23 DIY Mirror Ideas for Beginners
The first diy Mirror project I ever tried was a disaster: I bought a cheap round mirror, attempted to glue rope around the edge while it hung on the wall, and watched the whole thing slide slowly down the plaster. I have learned a lot since then, mostly by making every beginner mistake so you do not have to. Mirrors are genuinely the friendliest beginner project in home decor, because the mirror itself does the visual work and you only have to make the frame look good. This list is 23 mirror projects that need no power tools beyond a drill, no special skills, and budgets that stay firmly in the teens.
Most of these diy Mirror ideas start with a plain, affordable mirror: the round ones from discount stores, the big builder-grade rectangles glued to bathroom walls, or the full-length leaners everyone owns. Work on a flat table, measure twice, and always let adhesives cure fully before you hang anything heavy.
1. Painted Wooden Frame Mirror Makeover
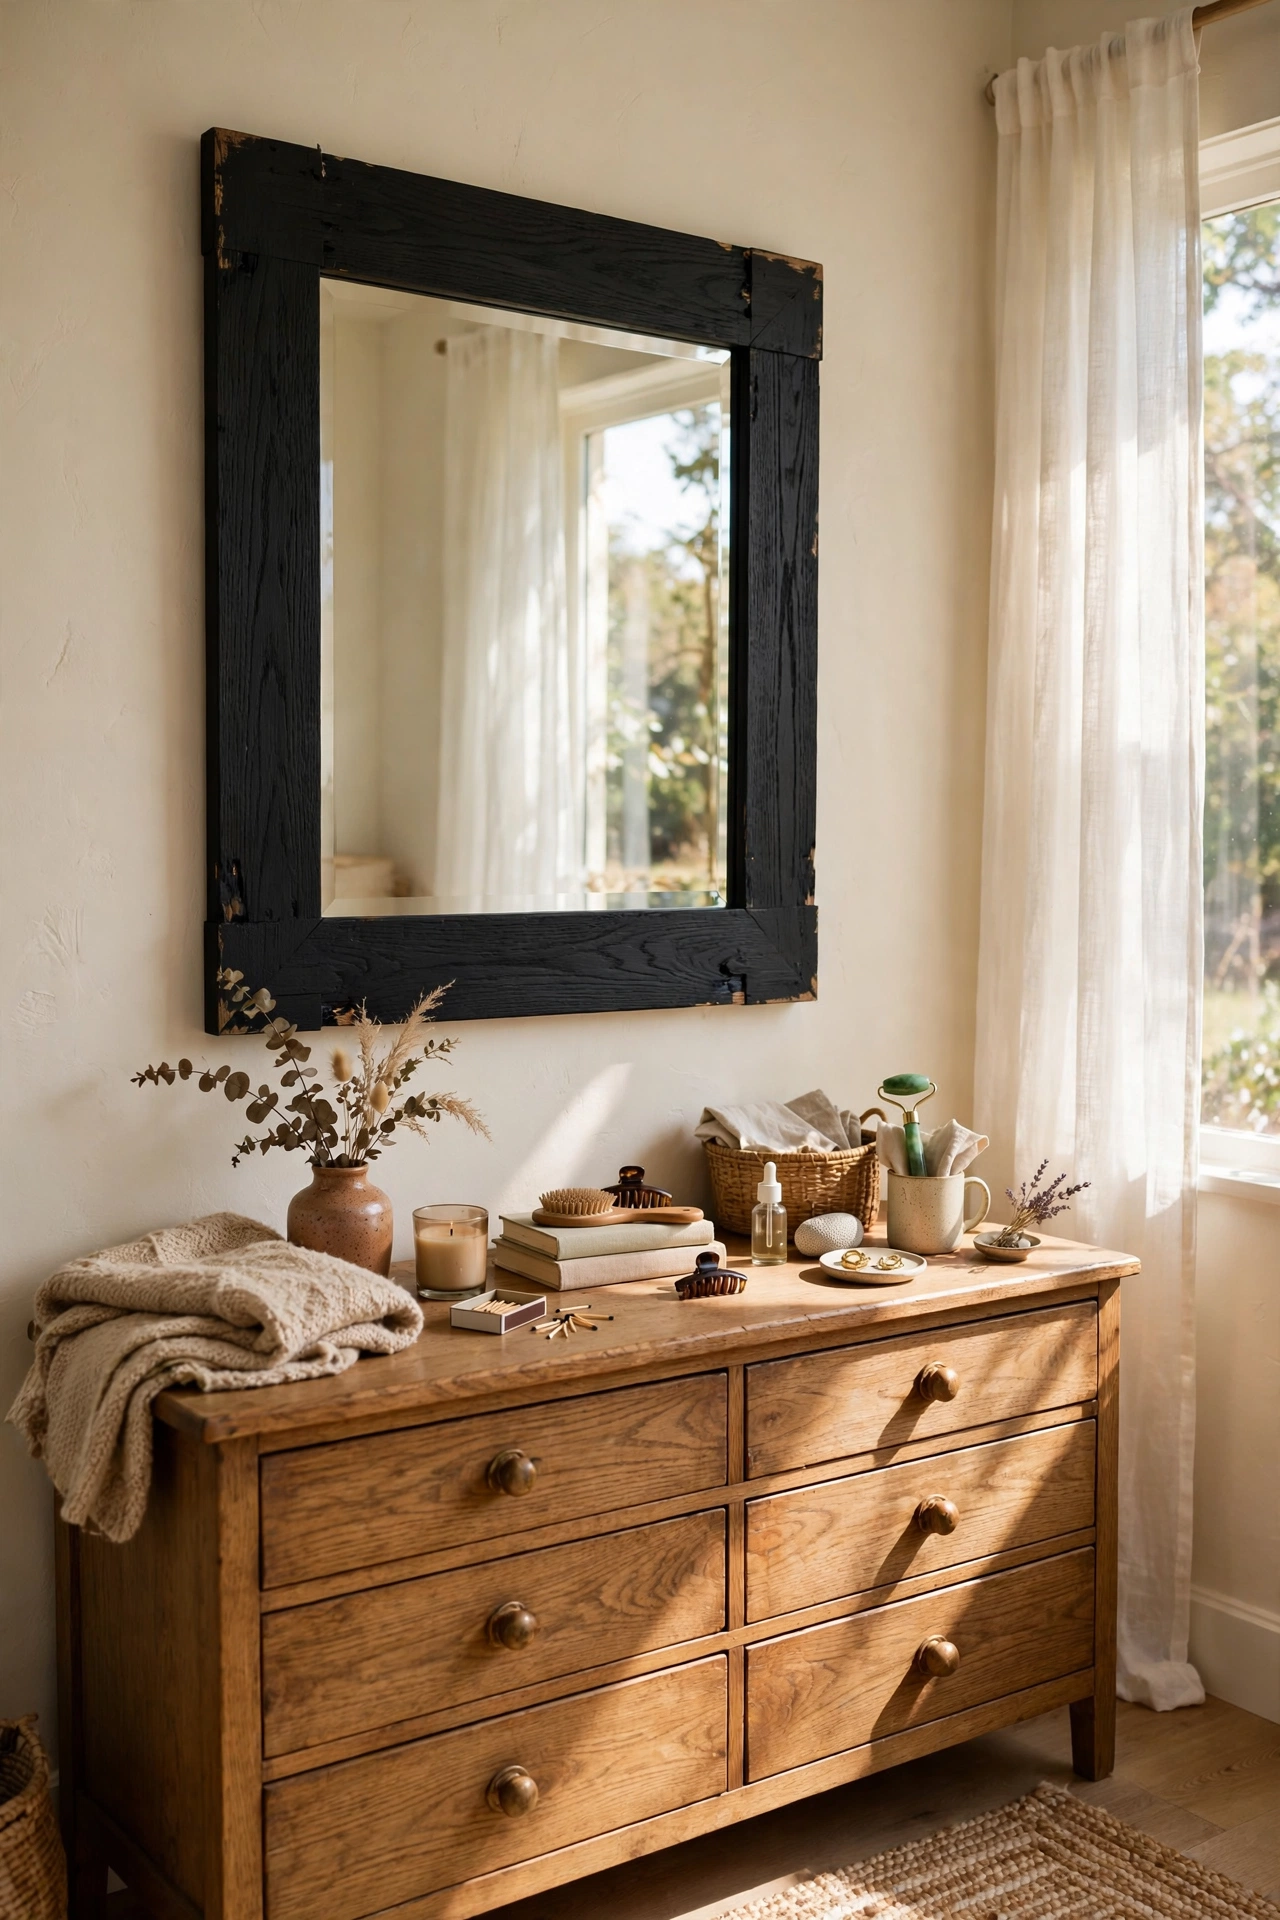
A dated wooden frame is the easiest mirror upgrade there is. I found a heavy oak-framed mirror at a charity shop for $15, and two coats of matte black paint turned it into something that looks straight out of a modern farmhouse catalogue. Remove the mirror from the frame first if you can, because masking is fiddly and paint always finds the glass. If the mirror is glued in, press painter’s tape right up to the frame edge and run a craft knife along it for a crisp line. Light sanding between coats gives the smoothest finish. I skipped the sanding on mine and you can see the brush marks if you look closely, which honestly does not bother me anymore.
Cost: ~$16-24 | Time: 1.5 hours plus drying
2. Sunburst Mirror From Wooden Skewers
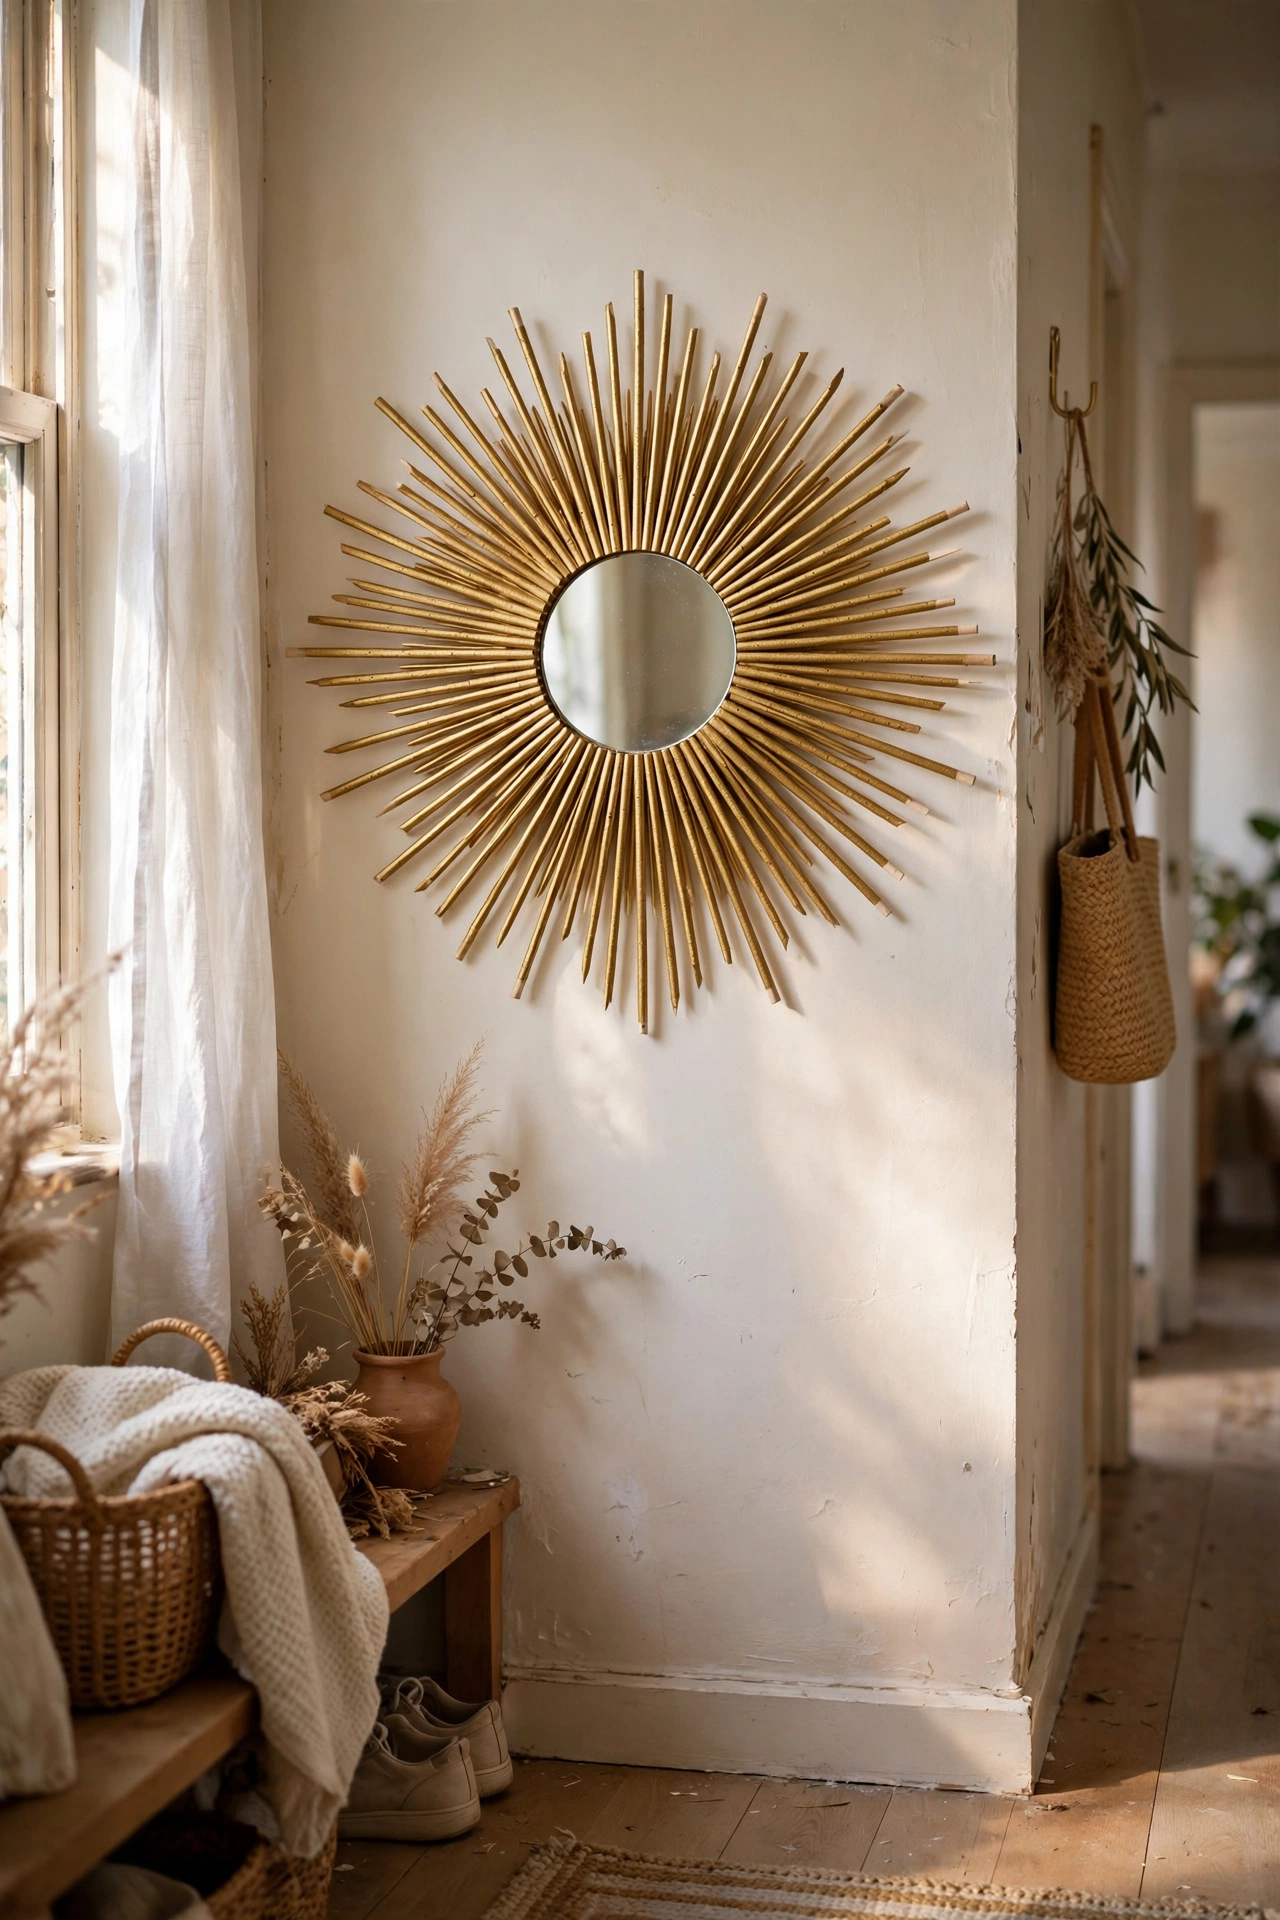
A sunburst mirror looks expensive and is secretly just barbecue skewers glued to cardboard. Cut a ring from sturdy cardboard, hot-glue skewers around it in a radiating pattern with alternating lengths, spray the whole thing gold, and glue a small round mirror in the centre. I made mine in an evening while watching television, and it hangs in my hallway where guests always assume it cost real money. The trick is keeping the skewers evenly spaced, so mark the cardboard ring with pencil ticks first. Trim any skewer that sticks out too far, because one rogue spike ruins the symmetry.
Cost: ~$8-12 | Time: 2 hours
3. Peel-and-Stick Trim on a Builder-Grade Bathroom Mirror
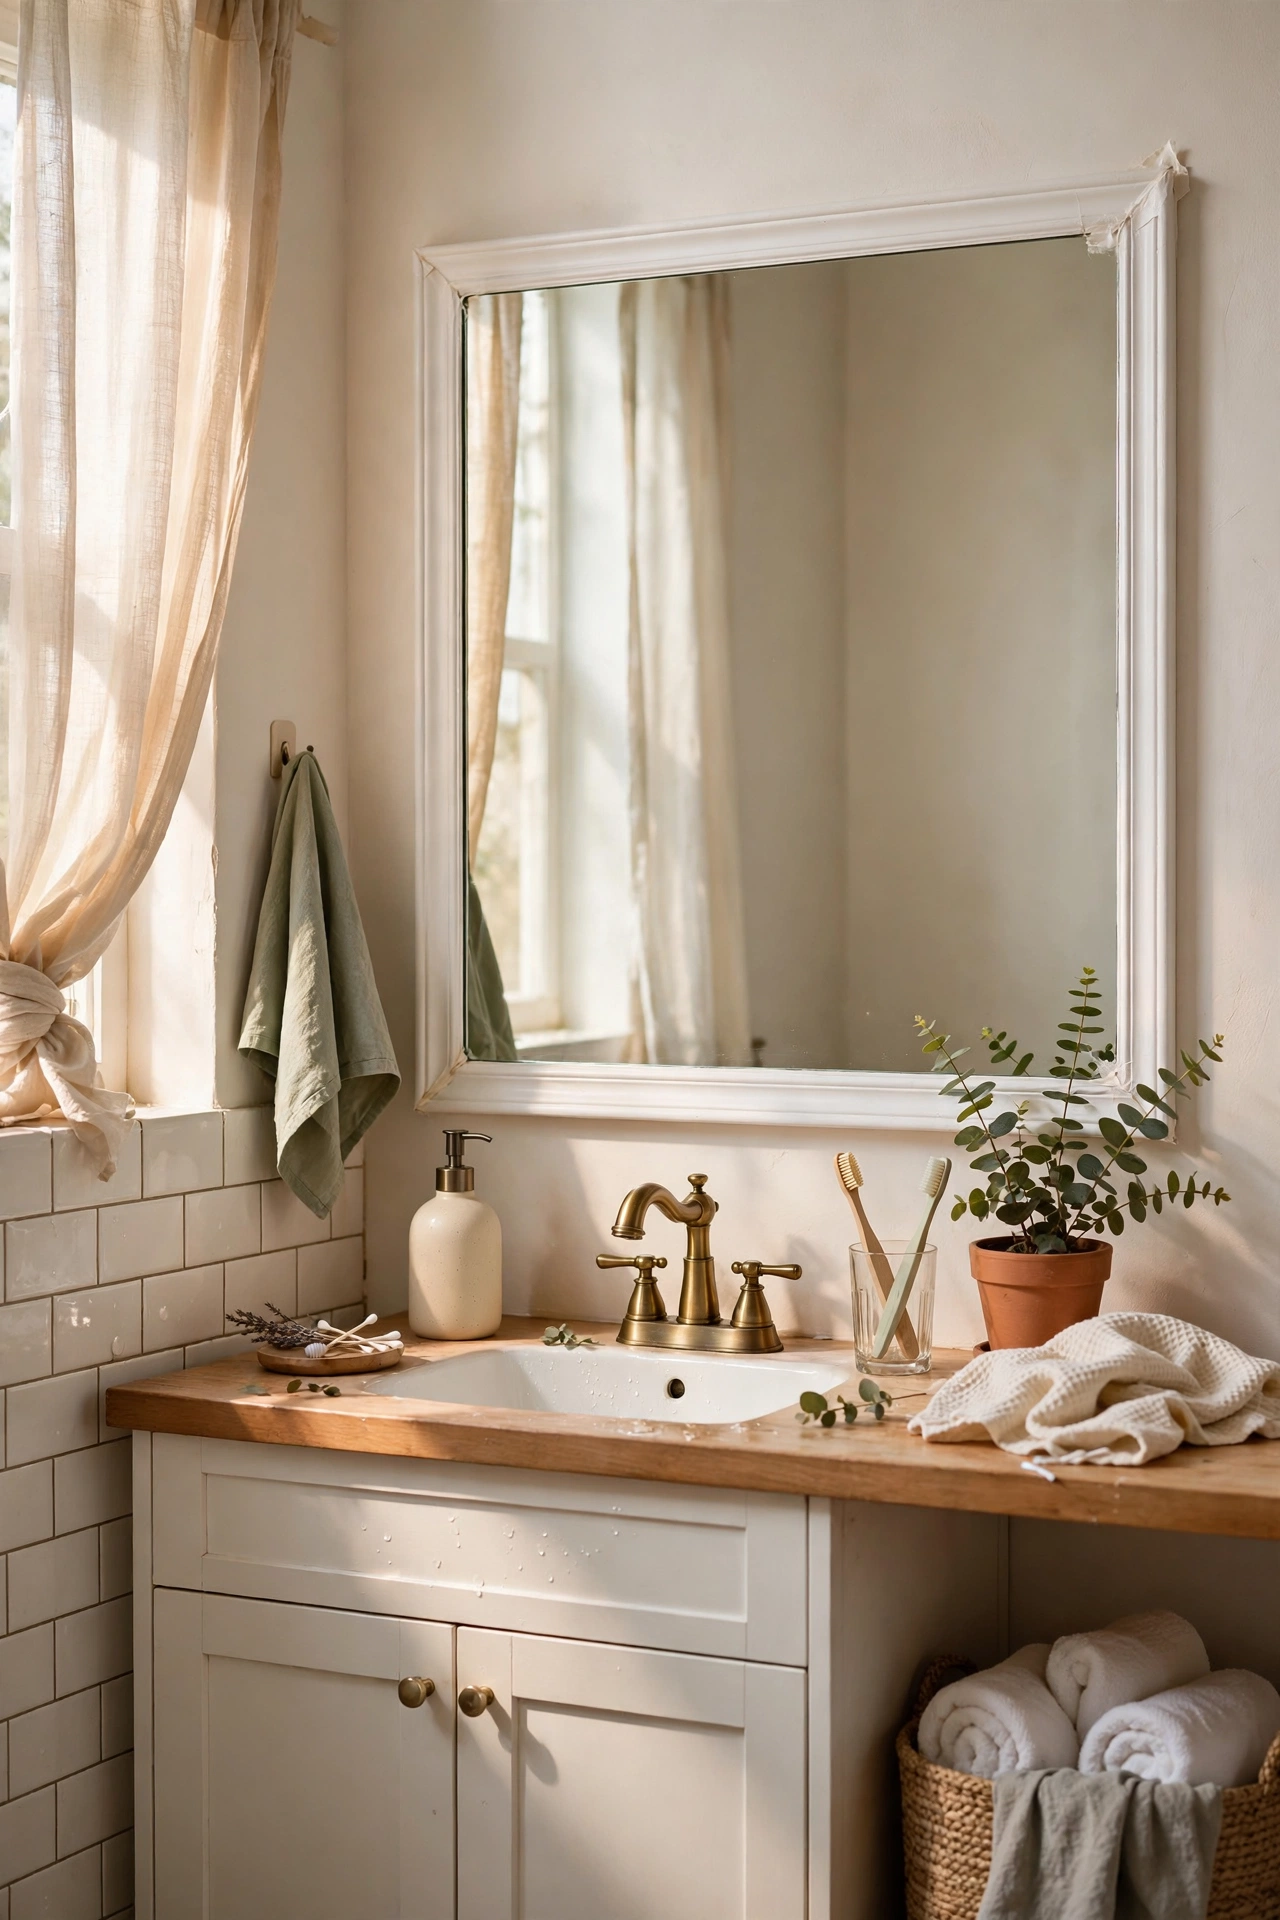
Those frameless mirrors glued to bathroom walls look cheap, but framing one with peel-and-stick trim takes an afternoon. I measured my mirror, cut lightweight moulding strips with a mitre box, and stuck them on with construction adhesive, then painted everything the same soft white. The mirror suddenly looks built-in. Measure each side separately, because builder mirrors are rarely perfectly square and a strip cut to the wrong length will show. Wipe the mirror edge with rubbing alcohol first so the adhesive bonds properly. This one project made my whole bathroom feel renovated for about twenty dollars.
Cost: ~$18-25 | Time: 2 hours
4. Plaster-Coated Arched Mirror
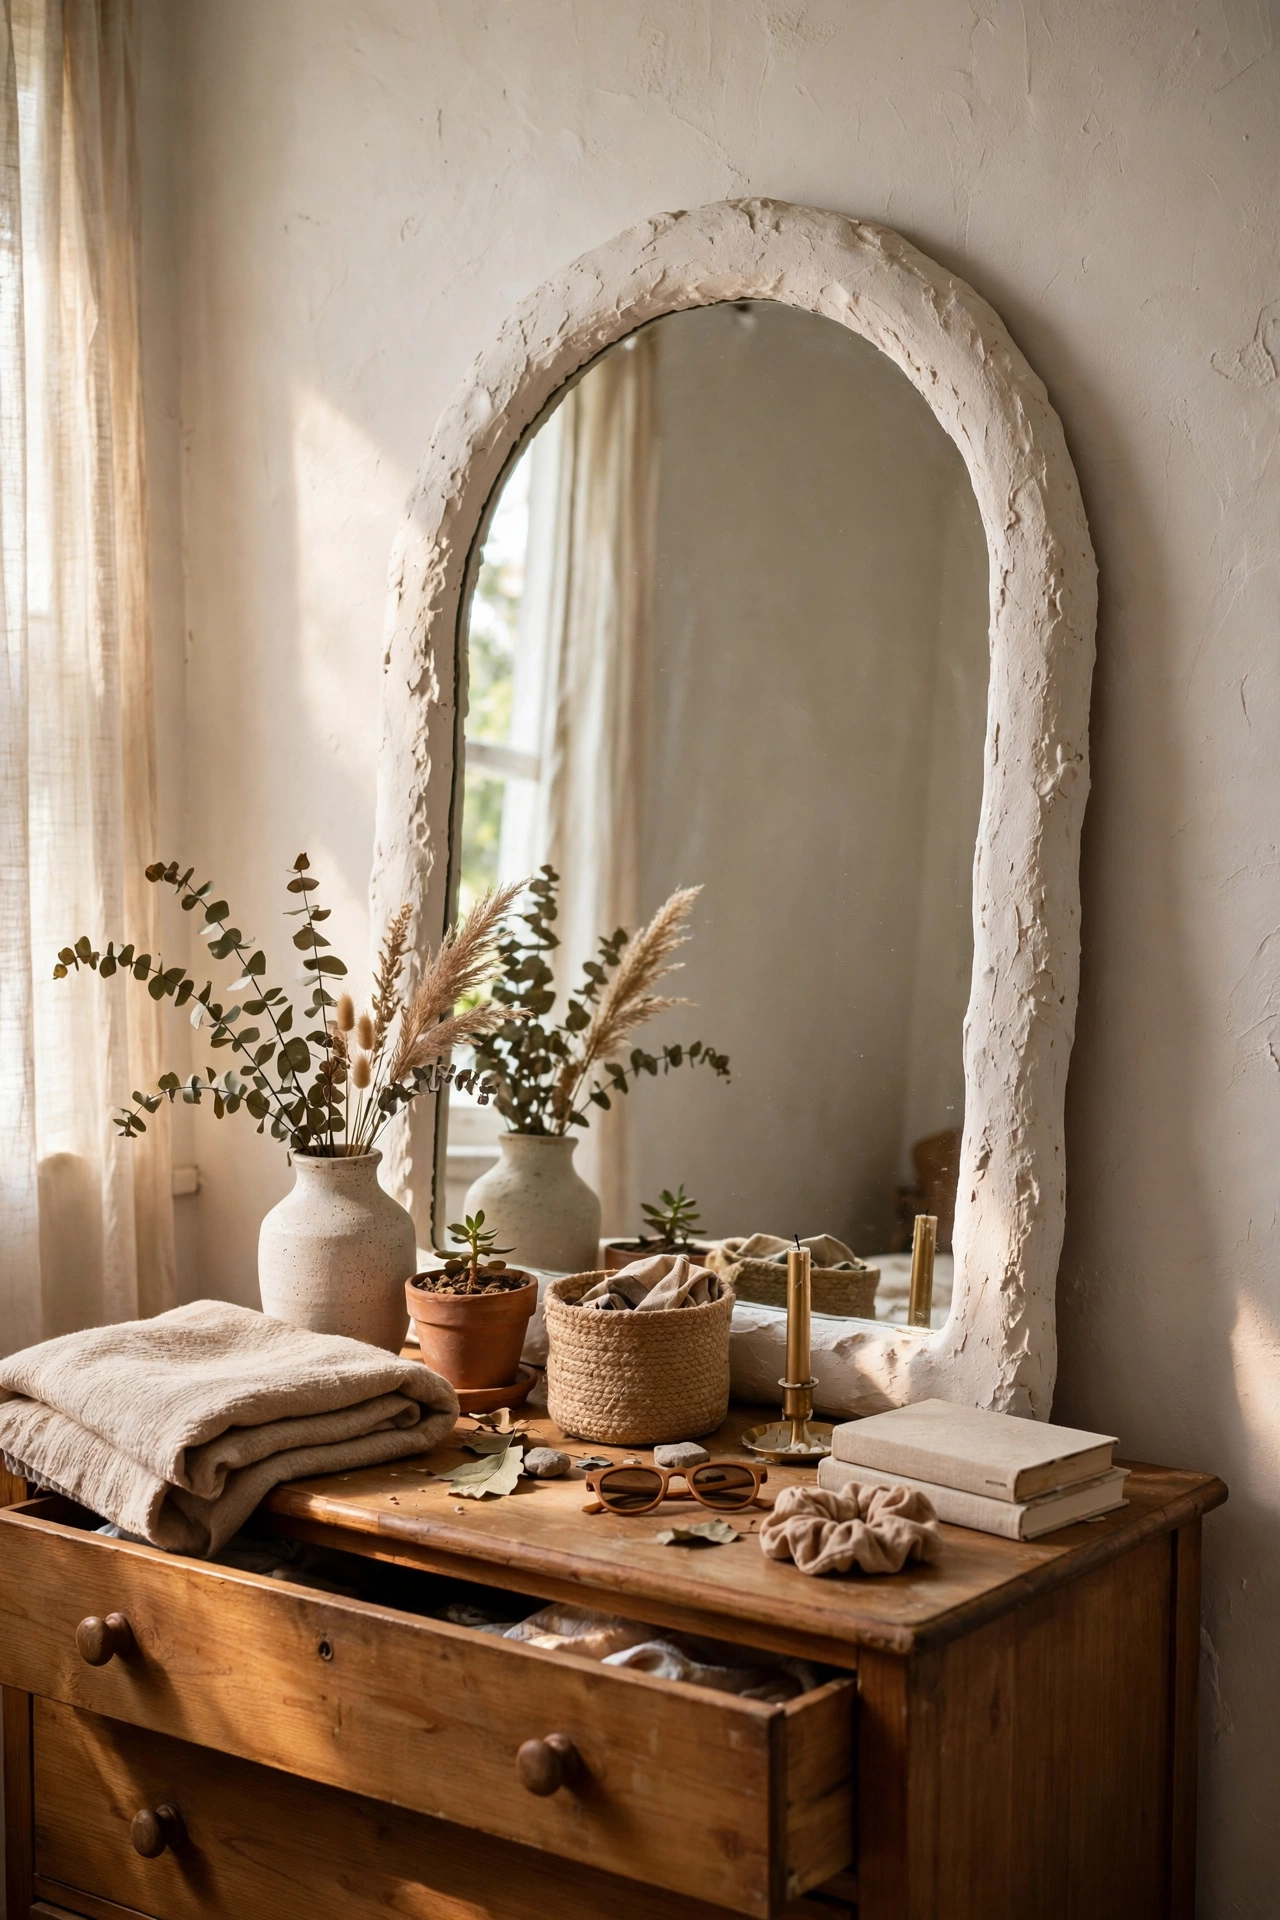
The trendy plaster arch mirror is very achievable with a cheap arch mirror and a bag of pre-mixed plaster. I bought a plain arch mirror for $25, smeared plaster over the frame with a putty knife in rough organic strokes, and let it cure. The handmade texture is the whole point, so do not aim for smooth. My first pass was too neat and looked like a mistake; the second, messier layer looked intentional and beautiful. Wear gloves, work in small sections, and keep a damp sponge handy for drips on the glass. Seal it with matte varnish so the plaster does not shed dust.
Cost: ~$28-38 | Time: 2 hours plus curing
Budget check: four mirrors down, and the priciest used a bag of plaster you will only half finish. Keep the leftover plaster; it shows up again in later projects on this site.
5. Jute-Wrapped Round Mirror Edge
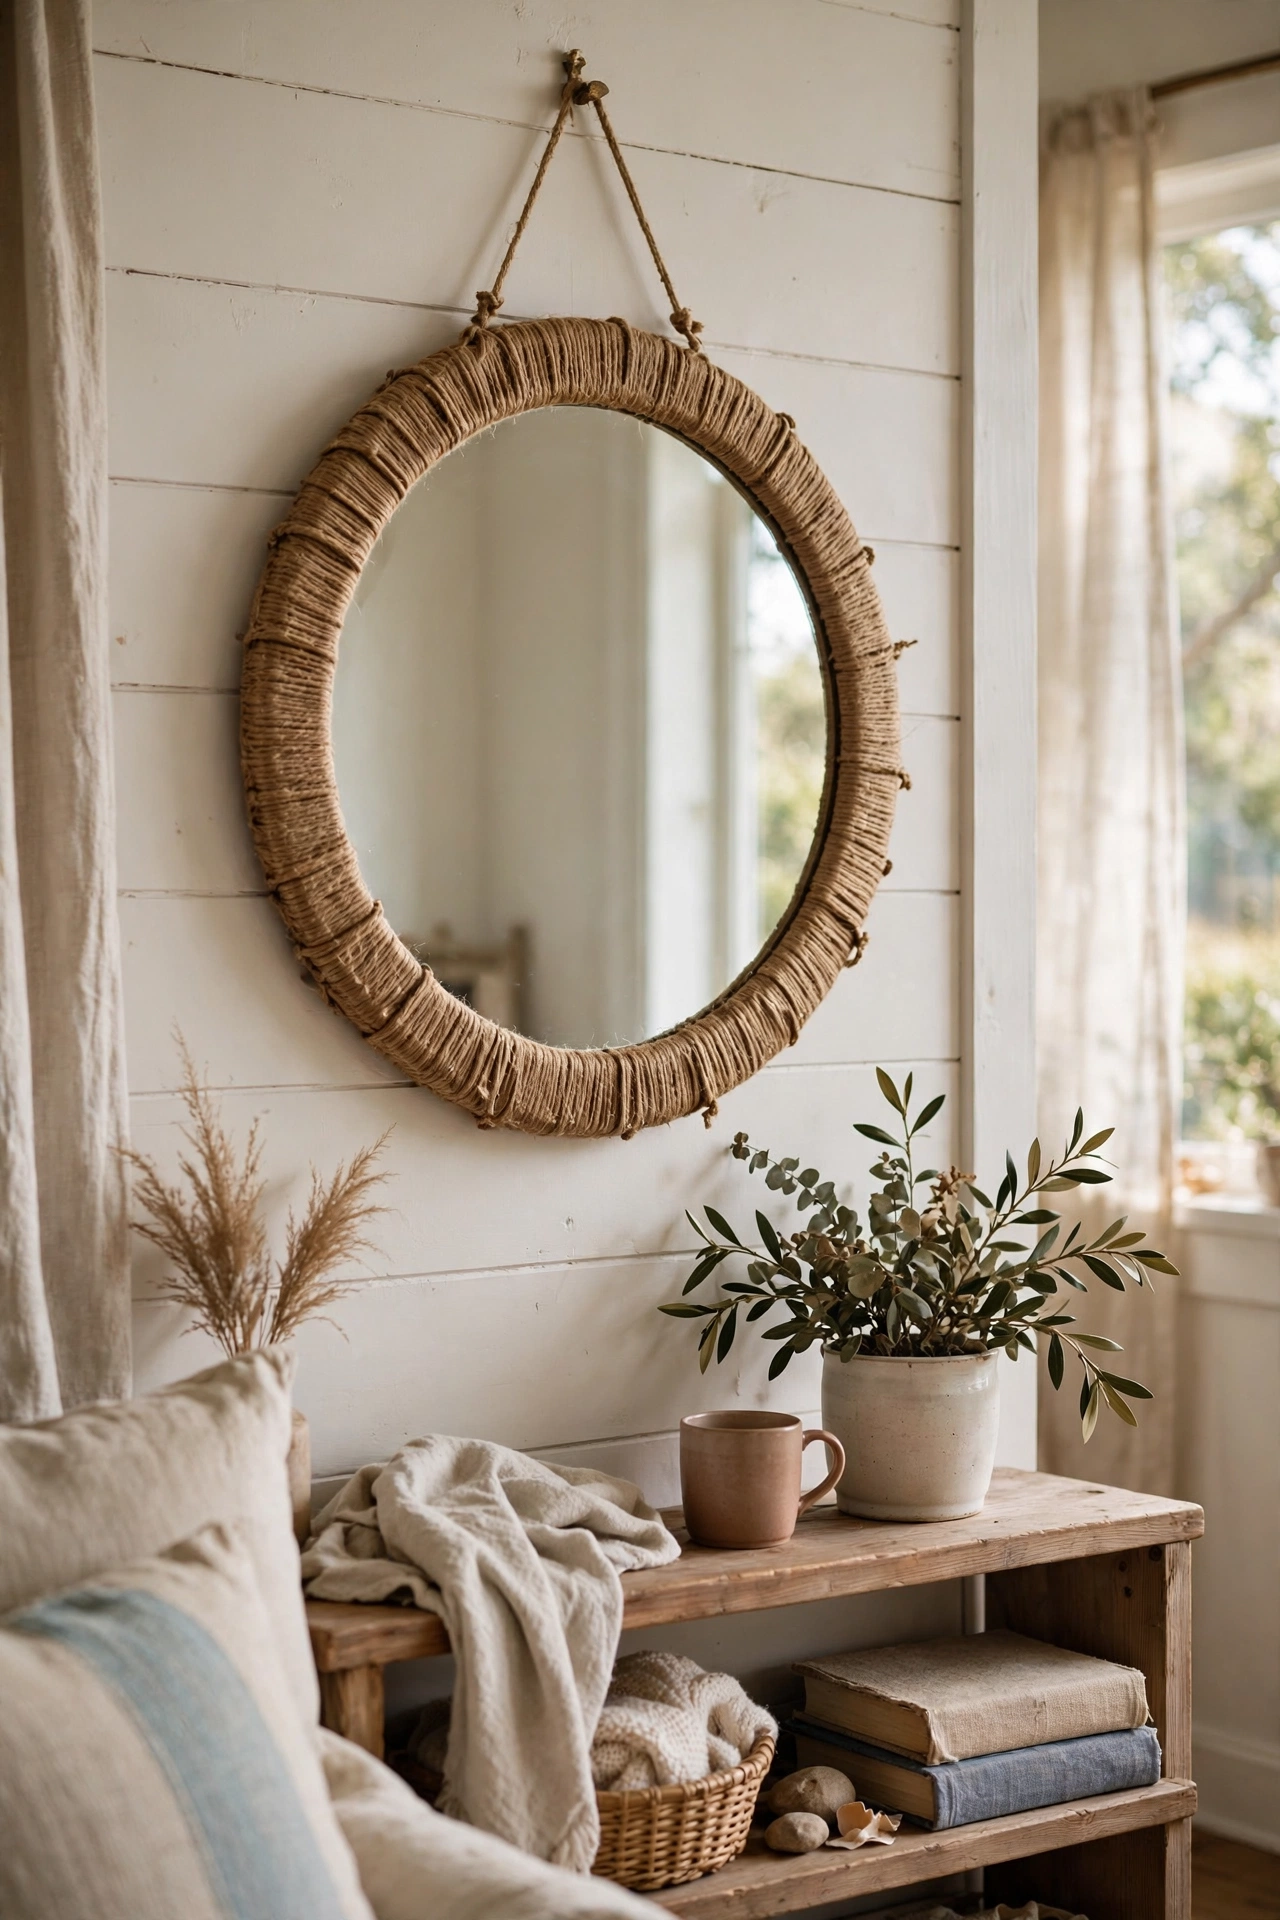
Wrapping a plain round mirror in jute twine gives it instant coastal warmth. I took a $10 frameless round mirror, ran a thick bead of hot glue around the edge, and pressed jute rope into it in tight coils until the whole rim was covered. It took one long evening and looks like something from a beach house boutique. Keep the coils tight against each other, because gaps show the mirror edge and spoil the effect. Start at the top so the join lands where it is least visible. I burned my fingertips twice doing this, so use the low-temperature setting on your glue gun and take breaks.
Cost: ~$12-16 | Time: 2 hours
6. Rattan Webbing Framed Mirror
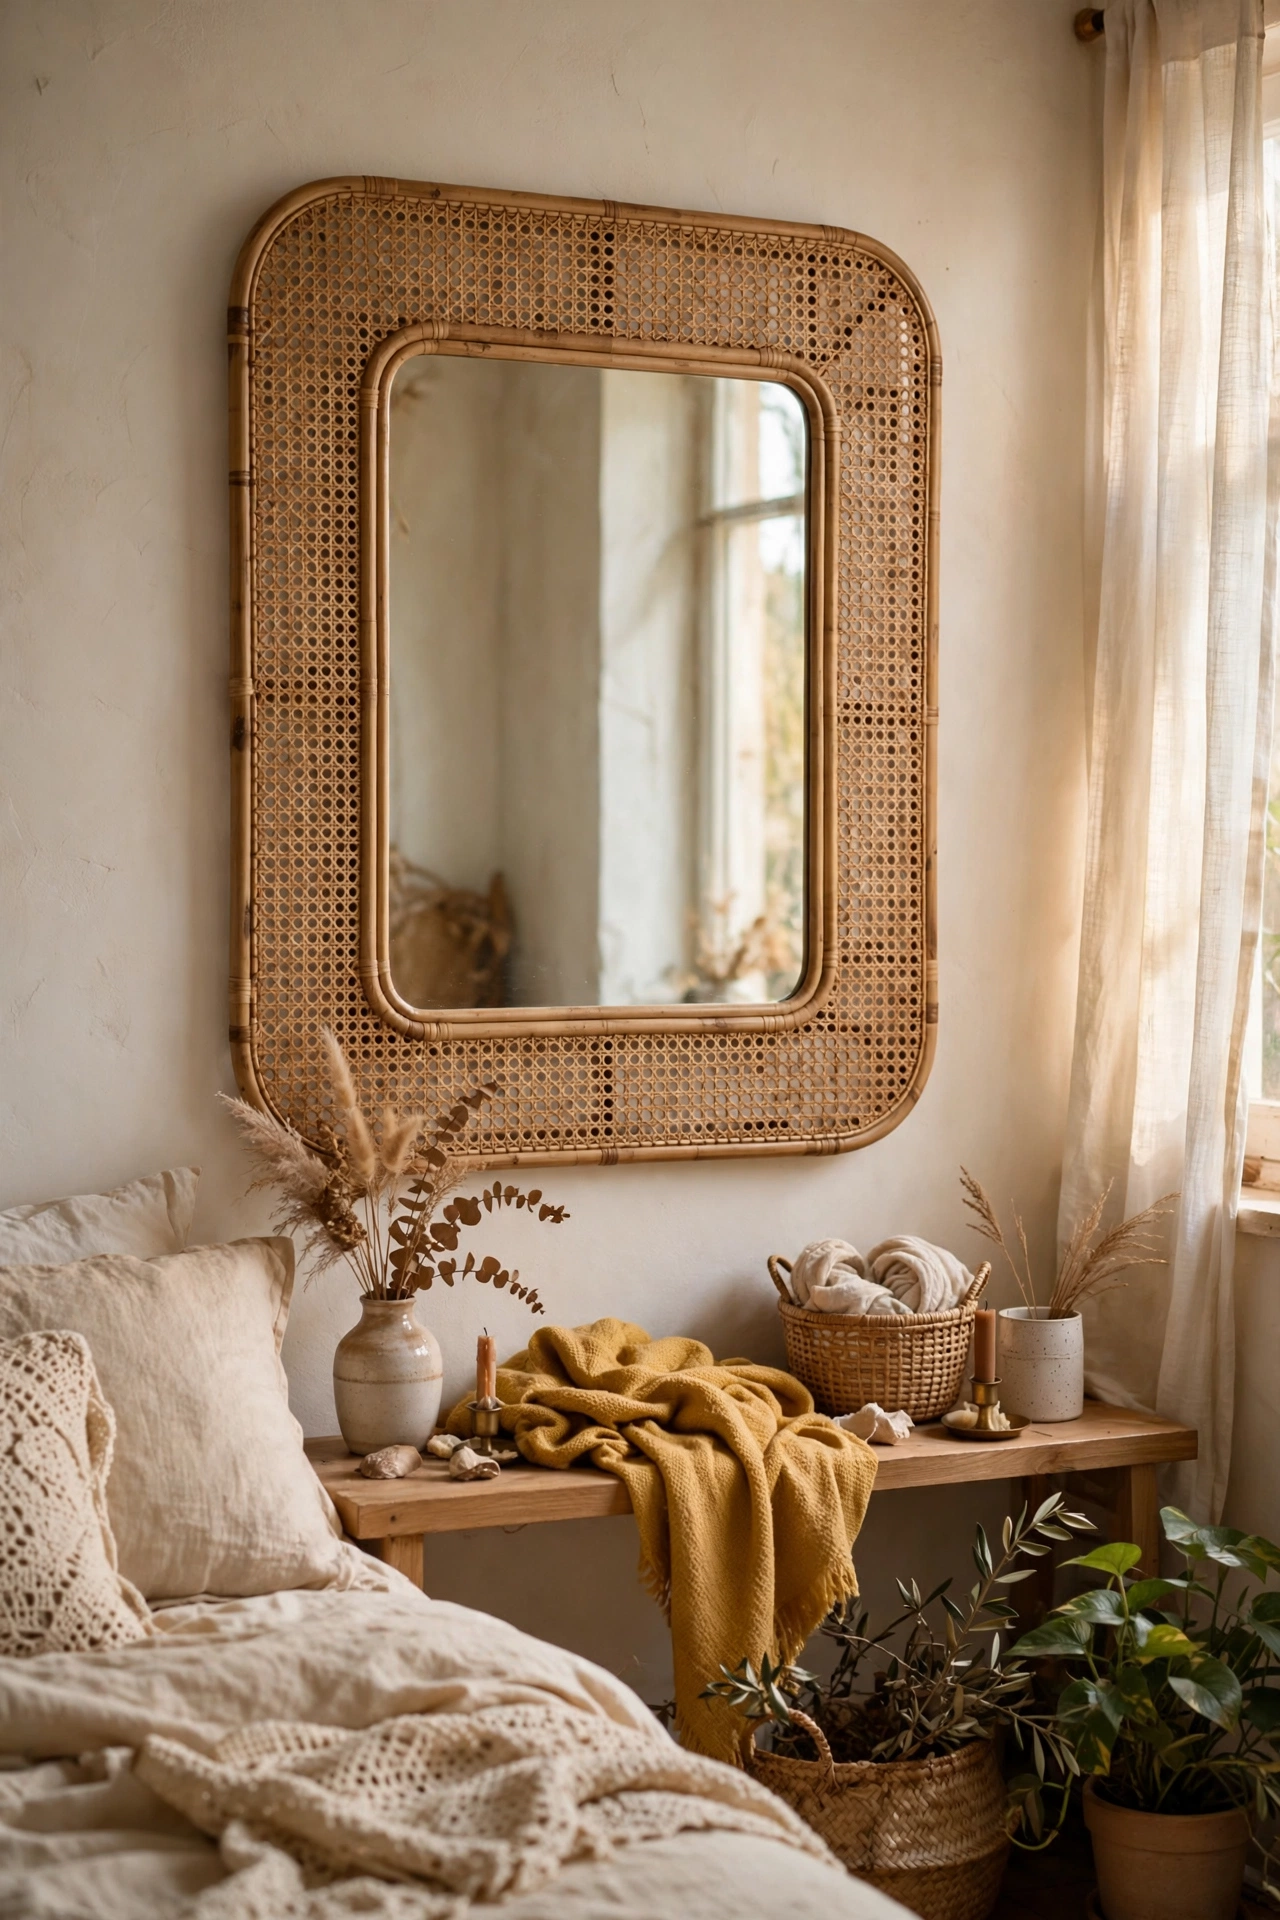
Rattan webbing wrapped around a mirror frame reads as boho and expensive. I bought a roll of cane webbing online, cut a wide strip, and stapled it around a plain wooden-framed mirror, folding the corners like wrapping a present. The open weave lets the wood show through, which gives it depth. Soak the webbing in warm water for ten minutes before you work with it, because dry cane is brittle and cracks at the folds. I learned that after snapping my first strip. Trim the excess with sharp scissors and hot-glue the raw edges to the back of the frame for a clean finish.
Cost: ~$18-26 | Time: 1.5 hours
7. Windowpane Mirror From a Salvaged Sash
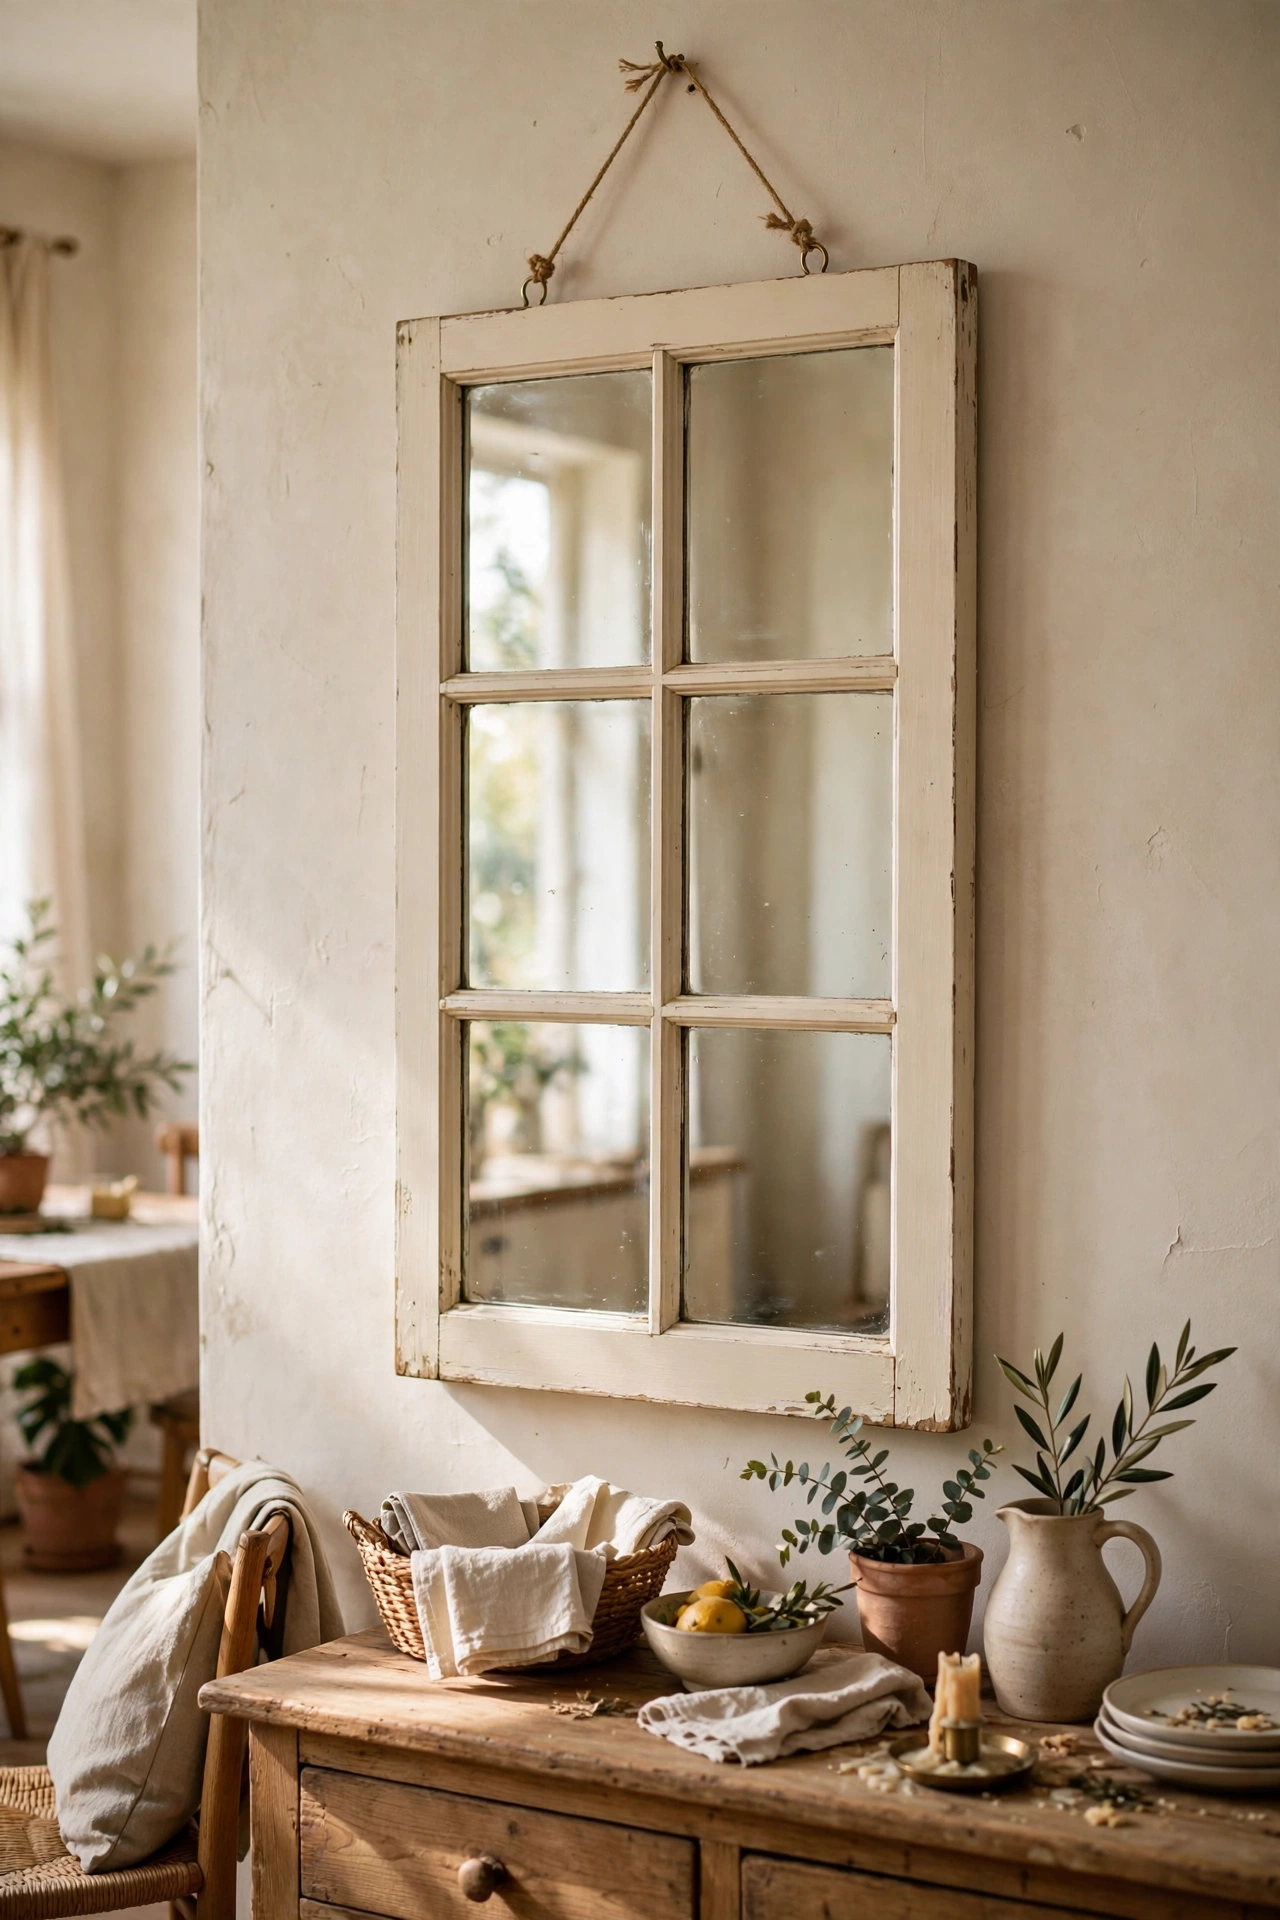
An old window sash with mirror fitted behind the panes is a classic for a reason. I found a six-pane sash at a salvage yard for $12, had a glazier cut a mirror to fit the back for $20, and secured it with glazing points. It hangs in my dining room and throws the loveliest light around. Check the sash for lead paint before you sand it, especially with older windows. Mine was clean, so I painted it cream and distressed the edges lightly. If the putty is crumbling, dig it out and re-putty before fitting the mirror, or the whole thing will rattle.
Cost: ~$30-45 | Time: 2 hours
8. Rope-Wrapped Porthole Mirror
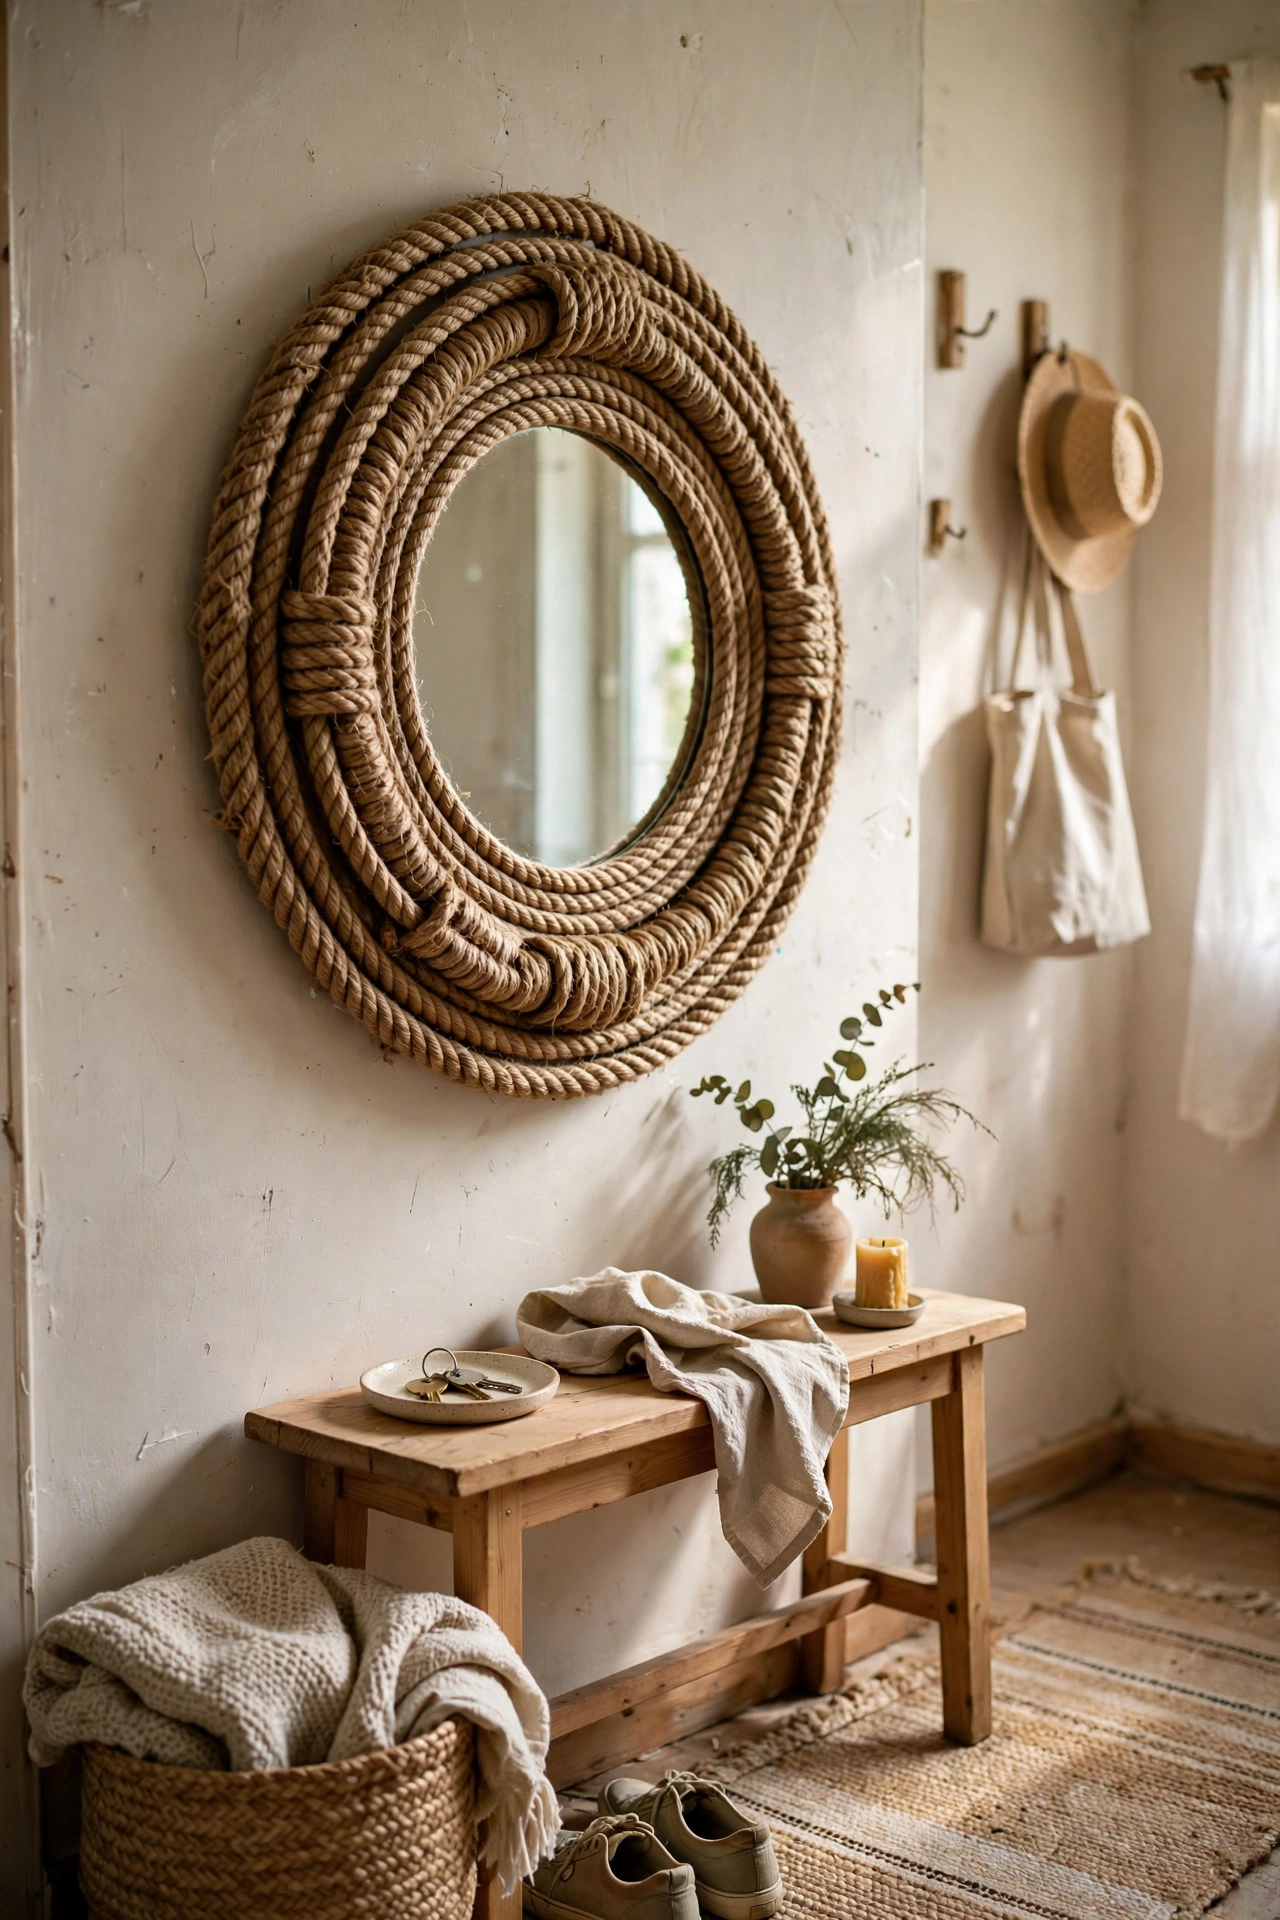
A thick rope frame turns a round mirror into a nautical porthole. I bought a 24-inch round mirror and a coil of chunky cotton rope, then hot-glued the rope in concentric rings around the mirror, building outward. Three rings gave mine a substantial, ship-worthy look. Use a rope at least half an inch thick, because thin rope takes forever and looks fiddly. Overlap the starting ends at the bottom where they are least noticeable. This one is heavier than it looks once finished, so hang it on a proper wall anchor rather than a nail. For more coastal styling ideas, see (see also: dollar-store-decor-ideas-that-look-expensive).
Cost: ~$20-28 | Time: 2.5 hours
Budget check: eight mirrors finished, averaging around $20 each. The salvaged window was the biggest spend, but it is also the one piece that looks genuinely antique.
9. Pearl Bead Vanity Mirror Edge
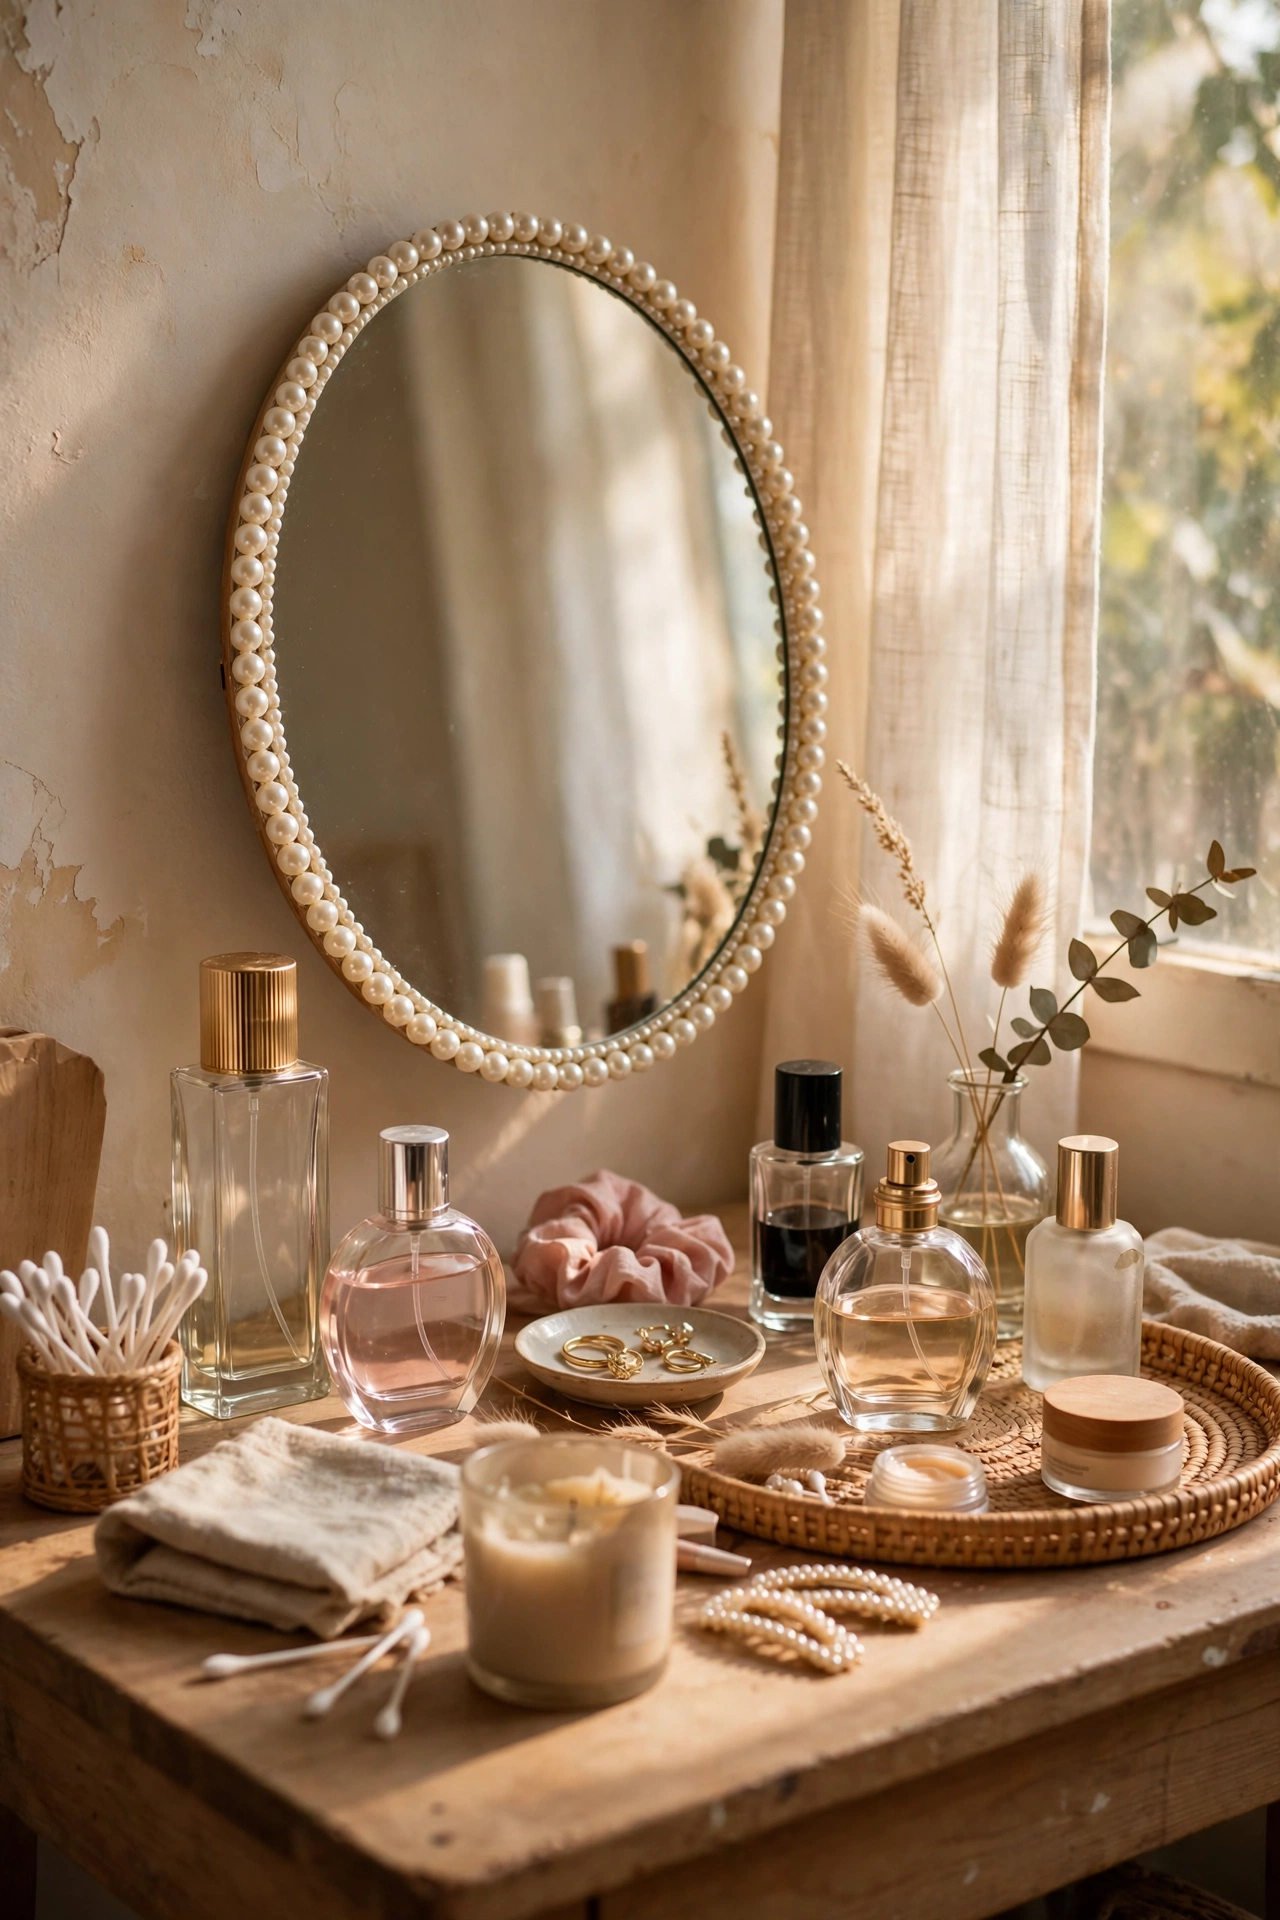
Glueing pearl beads around a small vanity mirror gives it a Hollywood glam feel for very little money. I bought two strands of faux pearls from the craft store, cut them to length, and hot-glued them around the edge of a plain oval mirror. The trick is buying strands rather than loose beads, because loose beads take ten times longer. Lay the strand dry first to check the length, then glue in short sections. Mine sits on my dressing table and catches the light beautifully in the morning. Keep the glue on the back edge so none squeezes onto the glass.
Cost: ~$10-14 | Time: 1 hour
10. Mosaic Tile Border Mirror
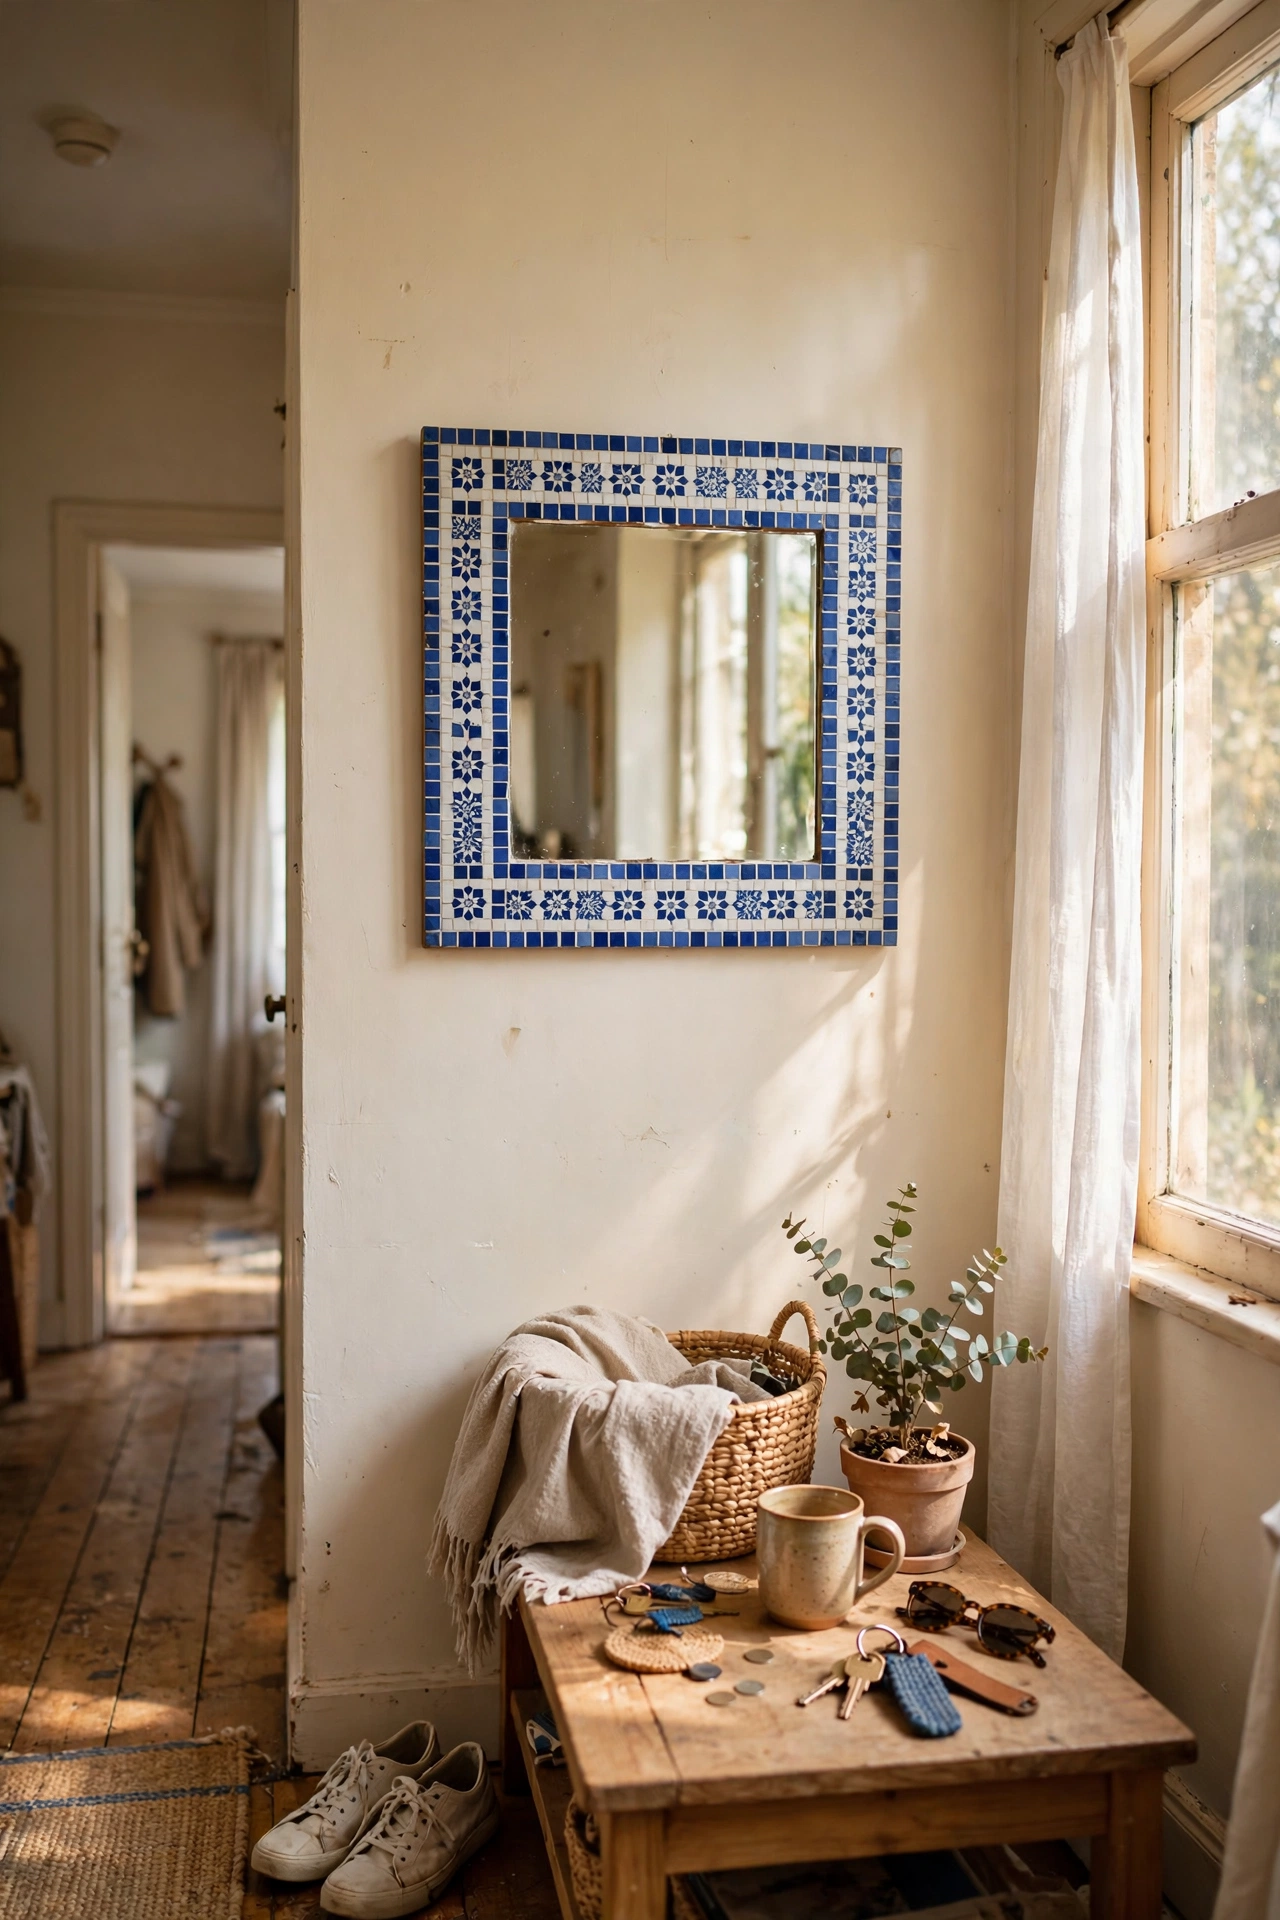
A border of mosaic tiles turns a plain square mirror into a Mediterranean statement. I bought a sheet of small glass mosaic tiles, cut it into strips with tile nippers, and stuck the strips around a frameless mirror with tile adhesive, then grouted the gaps. It sounds advanced, but mosaic sheets do the spacing work for you. Wear safety glasses when nipping tiles, because the shards fly. I grouted mine in a sandy colour that hides imperfections, which I recommend for a first attempt. Let the grout cure a full day before you hang it.
Cost: ~$22-30 | Time: 3 hours plus curing
11. Mismatched Small Mirror Gallery Wall
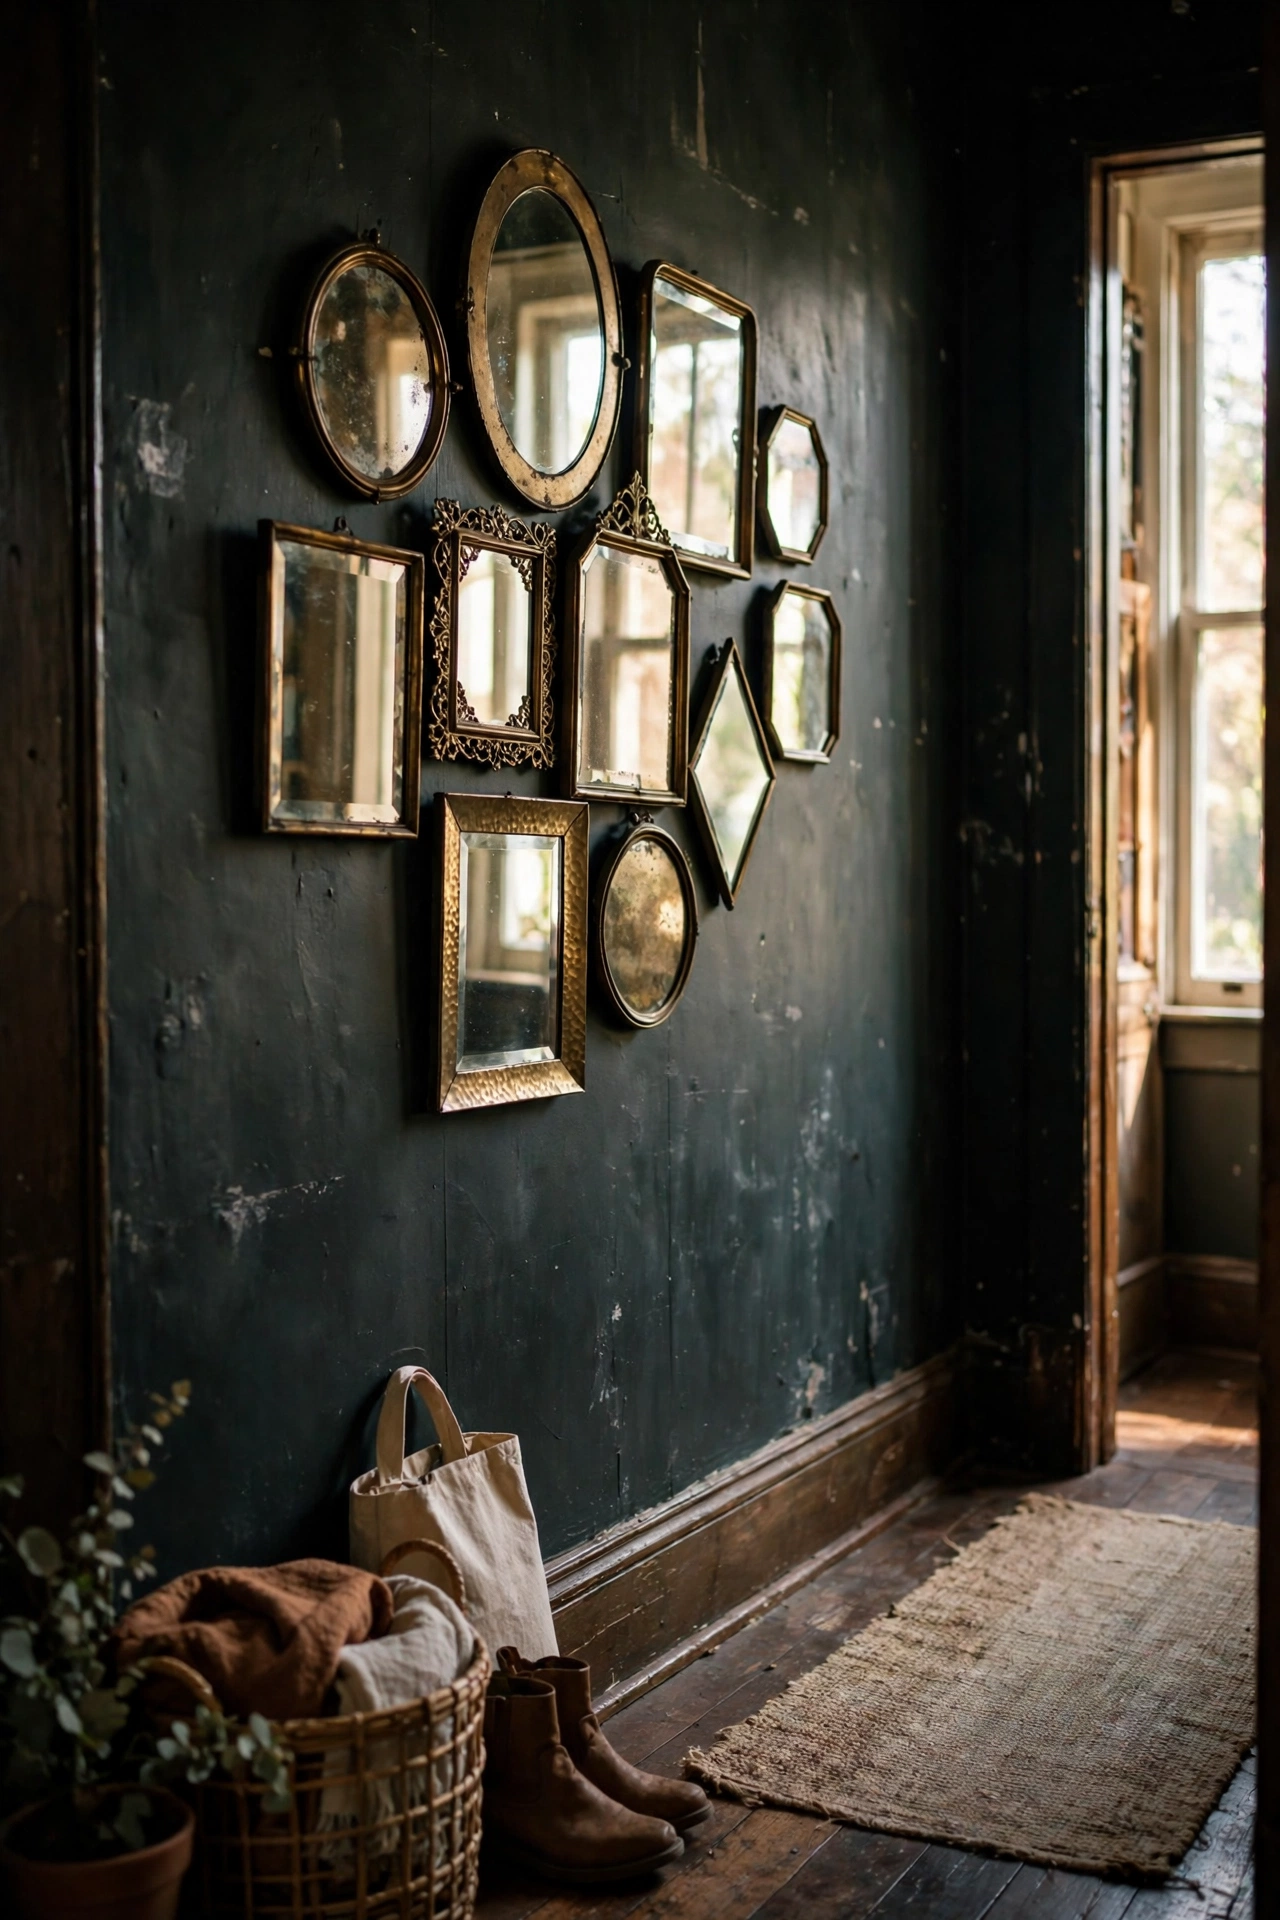
A wall of small mirrors in different shapes bounces light around a dark hallway like nothing else. I collected eleven small mirrors from charity shops over a month, sprayed the frames all the same antique brass, and hung them in a loose cluster. The frames matter less than the shapes: mix rounds, ovals, and rectangles for the collected look. I hung mine with the paper-template method, tracing each mirror and taping the shapes up first. Step back and squint at the arrangement before you commit to nails. Odd numbers of mirrors always look better than even.
Cost: ~$15-25 | Time: 2 hours
12. Leather Strap Hanging Round Mirror
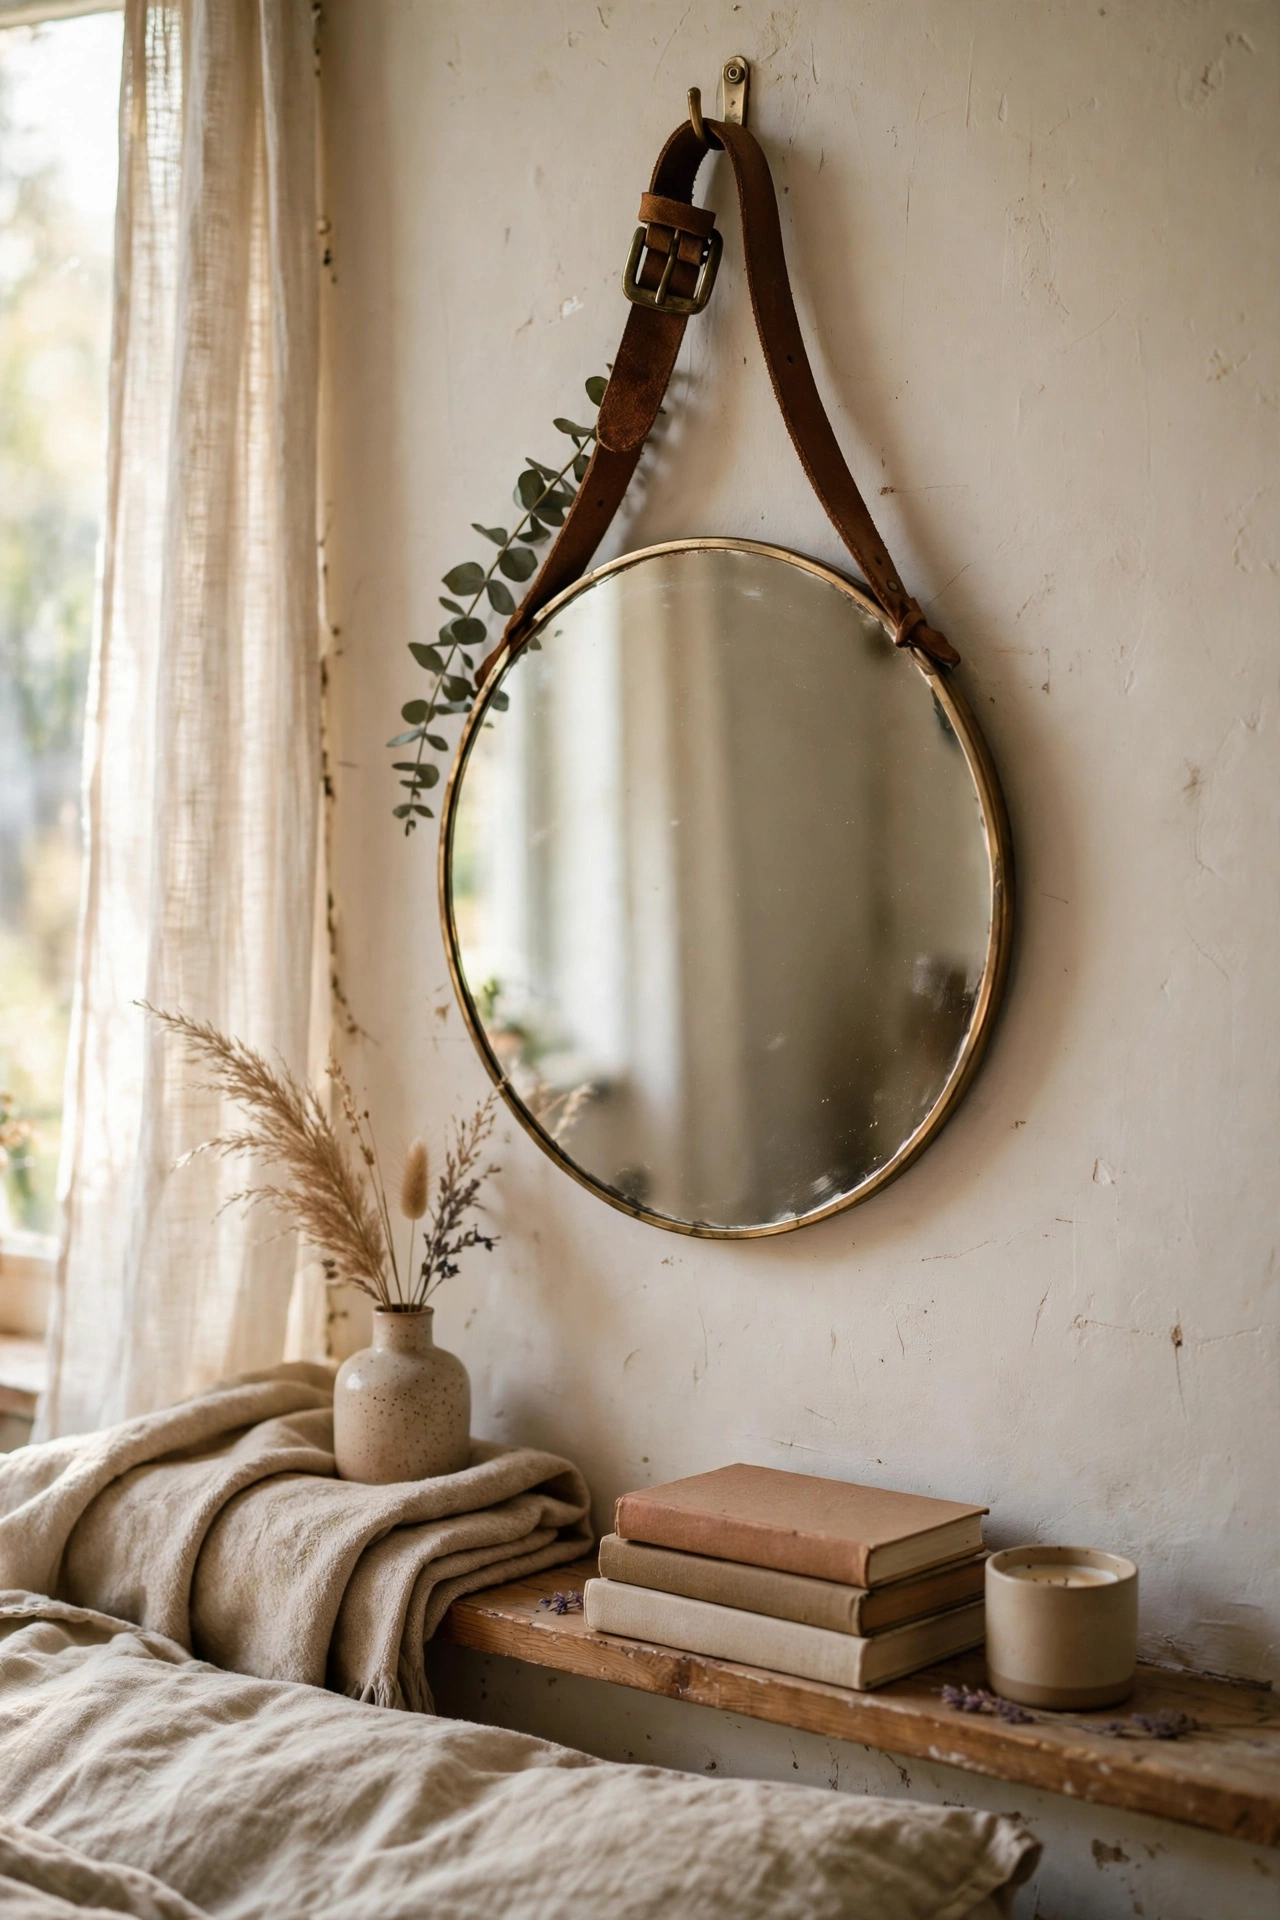
Hanging a round mirror from a leather strap is a five-minute upgrade that looks incredibly designed. I bought a leather belt from the charity shop for $2, cut it to length, looped it through a D-ring screwed into the wall, and clamped the mirror in the loop. The strap needs to be real leather or very sturdy faux, because a heavy mirror will stretch cheap material over time. Position the loop so the mirror hangs at eye level, and make sure the strap sits in the centre of the mirror’s back. Mine has held a 16-inch mirror for two years without slipping.
Cost: ~$8-14 | Time: 20 minutes
Budget check: twelve done and the leather strap mirror was the cheapest yet. You are officially past halfway, and the average is still sitting comfortably under $20 a project.
13. Painted Arch Wall Behind a Plain Mirror
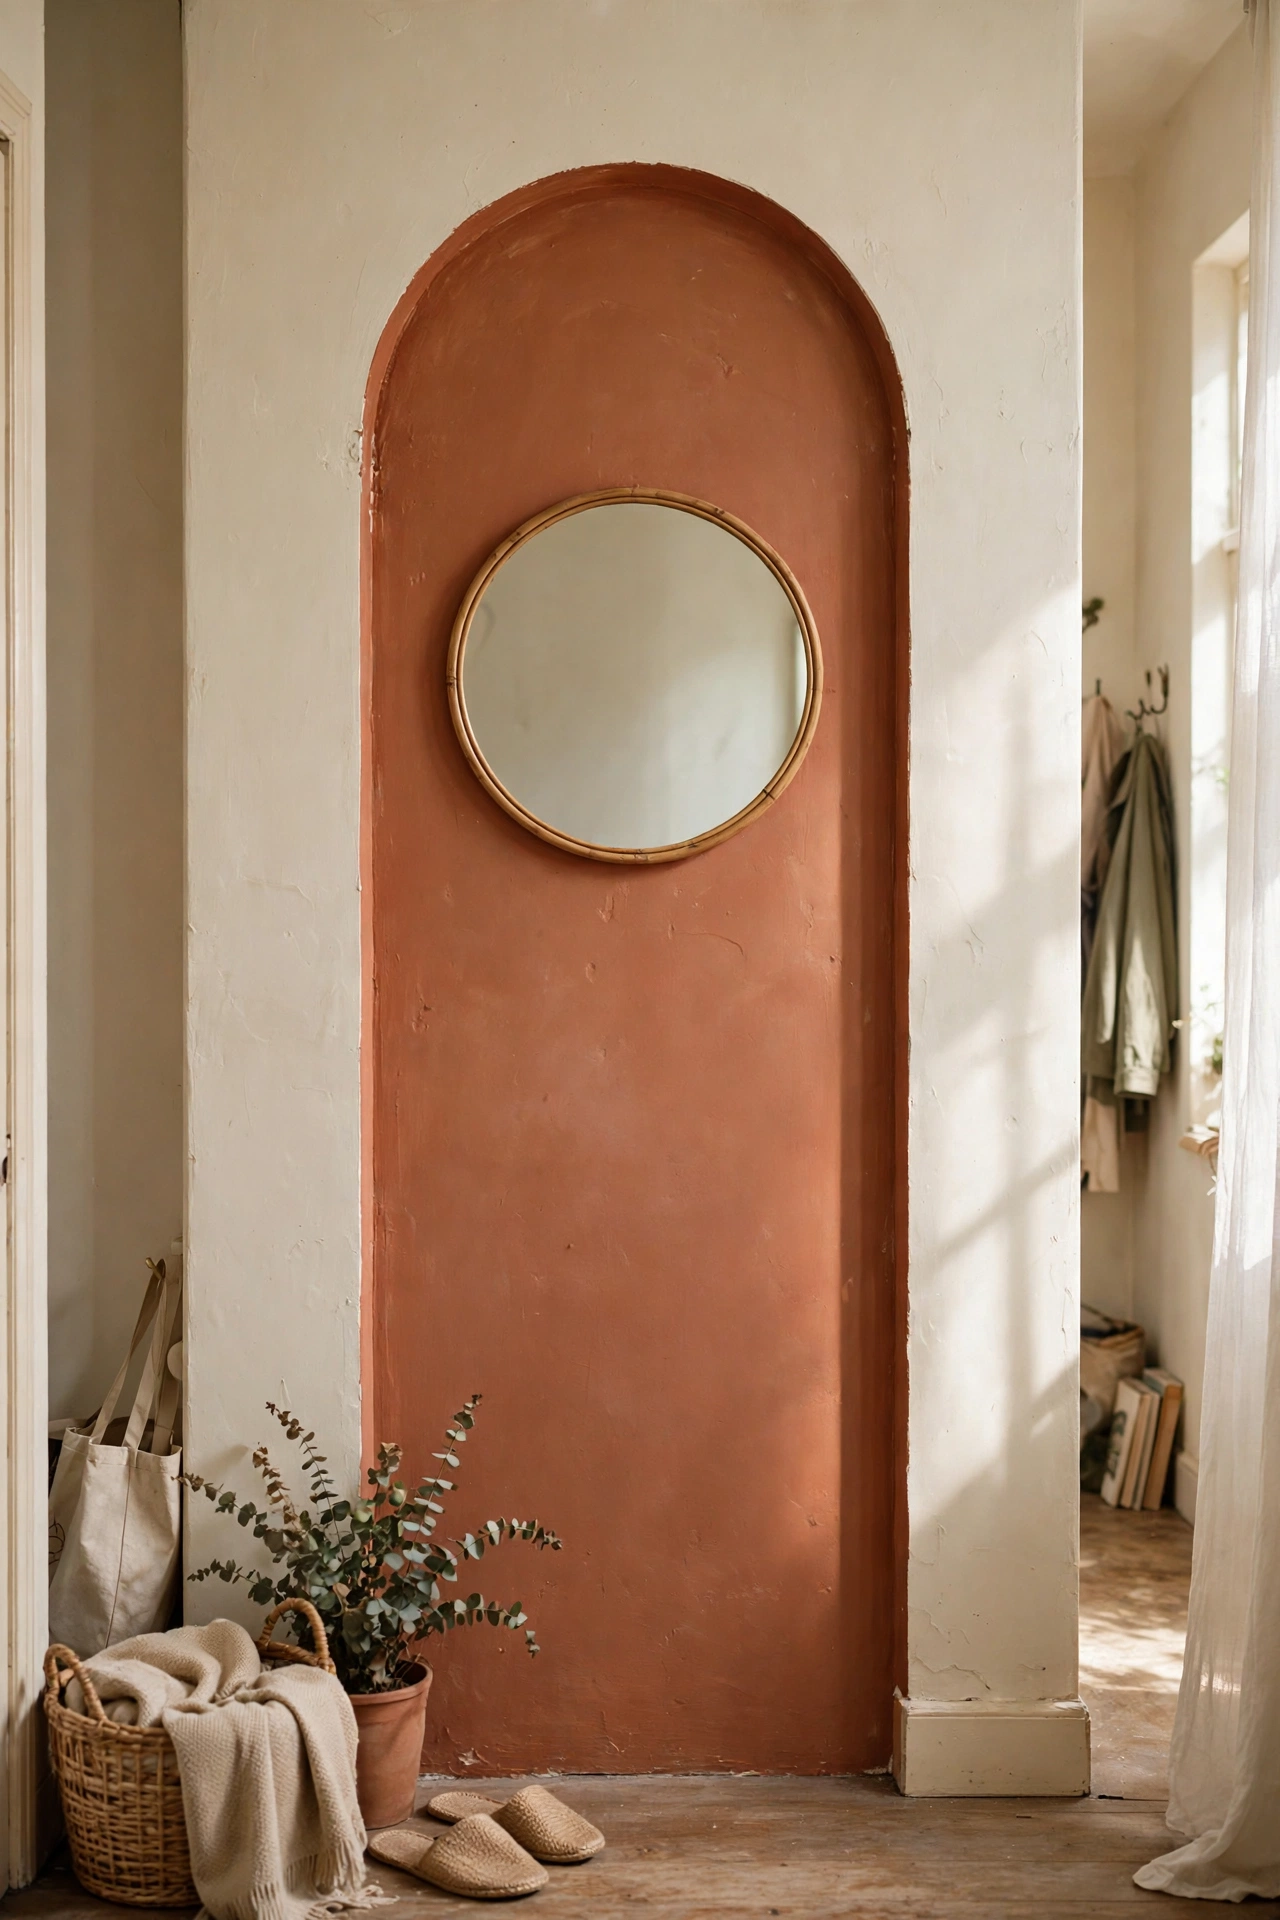
Sometimes the mirror does not need changing; the wall behind it does. I painted a tall arch in warm terracotta behind my plain round hallway mirror, and the mirror suddenly looked like a deliberate design moment. Mark the arch with a pencil tied to a string for a clean curve, paint two coats, and hang the mirror centred in the arch. The arch should be about twice the mirror’s width for the right proportions. I painted mine too narrow the first time and it looked like a halo, so go bigger than feels natural. This costs almost nothing if you have leftover paint.
Cost: ~$5-12 | Time: 2 hours plus drying
14. Antique-Effect Mirror With Distressing Spray
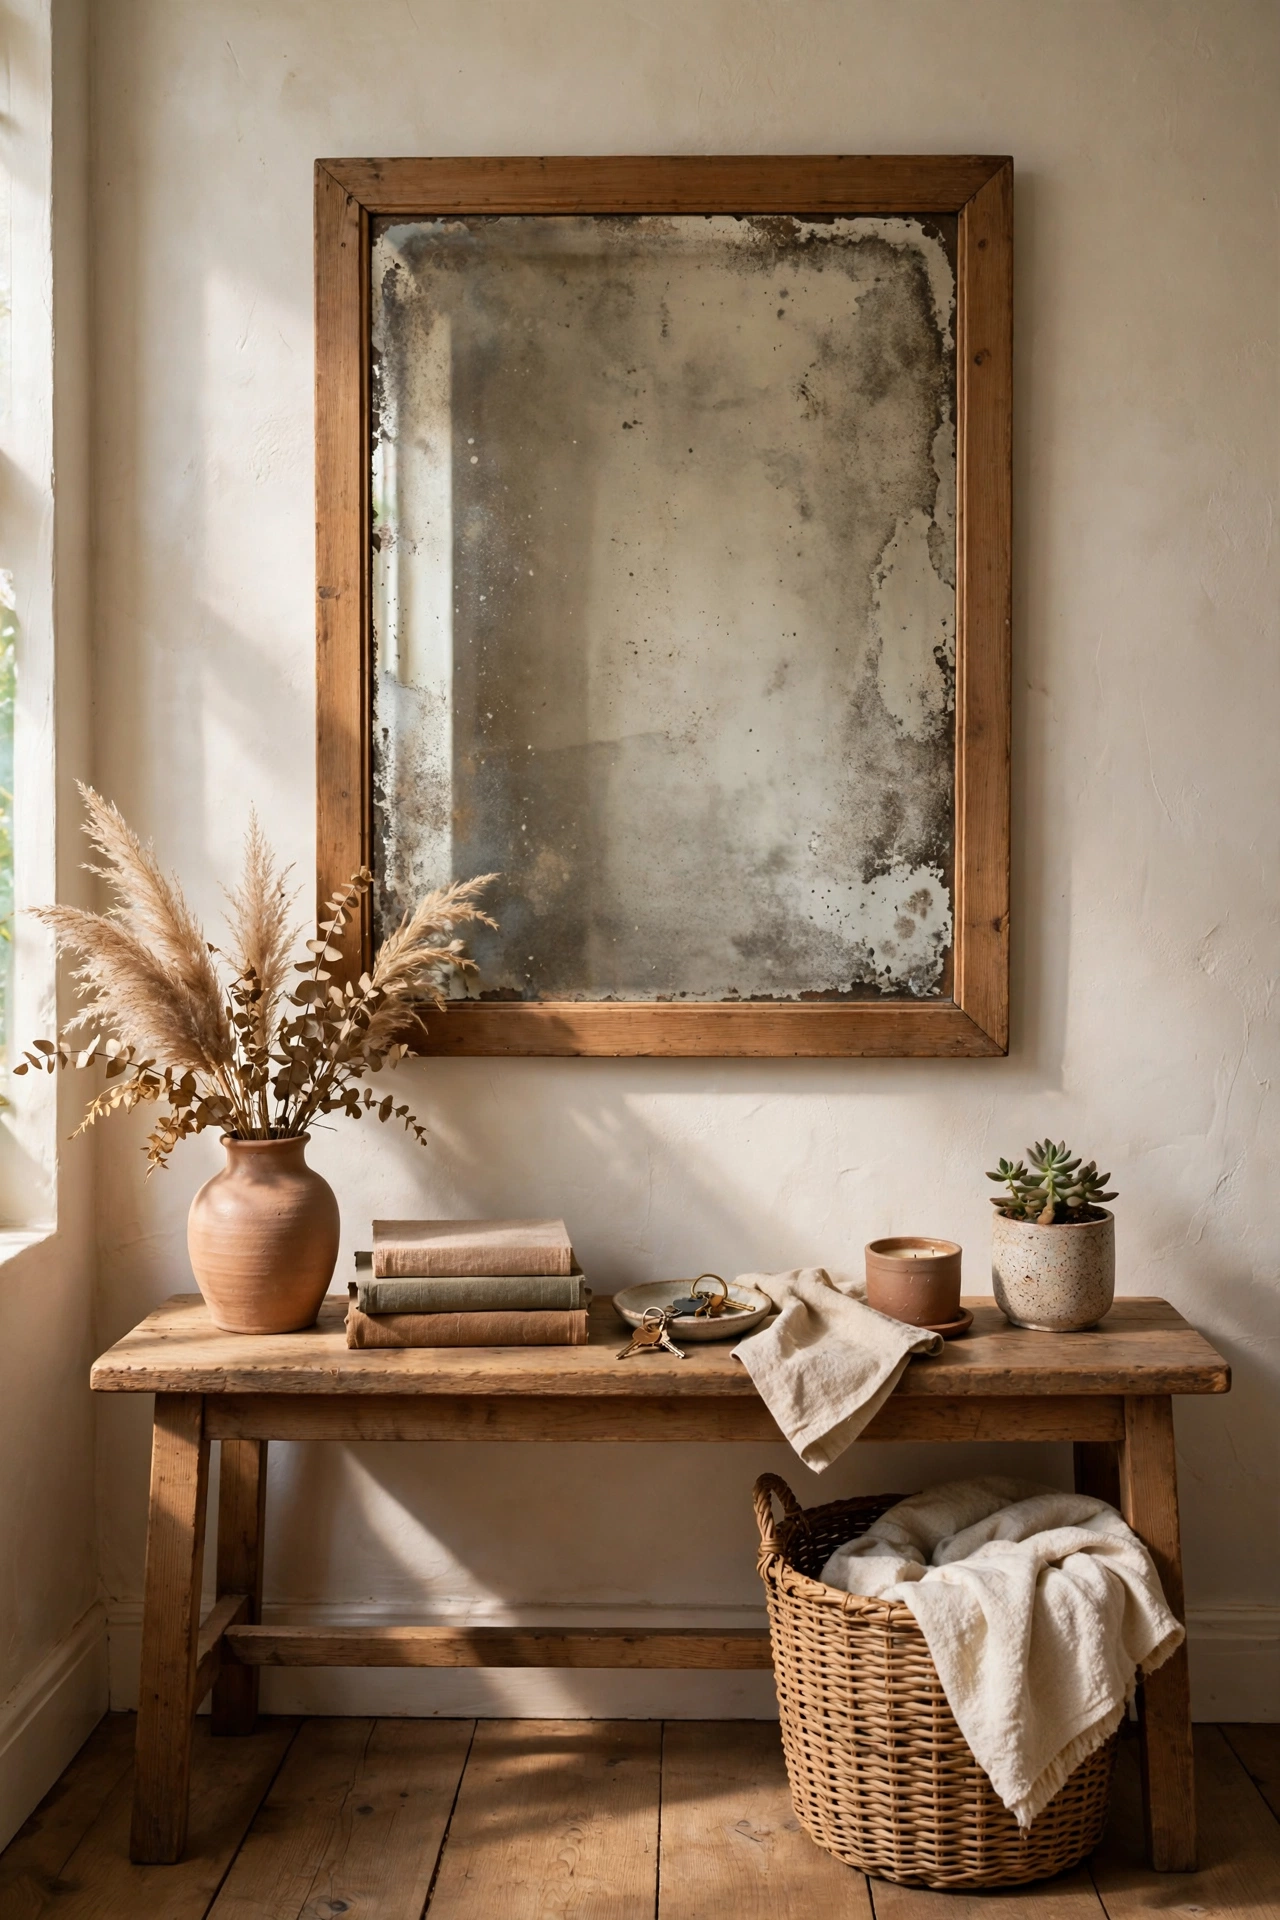
Mirror antiquing spray gives a new mirror that foxed, vintage look in minutes. I sprayed the back of a cheap rectangular mirror very lightly, working in patches, and the silvering developed cloudy, aged spots. Less is more here: my first attempt was far too heavy and the mirror looked dirty rather than antique. Spray from a distance in short bursts, and stop sooner than you think you should. You can always add more. Use it on the back of the glass only, and frame the finished mirror simply, because the aged surface is the star.
Cost: ~$14-20 | Time: 30 minutes
15. Hexagon Mirror Tile Cluster
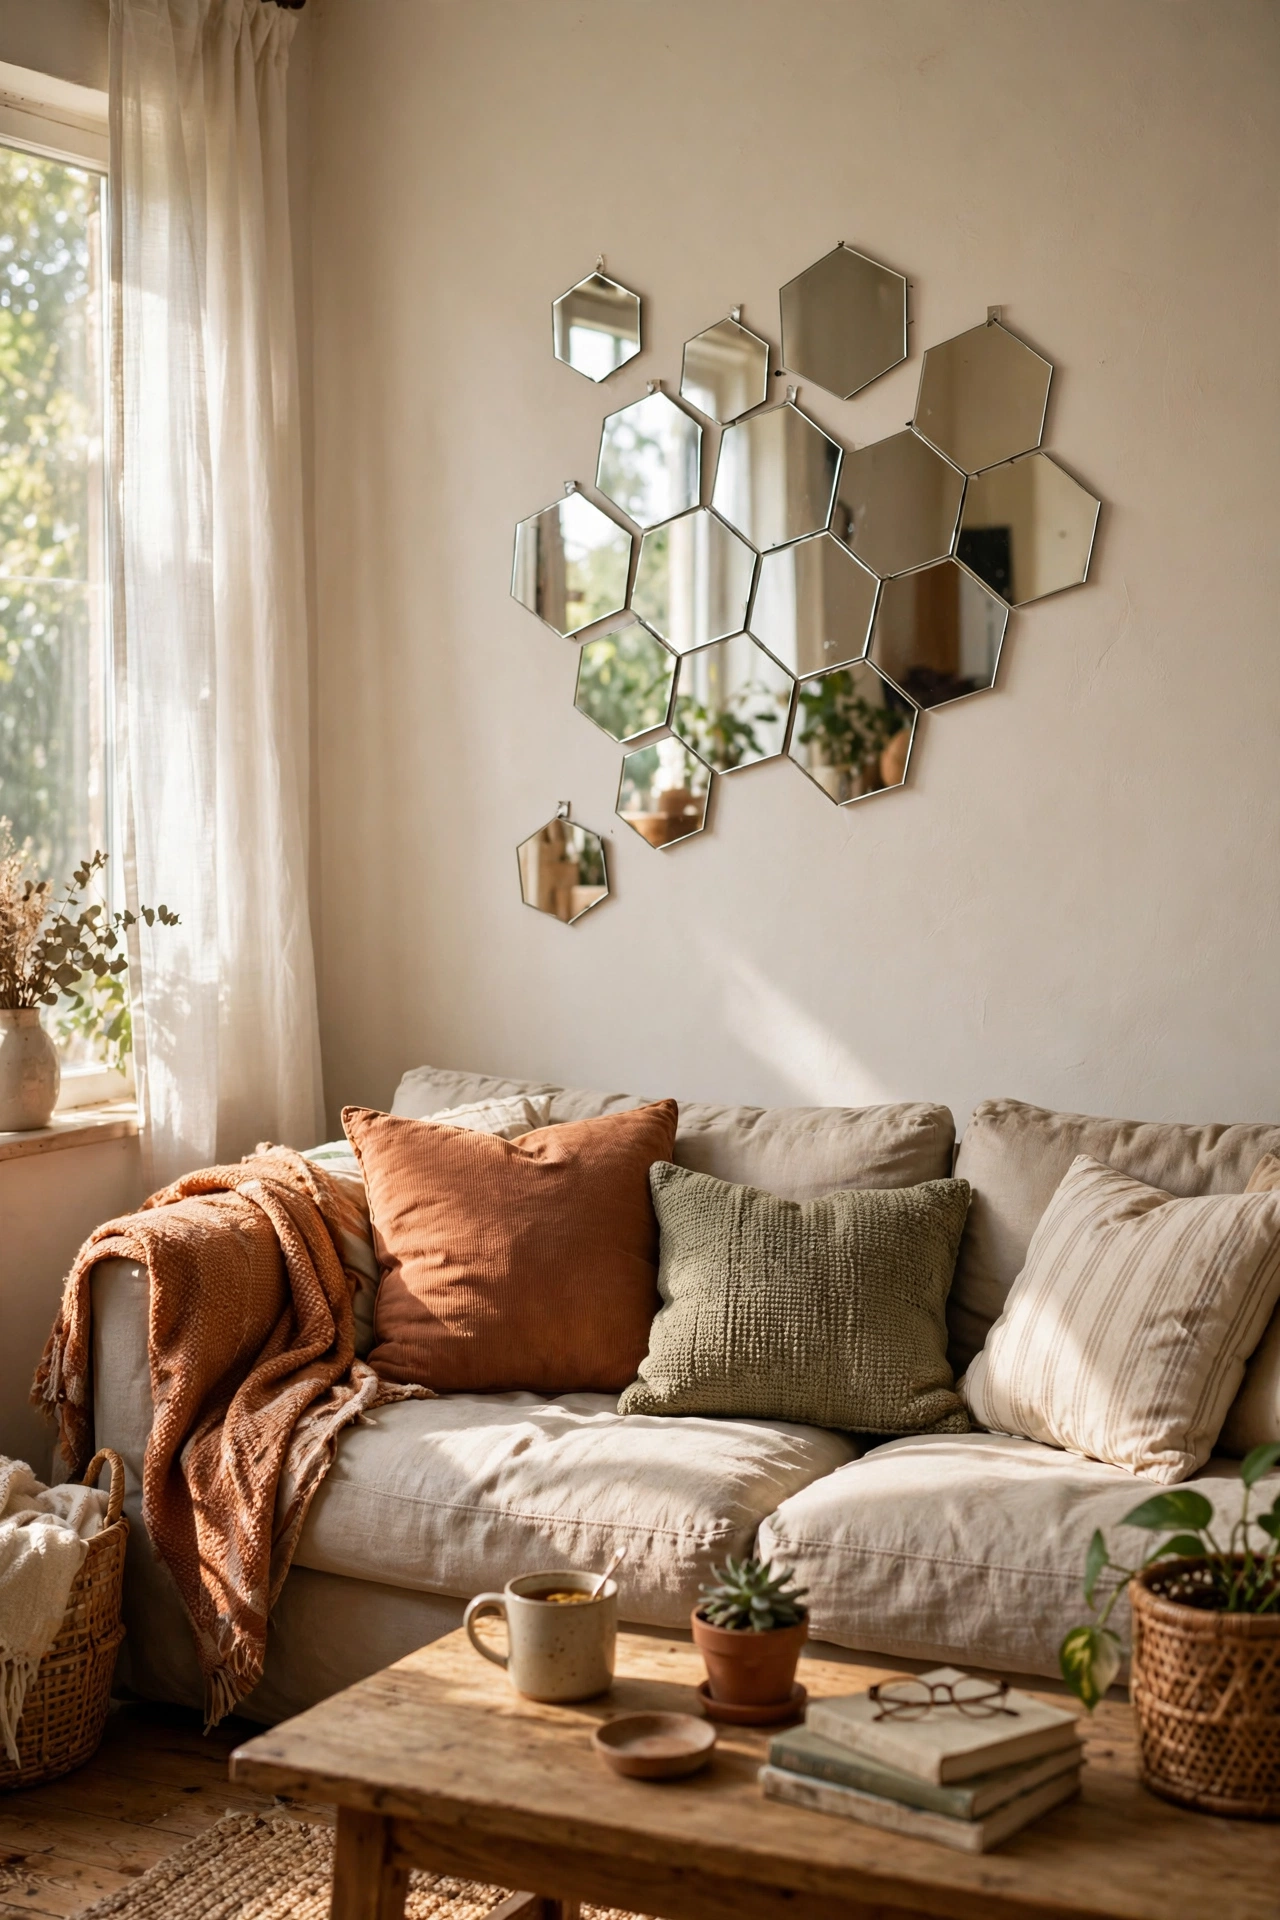
A cluster of small hexagon mirrors arranged like honeycomb is modern, sculptural, and very cheap. I bought a pack of twelve hexagon mirror tiles, played with the arrangement on the floor until I liked the shape, and stuck them up with adhesive pads. The arrangement is everything: an organic, asymmetric cluster looks designed, while a perfect grid looks like a science project. I photographed three layouts on my phone before choosing. Leave small even gaps between tiles for the cleanest look, and use a level on at least the central tile so the whole cluster does not drift.
Cost: ~$12-18 | Time: 1 hour
16. Wicker Tray Framed Mirror
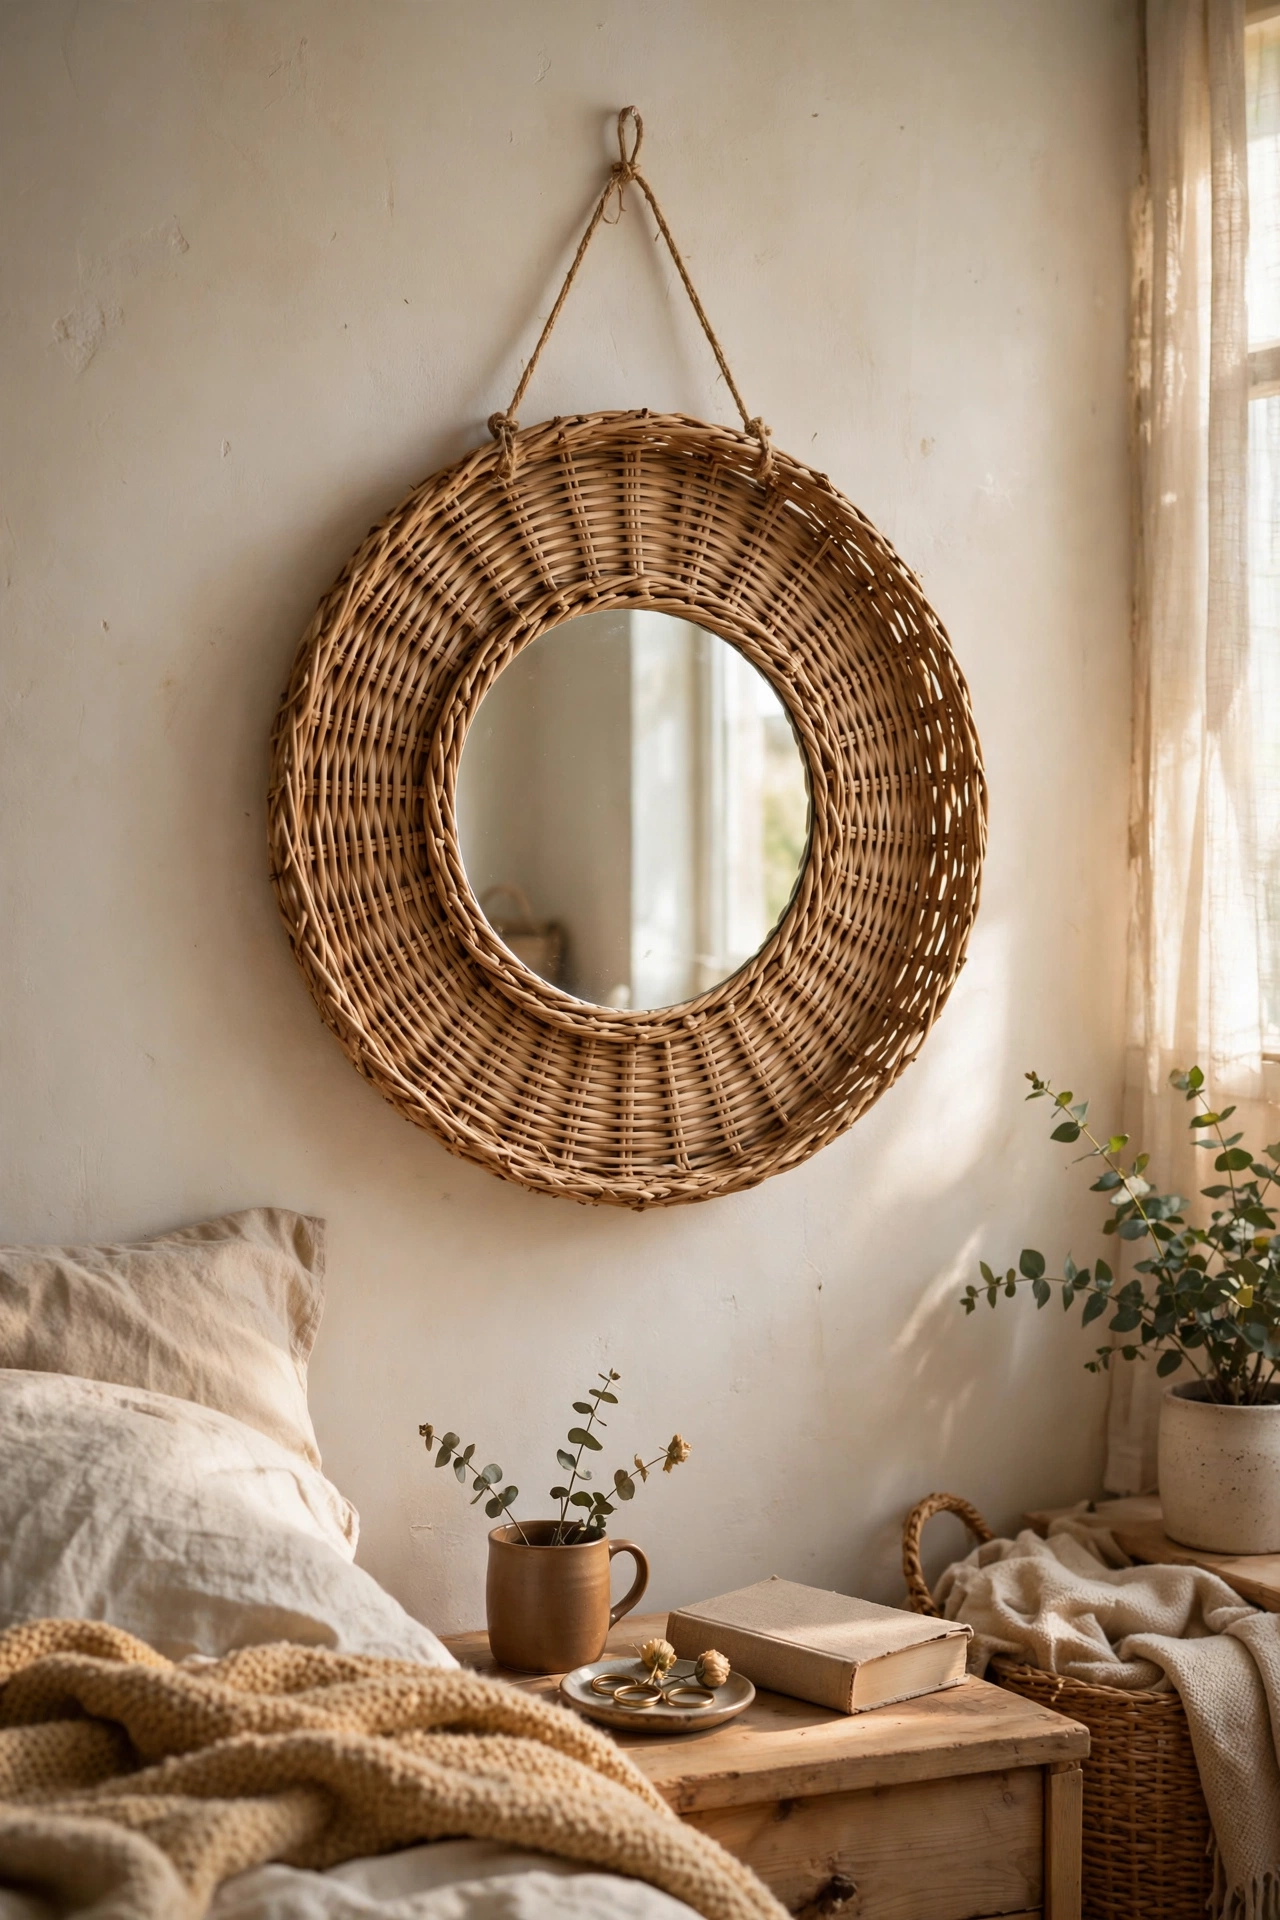
A flat woven tray with its centre cut out becomes a charming boho mirror frame. I found a round wicker tray for $4, cut out the middle with a craft knife, and glued a round mirror into the opening from behind. The tray’s rim becomes the frame. Cut the opening slightly smaller than the mirror so the glass sits on a lip of wicker, and secure it with strong adhesive plus a cardboard backing disc. Sand the cut edge smooth so no sharp strands poke out. Mine hangs in my bedroom and the texture of the wicker makes the whole corner feel warmer.
Cost: ~$10-16 | Time: 1 hour
Budget check: sixteen mirrors complete. The tray frame cost less than a sandwich, which is a good reminder that the frame material matters far less than the finish.
17. Entryway Mirror With a Hook Rail
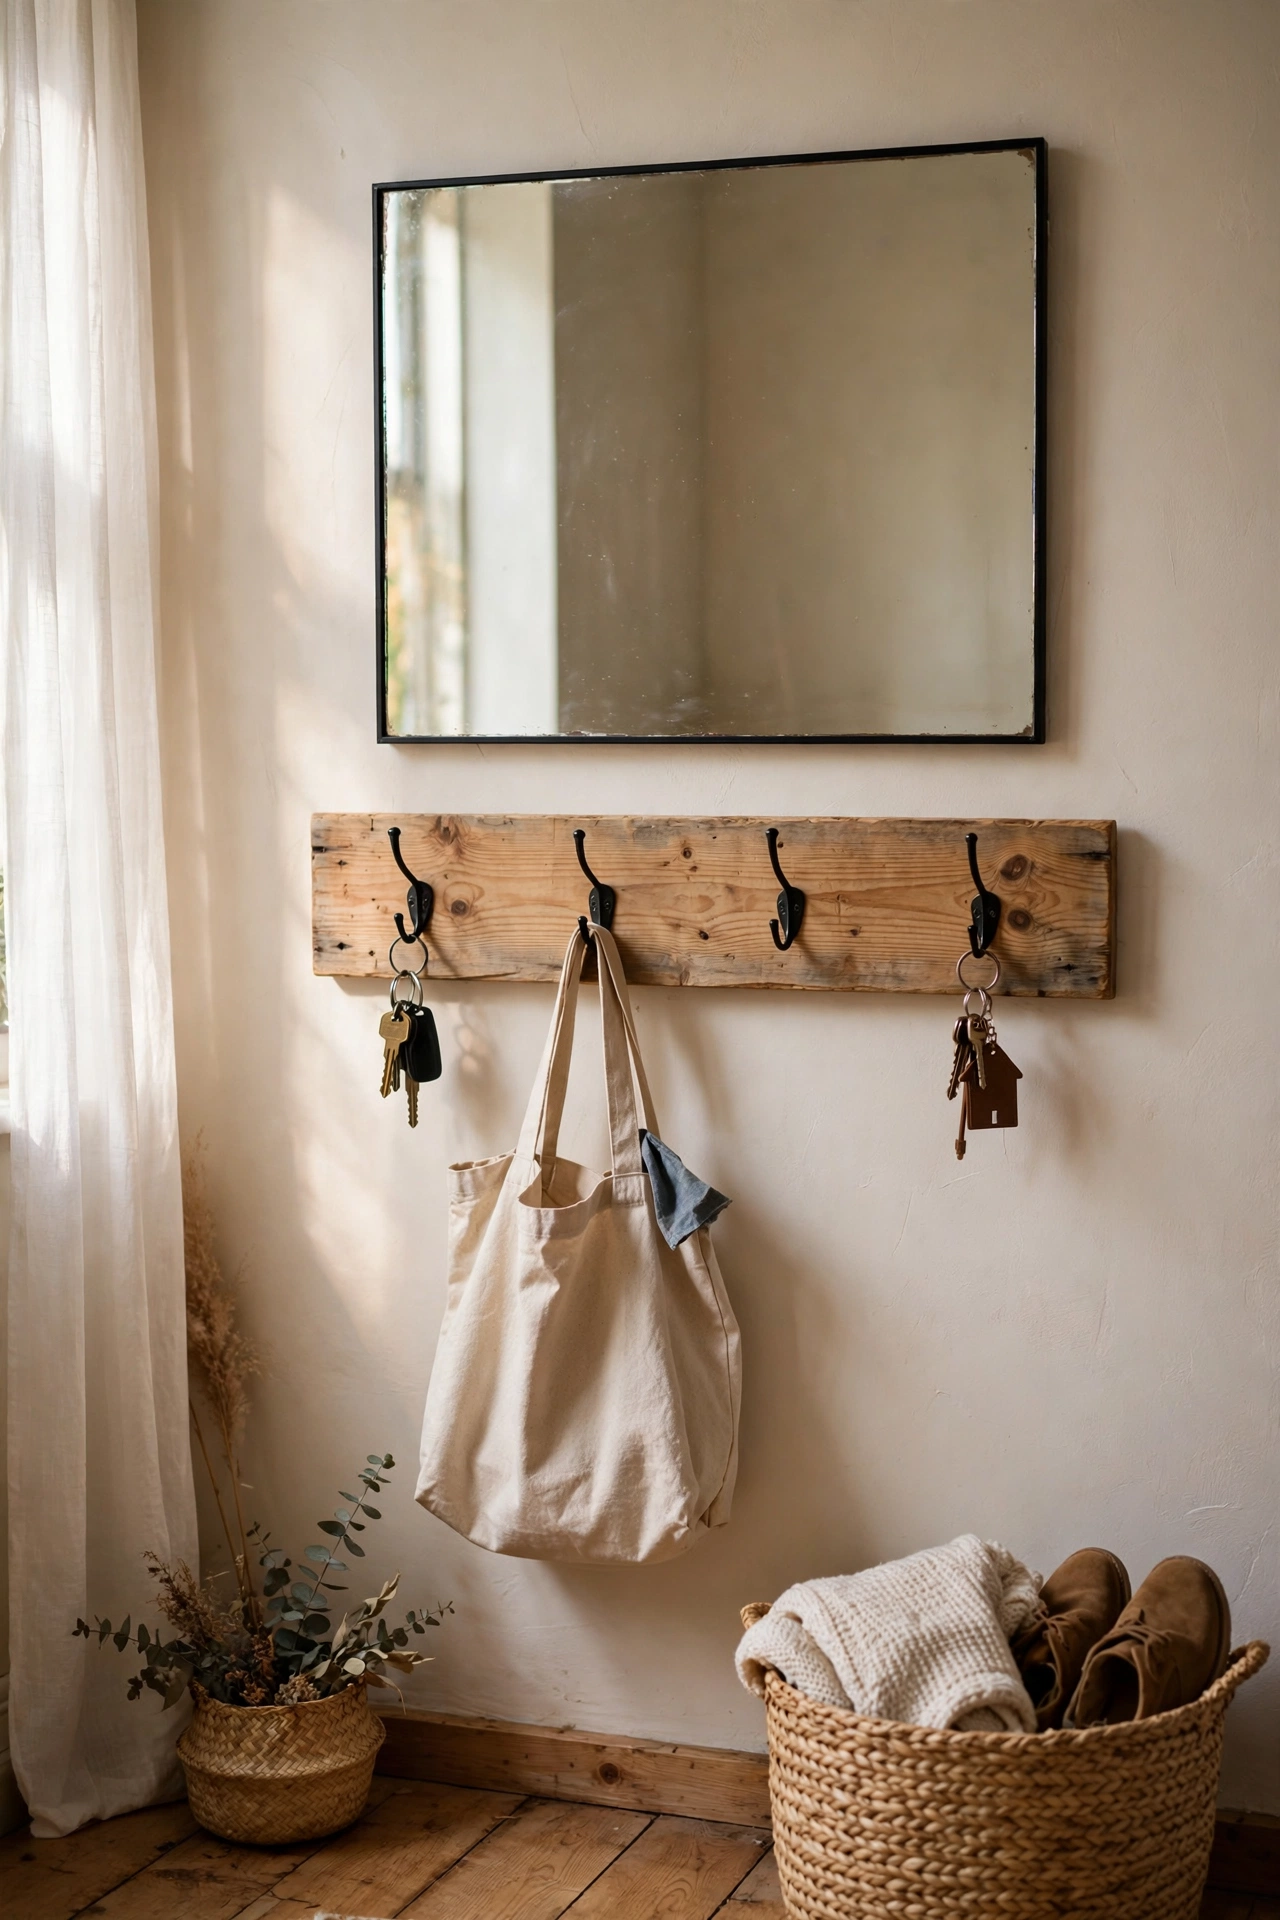
Mounting a mirror above a wooden hook rail turns an entryway into a proper drop zone. I screwed a $12 pine board to the wall, added four black hooks, and hung a rectangular mirror above it. Keys, bags, and dog leads all have a home now, and the mirror makes the narrow hallway feel twice as wide. Mount the board into studs, because hooks holding bags put real strain on the fixings. I spaced my hooks eight inches apart so coats do not bunch up. Stain or paint the board to match your door hardware for a pulled-together look.
Cost: ~$20-30 | Time: 1.5 hours
18. Cabinet Door Turned Mirror
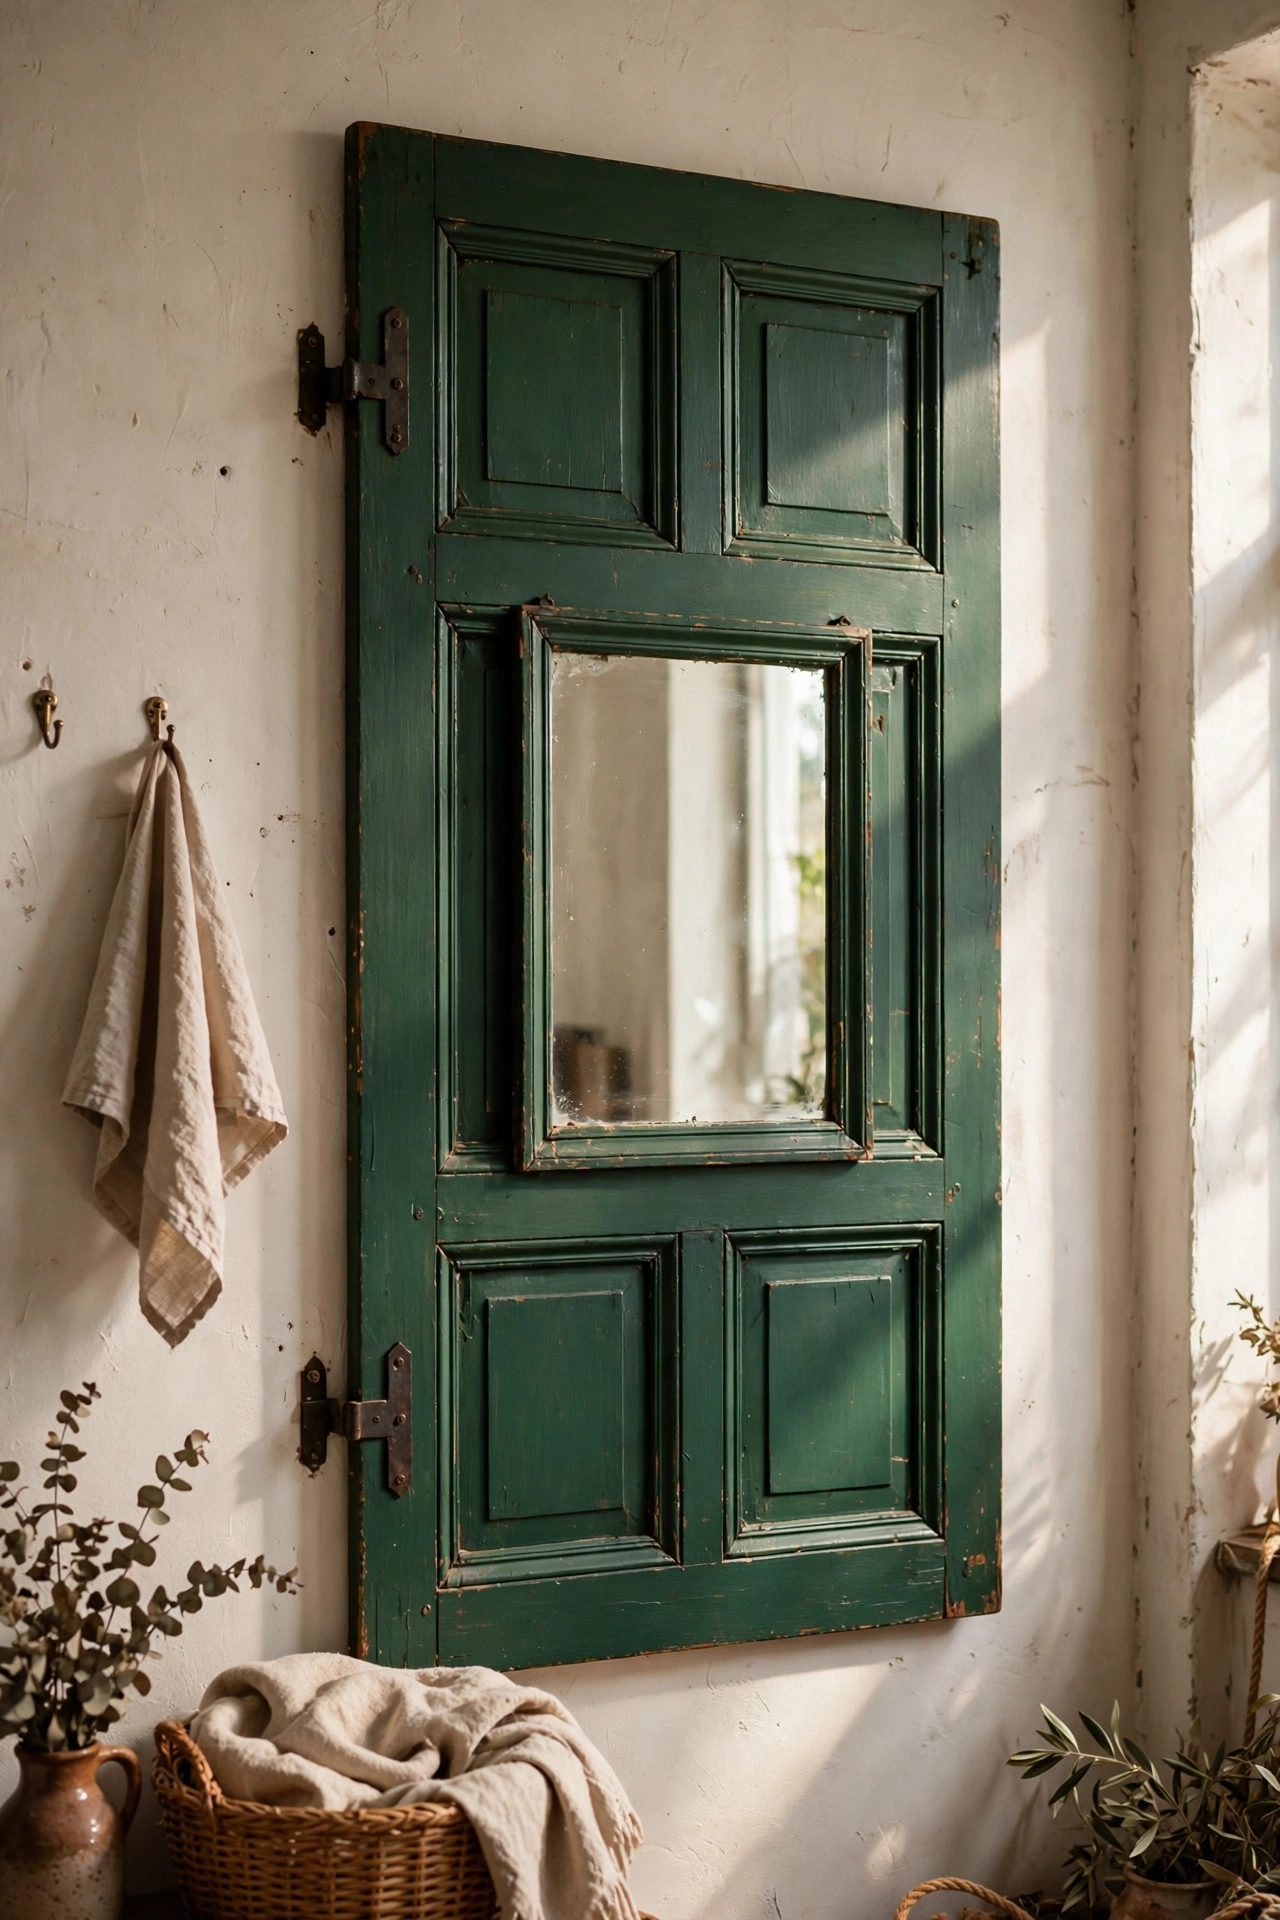
An old cabinet door with a mirror fitted into its panel is a beautiful upcycle. I found a solid panelled door front at a salvage shop for $8, painted it deep green, and had mirror cut to fit the recessed panel. The raised moulding of the door becomes an instant ornate frame. Measure the recess carefully and order the mirror a fraction small so it drops in easily. I secured mine with mirror adhesive and small glazing points. This looks far more expensive than it is, and it is a genuinely unique piece nobody else will own.
Cost: ~$25-40 | Time: 2 hours
19. Stencilled Border on a Plain Mirror
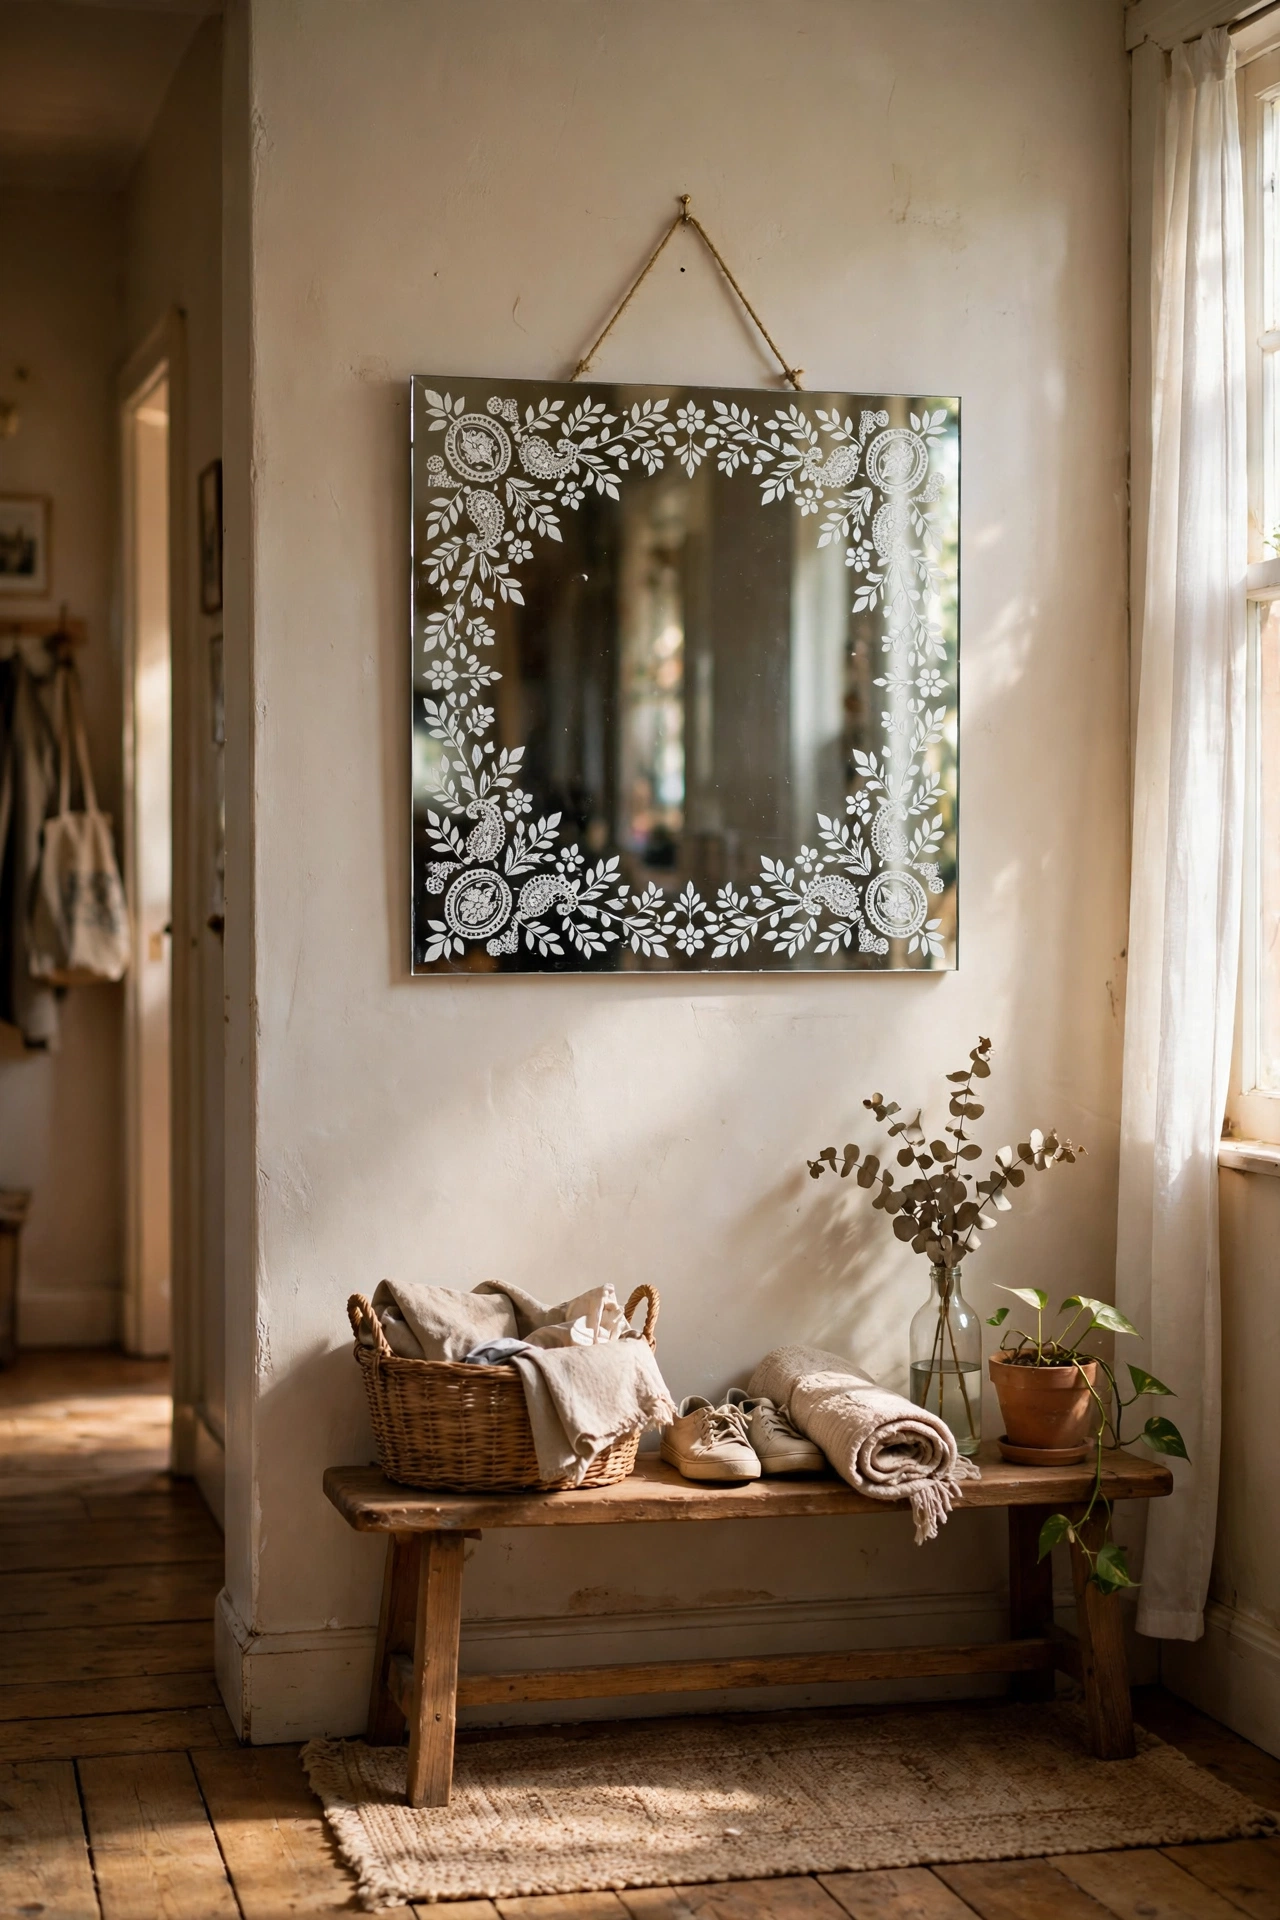
A stencilled border painted directly on the mirror glass gives a plain mirror a custom, etched look. I used a small damask stencil and white glass paint around the edge of a square hallway mirror. The trick is barely any paint on the stencil brush: dab most of it off on paper first, or the paint bleeds under the stencil and the lines go fuzzy. I ruined one corner this way and had to scrape it off with a razor blade. Work slowly around the border and let it dry fully before you touch it. Glass paint cures harder over a few days, so handle it gently at first.
Cost: ~$12-18 | Time: 1.5 hours
20. Pressed-Flower Framed Mirror
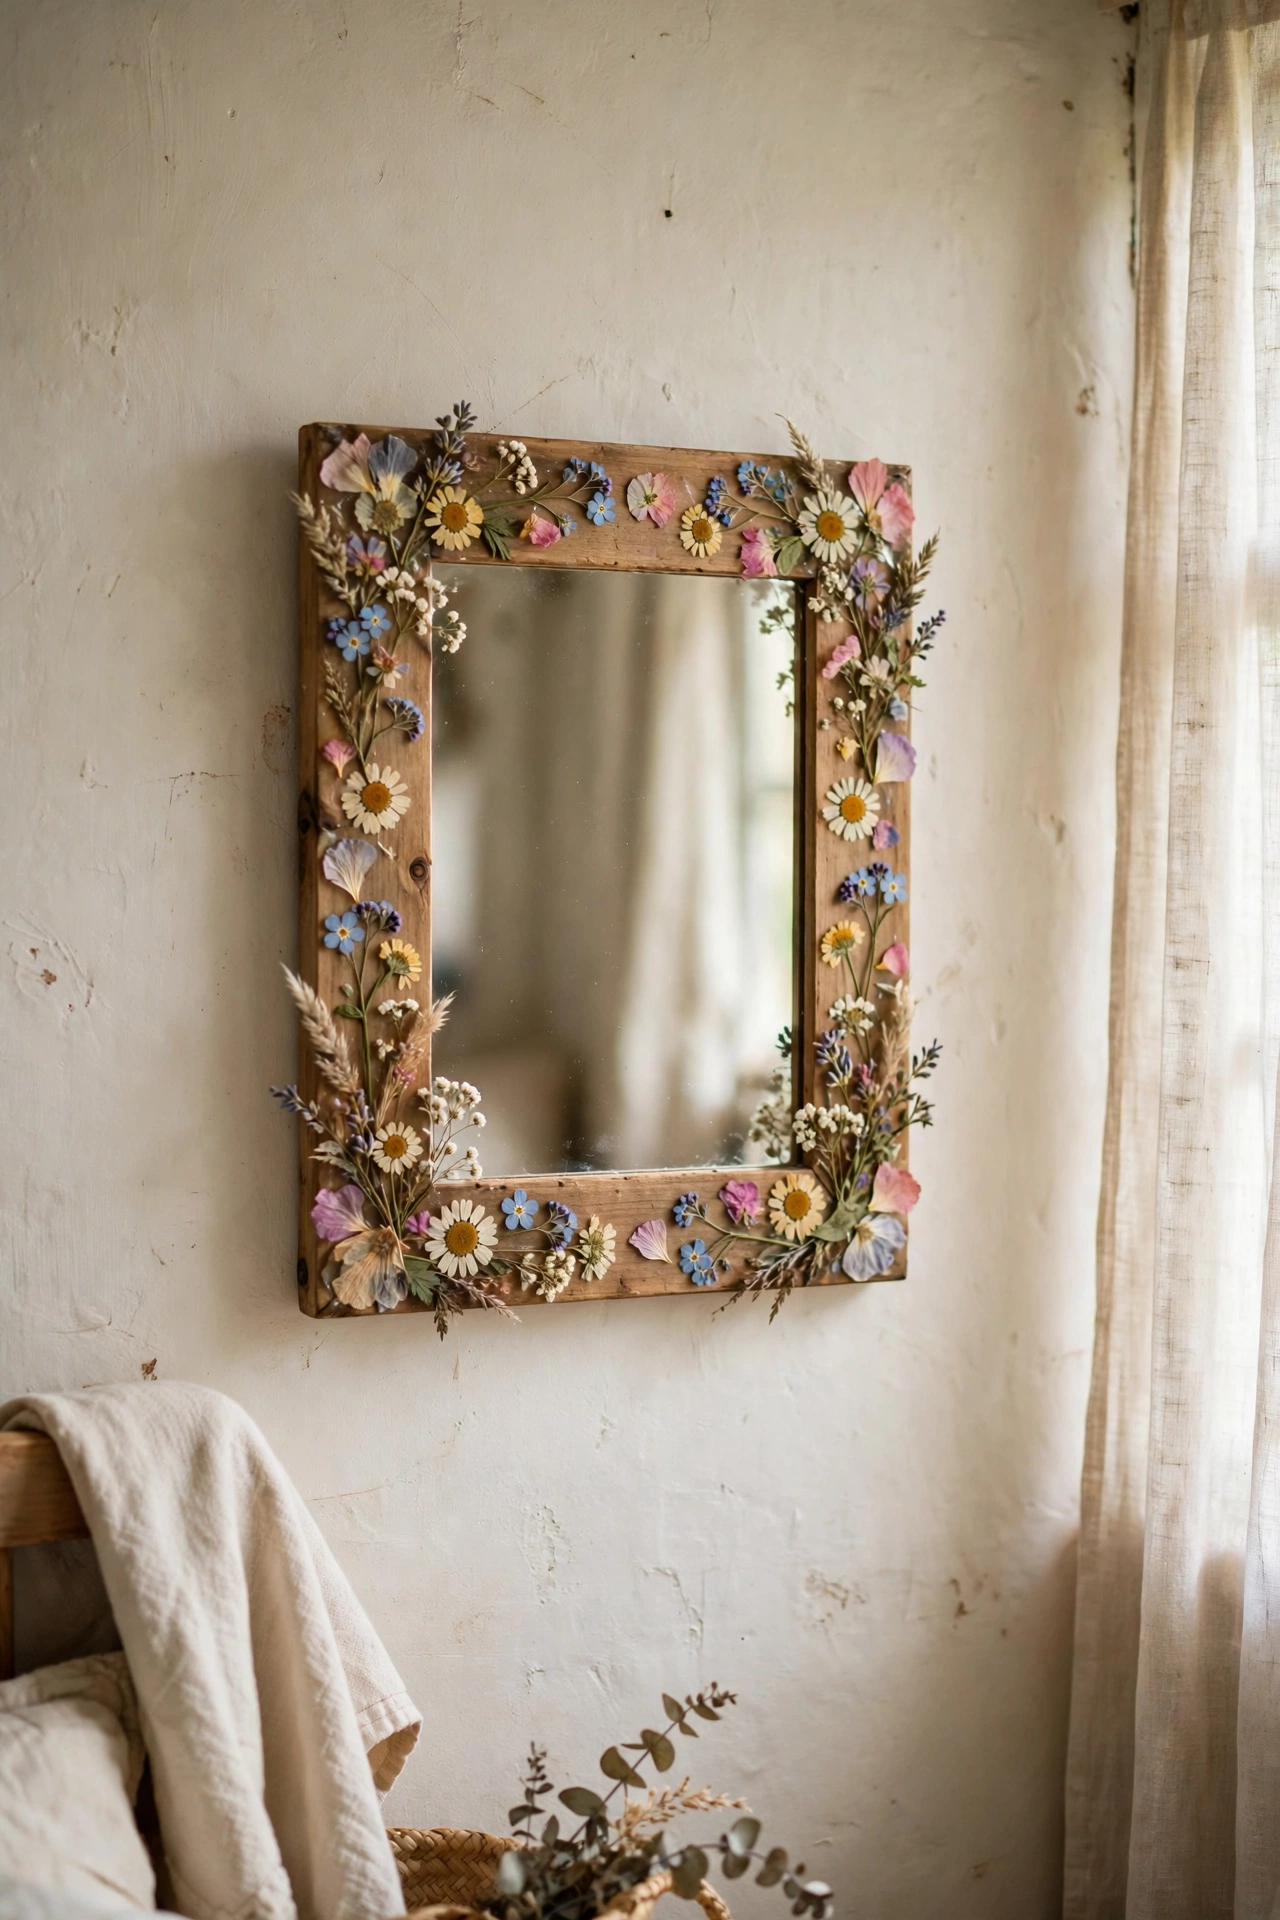
Pressed flowers arranged around a mirror frame make the sweetest cottage-style piece. I pressed flowers from my garden between heavy books for two weeks, then arranged them around the wooden frame of a small mirror and sealed everything with clear decoupage medium. Arrange the flowers dry first and photograph the layout, because once the glue is down there is no rearranging. I sealed mine with two thin coats, letting each dry fully. Keep it out of direct sun or the colours will fade within a season. For more floral craft ideas, see (see also: 17-thrift-store-diy-ideas-in-a-weekend).
Cost: ~$10-16 | Time: 1 hour plus pressing
Budget check: twenty mirrors done with three to go. The pressed-flower frame was nearly free if you count garden flowers as free, which I do.
21. Leaner Mirror With a Painted Frame Border
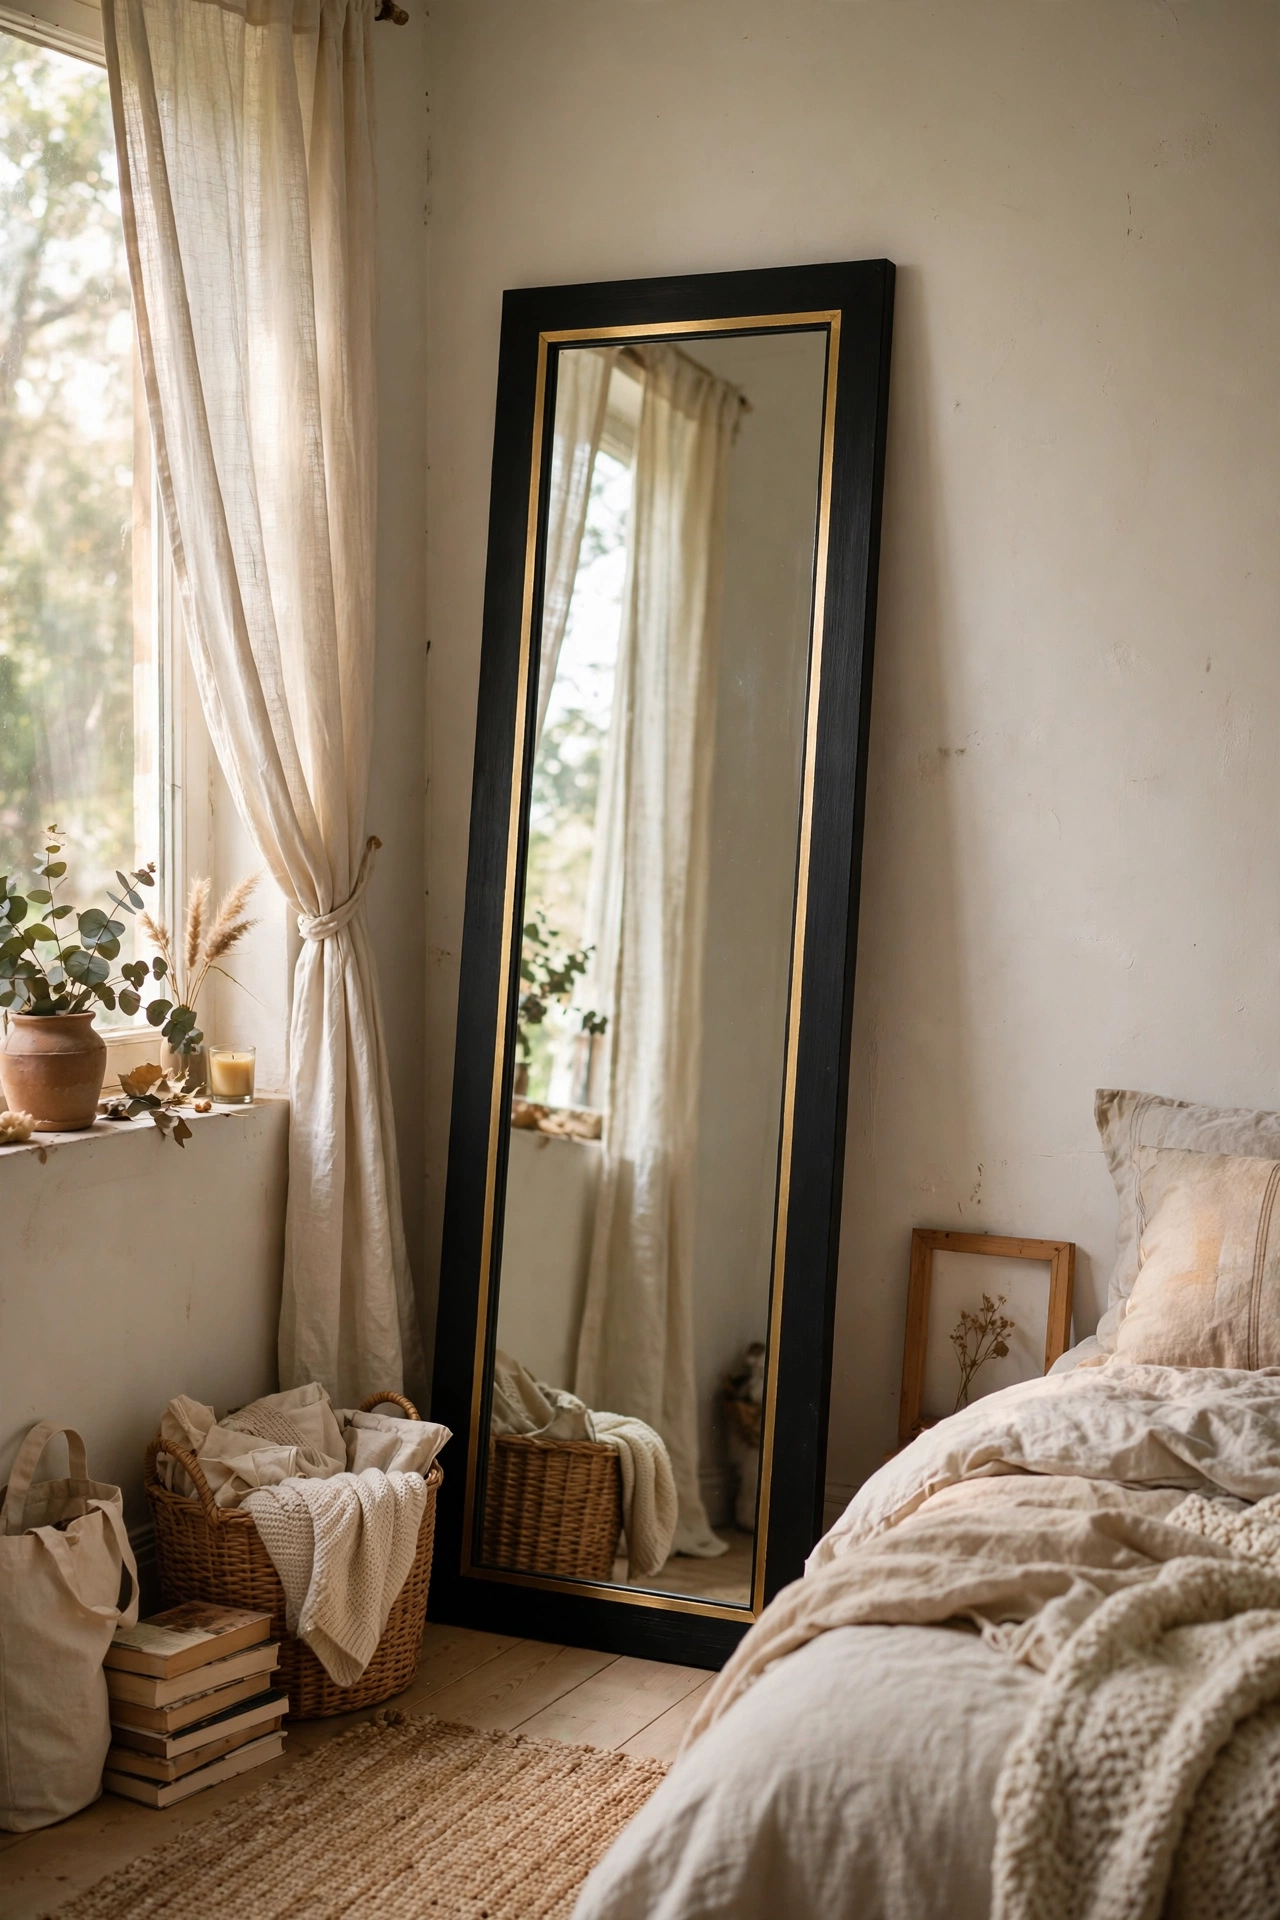
A full-length leaner mirror gets a designer look from a painted border stripe on the frame. Mine was a plain black leaner, and I masked off a two-inch stripe around the inner edge of the frame and painted it brushed gold. The gold line catches the light and makes the whole mirror look custom. Use a good quality painter’s tape and press the edges down firmly, because metallic paint loves to creep under loose tape. I did two thin coats and removed the tape while the second coat was still slightly tacky for the crispest line. Lean it at a slight angle and secure the top to the wall.
Cost: ~$8-12 | Time: 1 hour plus drying
22. Driftwood-Framed Beach Mirror
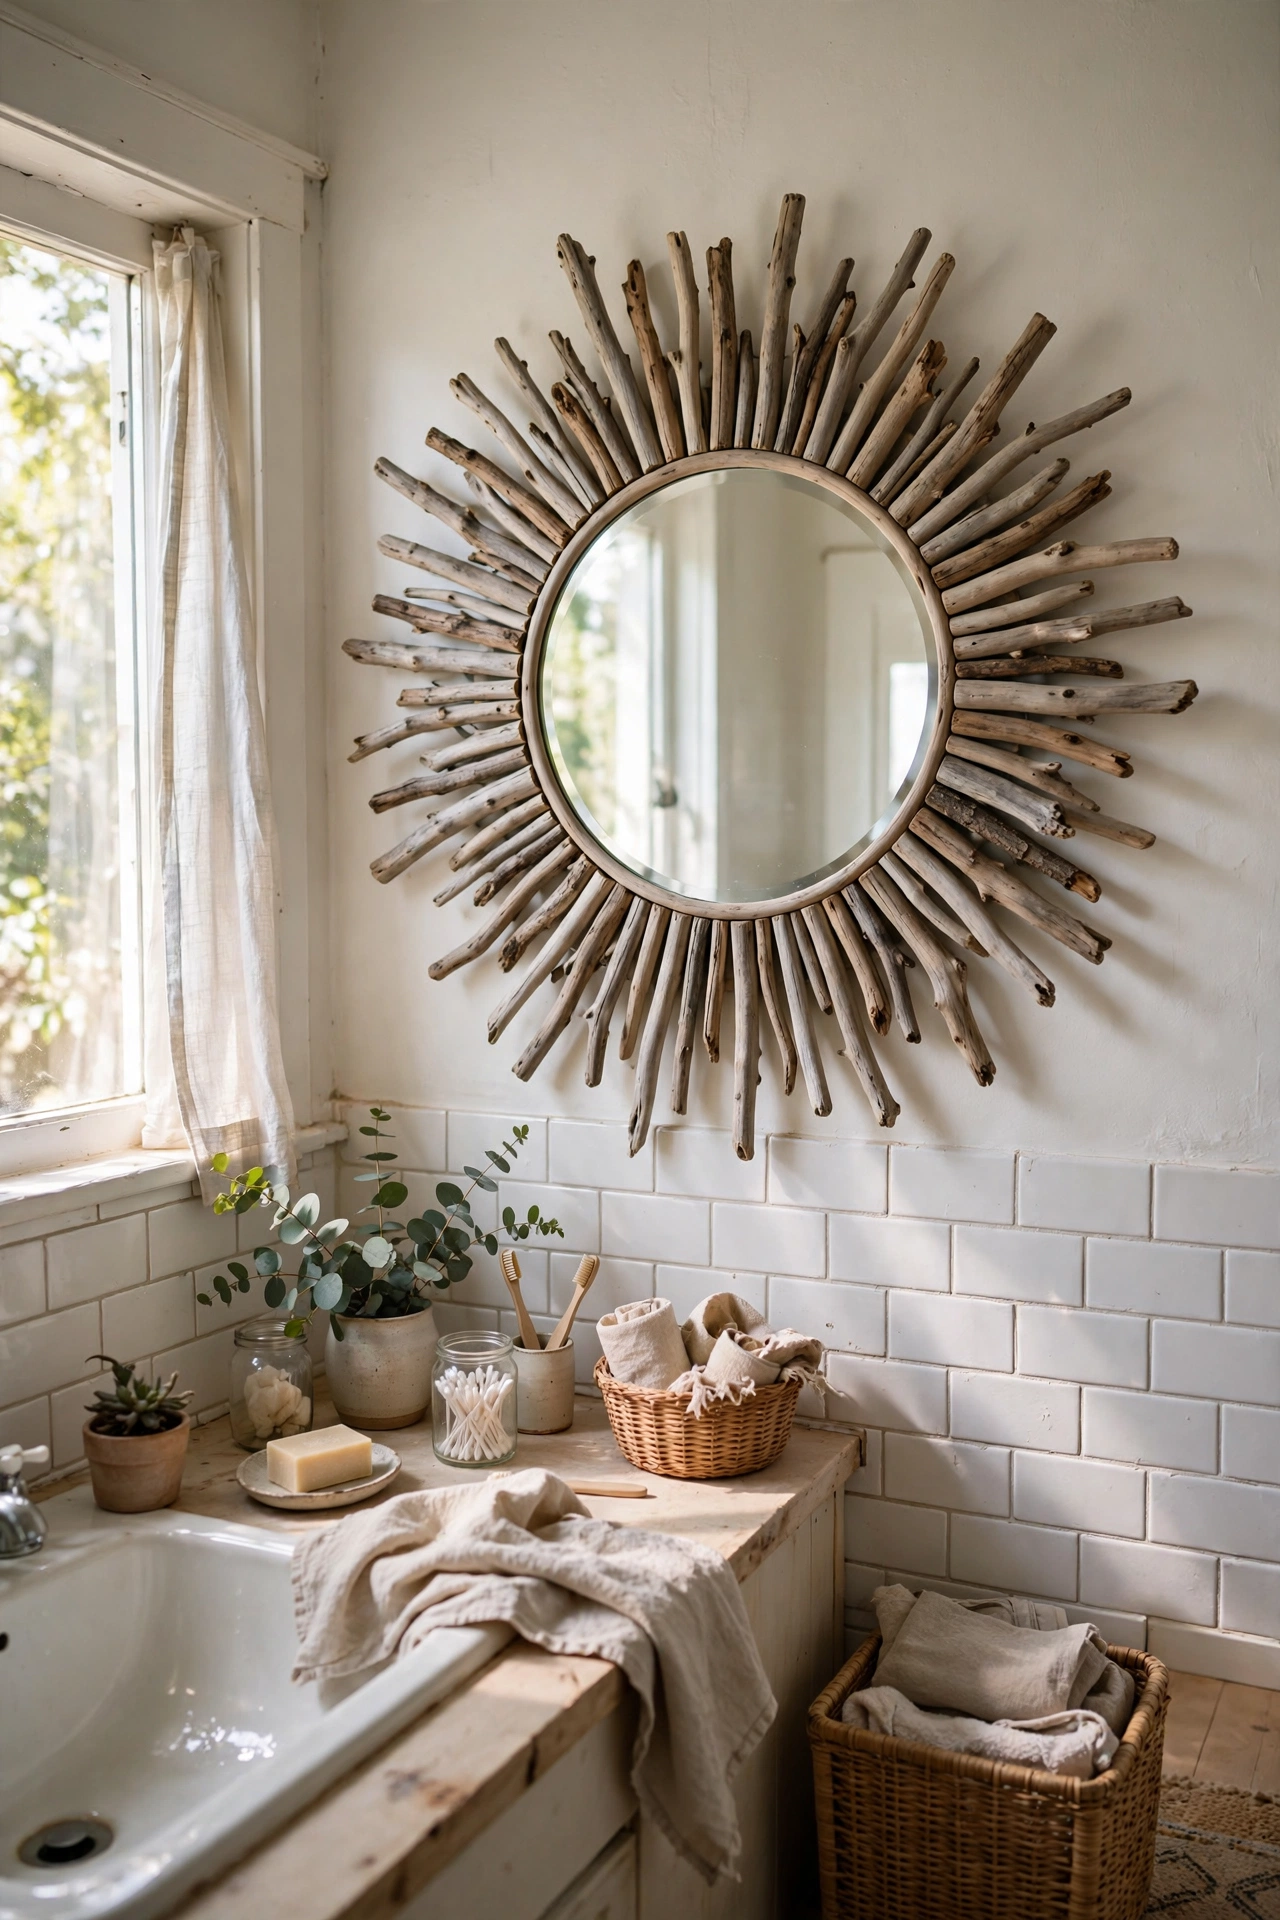
Pieces of driftwood glued around a round mirror make a beautiful coastal frame with real texture. I collected straight-ish pieces on a beach trip, scrubbed and dried them thoroughly, and hot-glued them in a radiating pattern around a small round mirror mounted on a plywood backing disc. The wood must be completely dry or it will keep shrinking and pop the glue. Mine dried indoors for a month before I built the frame. Overlap the pieces slightly and vary the lengths for a natural look. It hangs in my bathroom and smells faintly of the sea for the first few weeks.
Cost: ~$10-16 | Time: 2 hours
23. Black Grid Tape Mirror
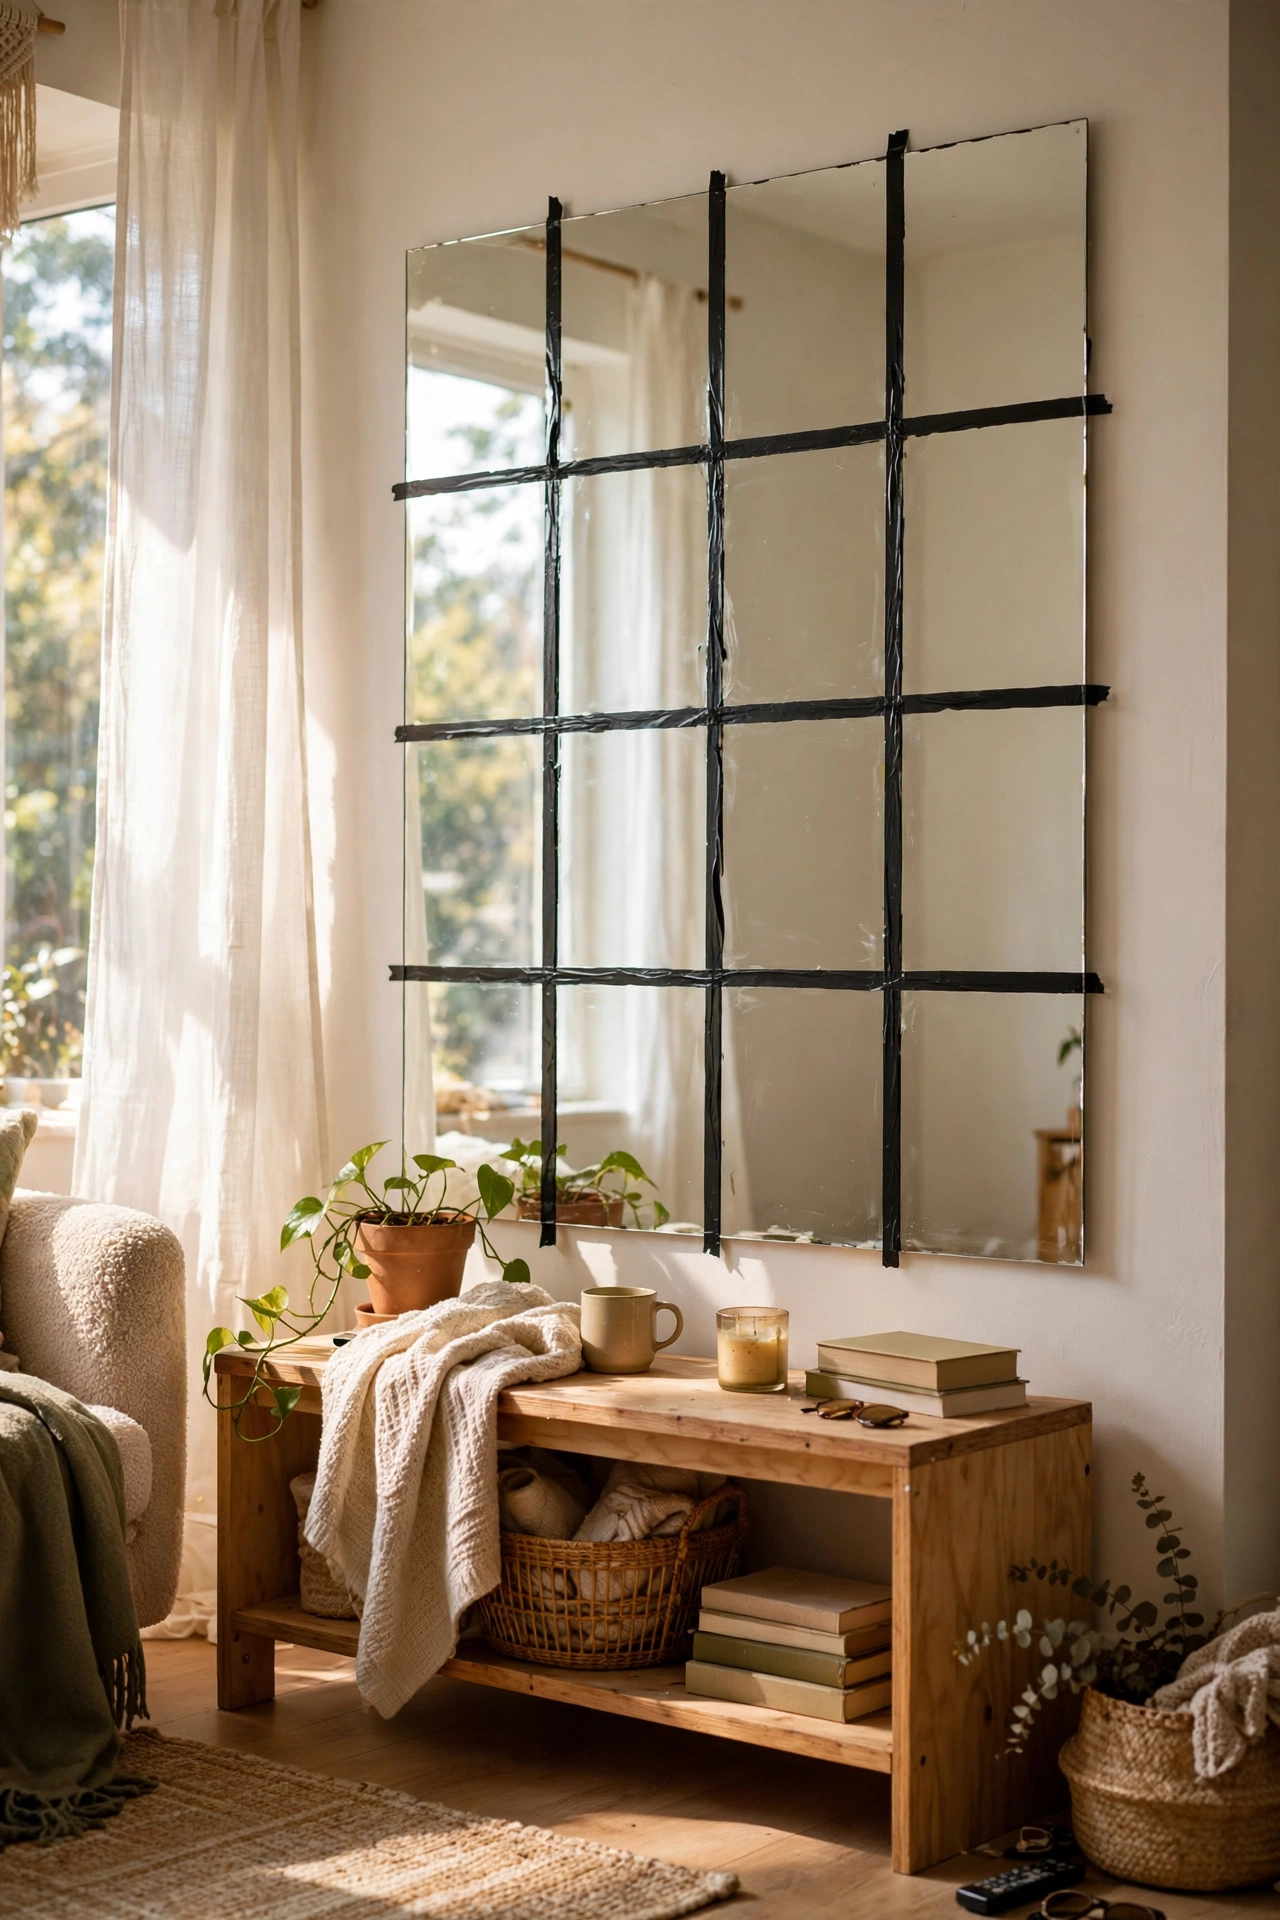
Thin black electrical tape applied in a grid turns a plain mirror into a convincing faux windowpane mirror. I marked a large rectangular mirror into equal panes with a ruler and pencil, then laid the tape in straight lines, burnishing each strip down firmly. The lines need to be truly straight, so use a long ruler as a guide and work slowly. I redid one crooked line three times before I was happy. This is the cheapest project on the list and one of the most striking. Step back frequently to check the grid reads evenly from across the room.
Cost: ~$6-10 | Time: 1 hour
Save this one for your next rainy-day project list.
Keep the DIY momentum going: (see also: dollar-store-decor-ideas-that-look-expensive) (see also: 17-diy-shelf-ideas-that-look-expensive)
