17 Thrift Store DIY Ideas in a Weekend
Last spring I gave myself a slightly ridiculous challenge: spend one weekend and less than $100 on thrift store diy ideas, and see how many corners of my house I could improve. By Sunday night I had redone a bare hallway wall, rescued a wobbly wooden chair, and restyled the top of my dresser, and I still had change from the hundred. The trick was never buying more stuff. It was learning which charity-shop finds are worth hauling home and which ones will sit in your garage for a year. This list is the seventeen projects that actually worked, with honest costs and the mistakes I made so you can skip them.
Every one of these thrift store diy ideas fits into a single weekend, and most take under two hours. You will need basic supplies you probably own already: spray paint, sandpaper, a screwdriver, and a hot glue gun. Hit the furniture and hard-goods aisles first; the pretty small stuff is tempting, but the big wins come from the boring-looking pieces.
1. Gallery Wall of Thrifted Frames
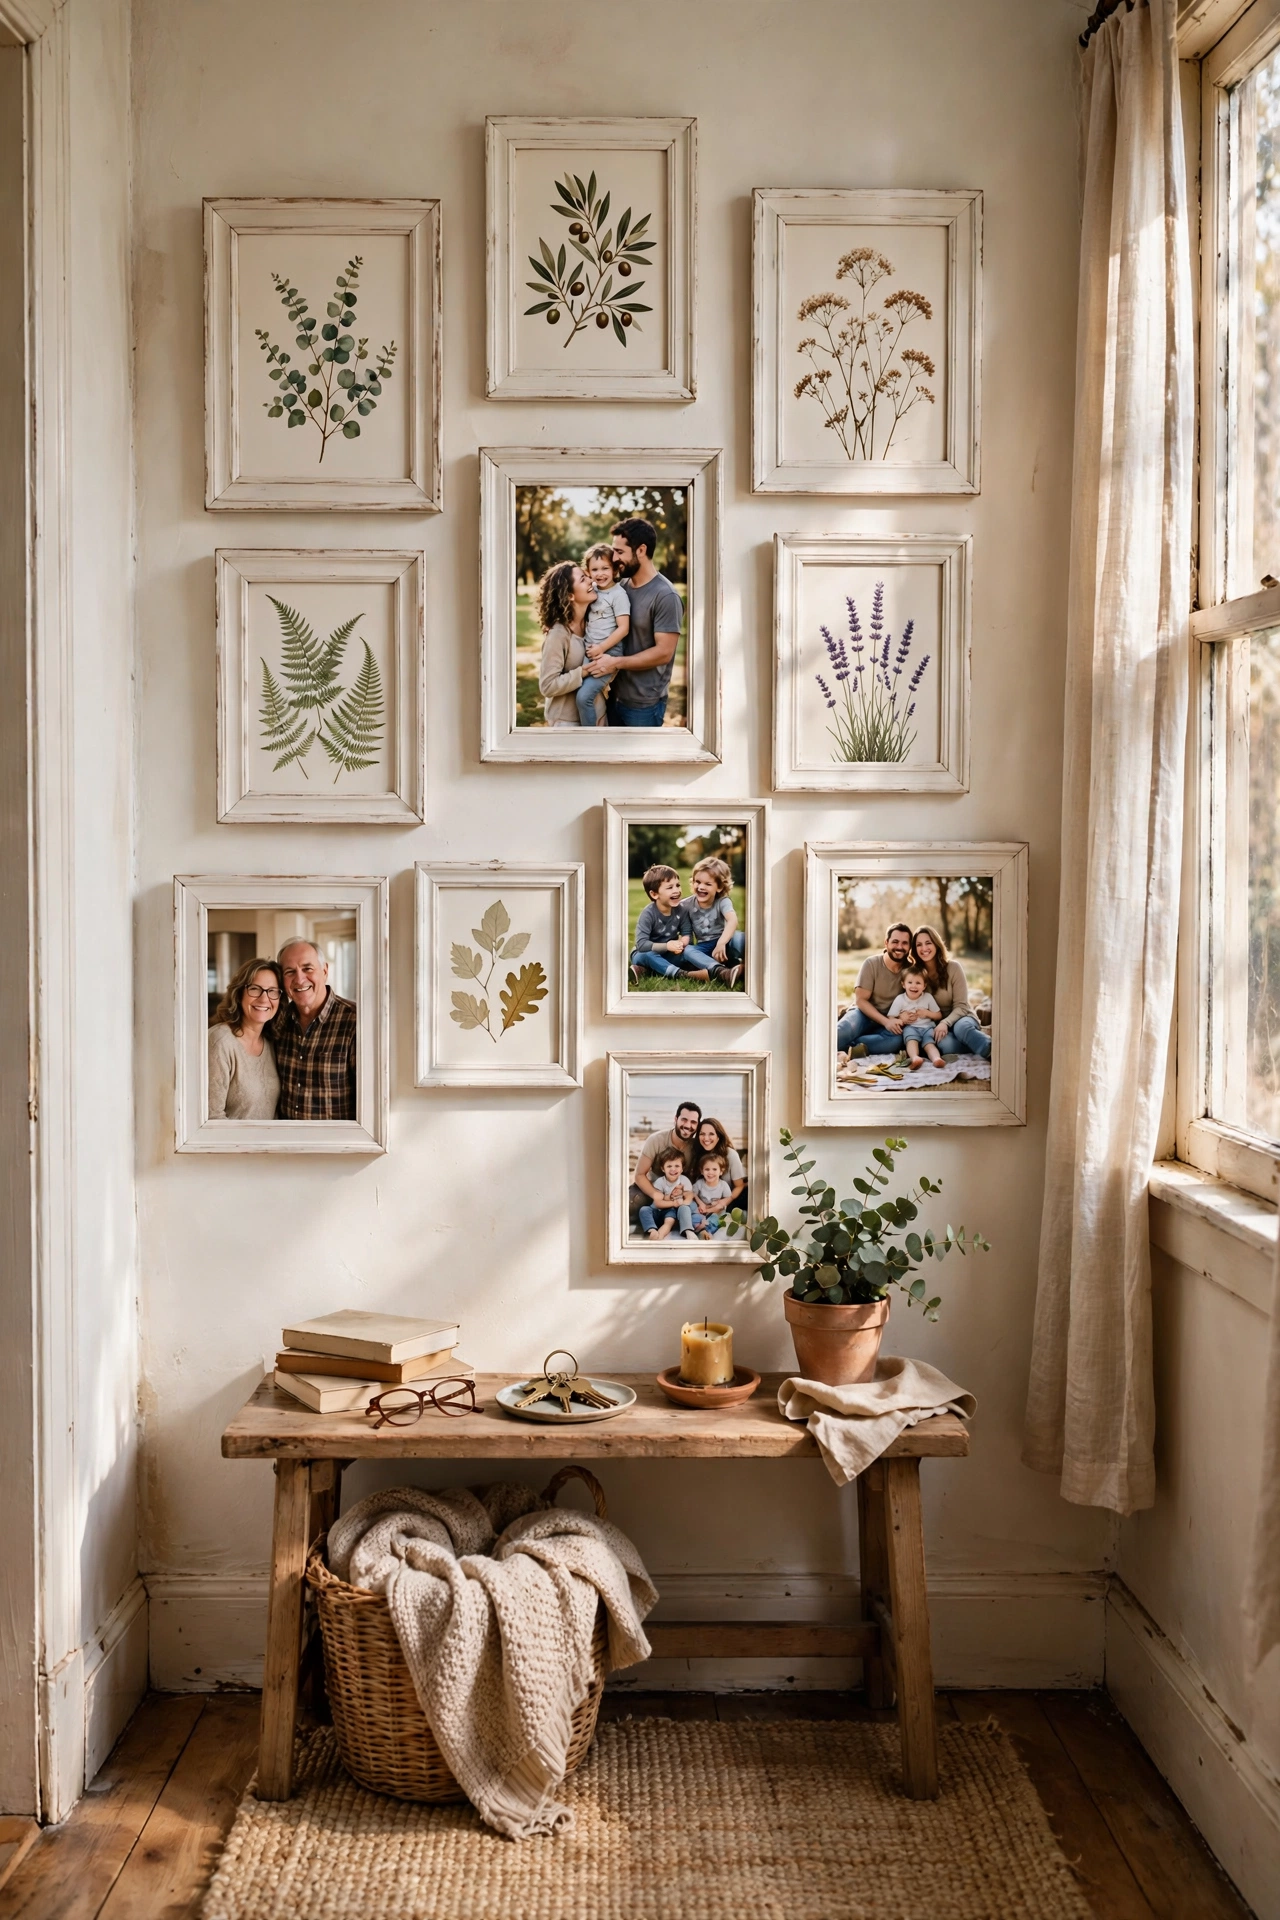
A gallery wall built from thrifted frames costs a fraction of a matched set and looks far more interesting. I bought nine mismatched wooden frames for about $12, sprayed them all the same warm white, and filled them with family photos and free printable art. The steps are simple: lay the frames on the floor and arrange them until the grouping feels balanced, trace each frame onto paper and tape the papers to the wall to test the layout, then hang. I tried hanging mine freehand the first time and the whole thing drifted sideways by dinner. The paper-template trick takes twenty minutes and saves you from a wall full of extra nail holes.
Cost: ~$12-20 | Time: ~2 hours
2. Spray-Painted Ceramic Lamp Base
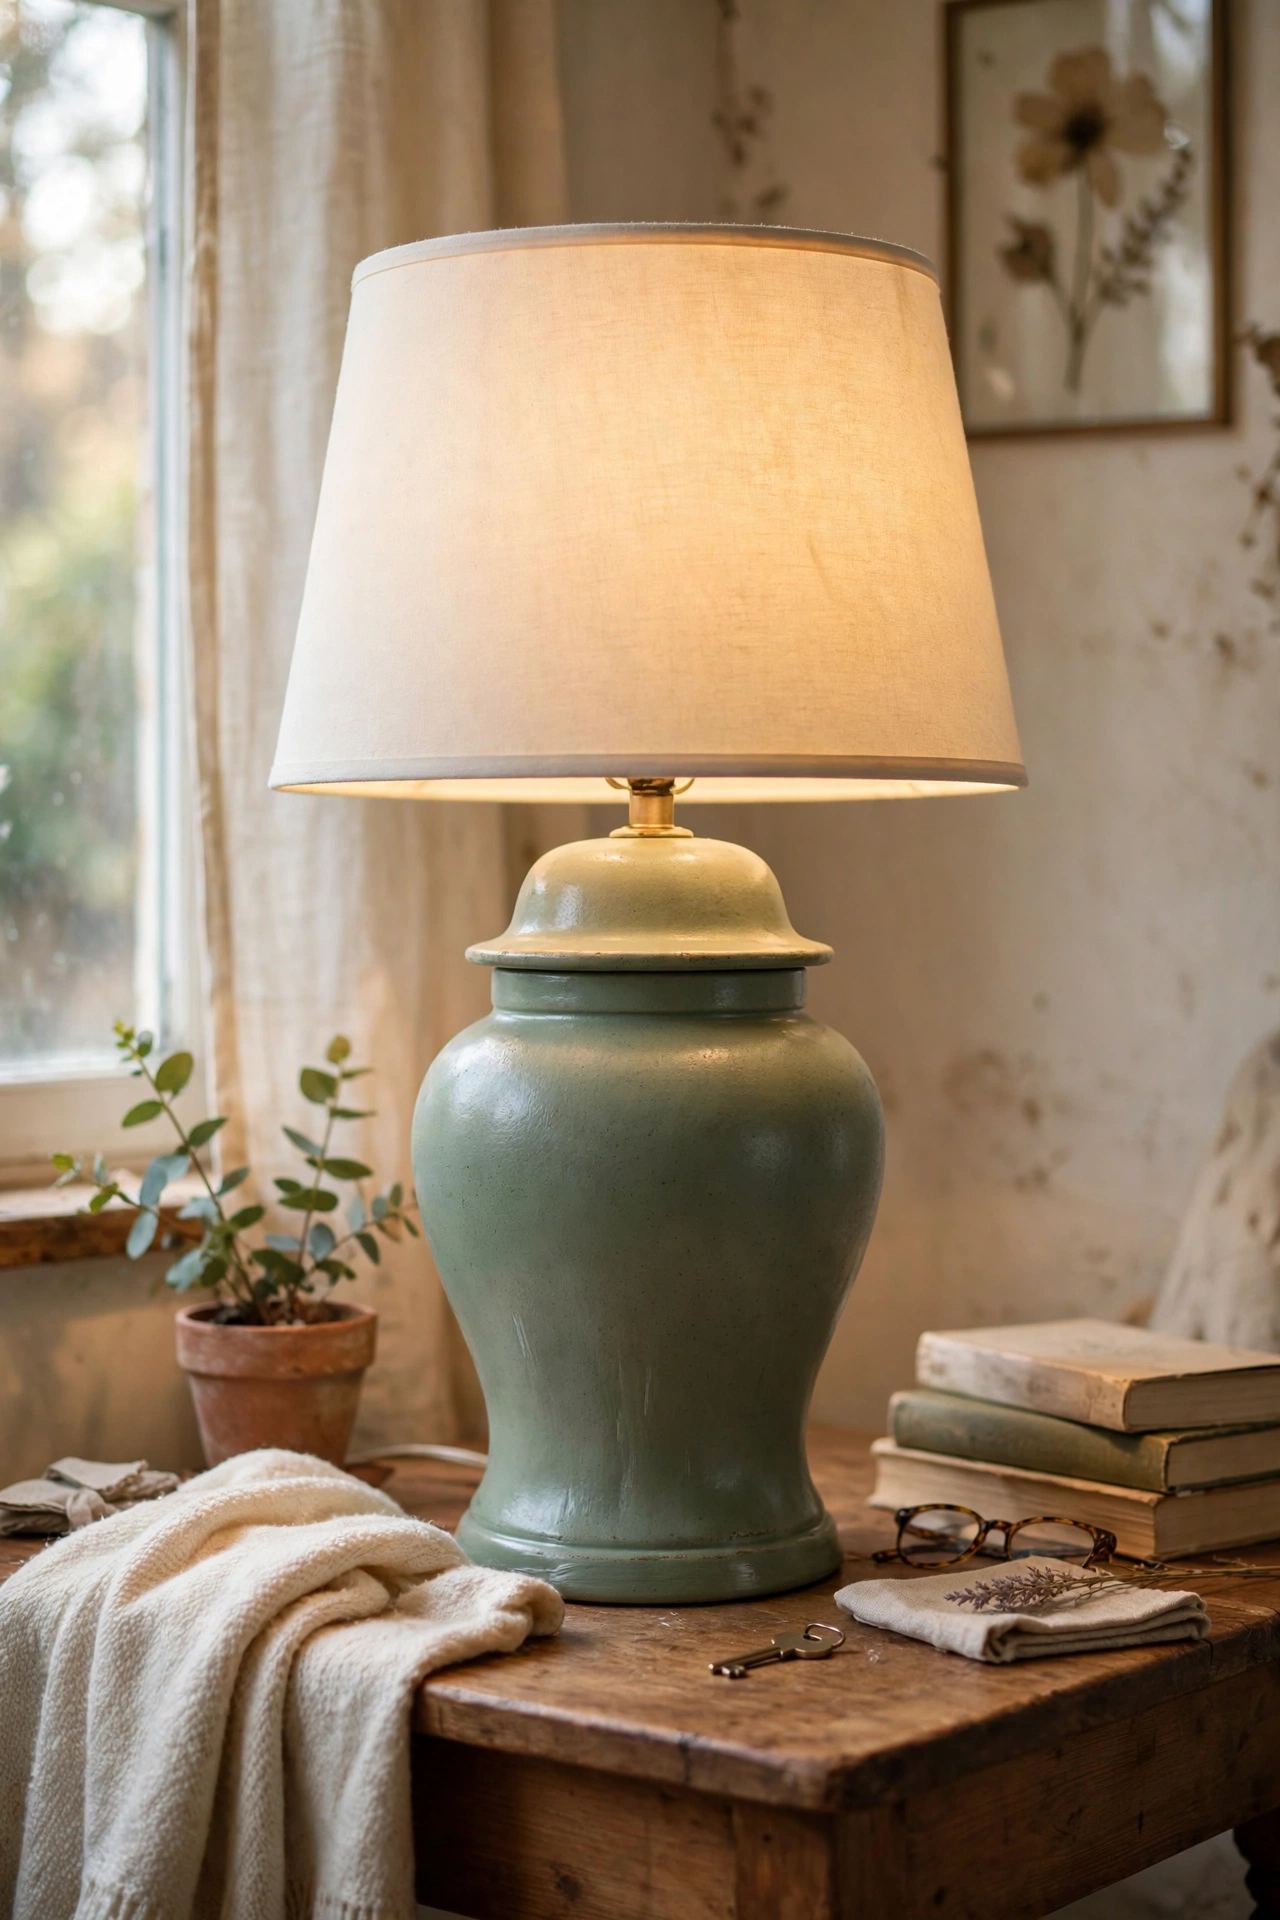
That heavy ceramic lamp base at the charity shop is usually a great lamp hiding under a dated glaze. I found one shaped like a ginger jar for $8, cleaned it well, sprayed it with primer and then two coats of matte sage green, and topped it with a $10 drum shade from the discount aisle. It looks like a boutique find now. Do not skip the primer, because spray paint slides right off glossy ceramic. I learned that the expensive way on my first attempt when the paint peeled in sheets within a week and I had to strip the whole base and start over. Thin coats, twenty minutes apart, and the finish will last for years.
Cost: ~$18-25 | Time: 1 hour plus drying
3. Wicker Baskets as Planters
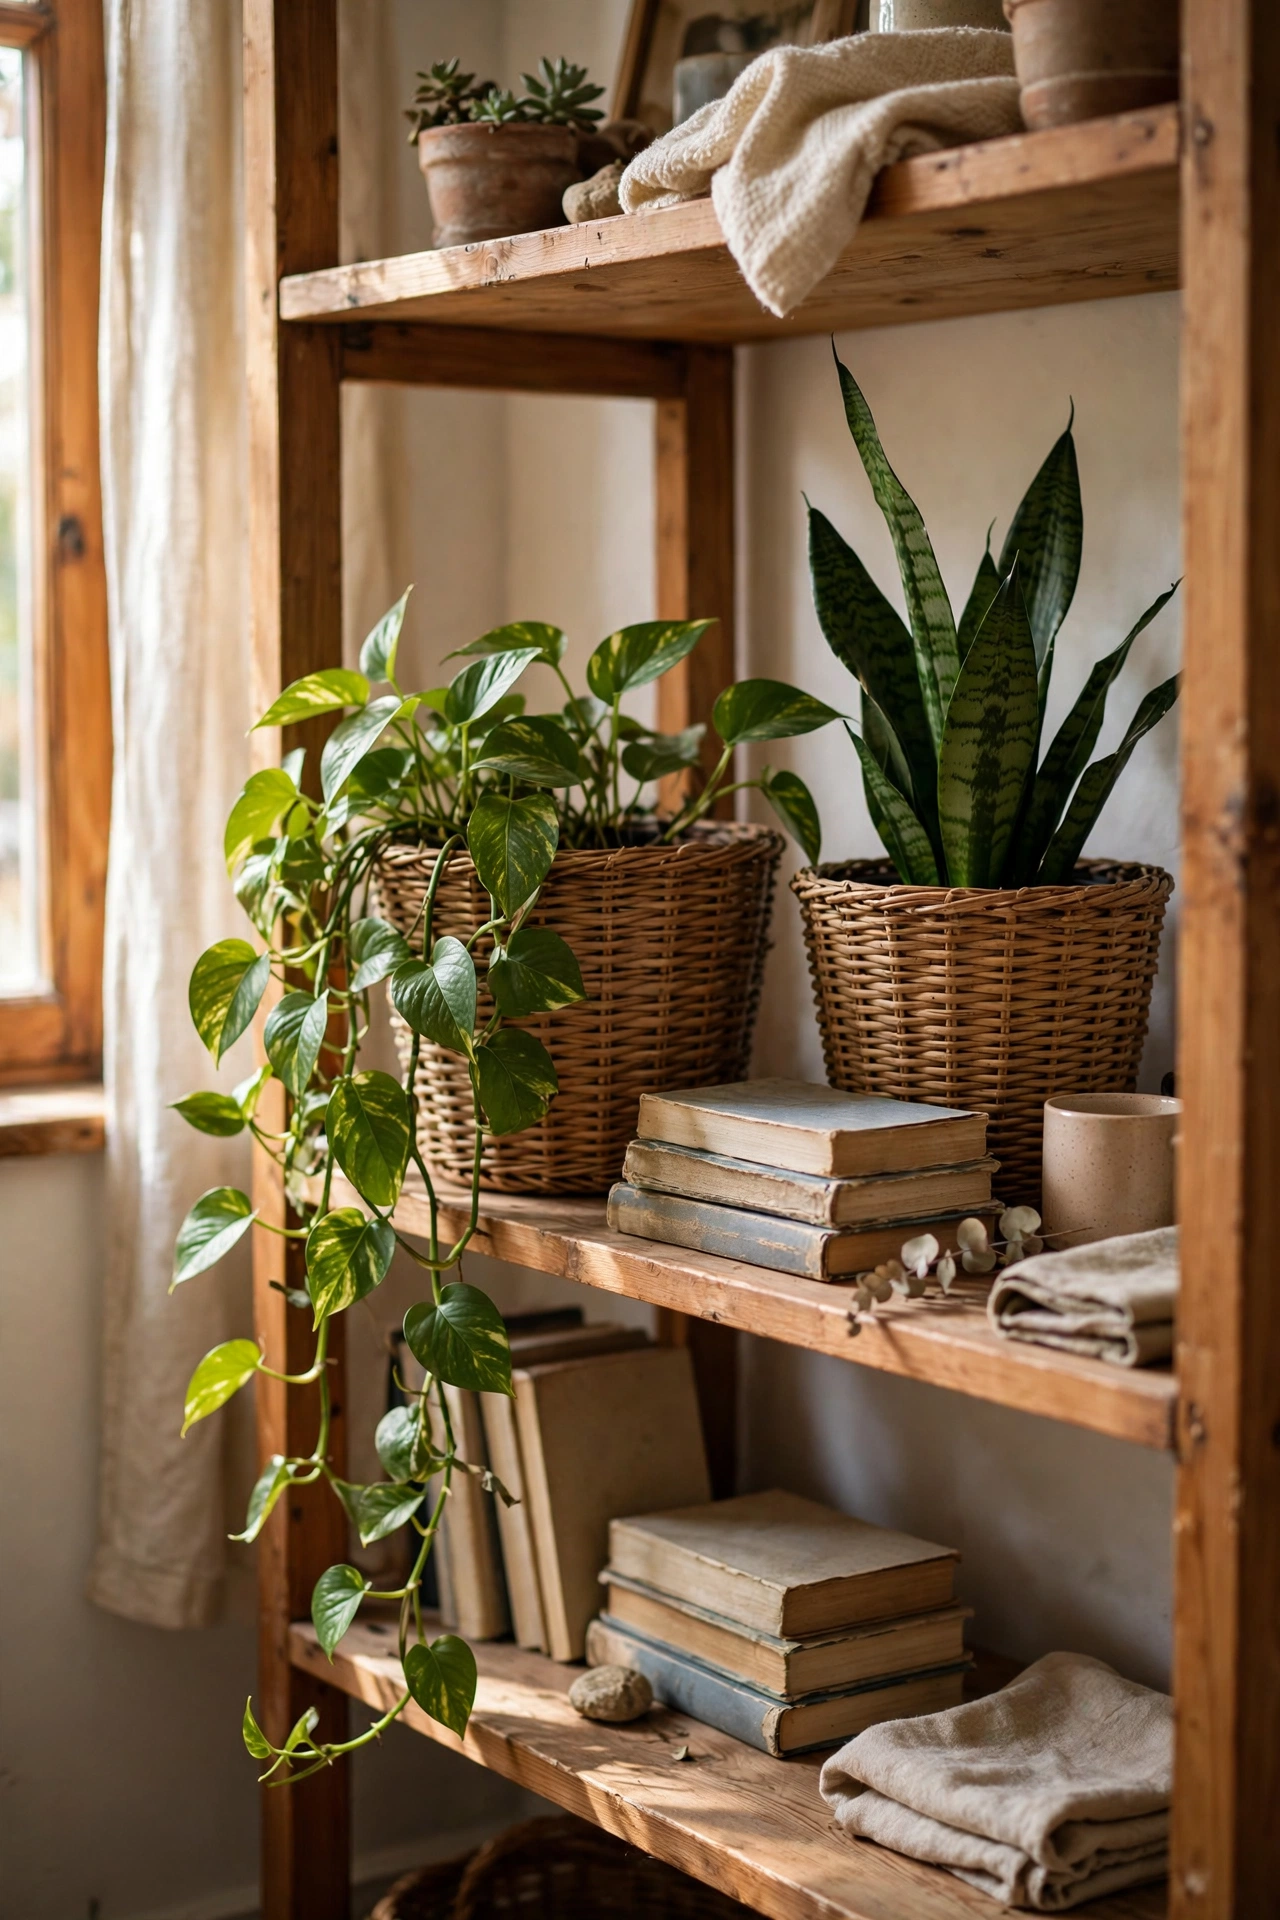
Wicker baskets make the prettiest planters, and thrift stores are full of them for a dollar or two. Line the inside with a plastic bag or a cut-to-fit nursery pot, drop your plant in, and the basket hides the boring plastic completely. I keep a trailing pothos in one on my bookshelf and a snake plant in a bigger one by the sofa. The one rule is the liner, because watering straight into wicker will stain your shelf and rot the weave. I forgot the liner on my first one and found a damp ring on the wood a week later. A grocery bag works fine as a liner if you trim it below the rim so it does not peek out.
Cost: ~$3-8 | Time: 15 minutes
4. Chalk-Painted Wooden Chair
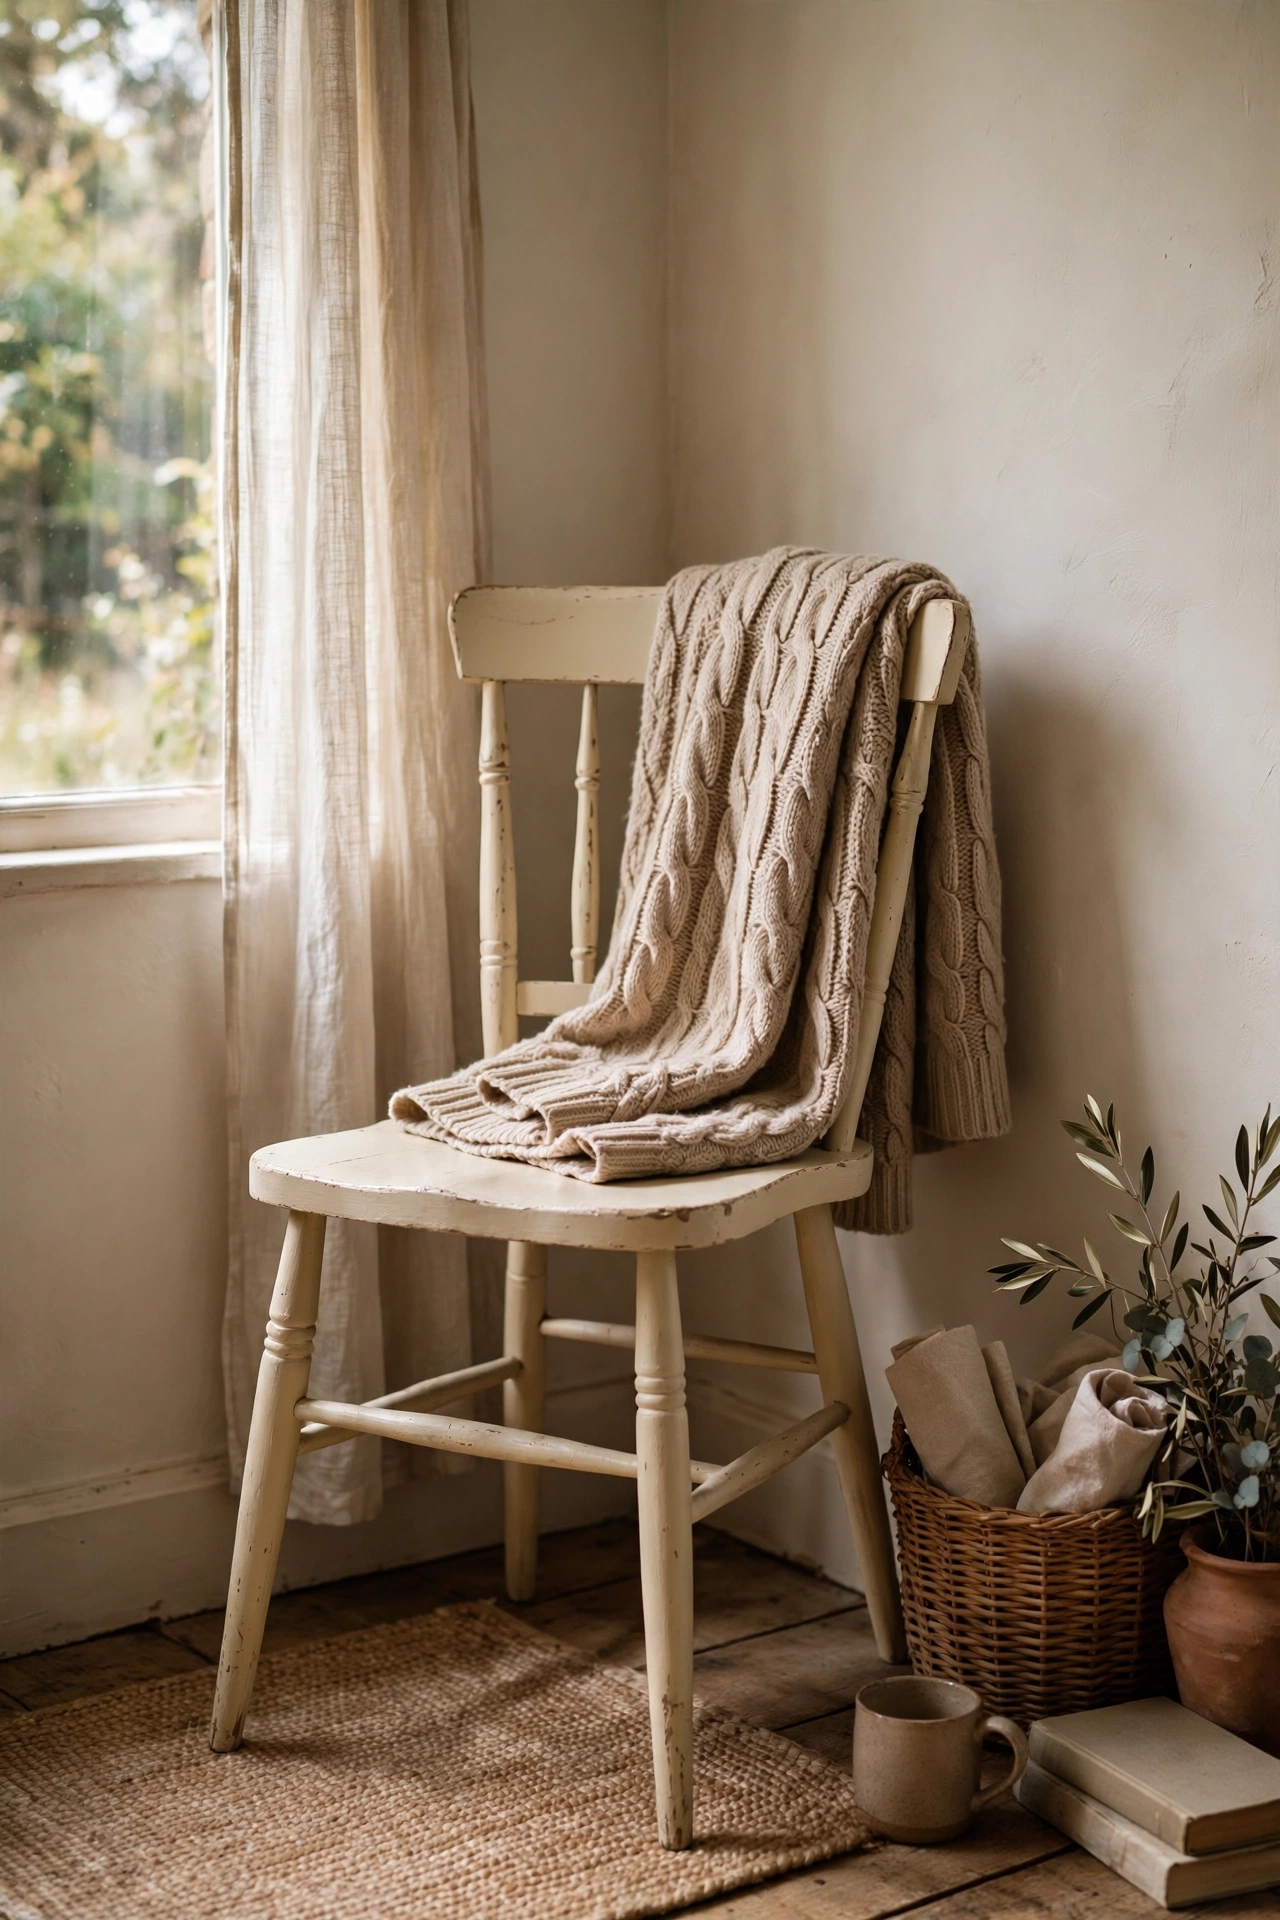
A scratched wooden chair is one of the easiest thrift store furniture flips for beginners, because chalk paint sticks to almost anything with minimal prep. I bought a plain dining chair for $10, wiped it down, brushed on two thin coats of chalk paint in a soft cream, and sealed it with clear wax. It went from garage-sale sad to cottage pretty in an afternoon. My mistake was loading the brush too heavily on the spindles, which left drips that showed through the wax. Thin coats are everything with chalk paint. Sand lightly between coats if you want a smoother finish, or skip it for a relaxed matte look.
Cost: ~$14-22 | Time: 2 hours plus drying
Budget check: the first four projects average about $13 each, and three of them used supplies you probably own already. Shop your own cupboards for paint and glue before you buy anything new.
5. Thrifted Books as Shelf Styling
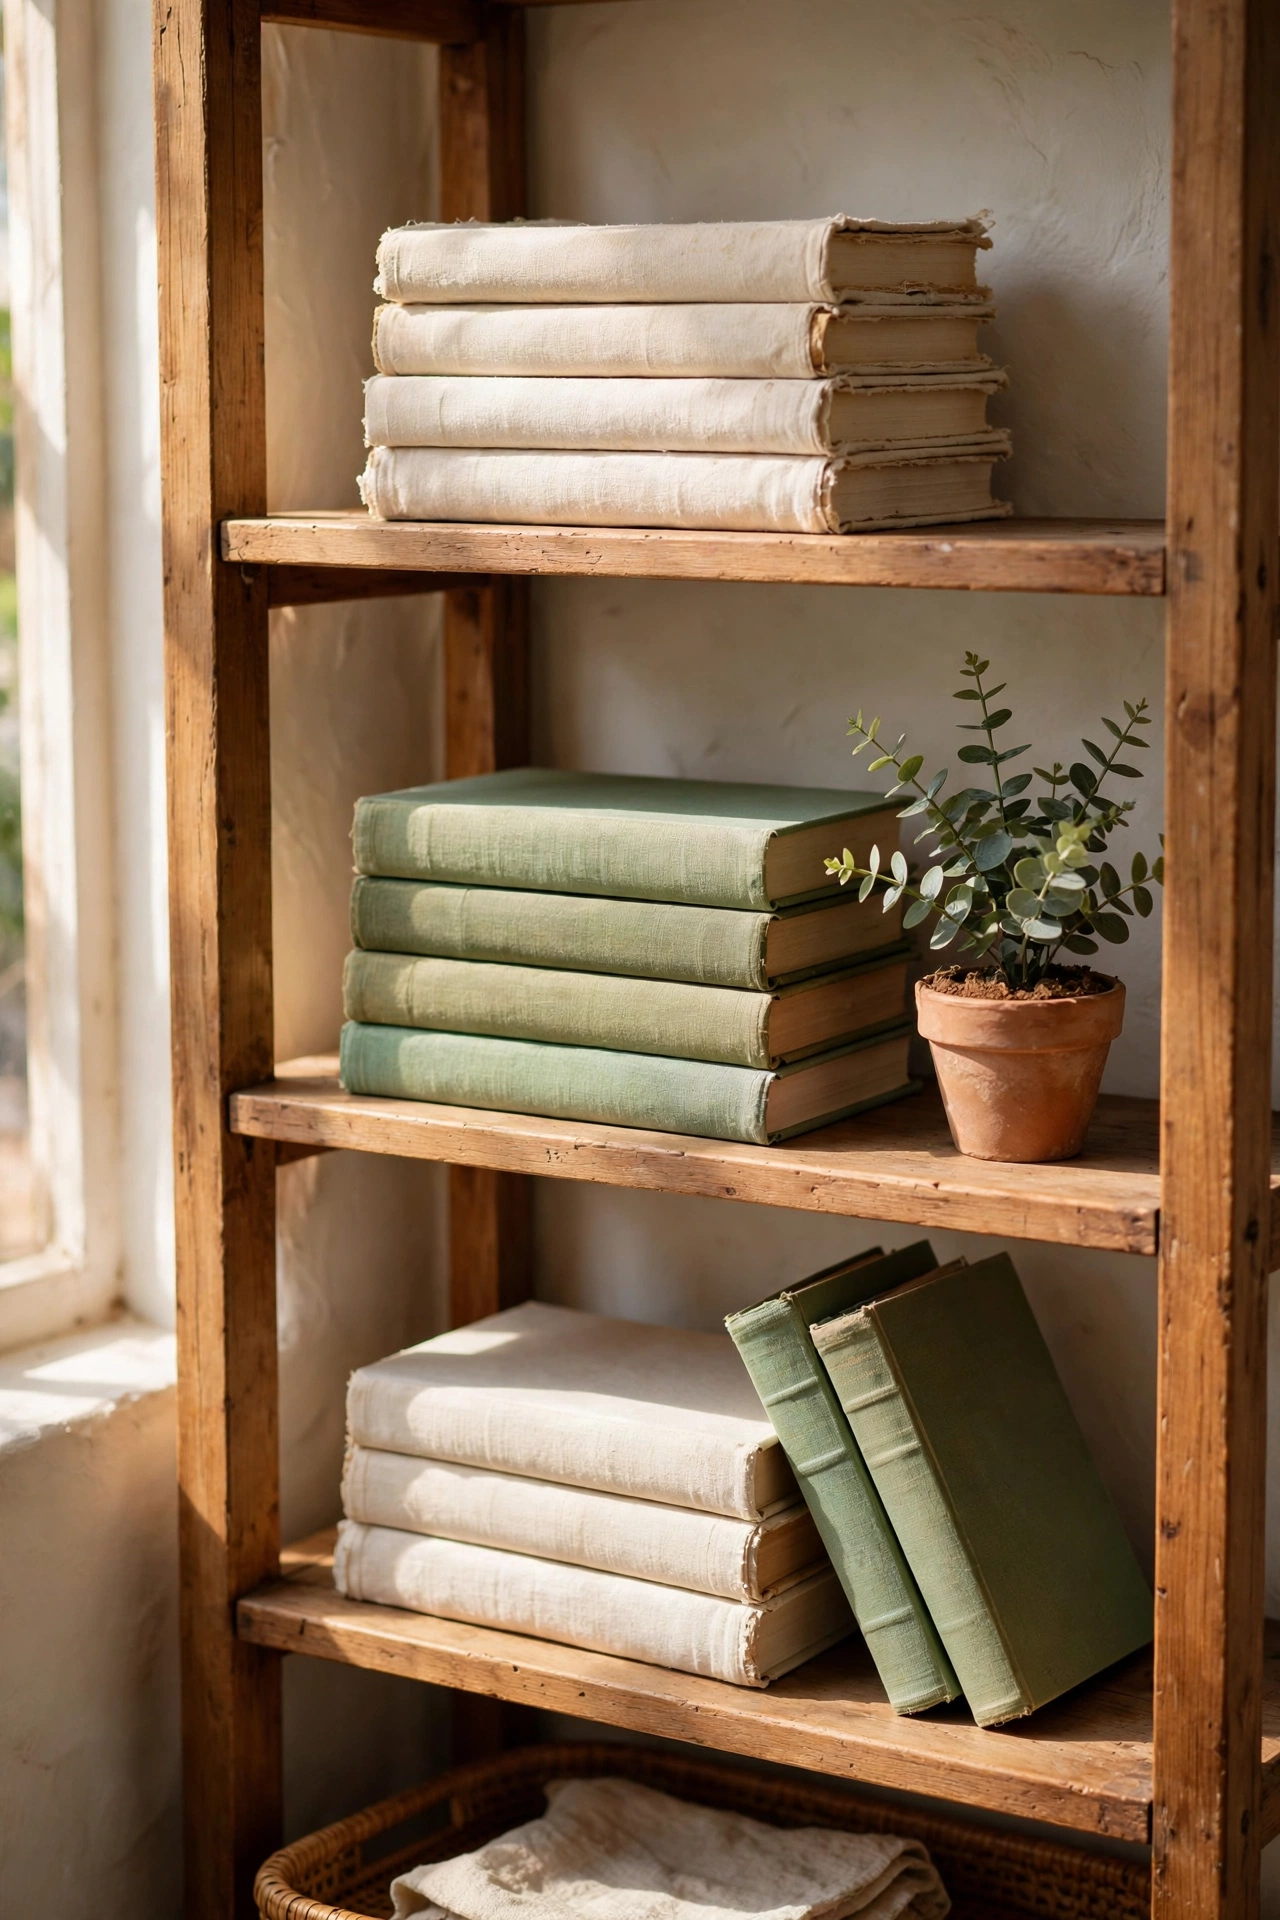
A shelf of well-chosen books is the cheapest styling trick I know, and charity shops sell hardcovers for fifty cents. Pull the dust jackets off to reveal the cloth bindings, stack them in groups of three or four, and mix horizontal stacks with a few upright rows. I bought twenty books on my first trip and kept six, which taught me to shop by colour and size rather than grabbing everything. Look for cloth covers in creams, greens, and tans, and avoid anything with a musty smell, because that smell will move into your room. Stand a small plant or a candle on top of one stack and the shelf looks styled instead of stuffed.
Cost: ~$3-6 | Time: 30 minutes
6. Plate Wall Display
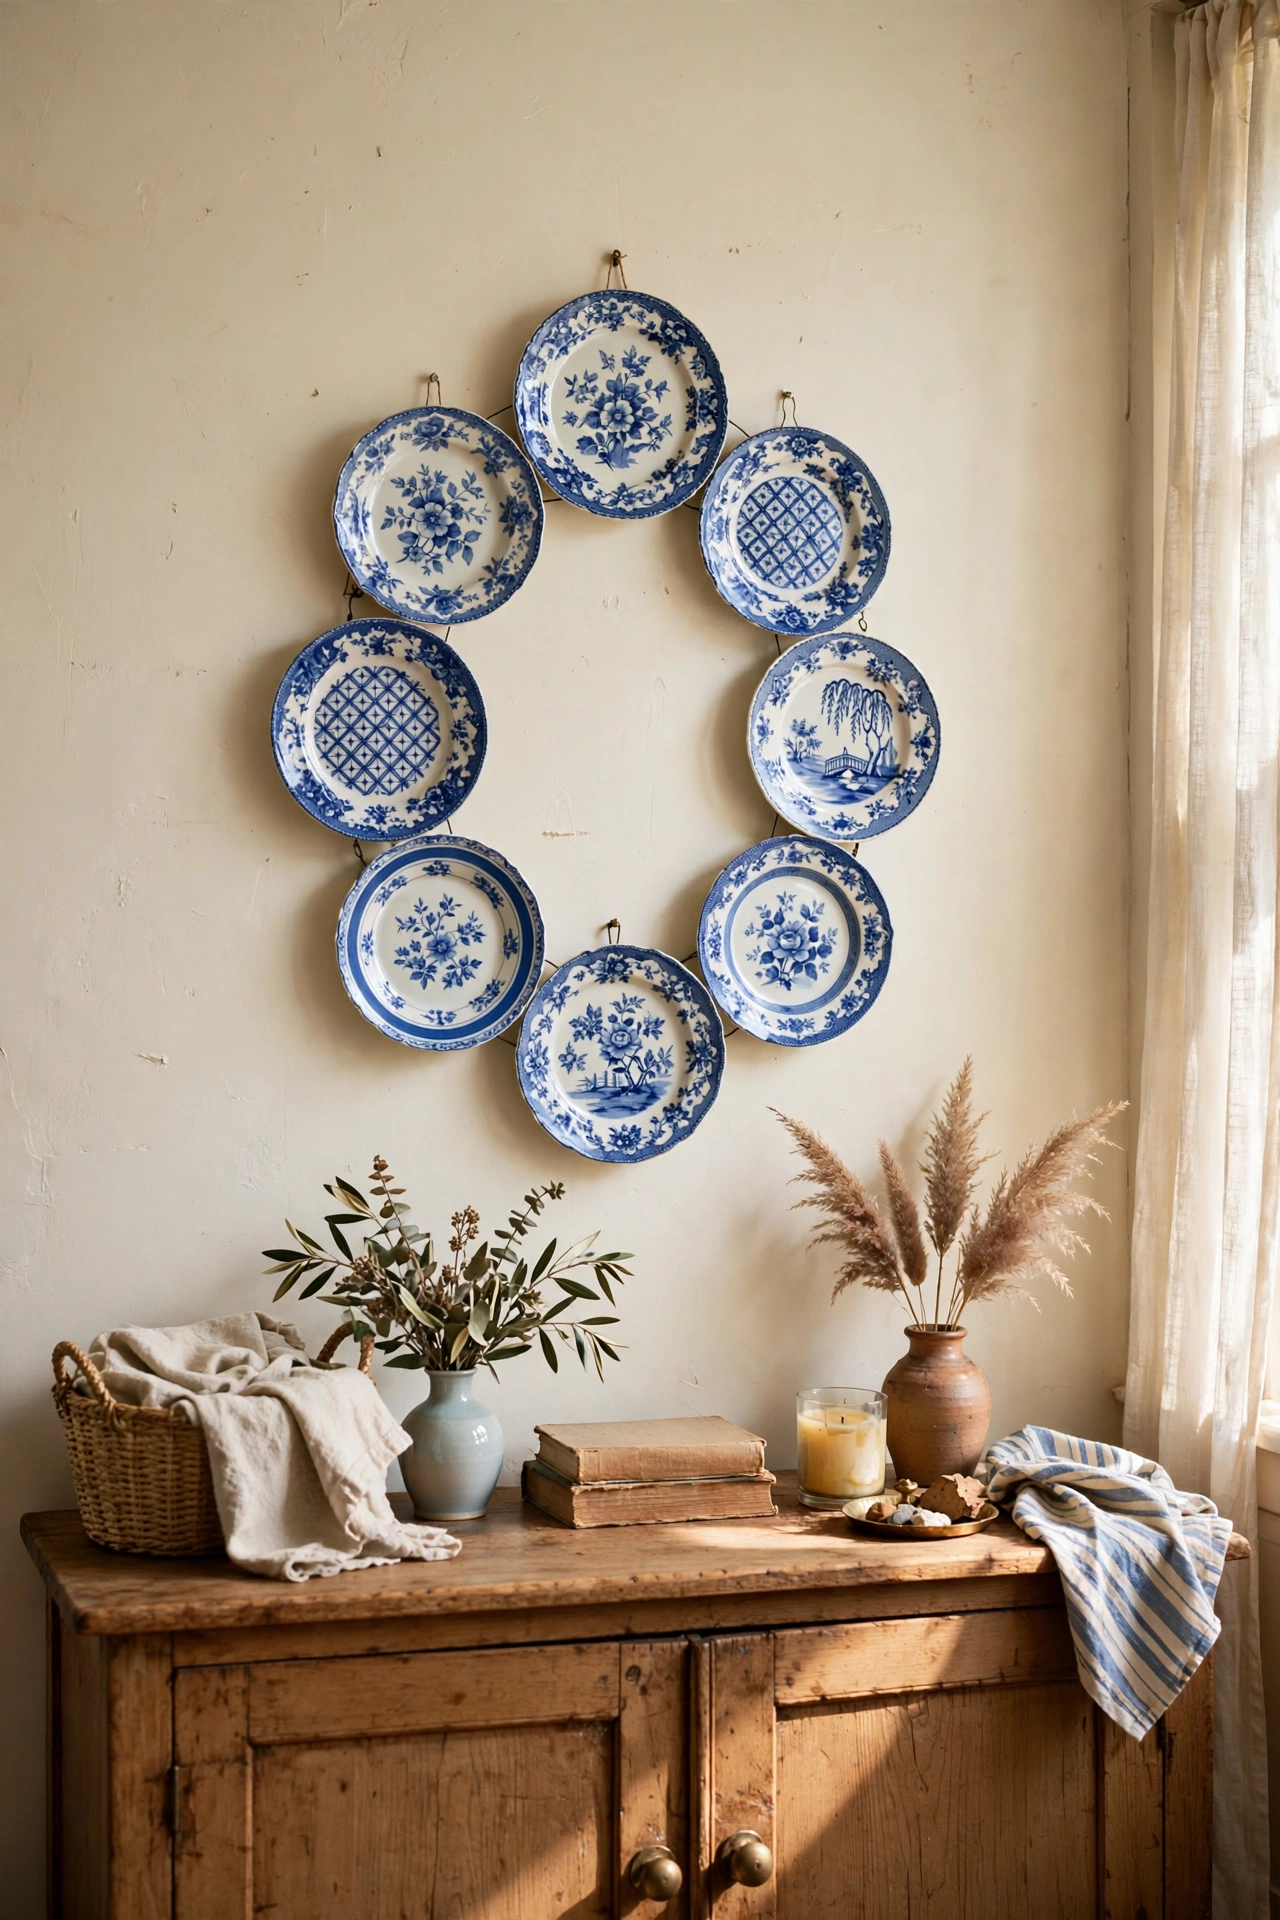
A wall of thrifted plates is pure cottage charm and costs almost nothing. I collected seven plates in blues and whites over two visits, bought adhesive plate hangers, and arranged them in a loose oval above my sideboard. The arrangement matters more than the plates: odd numbers look better, and mixing one patterned plate among plain ones keeps it interesting. One of mine crashed to the floor the first night because I used a cheap suction hanger instead of a proper adhesive disc. Buy the real plate hangers, press them on firmly, and let the adhesive cure overnight before you hang. The whole wall cost me less than a single framed print.
Cost: ~$8-14 | Time: 1 hour
7. Textured Vase Makeover
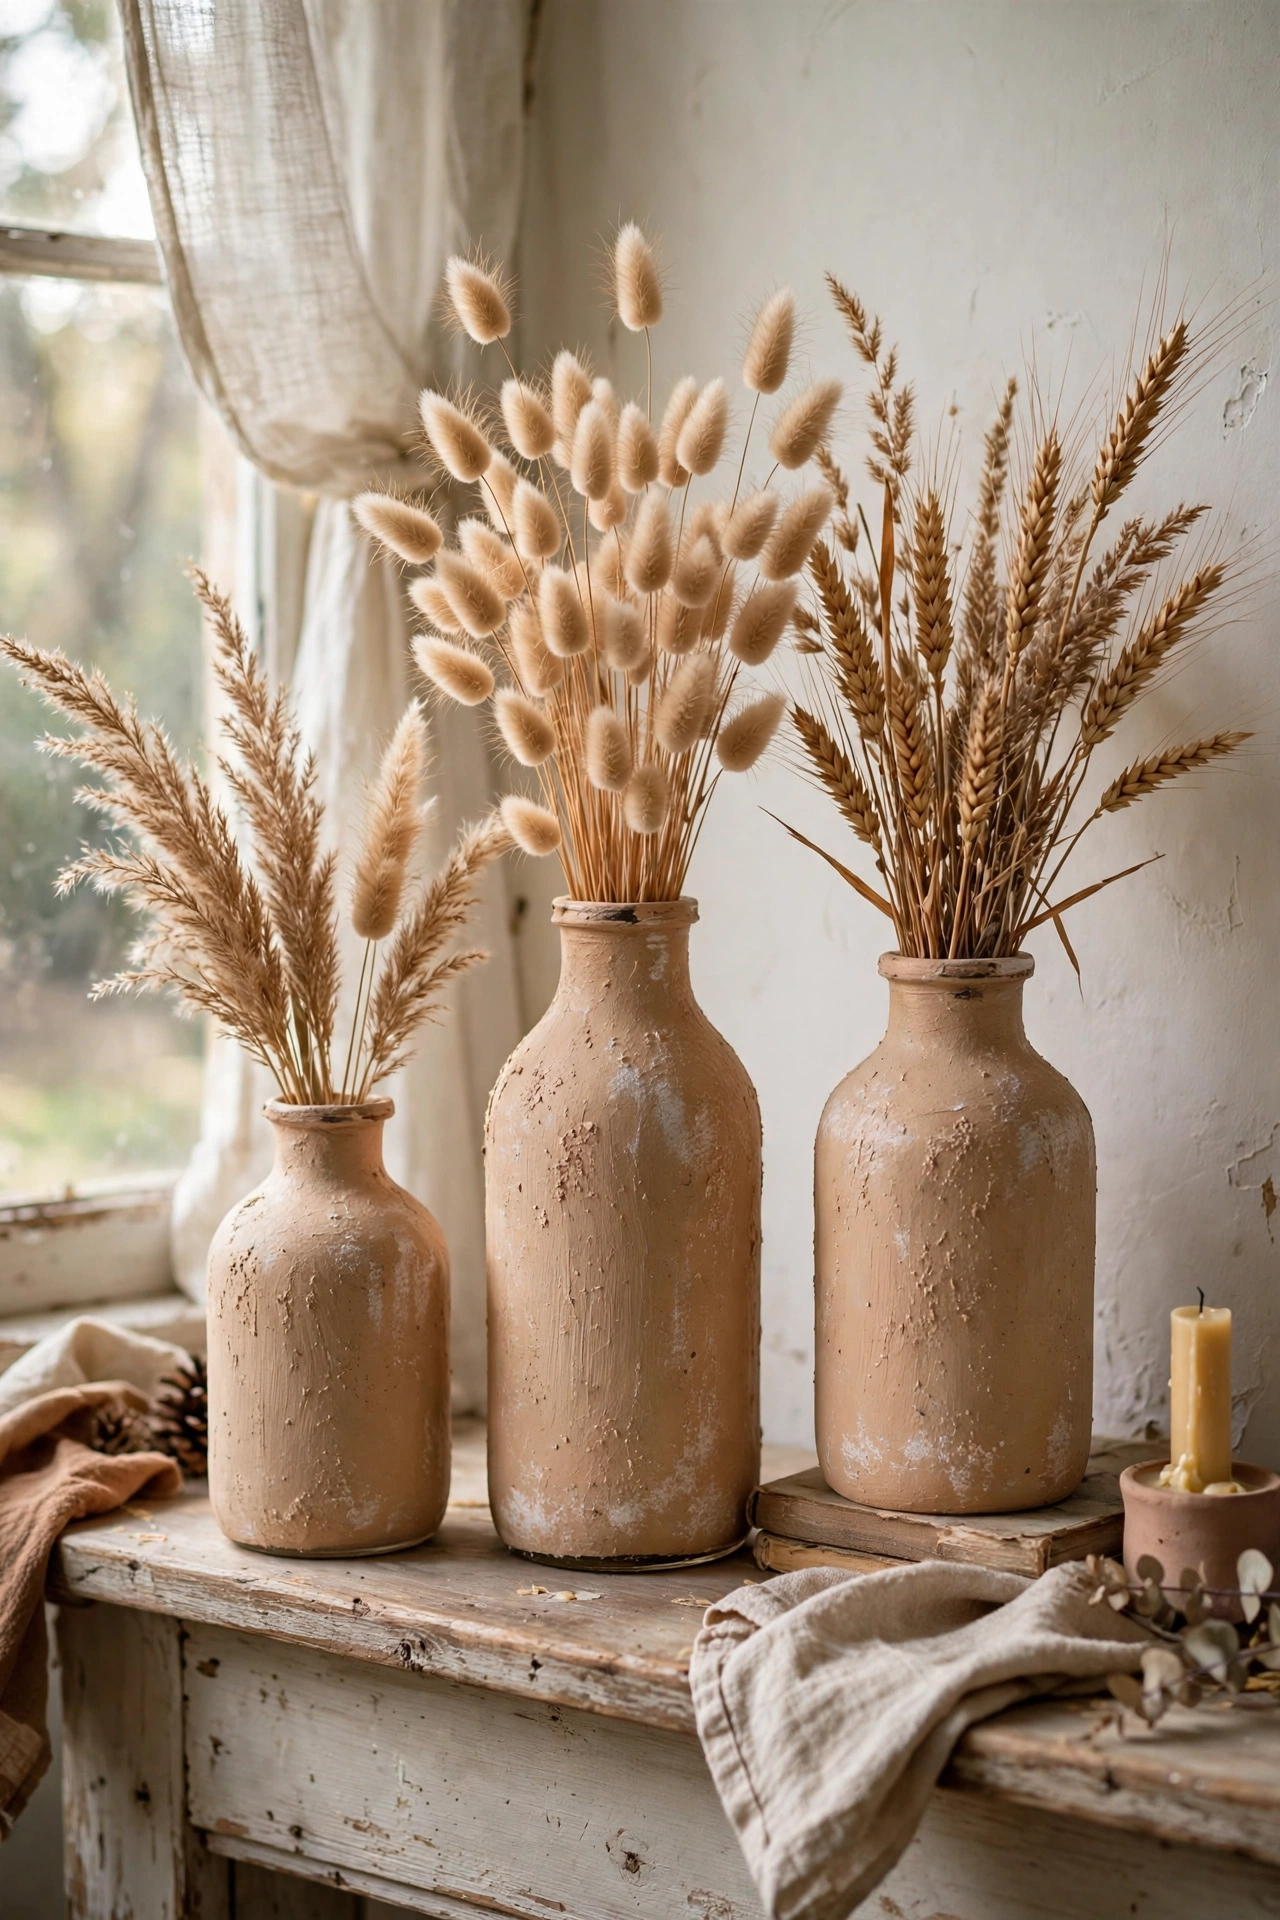
You can turn a shiny thrifted glass vase into a convincing stoneware look with baking soda and paint. Mix a spoonful of baking soda into matte house paint, brush it onto the vase in two coats, and the finish dries with a chalky, handmade texture. I did a whole cluster of three vases in an afternoon and they pass for pottery at a glance. My first attempt used far too much baking soda and the texture cracked as it dried, so keep the ratio modest: about one part soda to four parts paint. Stick to neutral colours like clay, oatmeal, and charcoal, because bright colours reveal the trick immediately.
Cost: ~$4-8 | Time: 1 hour plus drying
8. Stacked Suitcase Side Table
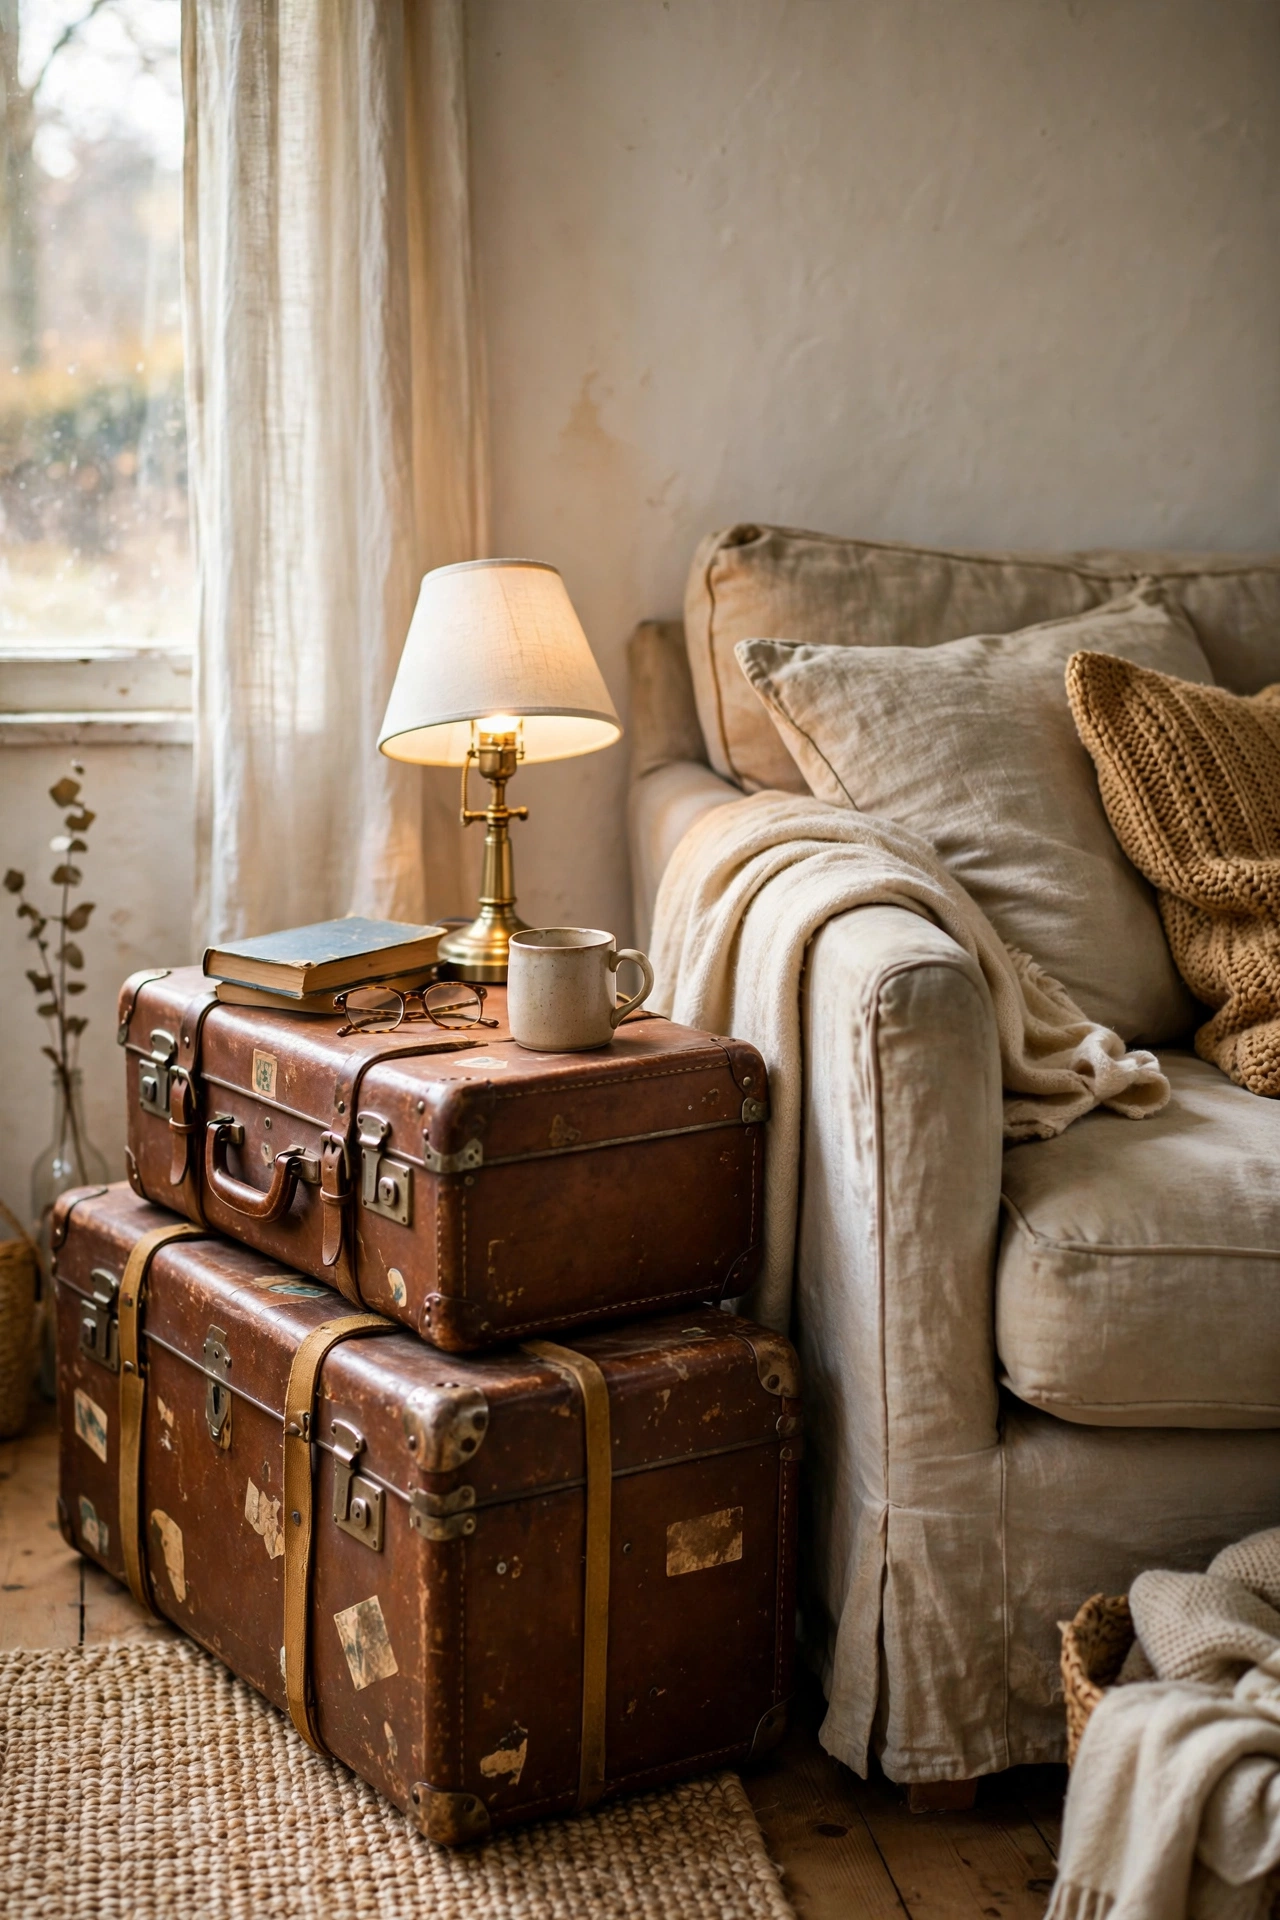
Two vintage suitcases stacked beside a sofa make a side table with built-in storage, and thrift stores always have them. I found a pair for $15 total, stacked the larger one on the bottom, and set a small lamp on top. Check the hinges and latches before you buy, because a case that will not stay shut is useless. I also stuck felt pads under the bottom case so it would not scratch the floor. Inside the cases I keep spare throws and board games, which means this little table earns its floor space twice over. If the cases smell musty, wipe them with vinegar water and leave them open in the sun for a day.
Cost: ~$15-22 | Time: 30 minutes
Budget check: eight projects in and the running total is still under $100 for everything. The suitcase table was the priciest so far, and it replaced a side table that would have cost ten times more new.
9. Brass Candlestick Cluster
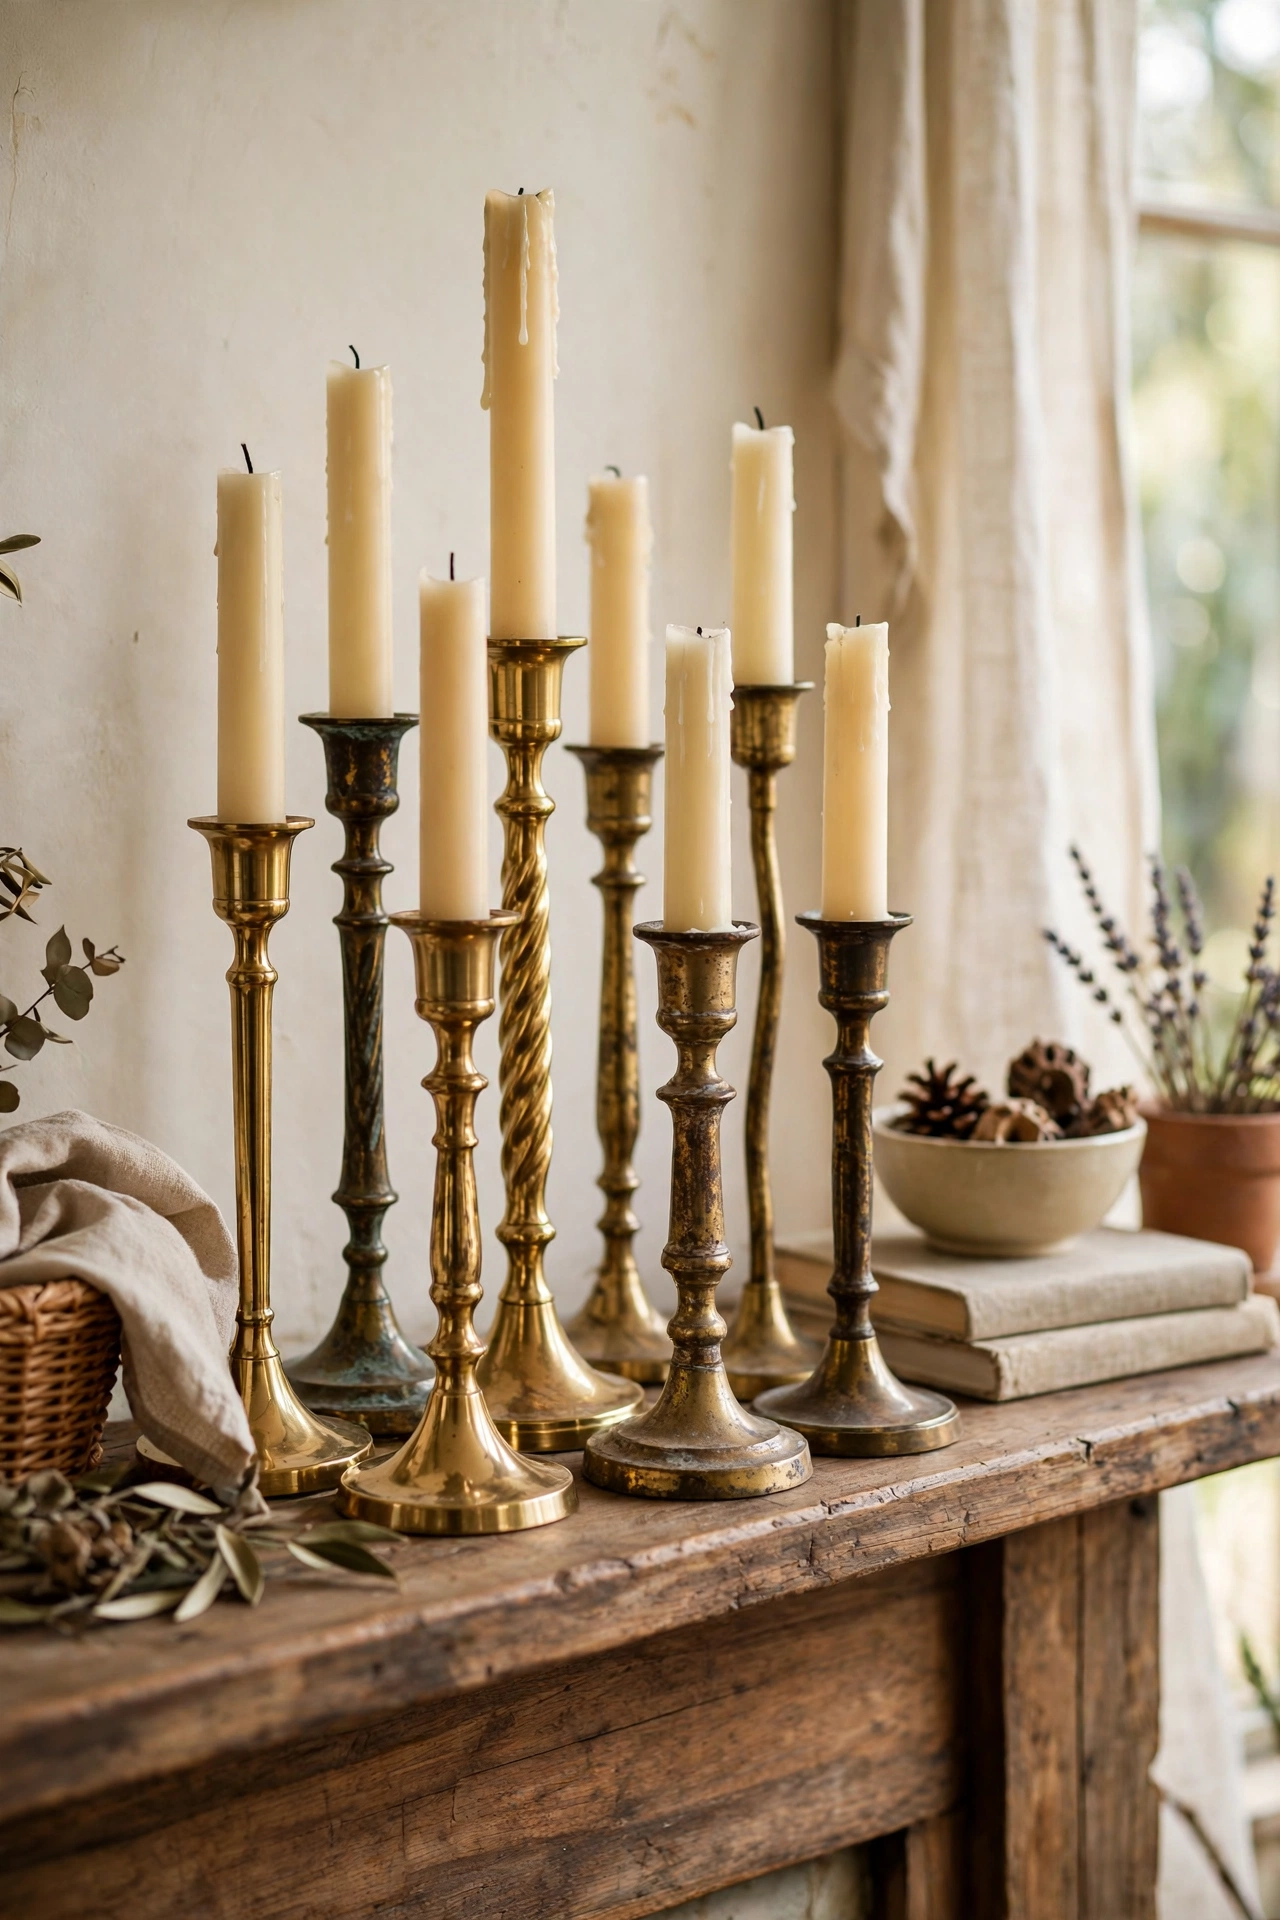
Single brass candlesticks look lost on their own, but a cluster of three to five at different heights looks deliberately collected. I gathered mine over a month of thrift visits for about $2 each, polished one to a shine and left the rest with their aged patina, and grouped them on my mantel with cream candles. The mixed finish is the secret: all-shiny looks new, all-tarnished looks dusty, but the combination looks curated. Vary the heights by at least a few inches or the group reads as a flat row. I keep a soft cloth in the drawer and give the polished one a wipe every few weeks to keep it glowing.
Cost: ~$8-14 | Time: 20 minutes
10. Thrifted Quilt as a Bed Throw
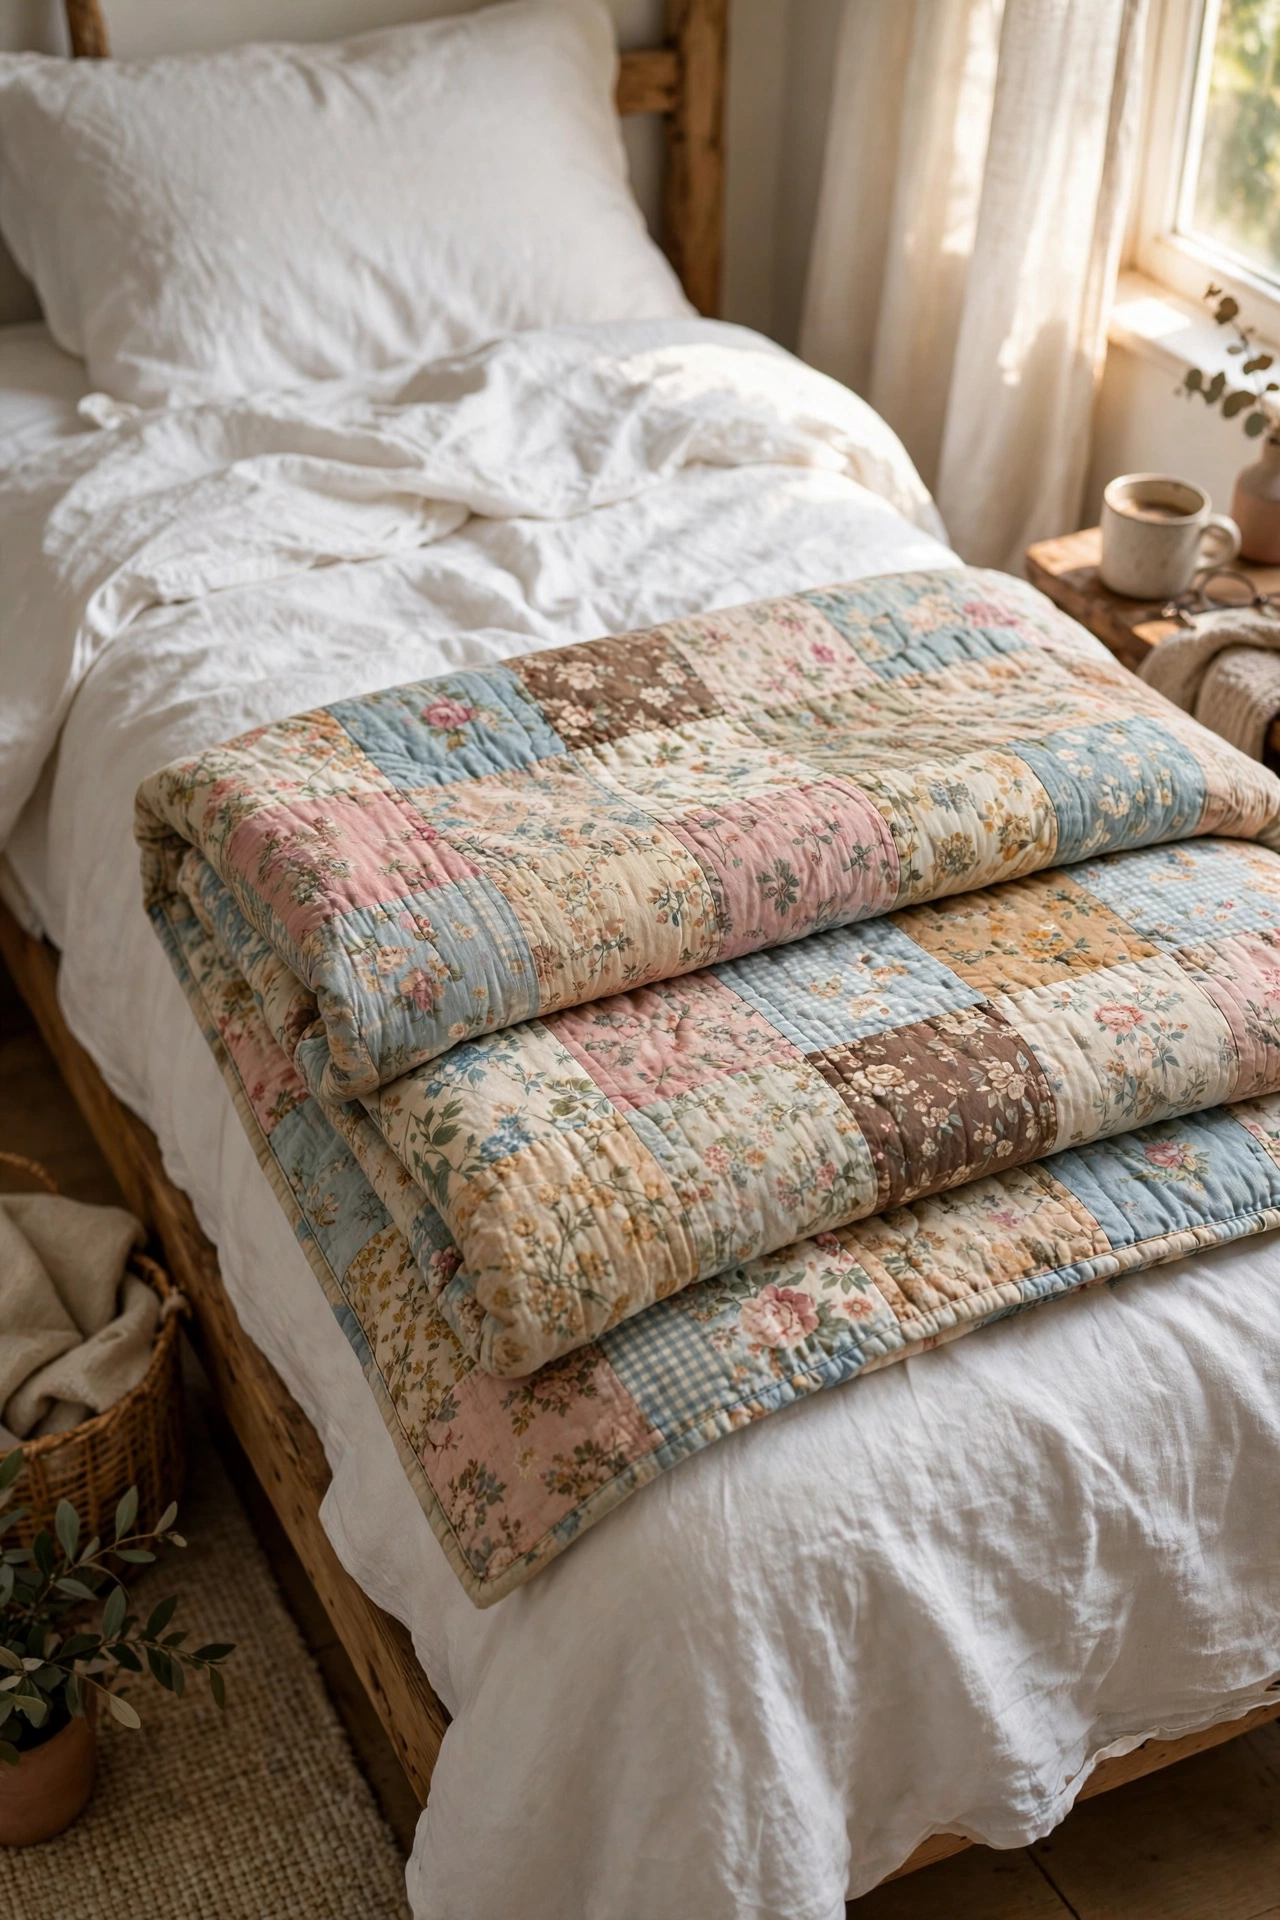
A handmade quilt folded across the foot of the bed adds more warmth than any throw blanket from a chain store, and thrift stores sell them for a tenth of boutique prices. I found a patchwork quilt in faded florals for $12 and it completely changed my plain white bedding. Wash it hot before it touches your bed, because you have no idea where it has been. Check the stitching for weak spots while it is in the wash, and mend any loose seams before you display it. Fold it in thirds so the prettiest section faces out, and your bedroom looks layered without any extra spending.
Cost: ~$10-16 | Time: 20 minutes plus laundry
11. Tablecloth Curtains
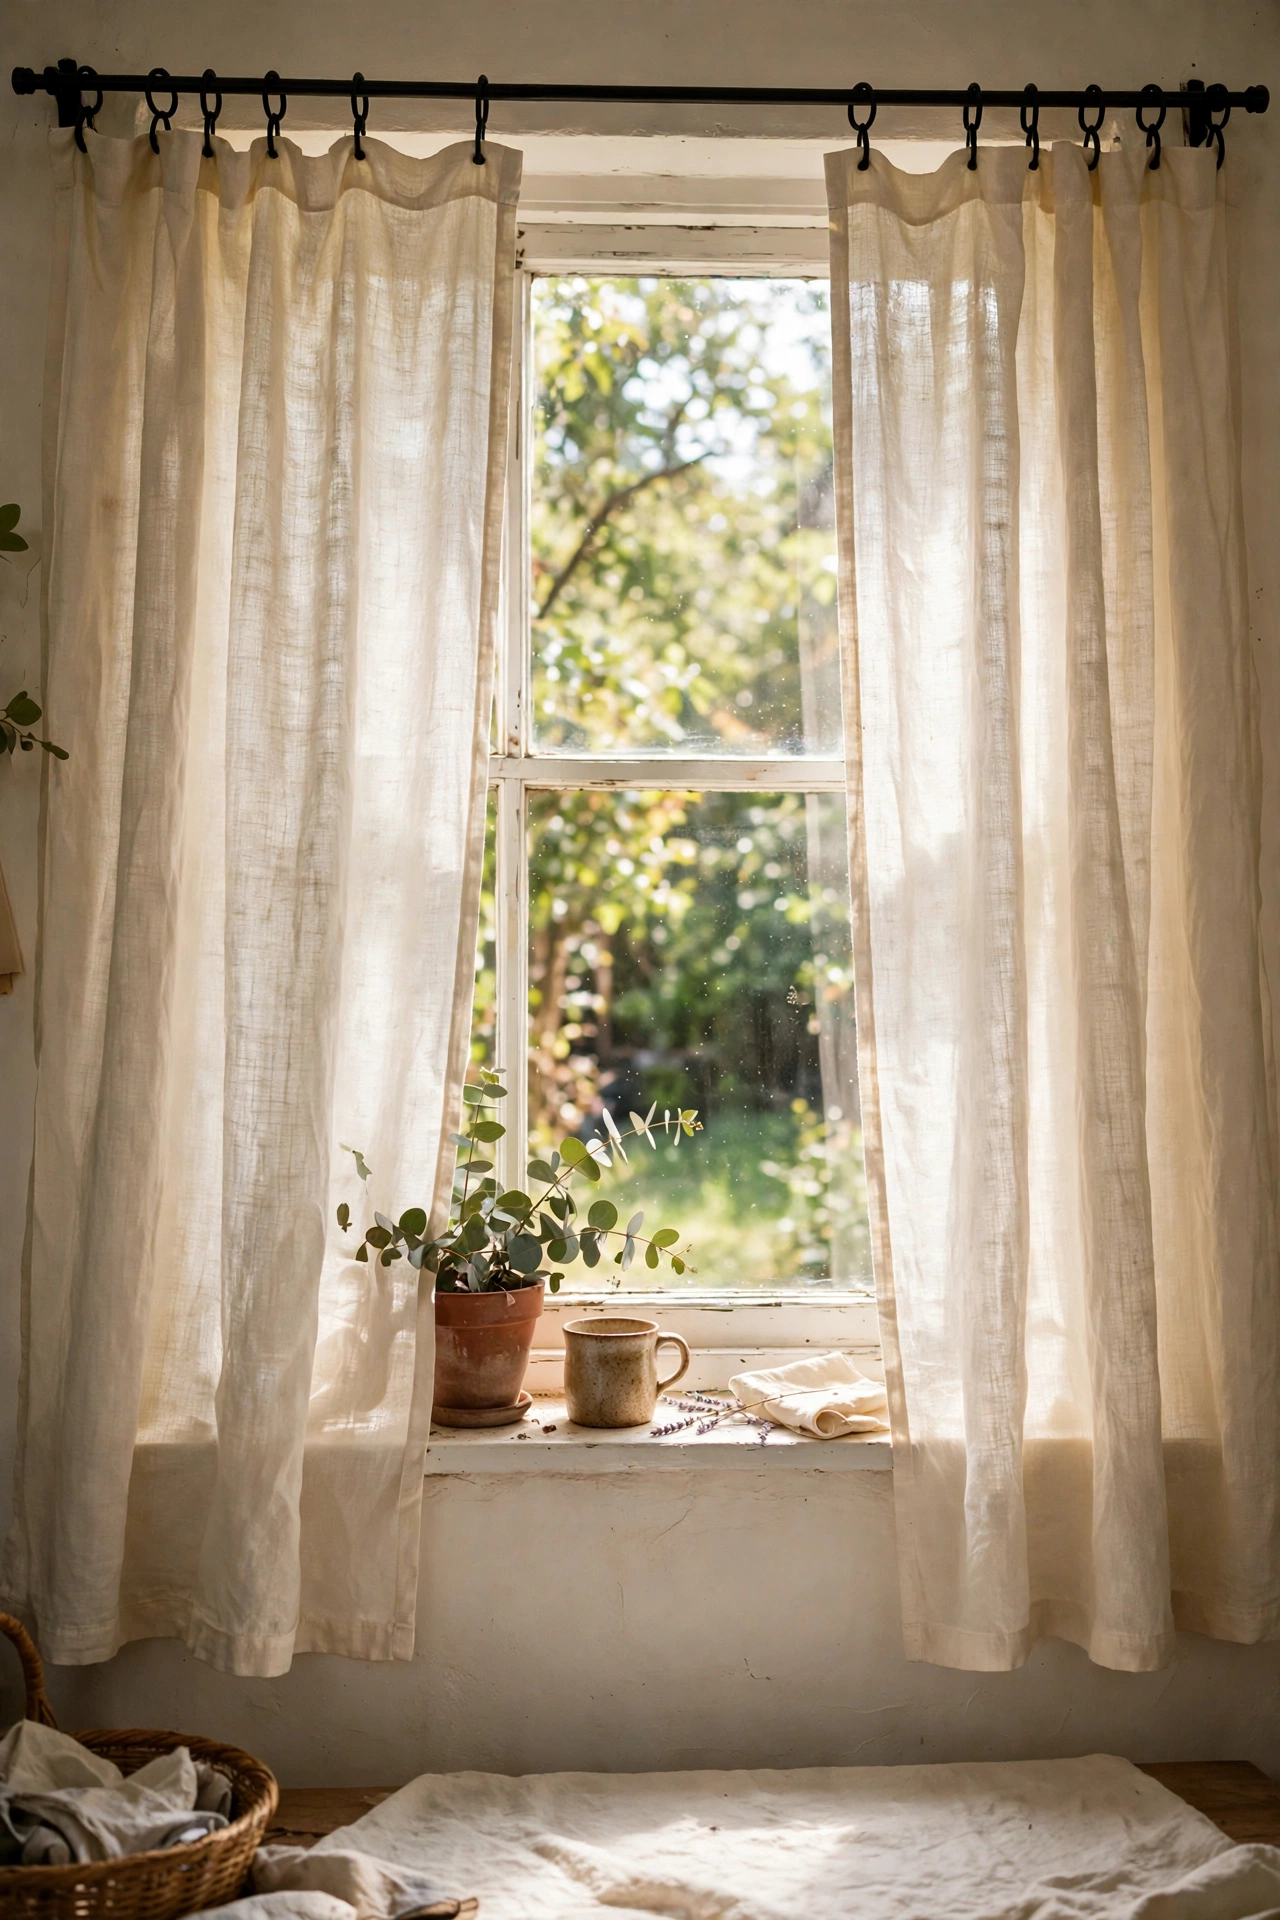
Two matching thrifted tablecloths make surprisingly good curtains, especially in linen or cotton. I found a pair of cream linen cloths for $6, hemmed the cut edges with iron-on tape, and hung them on clip rings. The fabric is heavier than cheap curtain panels, so they drape beautifully. Measure your window before you shop, because this is where I went wrong: my first pair was six inches too short and looked like high-water trousers for a window. You want the cloths to just kiss the sill or the floor. Wash and iron them first, since thrifted linen always has fold lines that will not relax on their own.
Cost: ~$8-14 | Time: 1 hour
12. Wooden Ladder as a Blanket Rack
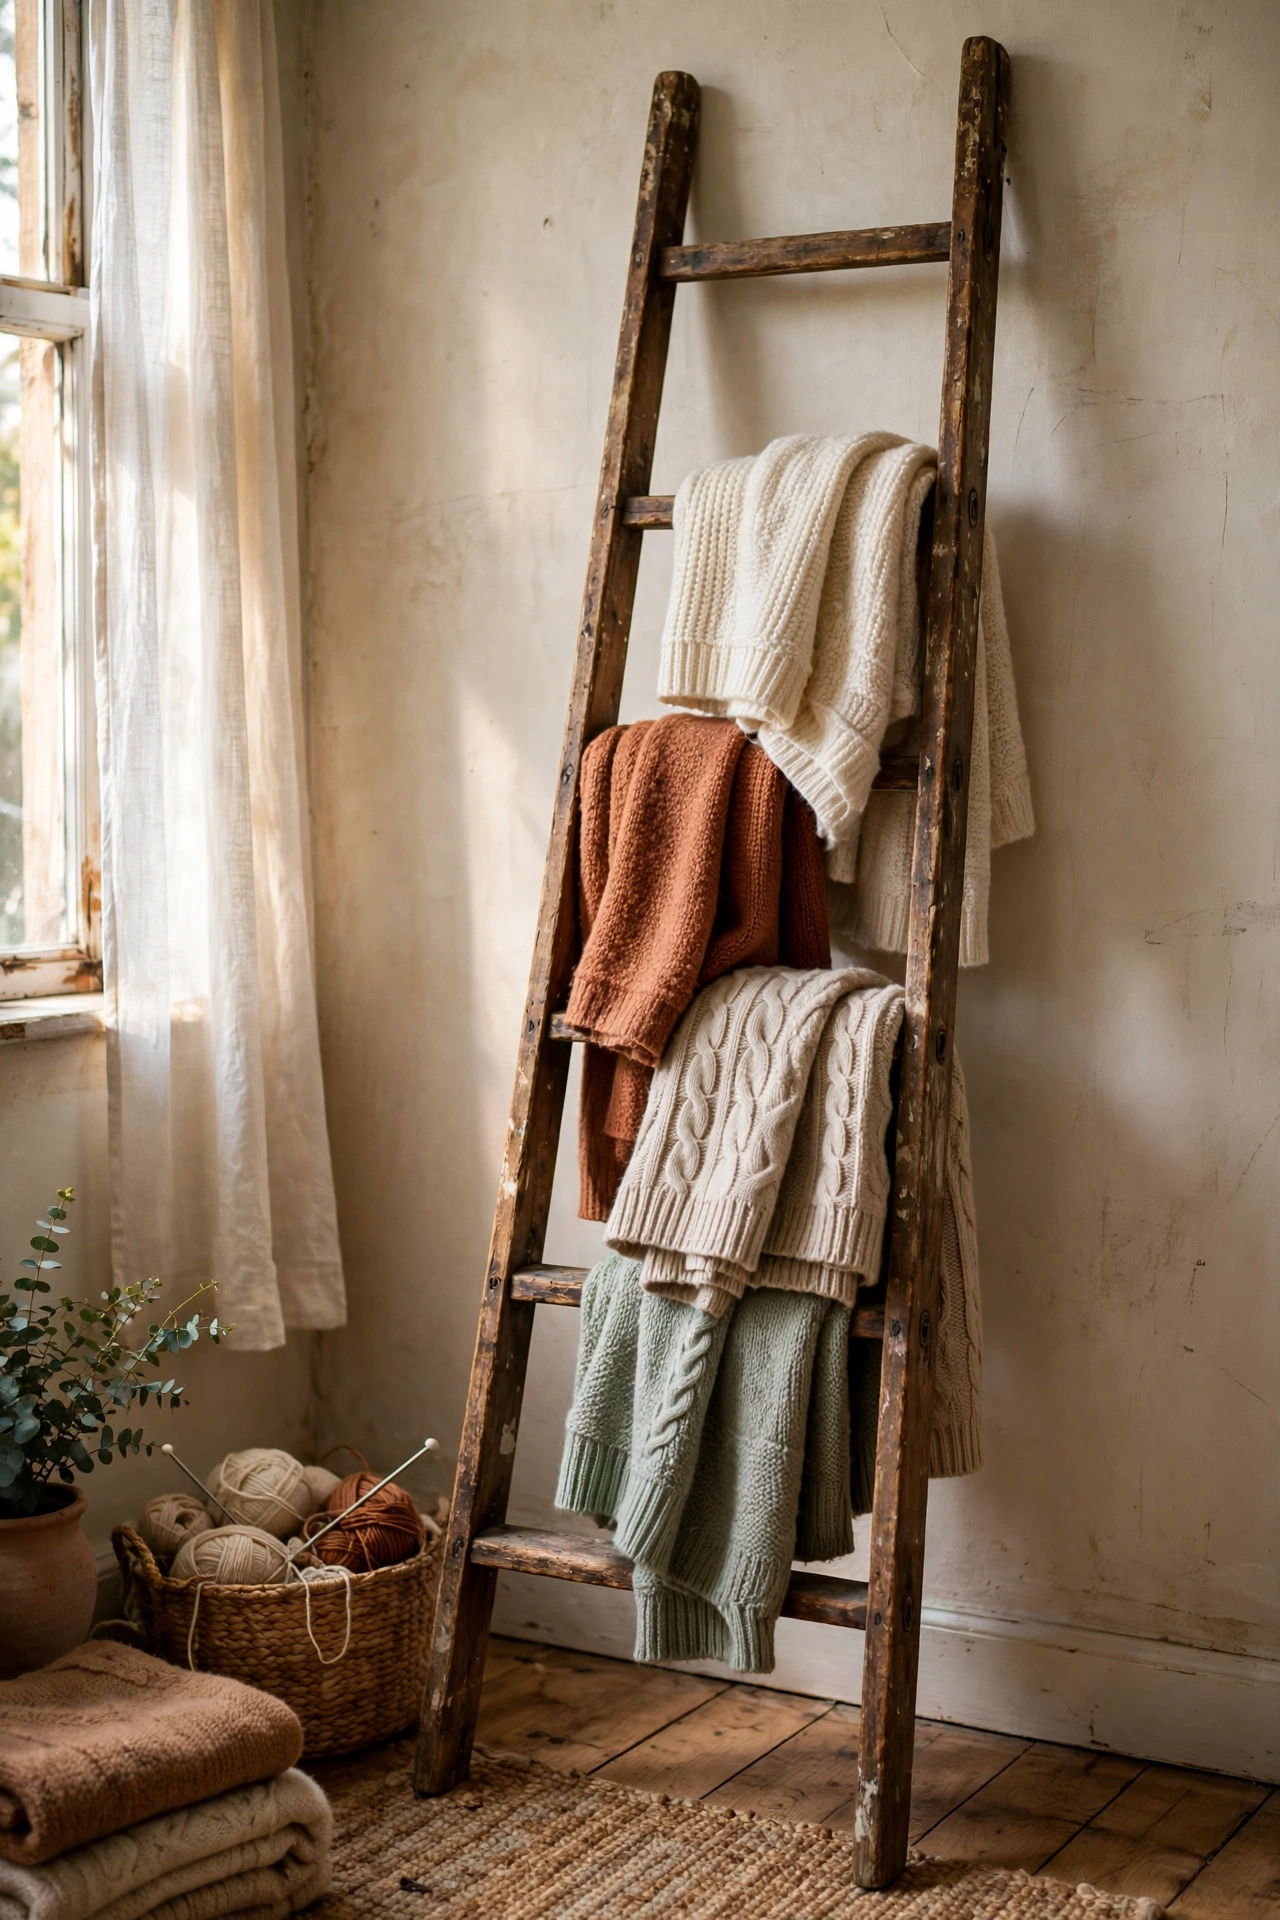
An old wooden ladder leaned against the wall is the easiest blanket storage you will ever make. I bought a paint-splattered step ladder for $8, sanded off the rough spots so it would not snag fabric, gave it a coat of clear wax, and leaned it in the corner of my living room. It now holds three throws and looks like a styling choice rather than storage. Sand every rung and rail before you drape anything on it, because old ladders are splinter factories. Check it stands steady on your floor before you load it up, and put small felt pads on the feet so it does not mark the wall. For more beginner-friendly furniture flips like this, see (see also: thrift-store-furniture-flips-for-beginners).
Cost: ~$8-12 | Time: 1 hour
Budget check: twelve done, and the blanket ladder was the cheapest furniture piece yet at $8. If you are keeping a weekend tally, you are roughly at the price of one new throw pillow from a home store.
13. Teacup Succulent Planters
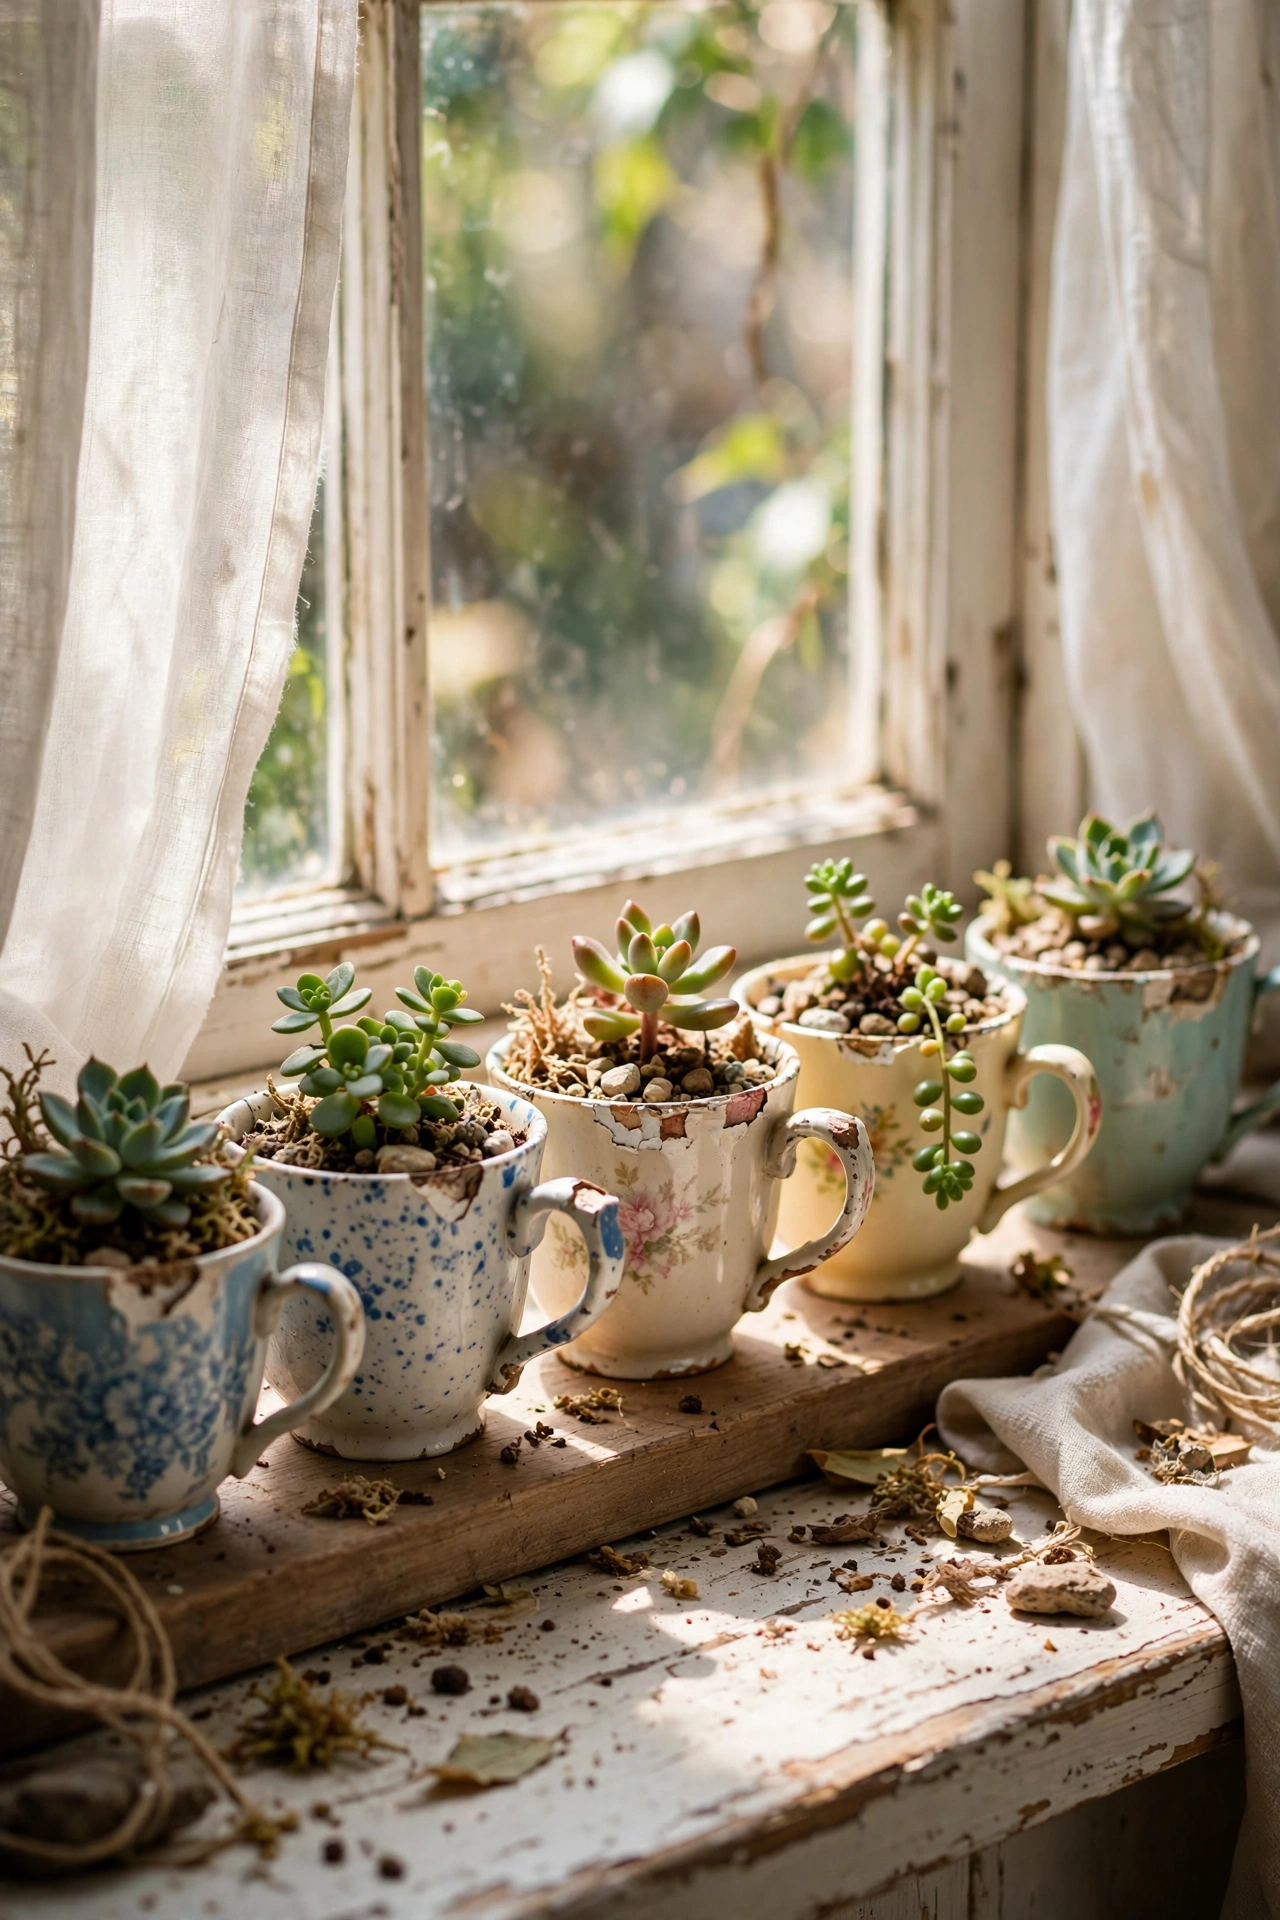
Chipped teacups are useless for tea and perfect for succulents. I bought a handful of pretty orphaned cups for fifty cents each, filled them with cactus soil, and tucked in small succulents. They look adorable lined up on a windowsill. Succulents need drainage, so either drill a small hole in the cup with a ceramic bit or add a layer of gravel at the bottom and water very sparingly. I drowned my first one by treating it like a normal houseplant, so now I water with a teaspoon every two weeks and they thrive. Group odd numbers together and vary the cup patterns for a collected feel.
Cost: ~$3-6 | Time: 20 minutes
14. Dresser With New Drawer Pulls
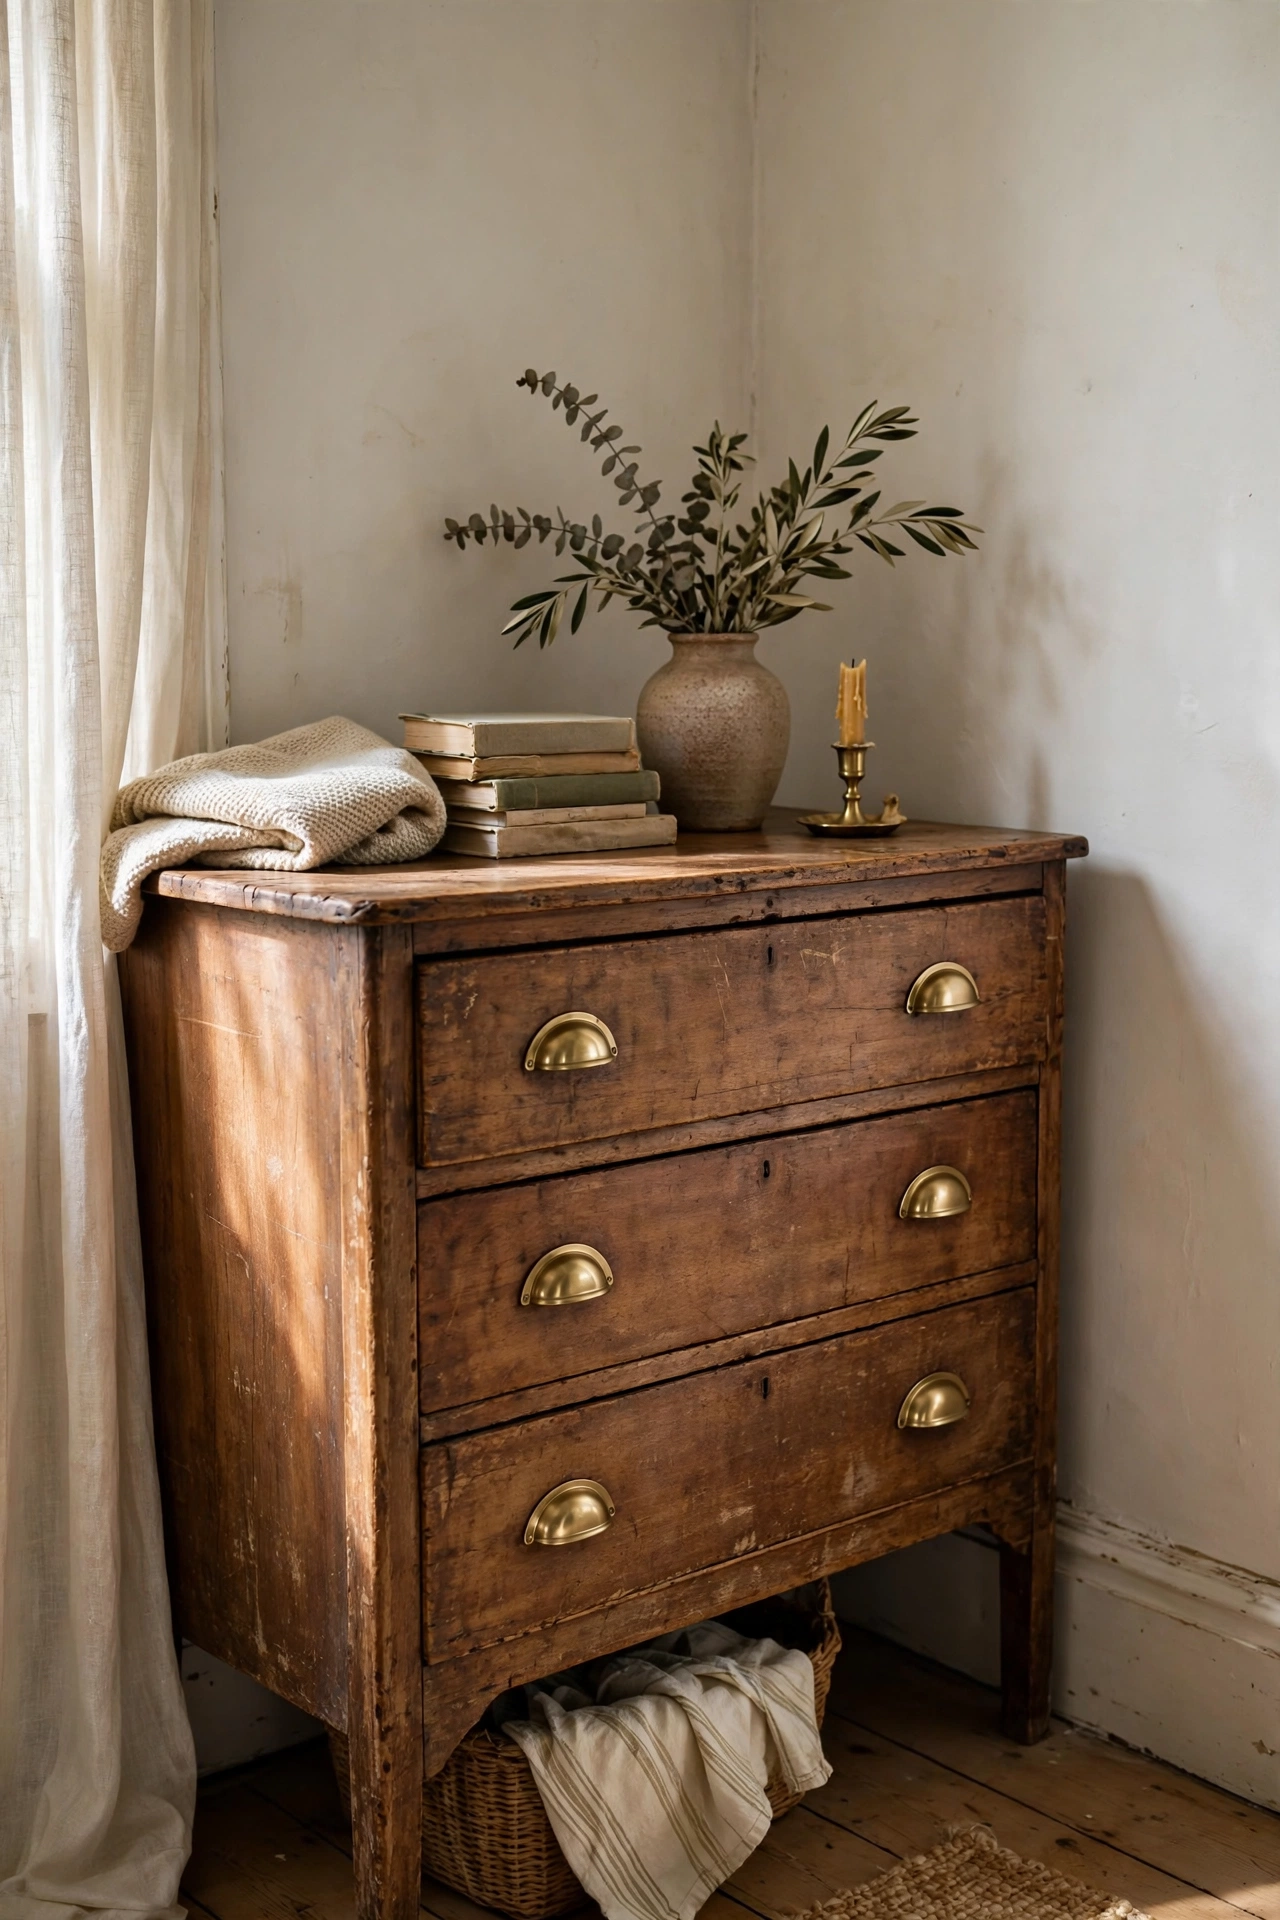
Swapping drawer pulls is the fastest way to make a tired dresser look intentional. My thrifted dresser had mismatched plastic knobs, so I replaced them all with simple brass cup pulls I found in a hardware bin for a dollar each. Unscrew the old ones, screw in the new ones, done in fifteen minutes. Measure the hole spacing before you buy, because pulls come in standard widths and the wrong size means drilling new holes. One of my drawers had wider spacing, so I bought two adjustable pulls for those. The dresser looks like a different piece of furniture now, and the whole upgrade cost less than a takeaway.
Cost: ~$6-12 | Time: 20 minutes
15. Layered Thrifted Rug
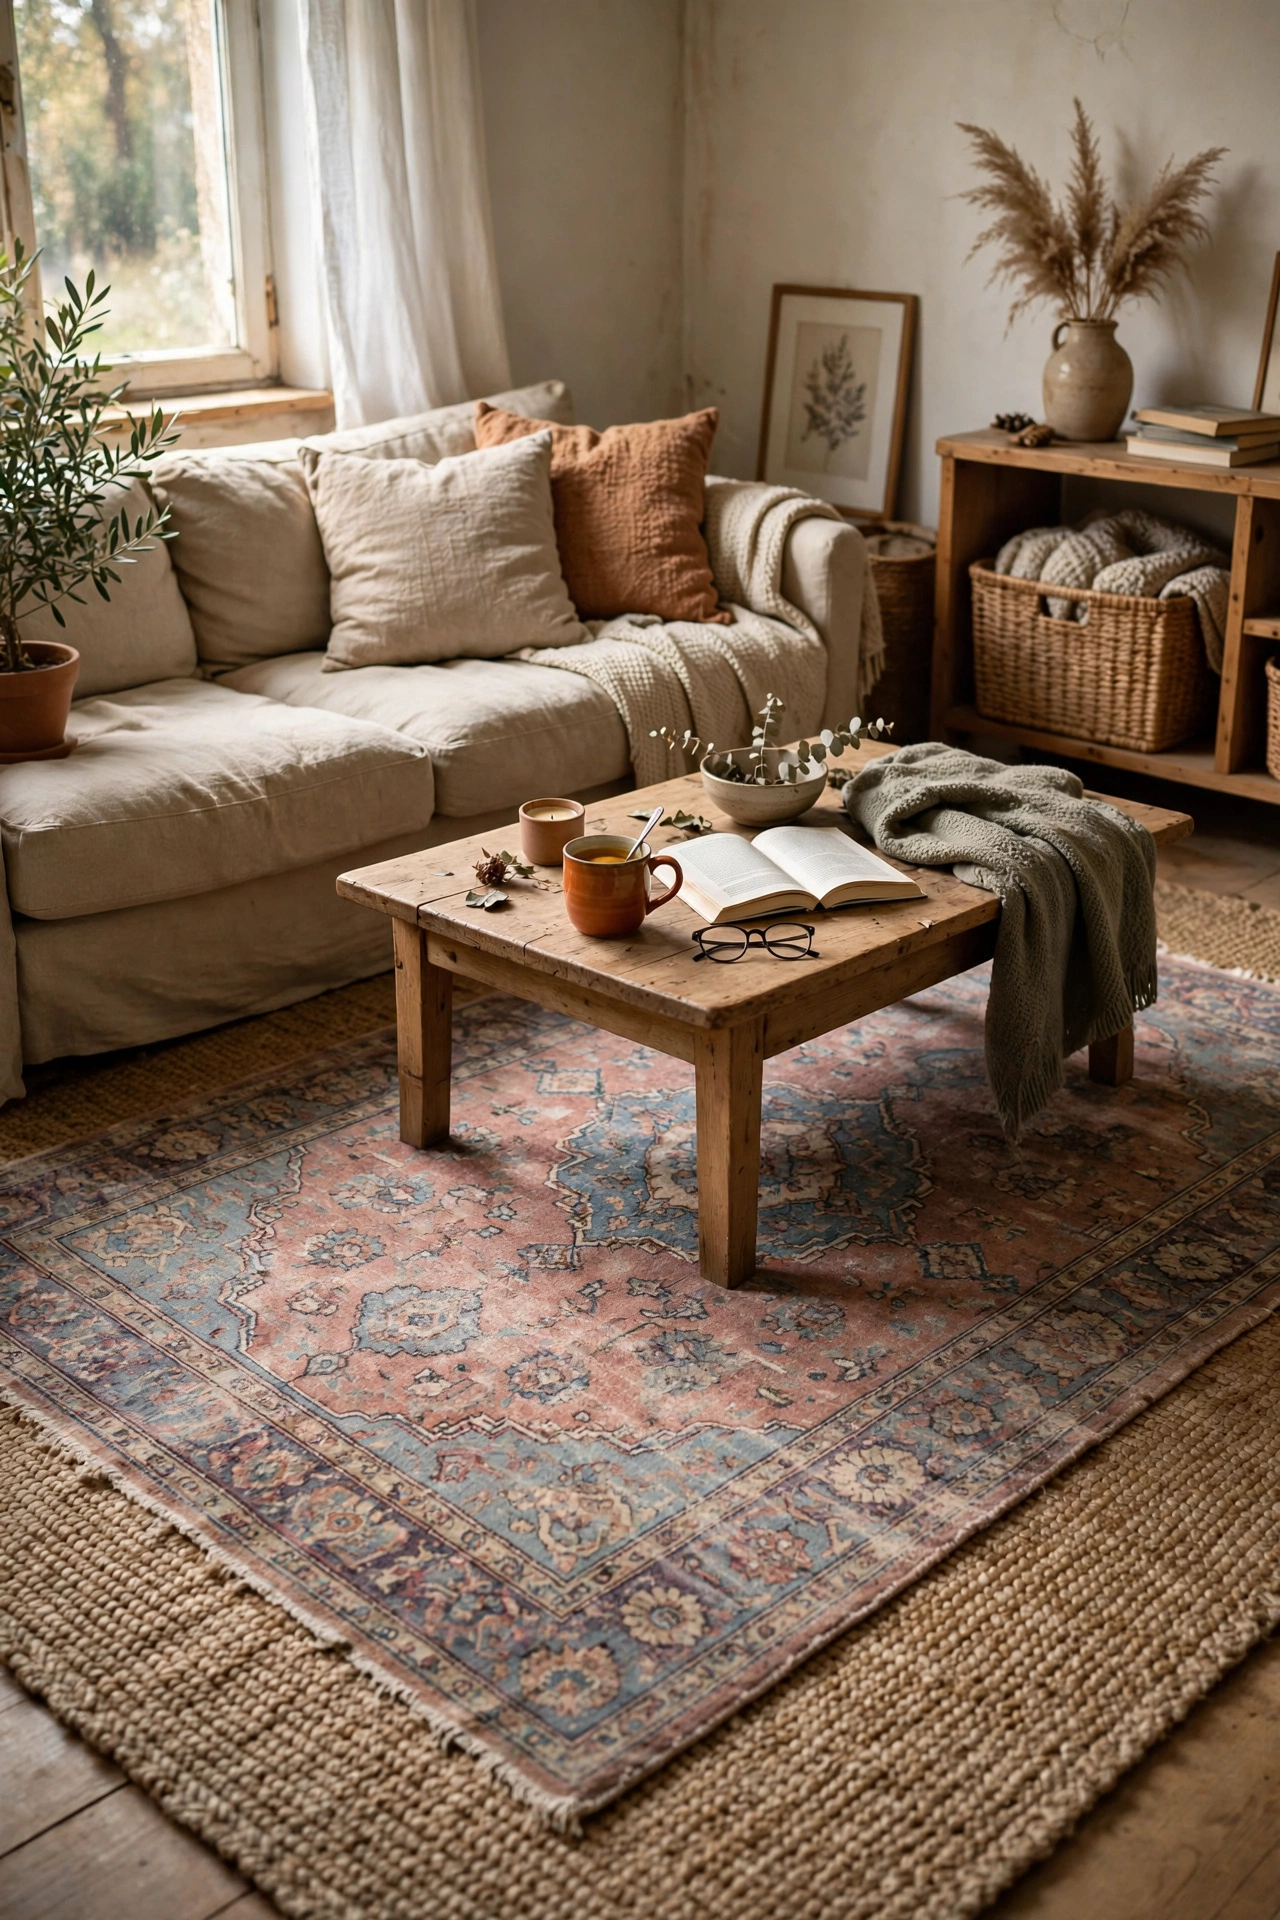
Layering a smaller thrifted rug over a plain large one is a designer trick that costs almost nothing secondhand. I found a faded Persian-style rug for $18 and laid it at an angle over my neutral jute rug in the living room. The room instantly looked warmer and more layered. Check the back for stains before you buy, because the front can hide a multitude of sins. My rug slid around for a week until I put rug tape underneath, so do that from the start. Keep the top rug about two-thirds the size of the base rug, and let the edges sit unevenly for a relaxed look.
Cost: ~$15-25 | Time: 15 minutes
16. Wooden Bowl Centrepiece
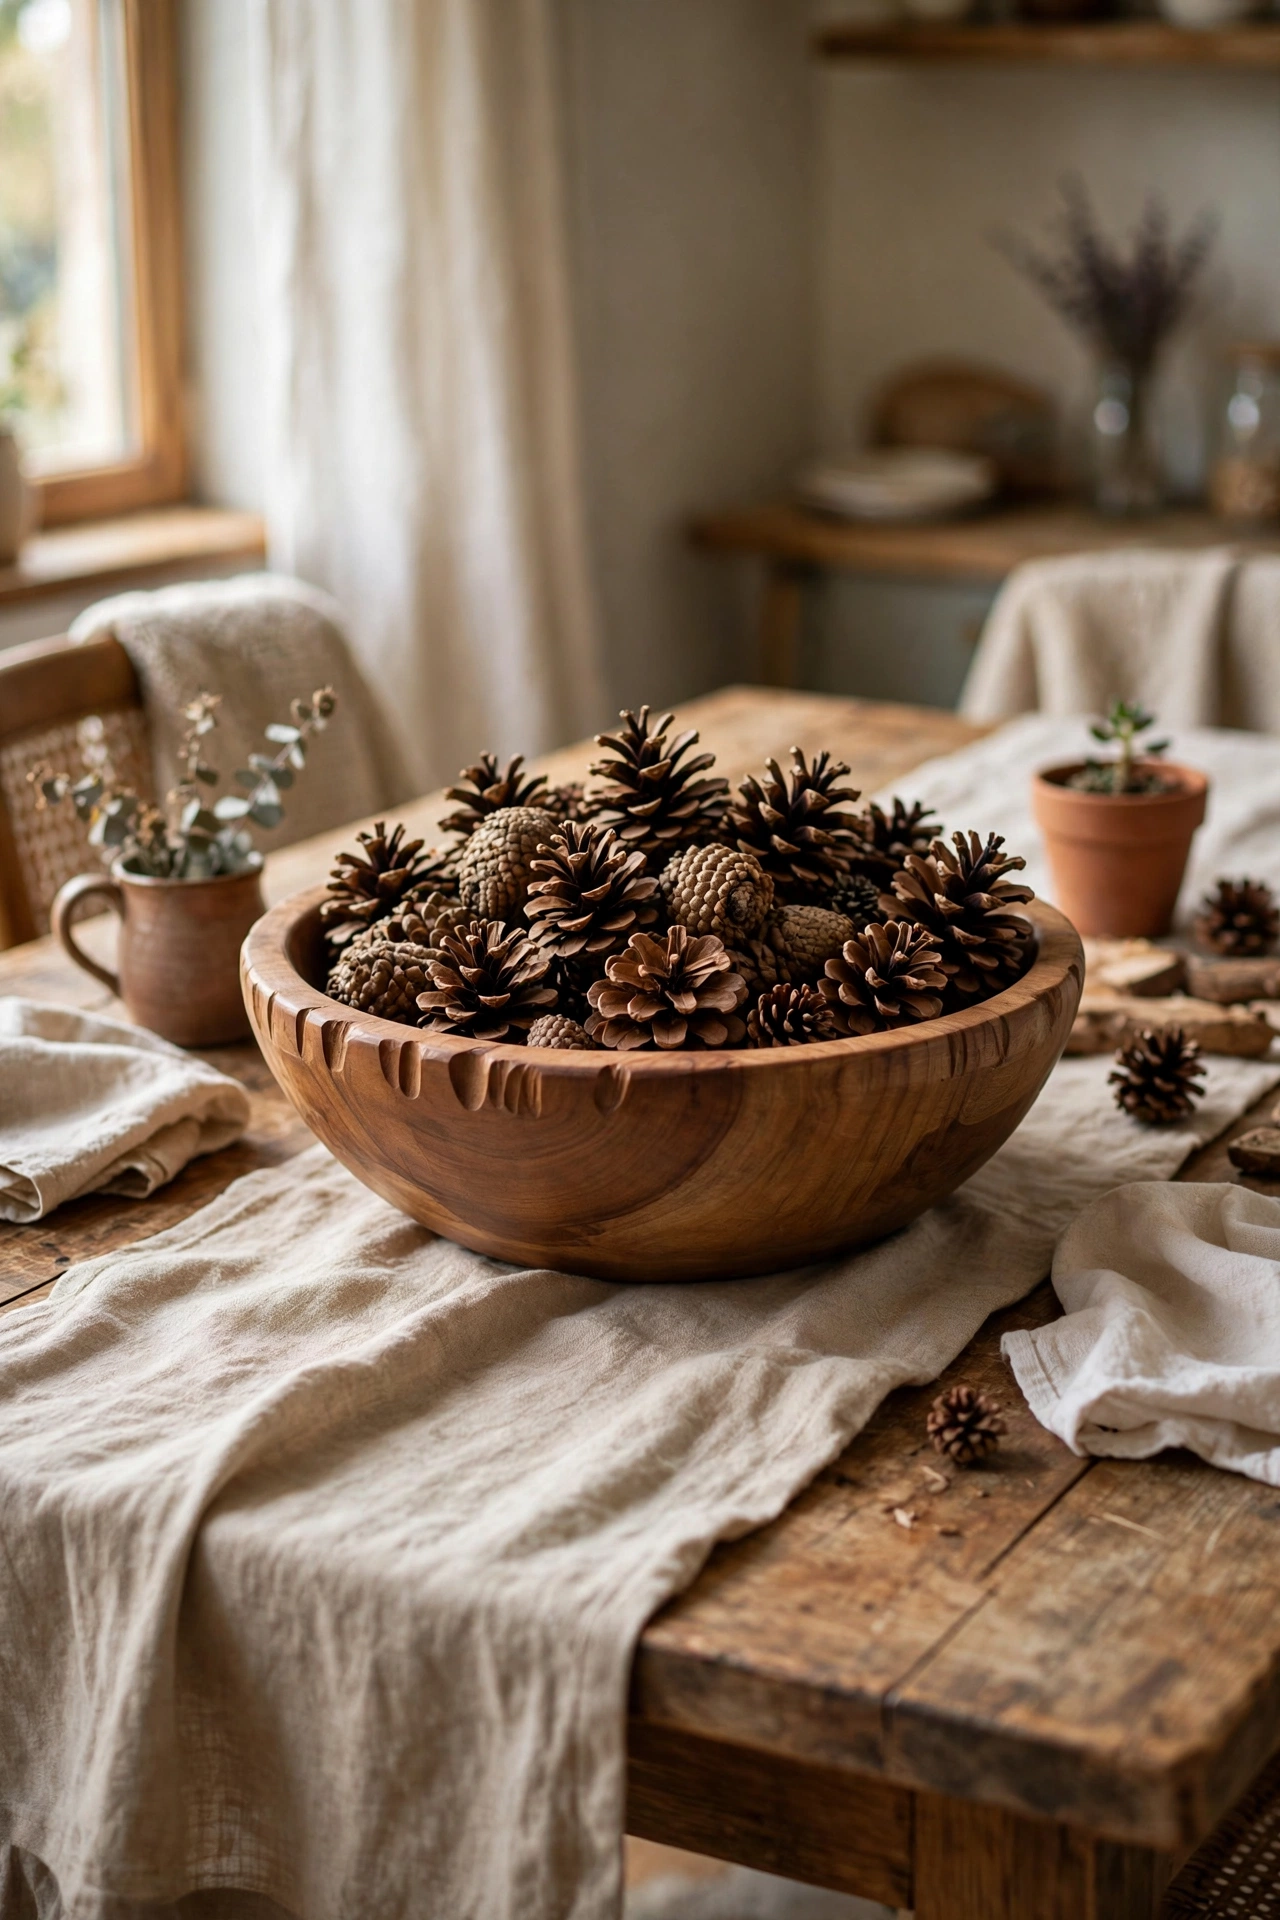
A big wooden bowl filled with something seasonal is the easiest centrepiece there is. I found a solid turned-wood bowl for $5, and I rotate the filling: pinecones in winter, lemons in summer, dried seed heads in autumn. The bowl itself does most of the work, so the filling just needs to be plentiful. Mine had a hairline crack that I fixed with wood glue and a clamp overnight, and it has held for two years. Avoid bowls with a strong varnish smell, which means the finish is failing. Set it on a folded linen runner and your dining table looks styled in about three minutes.
Cost: ~$5-10 | Time: 10 minutes
Budget check: sixteen projects finished and the whole weekend is still tracking under $100. The rug was the biggest single spend, and it is also the piece guests comment on most.
17. Thrifted Desk as an Entryway Console
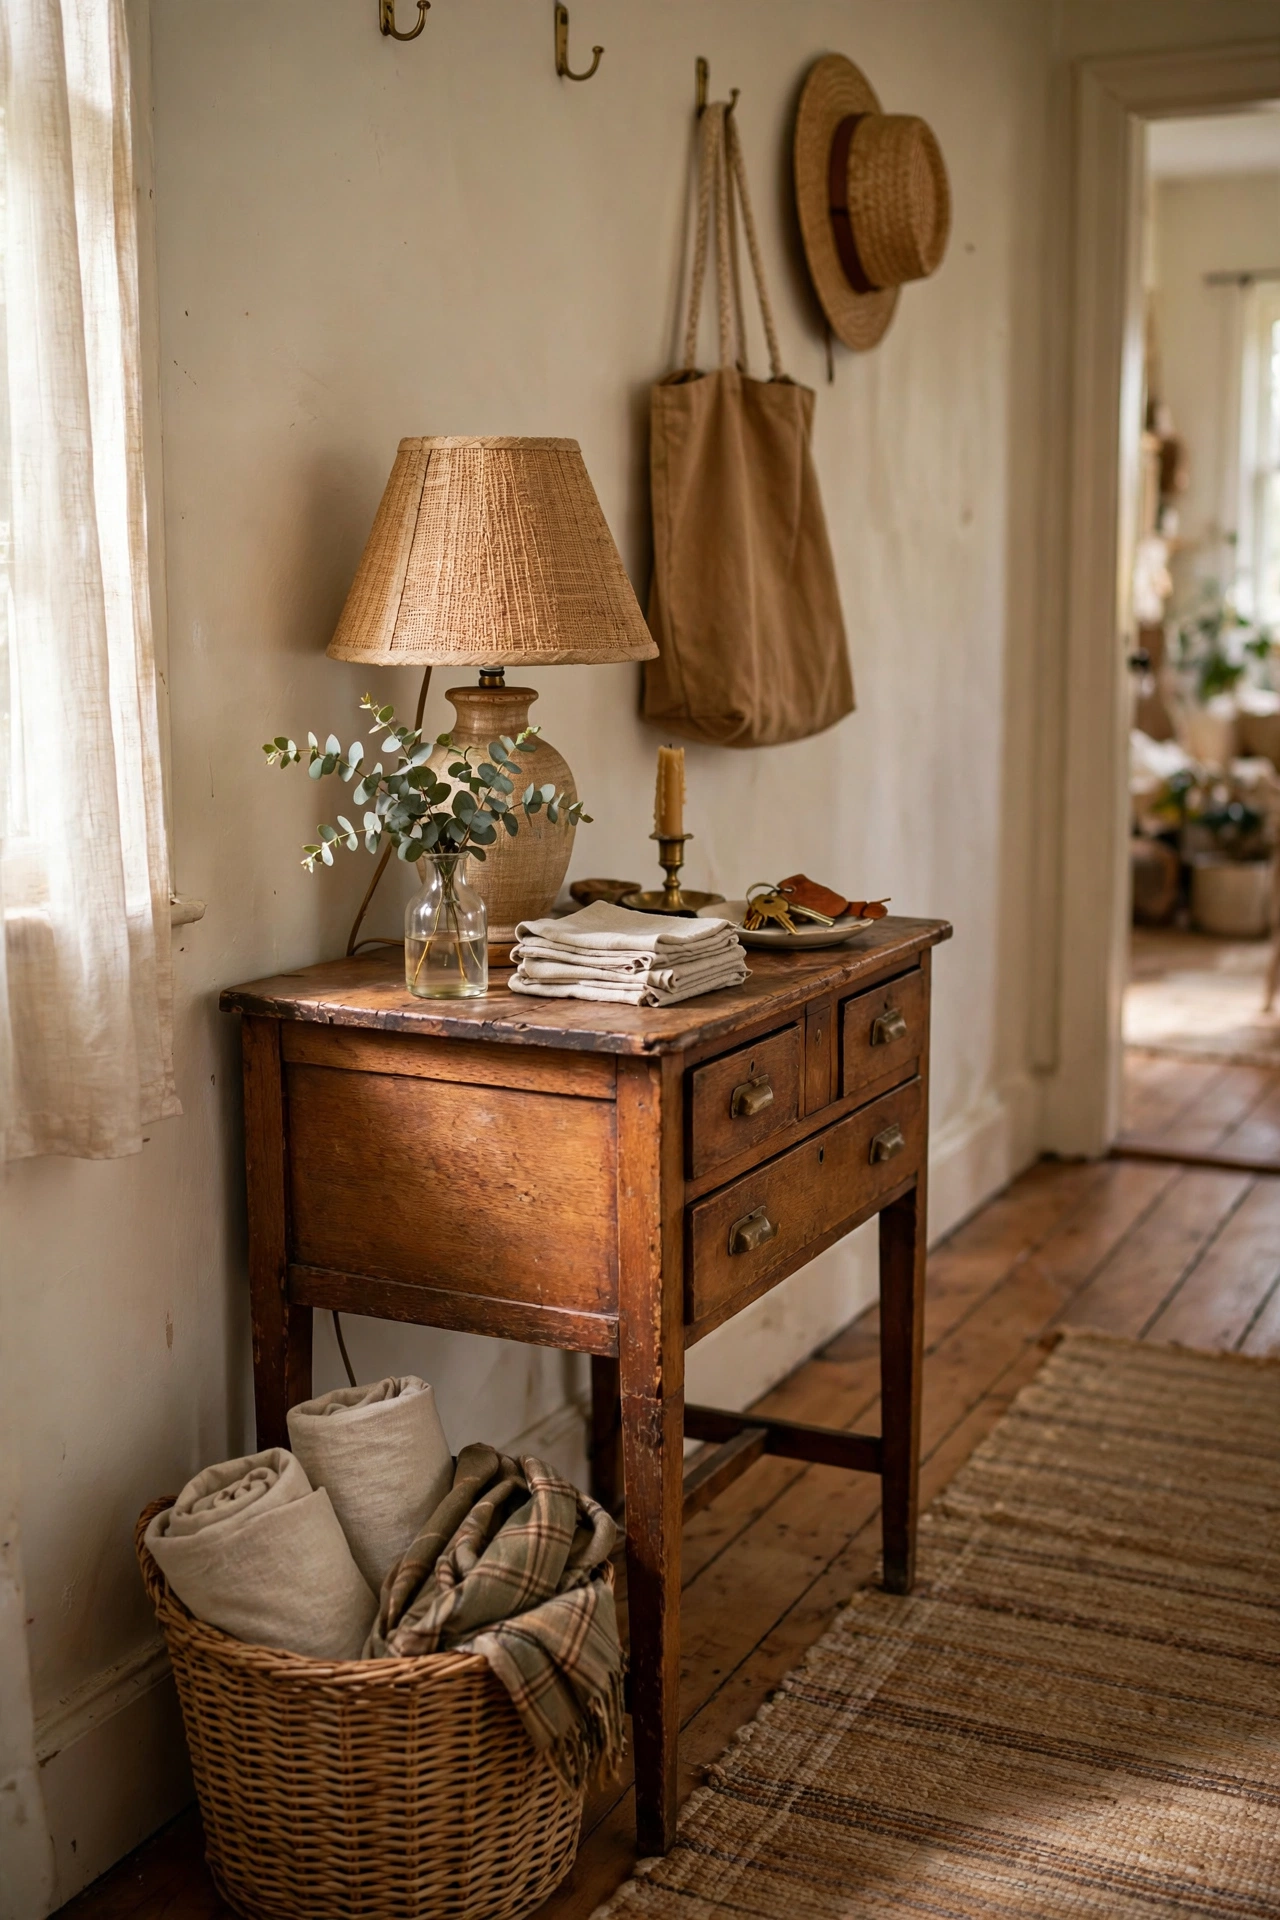
A small thrifted desk makes a perfect entryway console: the drawers swallow keys and post, and the top holds a lamp and a basket. I bought a sturdy little writing desk for $20, gave it a quick clean and a coat of furniture wax, and styled the top with a lamp and a basket for gloves. Check for wobble before you buy, because a shaky desk will drive you mad every time you drop your keys. Mine had one short leg that I fixed with a felt pad shim. If the finish is scratched but the bones are good, that is exactly the piece to buy. For easy styling projects to pair with it, try (see also: 15-easy-diy-home-decor-projects-for-beginners).
Cost: ~$20-30 | Time: 45 minutes
Save this one for your next rainy-day project list.
Keep the DIY momentum going: (see also: thrift-store-furniture-flips-for-beginners) (see also: 23-diy-mirror-ideas-for-beginners)
