21 DIY Lamp Ideas for Beginners
The first lamp I ever wired tripped the breaker and threw my whole flat into darkness. I had grabbed a bargain lamp kit, skimmed the instructions, and wired the plug backwards, then stood there in the dark feeling like an idiot. That evening taught me more than any tutorial, and since then I have built over twenty lamps for my own rooms without a single scare. Consider this your DIY lamp for beginners handbook: simple builds, cheap parts, and the exact steps that keep every project safe and drama-free.
Every lamp below starts from the same two ingredients: a basic ready-to-assemble lamp kit, that is the socket, cord and plug sold as one set, and a shade or cover you make yourself. You do not need wiring experience, just a screwdriver and the patience to follow the kit diagram. I have built each one in my own home and noted where I messed up, so you can skip straight to what works. One safety rule for all of them: use LED bulbs only, they stay cool, which matters a lot with paper and fabric shades.
1. Mason Jar Table Lamp Kit Build
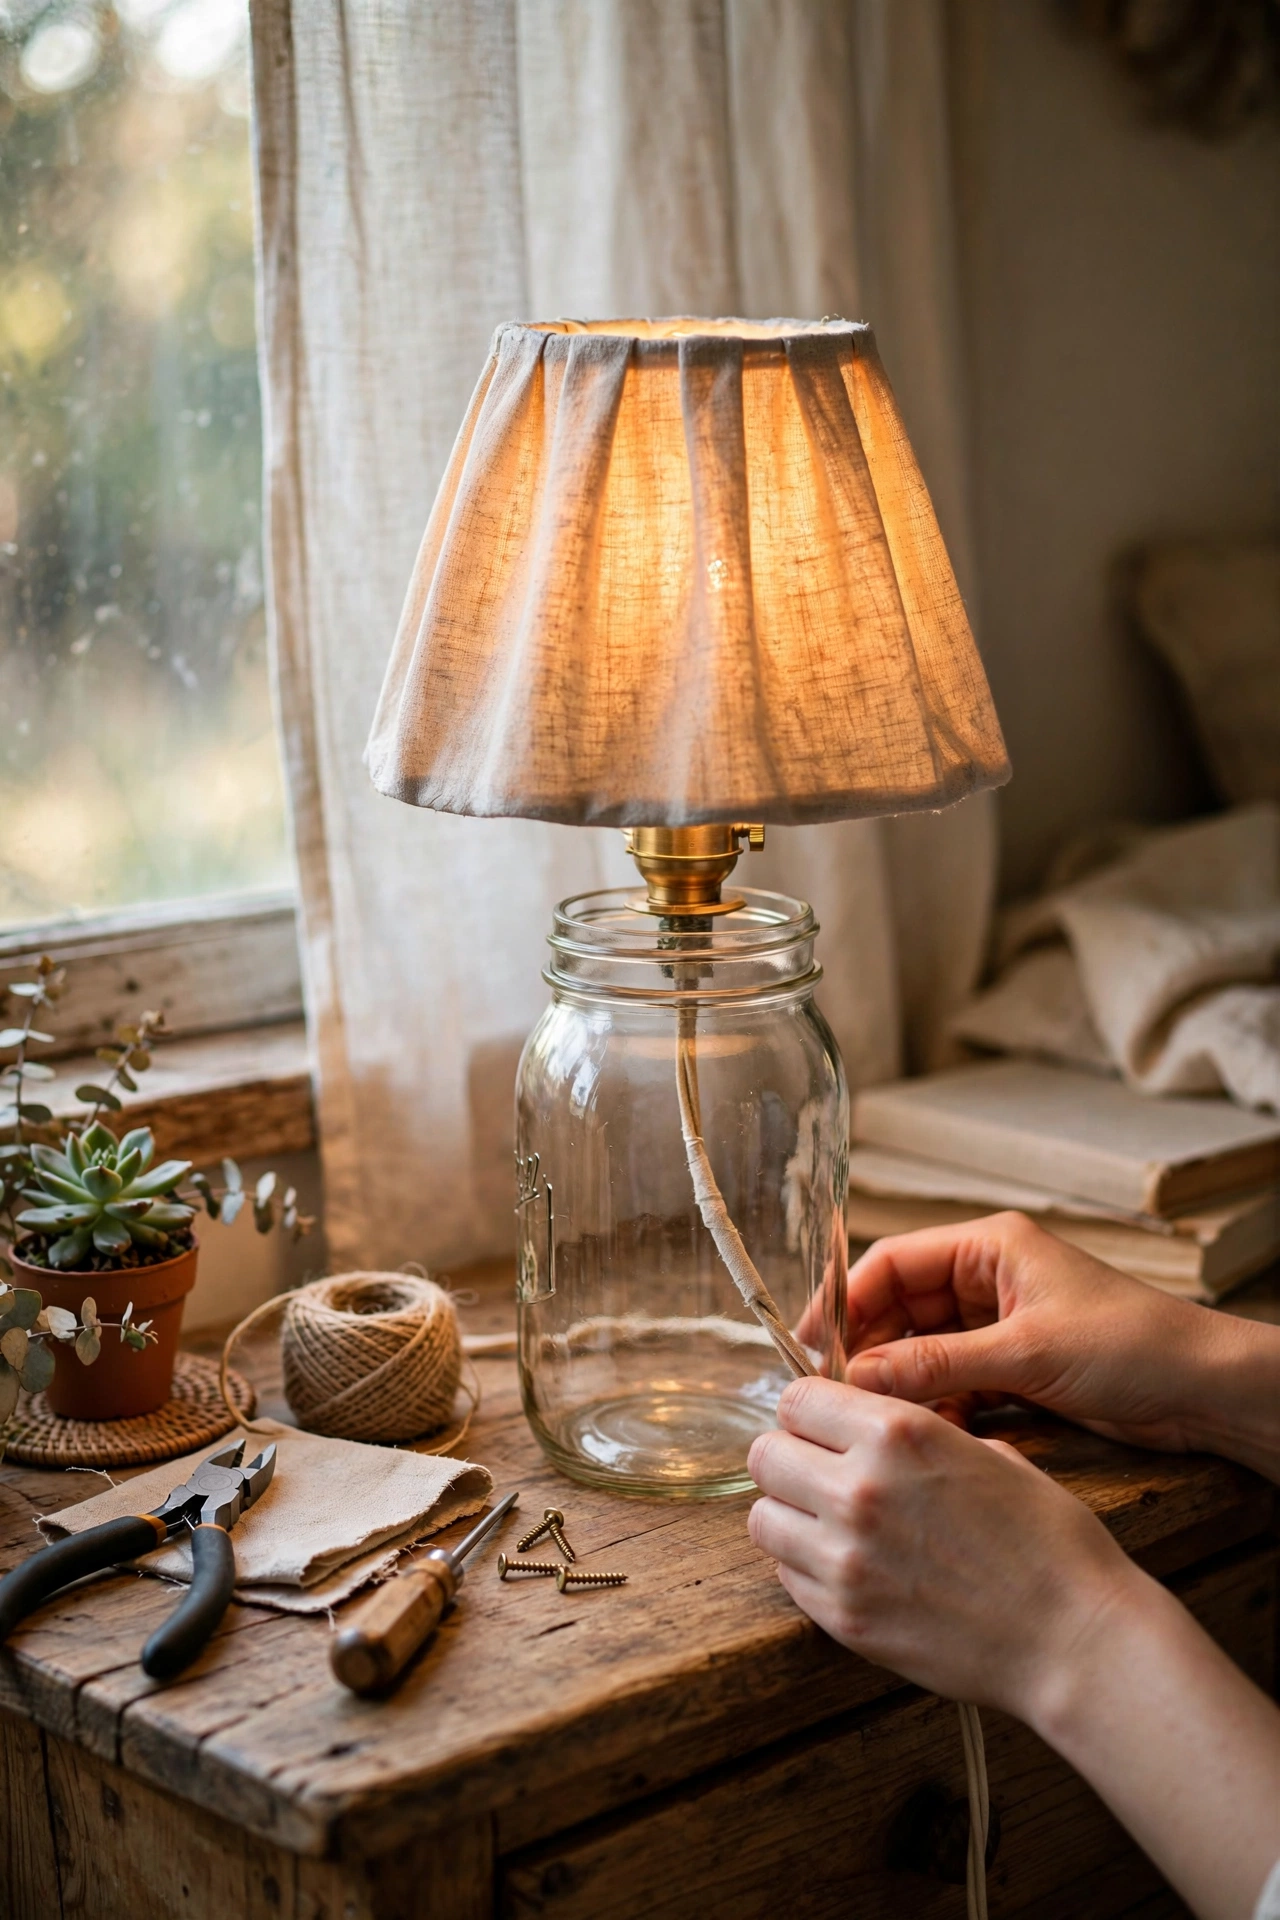
A mason jar lamp looks like something from a farmhouse boutique, and the kit does the electrical thinking for you. I used a wide-mouth jar, marked the centre of the lid, and punched a hole with a nail and hammer, then threaded the socket of a bottle lamp kit through from underneath and tightened the hardware. Fill the jar a third full with dried beans or fairy lights for glow, screw the lid on, and add a small clip-on shade. My first attempt failed because I punched the hole too big and the socket wobbled, so start small and widen slowly. It now sits on my nightstand and everyone asks about it. Pair it with soft surroundings from (see also: 15-bedroom-lighting-ideas-on-a-budget/) for the full cosy effect.
Materials: Wide-mouth mason jar, bottle lamp kit, small clip-on shade, dried beans | Cost: ~$8-12 | Time: 30 minutes
2. Painted Thrift Store Lamp Base Makeover
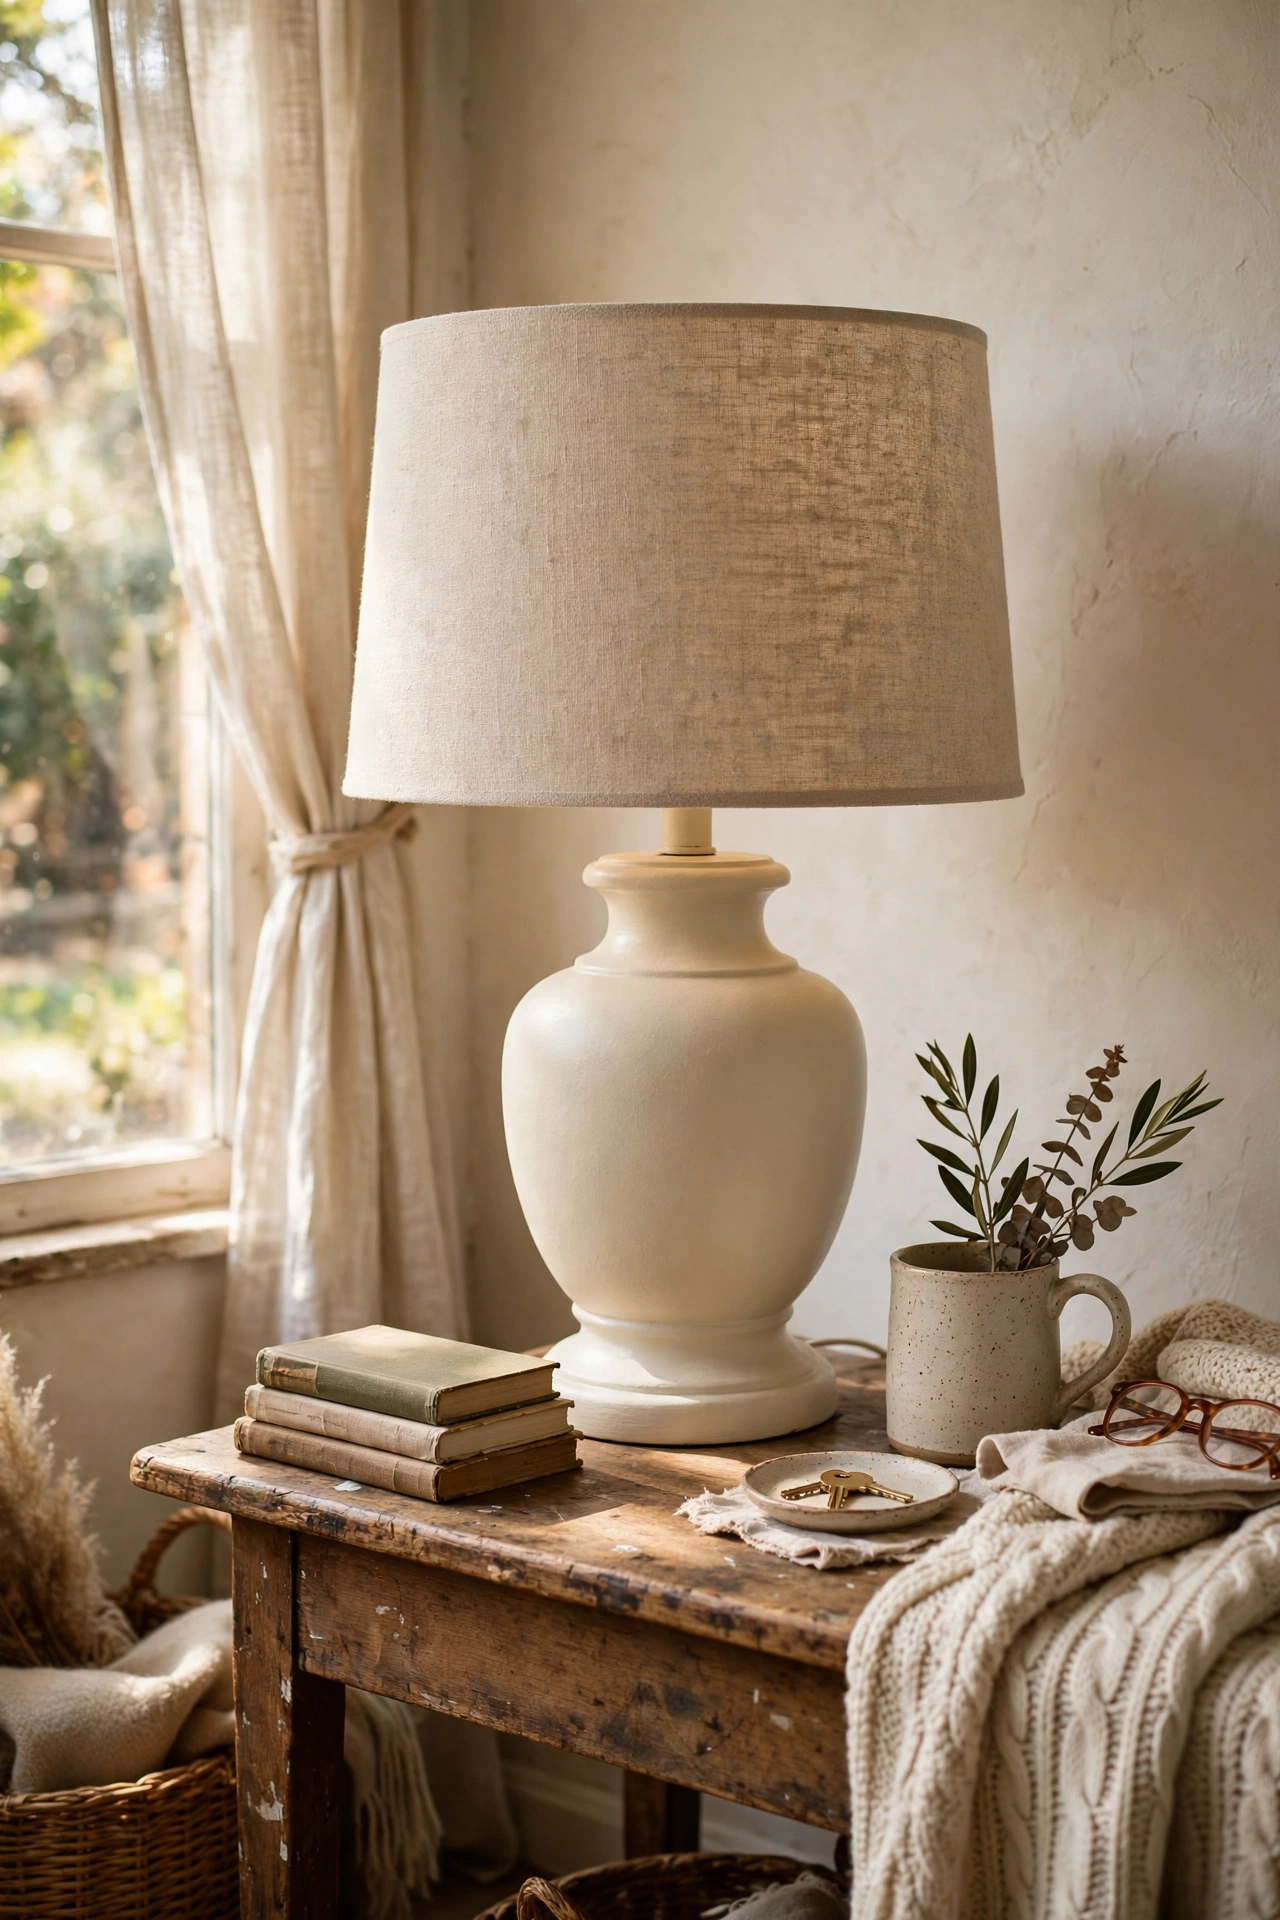
The ugliest lamp in the charity shop is usually hiding the best bones. I found a heavy brass-effect base with a hideous shade for three dollars, stripped the shade off, and gave the base two thin coats of matte cream spray paint after a light sanding. A fresh drum shade in natural linen finished it, and the whole thing looks designer. The mistake I made was skipping the sanding on my first makeover, and the paint chipped within a month, so rough the surface with fine sandpaper first and wipe it clean. Check the existing wiring while you are at it: if the cord is cracked or brittle, replace it with a new kit rather than risking it.
Materials: Thrifted lamp base, fine sandpaper, spray paint, new drum shade | Cost: ~$8-15 | Time: 1 hour plus drying
3. Paper Bag Pendant Shade
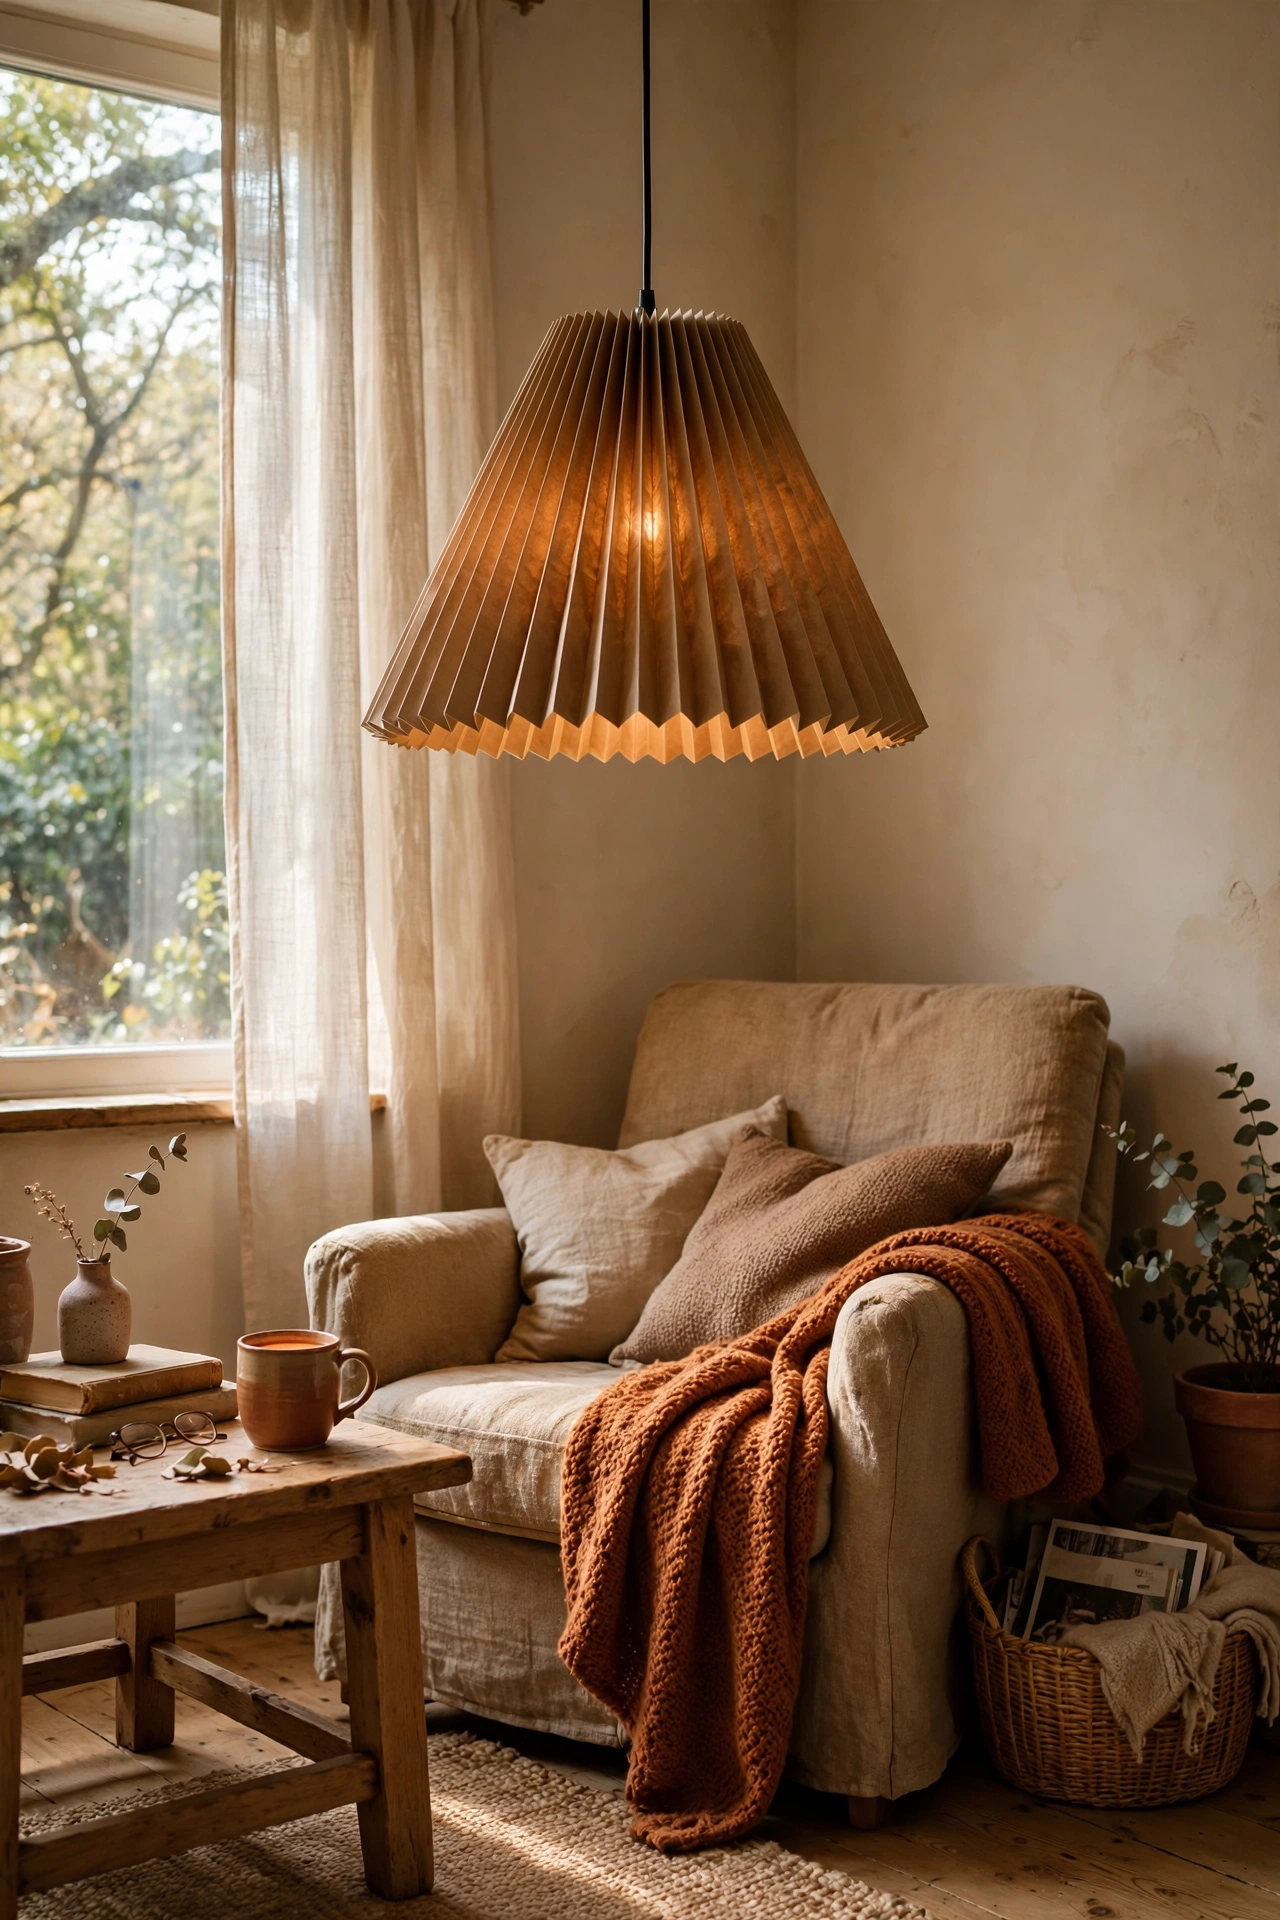
A brown paper bag, cut and folded, makes a pendant shade with beautiful warm texture. I took a large lunch bag, cut the bottom off, folded accordion pleats around the whole thing, and slipped it over a simple pendant cord kit, securing the top with twine. The pleats catch the light and throw soft shadows across the ceiling. My first bag tore because I folded against the grain too sharply, so score each fold lightly with a ruler first and work slowly. Use an LED bulb only, paper and heat are a bad combination, and hang it over a reading chair or kitchen table where the glow shows best.
Materials: Large brown paper bag, pendant cord kit, twine, LED bulb | Cost: ~$6-10 | Time: 40 minutes
4. Rope-Wrapped Bottle Lamp
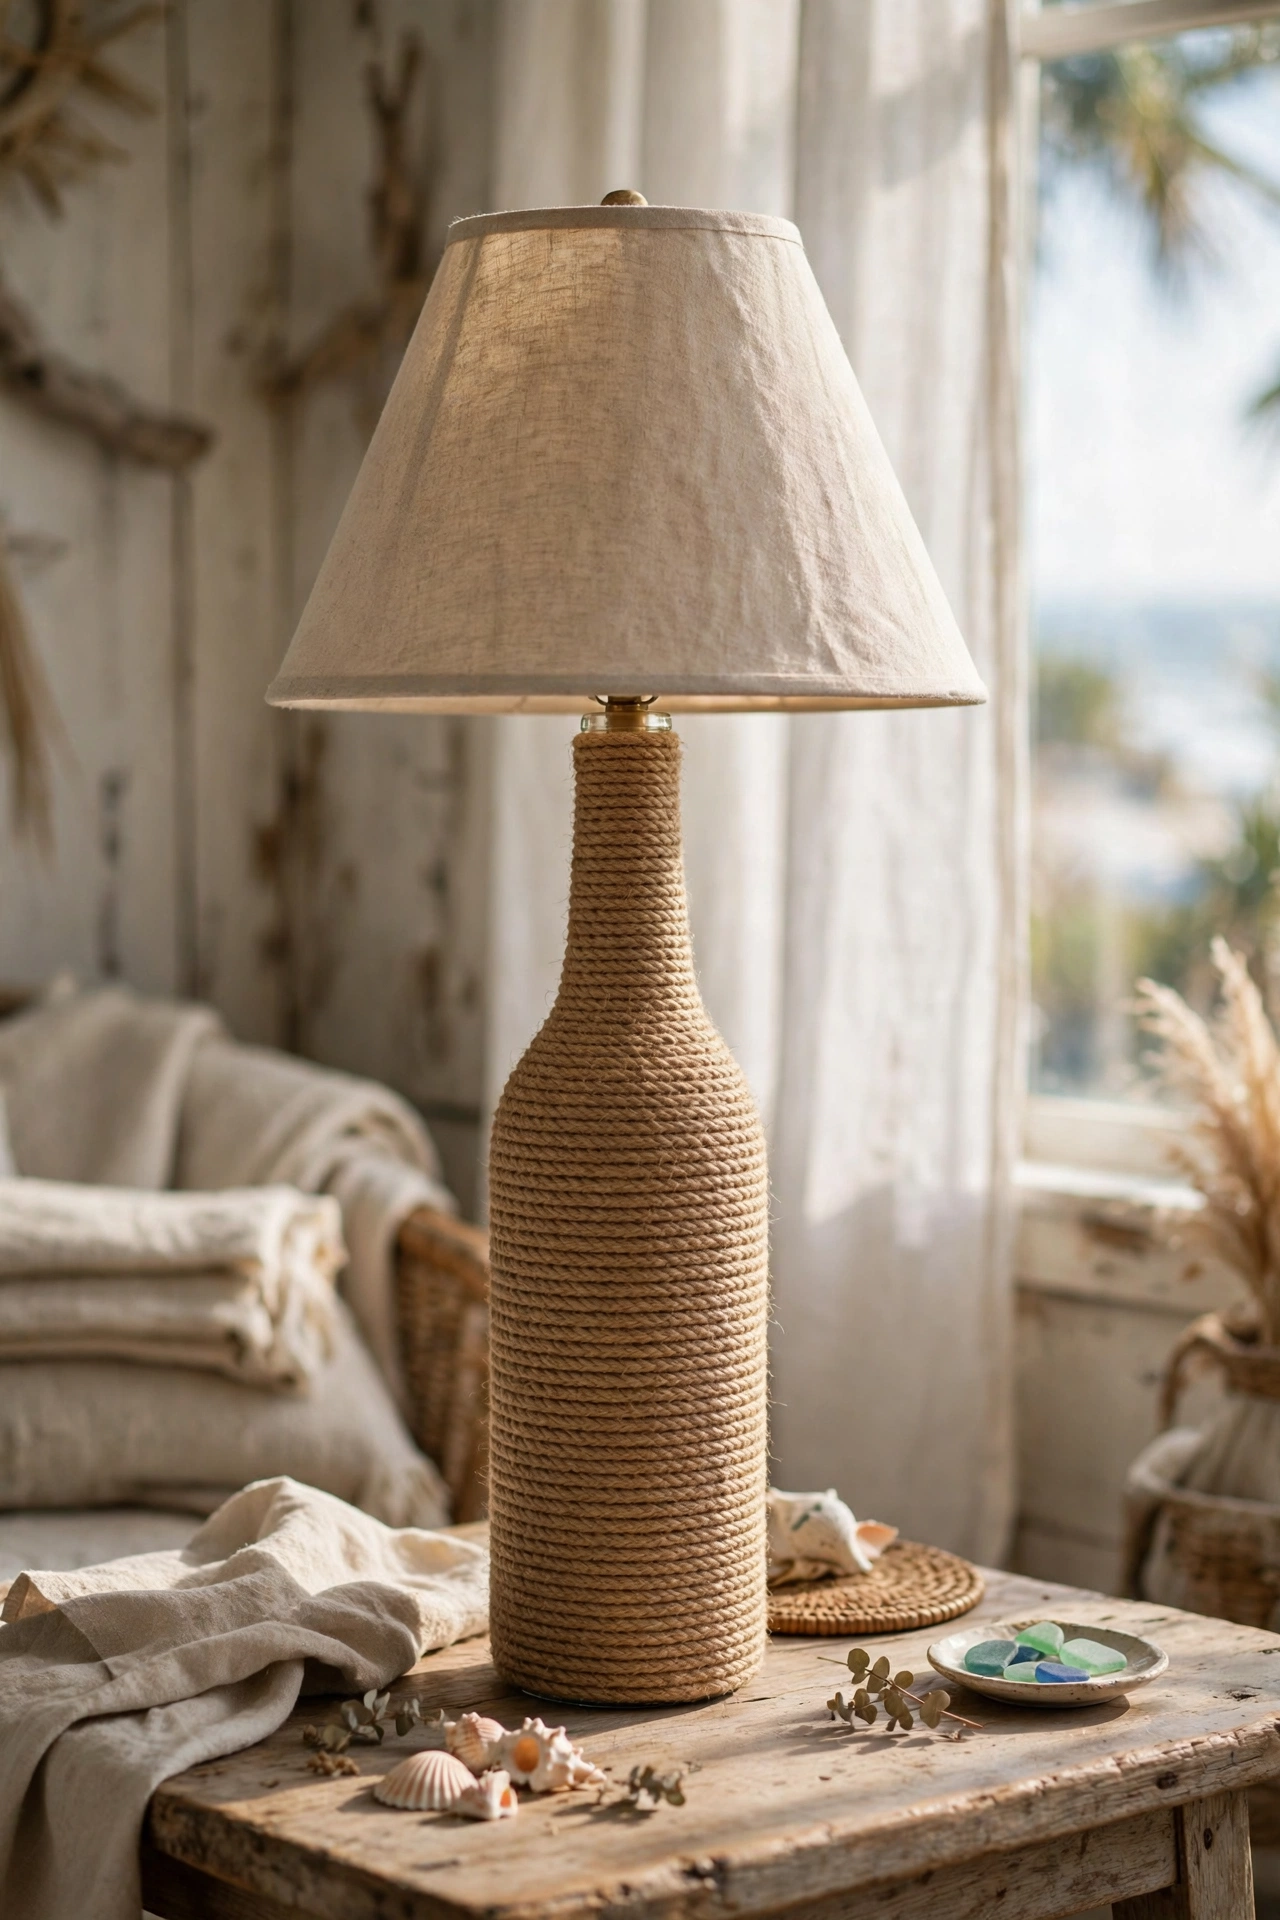
Wrapping a bottle in jute rope turns recycling into a coastal-style lamp base. I cleaned a tall glass bottle, ran a line of hot glue near the base, and wound the rope tightly upward in neat rows, adding a dab of glue every few centimetres to stop it slipping. A bottle lamp kit threads through the neck and a linen shade tops it off. The trick I learned the hard way is keeping the rows snug: my first wrap had gaps where the glass peeked through, so push each row firmly against the last as you go. It looks like something from a seaside gift shop and cost me almost nothing.
Materials: Tall glass bottle, jute rope, hot glue gun, bottle lamp kit, shade | Cost: ~$8-12 | Time: 1 hour
5. Wire Basket Pendant Light
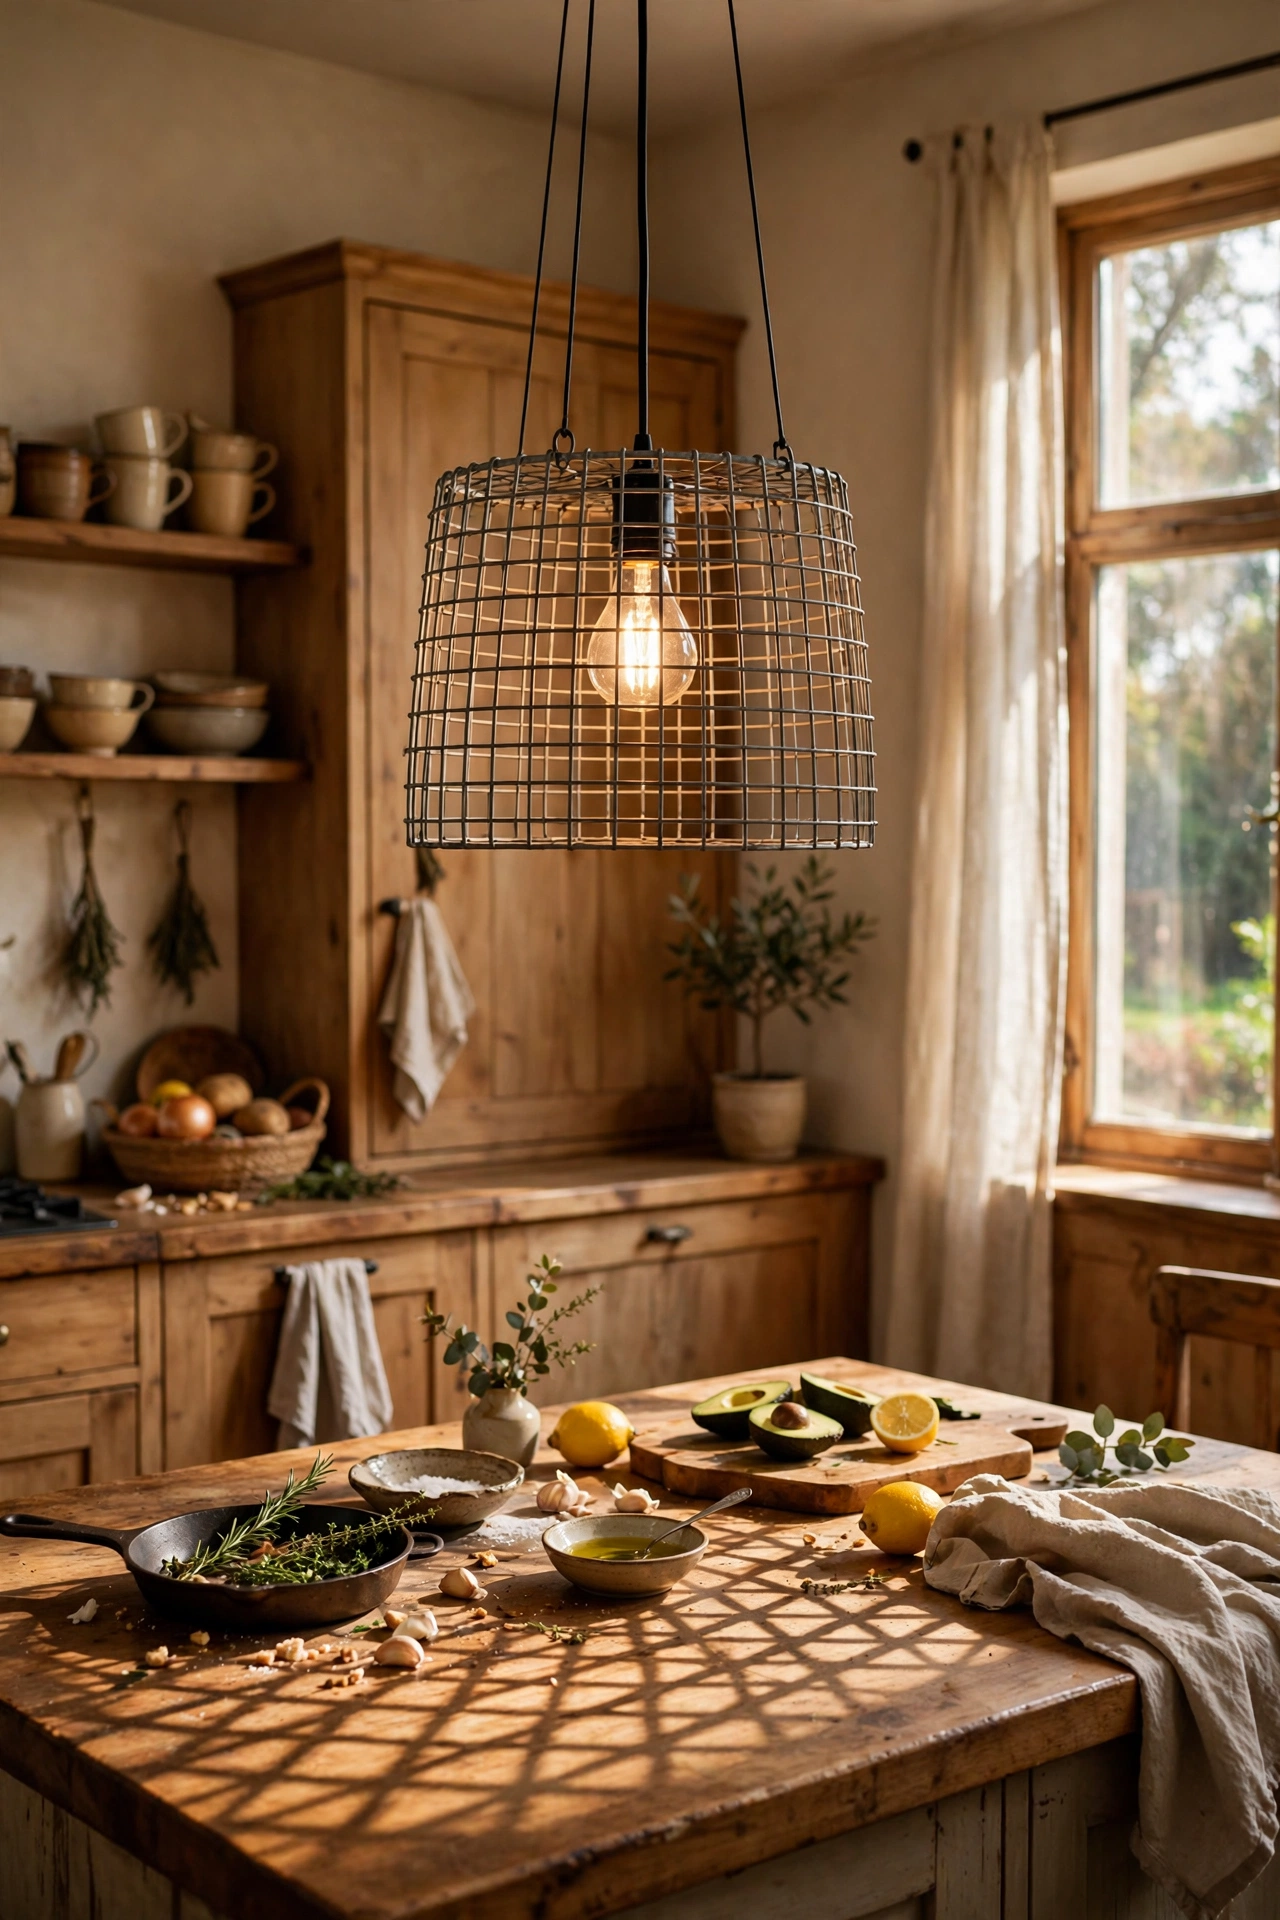
A wire storage basket flipped upside down makes an industrial pendant shade in about ten minutes. I bought a cheap wire basket, threaded a pendant cord kit through the base of the basket, and hung it over my kitchen island with a warm LED bulb inside. The open weave throws the most gorgeous patterned shadows across the walls. My mistake was using a basket with a wide weave and a visible bright bulb, which was blinding from below, so choose a filament-style LED or a basket with tighter mesh. Hang two or three at staggered heights for a proper designer cluster.
Materials: Wire storage basket, pendant cord kit, warm LED filament bulb | Cost: ~$8-12 | Time: 20 minutes
6. Stacked Old Books Table Lamp
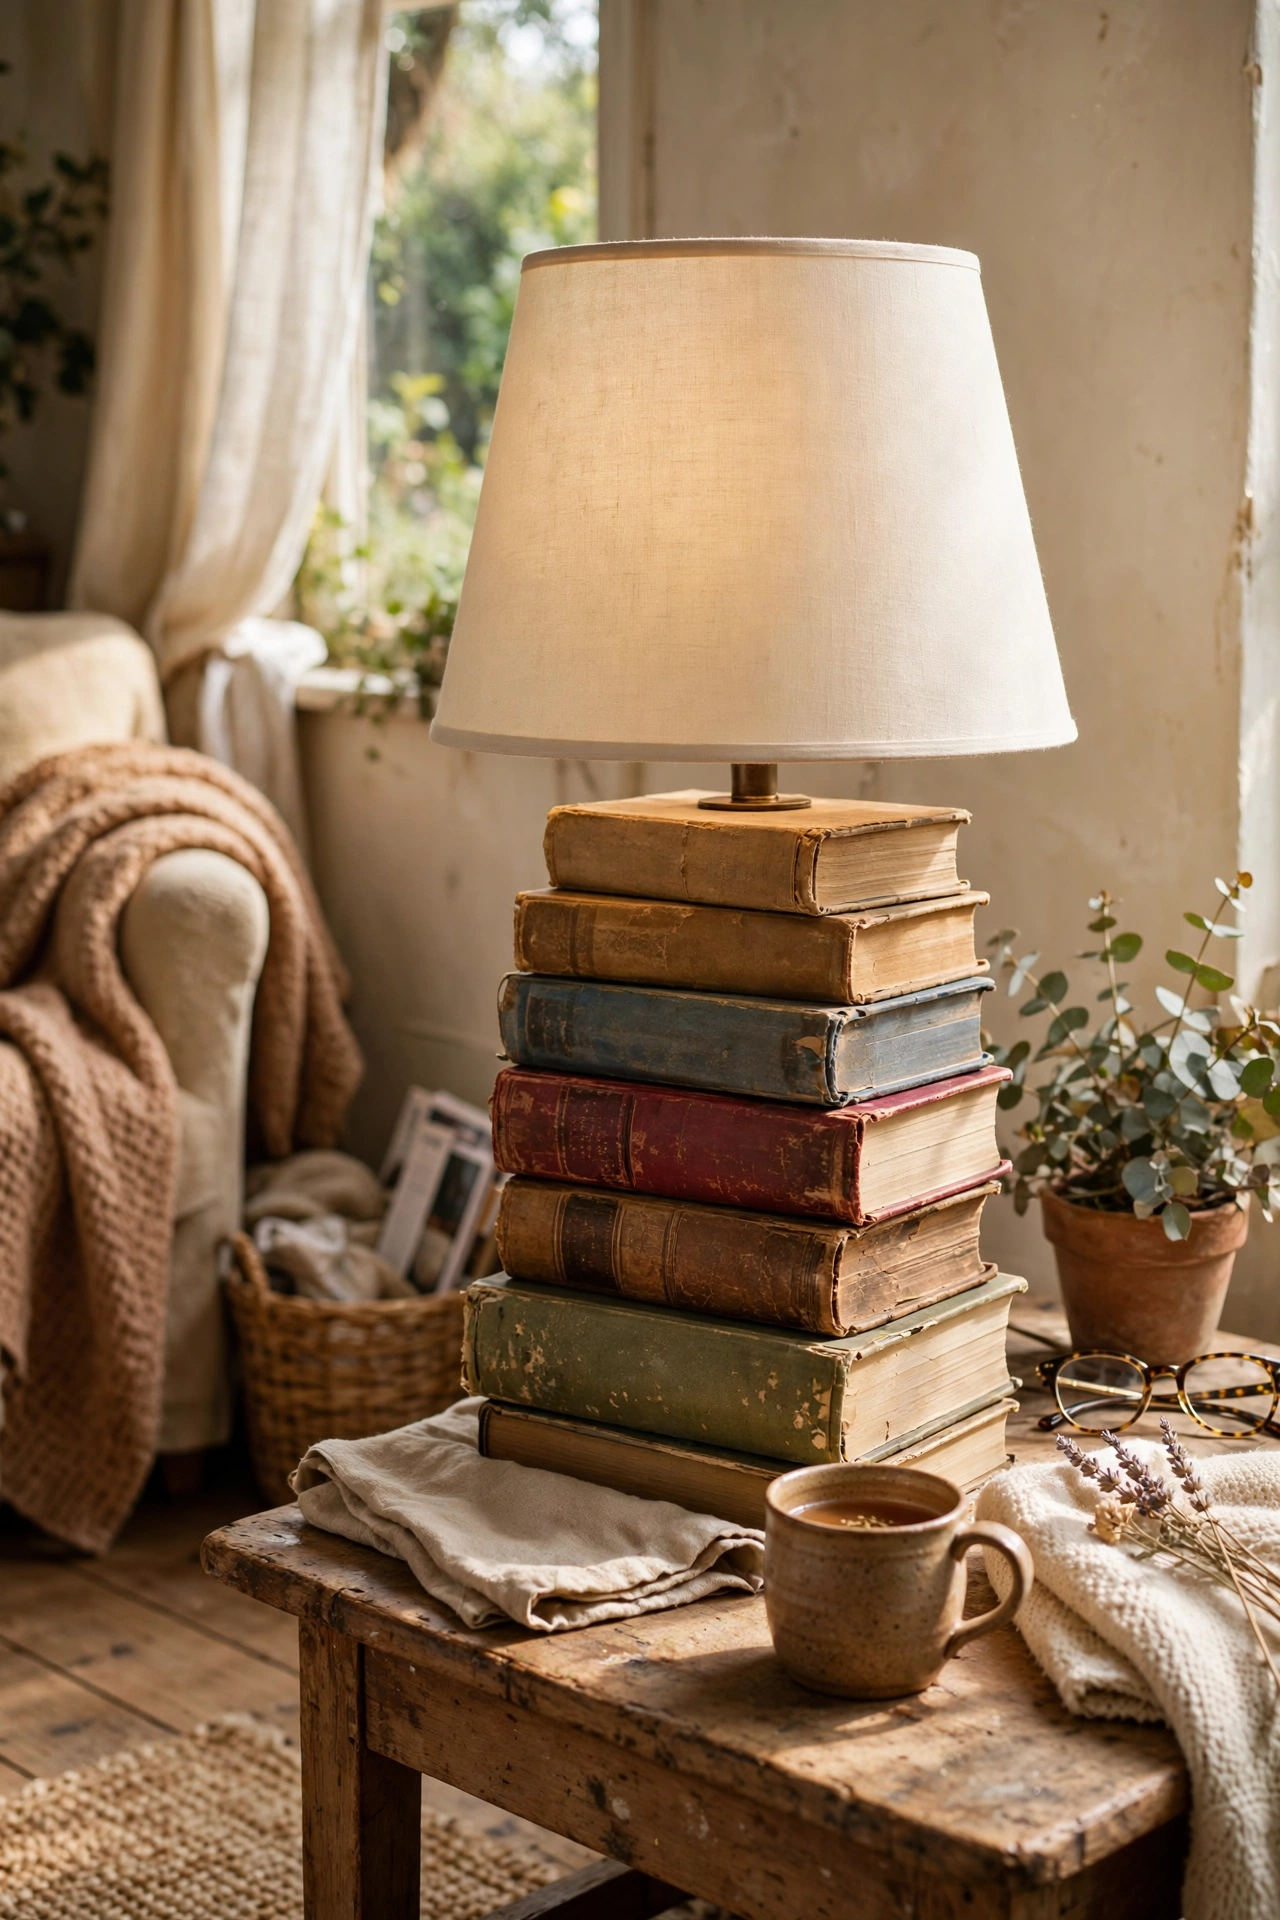
A stack of old hardbacks with a lamp kit running through the middle is pure library charm. I picked five books I would never read again, drilled a hole through the centre of each with a spade bit, and threaded a threaded lamp rod through the stack, tightening it top and bottom with the kit hardware. The books get slightly imperfect holes, which is fine, they are clamped tight and nobody sees inside. My first stack toppled because I used tall thin books, so choose chunky hardbacks and keep the stack under 30cm. Top with a simple cream shade and it looks like it belongs in a bookshop.
Materials: 5 old hardback books, lamp rod kit with socket and cord, spade drill bit, shade | Cost: ~$10-15 | Time: 45 minutes
7. Wine Bottle Lamp with a Bottle Lamp Kit
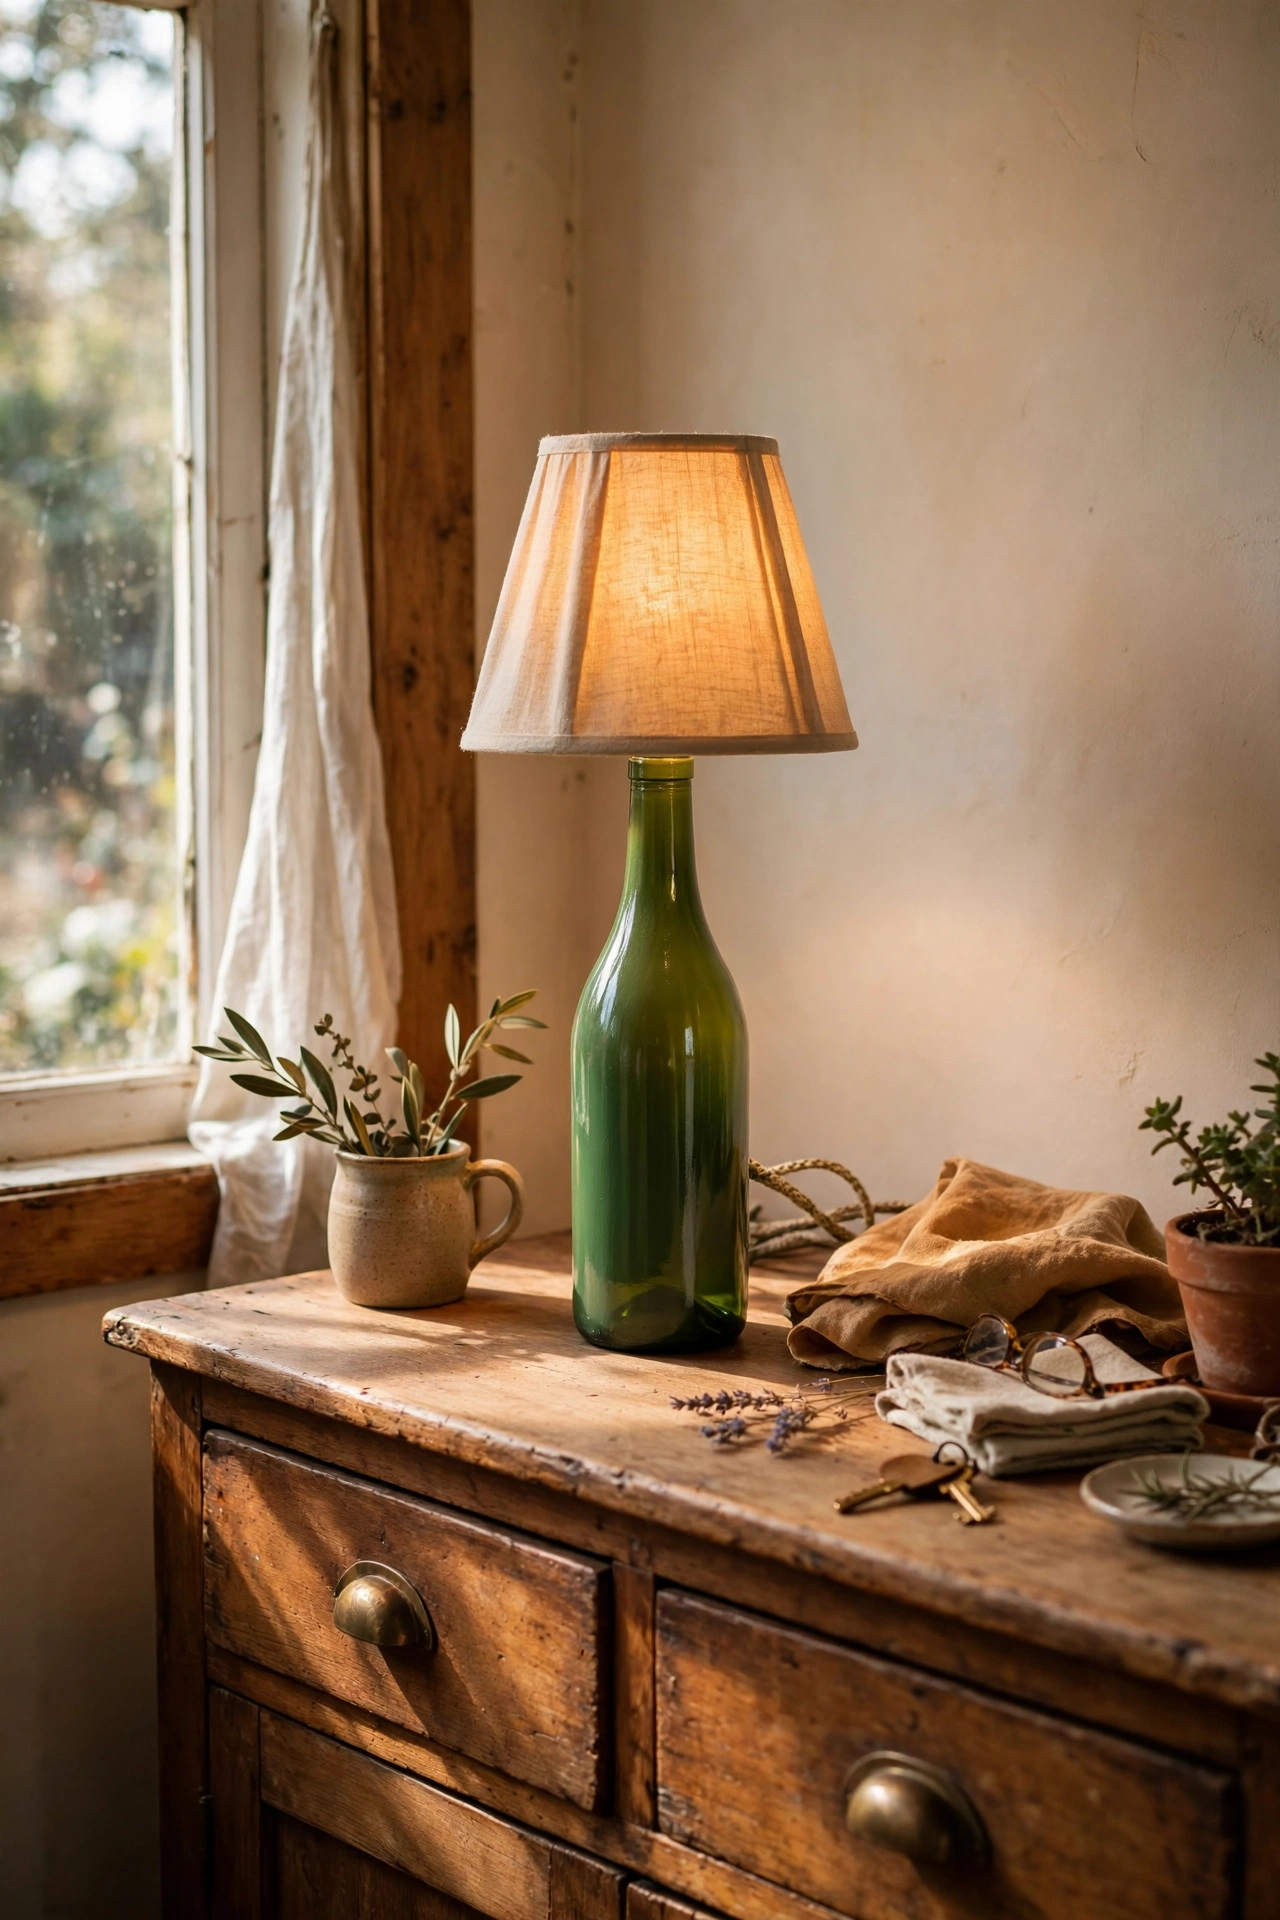
Wine bottles have the perfect neck for a bottle lamp kit, and a nice bottle needs no decoration at all. I rinsed a green glass bottle, let it dry completely inside, and pushed the kit’s socket assembly down through the neck according to the diagram, with the cord exiting through the rubber stopper at the base of the kit. A small tapered shade finishes it. The mistake to avoid is impatience: my first bottle still had droplets inside and they fogged the glass for weeks, so leave it upside down overnight to drain fully. A row of three in different coloured glass looks stunning on a sideboard.
Materials: Wine bottle, bottle lamp kit, small tapered shade | Cost: ~$7-11 | Time: 20 minutes
8. Fabric Scrap Drum Lampshade
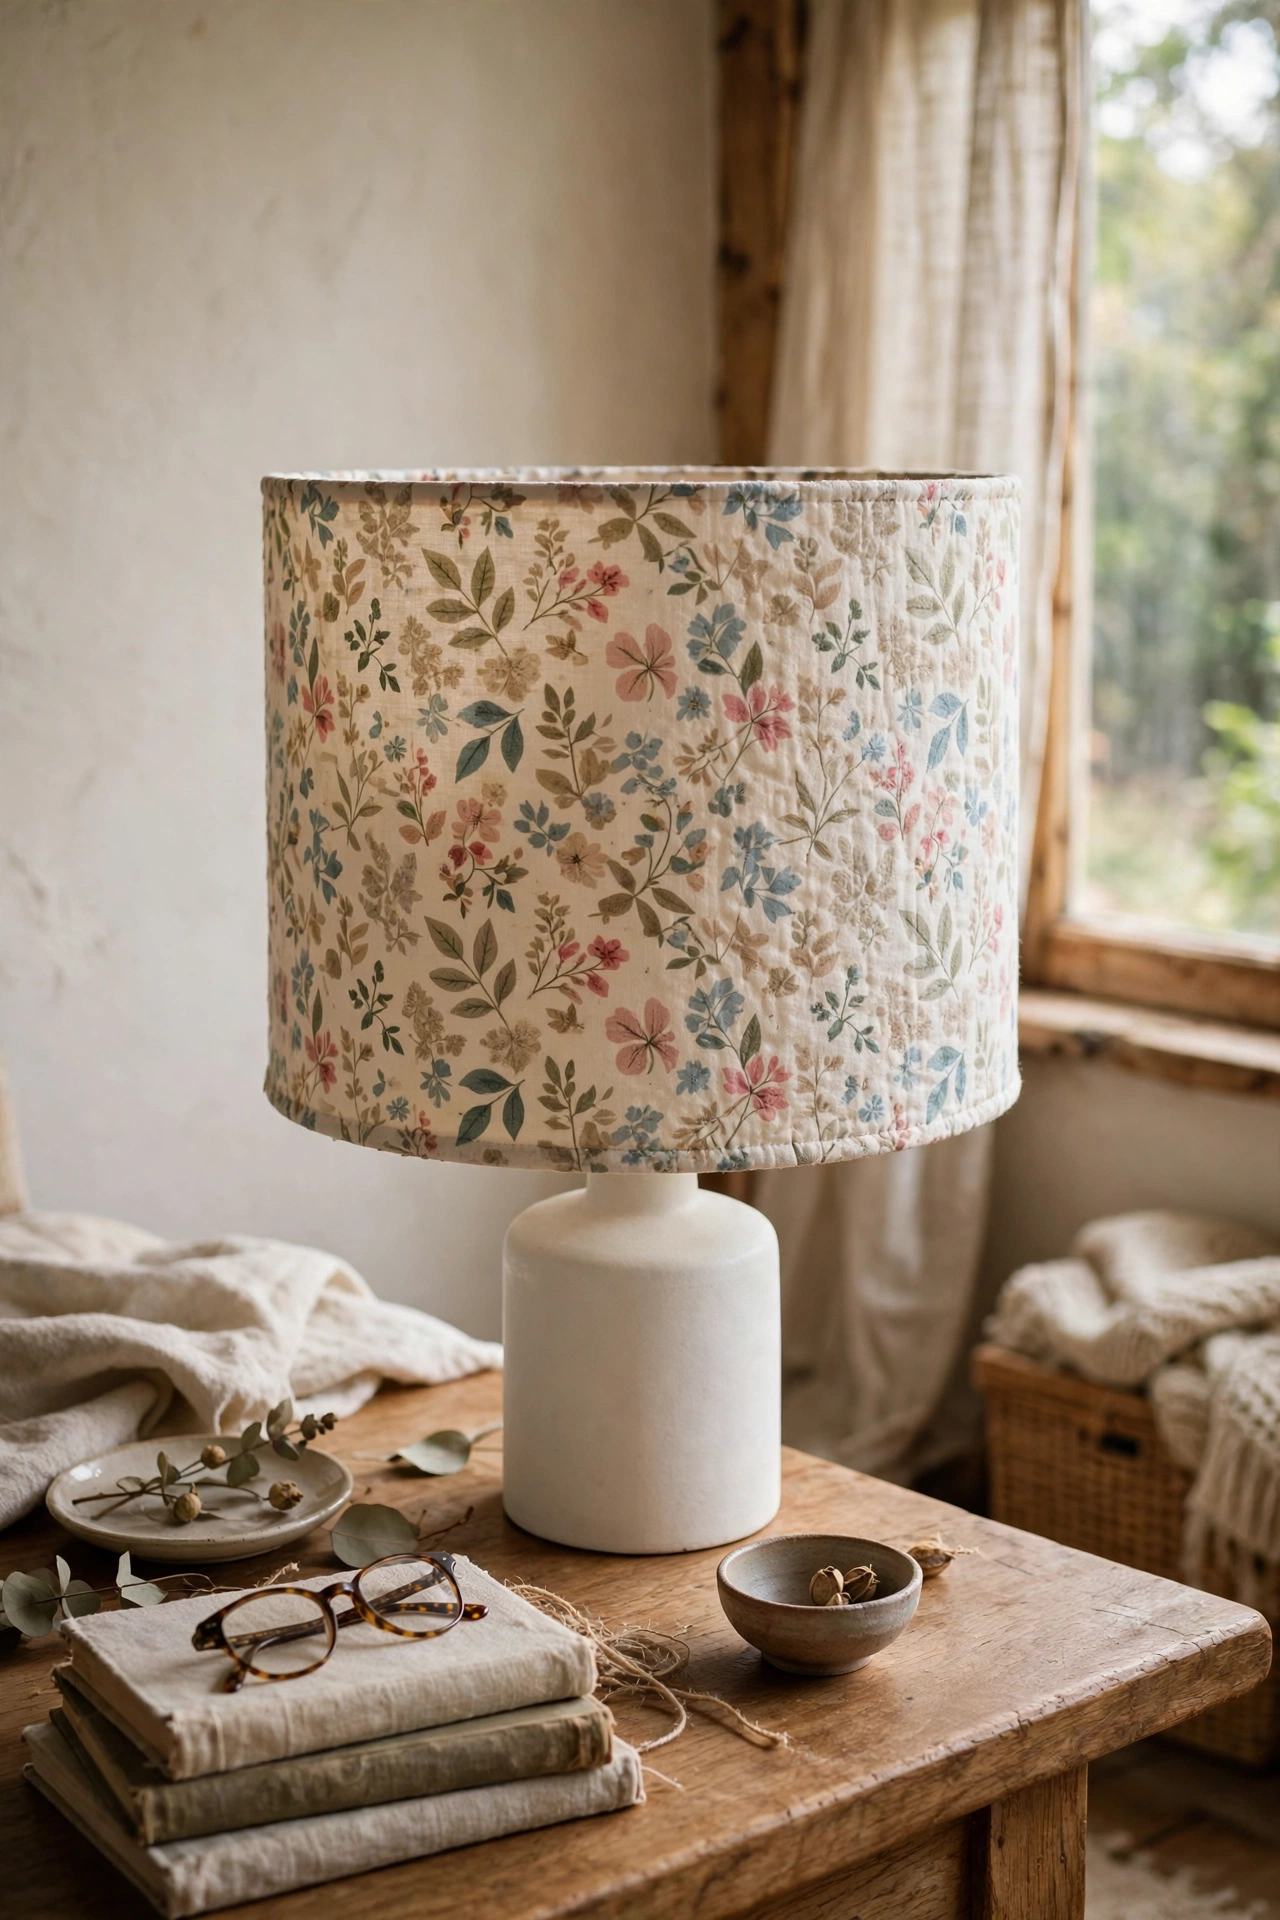
Self-adhesive lampshade panels let you make a professional drum shade from any fabric. I peeled the backing off a panel, smoothed a favourite floral fabric onto the sticky side, rolled it into a drum using the rings supplied, and fixed the seam with the sticky strip. It looks shop bought, honestly. The key is smoothing the fabric from the centre outward to avoid bubbles, which ruined my first attempt and left a permanent wrinkle. Choose a medium-weight cotton so the light glows through softly, and pair the finished shade with a simple base from (see also: 17-thrifted-bedroom-decor-worth-every-penny/) for a fully thrifted lamp.
Materials: Self-adhesive drum shade kit, cotton fabric, scissors | Cost: ~$8-12 | Time: 30 minutes
9. Embroidery Hoop Pendant Shade
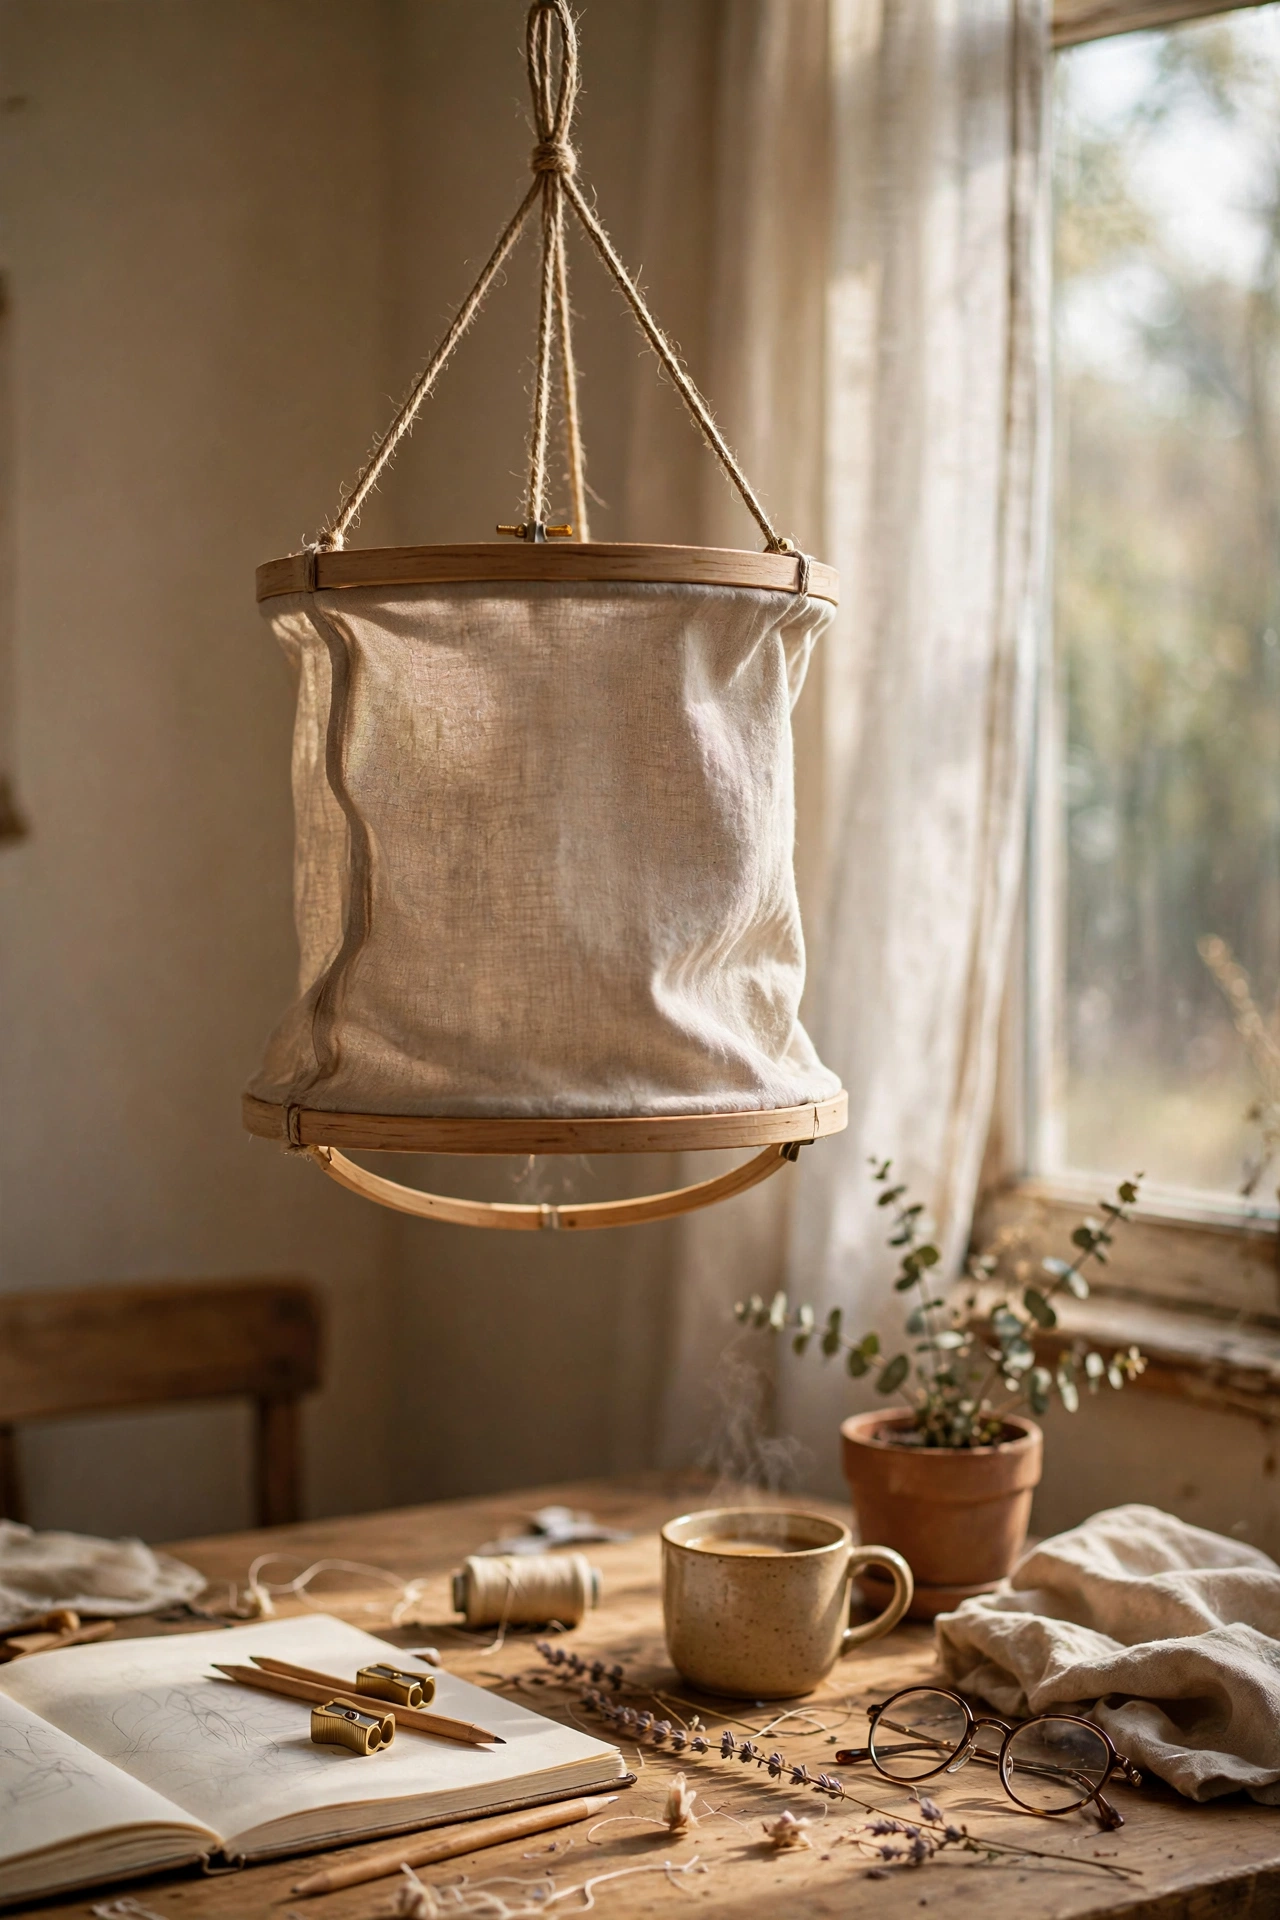
Two embroidery hoops and a length of fabric make a soft drum pendant with real charm. I stretched fabric between a large hoop at the bottom and a smaller one at the top, trimming the excess and securing it with hot glue inside the hoops, then threaded a pendant cord through the centre. It hangs over my daughter’s desk and throws a lovely diffused light. My first version sagged because the fabric was too heavy, so stick to light cotton or linen. Keep the fabric a few centimetres from the bulb and always use an LED, and you have a nursery-worthy pendant for pocket money.
Materials: 2 embroidery hoops, light cotton fabric, hot glue, pendant cord kit, LED bulb | Cost: ~$7-11 | Time: 40 minutes
10. Beaded Fringe Table Lamp Shade
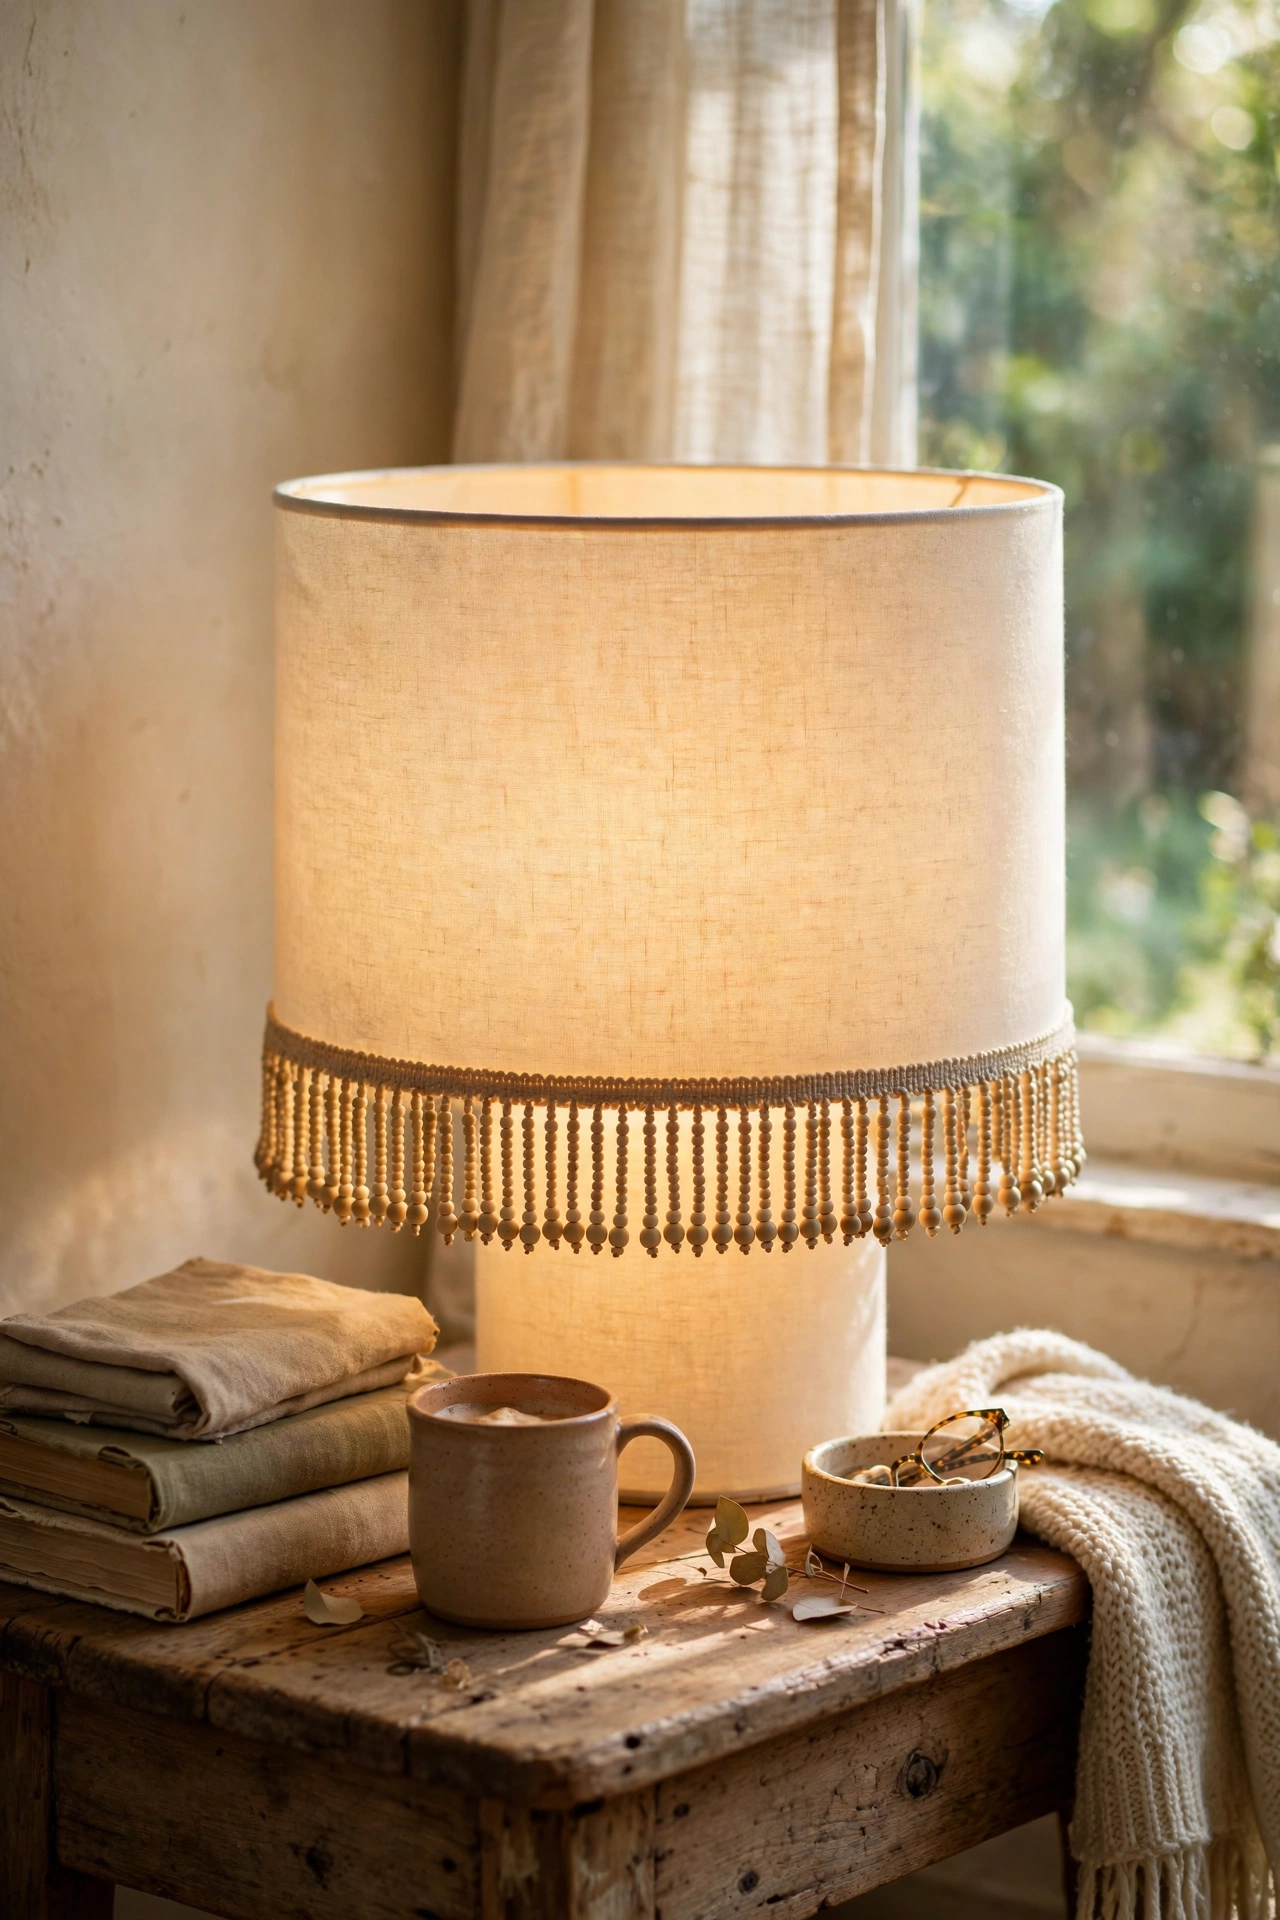
Glueing beaded trim around the bottom edge of a plain shade gives instant vintage glamour. I bought a plain cream drum shade and a metre of beaded fringe from the craft store, ran hot glue along the bottom rim, and pressed the trim on in sections, keeping it level as I went. The beads catch the light beautifully when the lamp is on. My first attempt used too much glue and it seeped through onto the beads, so use a thin line and let each section set before moving on. It is the fastest transformation on this list and looks far more expensive than it is.
Materials: Plain drum shade, beaded fringe trim, hot glue gun | Cost: ~$6-10 | Time: 30 minutes
11. Tin Can Punched Lantern Lamp
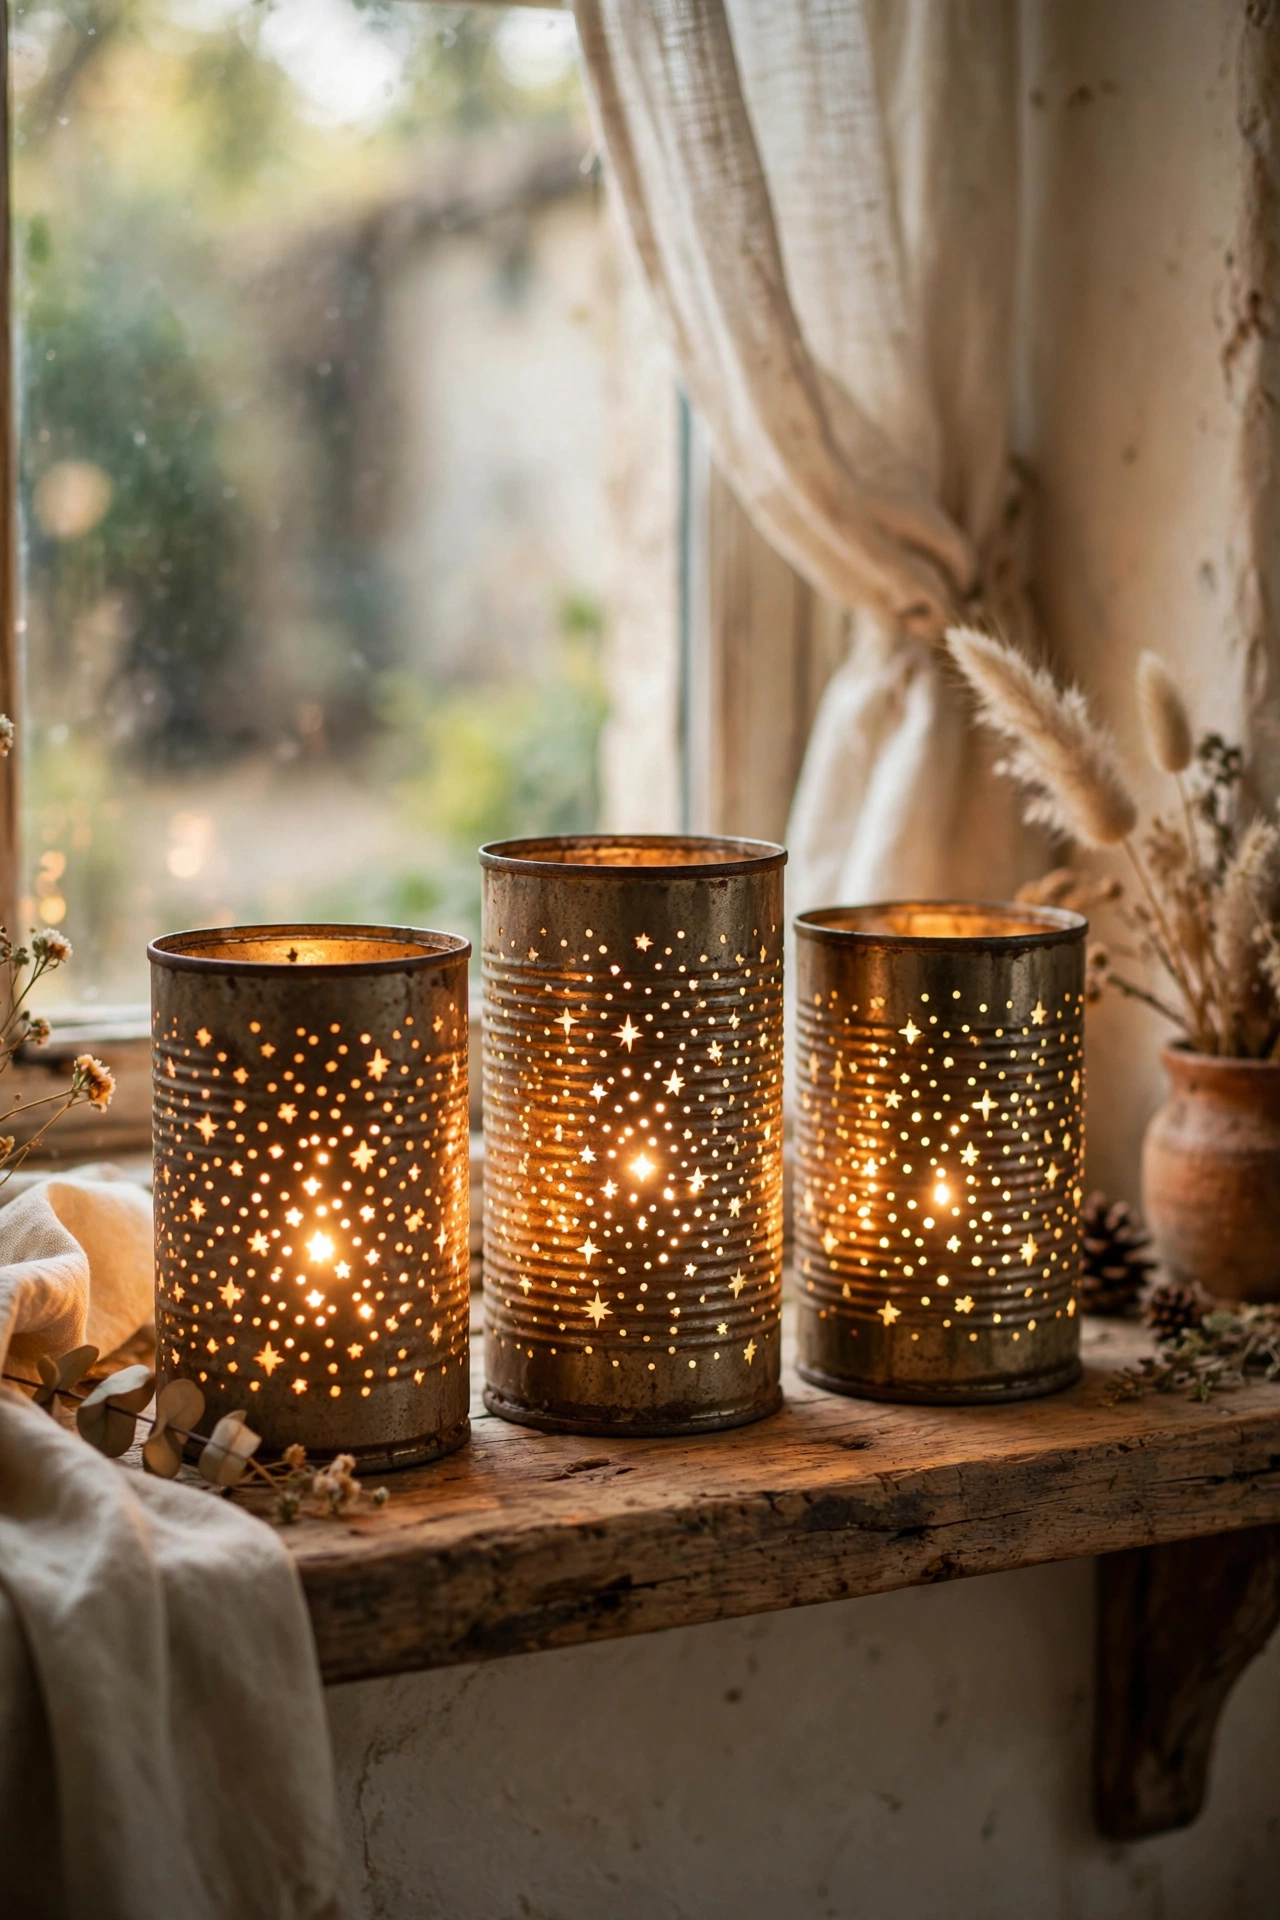
Punched tin cans throw magical starry light and cost nothing if you eat tinned tomatoes. I filled a clean can with water and froze it solid, which stops the metal denting, then hammered a nail through in a simple dot pattern and let it thaw. A short lamp kit sits inside with an LED bulb, and the light spills through the holes in constellations. My first can dented badly because I skipped the freezing step, so do not skip it. Sand any sharp edges inside, and cluster three cans of different heights on a shelf for maximum effect.
Materials: 3 clean tin cans, hammer, nail, short lamp kit, LED bulbs | Cost: ~$6-10 | Time: 1 hour plus freezing
12. Paper Lantern Cluster Pendant
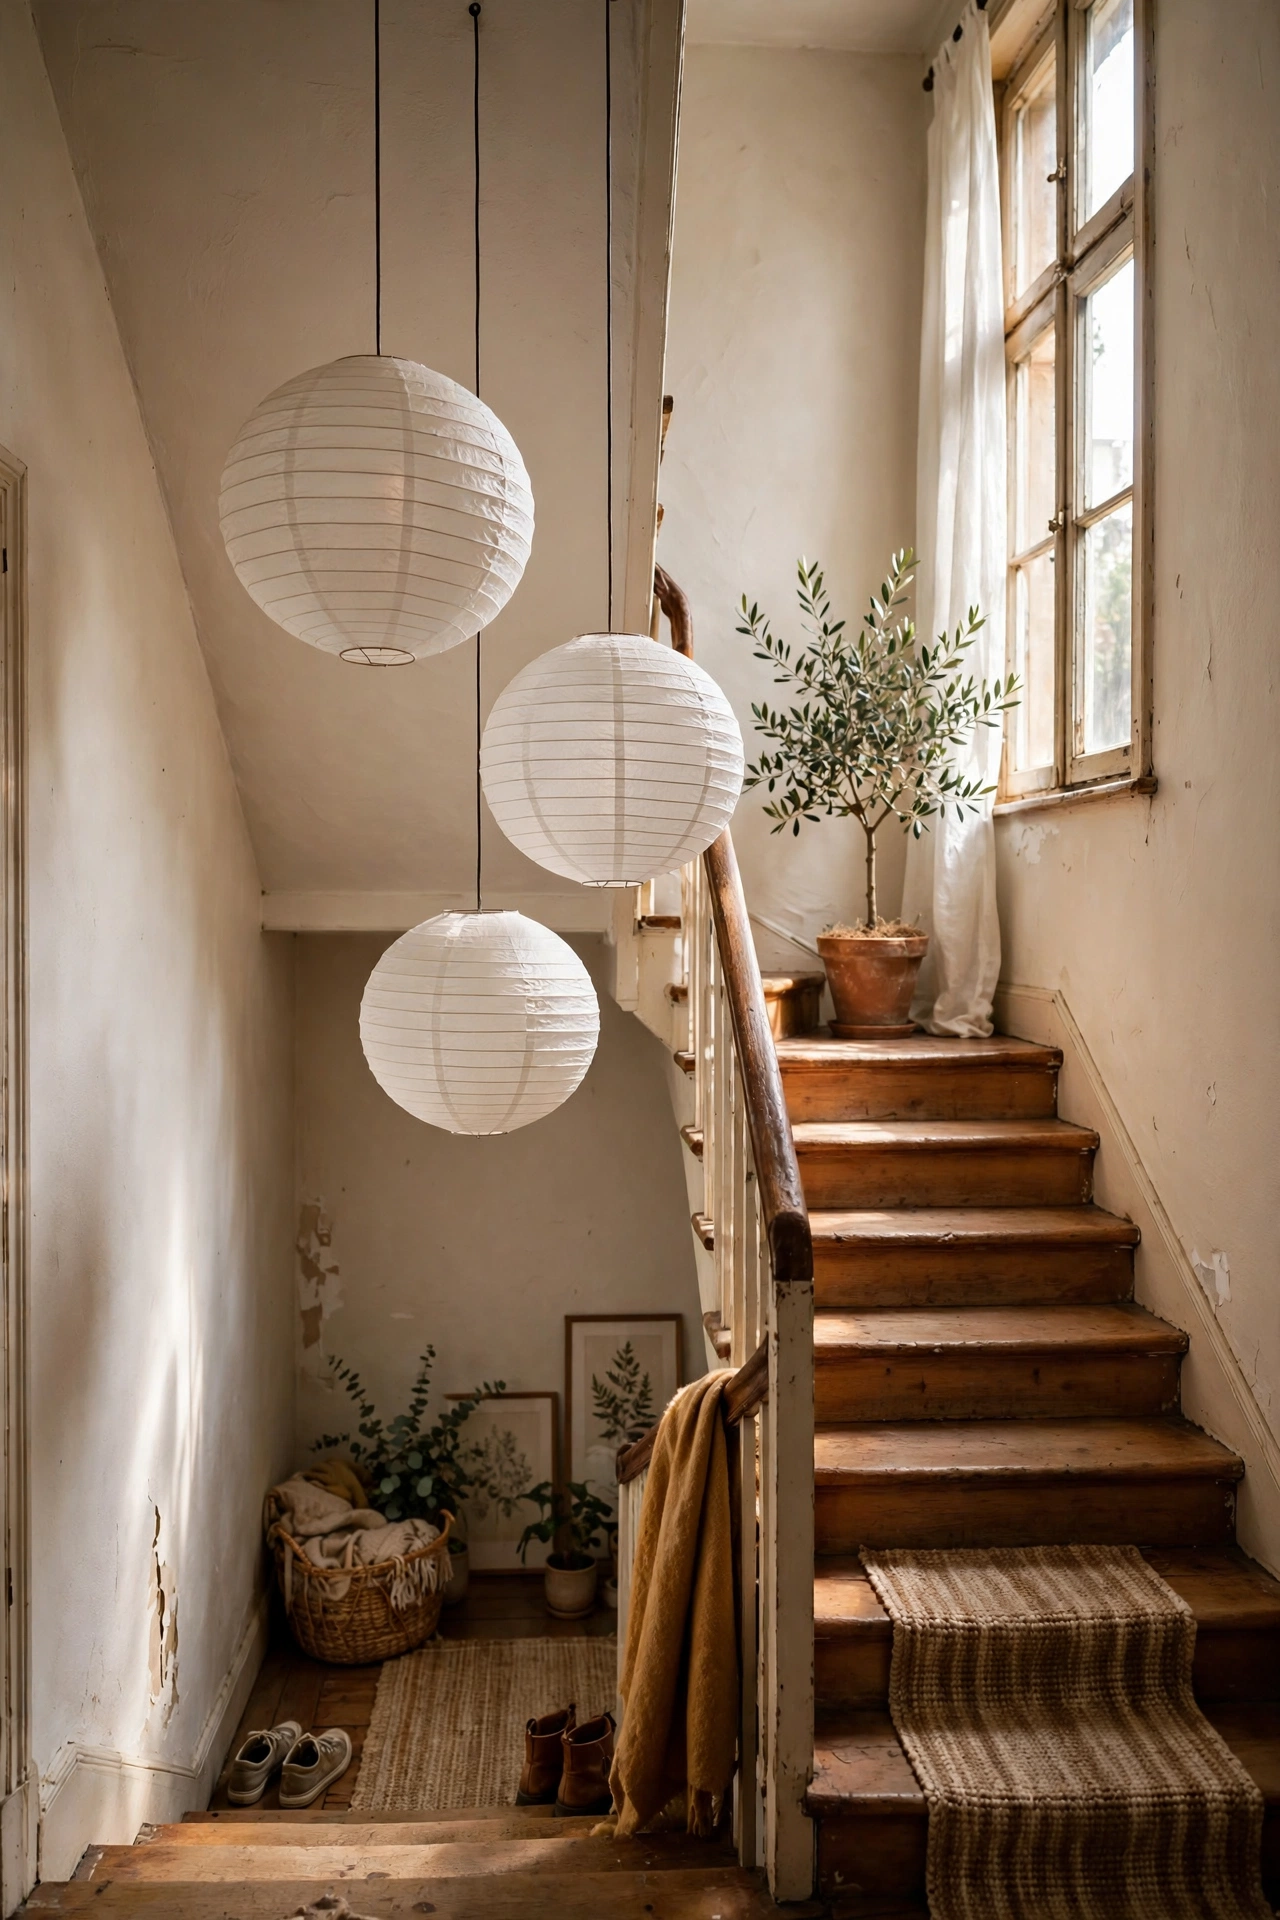
Three paper lanterns hung at different heights from one ceiling point look like a proper lighting installation. I bought plain white lanterns in three sizes, expanded each over its wire frame, and hung them from a single pendant cord using thin clear fishing line at staggered drops of about 15cm apart. The cluster hangs in my stairwell and guests always assume it cost a fortune. My first attempt had them all at the same height, which looked flat, so vary the drops. Use LED bulbs only, and keep the lanterns away from anything that gets hot.
Materials: 3 paper lanterns in varied sizes, pendant cord kit, fishing line, LED bulbs | Cost: ~$8-12 | Time: 30 minutes
13. Colander Pendant Light for the Kitchen
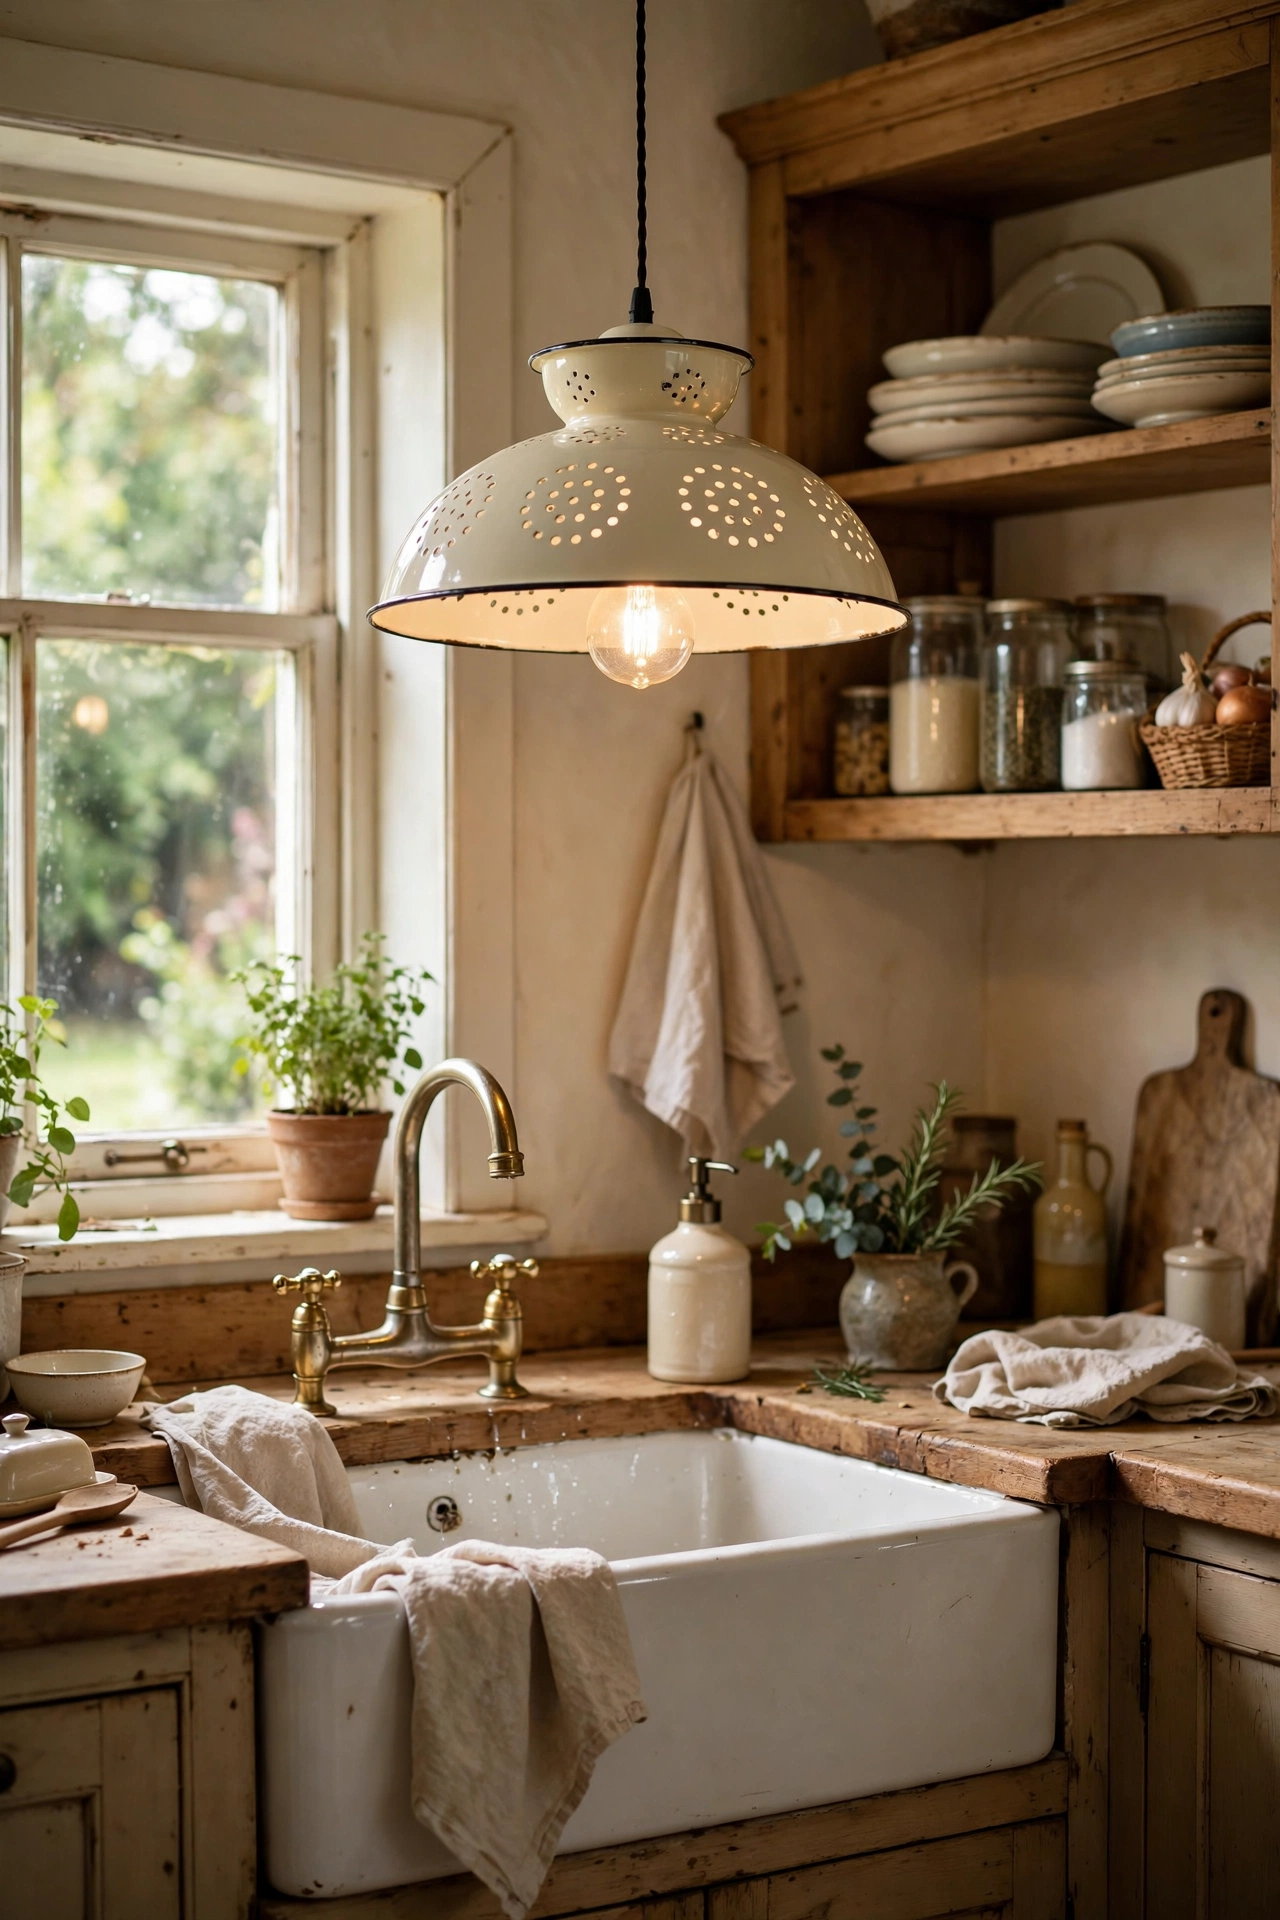
A metal colander makes a brilliant kitchen pendant, and the holes are already there. I took an enamel colander, threaded a pendant cord kit up through the base hole area, enlarging one hole slightly with pliers so the cord passed through neatly, and hung it over the sink. The light streams through the holes in the loveliest pattern. My first colander was aluminium and looked cheap, so I swapped to a cream enamel one and it instantly looked intentional. Choose a colander with a flat-ish base so it hangs level, and wipe it down before hanging since kitchen grease shows.
Materials: Enamel colander, pendant cord kit, pliers, LED bulb | Cost: ~$7-11 | Time: 25 minutes
14. Painted Ceramic Vase Lamp
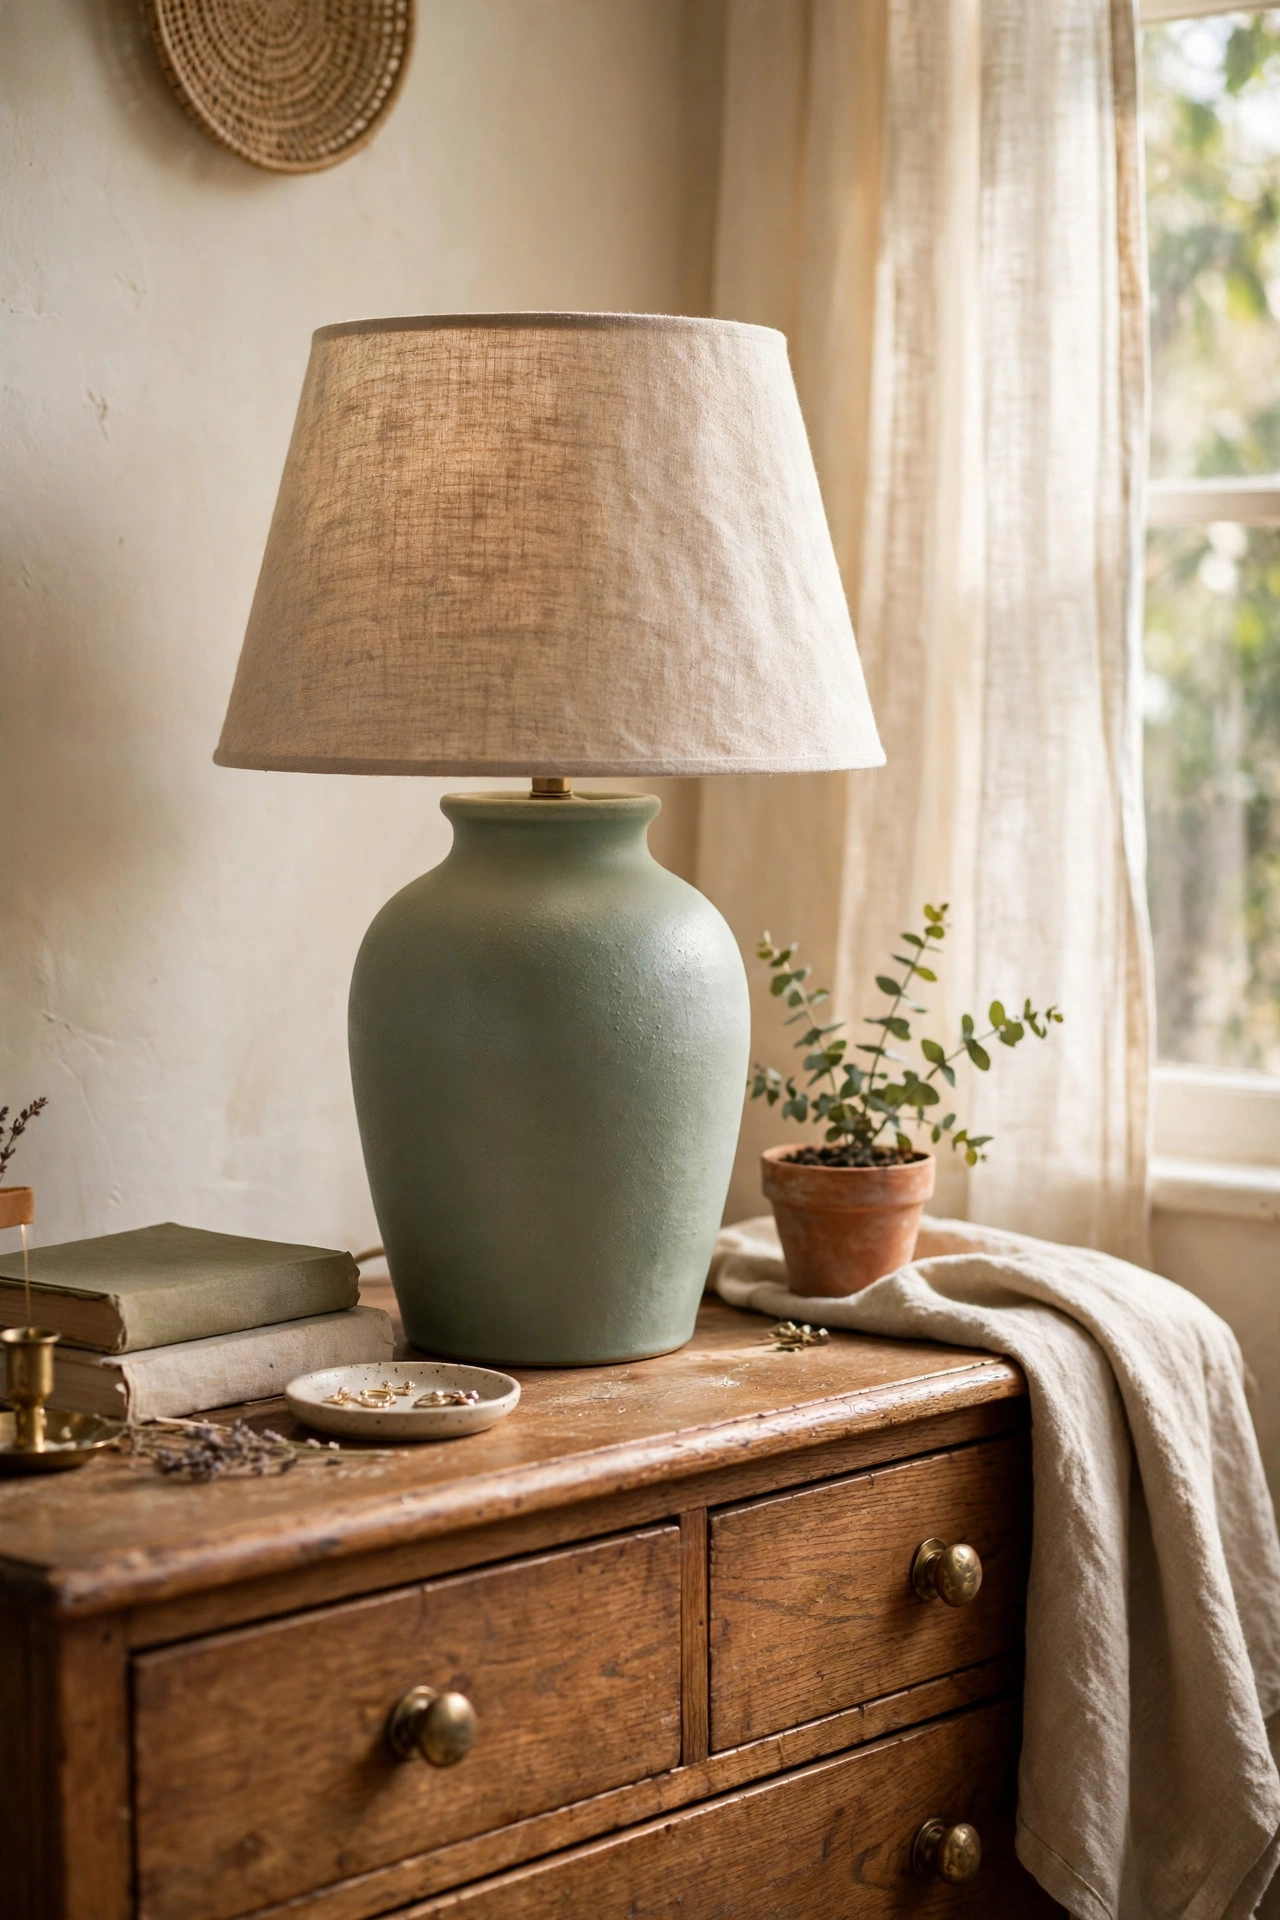
A charity shop vase becomes a lamp base with one kit and zero skill. I found a squat ceramic vase, cleaned it thoroughly, and fitted a bottle lamp kit through the neck following the diagram, with the cord tucked neatly out of the rubber base. I painted the vase first in matte sage, two thin coats, and it looks like a high street designer piece. The mistake I made on round one was choosing a vase with too narrow a neck for the kit, so take the kit with you when you shop or measure the neck at home first. Top with a linen shade and enjoy.
Materials: Ceramic vase with wide neck, bottle lamp kit, spray paint, shade | Cost: ~$9-14 | Time: 40 minutes plus drying
15. Craft Stick Geometric Table Lamp
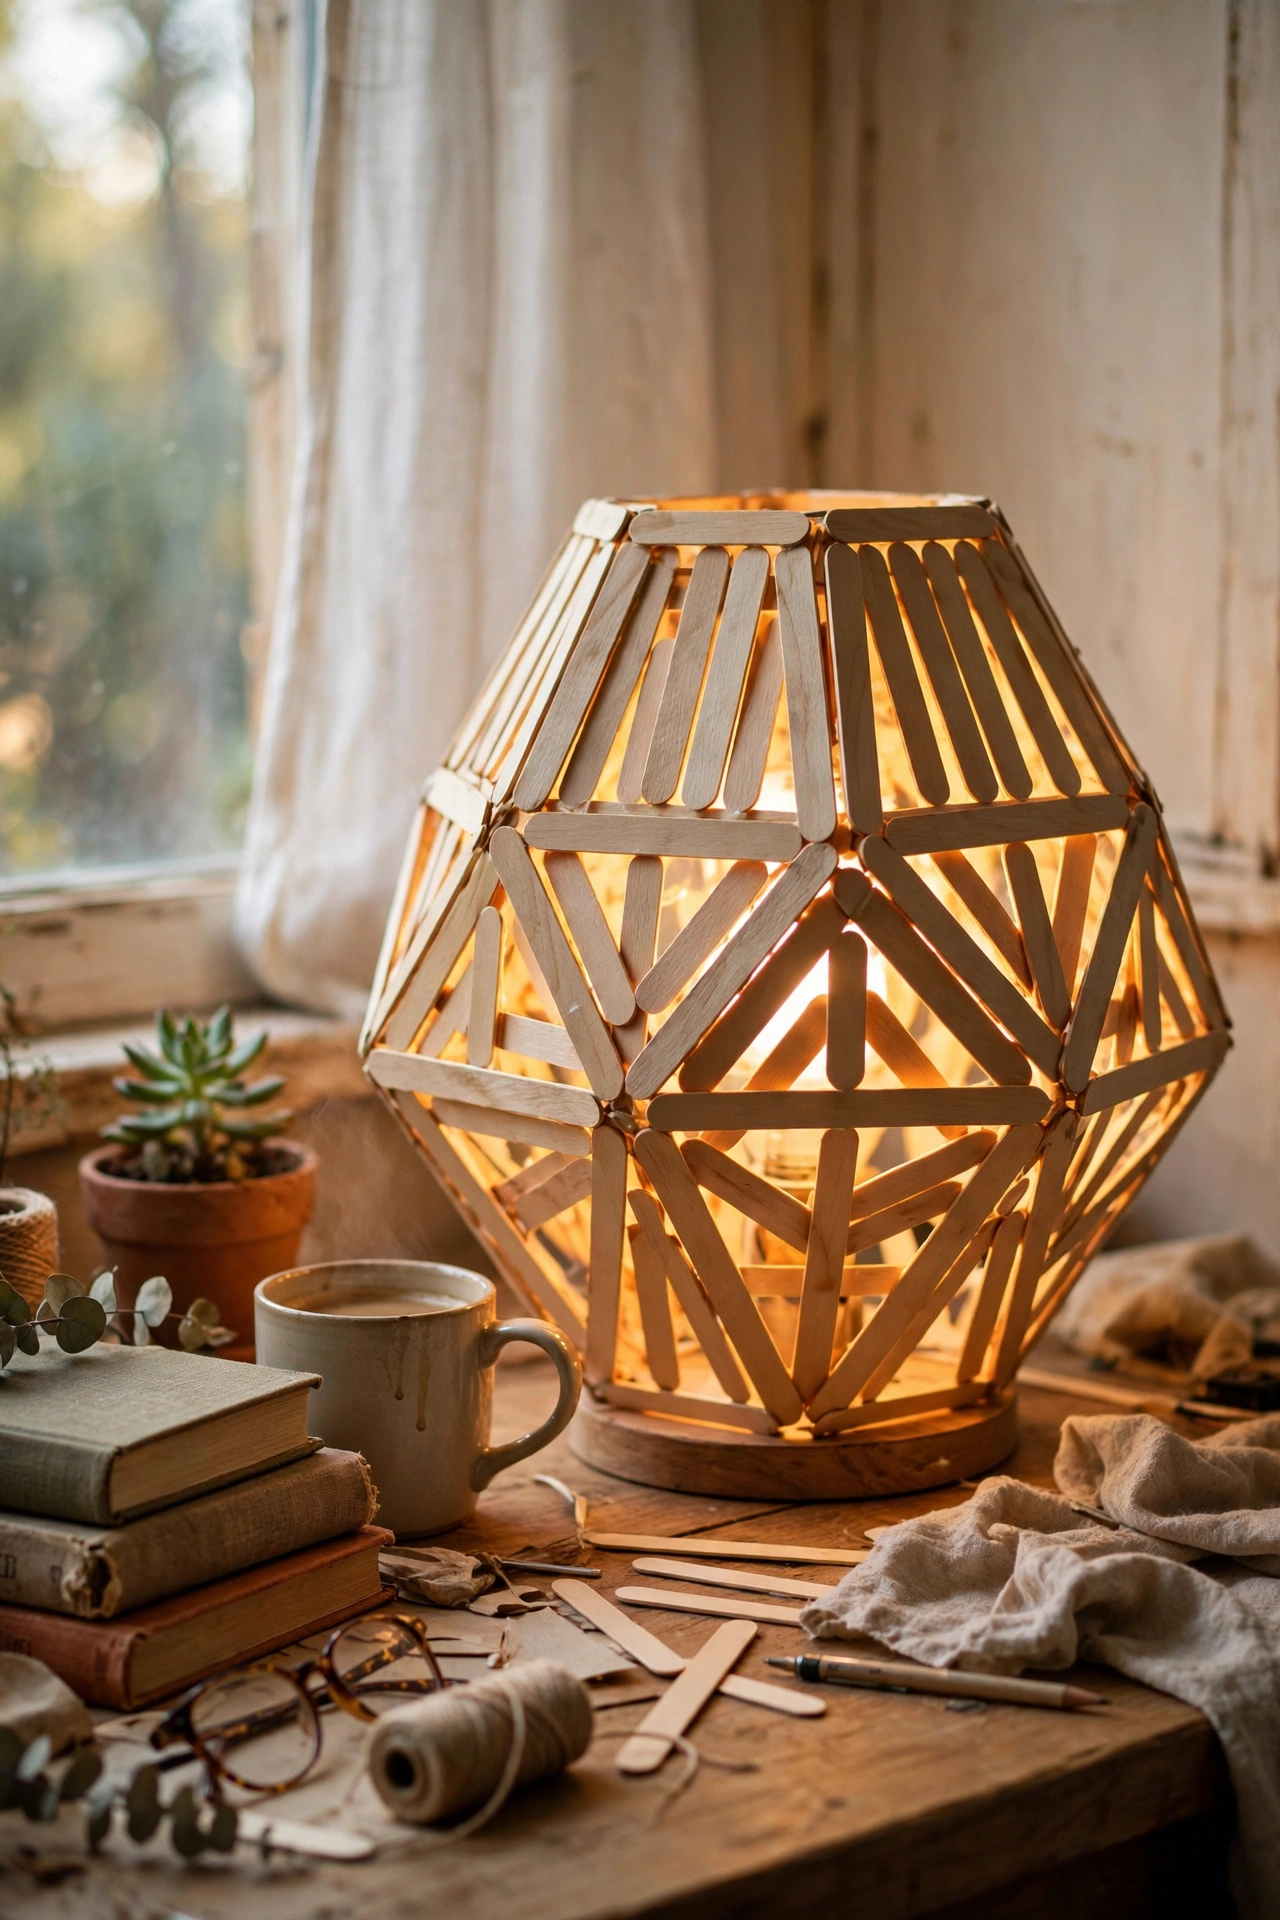
Glueing craft sticks into a geometric shade looks far harder than it is. I built two identical squares of sticks, joined them with four angled corner sticks to make a tapered box shape, and glued the whole thing with wood glue, clamping with rubber bands while it dried. A short lamp kit sits underneath with the shade resting over it on small feet. My first shade collapsed because I rushed the glue and removed the bands too early, so leave it a full hour. Stain the sticks with tea for a warm aged tone that looks genuinely expensive.
Materials: Craft sticks, wood glue, rubber bands, short lamp kit, LED bulb | Cost: ~$6-10 | Time: 1.5 hours including drying
16. Pleated Paper Lampshade
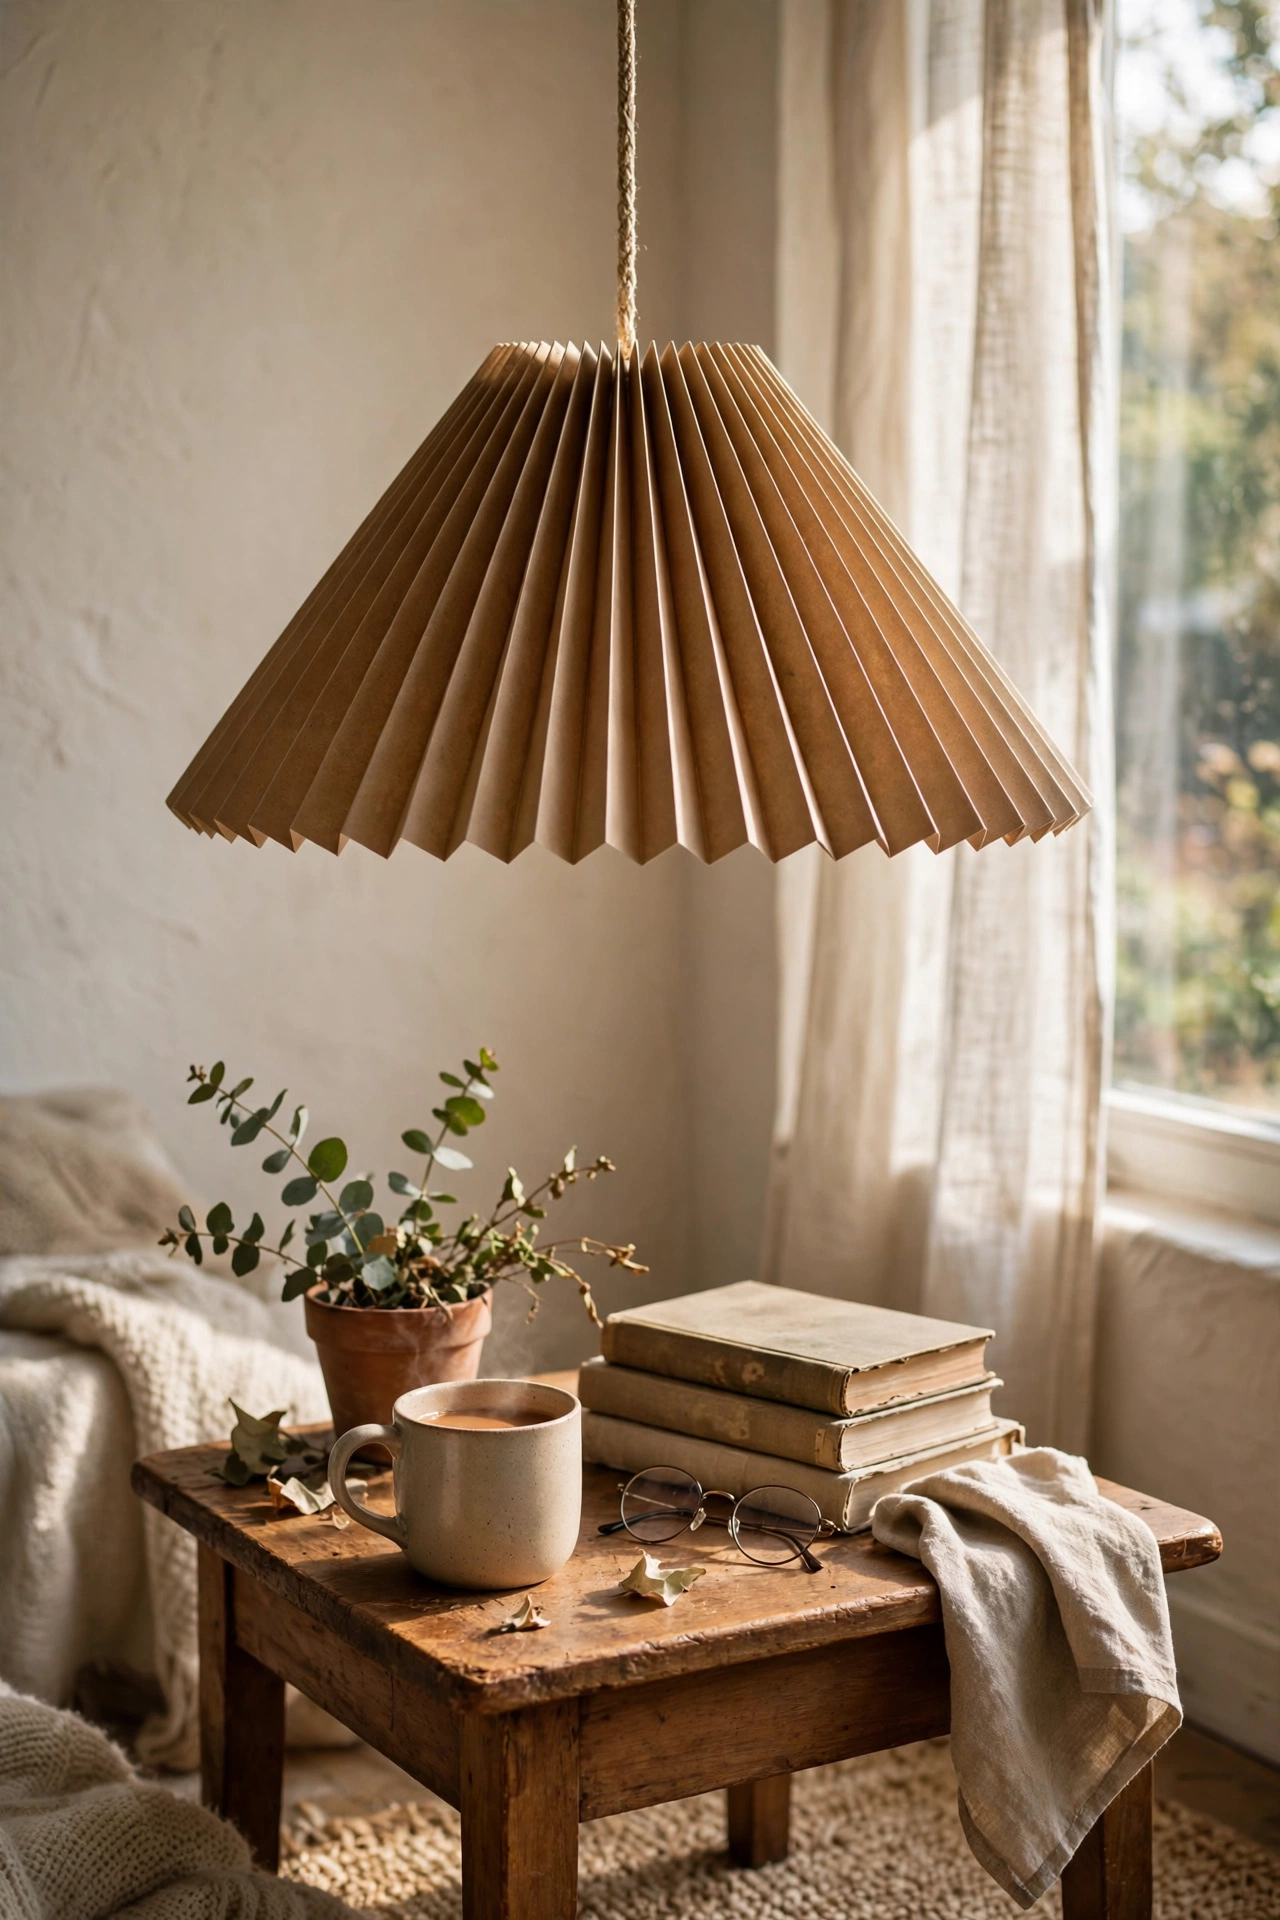
A pleated paper shade looks like origami lighting and folds up in an evening. I cut a long strip of sturdy kraft paper, folded it back and forth in even 3cm accordion pleats using a ruler to score each fold, then joined the ends and threaded cord through the top and bottom pleats to cinch it into a drum around two wire rings. The pleats glow beautifully with an LED inside. My first strip was too short and the seam landed awkwardly at the front, so measure the full circumference plus 5cm overlap before you start folding. Hang it as a pendant over a side table.
Materials: Kraft paper roll, 2 wire lampshade rings, ruler, cord, pendant kit, LED bulb | Cost: ~$7-11 | Time: 1 hour
17. Glass Demijohn Floor Lamp
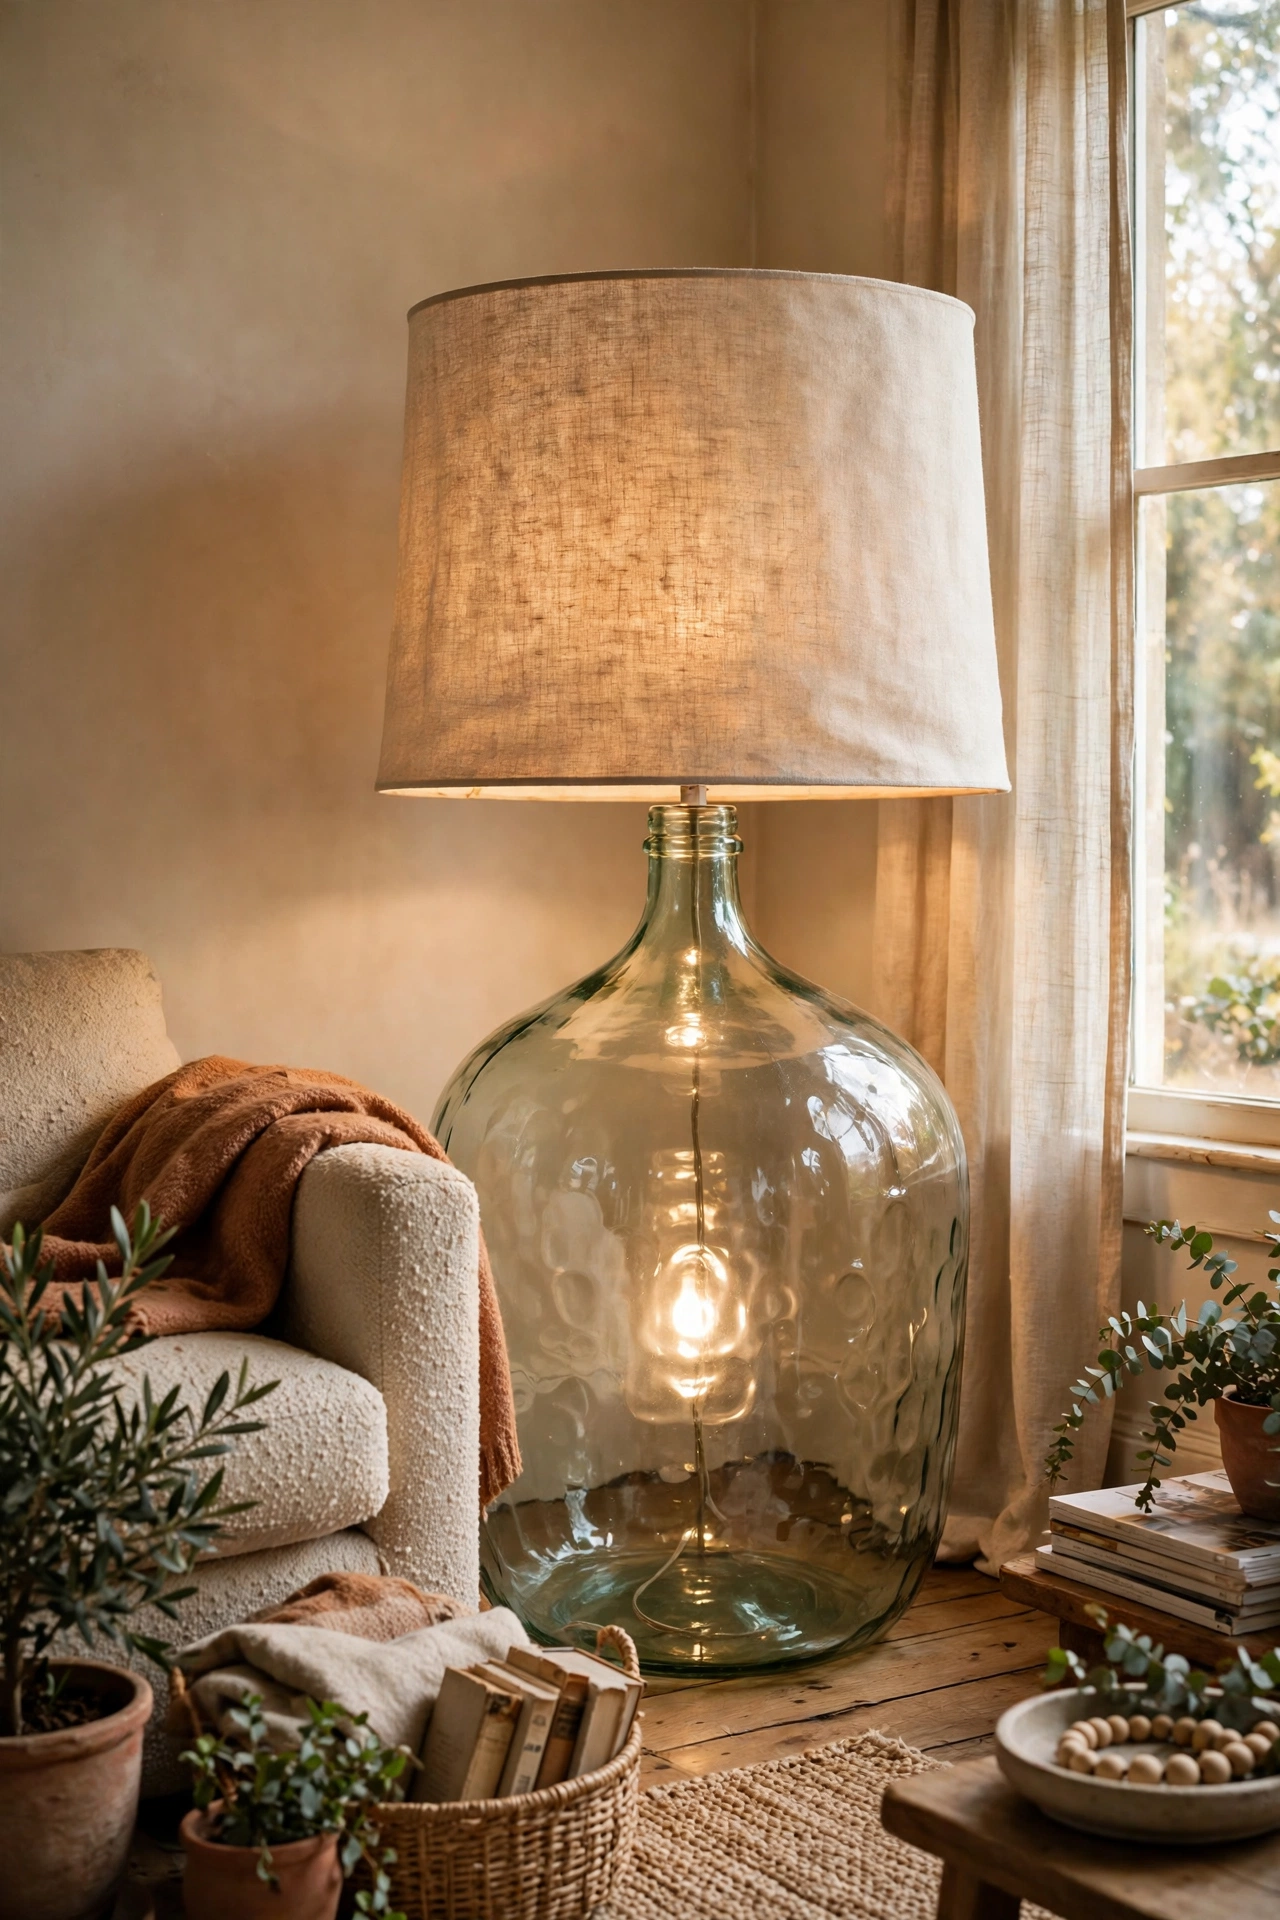
A big glass demijohn with a tall shade makes a floor lamp with real presence. I found a demijohn at a car boot sale, fitted a bottle lamp kit with a long cord through the neck, and topped it with an oversized linen drum shade. The glass magnifies the glow and the whole thing looks sculptural in the corner of my living room. The lesson I learned is about stability: my first version sat directly on the floor and wobbled on uneven boards, so I set it on a small round wooden board for a steady base. It is the most complimented lamp I own.
Materials: Glass demijohn, bottle lamp kit with long cord, oversized drum shade, round wooden board | Cost: ~$12-18 | Time: 30 minutes
18. Mini Concrete Lamp Base
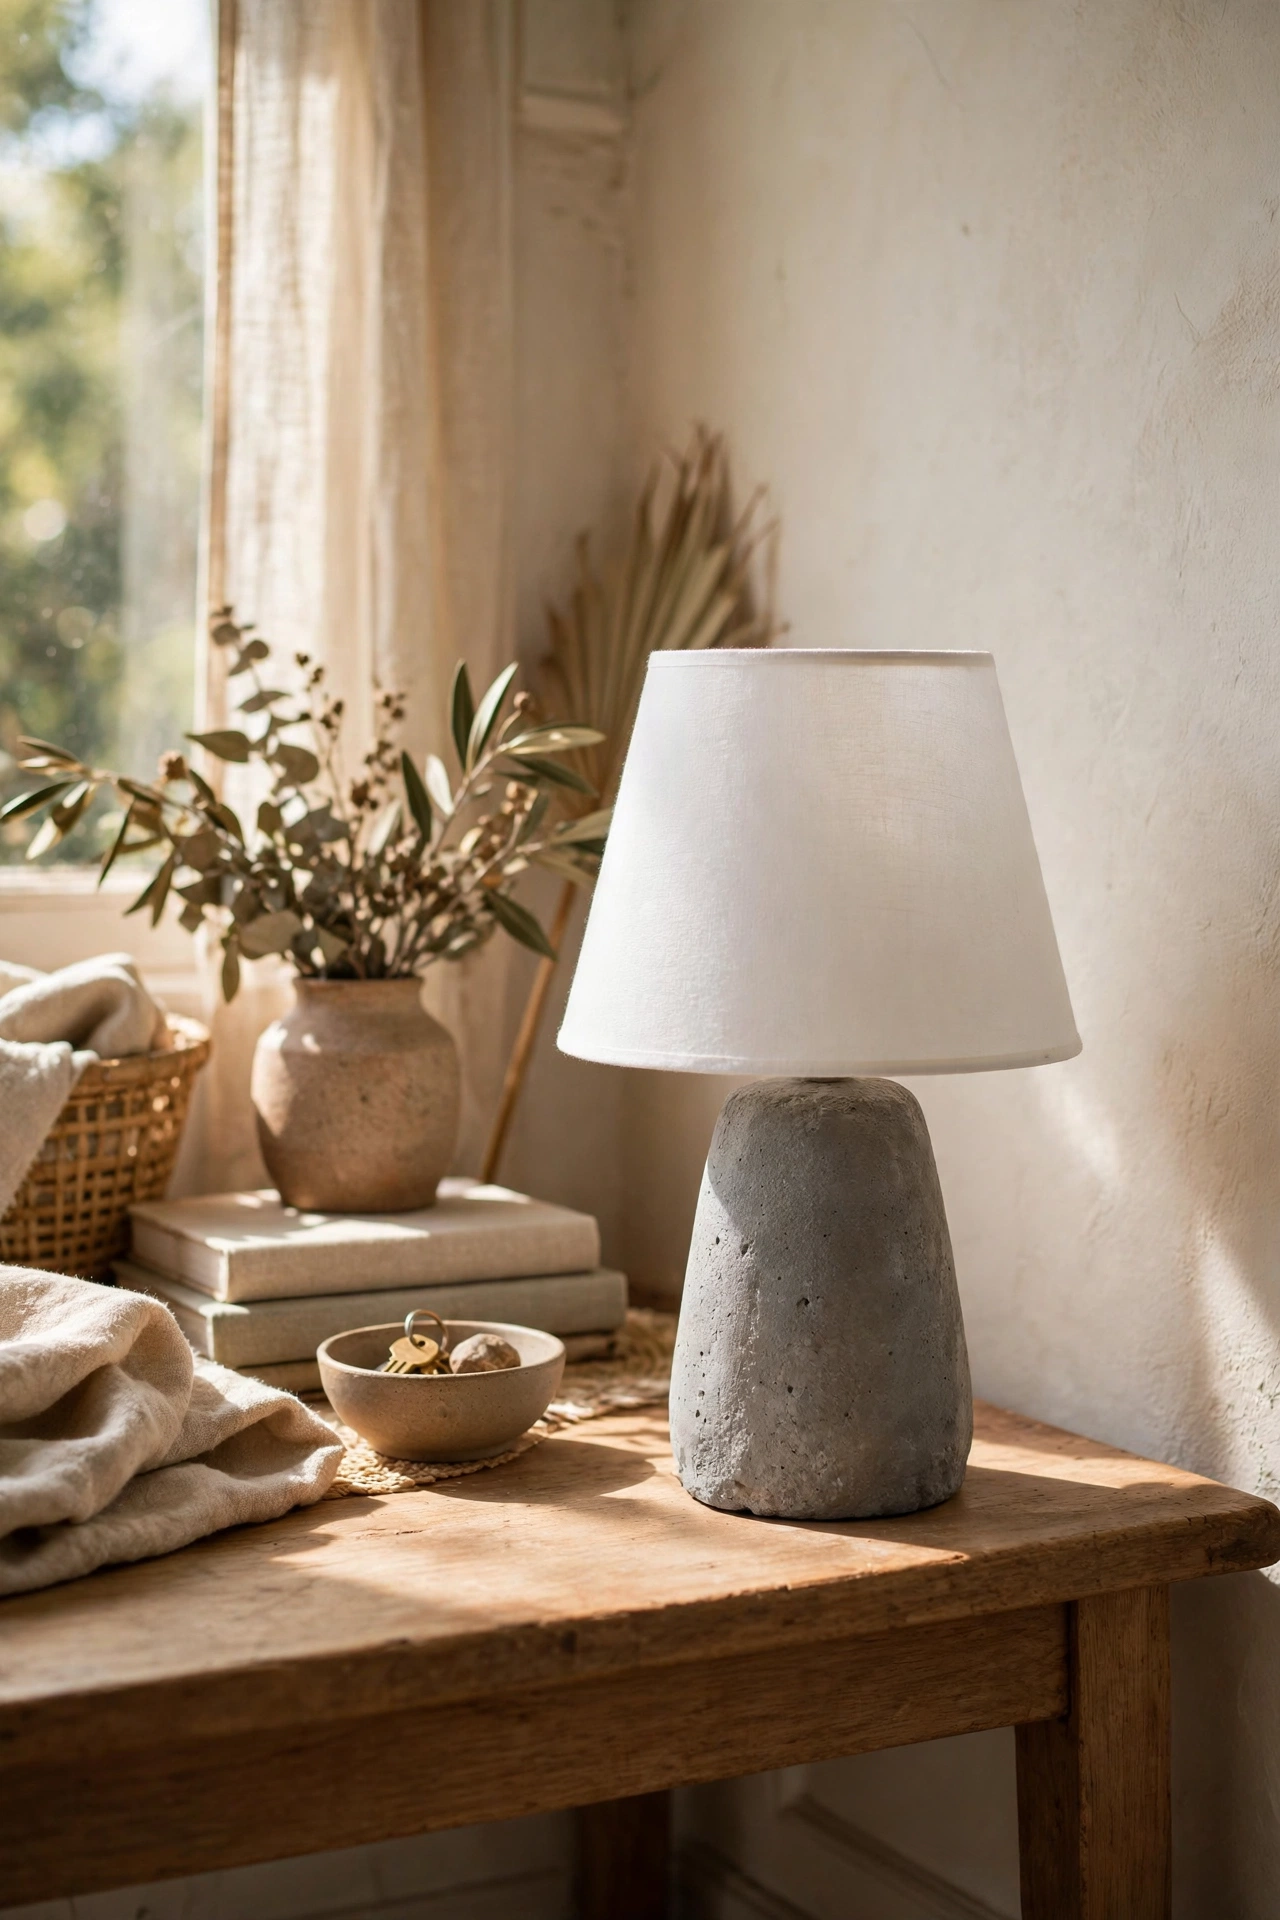
A small concrete base gives a lamp satisfying weight and a modern edge. I mixed a bag of quick-set concrete, poured it into a plastic food container lined with cling film, and pushed a short section of copper pipe into the centre as a channel for the lamp rod. Once set, I popped it out, sanded the edges smooth, and threaded a lamp kit through the pipe. My first pour cracked because I mixed it too dry, so follow the water ratio on the bag exactly and tap the mould to release air bubbles. Seal it with clear wax to stop dust.
Materials: Quick-set concrete, plastic container, cling film, copper pipe offcut, lamp kit, shade | Cost: ~$10-14 | Time: 1 hour plus 24 hours curing
19. Wooden Bead Table Lamp
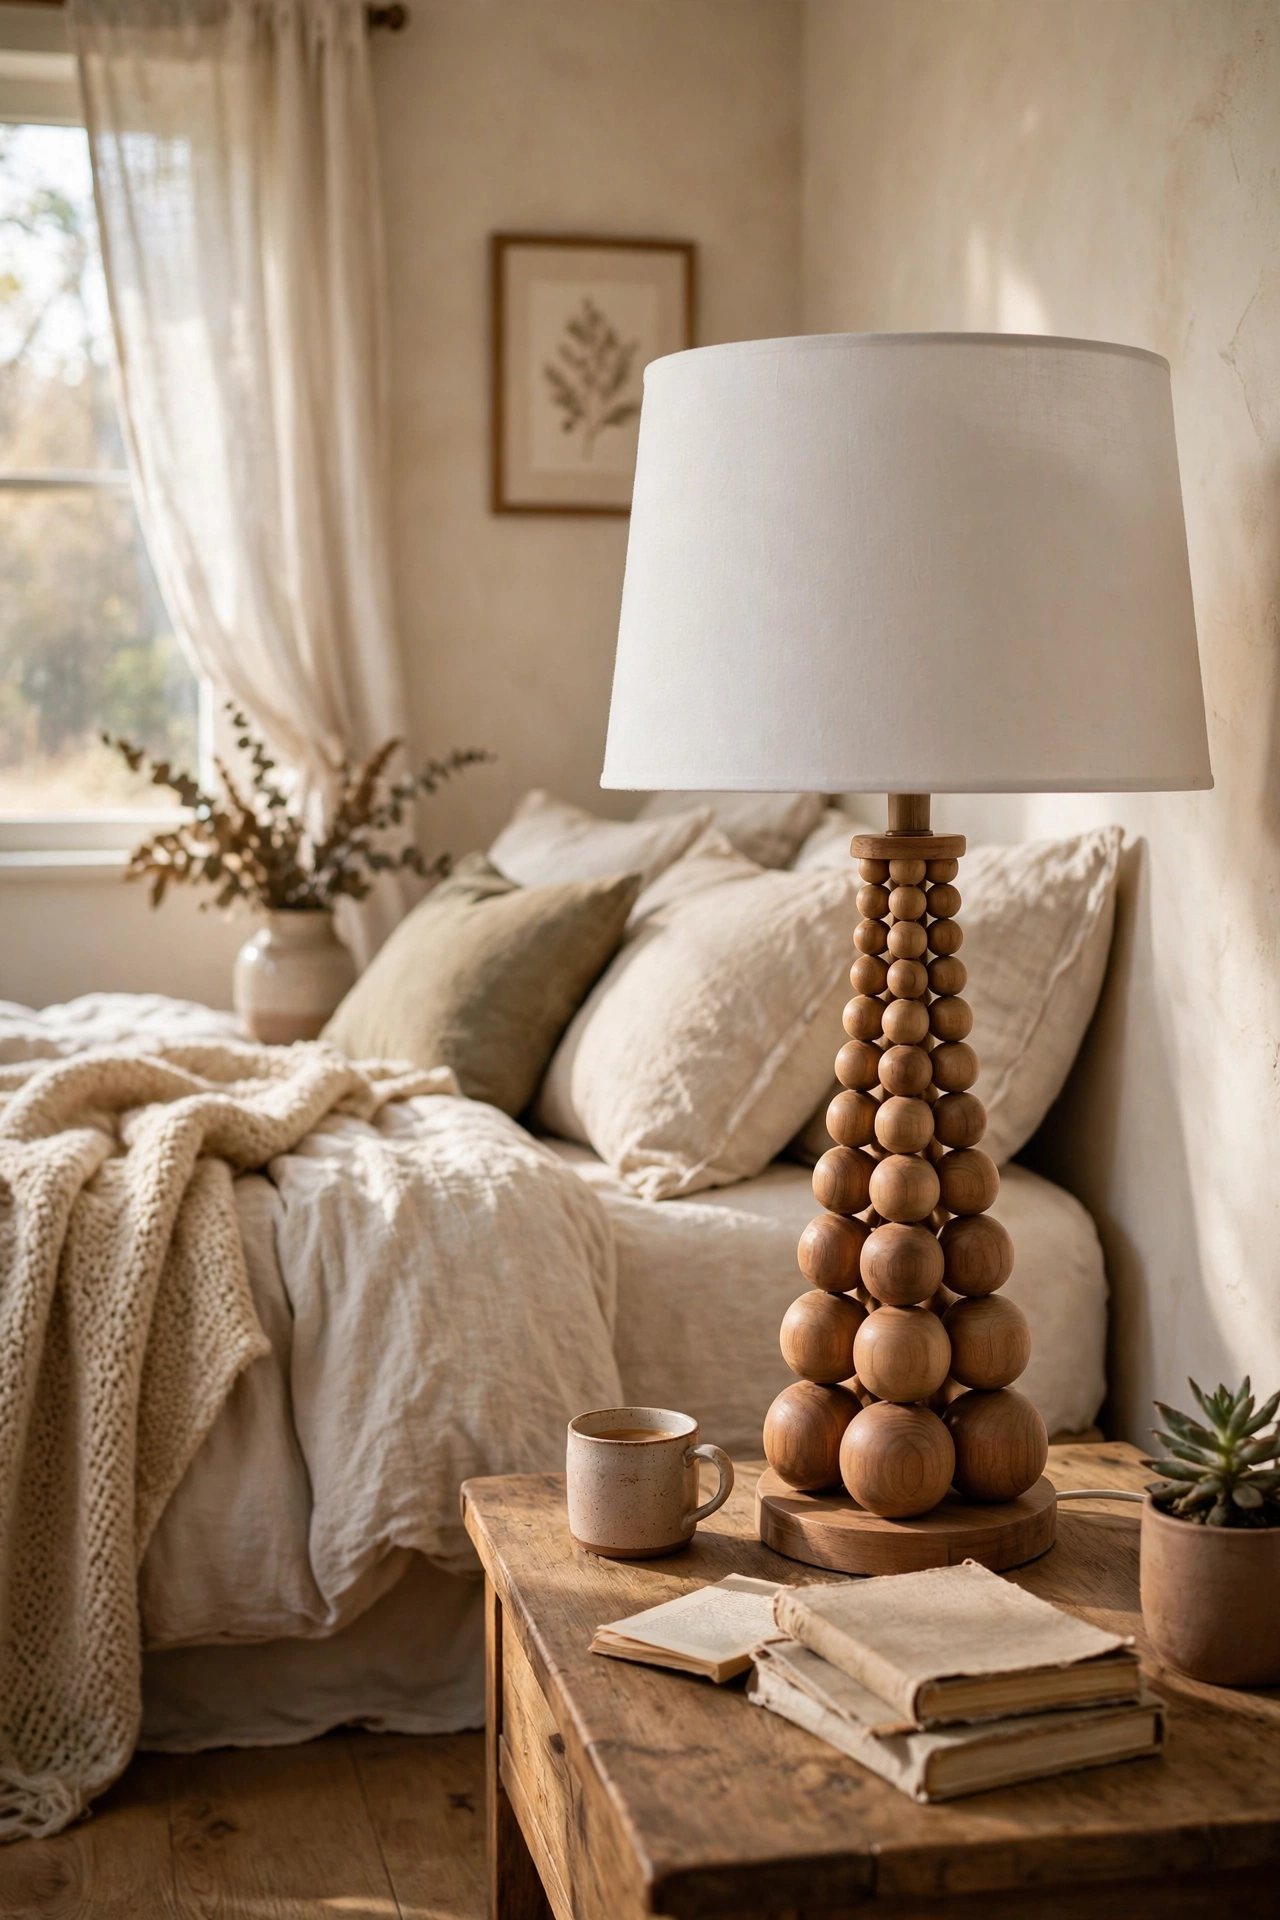
Threading wooden beads onto a lamp rod makes a base with lovely Scandinavian texture. I bought two bags of natural wooden beads in mixed sizes, threaded them onto the rod of a lamp kit in a graduated pattern, large at the bottom tapering to small at the top, and secured them with the kit hardware. A white drum shade keeps it fresh. The fiddly bit is keeping the beads from spinning while you tighten, which defeated my first attempt, so wrap a strip of masking tape around the rod first for grip. It looks handmade in the best way and suits a calm bedroom. See (see also: 23-bedroom-decor-ideas-under-50-for-a-cozy-retreat/) for more calm-bedroom ideas.
Materials: Wooden beads in mixed sizes, lamp rod kit, masking tape, drum shade | Cost: ~$10-14 | Time: 45 minutes
20. Woven Seagrass Basket Floor Lamp
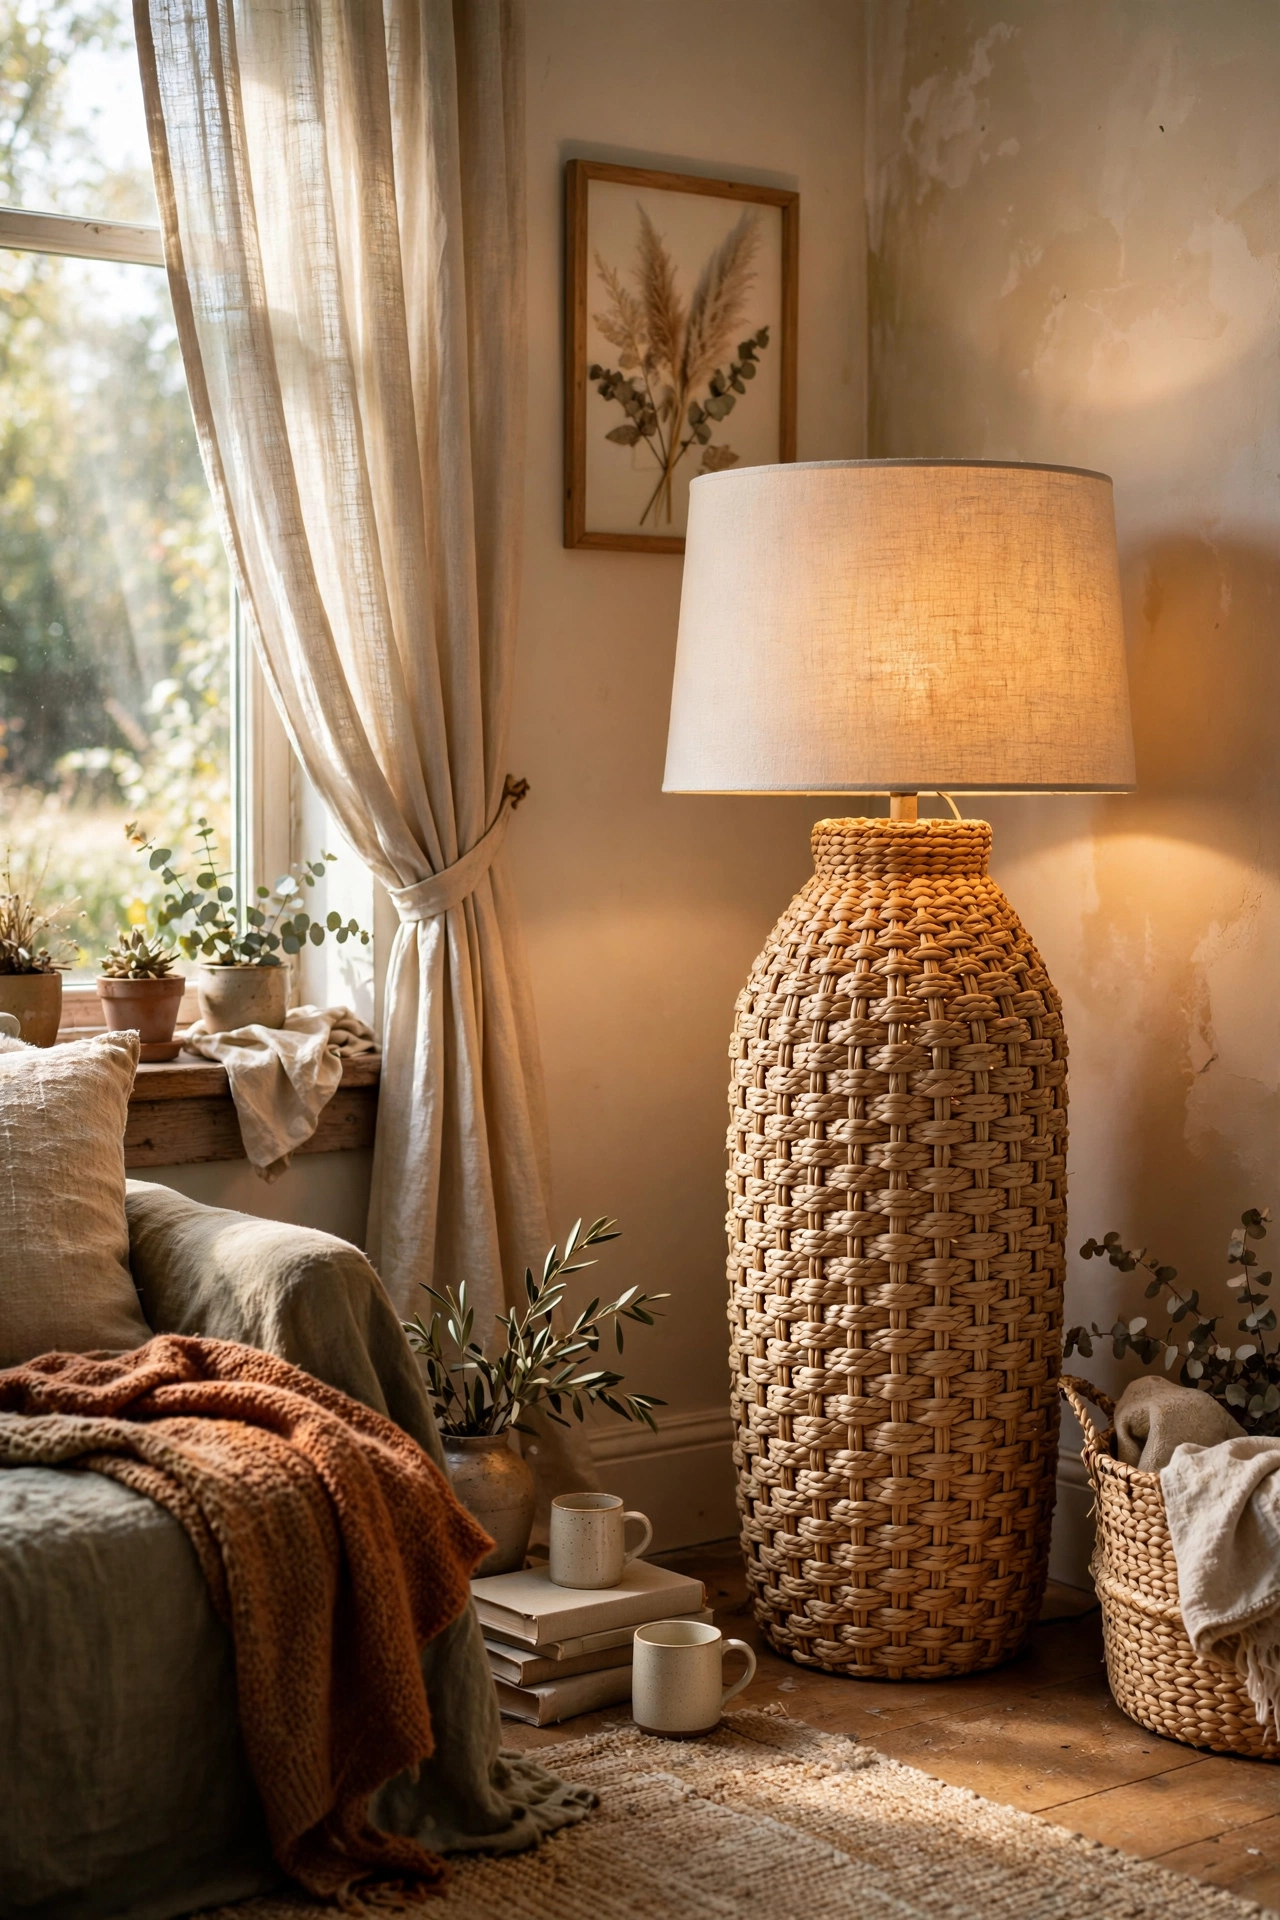
A tall seagrass basket hides a simple lamp kit and becomes a glowing floor lamp. I cut a small hole in the base of a tall lidded basket, threaded a lamp kit up through it, and set a linen drum shade on the harp above the basket rim. When lit, the weave glows with the loveliest texture. My first basket was too short and the shade sat awkwardly low, so choose one at least 50cm tall for proper proportions. It is lightweight, so keep it in a corner away from foot traffic, and the whole build takes under half an hour.
Materials: Tall seagrass basket with lid, lamp kit, drum shade, scissors | Cost: ~$12-16 | Time: 30 minutes
21. Rewired Thrift Lamp with a Brand New Shade
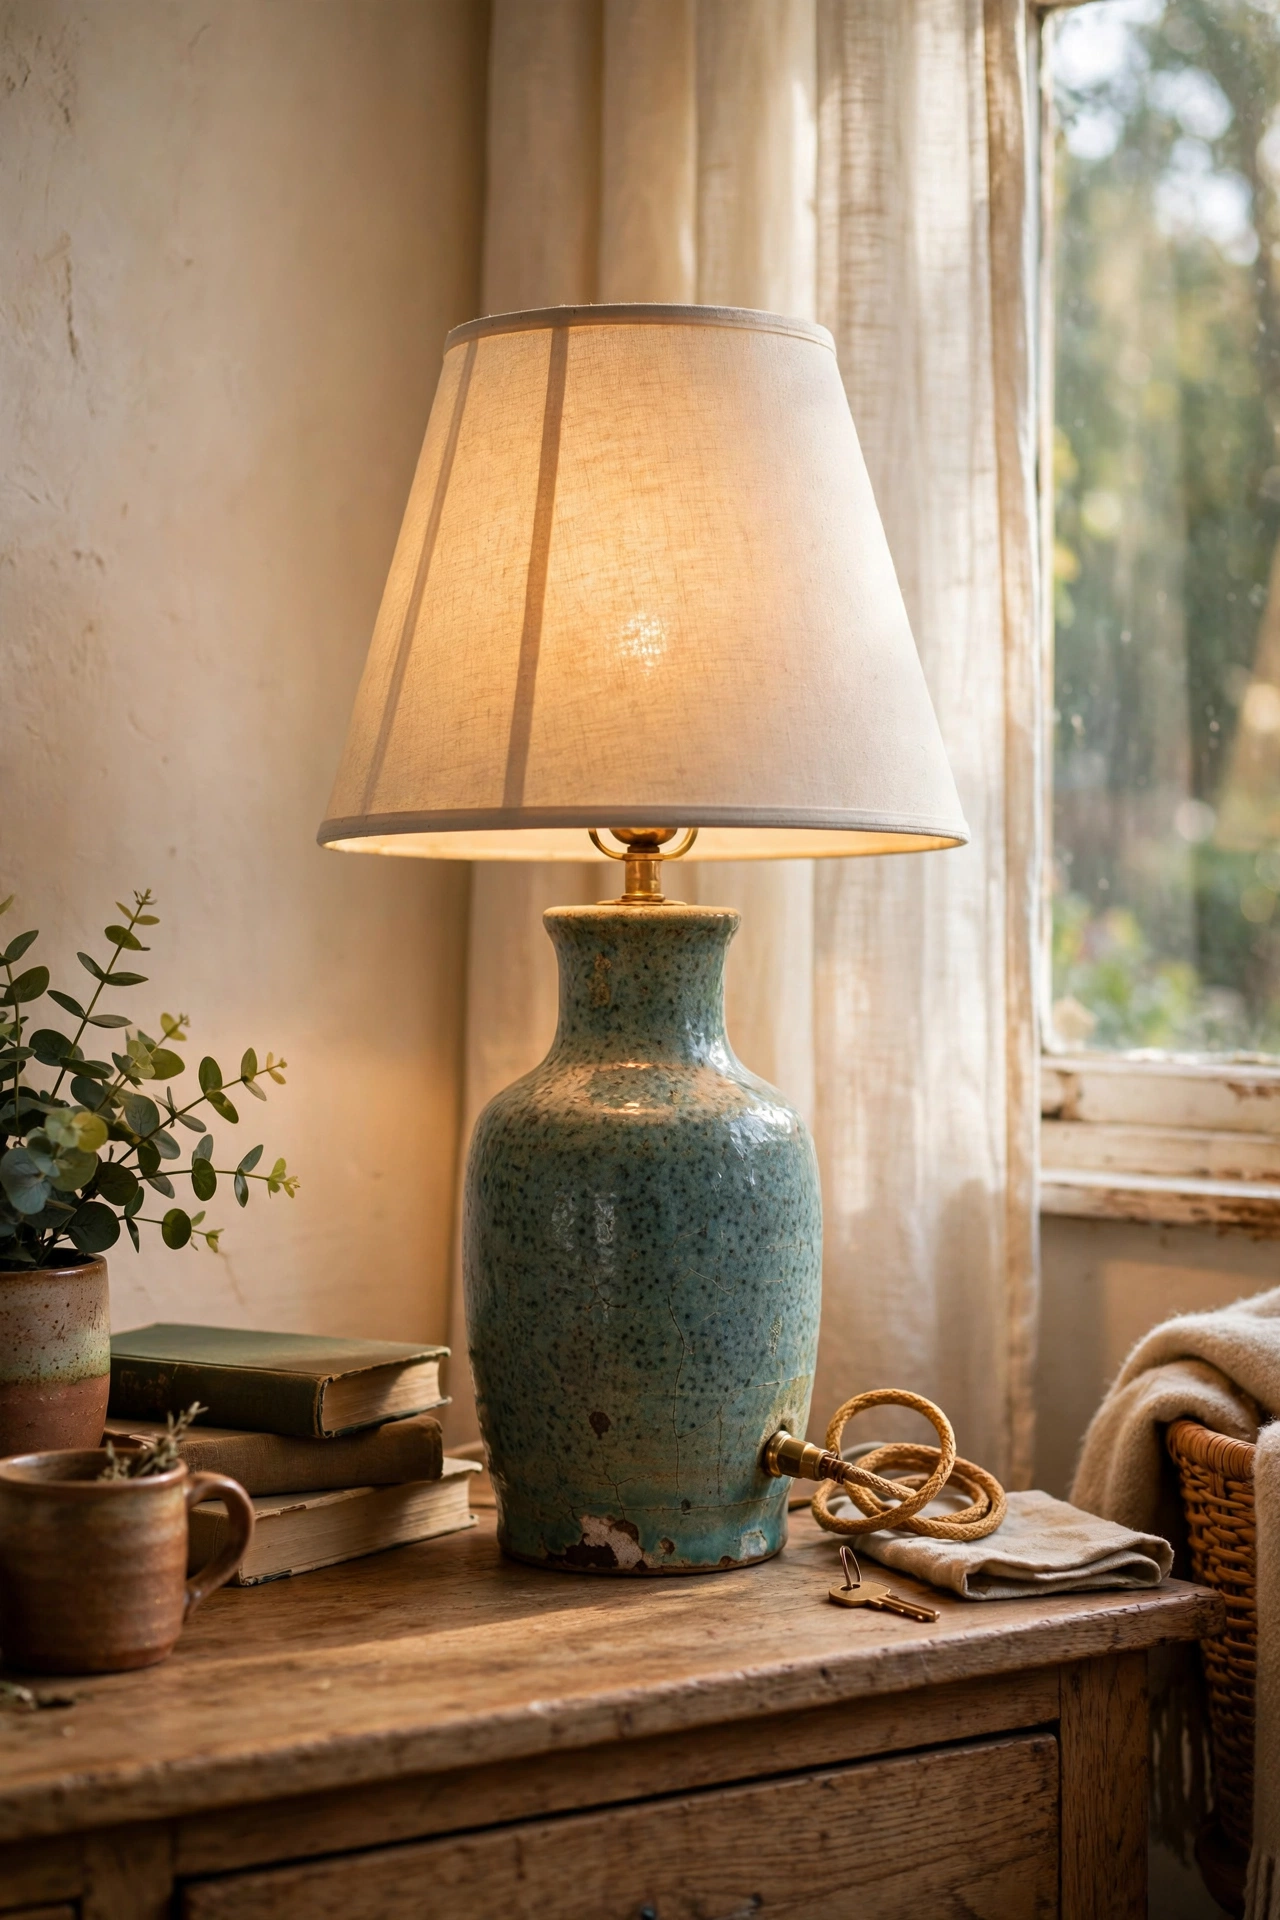
The ultimate beginner project is rescuing a thrift lamp properly: new cord, new shade, same charming base. I found a ceramic base I loved with a frayed cord, so I stripped the old wiring out completely, threaded a fresh lamp kit through following the diagram step by step, and finished it with a brand new tapered shade. Rewiring sounds scary but the kit instructions hold your hand through every connection, and mine took twenty minutes. My early mistake, the one that tripped the breaker years ago, was rushing and skipping the diagram, so read it twice first. The result is a safe, unique lamp with a story.
Materials: Thrifted lamp base, replacement lamp kit, new shade, screwdriver | Cost: ~$10-15 | Time: 40 minutes
Pin this post now so you can save this idea for your next weekend project run! Pick the build that matches the lamp kit you can find locally, and you will be switching on your own handmade light by Sunday evening.
