15 DIY Headboard Ideas on a Budget
A headboard is the single fastest way to make a bedroom feel finished, and a DIY headboard is the cheapest way to get one. I built mine for less than the cost of two pizzas, from timber I was honestly about to skip, and three years later it is still the piece guests comment on first. You do not need a workshop or carpentry skills, just a Saturday afternoon and a willingness to drill a few holes straight.
This list covers every style of cheap headboard I have made, helped friends make, or wished I had made first. Every idea costs under $60, most sit under $30, and each one includes the steps and the mistakes to avoid. Work through them in order and pick the one that matches your tools, your patience, and the look you want.
Pallet and Reclaimed-Wood Headboards
1. Classic Pallet Plank Headboard
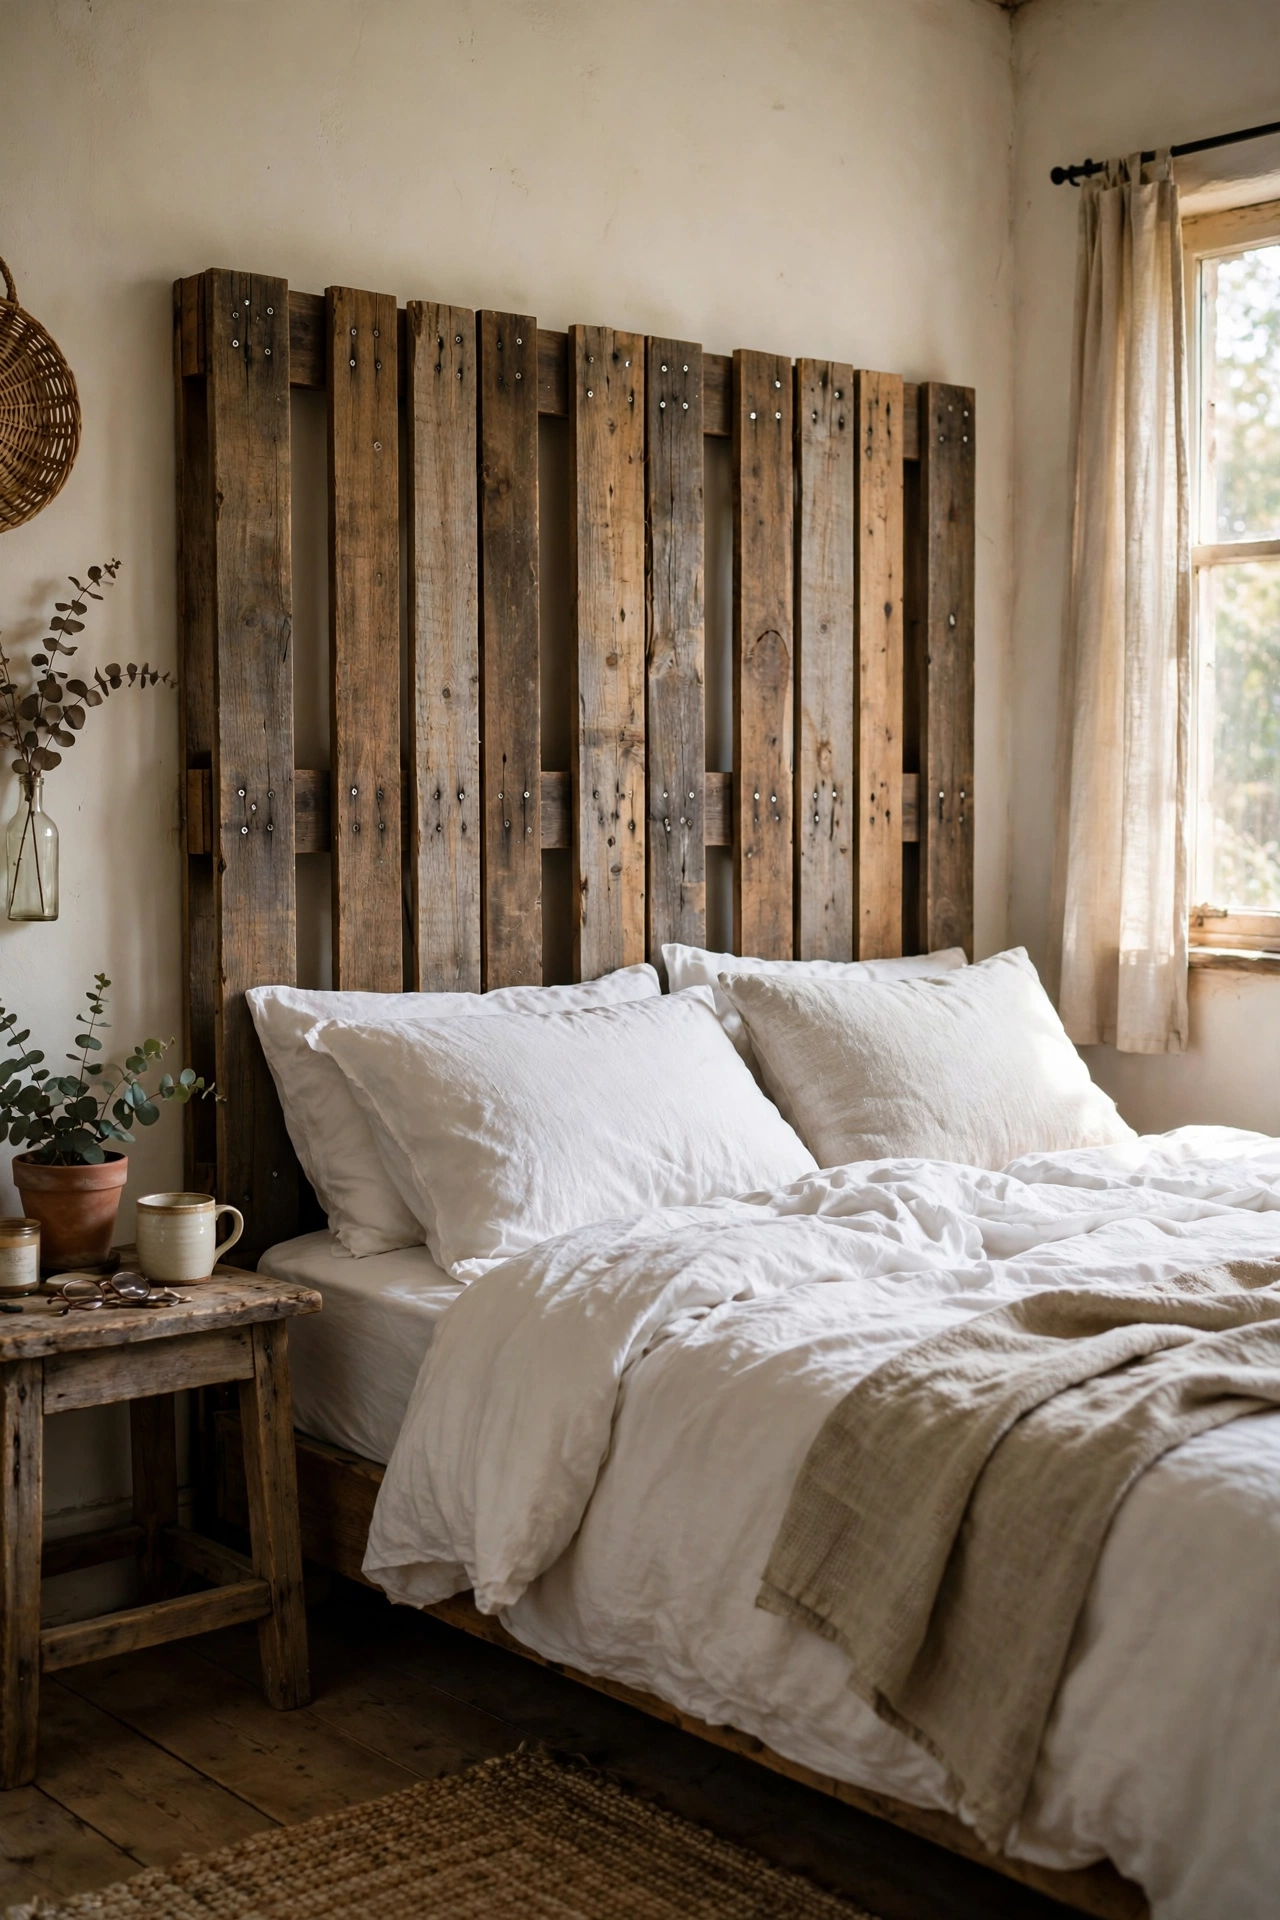
A pallet headboard is the poster child of cheap DIY headboards for a reason: the timber is often free and the look is instant rustic warmth. I built mine from two heat-treated pallets, the ones stamped HT, never the chemically treated kind. First, pull the pallets apart with a wrecking bar and pull every nail with pliers. Second, sand every plank with 80-grit then 120-grit paper until smooth to the touch. Third, arrange the planks vertically on two horizontal back rails and screw them down from behind. I tried skipping the sanding once and paid for it with splinters for a month, so do not do that. Check pallets behind garden centres and warehouse estates, but always ask first. The whole build took me an afternoon, and with a dark stain it looks like reclaimed farmhouse timber.
Cost: ~$10-25 | Time: 4 hours
2. Old Door Turned Headboard
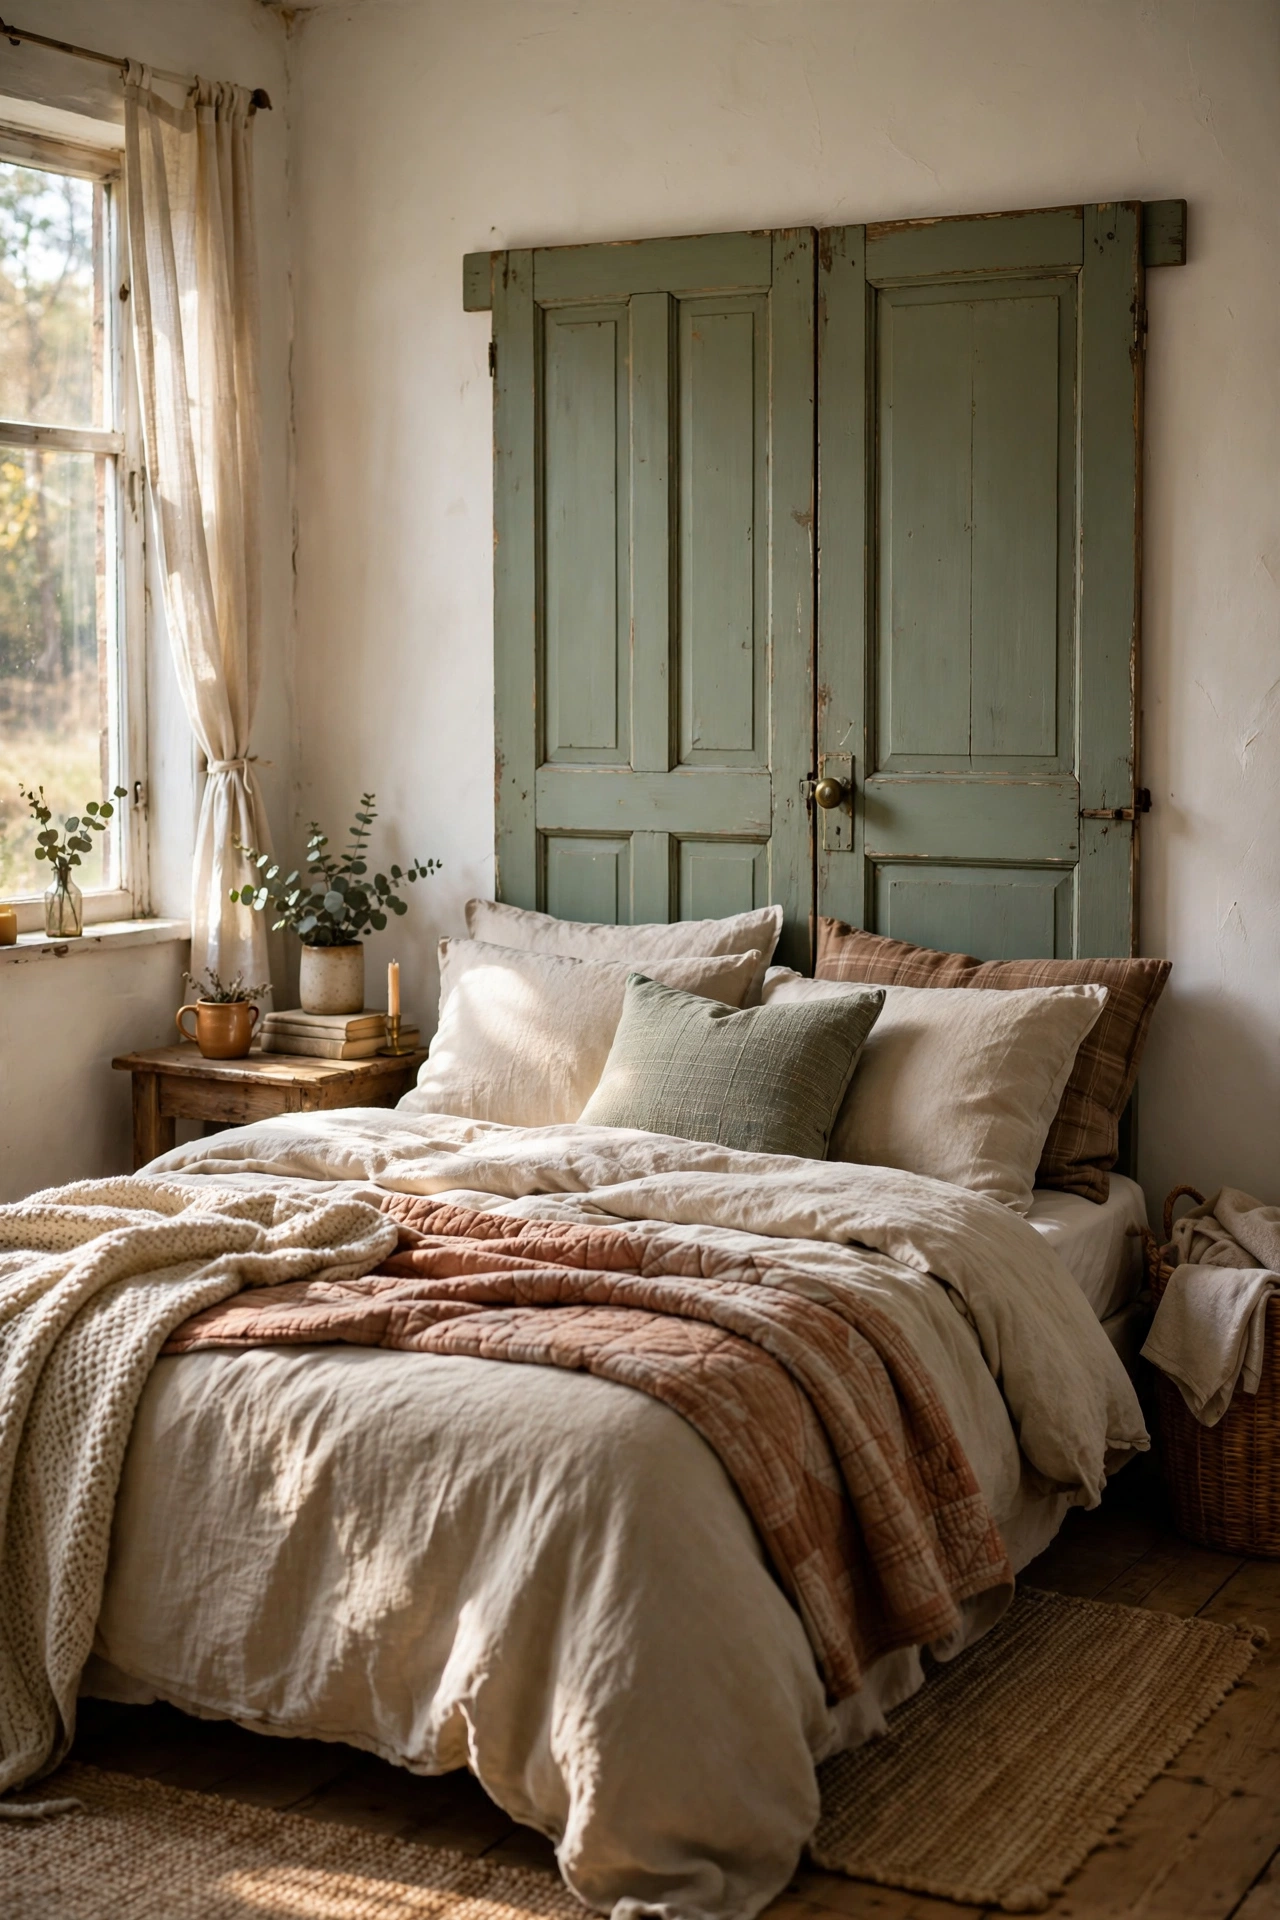
A salvaged door makes a headboard with instant character, because the panel mouldings do all the decorating for you. I found a four-panel pine door at a reclamation yard for $18. First, scrub it down and sand any flaking paint, wearing a mask if the paint looks old. Second, paint it in a chalk-style matt paint in the colour of your bedding palette, two thin coats. Third, mount it to the wall with heavy-duty French cleats or bolt it straight through the bed frame rails. I tried leaning mine against the wall unsecured and it crept forward every time someone sat up in bed, so do not do that. A door with glass panels works too if you back the glass with fabric. This looks expensive because doors were built to be looked at.
Cost: ~$25-45 | Time: 3 hours plus drying
3. Horizontal Fence Board Headboard
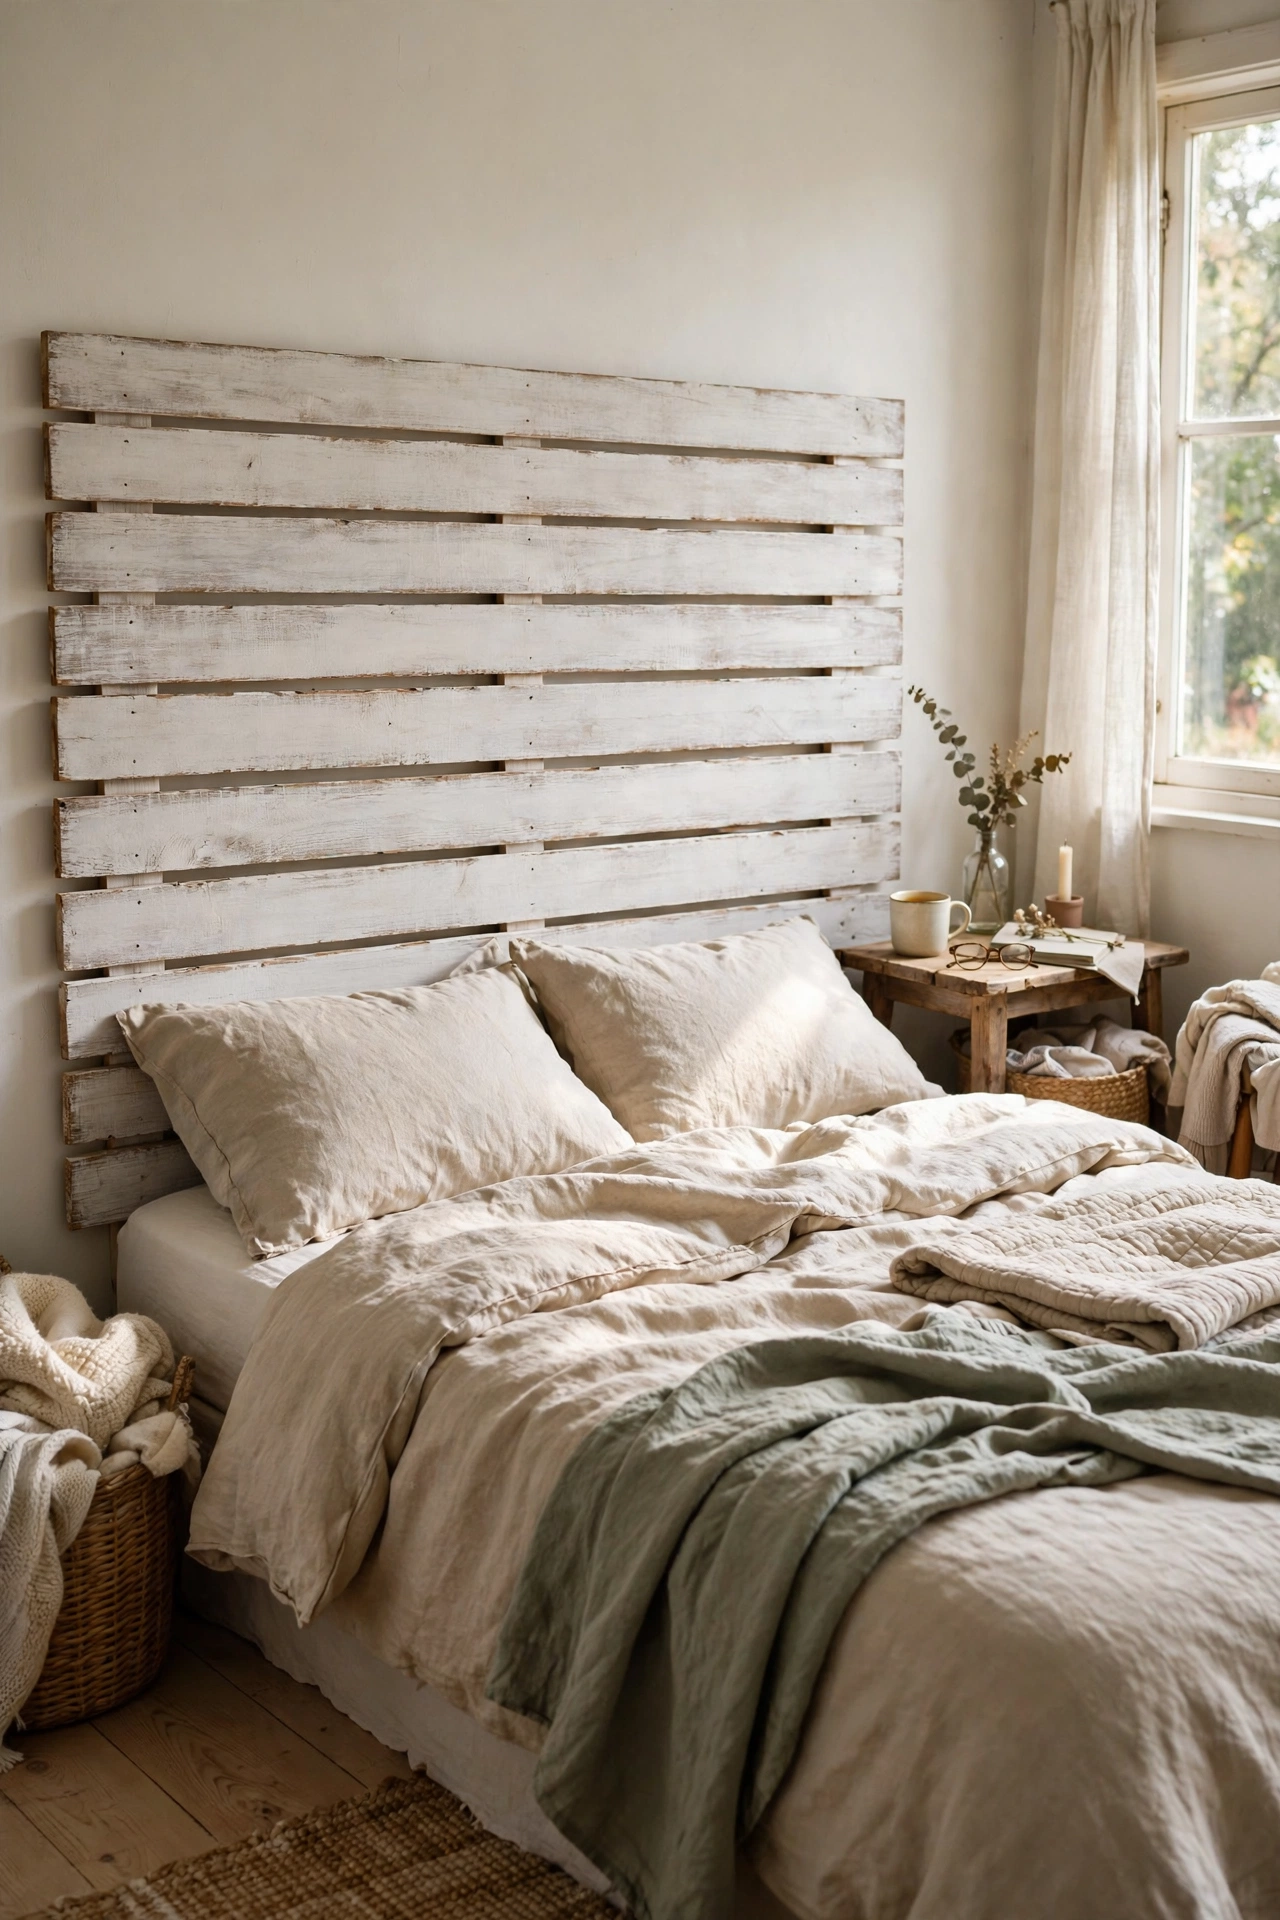
Fence boards run horizontally give a headboard a calm, modern farmhouse feel that pallets cannot quite match. I bought ten new featheredge boards for about $30 and spent an hour choosing the cleanest faces. First, cut the boards to your bed width with a handsaw or have the timber yard cut them. Second, sand the front faces smooth and round off the edges lightly. Third, fix them to two upright battens with small gaps of about 5mm between boards so the eye reads clean lines. I tried butting them tight on my first attempt and the wood swelled within weeks and buckled, so do not do that. Whitewash or leave them natural with a clear matt seal. It reads as custom joinery rather than DIY.
Cost: ~$30-45 | Time: 3 hours
4. Salvaged Floorboard Statement Headboard
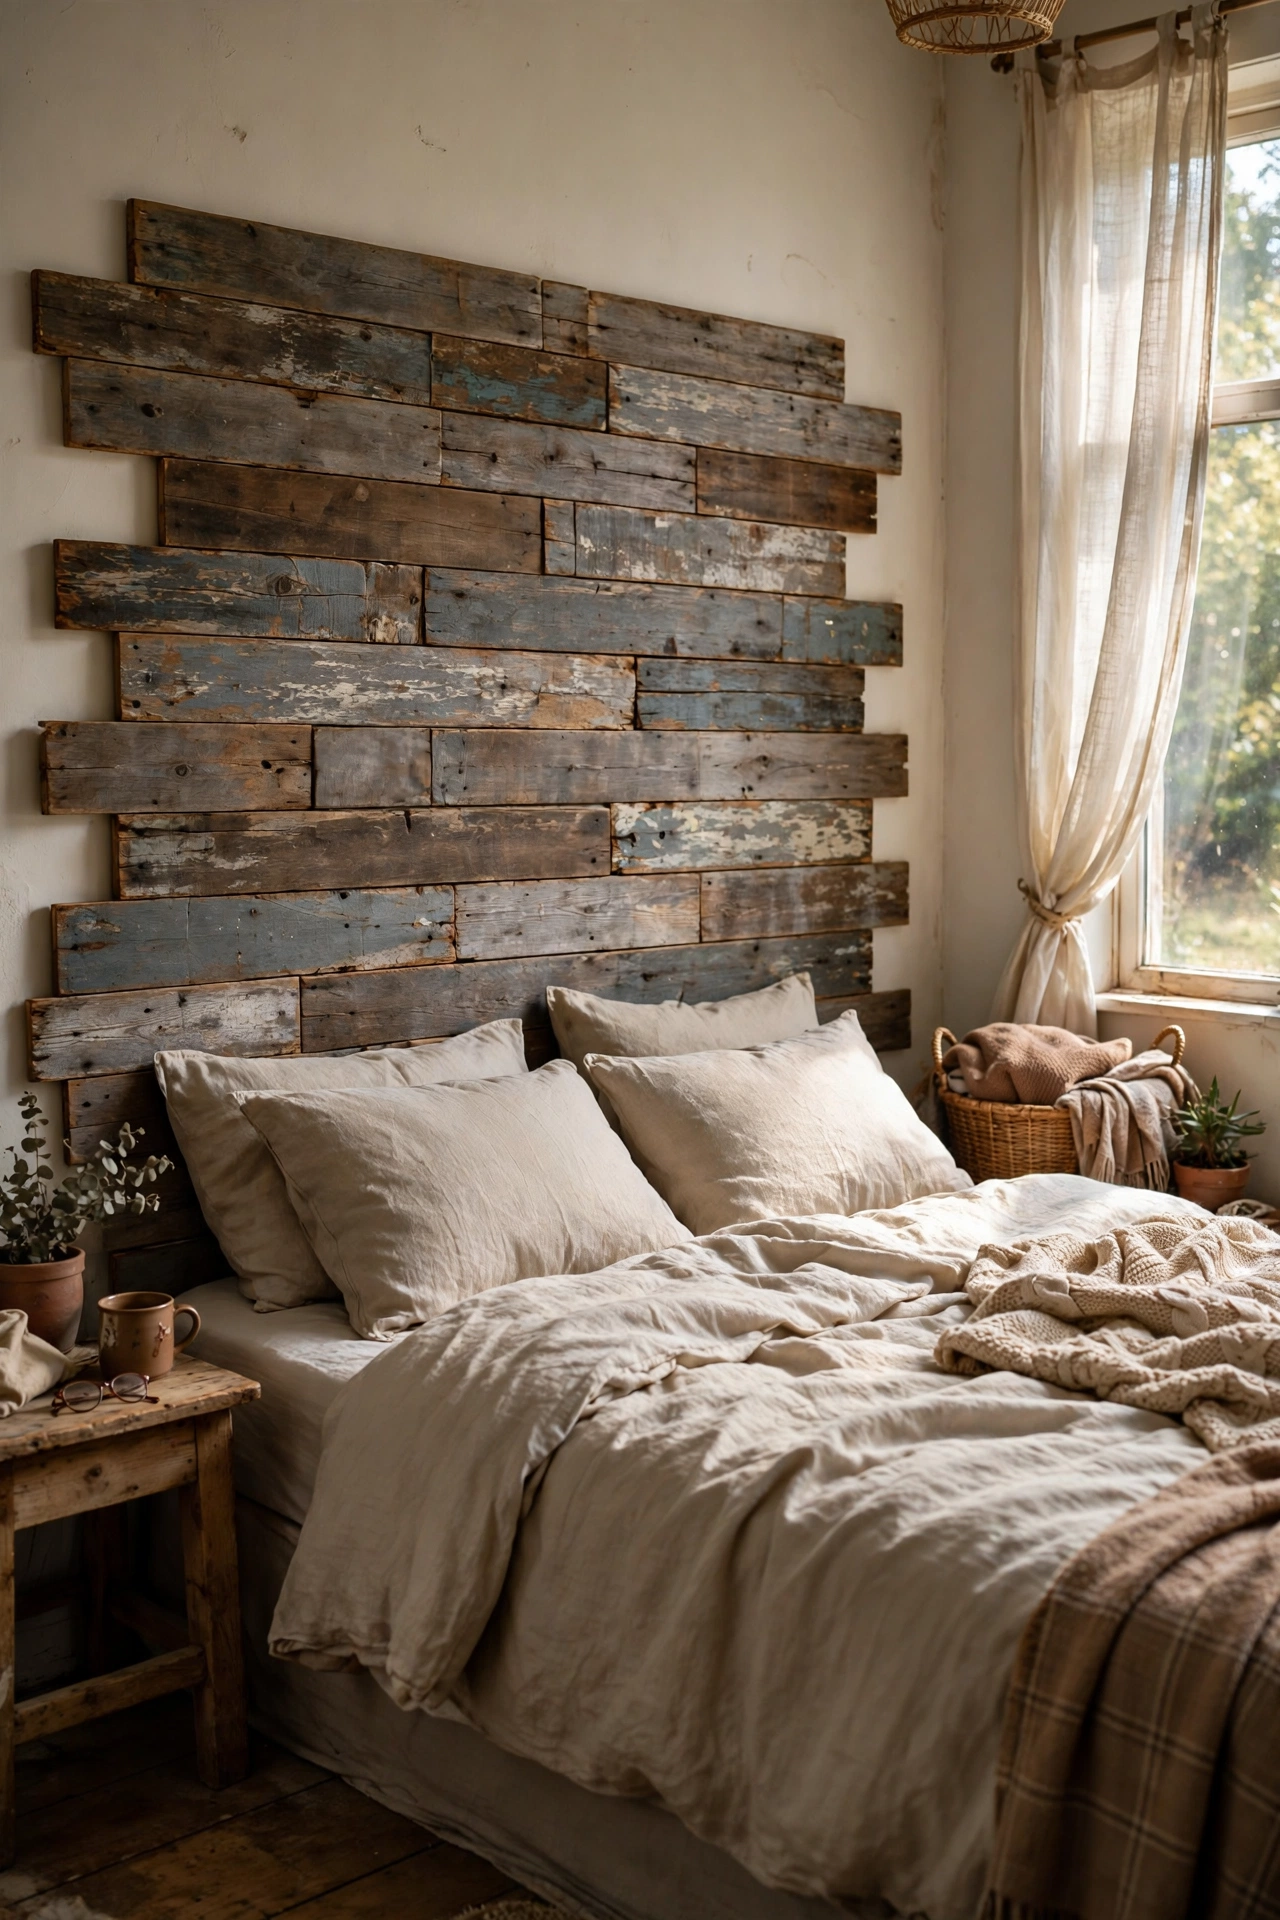
Old floorboards have a patina that no stain can fake, which makes them the best timber for a feature headboard. I rescued a stack of Victorian pine boards from a skip, with permission, and gave them a weekend to dry out. First, knock out the old nails and sand with 60-grit to level the surface, then finish with 120-grit. Second, cut boards to staggered lengths so the joints land in different places, which looks far more crafted than uniform rows. Third, mount them on battens screwed to the wall, checking level as you go. I tried gluing mine at first and two boards popped off overnight, so do not do that. Screws into battens hold for years. The aged grain does all the talking.
Cost: ~$8-20 | Time: 5 hours
Fabric and Upholstered Headboards
5. No-Sew Plywood Upholstered Headboard
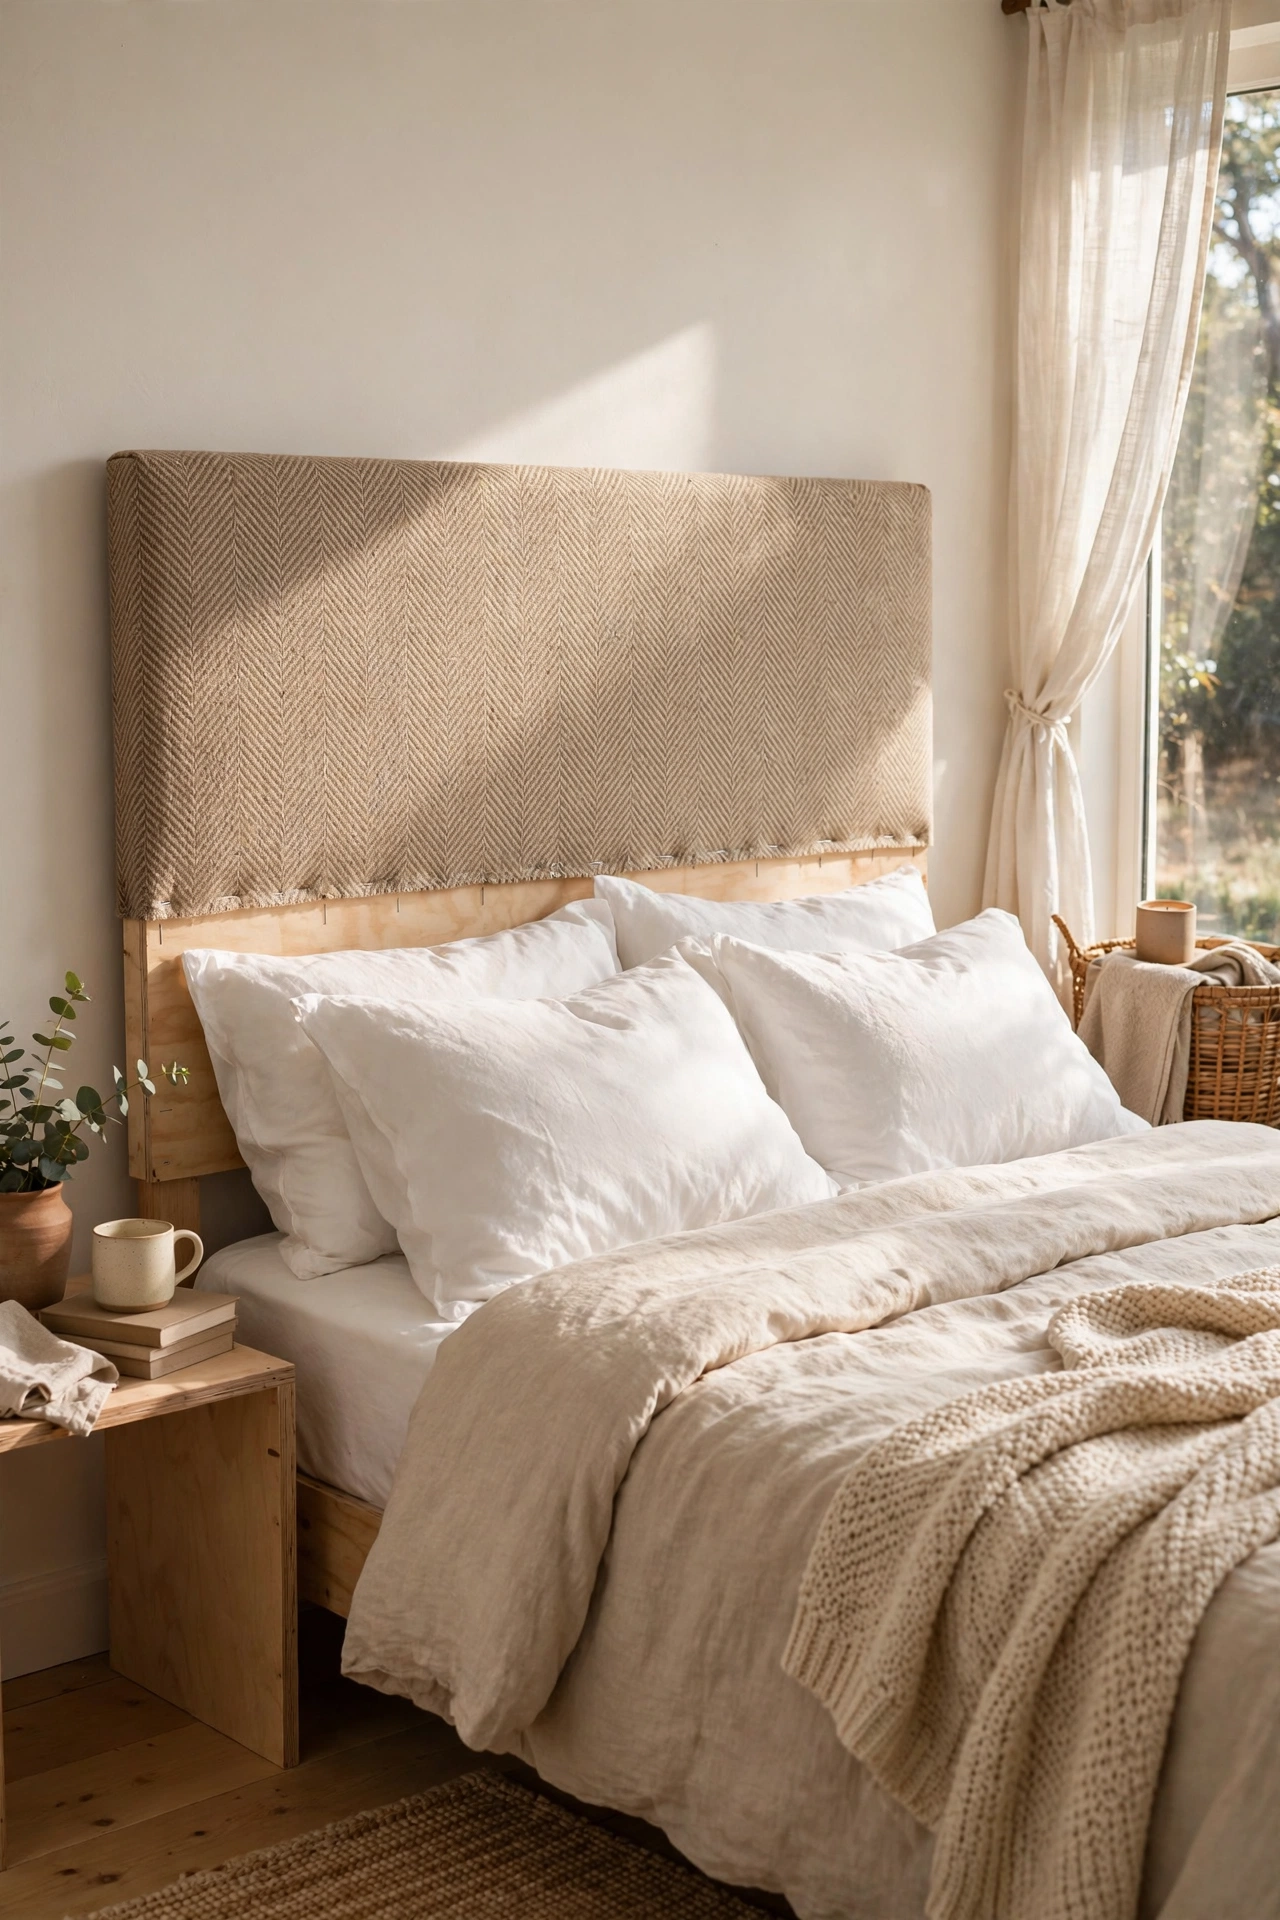
An upholstered headboard looks like a four-figure purchase but needs no sewing at all. I made mine from a sheet of half-inch plywood, two layers of cheap foam, and a cotton duvet cover in a herringbone weave. First, cut the plywood to size with a jigsaw or get it cut at the shop, then round the corners. Second, layer foam over the front and wrap your fabric around the back like a present, pulling it tight. Third, staple the fabric to the back with a heavy-duty staple gun, working from the middle of each side outward so the front stays smooth. I tried thin batting first and you could feel every staple through it, so do not do that. Two layers of foam hides everything. Mount with French cleats.
Cost: ~$40-60 | Time: 2 hours
6. Deep-Button Tufted Headboard on a Budget
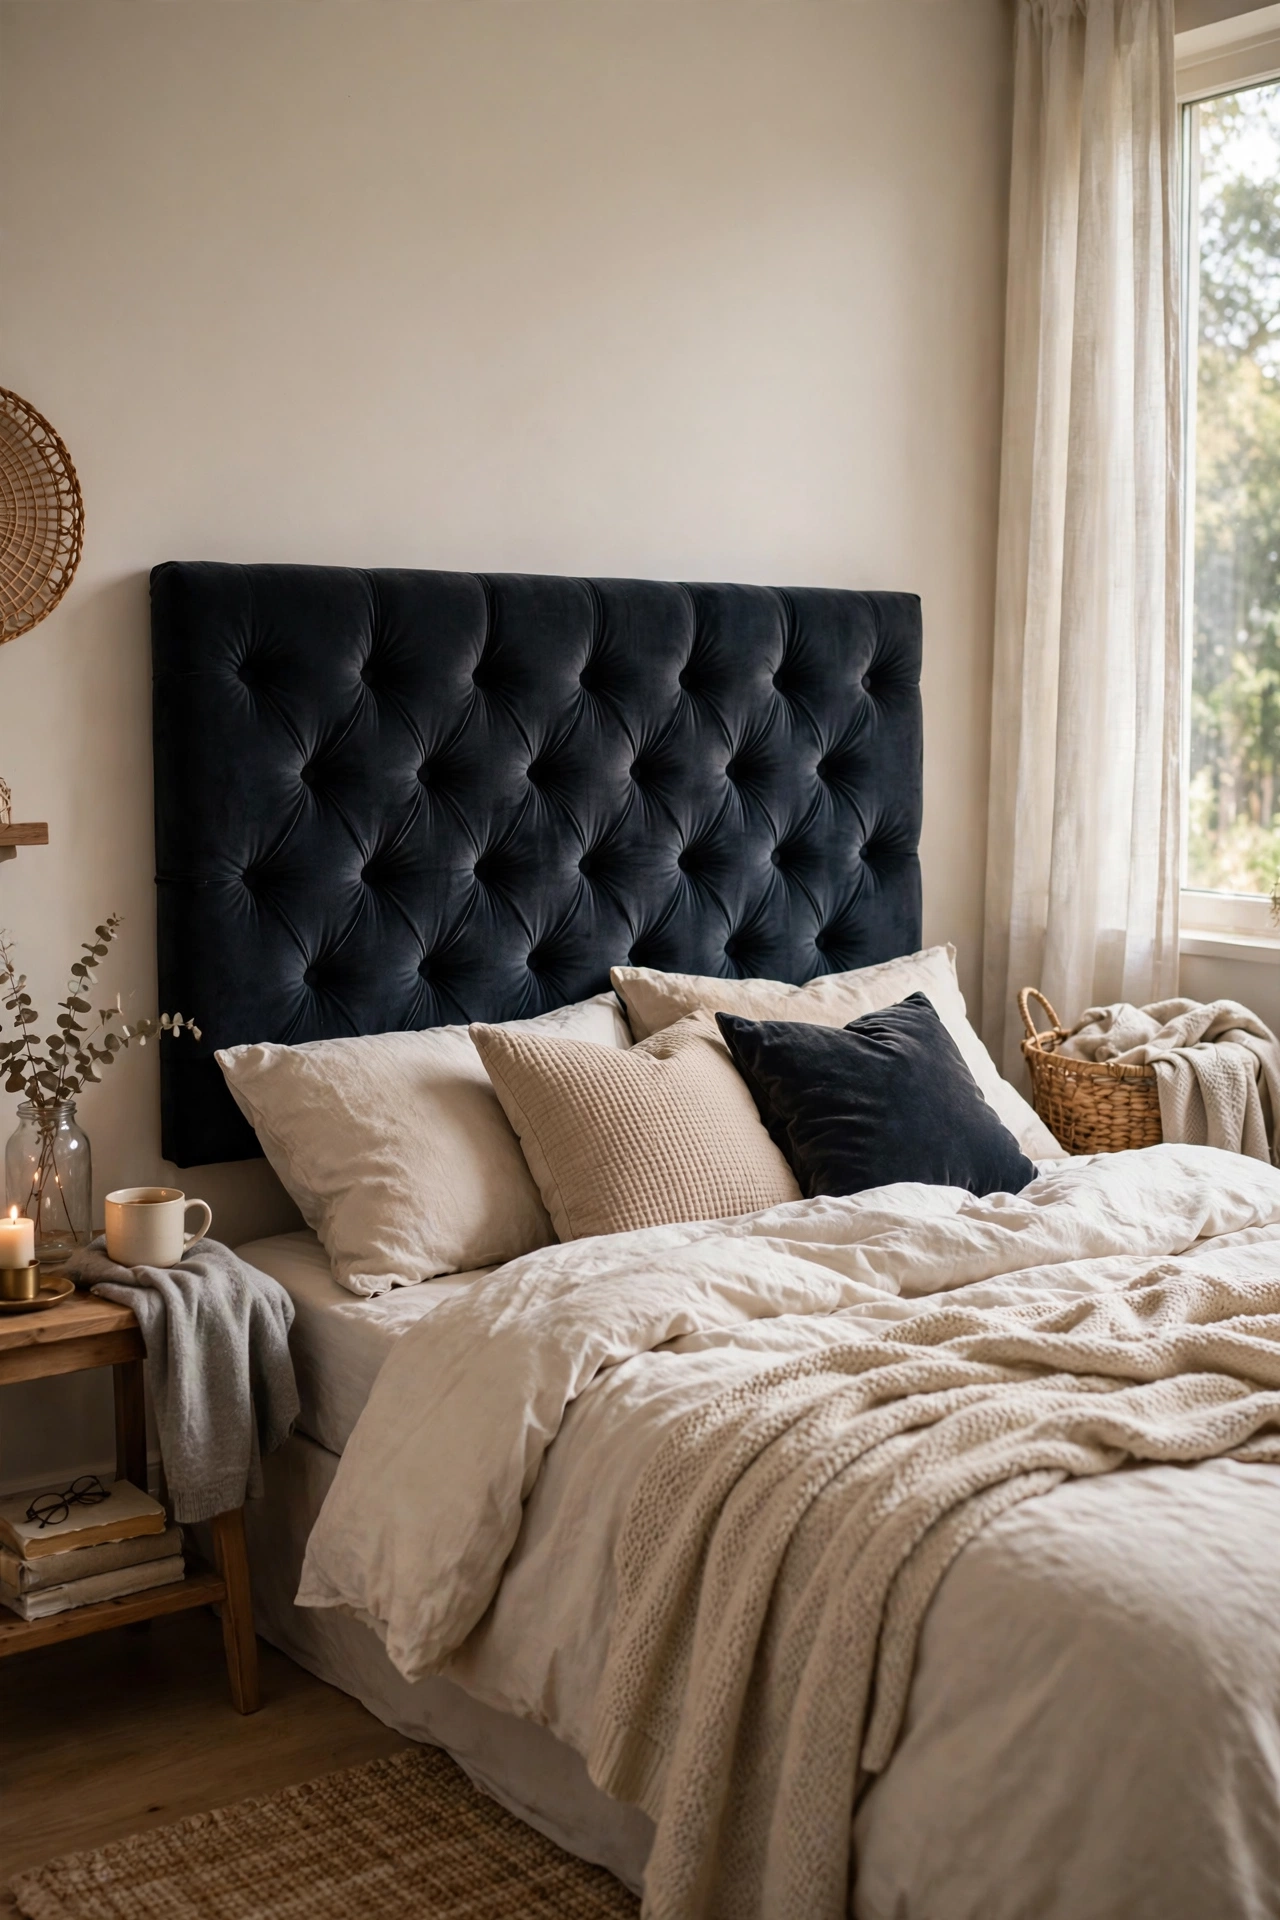
Tufting sounds like an upholsterer-only skill, but a drill and covered buttons get you ninety percent of the look. I built mine on plywood with three-inch foam. First, mark a diamond grid on the back of the foam and drill through both foam and board at each point. Second, pull upholstery twine through each hole from the back, loop it over a covered button, and pull it back through to the rear, knotting it tight. Third, fold the fabric into gentle pleats between buttons and staple the edges behind. I tried spacing my buttons too wide on the first panel and it looked saggy rather than plush, so do not do that. A 20cm grid is the sweet spot. Velvet-effect fabric from the bargain bin makes this look properly plush.
Cost: ~$35-55 | Time: 4 hours
7. Curtain Panel Slipcover Headboard
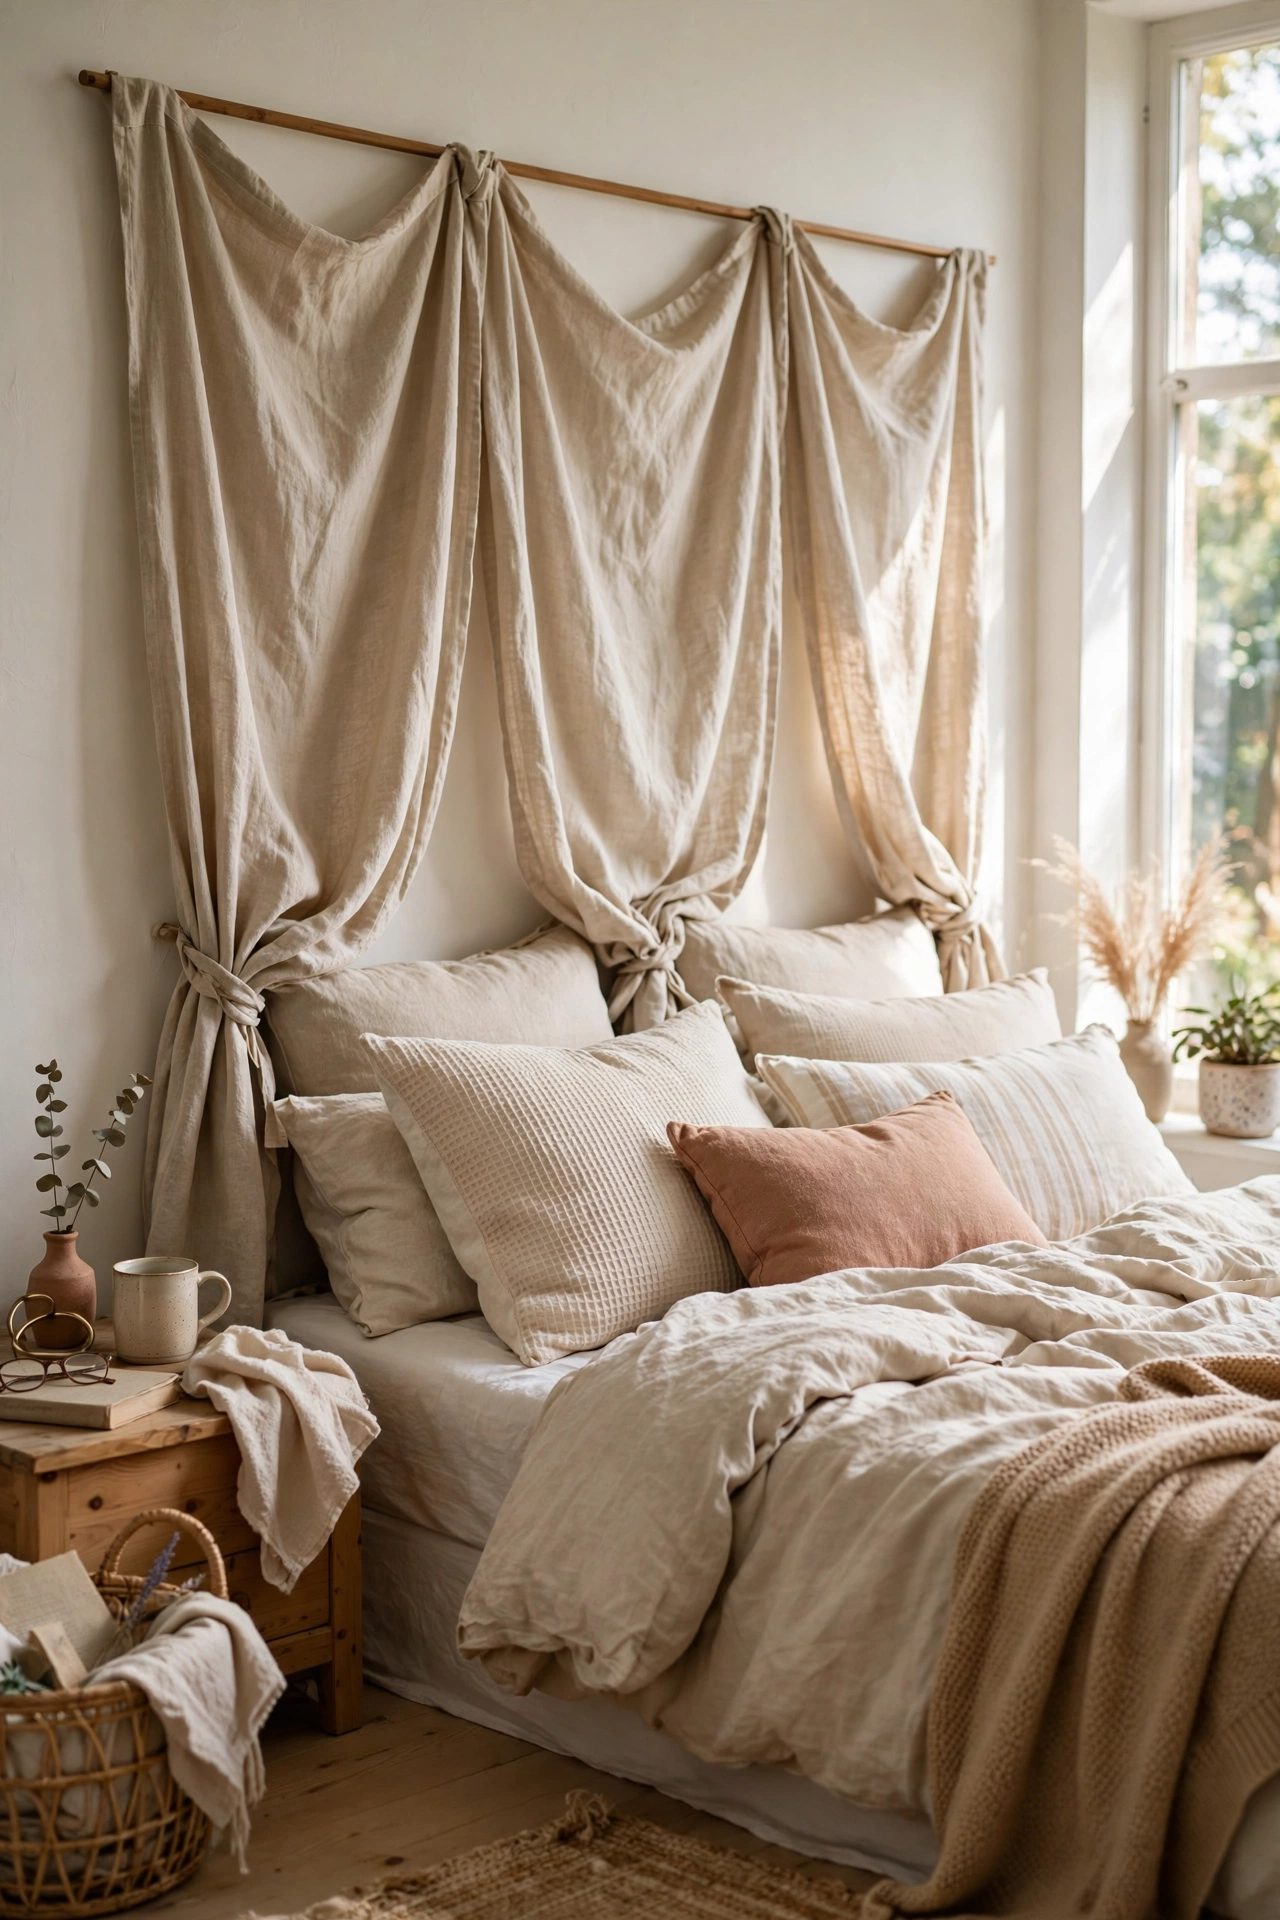
This is the gentlest upholstered headboard idea: a curtain panel hung over a simple frame, zero tools beyond a drill. I bought two long linen-look curtain panels for $14 each and a basic tension rod. First, fix two small hooks or a rod to the wall at the height you want the headboard to start. Second, hang the panels so they fall just behind your pillows, pleating them loosely for softness. Third, steam out the creases once hung and let the fabric puddle very slightly at mattress level for a relaxed look. I tried pinning them flat and tight first and it looked like a office blind, so do not do that. Loose and soft is the whole charm. Swap the panels seasonally for a new look in minutes.
Cost: ~$25-35 | Time: 30 minutes
8. Patchwork Quilt Headboard
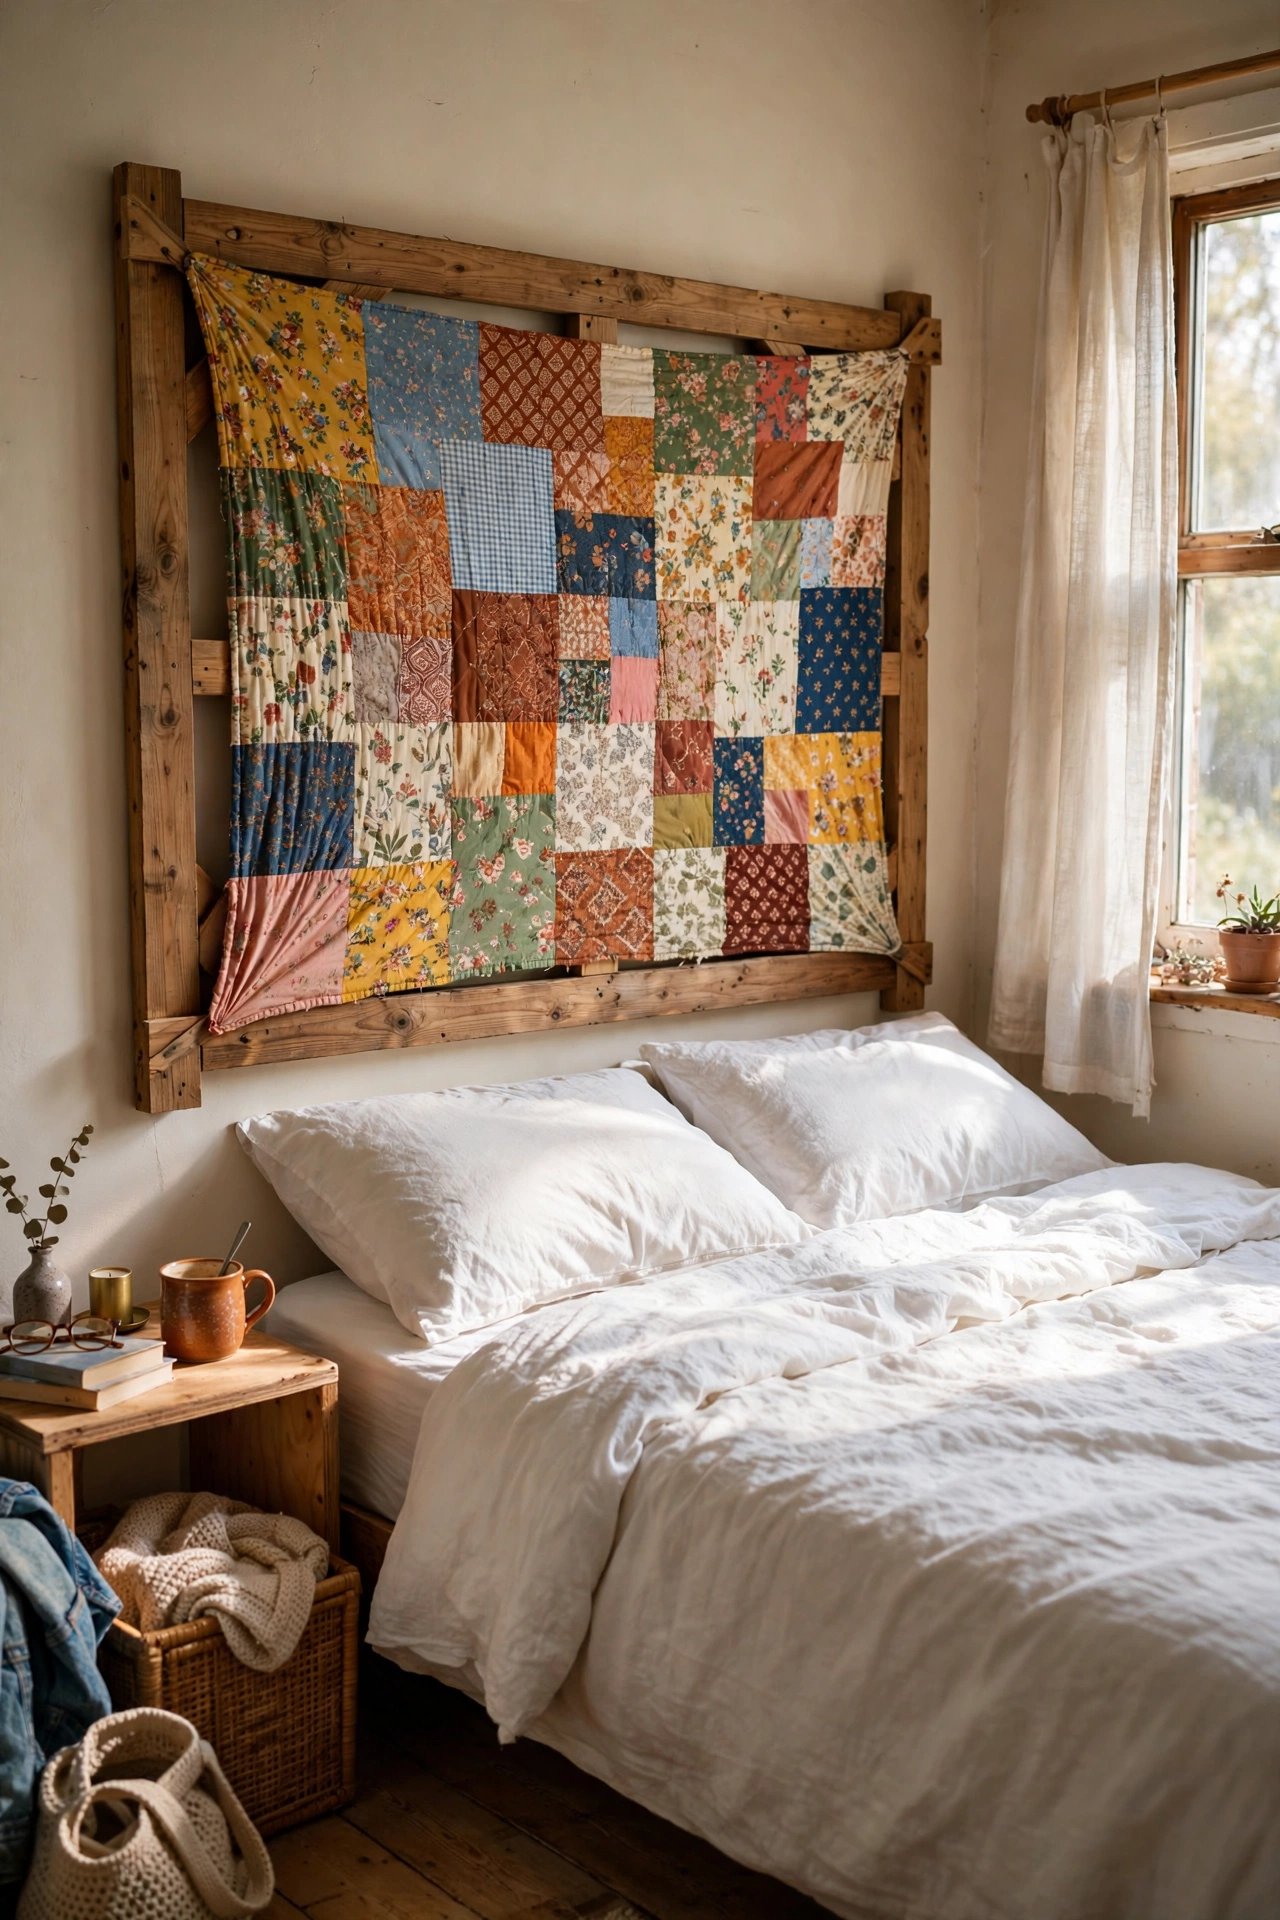
A charity-shop quilt stretched over a frame makes the cosiest headboard imaginable, all pattern and softness. I found a handmade patchwork quilt for $12 that someone had clearly spent months on. First, build or buy a simple timber frame the size of your bed, it can be crude because it stays hidden. Second, stretch the quilt over the front and staple it to the back of the frame, pulling evenly so the pattern stays square. Third, hang the frame on French cleats. I tried hanging the quilt on a curtain rod first and it slumped and wrinkled within days, so do not do that. The frame keeps it drum-tight and proud. Check the quilt for stains in daylight before you buy, and wash it hot first.
Cost: ~$15-30 | Time: 1 hour
Painted and Low-Build Headboards
9. Painted Arch Headboard on the Wall
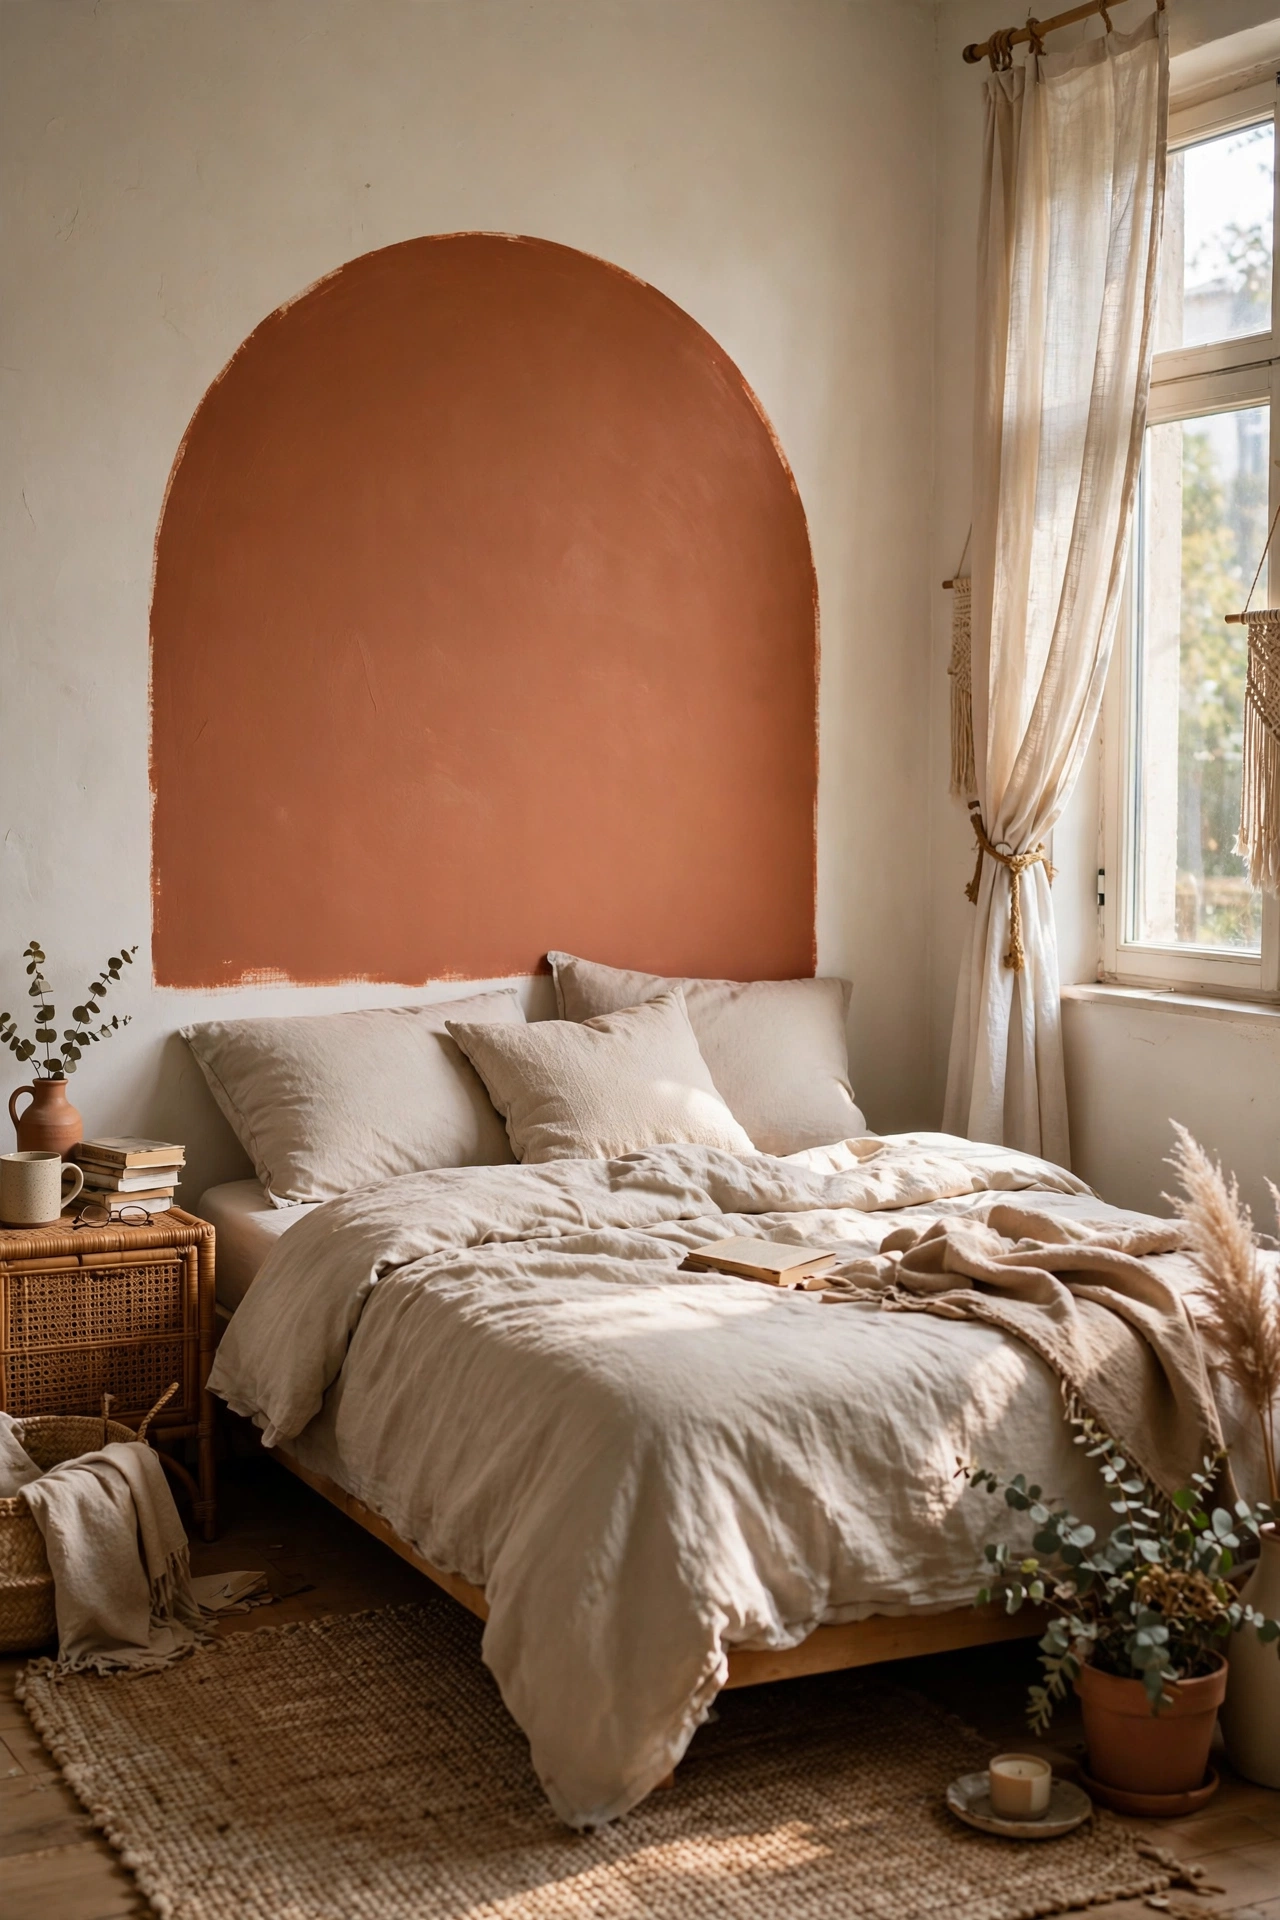
A painted arch behind the bed gives the effect of a headboard for the price of a paint sample pot. I painted mine in a warm terracotta over a weekend using a $6 tester and a steady hand. First, mark the arch on the wall with a pencil tied to a string, pivoting from a nail at the centre, and add painter’s tape along the curve in short overlapping pieces. Second, paint two thin coats, letting each dry fully. Third, peel the tape while the last coat is still slightly tacky for the crispest line. I tried freehanding the curve first and it wobbled visibly, so do not do that. The string trick takes five minutes. This suits renters too if you paint a canvas instead of the wall.
Cost: ~$5-12 | Time: 2 hours plus drying
10. Vintage Shutter Headboard
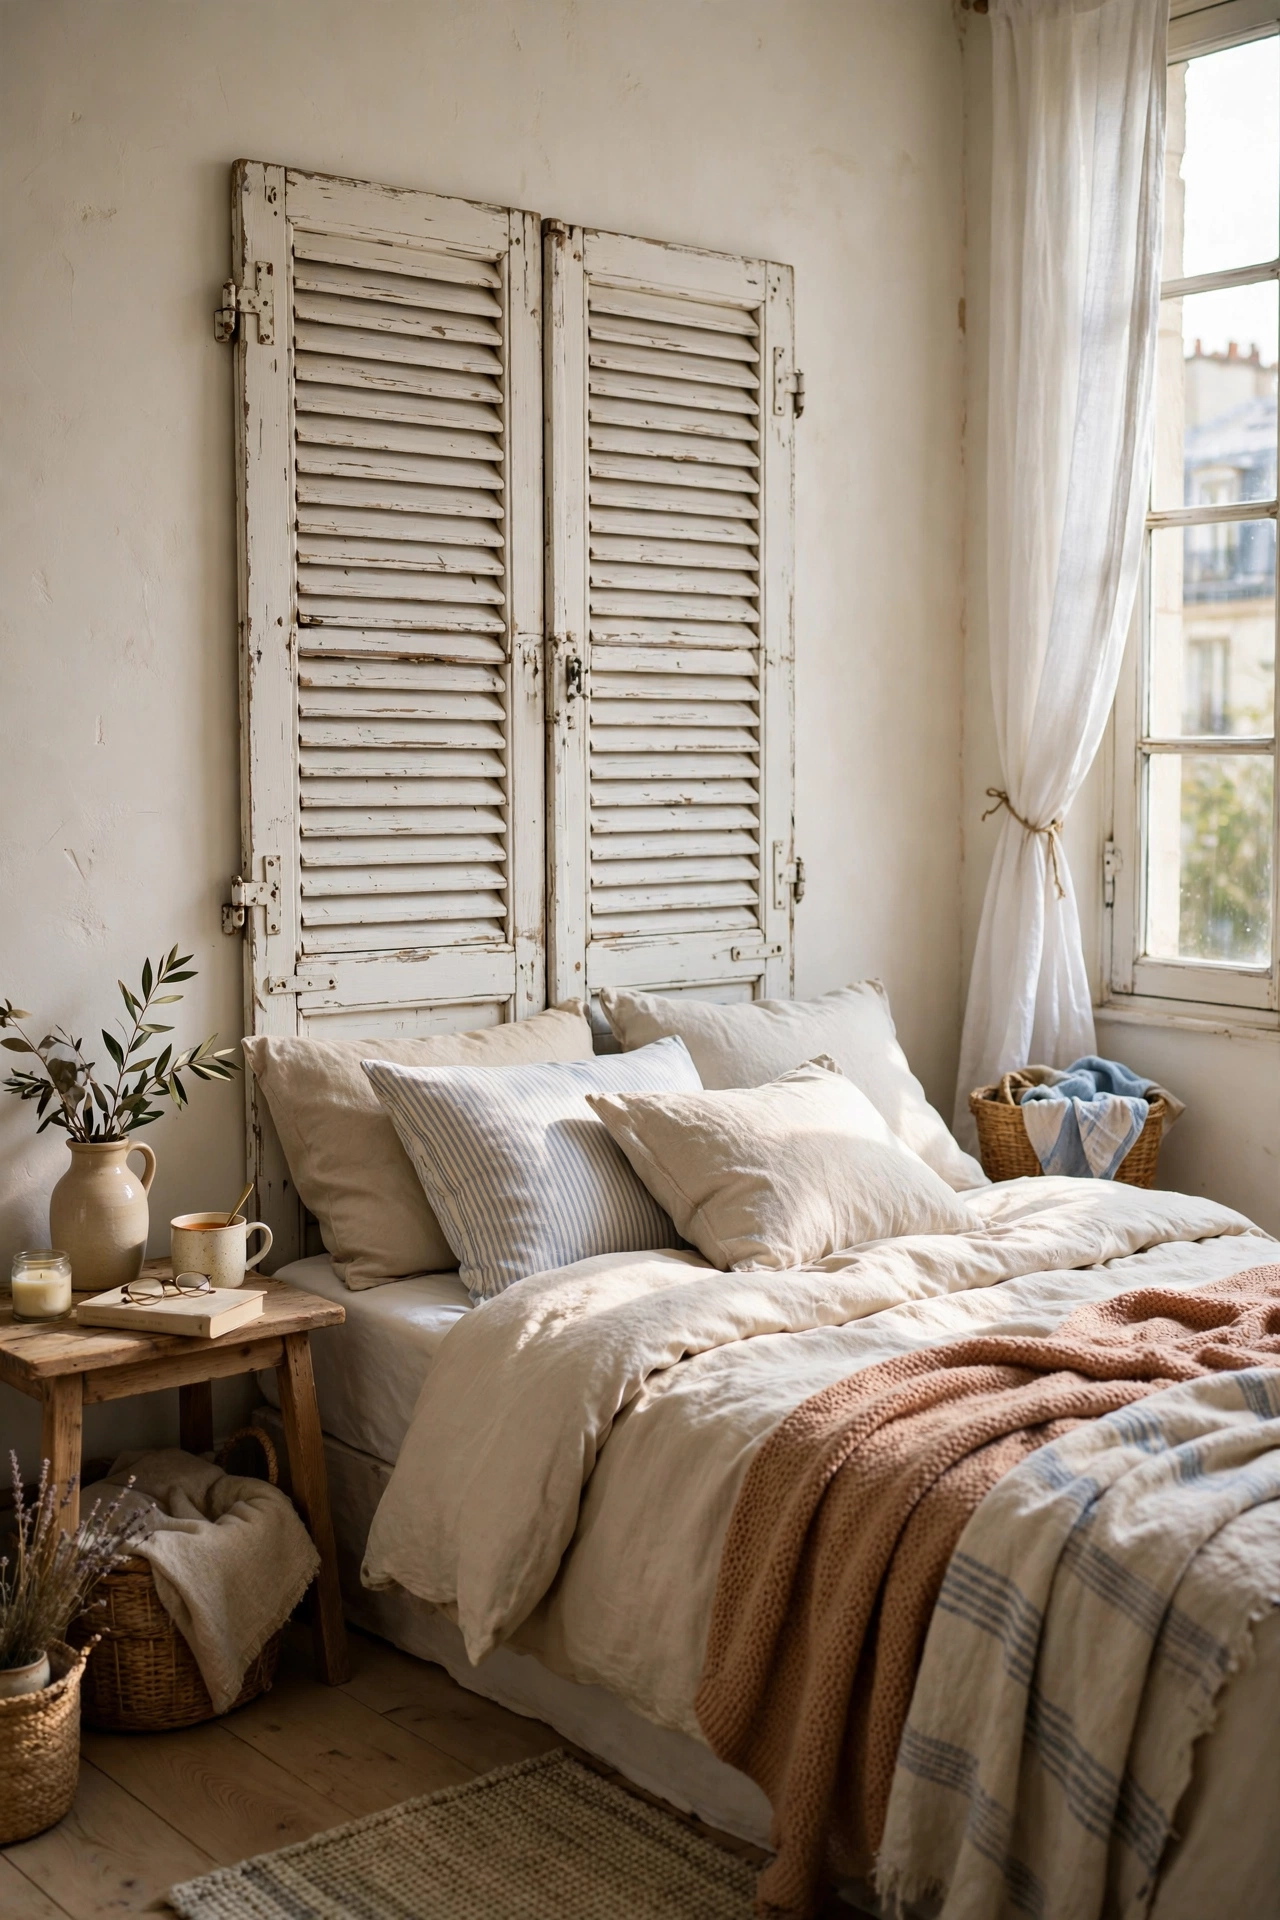
A pair of wooden shutters makes a headboard with built-in texture and French charm. I found two tall pine shutters at a flea market for $10 the pair. First, clean them thoroughly and sand the edges smooth, then check the slats are all sound. Second, join the two shutters side by side with small hinges so they stand as one wide panel, or mount each directly to the wall. Third, paint or wax them in a colour that echoes your bedding. I tried leaving mine with the original flaky gloss paint and the dust stuck to it forever, so do not do that. A fresh coat of matt paint seals everything and looks deliberate. Louvred shutters in white are the classic choice.
Cost: ~$12-25 | Time: 2 hours
11. Book Page Collage Headboard
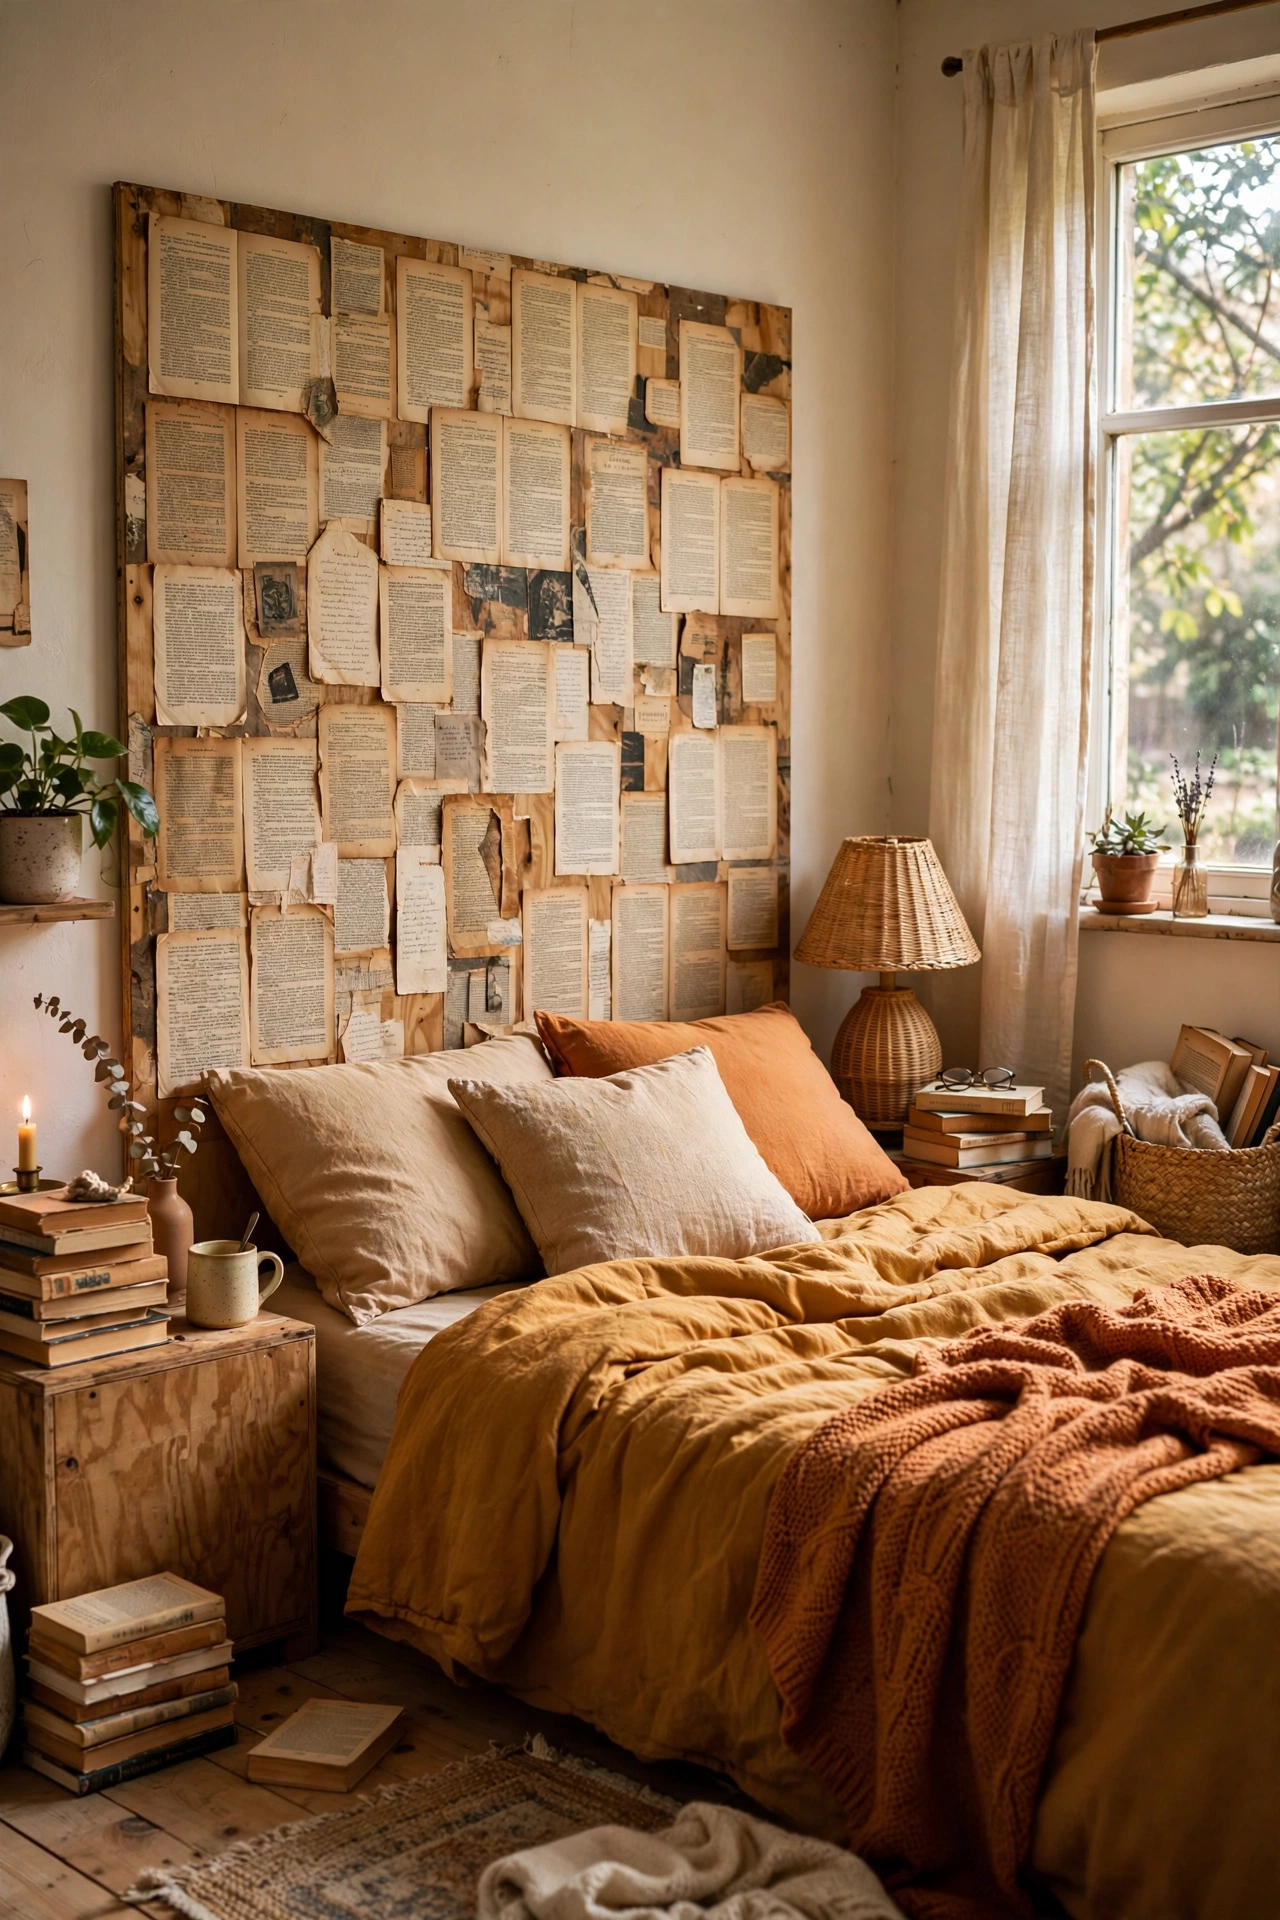
For a reader’s bedroom, a collage of vintage book pages on plywood is a headboard with real personality. I used a battered poetry anthology from a 50p charity-shop bin. First, cut a plywood board to size and paint it cream so no bare wood shows between pages. Second, tear or cut pages to slightly different sizes and glue them down with decoupage medium, overlapping the edges like tiles. Third, seal the whole surface with two coats of matt varnish so it wipes clean. I tried using regular PVA first and the pages yellowed and wrinkled, so do not do that. Proper decoupage medium dries clear and flat. Seal the back edges too and it will last years.
Cost: ~$10-20 | Time: 3 hours plus drying
12. Woven Rope and Belt Headboard
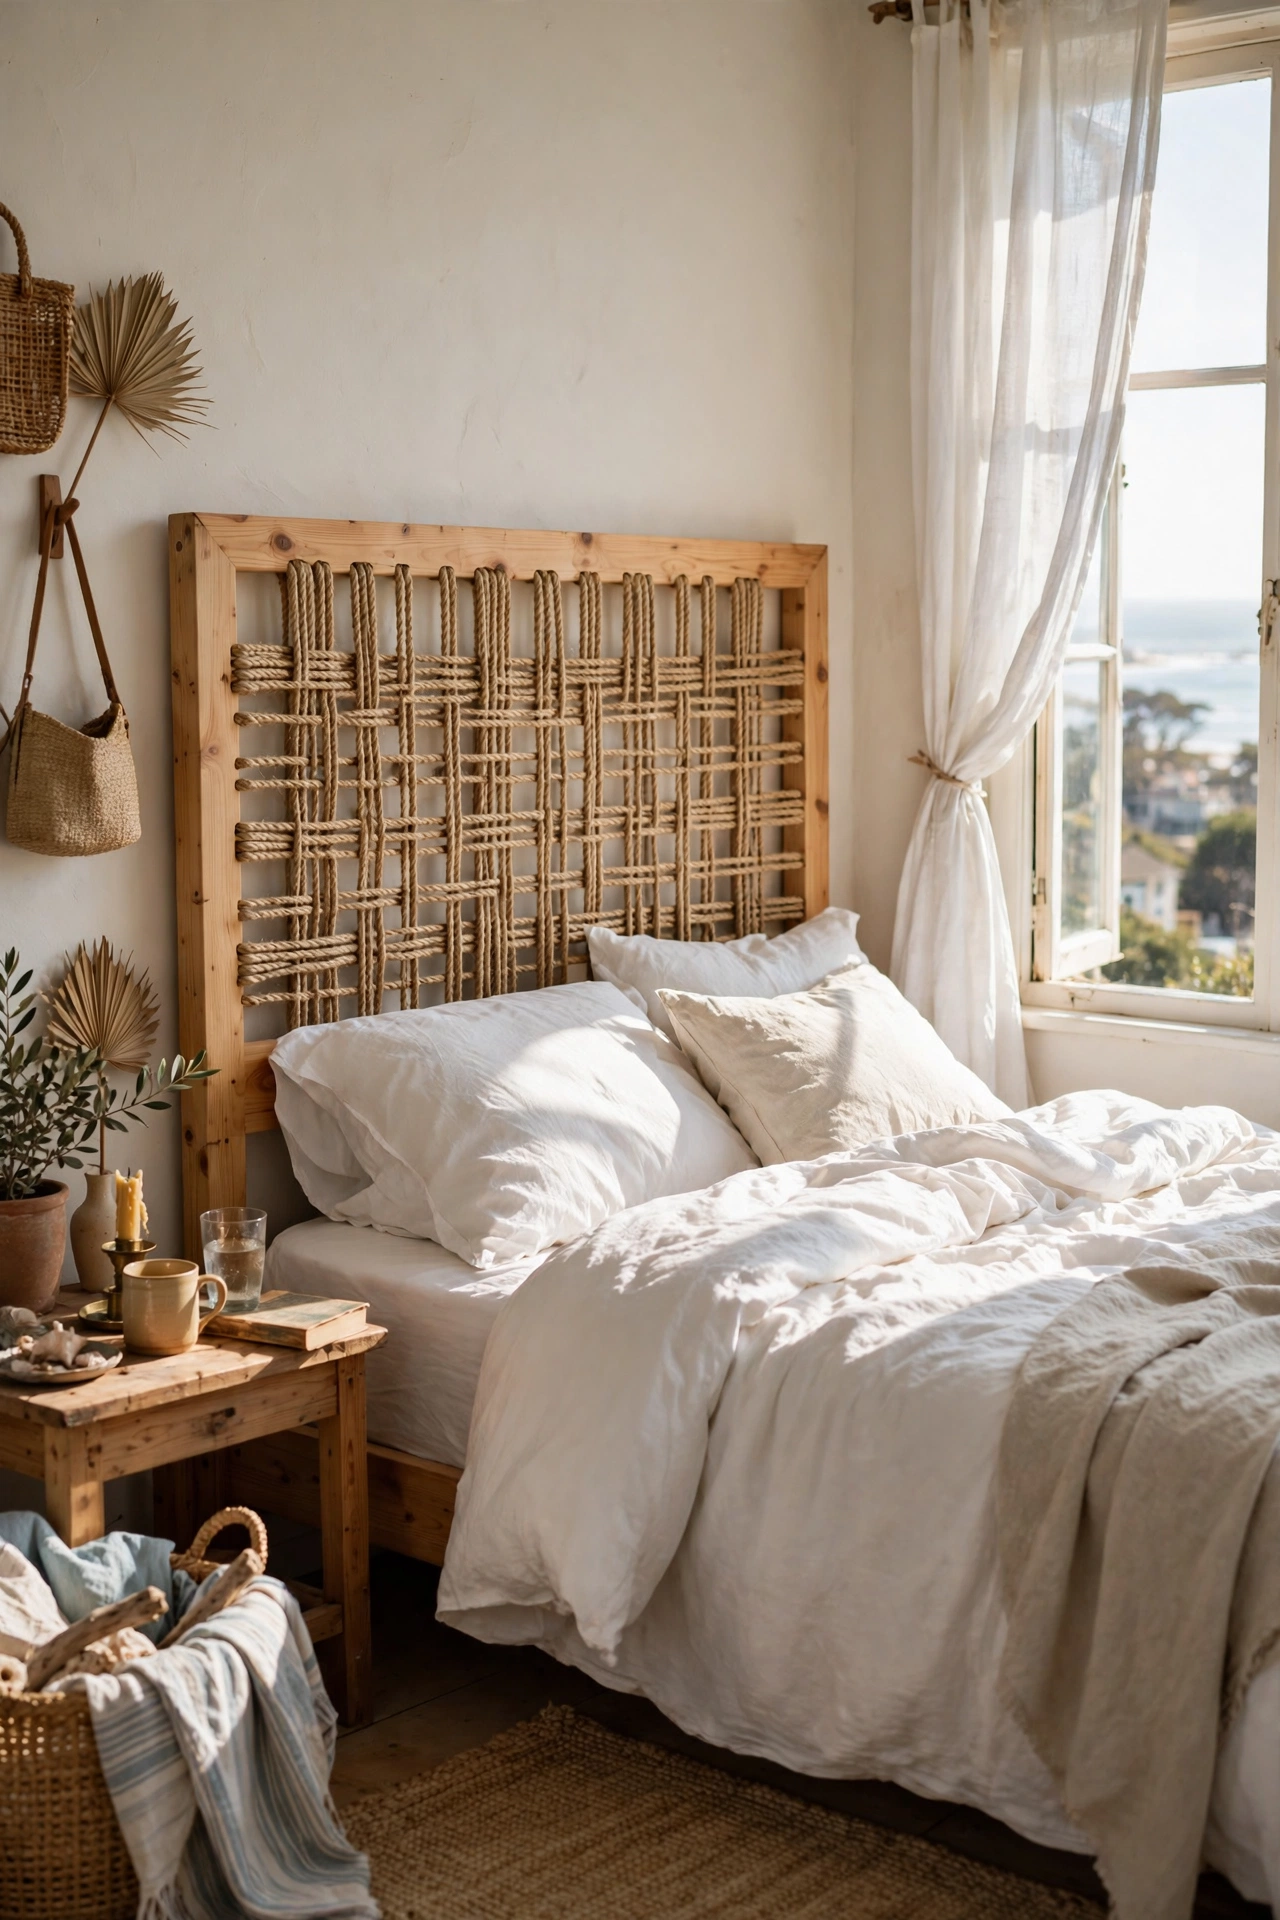
Woven rope stretched across a simple frame makes a coastal, laid-back headboard for almost nothing. I bought 30 metres of natural sisal rope for $16 and two lengths of cheap pine. First, build a plain rectangular frame and sand it smooth. Second, weave the rope horizontally across the frame in tight, even rows, stapling each end to the back of the frame. Third, knot a final decorative row along the top rail to finish the edge neatly. I tried weaving loosely first and the ropes sagged into a smile shape within a week, so do not do that. Pull each row drum-tight as you go. The texture catches morning light beautifully and it is genuinely comfortable to lean against.
Cost: ~$20-30 | Time: 3 hours
Statement Headboards from Everyday Things
13. Chalkboard Headboard for Doodles and Notes
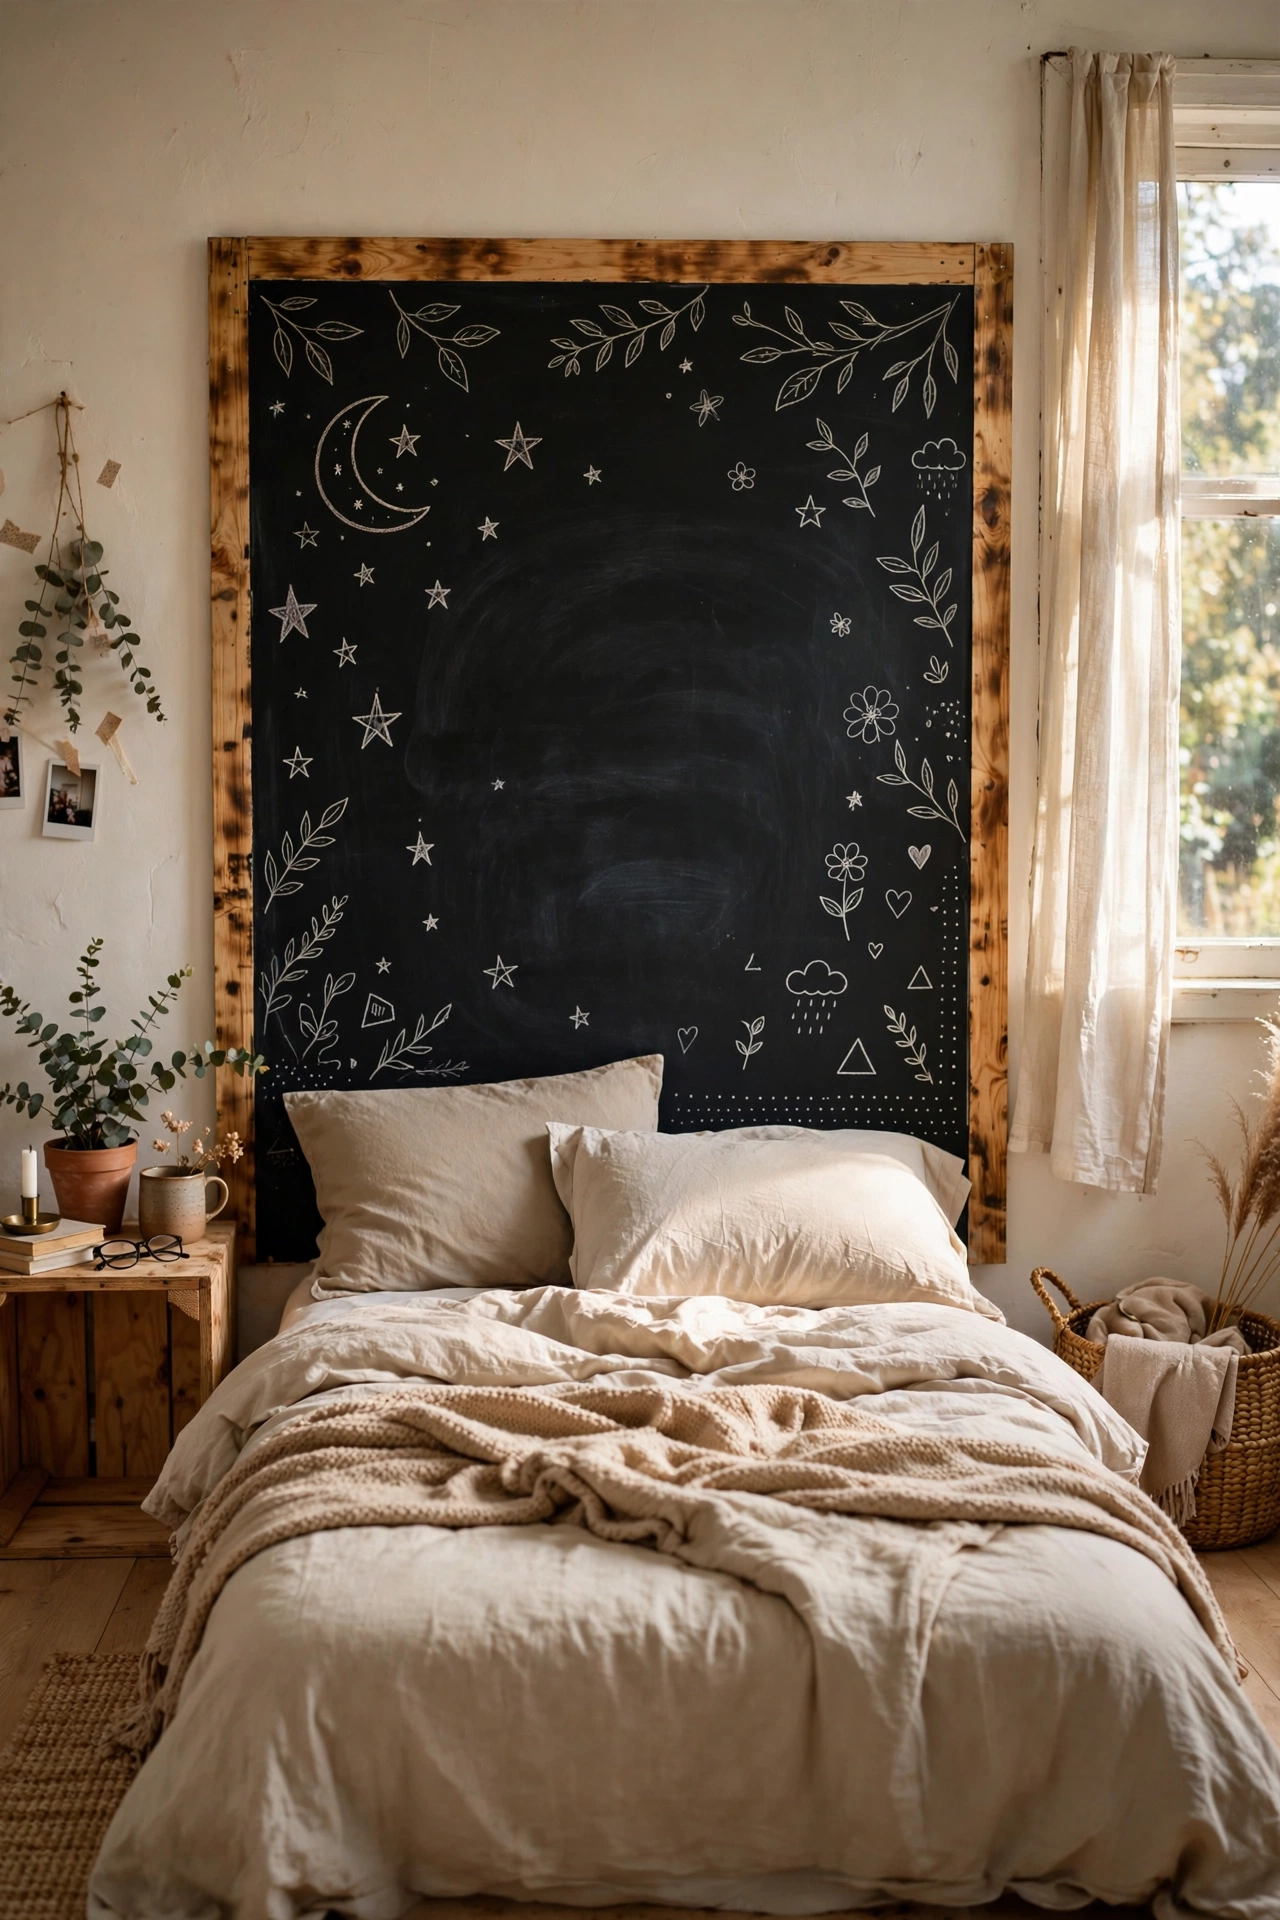
A chalkboard headboard turns the wall behind your bed into a rotating piece of art. I made mine from a plywood board painted with three coats of chalkboard paint. First, cut and sand the board, then apply the chalkboard paint in thin coats with a foam roller, sanding lightly between coats. Second, season the board by rubbing chalk over the whole surface and wiping it off, which stops the first drawings from ghosting. Third, mount it on French cleats so it sits flush. I tried skipping the seasoning step and my first quote is still faintly visible two years later, so do not do that. Write quotes, draw botanicals, or leave it blank for a moody black slab. Kids’ rooms love this one.
Cost: ~$20-35 | Time: 2 hours plus drying
14. Mirror and Frame Gallery Headboard
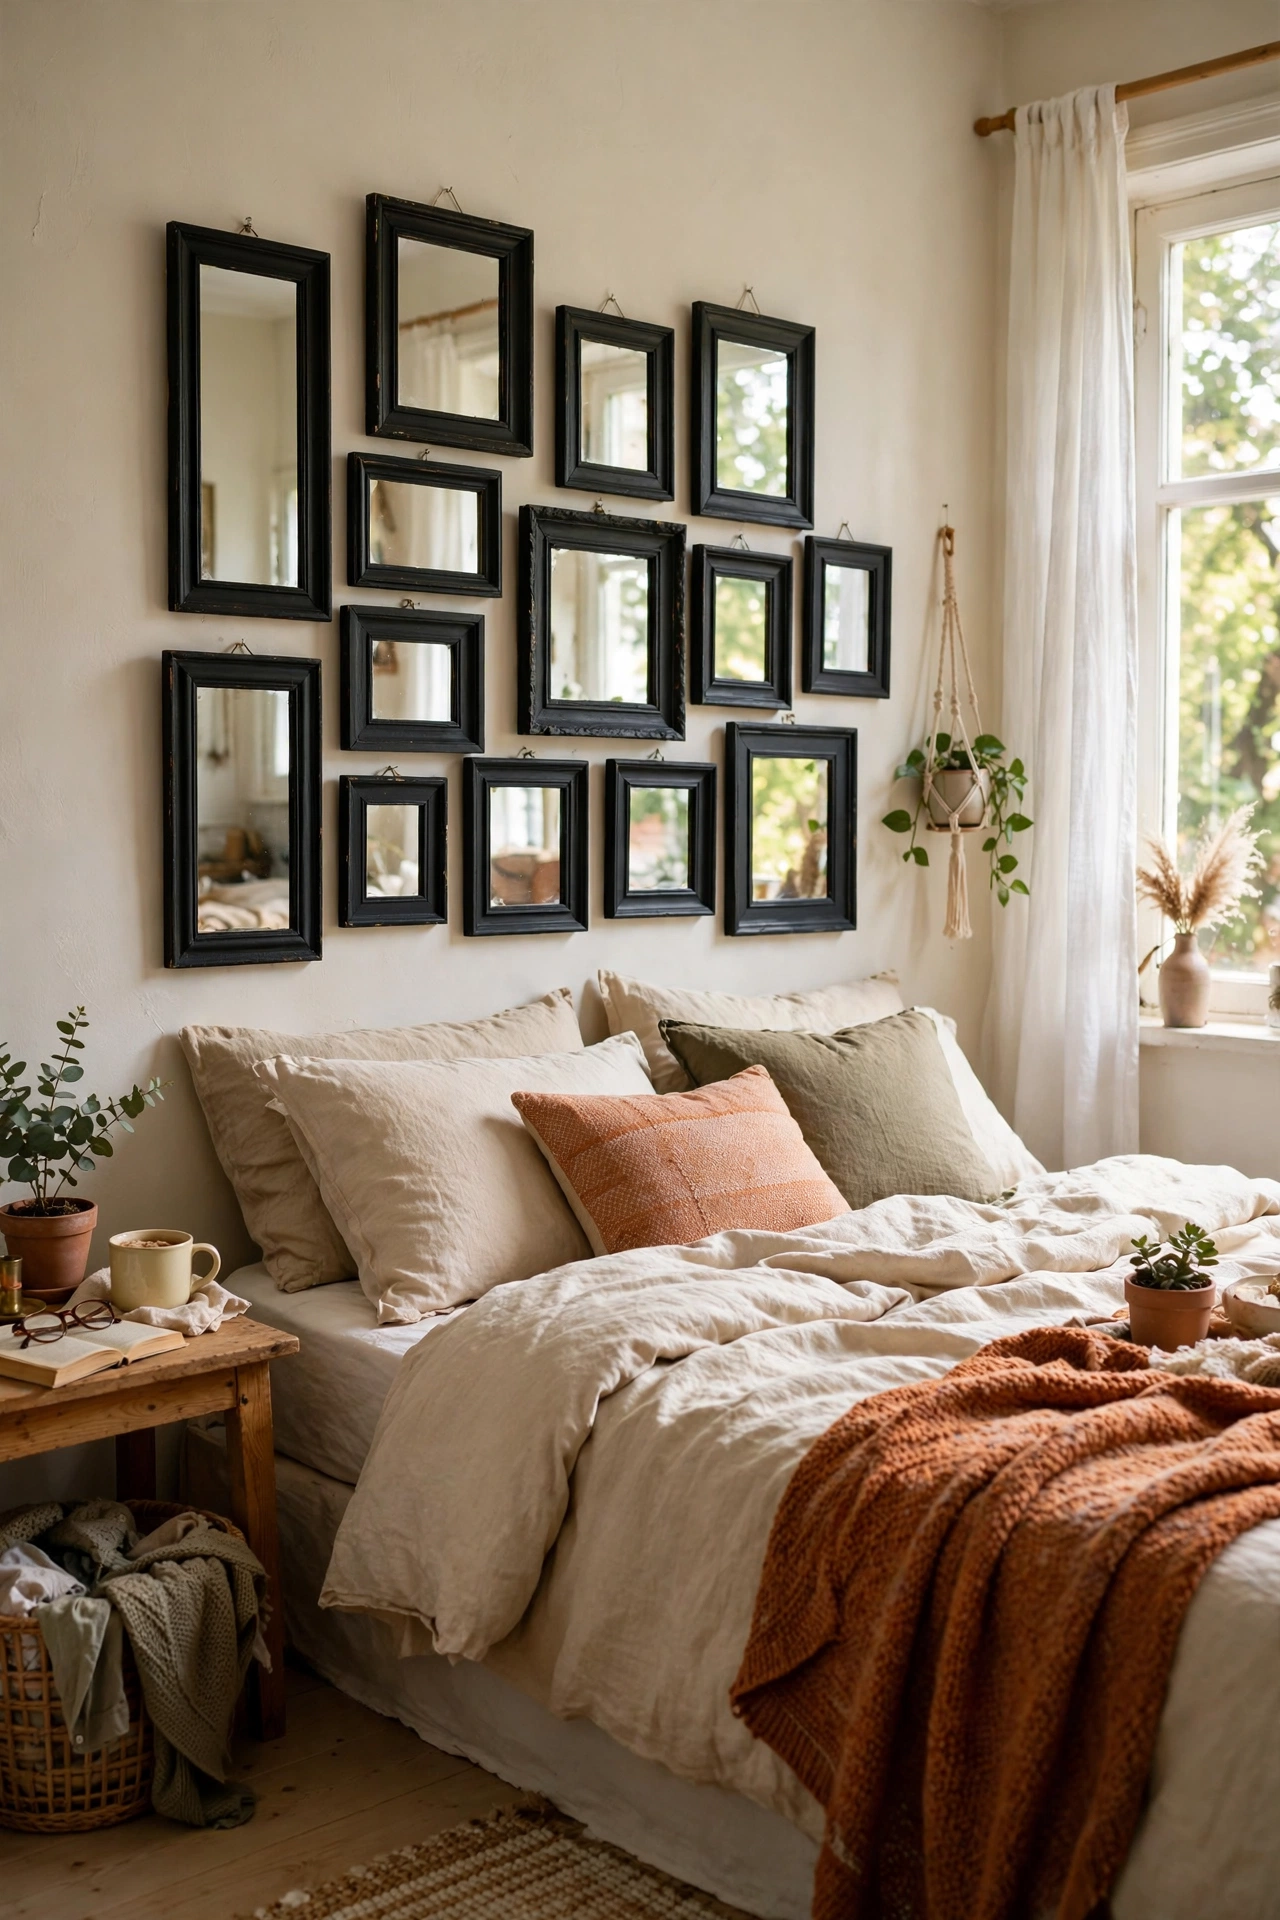
A cluster of empty frames and small mirrors arranged headboard-style bounces light around the room beautifully. I collected eleven mismatched frames from charity shops for under $20 total. First, lay the arrangement out on the floor in a rectangle roughly the size of a headboard, mixing sizes but keeping one finish colour. Second, paint every frame the same shade, matt black in my case, so the collection reads as one piece. Third, hang them in the floor plan with a paper template taped to the wall, starting from the centre frame outward. I tried hanging them freehand first and the whole thing drifted sideways by the fifth frame, so do not do that. The paper template is non-negotiable.
Cost: ~$20-35 | Time: 3 hours
15. Storage Crate Headboard with Shelves
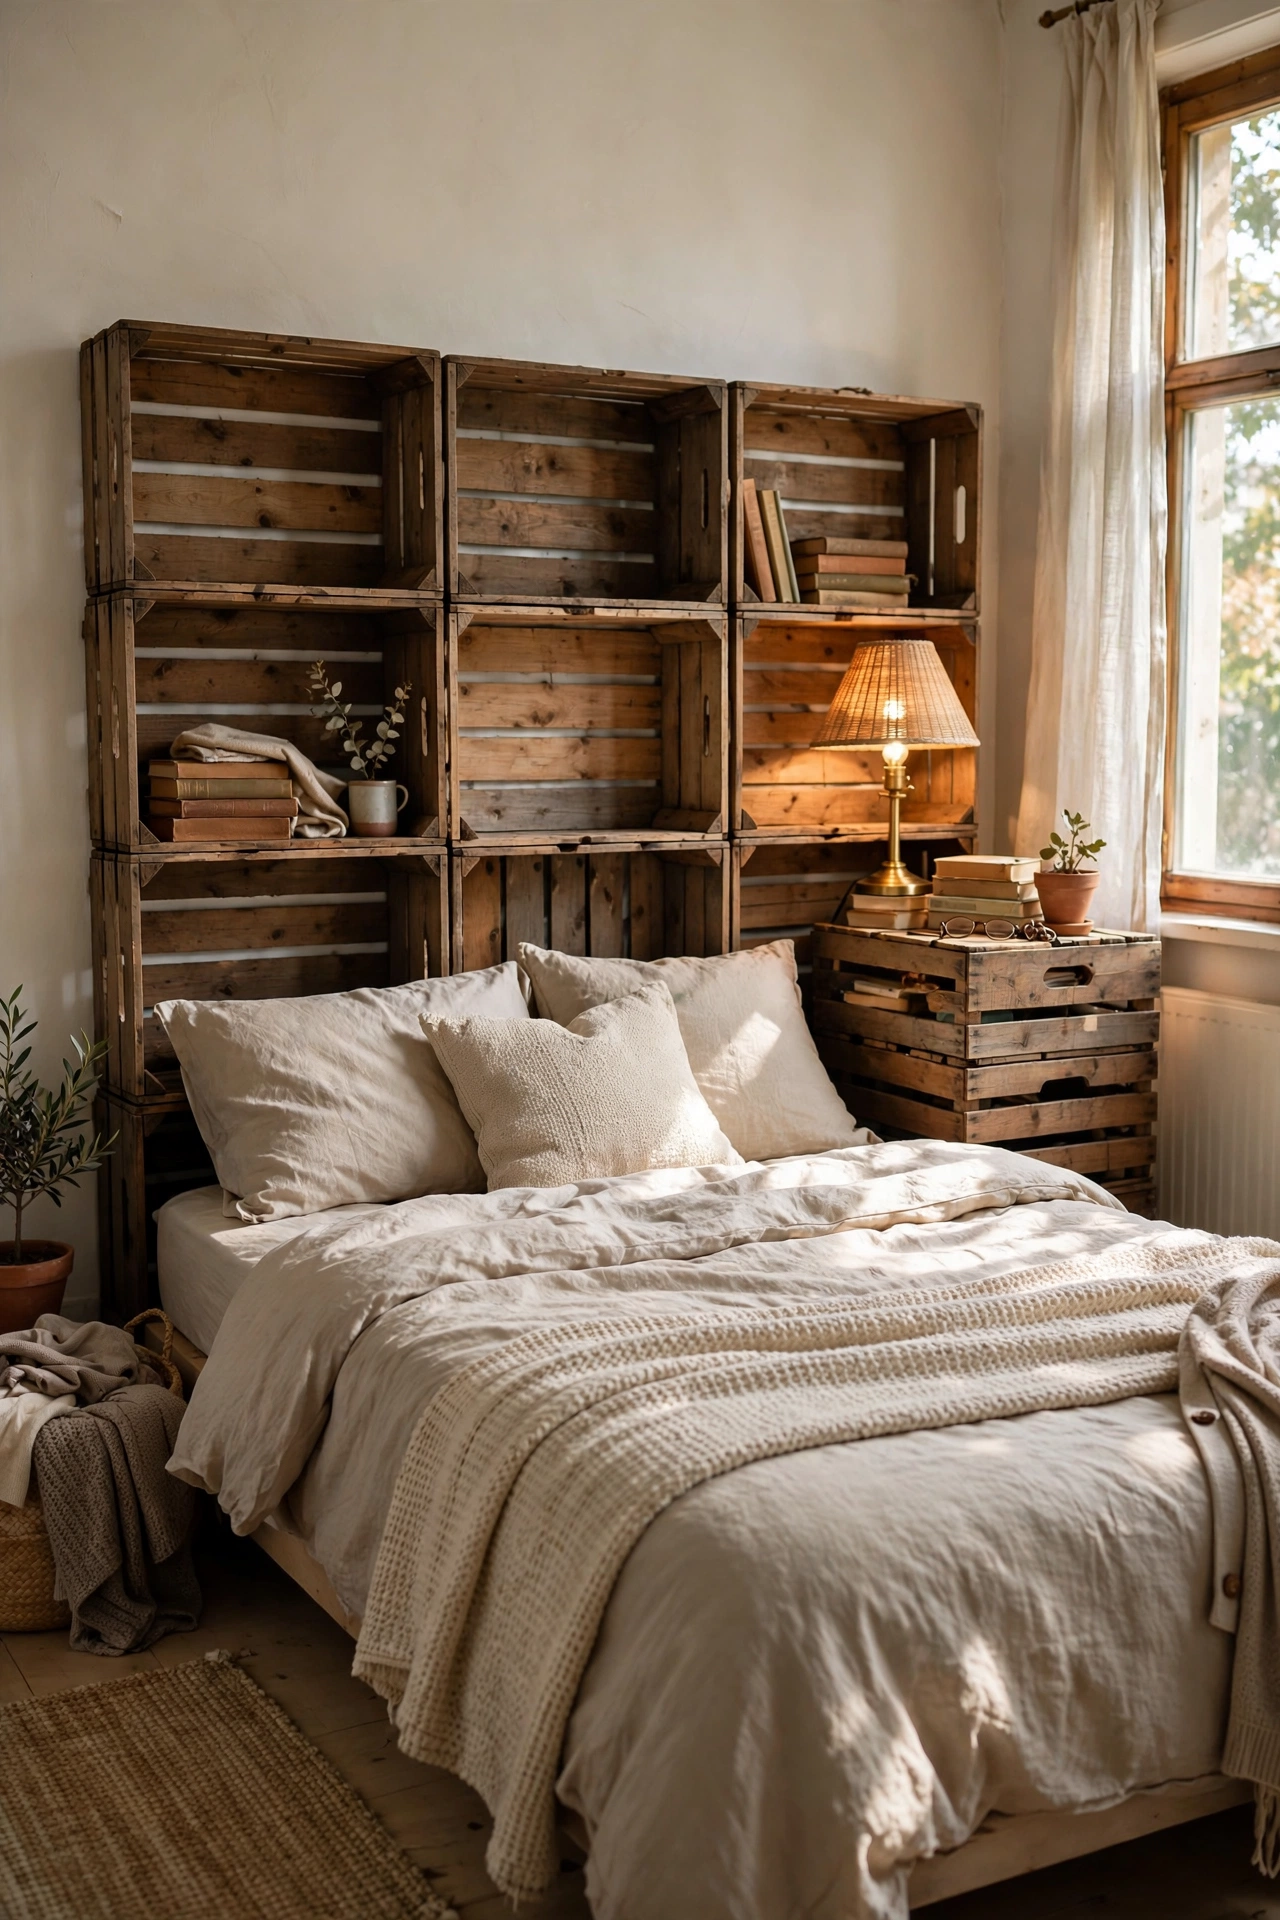
Wooden crates stacked sideways give you a headboard and bedside shelving in one build. I used six solid pine crates at $8 each from the craft store. First, sand every crate inside and out and seal with matt varnish so books and alarm clocks slide in cleanly. Second, stack them two high and three wide on the floor, checking the whole block is level, and screw the crates to each other from the inside faces. Third, anchor the entire unit to the wall with L-brackets so it cannot tip. I tried stacking them unanchored first and my cat rearranged the whole thing at 3am, so do not do that. Wall anchors are the difference between storage and hazard. Style the cubbies with books, plants, and a reading lamp.
Cost: ~$45-60 | Time: 2 hours
📌 Found a headboard you love? Save this idea now so it’s ready for your next weekend project.
More budget bedroom builds to browse next: (see also: 23-diy-headboard-ideas-in-a-weekend) (see also: 25-diy-accent-wall-ideas-without-paint-or-wallpaper) (see also: 17-bedroom-decor-ideas-under-100-for-a-cosy-retreat)
