23 DIY Headboard Ideas for Beginners
The first diy headboard I ever built was a piece of plywood wrapped in a ten-pound duvet cover, and I was embarrassingly proud of it. My bedroom had gone years with the bed shoved against a bare wall, and I kept telling myself a proper headboard was a “someday” purchase. Then one Saturday I realised the whole thing — board, fabric, and all — cost less than a takeaway and took about two hours. It changed the entire room. A headboard anchors the bed, makes the bedroom feel finished, and gives you something soft to lean against when you read in bed.
Every idea below is genuinely beginner-friendly: no advanced woodworking, no sewing machine required unless I say so, and most need nothing more than a saw, a drill, or just paint. Pick the one that matches your tools and your nerve. The worst that happens is you learn something and try the next one.
1. Fabric-Wrapped Plywood Headboard
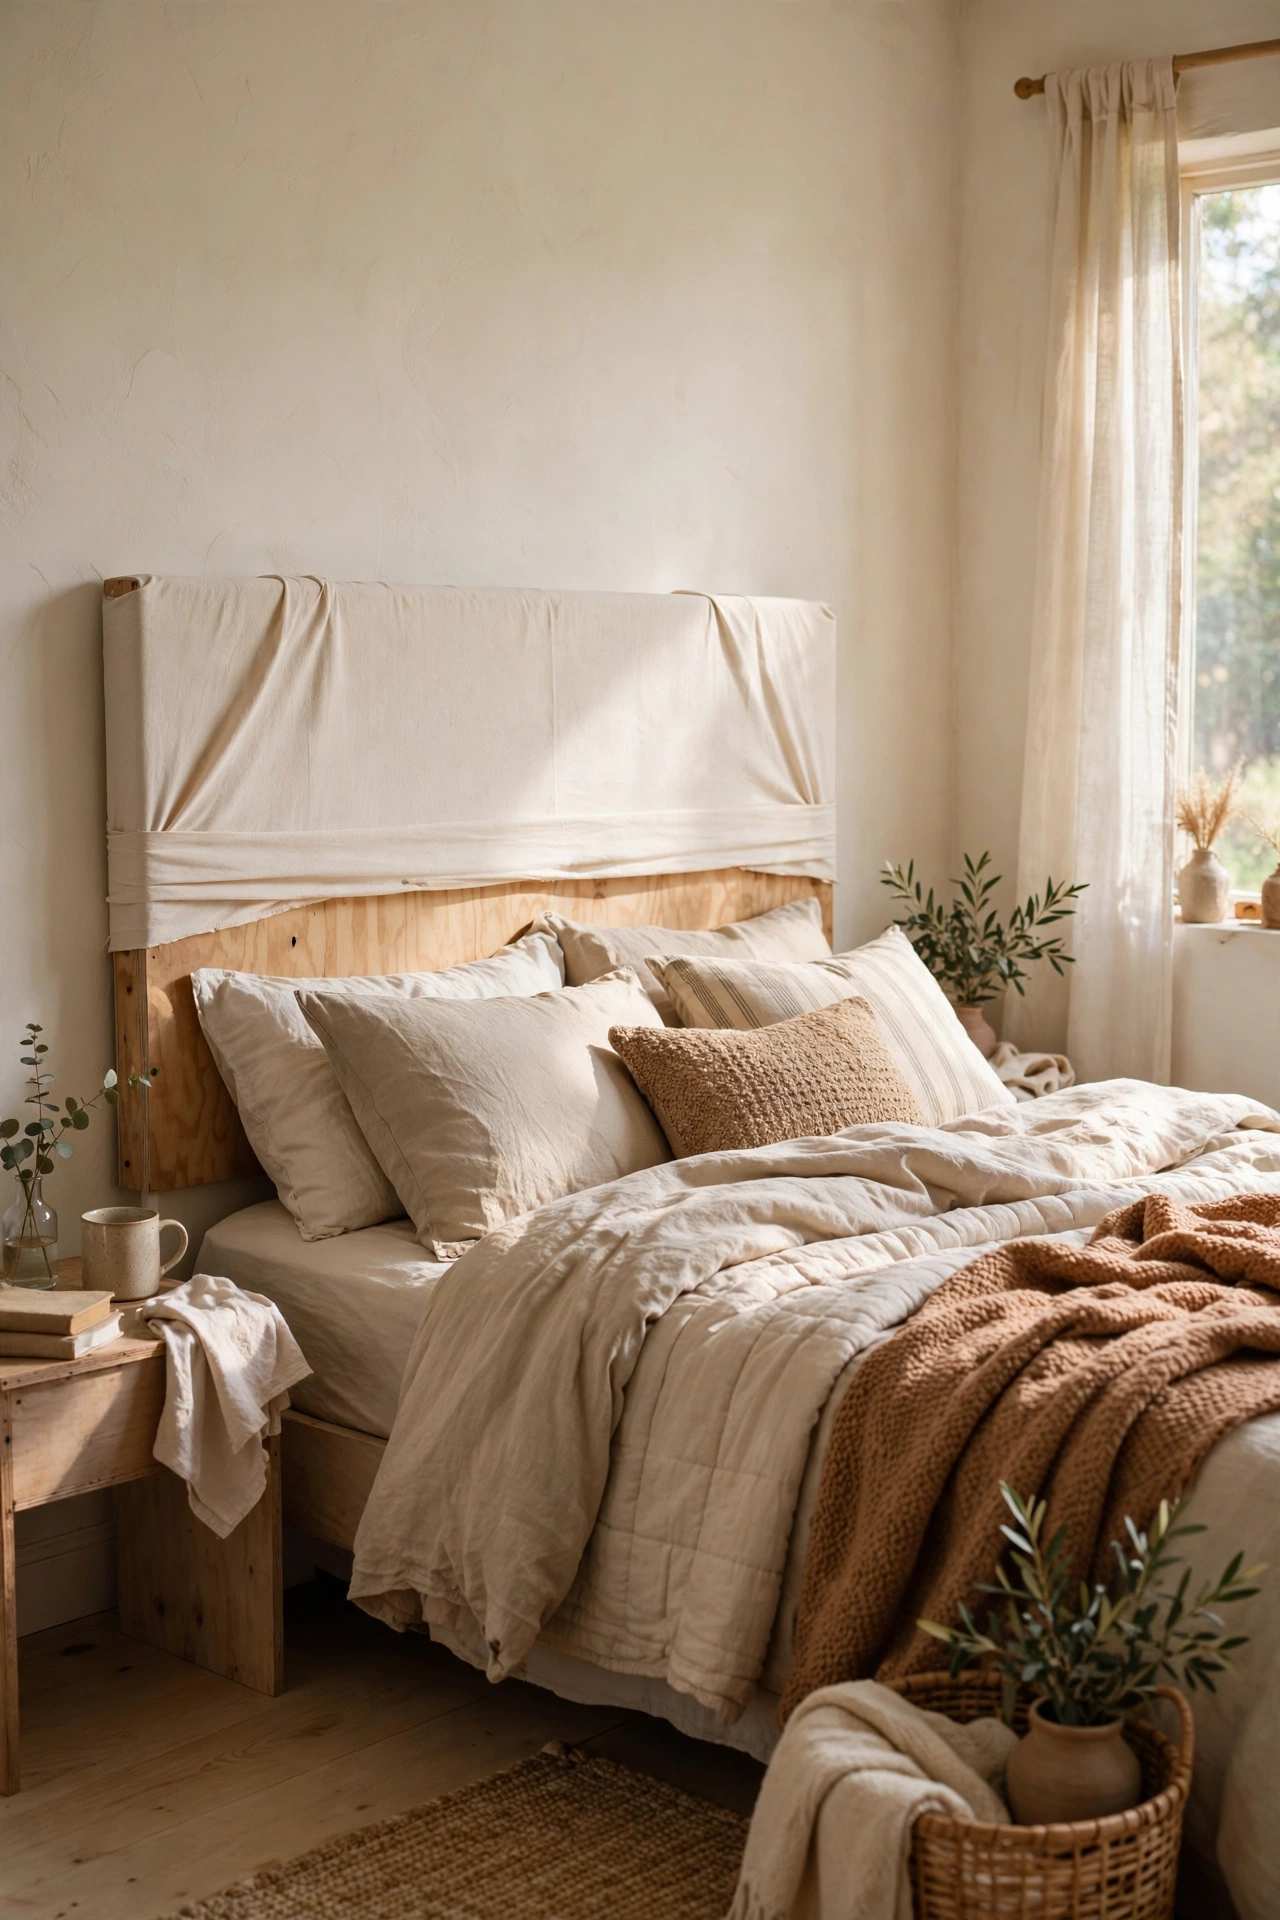
The classic beginner build: a sheet of plywood cut to the width of your bed, wrapped in fabric like a present. Cut the plywood to size at the hardware shop (most cut for free), lay your fabric face-down, centre the board, and staple the fabric around the back, pulling tight as you go. Fold the corners like wrapping paper. I used a heavy cotton duvet cover for mine and it looked properly upholstered. I tried thin quilting cotton first and the plywood texture showed through — a medium-weight fabric or a layer of cheap batting underneath fixes that. Do staple the middle of each side first, then work toward the corners for even tension.
Pro tip: iron the fabric before you start — wrinkles get locked in forever once the staples go in.
Cost: ~$25 | Time: 2 hours
2. Painted Arch Headboard
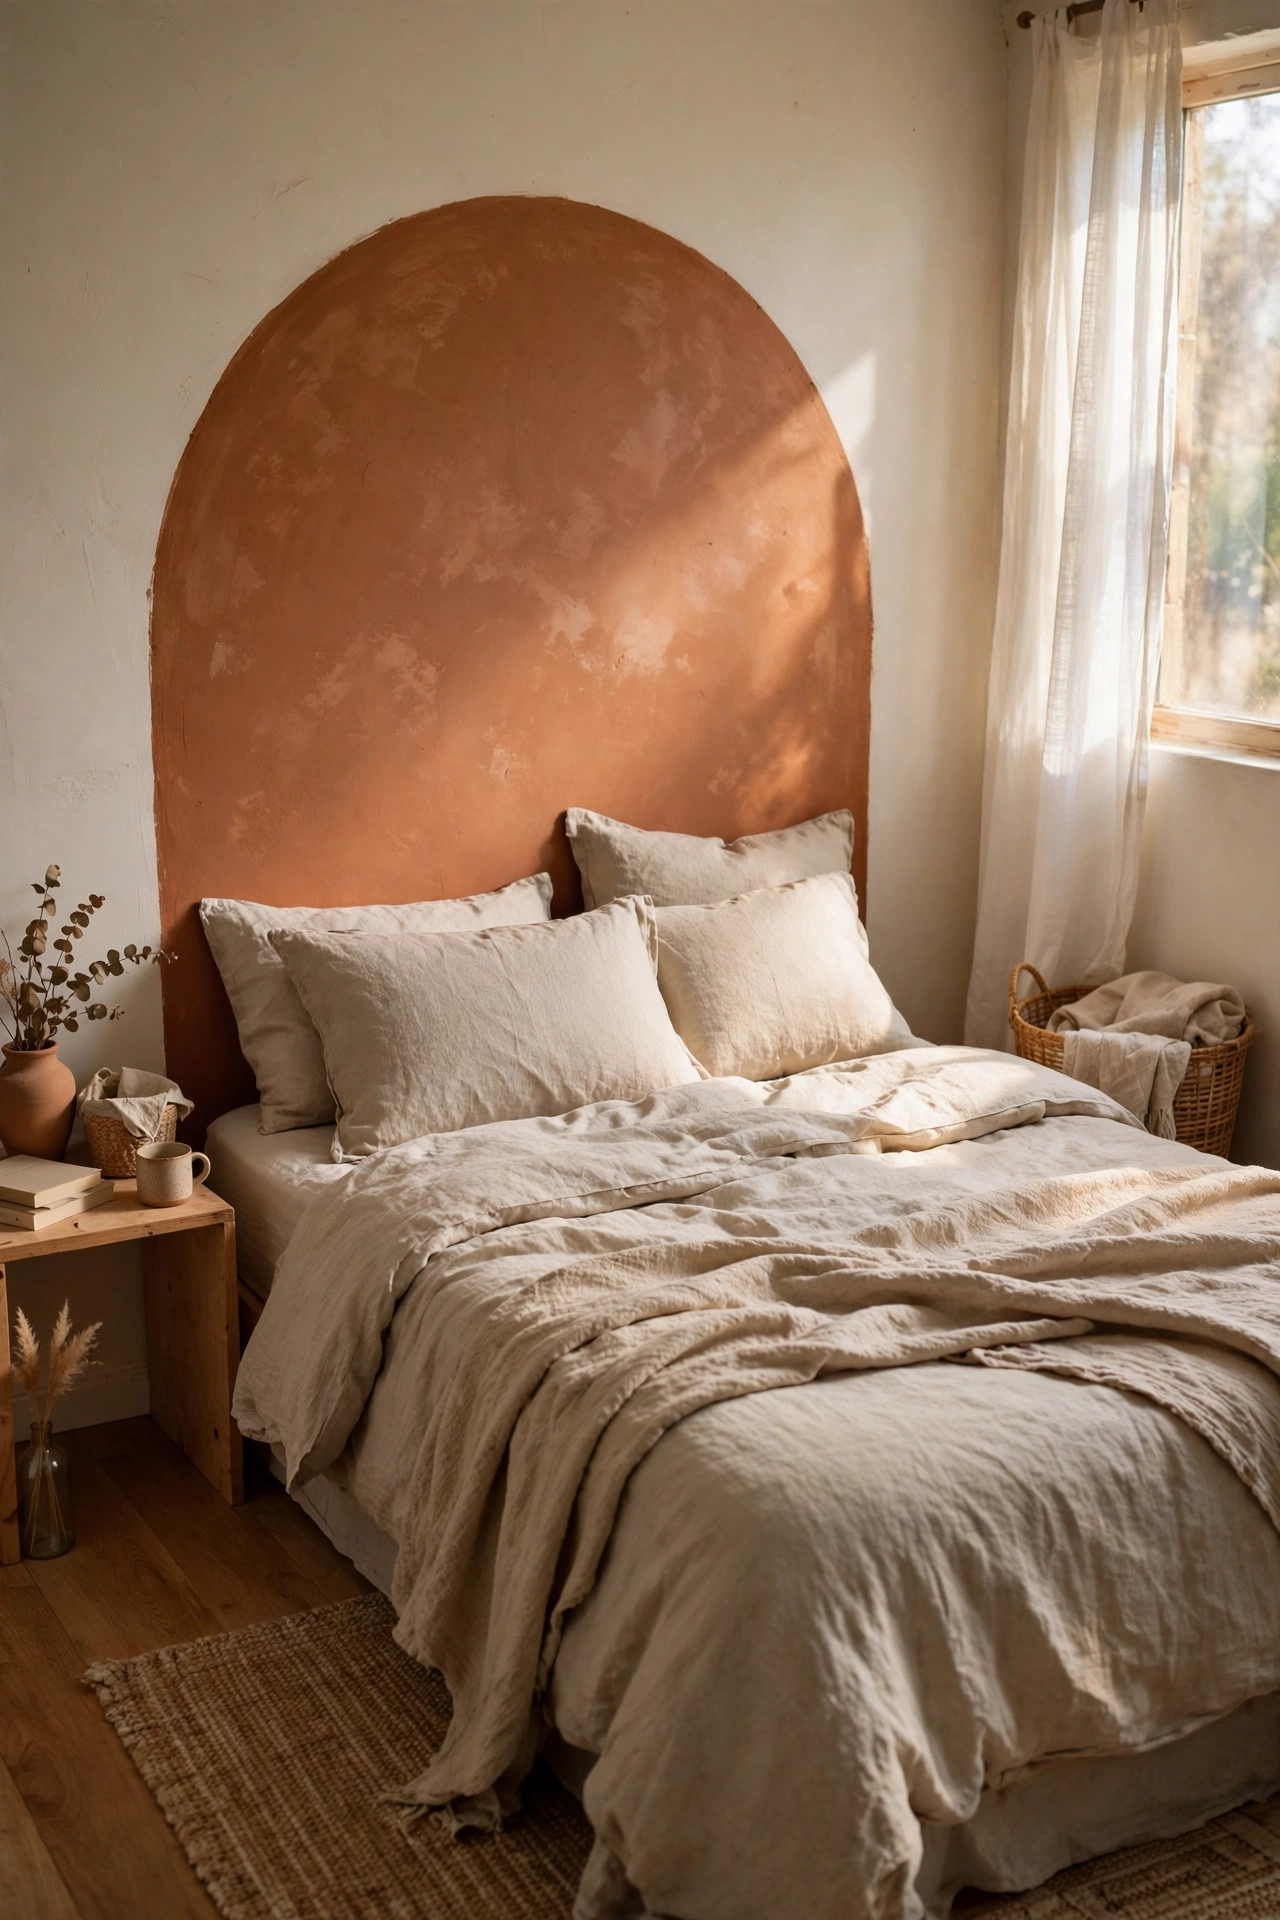
No building at all: paint an arch on the wall behind your bed and it reads as a headboard. Mark the arch with a pencil on a string, fill it in with two coats of paint in a colour you love, and peel the tape for a crisp edge. It costs one tester pot and takes an afternoon. I painted a warm clay arch in my spare room and visitors always ask where the headboard came from. Do extend the arch a little wider than the mattress on each side so it frames the bed properly. Don’t paint it the same colour as the wall — the whole point is the contrast.
Pro tip: paint the arch before you move the bed into position; edging around a mattress is miserable.
Cost: ~$8 | Time: an afternoon plus drying
3. Pallet Wood Headboard
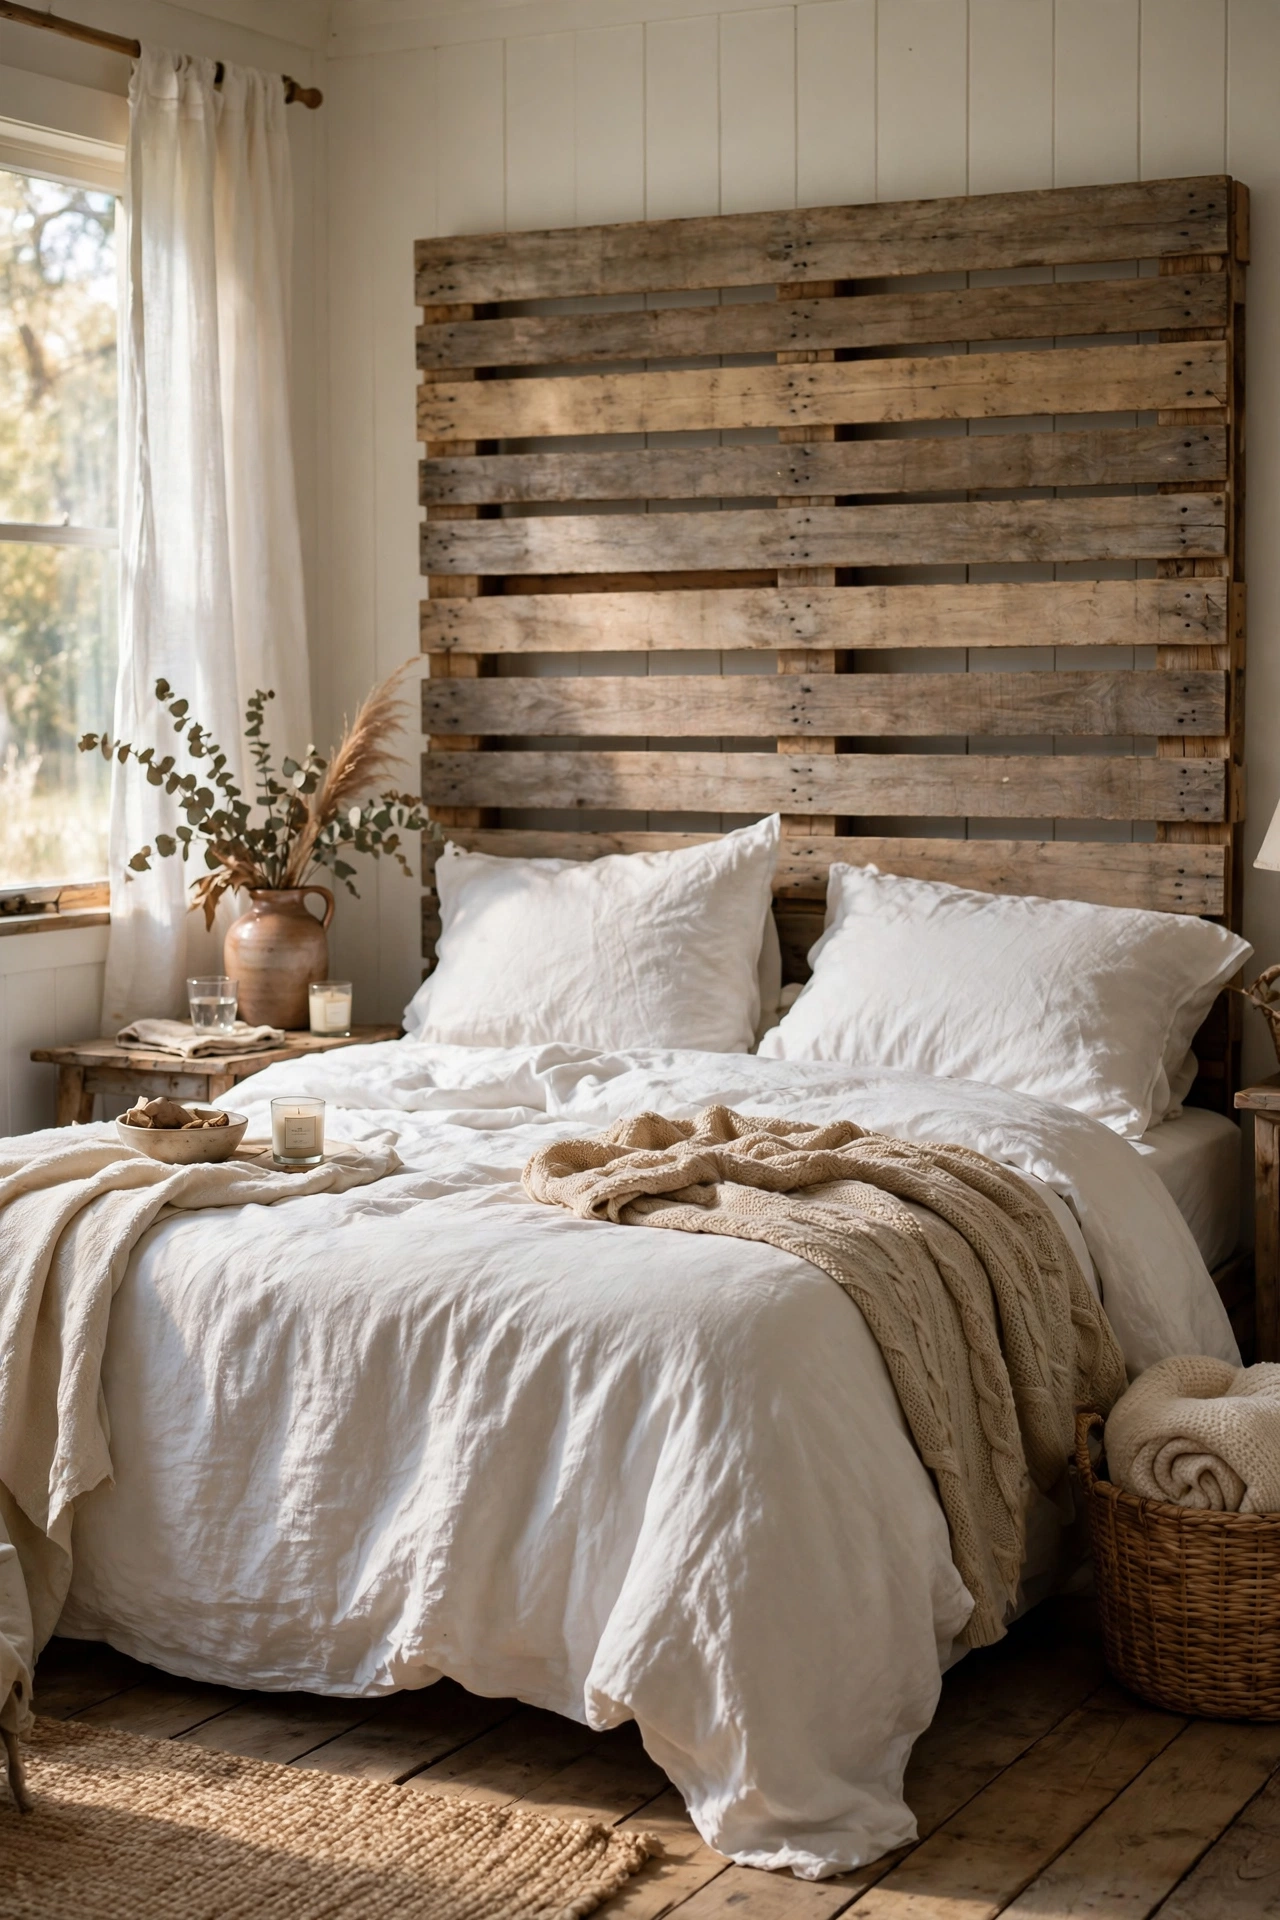
Free pallets become a rustic plank headboard with a bit of sanding and some screws. Break down two pallets, sand every board smooth (this takes a while — put on a podcast), then screw the planks horizontally onto two vertical battens on the back. Stain or whitewash to taste. Mine cost nothing but sandpaper and it suits my farmhouse-style bedroom perfectly. I tried skipping the sanding and got a splinter in my pillow within a week — sand thoroughly, especially the top edge. Do check pallets for the HT stamp (heat-treated) rather than MB (chemically treated) before bringing them into a bedroom.
Pro tip: run the planks through a planer at a local maker space if you can — it takes the sanding time down to minutes.
Cost: ~$10 | Time: a weekend
4. Curtain Panel Headboard
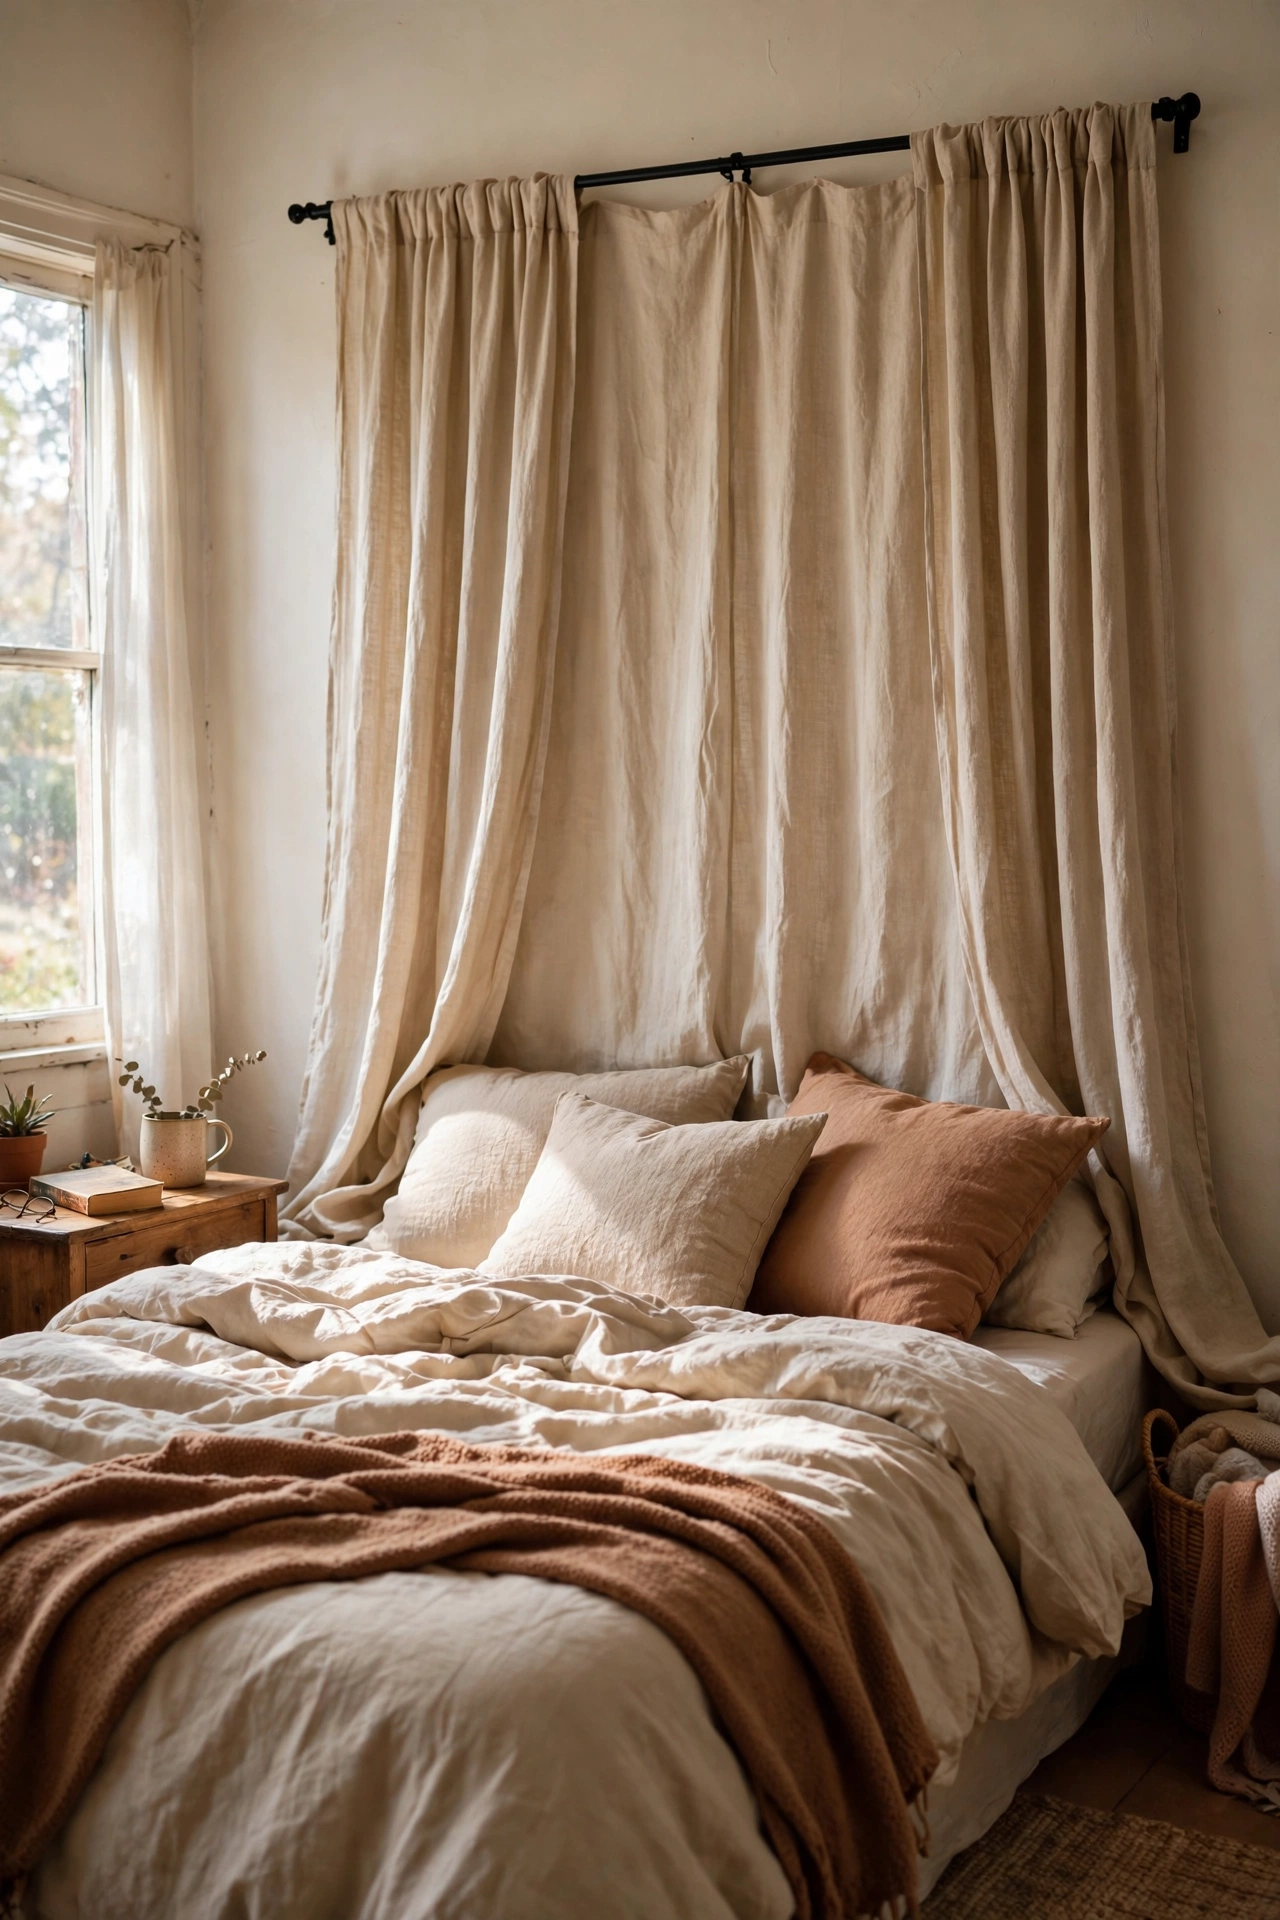
Hang a curtain rod on the wall behind the bed and drape two floor-length curtain panels behind it — instant soft, tall headboard. Mount the rod about 15cm above where you want the “headboard” to top out, hang the panels, and let them pool slightly or just kiss the mattress. I did this in a rental where I couldn’t build anything, and the floor-to-ceiling fabric made the tiny bedroom feel grand. Do use a proper curtain rod with wall brackets, not a tension rod — it needs to hold real weight. Don’t choose sheer fabric unless you layer it; sheers alone look flimsy as a headboard.
Pro tip: hang the rod wider than the bed by 20cm each side — narrow rods make the bed look squeezed.
Cost: ~$30 | Time: 1 hour
5. Vintage Shutter Headboard
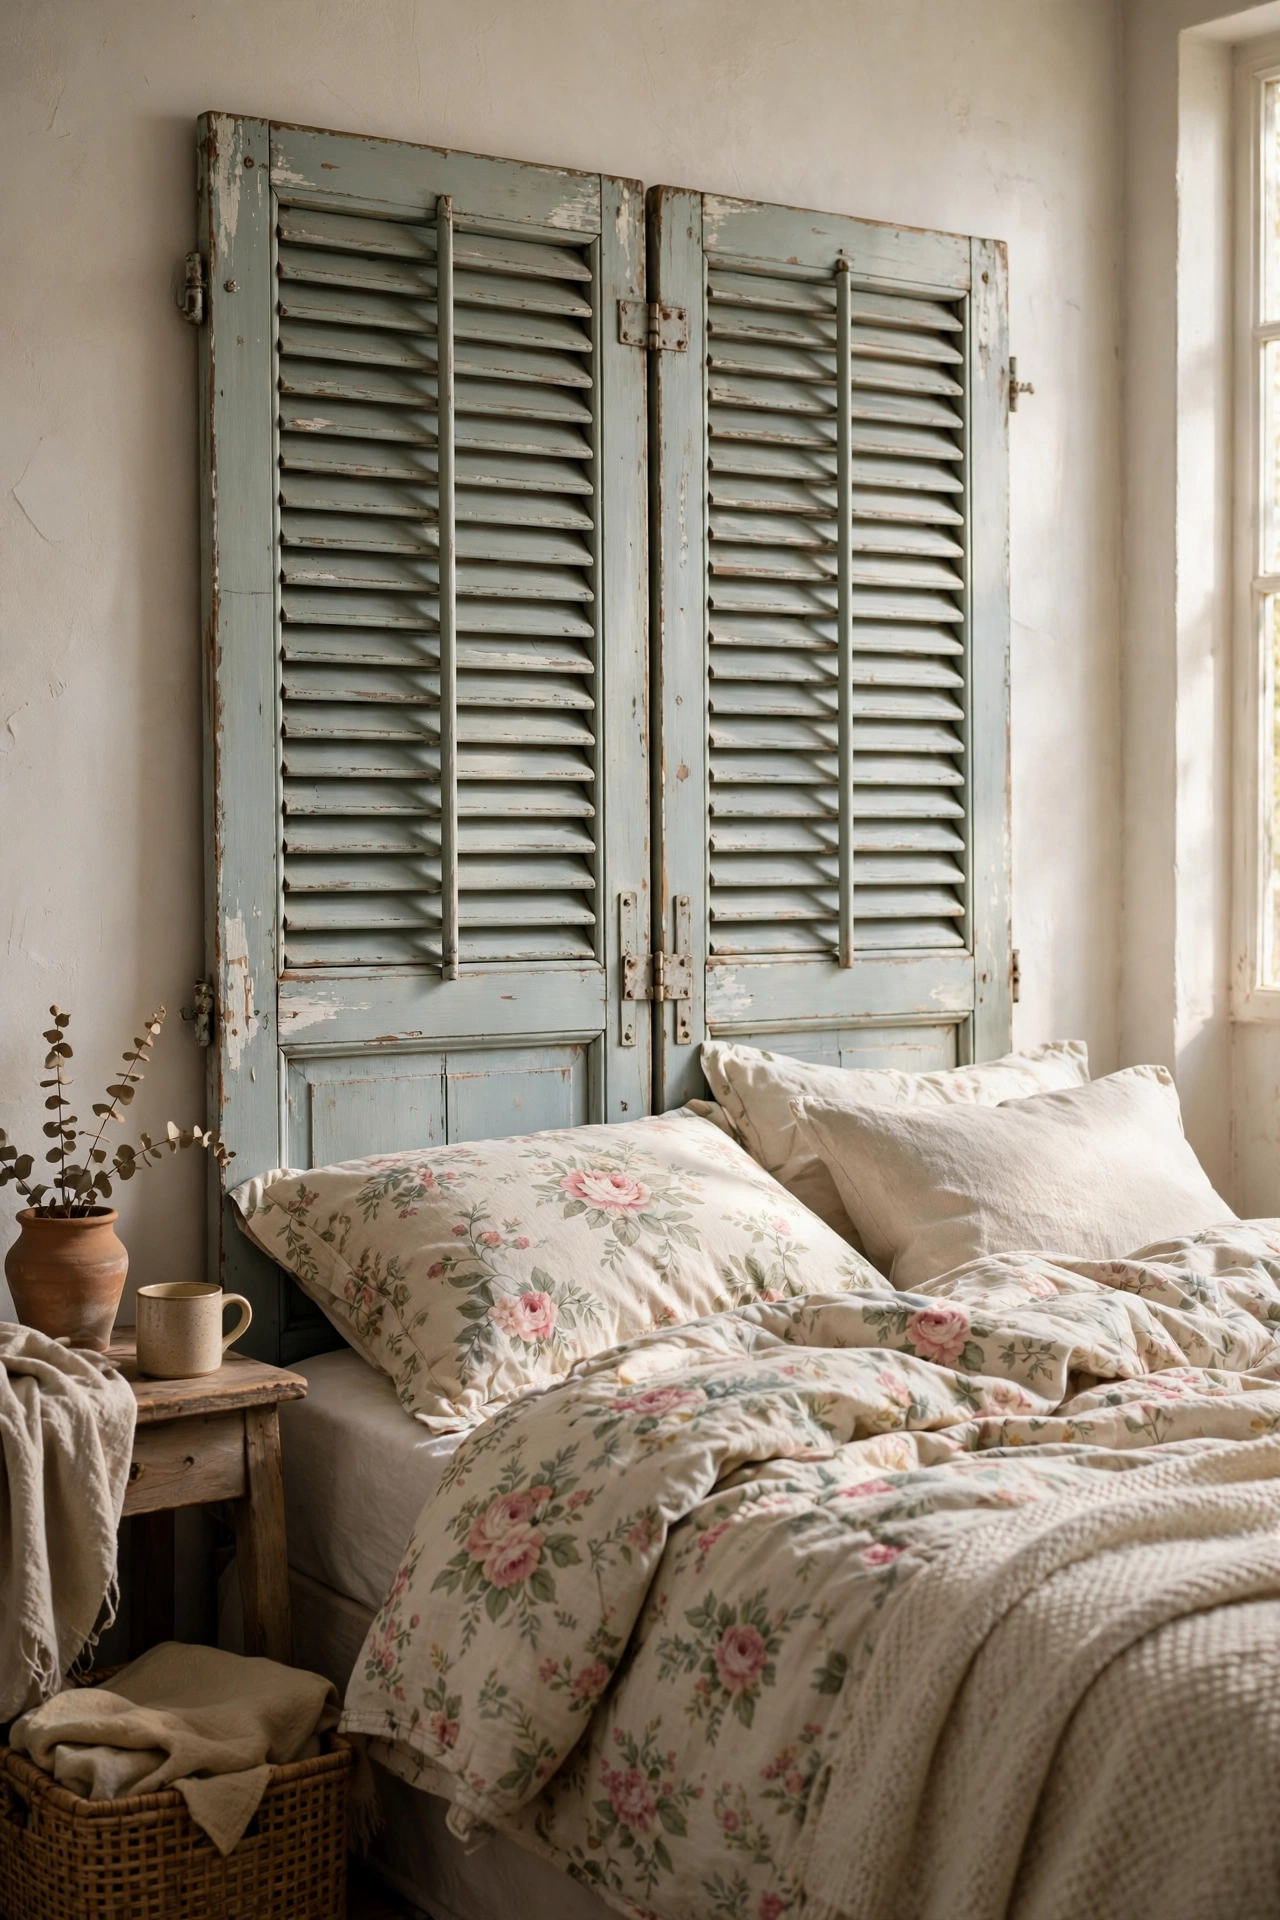
Two old wooden shutters hinged together make a charming cottage-style headboard. Find shutters at salvage yards or online marketplaces, clean them up, paint or leave the chippy finish, then join them with hinges or screw them to a back batten. Stand or wall-mount behind the bed. Mine came from a house clearance for a fiver and the worn green paint is my favourite thing in the room. I tried mounting mine with just lean-and-hope and it slid down behind the bed — fix it to the wall with proper brackets. Do check for lead paint on very old shutters and seal them before use.
Pro tip: if the shutters are different heights, add small wooden feet to the shorter one so the tops line up.
Cost: ~$15 | Time: 2 hours
6. No-Sew Buttoned Headboard
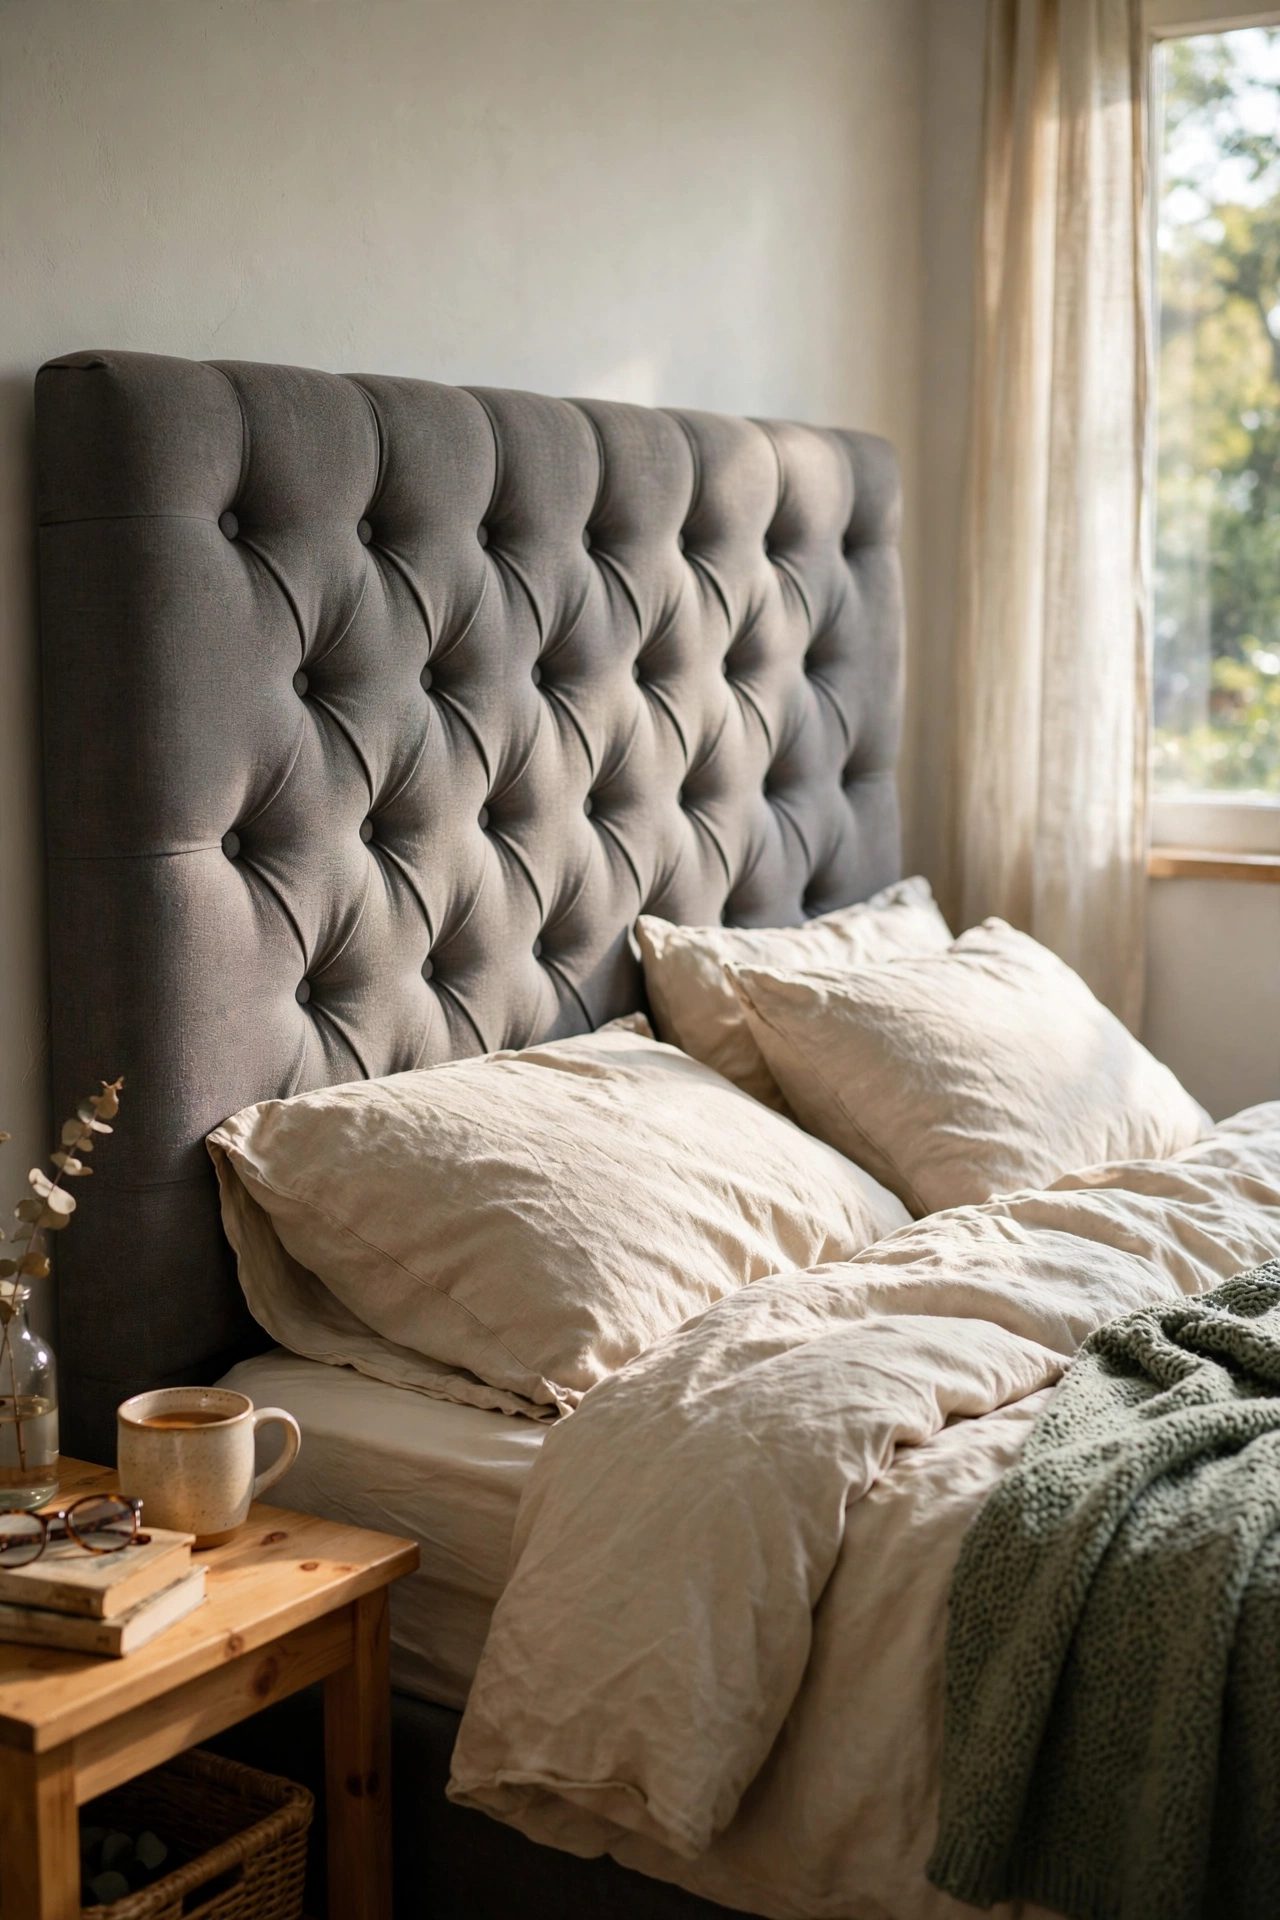
You can fake deep-buttoned upholstery with plywood, foam, fabric, and covered buttons — no sewing at all. Glue foam to the plywood, wrap it in batting then fabric, and at each button point, push a needle threaded with strong cord through to the back, thread on a fabric-covered button, and pull tight to create the dimple. Knot it off at the back. Mine looks like a proper chesterfield from across the room. I tried spacing my buttons by eye and the grid drifted — mark the grid with chalk first. Do use upholstery-strength thread; regular thread snaps when you pull the dimples tight.
Pro tip: cover the buttons with the same fabric as the headboard for the most expensive-looking result.
Cost: ~$35 | Time: 3–4 hours
7. Low Bookcase Headboard
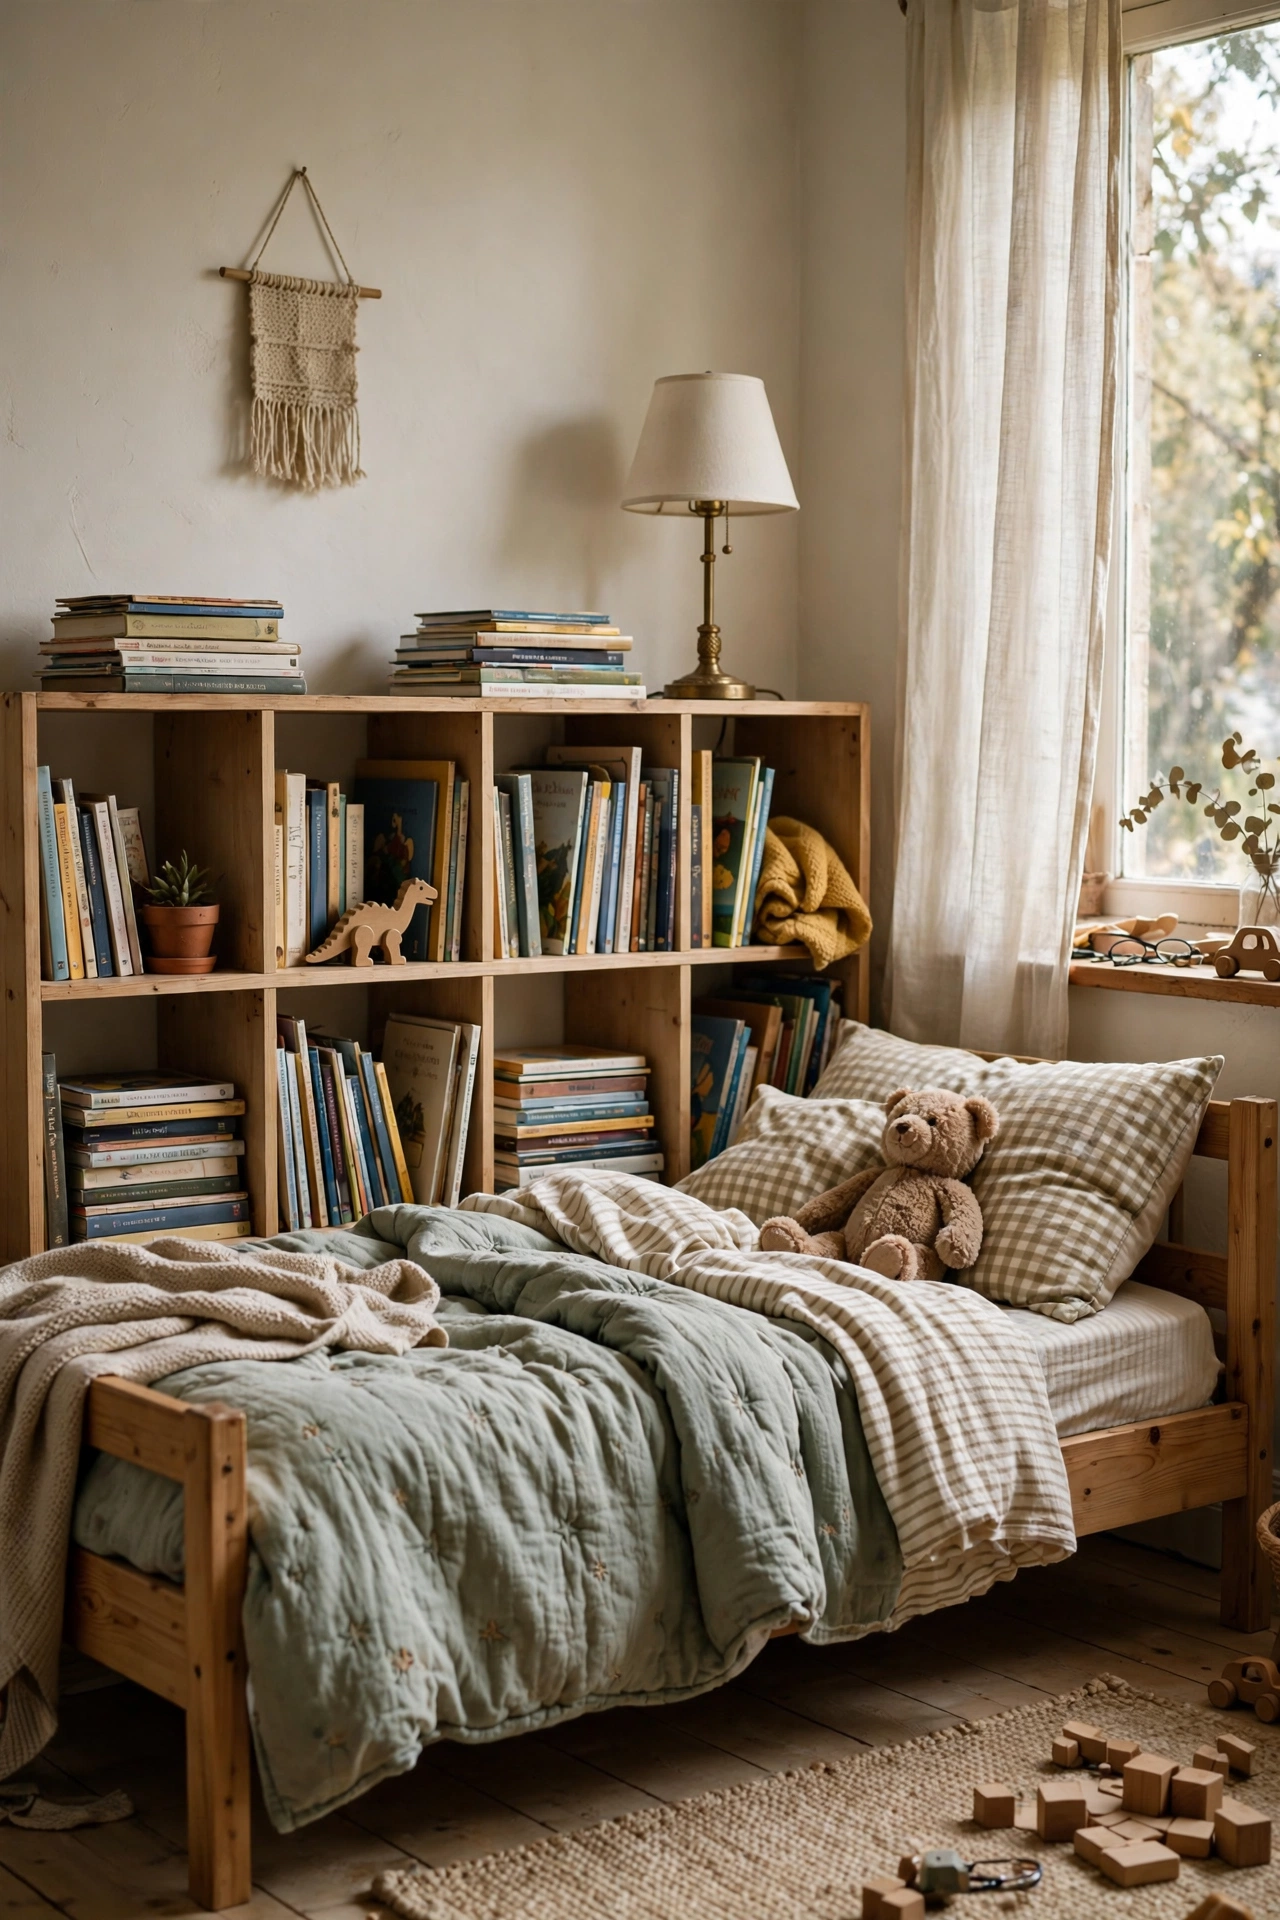
A low, wide bookcase pushed against the wall behind the bed works as a headboard with built-in storage. Buy a cheap cube bookcase (or two side by side for a king), anchor it to the wall, and style the top with books, a lamp, and a plant. The shelves hold your bedtime reading and the top acts as a nightstand on both sides. I did this in my son’s room and the extra storage ended the under-bed book avalanche. Do anchor it to the wall — a bookcase behind a bed must not tip. Don’t overload the top shelf; keep it to a lamp and a few light items.
Pro tip: paint the back panel of the bookcase a contrasting colour so it reads as intentional furniture, not a hack.
Cost: ~$40 | Time: 2 hours
8. Woven Wall Hanging Headboard
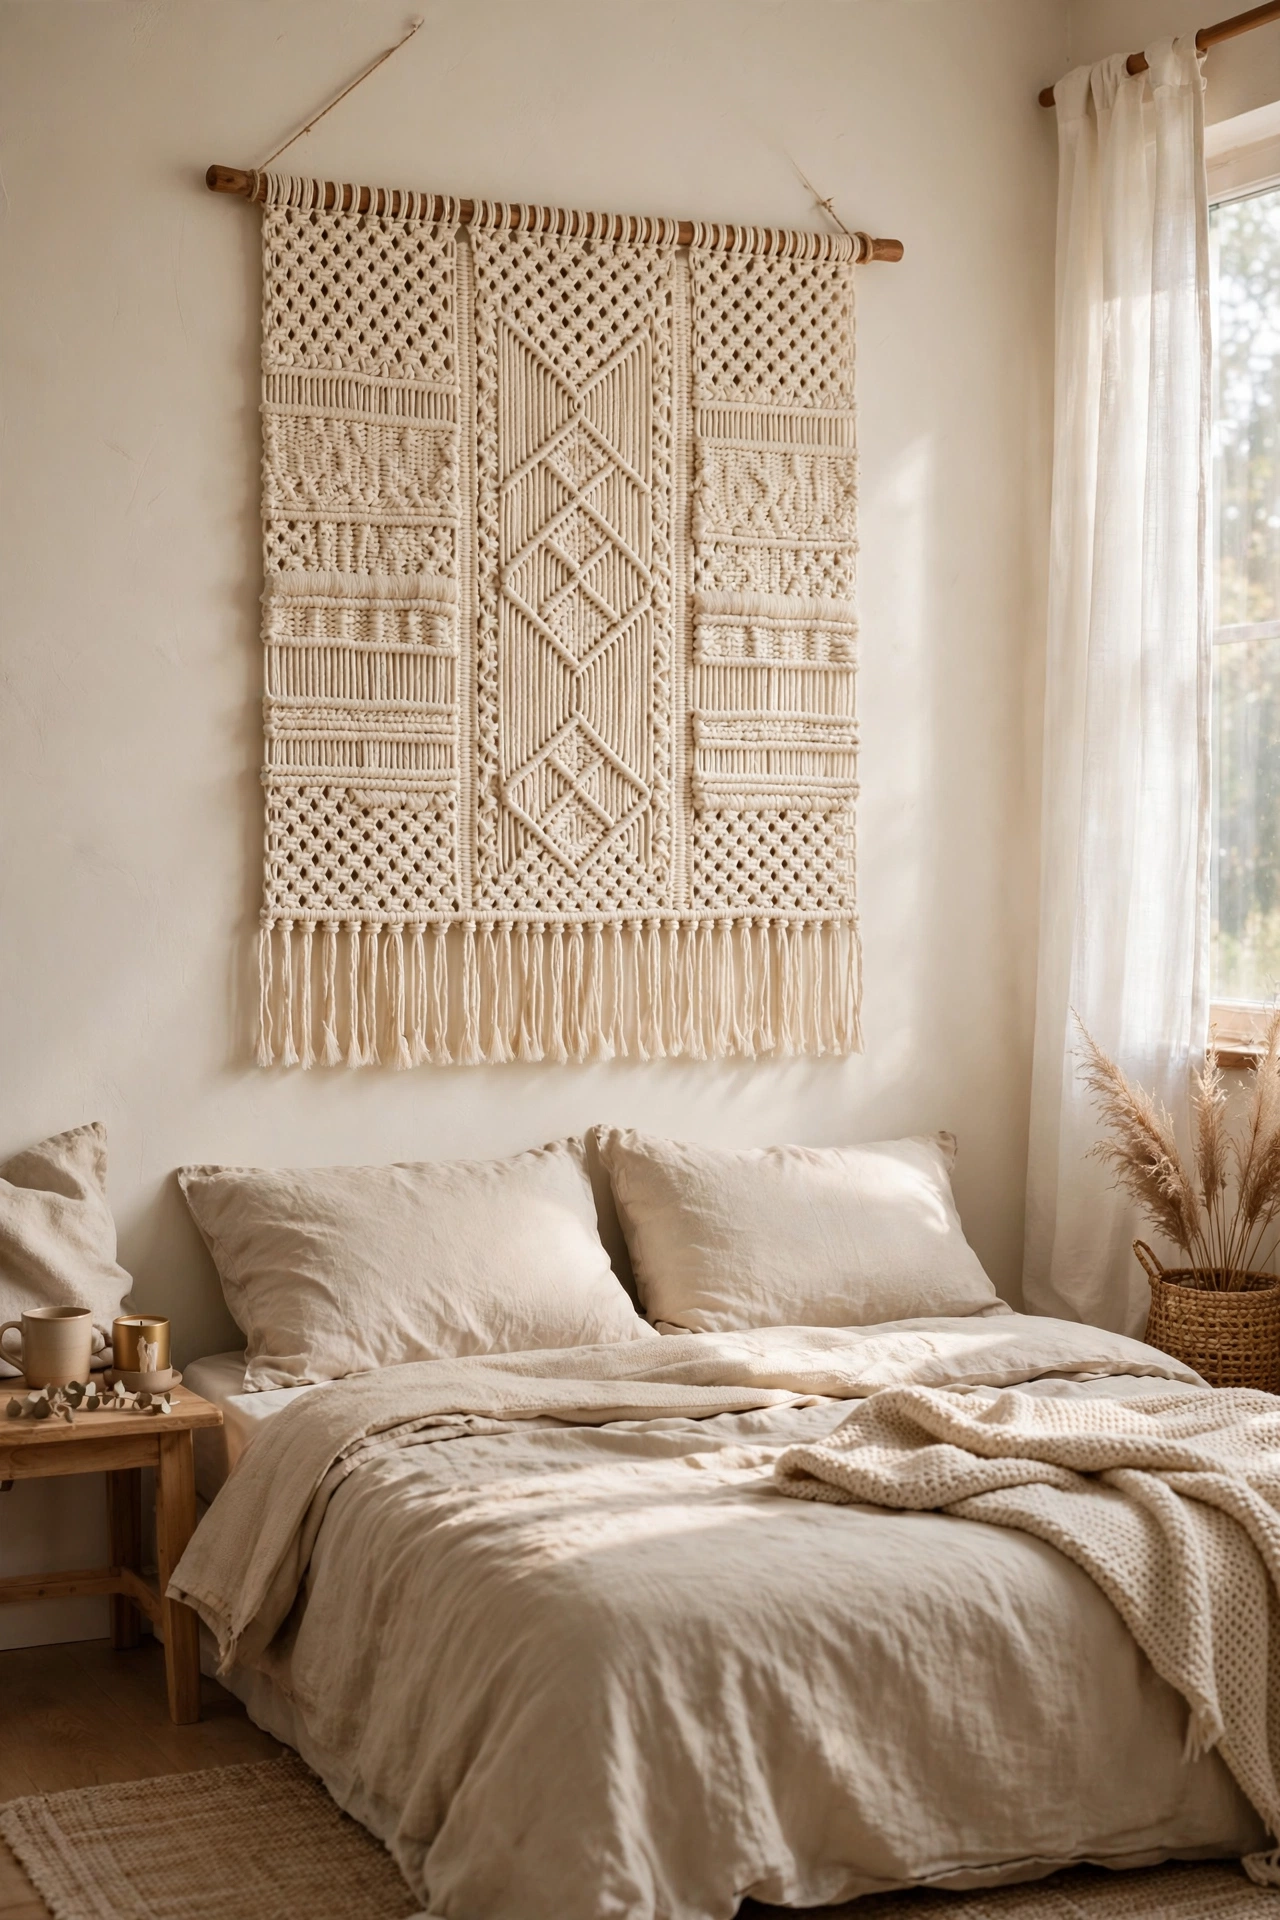
A large woven wall hanging centred behind the bed softens the wall like a textile headboard. Hang it from a wooden dowel on two hooks, positioned so the bottom edge sits just behind the pillows. Charity shops and online marketplaces are full of large weavings for a few pounds. Mine is a cream macramé-style piece that adds texture without any building. I tried hanging mine too high and it floated oddly above the bed — the bottom third should tuck behind the pillows. Do use wall anchors rated for the weight; large textiles are heavier than they look.
Pro tip: steam out the creases with a handheld steamer before hanging — folded storage lines show badly on a wall.
Cost: ~$18 | Time: 30 minutes
9. Beadboard Panel Headboard
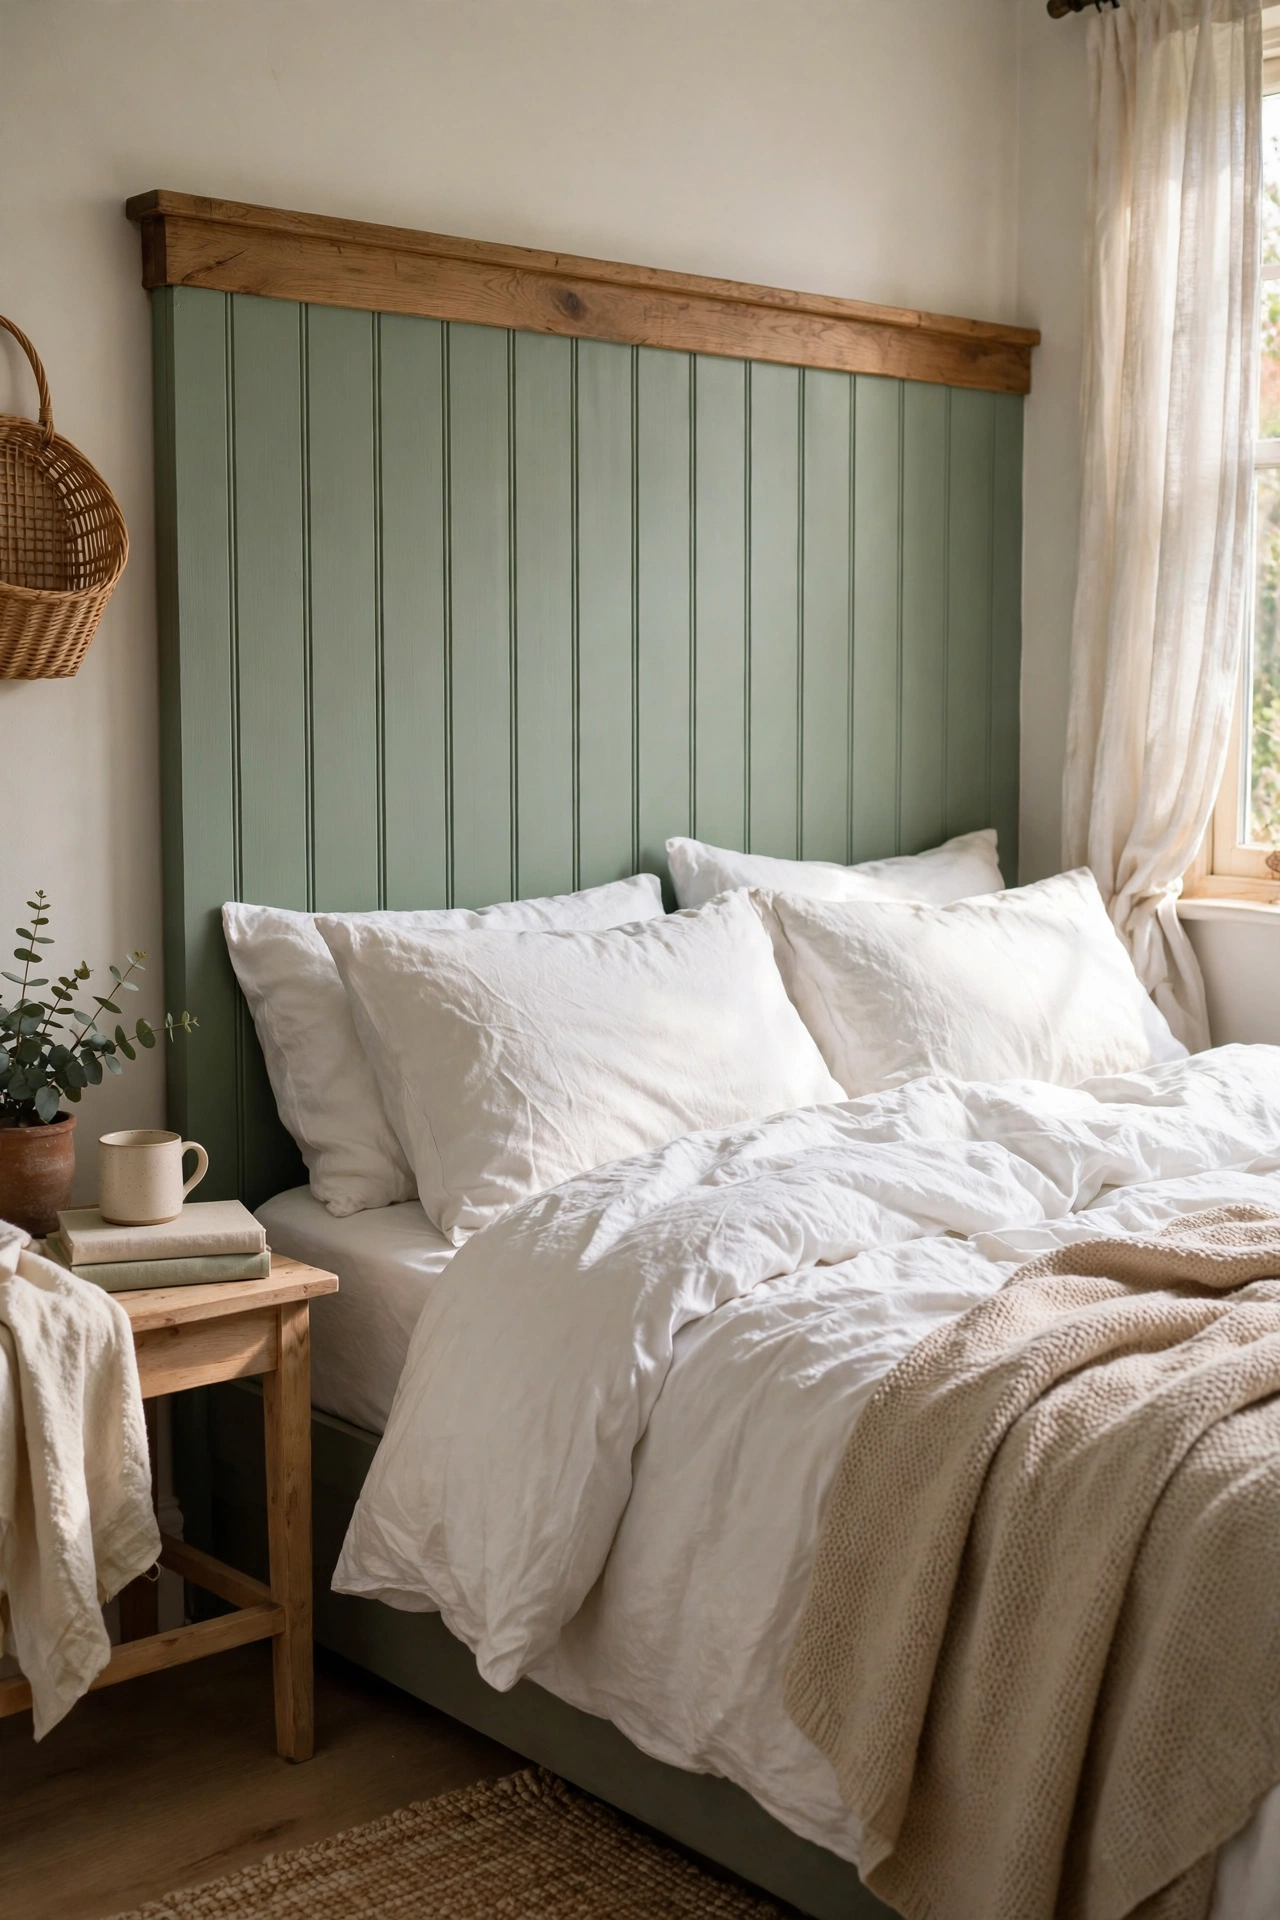
Beadboard panels from the hardware shop screw straight to the wall for a classic panelled headboard look. Cut two or three panels to the width of your bed, paint them in a soft colour, and fix them to the wall with screws into studs, adding a simple timber cap along the top edge. It looks like custom joinery. I painted mine a soft sage and the bedroom finally feels “done”. I tried gluing the panels instead of screwing and one warped off the wall within a month — screws into studs are non-negotiable. Do fill and sand the screw holes before the final paint coat.
Pro tip: run a bead of caulk along the top cap where it meets the wall for a clean, built-in finish.
Cost: ~$30 | Time: 3 hours
10. Macramé Headboard Panel
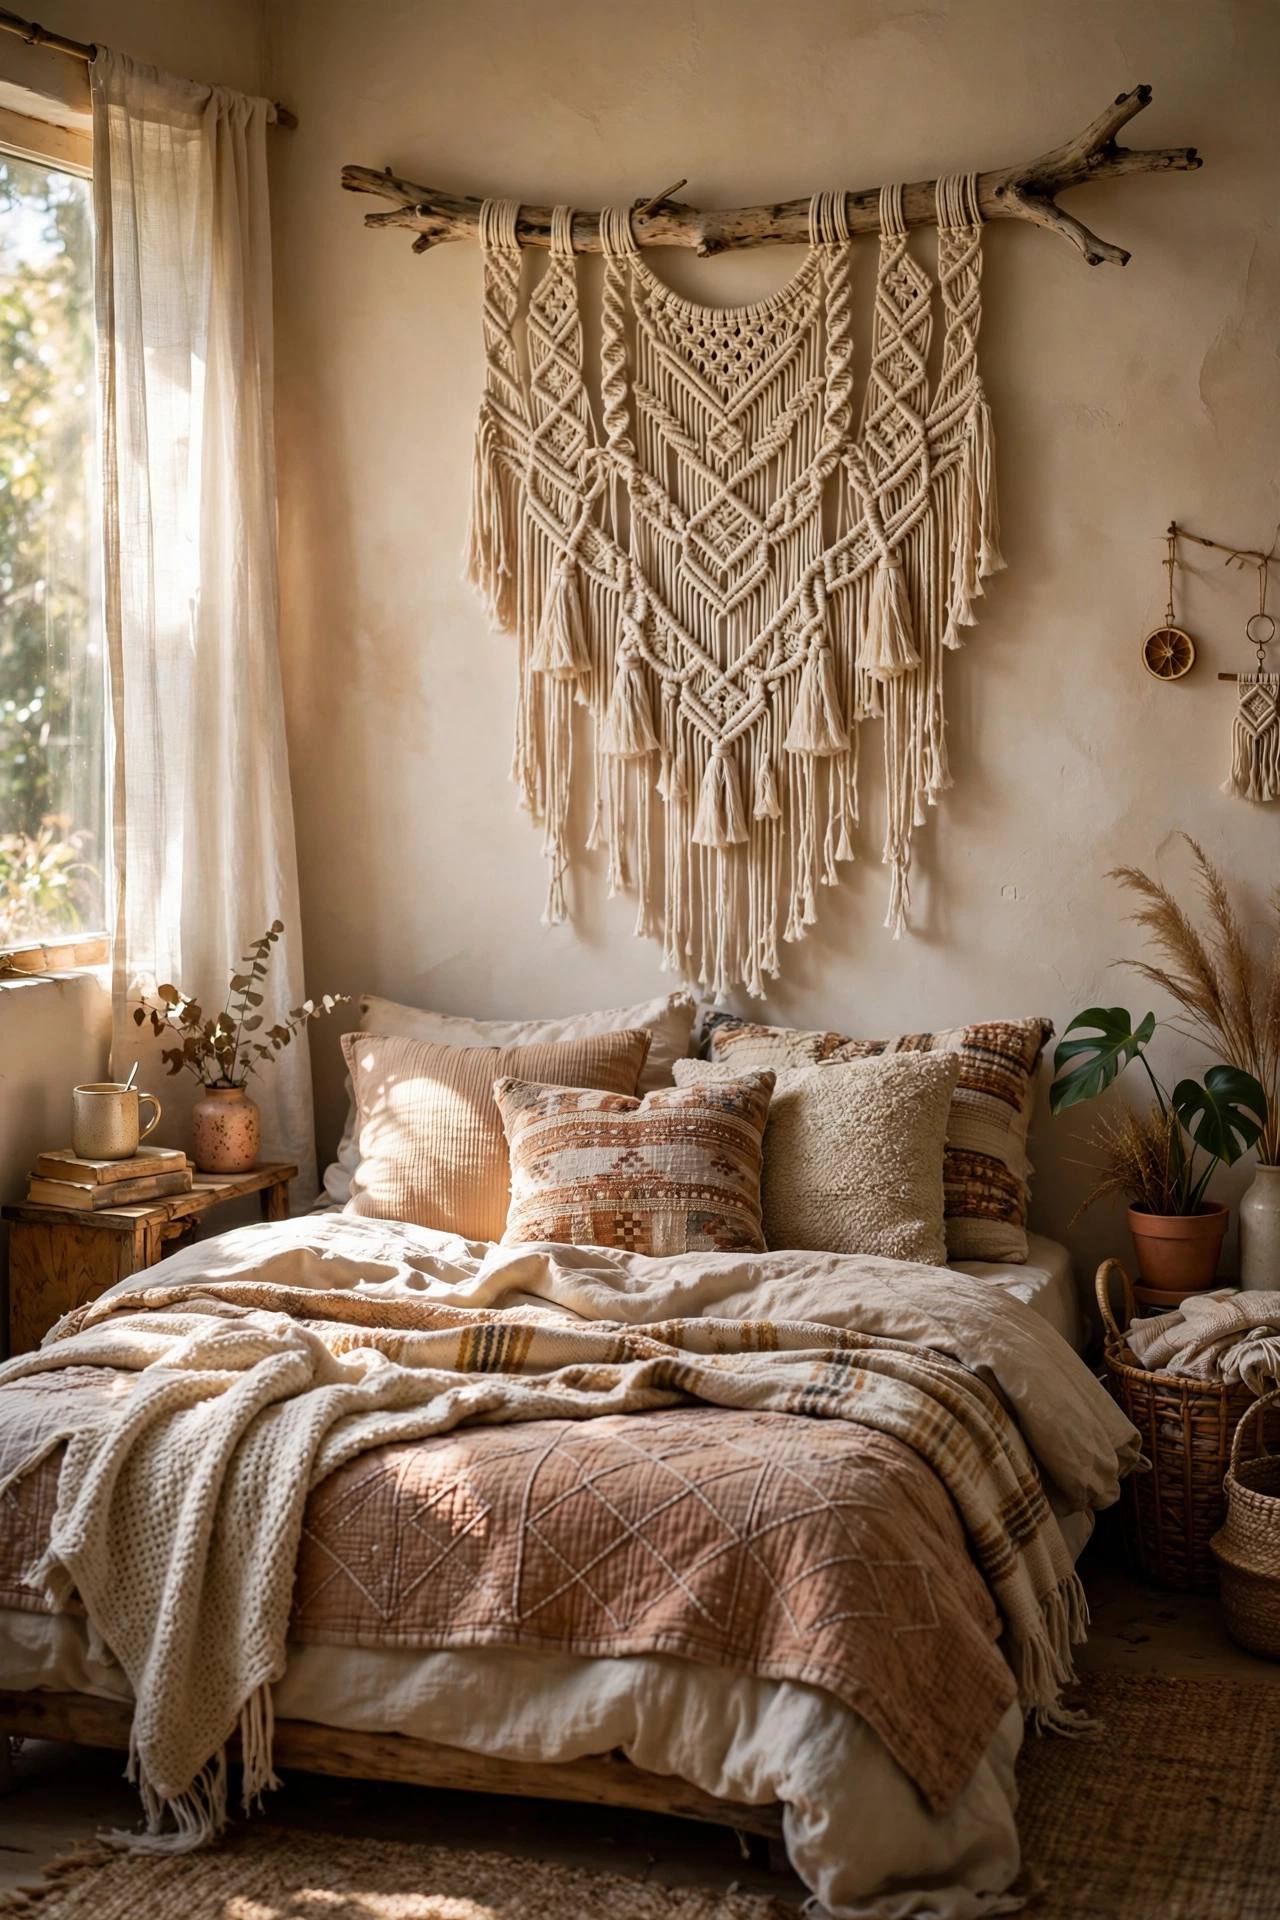
A big macramé wall hanging on a driftwood branch makes a soft, boho headboard. You can buy a large ready-made macramé piece cheaply online, or knot a simple square-knot panel yourself if you fancy learning — it is repetitive but easy. Hang the branch from two sturdy hooks and let the macramé fall behind the pillows. Mine took two evenings of knotting while watching telly and I love the texture. I tried using thin craft cord and it looked stringy — 5mm cotton cord gives the chunky, quality look. Do hang it low enough that the pillows overlap the bottom edge.
Pro tip: comb out the fringe at the bottom with a wide-tooth comb for that soft, feathery finish.
Cost: ~$22 | Time: 2 evenings (or 30 mins if bought)
11. Vertical Timber Slat Headboard
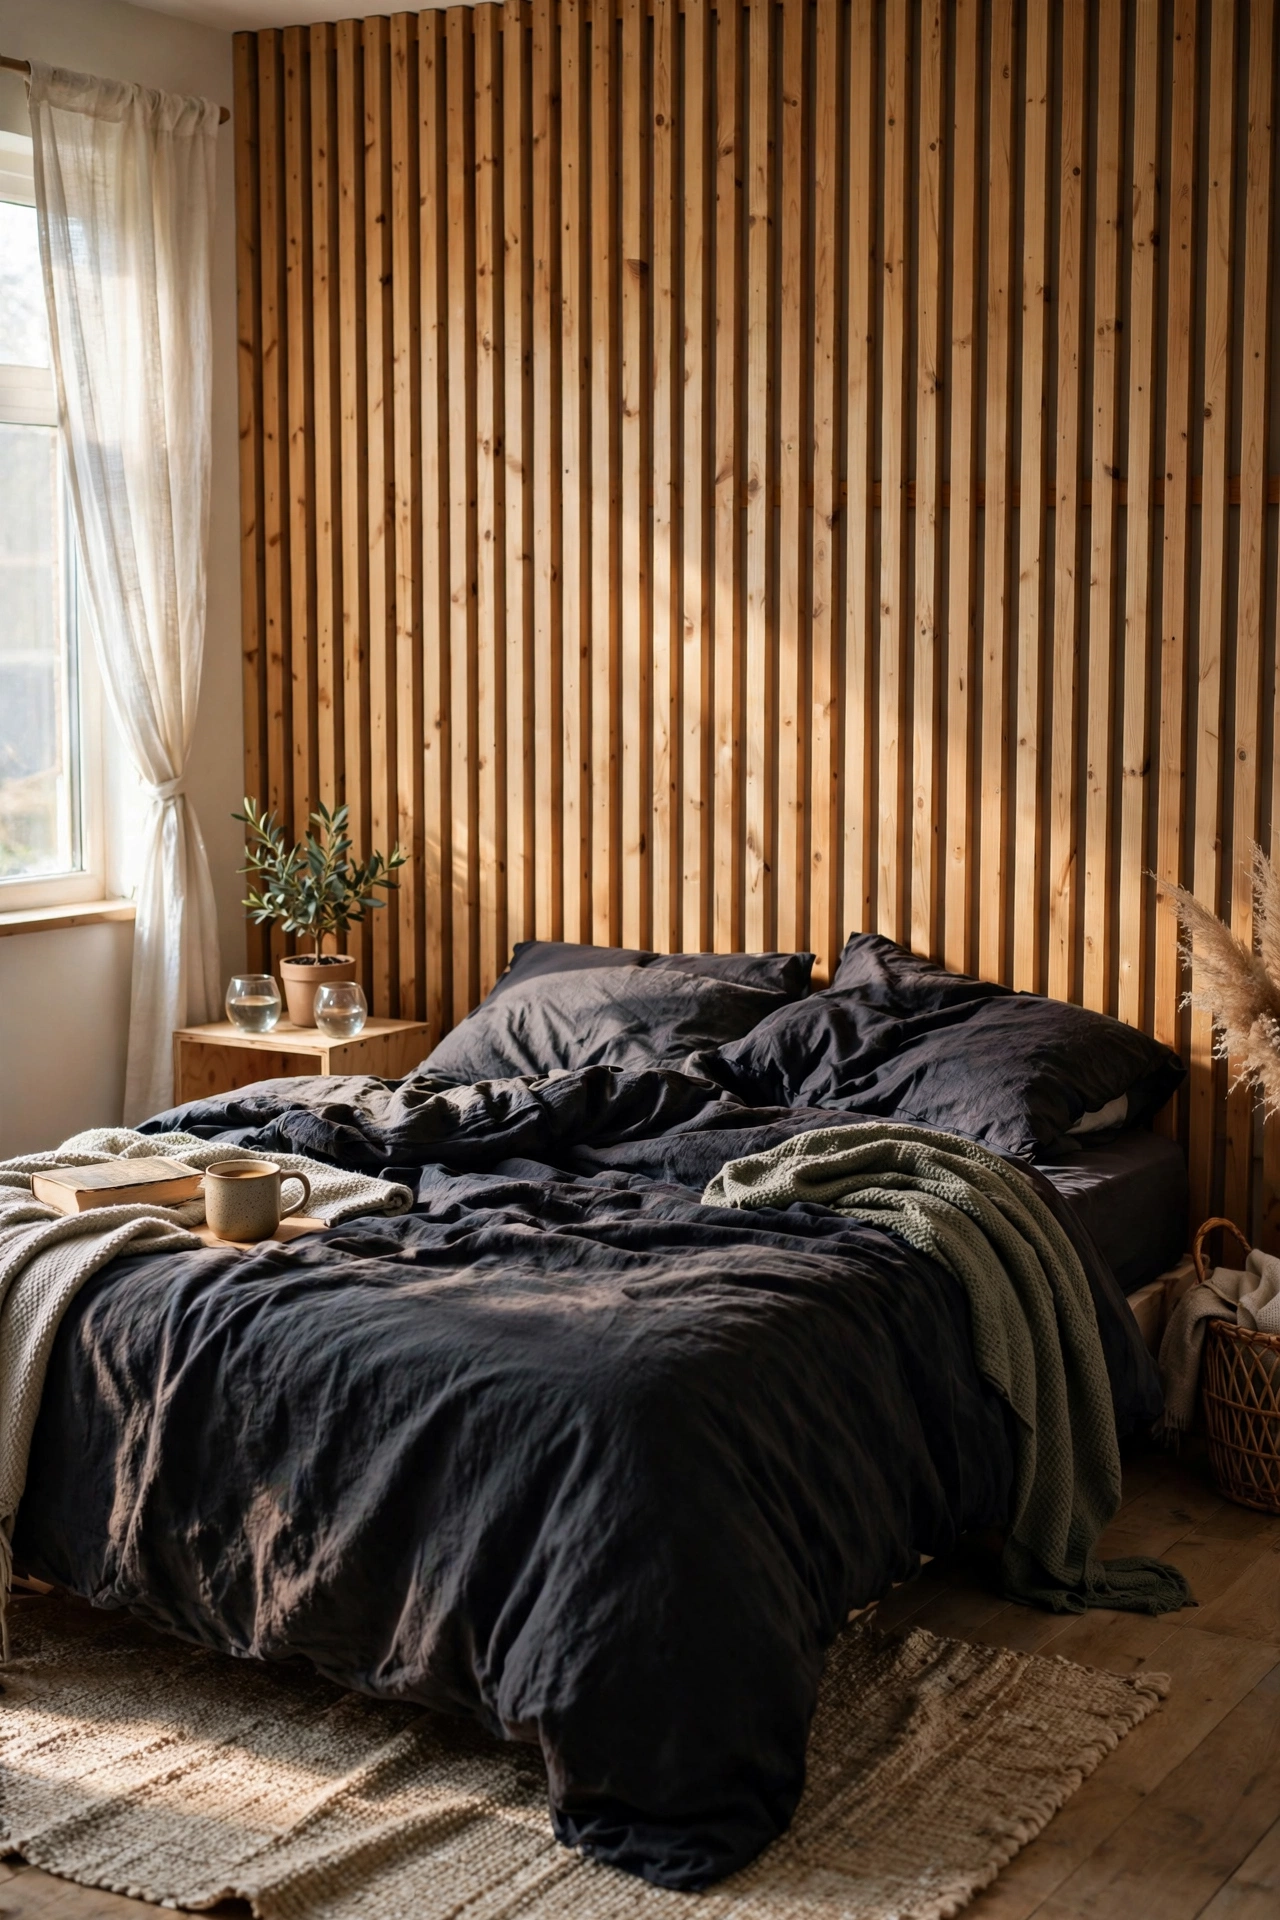
Vertical timber battens screwed to the wall behind the bed give a warm, modern, slightly Japanese feel. Cut battens to equal lengths, space them evenly with a spacer block, and screw each into the wall through the back. Stain them or leave natural. Mine is floor-to-almost-ceiling and it made my plain bedroom feel designed. I tried eyeballing the spacing and it looked drunk — cut one spacer block and use it religiously between every batten. Do pre-drill the battens so they don’t split, especially near the ends.
Pro tip: stain the wall behind the slats a shade darker than the battens so the gaps read as shadow lines.
Cost: ~$28 | Time: 3–4 hours
12. Stencilled Design Headboard
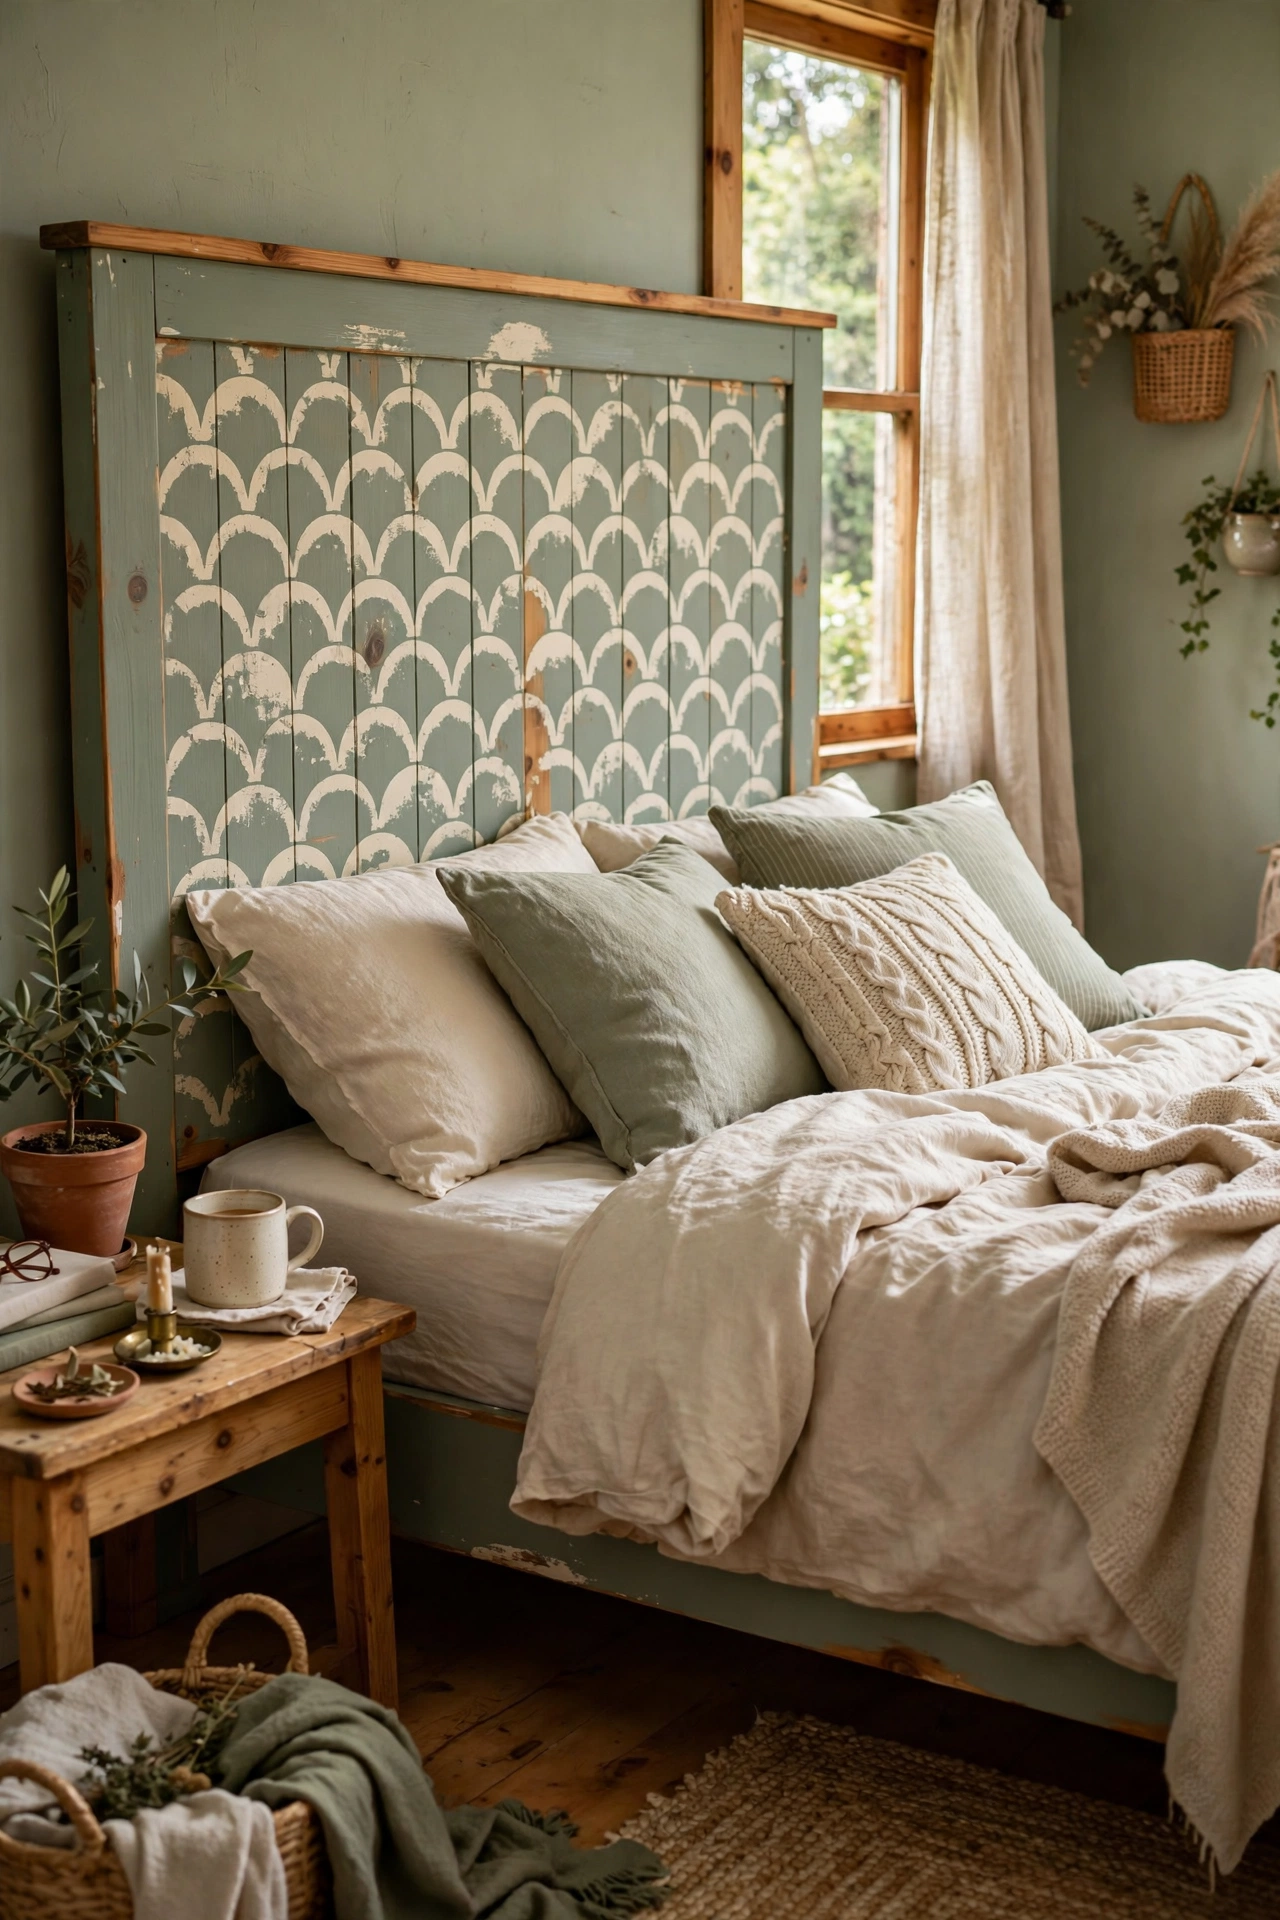
Stencil a pattern directly onto a plain wooden headboard — or a plywood board — for a custom look. Buy or cut a repeating stencil, position it with low-tack tape, and dab the paint on with a nearly-dry stencil brush (too much paint bleeds under the edges). I stencilled a simple scallop pattern onto a secondhand pine headboard in cream over sage and it looks hand-painted in the best way. I tried rolling the paint on and it seeped under every edge — the dry-brush dabbing technique is everything. Do practice on cardboard first to get the paint load right.
Pro tip: mark registration points with a pencil so each repeat of the stencil lines up perfectly.
Cost: ~$12 | Time: 2–3 hours
13. Padded Staple-Only Headboard
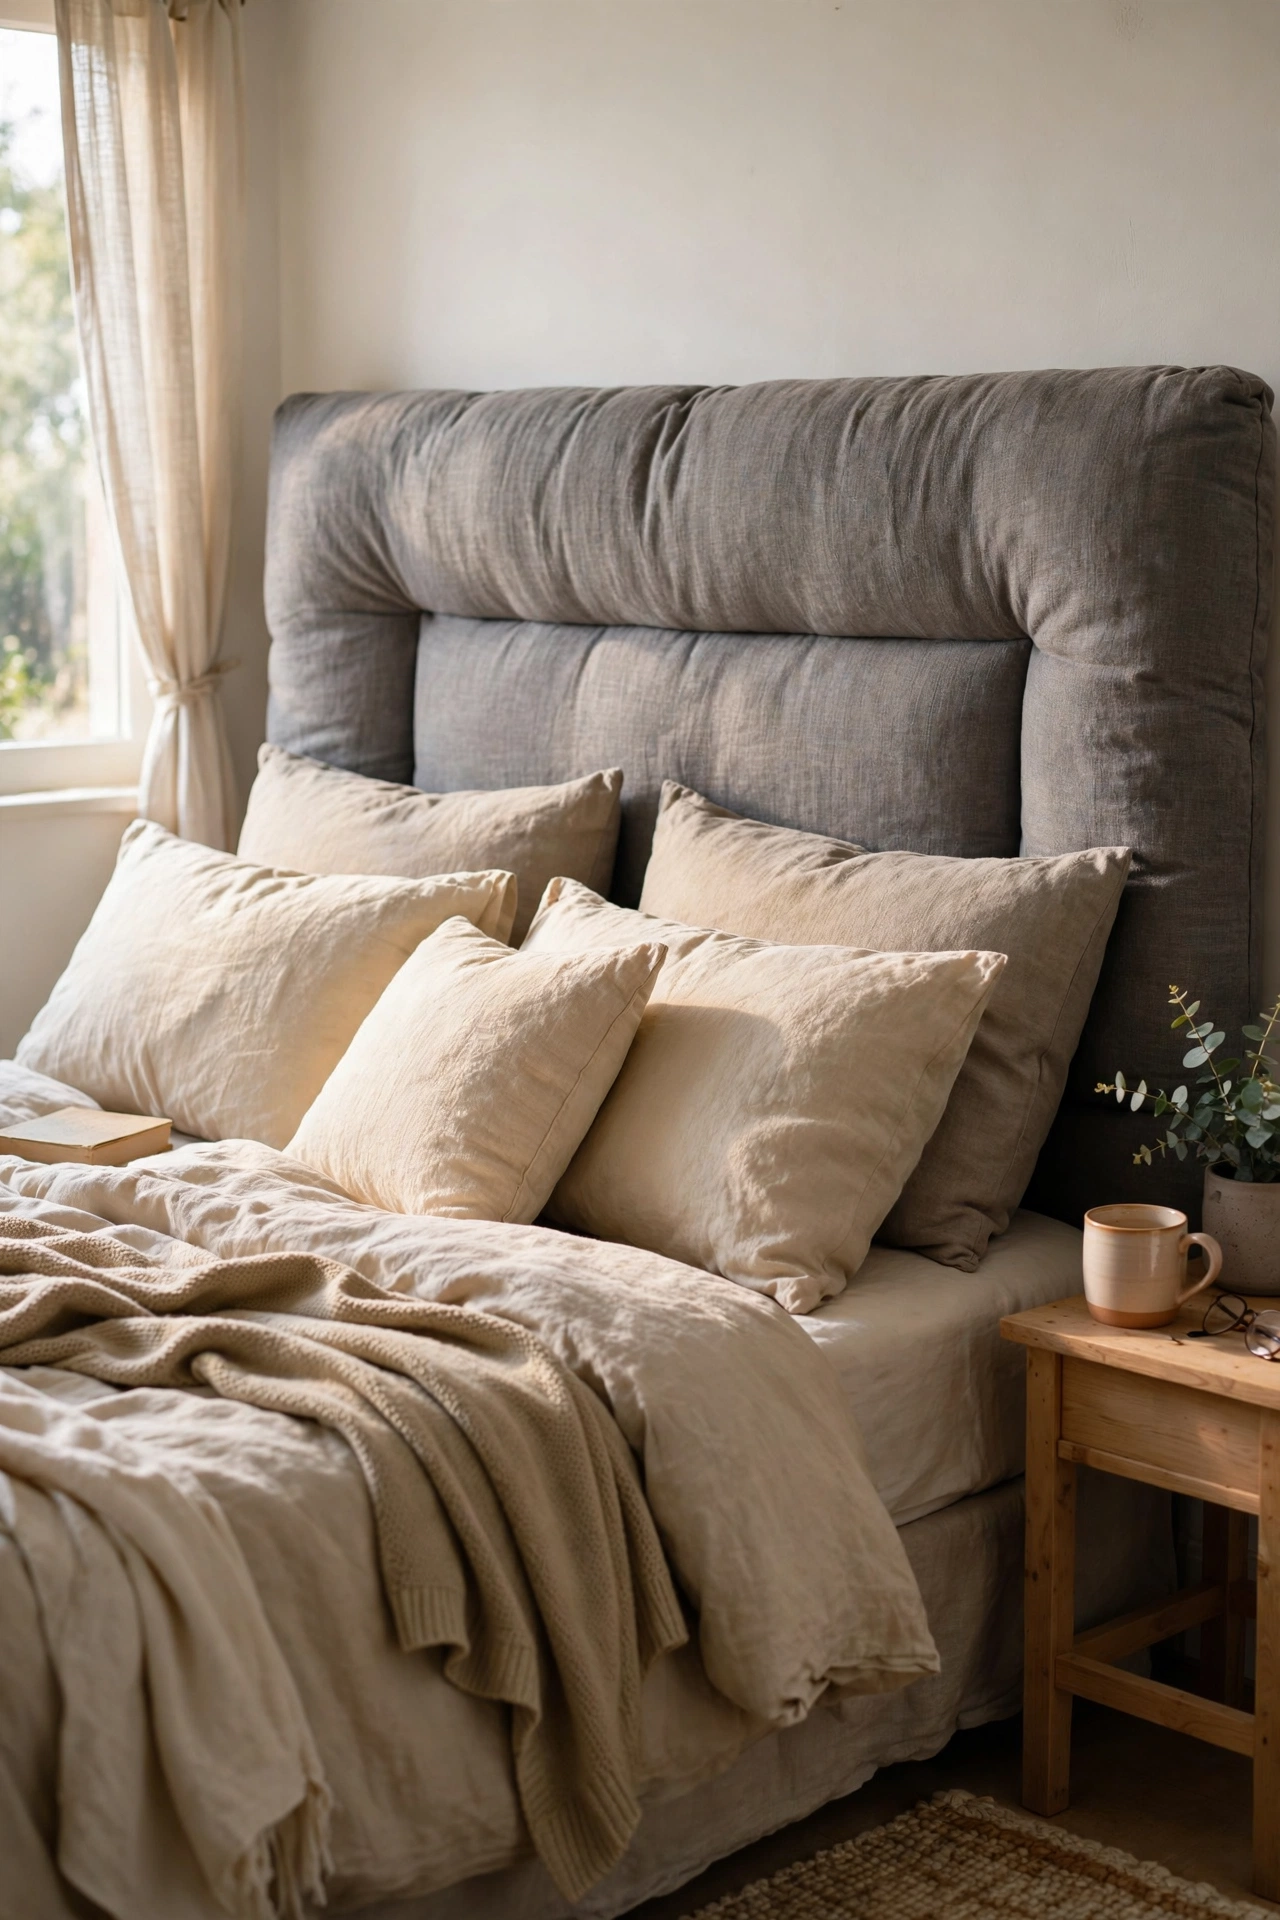
Foam, batting, fabric, plywood, and a staple gun — that is the whole shopping list for a properly padded headboard. Layer foam then batting on the plywood, wrap your fabric over the top, and staple around the back, pulling firmly. The padding forgives lumpy stapling and the result feels genuinely soft to lean on. Mine is in grey linen-look fabric and guests assume it was custom-made. I tried skimping on the batting and the foam edge showed through the fabric — two layers of batting gives the smooth, rounded edge. Do round the plywood corners with sandpaper first; sharp corners poke through fabric over time.
Pro tip: work from the centre of each side outward, alternating sides, to keep the fabric tension even.
Cost: ~$38 | Time: 2–3 hours
14. Old Door Headboard
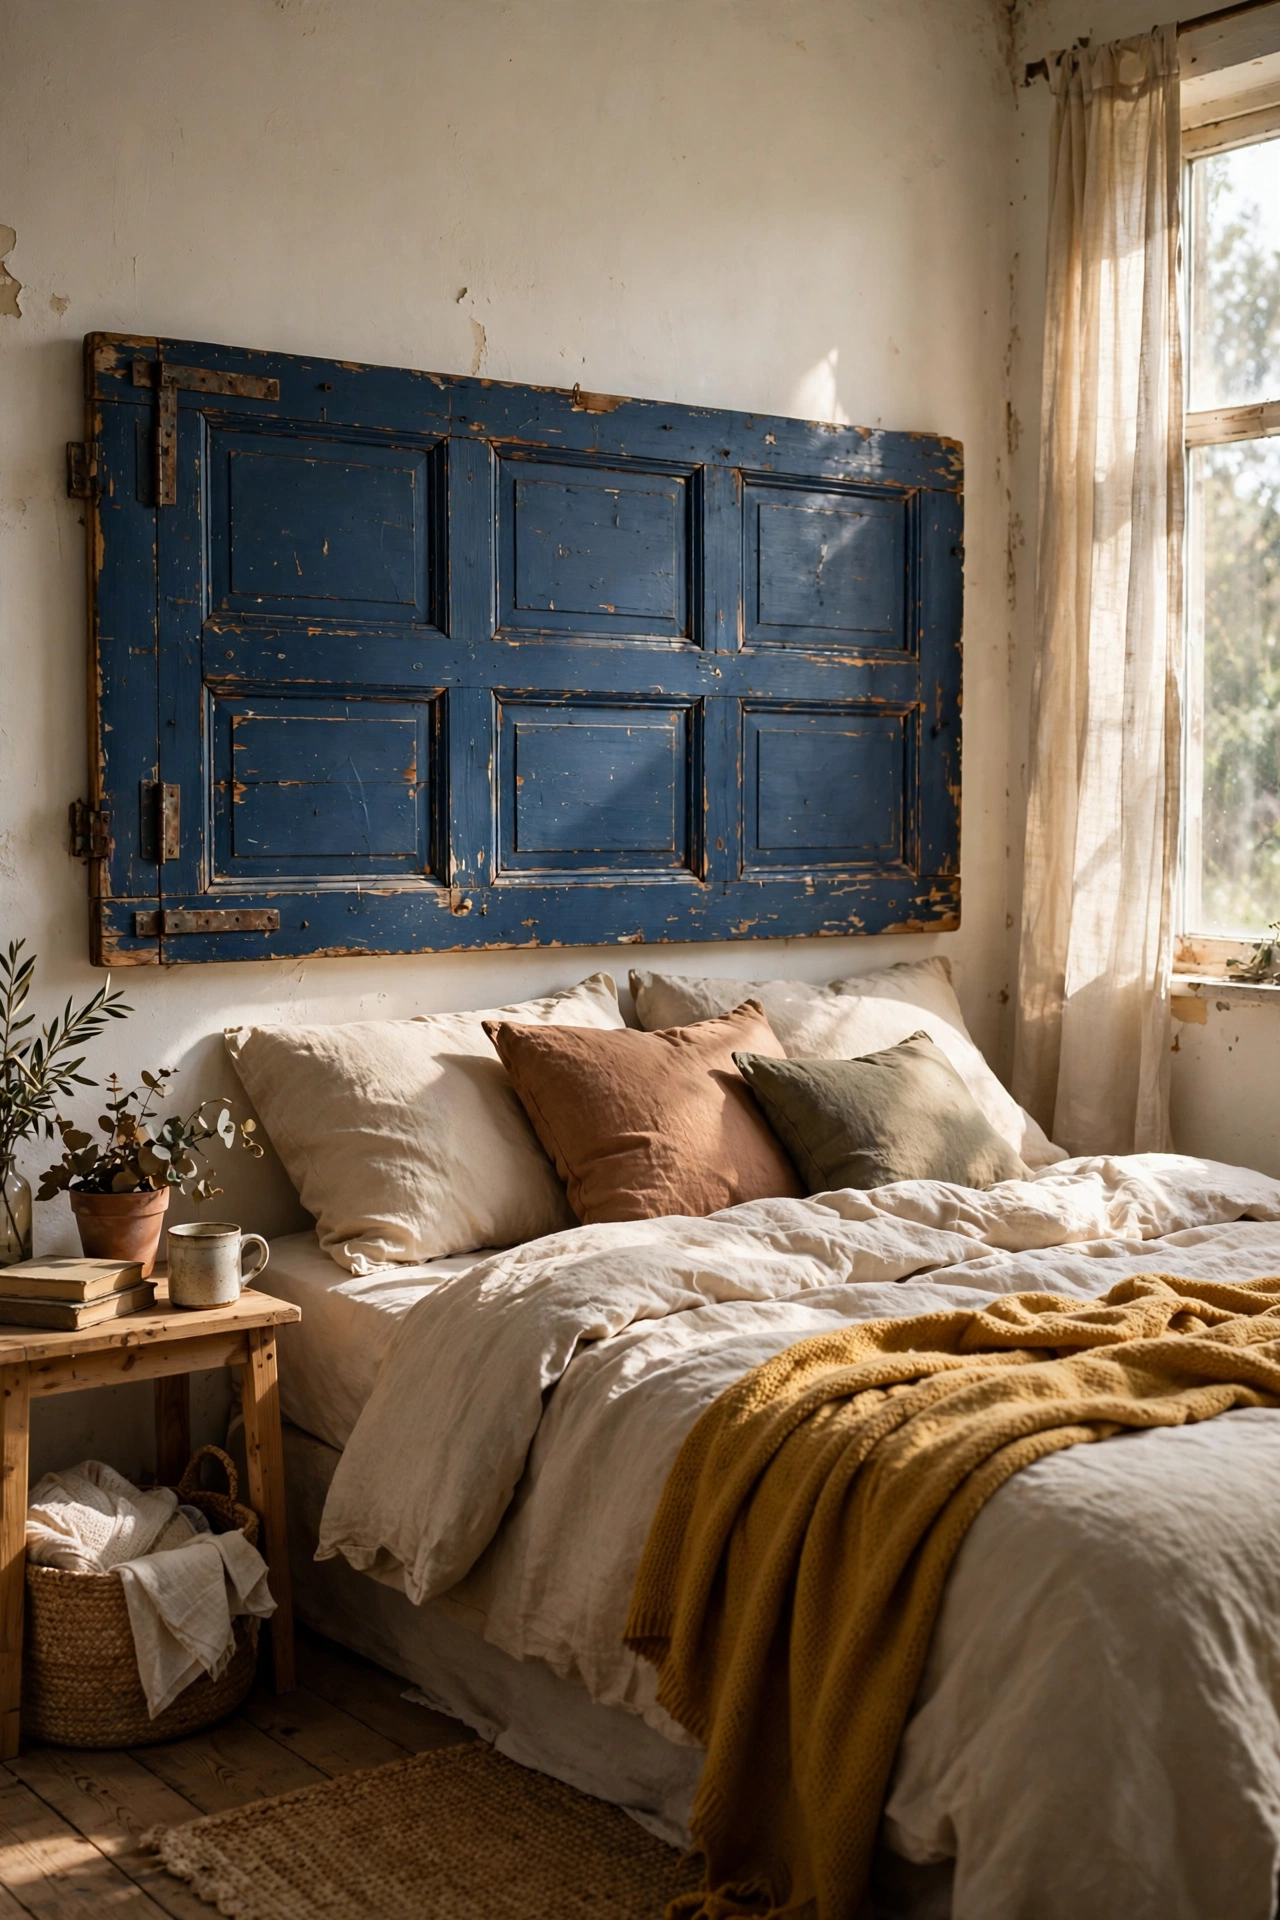
A salvaged wooden door laid horizontally makes an instant headboard with real character. Find a solid panelled door at a salvage yard, clean it, paint or wax it, and mount it horizontally behind the bed on wall brackets. The panels give it a built-in, architectural look. Mine is a Victorian-style four-panel door painted deep blue and it is the boldest thing in my bedroom. I tried a hollow modern door first and it felt flimsy and sounded hollow when knocked — a solid wood door is worth hunting for. Do fill old lock holes with wood filler before painting.
Pro tip: keep the original door knob hole and fit a small brass hook there — it becomes a handy spot for hanging pyjamas.
Cost: ~$20 | Time: 3 hours
15. Rug Hung as a Headboard
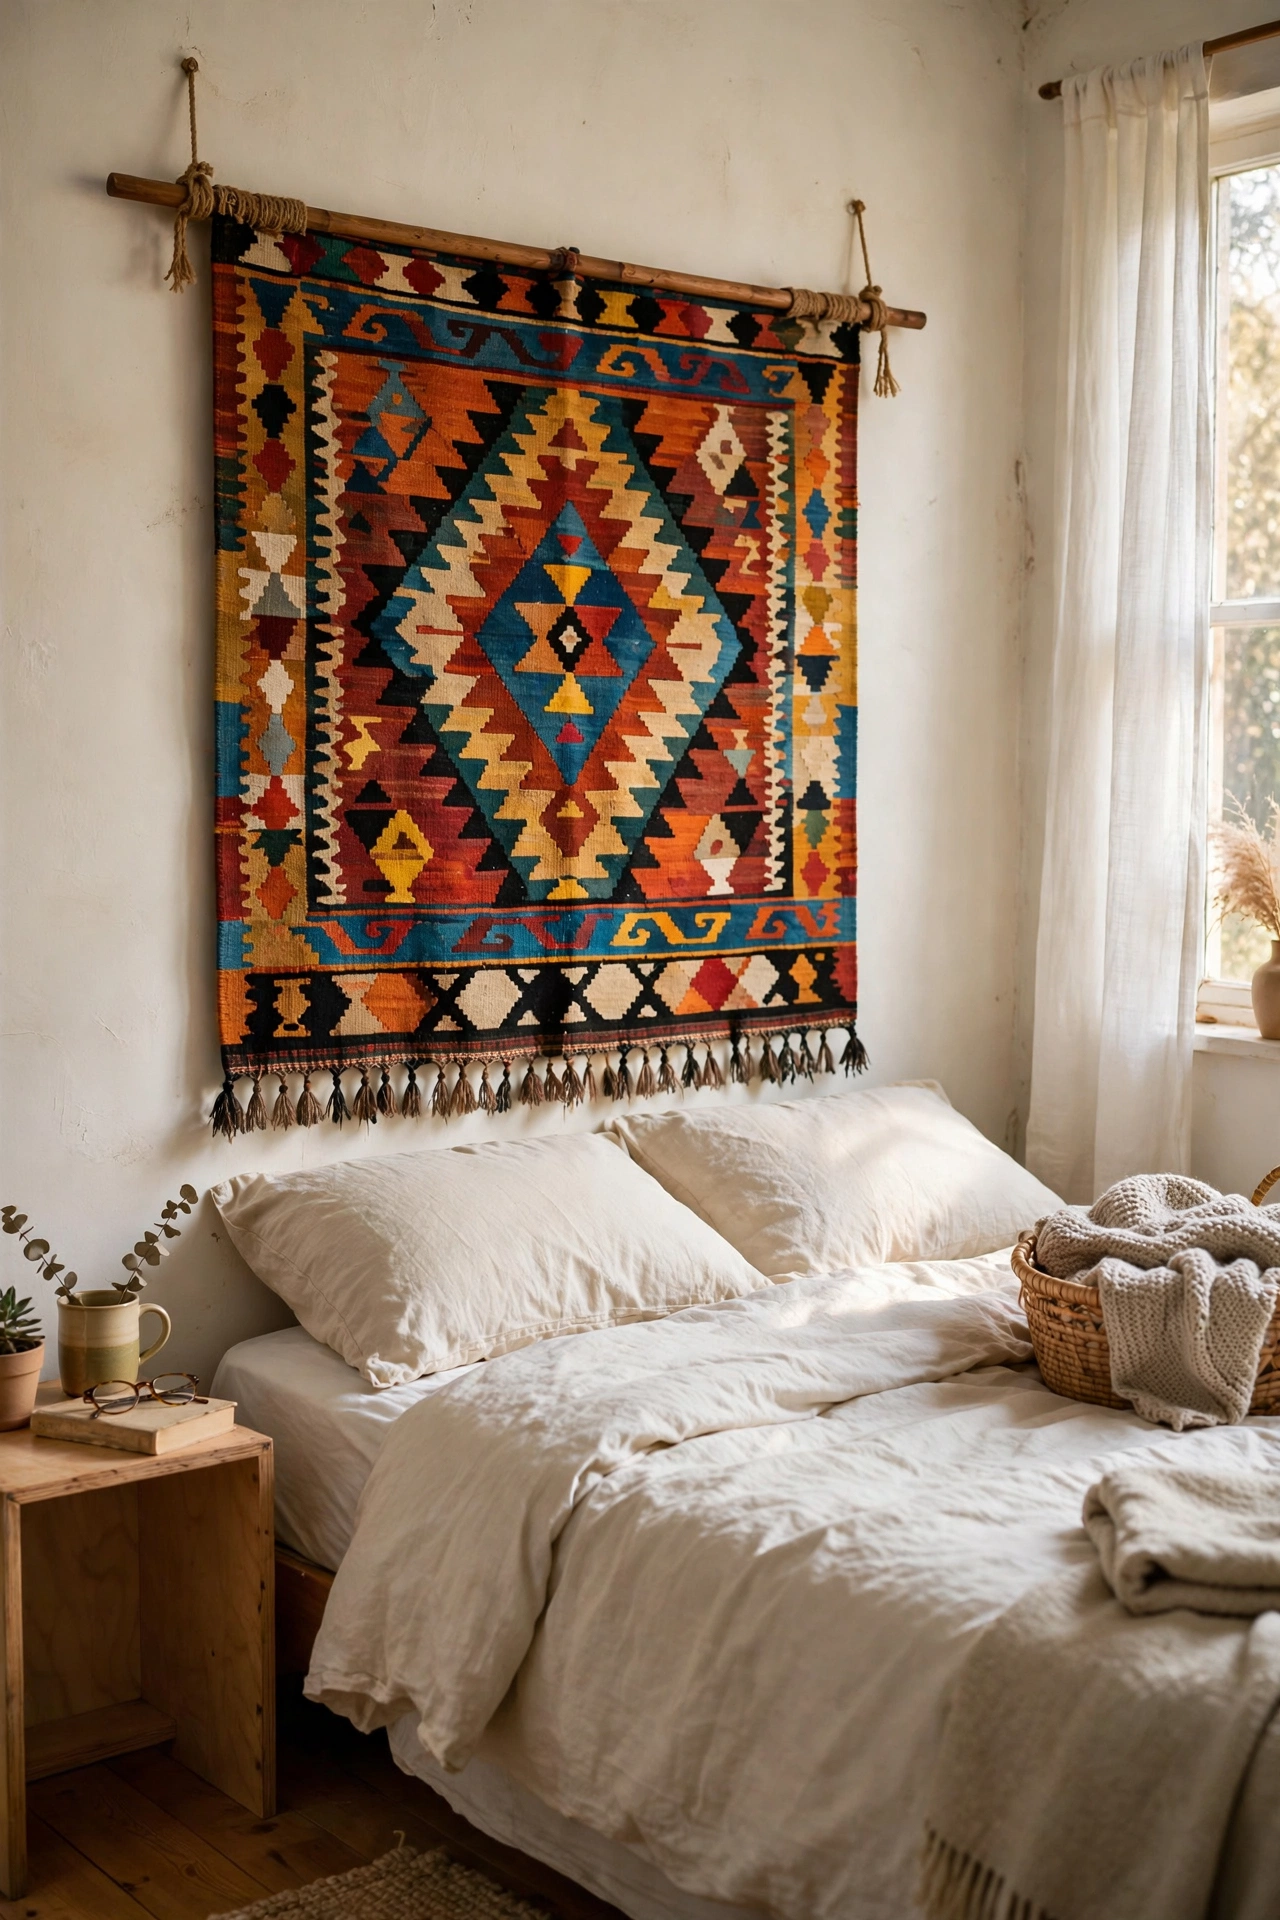
A flatweave rug or kilim hung behind the bed adds colour, pattern, and softness in one move. Choose a rug roughly the width of the bed, hang it from a curtain rod or a wooden dowel threaded through a fabric sleeve sewn (or ironed with hemming tape) across the top. Mine is a secondhand kilim in rust and cream and it warms up the whole room. I tried hanging mine with clips and they left marks — the sleeve method distributes the weight evenly. Do keep it out of direct sun or the colours fade unevenly.
Pro tip: a rug pad cut slightly smaller and hung behind the rug stops it rippling against the wall.
Cost: ~$25 | Time: 1 hour
16. Plywood Headboard with Picture Ledge
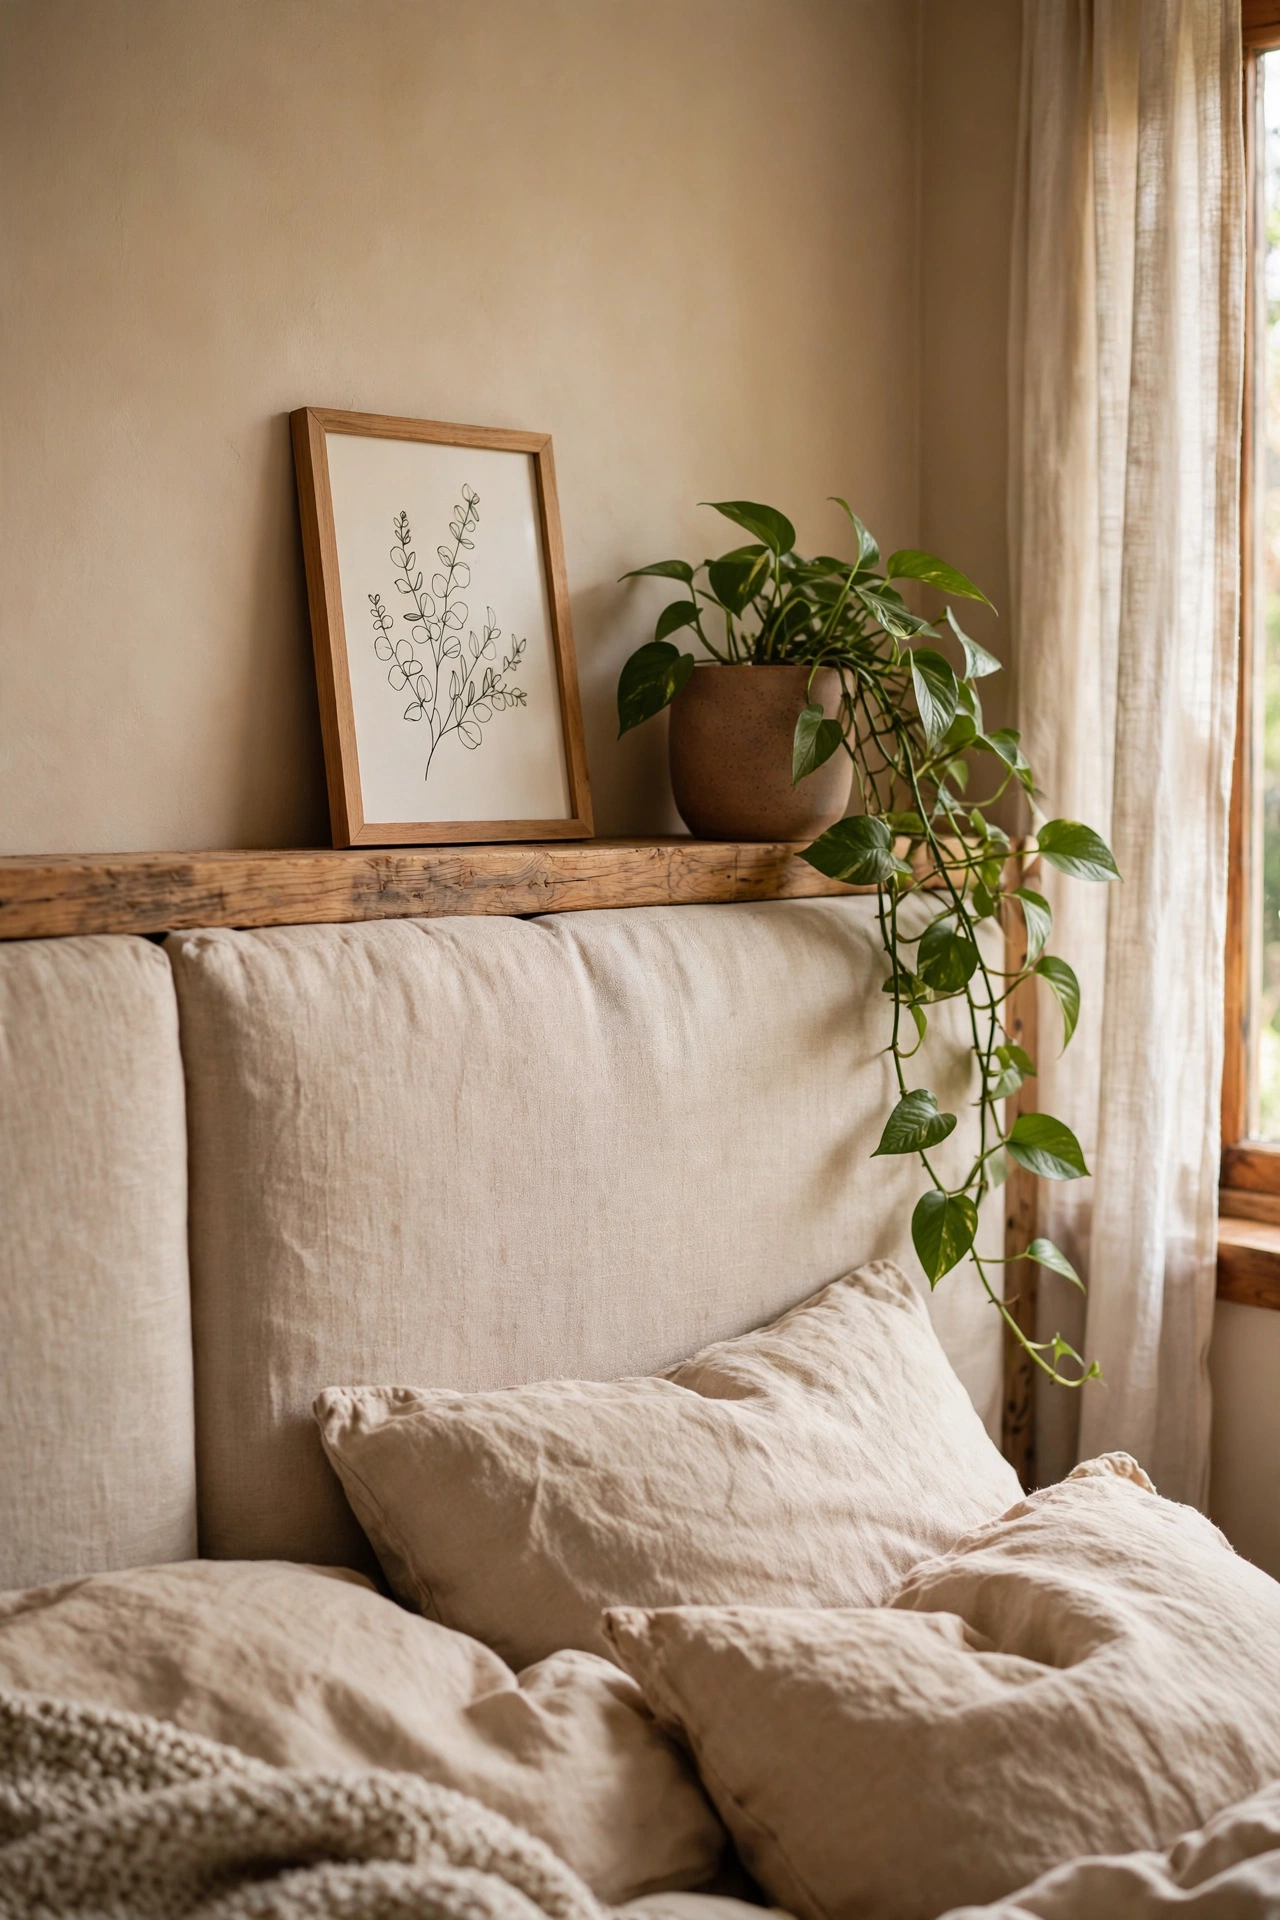
Add a shallow shelf along the top of a plywood headboard and you get display space for art, plants, and a reading lamp. Build the basic fabric-wrapped or painted plywood headboard, then screw a 10cm-deep timber ledge along the top edge, supported by small brackets underneath. I keep a framed print and a trailing plant on mine — it is like a mini gallery above the bed. I tried making the ledge too deep and pillows knocked things off — 10cm is the sweet spot. Do fix the headboard itself to the wall; a ledge full of objects adds top weight.
Pro tip: paint the ledge the same colour as the headboard so it reads as one piece, not an add-on.
Cost: ~$30 | Time: 3 hours
17. Bamboo Screen Headboard
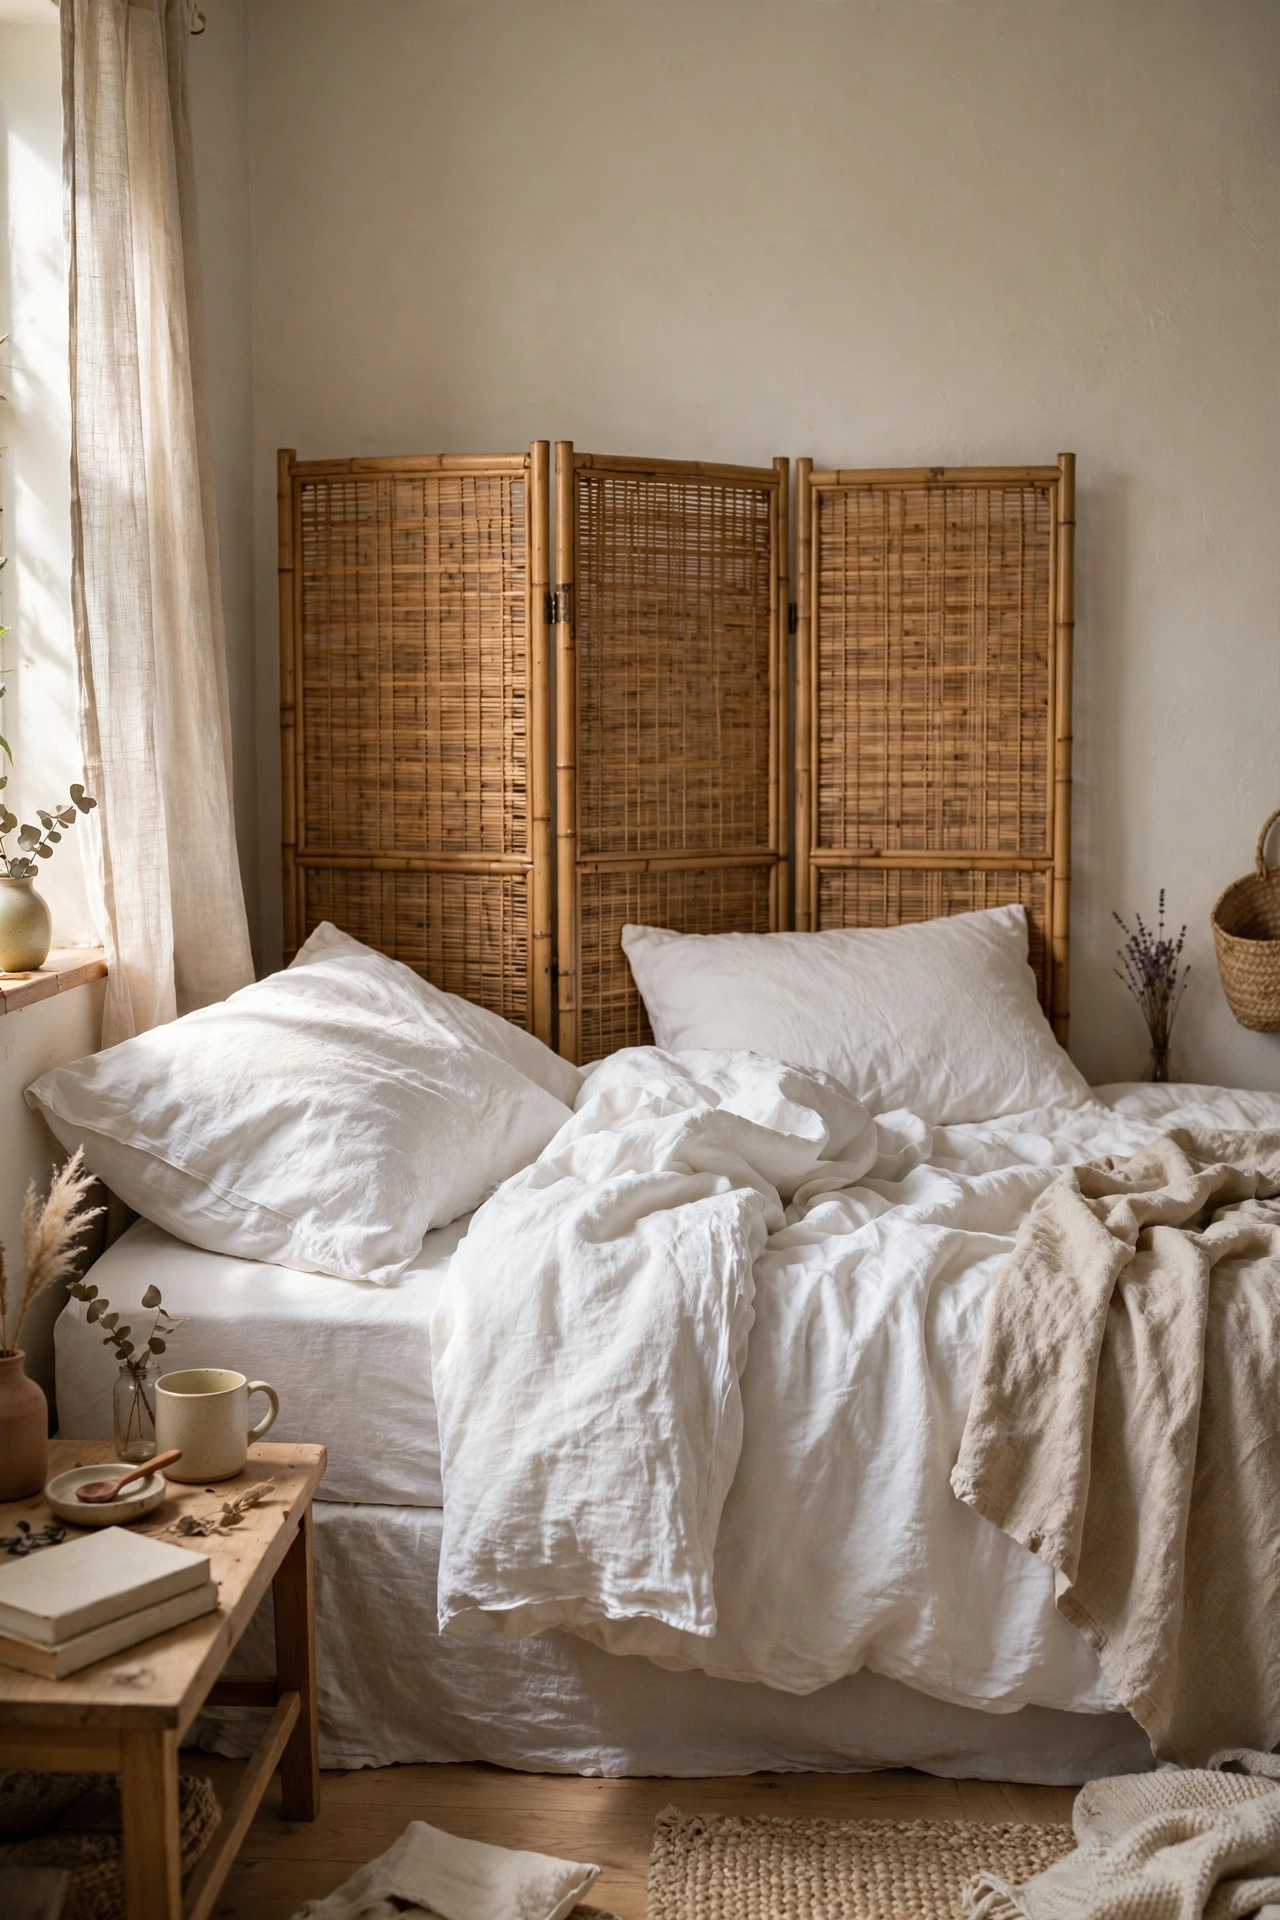
A folding bamboo or rattan room screen stood behind the bed makes a light, airy headboard. Open two panels of the screen flat against the wall behind the bed and secure the top to the wall with small brackets so it can’t topple. The woven texture adds warmth without any building. I found mine at a charity shop for twelve pounds and it suits my light, neutral bedroom. I tried just leaning it and the bed shifting pushed it over — bracket the top, it takes five minutes. Do check the screen is at least as wide as the mattress or it looks undersized.
Pro tip: weave fairy lights through the screen’s slats for a soft evening glow behind the pillows.
Cost: ~$20 | Time: 30 minutes
18. Pegboard Headboard with Hooks
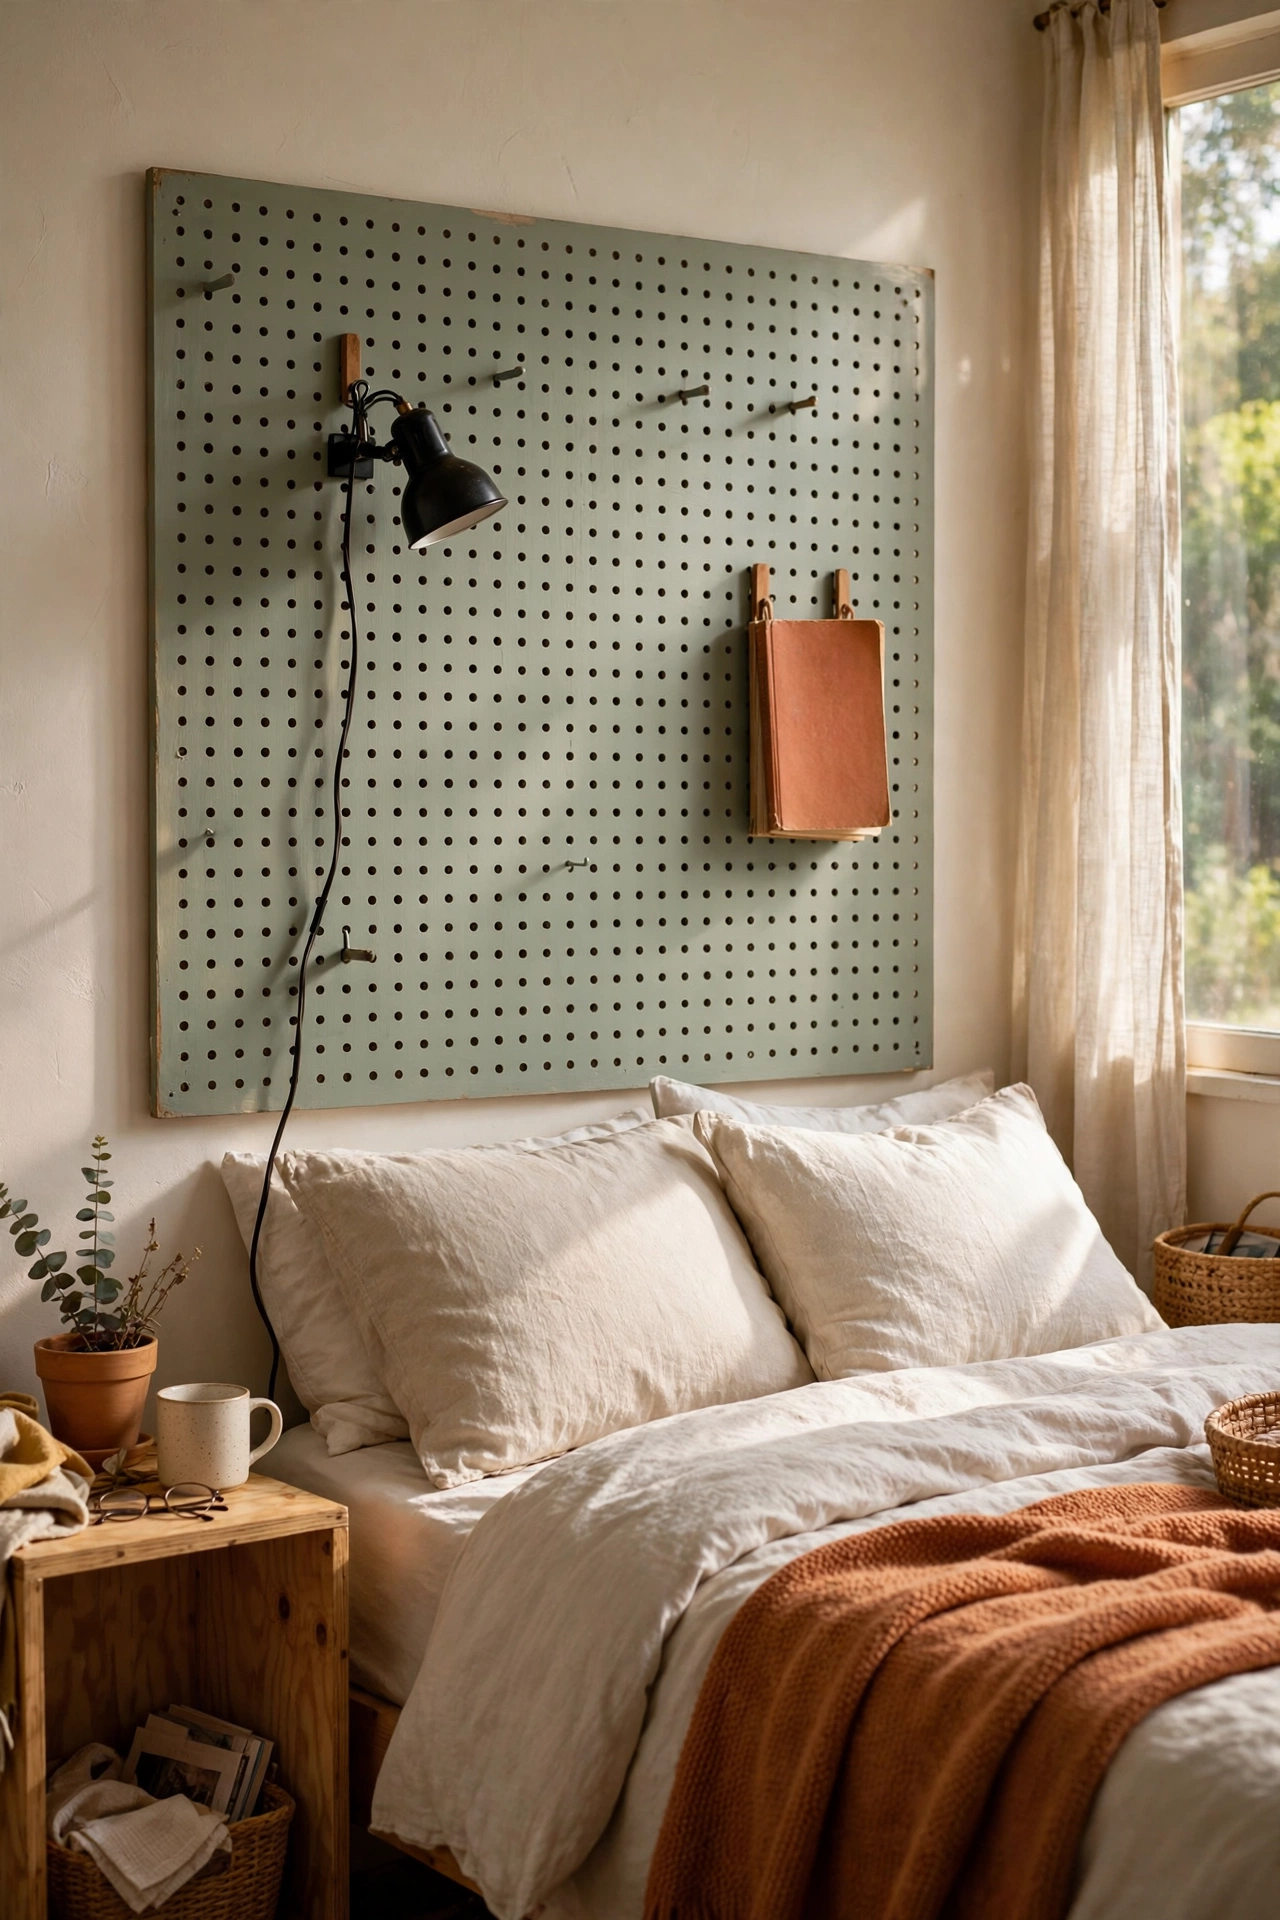
A painted pegboard panel behind the bed doubles as a headboard and a clever organiser. Mount a large pegboard on wall battens (so there is a gap behind for the hooks), paint it to match your room, then add hooks for a reading light, headphones, and a small shelf for your book. Mine holds my lamp and glasses and freed up my nightstand completely. I tried mounting it flush to the wall and the hooks wouldn’t fit — the batten gap behind is essential. Do paint the pegboard before mounting; painting around hooks is tedious.
Pro tip: use two pegboard panels side by side for a double bed — one panel looks lost behind a wide mattress.
Cost: ~$22 | Time: 2 hours
19. Scallop-Edge Painted Headboard
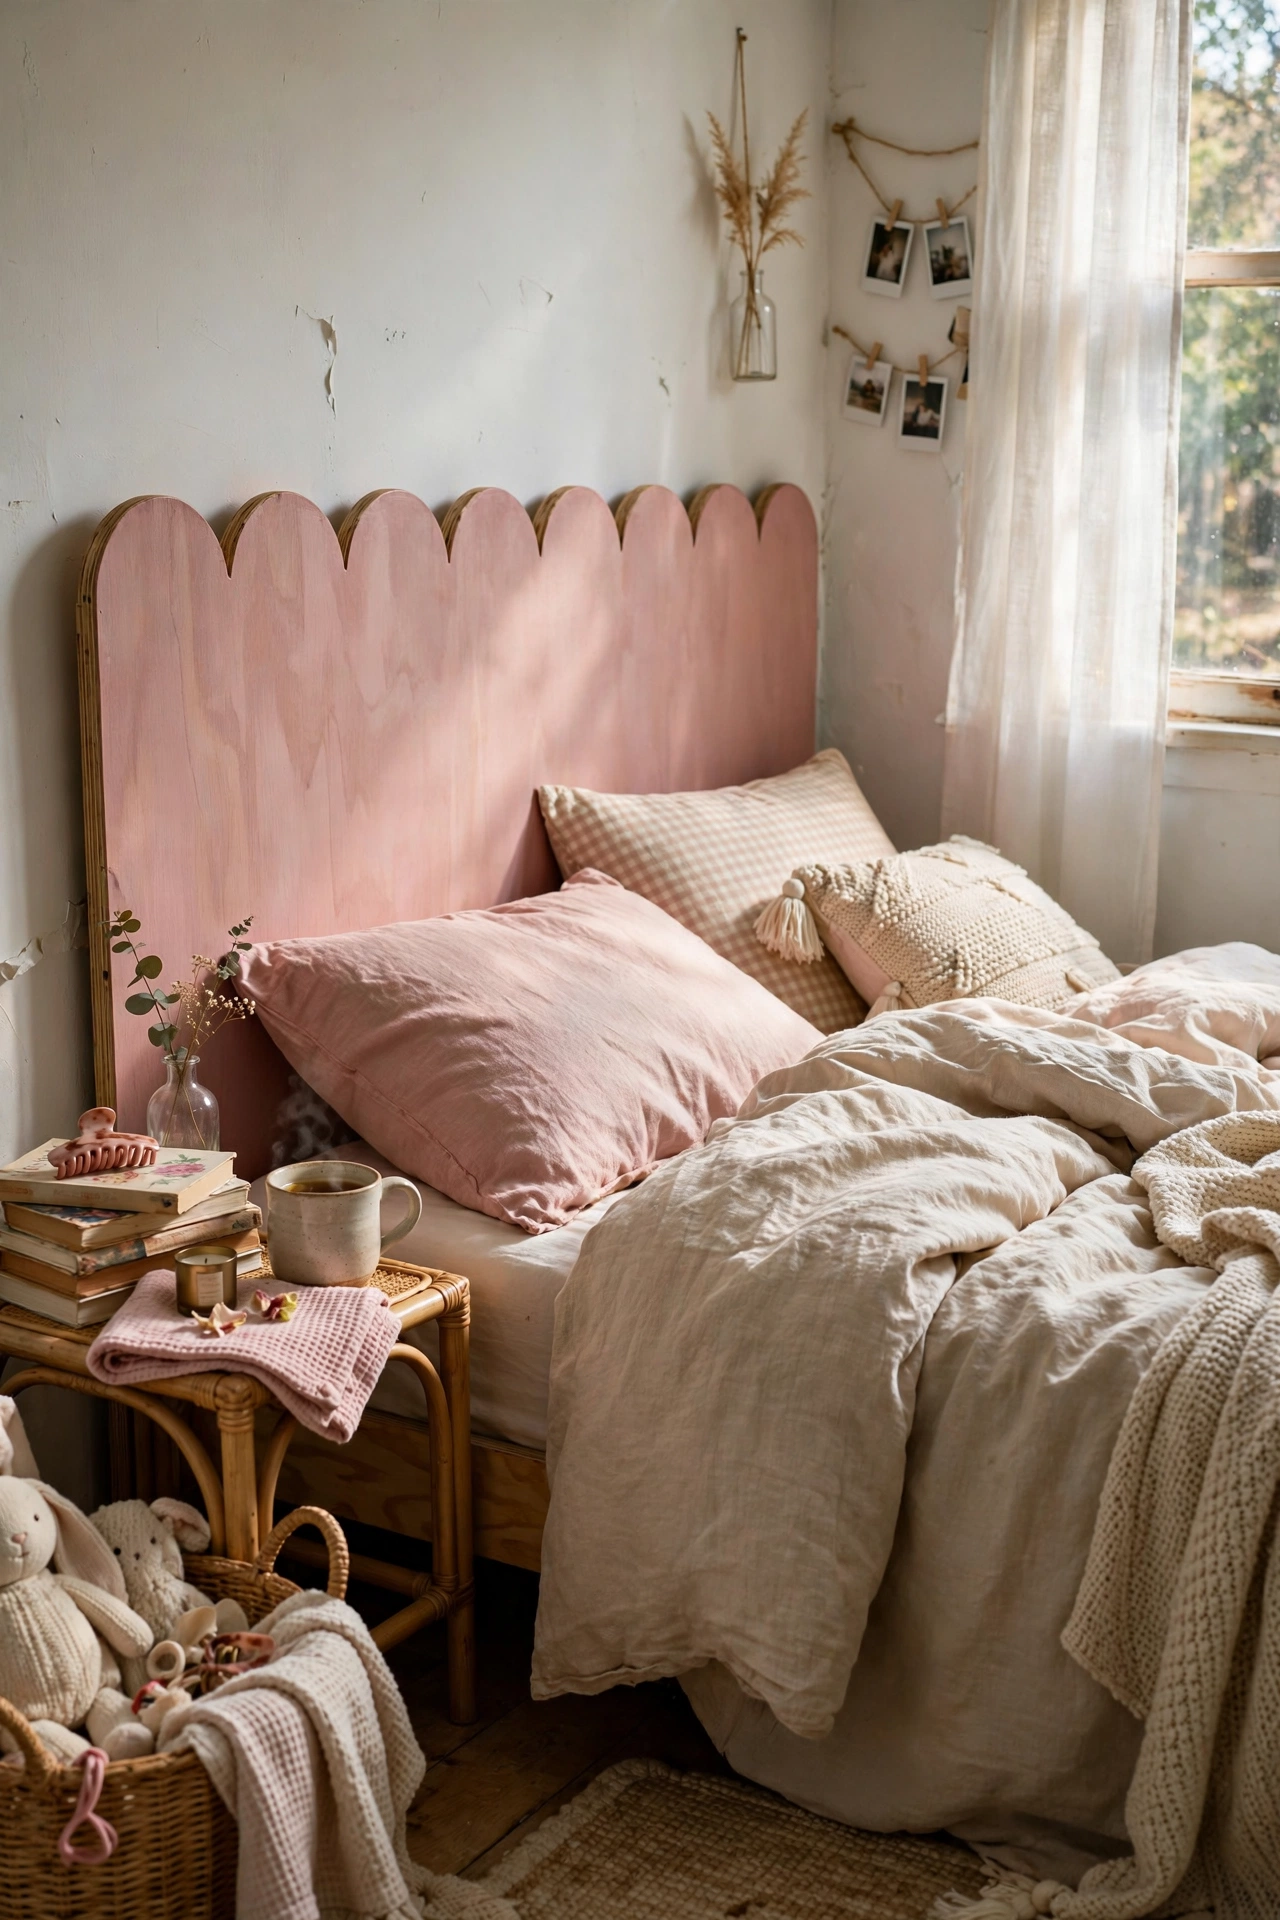
Cut a scalloped top edge into a plywood board for a pretty, vintage-inspired headboard. Draw the scallops with a bowl or plate as a template, cut with a jigsaw, sand smooth, and paint in a soft colour. The shaped edge makes a plain board look designed. Mine is painted dusty pink in my daughter’s room and she adores it. I tried cutting the scallops freehand and they were visibly uneven — the plate template is worth the faff. Do sand the cut edges really smooth; scallops show every bump once painted.
Pro tip: paint the scalloped edge a shade darker than the board for a subtle outlined effect.
Cost: ~$18 | Time: 3 hours
20. Birch Pole Headboard
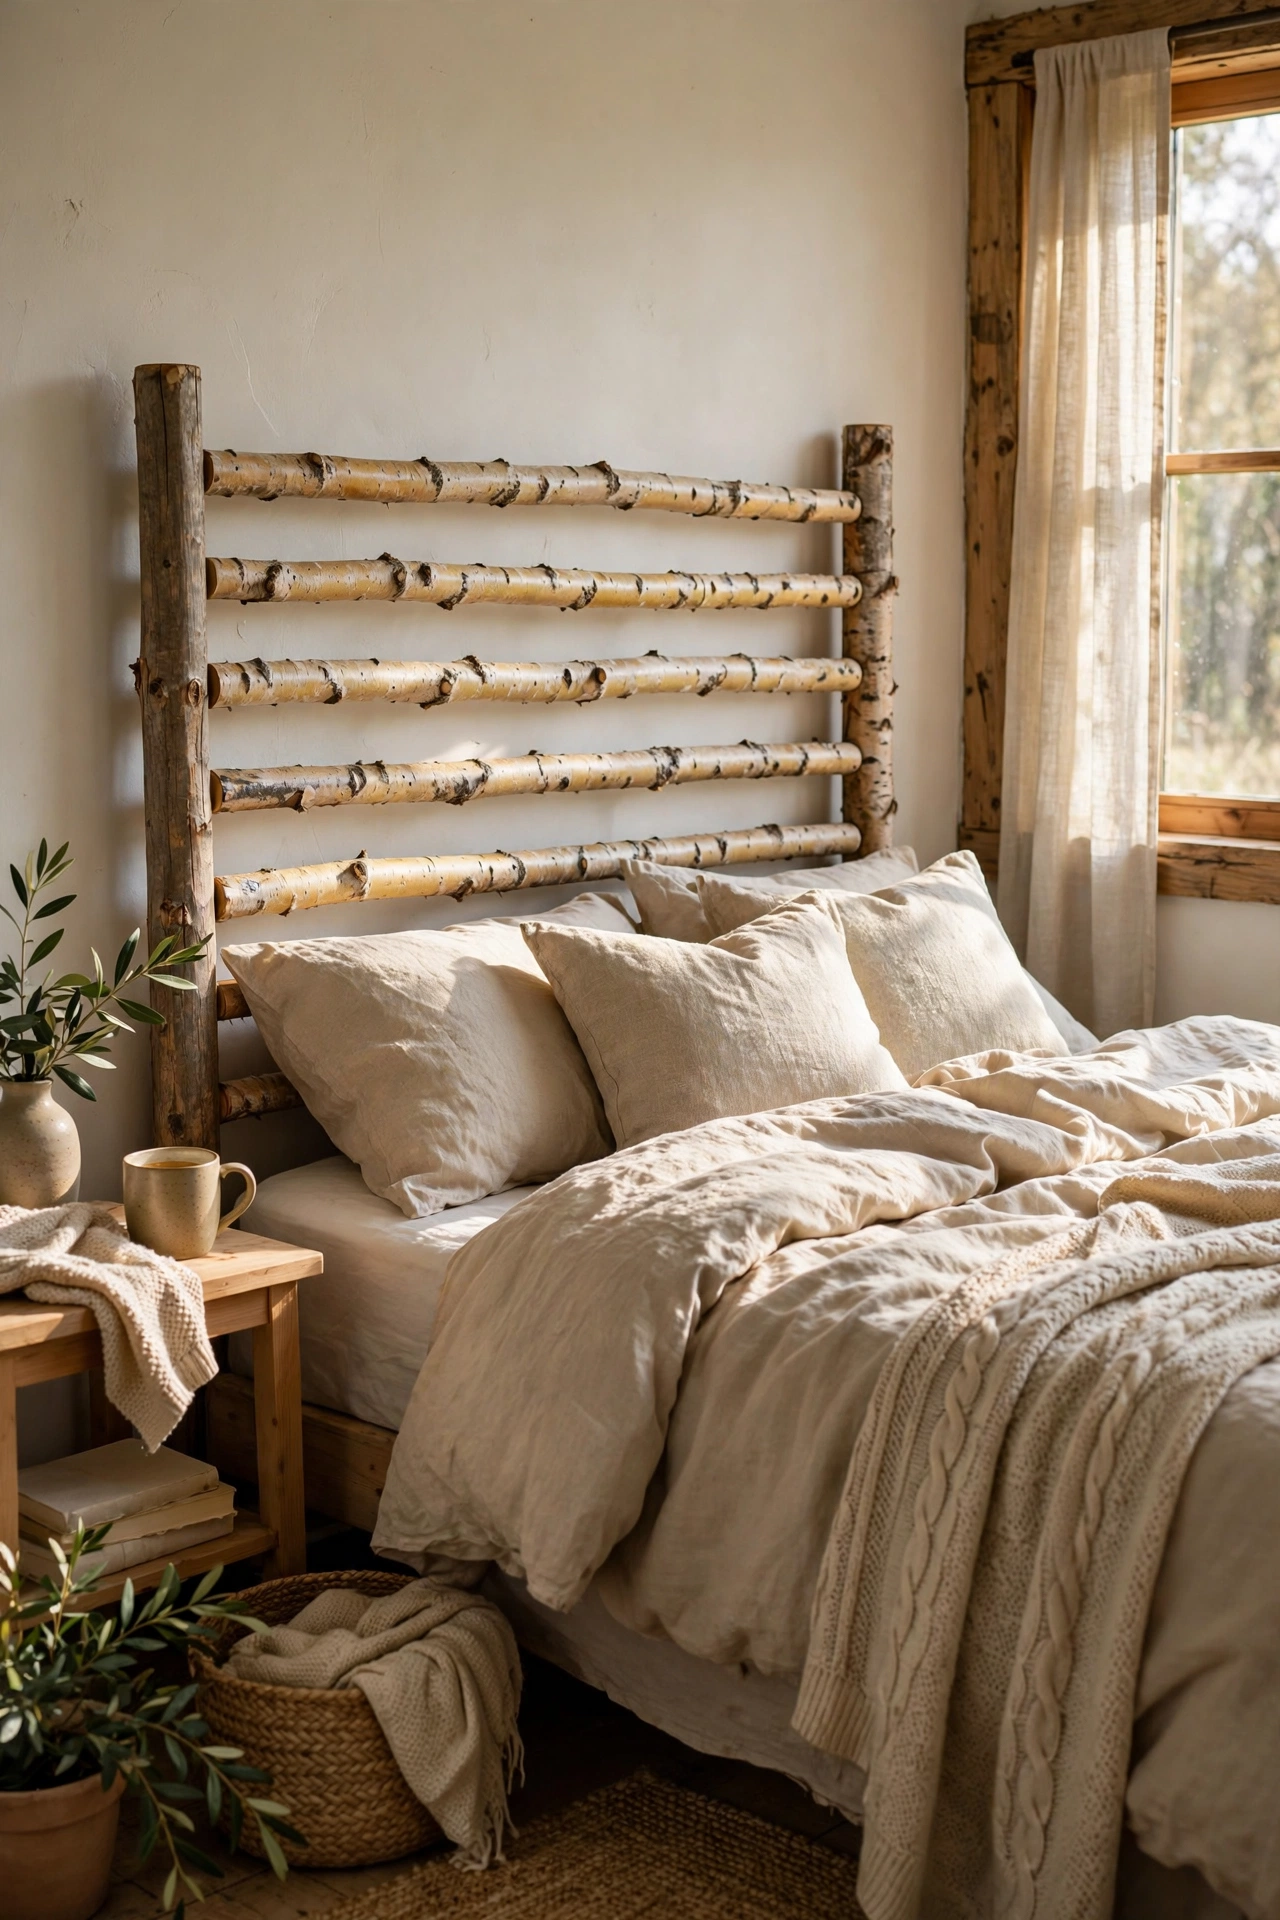
Lash horizontal birch poles (or garden canes) between two vertical posts for a rustic lodge-style headboard. Cut the poles to equal length, drill and screw them between two uprights, and stand or wall-mount the frame behind the bed. The natural bark texture is beautiful against plain bedding. I built mine from pruned branches and it cost nothing. I tried using green, freshly cut wood and it shrank and loosened within months — use properly dried wood. Do sand any sharp knots; you lean against this every night.
Pro tip: rub the poles with clear wax to bring out the bark colour and stop them shedding.
Cost: ~$8 | Time: 3 hours
21. Drop-Cloth Slipcover Headboard
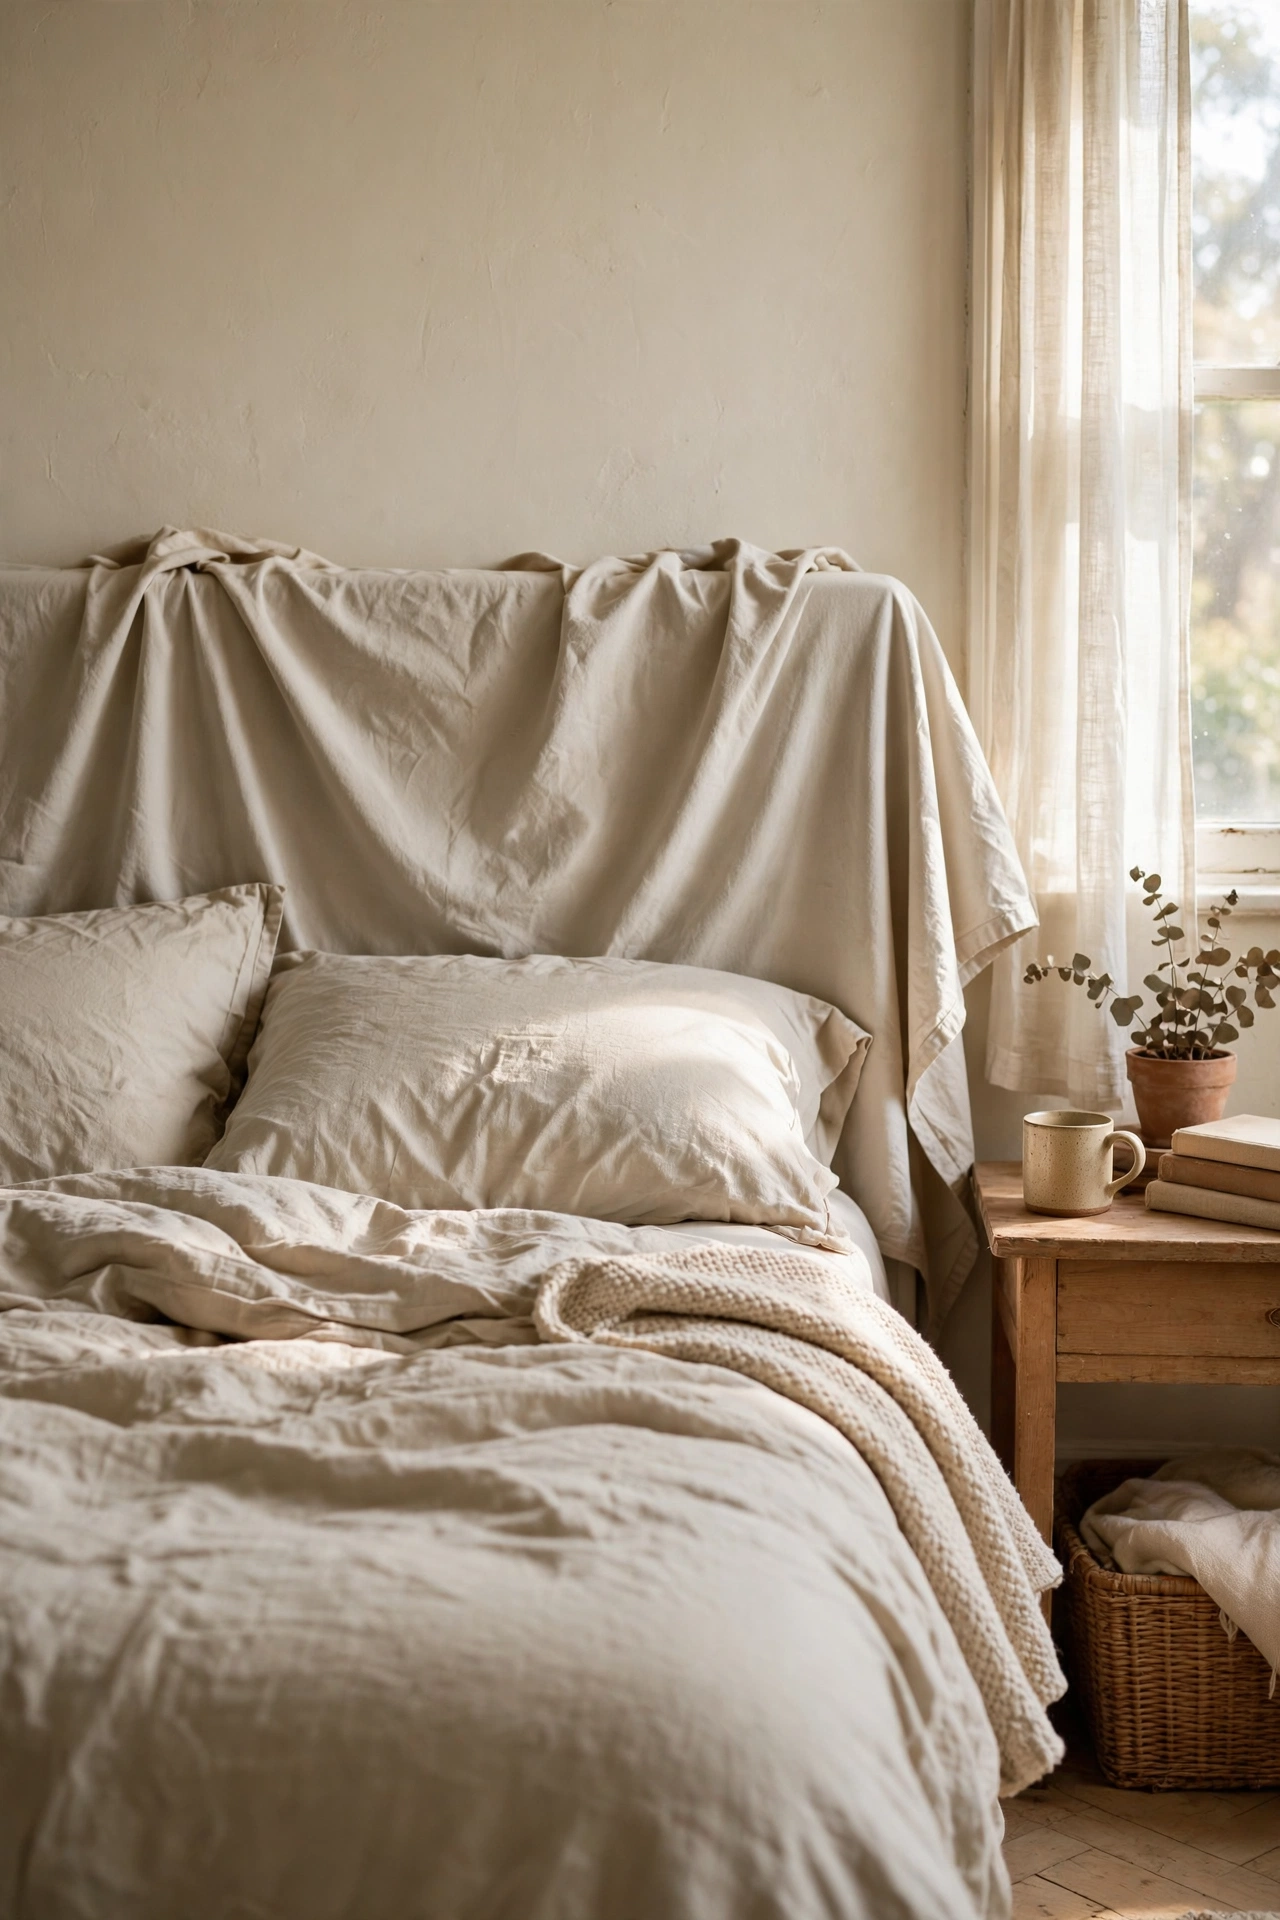
A painter’s drop cloth draped over an existing ugly headboard — or a plywood board — gives you a relaxed linen look for pennies. Wash and dry the drop cloth first to soften it (it comes stiff), then drape it over the headboard, tucking and stapling the excess at the back. The natural cotton has a lovely slubby texture. I slipcovered a dated brown headboard this way and it looks like Belgian linen. I tried using it straight from the packet and it looked like a dust sheet — the pre-wash is what transforms it. Do buy the canvas drop cloth, not the thin plastic-backed kind.
Pro tip: tea-dye the drop cloth for a warm oatmeal tone — plain drop cloths can look stark white.
Cost: ~$12 | Time: 1 hour plus washing
22. Headboard with Built-In Reading Lights
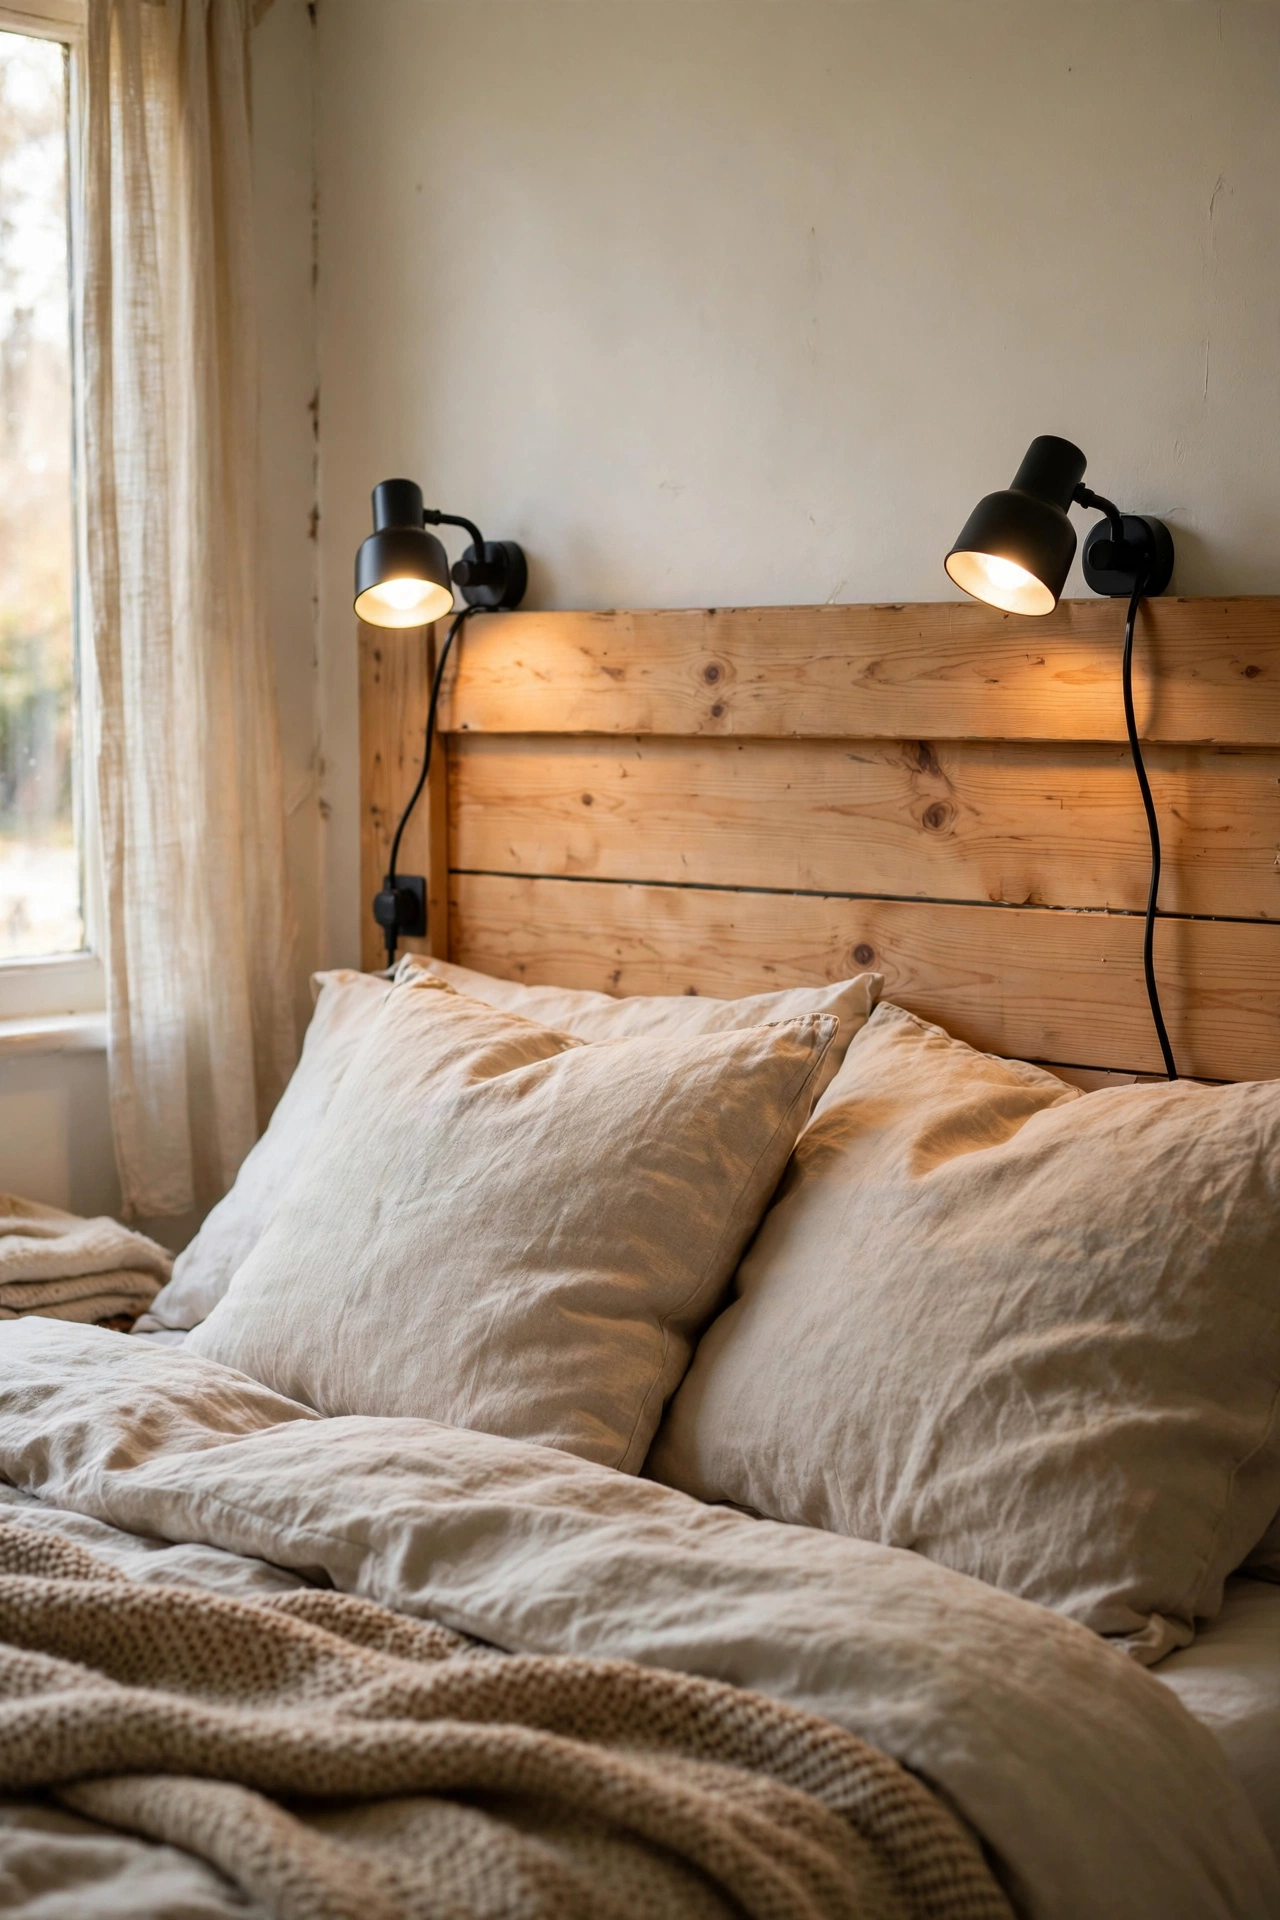
Clip two plug-in wall lights onto a simple wooden headboard and you get hotel-style reading lights on a budget. Build or buy a basic timber headboard, then fix two inexpensive plug-in swing-arm or clip lights to the top corners, running the cables neatly down the back with cable clips. Mine cost less than one “proper” bedside lamp and the light is exactly where I need it. I tried battery puck lights first and they were too dim to read by — mains plug-in lights are worth the cable. Do use cable clips and a cord cover so the wires disappear down the back.
Pro tip: choose lights with individual switches so each side of the bed controls its own.
Cost: ~$35 | Time: 2 hours
23. Wainscoting Panel Headboard
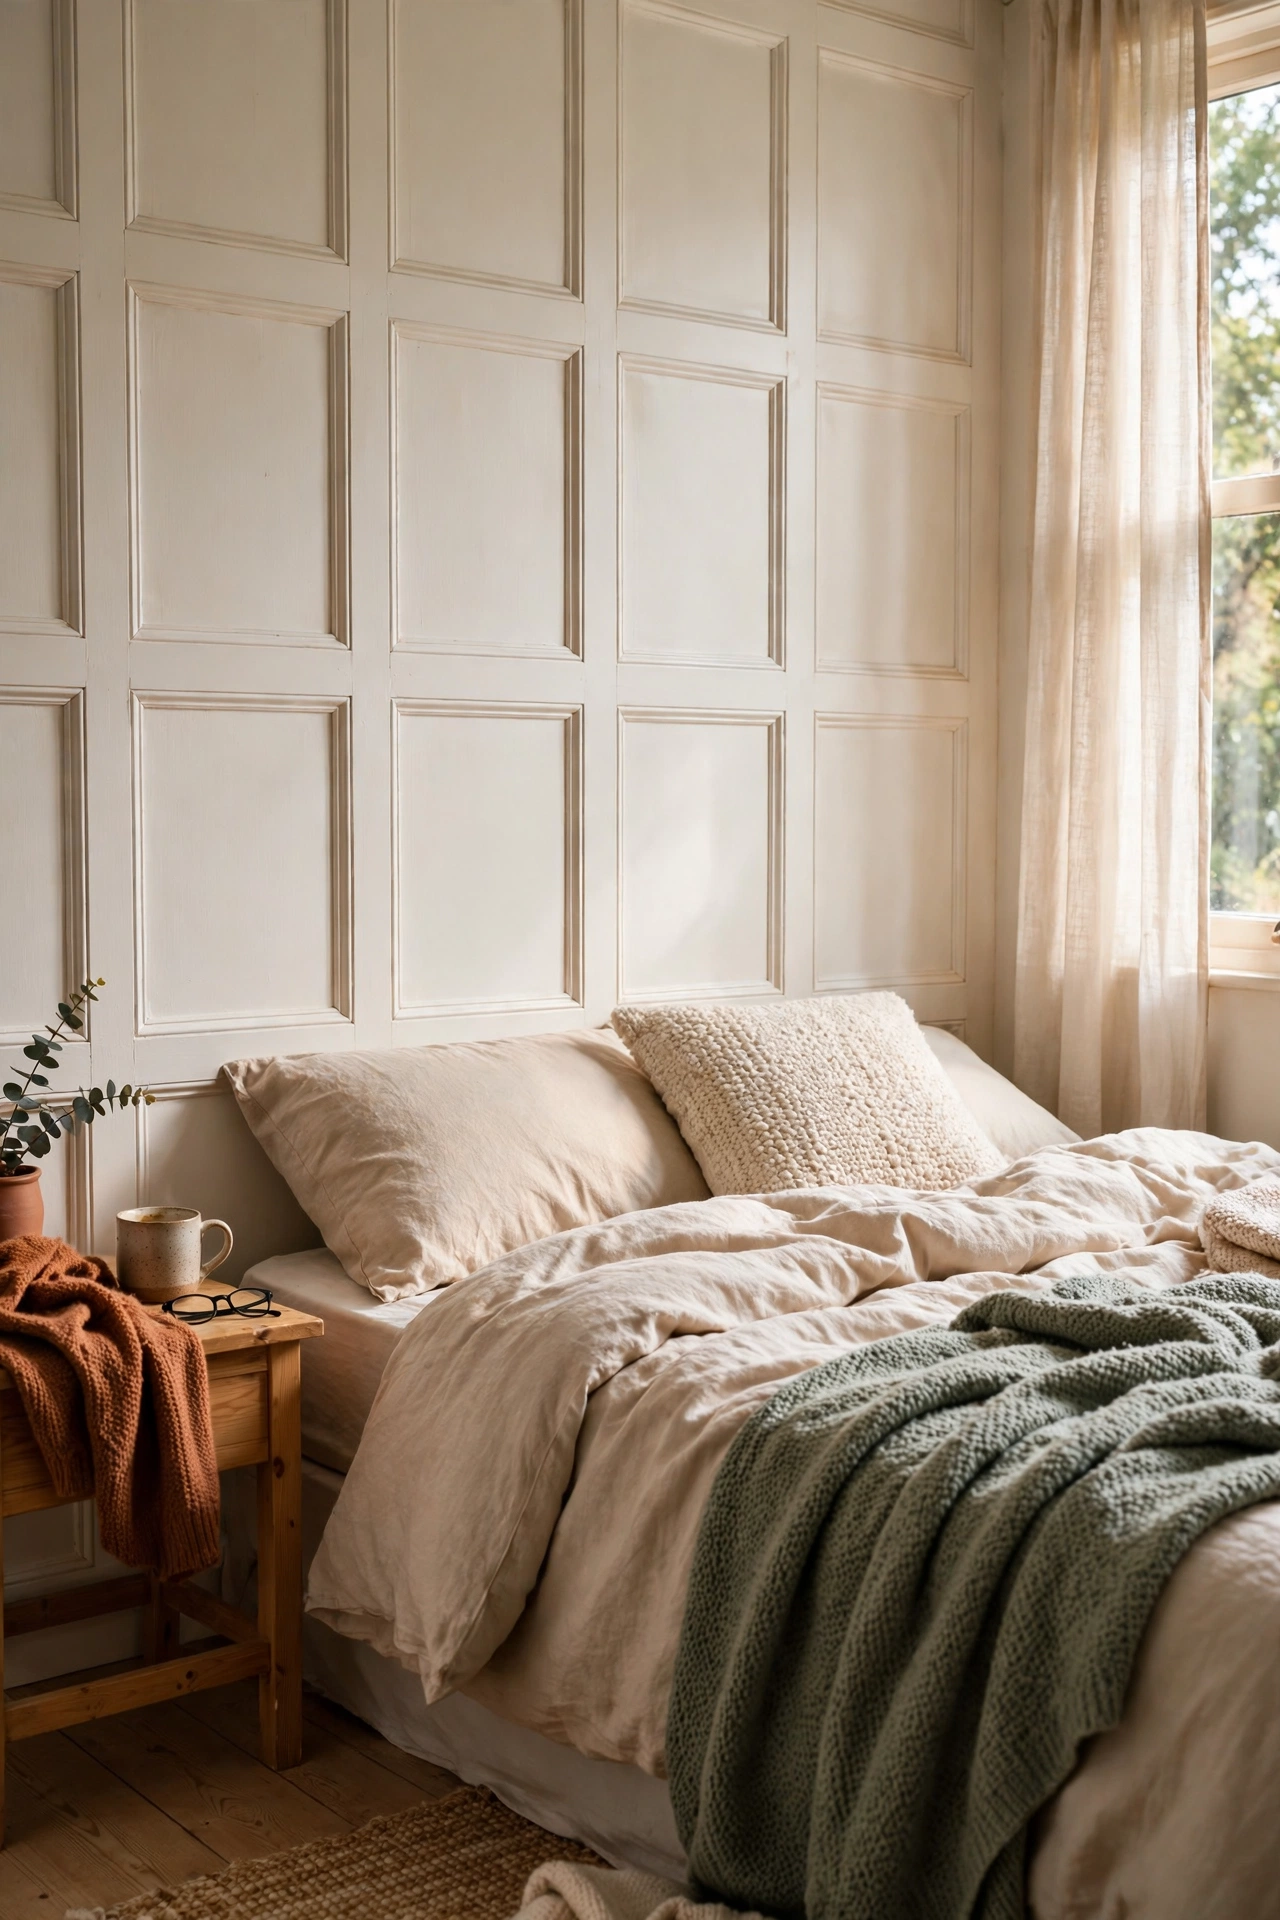
Frame the wall behind your bed with simple wainscoting-style timber trim for an elegant panelled headboard effect. Cut thin trim into rectangles, glue and pin them to the wall in a symmetrical layout, caulk the edges, and paint everything one colour. It looks like expensive wall panelling. I did a three-panel layout behind my bed in warm white and the bedroom feels twice as grand. I tried skipping the caulk and the shadow gaps gave away the DIY — caulk is the five-minute step that makes it look professional. Do use a level for every piece; wonky rectangles ruin the effect.
Pro tip: paint the wall and trim the exact same colour and sheen so it reads as one architectural feature.
Cost: ~$25 | Time: 4 hours plus drying
Twenty-three headboards, and not one of them needs a joinery qualification. Pick the one that fits your tools, your budget, and your nerve — then enjoy the smug feeling of telling guests you made it yourself.
📌 Loving this look? Pin this post now so you can save this idea for your next weekend refresh.
Quick questions, answered
How wide should a DIY headboard be?
Match the width of your mattress as a minimum, and add 10–15cm each side if you want it to feel generous. A headboard narrower than the bed always looks like a mistake.
Do I need to attach a headboard to the bed frame?
No — wall-mounting is easier and sturdier. Fix it to wall studs with proper brackets and it will never wobble, and you can change the bed underneath without touching the headboard.
What is the cheapest headboard I can make?
A painted arch on the wall costs one tester pot and an afternoon. After that, a fabric-wrapped plywood board is the best value proper headboard at around twenty-five pounds all in.
Keep the calm going with these next: (see also: 25-diy-coffee-table-ideas-for-beginners/) (see also: 23-no-paint-diy-wall-decor-ideas-on-a-budget/) (see also: 17-diy-planter-ideas-for-beginners/)
