15 Dollar Tree Craft Ideas That Don’t Look Like Kid Crafts
15 Dollar Tree Craft Ideas That Don’t Look Like Kid Crafts
I used to walk past the craft aisle at the dollar store assuming everything there would look like a school project. Then my neighbour showed me her “marble” tray, and I refused to believe it came from the dollar store until she showed me the receipt. Dollar tree craft ideas have a reputation problem — but the materials are genuinely useful when you skip the glitter glue and treat them like real supplies. These fifteen projects all pass the dinner-party test: nobody guesses the source.
The rule for grown-up dollar store crafting is simple: choose plain, well-shaped basics and upgrade them with paint, texture, and restraint. Every project below includes an exact cost breakdown so you can see where every dollar goes. Nothing here costs more than $10 all-in, and most come in under $5. The five cheapest projects on the list are ranked at the end.
1. Faux Marble Tray from a Baking Sheet
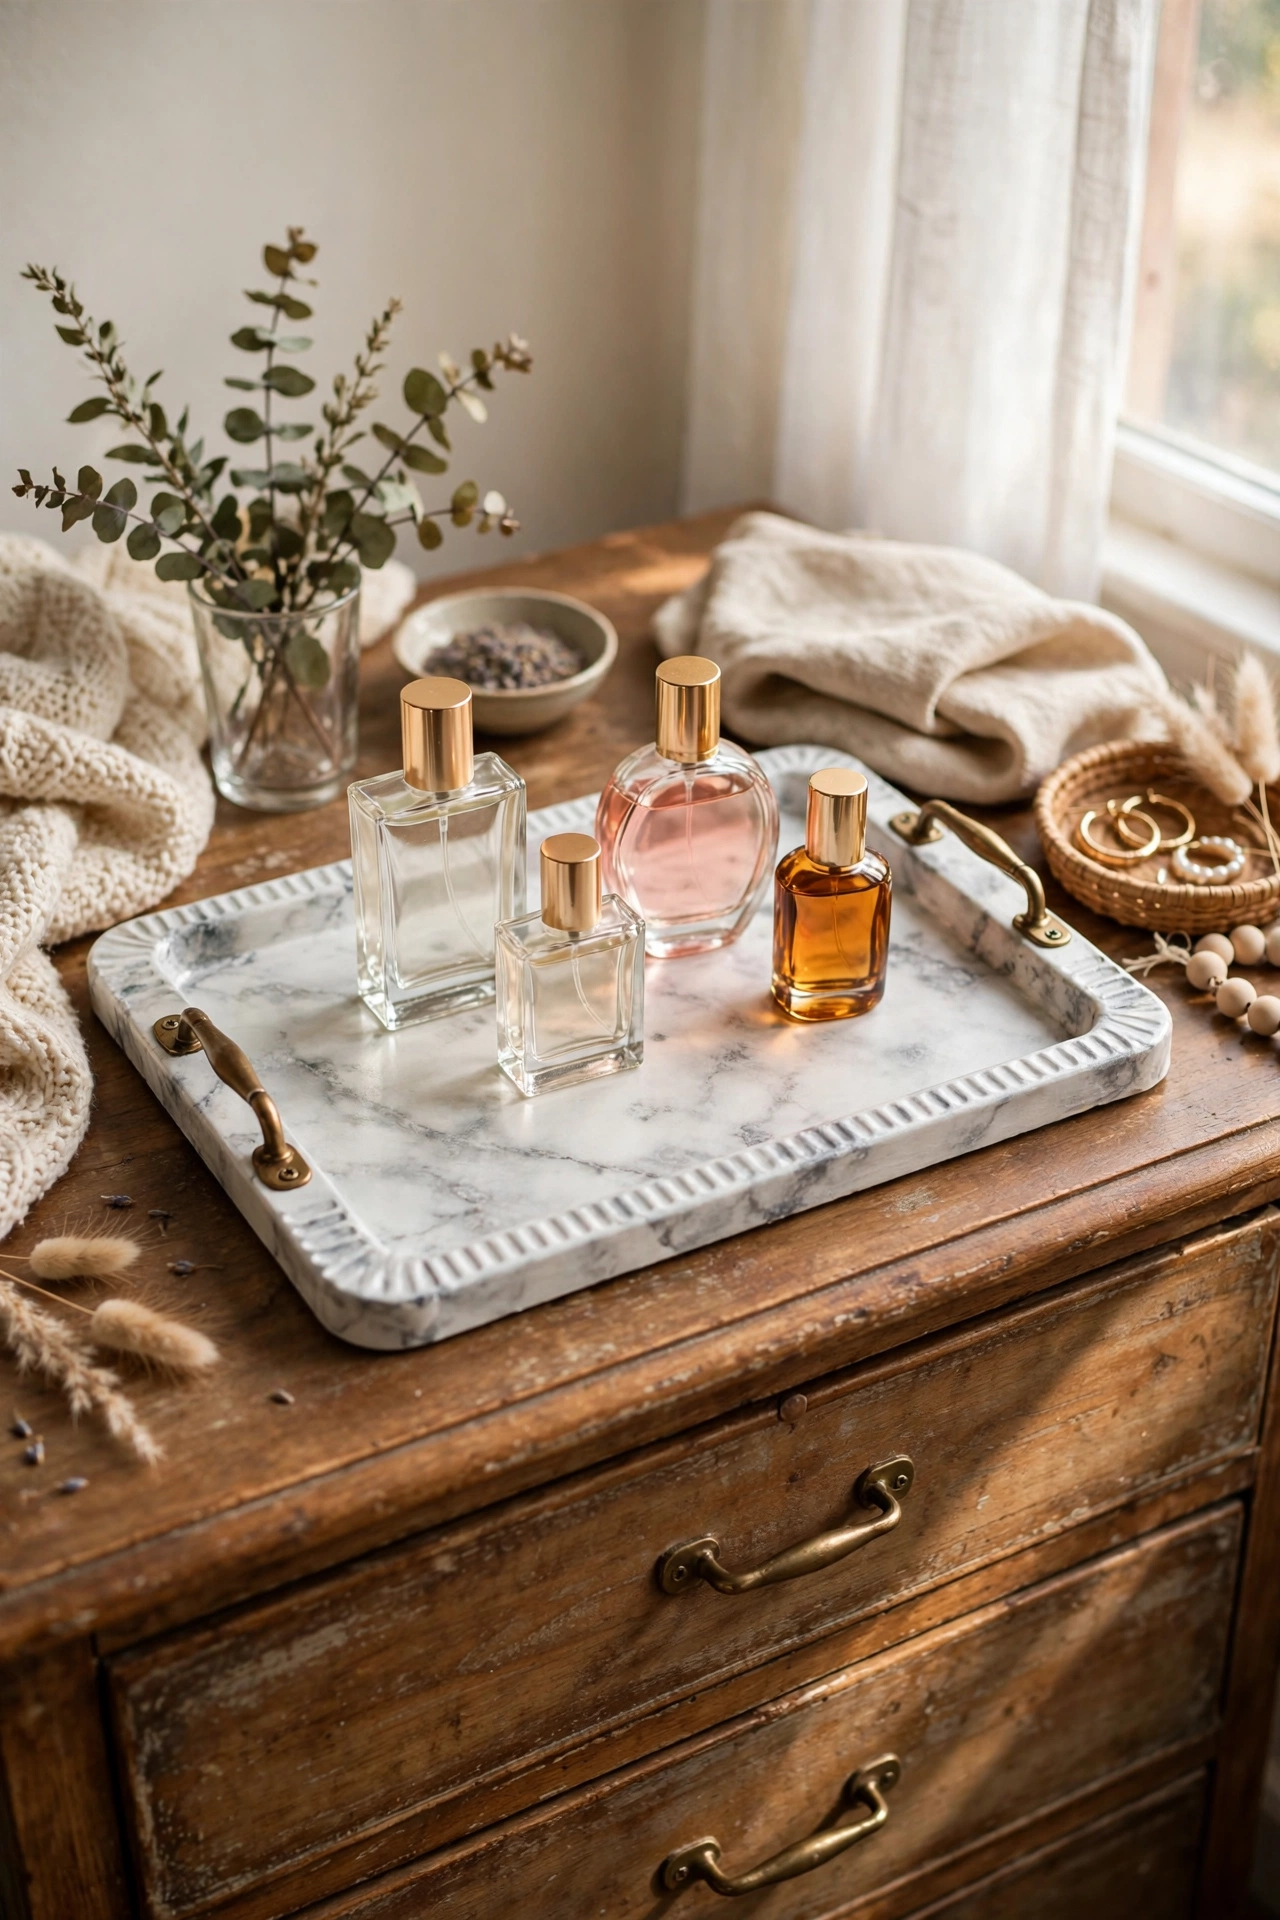
A rectangular metal baking sheet becomes a marble vanity tray with contact paper and handles. Cover the sheet in white marble-effect vinyl, add two small cabinet handles as tray handles, and you have a chic organiser for perfumes or coffee bits. I keep mine on my dresser and it genuinely looks like stone. Do wrap the vinyl around the sheet’s edges for a finished look. Don’t use a non-stick sheet with peeling coating — pick a plain metal one so the vinyl adheres.
Cost breakdown: baking sheet $1.25, marble vinyl $1.25 (shared roll), 2 handles $2.50 → total ~$5 | Time: 25 minutes
2. Frosted Glass Vases from Dollar Store Glassware
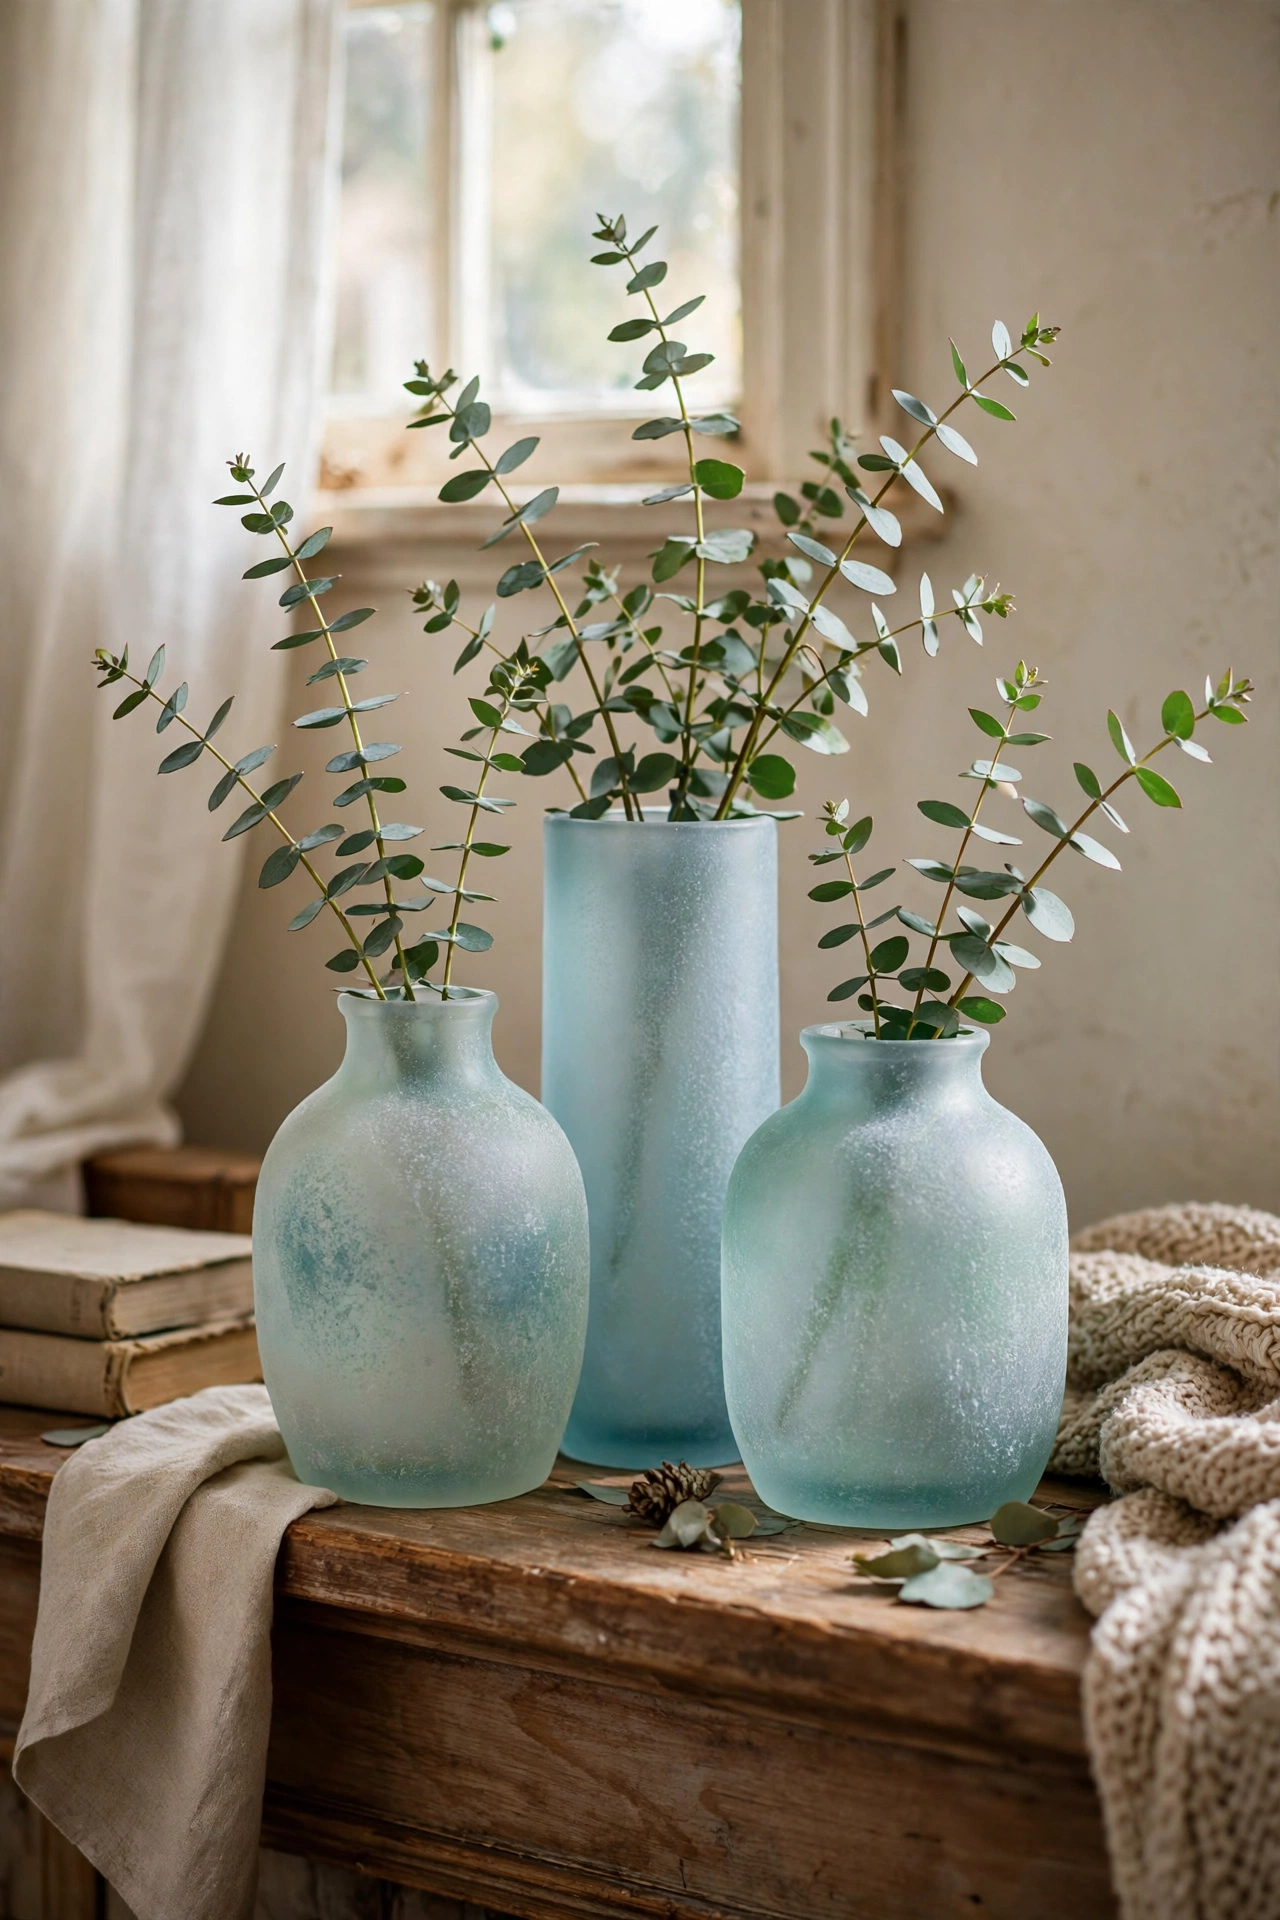
Plain glass cylinders become frosted designer vases with a $1.25 can of frost spray. Clean three vases, spray two light coats of frost effect paint, and group them with simple stems. Mine sit on my mantel and look like the sea-glass vases selling for $25 each. Do spray in light passes to avoid drips — frost spray shows every run. Don’t handle them for a full day; the frost coating scratches easily before it cures. The magic is in grouping three together.
Cost breakdown: 3 vases $3.75, frost spray $1.25 (shared can) → total ~$5 | Time: 20 minutes plus curing
3. Linen-Look Lampshade Cover
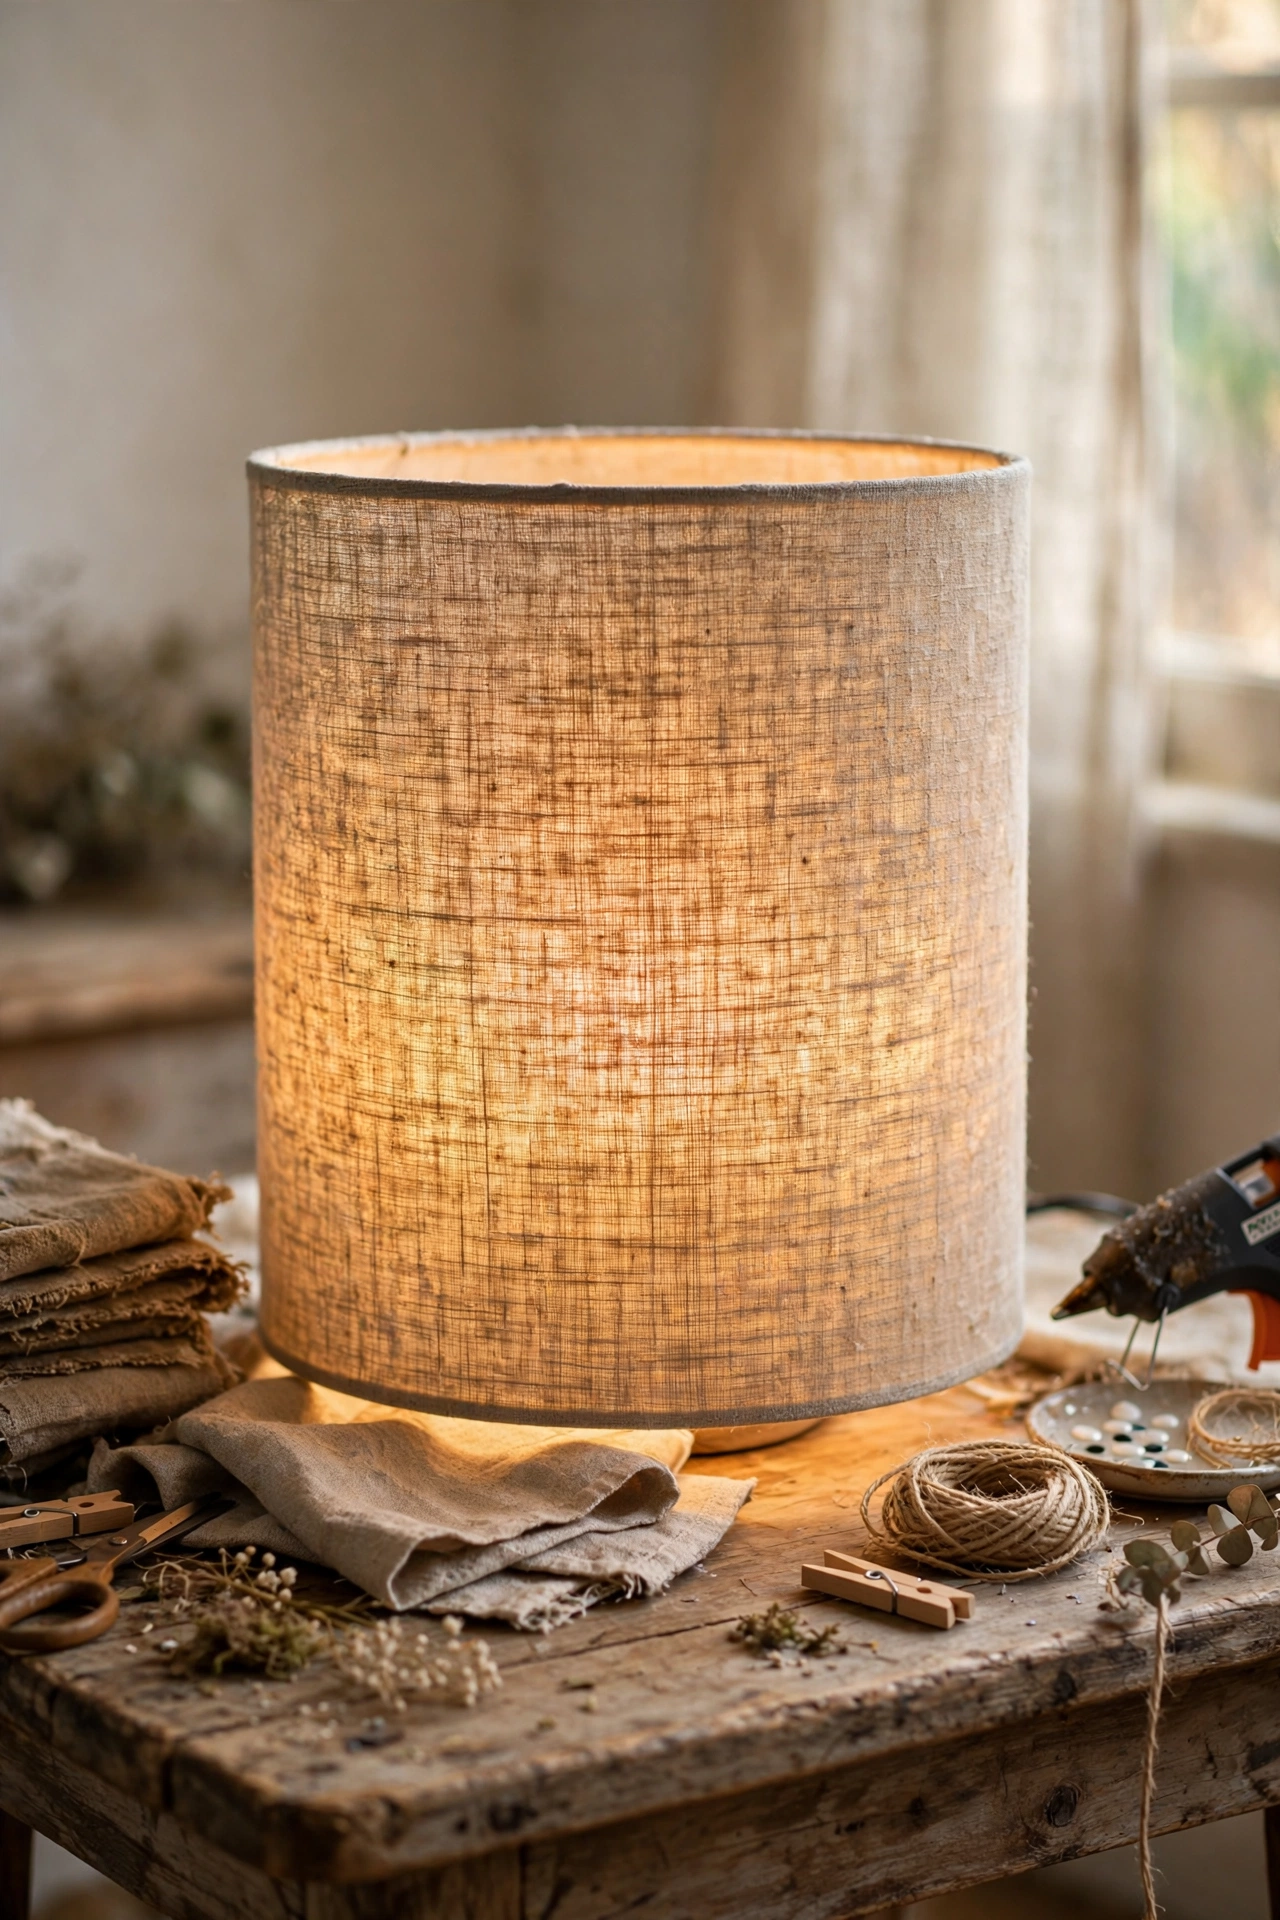
A dated lampshade gets a linen rebirth with a dollar store table runner. Wrap a plain drum shade in a natural-fibre runner, securing the top and bottom edges with fabric glue, and trim neatly. I recovered two matching shades for $2.50 total and the texture reads as expensive Belgian linen. Do choose a runner with a visible weave — smooth fabric just looks like fabric. Don’t glue over the inside of the shade where the bulb heat hits; keep the covering to the outside only.
Cost breakdown: table runner $1.25, fabric glue $1.25 (shared) → total ~$2.50 | Time: 30 minutes
4. Beaded Garland from Wooden Beads
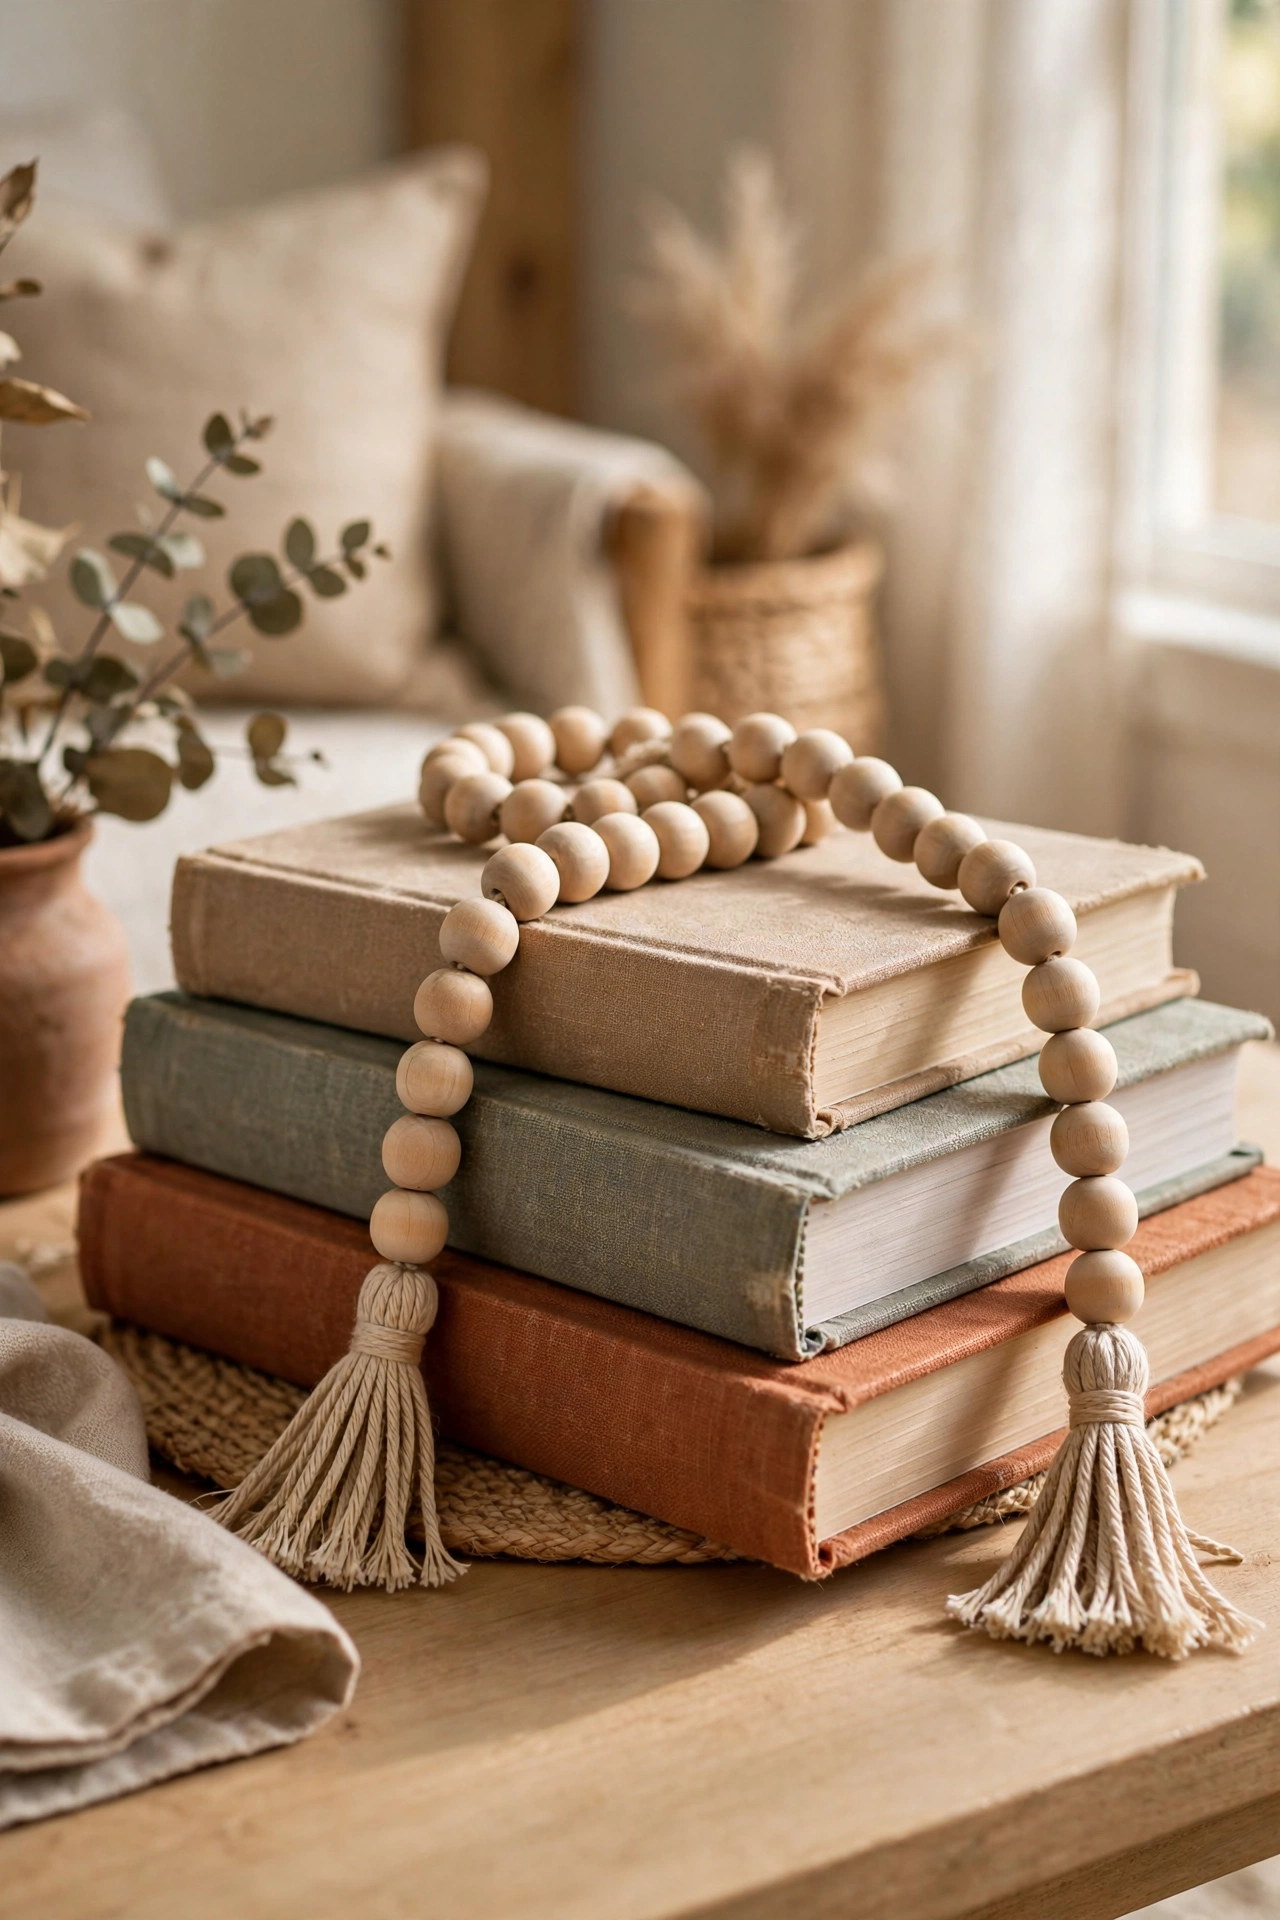
Wooden bead garlands sell for $18 in homeware shops; the dollar store sells the beads for $1.25 a bag. String large wooden beads onto jute cord with a knot between each, add a tassel at each end, and drape over a stack of books or a vase. I have three draped around my house and they are the easiest styling win I know. Do mix in a few beads painted white for a two-tone look. Don’t use small beads — 20mm or larger is what reads as decor rather than jewellery.
Cost breakdown: 2 bead bags $2.50, jute cord $1.25 (shared) → total ~$3.75 | Time: 30 minutes
5. Framed Botanical Prints
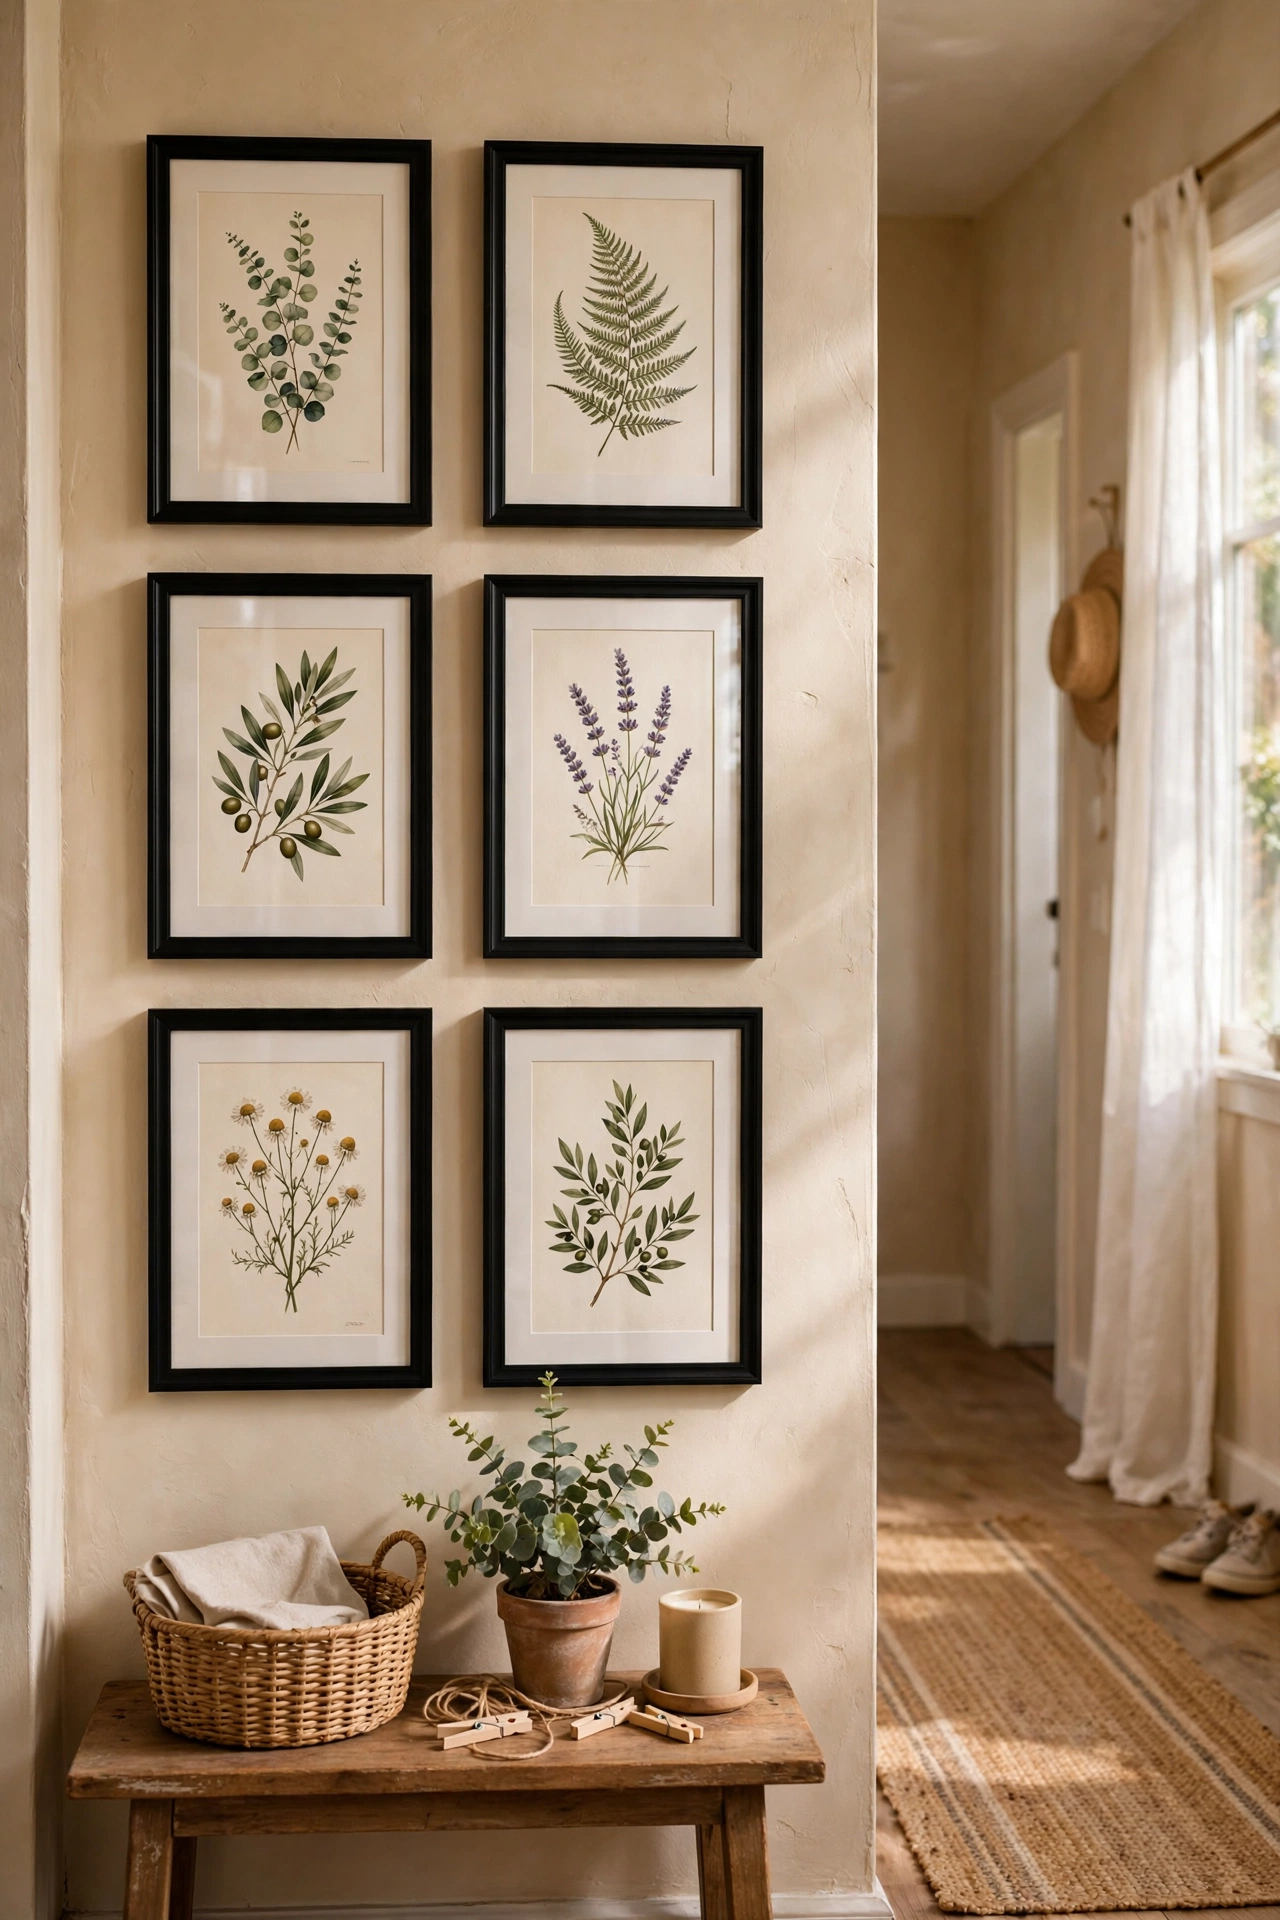
Dollar store frames plus free printable botanical art equals a gallery wall for pocket change. Print botanical illustrations at the library, trim to fit $1.25 frames, and hang in a grid. My hallway grid of six cost under $10 including printing and looks properly curated. Do remove the cheap cardboard backing and replace it with the print mounted on card for a flatter finish. Don’t use the glossy plastic “glass” — actually, do keep it; cleaned well it looks fine and keeps dust off.
Cost breakdown: 6 frames $7.50, printing ~$2 → total ~$9.50 | Time: 45 minutes
6. Concrete-Look Candle Holders
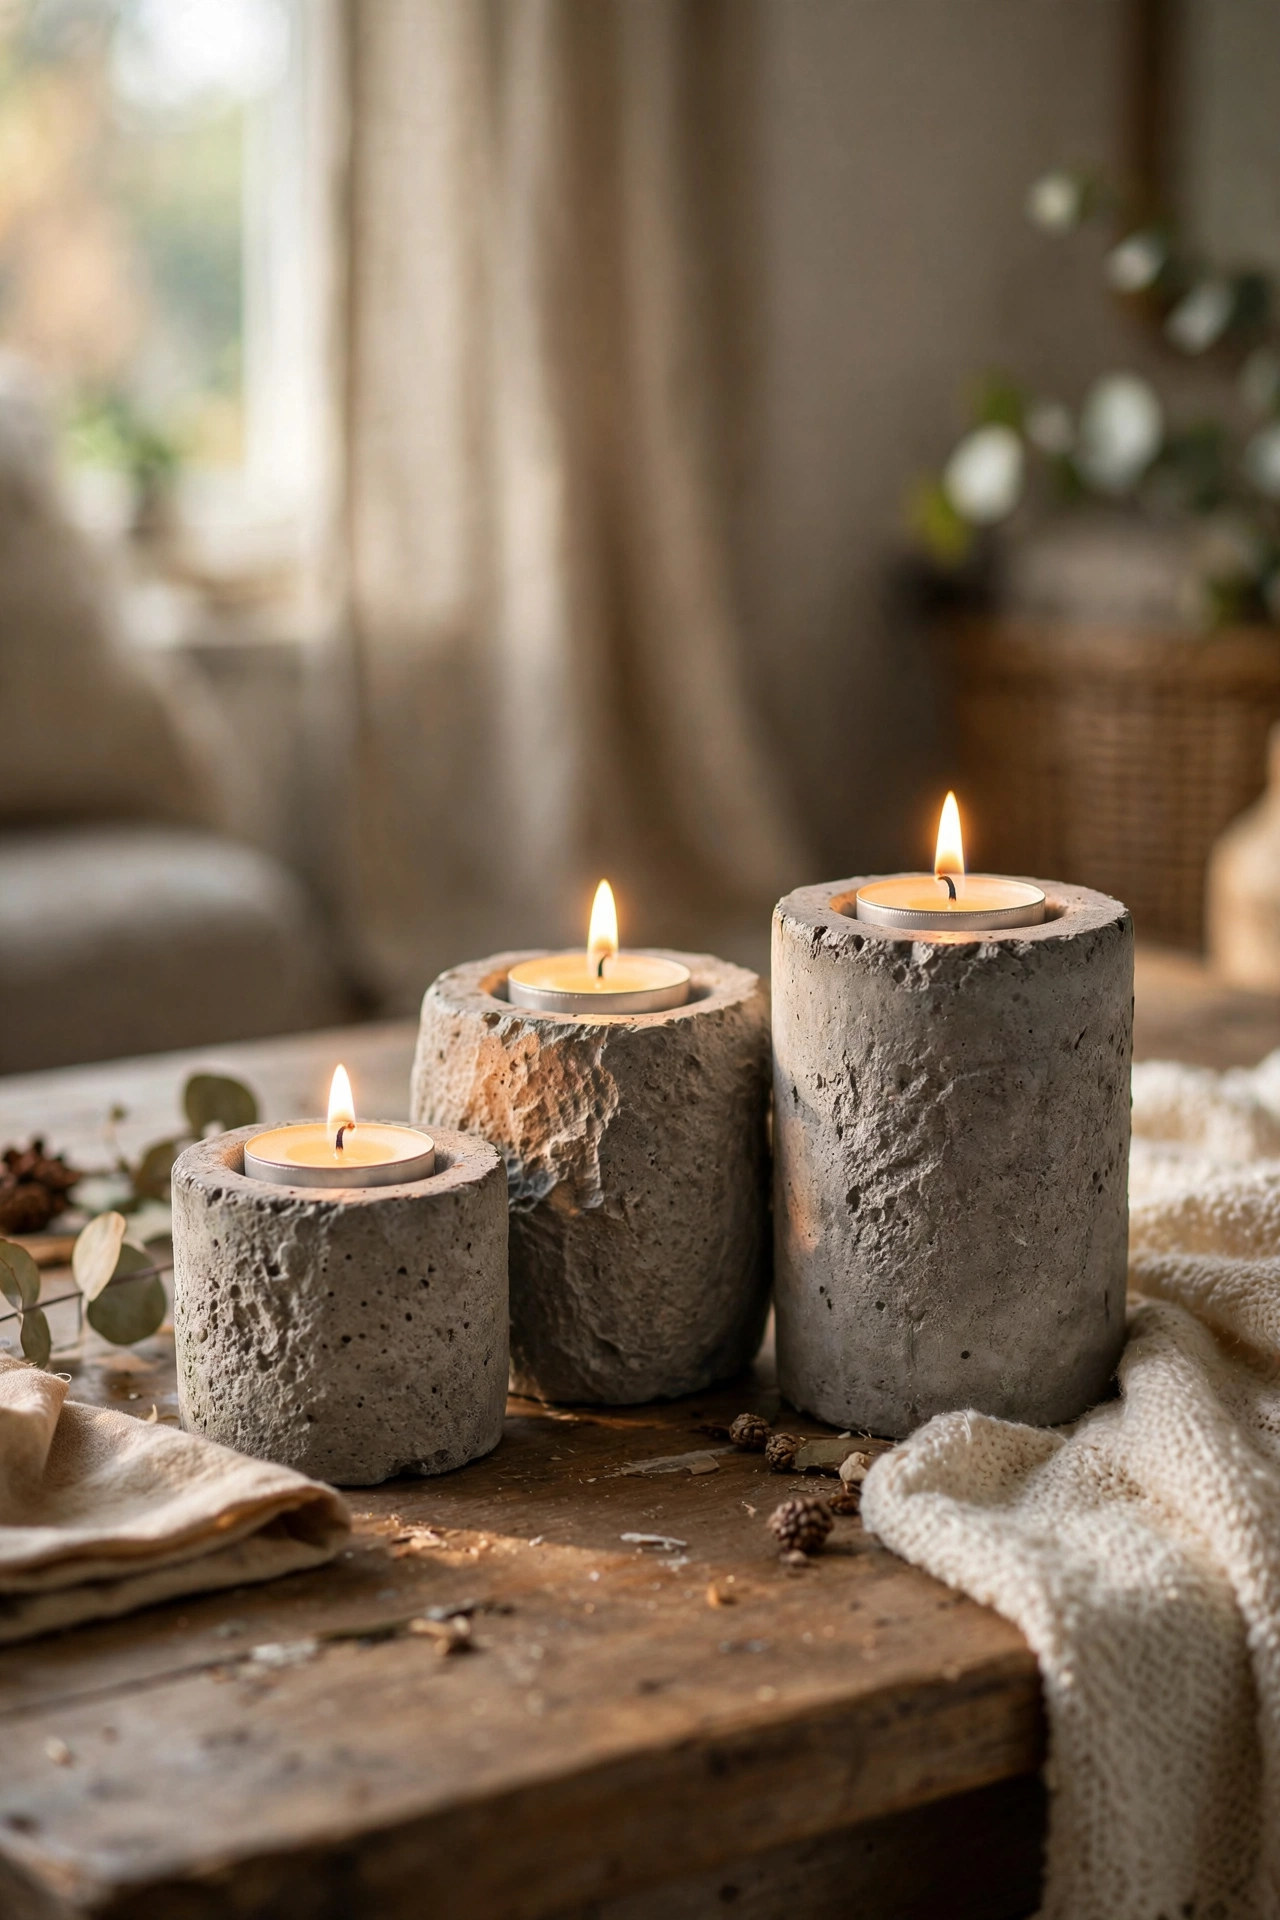
Small glass votives become concrete candle holders with textured spray paint. Spray three votive holders with stone-texture paint in two coats and they read as cast concrete. I cluster mine on the coffee table and the texture catches candlelight beautifully. Do spray the outsides only — keep paint away from where the flame sits. Don’t use them with tall tapers; tealights and short pillars are the safe match. The weight still says glass, so keep them where they will not be lifted and judged.
Cost breakdown: 3 votives $3.75, texture spray $1.25 (shared can) → total ~$5 | Time: 20 minutes plus drying
7. Woven Placemat Wall Art
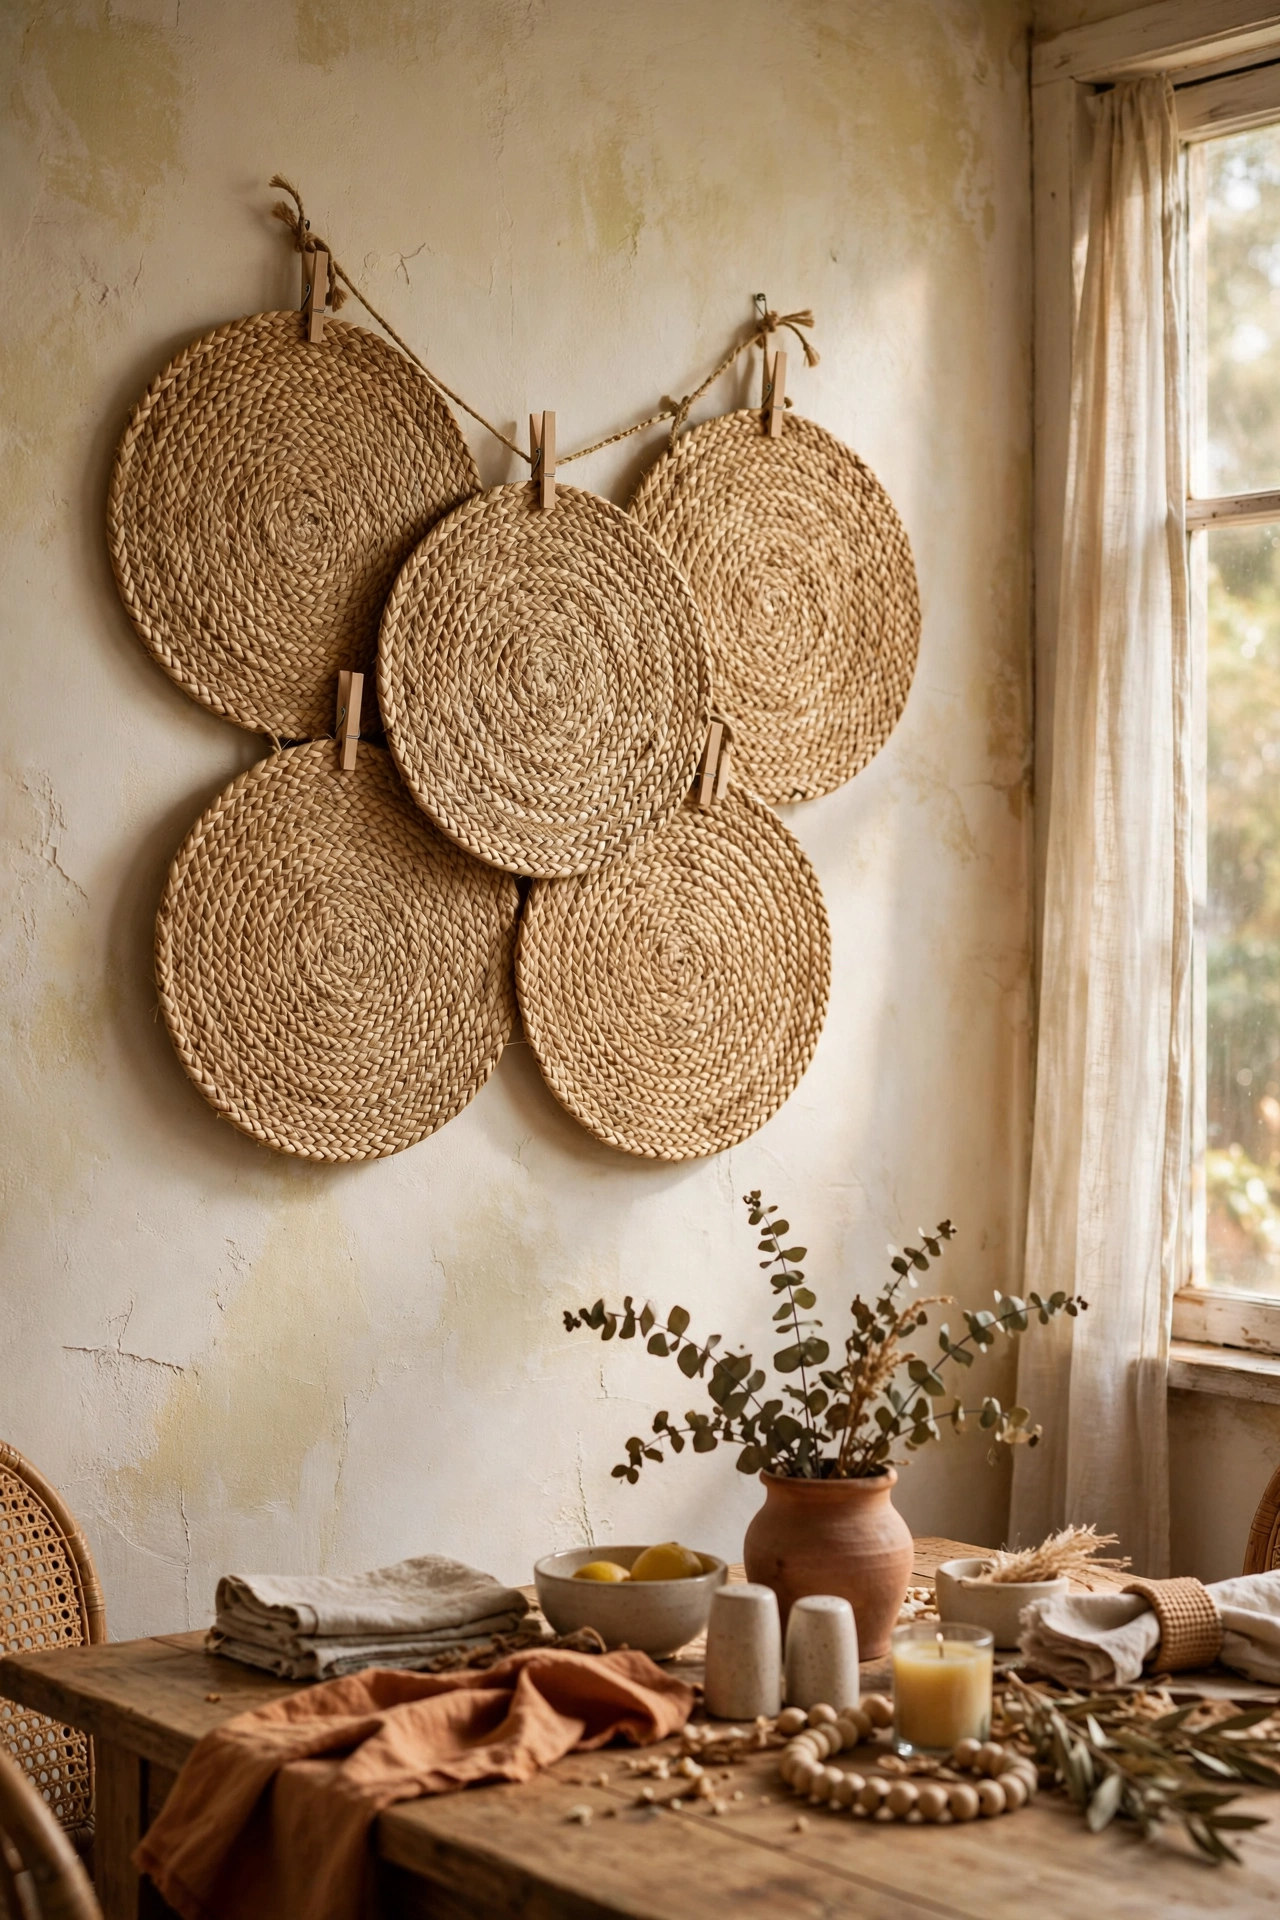
Round woven placemats hung in a cluster make brilliant boho wall art. Buy five seagrass-look placemats, hang the largest centrally with a small nail through the weave, and arrange smaller ones around it. My dining room wall cost $6.25 and gets more comments than the art I actually paid for. Do choose placemats with tight weaves so they hold their shape on the wall. Don’t hang them in a bathroom — steam warps the weave. This is the cheapest wall transformation on the list.
Cost breakdown: 5 placemats $6.25 → total ~$6.25 | Time: 20 minutes
8. Gold-Rimmed Picture Frames
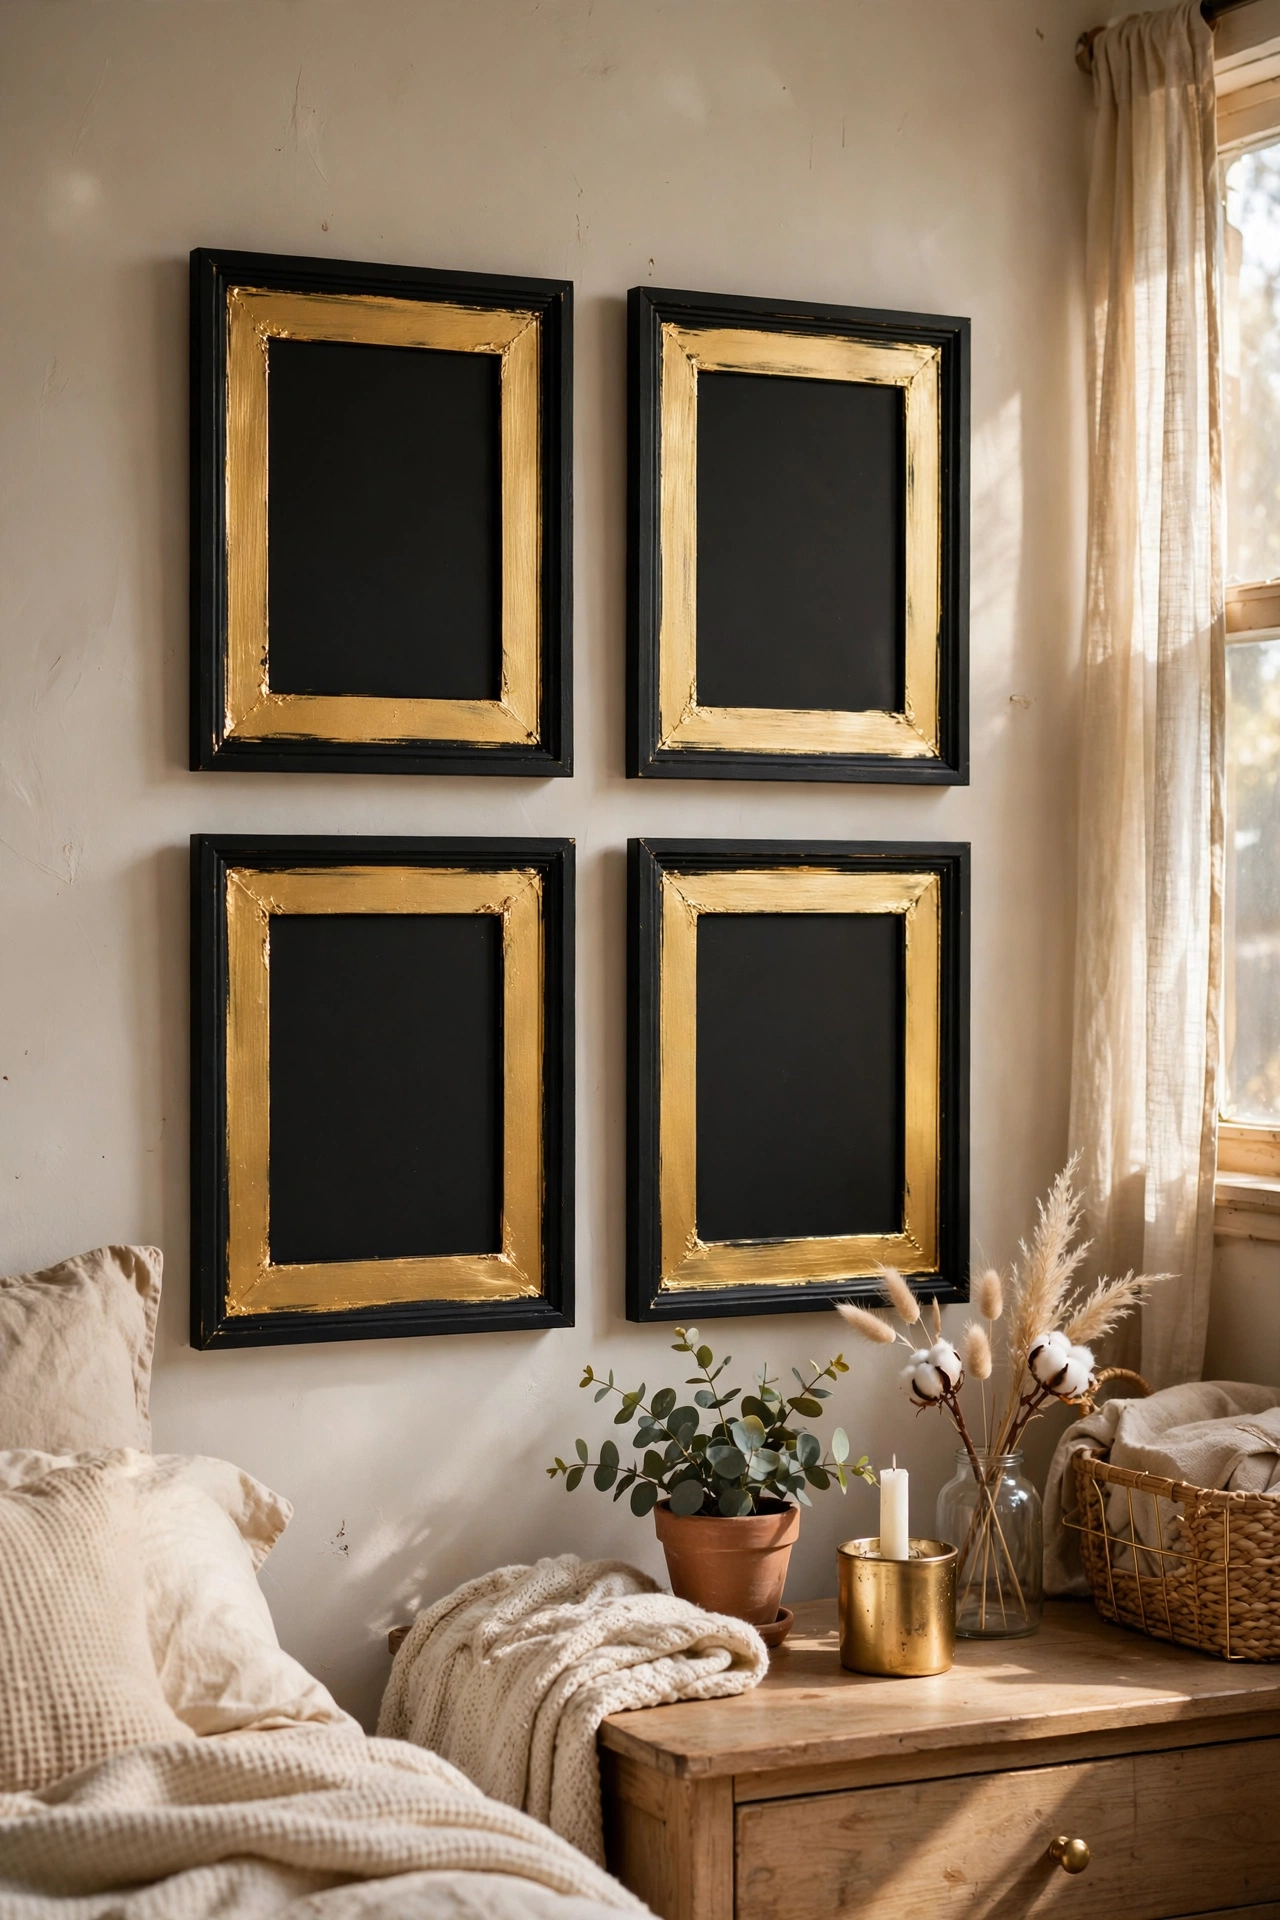
Plain black dollar store frames become gold-rimmed beauties with metallic paint. Paint just the inner lip of each frame with gold acrylic using a small brush — the thin gold line against black looks incredibly chic. I did a set of four for my bedroom and they look like the $30 versions. Do use two thin coats for even metallic coverage. Don’t paint the whole frame gold; the restraint of just the inner rim is what makes it elegant. This trick works on any dark frame.
Cost breakdown: 4 frames $5, gold paint $1.25 (shared) → total ~$6.25 | Time: 40 minutes plus drying
9. Faux Terracotta Pots
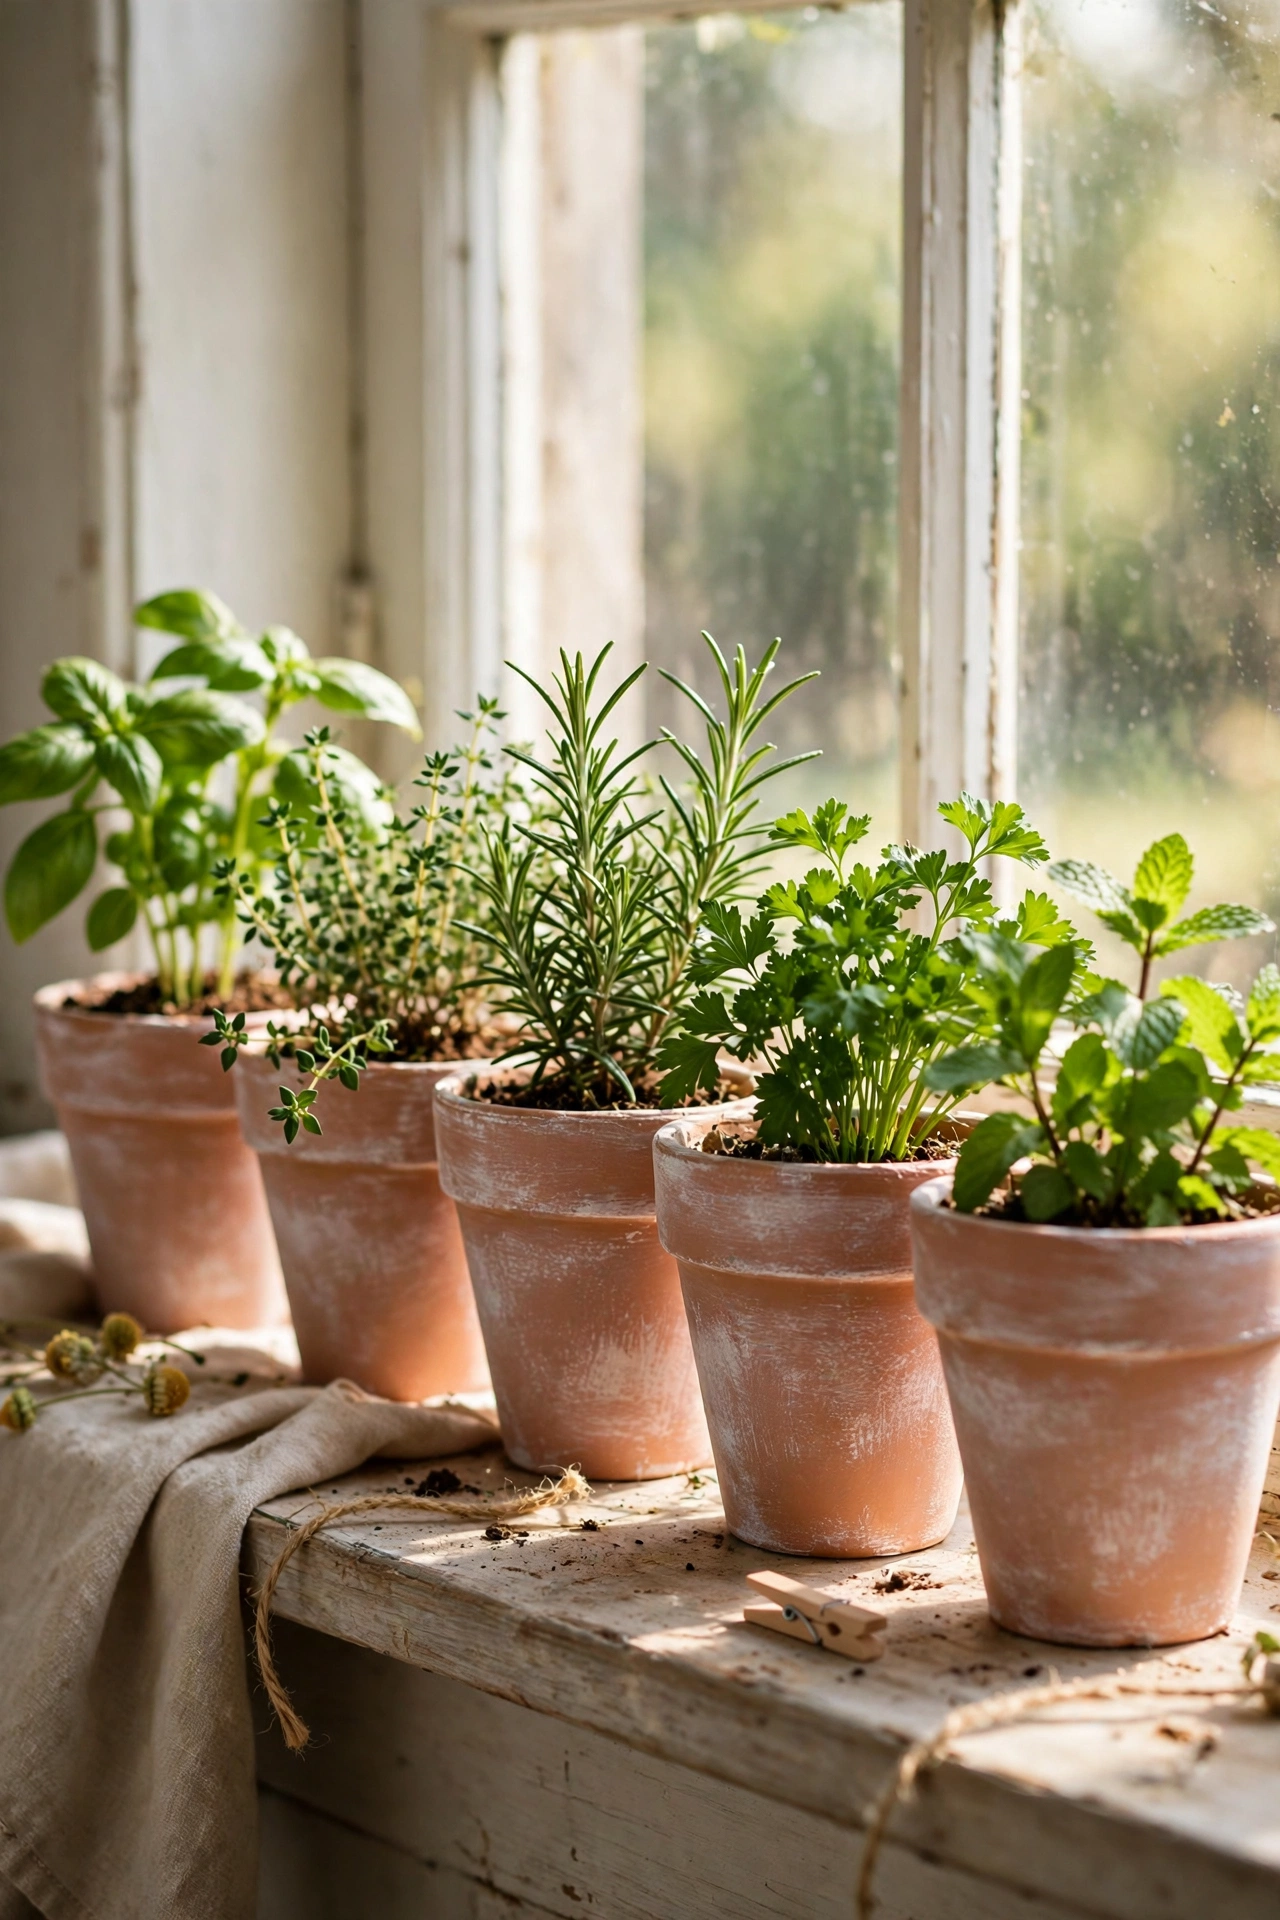
White plastic pots become convincing terracotta with the baking soda paint trick. Mix acrylic paint in a terracotta tone with a spoonful of bicarbonate of soda for texture, and brush onto clean plastic pots in two coats. The finish is matte and chalky, exactly like real clay. My faux terracotta row holds herbs on the windowsill and nobody has guessed plastic. Do let each coat dry fully — the texture builds between coats. Don’t skip the bicarbonate; without it the paint just looks like orange plastic.
Cost breakdown: 4 pots $5, paint + bicarbonate $1.25 (shared) → total ~$6.25 | Time: 45 minutes plus drying
10. Decorative Book Stack from Wrapped Boxes
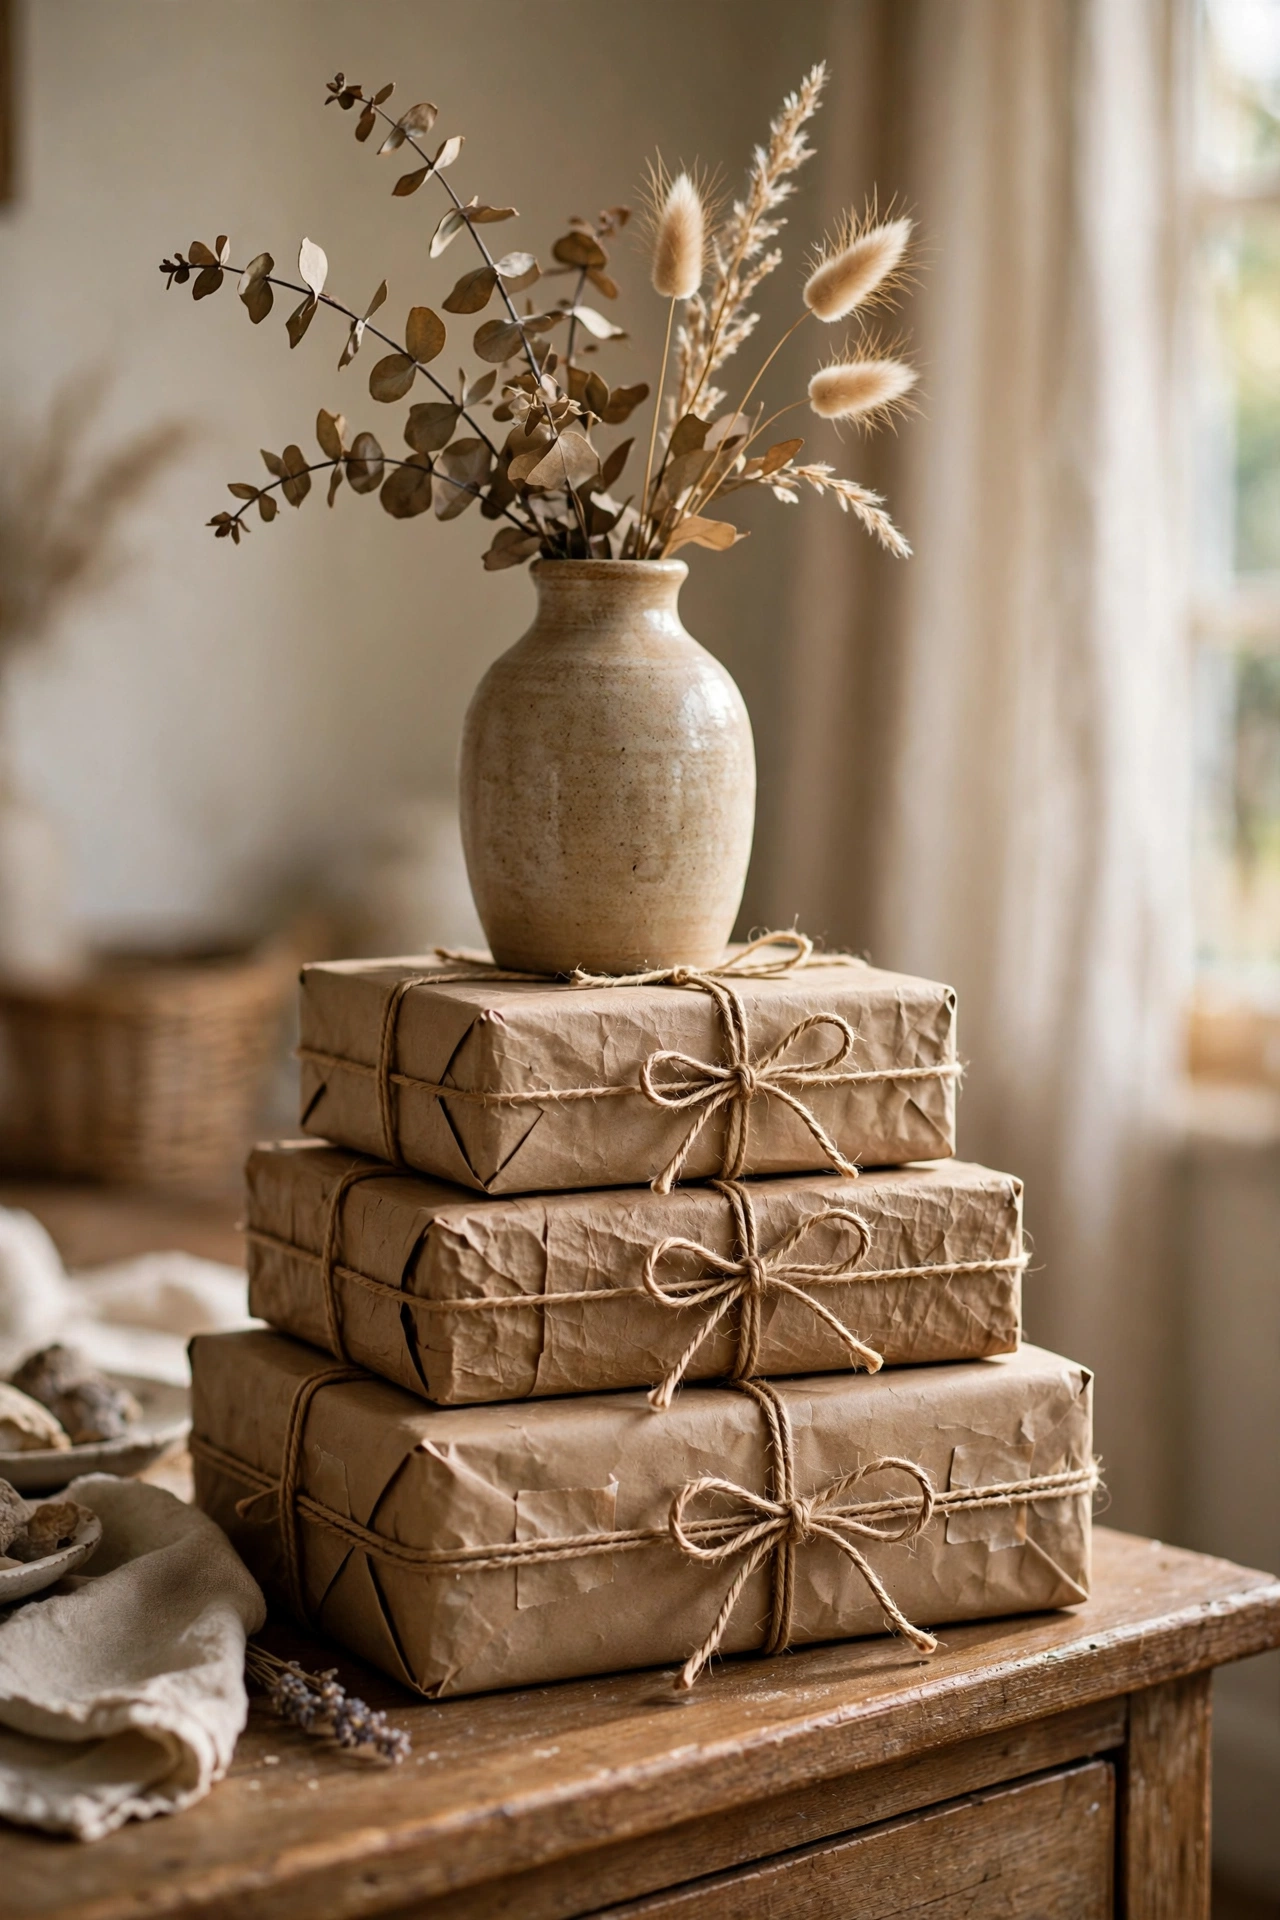
Fake book stacks are a stylist staple, and small boxes wrapped in craft paper fake them perfectly. Wrap three graduated boxes in neutral craft paper, glue on printed “titles” or simple labels, stack largest to smallest, and tie with twine. Mine sits under a vase on my console and looks like vintage volumes. Do distress the paper edges slightly with sandpaper for an aged feel. Don’t make the titles silly — simple words like “Poems” and “Travels” read authentic. This is pure styling with zero skill required.
Cost breakdown: 3 boxes $3.75, craft paper $1.25 (shared), twine $1.25 (shared) → total ~$6.25 | Time: 30 minutes
11. Textured Throw Pillow from Placemats
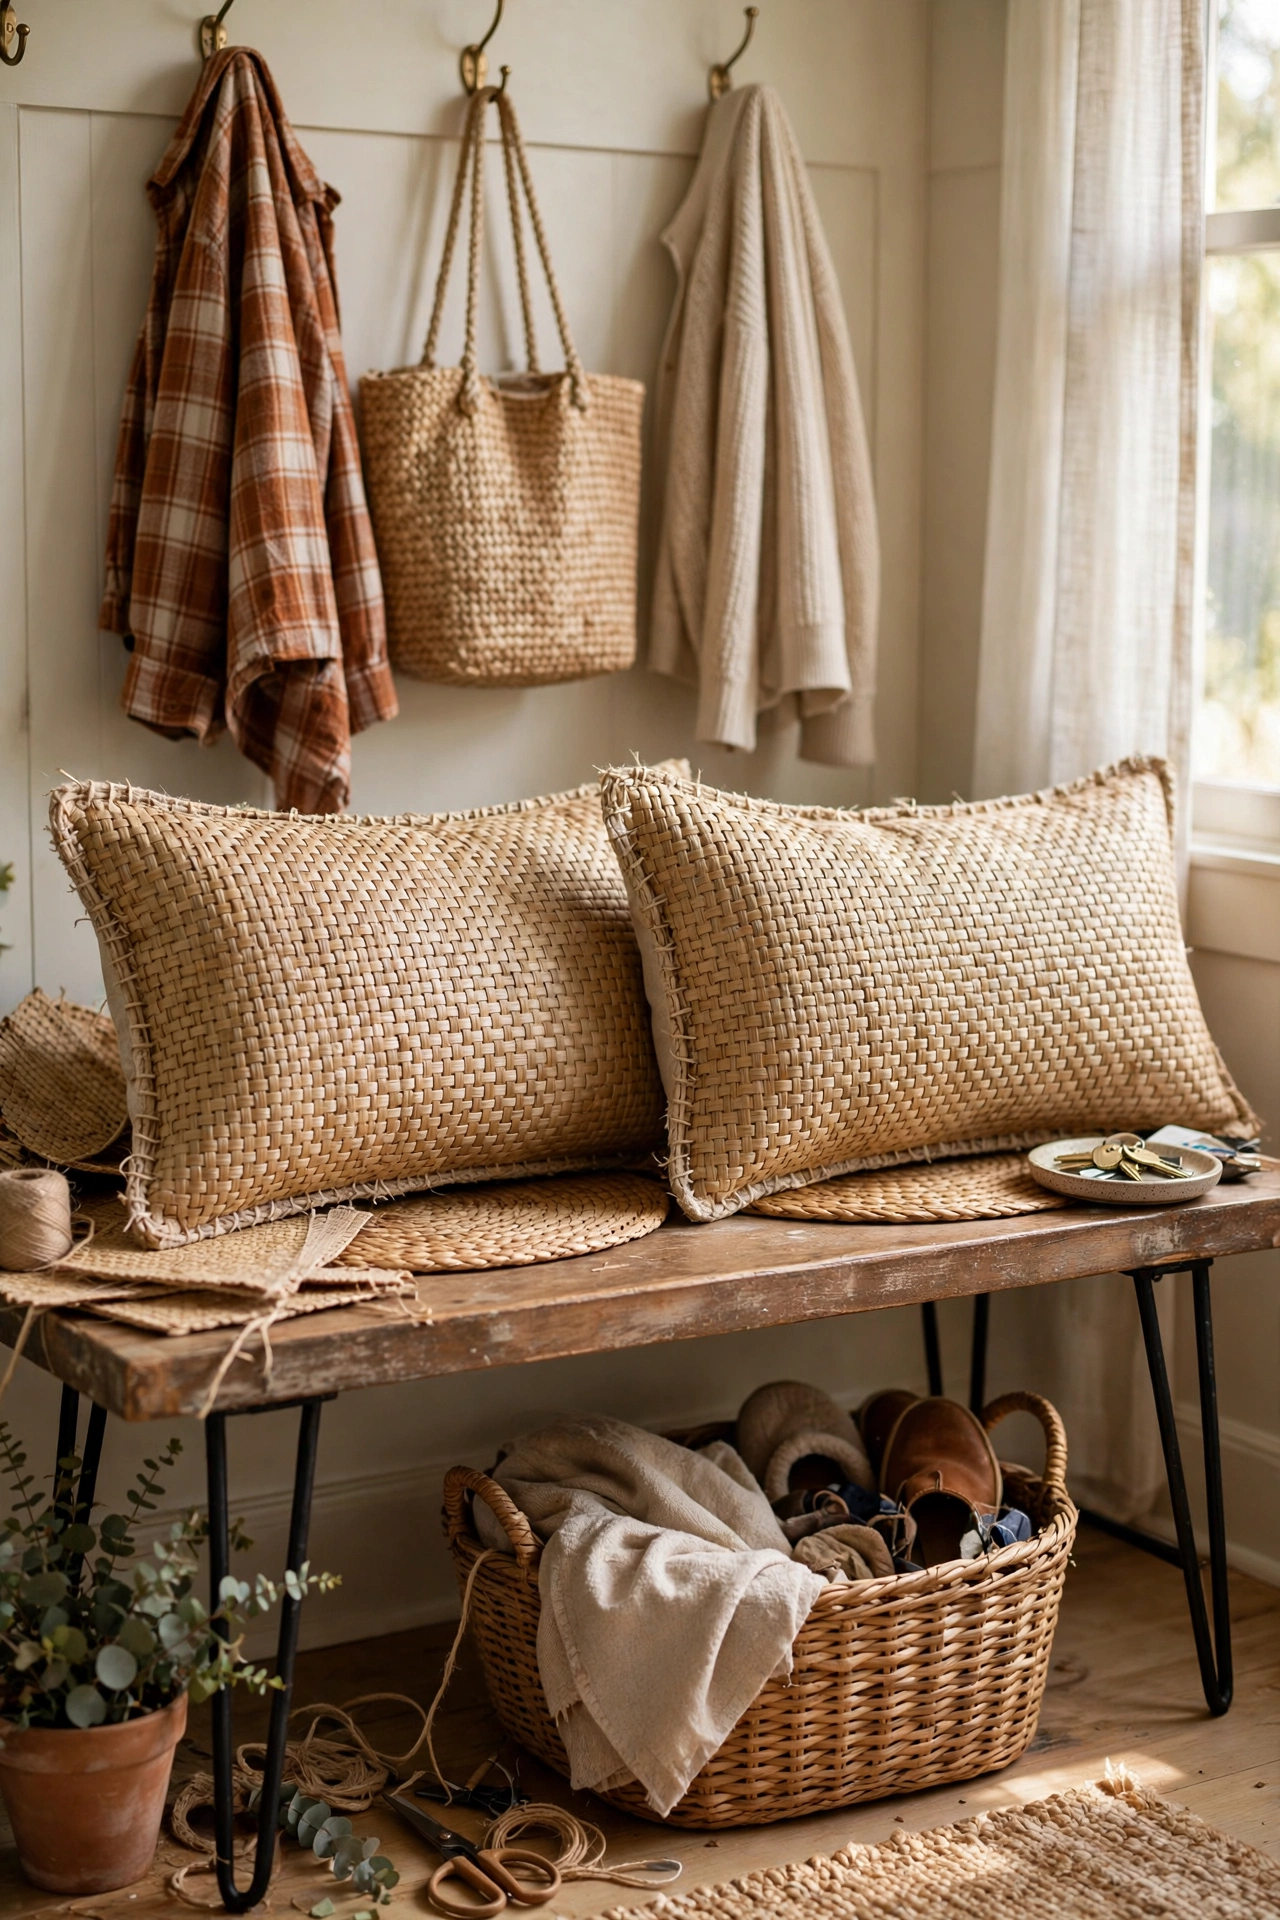
Two woven placemats sewn together make a textured lumbar pillow that looks boutique. Place two rectangular woven placemats back to back, sew or glue three sides, insert a pillow form, and close the fourth. I made two for my bench and the texture is gorgeous. Do choose placemats with finished edges so no raw weave shows. Don’t use a pillow form larger than the placemats — measure first. Fabric glue holds fine since pillows take little strain.
Cost breakdown: 4 placemats $5, pillow inserts $2.50 → total ~$7.50 | Time: 25 minutes
12. Eucalyptus Wreath from Faux Stems
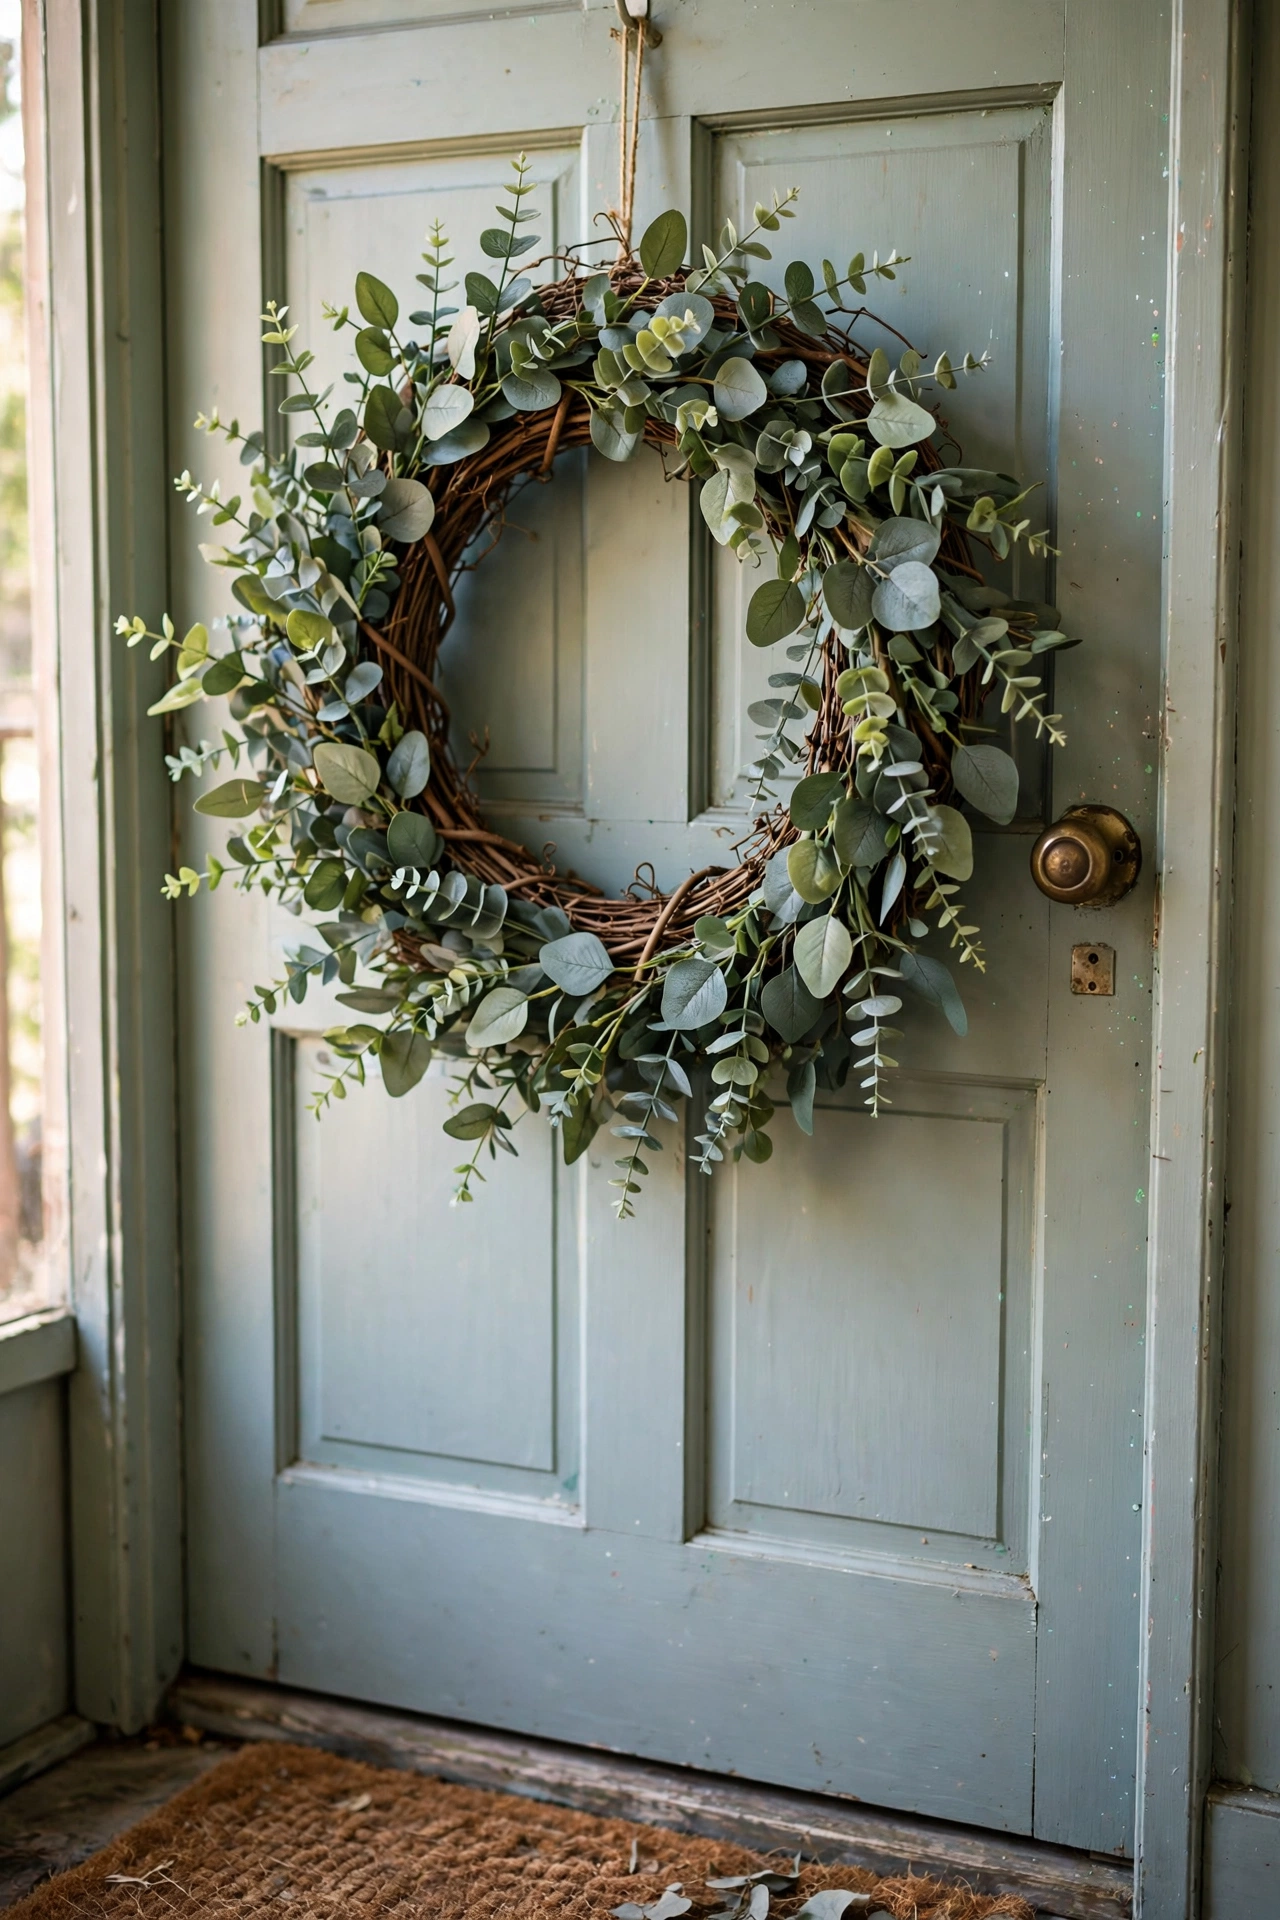
A full eucalyptus wreath for $5 beats the $40 shop version every time. Buy four faux eucalyptus stems, wire them onto a grapevine wreath base overlapping in one direction, and fluff. Mine hangs on my front door and has survived two years of weather. Do wire each stem in at least two points so nothing droops. Don’t arrange stems in opposite directions — one consistent flow looks natural, mixed directions look messy. Add a simple ribbon if you like, or leave it plain.
Cost breakdown: 4 stems $5, wreath base $1.25, wire $1.25 (shared) → total ~$7.50 | Time: 30 minutes
13. Brass-Look Mirror from a Charger Plate
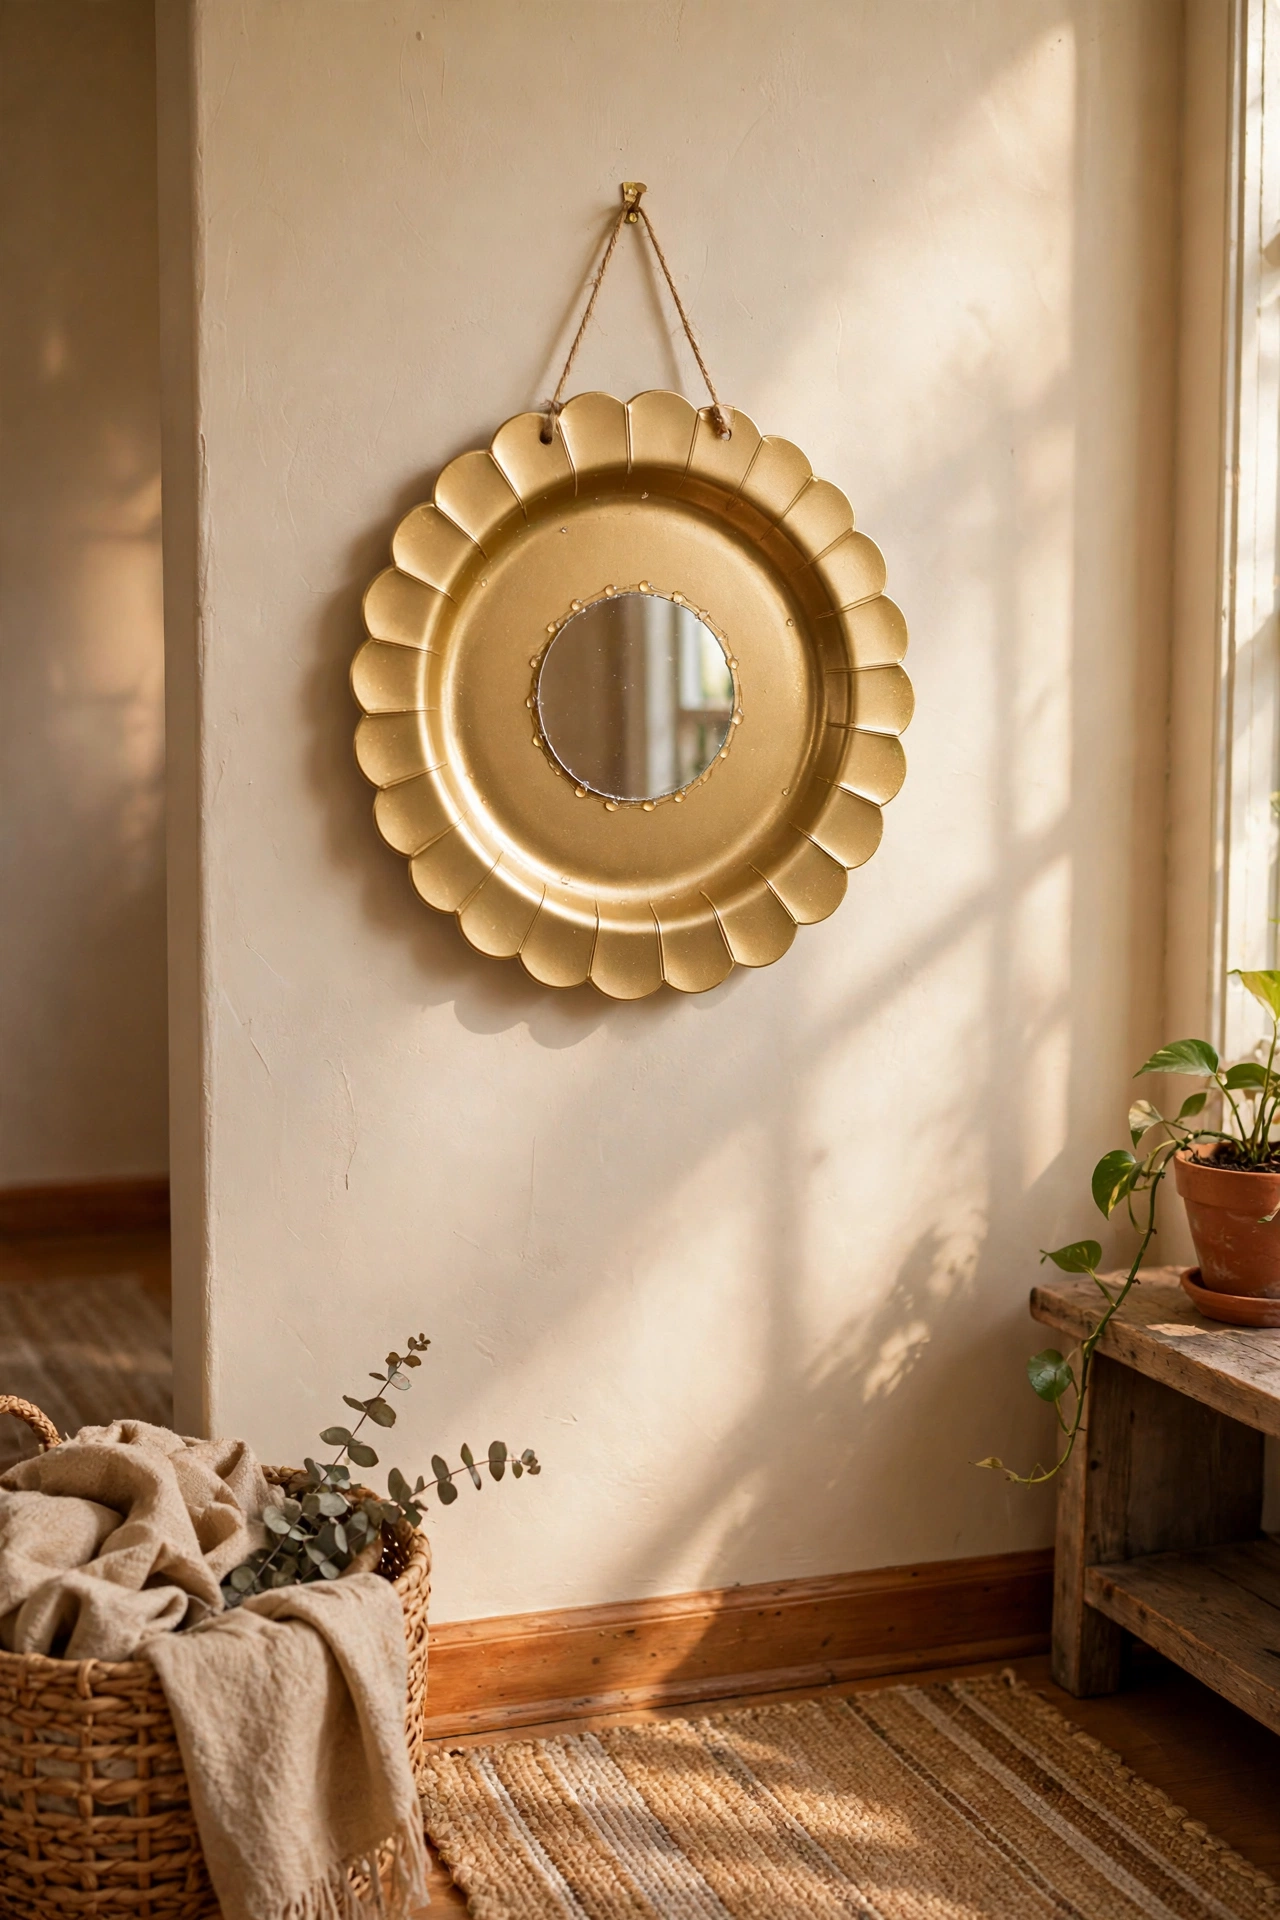
A gold charger plate plus a round mirror becomes a brass-look wall mirror. Glue a small round mirror — the dollar store sells them — into the centre of a gold charger plate, add a hanging tab on the back, and hang. Mine hangs in my hallway and the layered gold reads as an expensive sunburst-style mirror. Do centre the mirror carefully before the glue sets. Don’t use a charger with a heavily patterned rim; plain gold moulding looks the most expensive. Two or three grouped together make a real statement.
Cost breakdown: charger $1.25, mirror $1.25, glue $1.25 (shared) → total ~$3.75 | Time: 15 minutes plus curing
14. Tiered Tray from Plates and Candlesticks
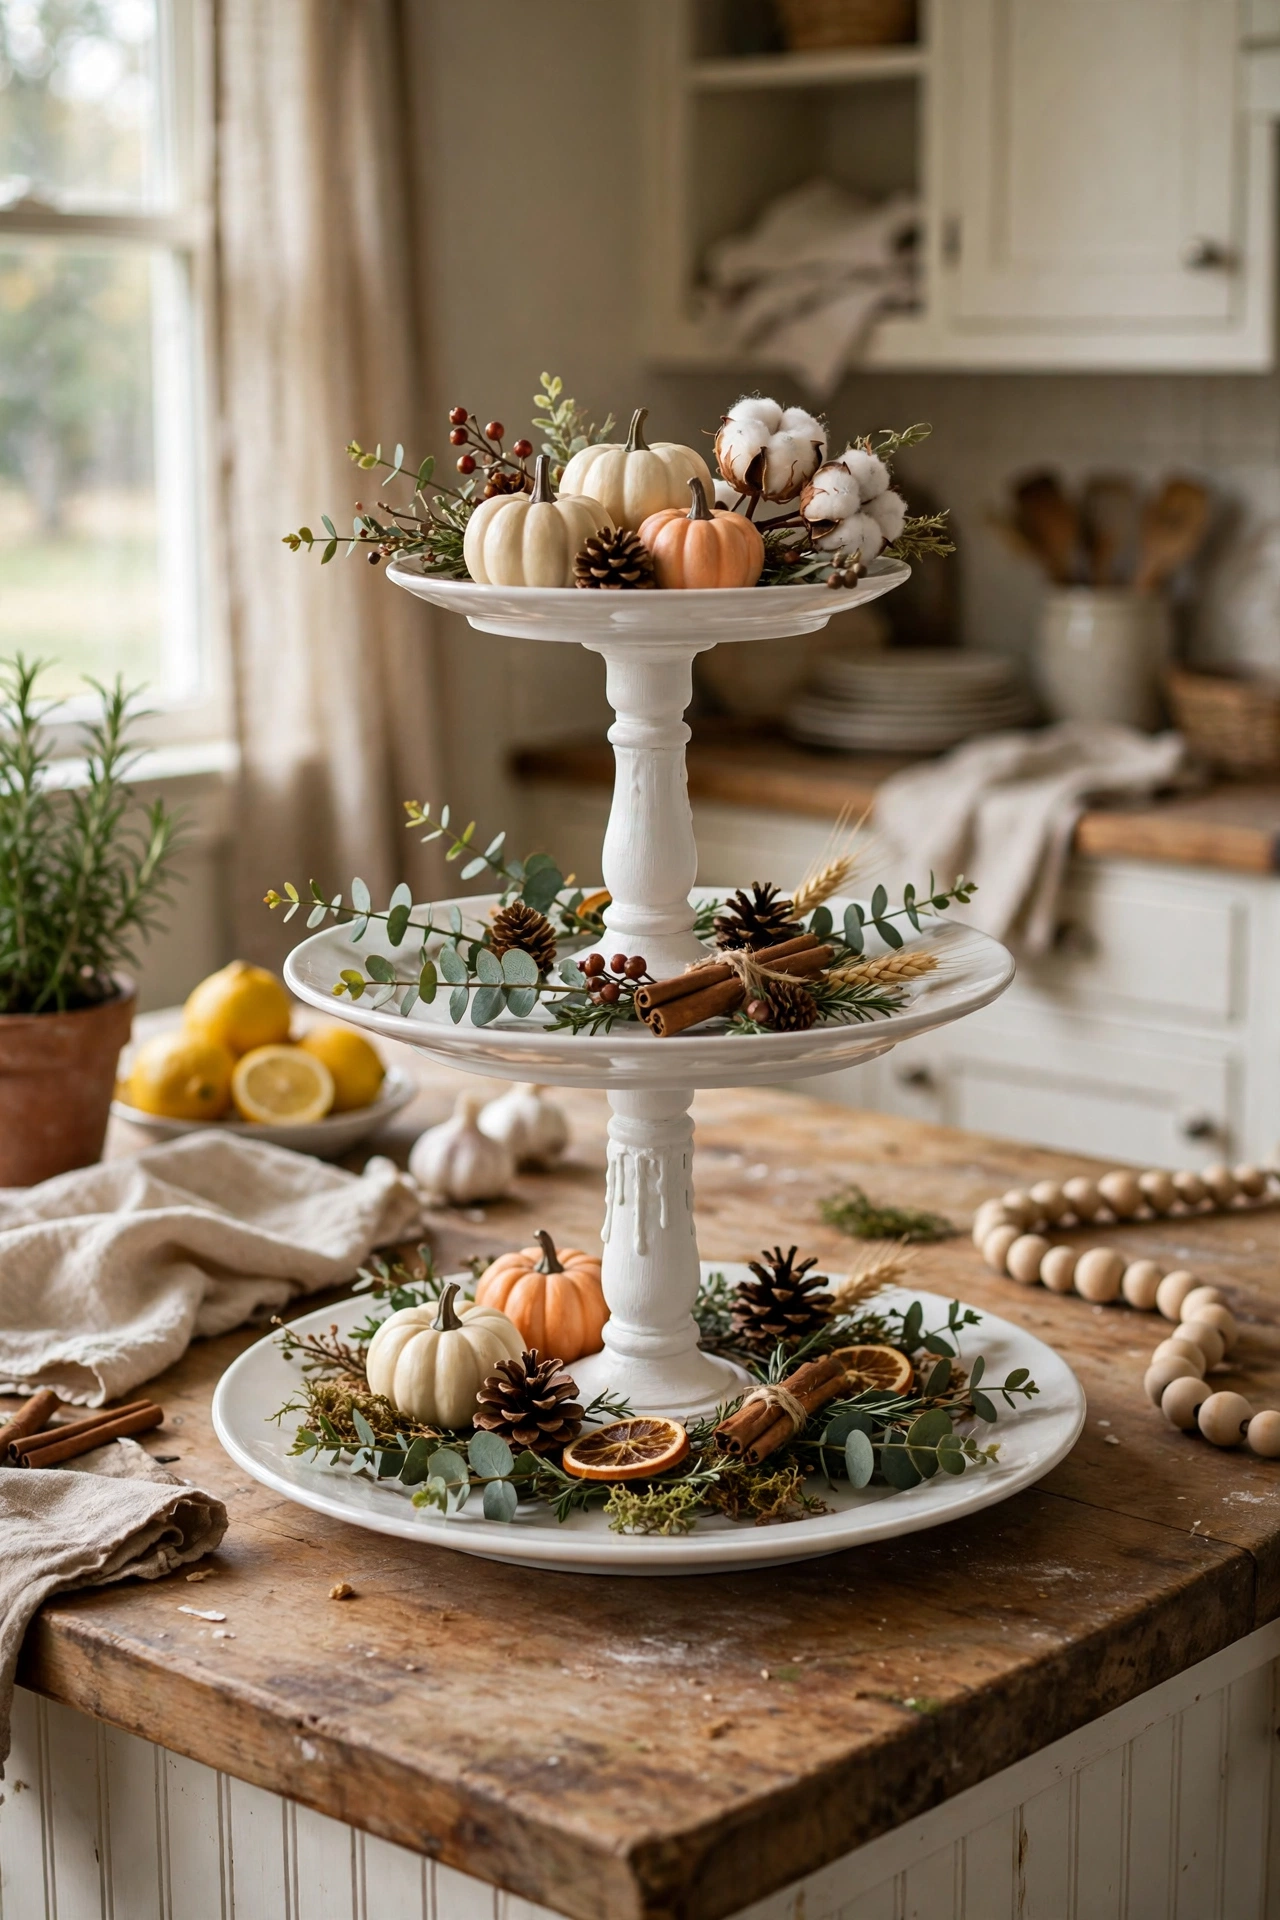
The farmhouse tiered tray is just plates and candlesticks glued together. Glue a candlestick between two plates — large plate at the bottom, small at the top — let cure, and spray the whole thing one colour. Mine is matte white and holds seasonal bits on my kitchen island. Do let the glue cure a full 24 hours before loading it; impatience is how tiered trays collapse. Don’t overload the top tier — it is for display, not storage. One colour unifies the random pieces into a single object.
Cost breakdown: 2 plates $2.50, candlestick $1.25, spray paint $1.25 (shared) → total ~$5 | Time: 20 minutes plus curing
15. Stoneware-Look Vase with Baking Soda Paint
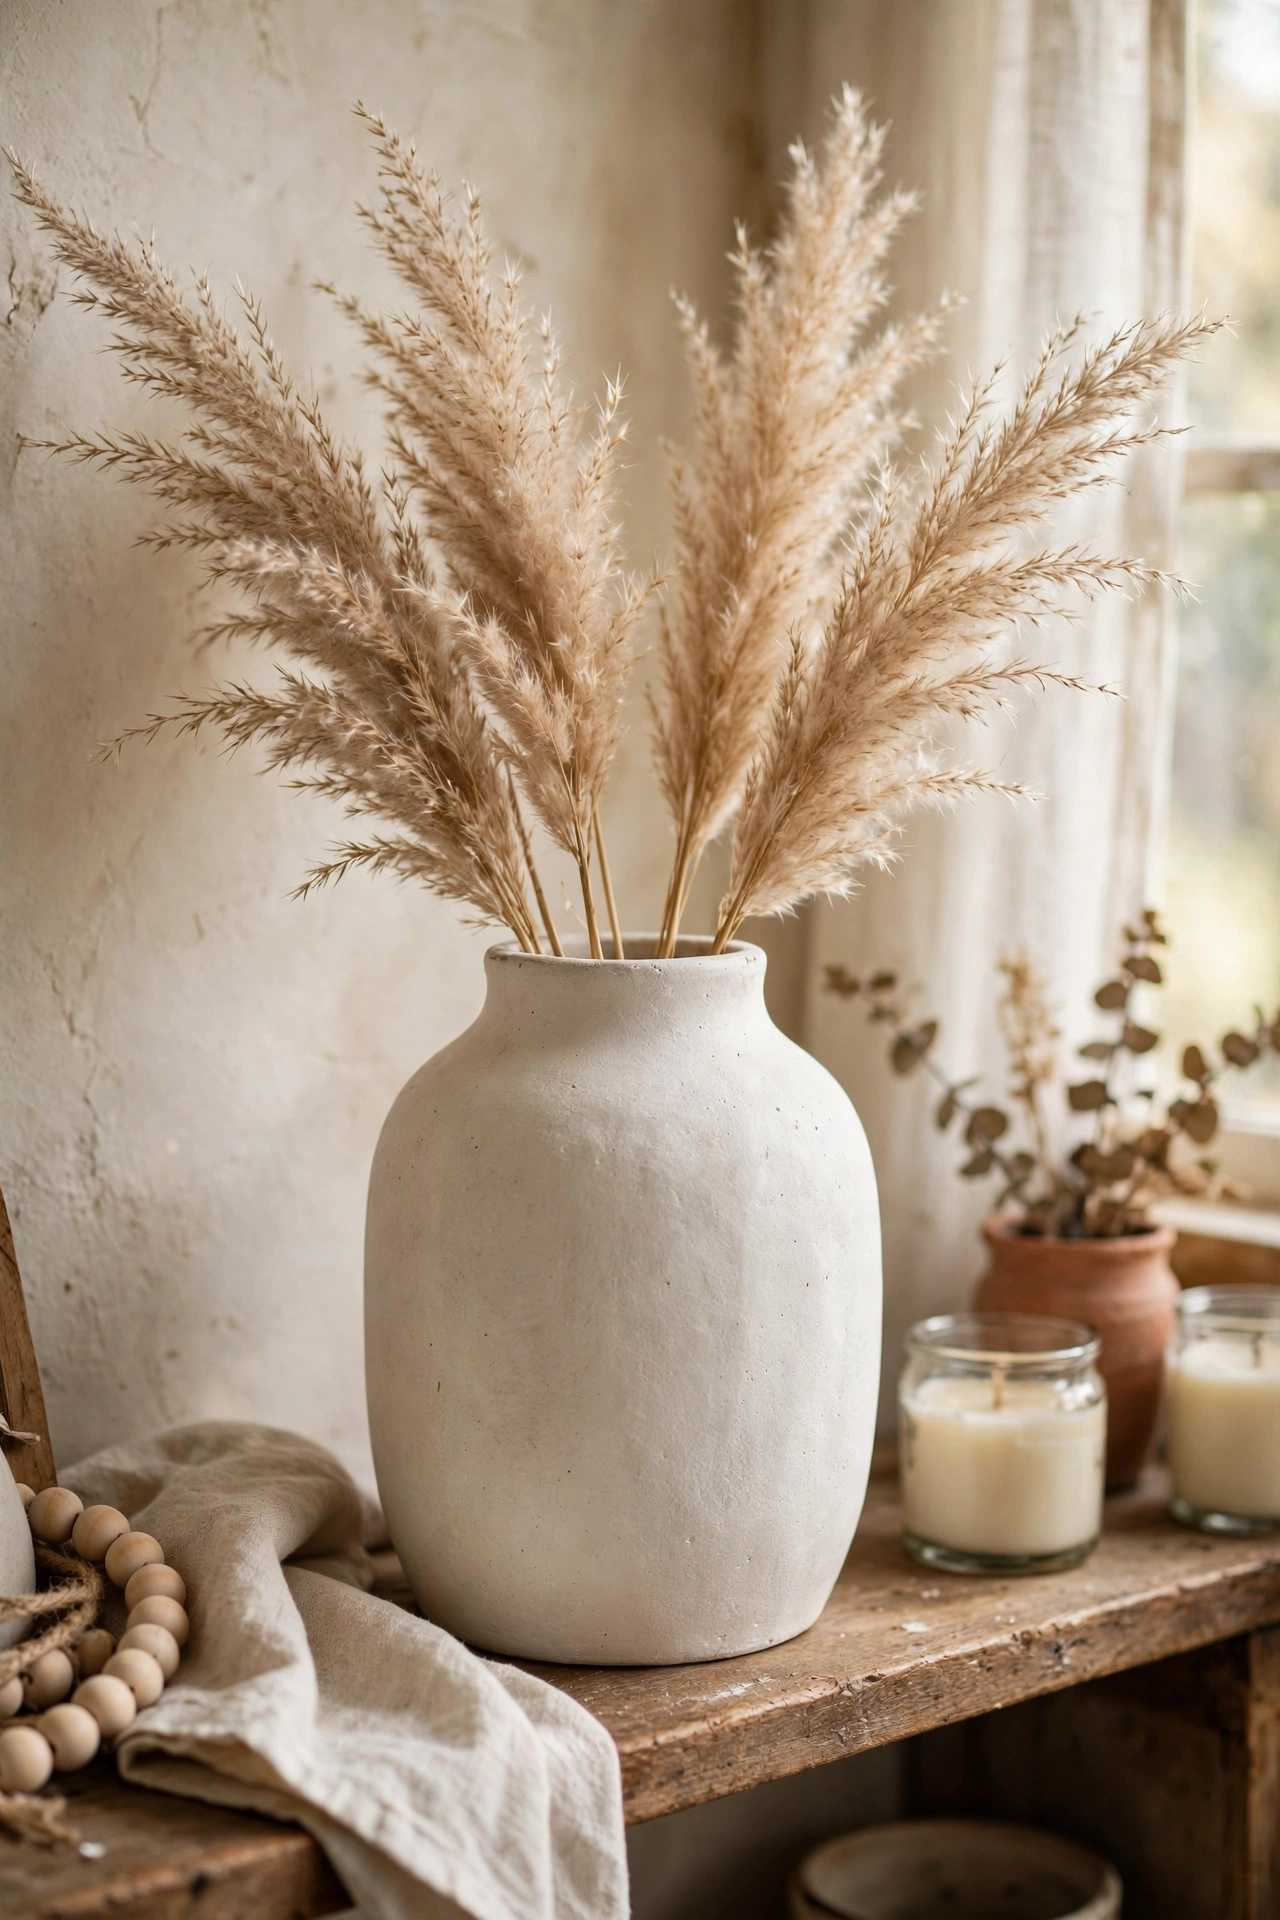
A glass vase painted with the baking soda mixture becomes matte stoneware. Mix white or cream acrylic with bicarbonate of soda, brush onto a shapely glass vase in two coats, and the finish is chalky and ceramic-looking. Mine holds dried grasses on my shelf and looks handmade in the best way. Do choose a vase with an interesting silhouette — the shape does half the work. Don’t paint the inside where water sits; this vase is for dried stems only. Two coats minimum for full coverage.
Cost breakdown: vase $1.25, paint + bicarbonate $1.25 (shared) → total ~$2.50 | Time: 30 minutes plus drying
The five cheapest projects on this list
1. Linen-look lampshade cover — ~$2.50. One table runner, some glue, and a dated shade becomes Belgian-linen chic. The highest impact per dollar on the entire list.
2. Stoneware-look vase — ~$2.50. A $1.25 vase plus paint you already own. Dried stems only, but it looks like a $30 handmade piece.
3. Brass-look mirror — ~$3.75. Charger plate plus mirror, fifteen minutes of work. Group three for a hallway moment that looks seriously expensive.
4. Beaded garland — ~$3.75. Bags of wooden beads and cord. Drape it anywhere that needs styling and it instantly looks considered.
5. Faux marble tray — ~$5. Baking sheet, vinyl, handles. The organiser your dresser has been waiting for, at a tenth of the shop price.
📌 Crafty on a budget? Pin this post now so you can save this idea for your next dollar store run.
Keep the budget crafting going with these next: (see also: 21-dollar-store-diys-that-look-expensive) (see also: 19-dollar-store-diys-that-look-designer) (see also: 15-upcycled-home-decor-ideas-worth-trying-this-weekend)
