15 DIY Wall Art Ideas on a Budget
There’s a special kind of emptiness to a rental-white wall that’s been bare for months — I know, because my living room had one for the better part of a year. I kept telling myself I’d buy “real” art when I had the money, which meant I had a blank wall and an excuse. Then I framed a single piece of leftover wallpaper one Sunday afternoon, and that one bit of diy wall art broke the spell entirely. These fifteen ideas are all cheap, all genuinely doable, and none of them require you to be “artistic” — just willing to have a go.
1. Framed Wallpaper Sample Grid
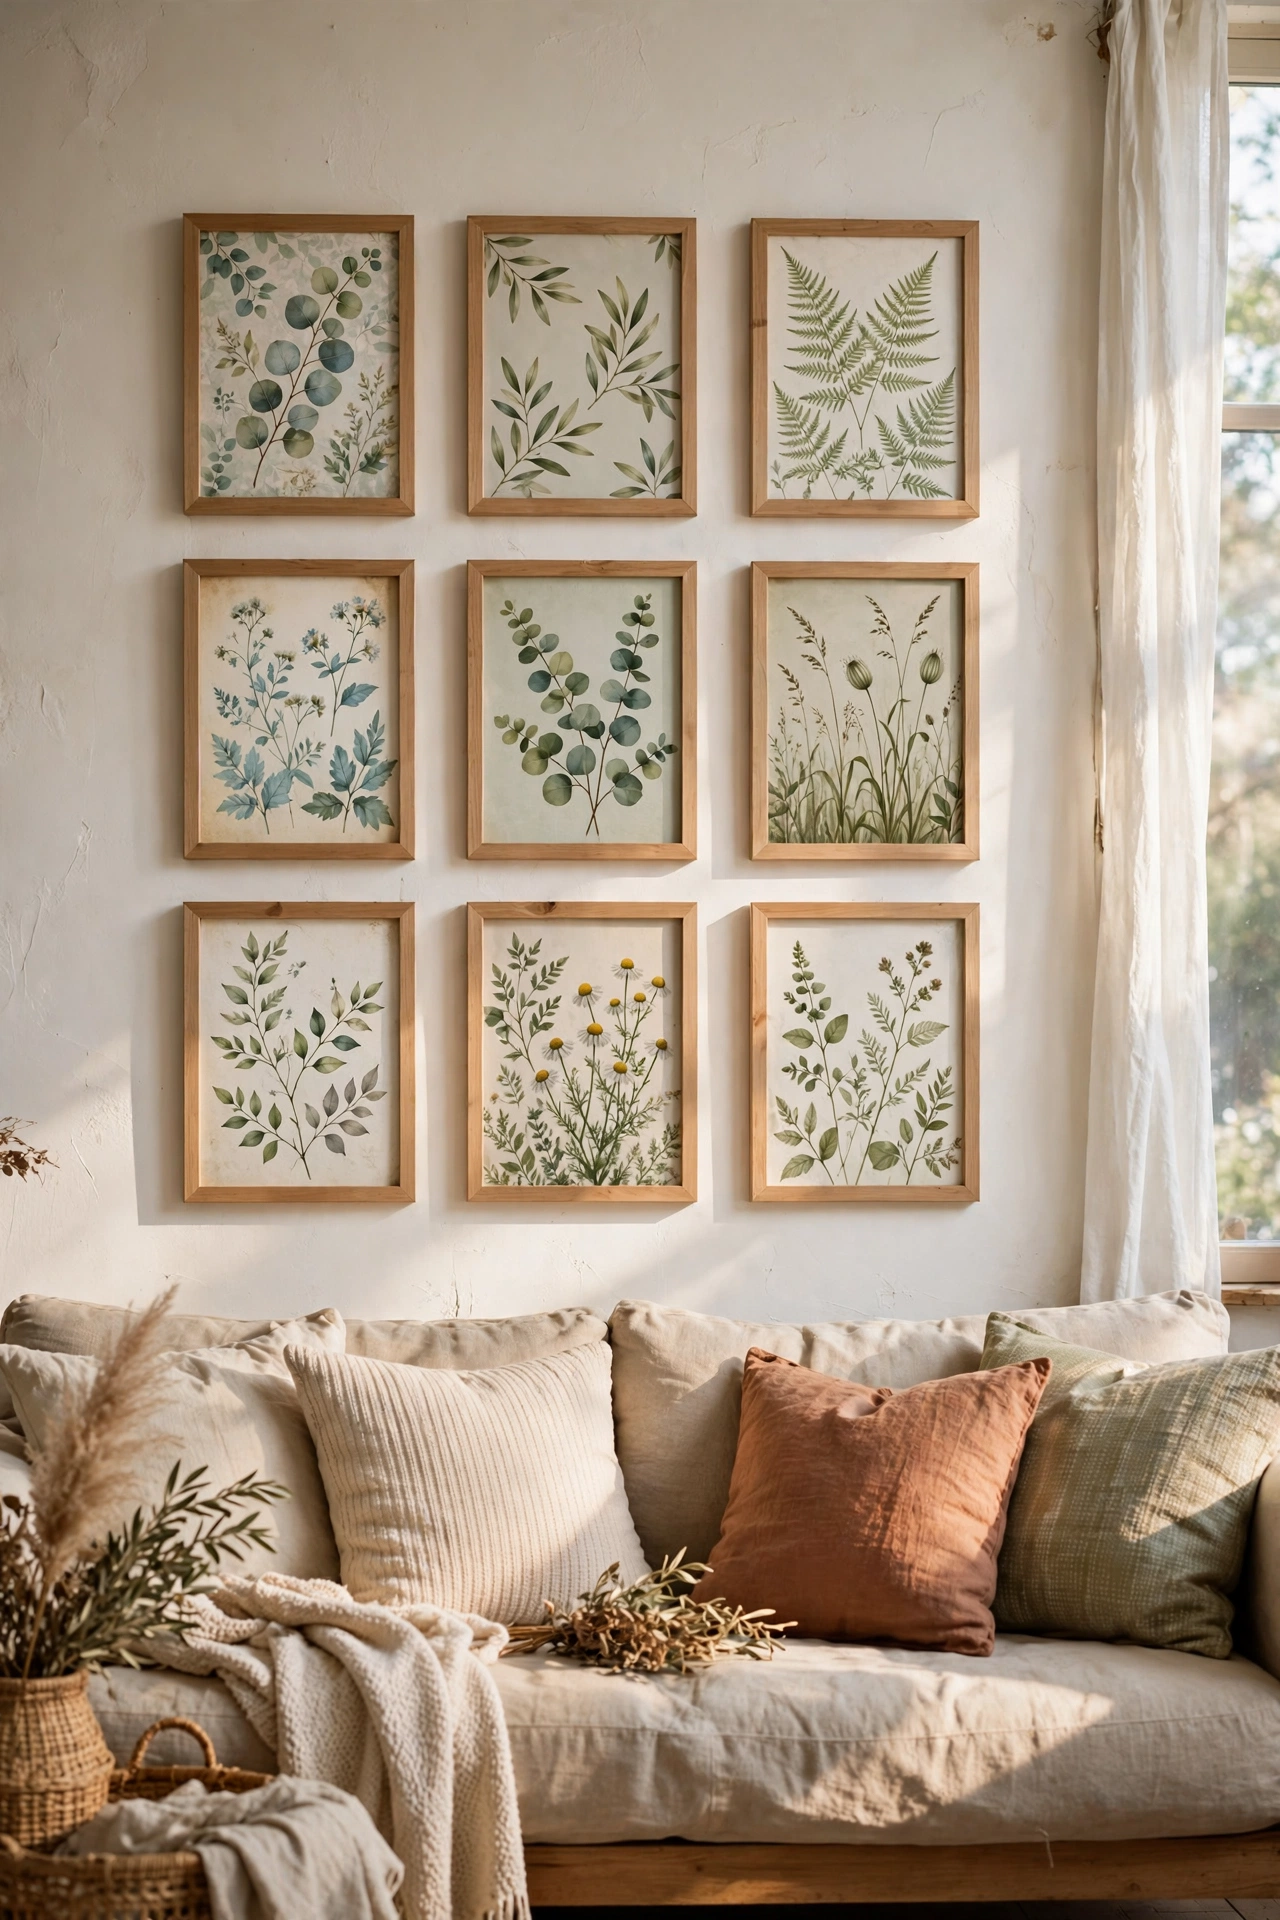
Wallpaper sample books get thrown out by decorating shops all the time, and those little squares are basically free art. Pick six or nine samples in a colour family you love, trim them to identical sizes, and frame them in matching cheap frames in a neat grid. Hang them with even gaps and it reads as a proper curated collection. I did this with botanical prints above my sofa and a visitor asked which shop they were from — I nearly told her the truth too quickly. The trick is sticking to one colour story; I tried mixing patterns at first and it looked like a fabric shop exploded.
Pro tip: ask decorating shops for old sample books — most will hand them over free rather than bin them.
Cost: ~$18 | Time: 1 hour
2. Abstract Painted Canvas Trio
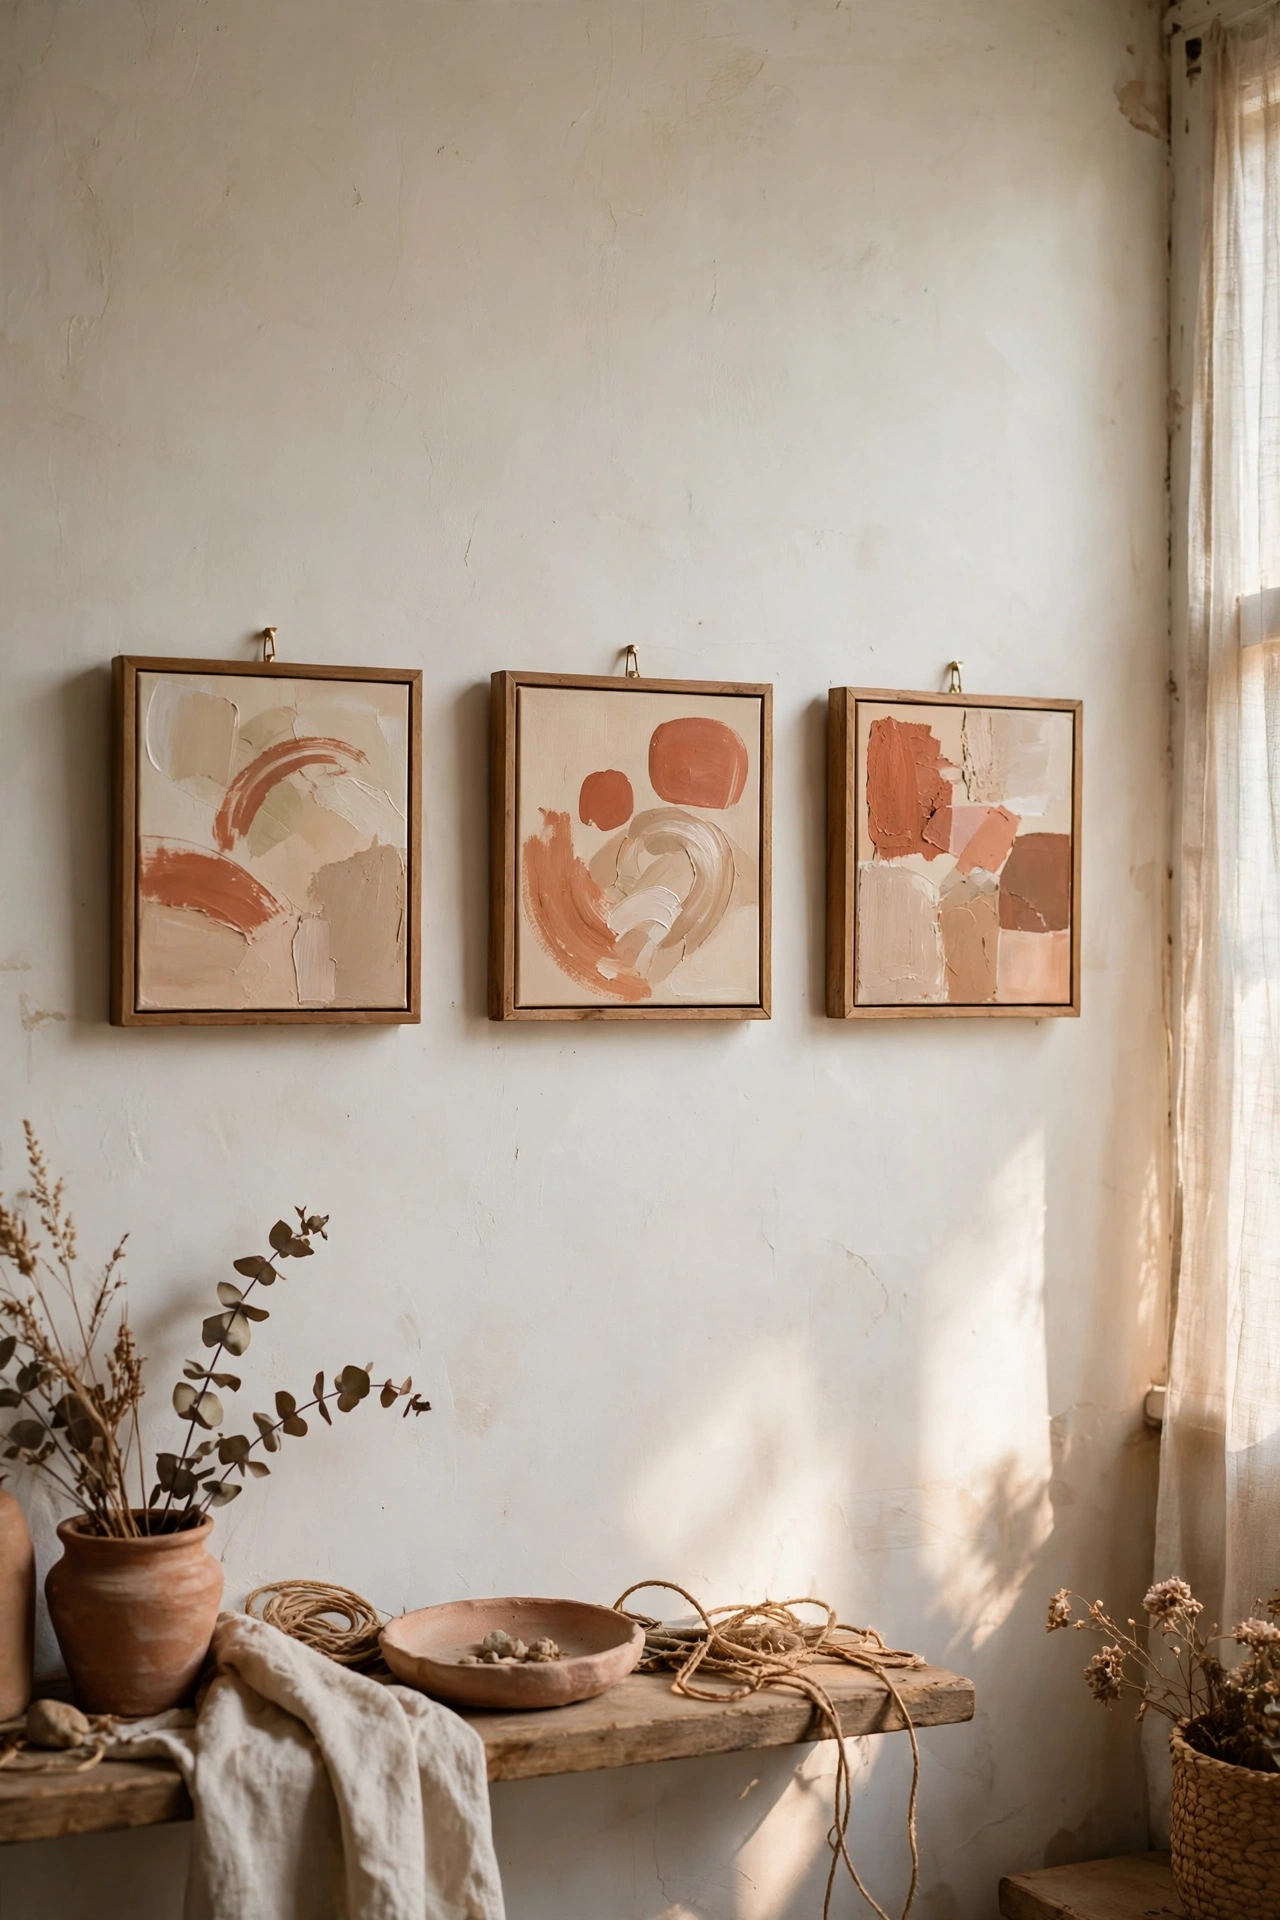
Three small canvases, two or three paint colours, and permission to make a mess — that’s abstract art. Squeeze paint directly onto the canvas and drag it with a wide brush, a palette knife or even an old credit card, keeping the same palette across all three so they hang as a set. Let them dry fully between layers so the colours stay clean. I made mine while listening to a podcast and honestly enjoyed it more than half the films I’ve watched this year. My first attempt was too timid — small dabs in the middle of a big canvas. Be braver than that; big sweeping marks look a hundred times better.
Pro tip: limit yourself to three colours maximum — restraint is what makes abstract pieces look expensive.
Cost: ~$22 | Time: 1.5 hours (plus drying)
3. Dried Flower Shadow Box
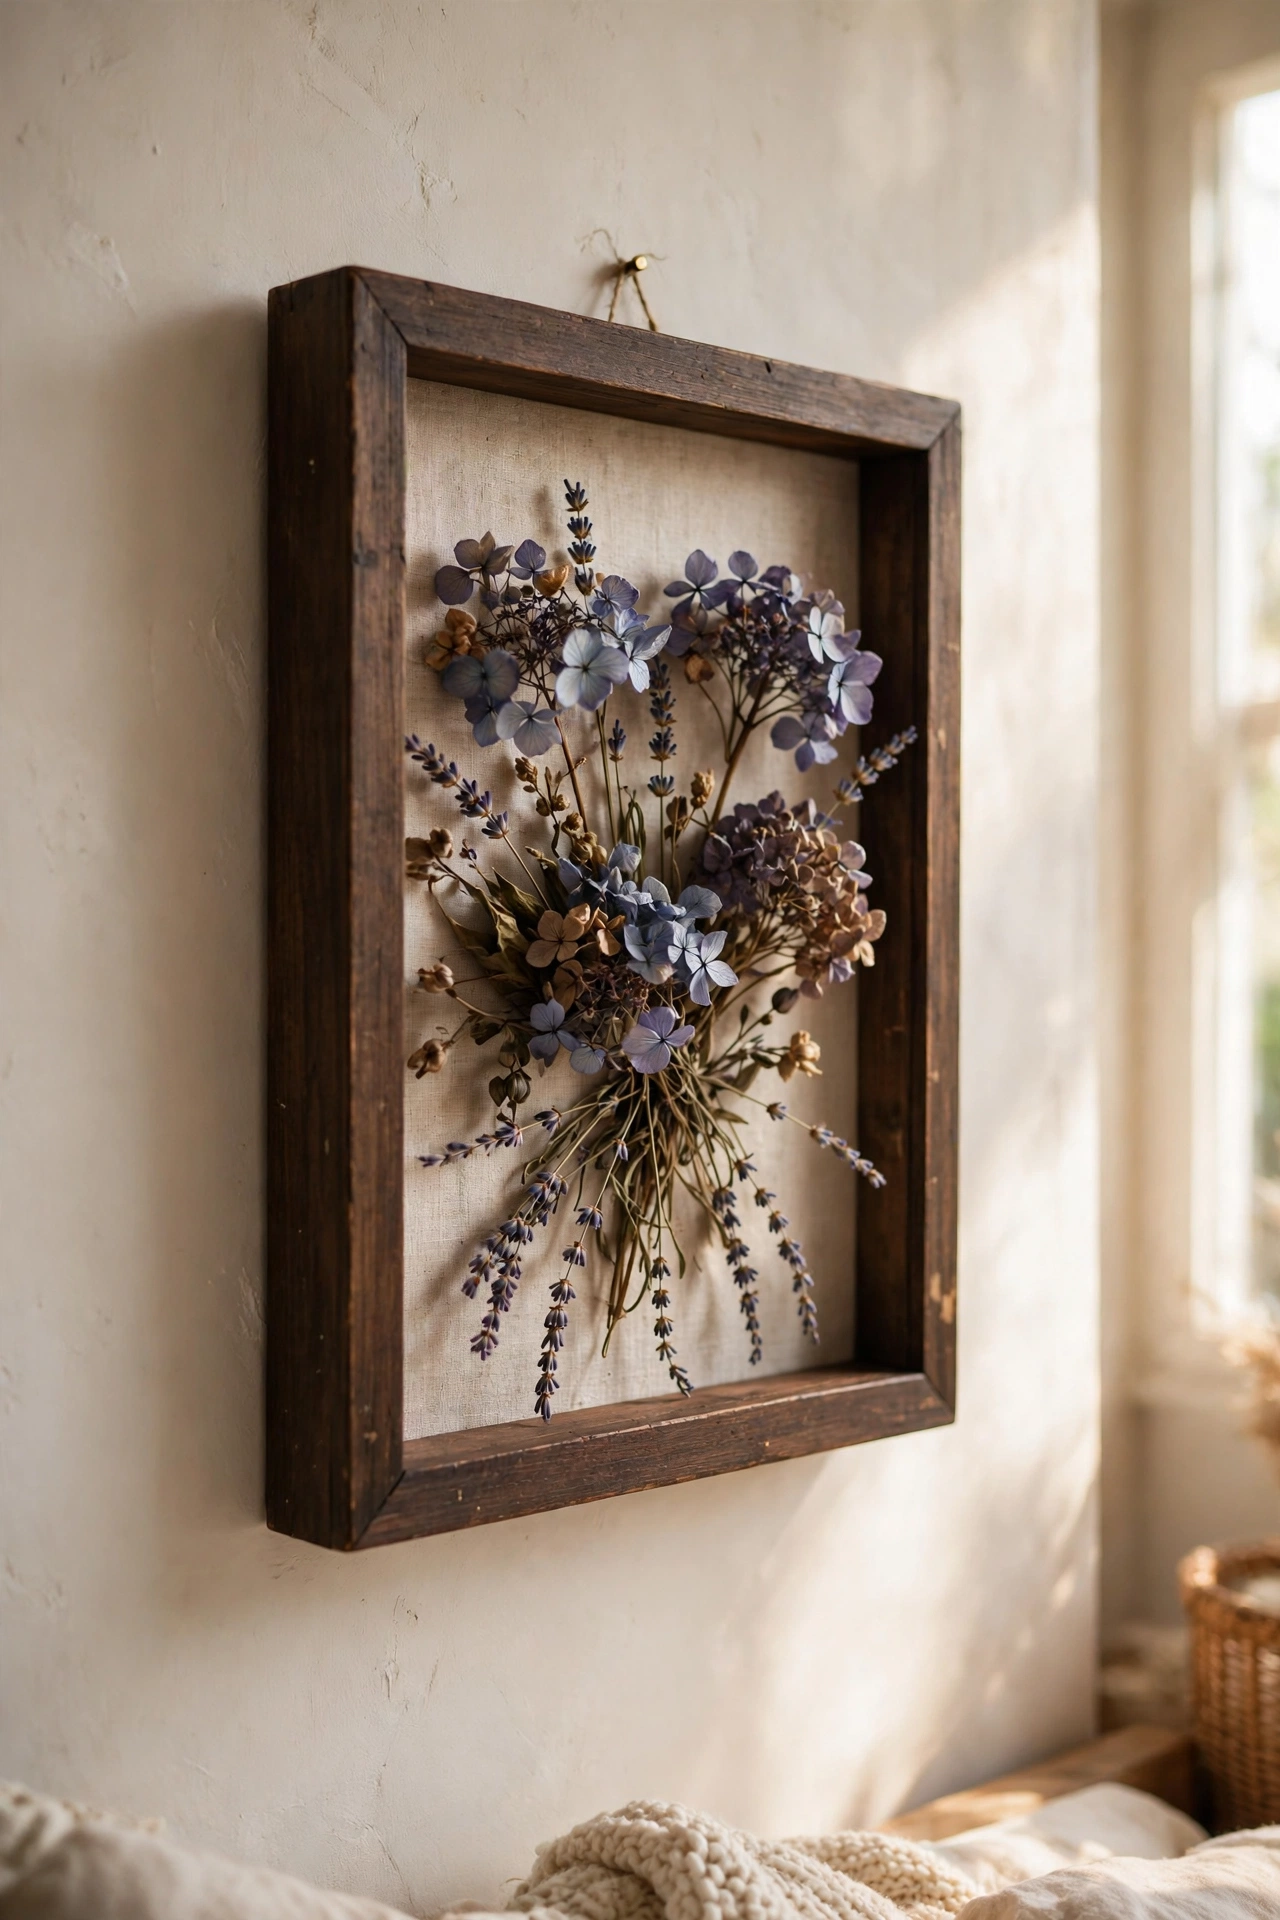
Press or dry flowers from your garden (or a supermarket bouquet past its best), then arrange them inside a deep frame against a linen backing. Lay the composition on the backing first and photograph it, then glue each stem in place starting from the largest blooms. I used hydrangea heads and some dried lavender, and it genuinely looks like something from a boutique. The first one I made, I glued the flowers directly without planning and ended up with a lopsided mess I had to redo — lay it out first, every time. Keep it out of direct sun or the colours will fade within months.
Pro tip: a dab of hot glue on the stem, not the petals, holds flowers firmly without visible blobs.
Cost: ~$16 | Time: 1 hour
4. Fabric Scrap Framed Prints
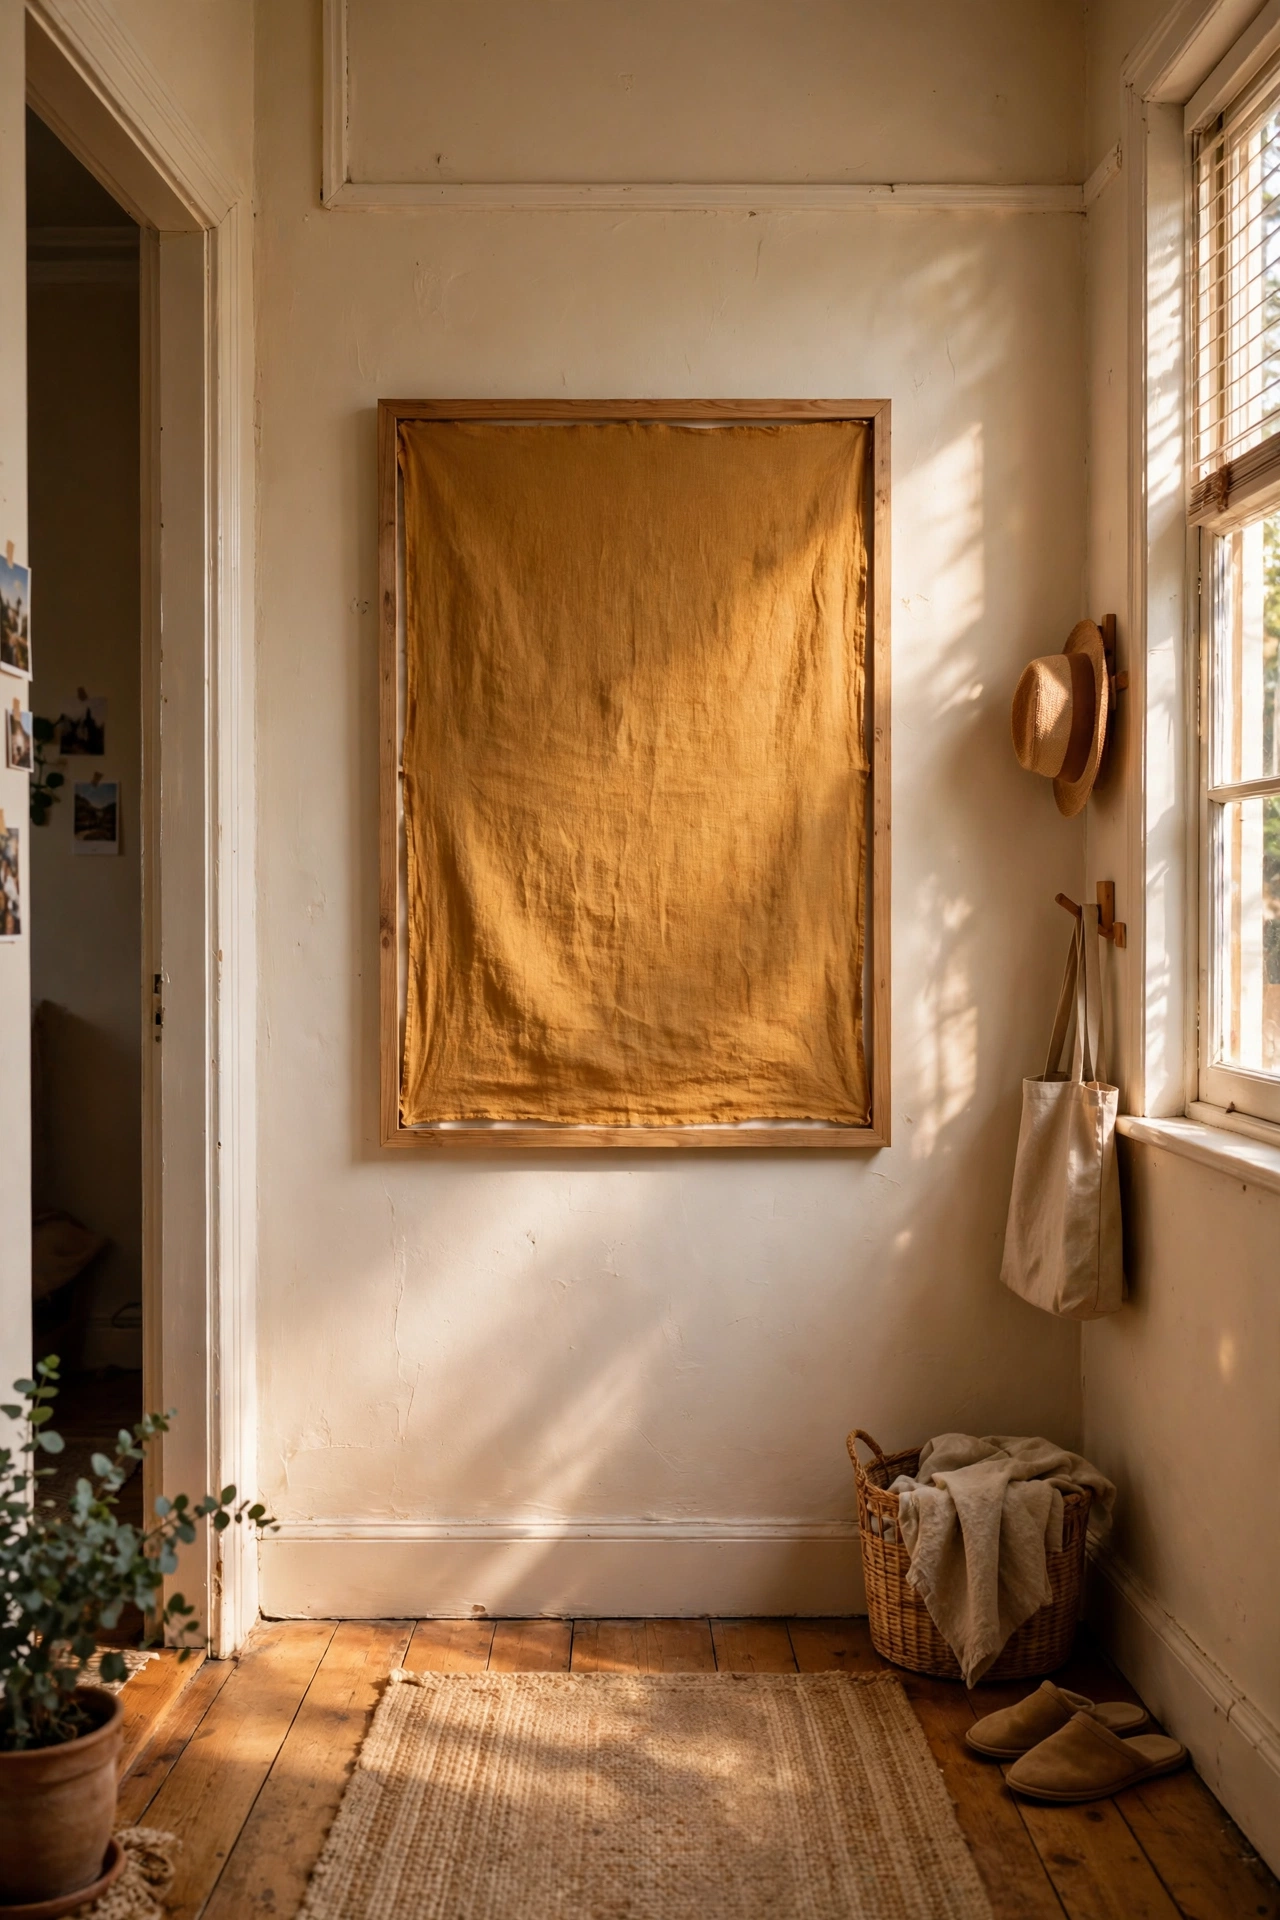
Beautiful fabric offcuts — the ends of bolts, fat quarters, old scarves — make striking framed art when you stop thinking of them as craft supplies. Stretch a piece over a bit of card or a canvas board, secure it at the back with tape or staples, and frame it. The texture of fabric under glass catches light in a way paper never does. I framed a scrap of ochre linen I found in a charity shop for 50p and it’s now my favourite thing in the hallway. I tried ironing one piece and scorched it, so now I just smooth them by hand — honestly, the slight wrinkles add character anyway.
Pro tip: charity shops sell curtain and fabric remnants for pennies — check the homeware aisle, not just clothes.
Cost: ~$14 | Time: 45 minutes
5. Painted Arch Feature
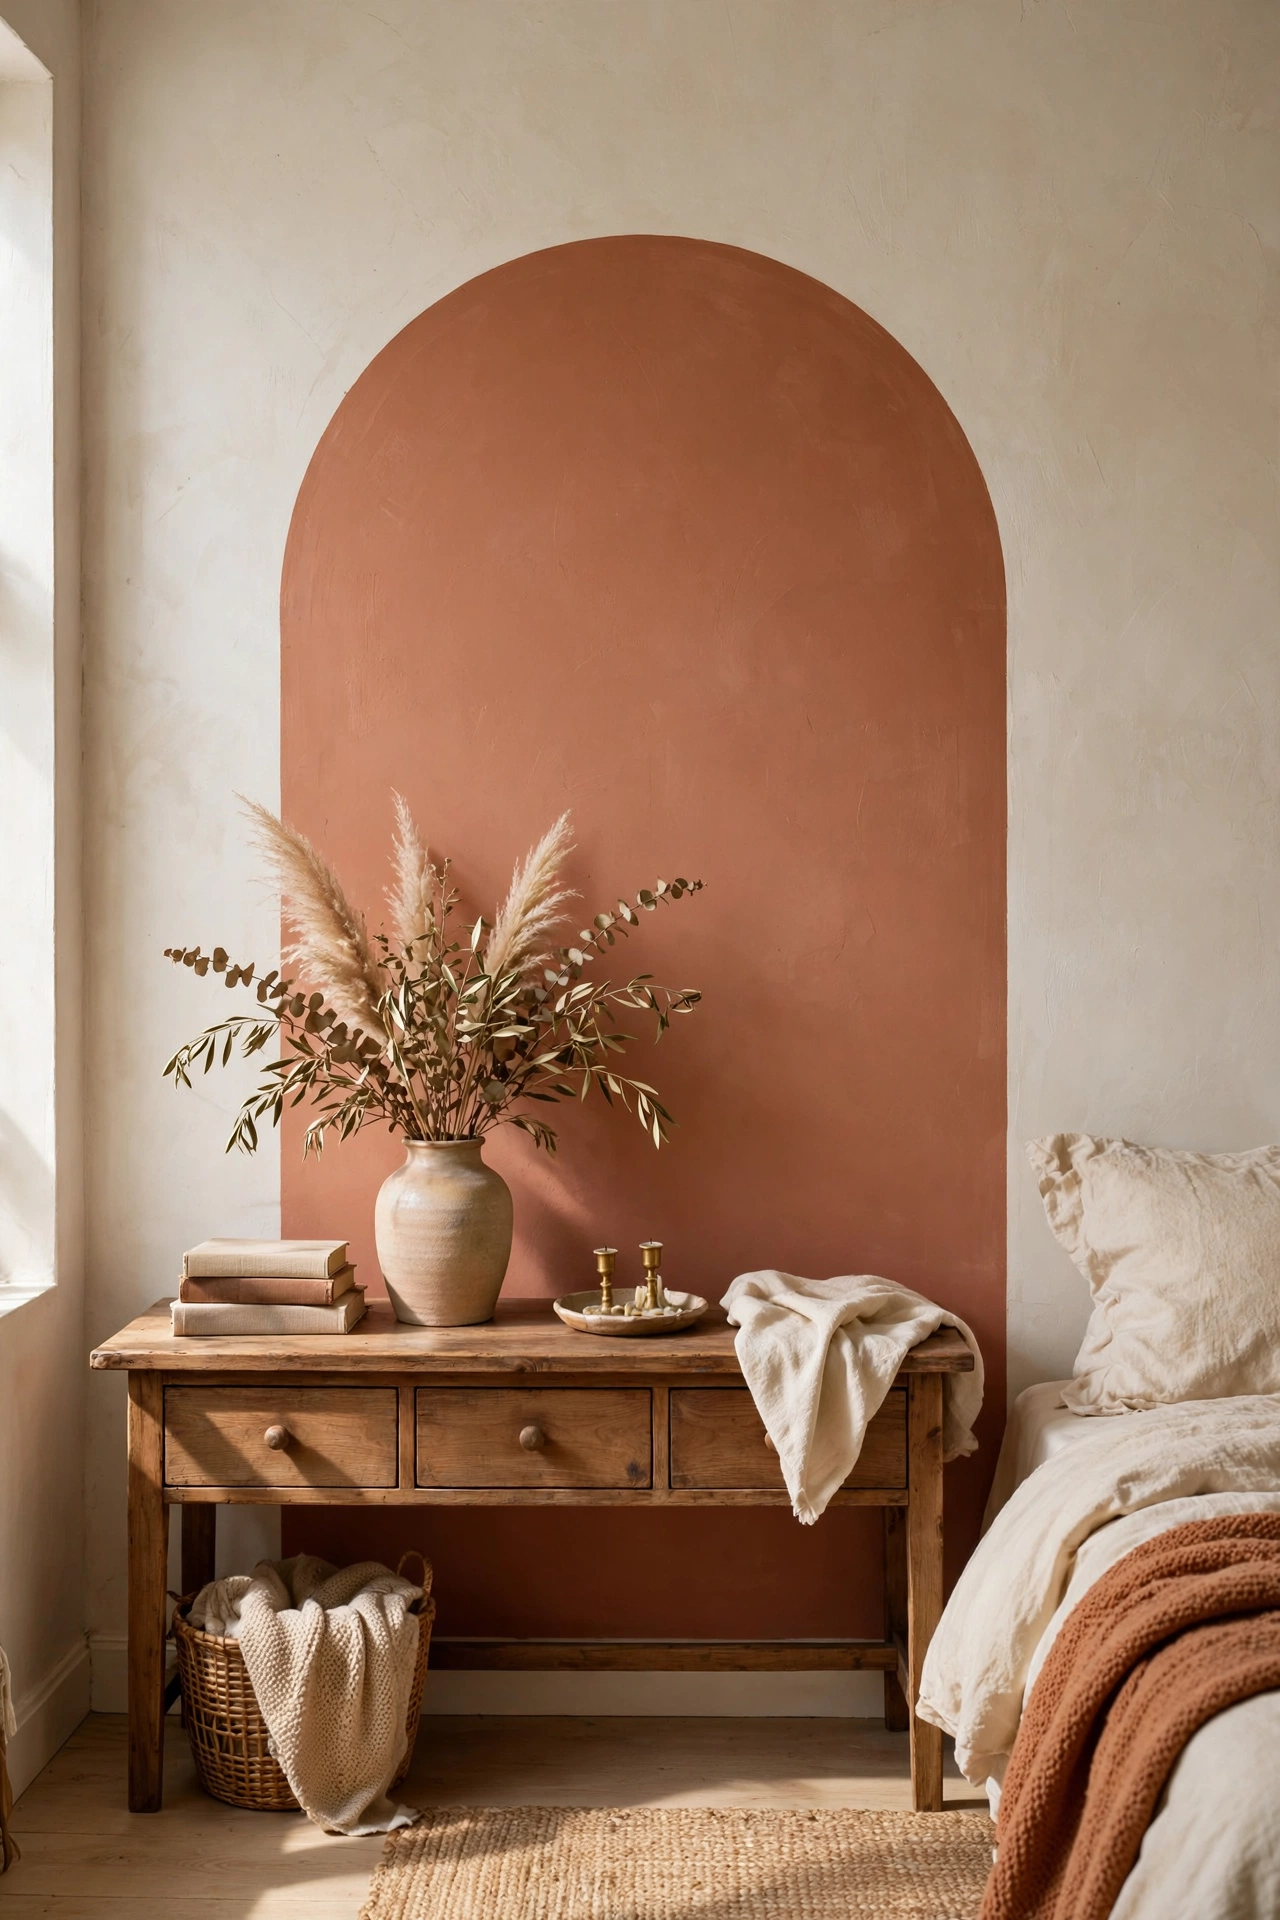
Painting a single arch shape directly on the wall behind a console table or bed gives you mural-level impact for the price of a tester pot. Mark the arch with a pencil using a plate or string compass for the curve, mask the edges with tape, and roll on two coats. It takes a steady hand more than skill. I painted a terracotta arch in our bedroom and it completely changed the room — guests notice it before anything else. My first arch edge was wobbly because I freehanded it; a simple string-and-pencil compass gives you a perfect curve in two minutes, so don’t skip that step.
Pro tip: sample the paint on paper first and live with it for a day — wall colours read darker than you expect.
Cost: ~$12 | Time: 2 hours
6. Black-and-White Photo Gallery
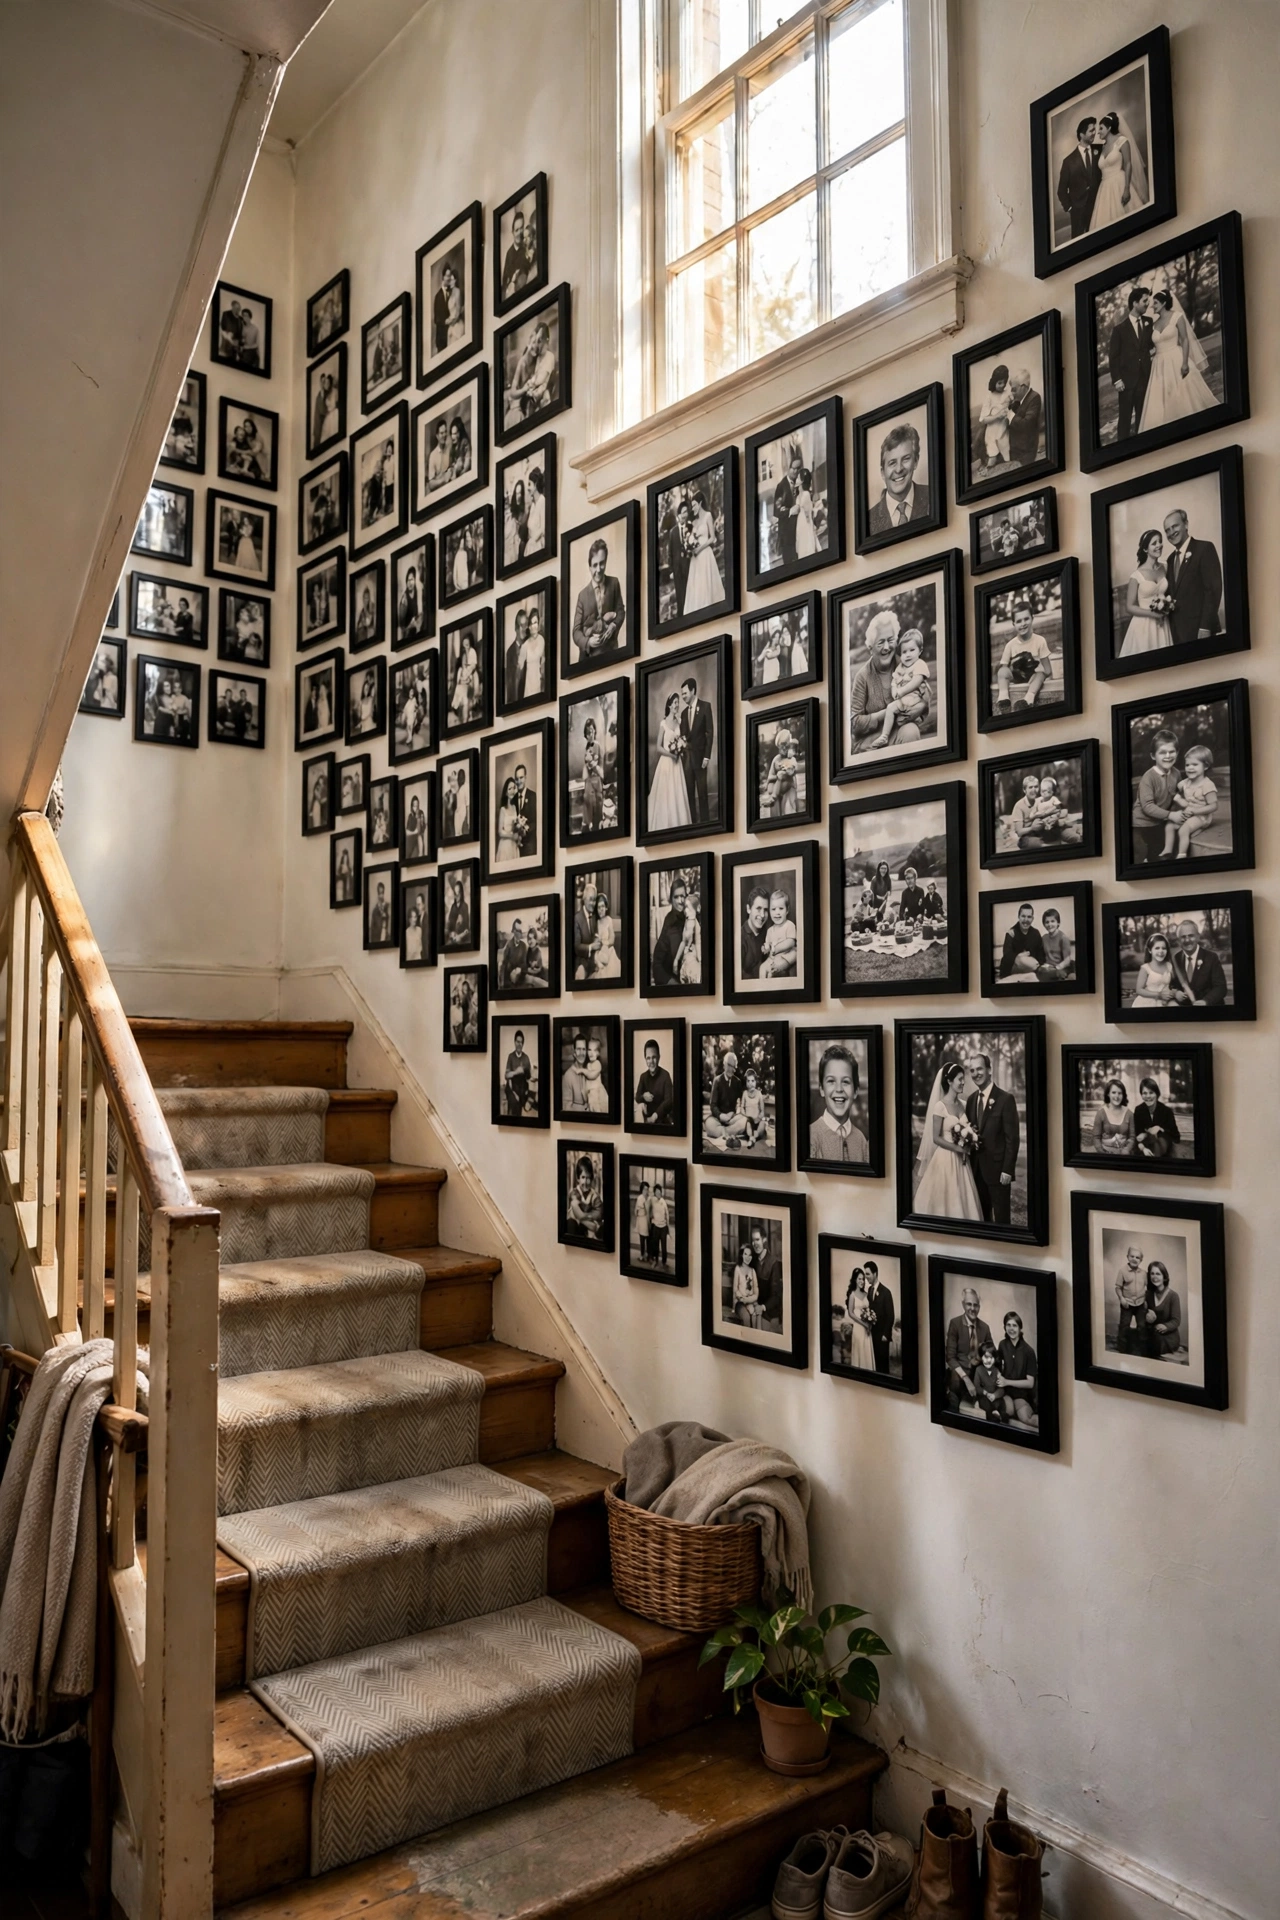
Your own photos, printed in black and white, look instantly more “gallery” than the same shots in colour — it’s a cheat code and I use it constantly. Pick ten or twelve favourites, print them in mixed sizes at a photo kiosk or online, and hang them in a loose arrangement with simple black frames. Print everything at home first on plain paper and tape the sheets to the wall to plan the layout before you drill. I did a stairwell gallery of family trips and it’s the wall everyone stops at. I tried mixing colour and black-and-white prints at first and it looked scattered — going all monochrome is what pulls it together.
Pro tip: keep all the frames identical — matching frames are what make mixed photos look intentional.
Cost: ~$30 | Time: 2 hours
7. Chunky Yarn Wall Hanging
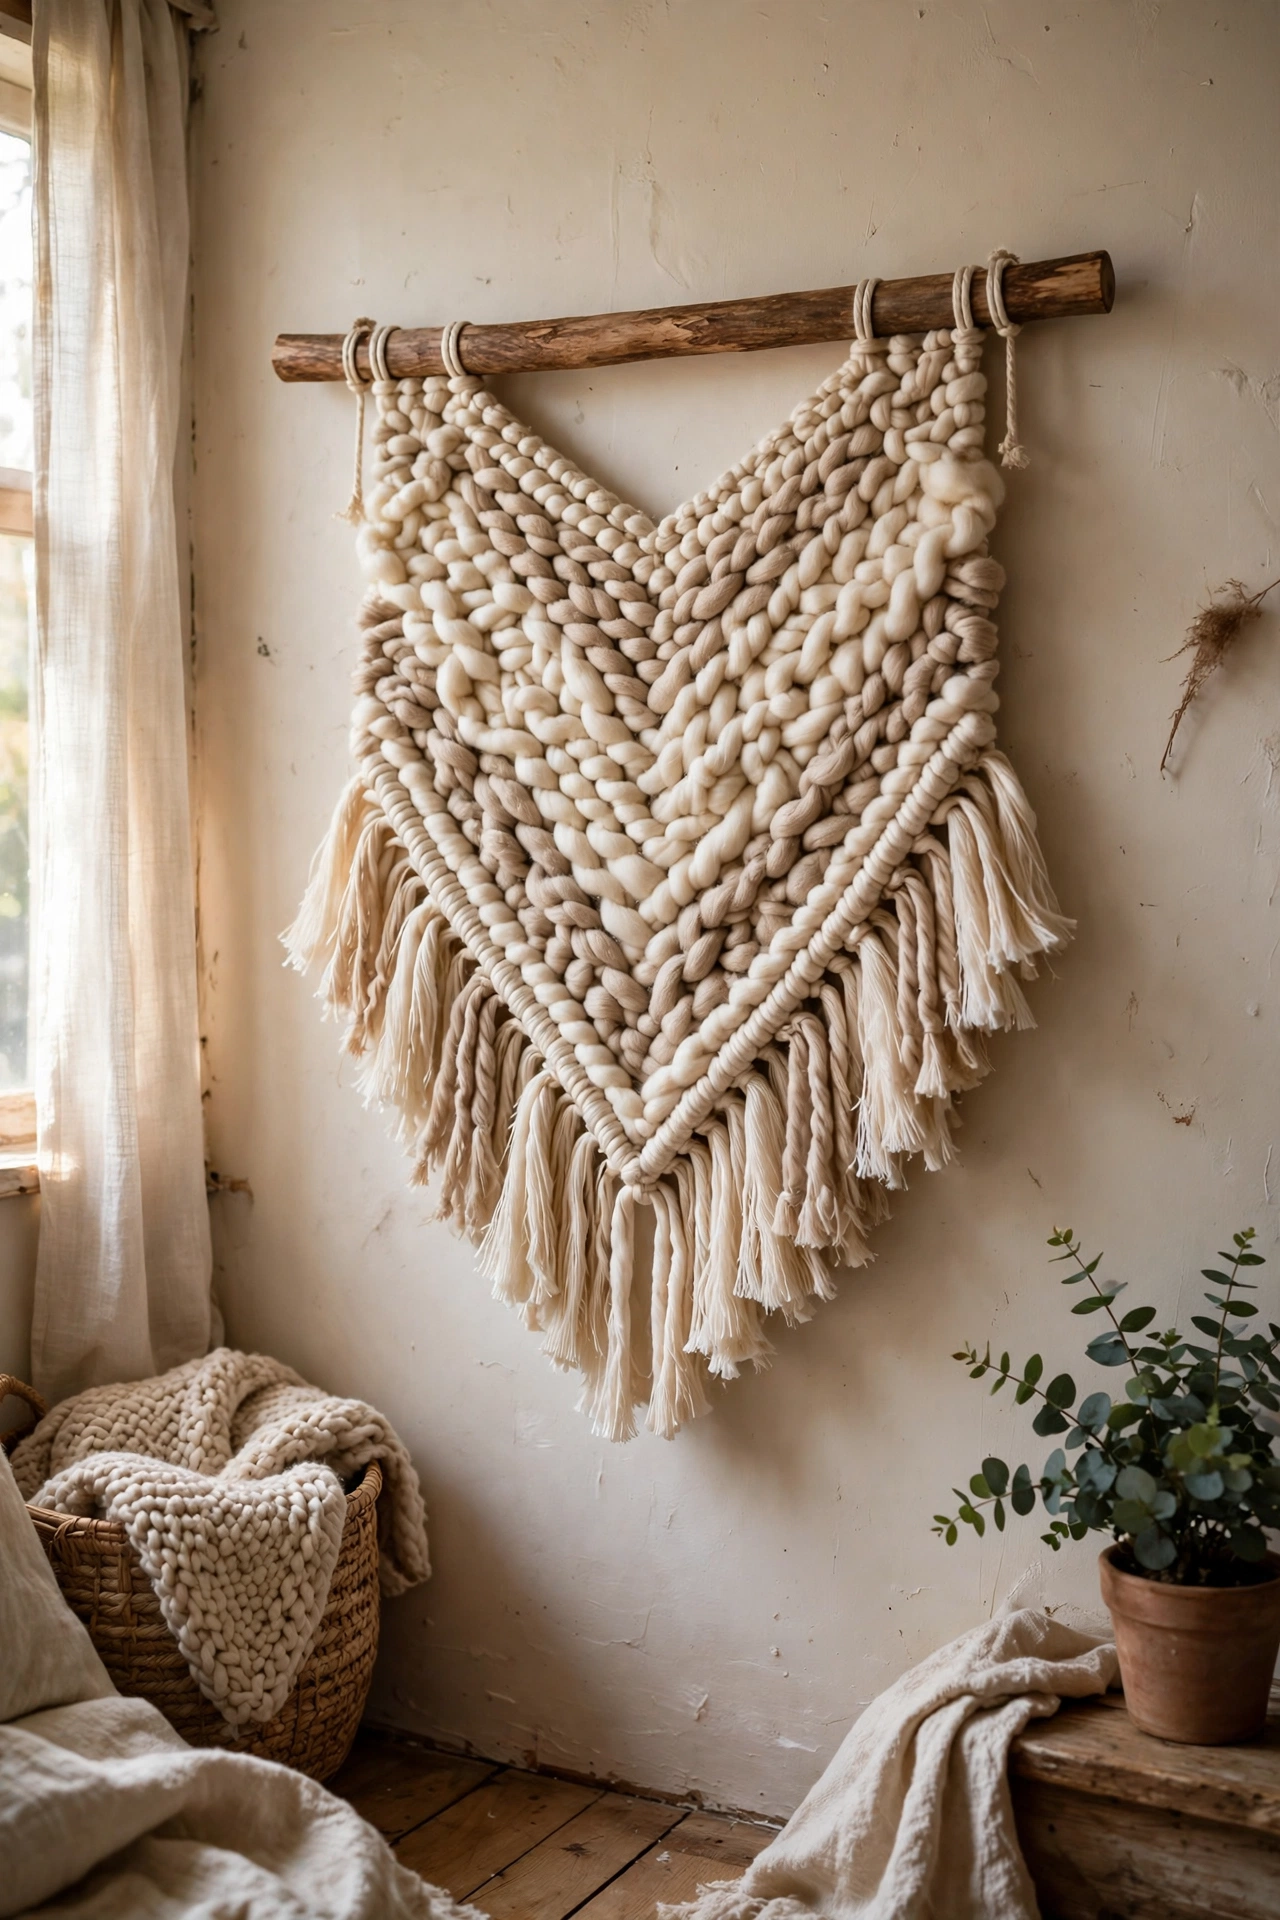
A dowel or copper pipe, several skeins of chunky yarn, and basic knots make a soft textile hanging that adds real warmth to a bare wall. Cut yarn lengths double your finished size, fold each over the dowel and pull the ends through the loop, then trim the bottom into a V or straight line. It looks far more skilled than it is — my first one took an evening in front of the telly. I used cheap acrylic yarn at first and it looked a bit shiny and flat; switching to a matte wool-blend yarn made it look twice the price. Hang it from a nail or a leather loop for a finished touch.
Pro tip: vary the yarn thickness slightly — mixed textures look far more interesting than one uniform strand.
Cost: ~$20 | Time: 2–3 hours
8. Thrift-Store Art Makeover
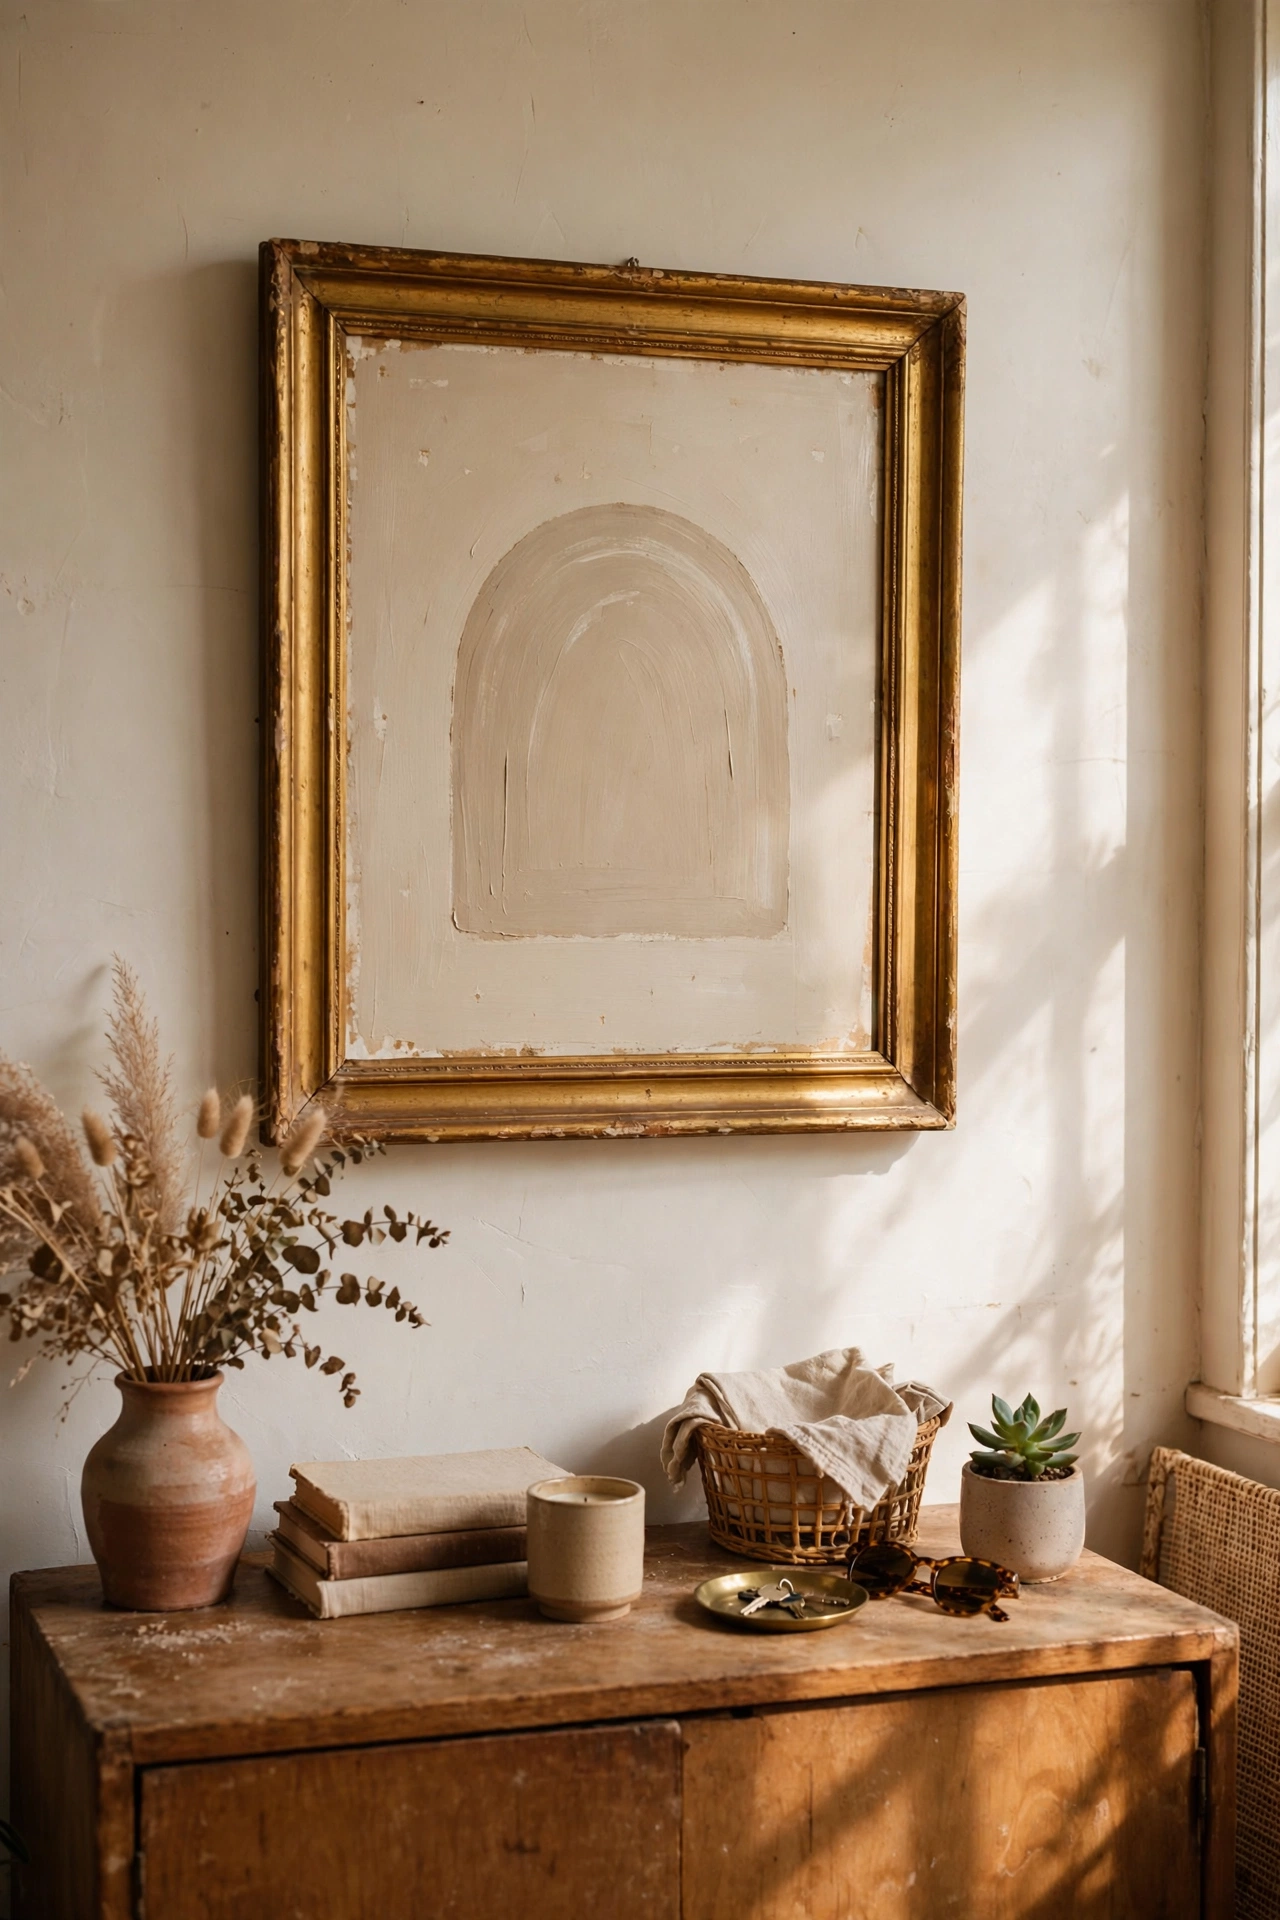
Charity shops are full of sad, dated prints in genuinely good frames — and the frame is the valuable part. Buy the ugliest landscape you can find, keep the frame, and paint right over the canvas or board with your own abstract design, or cover it with fabric or wallpaper. I painted over a grim 1980s cottage scene with a simple beige arch composition and kept the lovely gilt frame. My one regret: I once painted over a print that turned out to be a limited edition — now I always flip it over and check for signatures or edition numbers before the paint comes out.
Pro tip: check the back of thrift art before painting over it — signatures and edition marks mean leave it alone.
Cost: ~$15 | Time: 1.5 hours
9. Pressed Botanical Frames
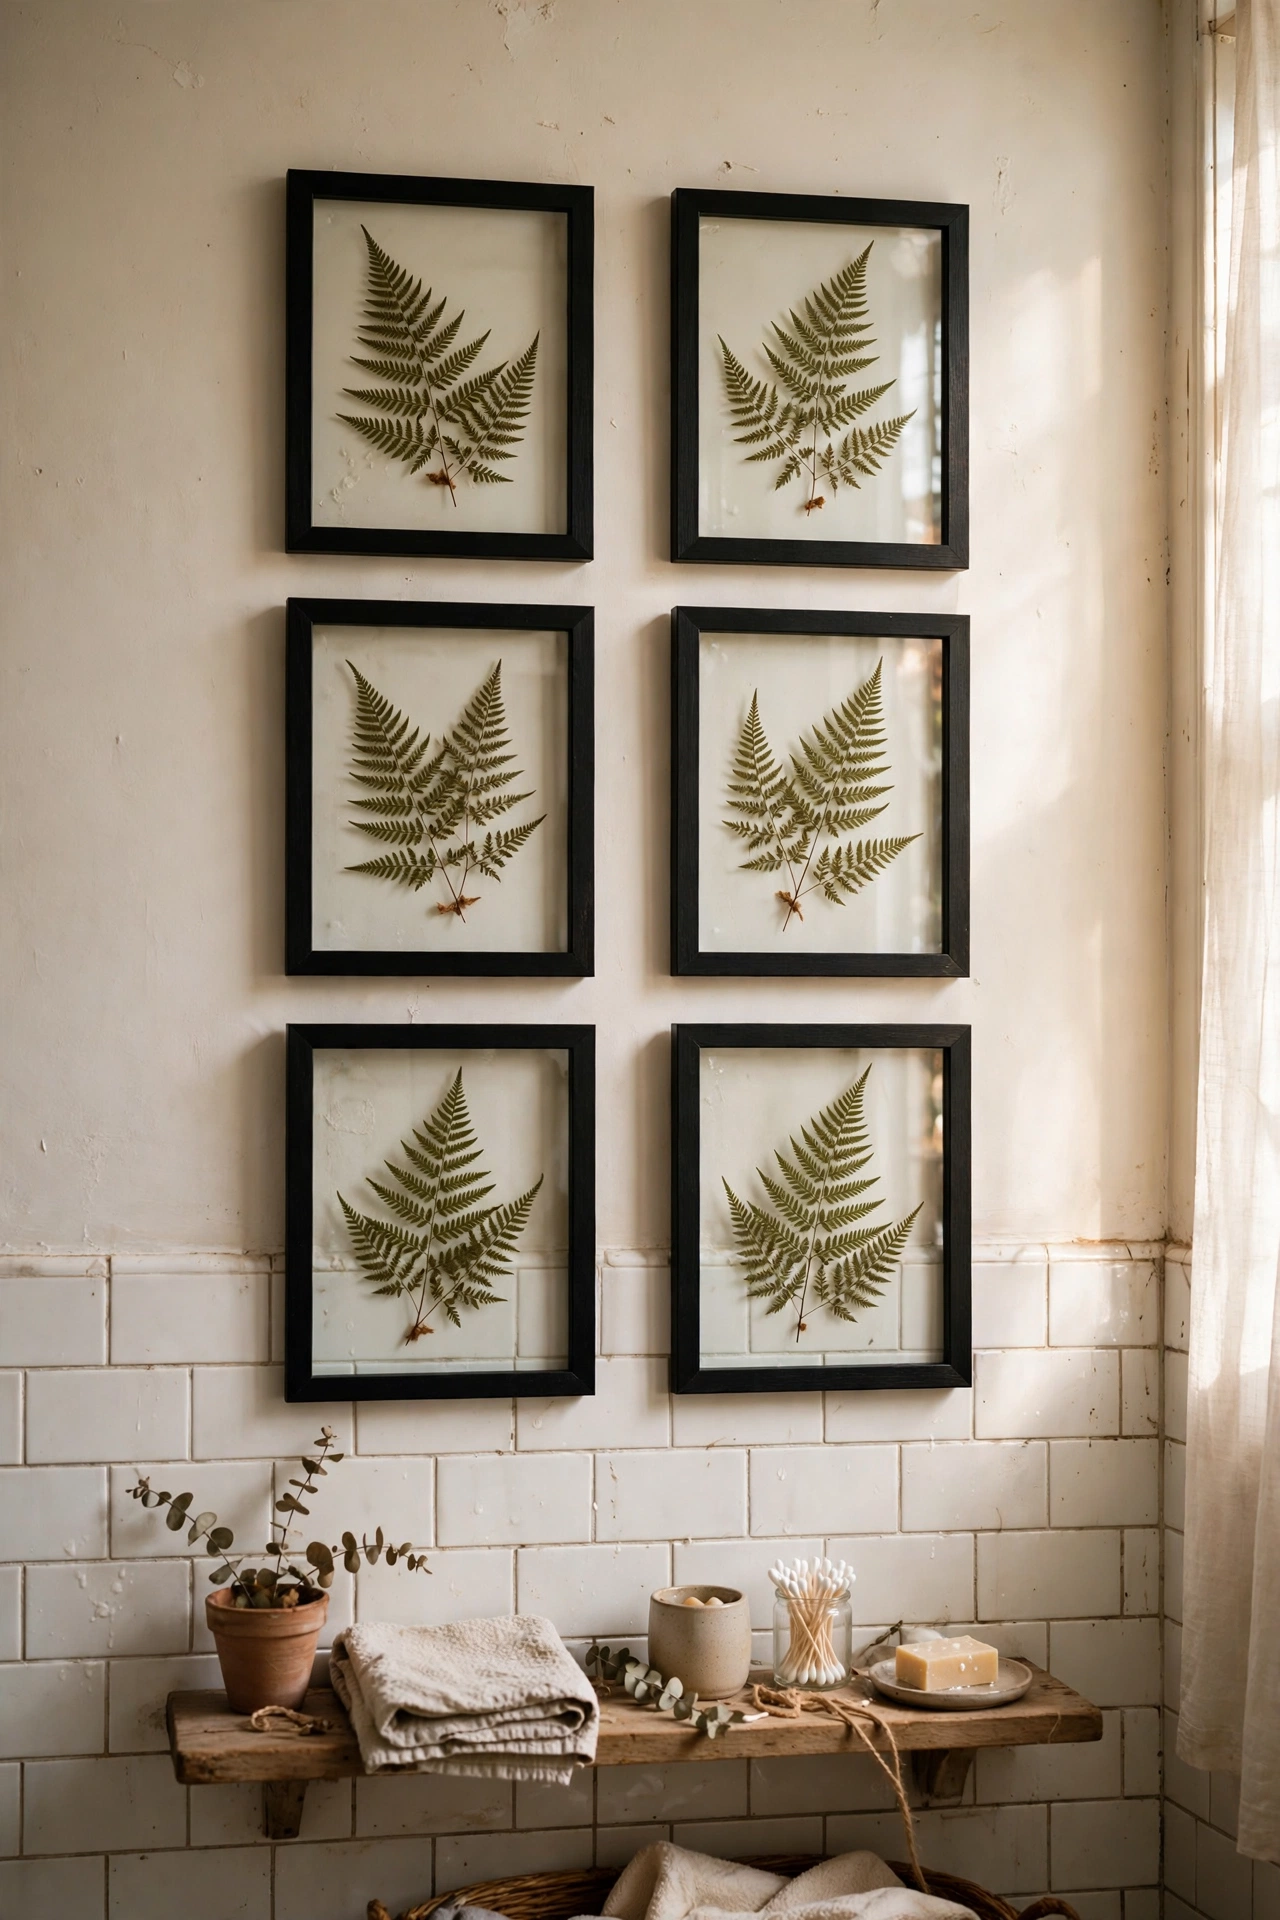
Press leaves and ferns between heavy books for a week or two, then float them between two pieces of glass in a simple frame. The floating effect — specimen visible from both sides — looks scientific and elegant at once. I pressed ferns from a woodland walk and framed six of them for the bathroom, where the humidity doesn’t bother them behind glass. My first batch went mouldy because I pressed them while still damp — let foliage dry for a day first, and change the blotting paper halfway through. Simple weeds and grasses press beautifully; you don’t need exotic plants.
Pro tip: press more than you need — about a third will tear or discolour, so extras save a redo.
Cost: ~$18 | Time: 30 minutes (plus pressing time)
10. Hand-Lettered Wooden Sign
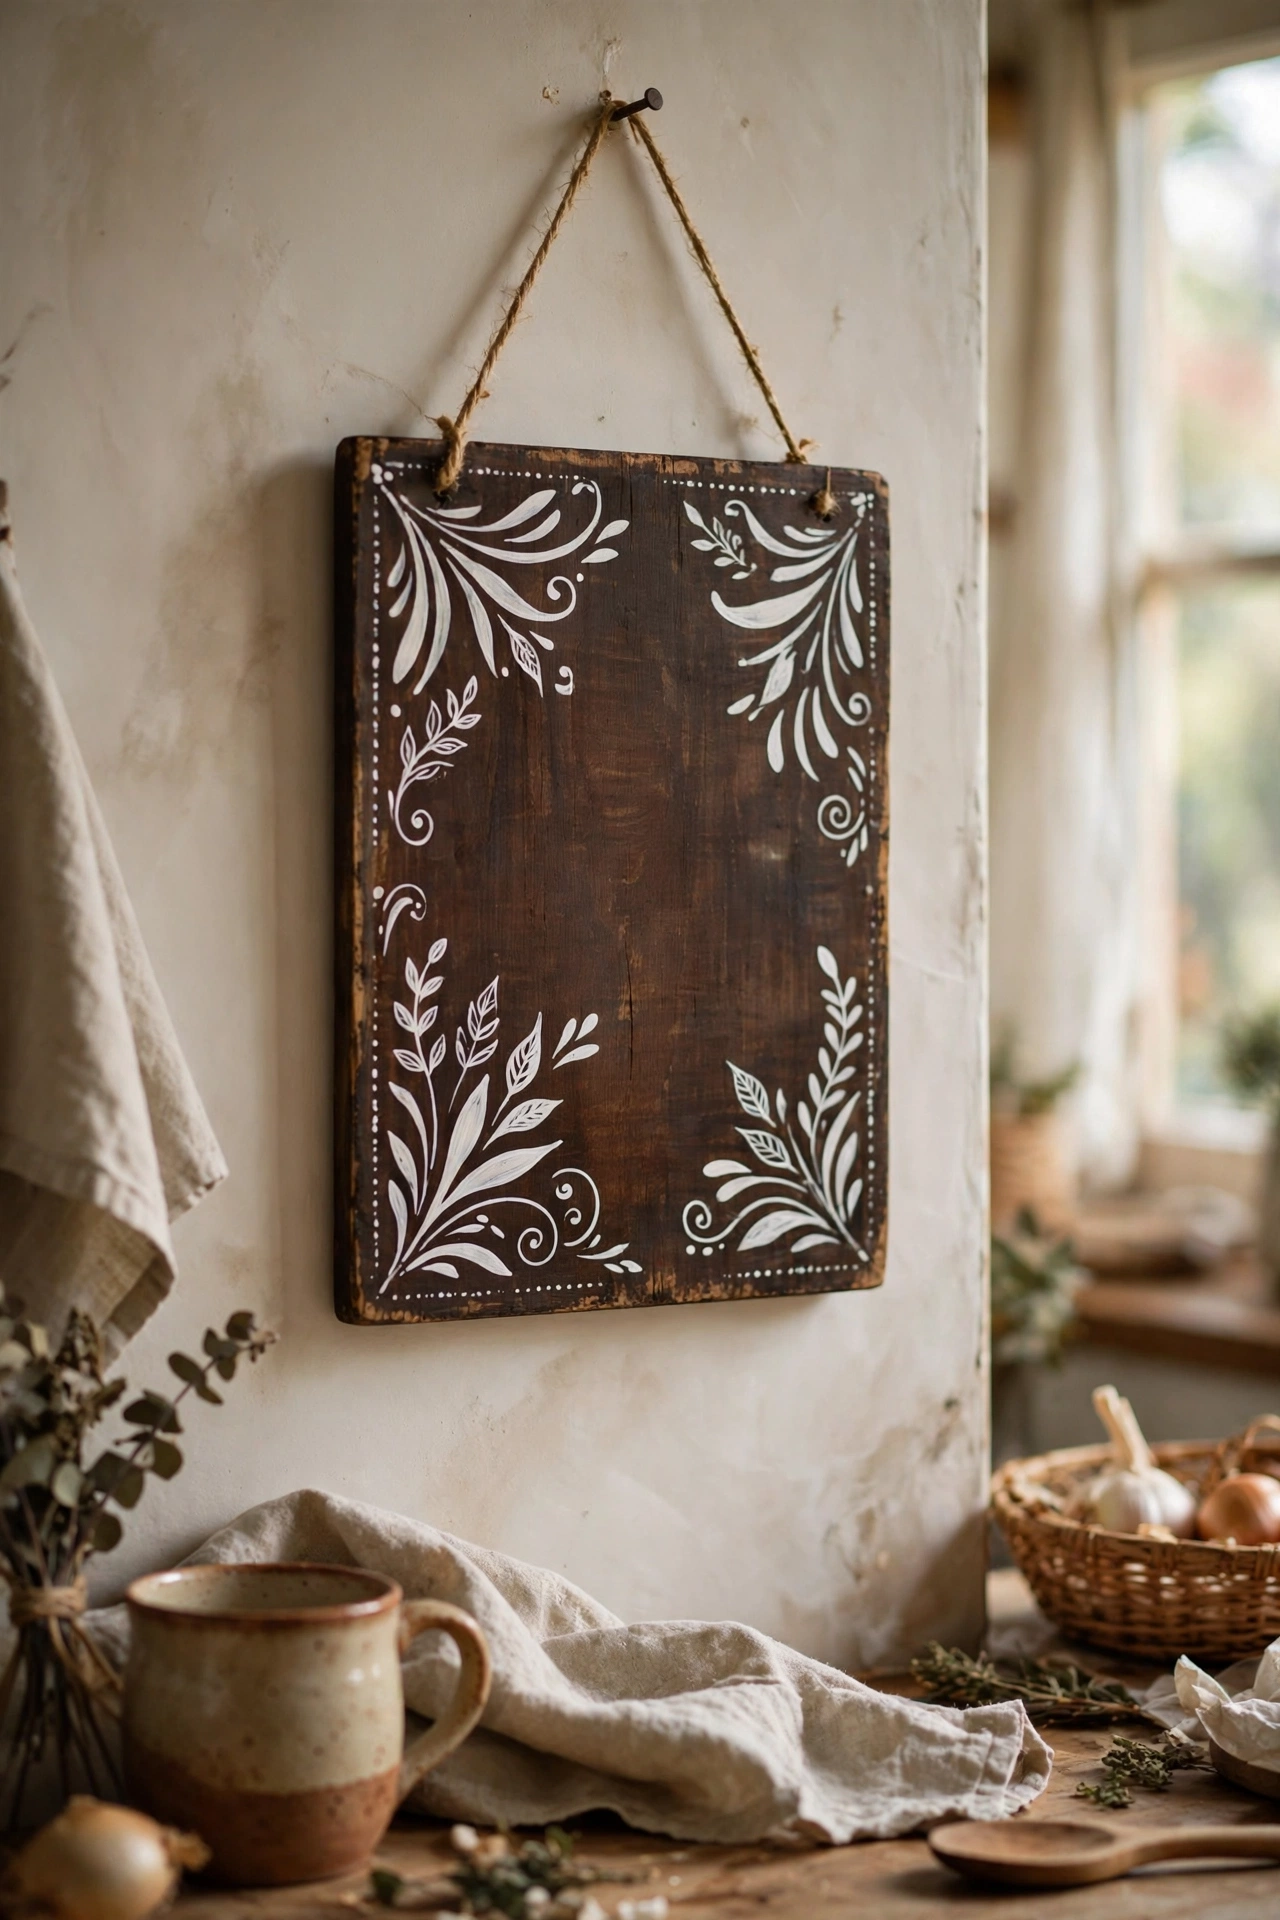
A plank of wood, some chalk paint, and a printed quote traced with carbon paper make a sign that looks hand-painted by someone far more talented than you. Paint the board, print your words in a font you like, trace them with carbon paper, then fill in with a paint pen. I made one for our kitchen with our family motto and people assume I lettered it freehand. I tried freehanding my first one and the letters drifted downhill like a ski slope — tracing is not cheating, it’s the whole technique. Sand the edges lightly after painting for a softly worn look.
Pro tip: print the quote at the exact finished size first — resizing mid-project is where lettering goes wrong.
Cost: ~$14 | Time: 1.5 hours
11. Mixed Mirror Cluster
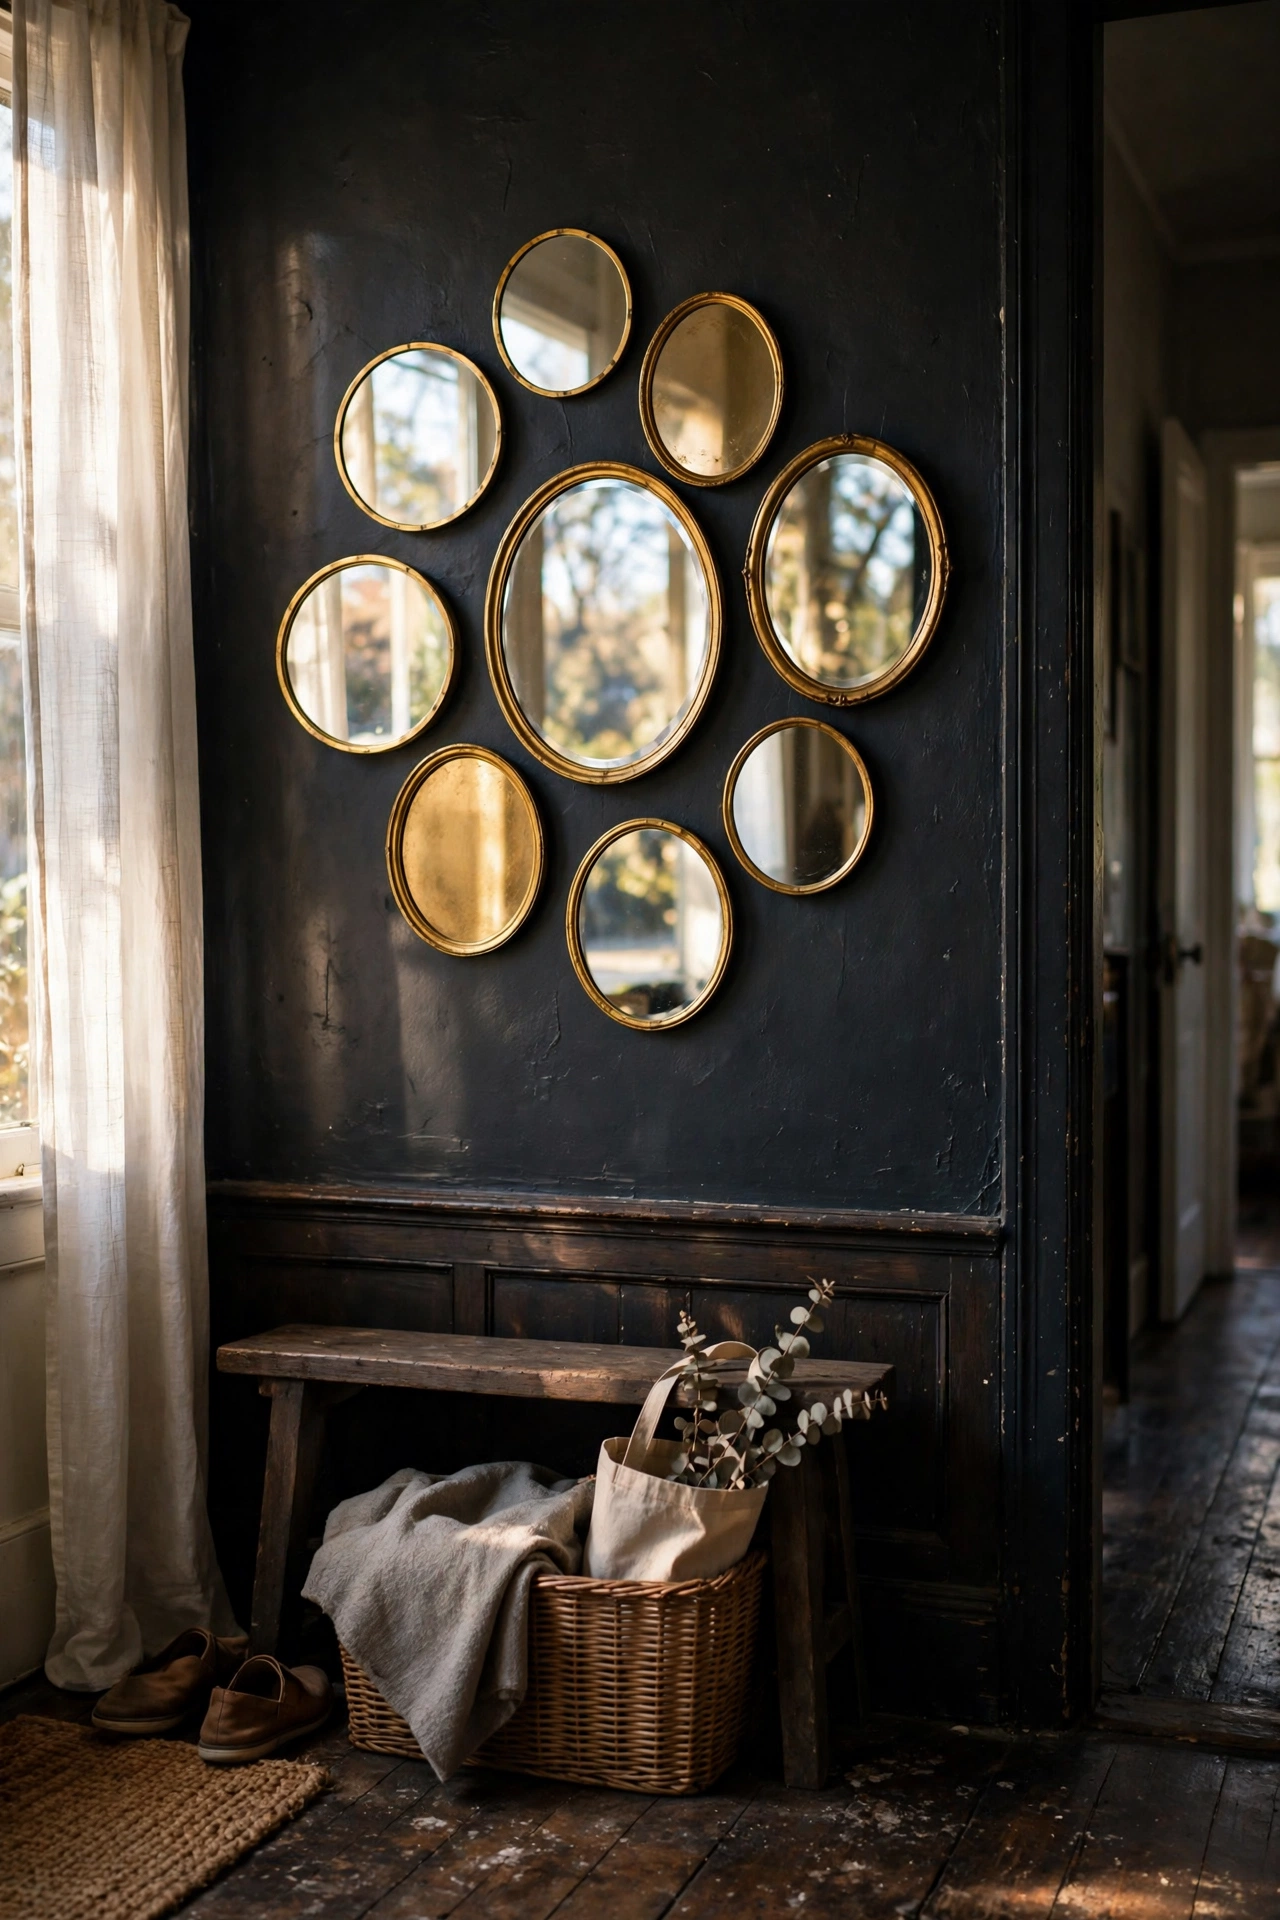
A cluster of small mirrors in different shapes bounces light around the room and counts as wall art without a single picture. Collect inexpensive mirrors from pound shops and car boot sales, arrange them on the floor first in a shape you like, then hang with the largest one roughly at eye level. My hallway was a dark cave until I did this — the mirrors catch the front-door light and throw it down the corridor. I hung my first cluster too high, at picture height for a giant, and it did nothing; drop the centre of the arrangement to your actual eye level. Odd numbers of mirrors always look better than even.
Pro tip: stick to one frame finish — all gold, all black — to keep a mixed cluster looking collected, not chaotic.
Cost: ~$28 | Time: 1.5 hours
12. Paper-Bag Textured Abstract
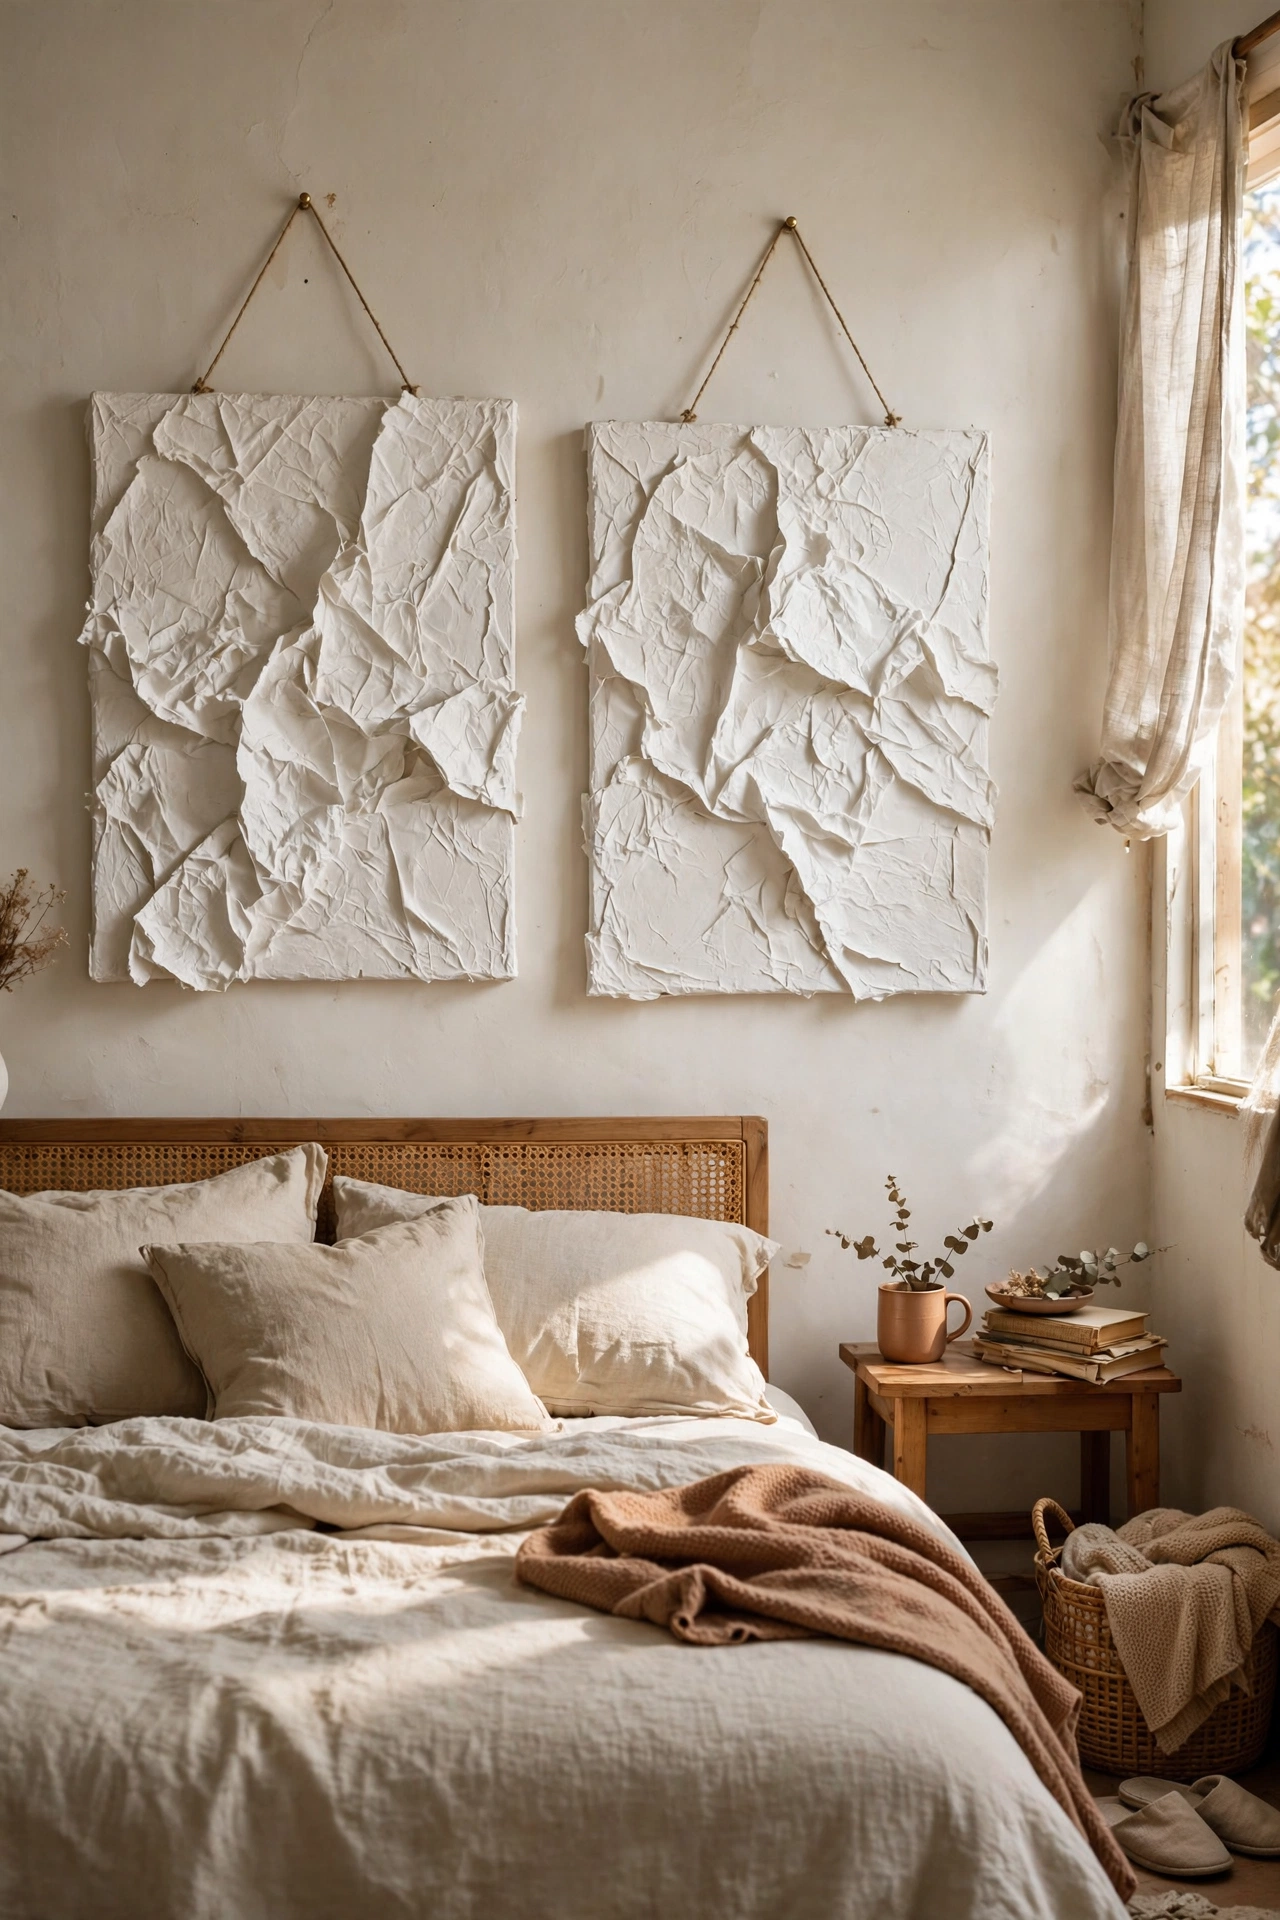
Crumpled brown paper bags, glued onto a canvas board and painted in one colour, make genuinely interesting textured art for almost nothing. Crumple the paper, flatten it slightly, glue it down in overlapping pieces, then brush over the whole thing with paint once dry. The creases catch the paint and create shadows that look like expensive plaster art. I made a pair for our bedroom in warm white and guests always touch them — they’re that tactile. I tried using newspaper first and the print showed through the paint; brown paper bags are thicker and give a cleaner finish.
Pro tip: one colour only — monochrome paint is what turns crumpled paper into “plaster art” instead of a school project.
Cost: ~$12 | Time: 1 hour (plus drying)
13. Embroidery Hoop Art Set
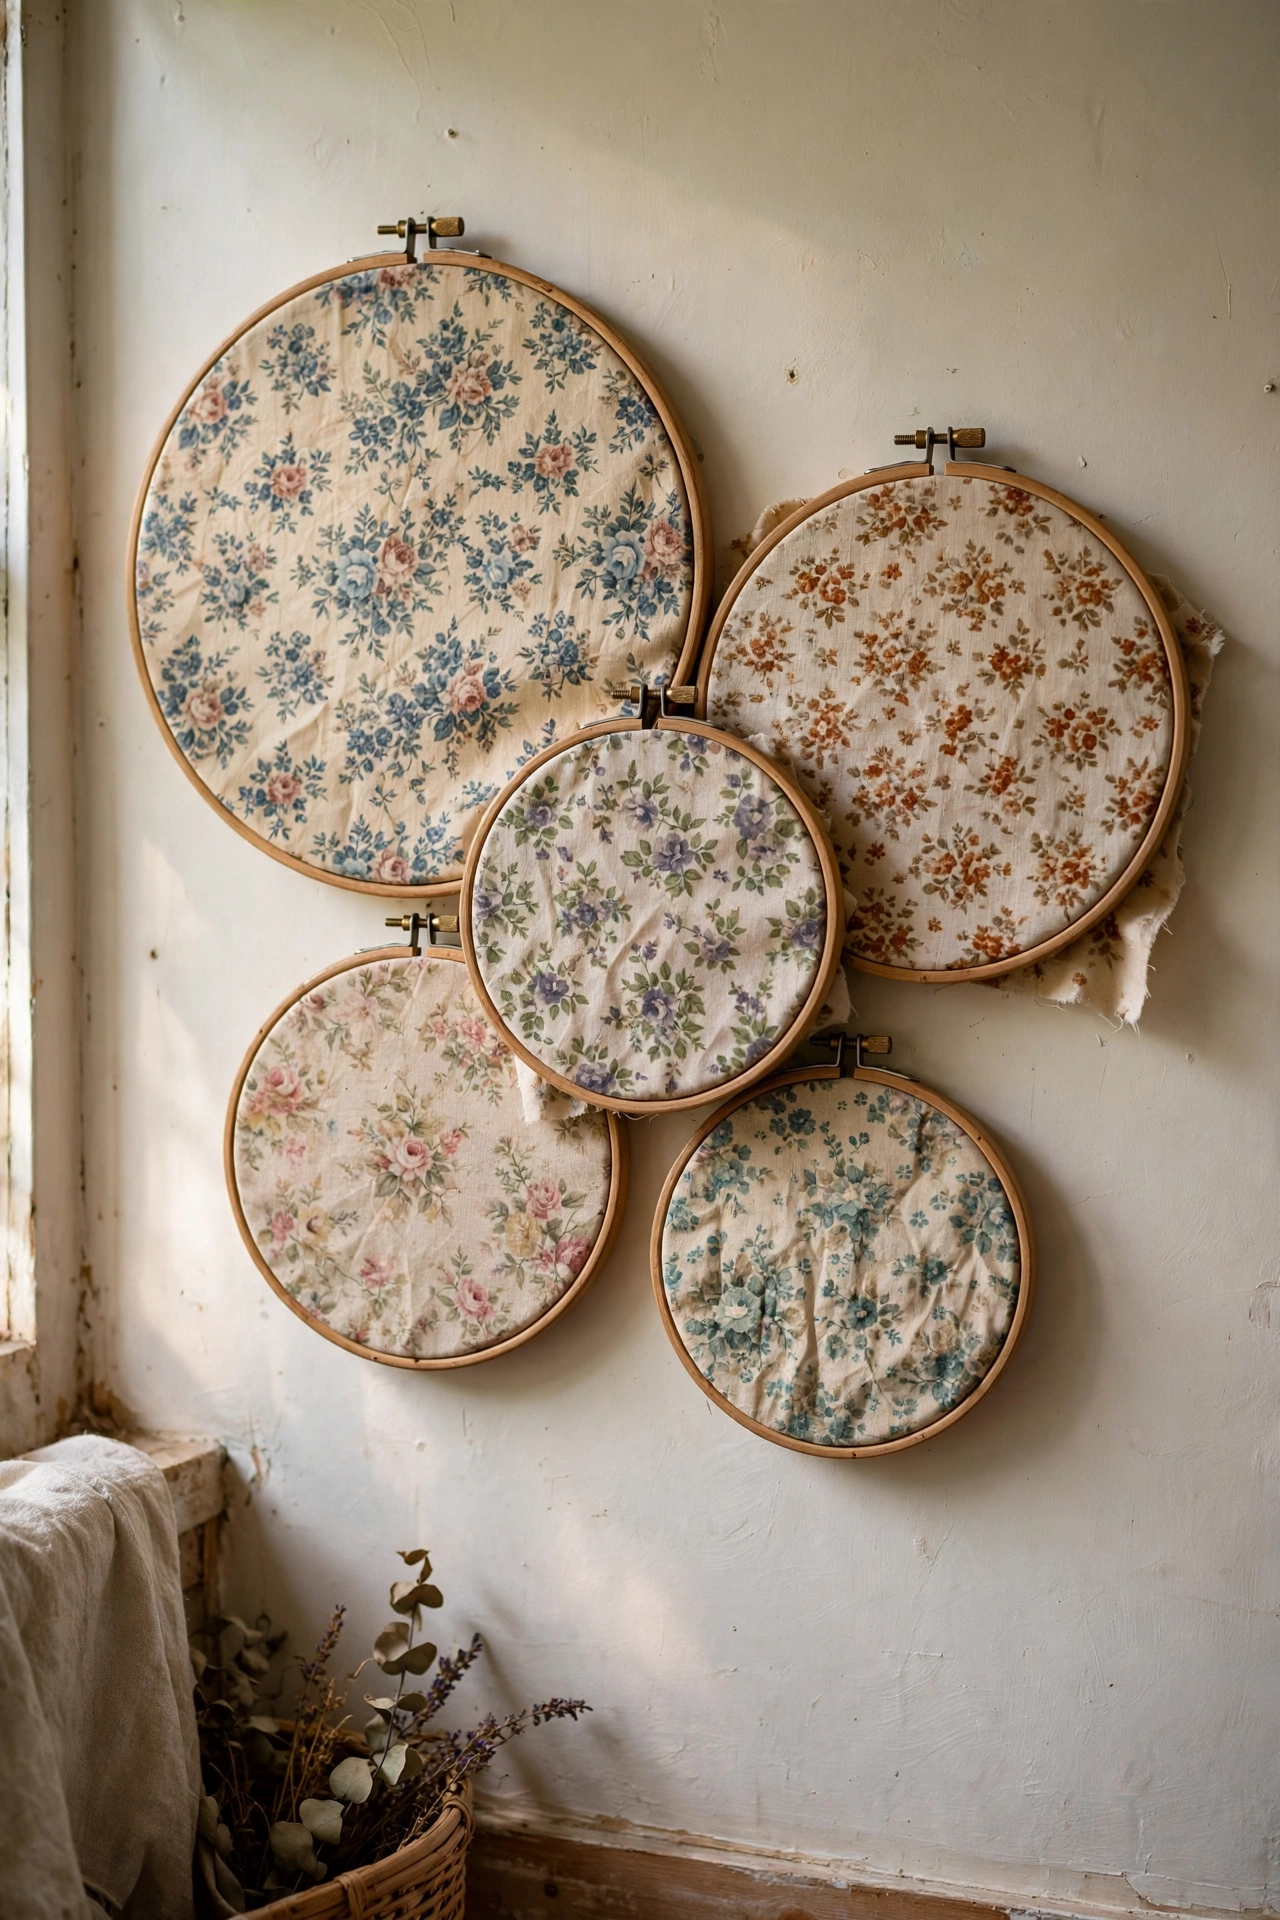
Wooden embroidery hoops stretched with patterned fabric or simple stitched designs make a charming set of round artworks. Stretch fabric tight in hoops of different sizes, trim the excess at the back, and hang three or five in a cluster. You can cross-stitch a simple motif or just use a beautiful fabric and let the hoop be the frame. I did a set of five with vintage floral fabric scraps for our spare room — total cost under a tenner. My first hoop was stretched too loosely and the fabric sagged within a week; pull it properly taut and tighten the screw firmly.
Pro tip: mix hoop sizes from small to large in one cluster — the size variation is what makes it look designed.
Cost: ~$16 | Time: 1 hour
14. Framed Chalkboard Art
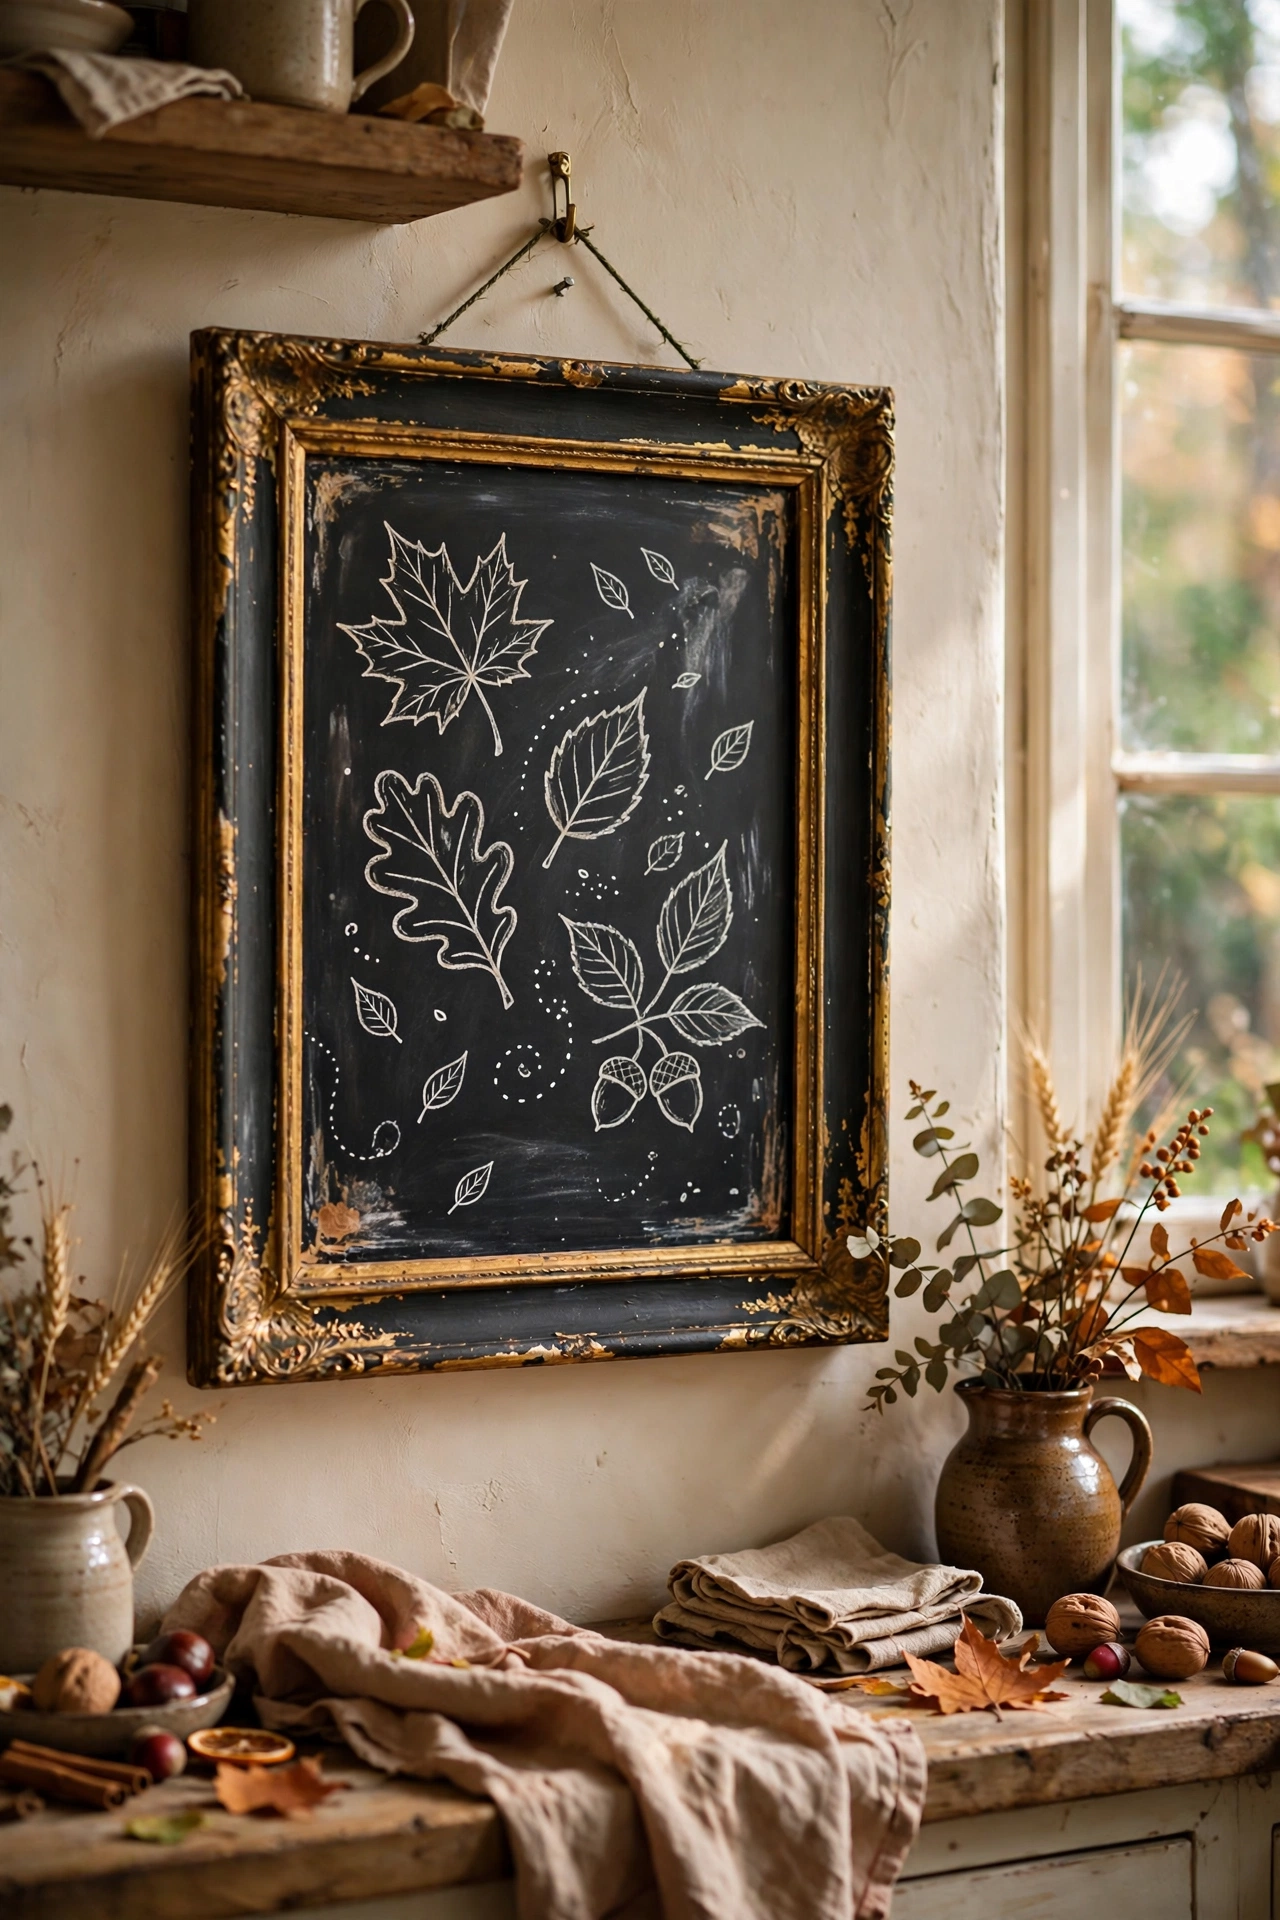
An old framed print or mirror, painted with chalkboard paint, becomes a changeable art piece you can redraw with the seasons. Remove or cover the glass, paint the surface with two coats of chalkboard paint, season it by rubbing chalk over the whole thing and wiping off, then draw your design with chalk pens. I keep one in the kitchen and redraw it every season — autumn leaves, Christmas sprigs, spring blossom. My first attempt skipped the seasoning step and the first drawing ghosted permanently; that one rub of chalk over the surface really matters. Keep a damp cloth nearby for the inevitable wobbles.
Pro tip: chalk pens give crisper lines than chalk sticks — and they wipe off cleanly with a damp cloth.
Cost: ~$15 | Time: 1.5 hours (plus drying)
15. Vintage Map Print Collage
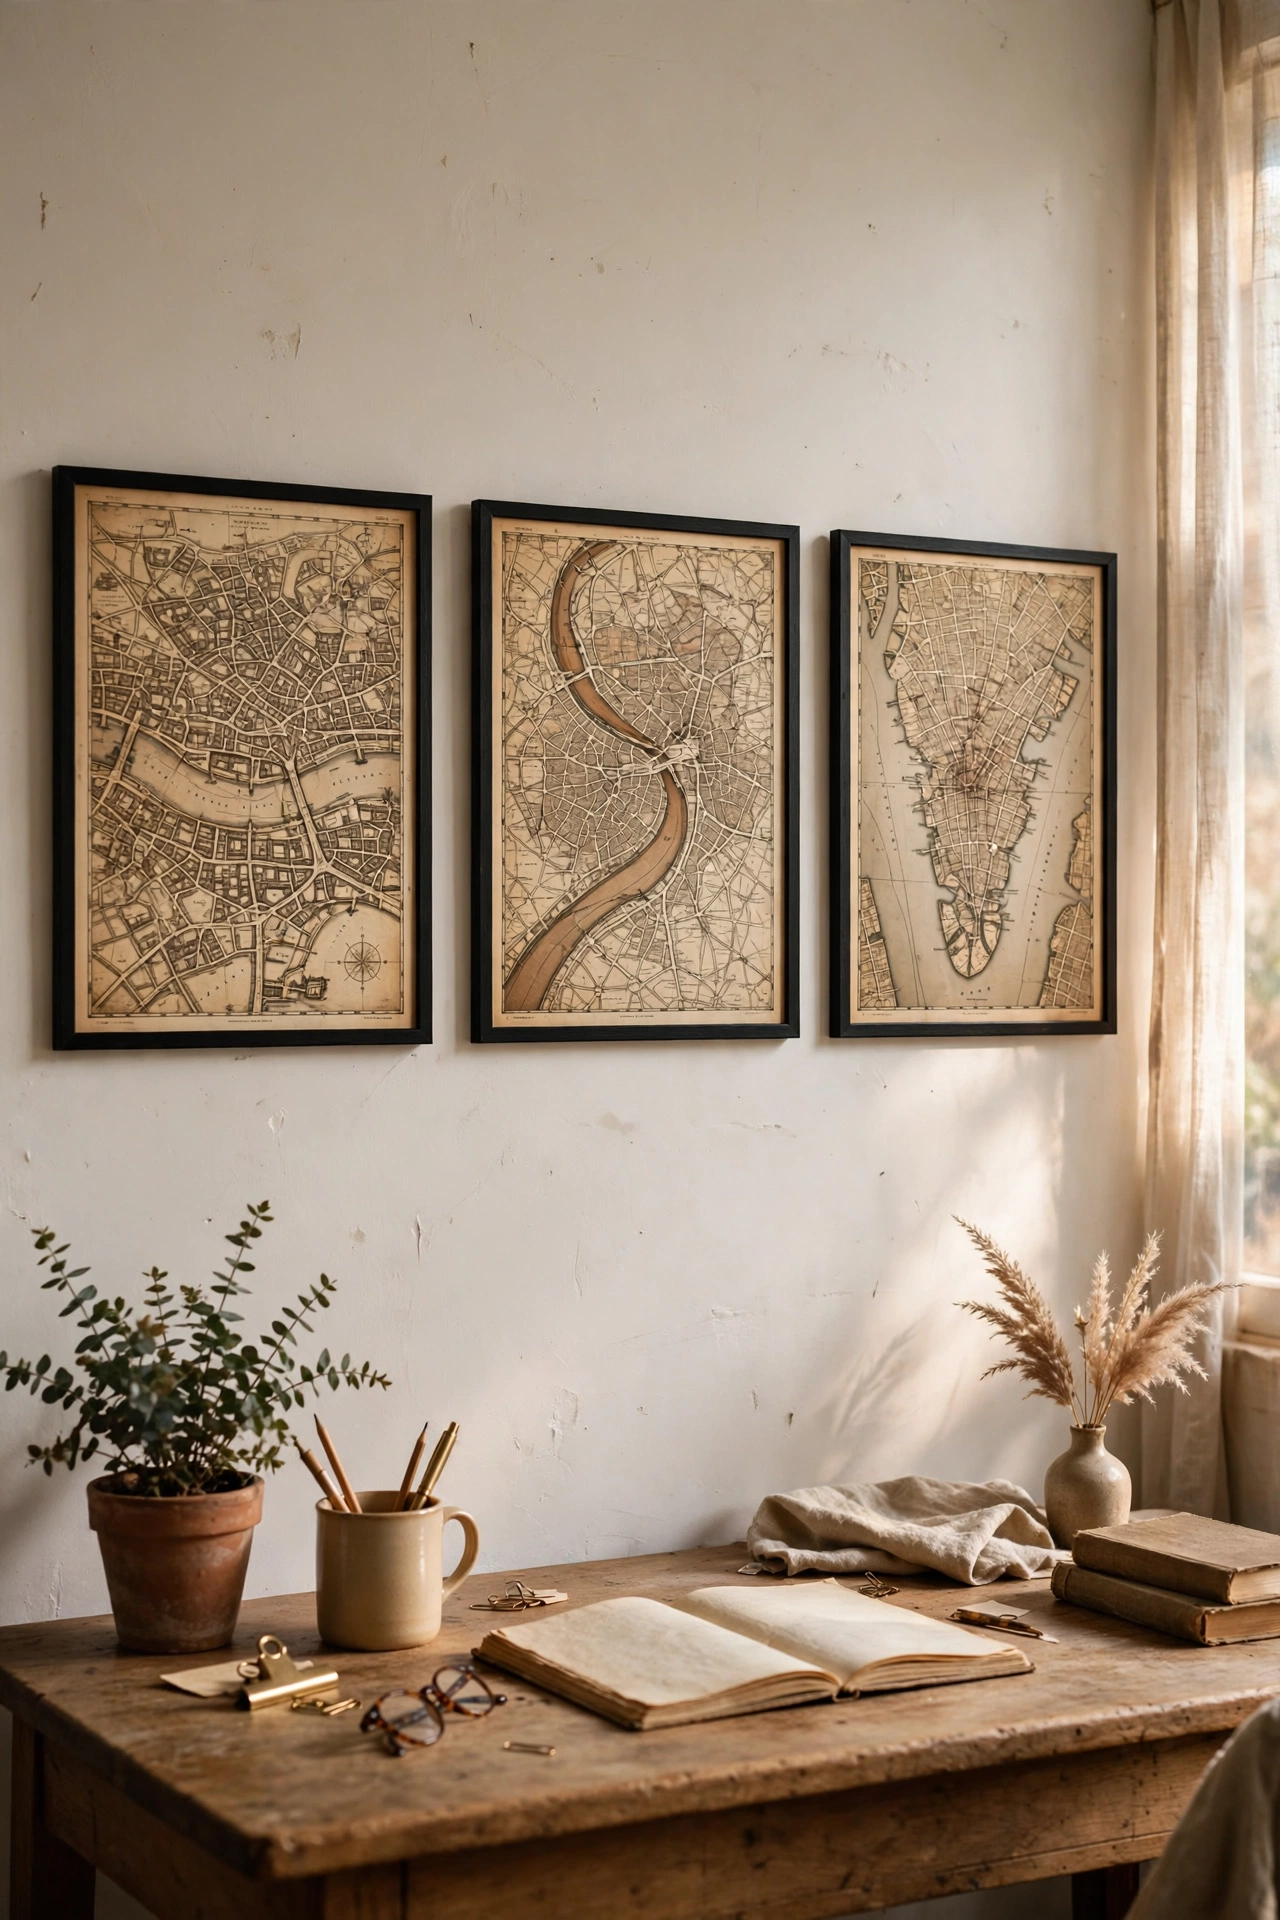
Old maps — of places you’ve lived, travelled, or dream of visiting — framed in a grid tell your story better than any generic print. Source maps from secondhand bookshops, print digital ones at a copy shop, and frame them identically in a row or grid. I framed maps of the three cities we’ve lived in, in a row above our desk, and it’s the most personal wall in the house. I tried framing whole atlases pages at first and the scale was wrong for the frames; cropping to the interesting section of each map made each one stronger. Tea-staining the edges of new prints ages them convincingly.
Pro tip: crop each map to its most interesting section — a tight crop of a coastline beats a whole country.
Cost: ~$24 | Time: 1.5 hours
Quick questions, answered
How do I make cheap wall art look expensive?
Three things do the heavy lifting: matching frames, generous spacing, and restraint in colour. A £3 print in a proper frame hung with breathing room around it reads as expensive; a £30 print in a flimsy frame does not.
What is the easiest DIY wall art for beginners?
Start with the painted arch or the framed wallpaper grid — both need almost no skill, just patience and masking tape. If you can roll paint on a wall, you can do either of these in an afternoon.
How do I hang art without damaging walls?
Adhesive hanging strips hold light frames beautifully and remove cleanly — I use them for everything under about 2kg. For heavier pieces, proper wall plugs in the right wall type are worth the five minutes of effort.
📌 Loving this look? Pin this post now so you can save this idea for your next weekend refresh.
Keep the calm going with these next: (see also: 23-diy-gallery-wall-ideas-on-a-budget/) (see also: 23-no-paint-diy-wall-decor-ideas-on-a-budget/) (see also: 15-upcycled-home-decor-ideas-worth-trying-this-weekend/)
Pick the idea that made you think “oh, I could actually do that” — that’s always the right first one. One piece of art on the wall changes how a whole room feels, and once you’ve made one, the second comes much faster. Your walls have waited long enough.
