25 DIY Planter Ideas That Look Expensive
I used to think beautiful planters meant spending $40 at a garden centre, until I priced up the pots for my twelve houseplants and nearly fainted. A DIY planter obsession saved my wallet that spring. With paint, plaster, and a few clever tricks, cheap pots and thrifted bowls can pass for the expensive stoneware and handmade ceramics you see in design magazines. These are the twenty-five finishes and builds I have actually tried, ranked from the easiest wins to the weekend projects.
The secret to a planter that looks expensive is always the finish, not the base. Matte textures, natural materials, and simple shapes read high-end; glossy plastic and fussy patterns read cheap. Every idea here costs under $20, most under $10, and each one includes the exact technique that makes it convincing. Work through a few and your plants will look like they live in a boutique, not a bargain bin.
1. Terracotta Pots with a Limewash Finish
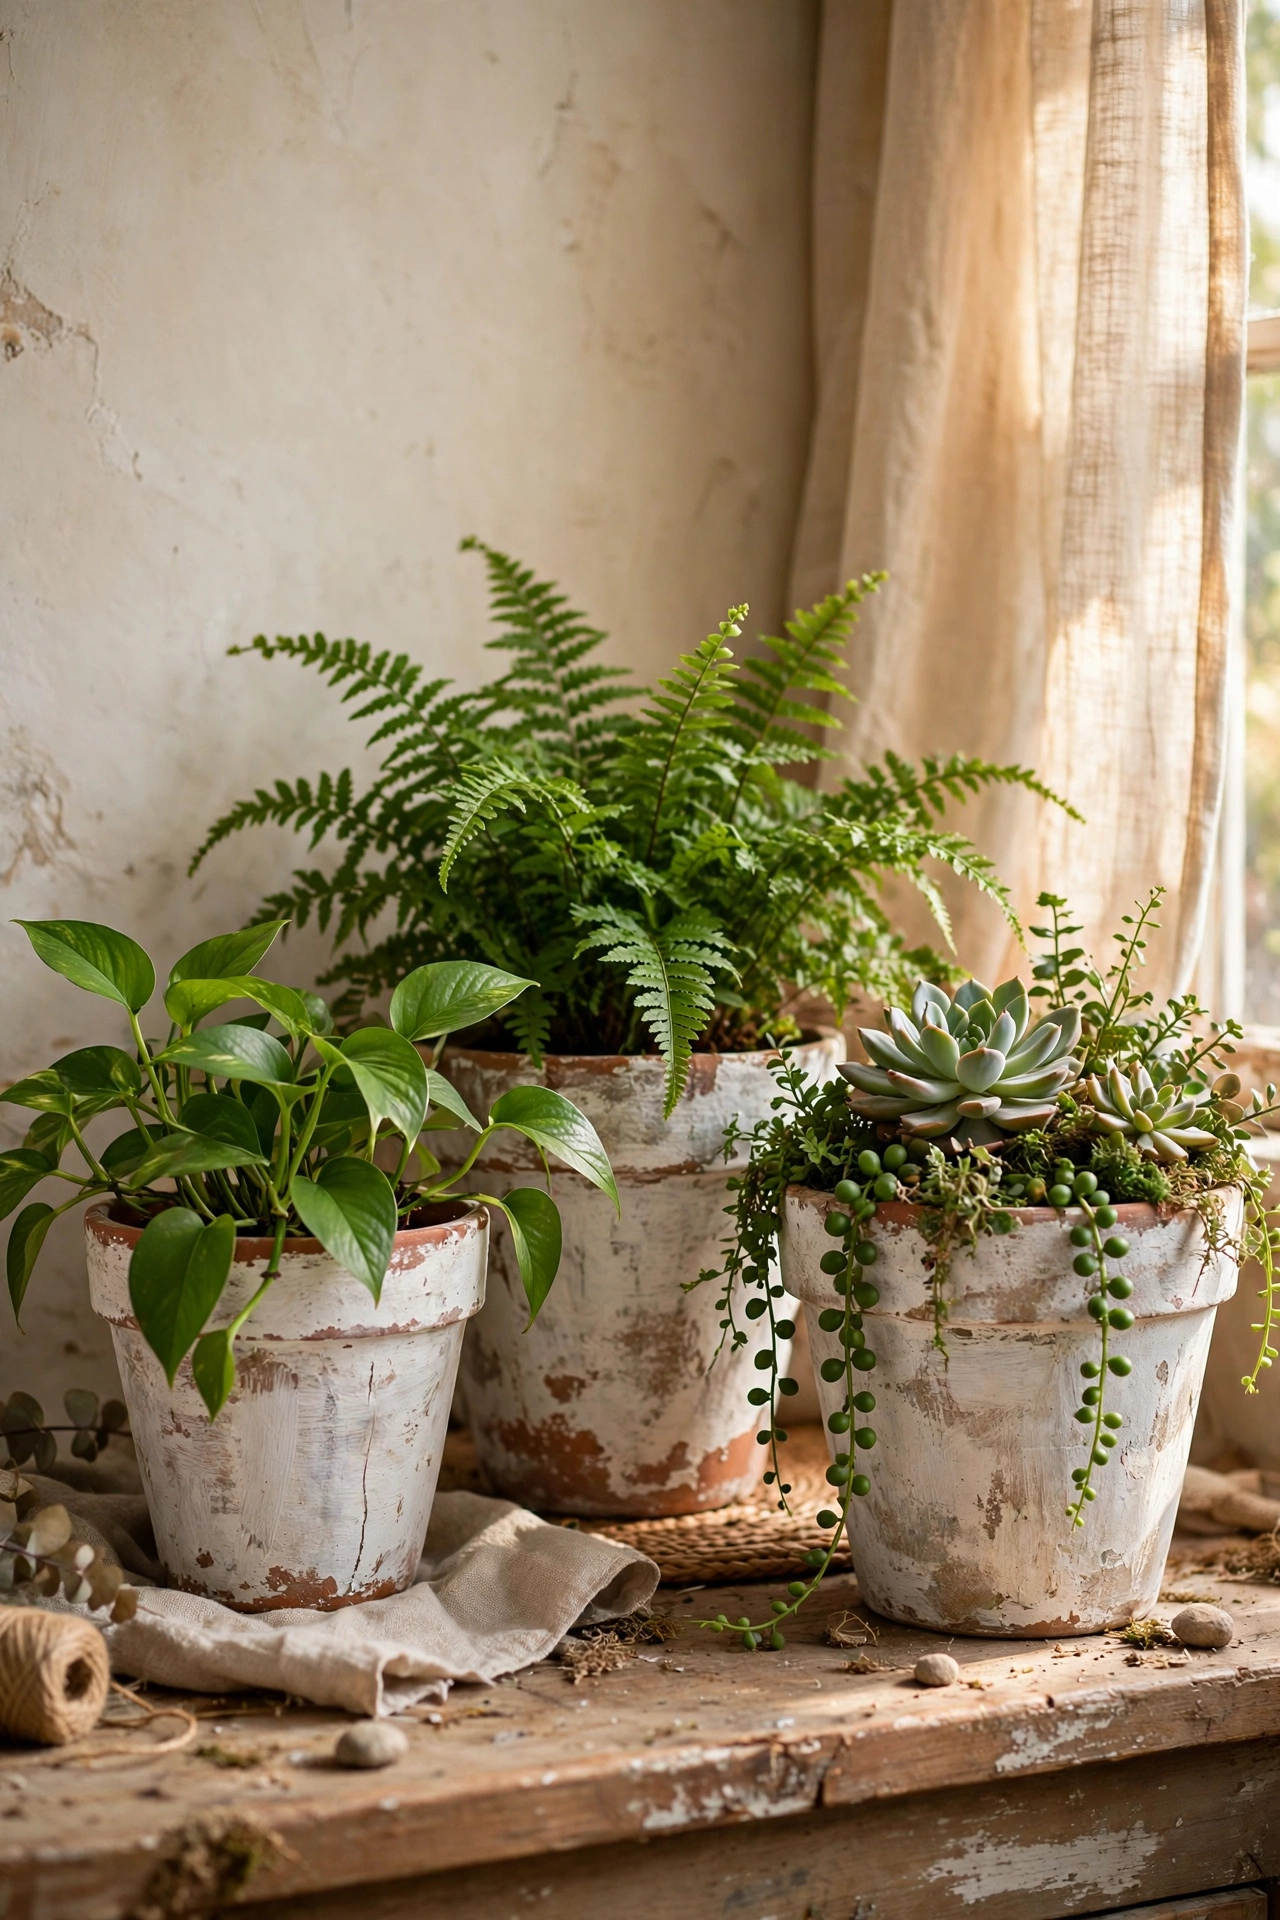
Limewash turns a 99p terracotta pot into something that looks hand-thrown in Provence. Mix equal parts white chalk paint and water, brush it over the terracotta in loose strokes, then wipe some back with a dry cloth so the orange shows through in patches. I limewashed six pots in an hour and my monstera suddenly looked designer. Do leave the finish patchy on purpose — perfect coverage looks like plain white paint. Don’t seal it with glossy varnish; a matte sealer or nothing at all keeps the chalky, aged feel. The slight colour variation is exactly what makes expensive handmade pots look handmade.
Cost: ~$5-10 | Time: 1 hour plus drying
2. Concrete-Look Planters from Pound Shop Bowls
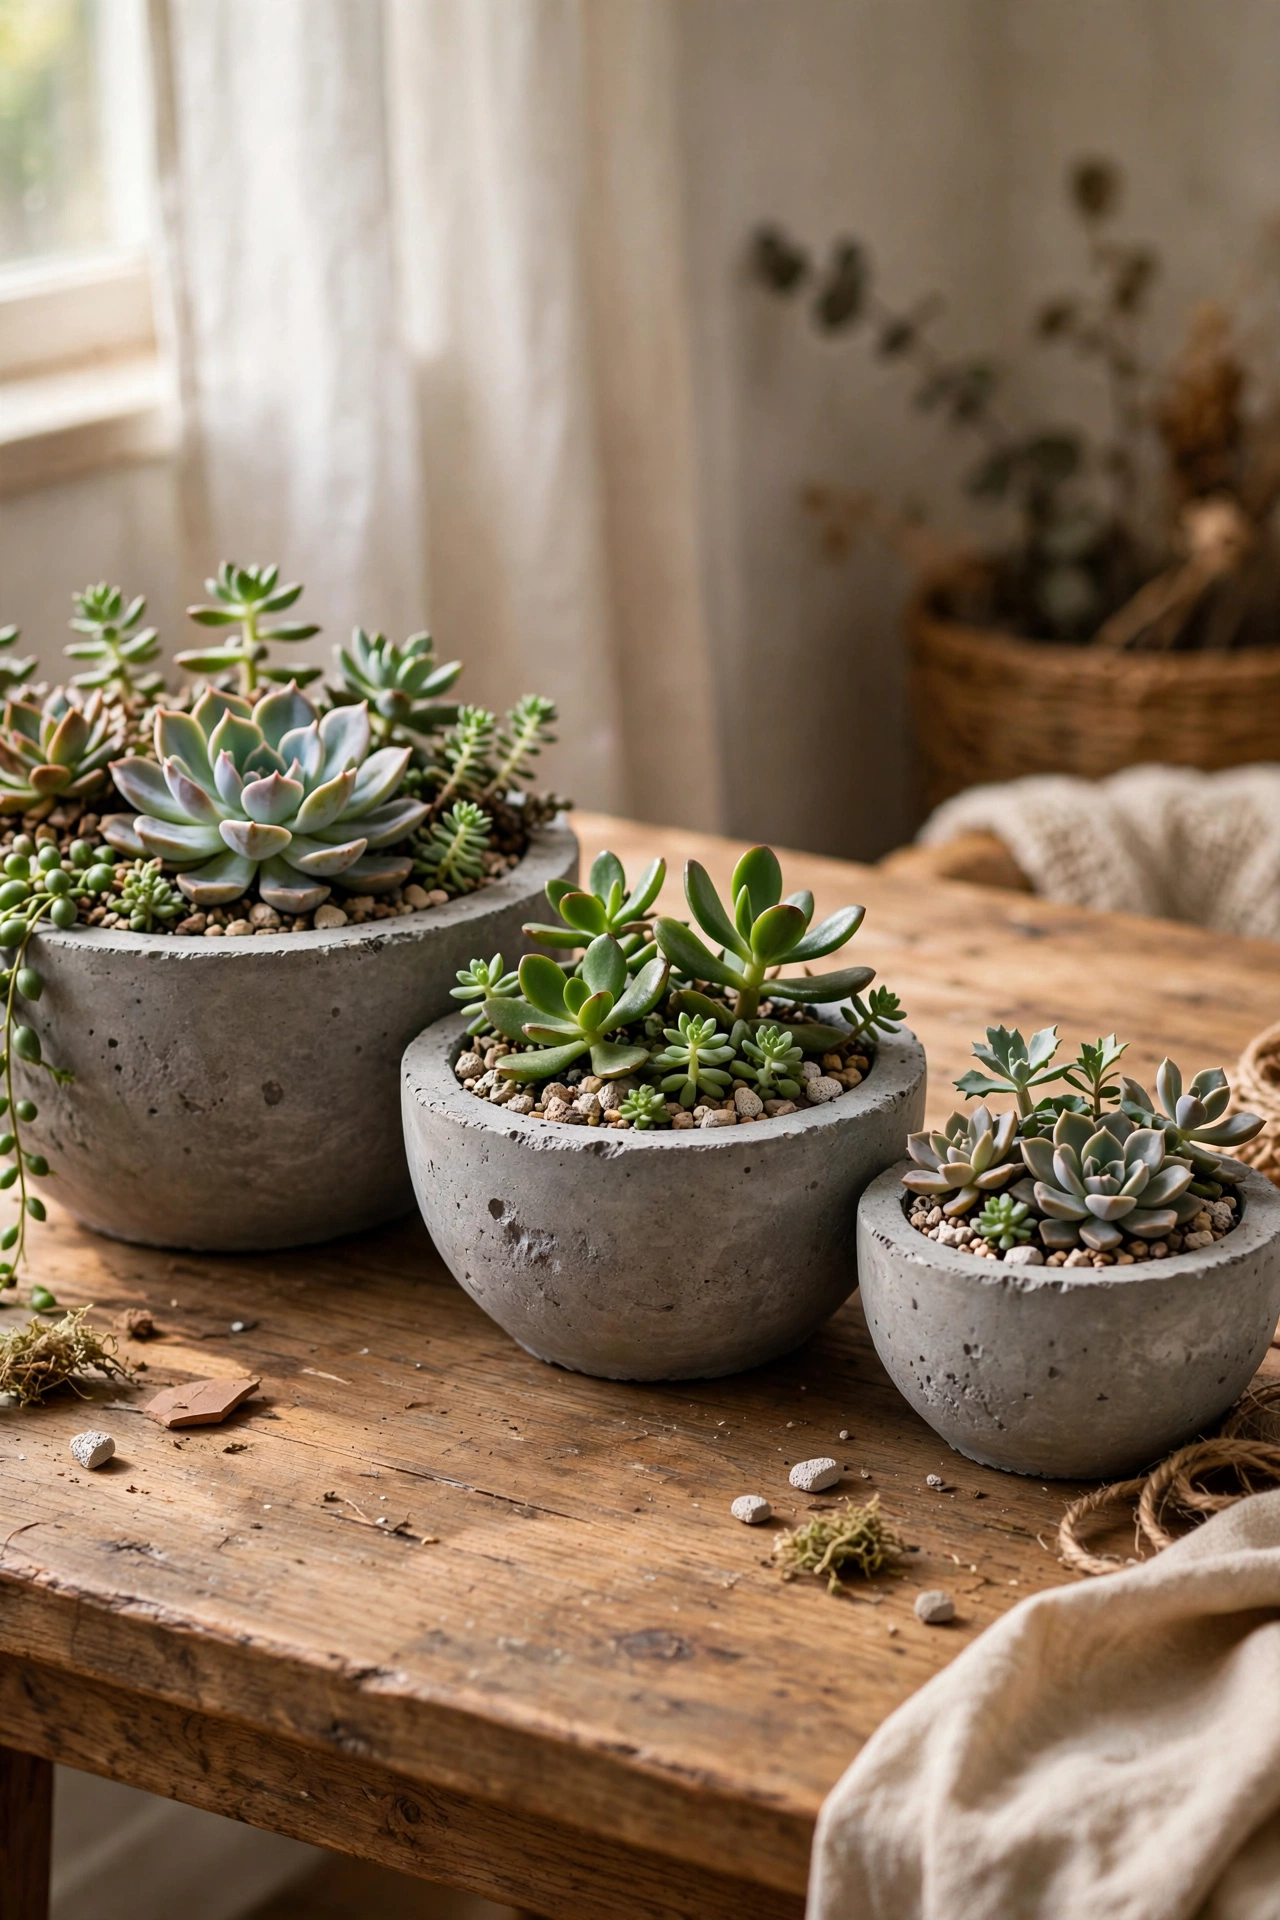
Grey concrete planters cost a fortune in shops, but a plastic bowl and textured spray paint get you there for $4. Choose a bowl with a simple shape, spray it with stone-textured paint in two light coats, and finish with a matte clear coat. I made a set of three graduated bowls for my succulents and guests assumed they were real cast concrete. Do spray outdoors on a calm day, holding the can 25cm away to avoid drips. Don’t skip the primer on plastic — the texture paint peels off smooth plastic within weeks without it. The weight gives it away if lifted, so keep these where they will be admired, not carried.
Cost: ~$4-8 | Time: 30 minutes plus drying
3. Brass-Rimmed Planter from a Tin Can
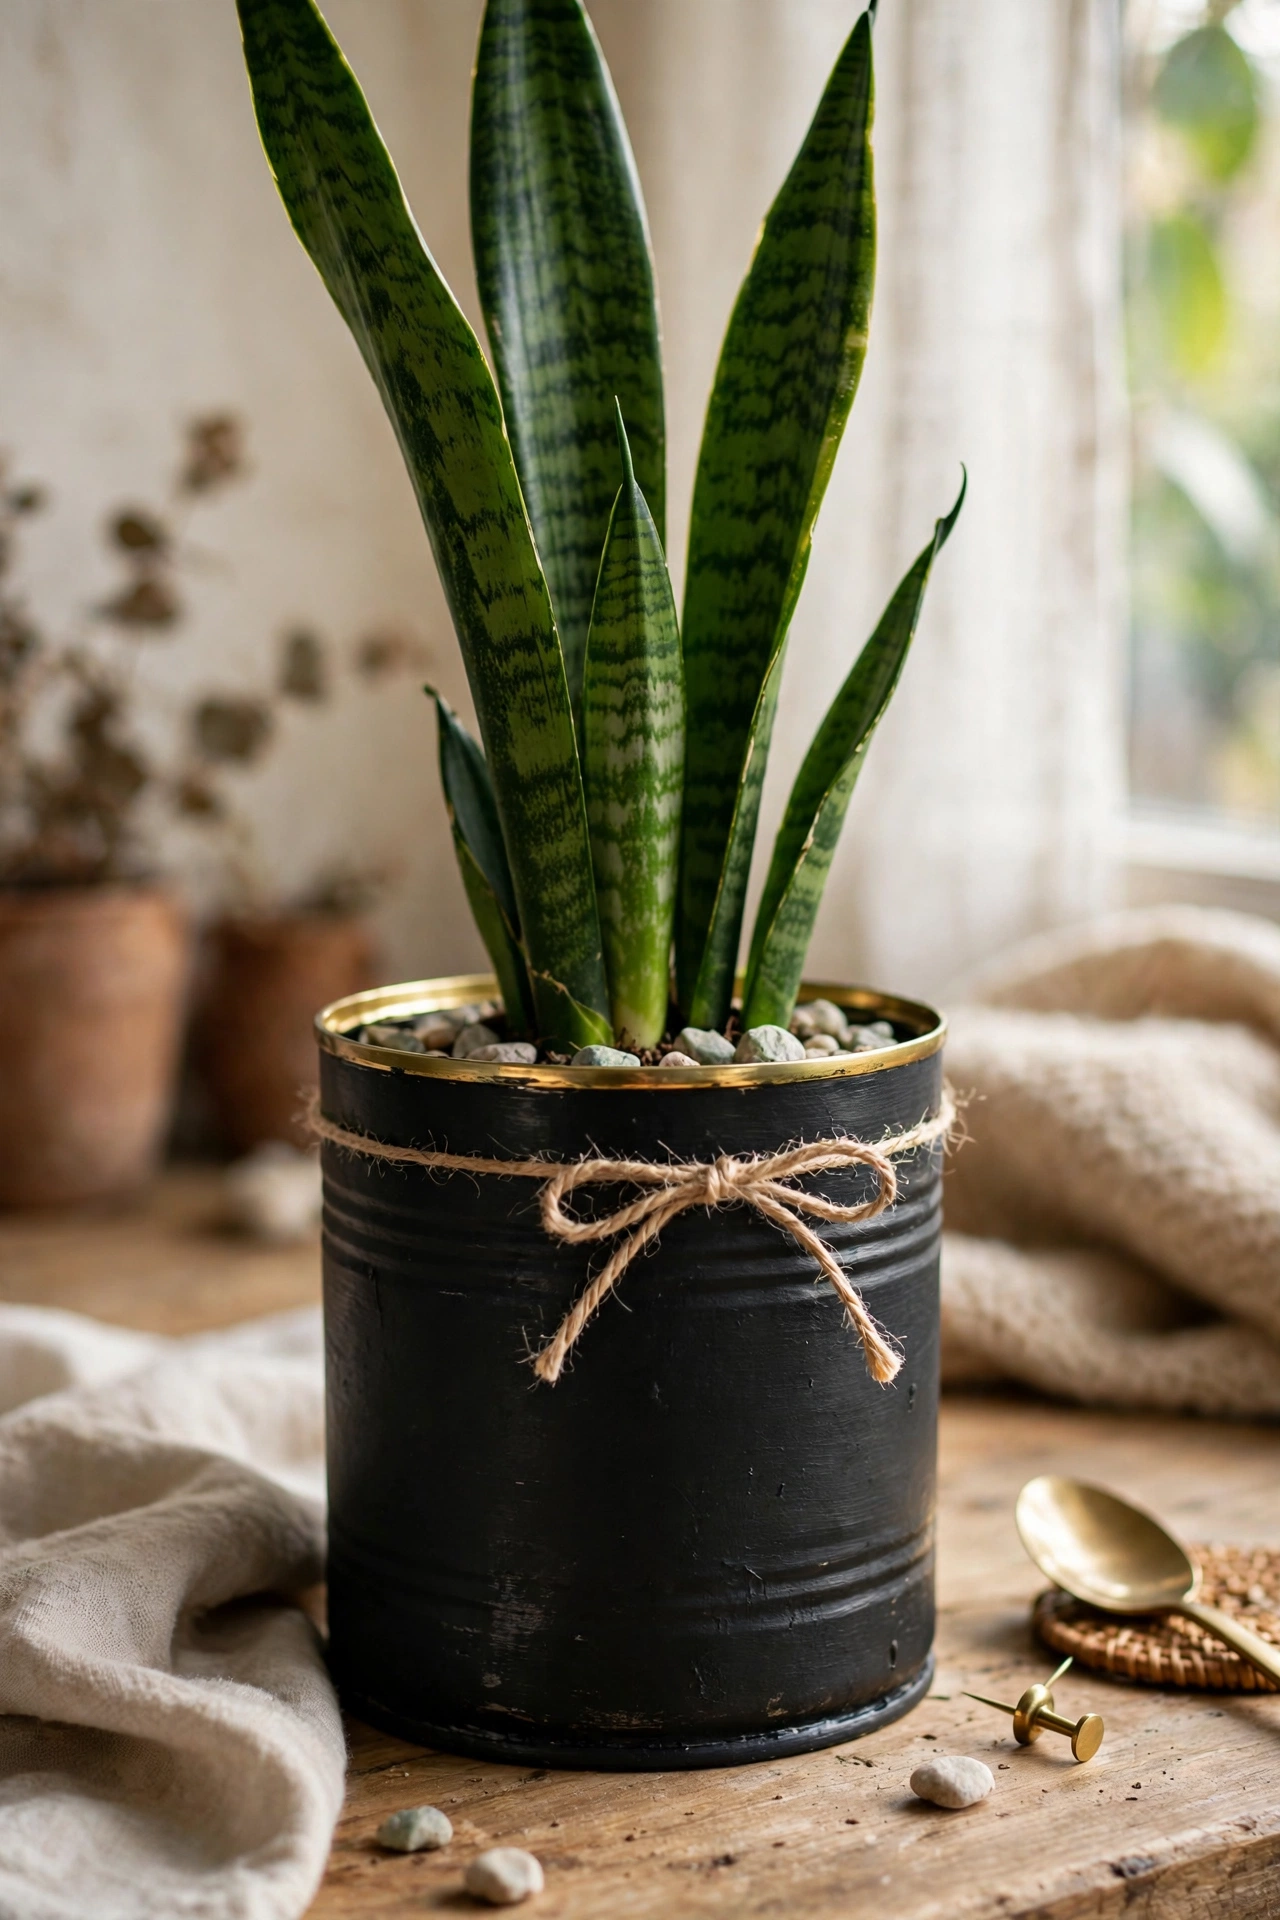
A tin can with a brass rim looks like a chic metal planter from a design shop. Take a large clean tin — coffee tins are the perfect size — paint the body matte black or deep green, then wrap the top rim with thin brass or gold adhesive tape, pressing it smooth. I keep a snake plant in mine and it looks wildly more expensive than the 20 minutes it took. Do sand any sharp edges on the rim before taping. Don’t use real metal leaf here; adhesive tape is crisper and survives watering splashes. Line the tin with a plastic pot so the metal never sits in wet soil.
Cost: ~$3-7 | Time: 20 minutes
4. Speckled Stoneware Effect with Spray Paint
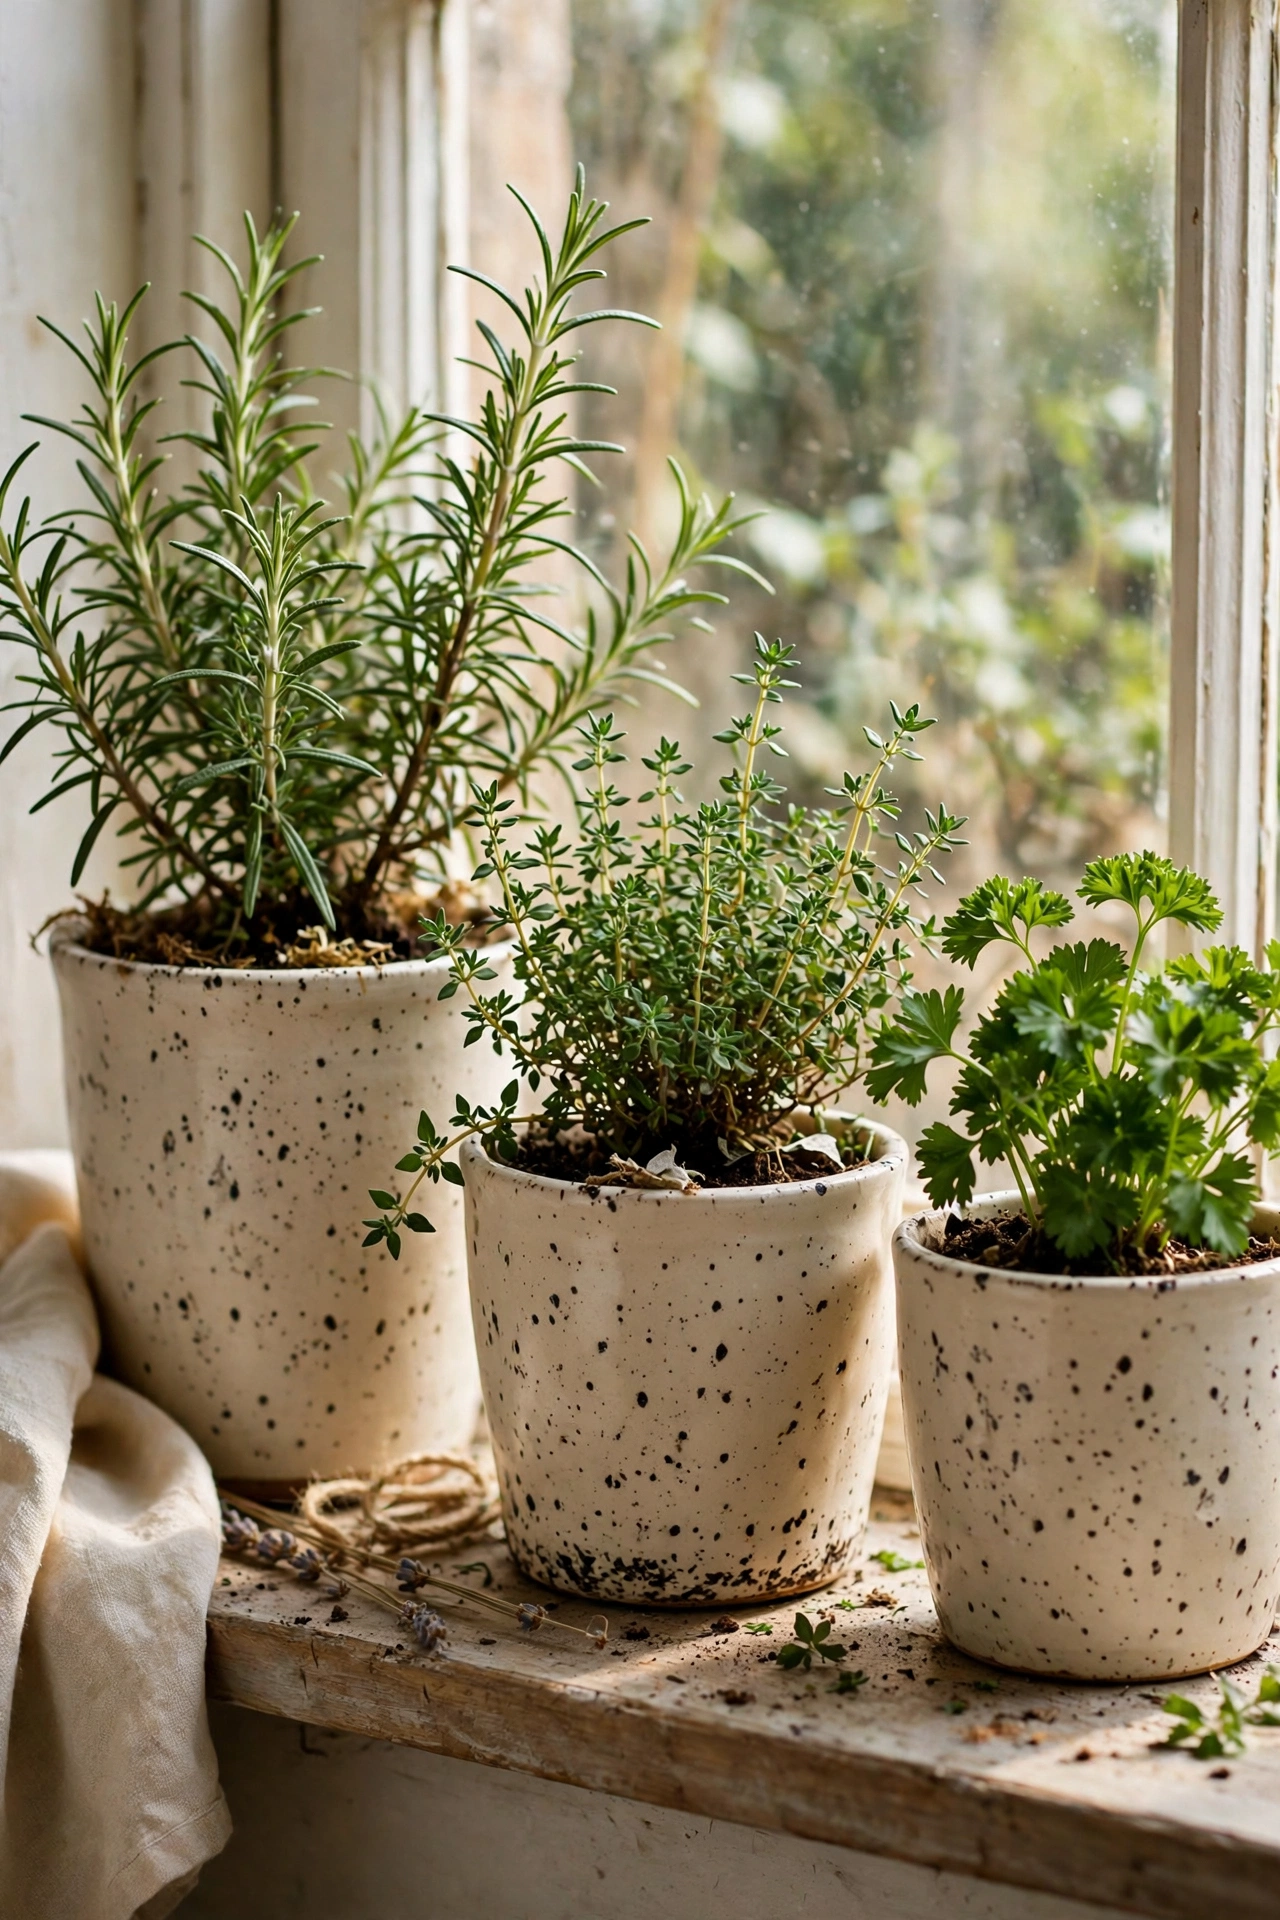
Speckled stoneware is the pottery trend that costs $60 in shops and $6 with two spray cans. Paint a plain pot matte cream, then flick the speckles on with a toothbrush dipped in dark brown acrylic, or use a speckled stone spray paint for an even easier route. I did my whole windowsill herb collection this way and they photograph beautifully. Do practise the flicking motion on newspaper first, because the first attempt always throws too much paint. Don’t place speckles evenly — random clusters look handmade, grids look printed. A matte finish sells the stoneware illusion; gloss ruins it instantly.
Cost: ~$5-9 | Time: 30 minutes plus drying
5. Ribbed Ceramic Look from Cardboard Tubes
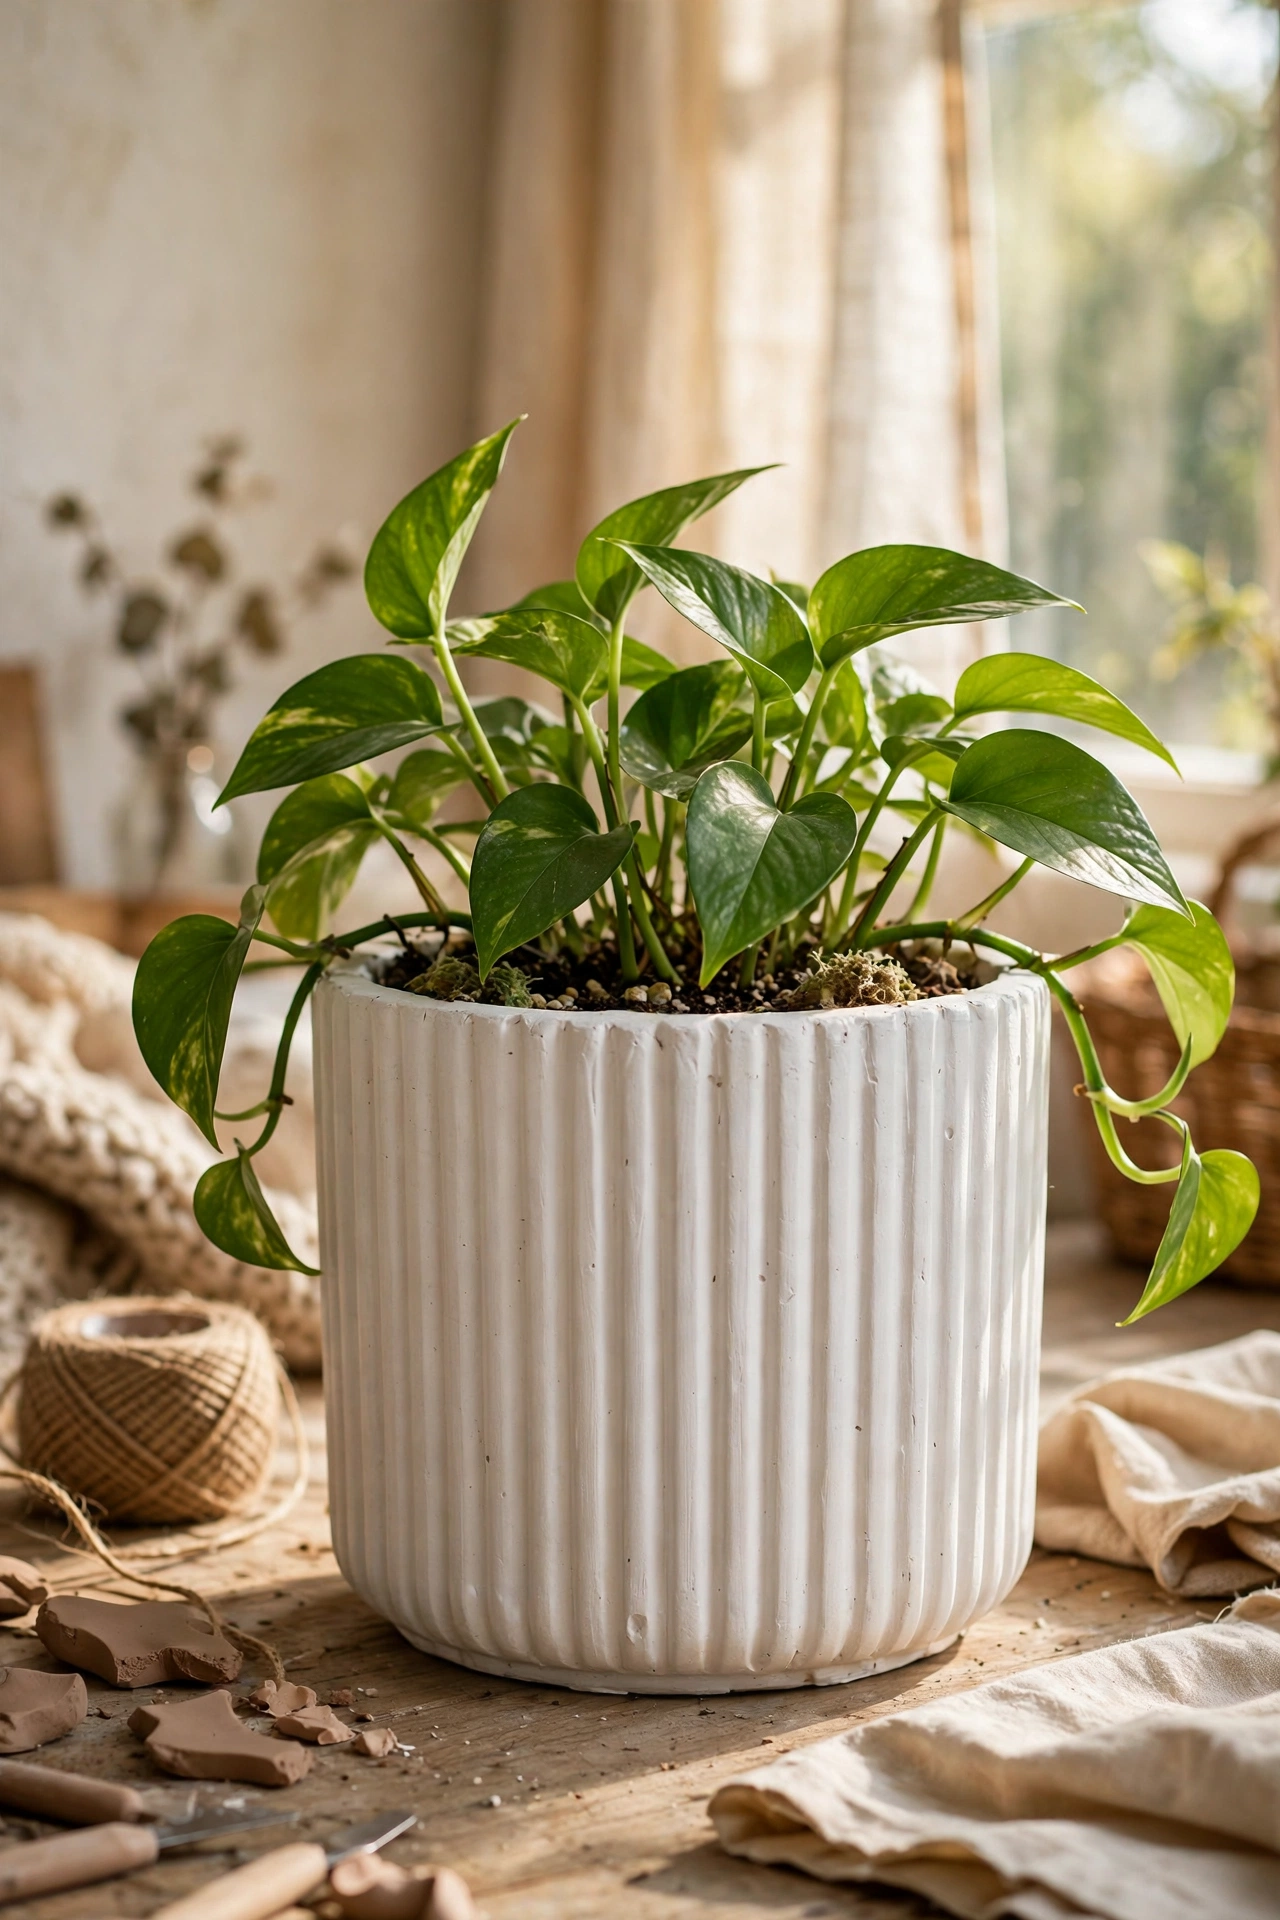
Ribbed planters are everywhere in expensive homeware shops, and cardboard tubes fake them brilliantly. Glue vertical strips of corrugated cardboard or thick rope around a straight-sided pot, paint the whole thing matte white or sage, and seal with matte varnish. The ribs catch light exactly like real fluted ceramic. I made a pair from oatmeal tubs for my fiddle leaf fig and nobody guessed the base. Do keep the strips evenly spaced using a ruler as a guide. Don’t use this finish outdoors — cardboard and rain are not friends, even sealed. Indoors, it lasts for years.
Cost: ~$4-8 | Time: 1 hour plus drying
6. Matte Black Planters for a Modern Edge
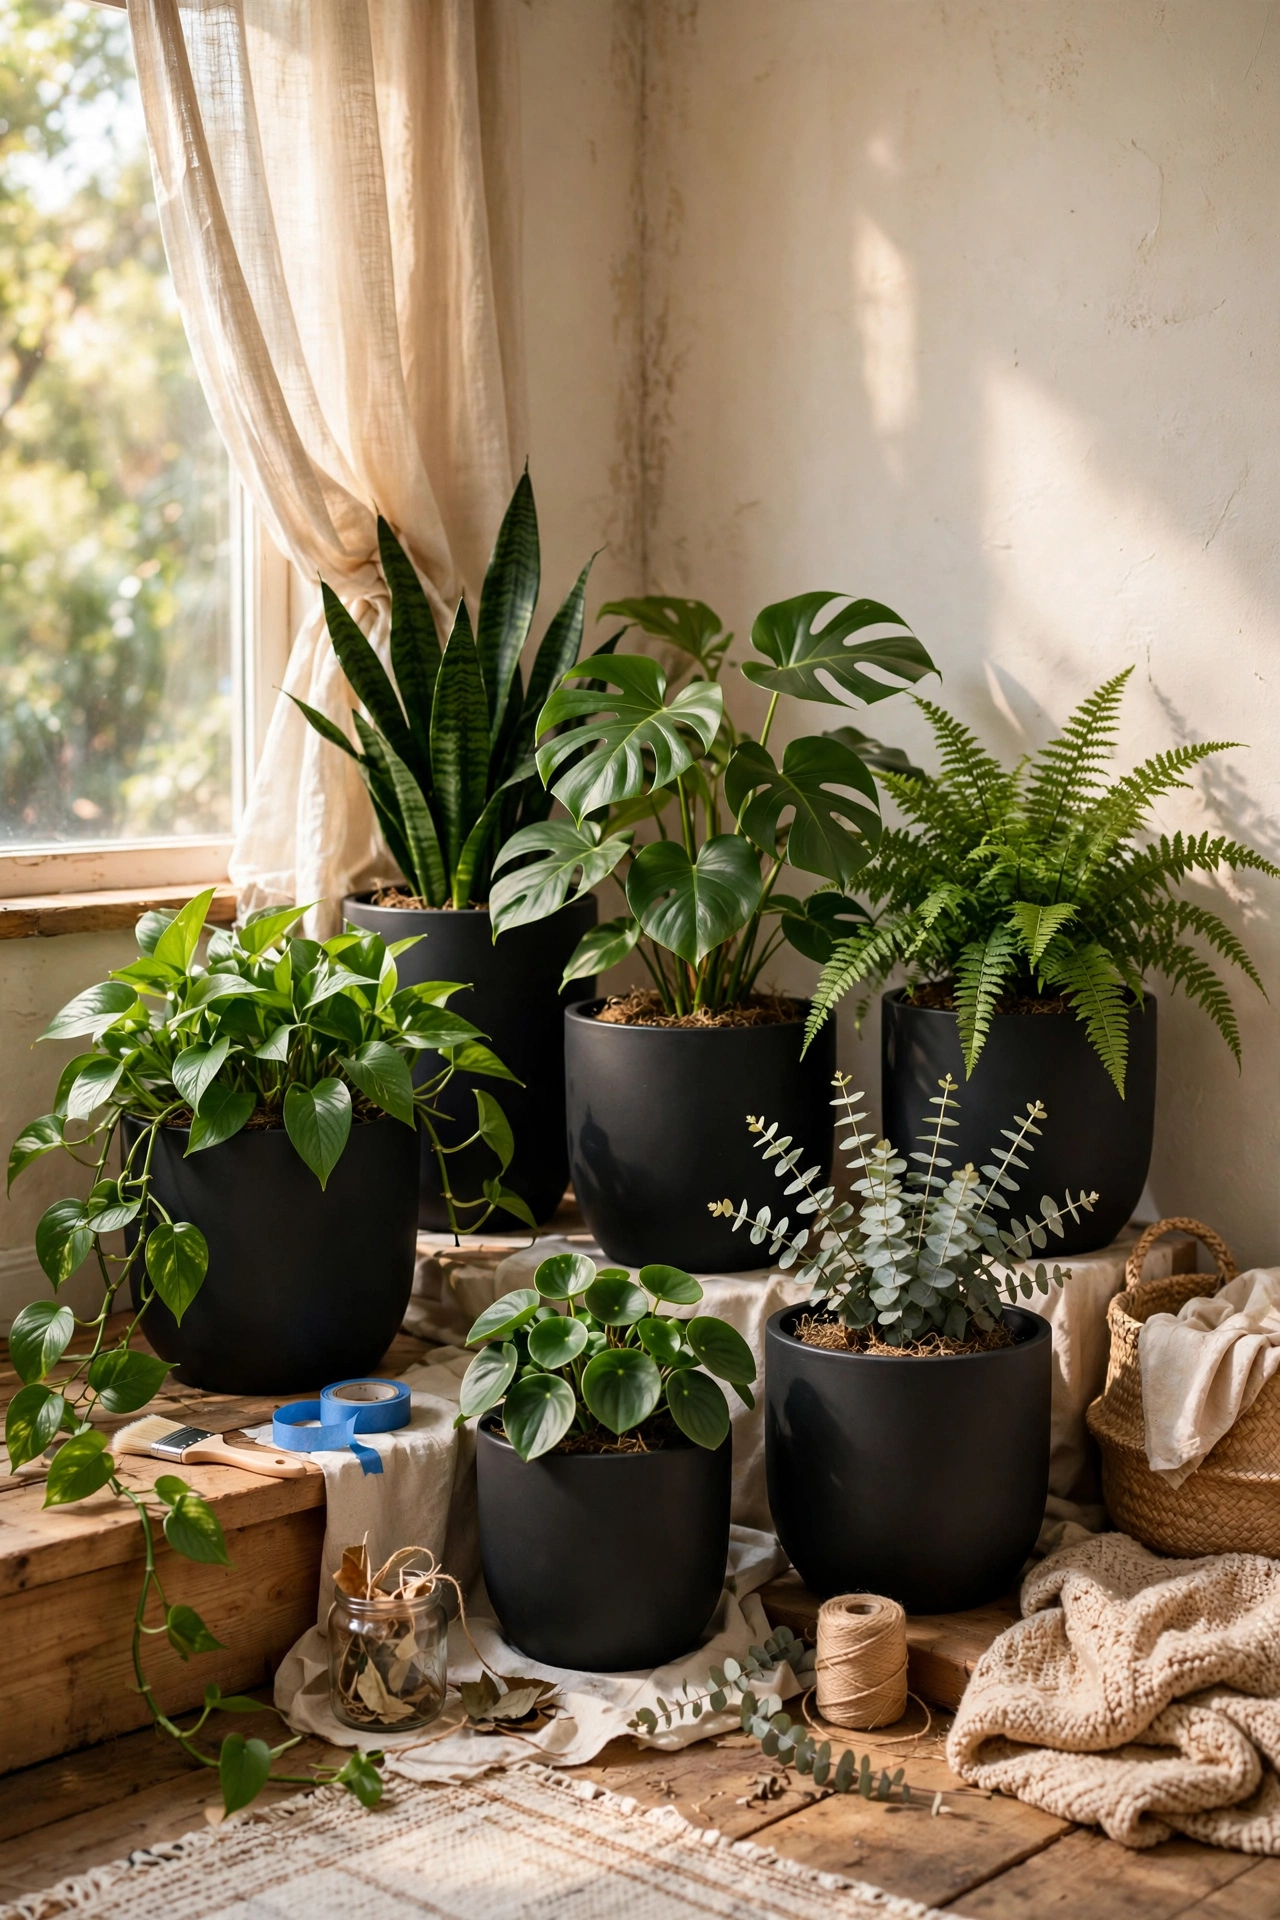
Sometimes the most expensive-looking finish is the simplest: matte black. Spray any ugly plastic nursery pot with matte black paint — two coats, primer first — and it instantly reads as a deliberate modern design choice. I converted every mismatched nursery pot in my house to matte black in one afternoon, and my plant corner finally looked intentional. Do choose true matte, not satin, because any sheen cheapens the effect. Don’t forget the inside rim, which shows when the soil sits low. Black makes green foliage pop dramatically, so put your leafiest plants in these.
Cost: ~$3-6 | Time: 20 minutes plus drying
7. Travertine-Look Planter with Plaster
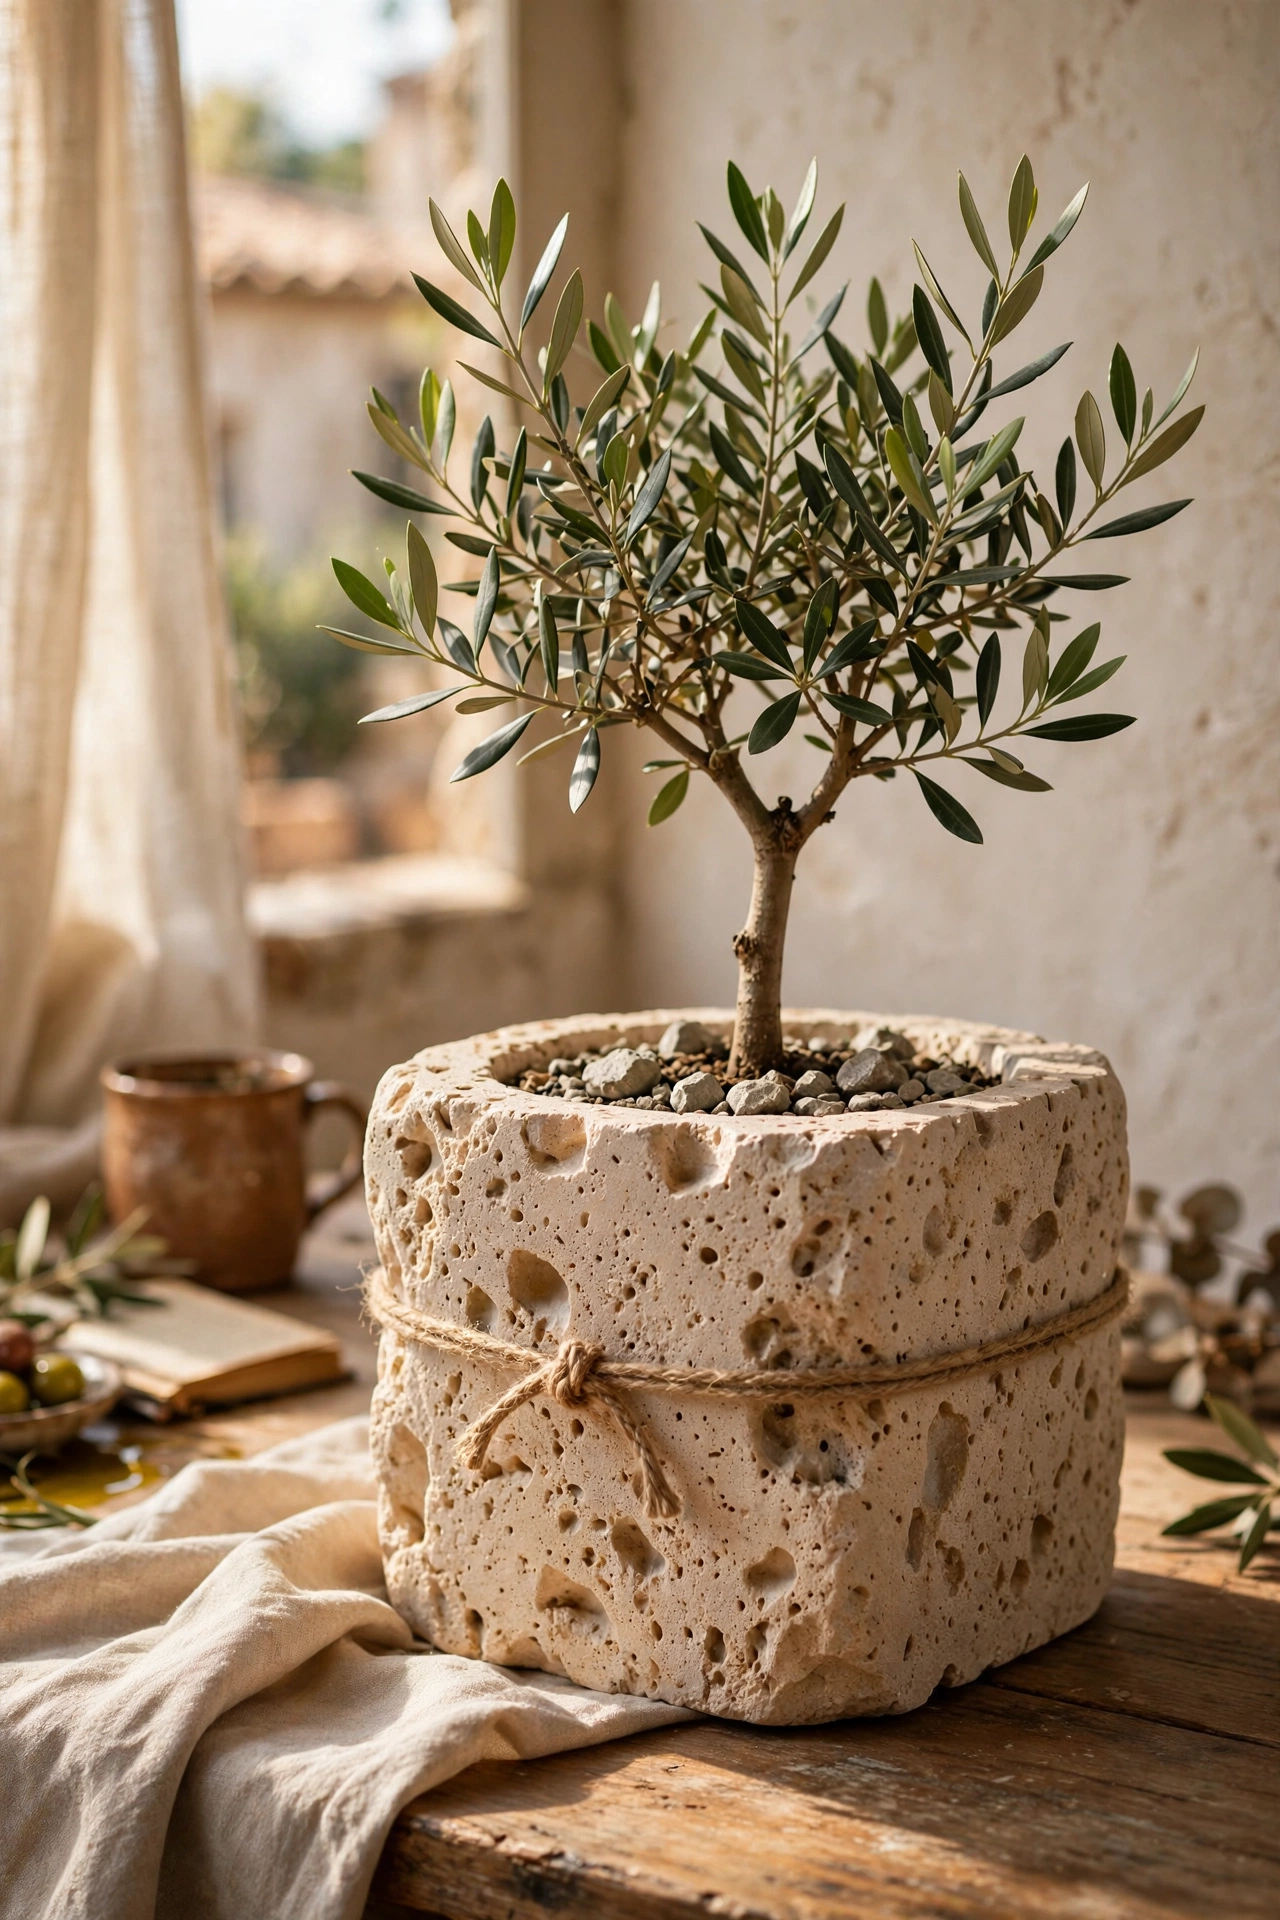
Travertine planters sell for hundreds, but plaster of Paris and a cheap pot fake the stone beautifully. Mix plaster to a thick yoghurt consistency, trowel it over a plain pot in uneven layers, and while it is still soft, press in small pits and streaks with your fingers and a fork to mimic natural stone. Paint with a wash of beige once dry. My travertine-look pot holds my olive tree and looks like it came from a Mediterranean villa. Do work in small sections, because plaster sets in about 20 minutes. Don’t make the surface perfectly smooth — travertine is full of pits and veins. Seal with matte outdoor sealer if it will live outside.
Cost: ~$6-12 | Time: 1.5 hours plus drying
8. Woven Basket Planters with Plastic Liners
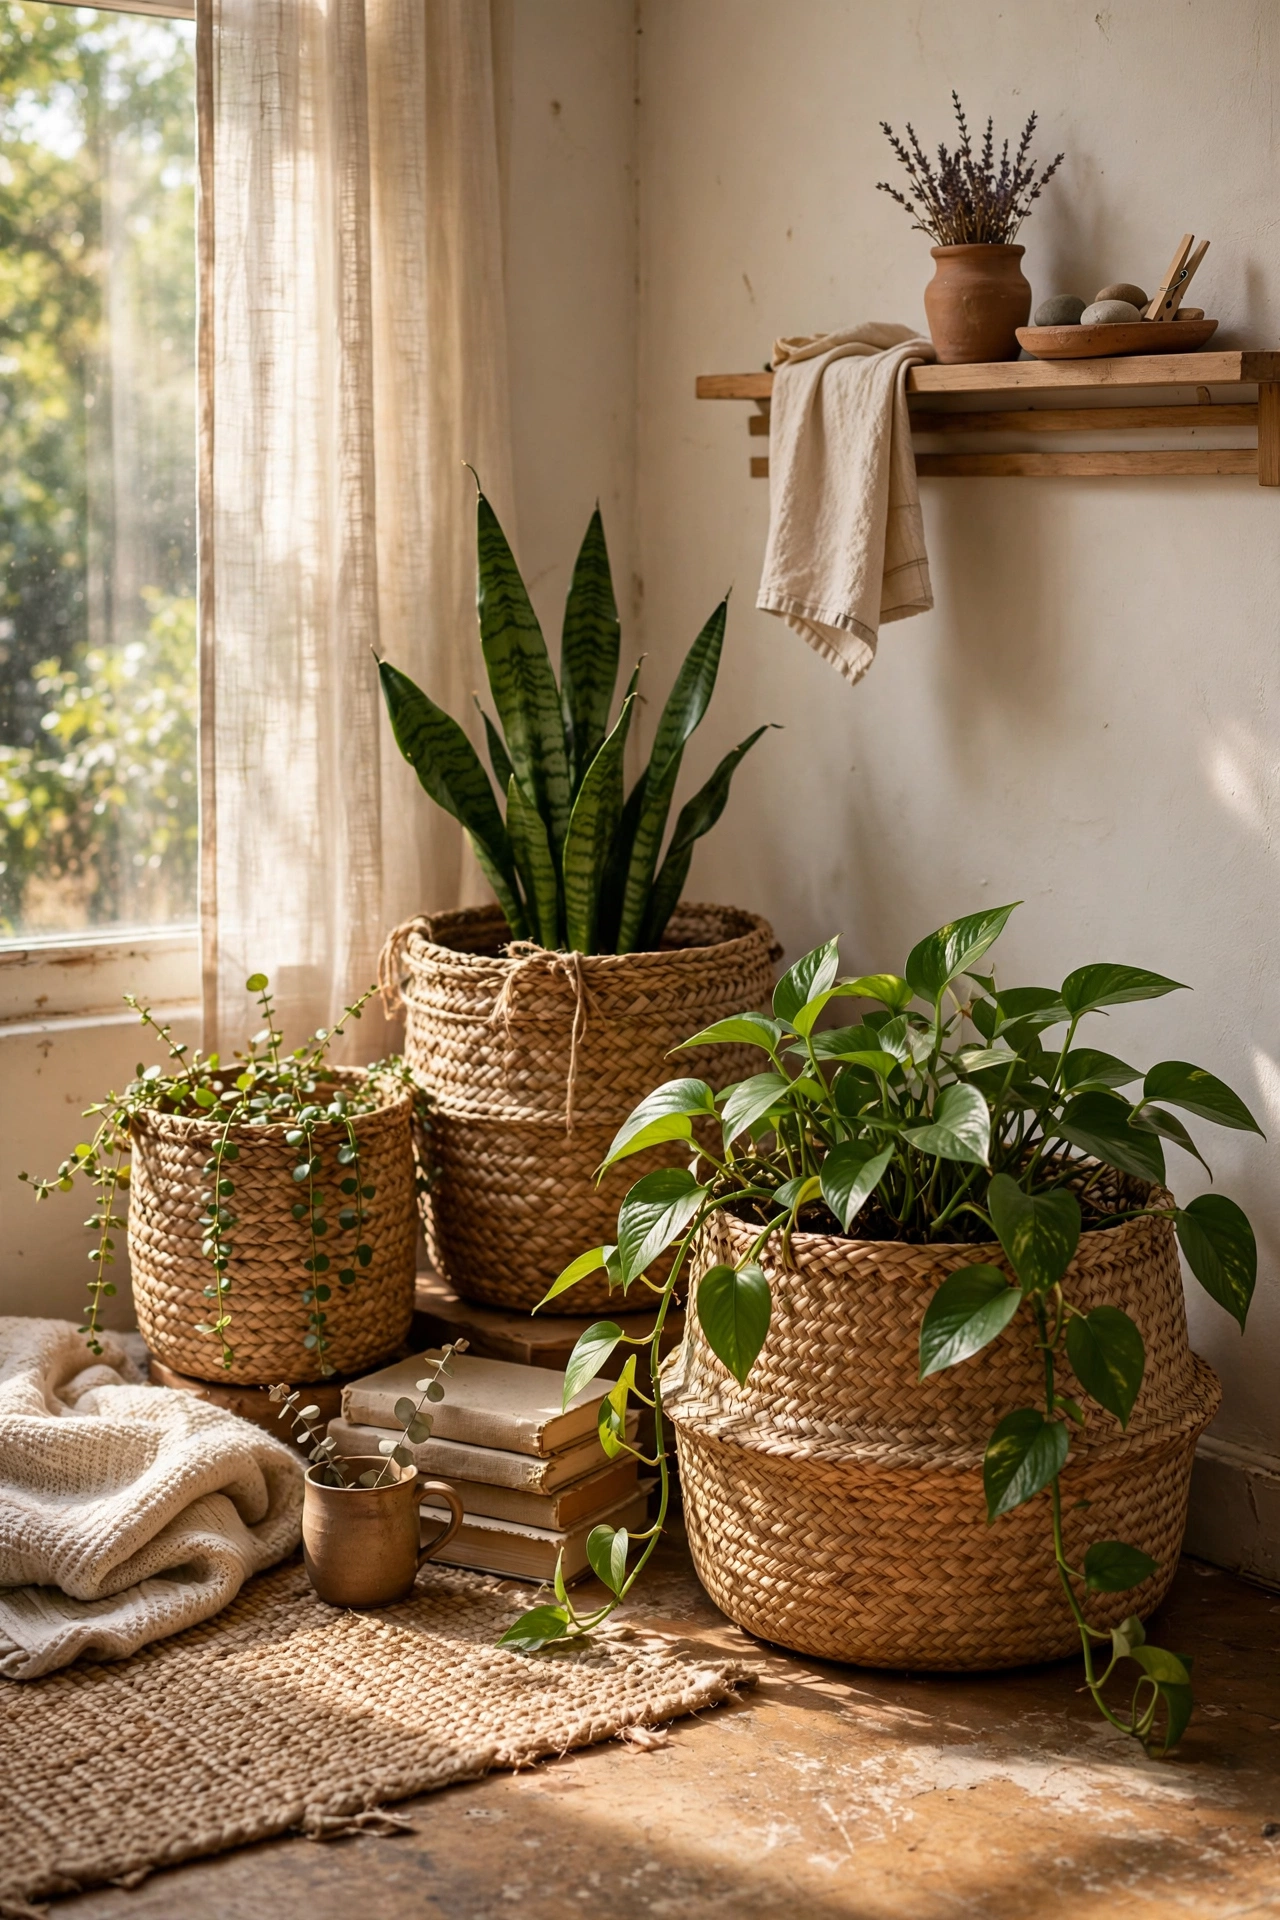
Basket planters are the designer trick for softening a room, and charity shops are full of suitable baskets for $2-4. The only technique is the liner: cut a plastic bag or pond liner to fit inside, fold it over the rim, and set your nursery pot inside so the basket never touches wet soil. I have five basket planters around my house and they add warmth no ceramic pot can match. Do choose baskets with a tight weave so soil does not sift through. Don’t plant directly into the basket — even lined, direct planting rots the base within a season. Trim the liner just below the rim so it stays invisible.
Cost: ~$3-8 | Time: 15 minutes
9. Footed Planters from Old Bowls and Candlesticks
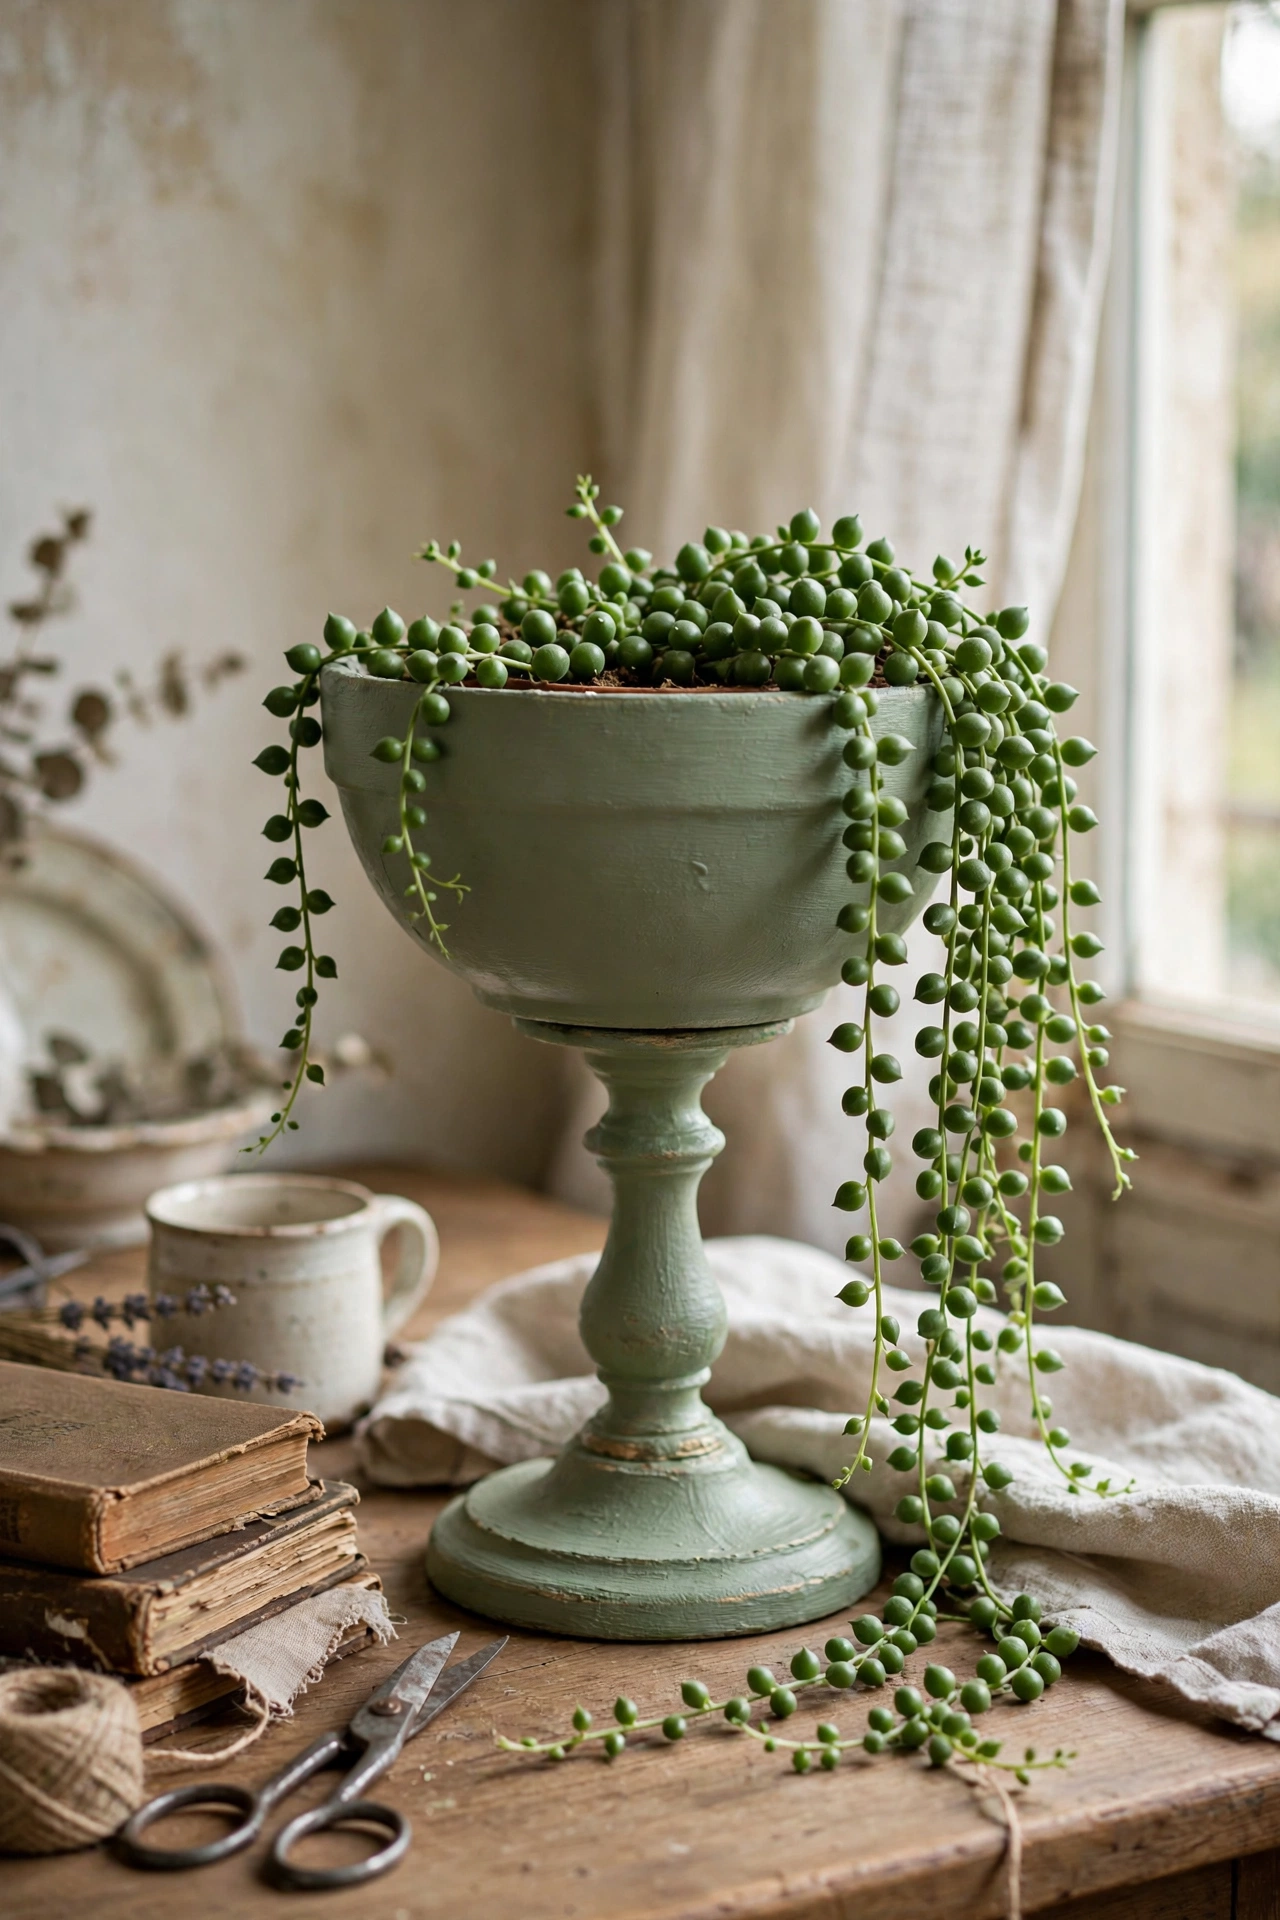
Footed planters look antique and expensive, and they are just a bowl glued to a candlestick. Find a shallow bowl and a sturdy candlestick at a charity shop, glue them together with strong epoxy, and paint the whole thing one colour — cream or sage works beautifully. I made a footed planter for my string of pearls and it looks like vintage French pottery. Do let the epoxy cure a full 24 hours before adding soil and weight. Don’t use a top-heavy bowl on a narrow candlestick, or it will tip. The unified paint colour is what makes two random objects read as one intentional piece.
Cost: ~$4-9 | Time: 20 minutes plus curing
10. Marble-Effect Planter with Contact Paper
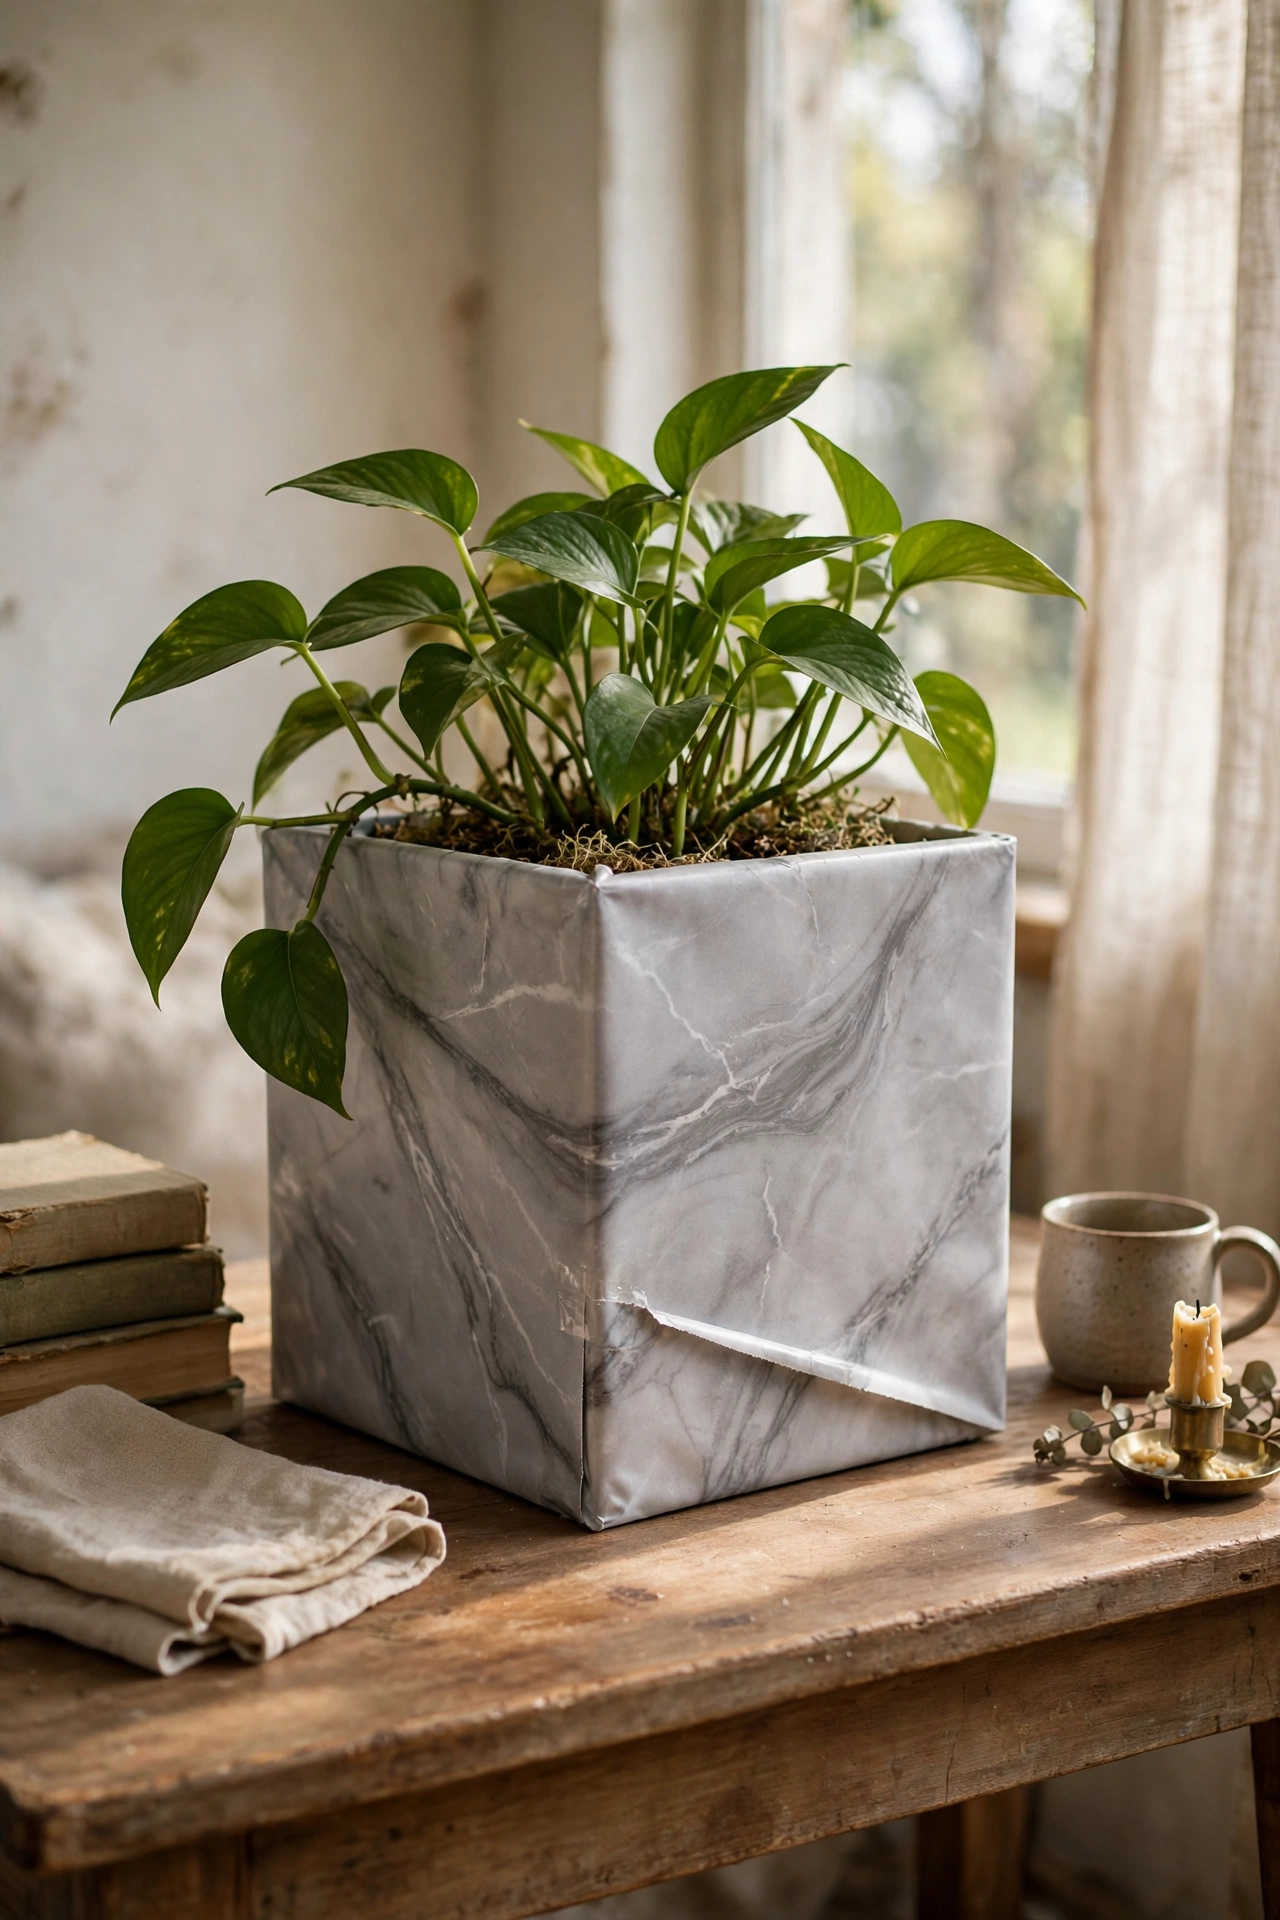
Marble contact paper wrapped around a square pot fools everyone at first glance. Choose a straight-sided pot, wrap it carefully in marble-effect adhesive vinyl, smoothing out bubbles with a credit card, and trim the top edge neatly. I wrapped a boring grey cube pot and it now anchors my console table like a $50 buy. Do pick a vinyl with soft grey veining rather than harsh black lines, which look fake. Don’t stretch the vinyl around corners — cut and overlap instead, or it springs back. This works best on geometric pots where the crisp lines suit the marble look.
Cost: ~$5-9 | Time: 25 minutes
11. Fluted Planter from a Cardboard Box
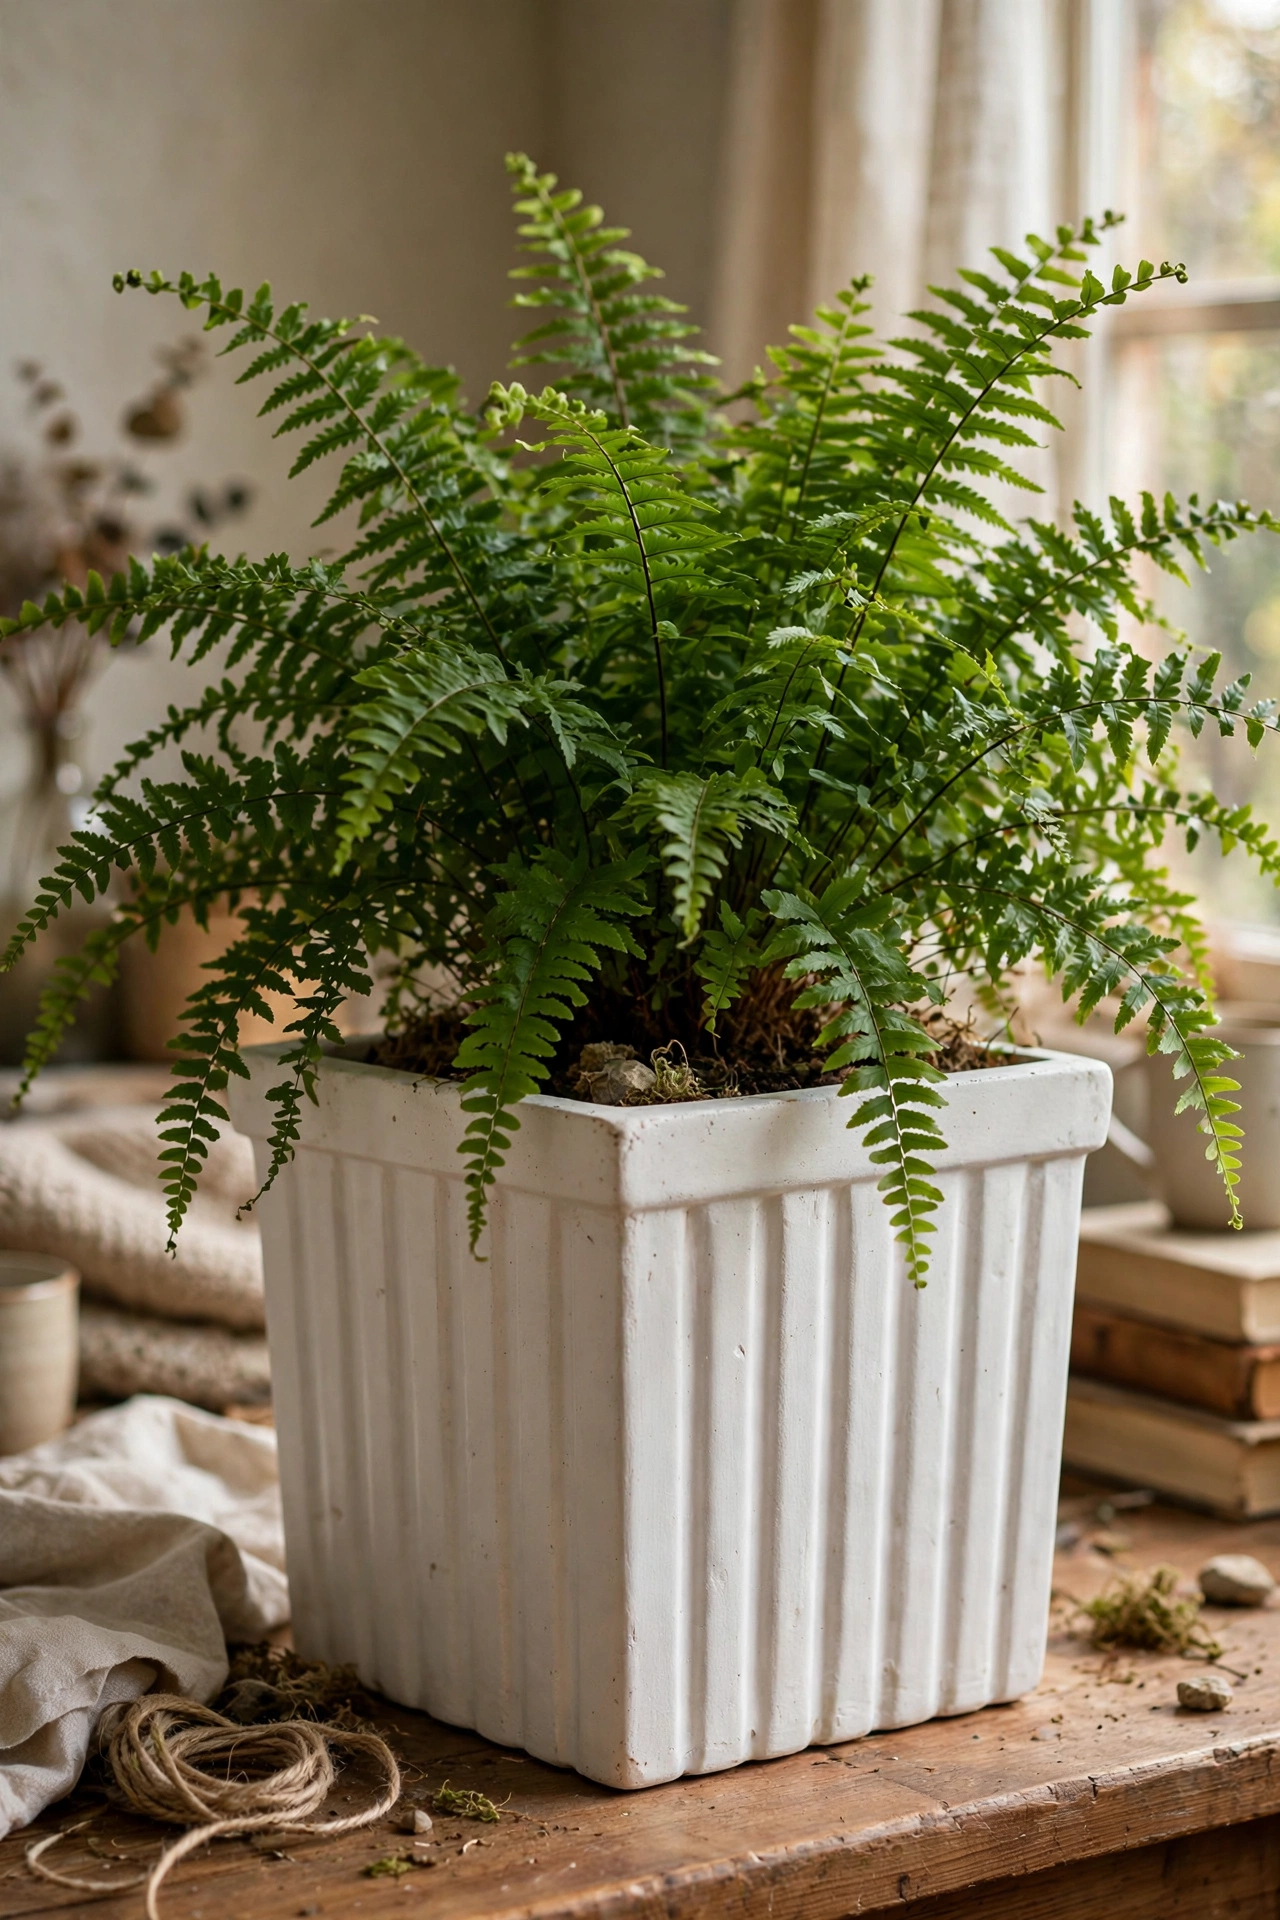
A square fluted planter built from cardboard sounds mad until you see the result. Cut four equal panels from thick cardboard, glue vertical half-round dowels or rolled paper tubes across each panel, assemble into a box with hot glue, and paint matte white. Seal thoroughly with matte varnish. I built one as a cachepot for a large fern and visitors tap it in disbelief. Do use it as a cachepot with a plastic pot inside, never for direct planting. Don’t rush the dowel spacing — uneven ribs are the giveaway. The fluting reads as expensive moulded ceramic from two metres away.
Cost: ~$6-10 | Time: 2 hours plus drying
12. Aged Terracotta with a Vinegar Wash
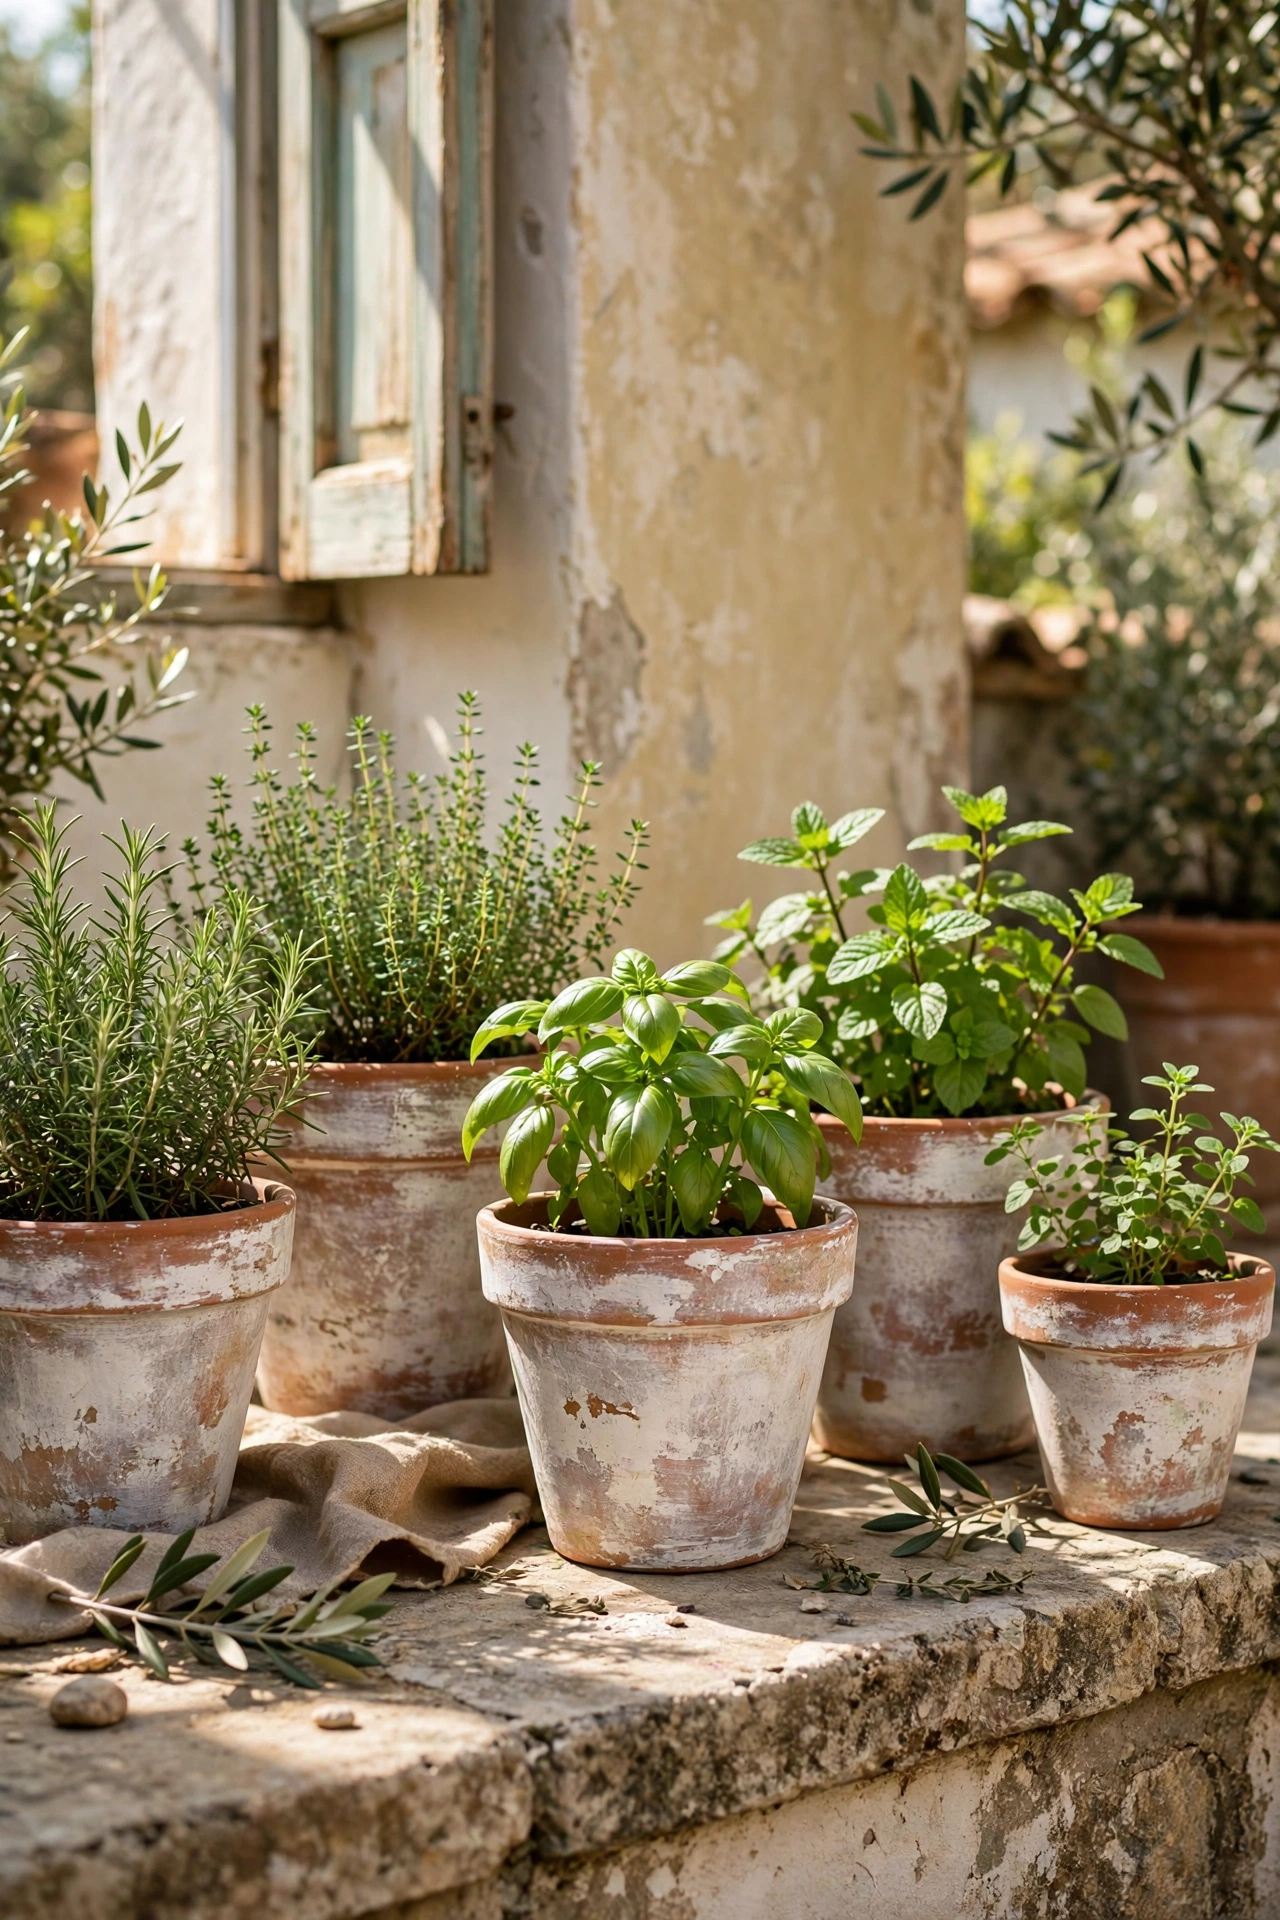
New terracotta looks flat; aged terracotta looks collected. Brush white vinegar over the pot, then dab on a thin wash of white and grey chalk paint, letting it settle into the pores. Finish by rubbing garden soil into the surface and brushing the excess off — it sounds odd but it creates a genuinely aged patina. My vinegar-washed pots look like they have sat in a Mediterranean courtyard for decades. Do work the paint into the texture rather than painting a flat coat. Don’t seal it, because the whole point is the chalky, weathered surface. Group three aged pots together for a proper old-garden feel.
Cost: ~$4-8 | Time: 45 minutes plus drying
13. Gold-Leafed Rim on Plain Ceramic
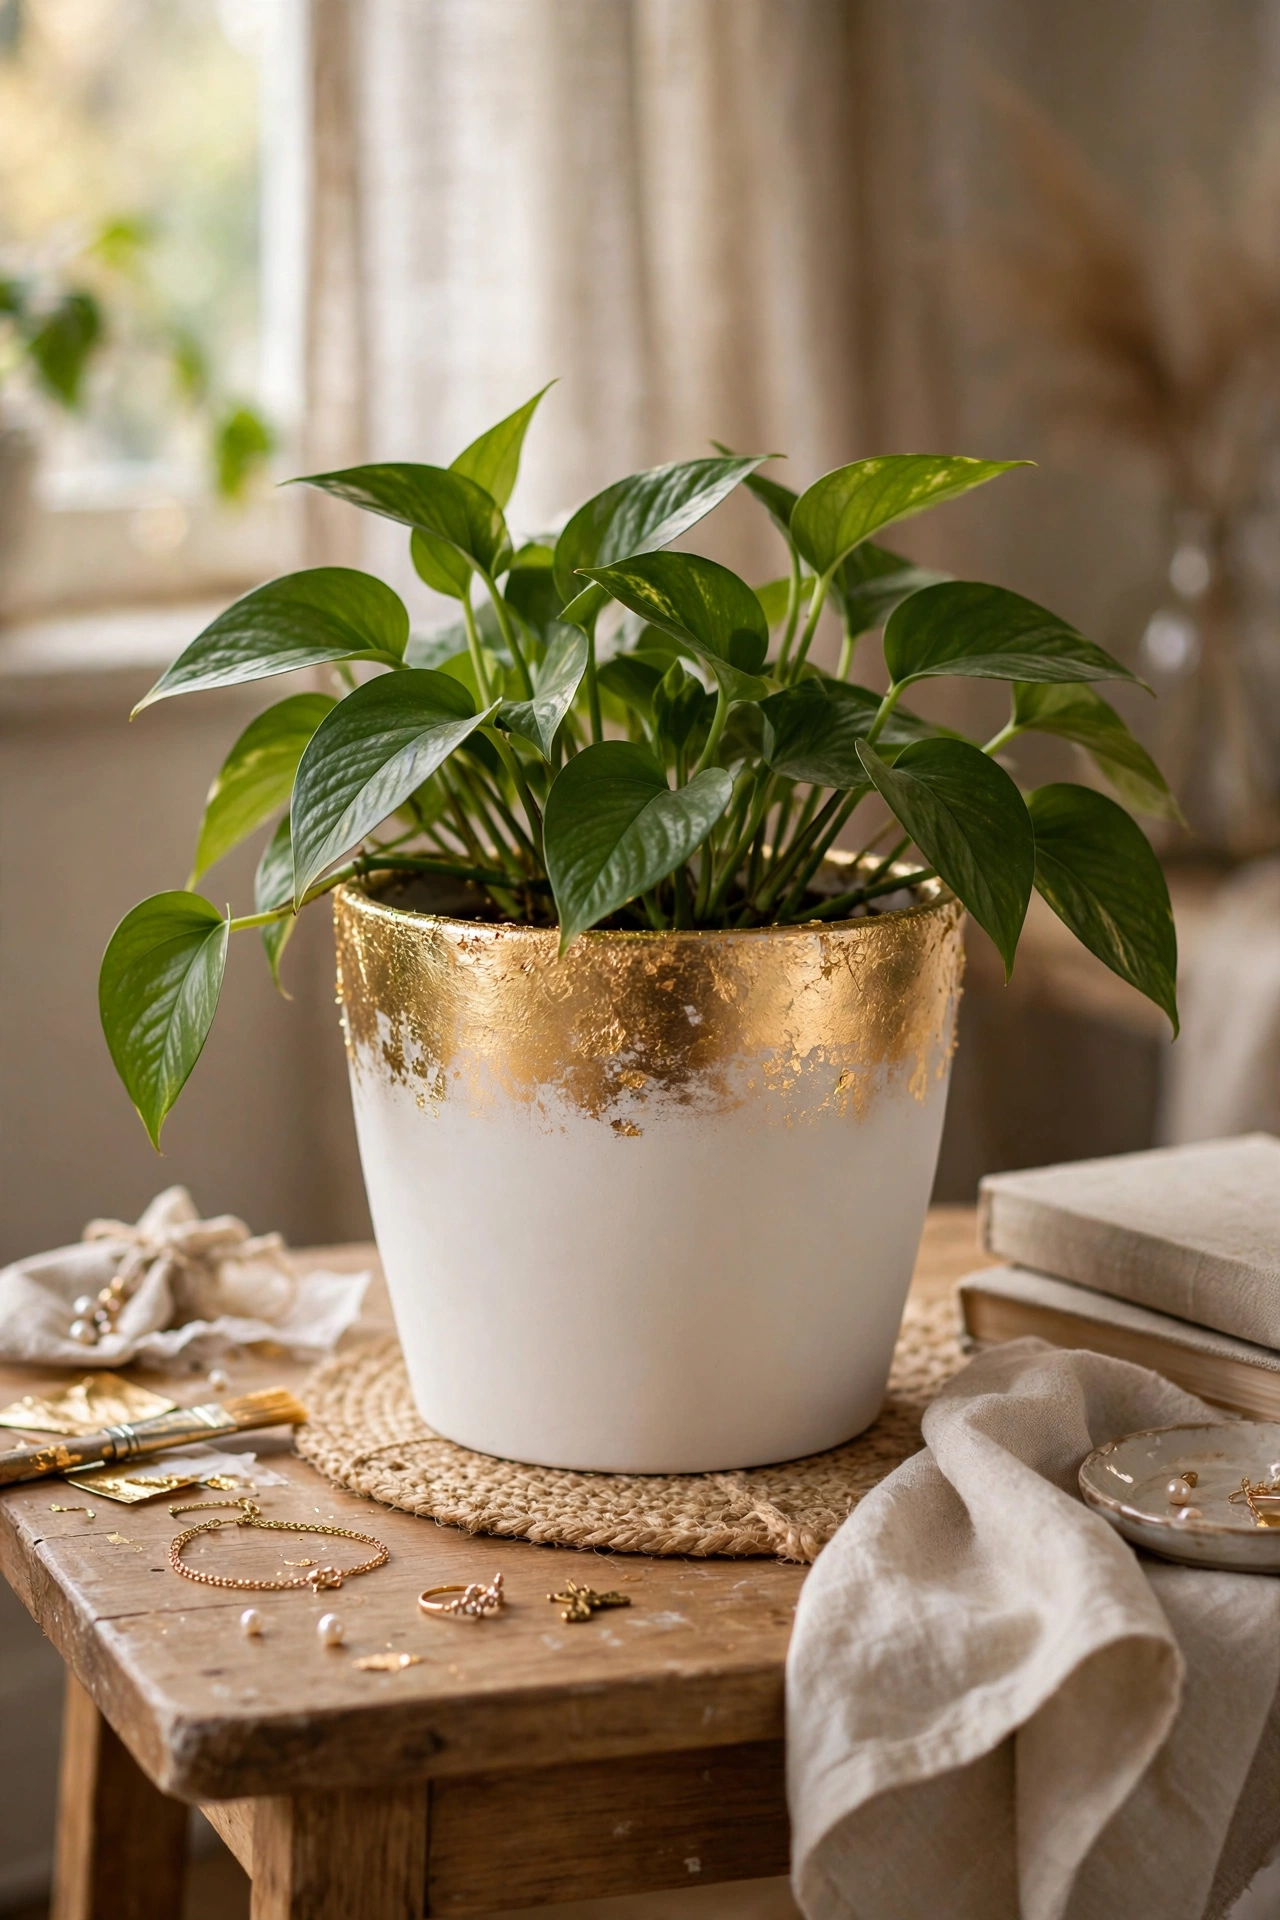
A gold-leafed rim is the jewellery of the planter world. Brush adhesive size around the rim of a plain white or black ceramic pot, wait until tacky, press on gold leaf sheets, and brush away the excess with a soft brush. Seal with a clear gloss sealer so it survives handling. I gold-leafed the rim of a $3 white pot and it looks like the designer pieces selling for $45. Do work over a tray, because gold leaf drifts everywhere. Don’t touch the finished leaf with bare fingers before sealing — the oils dull it. One rim is elegant; gold-leafing the whole pot is too much.
Cost: ~$6-12 | Time: 40 minutes plus drying
14. Striped Planter with Painter’s Tape Lines
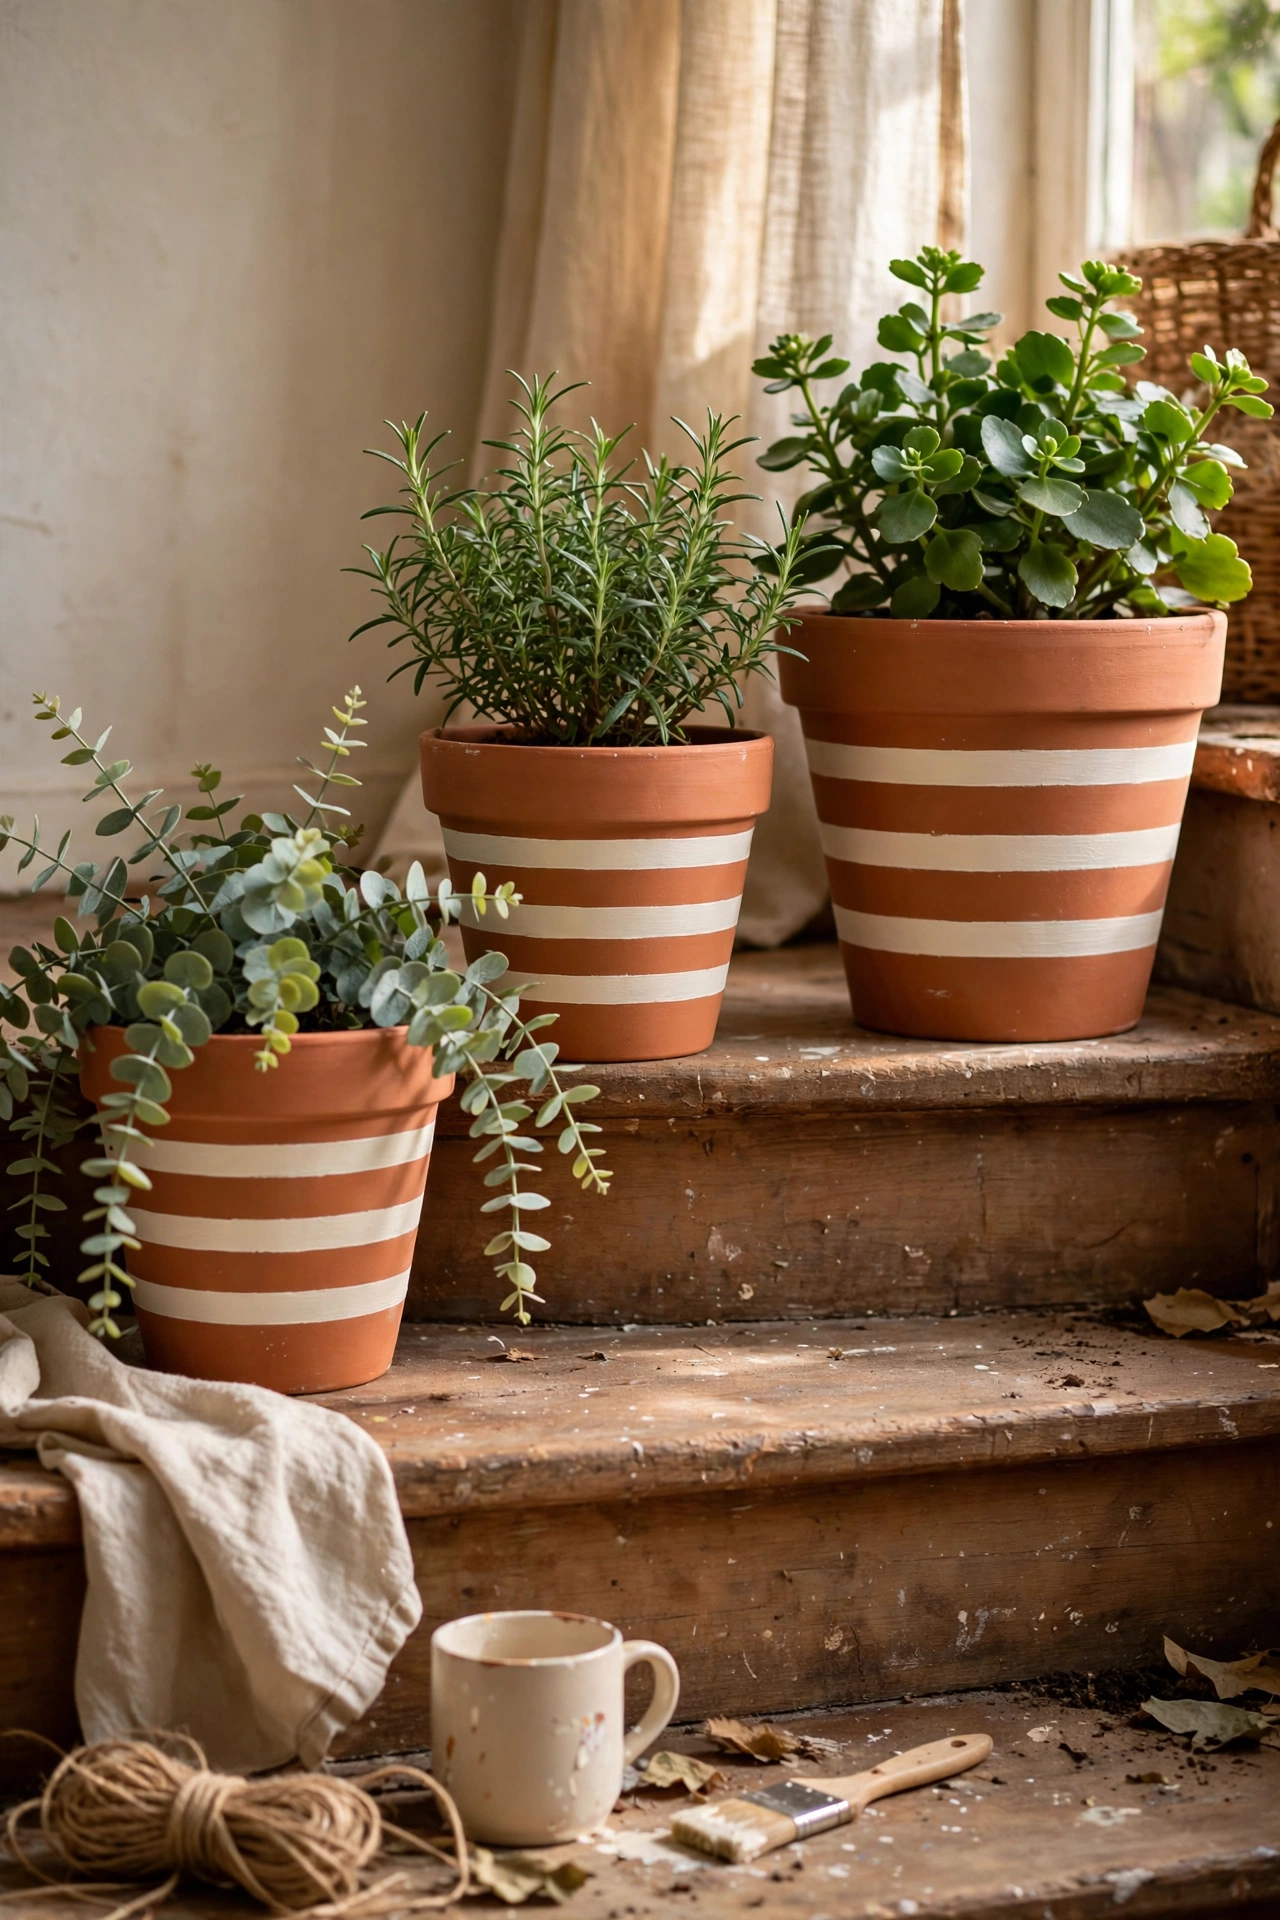
Crisp stripes make a planter look graphic and intentional, like the designer pots with $40 price tags. Paint the pot your base colour, let it dry fully, apply painter’s tape in even stripes, paint the second colour over, and peel the tape while the paint is still slightly tacky for the sharpest lines. I did wide cream and terracotta stripes on a set of three and they look straight out of a boutique. Do burnish the tape edges with a fingernail to stop paint bleeding underneath. Don’t use cheap masking tape — proper painter’s tape is the difference between crisp and ragged. Vertical stripes suit tall plants; horizontal suits trailing ones.
Cost: ~$4-8 | Time: 45 minutes plus drying
15. Hanging Macramé Planter from Cotton Cord
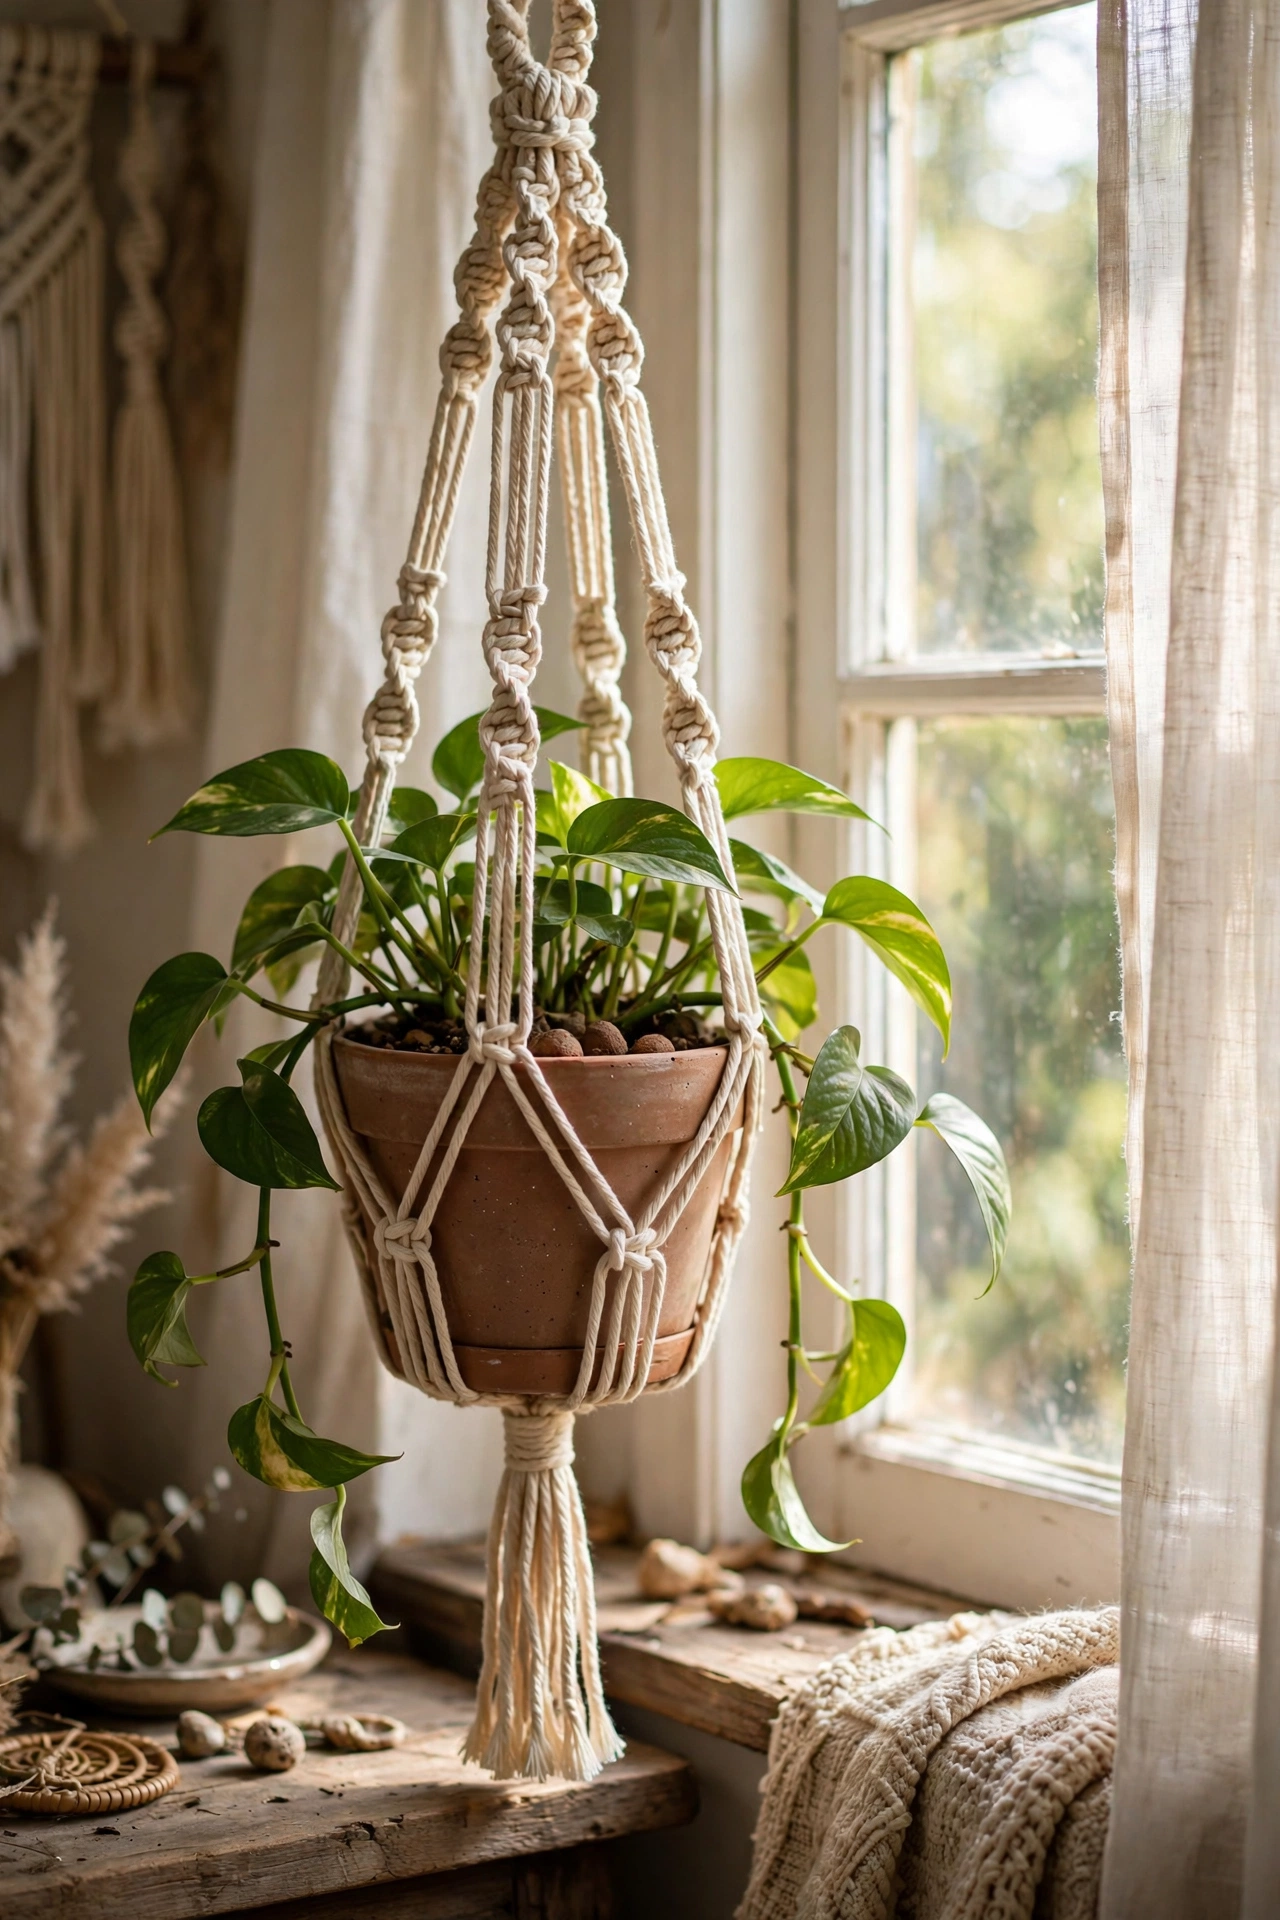
A macramé hanger turns any plain pot into a boho statement piece. You only need to learn two knots — the square knot and the gathering knot — and there are free tutorials everywhere. Cut four long cords, knot them around a metal ring, work square knots down the length, and gather at the bottom to cradle the pot. My first hanger took an evening and looked wonky; my third took an hour and looked shop-bought. Do measure your pot first and size the hanger to fit snugly. Don’t use stretchy cord, because the pot slowly sinks through. Hang near a window where trailing plants can cascade.
Cost: ~$5-10 | Time: 1-2 hours
16. Face-Profile Planter from Air-Dry Clay
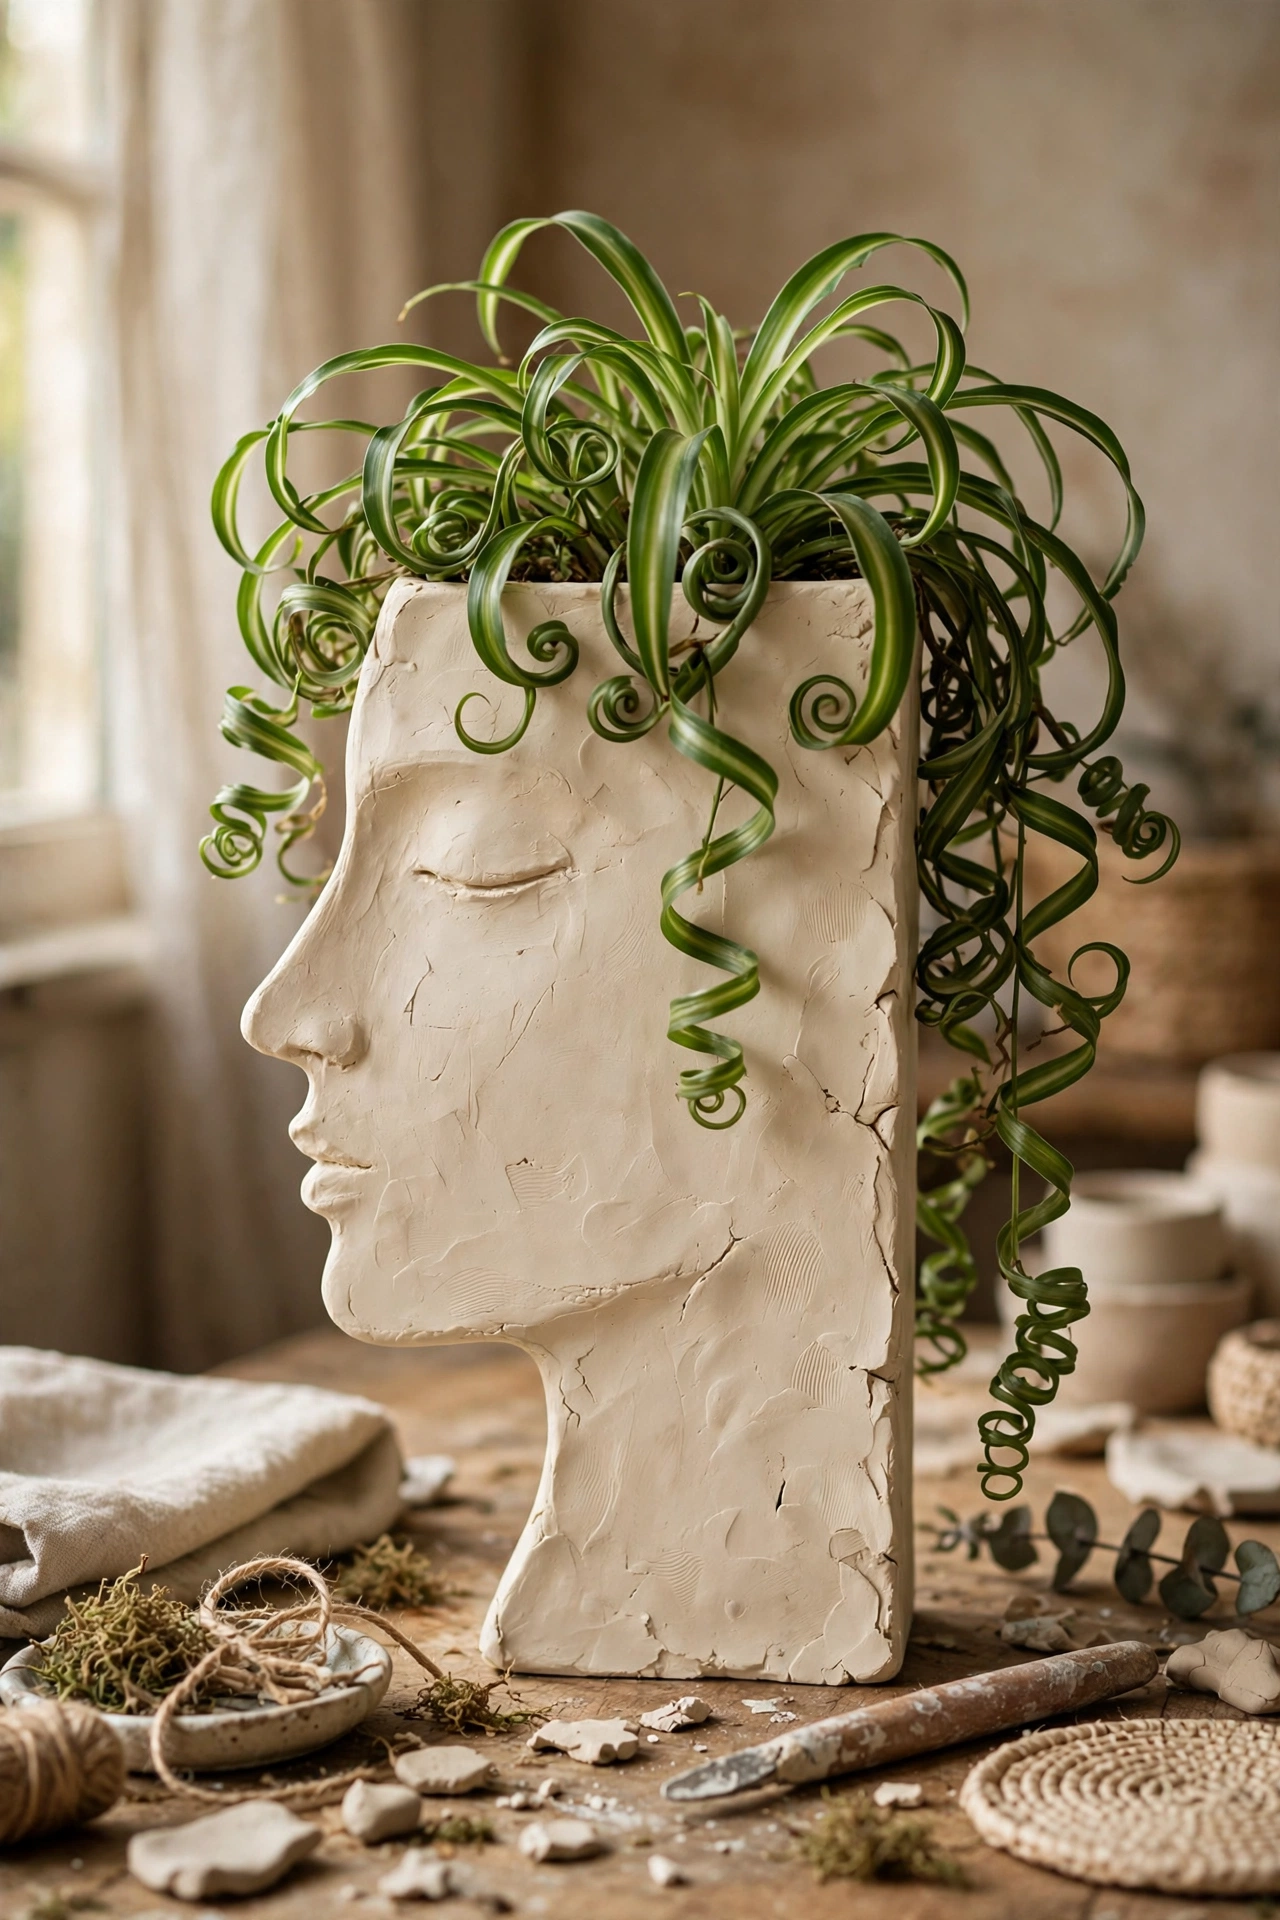
The sculptural face planters selling for $50 are just clay over a base pot. Roll air-dry clay into a slab, drape it over a straight-sided pot, smooth the seams, and sculpt simple closed eyes, a nose, and lips with your fingers and a toothpick. Paint matte cream or terracotta once fully dry. Mine holds a curly spider plant that looks like wild hair, and everyone asks where I bought it. Do keep the features simple and abstract — detailed faces look creepy, minimalist ones look arty. Don’t rush the drying; thick clay takes three days and cracks if hurried. Seal with matte varnish for durability.
Cost: ~$7-12 | Time: 2 hours plus 3 days drying
17. Two-Tone Dipped Planters
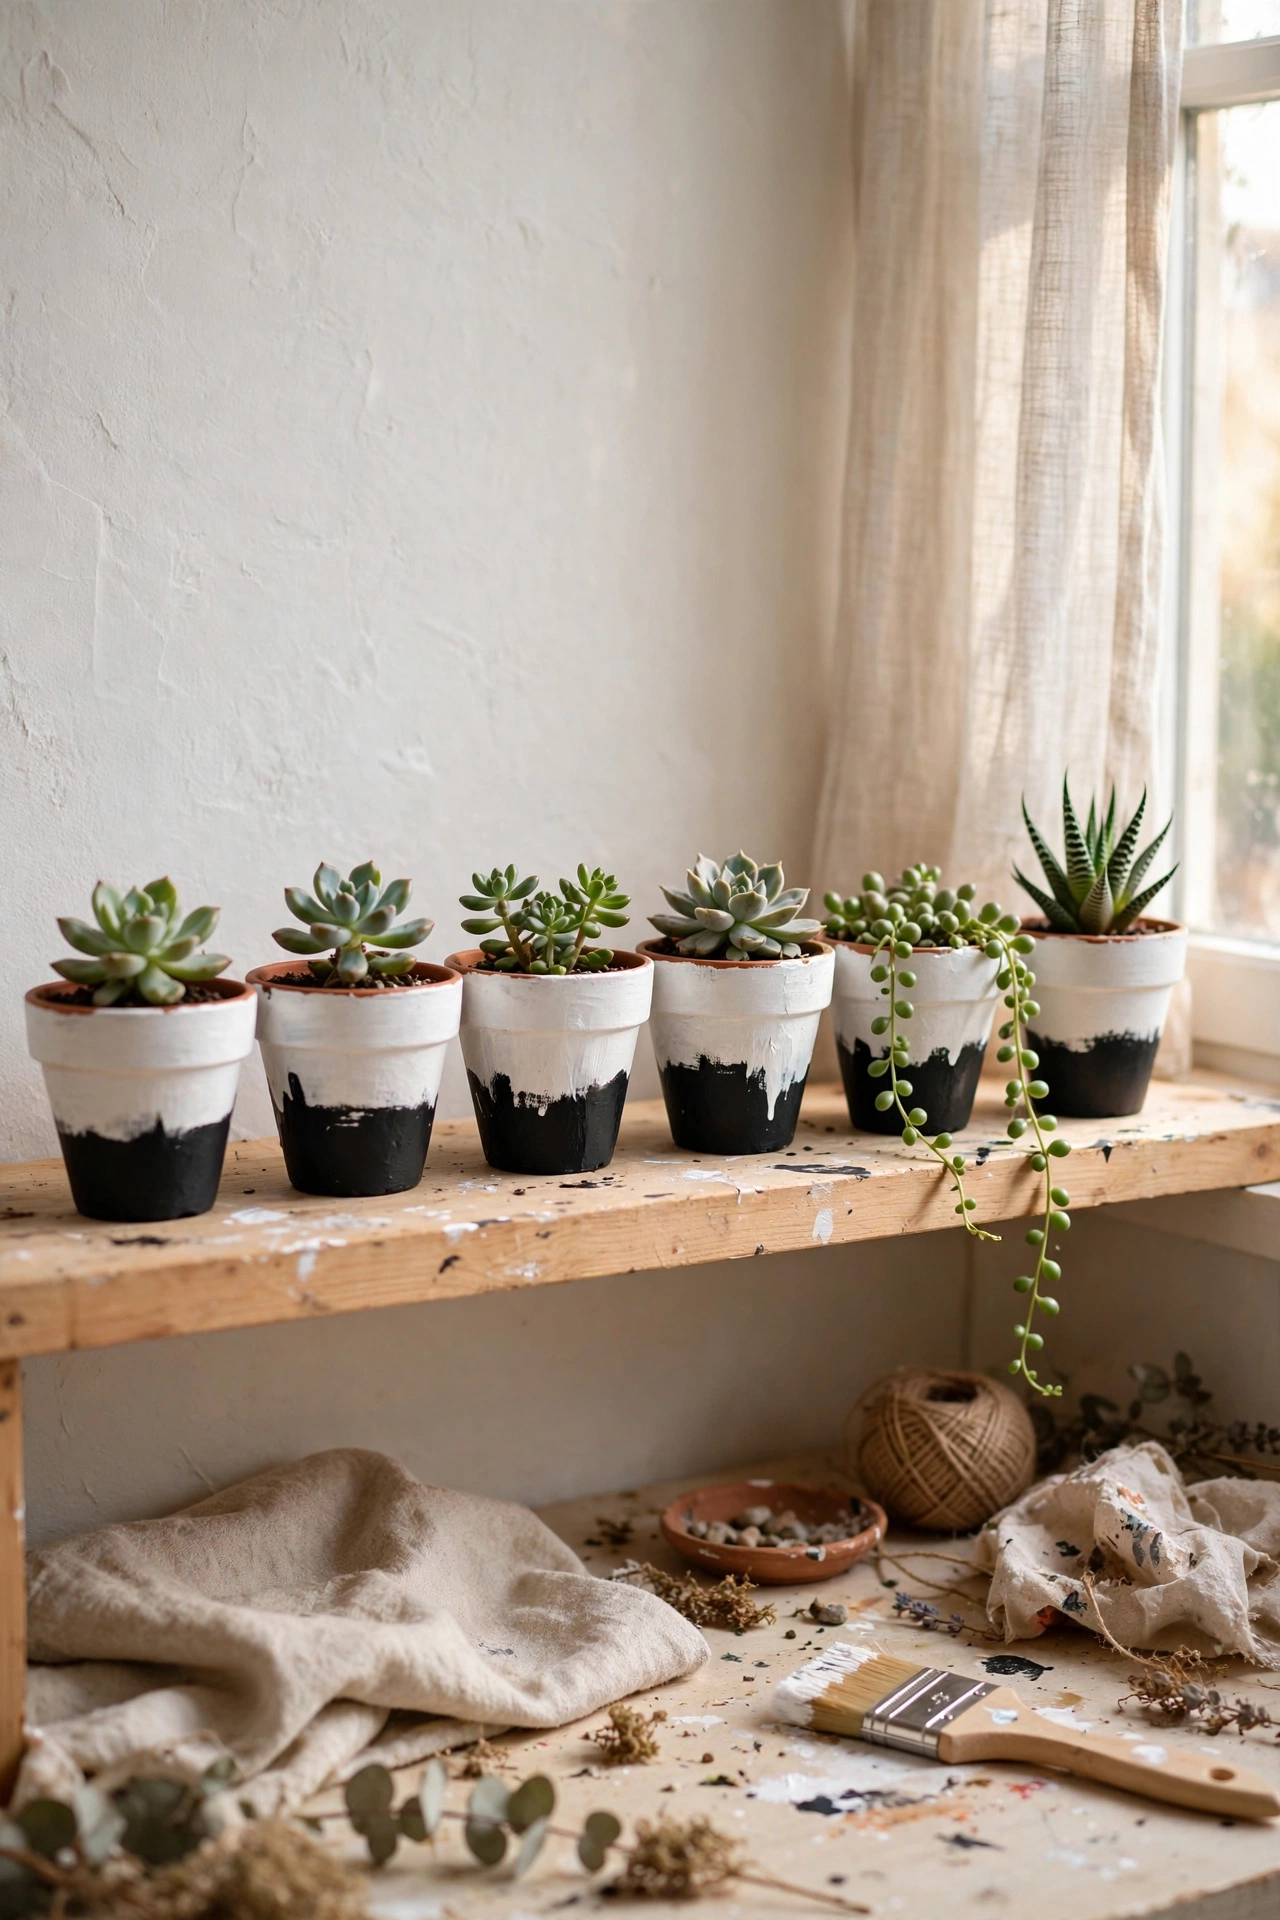
Two-tone dipped planters look like Scandinavian design pieces and take ten minutes. Paint a terracotta pot white, then dip or paint the bottom third in a contrasting colour — black, sage, or terracotta — keeping the dividing line crisp with painter’s tape. I dipped a whole row of small pots in black for my succulent collection and the shelf looks curated. Do let the base coat cure fully before taping, or the tape pulls paint off. Don’t eyeball the line — measure and mark it, because a wavy line ruins the minimal look. The two-tone trick works on any pot shape.
Cost: ~$4-8 | Time: 30 minutes plus drying
18. Etched Glass Planter from a Jar
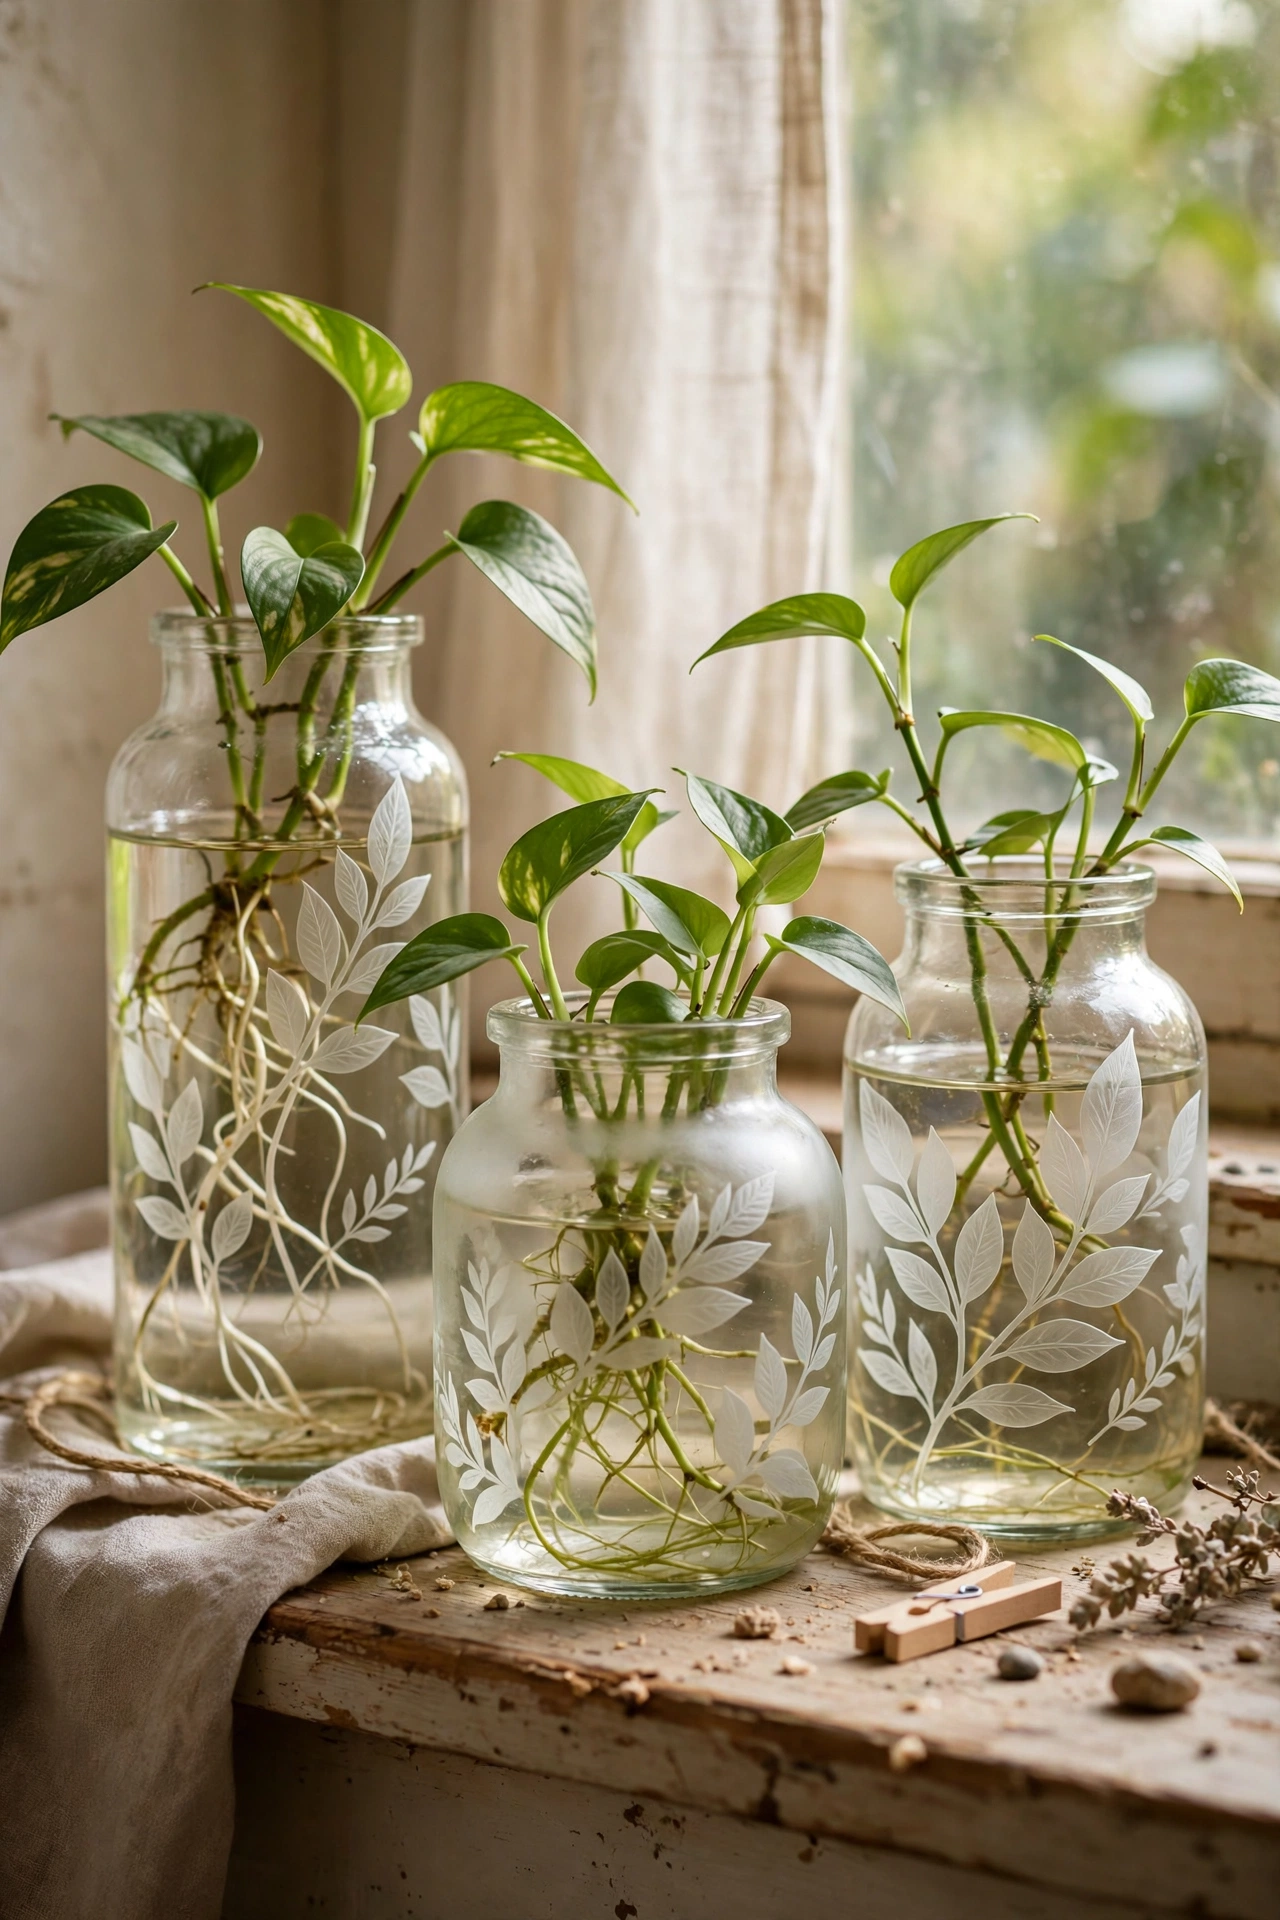
Etching cream turns a plain glass jar into a frosted designer planter. Apply adhesive stencils — leaves, dots, or geometric patterns — to a clean jar, brush on etching cream, wait 15 minutes, and rinse thoroughly. The result is permanent frosted detailing that looks sandblasted. I etched a set of jars with eucalyptus sprig stencils for my propagated cuttings and they look like apothecary glass. Do wear gloves, because etching cream is caustic. Don’t leave the cream on longer than directed — it does not etch deeper, it just risks uneven patches. Perfect for water-propagated plants where the roots show through.
Cost: ~$6-11 | Time: 40 minutes
19. Rustic Wood Crate Planter
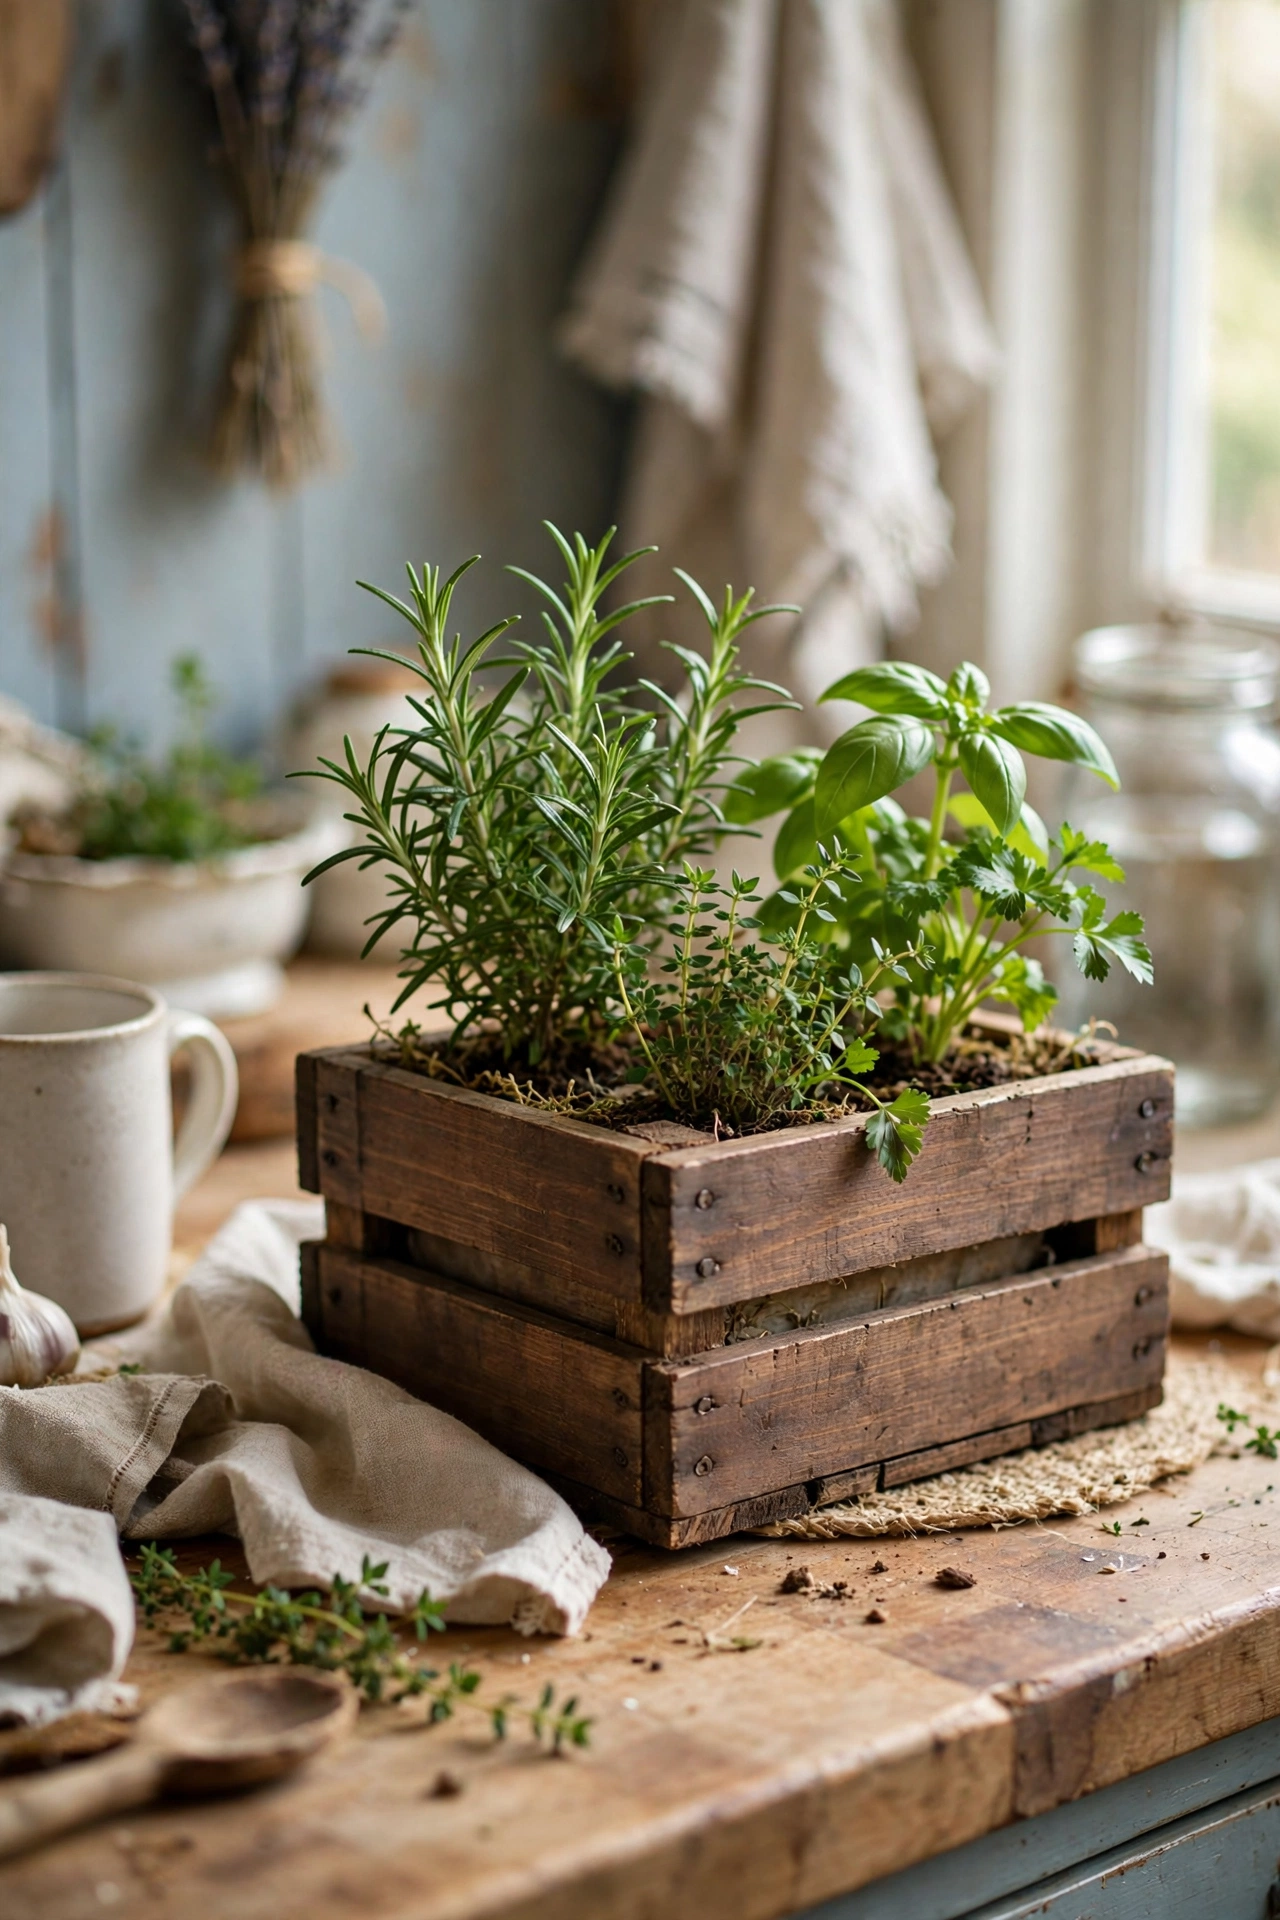
A wooden crate planter brings farmhouse charm to a porch or windowsill for the price of a coffee. Line a small wooden crate with landscape fabric, fill with compost, and plant herbs or trailing flowers directly. I screwed four small bun feet onto mine and stained it walnut, and it looks like a proper vintage piece. Do drill drainage holes if the crate will sit outdoors in rain. Don’t use an untreated crate for direct planting indoors without a liner — it will leak onto your sill. This is the best planter on the list for a kitchen herb garden.
Cost: ~$6-12 | Time: 45 minutes
20. Terrazzo-Look Planter with Sponge Dabbing
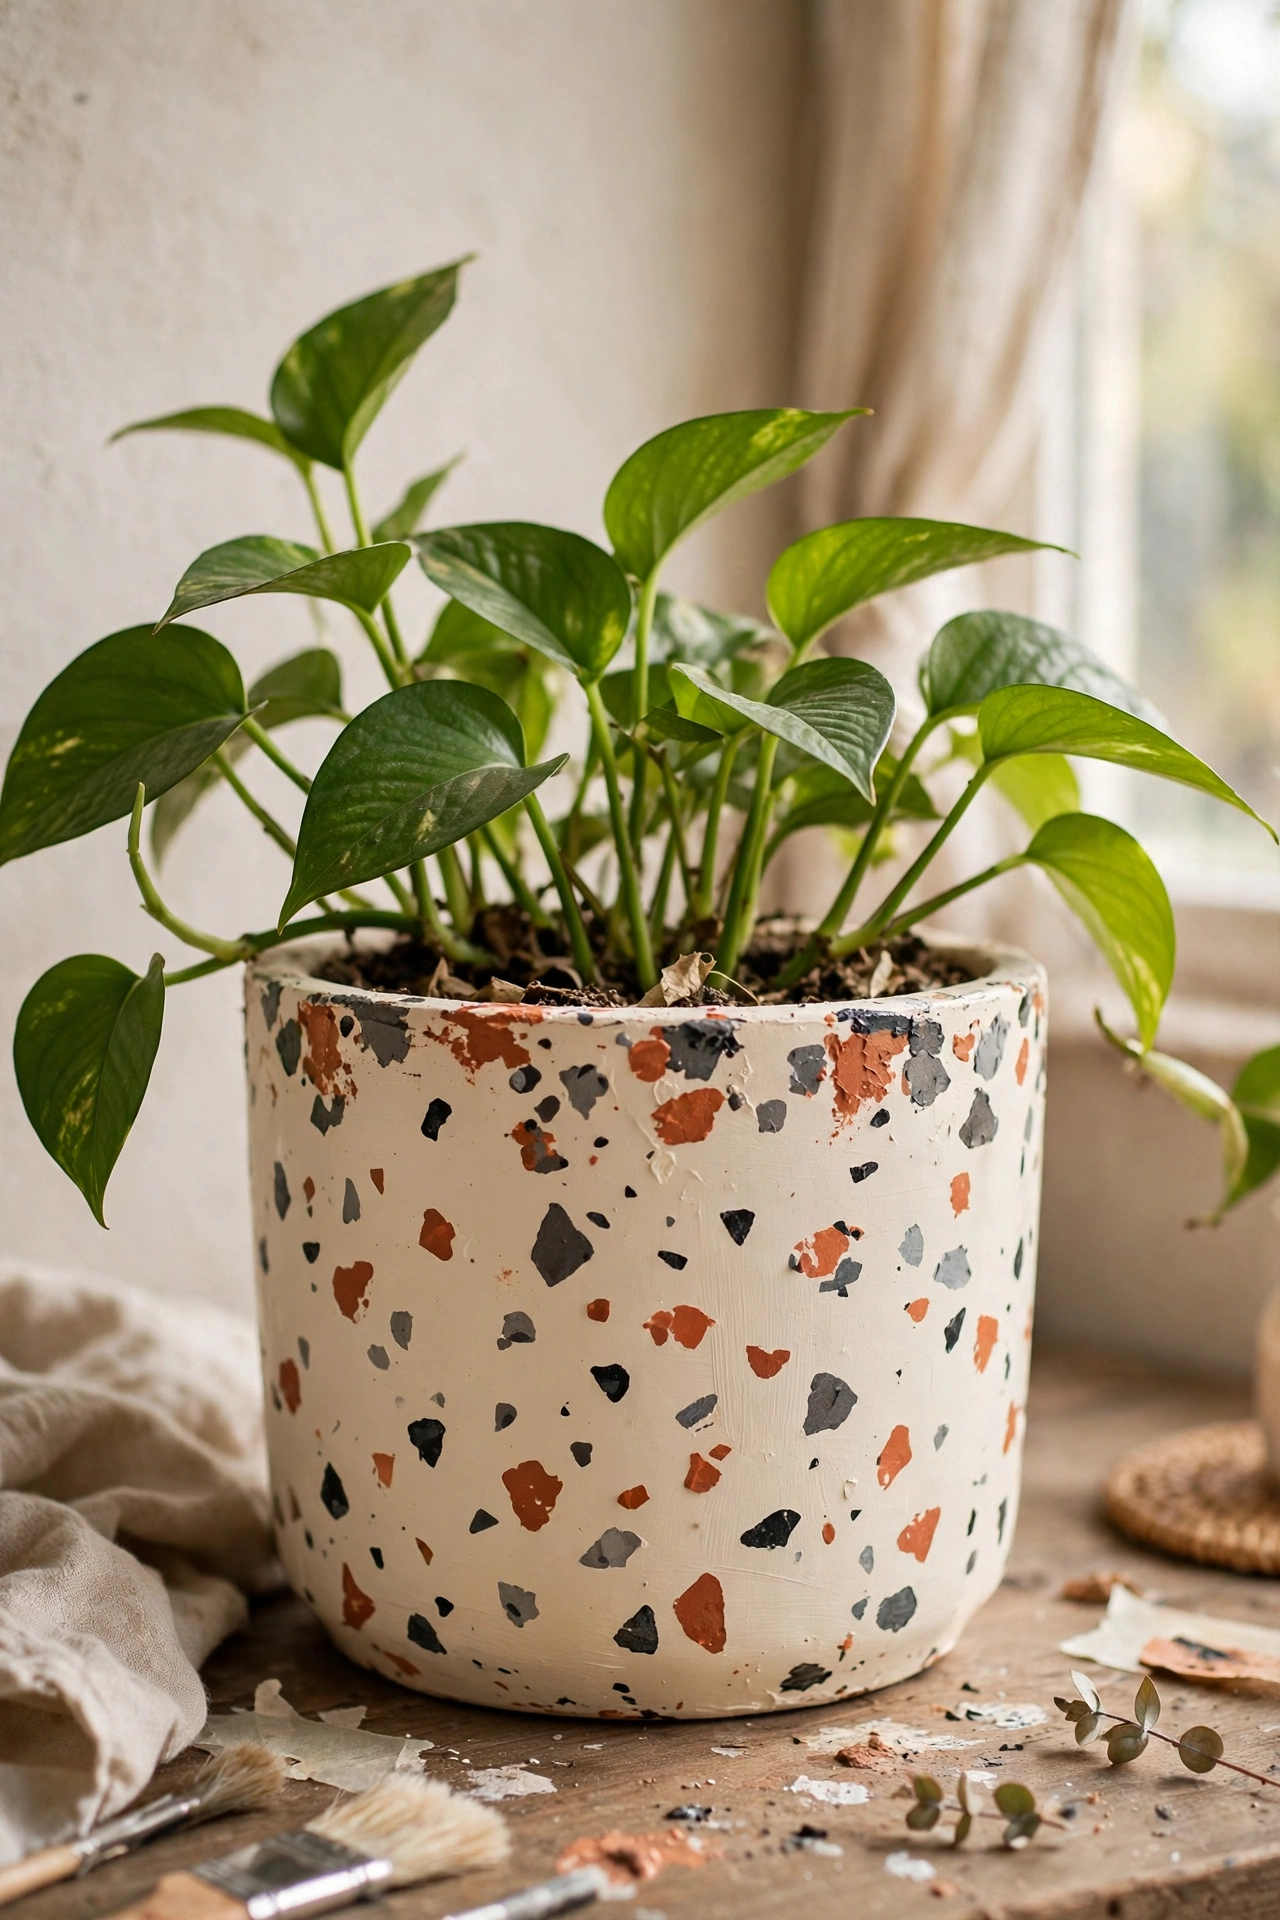
Terrazzo planters are a huge trend with a huge price tag, but sponge dabbing fakes the chips convincingly. Paint a pot matte cream, then dab on irregular chips of terracotta, grey, black, and sage with a torn sponge, keeping each chip small and random. Seal with matte varnish. I terrazzo-ed a set of nursery pots and they look like the $35 versions from homeware shops. Do step back frequently to check the overall balance — it is easy to over-dab one side. Don’t make the chips uniform in size; real terrazzo is gloriously random. Small chips read more expensive than big ones.
Cost: ~$5-9 | Time: 40 minutes plus drying
21. Minimalist White Planter with Clay Feet
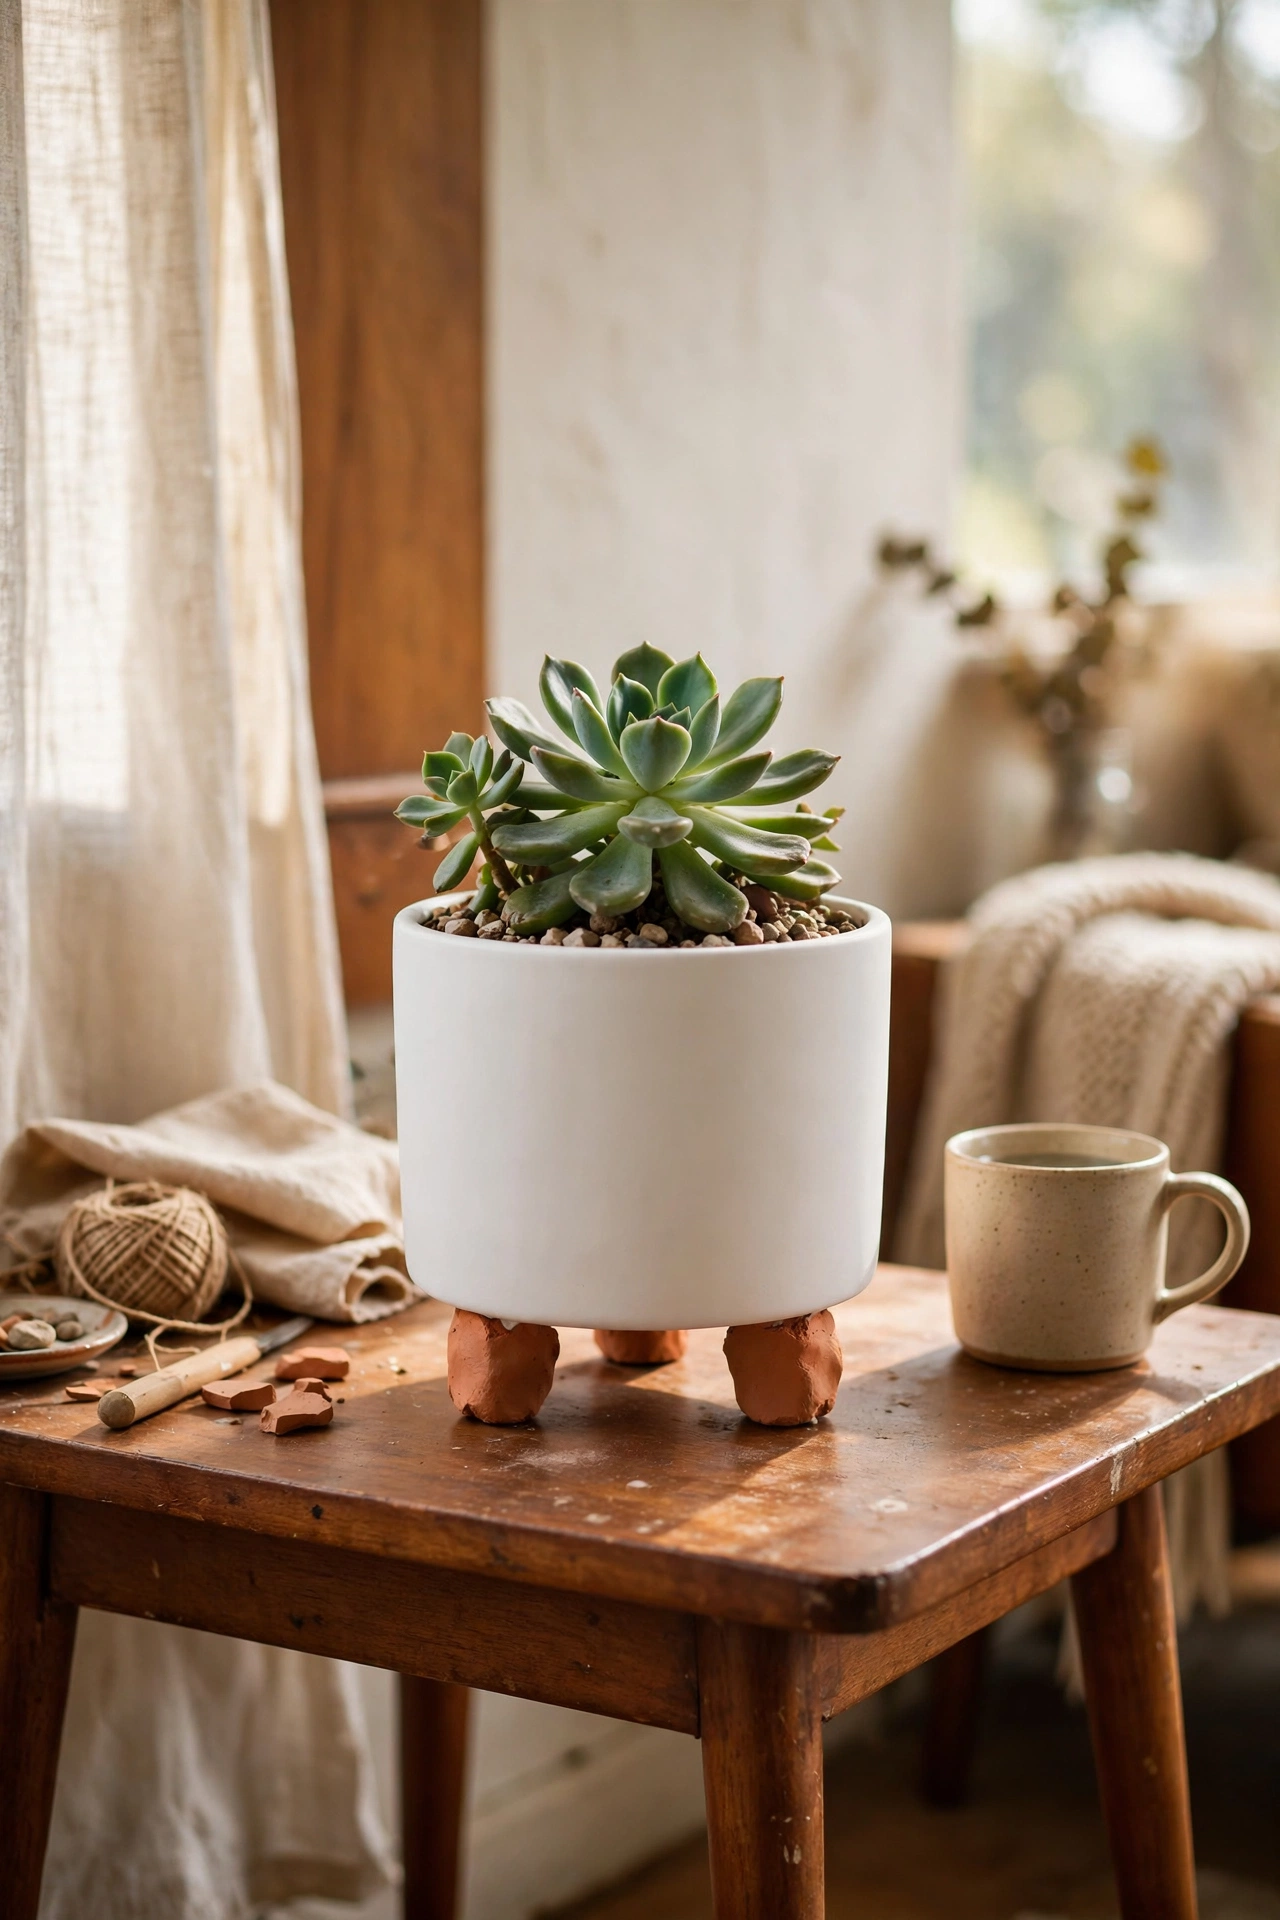
Three little clay feet transform a plain white pot into a mid-century style piece. Roll air-dry clay into three stubby tapered legs, score and slip them onto the base of a white ceramic or painted pot, and let dry fully. Paint the feet to match the pot for a clean, unified look. I added feet to a $4 white pot and it now looks like the Scandinavian designs selling for ten times that. Do make the feet chunky enough to bear the weight of soil and plant. Don’t attach them with glue alone on a heavy pot — the clay bond is stronger. Even feet matter, so measure as you go.
Cost: ~$5-9 | Time: 1 hour plus 2 days drying
22. Patterned Planter with Stencils
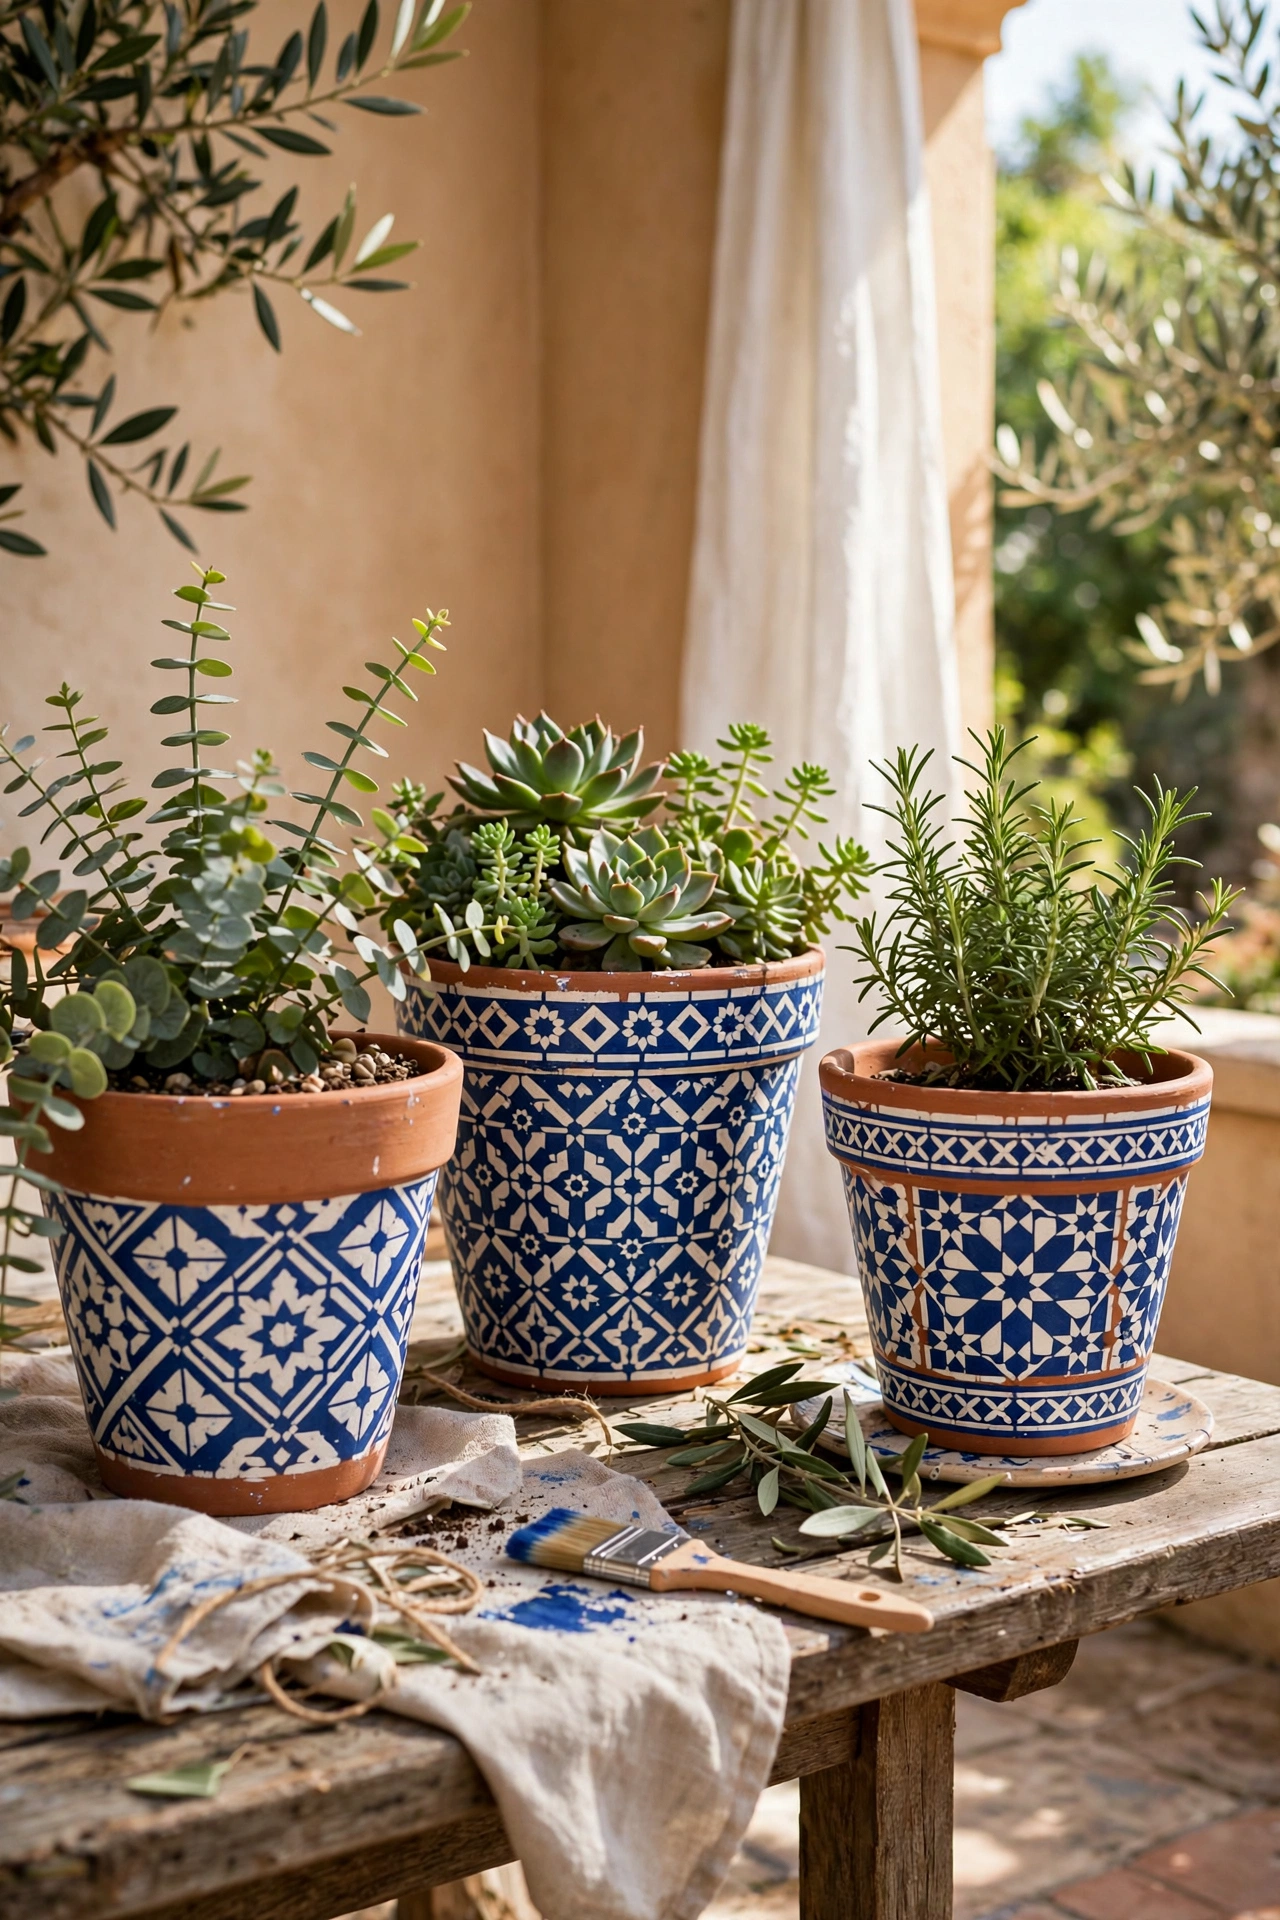
Stencilled patterns give a planter the hand-painted artisan look for the cost of a stencil. Paint the pot a solid base colour, position a tile or Moroccan stencil, and dab contrasting paint through with a nearly-dry brush, repositioning to repeat the pattern around the pot. I stencilled a blue-and-white pattern on terracotta pots for my patio and they pass for imported ceramics. Do secure the stencil with painter’s tape at the top so it does not slip mid-dab. Don’t overload the brush — dry-brushing gives the crisp, slightly imperfect finish that reads handmade. Seal for outdoor use.
Cost: ~$6-11 | Time: 1 hour plus drying
23. Copper-Painted Planter from a Bucket
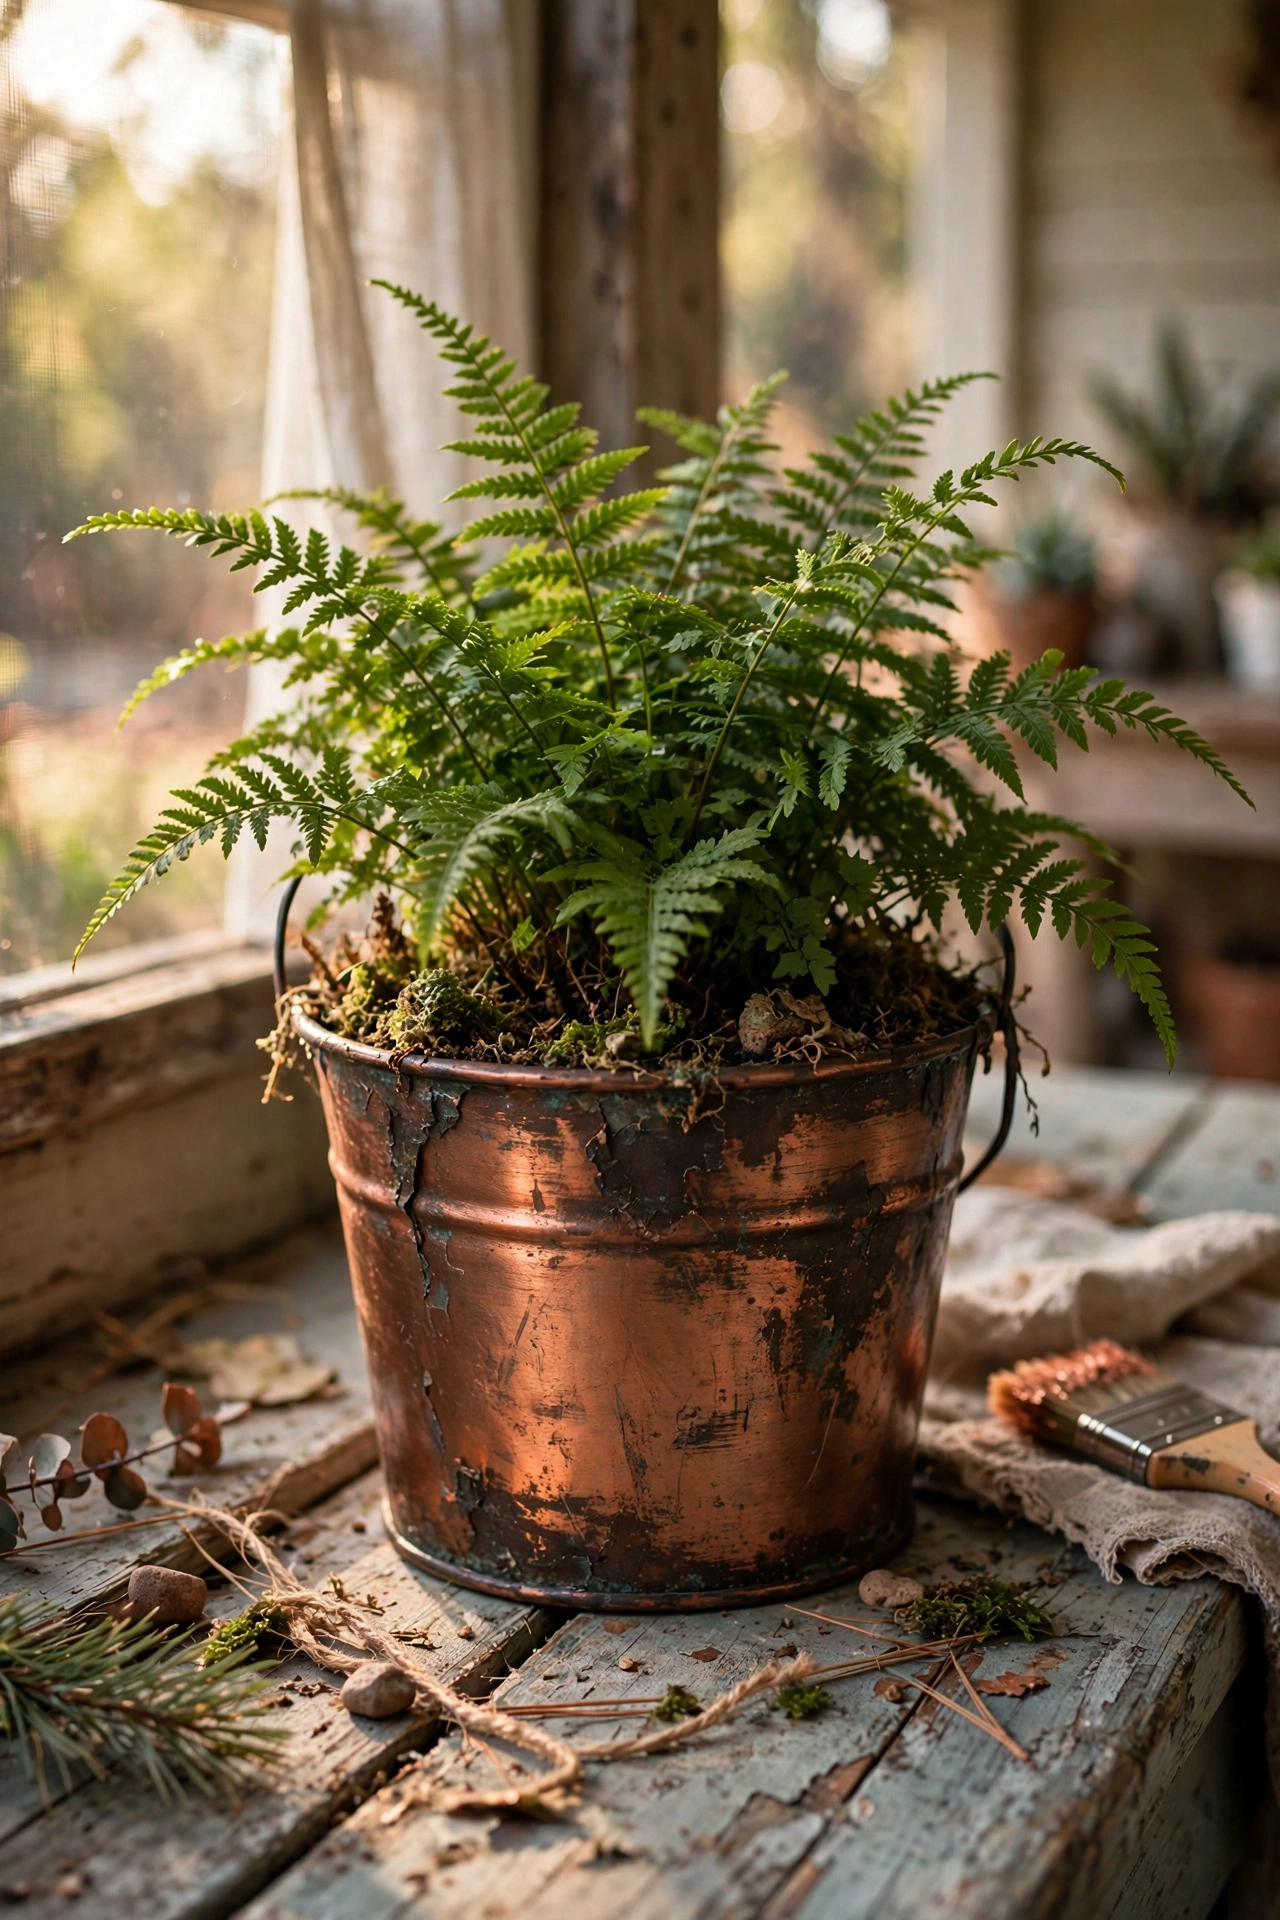
A metal bucket painted copper looks like an expensive aged-metal planter. Take a small galvanised bucket, prime it, spray with copper metallic paint, then dab on a little dark wax or brown paint in the crevices for an aged patina. I use mine for a large fern on the porch and the copper glows in evening light. Do build the copper in two light coats rather than one heavy one, which looks flat. Don’t skip the ageing step — flat metallic paint looks like a Christmas decoration. Drill drainage holes if it will live outside.
Cost: ~$6-10 | Time: 30 minutes plus drying
24. Textured Stucco Planter for Outdoors
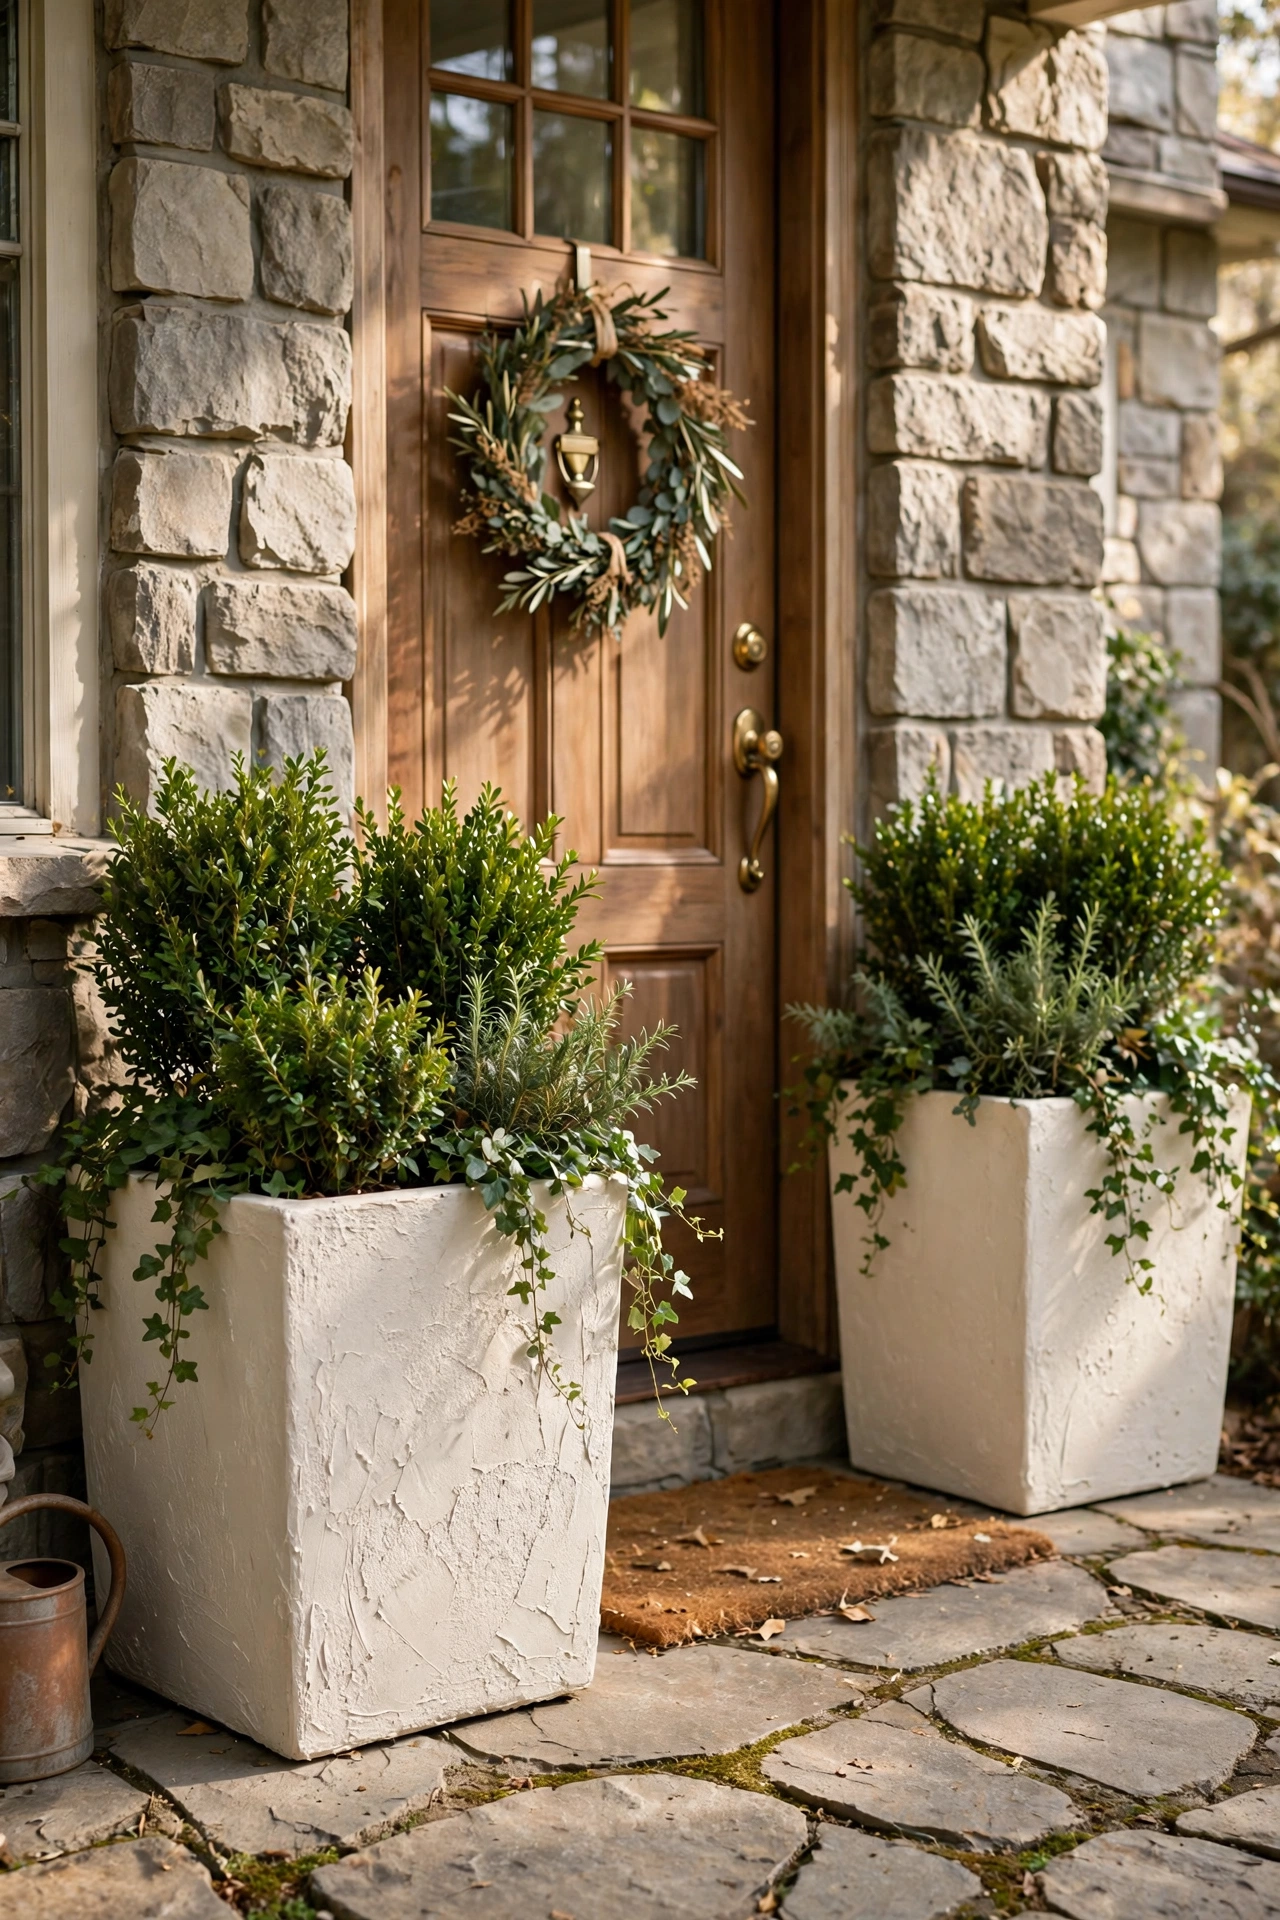
Outdoor planters need to look substantial, and stucco texture does the heavy lifting. Trowel exterior stucco or textured masonry paint over a plain plastic or terracotta pot, working in sweeping arcs for an artisanal finish. Paint over with exterior masonry paint in warm white or stone. I stuccoed four large pots for my front step and they look like proper stone planters. Do wear gloves — stucco is rough on hands. Don’t apply it too thick, or it cracks as it cures; two medium coats are better than one heavy one. These survive frost far better than plain terracotta.
Cost: ~$8-14 | Time: 1.5 hours plus curing
25. Stacked Stone-Look Planter from Foam Blocks
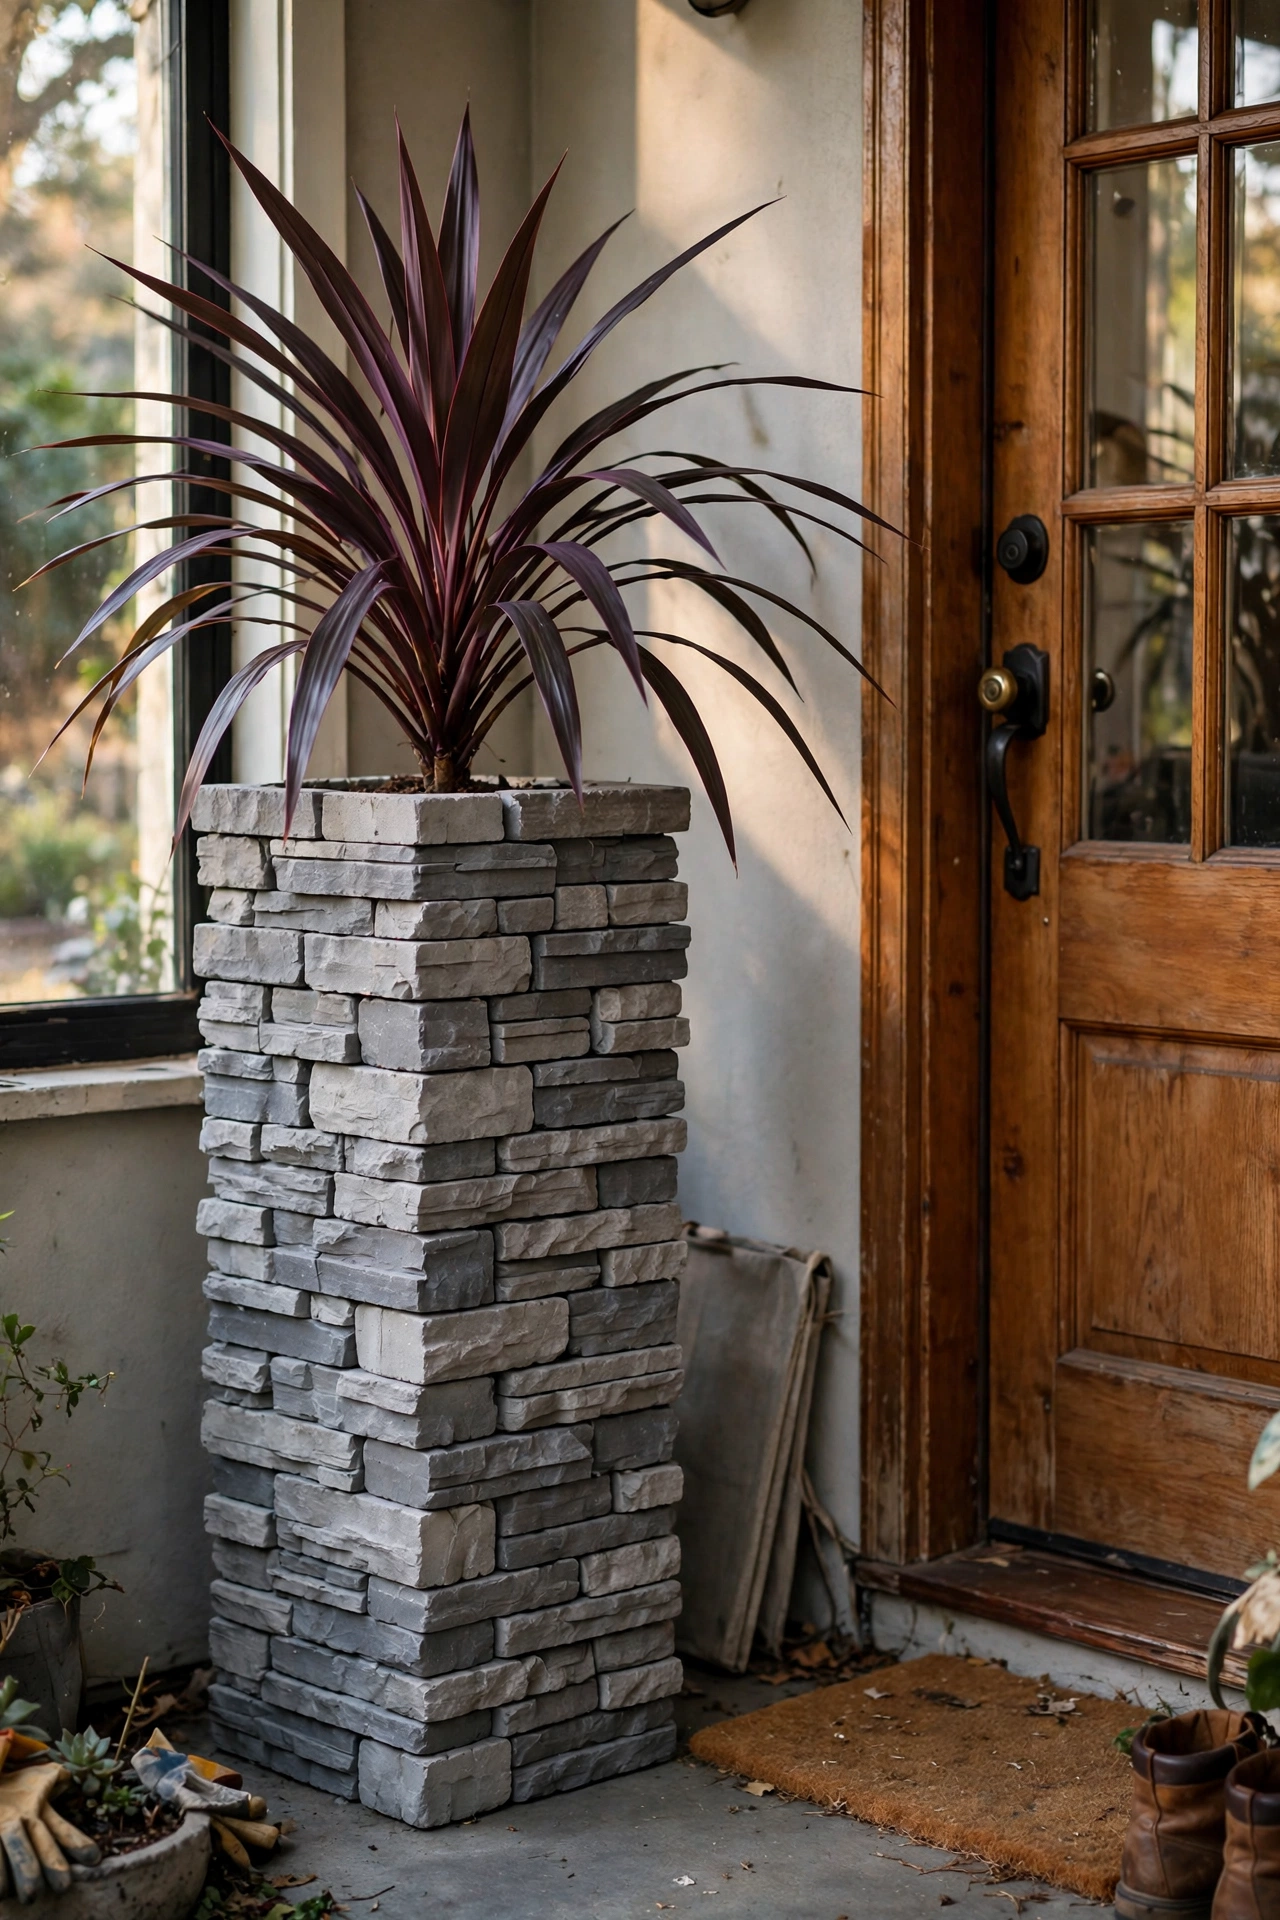
The grand finale: a stacked-stone planter built from foam blocks that weighs almost nothing. Glue blocks of rigid foam into a hollow square tower, carve stone-like texture with a knife, coat with exterior tile adhesive for hardness, and paint in layered greys with dark crevices. I built a pair flanking my front door and the postman asked which garden centre sold them. Do carve each “stone” slightly differently — uniformity is the giveaway. Don’t skip the tile adhesive coat, which is what makes foam survive outdoors. Use it as a tall cachepot for a dramatic plant like a cordyline.
Cost: ~$10-18 | Time: 3 hours plus curing
Quick questions, answered
What paint is safe for planters?
Acrylic, chalk paint, and spray paint are all fine on the outside of planters. Never paint the inside where soil sits — plant roots are sensitive to paint chemicals. Always use a plastic nursery pot as a liner inside any painted or decorated planter, and drill drainage holes where the planter will hold soil directly.
How do I stop painted planters peeling outdoors?
Use exterior-grade or masonry paint, seal with an outdoor matte sealer, and bring decorated pots under cover in hard frost. The biggest cause of peeling is water getting behind the paint, so make sure drainage is good and the pot never sits in a puddle.
Can I plant directly into a decorated pot?
You can, but a liner pot is better. Liners protect your paintwork from constant moisture, make repotting easy, and let you swap plants seasonally without disturbing the decorative pot. For baskets, cardboard, and foam builds, a liner is essential rather than optional.
Which finish looks most expensive for the least effort?
Matte black spray paint on a simple-shaped pot. It takes twenty minutes, costs a few dollars, and reads as a deliberate modern design choice every time. Limewash on terracotta is the close second for a softer, handmade look.
📌 Growing your plant family? Pin this post now so you can save this idea for your next potting weekend.
Keep the handmade going with these next: (see also: 17-diy-planter-ideas-for-beginners) (see also: 25-diy-vase-and-centerpiece-ideas-that-look-store-bought) (see also: 15-easy-diy-home-decor-projects-for-beginners-under-25)
