17 Boho-Style DIY Decor Projects on a Budget
I fell for the boho look long before I could afford it, and honestly that turned out to be a gift. Every rattan pendant and macramé hanging in the shops cost more than my weekly grocery budget, so I started learning boho diy decor the slow way: one knotted cord, one thrifted pot, one painted basket at a time. Three years later my flat is full of pieces people assume I bought, and nearly all of them cost under fifteen dollars to make. This list is the full collection of projects that worked, grouped so you can start with knots or skip straight to the finishing touches.
A quick note before you start: boho style is forgiving by nature. Uneven knots, wobbly paint lines, and baskets that lean a little all read as character rather than mistakes. You will need very little beyond cotton cord, jute twine, a hot glue gun, and whatever paint you already own. Work through the groups in order or jump to whatever catches your eye, and remember that layering is the whole trick: three small handmade pieces grouped together look more bohemian than one big one ever could.
Macramé and Knotted Projects
1. Simple Macramé Plant Hanger from Cotton Cord
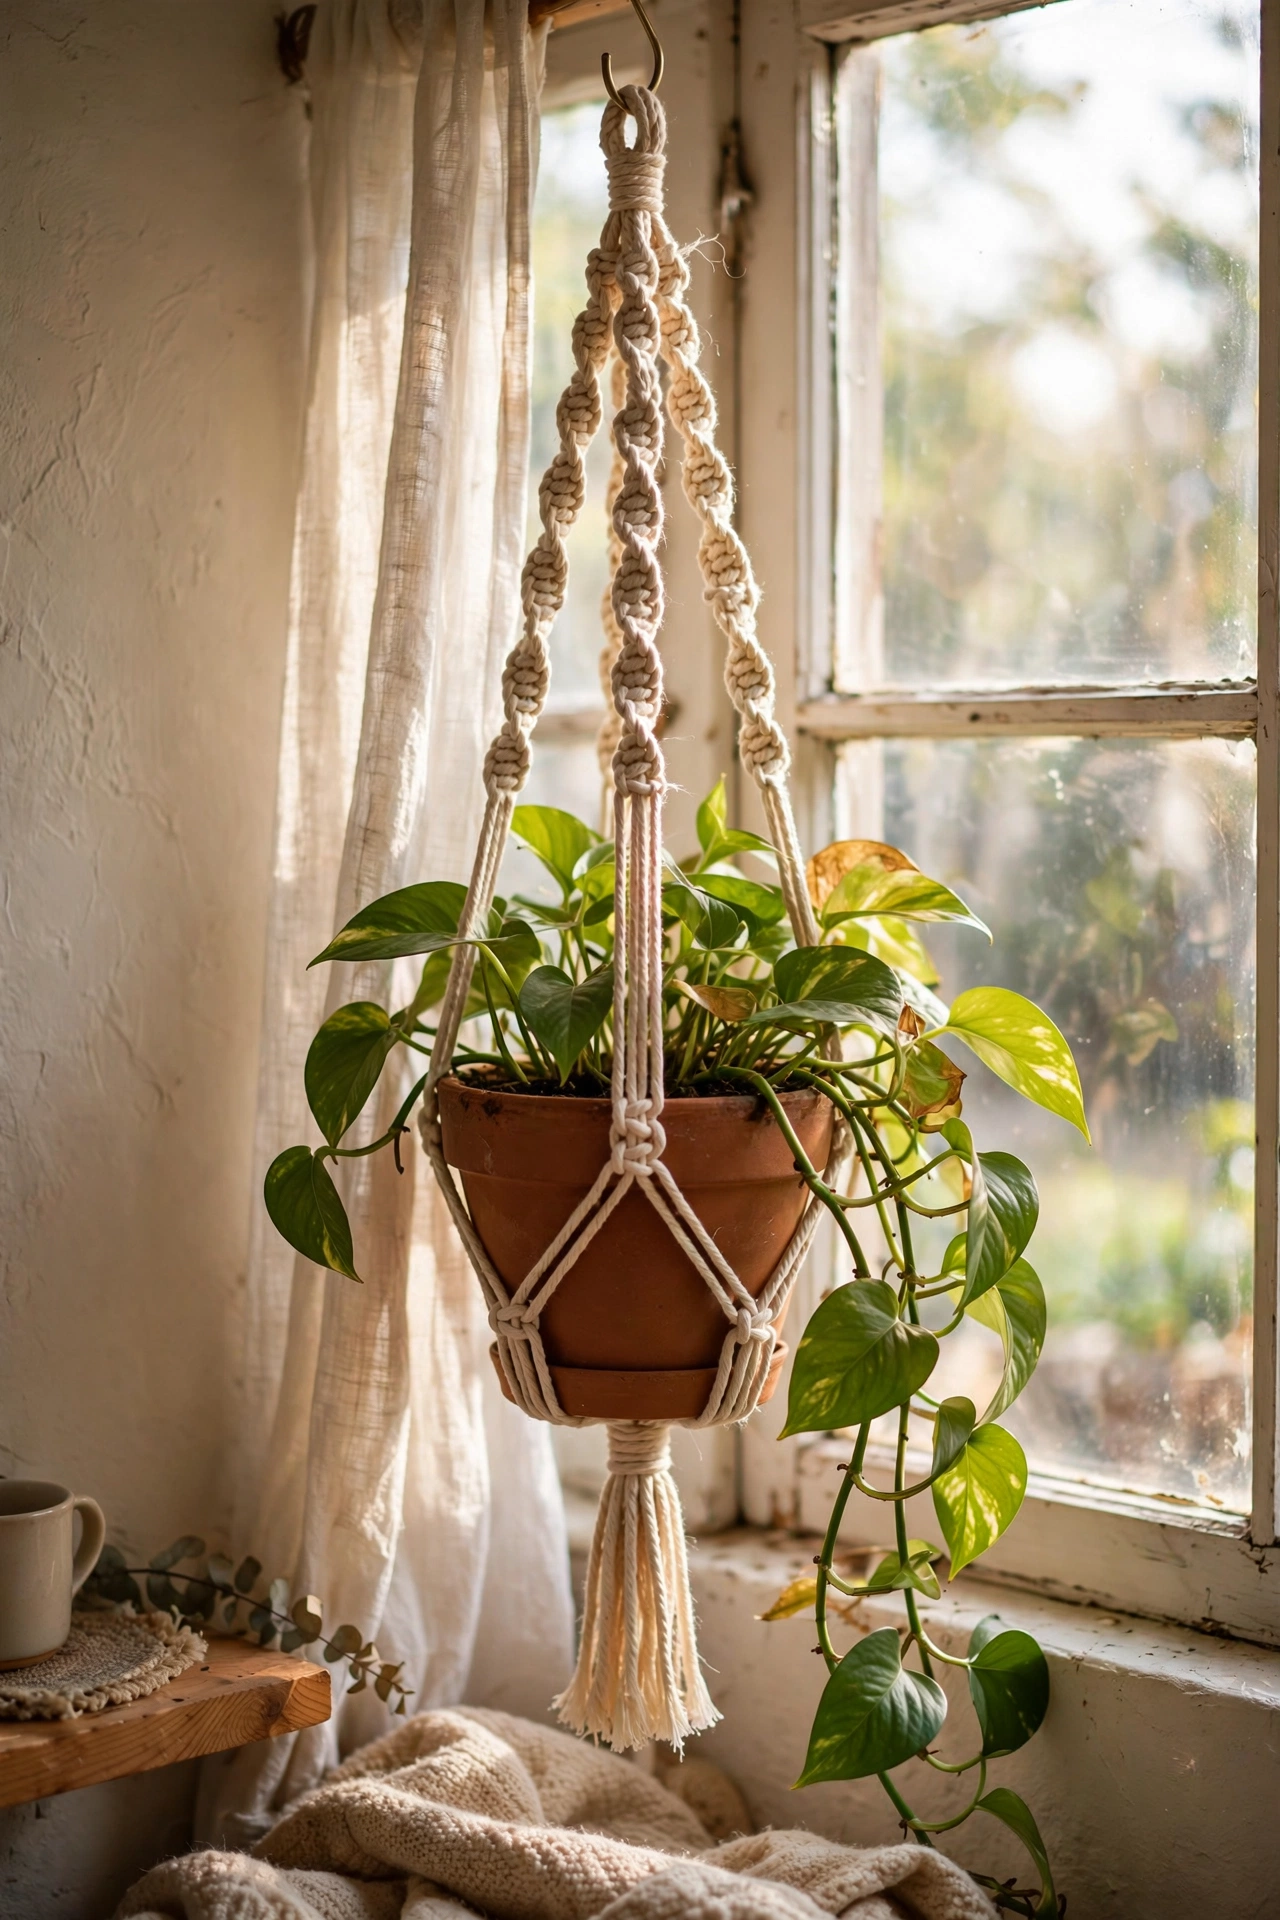
A macramé plant hanger is the gateway project that hooks most people on knotting. You need one ball of 3mm cotton cord, a wooden ring or a curtain ring, and about an hour. Cut four cords to roughly four times your finished length, fold them through the ring with a lark’s head knot, then work a series of square knots down the length, adding a gathering knot near the bottom to form the basket for the pot. I made my first one with cord that was far too short because I guessed instead of measuring, and it ended up holding a teacup instead of a plant. Measure twice, knot once. Hang it in a bright corner and it instantly reads as boho.
Cost: ~$4-8 | Time: 1 hour
2. Beginner Square-Knot Macramé Wall Hanging
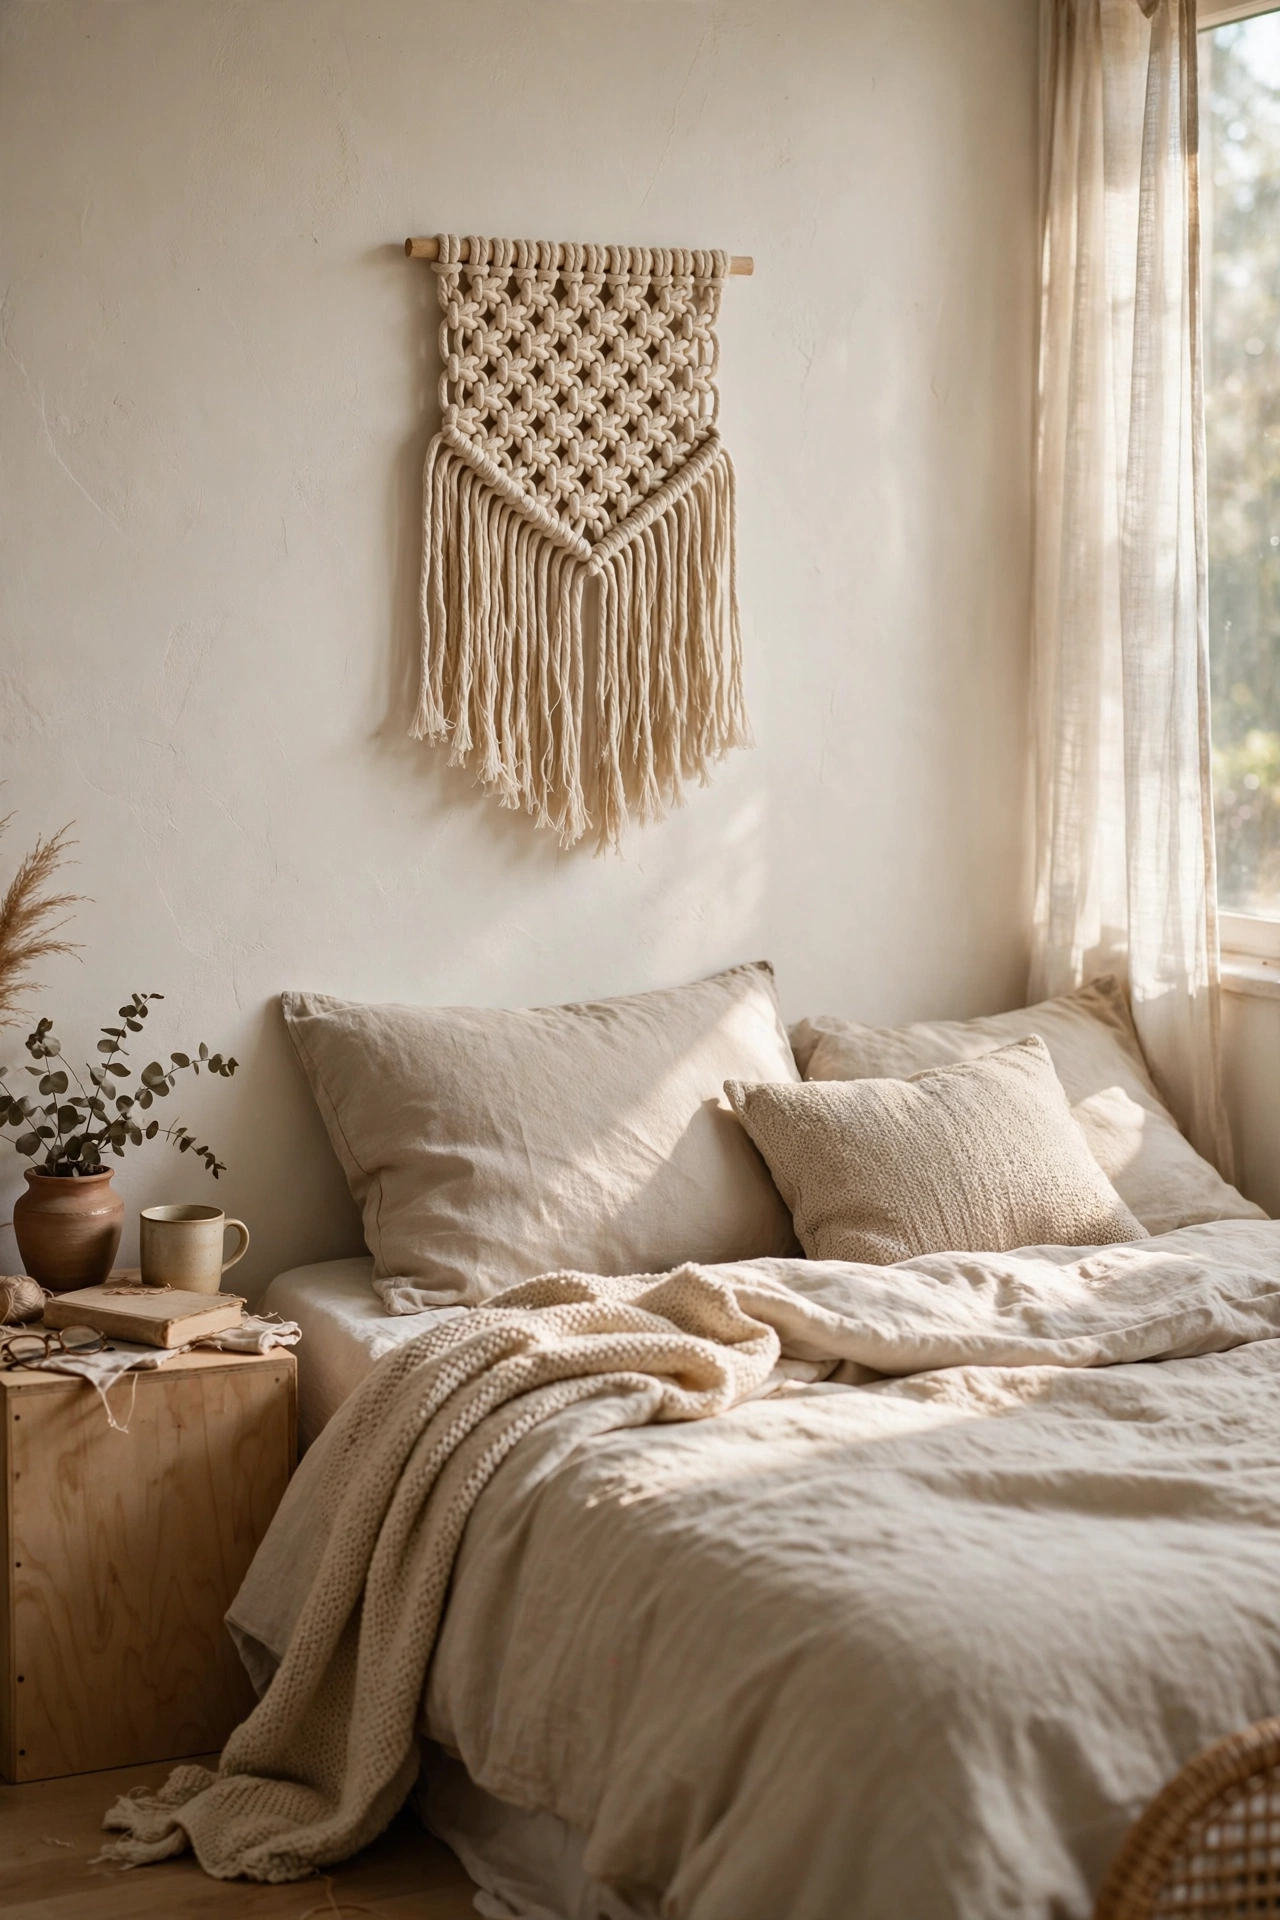
If the plant hanger went well, a small wall hanging is the natural next step, and it uses exactly the same square knot. Tie your cords onto a wooden dowel or a found branch, knot a few rows of square knots across the width, then leave the ends long and comb them out into a soft fringe. I started with plain natural cord and felt it looked a bit pale against my white wall, so I dipped the bottom of the fringe in weak tea for ten minutes to get a warm beige ombré. The fringe is what makes it look expensive, so take time combing it with a fine-tooth comb. Hang it above a bed or sofa for instant texture.
Cost: ~$6-10 | Time: 2 hours
3. Fringed Cushion Covers Without Sewing
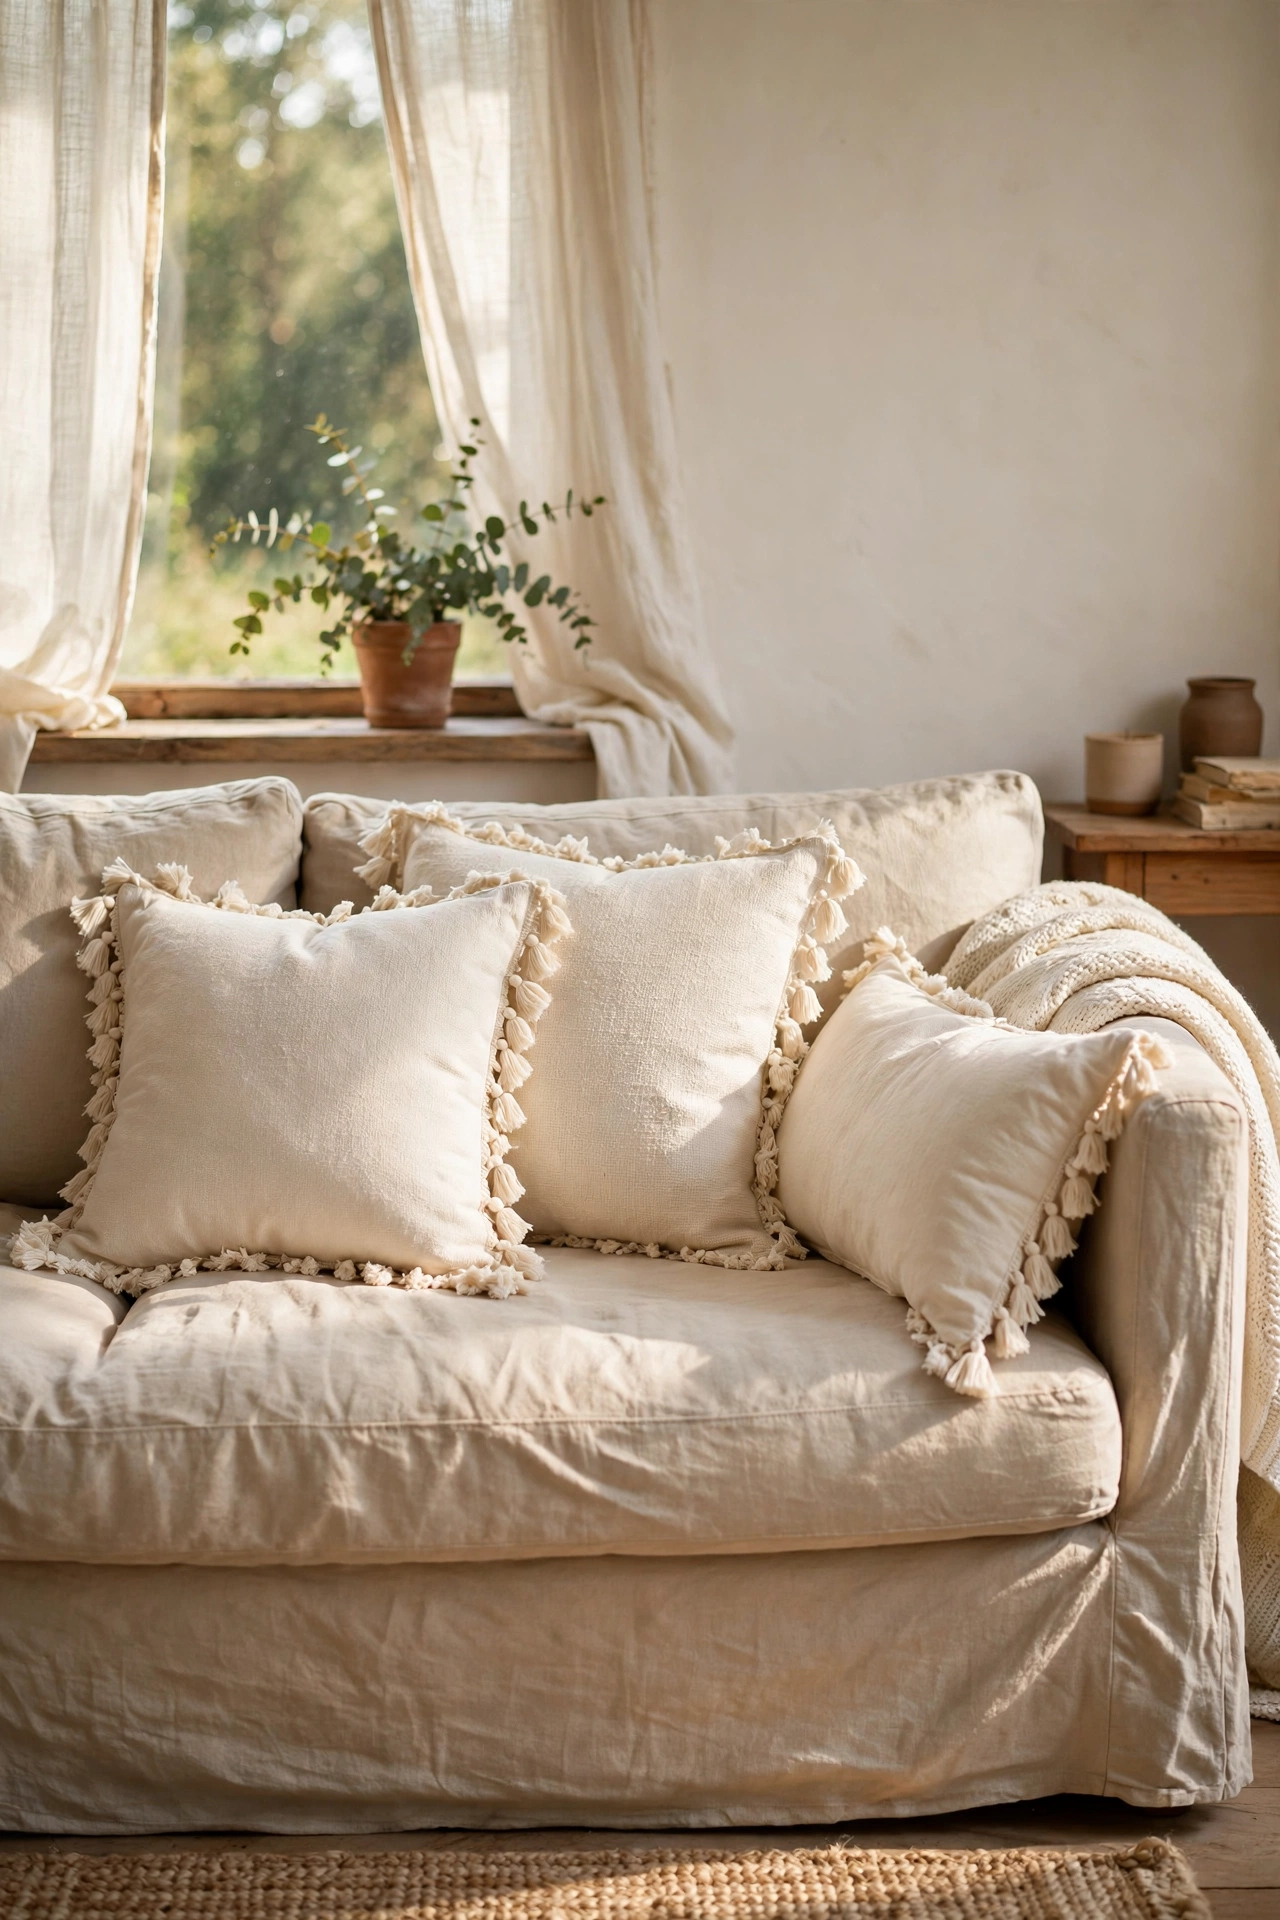
Fringe turns a plain cushion into a boho statement, and you can add it without touching a sewing machine. Buy a cheap plain cushion cover or make an envelope-style cover from cotton fabric, then hot-glue a strip of bullion fringe or tassel trim around three sides, close to the seam. I used fringe from the curtain aisle, which cost a third of the price of the trim sold in the upholstery section for the same look. Glue in short sections and press the trim flat as you go, because once hot glue sets there is no repositioning. Two fringed cushions on a plain sofa change the whole feel of the room.
Cost: ~$8-14 | Time: 45 minutes
4. No-Sew Knotted Table Runner with Tassels
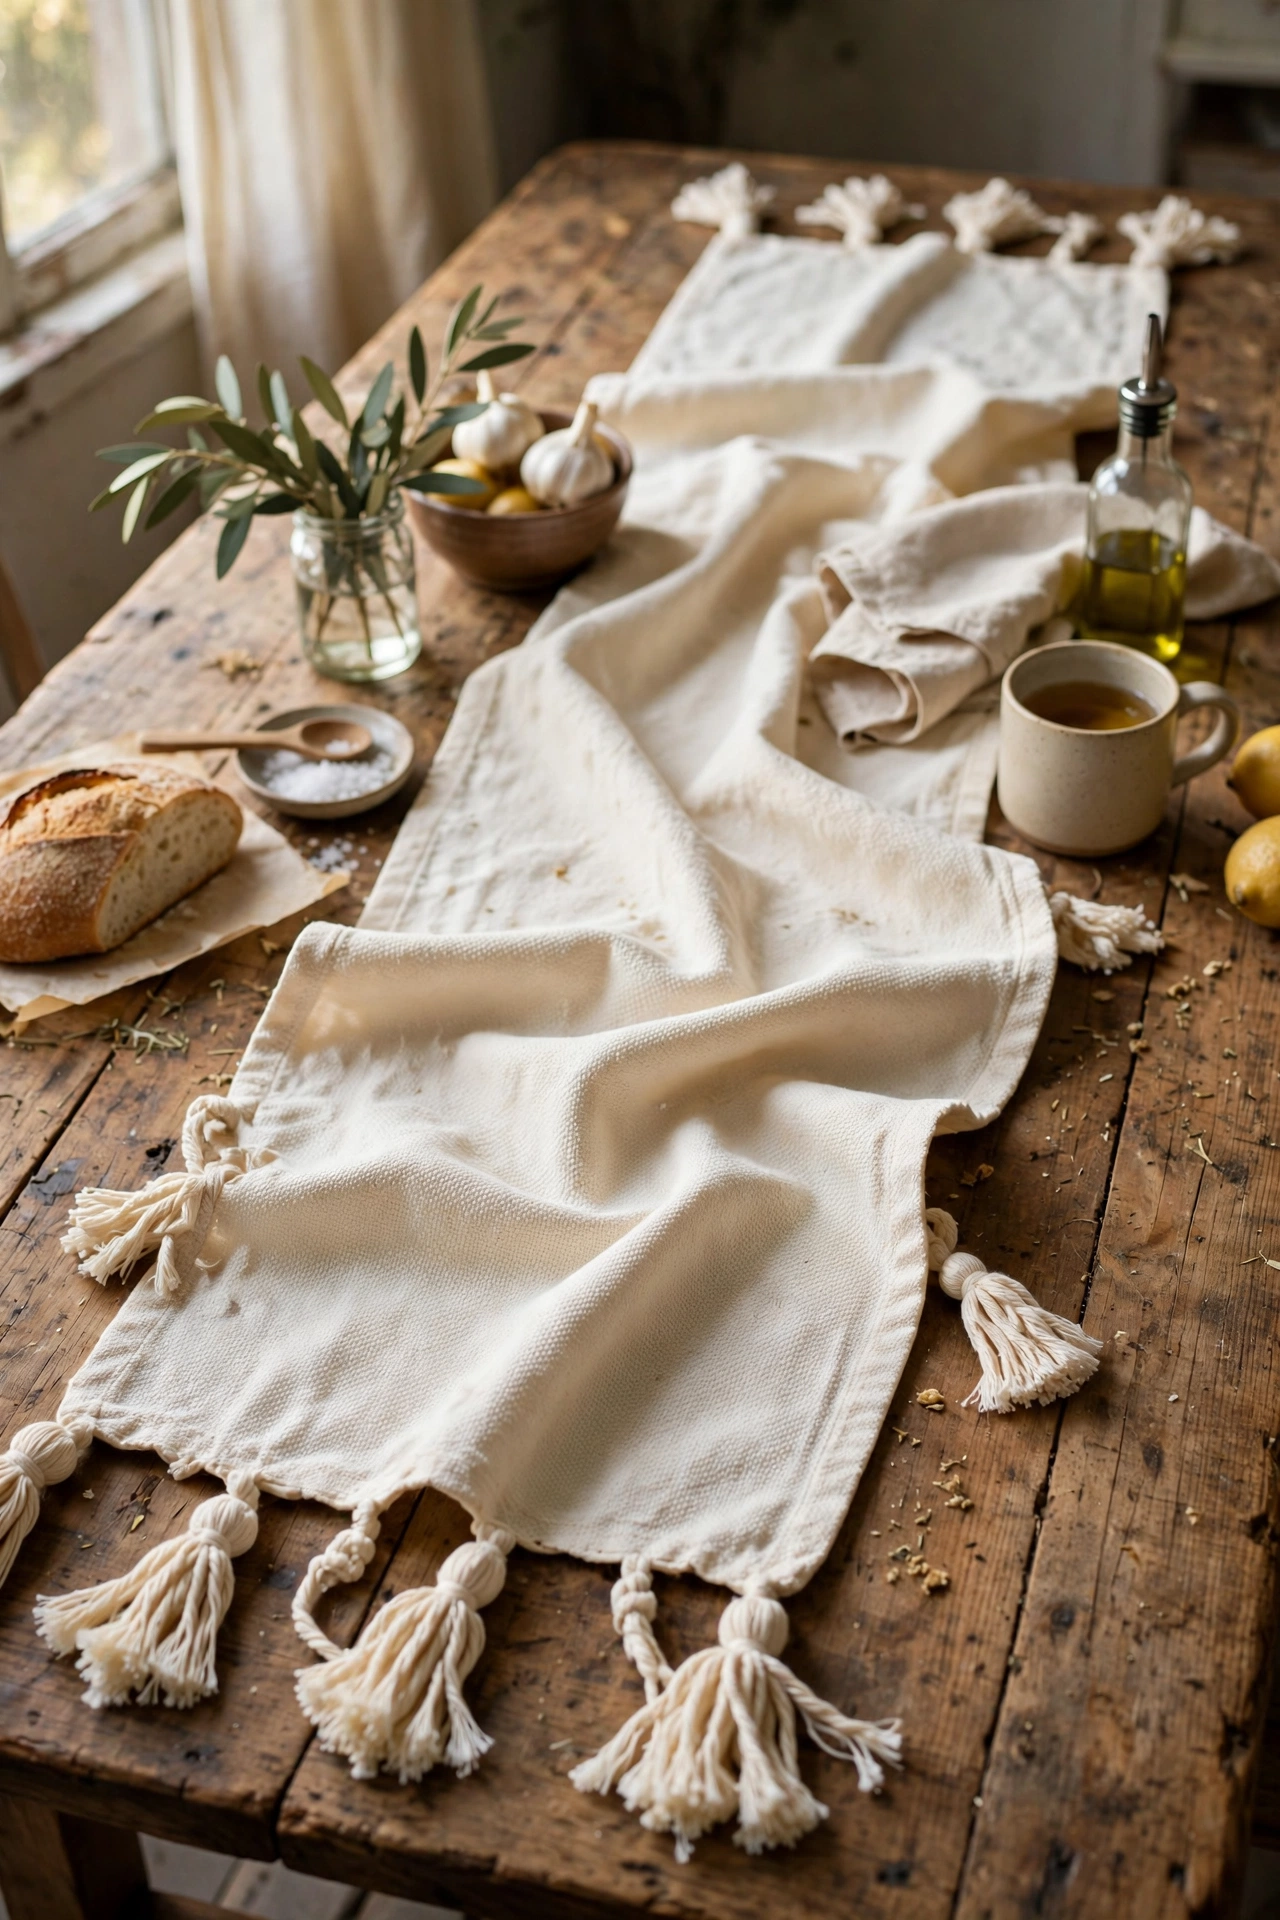
A long strip of cotton fabric with hand-tied tassels at each end makes a runner that looks woven by hand. Cut a strip about twice the length of your table and a foot wide, fringe the short ends by pulling threads, then tie chunky tassels from embroidery thread and stitch or glue one to each corner. I used an old cream flat sheet, which gave me enough fabric for two runners and cost nothing. Iron the runner flat before you add the tassels, because creases are much harder to fix once the tassels are on. Layer it over a plain tablecloth or straight onto wood for that collected, travelled feel.
Cost: ~$5-9 | Time: 30 minutes
5. Woven Yarn Wall Hanging on a Wooden Dowel
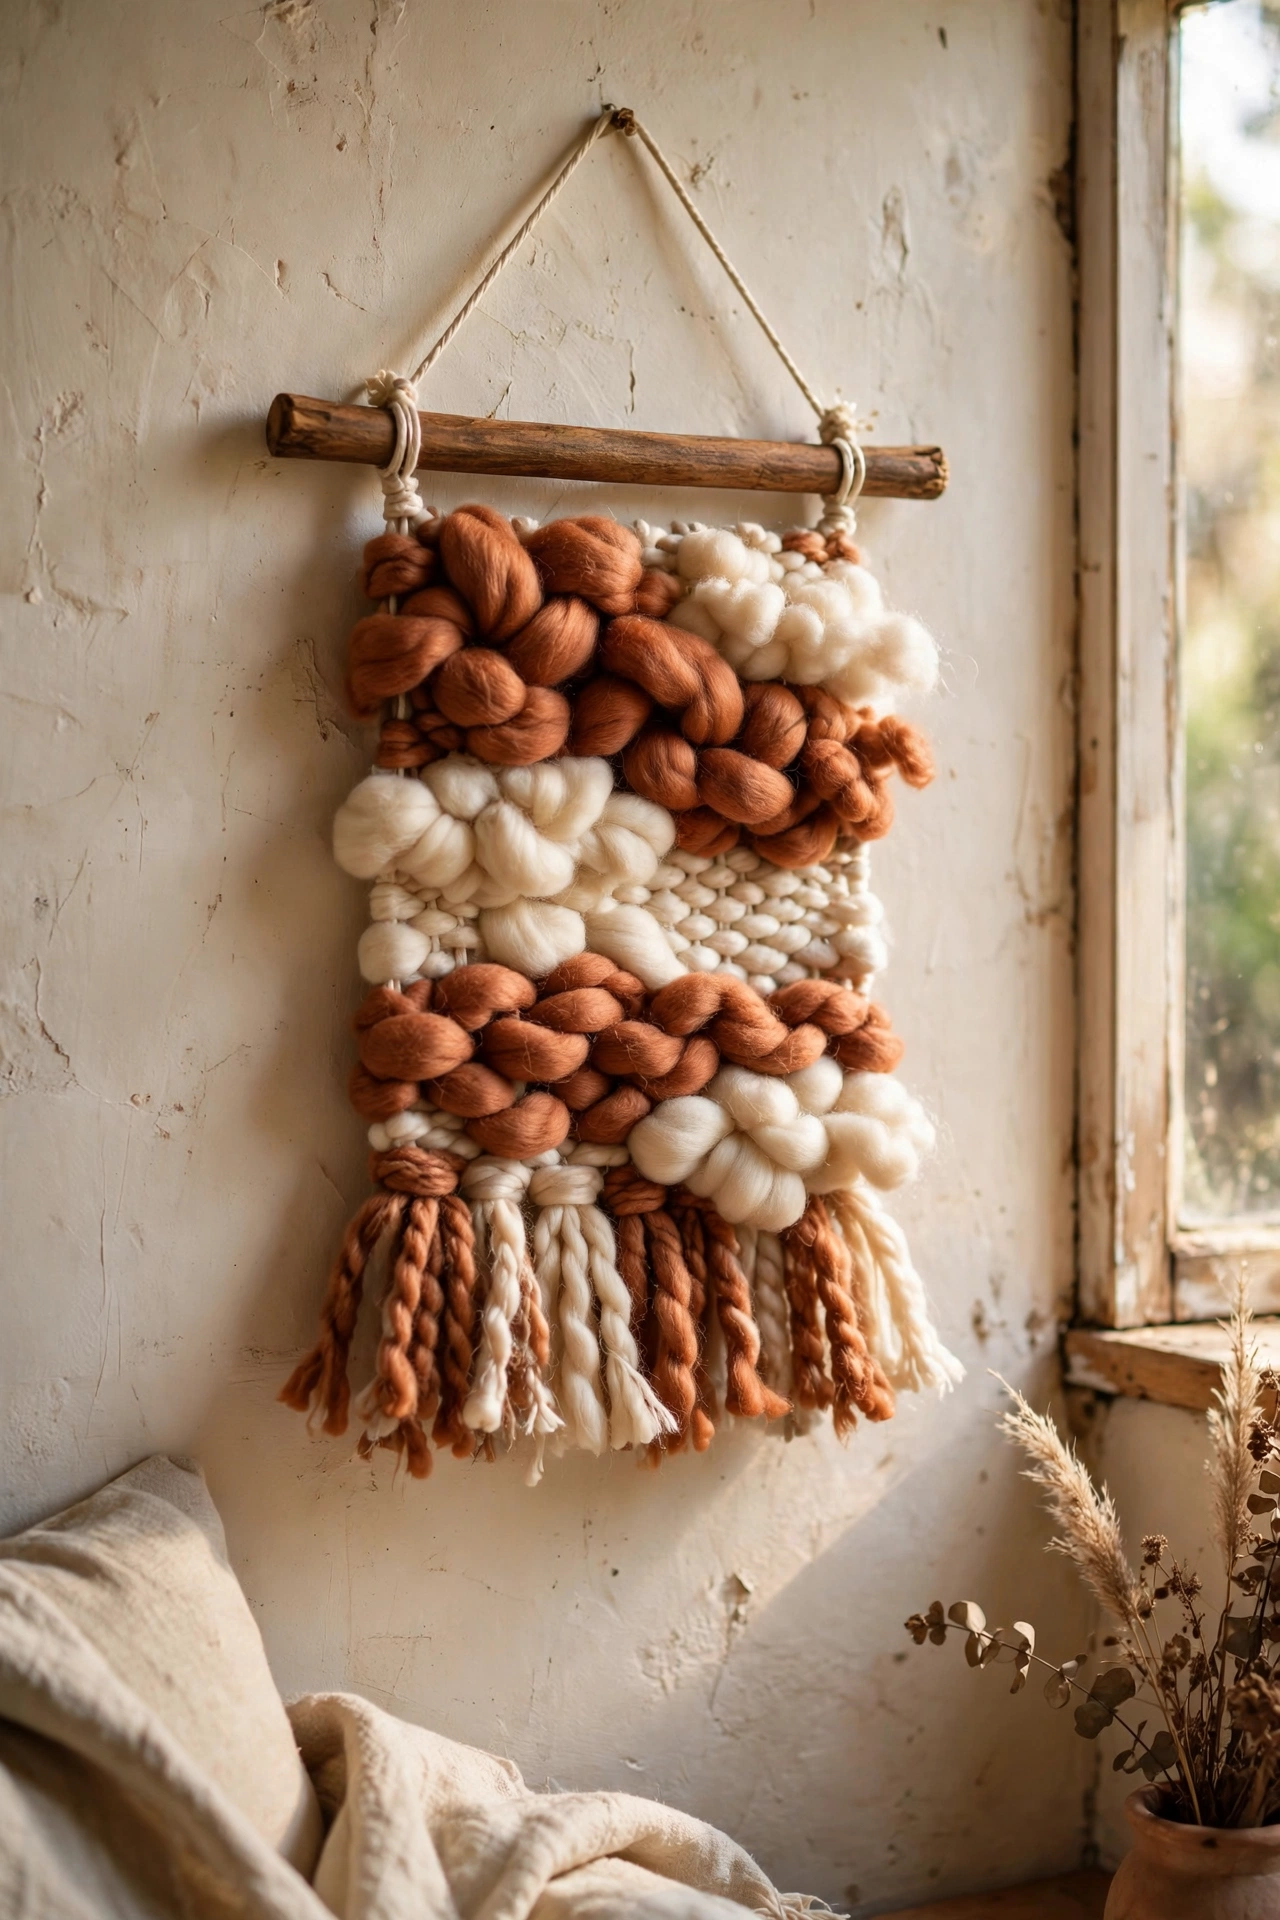
Weaving looks complicated but a small wall hanging is just yarn looped over and under, and the unevenness is the charm. Tie warp threads vertically onto a dowel, then weave rows of chunky yarn, roving, and strips of old fabric in earthy tones, finishing each row by tucking the ends at the back. I wove mine during a film and it was done before the credits rolled. My mistake was pulling the weft too tight, which made the sides bow inward, so keep your rows loose and even. Vary the textures: wool, cotton, and one strip of something shiny like an old scarf, and it looks like a market find.
Cost: ~$6-12 | Time: 2 hours
Natural Materials and Wood
6. Jute Rope Round Mirror Frame
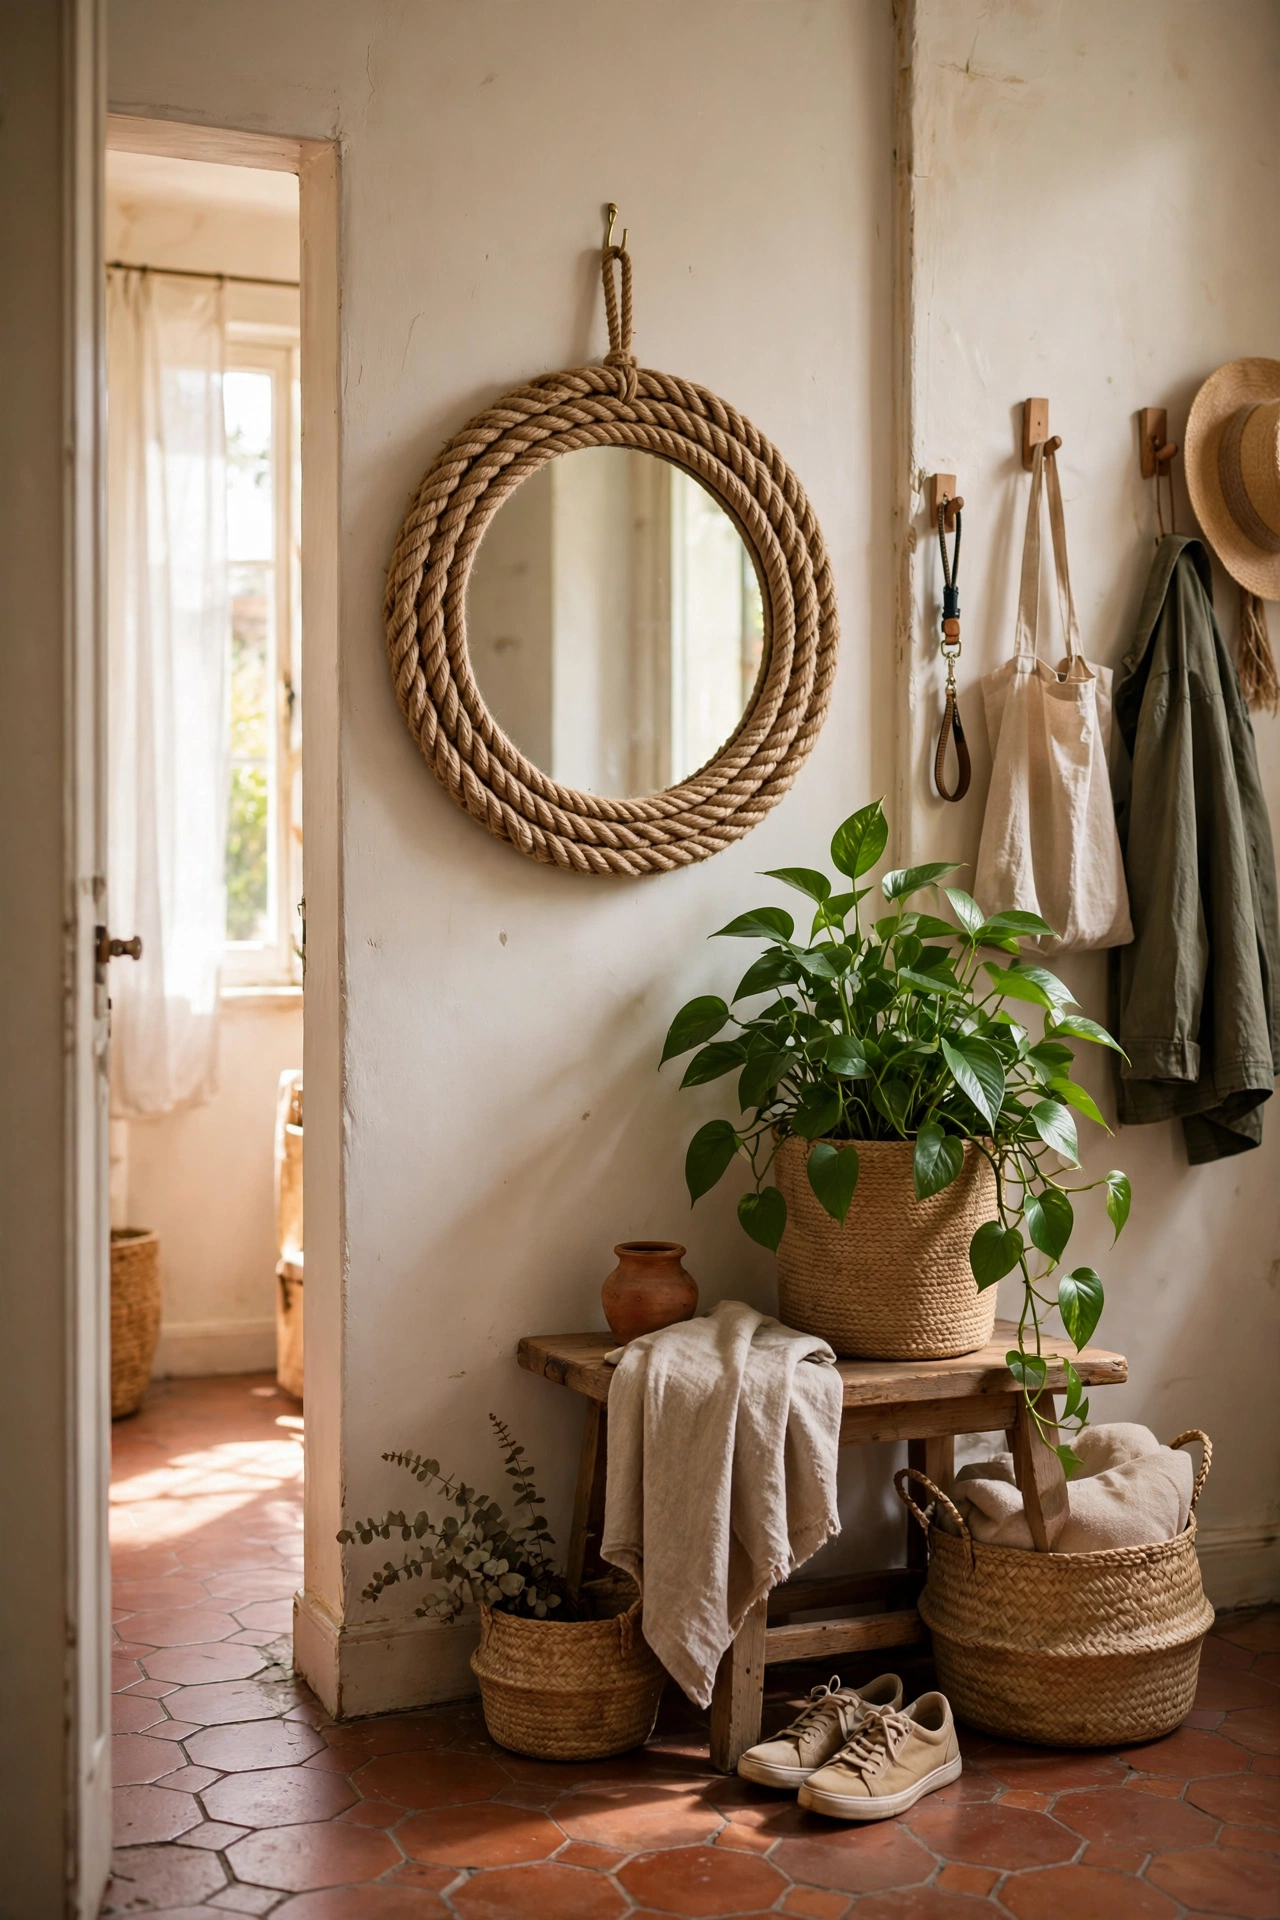
A plain round mirror becomes a boho focal point with nothing but jute rope and a glue gun. Start at the top of the frame and wind the rope tightly around it, gluing every few turns so nothing slips, and keep pushing the rows snug so no frame shows through. I wrapped mine while watching a series and it took one episode. The mistake to avoid is gluing long stretches at once, because the rope cools and shifts before you press it down. Finish the end with a dab of glue tucked underneath. Hang it in the hallway or over a dresser, and add a trailing plant nearby to complete the look.
Cost: ~$8-14 | Time: 1 hour
7. Driftwood Wall Shelf with Rope Hangers
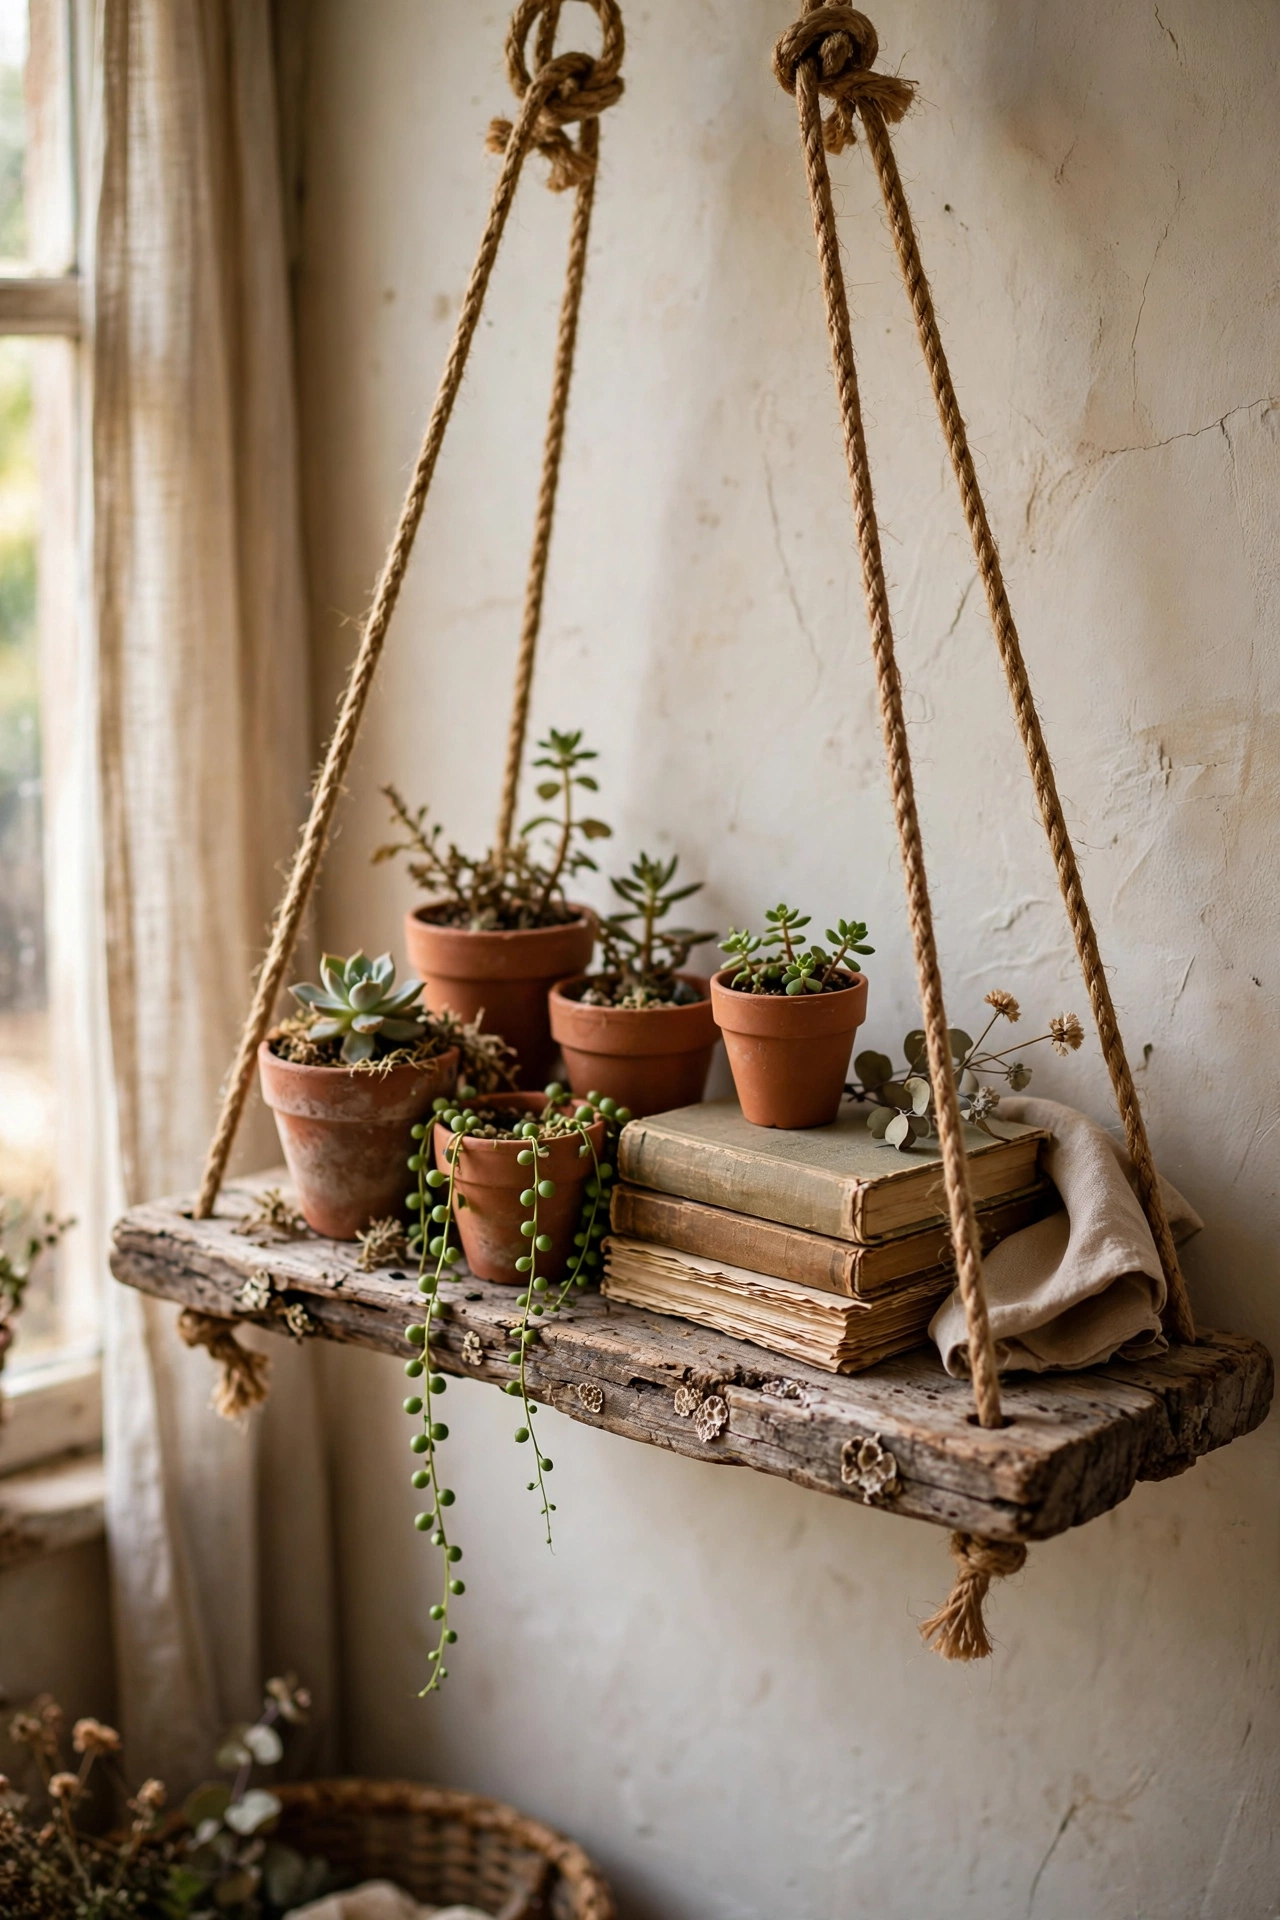
A flat piece of driftwood hung from two rope loops makes a shelf that looks gathered from the shore, even if you found the wood at a reclamation yard. Scrub the wood clean, sand it smooth, and seal it with a clear matte finish. Drill two holes at each end, thread thick jute rope through, knot it underneath, and hang both loops from wall hooks so the shelf sits level. I learned to measure the rope loops against each other before hanging, because mine sat crooked the first time and every photo looked off. Style it with small pots and a stack of books.
Cost: ~$10-16 | Time: 1.5 hours
8. Woven Seagrass Placemat Wall Art
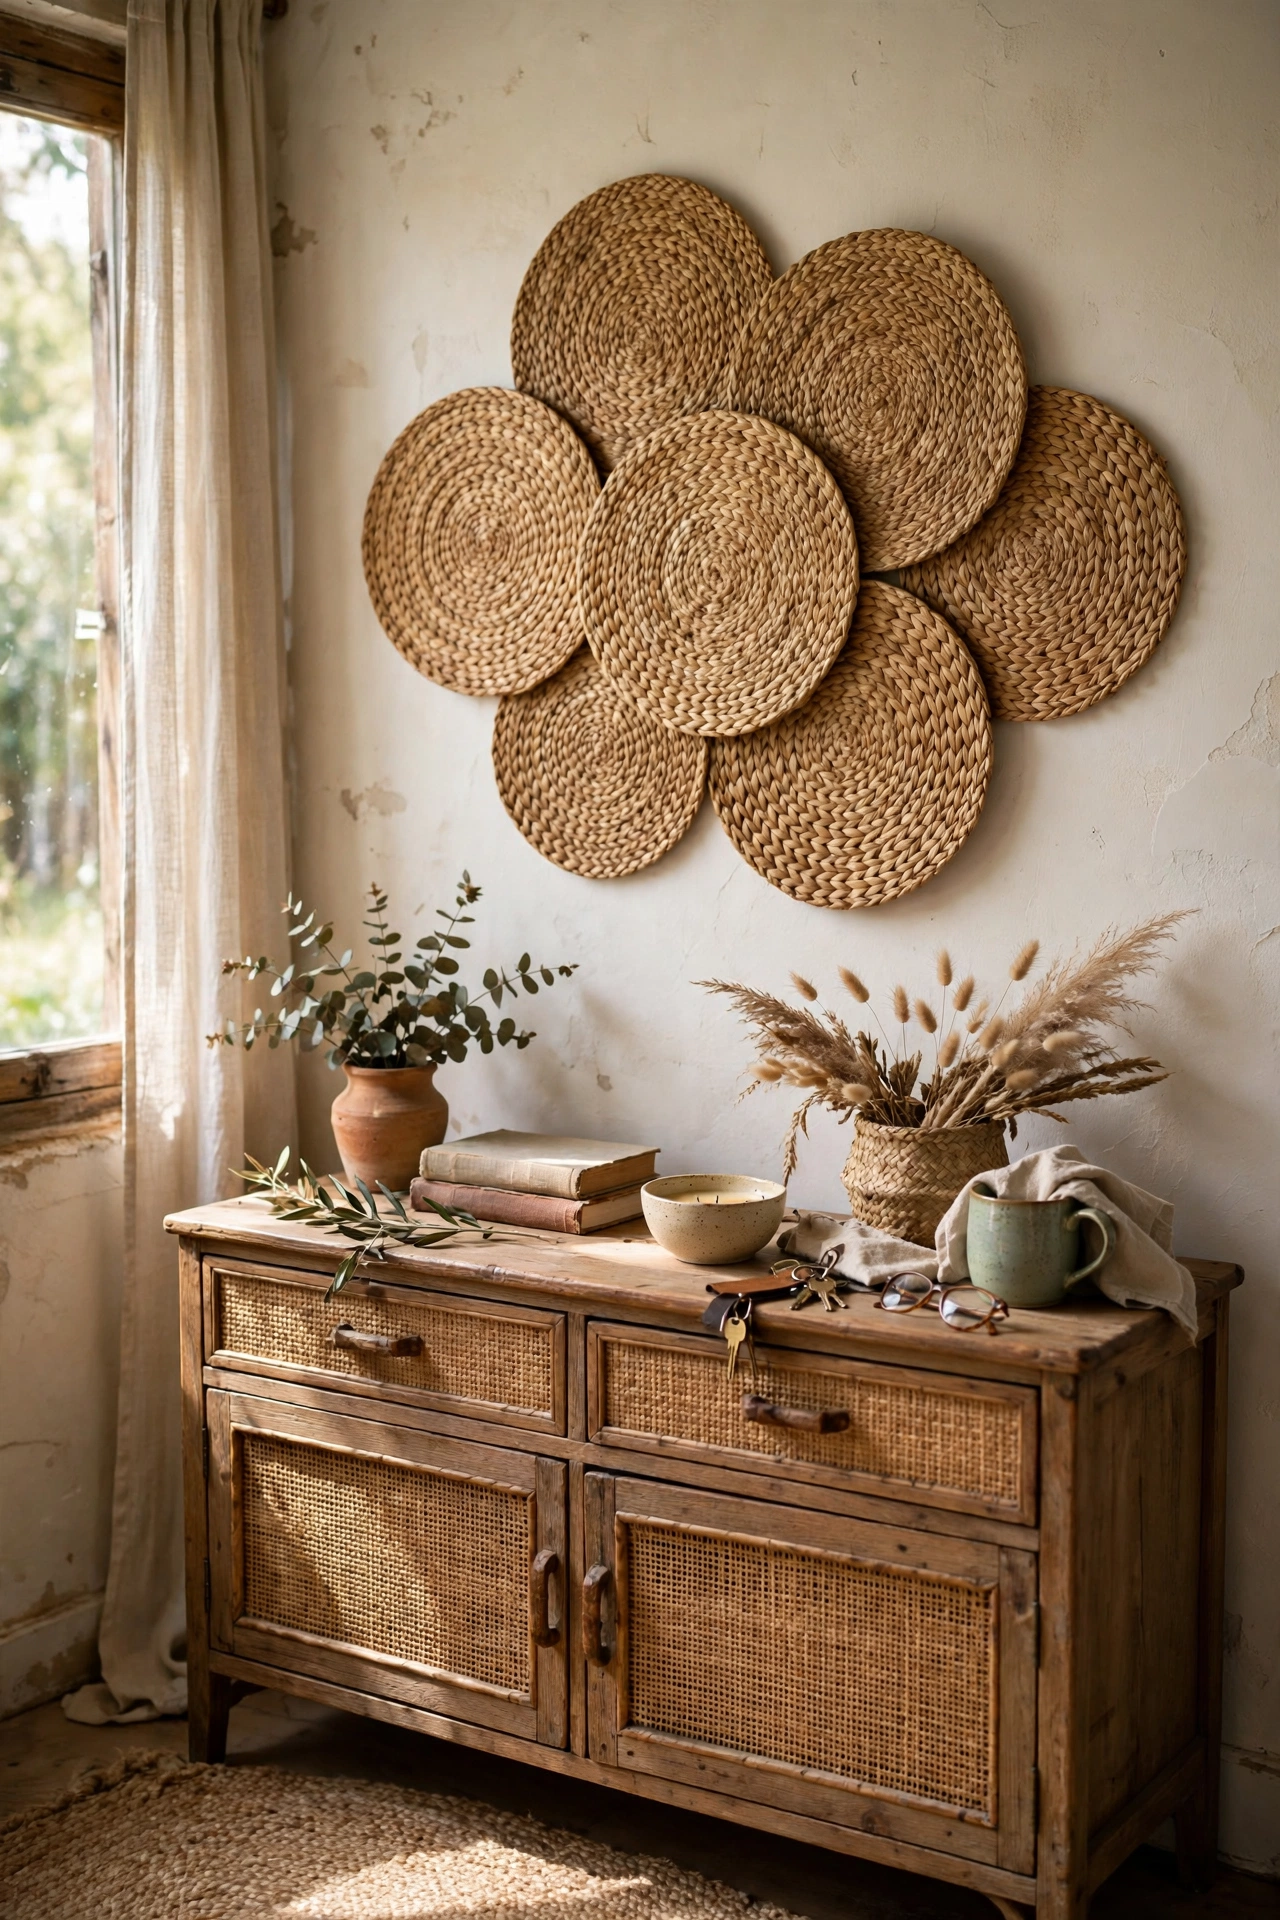
Round woven placemats from the pound shop make brilliant boho wall art when you group them. Buy six to nine in similar natural tones, lay them on the floor first to plan your arrangement, then hang them with small adhesive strips or a single nail each. I hung a cluster of seven above my sideboard in an organic shape and visitors always ask where I bought them. My mistake was hanging them perfectly evenly at first, which looked stiff, so I redid them in a loose, slightly irregular cluster and it instantly looked better. Add one painted in a muted terracotta for a focal point.
Cost: ~$6-12 | Time: 20 minutes
9. Stacked Wooden Crate Plant Stand
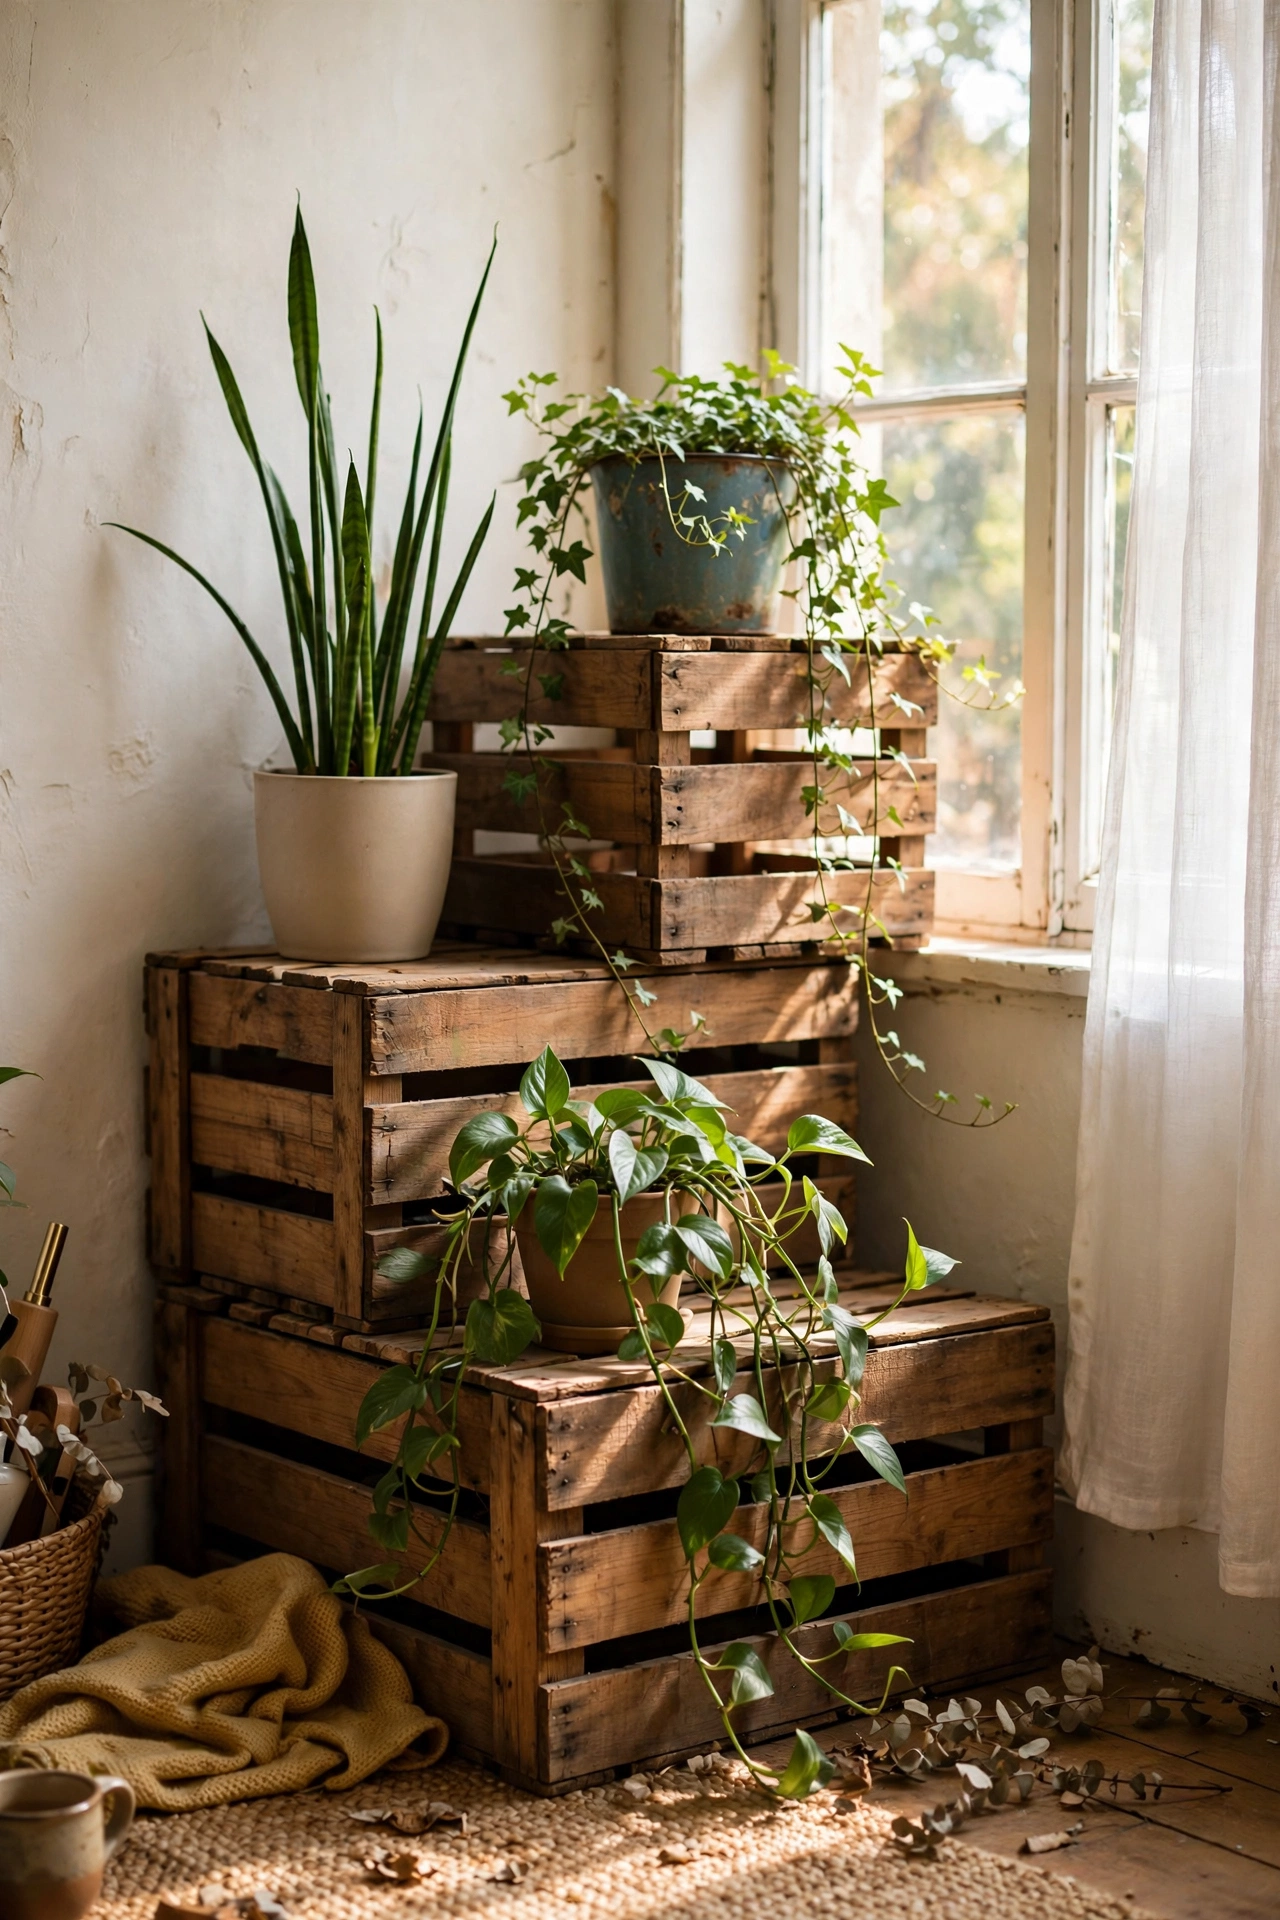
Two or three wooden crates stacked in a stair pattern make a plant stand with real presence, and crates are cheap second-hand. Sand the crates lightly, stain or paint them in a warm wood tone, then stack them offset so each crate forms a step, screwing them together from the inside for stability. I put mine in a dull corner by the window and filled it with trailing pothos and a tall snake plant. The mistake I made was skipping the screws, and the top crate slid off the first time I watered the plants. Take the extra ten minutes to fix them together properly.
Cost: ~$12-20 | Time: 45 minutes
Colour, Pattern and Textiles
10. Hand-Painted Terracotta Pots in Earthy Tones
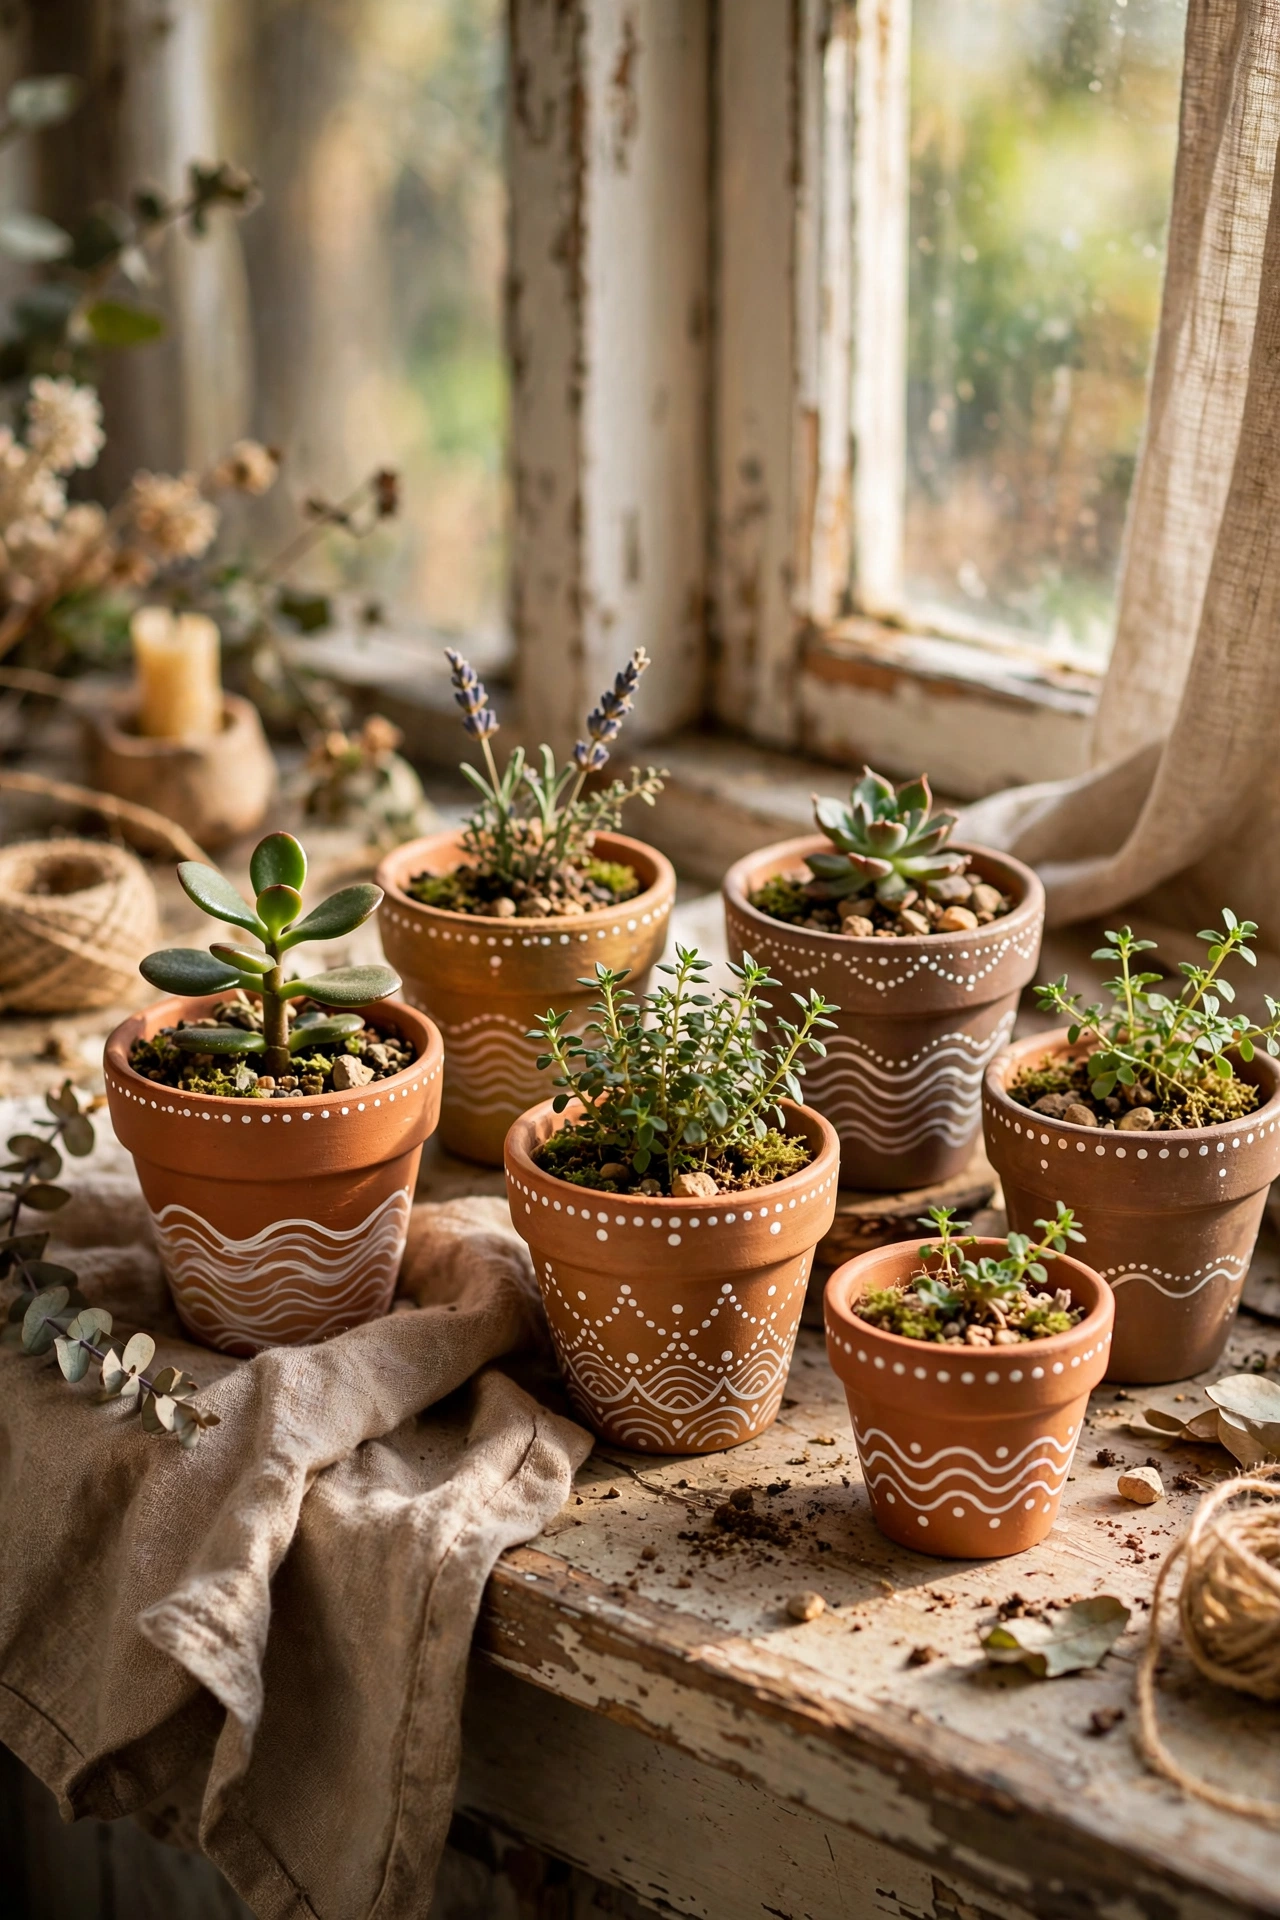
Plain terracotta pots painted in warm earthy tones look like they came from an artisan market. Paint the pots in colours like burnt orange, ochre, sage, and clay pink, then add simple patterns: a band of white dots, a wavy line, or a half-moon in a contrasting shade. I painted a set of five one rainy afternoon and sealed them with a clear matte spray so the paint survives watering. My mistake was painting the inside of the rim, and the paint peeled where the soil touched it, so leave the top inch of the inside unpainted. Group odd numbers together for the best look.
Cost: ~$6-10 | Time: 1 hour plus drying
11. Block-Printed Cushion Covers with Potato Stamps
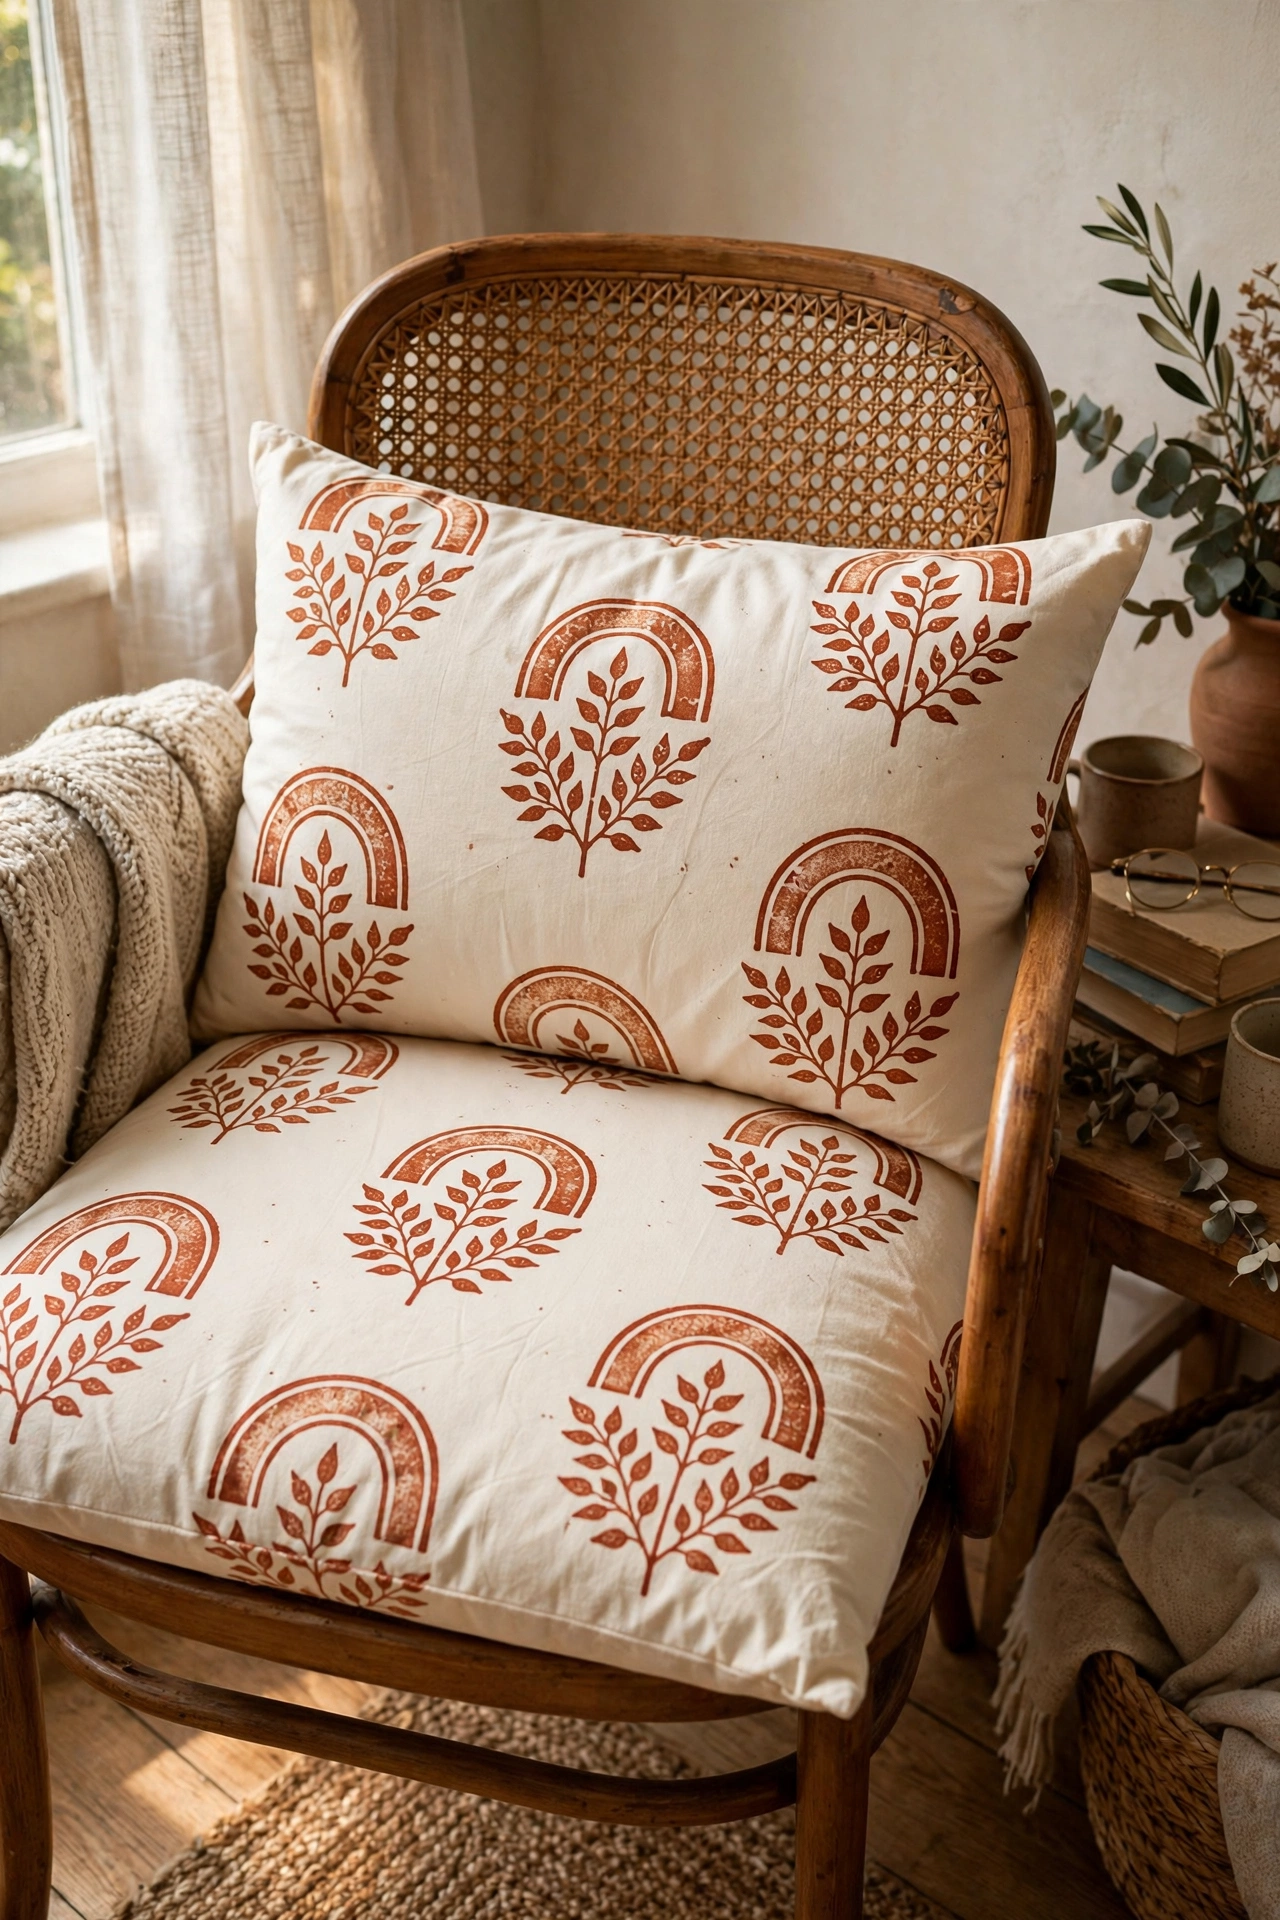
Block printing with a potato stamp gives you the global-print look of expensive boho textiles for pennies. Cut a potato in half, carve a simple shape like a leaf, dot, or arch with a small knife, blot it on fabric paint, and stamp a repeating pattern across a plain cushion cover. I printed a set of two in rust and cream and they sit on my reading chair looking far more expensive than they were. My mistake was pressing too hard on the first few stamps, which made blobs instead of shapes, so use a light, even press and test on scrap fabric first.
Cost: ~$8-12 | Time: 1 hour plus drying
12. Layered Mismatched Rugs for a Boho Floor
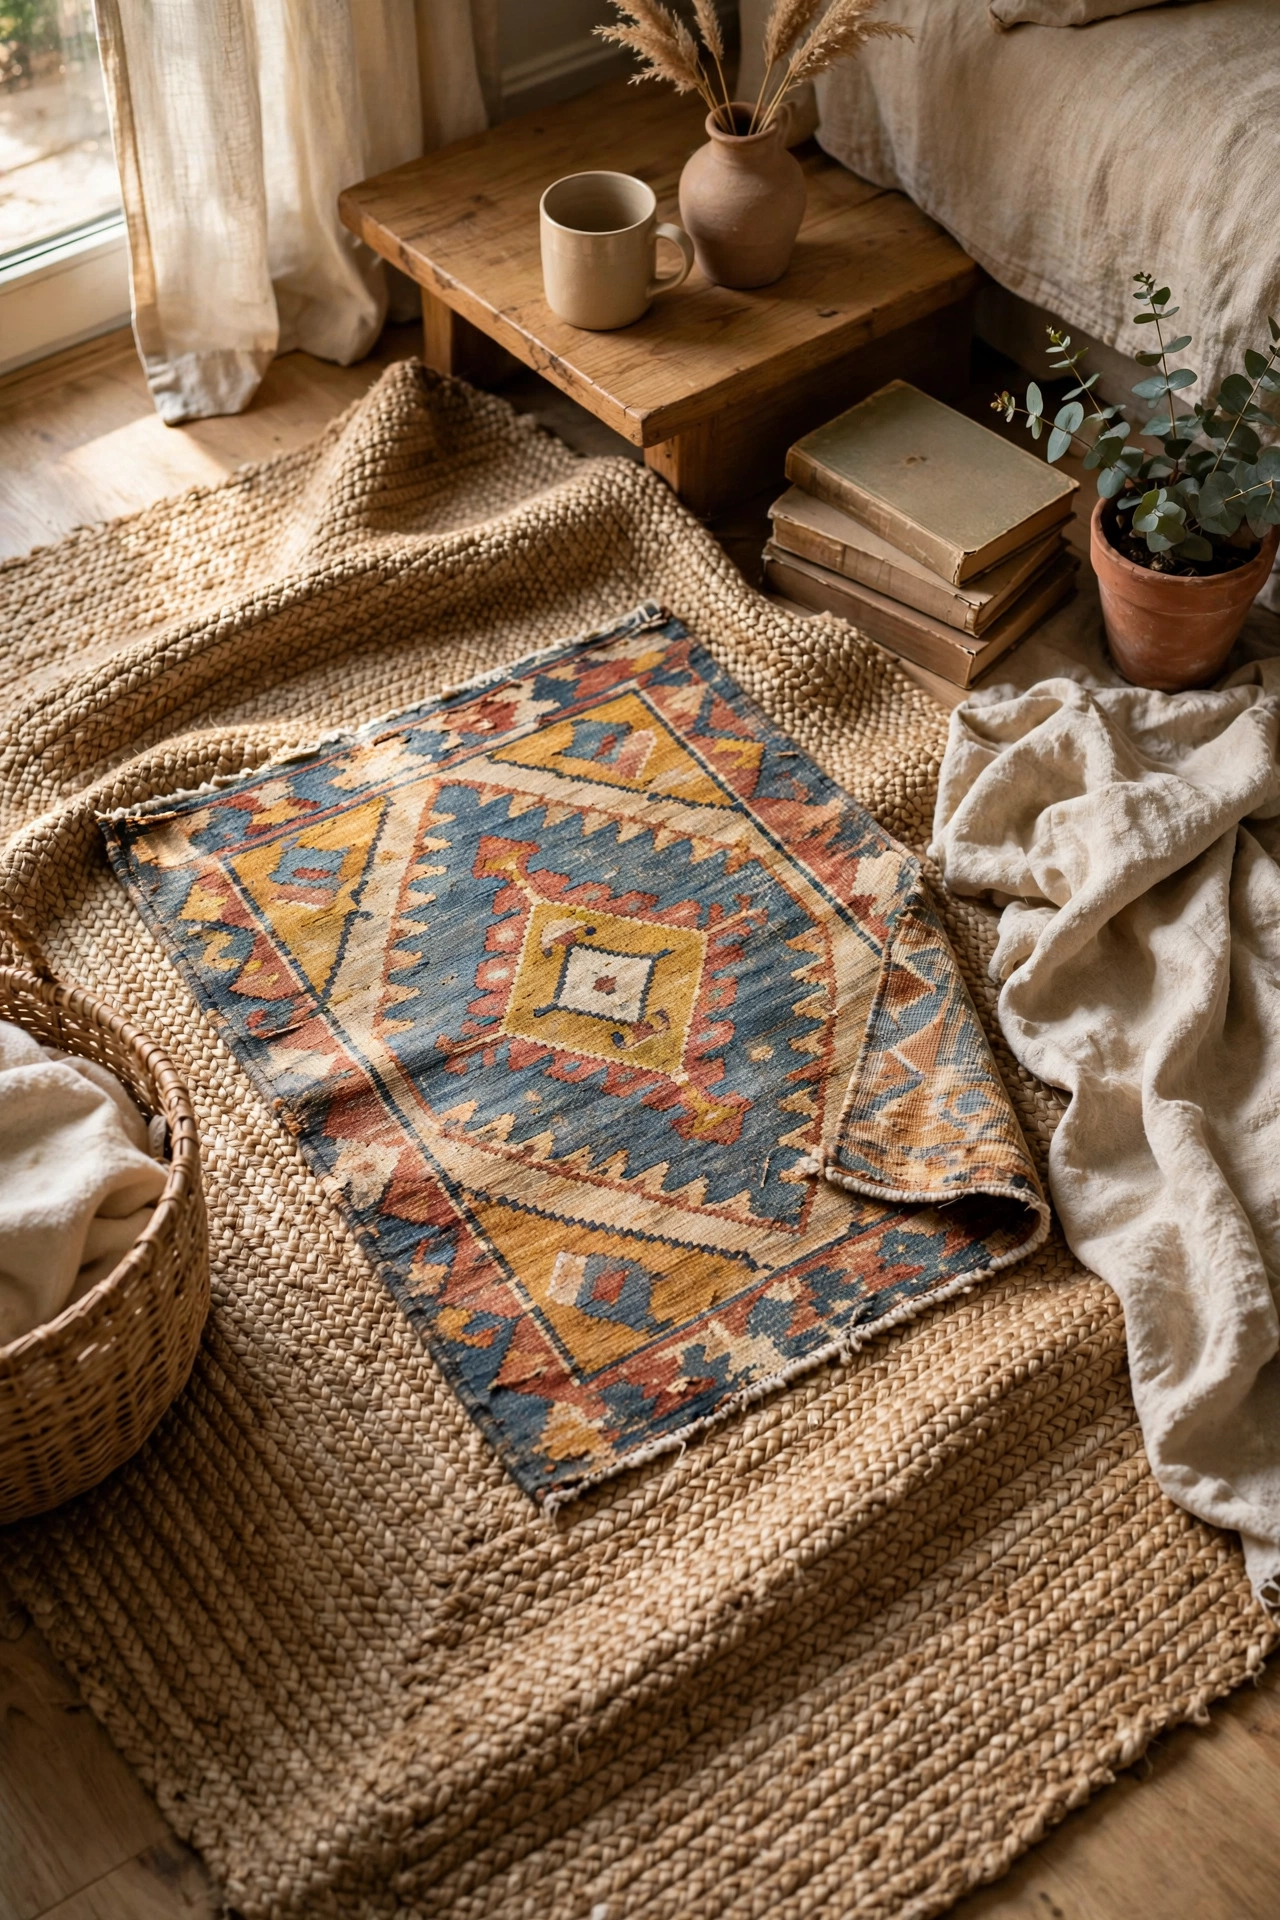
Layering rugs is the fastest way to get the boho look, and mismatched second-hand rugs are perfect for it. Start with a large, plain rug in jute or a neutral flatweave as the base, then layer a smaller patterned rug on top at a slight angle. I found a faded kilim-style rug for eight pounds at a charity shop and layered it over a plain jute rug I already owned. My mistake was choosing two rugs of nearly the same size, which looked like a mistake rather than a style, so make the top rug clearly smaller and offset. Use rug tape underneath to stop everything sliding.
Cost: ~$15-30 | Time: 30 minutes
13. Fringe Trim Lampshade Refresh
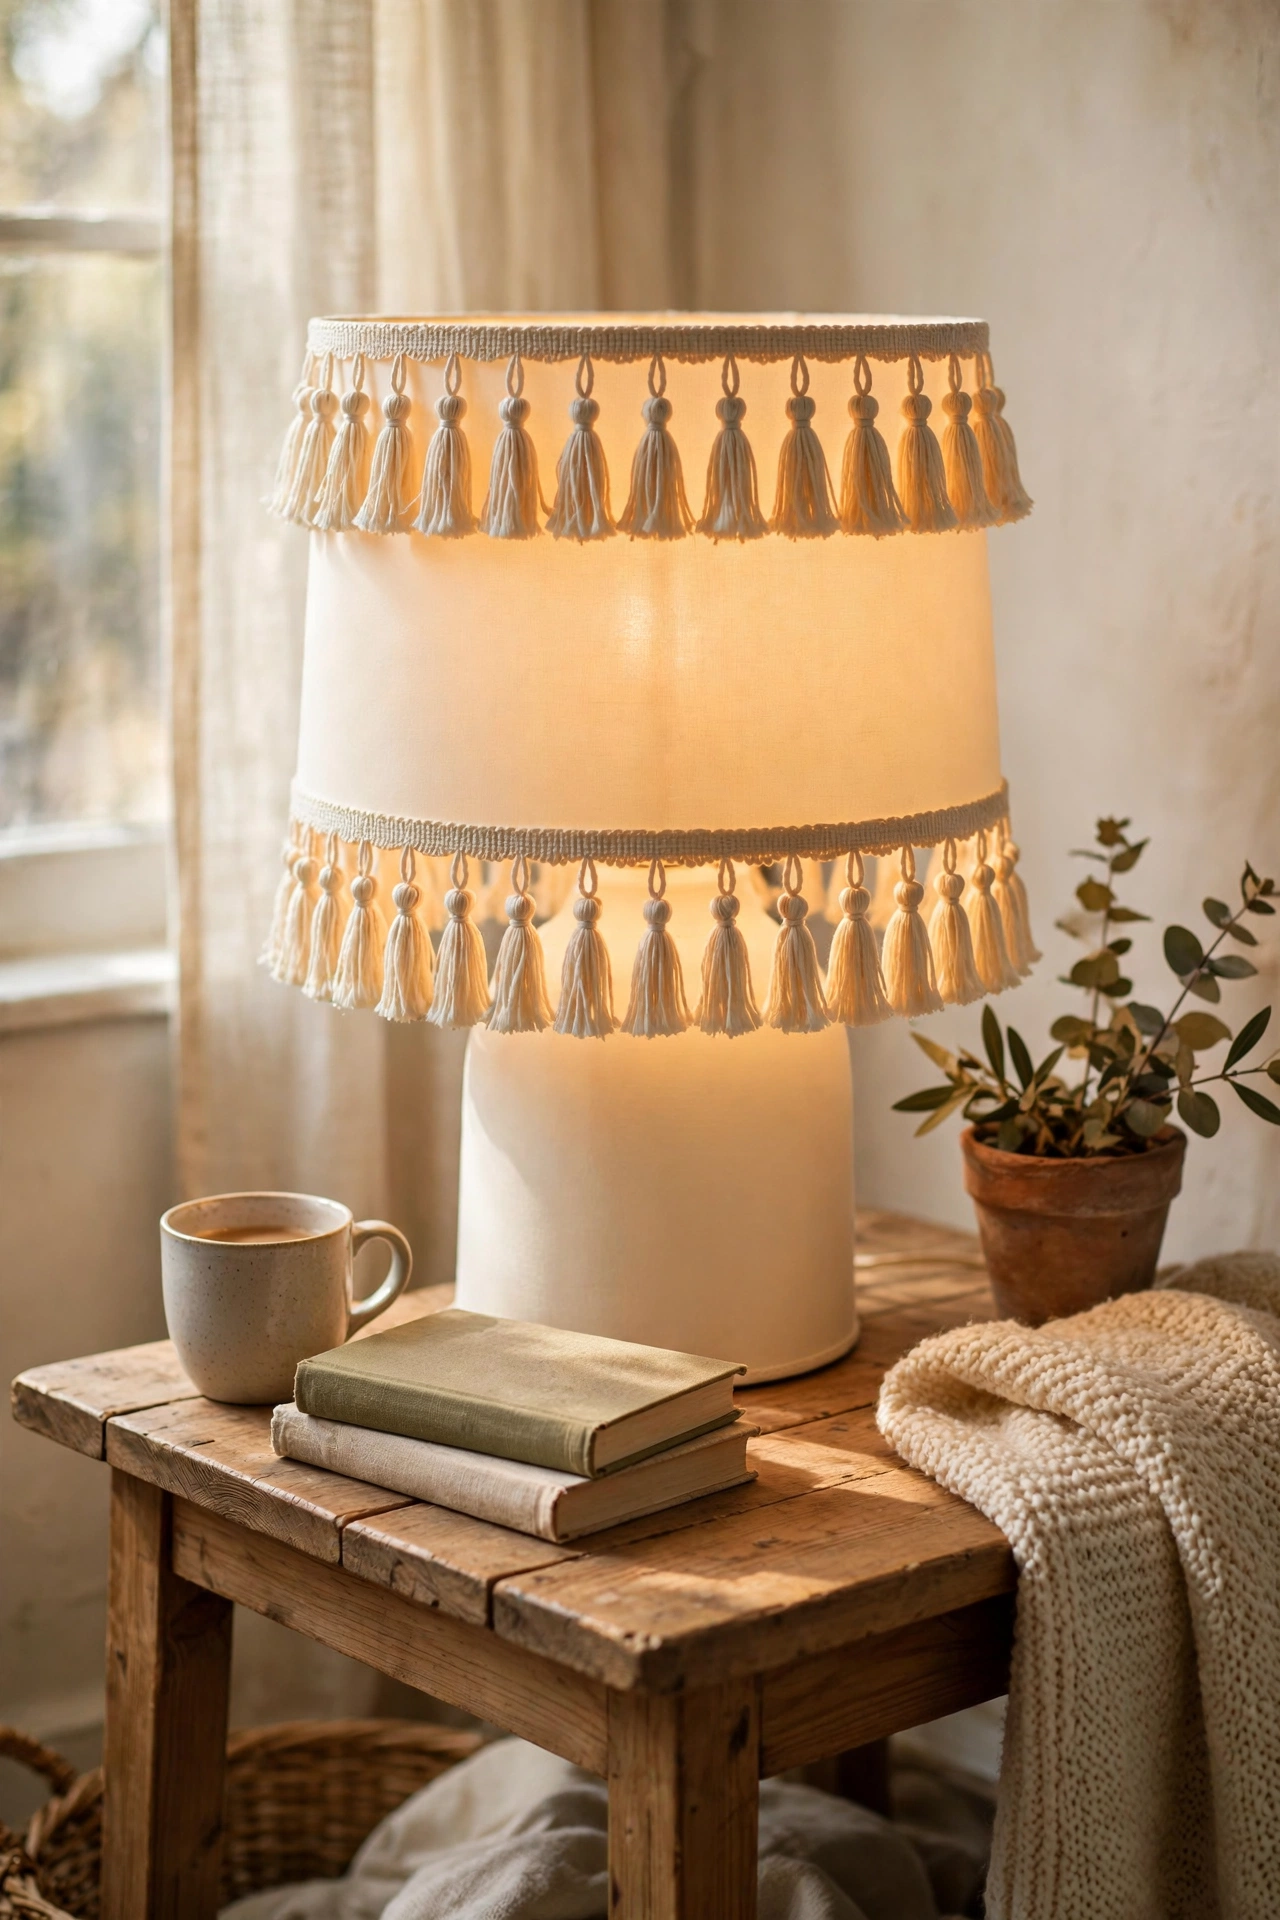
A plain drum shade becomes a boho feature with two rows of fringe trim. Choose a shade in cream or natural linen, then hot-glue a wide row of tassel fringe around the bottom edge and a narrower row just above it. I refreshed a tired shade I found for two pounds, and the fringe catches the lamplight beautifully in the evening. My mistake was using a shade that was slightly too small for the base, and the proportions looked wrong no matter how nice the fringe was, so check the shade height is roughly three-quarters of the base height before you start.
Cost: ~$10-16 | Time: 45 minutes
Plants and Finishing Touches
14. Dried Pampas Grass in a Thrifted Vase
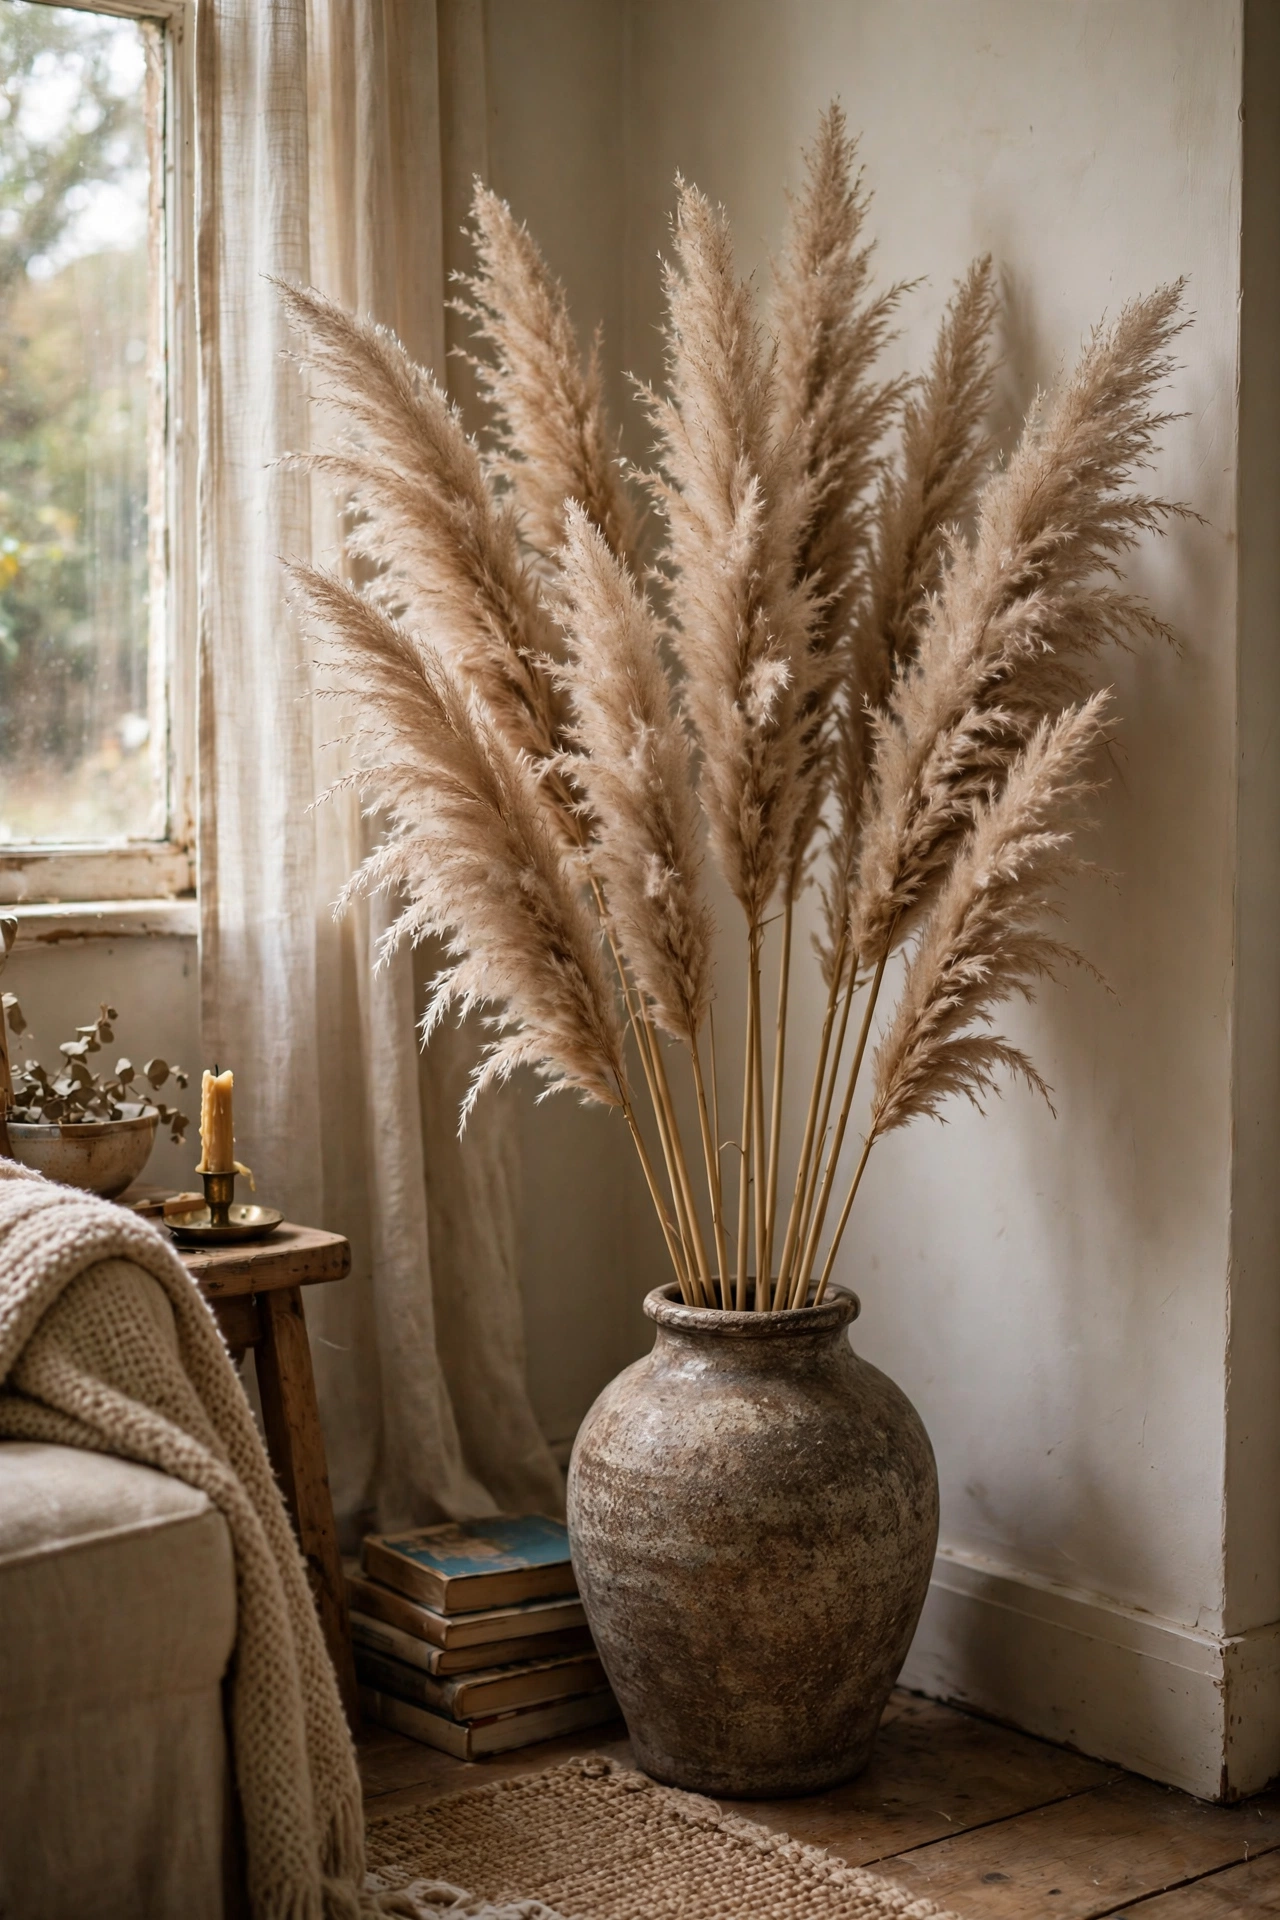
Nothing says boho like a tall spray of pampas grass, and a thrifted vase makes the whole arrangement cost almost nothing. Look for a vase with some height and weight, because pampas plumes are top-heavy and a light vase will tip. Trim the stems to staggered lengths, fan them out, and give the plumes a shake outside before bringing them in, because they shed. I sprayed mine lightly with hairspray to stop the shedding, which works surprisingly well. Keep the arrangement away from open flames, as dried grass is flammable, and replace the plumes when they start to look tired, usually after a year or so.
Cost: ~$8-15 | Time: 20 minutes
15. Wooden Bead Garland for Shelves and Mantels
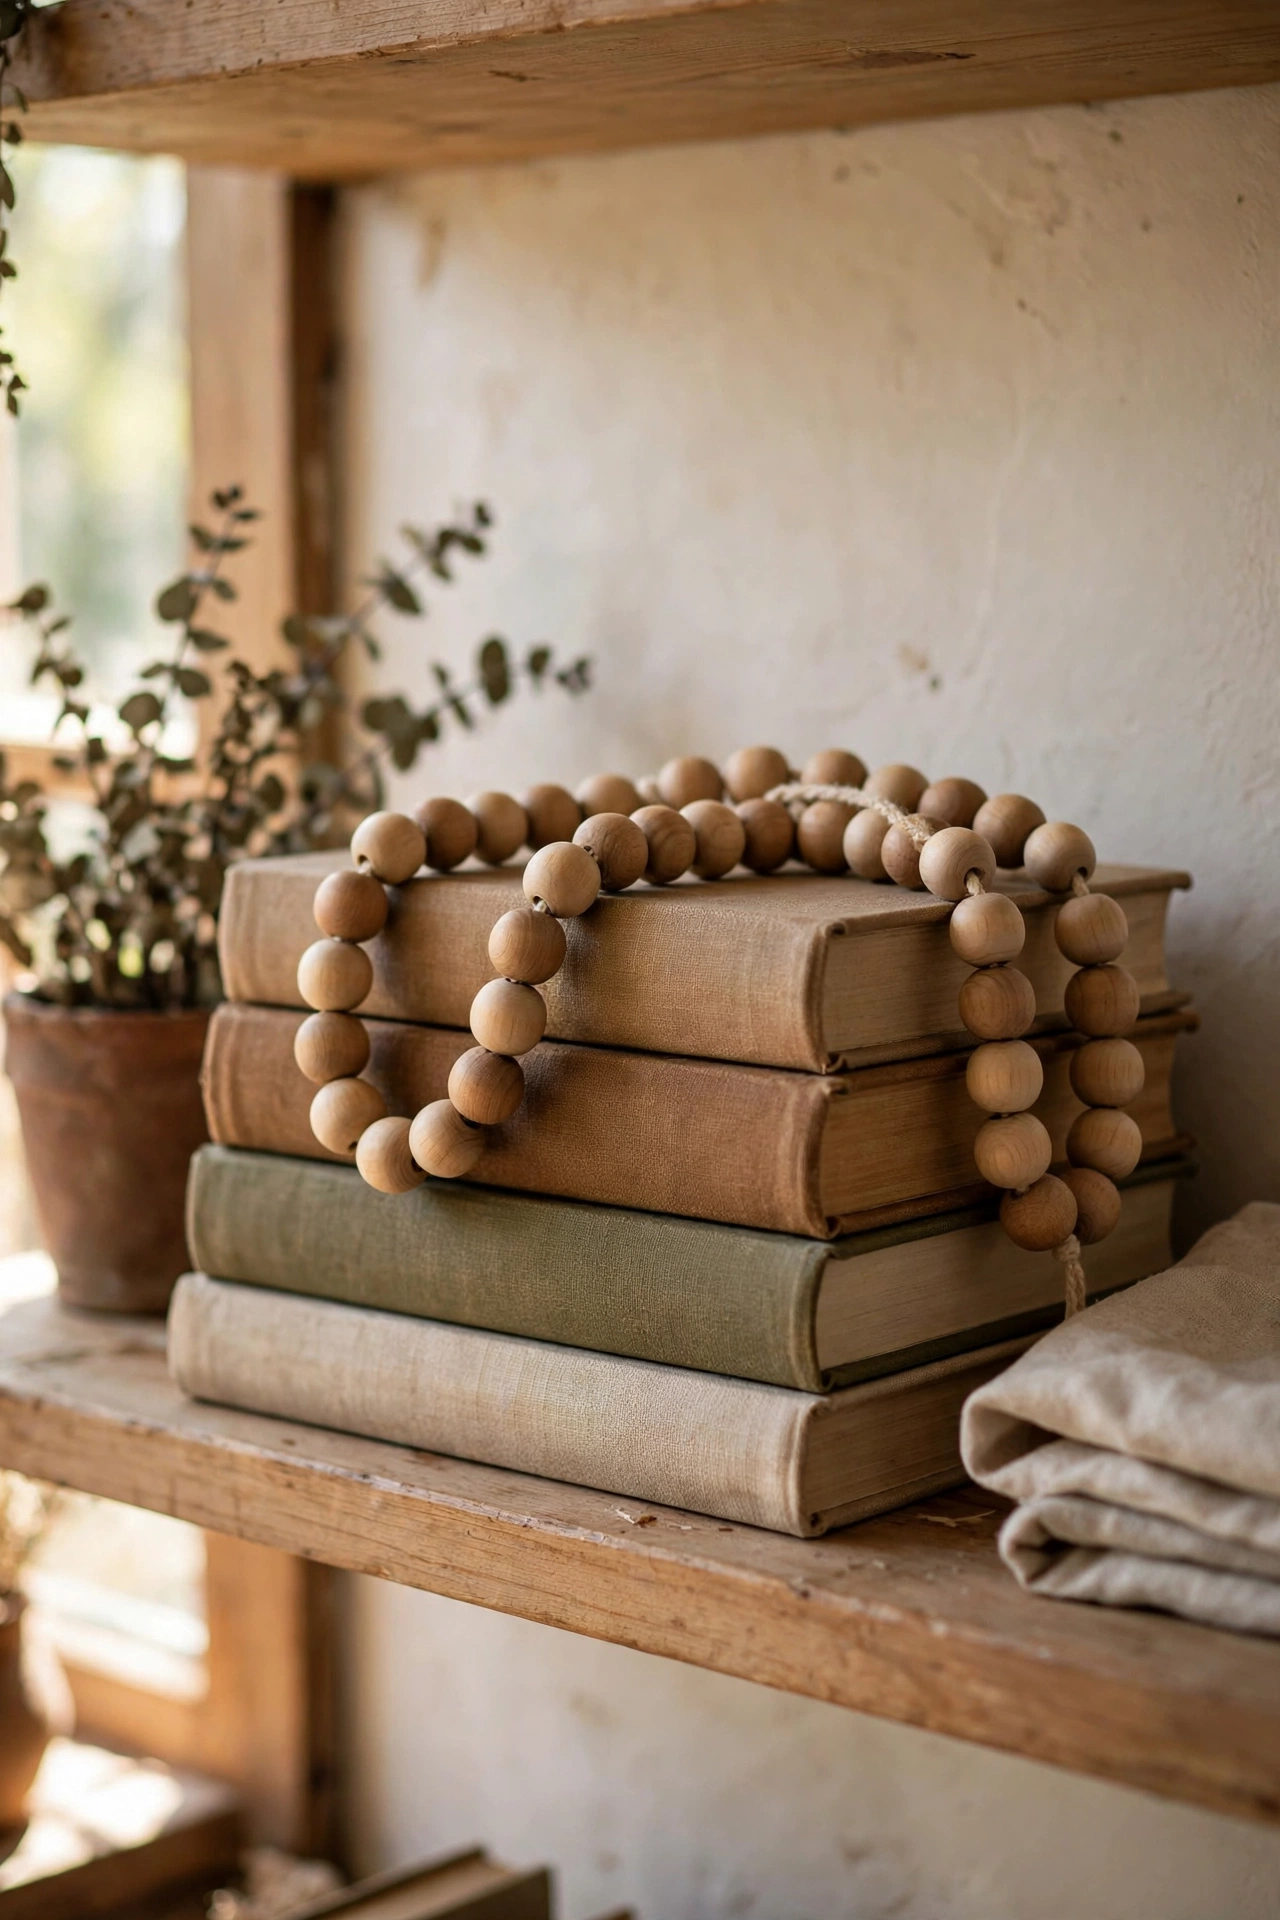
A strand of wooden beads draped over a stack of books or along a mantel is the kind of small detail that pulls a boho room together. Thread natural wooden beads onto jute twine, varying the bead sizes, and add a tassel of twine at each end. I made mine with beads from a craft multipack and it took half an hour in front of the television. My mistake was cutting the twine too short, so the garland would not drape properly, and I had to restring it. Cut the twine at least a third longer than the space you want to drape, so the beads hang in a soft curve.
Cost: ~$5-8 | Time: 30 minutes
16. Hanging Dried Flower Hoop Wreath
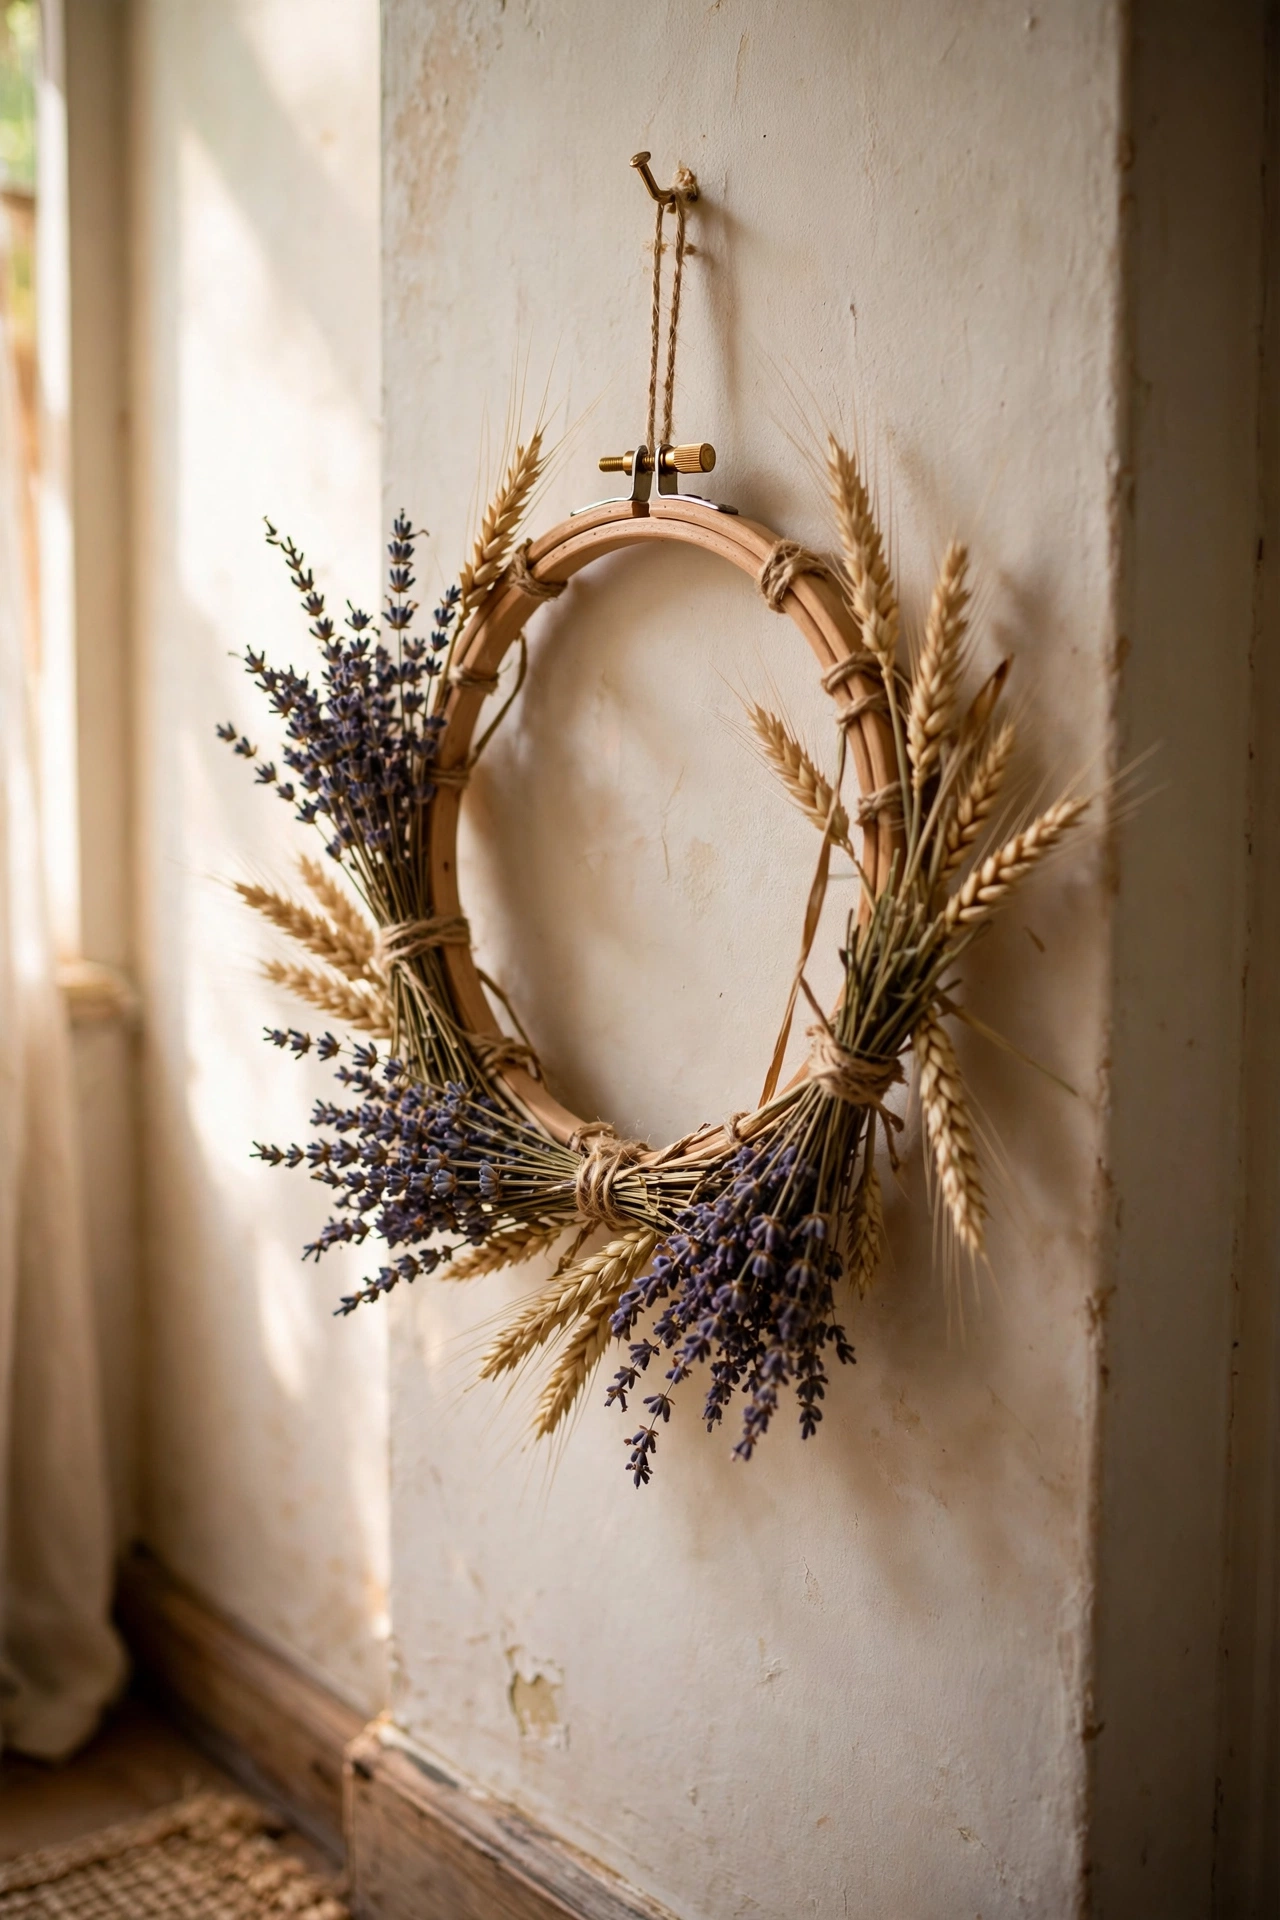
A metal or wooden embroidery hoop hung with dried flowers is a softer, more bohemian take on a wreath. Wrap the hoop in jute twine or leave the wood bare, then tie small bundles of dried lavender, wheat, and strawflowers around the bottom half with thin wire or thread, leaving the top of the hoop bare. I hung mine in the hallway and it has lasted over a year without fading much. My mistake was hanging it in direct sun at first, and the colours bleached within weeks, so keep it in indirect light. It makes a lovely handmade gift too.
Cost: ~$7-12 | Time: 40 minutes
17. Tassel Curtain Tiebacks from Embroidery Thread
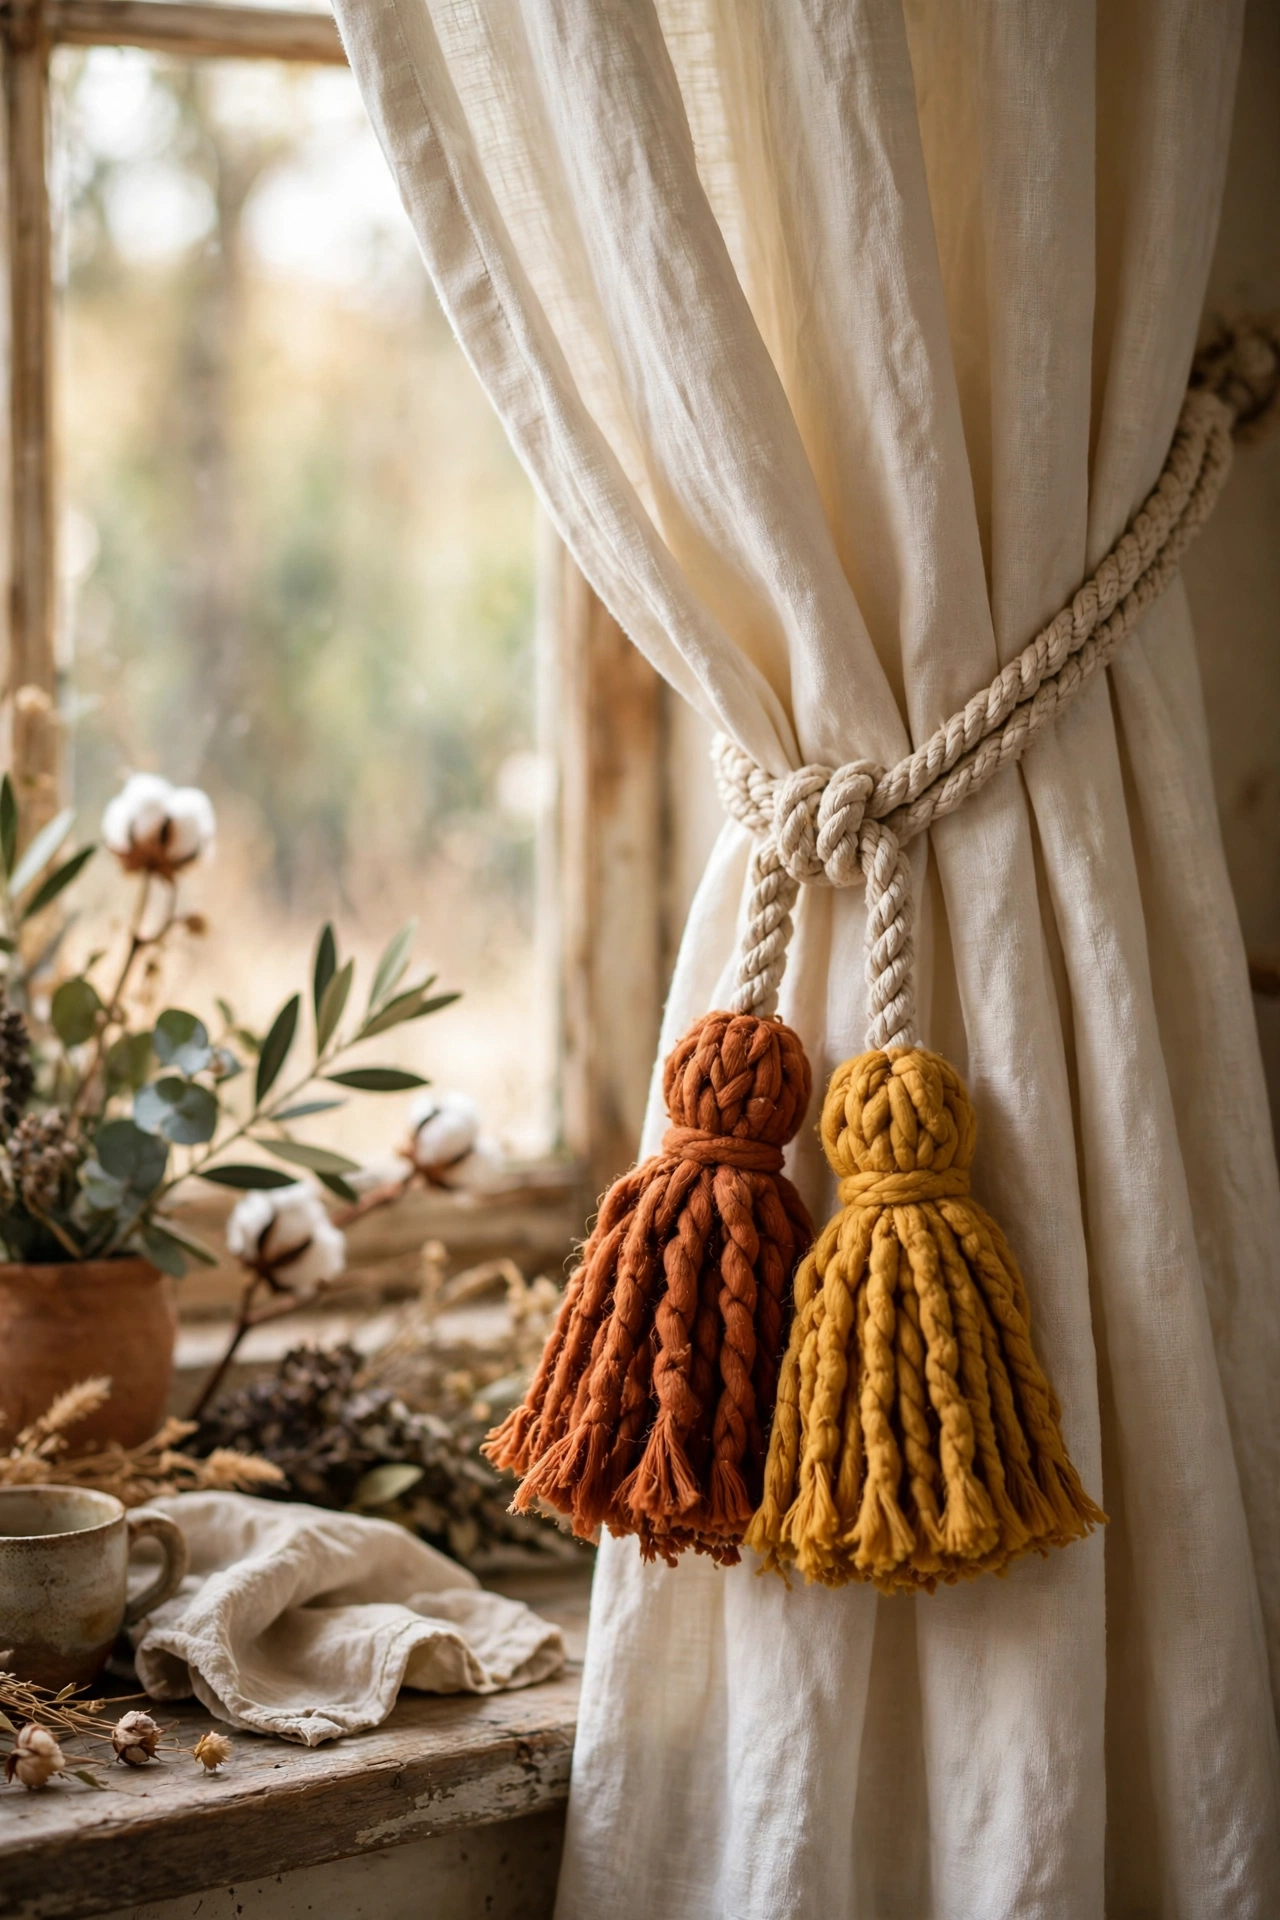
Shop-bought tiebacks rarely match a boho scheme, but chunky handmade tassels in warm colours do the job for pennies. Wrap embroidery thread around your hand about forty times, tie off one end, cut the loops at the other end, and wrap a second length of thread around the top to form the tassel head. Make two tassels, tie them to a length of cord or ribbon, and loop each around a curtain. I made mine in rust and mustard, and they lift my plain cream curtains completely. My mistake was making the first pair too small, and they looked lost, so go bigger than you think.
Cost: ~$4-7 | Time: 45 minutes
Save this one for your weekend project list.
Keep the handmade theme going: (see also: boho-bedroom-ideas-budget) (see also: 15-easy-diy-home-decor-projects-for-beginners-under-25) (see also: 17-diy-wall-decor-ideas-on-a-budget)
Quick Questions
Q: How much does it cost to decorate a room in boho style on a budget?
A: Less than you think. Every project in this list costs under $30 to make, and most land under $12. A full room refresh of five or six projects, like a macramé hanging, painted pots, a bead garland, and layered rugs, typically costs between $50 and $80 if you source materials from charity shops and pound shops. The trick is layering several small handmade pieces rather than buying one big statement item.
Q: What are the easiest boho DIY decor projects for beginners?
A: Start with the wooden bead garland, the painted terracotta pots, and the pampas grass arrangement. None of them needs special skills or tools, and each takes under an hour. Once you are comfortable, try the simple macramé plant hanger, which teaches you the square knot you will reuse for bigger wall hangings later.
Q: Where can I find cheap materials for boho projects?
A: Charity shops are the best source for vases, mirrors, baskets, and rugs. Cotton cord, jute twine, and wooden beads are cheapest in craft multipacks or online bundles. Terracotta pots, placemats, and plain cushion covers come from pound shops and discount homeware stores. For wood and driftwood, check reclamation yards and beach walks, and always let found wood dry fully indoors before using it.
