19 Thrift Store DIY Ideas Worth Trying
I have been hunting thrift store diy ideas for six years, and I have learned that not every charity shop bargain deserves your Saturday. Some flips eat a whole weekend and still look tired, while others take an afternoon and earn compliments for years. This list is my curated shortlist: only the projects I would genuinely recommend to a friend, the ones where the effort-to-payoff ratio actually works out.
Every idea here starts with something you can realistically find second hand, costs very little to finish, and ends with a piece that looks intentional rather than improvised. I have picked the flips with the highest success rate, so you can buy with confidence and skip the experiments that rarely pay off. Start with the furniture if you want the biggest wins, or try the smaller finds first to build your skills.
Furniture Flips Worth the Effort
1. Solid Wood Dresser Chalk-Paint Makeover
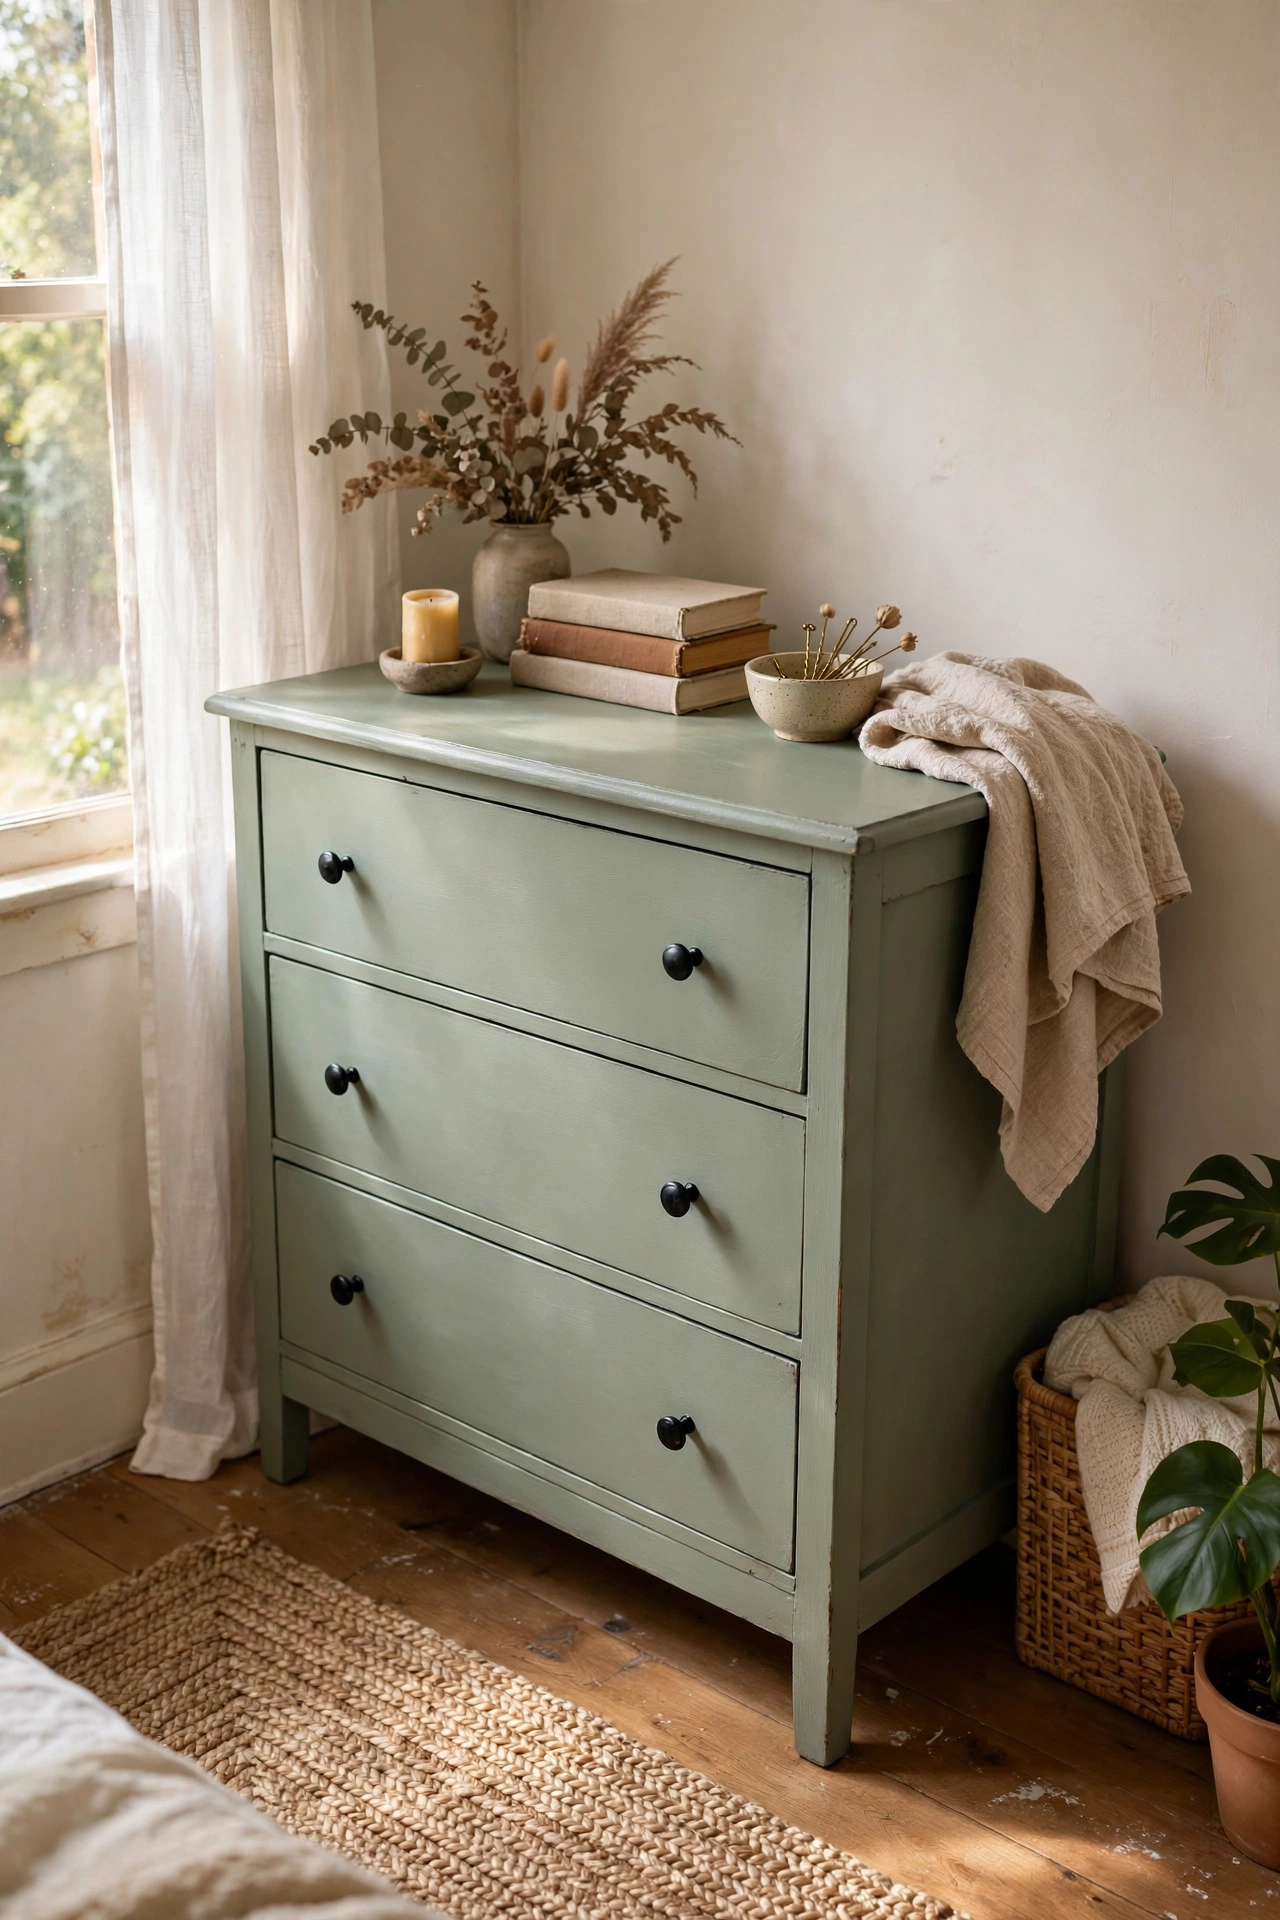
A solid wood dresser from a thrift store is the single most rewarding furniture flip for the effort involved, because the bones are good and paint forgives everything else. Check the drawers slide smoothly and the frame is solid wood rather than veneer over chipboard by looking at the raw drawer edges. Remove the hardware, clean every surface with sugar soap, then apply two coats of chalk paint with a decent brush and seal with clear wax buffed in with a soft cloth. I did mine in a soft sage green and swapped the old brass knobs for black ones. My mistake was skipping the cleaning step on the first drawer, and the paint beaded straight away, so never rush the sugar soap. The finished piece looks like it came from a far pricier shop.
Cost: ~$22-30 | Time: 1 weekend
2. Vintage Armchair Reupholstered in Linen
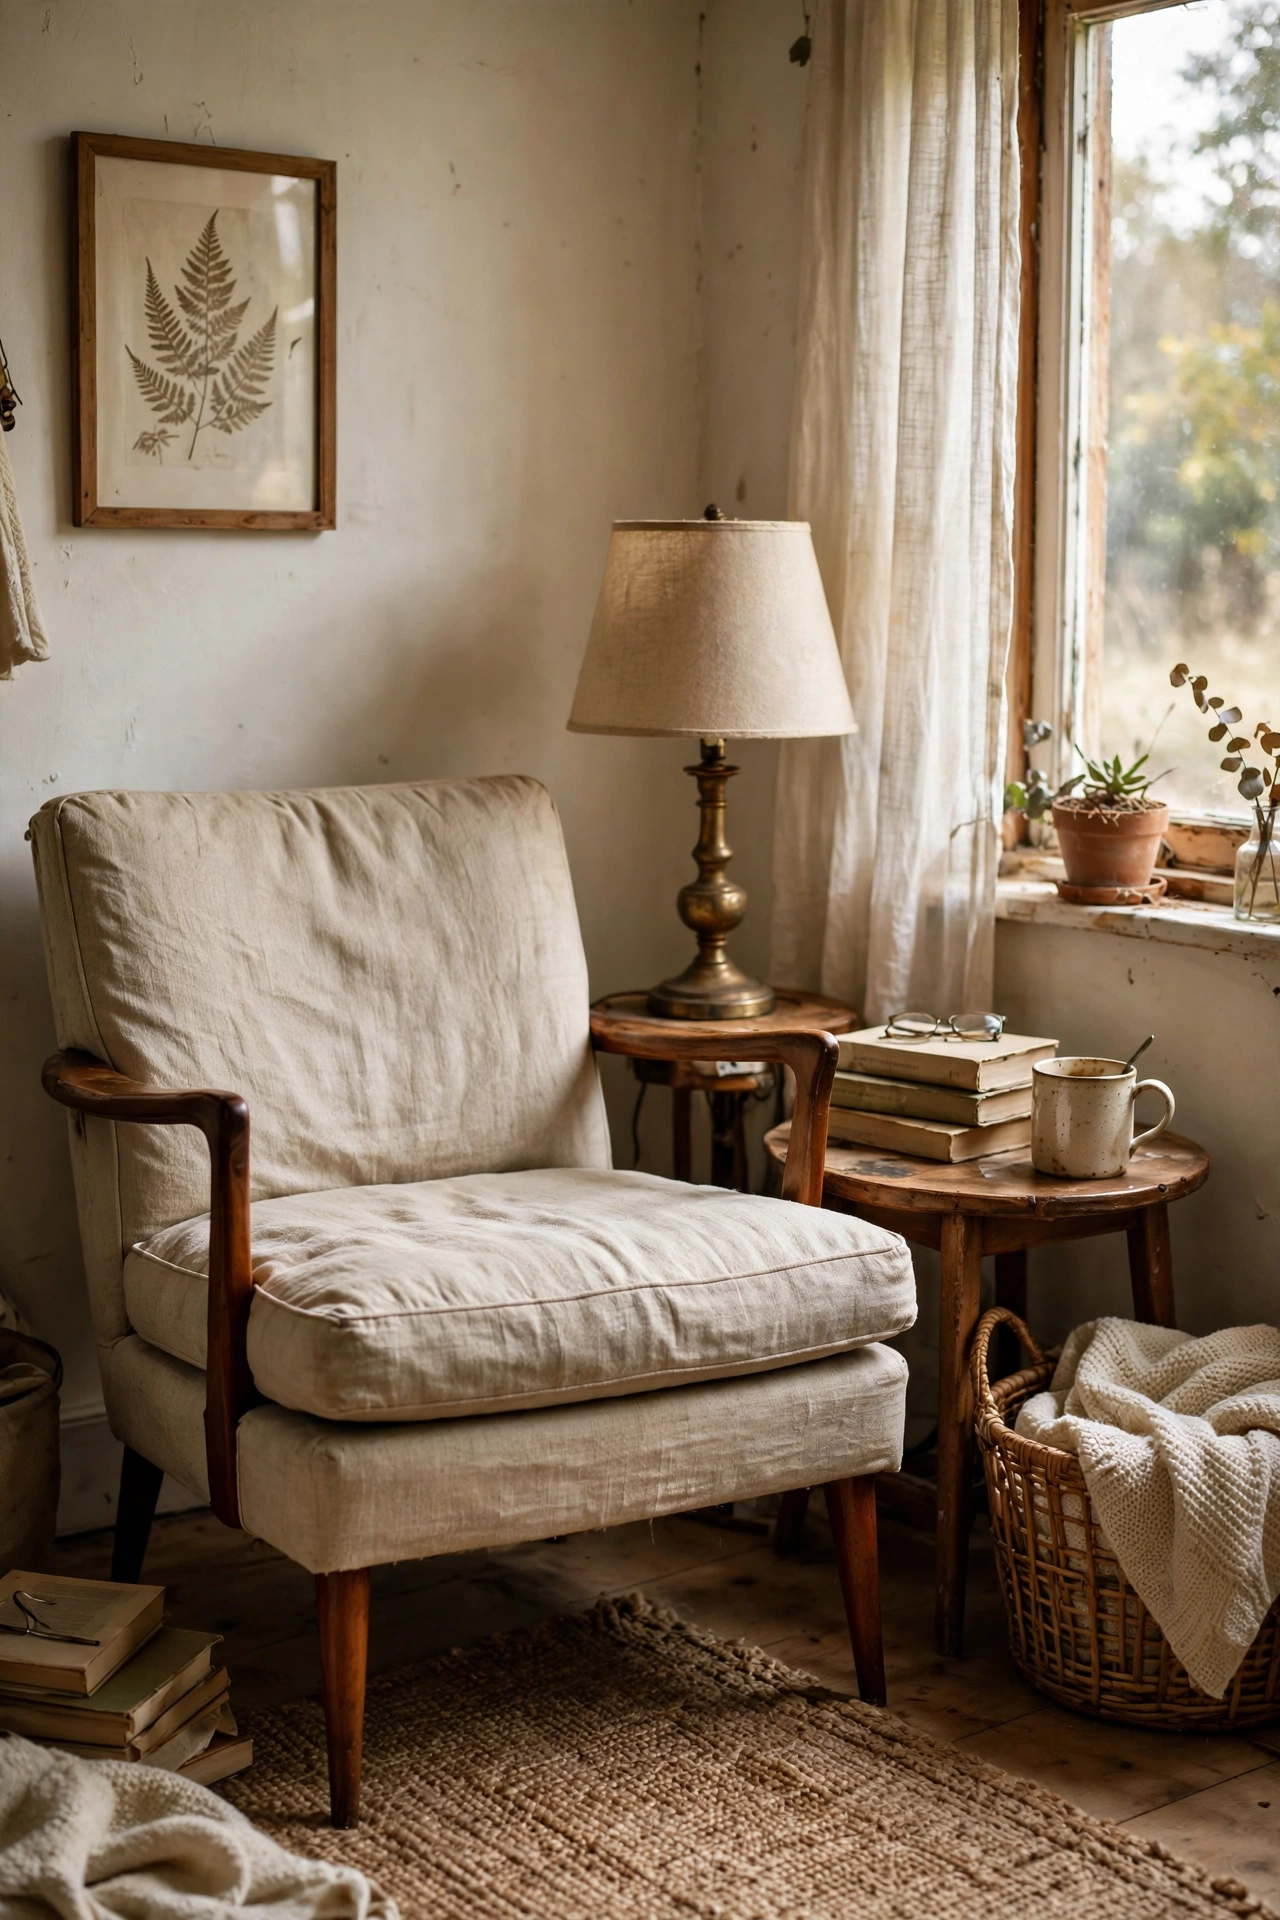
A sturdy vintage armchair with tired fabric is always worth saving when the frame is hardwood and the springs still feel firm. Sit in it first, then flip it over to check for a solid frame and intact webbing underneath. Strip the old fabric carefully to use as a cutting pattern, cut new medium-weight linen with an extra inch for seams, and staple it on with a heavy-duty staple gun, pulling tight and working opposite sides together. I reupholstered a 1960s chair in oatmeal linen for my reading corner. My mistake was choosing a thin fabric on my first attempt, which showed every staple bump underneath, so pick a proper upholstery-weight linen. It now gets more compliments than anything else I own.
Cost: ~$25-35 | Time: 1 weekend
3. Oak Side Table Stained Dark Walnut
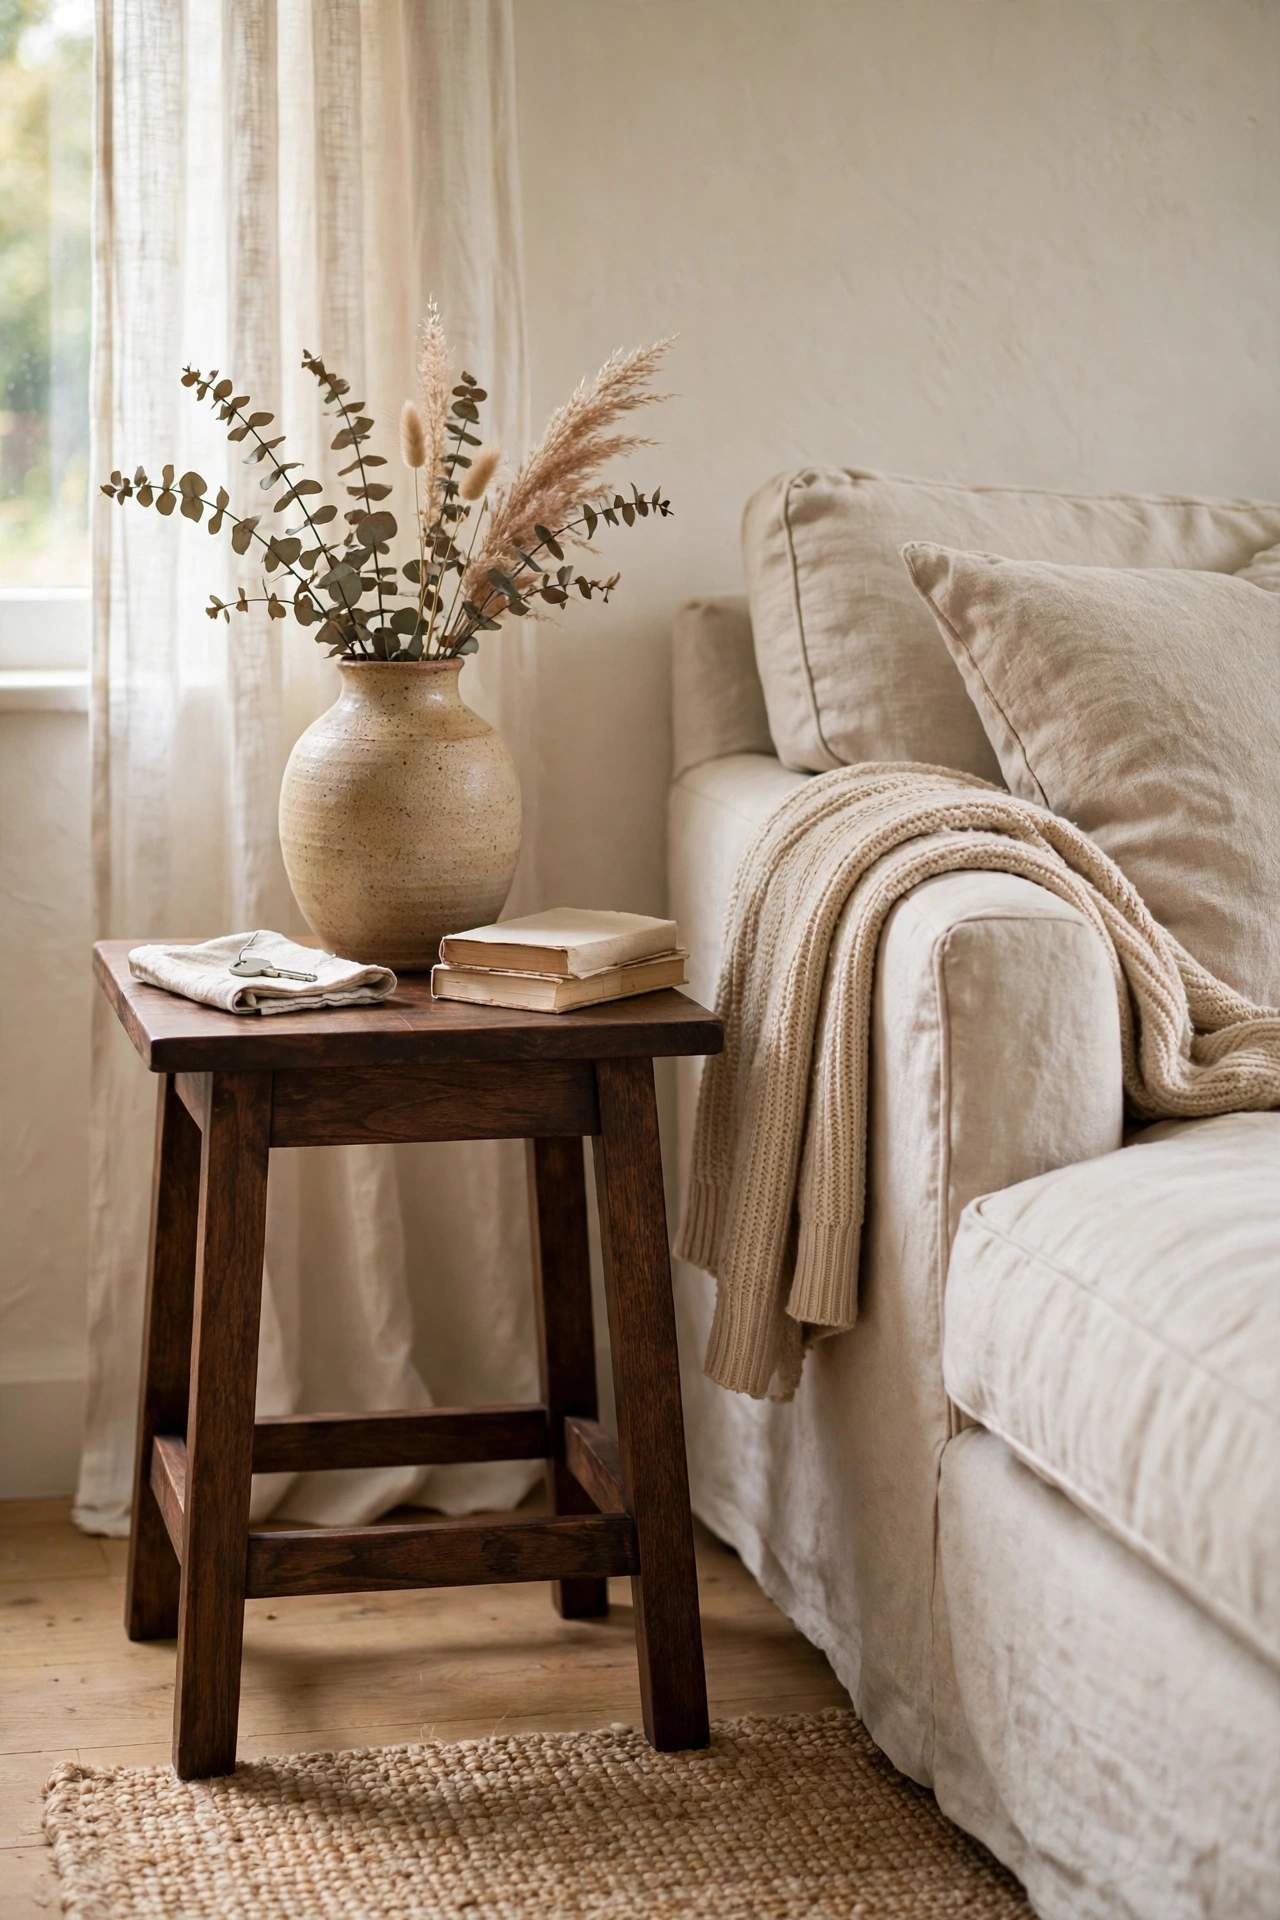
Thrift stores are full of pale, orange-toned oak side tables from the 1990s that nobody looks at twice, and that is exactly why they are such good value. Sand one back to bare wood with 120-grit then 220-grit sandpaper, wipe away the dust with a tack cloth, and apply two thin coats of dark walnut wood stain, wiping off the excess after five minutes each time. Finish with three coats of matte polyurethane for protection. I turned an $8 oak table into something that passes for walnut in my living room. My mistake was laying the stain on too thick the first time, which went blotchy and had to be sanded back, so thin coats and patience are everything. The grain looks rich and expensive now.
Cost: ~$15-20 | Time: 1 weekend
4. Thrifted Writing Desk Sanded and Waxed
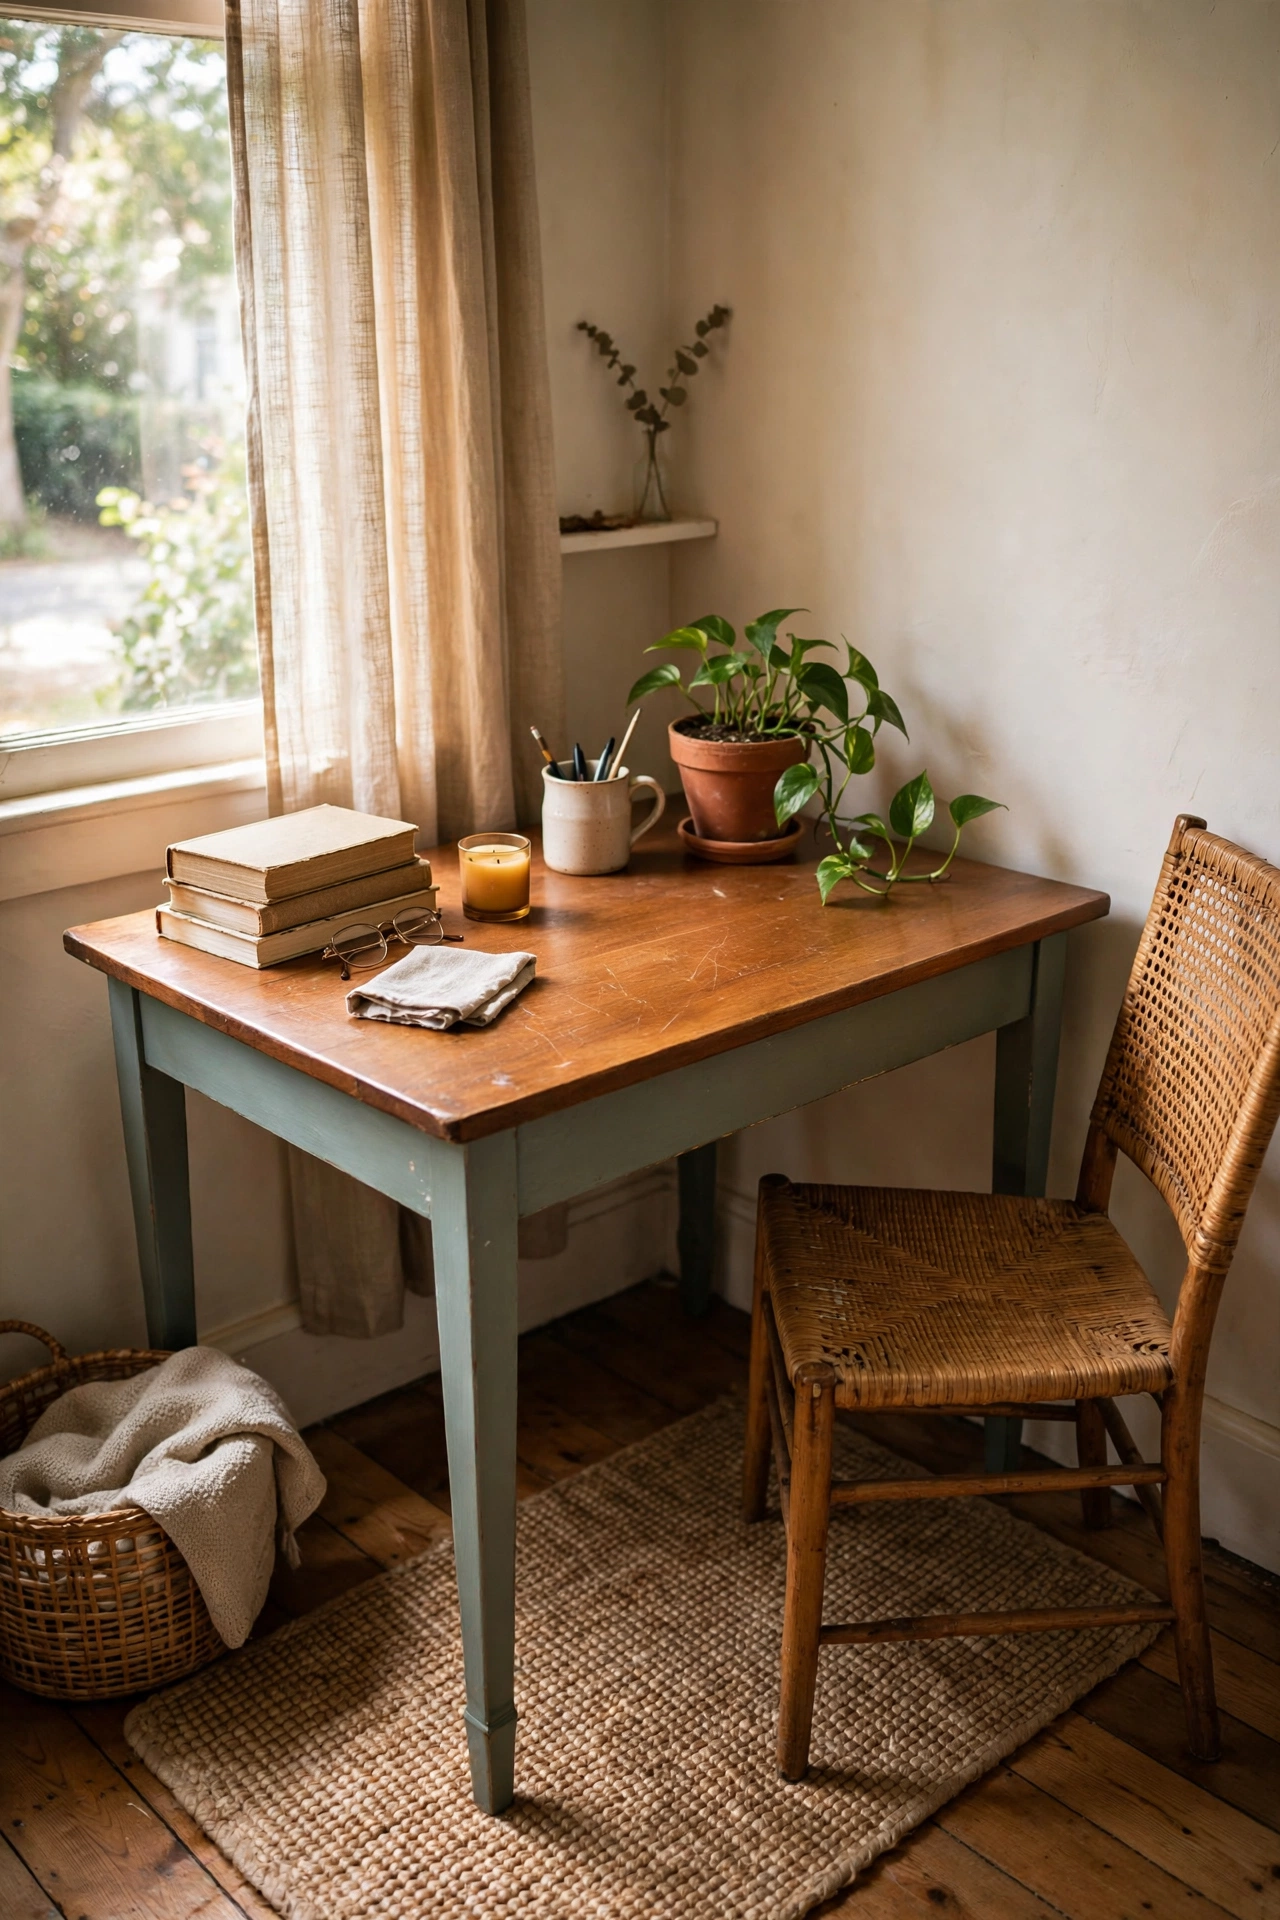
A solid wood writing desk with a scratched top is one weekend away from being beautiful. Sand the top down through the grits until the scratches disappear, always working with the grain, then apply two coats of clear furniture wax with a soft cloth, buffing between coats. Leave the legs and drawers in their original finish for a two-tone look, or paint them if the finish is beyond saving. I rescued a desk for $15 and now work at it every day. I tried an electric sander right up to the edge on my first pass and gouged the corner, so finish the edges by hand with a sanding block. The waxed top feels silky and shrugs off coffee rings.
Cost: ~$12-18 | Time: 1 day
5. Mid-Century Coffee Table Refinishing
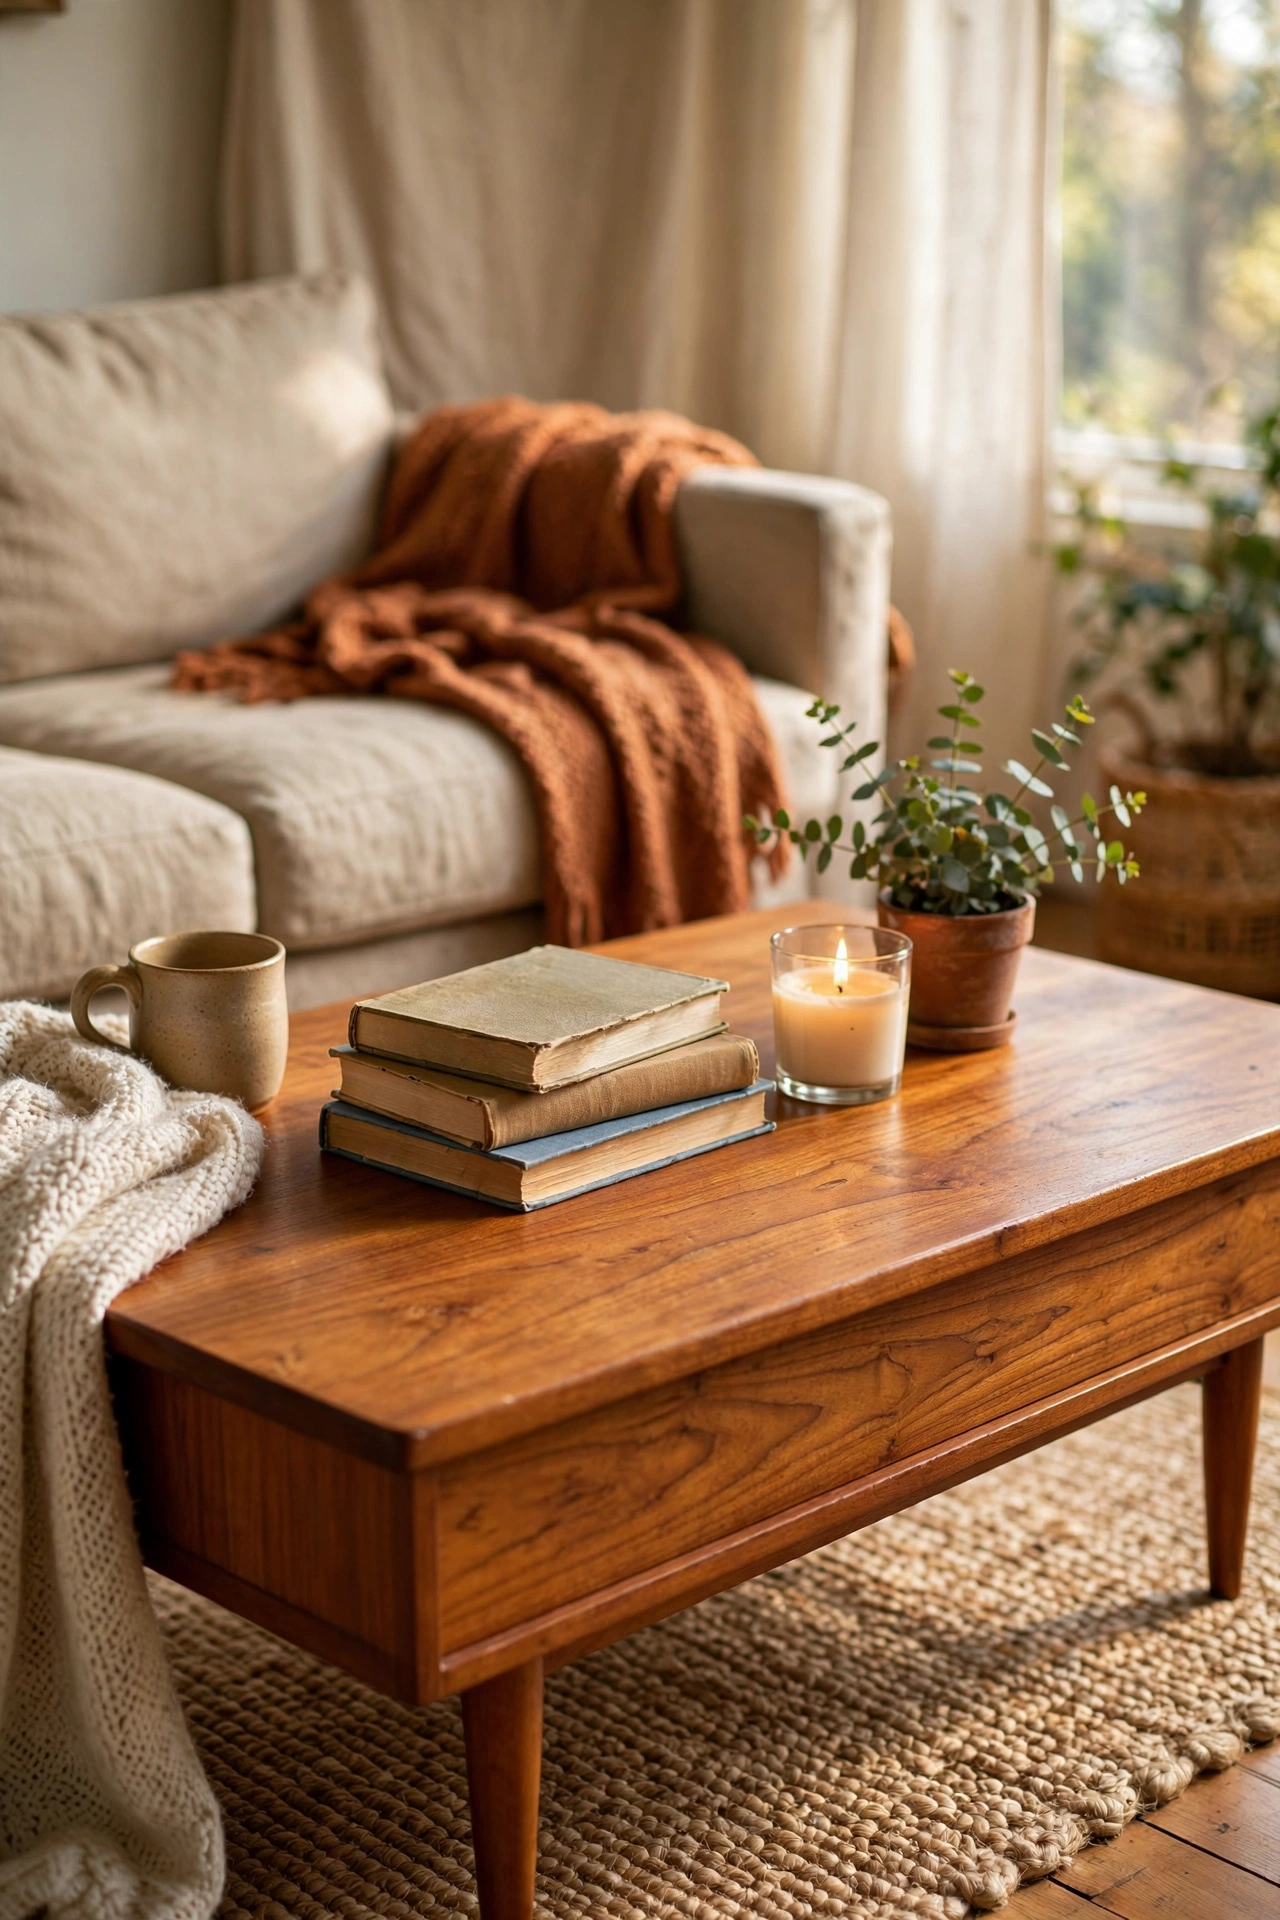
Those low mid-century coffee tables with water rings are common thrift finds with genuine quality underneath the damage. Strip the old finish with a citrus-based stripper, neutralise and sand the surface smooth, then apply teak oil in thin coats, wiping back the excess after twenty minutes. Three coats will do it. I refinished one for $12 in materials and it sits in my living room looking like a proper design piece. My mistake was using a metal scraper too aggressively and denting the edge veneer, so use plastic scrapers on veneered surfaces. Before you buy, check the legs are original and the veneer has no bubbling, because those are hard to fix.
Cost: ~$12-18 | Time: 1 weekend
Small Finds, Big Payoff
6. Ceramic Vase Limewash Makeover
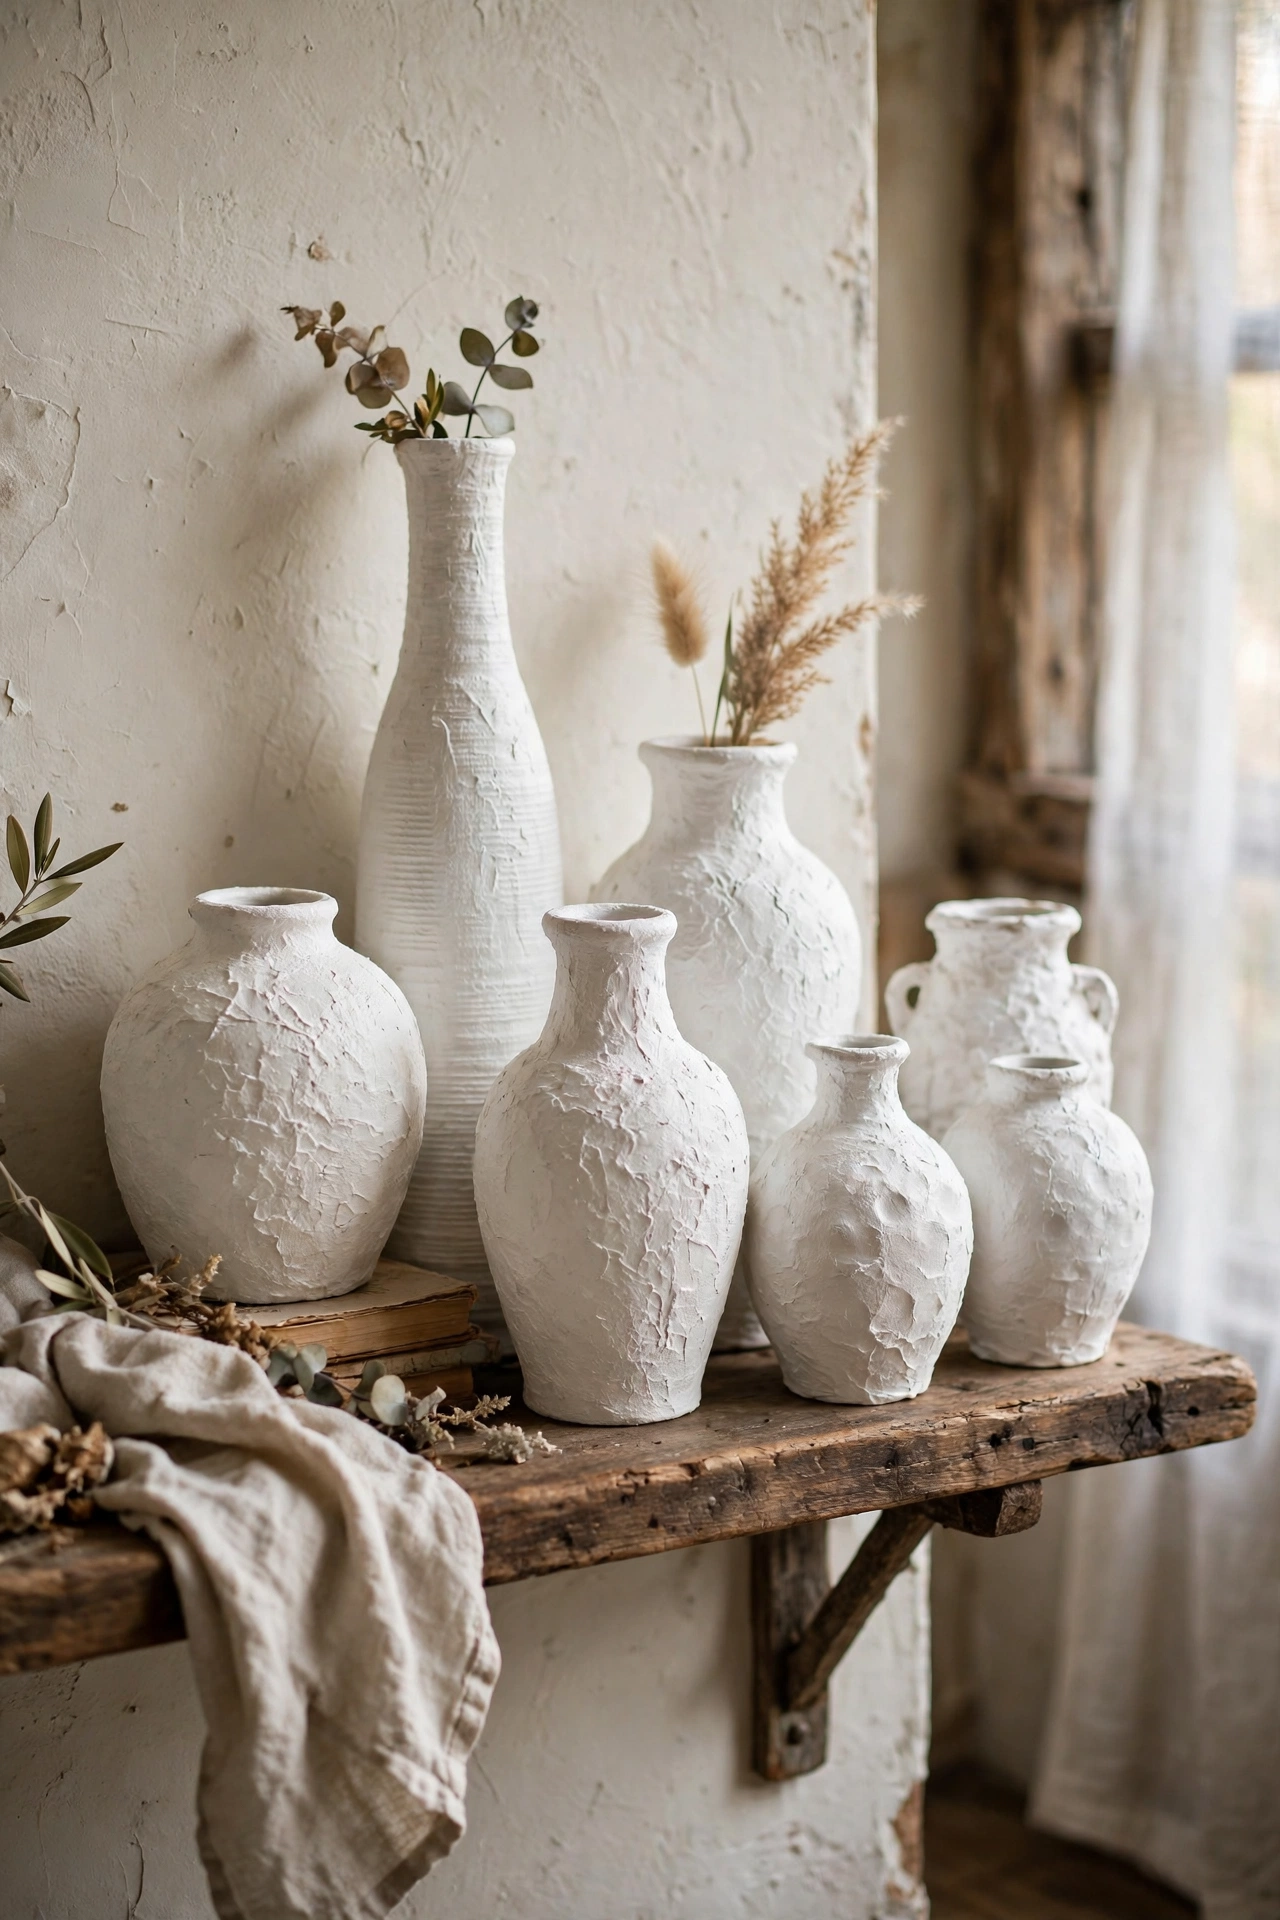
Ugly glazed vases in dated colours become modern sculptural pieces with a coat of limewash-effect paint. Mix baking soda into matte white or cream paint until it is thick and gritty, brush it on in uneven strokes, and let the texture do the work. Two coats give a convincing stone or plaster look. I limewashed a whole shelf of $1 vases in different heights and they now read as a curated set. My mistake was trying gloss paint on the first one, which the baking soda could not disguise, so matte paint is essential. Group three together in odd numbers and varying heights for the best effect.
Cost: ~$5-8 | Time: 1 hour plus drying
7. Gallery Wall from Mismatched Thrift Frames
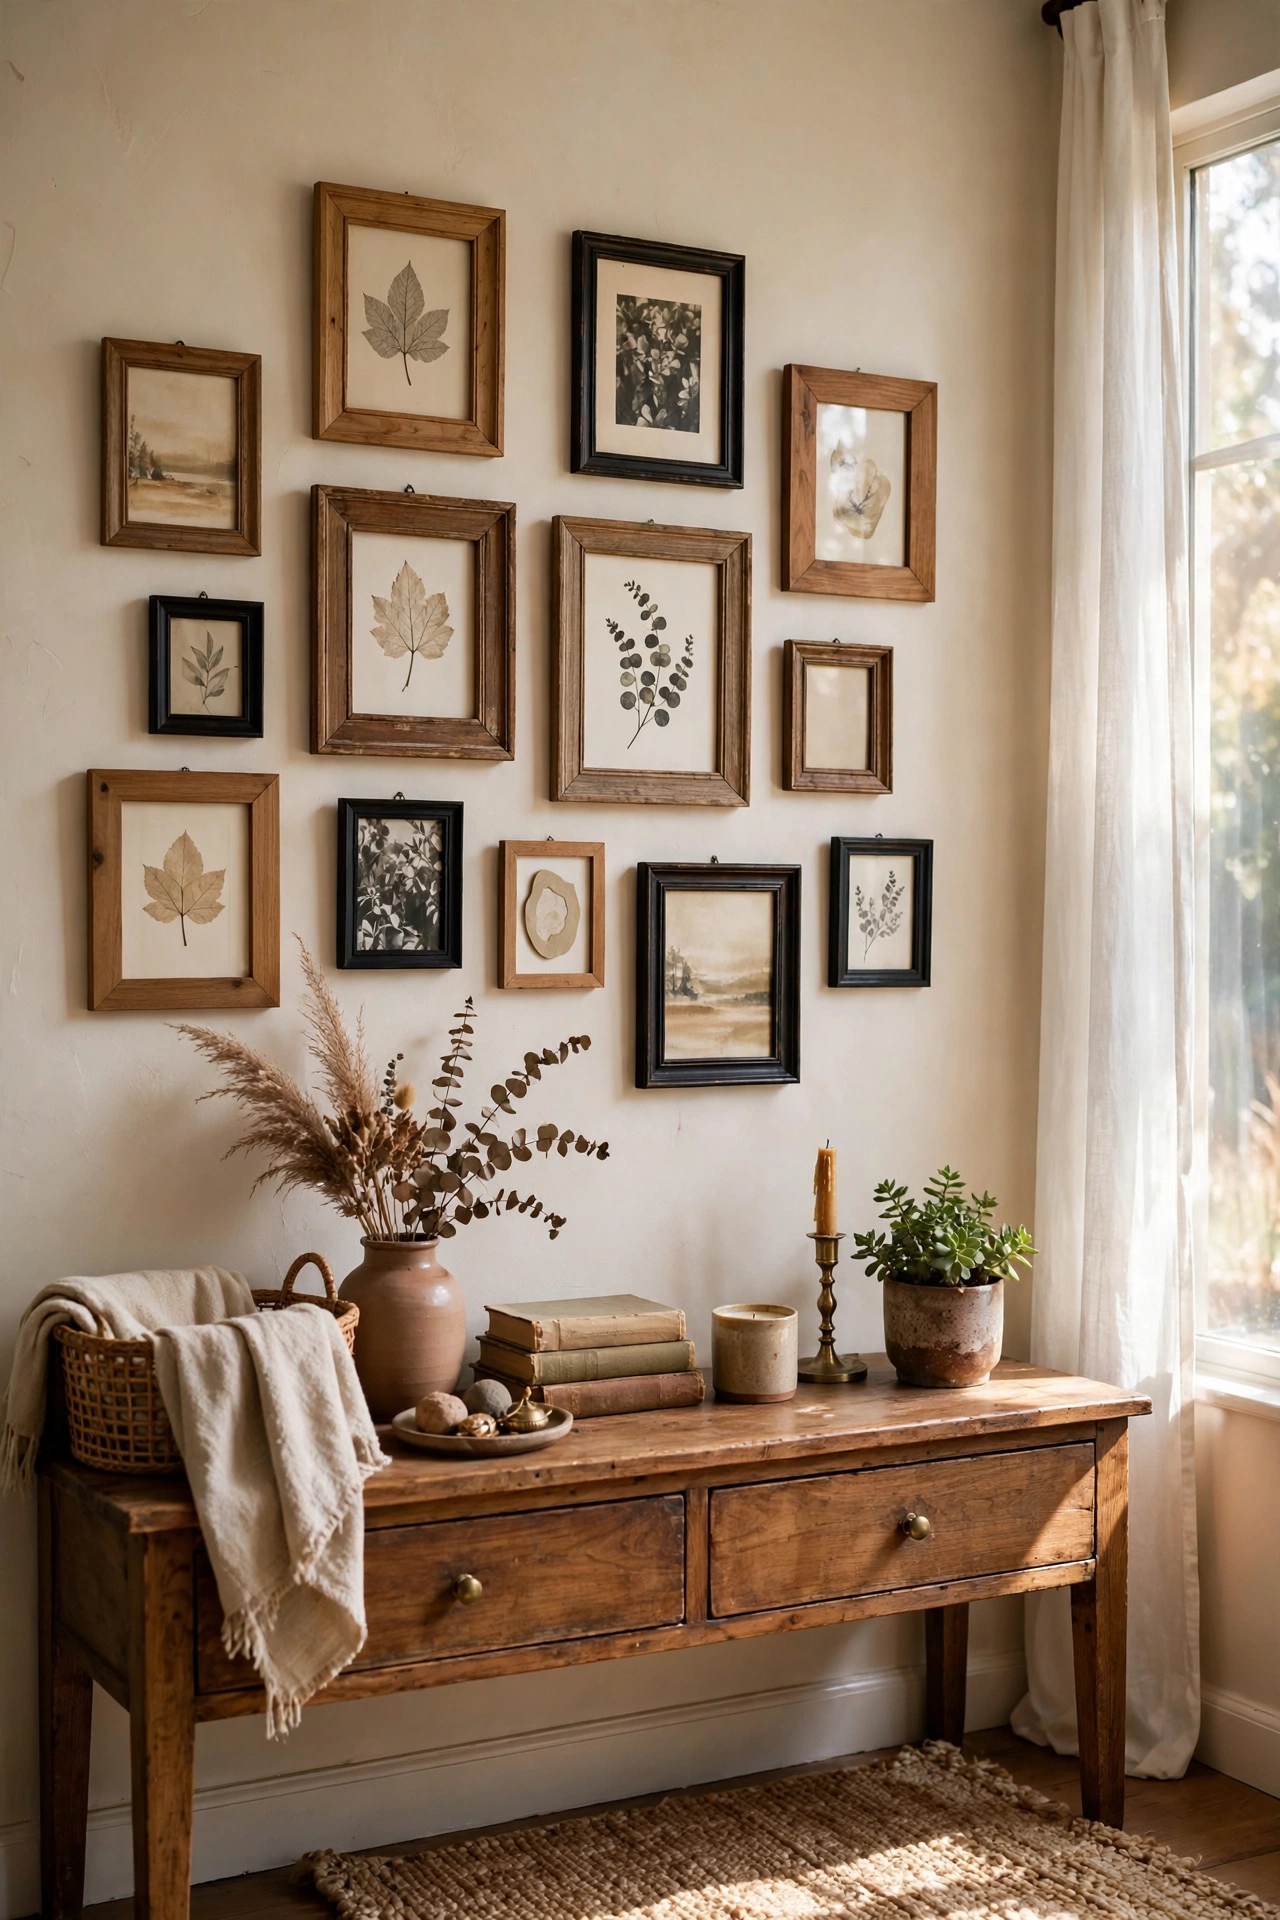
A gallery wall costs almost nothing when the frames come from a thrift store. Buy a mix of wood and metal frames in different sizes for a dollar or two each, spray the worst ones a unifying colour, and fill them with free printable art or your own photographs. Lay the whole arrangement out on the floor first and photograph it before you hang a single nail. I built a nine-frame wall for under $20. My mistake was hanging the first version without any planning and ending up with a lopsided mess, so the floor layout step is non-negotiable. Keep about two inches between frames for a calm, deliberate look.
Cost: ~$12-20 | Time: 2 hours
8. Vintage Mirror Frame Regilded
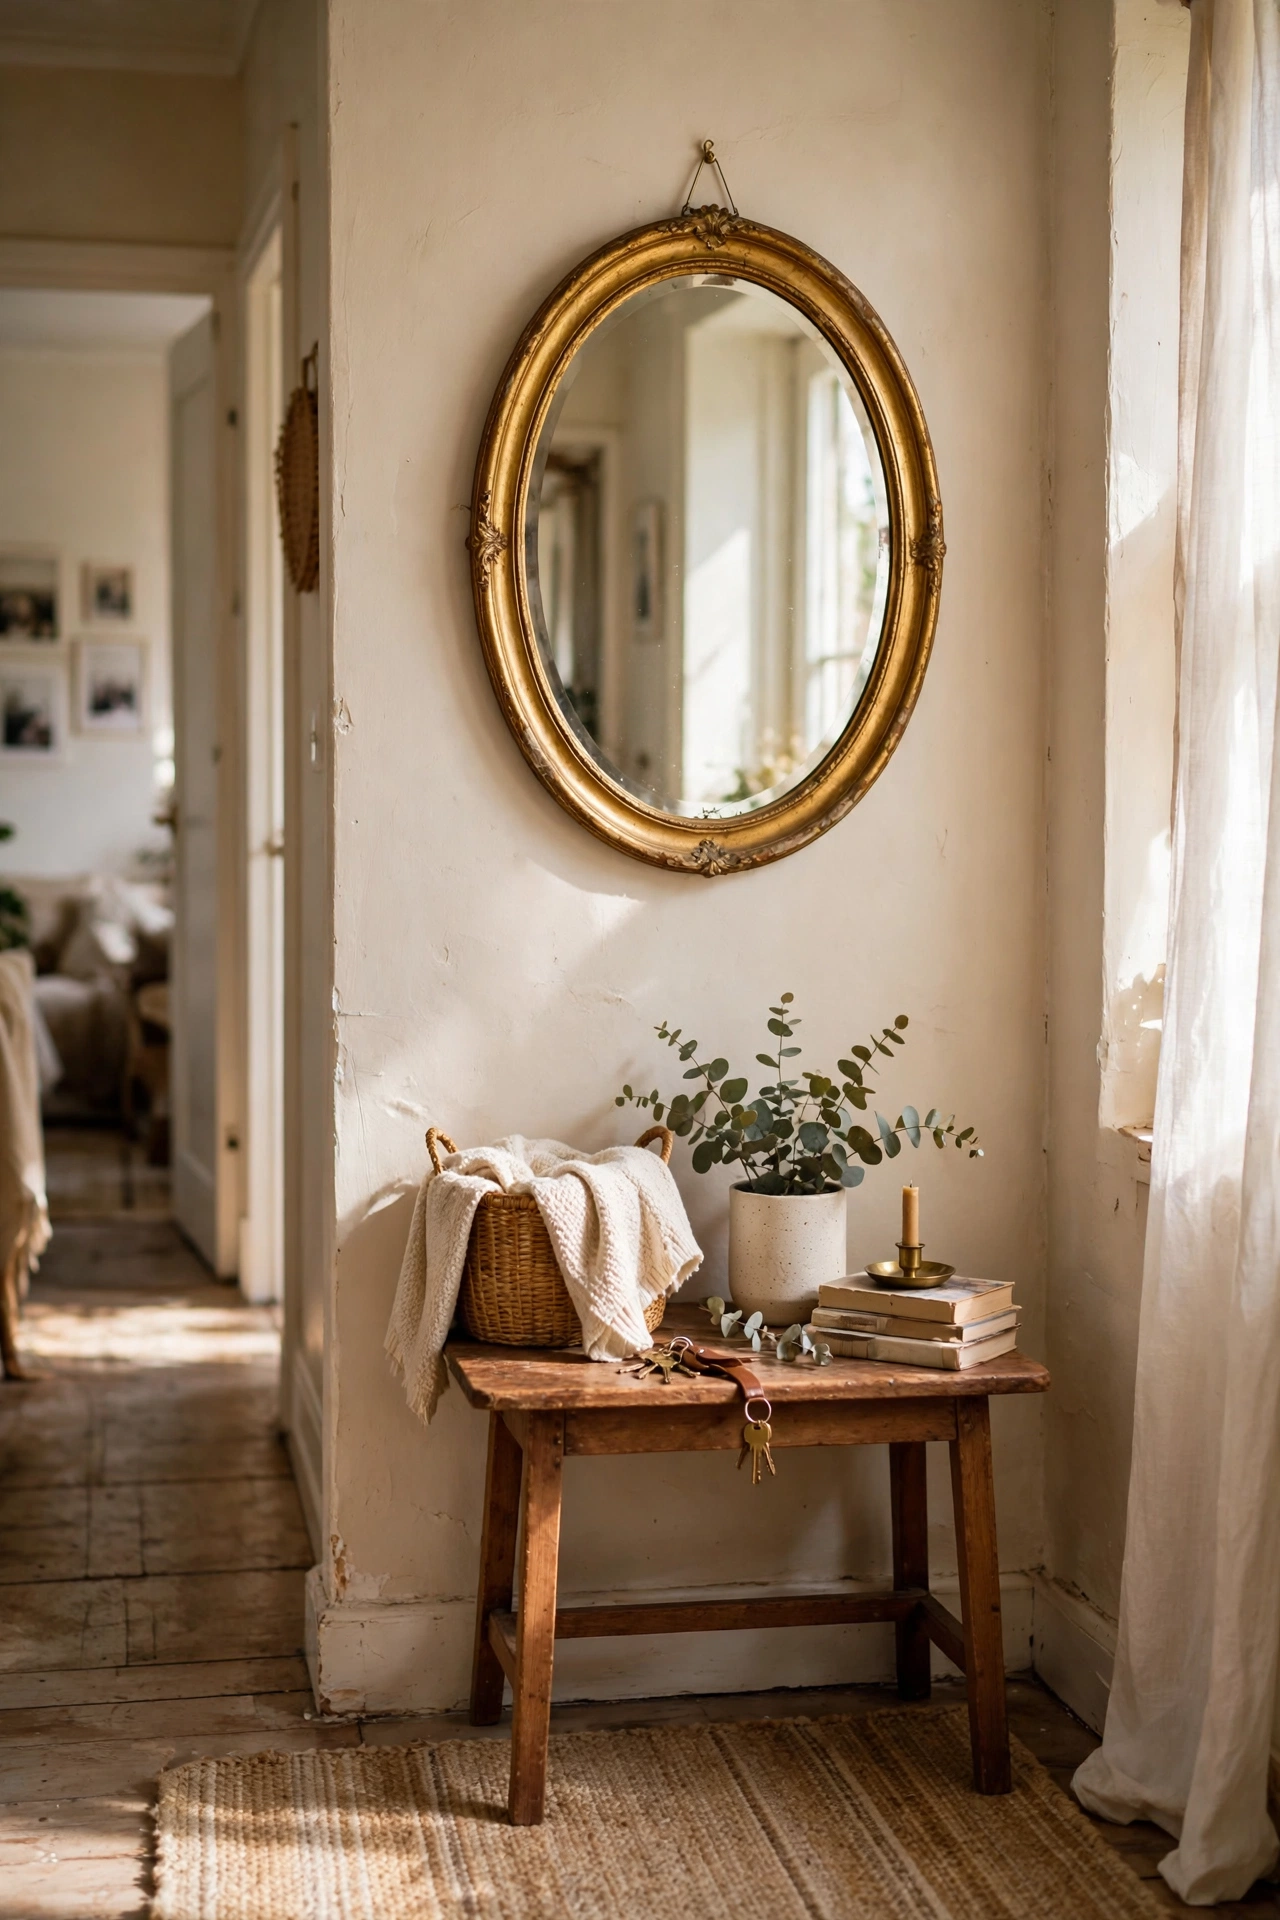
A heavy vintage mirror with a chipped gilt frame is always worth a second look. Clean the frame thoroughly, touch up the chips with gold leaf paint or metallic wax, and seal with a clear coat so the finish does not rub off on hands. I regilded an oval mirror for $6 in materials and it hangs in my hallway looking far grander than its price. My mistake was repainting the whole frame when only the chips needed attention, which flattened all the lovely carved detail, so touch up selectively. Check the mirror glass itself for dark desilvering spots before you buy, because damaged glass is very hard to fix.
Cost: ~$6-10 | Time: 1 hour
9. Wicker Basket Wall Display
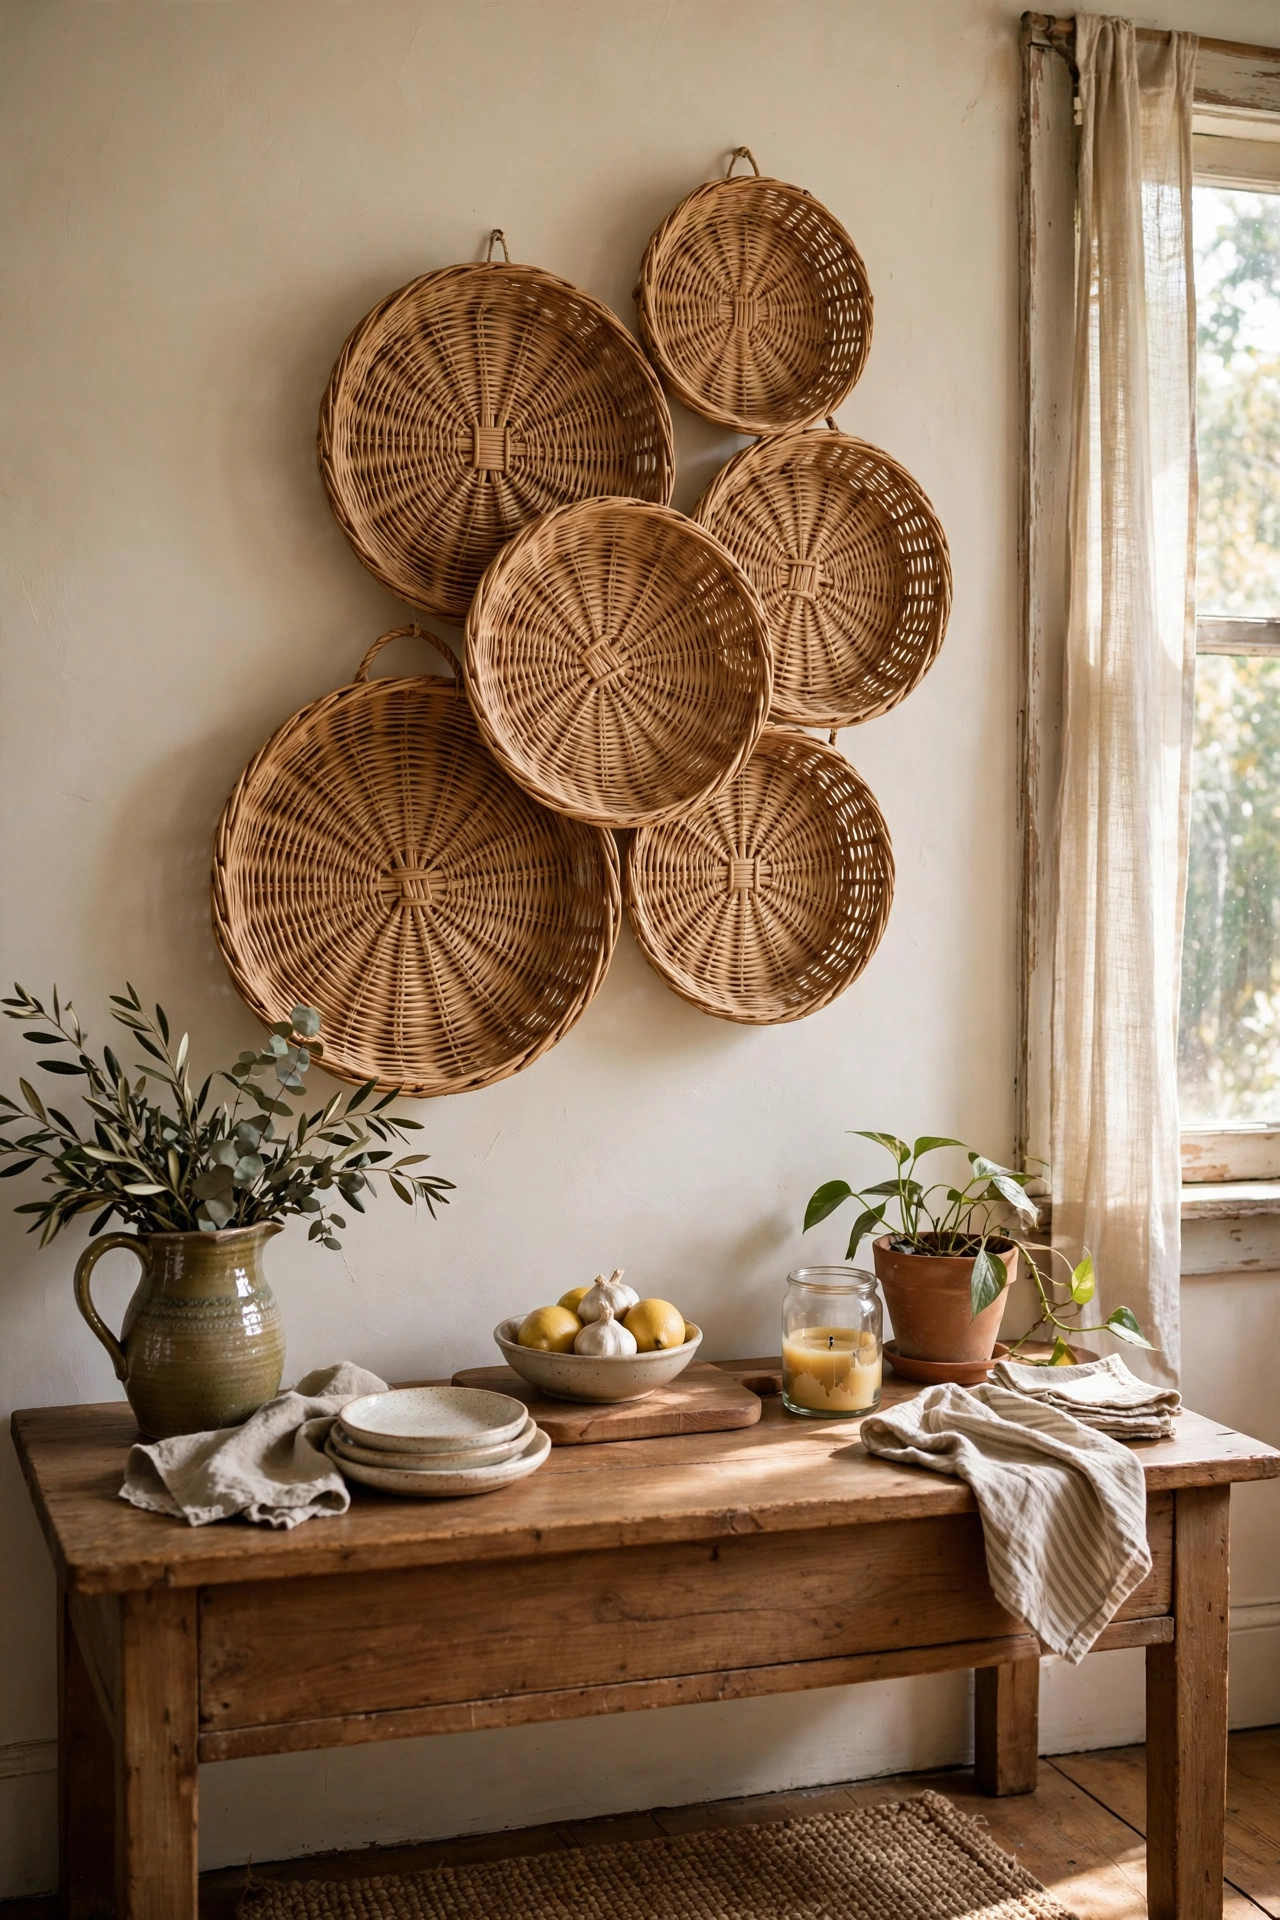
Flat wicker baskets hung as a wall display bring warmth and texture for almost nothing. Collect baskets in graduated sizes from thrift stores, usually $1 to $3 each, and hang them with a single nail each in a loose cluster above a sofa or console. Mix round and oval shapes for interest. I did a seven-basket arrangement in my dining room and guests always ask about it. My mistake was spacing them too far apart at first, which looked scattered rather than styled, so keep gaps to three inches or less. Dust them with a dry brush every few months to keep them fresh.
Cost: ~$8-15 | Time: 45 minutes
10. Cut-Glass Decanters as Bud Vase Sets
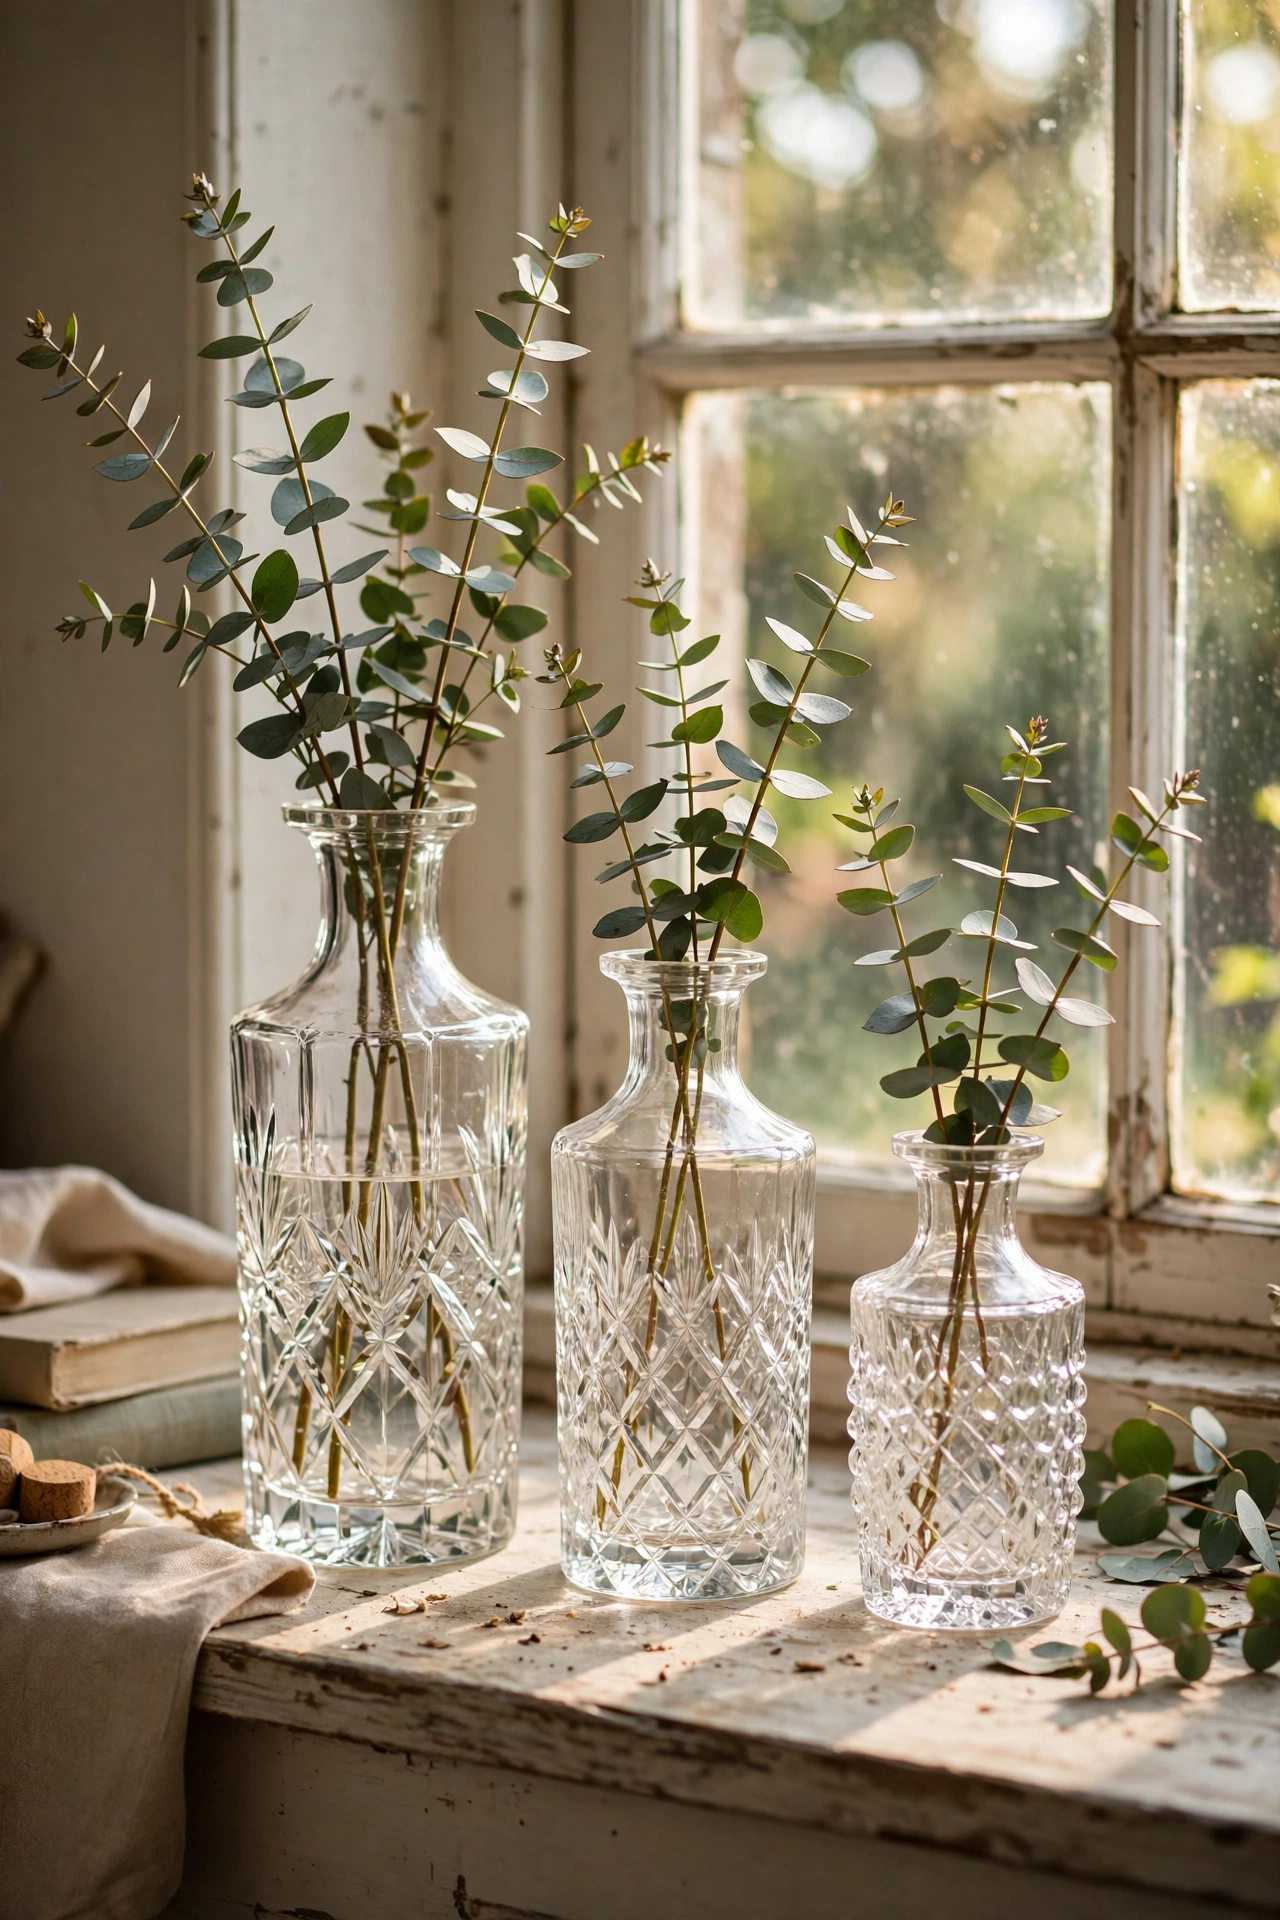
Thrift stores overflow with cut-glass decanters missing their stoppers, which makes them useless as decanters and perfect as vases. Buy three in different heights, wash them in warm soapy water with a splash of vinegar to lift any cloudiness, and group them with a single stem in each. I keep a set on my windowsill with eucalyptus cuttings. My mistake was buying one with a hairline crack I did not spot, so hold each piece up to the light before you pay. The cut glass throws beautiful light patterns across the room in the afternoon sun.
Cost: ~$4-9 | Time: 20 minutes
Save this idea for your weekend project list.
Soft Furnishing Scores
11. Wool Blanket Cushion Covers
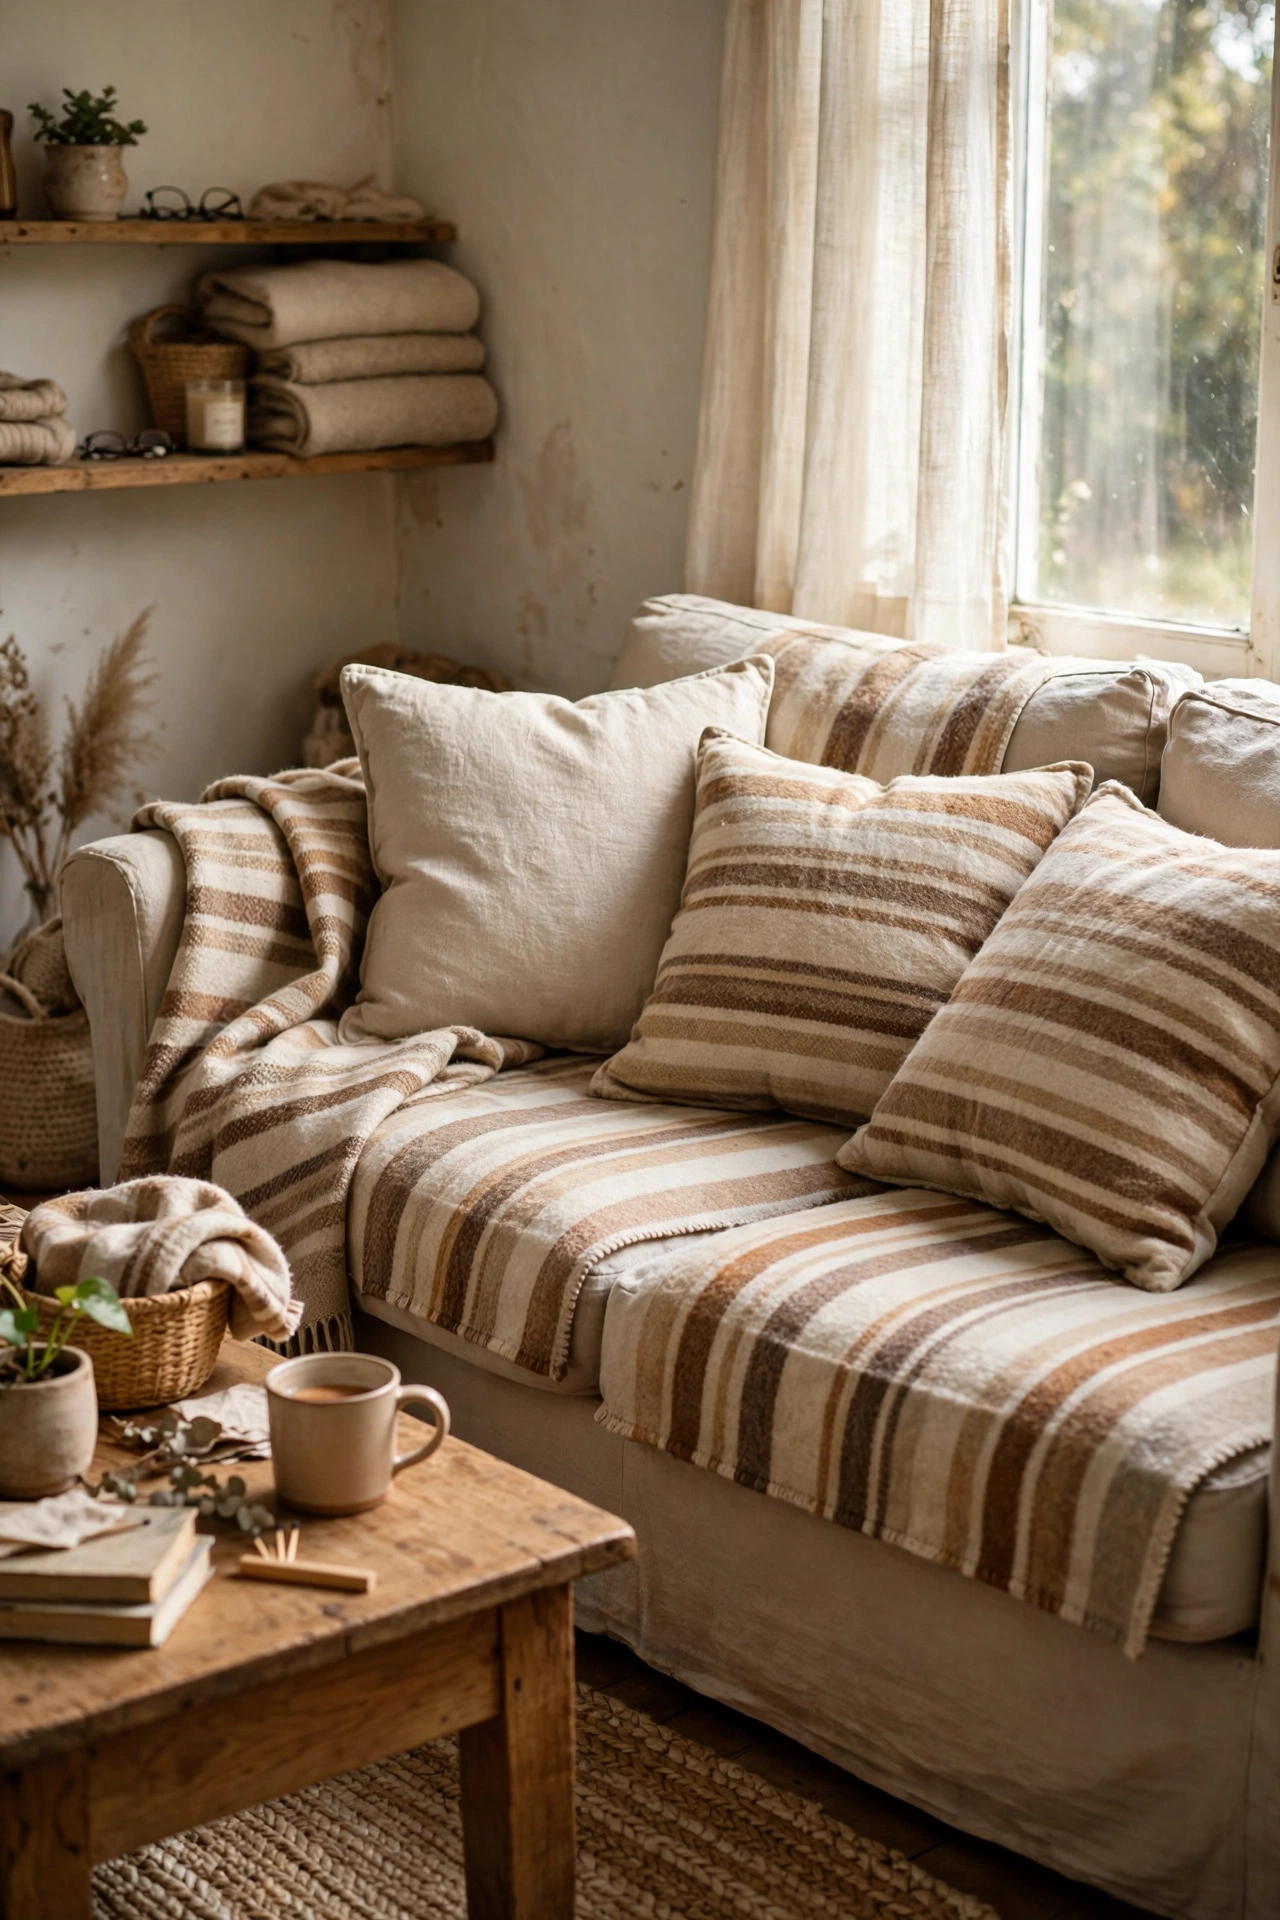
A moth-nipped or faded wool blanket still has plenty of good fabric for cushion covers. Cut the best sections into squares two inches larger than your cushion pads, sew three sides, turn the cover right side out, insert the pad, and hand-stitch the opening closed or add a simple zip. I made four covers from one $5 blanket with a classic stripe. My mistake was not pre-washing the blanket first, and one cover shrank after its first wash, so wash and dry the blanket before you cut a single piece. The weight of wool makes cushions look far more expensive than cotton covers ever do.
Cost: ~$5-10 | Time: 2 hours
12. Linen Curtain Panels Hemmed to Fit
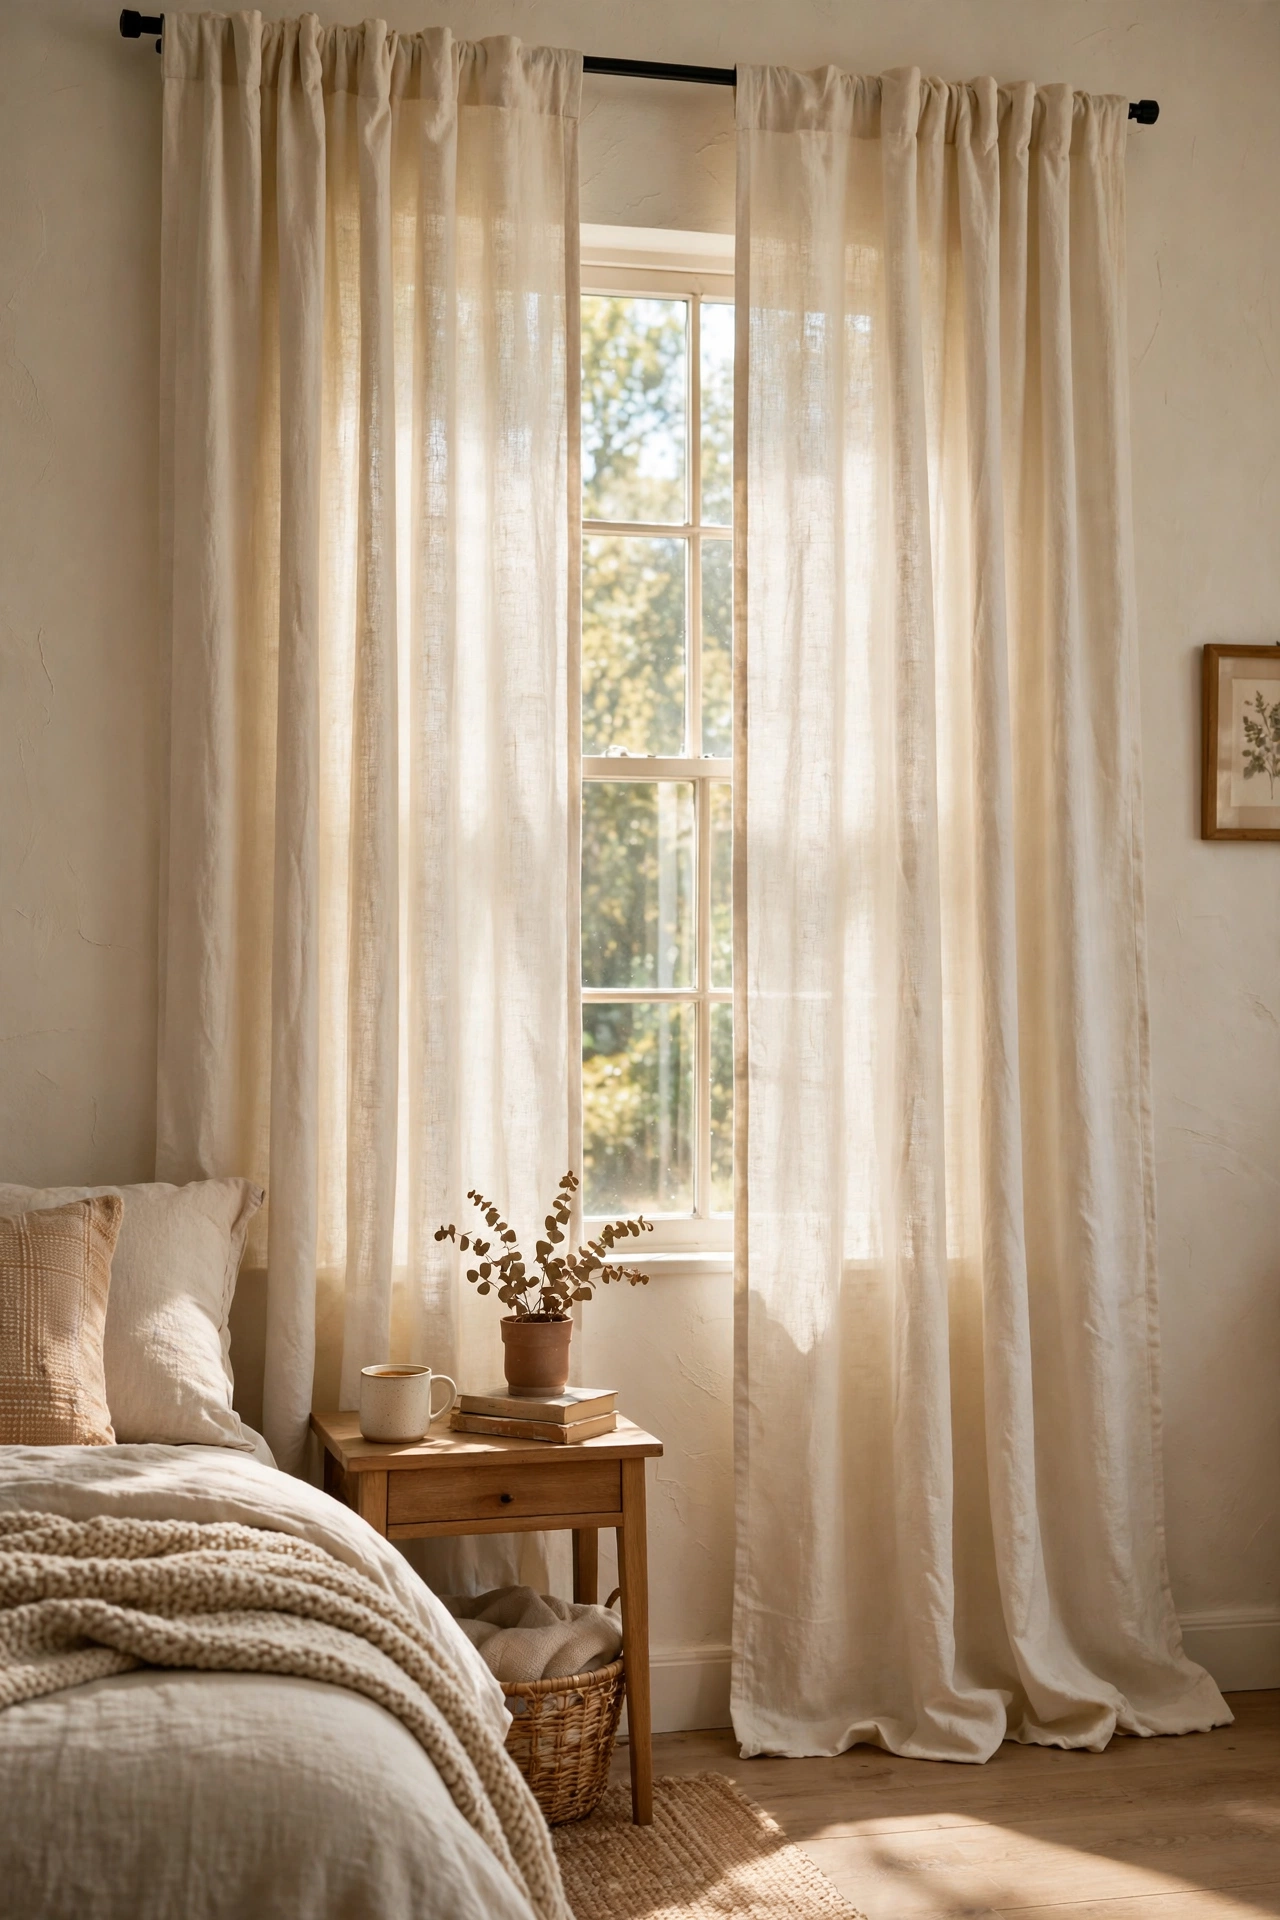
Thrift stores often have good linen curtain panels in the wrong length, which is a gift rather than a problem. Buy panels wider and longer than you need, wash them first, then hem to your window length with iron-on hem tape if you do not sew. Hang them high and wide so the window looks bigger than it is. I found cream linen panels for $8 a pair and hemmed them to just touch the floor. My mistake was hemming before washing, and they shrank two inches on the first wash, so always wash before you measure. Linen wrinkles are part of the charm, so skip the ironing and embrace the relaxed look.
Cost: ~$8-14 | Time: 1 hour
13. Vintage Quilt Folded as a Sofa Throw
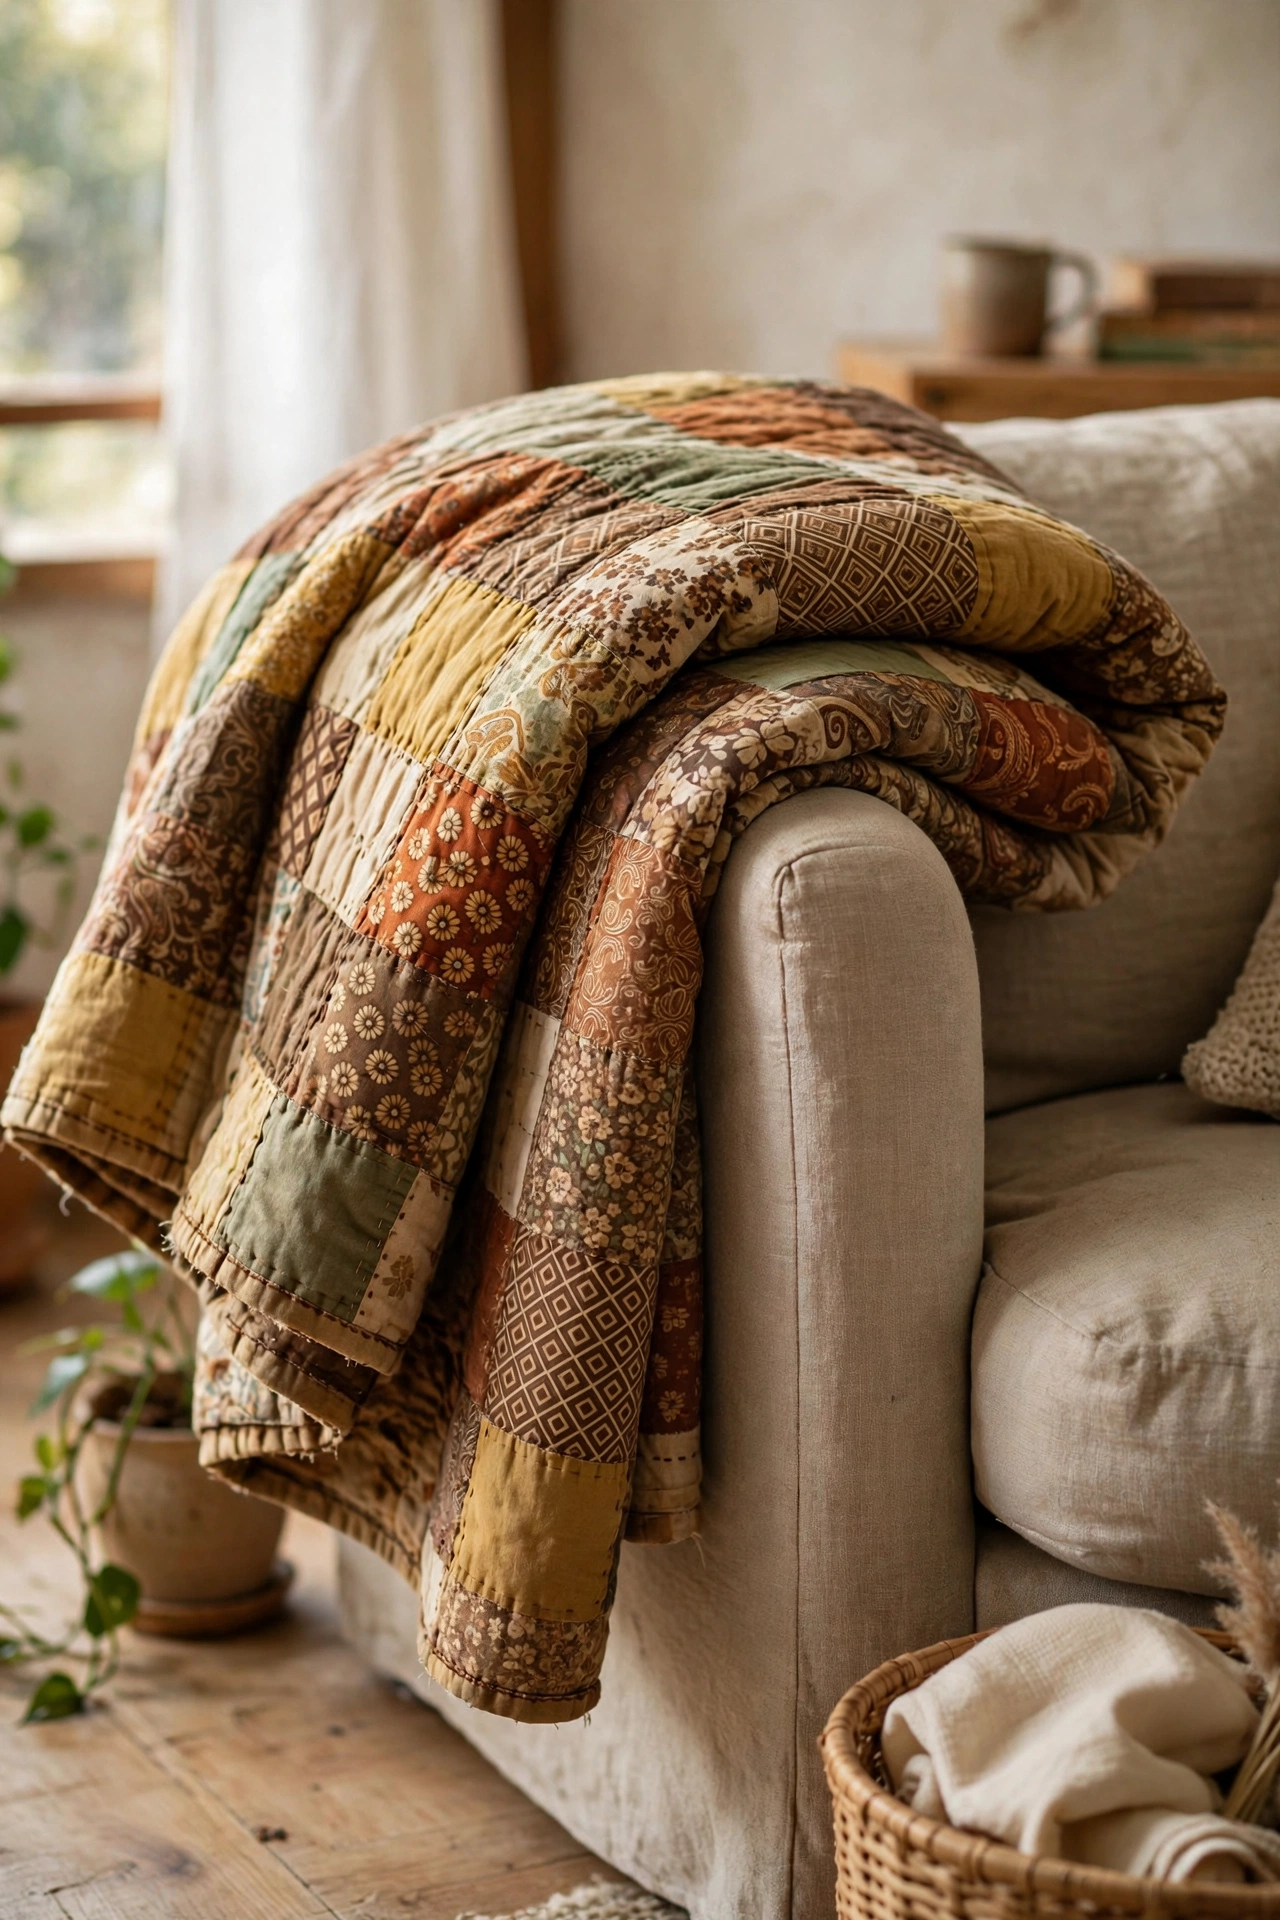
A handmade vintage quilt with a worn patch or two is too good for the linen cupboard and too fragile for daily bed use. Fold it in thirds and drape it over a sofa arm or the back of a favourite chair, worn side down. I display a 1970s patchwork quilt this way and it adds more character than any new throw I own. My mistake was machine-washing a fragile one on a normal cycle and tearing a seam, so hand wash or use the delicate cycle inside a laundry bag. Rotate which side faces out every few months to even out the fading.
Cost: ~$10-20 | Time: 15 minutes
14. Thrifted Flatweave Rug Layering
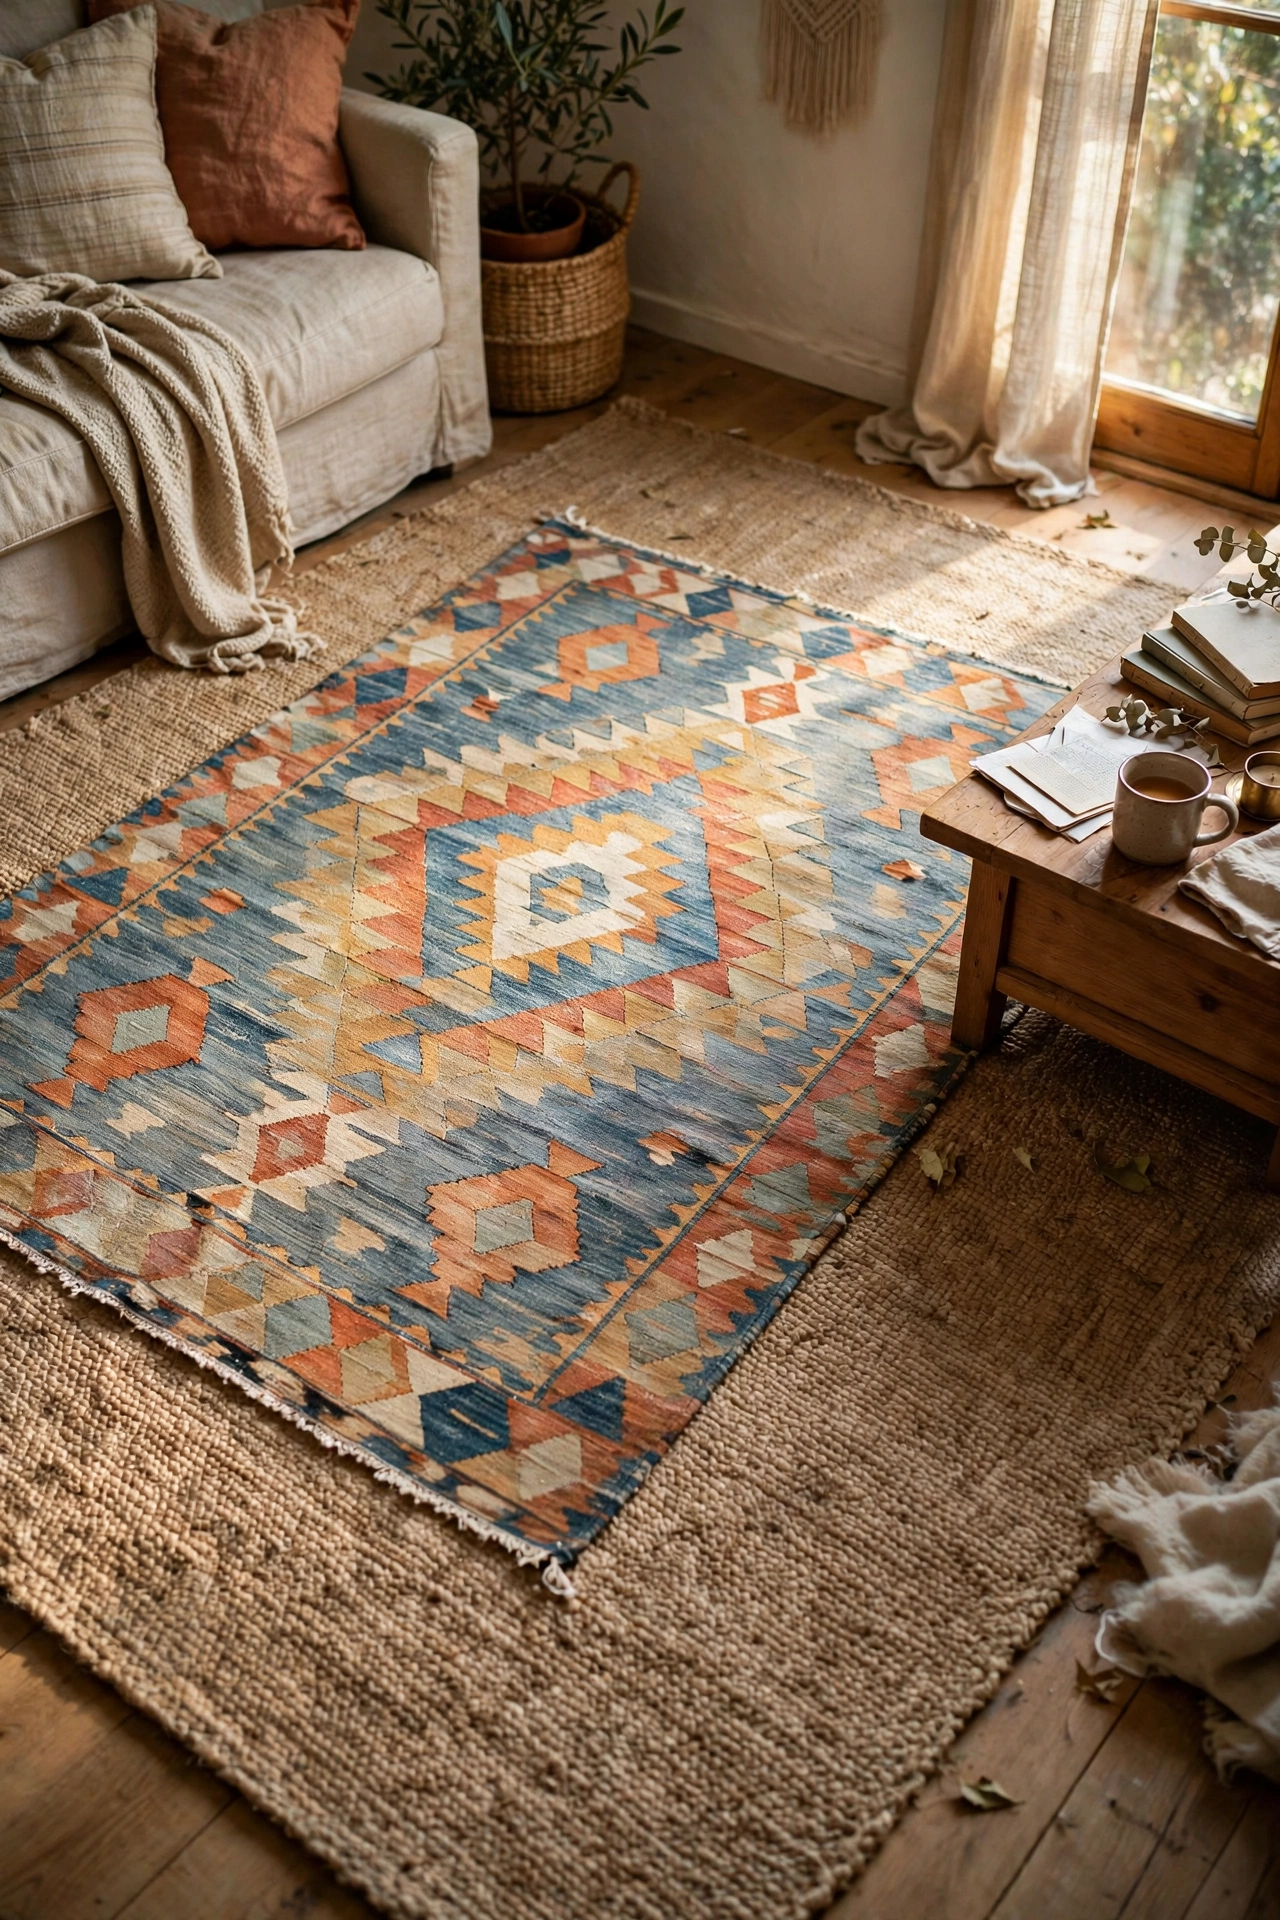
A slightly faded flatweave rug becomes genuinely interesting layered over a larger plain rug. Buy the biggest flatweave you can find for under $20, vacuum it and air it outside for a day, then lay it at a slight angle over your main rug with the edges offset. I layered a $12 kilim-style rug over a plain jute one and the room suddenly looked designed rather than assembled. My mistake was layering two rugs of the same size, which looked like a mistake instead of styling, so make sure the top rug is noticeably smaller. A rug pad underneath stops everything sliding around.
Cost: ~$12-20 | Time: 30 minutes
Kitchen and Dining Gems
15. Stoneware Crock Collection Display
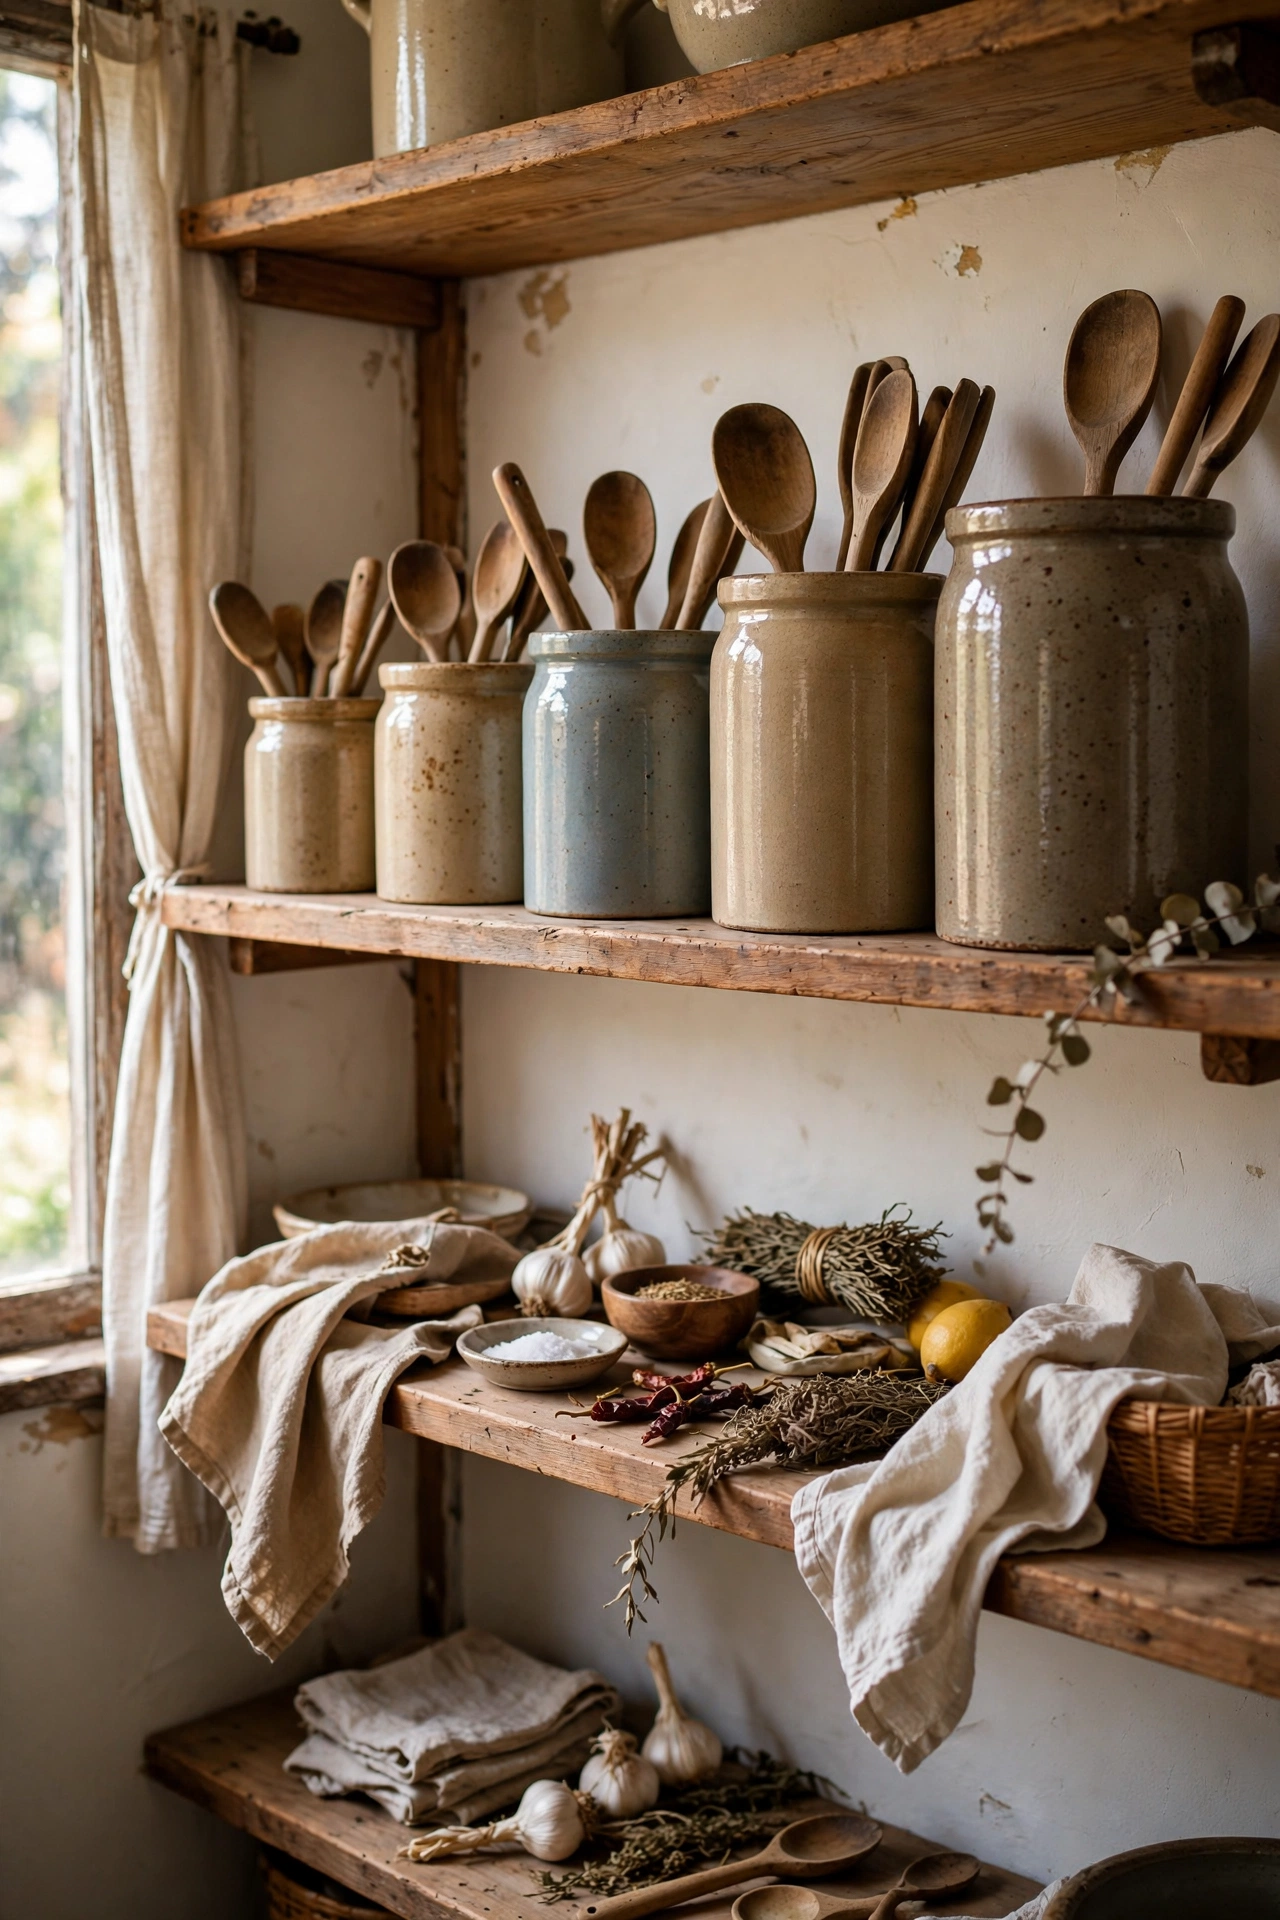
Old stoneware crocks with chips and crazing are cheap and gorgeous grouped as a collection. Buy three to five in graduated sizes, scrub them with a baking soda paste to lift old stains, and line them along open shelving or a sideboard, holding wooden spoons, dried flowers, or nothing at all. I built a row of four for $14 in total. My mistake was buying one that smelled of old oil that never washed out, so give every crock a good sniff before you buy. Keep the tallest at the back and vary the heights for a natural, unstudied look.
Cost: ~$10-18 | Time: 30 minutes
16. Wooden Chopping Boards Oiled and Styled
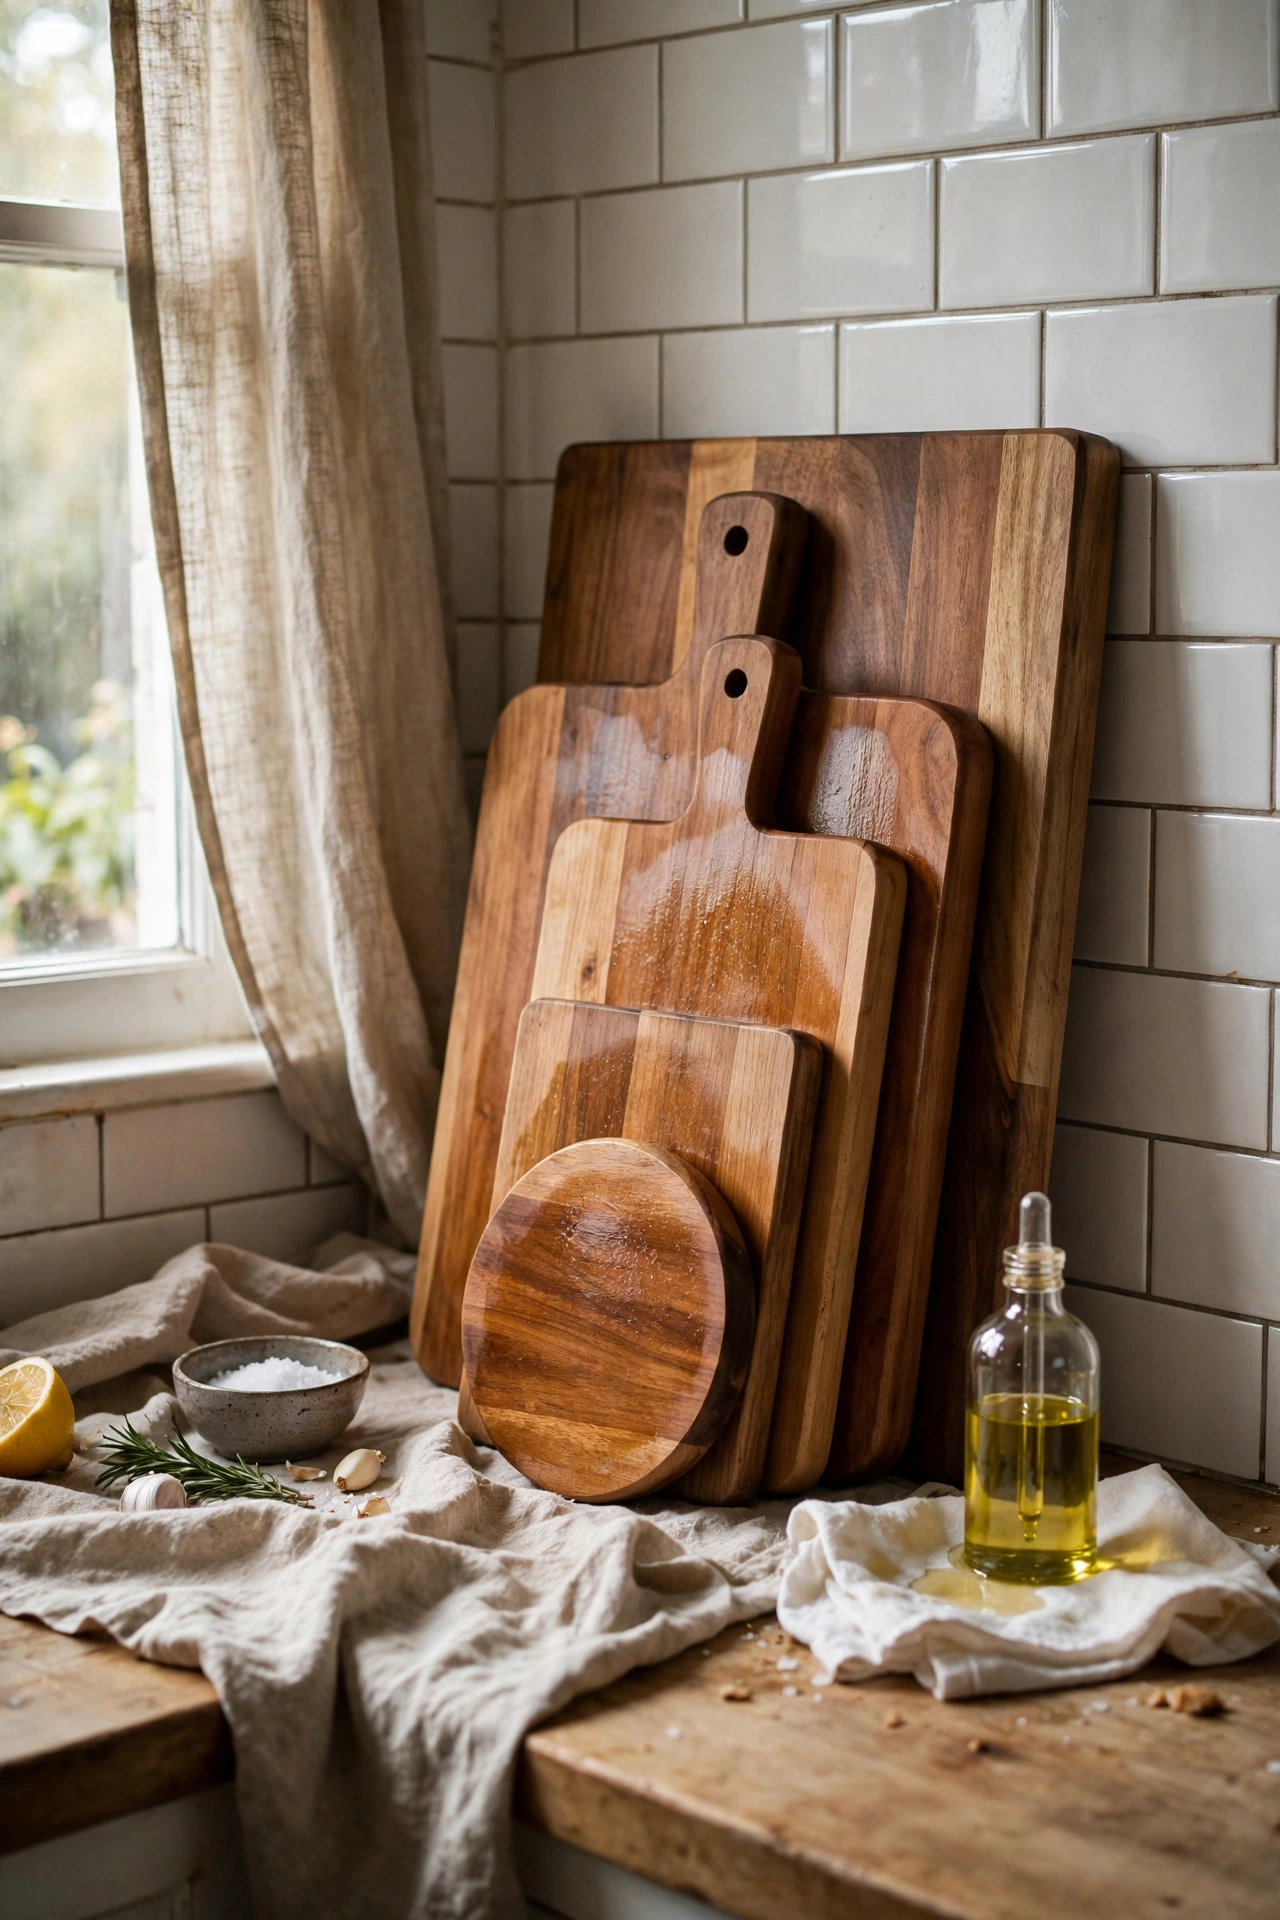
Scratched wooden chopping boards revive beautifully with mineral oil. Sand lightly with fine sandpaper, rub in food-safe mineral oil with a cloth, let it soak overnight, and repeat three times for a deep, rich finish. Lean the boards against the kitchen splashback in graduated sizes for instant styling. I rescued a set of three for $4 and they look brand new. My mistake was using olive oil on the first board, which went rancid within weeks, so only ever use food-safe mineral oil. Re-oil every few months to keep the wood from drying out and cracking.
Cost: ~$4-8 | Time: 30 minutes active
17. Brass Candlesticks for the Dining Table
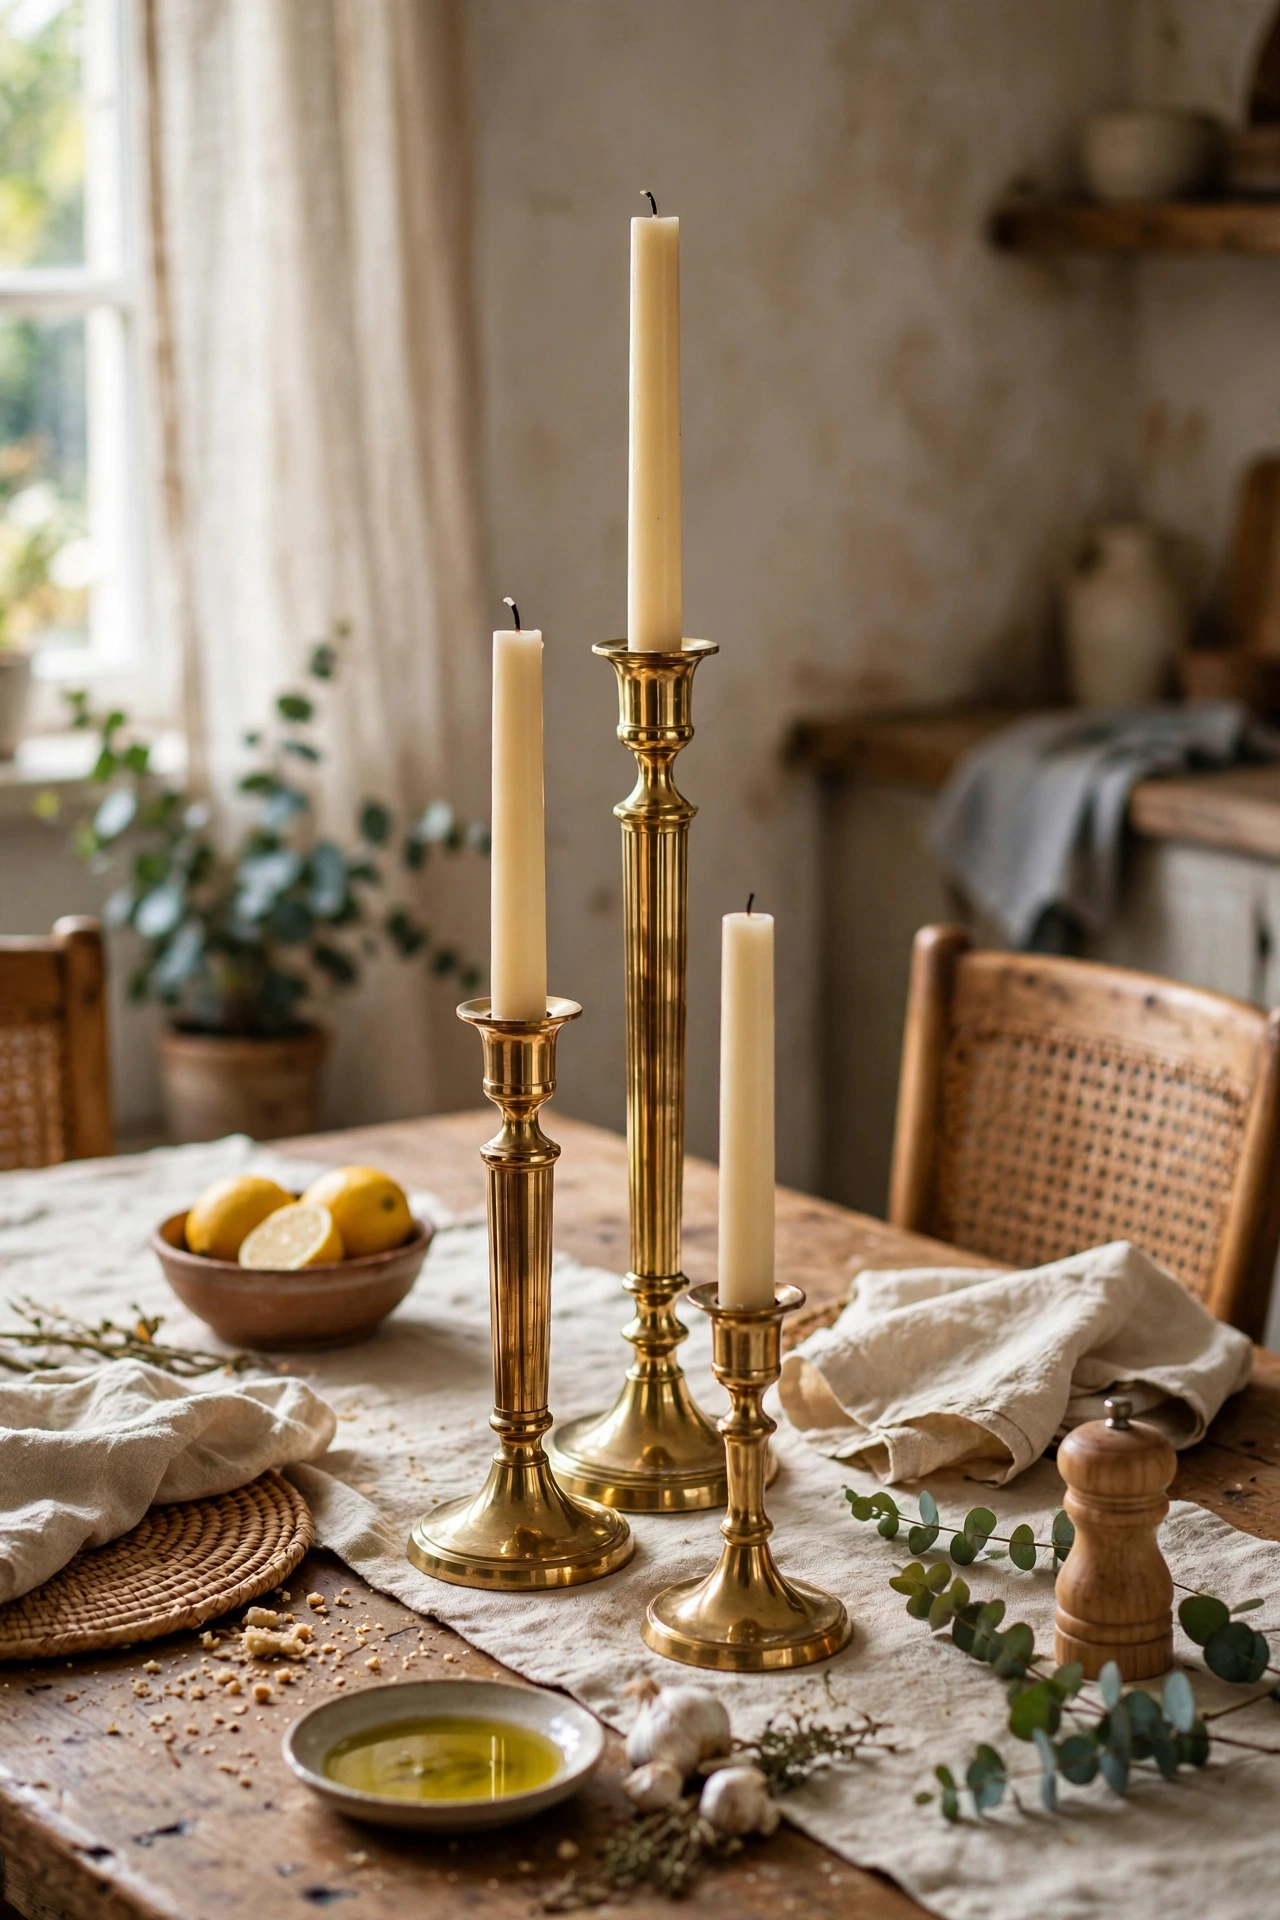
Tarnished brass candlesticks are a classic thrift win hiding in plain sight. Soak them in hot water with lemon juice and baking soda, scrub the details with an old toothbrush, and polish the crevices with a proper brass cleaner. Group three of mixed heights down the centre of the dining table with cream taper candles. I paid $9 for a set of three and they anchor every dinner party now. My mistake was using steel wool on the first pair and scratching the finish badly, so stick to soft cloths and brushes. Leave a little patina in the details for character.
Cost: ~$9-15 | Time: 1 hour
18. Vintage Teacup Planter Trio
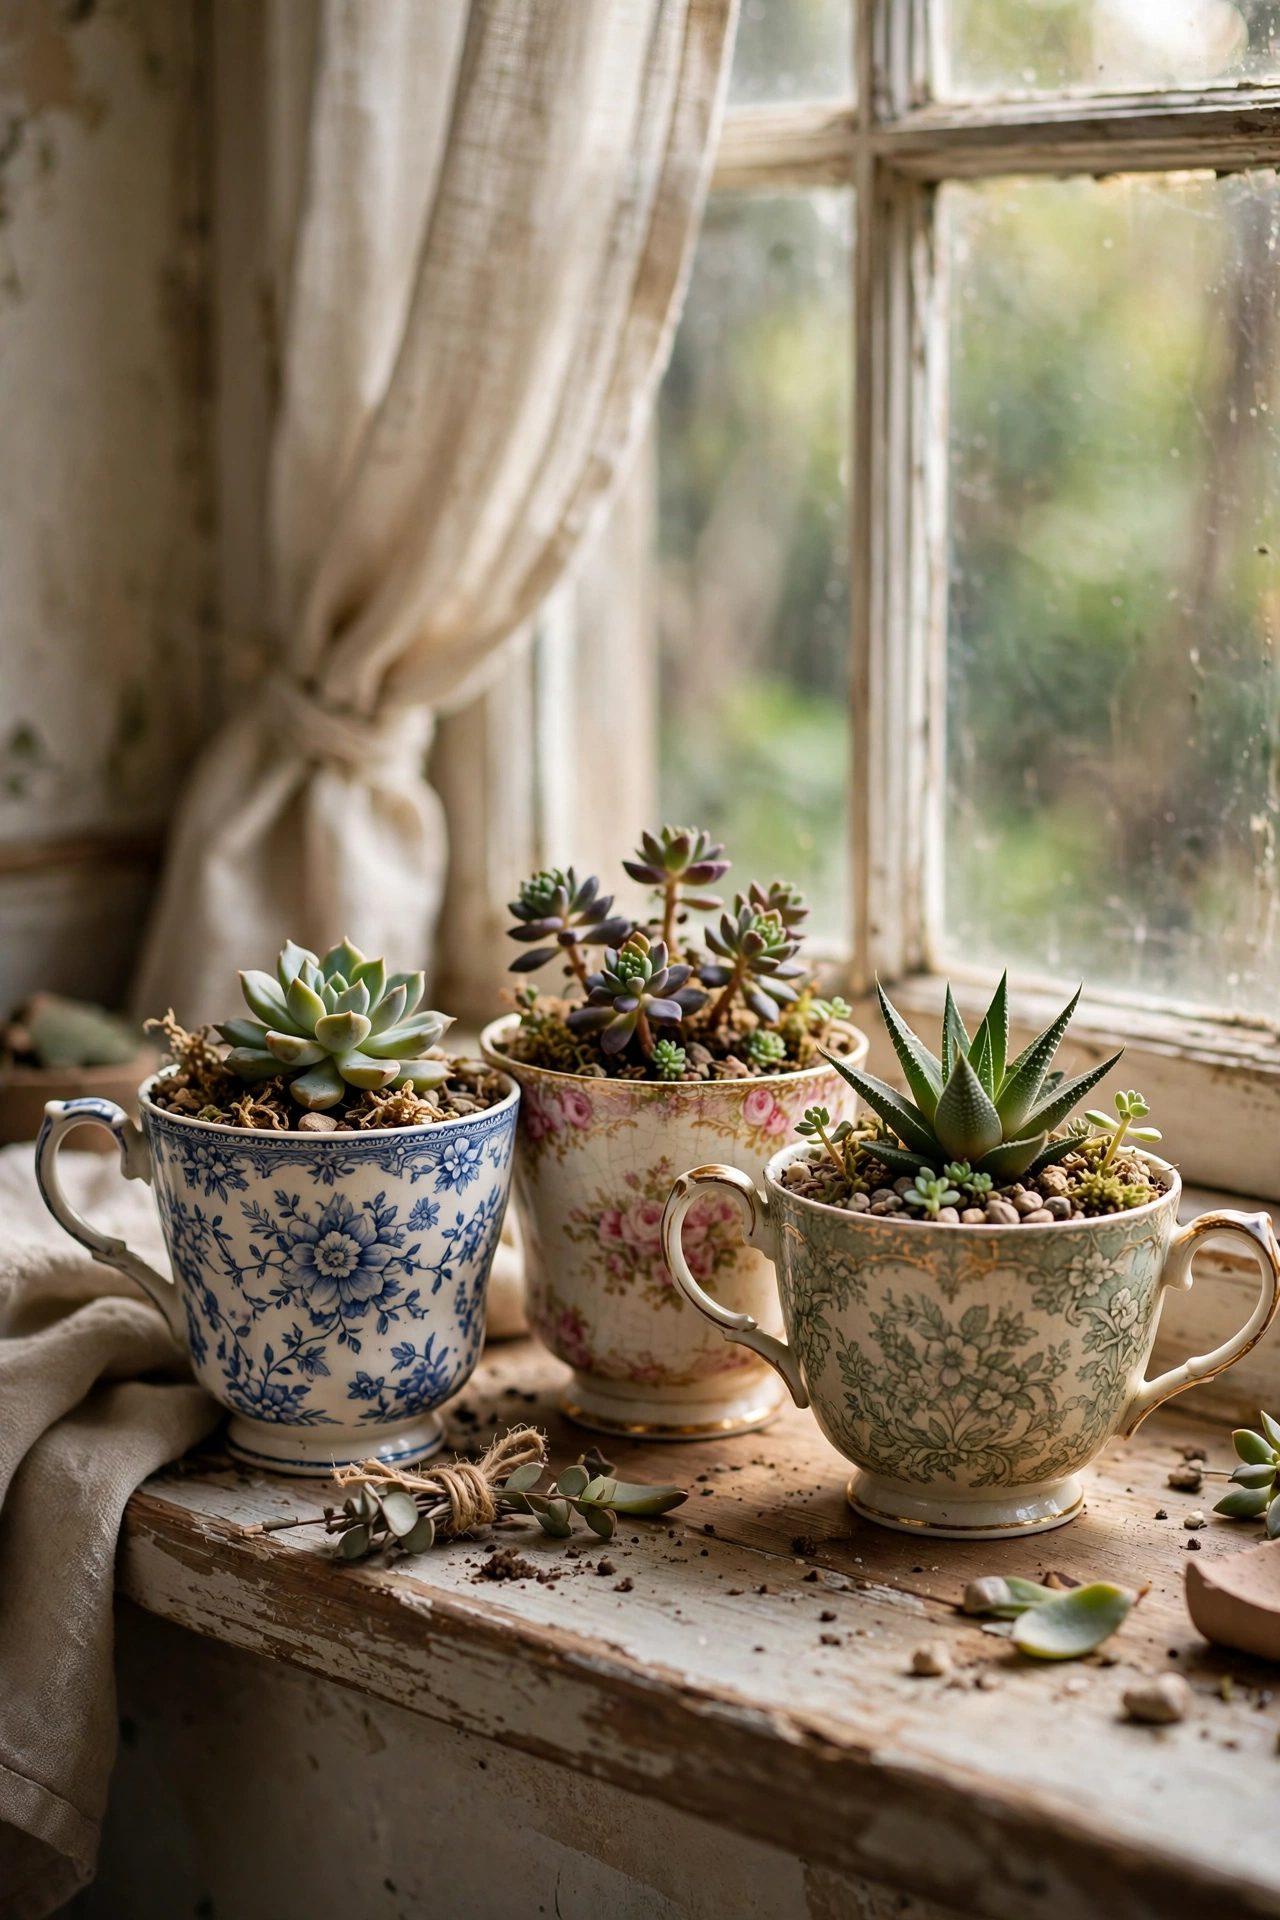
Chipped vintage teacups too damaged for tea make charming planters for succulents. Line the bottom with small pebbles for drainage, add cactus soil, and plant a small succulent or a trailing pothos cutting. Group three on a windowsill or a small tray for the full effect. I made a set from $1 cups and they are the most photographed corner of my kitchen. My mistake was planting the first one without the pebble layer and the succulent rotted, so drainage is essential since there is no hole in the cup. Water sparingly, only when the soil is fully dry.
Cost: ~$3-6 | Time: 20 minutes
19. Enamel Serving Tray Styling
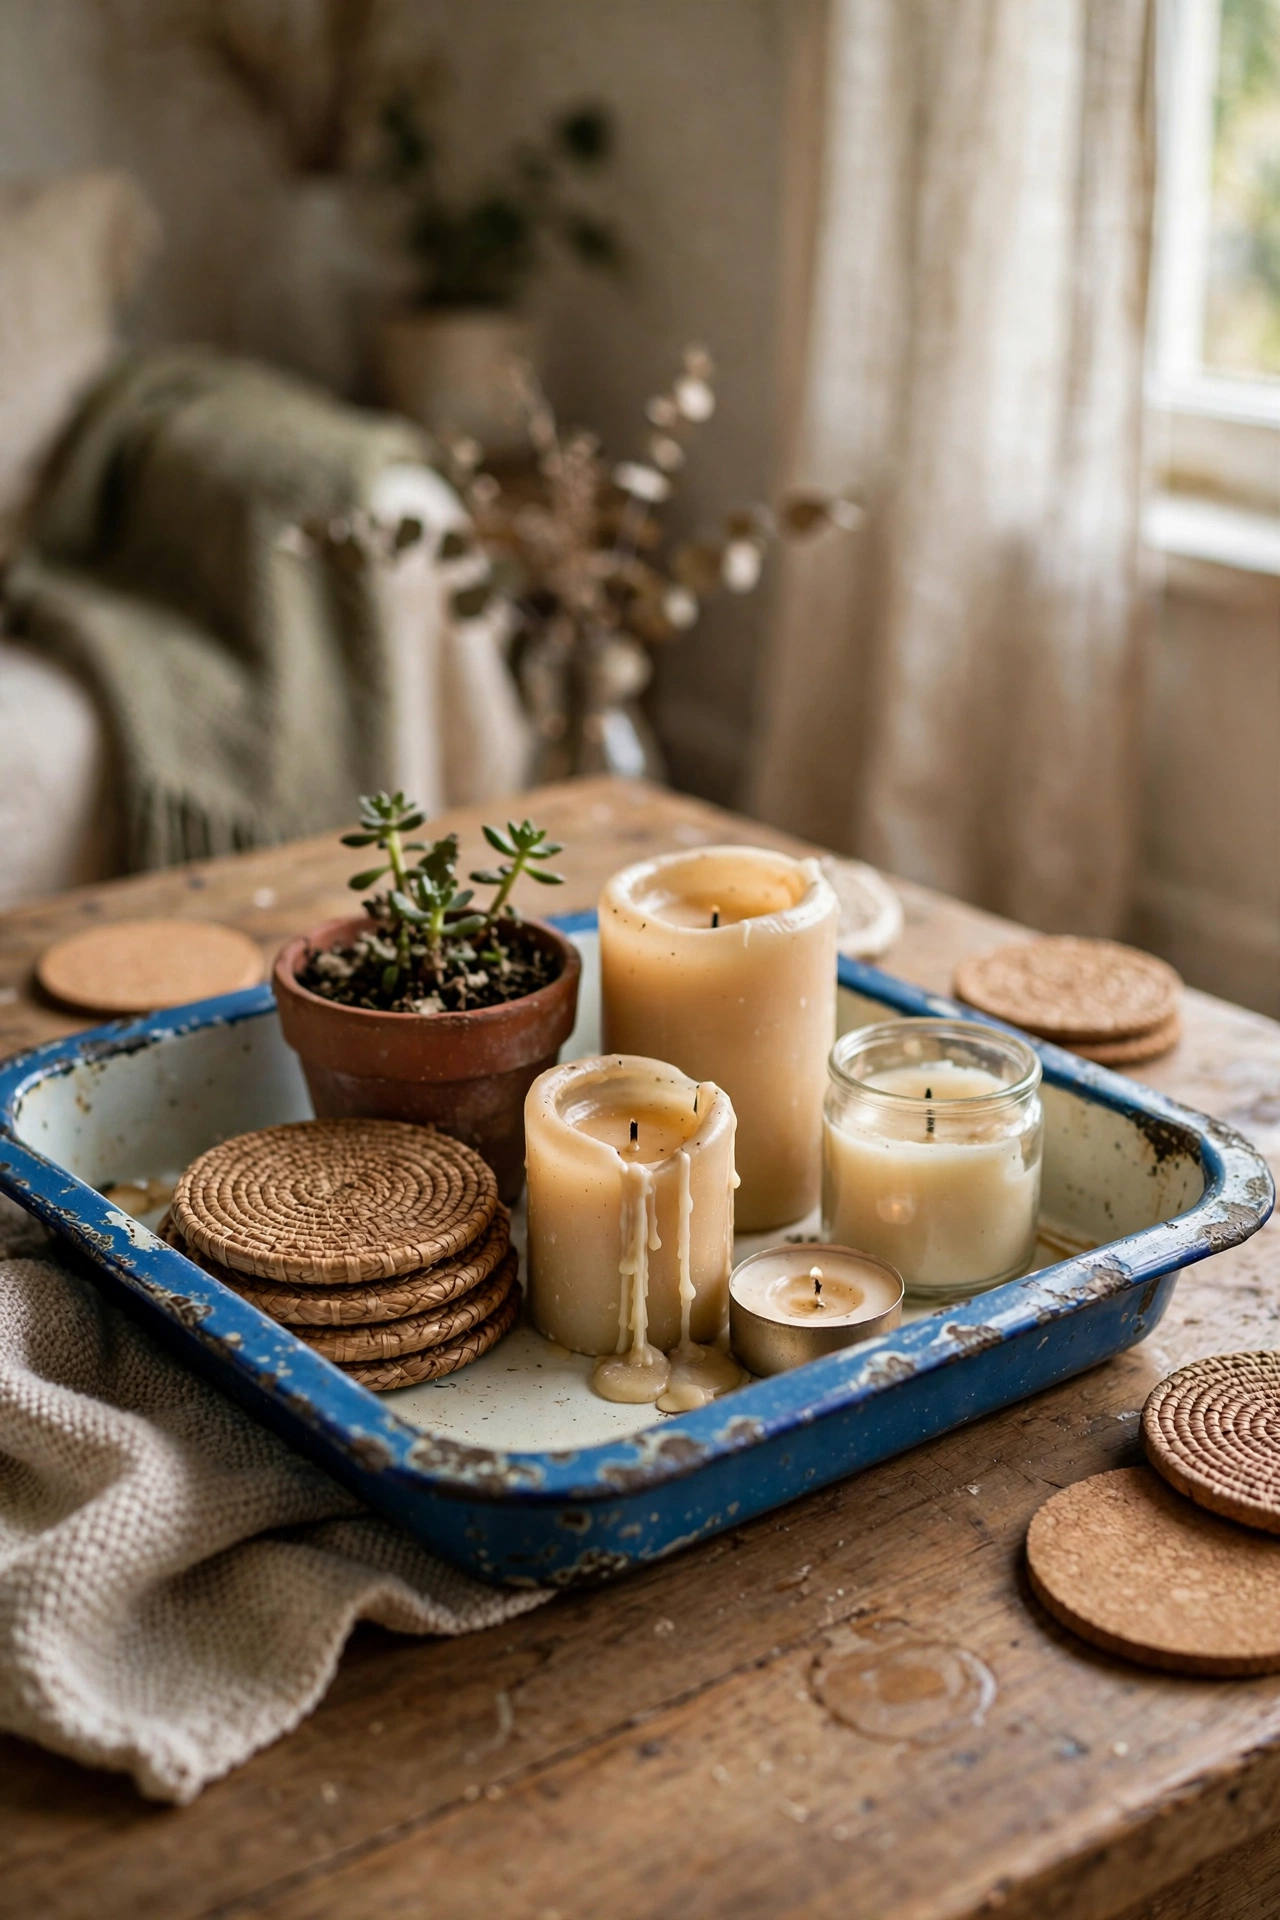
A worn enamel serving tray with a pretty rim pattern works hard as a styling base. Scrub off any rust spots with baking soda paste, dry it thoroughly, and use it to corral candles, a small plant, and a stack of coasters on a coffee table or ottoman. I use a $3 blue-rimmed tray that pulls my whole coffee table together. My mistake was leaving a wet glass on it overnight and creating a brand new rust ring, so use coasters on the tray itself. The contained grouping looks tidy even when every item on it is an everyday thing.
Cost: ~$3-6 | Time: 20 minutes
Keep browsing: (see also: 25-thrift-store-diy-ideas-on-a-budget) (see also: 25-painted-furniture-ideas-for-beginners) (see also: 19-thrift-store-diy-ideas-for-beginners)
Quick Questions
Q: How do I know if a thrifted furniture piece is worth flipping?
A: Check the bones first: solid wood, sturdy joints, drawers that slide, and no wobble you cannot fix with a screw or some glue. Bubbling veneer, particleboard swollen from water, and musty smells that survive a good airing are all walk-away signs. If the structure is sound, almost any cosmetic problem can be fixed with sanding, paint, or stain.
Q: What supplies should I keep on hand for thrift flips?
A: A basic kit covers most projects: sugar soap or a degreaser, sandpaper in a few grits, chalk paint or good matte paint, wood stain, clear wax, a decent brush, and a staple gun. Buy the paint and wax in neutral colours you will reuse again and again. This kit handles about three quarters of the ideas on this list.
Q: How do I get rid of thrift store smell from furniture and textiles?
A: Air pieces outside for a day or two first, which solves most of it. Wipe wood with a mix of white vinegar and water, and sprinkle baking soda on upholstery or inside drawers overnight before vacuuming it off. Wash all textiles before cutting or sewing. If a smell survives all of that, it is usually not worth fighting, so leave the piece behind.
