23 DIY Spring Decor Ideas on a Budget
Every March my front porch still looks like winter gave up halfway through leaving, so I spend one weekend making my own diy Spring decor instead of buying it. Two years ago I tallied what I used to spend on seasonal bits and realised a few afternoons of crafting could save me close to a hundred dollars each spring.
Everything on this list costs $25 or less, most under $12, and none of it needs specialist tools. A hot glue gun, sharp scissors, and a trip to the dollar store or your own garden will cover nearly all 23 projects. I have grouped them by area so you can finish one corner of the house at a time, starting with the spot everyone sees first.
Front Door & Entryway
1. Fresh Blossom Door Wreath
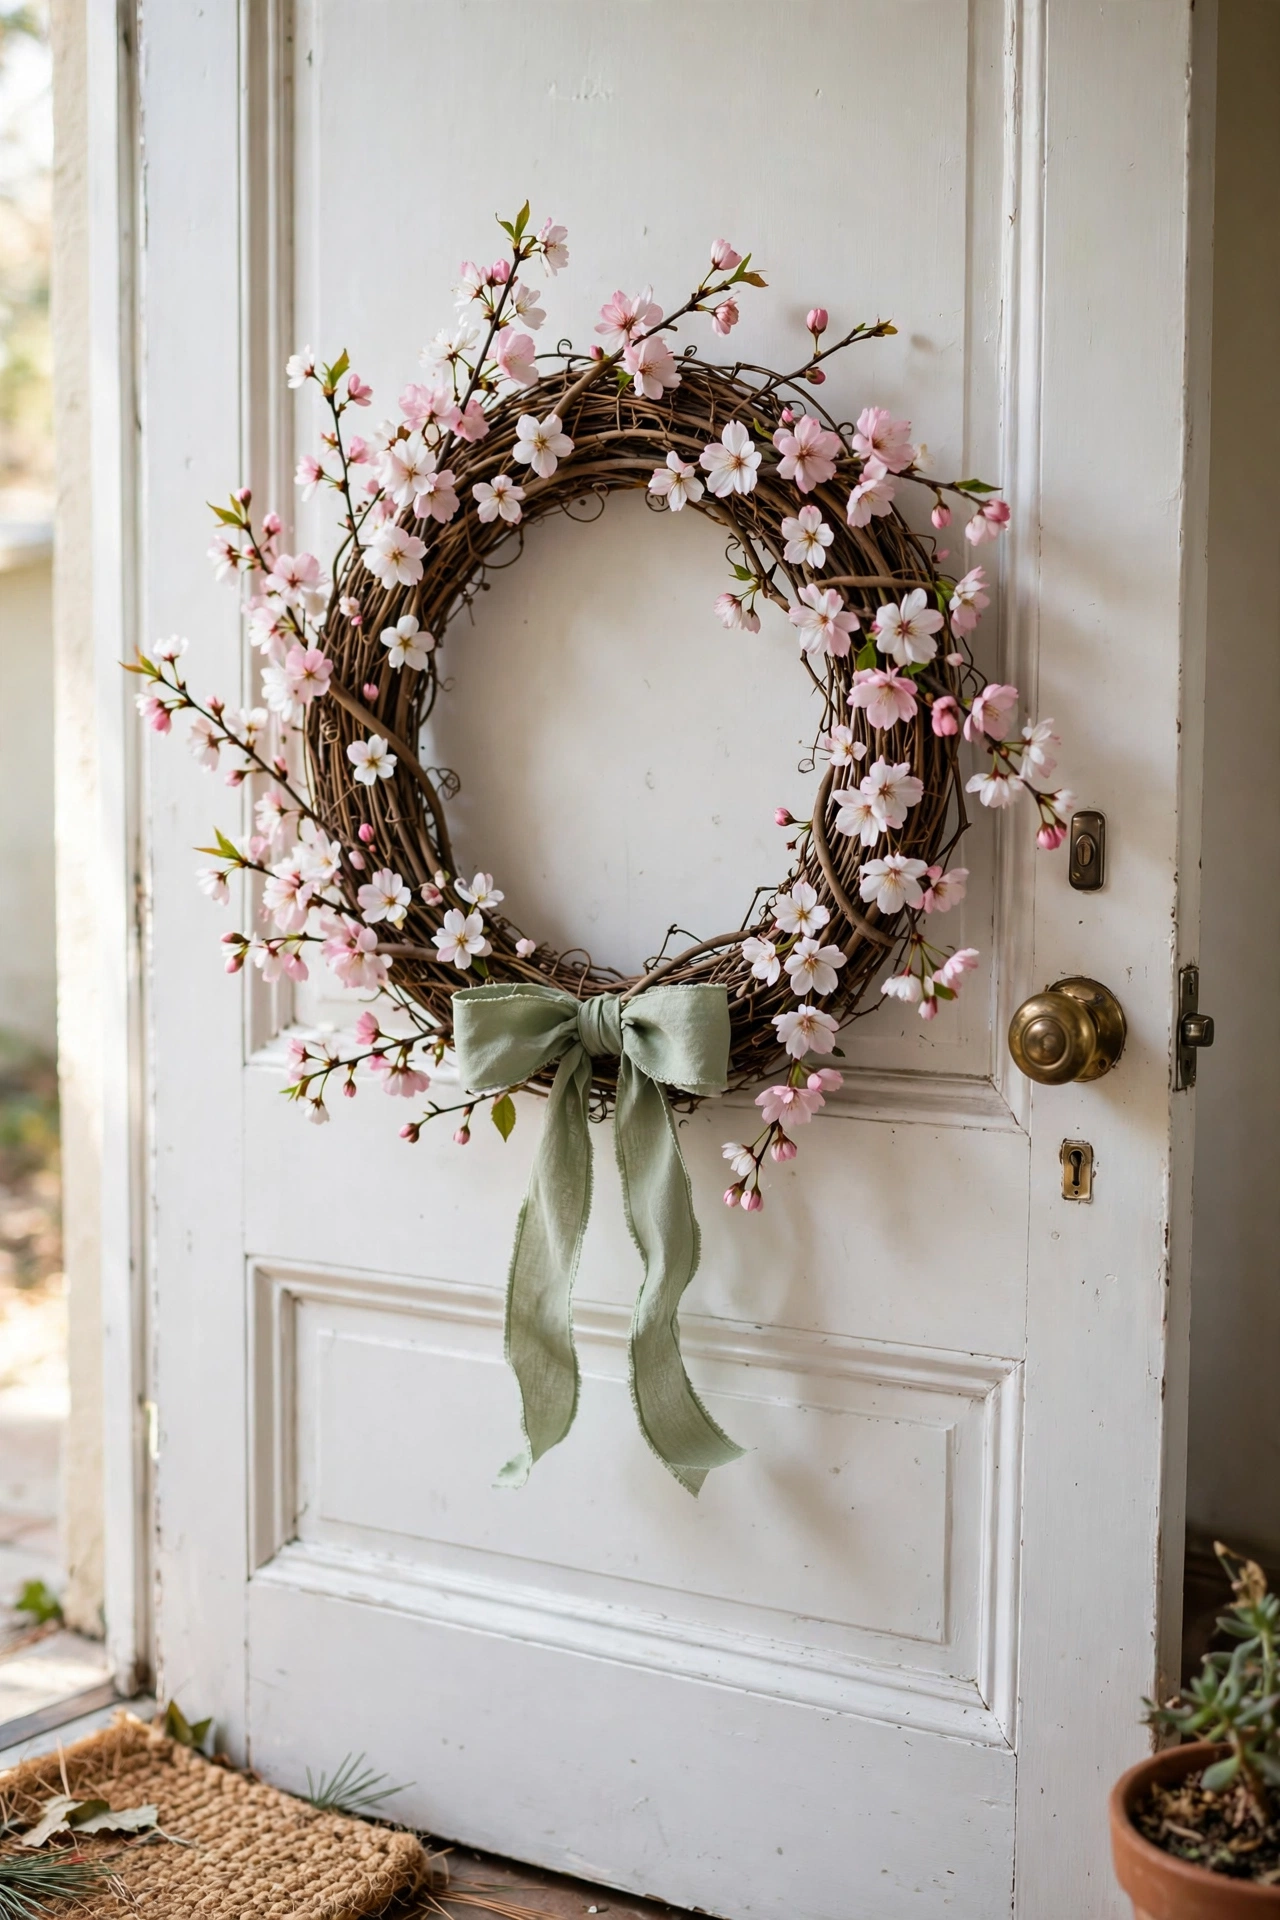
A spring wreath covered in blossom sprays is the fastest way to make the whole house feel awake again. Start with a plain grapevine wreath form, wire on five or six faux or freshly cut flowering branches like forsythia or cherry blossom, and tuck the stems so the blooms fan outward. Hang it with a wide grosgrain ribbon tied in a simple bow. I tried this with real forsythia one year and it wilted within days, so now I use good faux sprays for the door and keep the fresh stems for indoors where I can see them. The wreath form and sprays cost less than one store-bought wreath, and you can refresh it next year with new ribbon.
Cost: ~$10-16 | Time: 40 minutes
2. Stencilled Pastel Welcome Mat
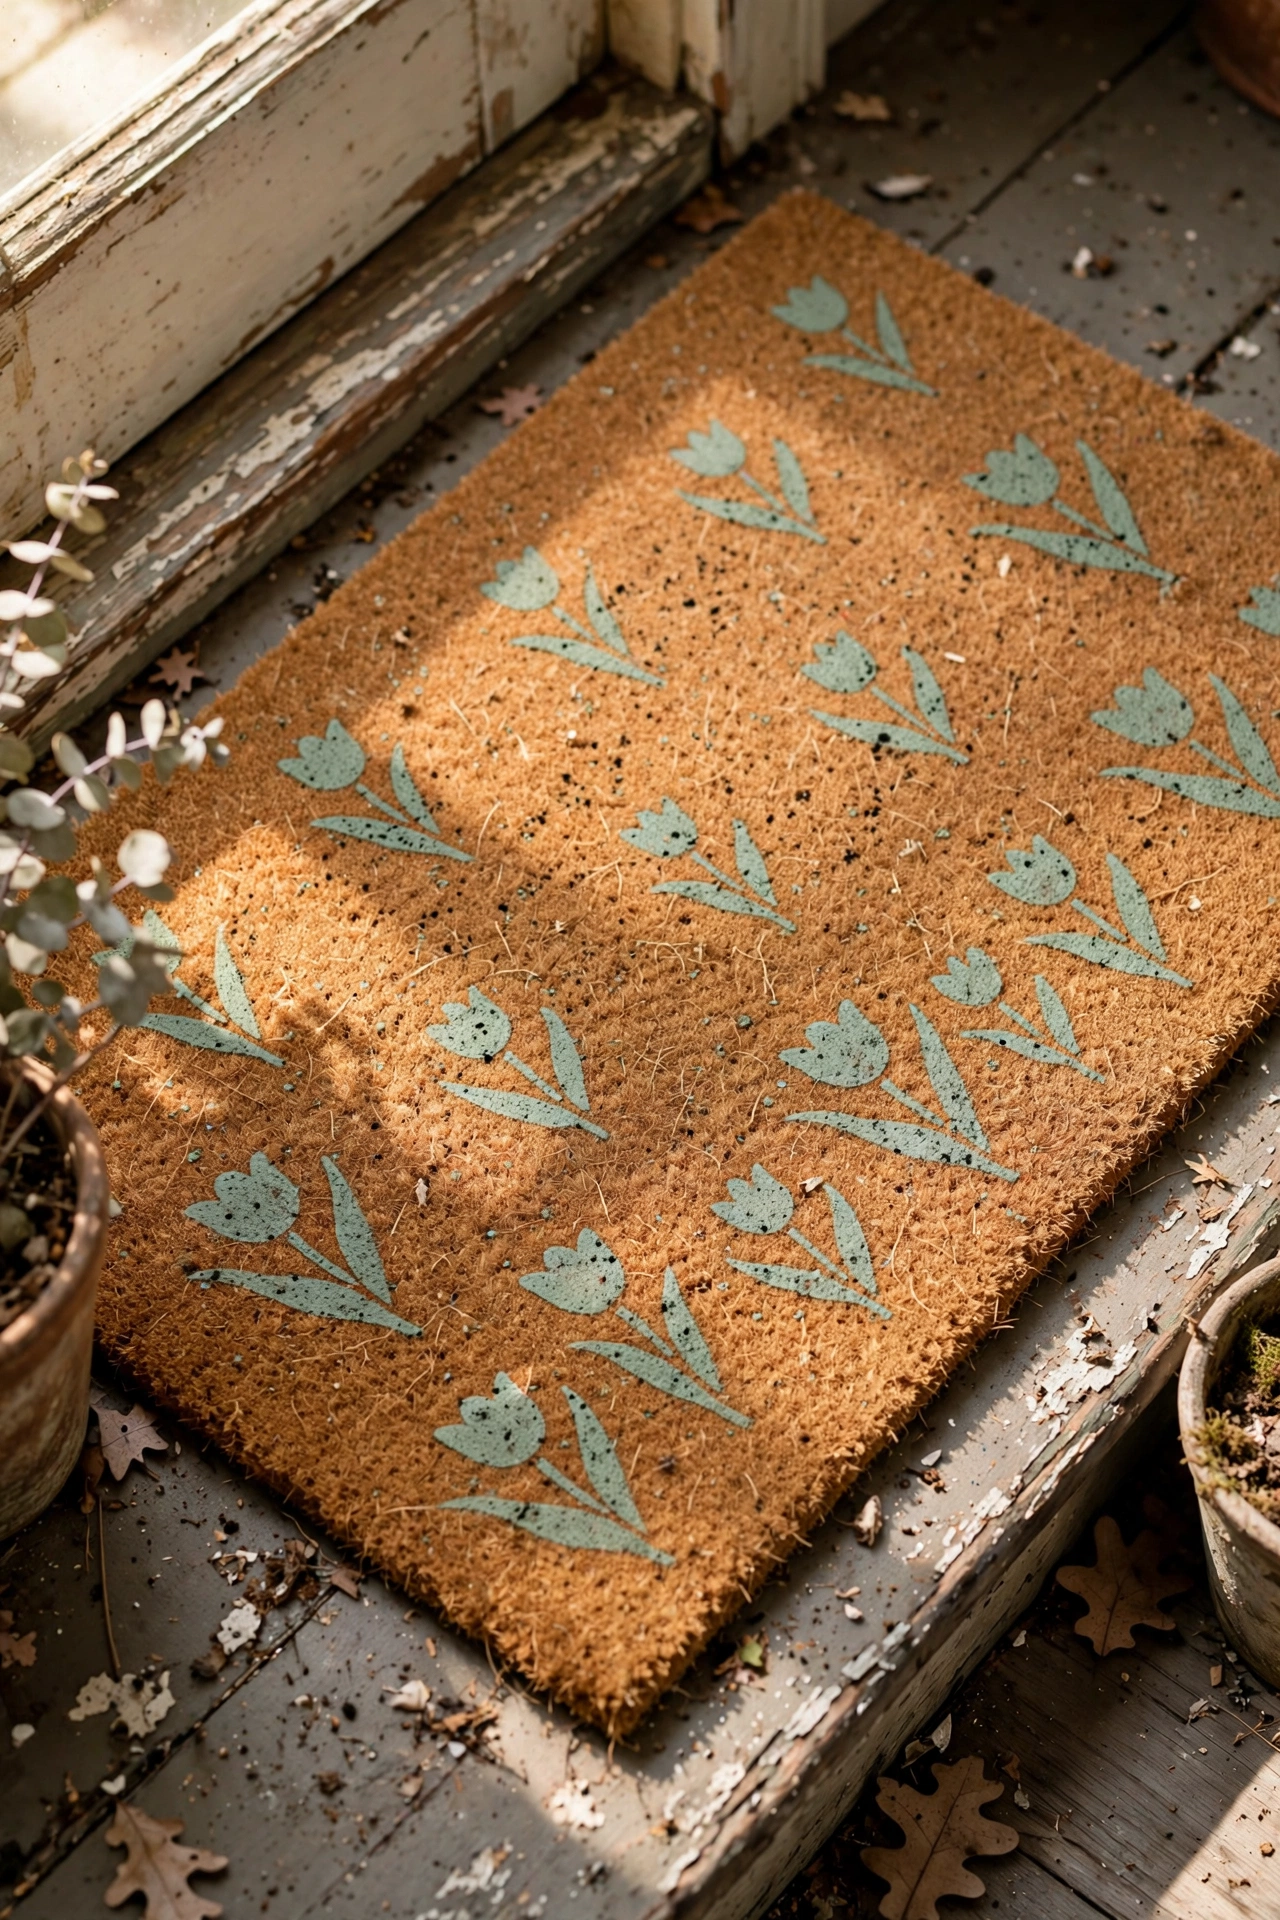
A tired coir doormat gets a spring lift with nothing more than craft paint and a stencil. Tape the stencil firmly to a clean, dry mat, dab on outdoor acrylic paint with a stiff brush rather than brushing strokes, and peel the stencil while the paint is still tacky for the sharpest edges. I spelled out “hello spring” in a soft sage green and added two little tulips underneath. My mistake was using regular indoor paint the first time; one rainy week and it bled into a mess. Outdoor acrylic or porch paint stays put all season. Let it cure for 24 hours before you put it back outside.
Cost: ~$8-12 | Time: 1 hour plus drying
3. Terracotta Pot Topiary Pair
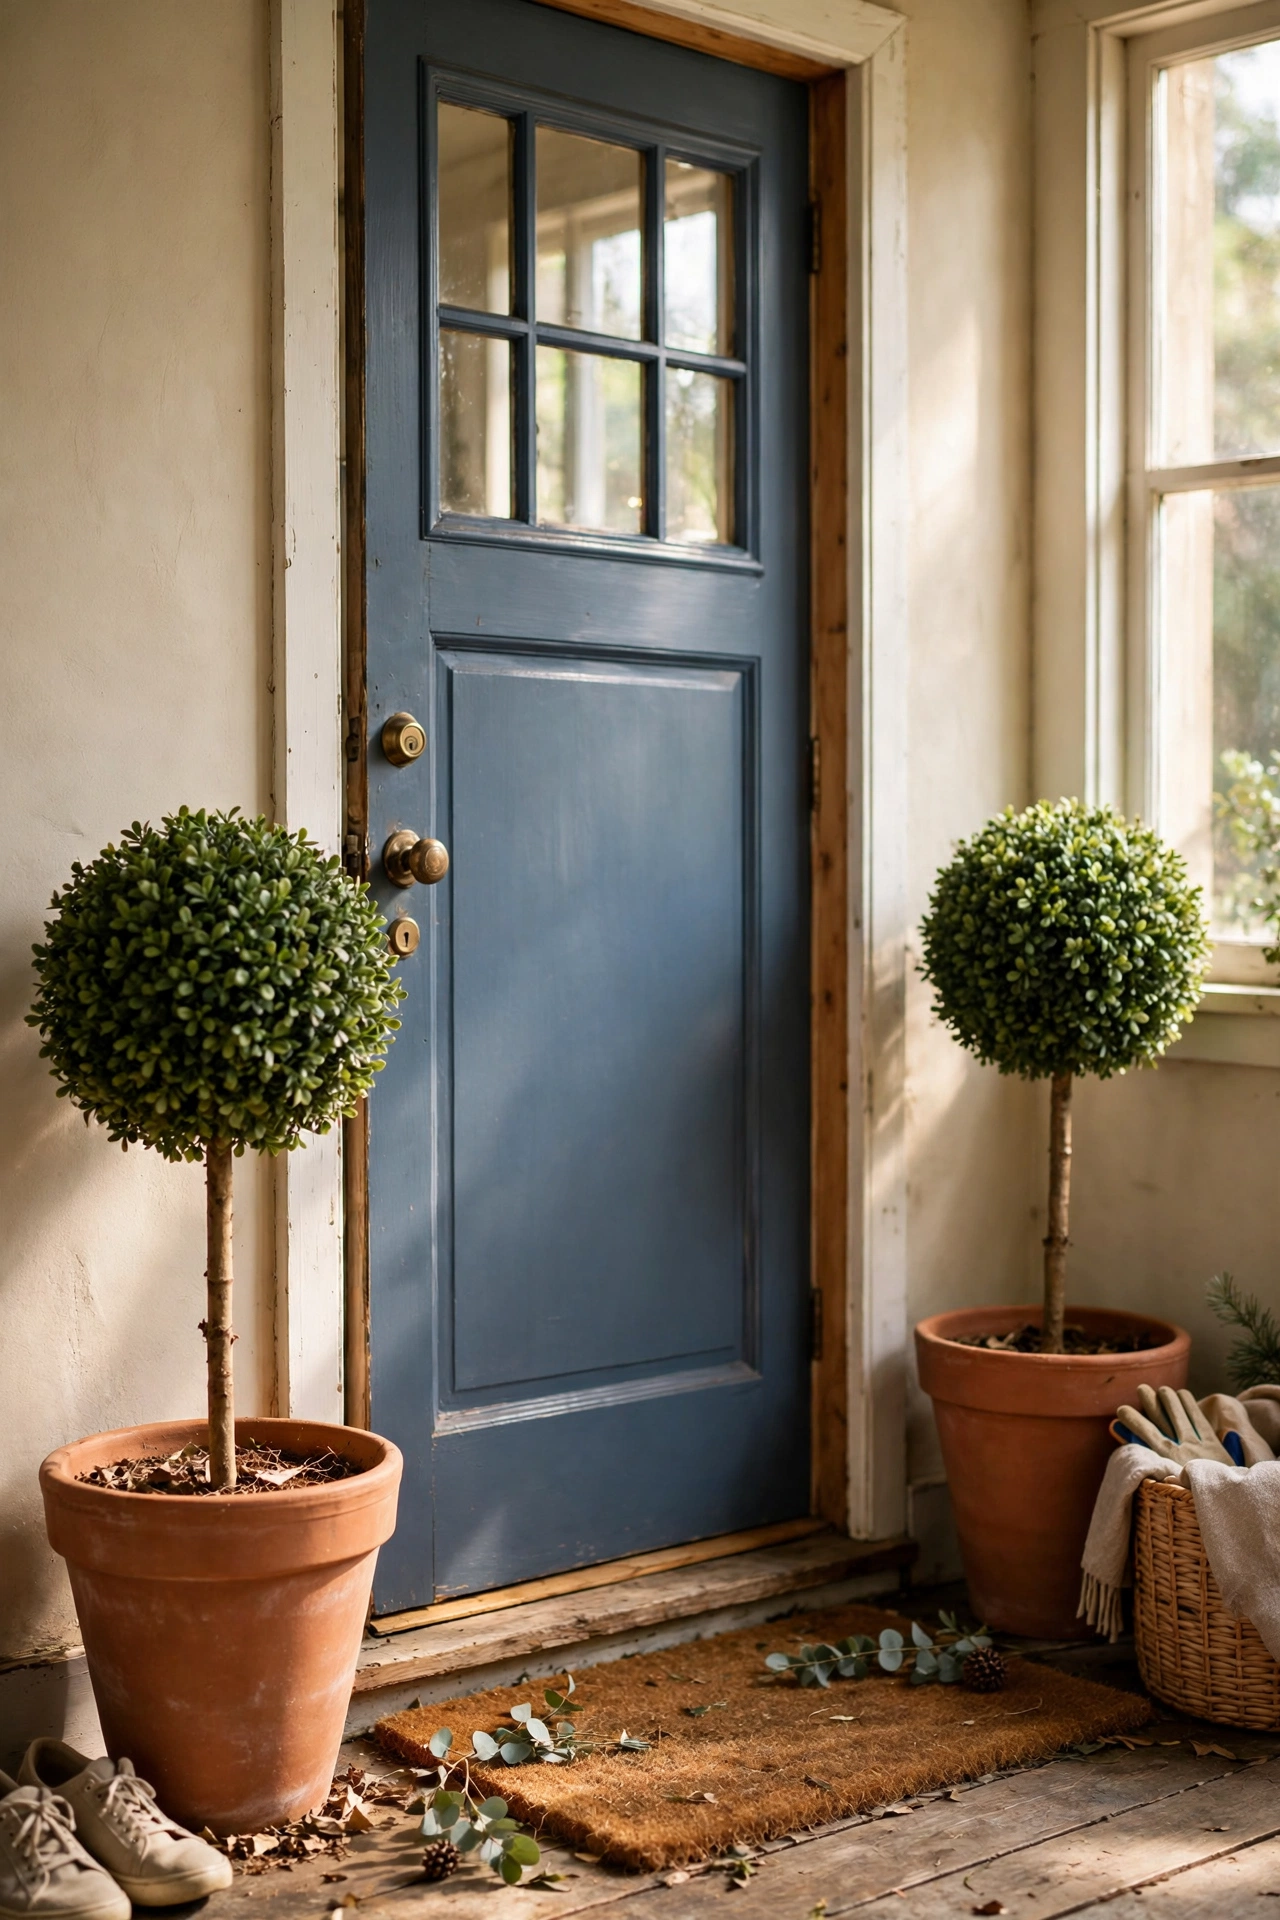
Two small topiaries flanking the door make an entryway look planned without any planting skill. Fill two terracotta pots with soil or floral foam, push a wooden dowel into each as a trunk, and hot-glue clusters of faux greenery or boxwood balls around a foam sphere at the top. Tie a pastel ribbon around each trunk to finish. I built mine for under $15 total using dollar-store foam spheres and greenery picks. Keep the pots weighted with a layer of gravel at the bottom so a windy April day does not send them rolling down the steps. This works indoors too, on a console or flanking the mantel.
Cost: ~$12-18 | Time: 45 minutes
4. Hanging Flower Basket by the Door
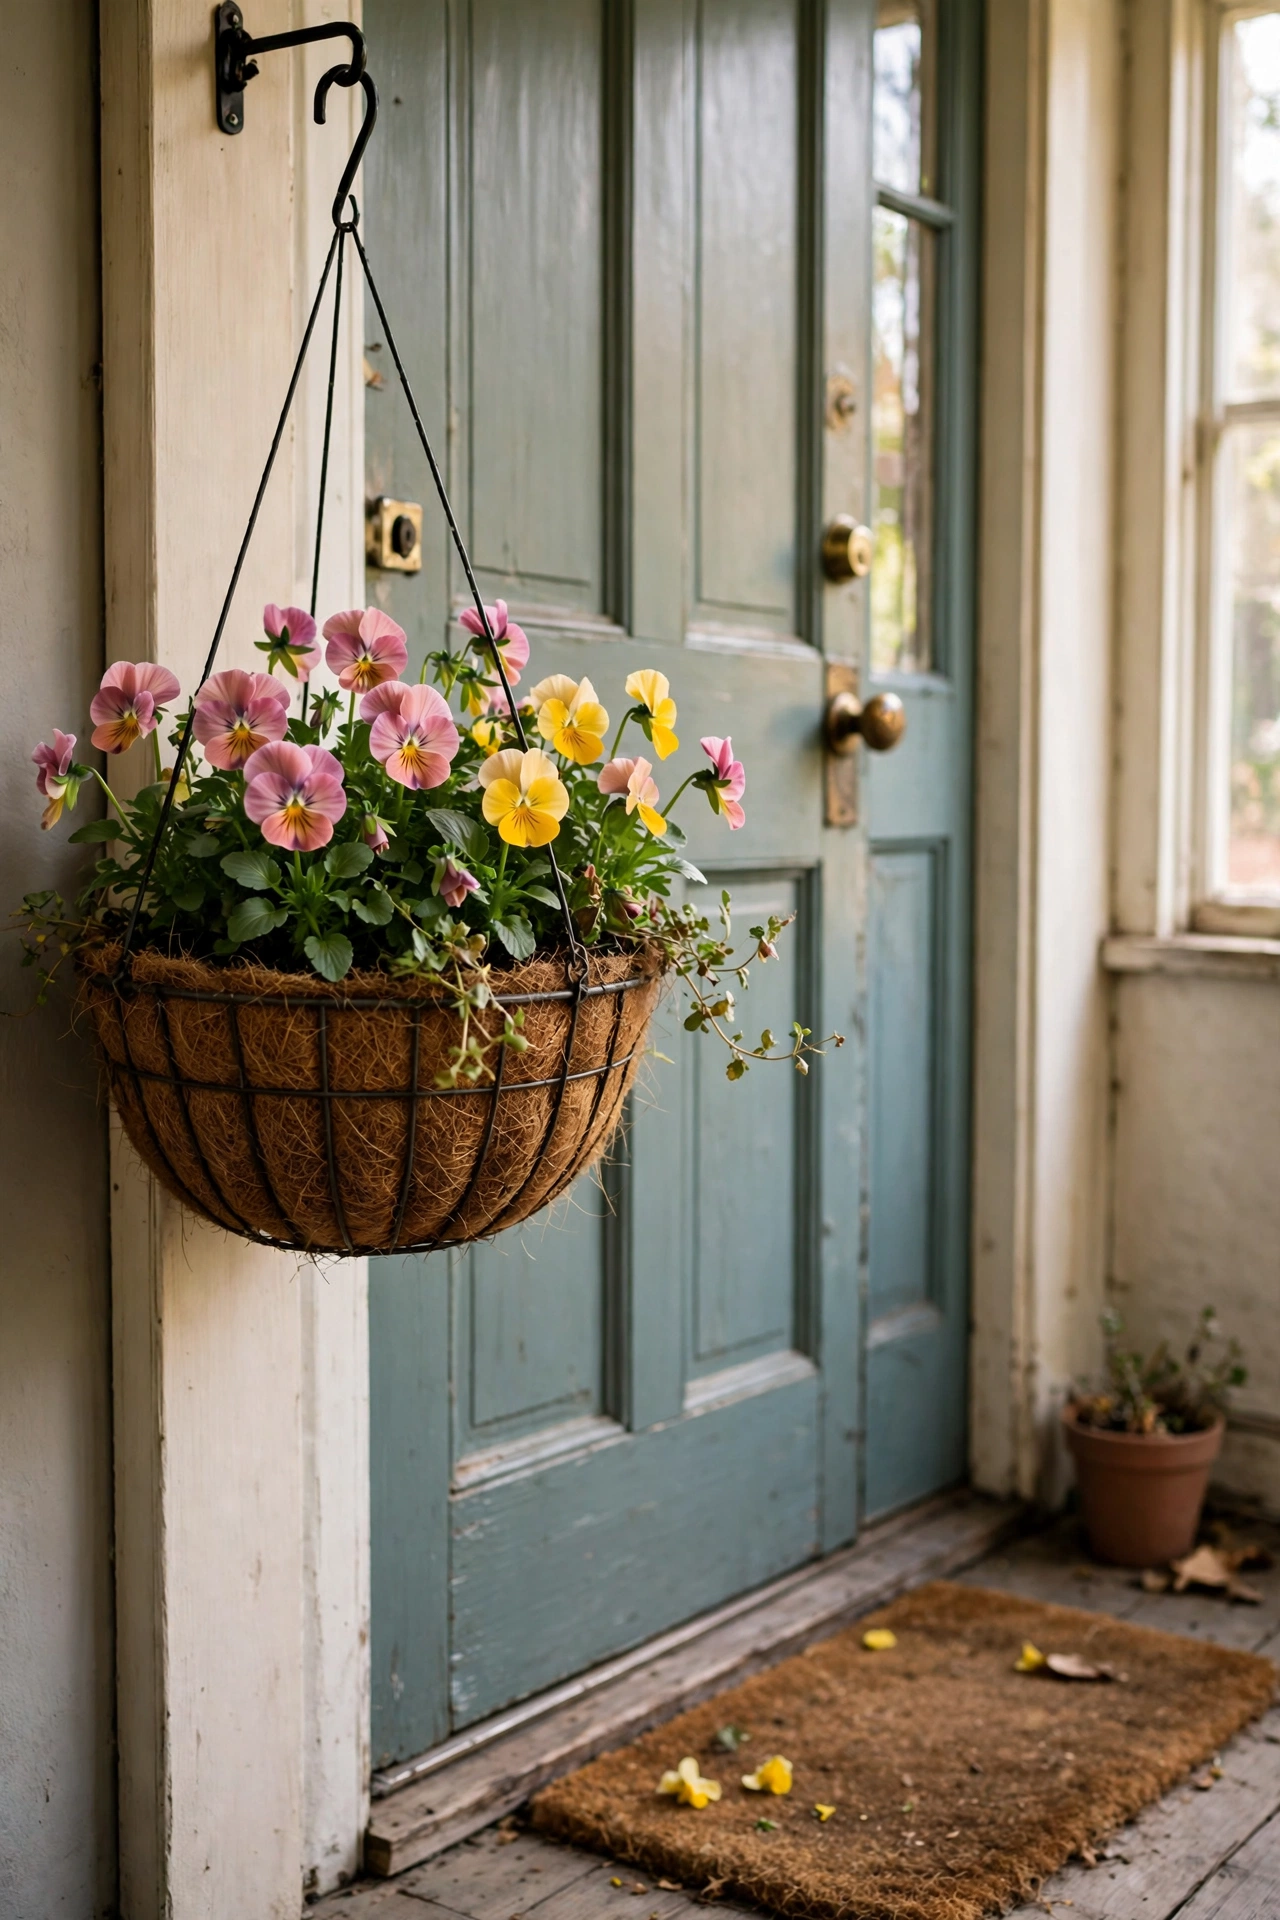
A hanging basket beside the front door says spring before anyone knocks. Line a wire basket with a coir liner, plant it with pansies or petunias in pinks and yellows, and hang it from a bracket or a sturdy shepherd’s hook. If you are starting early in the season, use hardy pansies that shrug off a cold snap. I hang mine with a length of chain so I can adjust the height easily, and I keep a small watering can by the door as a reminder because baskets dry out fast. Deadhead the spent blooms every few days and it will keep flowering for months.
Cost: ~$10-15 | Time: 20 minutes
5. DIY Birdhouse Door Hanger
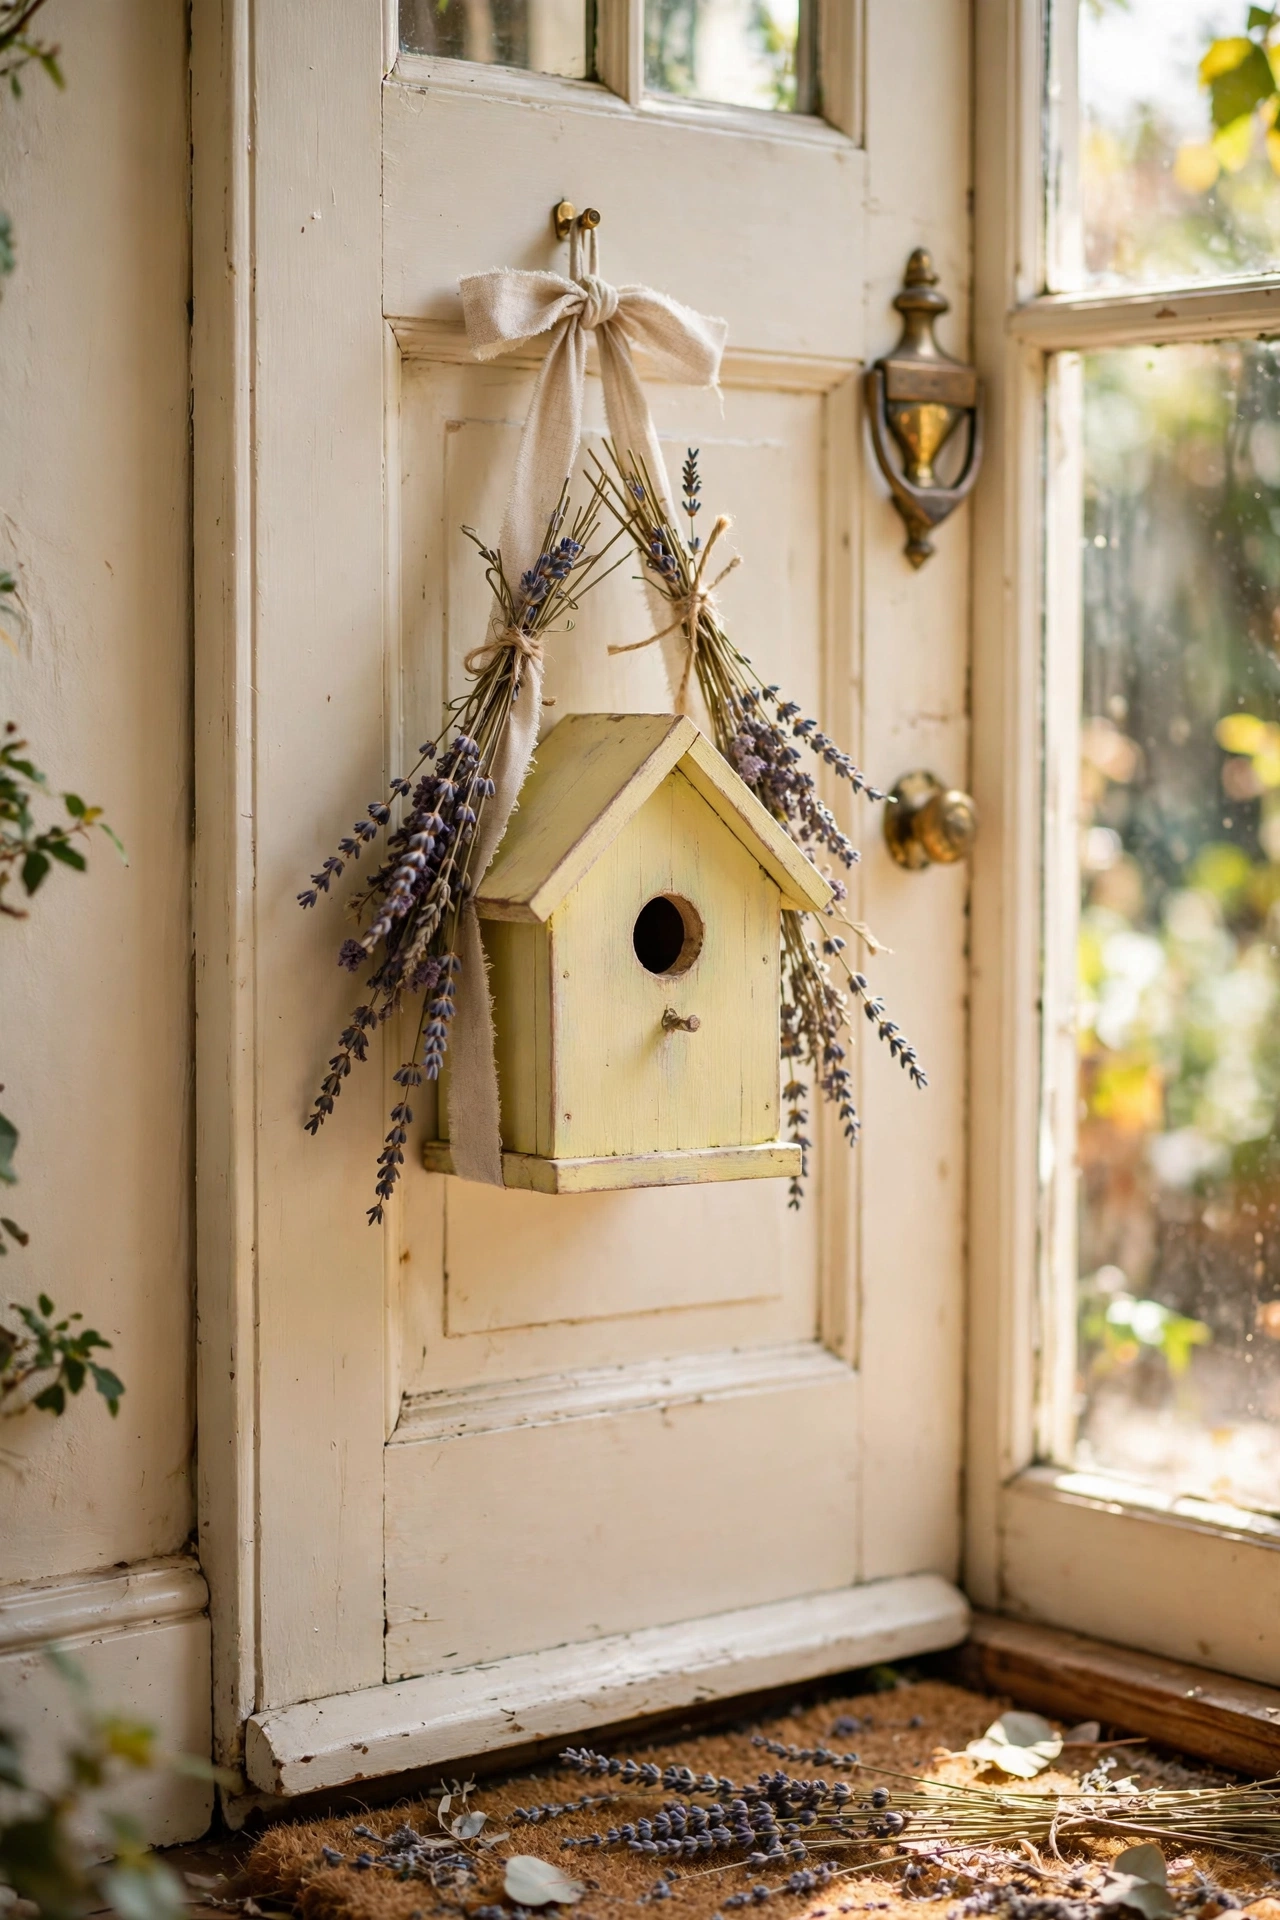
A little wooden birdhouse hanging where a wreath would go is a charming spring alternative. Buy a plain unfinished birdhouse, paint it a soft pastel, glue on a tiny moss roof or a few silk flowers around the entrance hole, and hang it from a ribbon. I painted mine pale yellow and glued dried lavender sprigs around the hole, and it gets more comments than any wreath I have made. Drill a small drain hole in the bottom if you hang it where rain reaches, so water does not pool inside. For a real nesting box version, skip the decorations and leave the wood natural.
Cost: ~$6-10 | Time: 45 minutes plus drying
6. Ribbon Garland on the Porch Rail
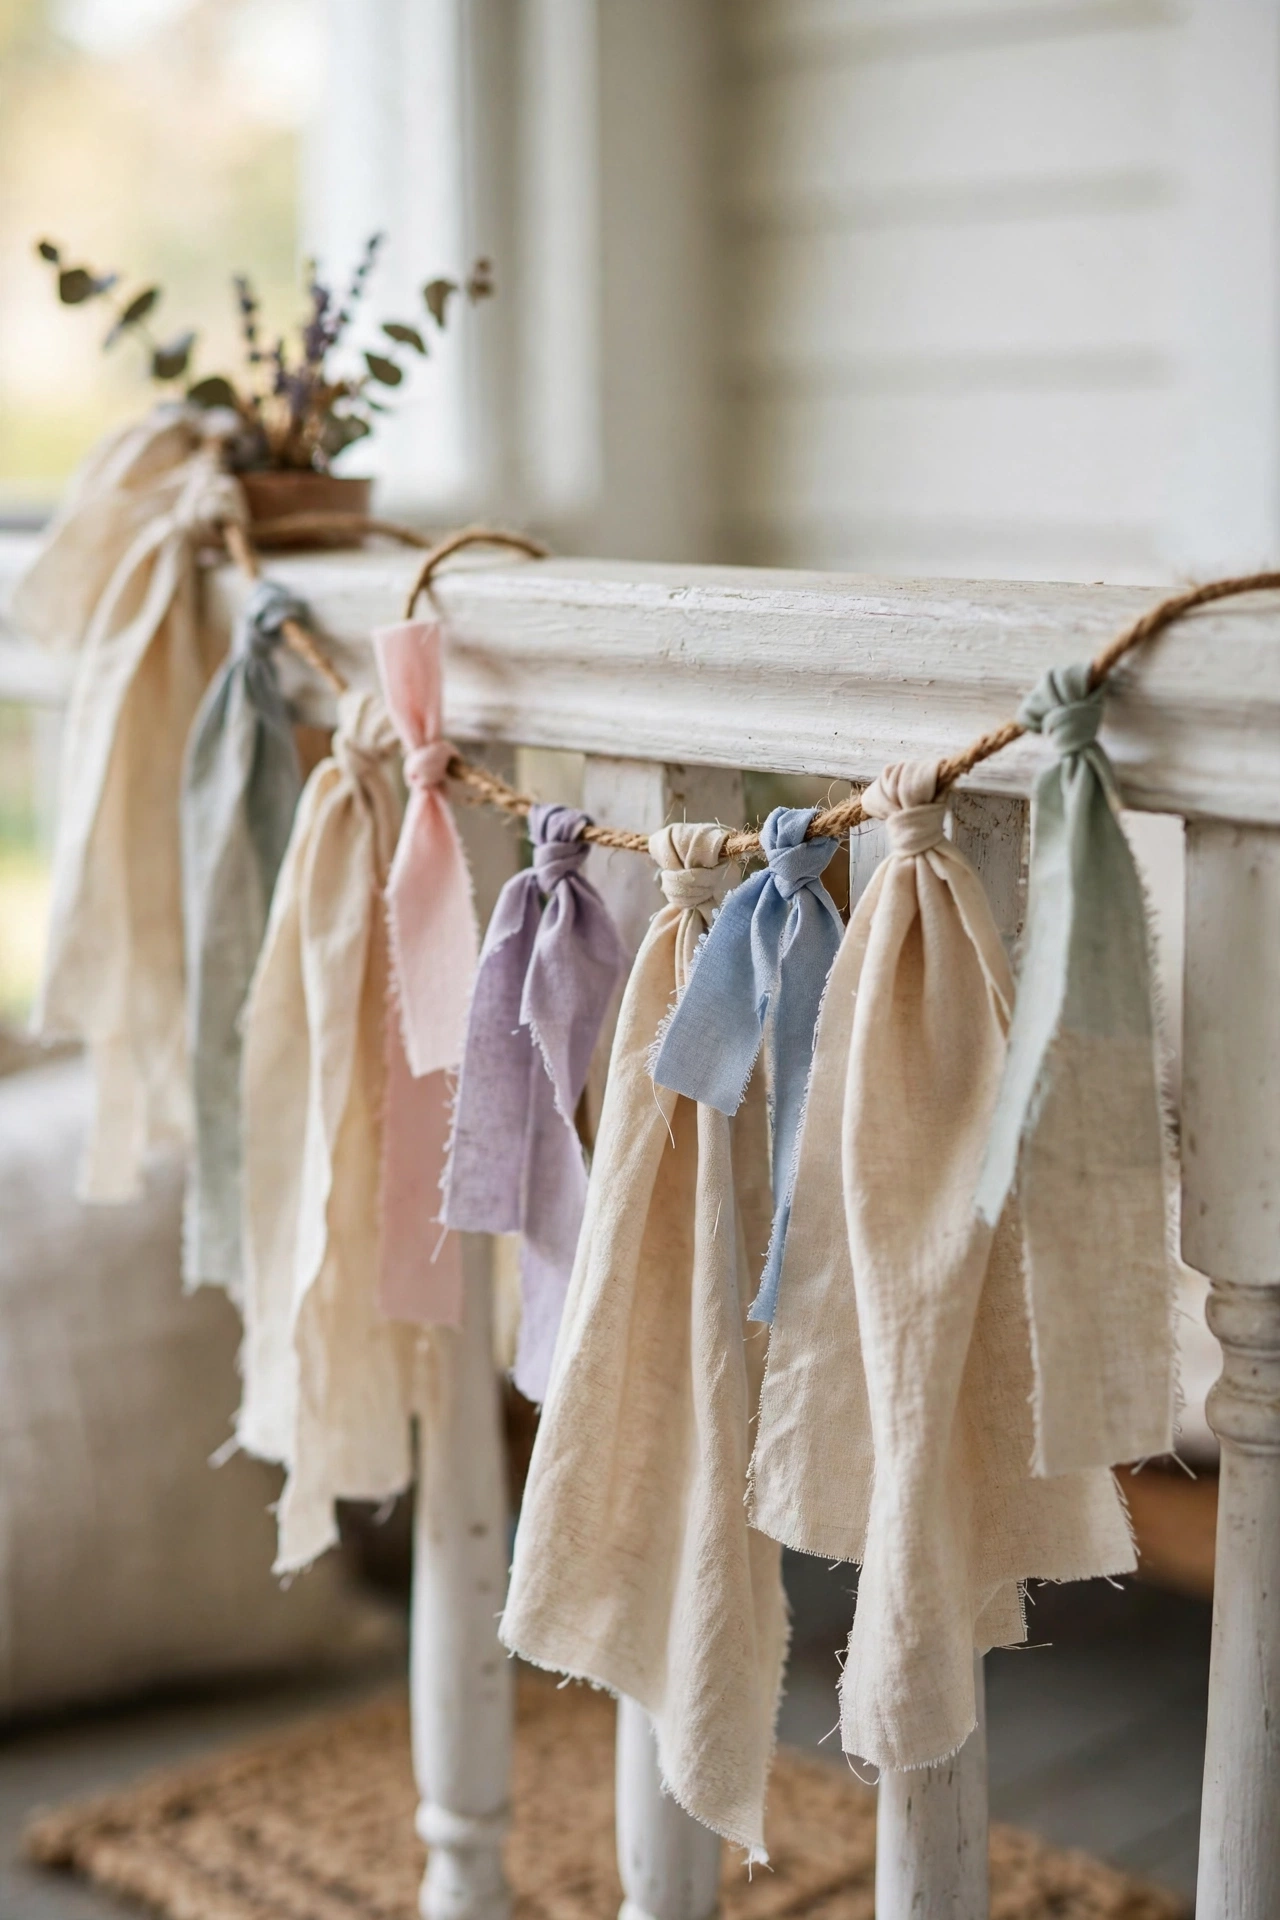
Strips of ribbon and fabric tied along a porch rail make a sweet, breezy spring garland. Cut muslin, linen scraps, or pastel ribbons into strips about 2 inches wide and 12 inches long, then tie them onto a length of twine in a repeating colour pattern until the twine is full. Drape the finished garland along the rail or across the porch beam. I made mine from an old floral bedsheet I was about to donate, and it cost me nothing but an hour. Save this one for your weekend project list.
Cost: ~$4-8 | Time: 1 hour
Fresh & Floral Indoors
7. Pressed-Flower Mason Jar Lanterns
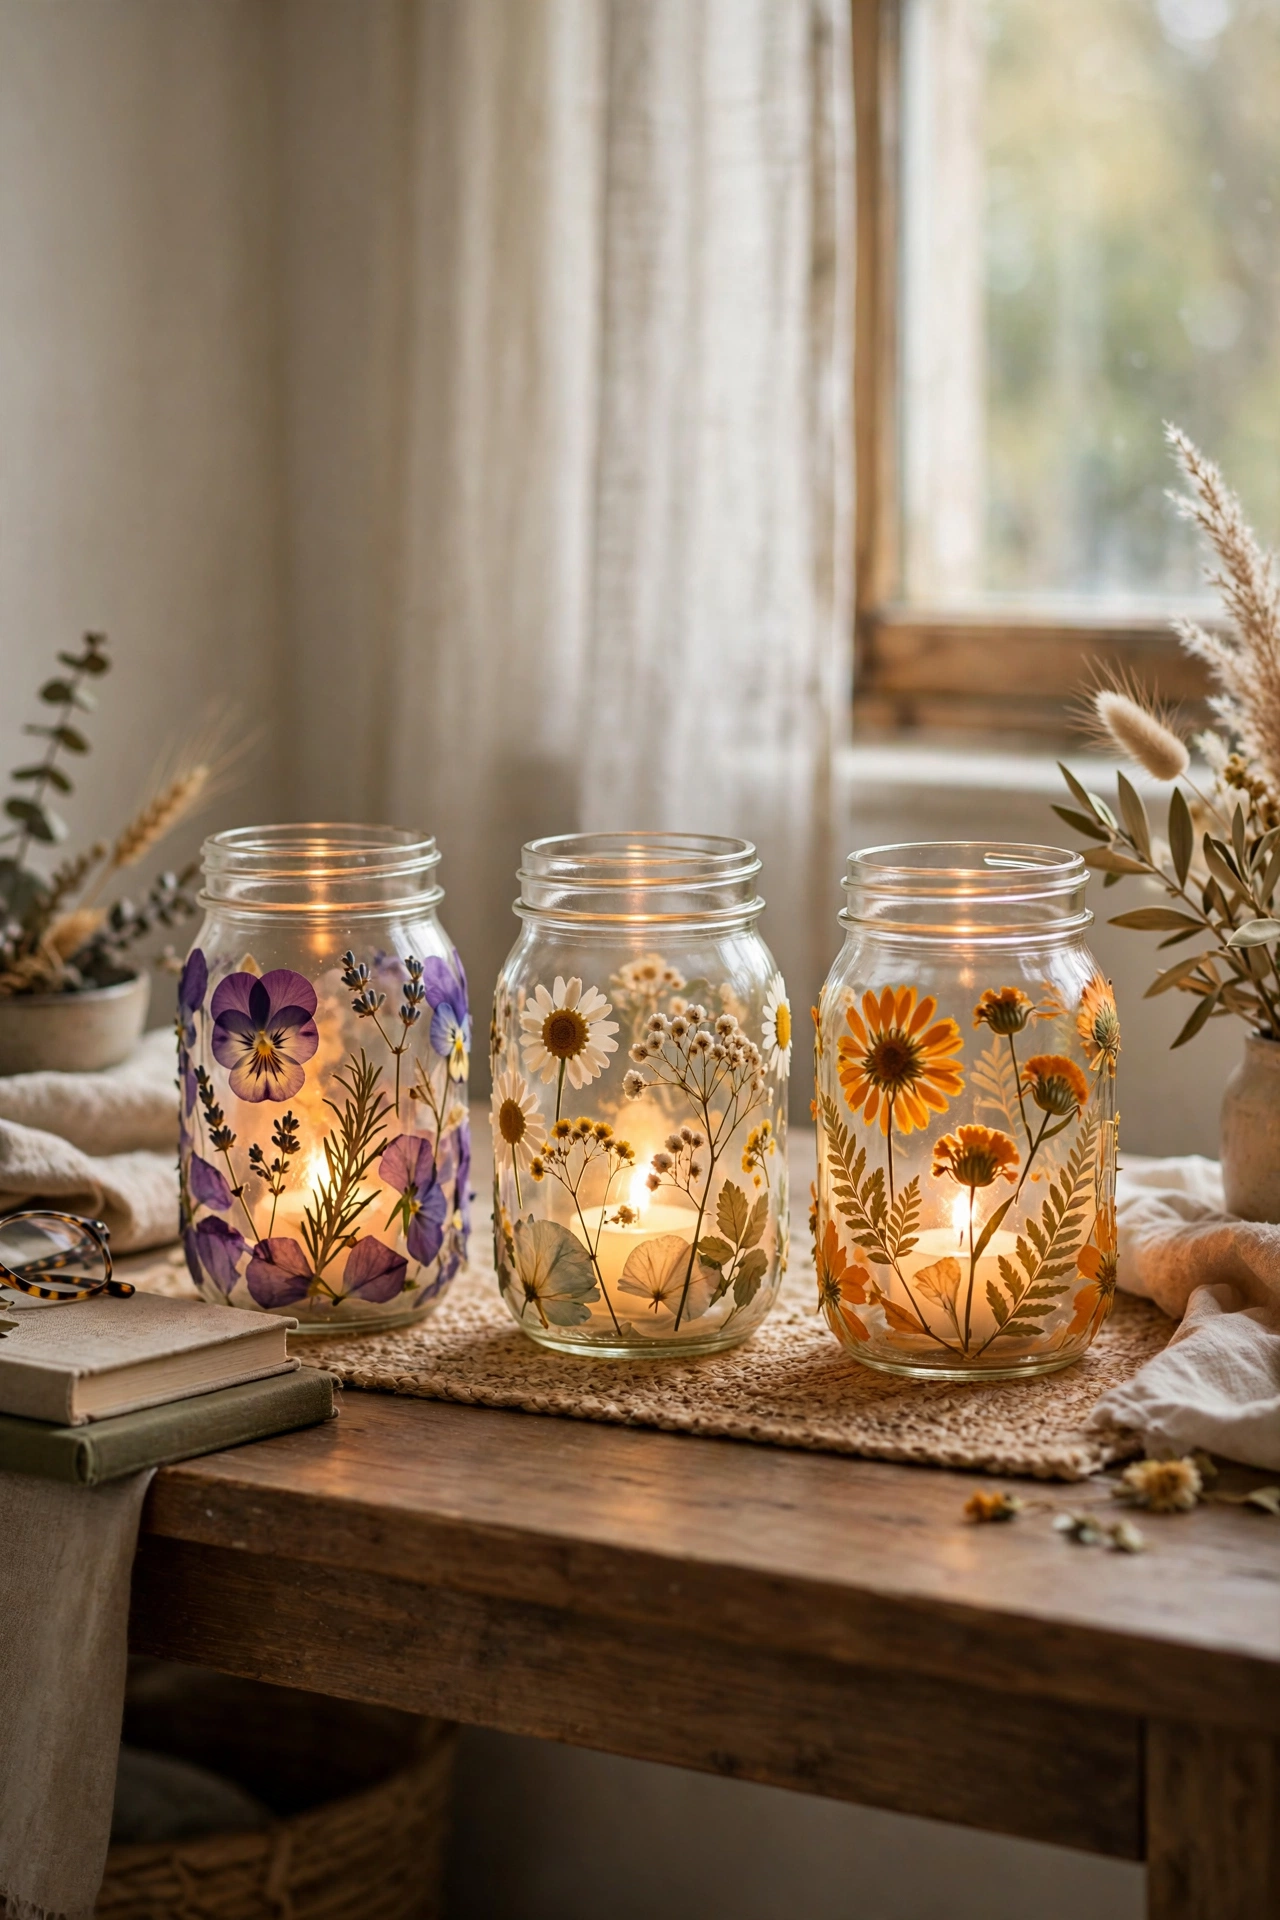
Mason jars decorated with pressed flowers glow beautifully at dusk and cost almost nothing. Press small flowers between heavy books for two weeks, or speed it up by microwaving them between paper towels in short bursts. Stick the pressed blooms to the outside of clean jars with decoupage glue, let them dry, and add a battery tea light inside. I line three of them down my hallway console each spring. My first attempt failed because I pressed the flowers too wet and they browned; make sure the petals are fully dry before gluing. Tied with twine, they also work as garden party table lights.
Cost: ~$5-9 | Time: 30 minutes plus pressing
8. Faux Blooms in a Thrifted Pitcher
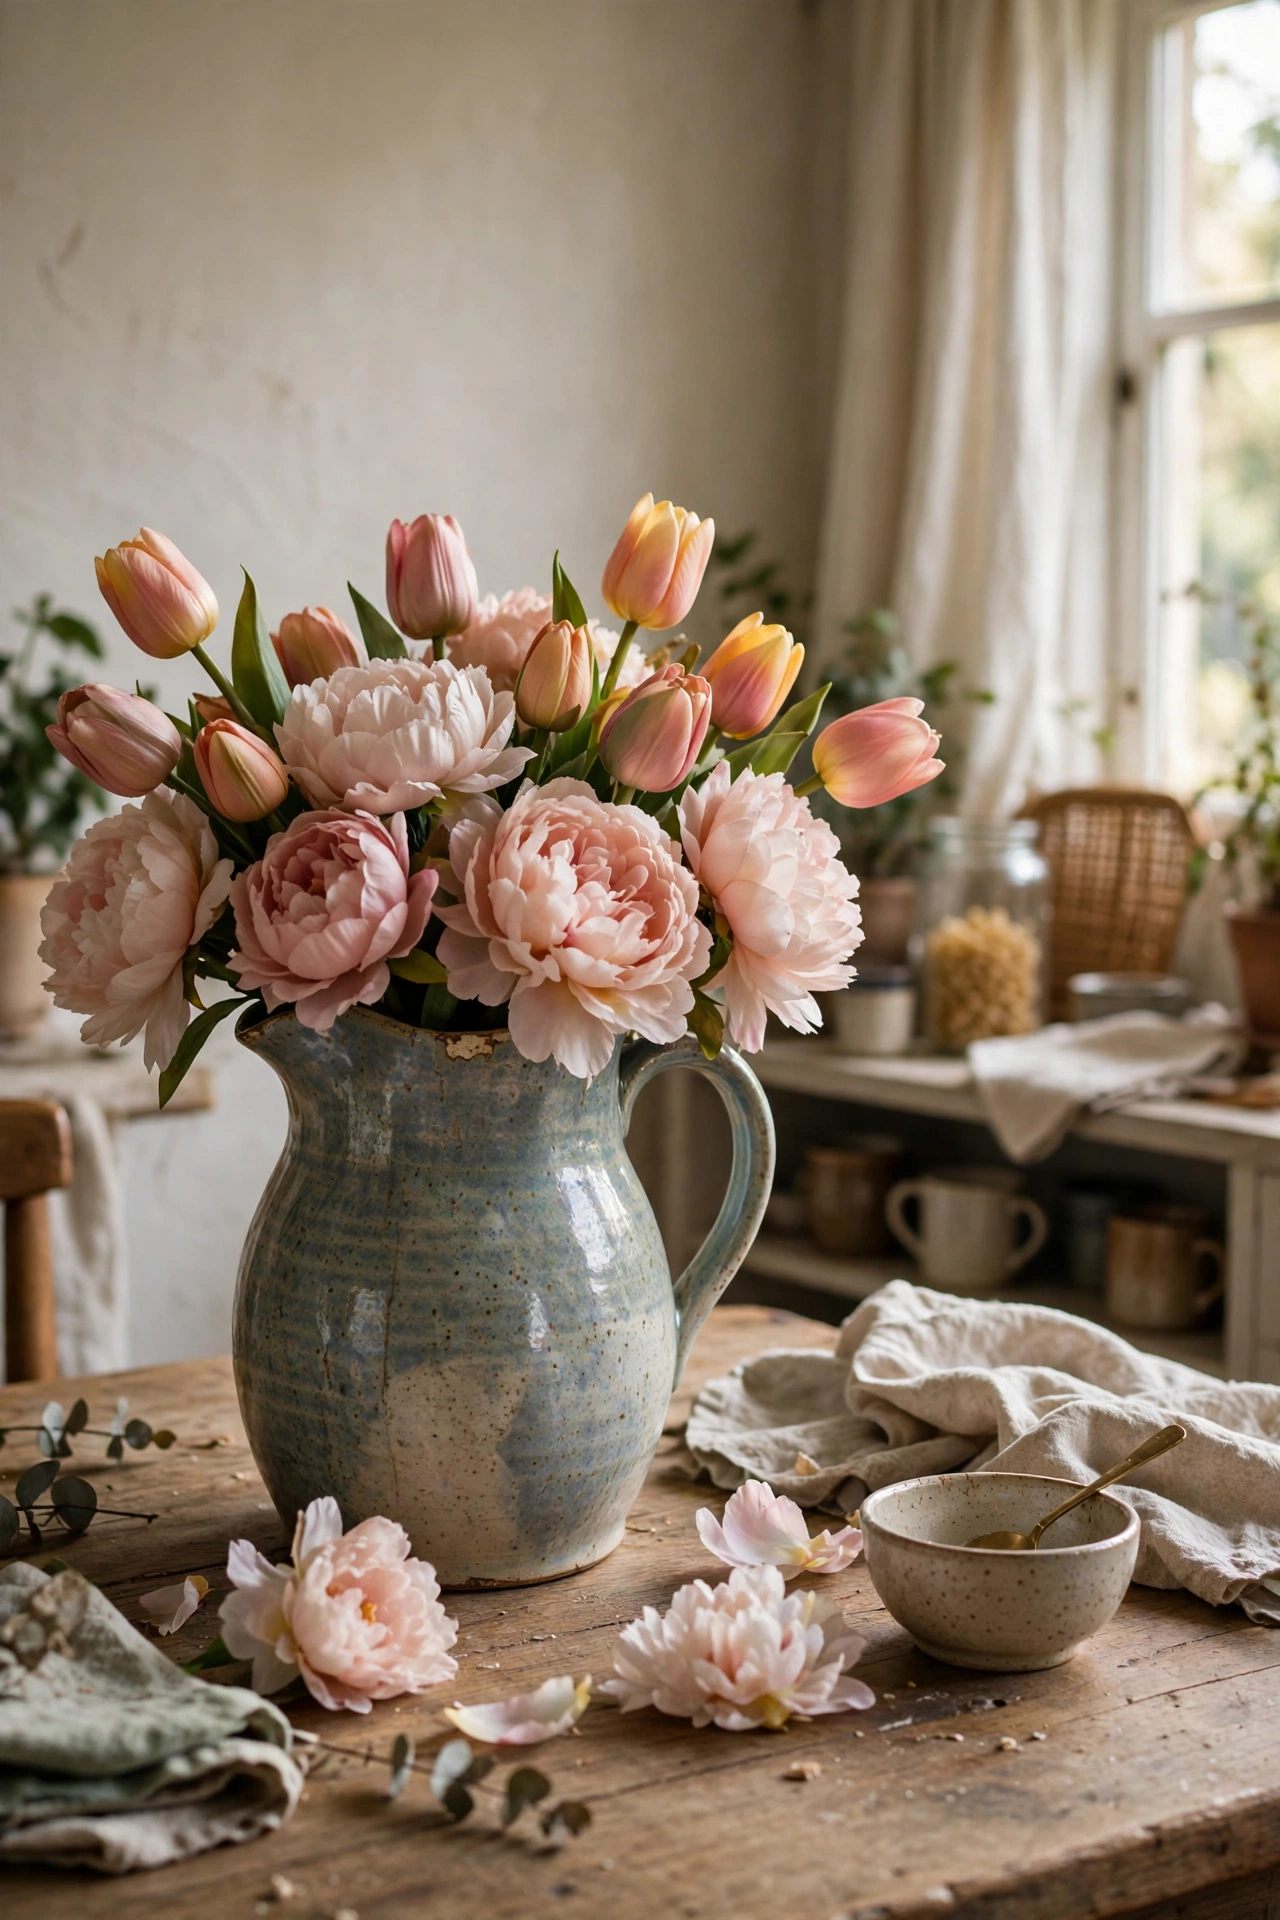
A jug of flowers on the kitchen table is the whole season in one gesture, and the jug does not need to be expensive. I keep an eye out for ceramic pitchers at charity shops and have bought three for under $3 each. Fill one with a handful of faux peonies or tulips, bend the stems to vary the heights, and add a couple of real leafy branches for movement. The secret to believable faux flowers is fewer stems arranged loosely, not a crowded bunch. I tried packing mine full once and it looked like a hotel lobby. Six or seven stems in a wide jug is plenty.
Cost: ~$8-14 | Time: 15 minutes
9. Hoop Floral Chandelier
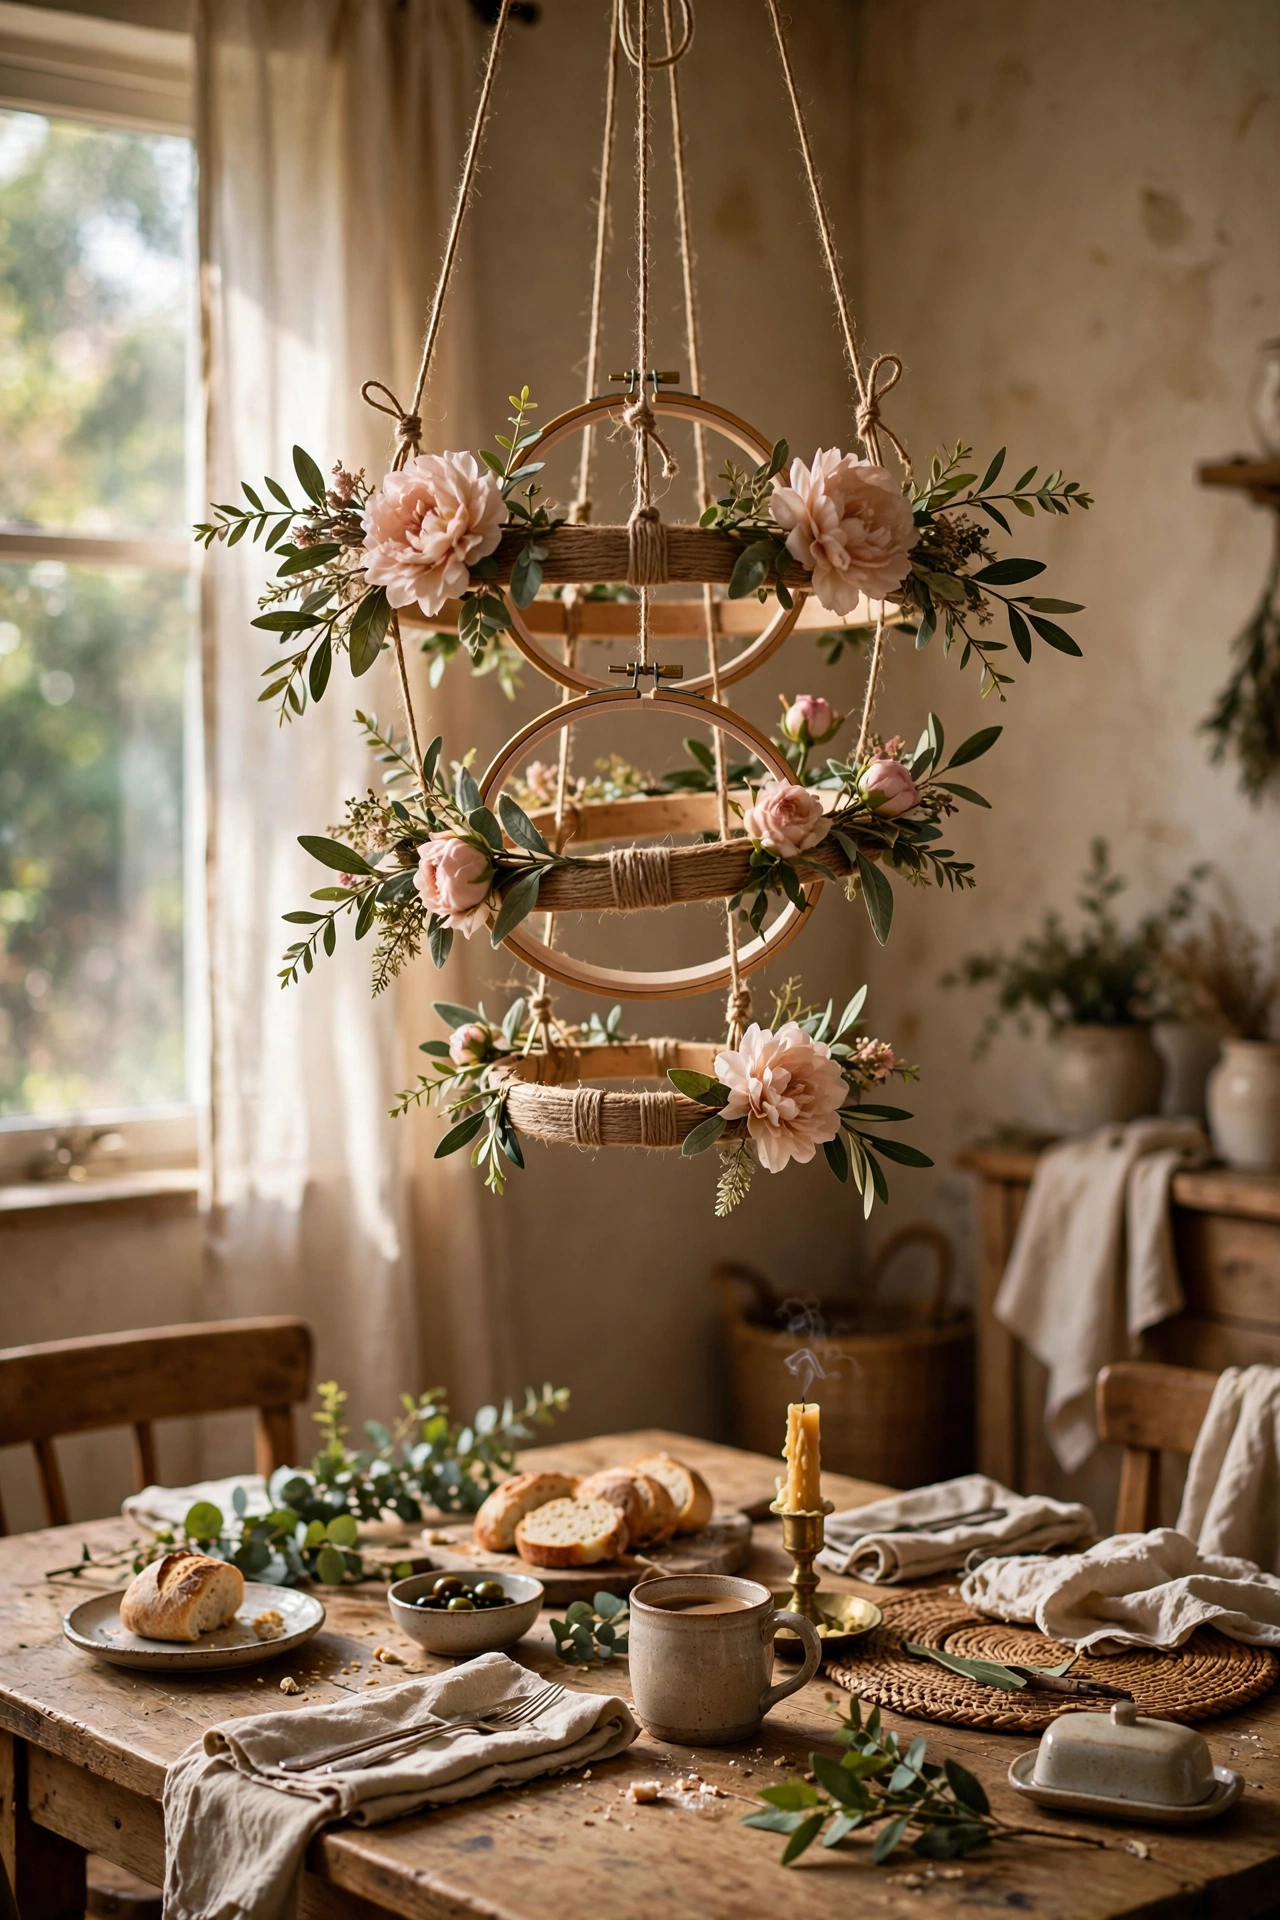
An embroidery hoop turned into a hanging floral chandelier makes a lovely centrepiece over the dining table. Wrap the hoop in twine, wire or glue faux blooms and greenery around the full circle, and hang it from the ceiling with three lengths of fishing line tied to a small ceiling hook. I made mine with dollar-store silk flowers in blush and cream, and guests always ask where I bought it. Keep it light so the hook stays secure; faux florals are much lighter than real ones for this. Swap the blooms each season and the hoop becomes a year-round fixture.
Cost: ~$10-16 | Time: 1.5 hours
10. Painted Eggshell Planters
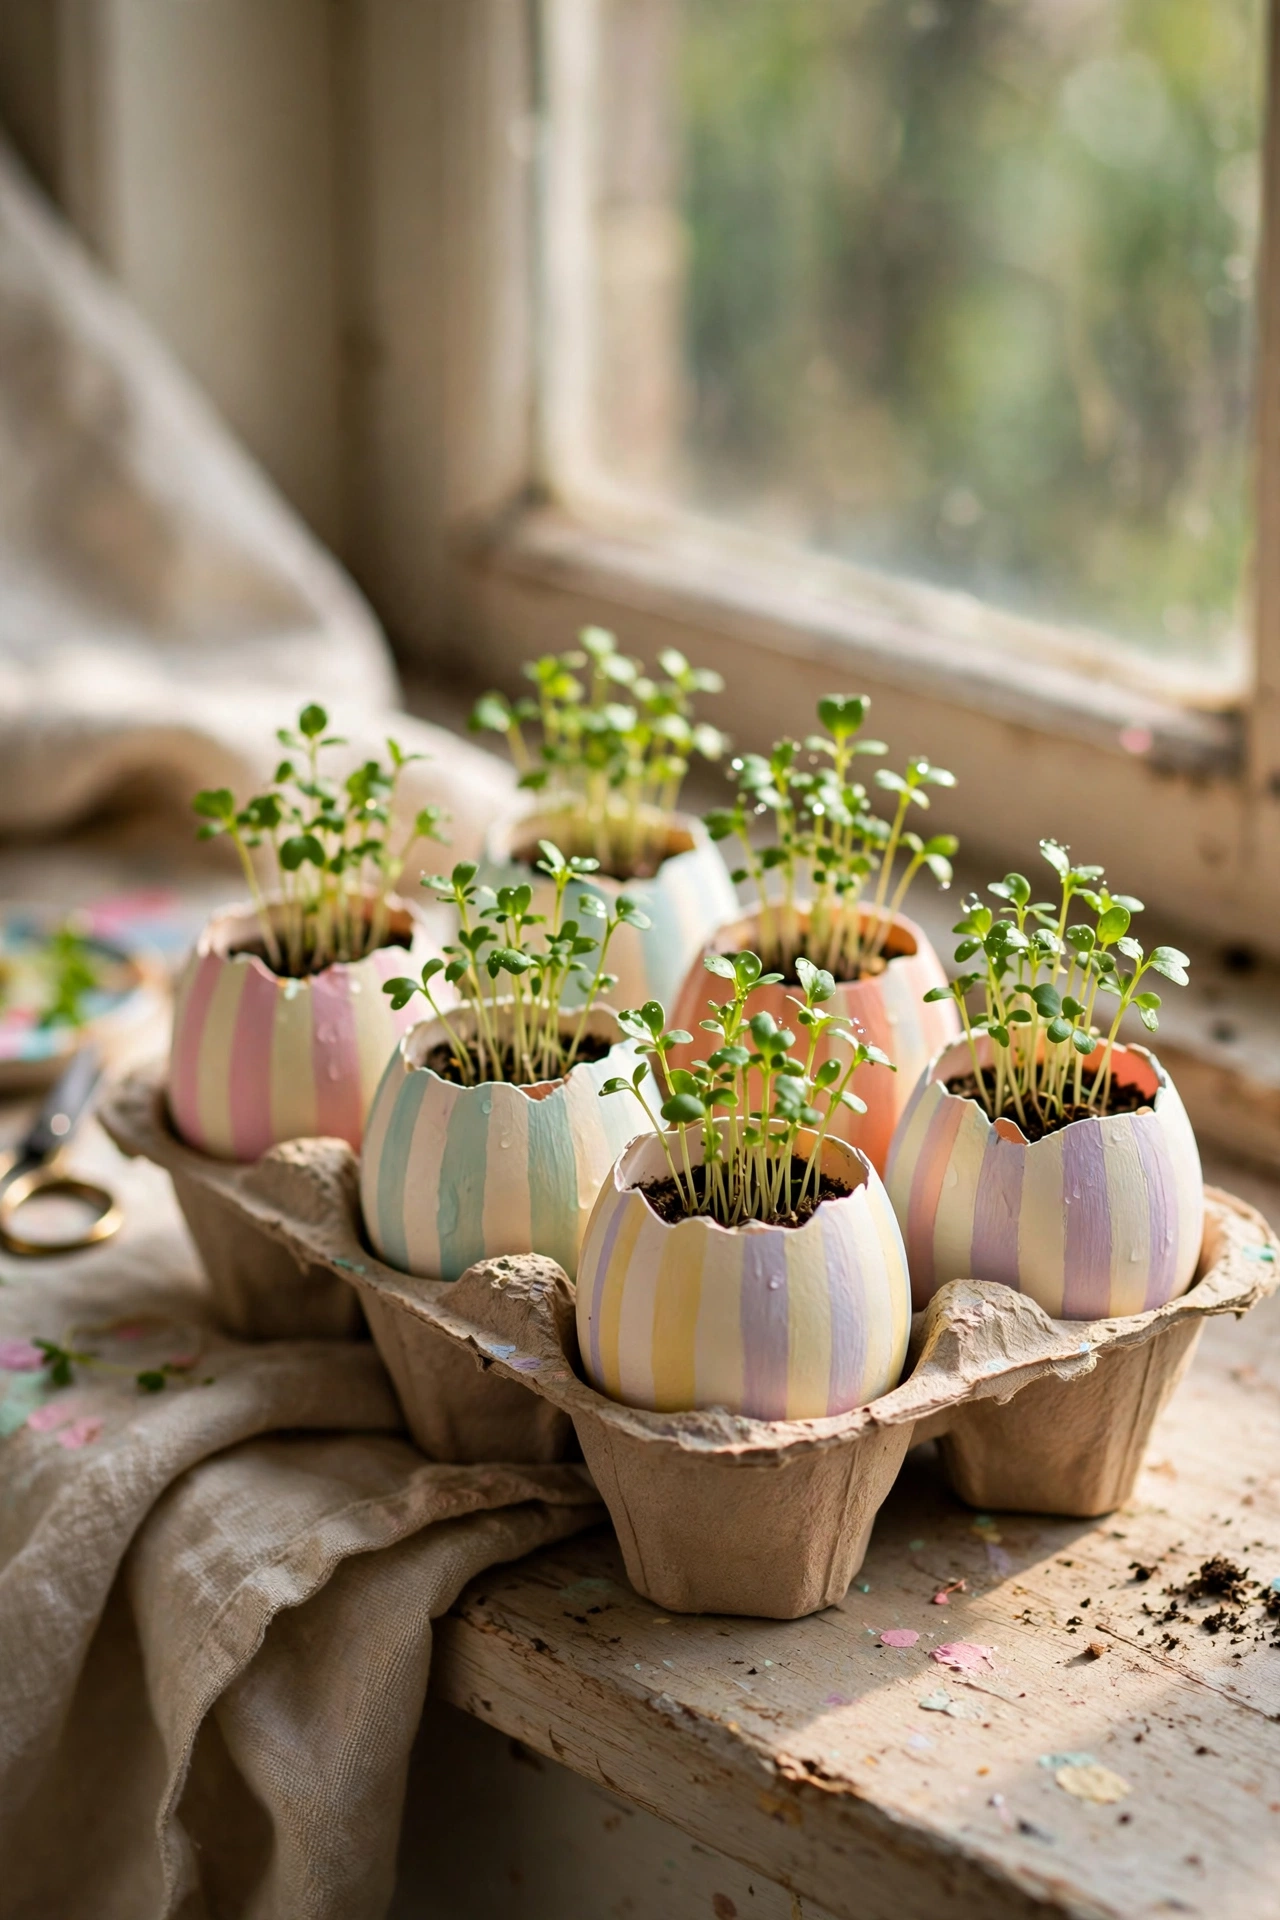
Eggshell halves make the cutest seedling pots for spring herbs or grass. Crack eggs cleanly near the top, rinse and dry the shells, paint them in pastel stripes or dots with acrylic paint, and nestle them in an egg carton for stability. Fill with potting soil and sow cress or basil seeds. I grow these on my kitchen windowsill every April and the grandchildren love watching the green fuzz appear. My mistake the first year was planting outside straight away; a hard frost killed them overnight. Keep them indoors until the nights are reliably warm.
Cost: ~$2-5 | Time: 45 minutes plus growing
11. Windowsill Herb Garden in Tin Cans
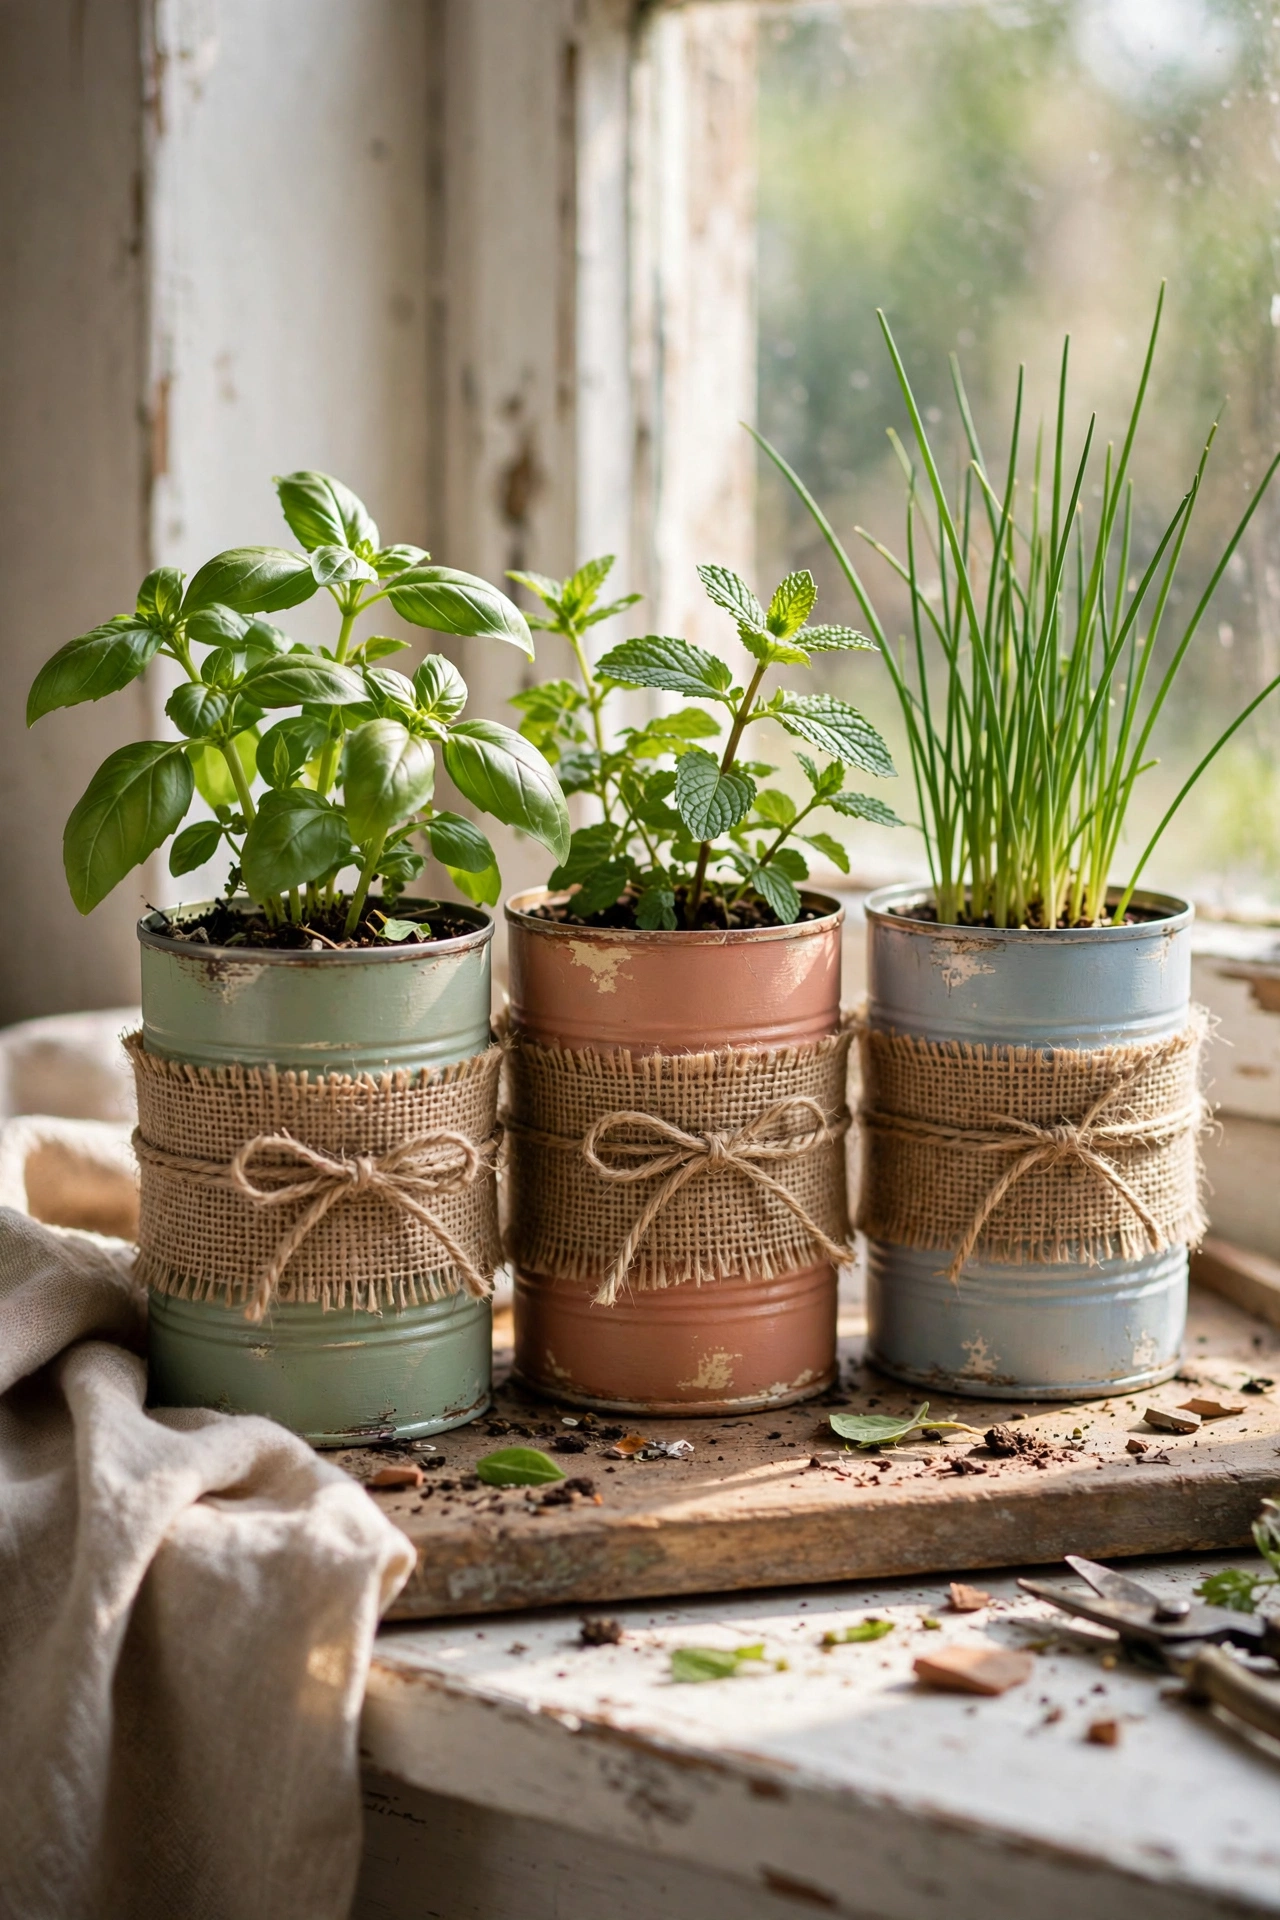
Fresh herbs on the windowsill are spring decor you can eat. Save large tin cans, peel the labels, and paint them or wrap them in hessian for a uniform look. Punch drainage holes in the bottoms with a nail, fill with potting soil, and plant basil, mint, and chives. I keep three cans on a small tray so watering does not stain the sill. The tray is the detail I skipped the first year, and I paid for it with a warped wooden sill. Label each can with a chalk marker so guests know what is growing. A south-facing window keeps them happy.
Cost: ~$6-10 | Time: 1 hour
12. Pastel Cushion Cover Swap
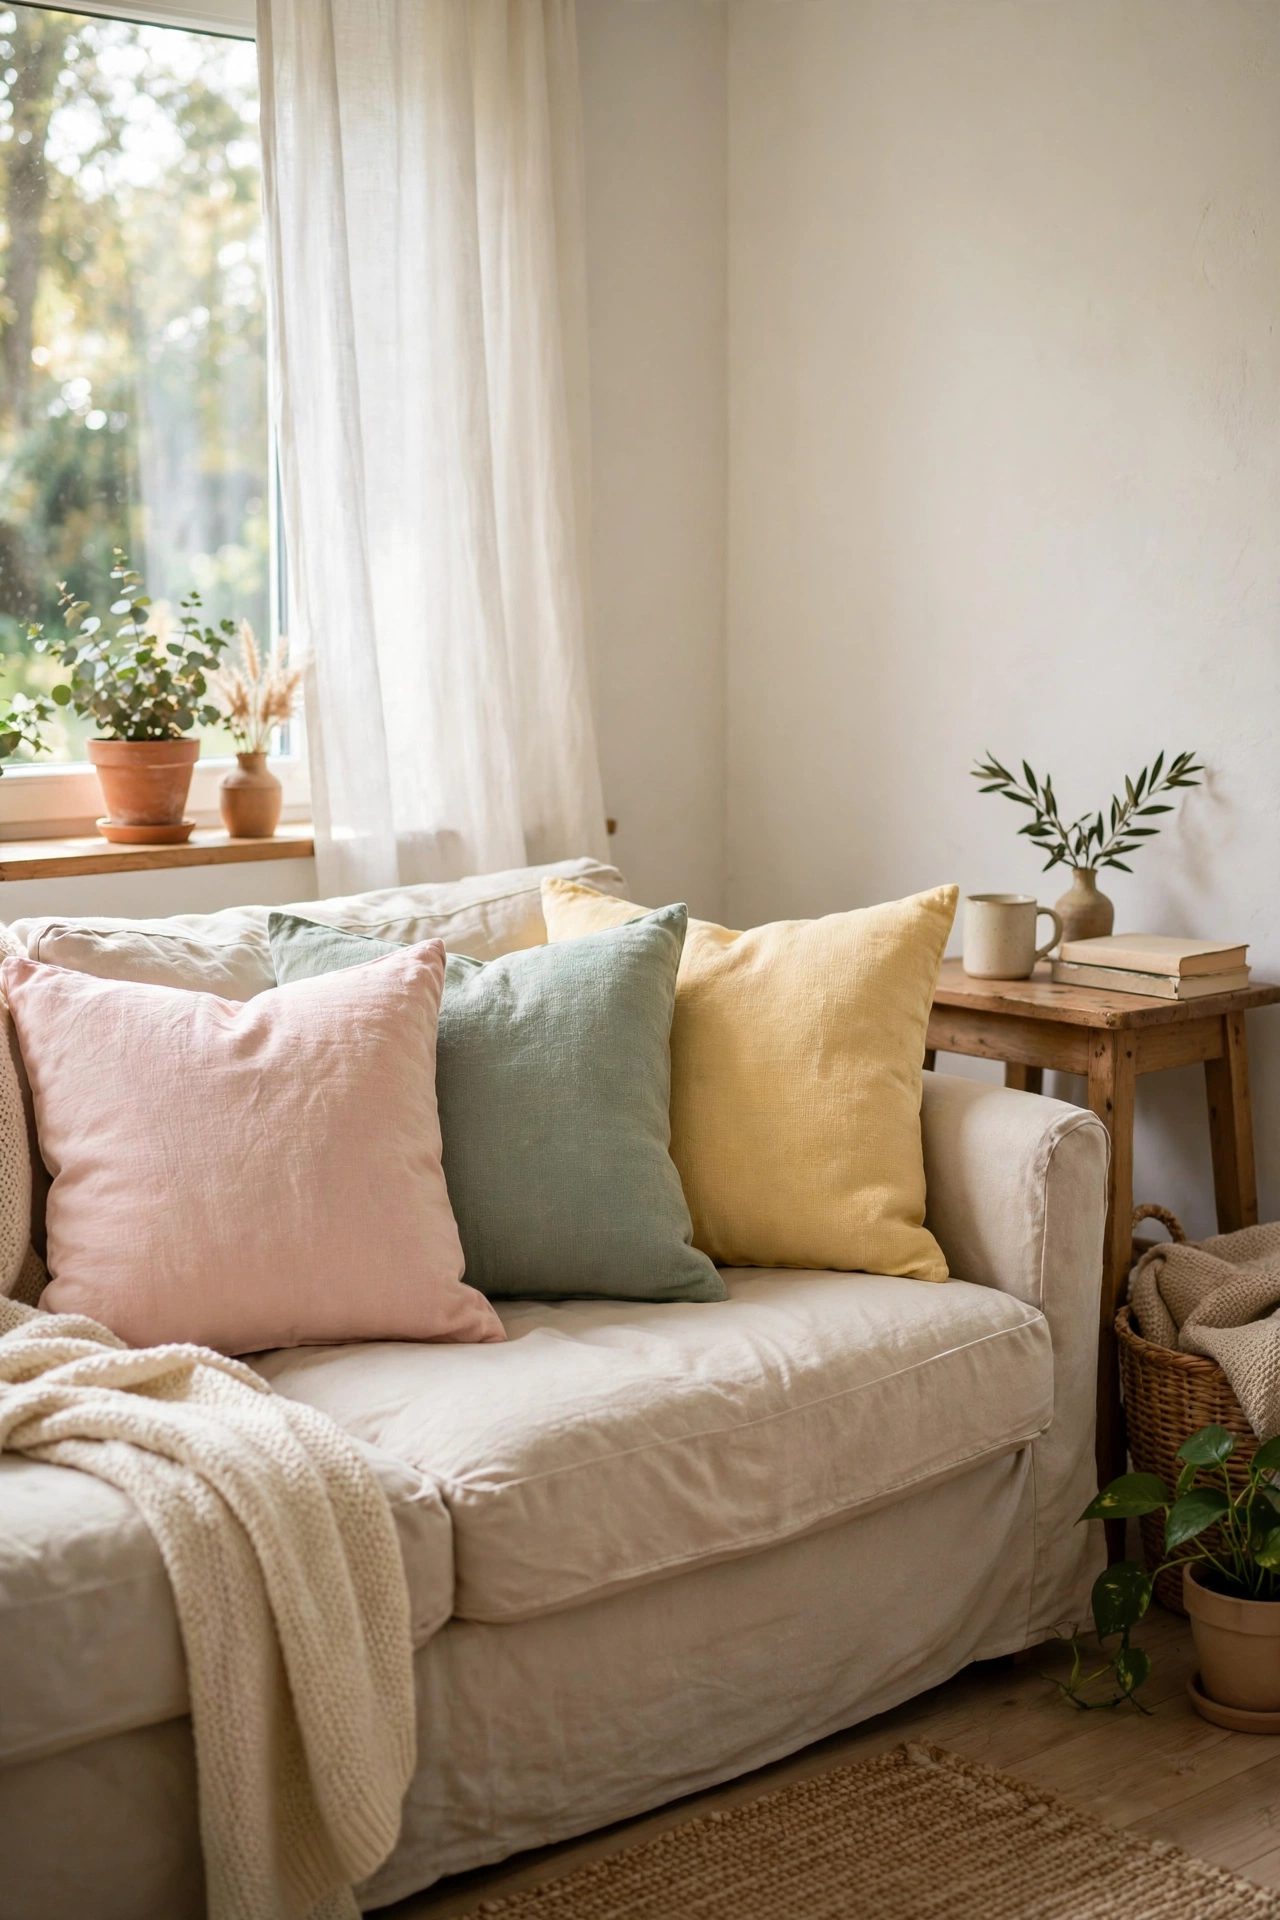
Swapping cushion covers is the cheapest seasonal reset a sofa can get. Buy or sew simple envelope covers in blush, sage, and butter yellow, and trade them in for the heavy winter fabrics. No sewing machine is needed; an envelope cover is two rectangles sewn or even fabric-glued together. I keep my spring set in a labelled bag in the linen cupboard and rotate them back each March. Fabric glue held mine together for two seasons before I finally learned to sew a straight seam. Wash the covers at the end of the season so they come out fresh next year.
Cost: ~$10-20 | Time: 1 hour for four
Walls & Windows
13. Botanical Print Gallery Wall
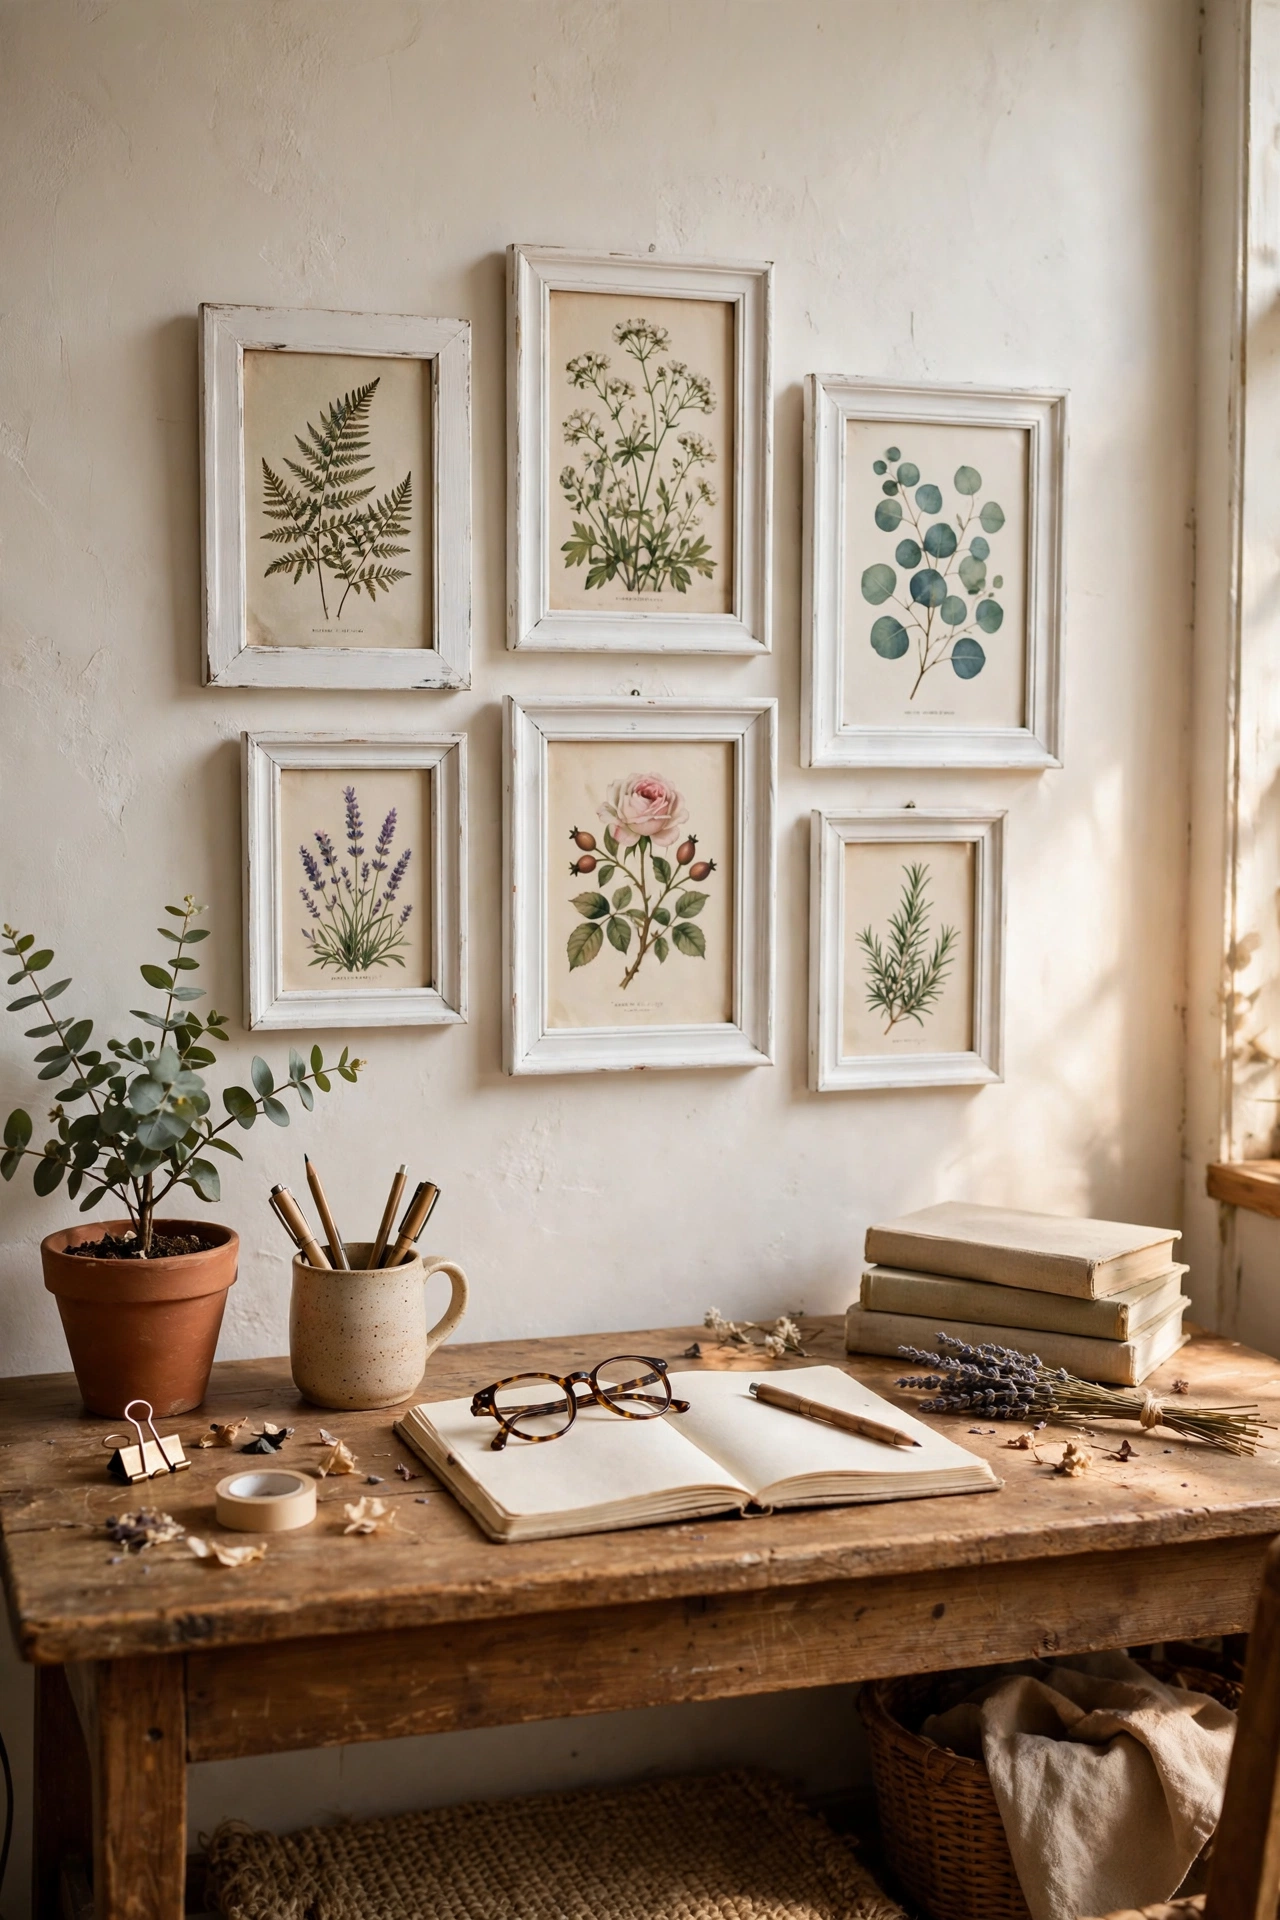
A small gallery wall of botanical prints makes spring feel permanent. Print free vintage botanical illustrations from public-domain archives on card stock, trim them, and frame them in matching thrifted frames sprayed one colour. I hung six small frames in a loose grid above my desk and the whole corner brightened up. Matching the frame colour matters more than matching the frames themselves; a coat of matte white spray paint made my mismatched set look deliberate. Plan the layout on the floor first with painter’s tape marks on the wall.
Cost: ~$10-18 | Time: 1.5 hours
14. Painted Mirror Frame in Spring Green
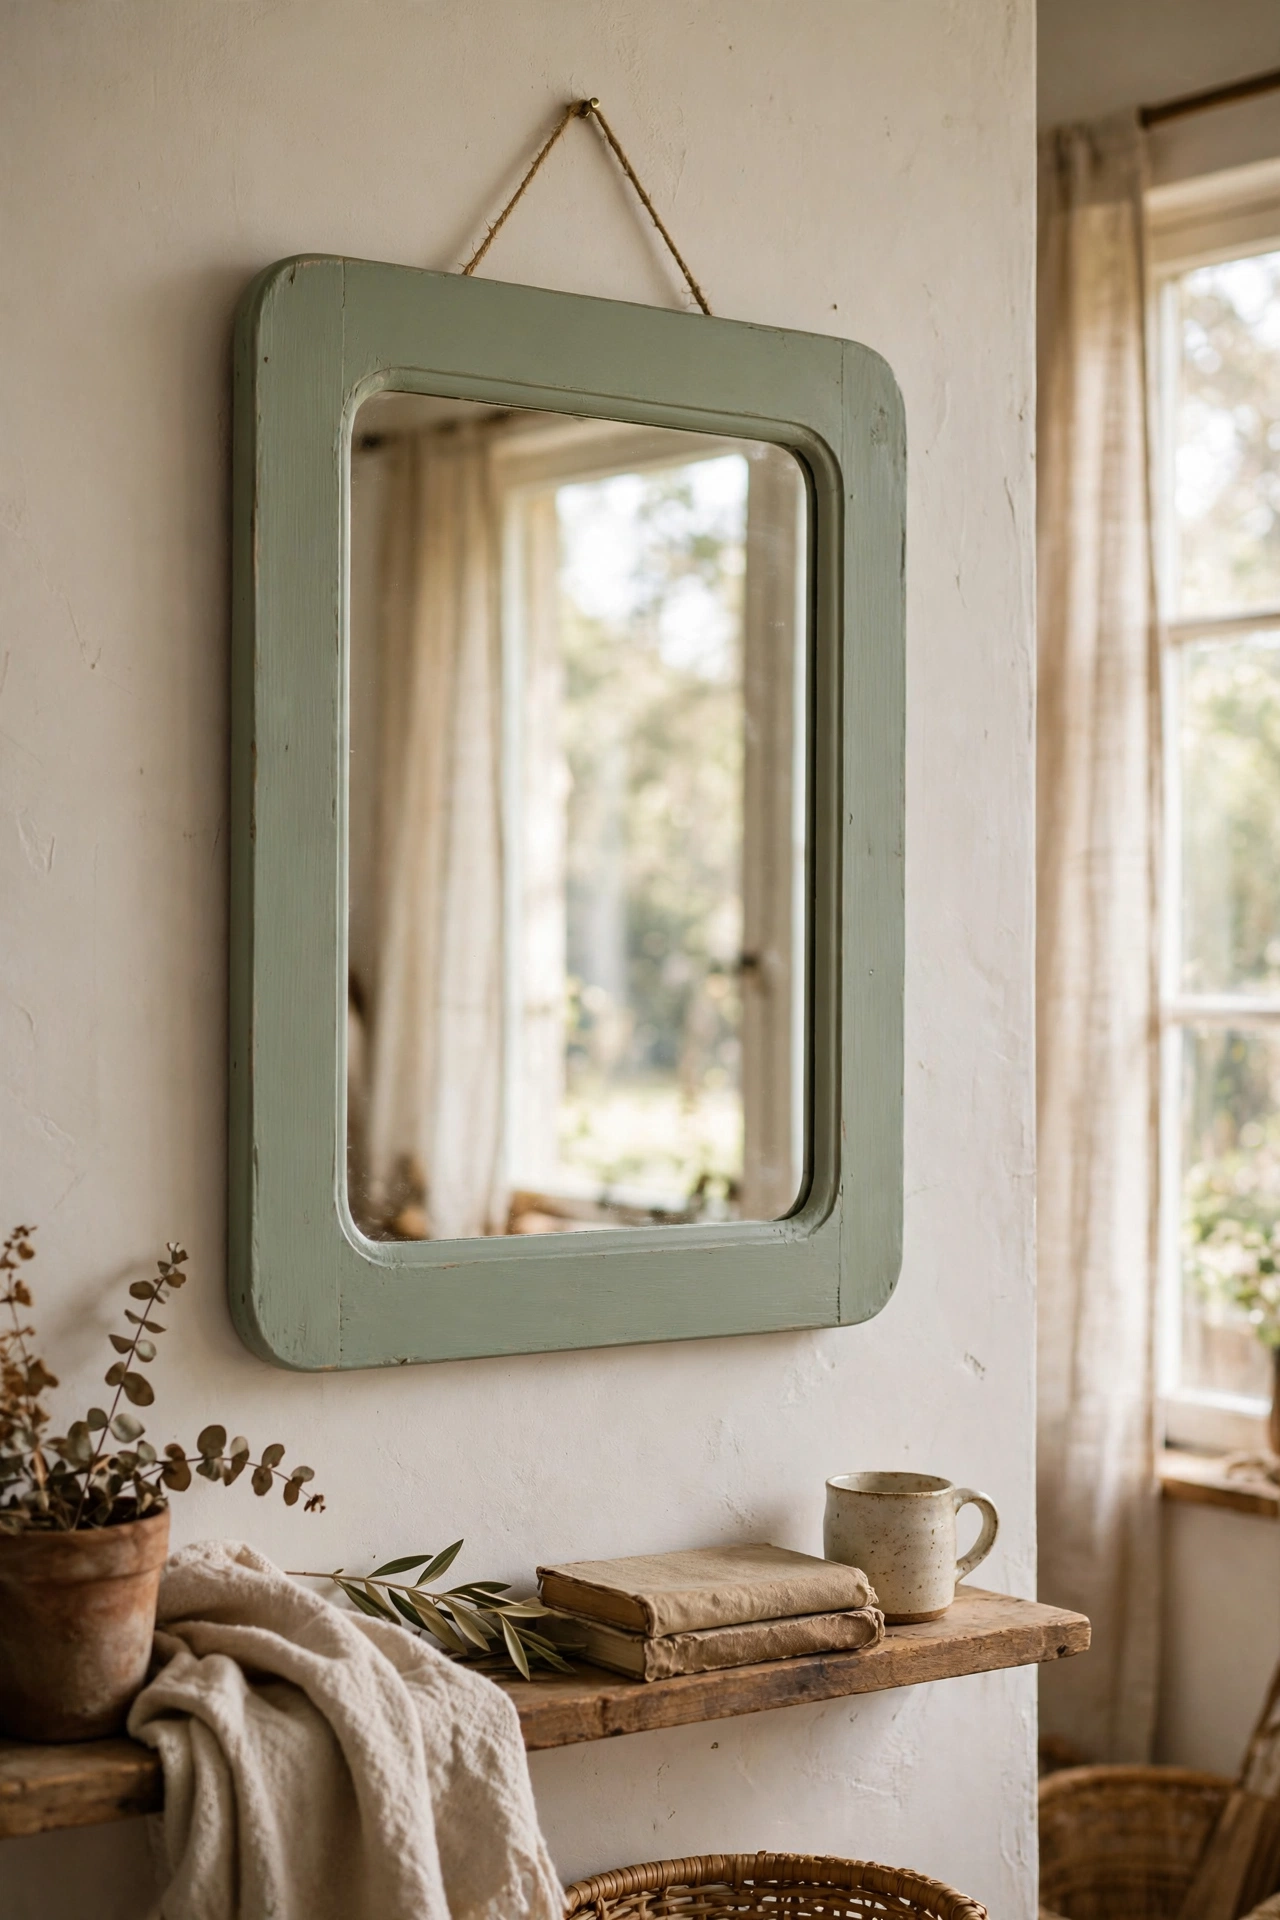
A dated mirror frame painted fresh is an easy spring win. I found a chunky wooden mirror at a flea market for $5, sanded it lightly, and painted it a soft sage with chalk paint, then distressed the edges lightly with sandpaper for a worn finish. Hanging it opposite a window doubles the spring light in the room. The chalk paint needs no primer, which is why I reach for it on frames, but seal it with wax if the mirror will hang in a steamy bathroom. One coat usually covers, and a second coat deepens the colour.
Cost: ~$8-14 | Time: 1.5 hours plus drying
15. Sheer Curtain Swap for More Daylight
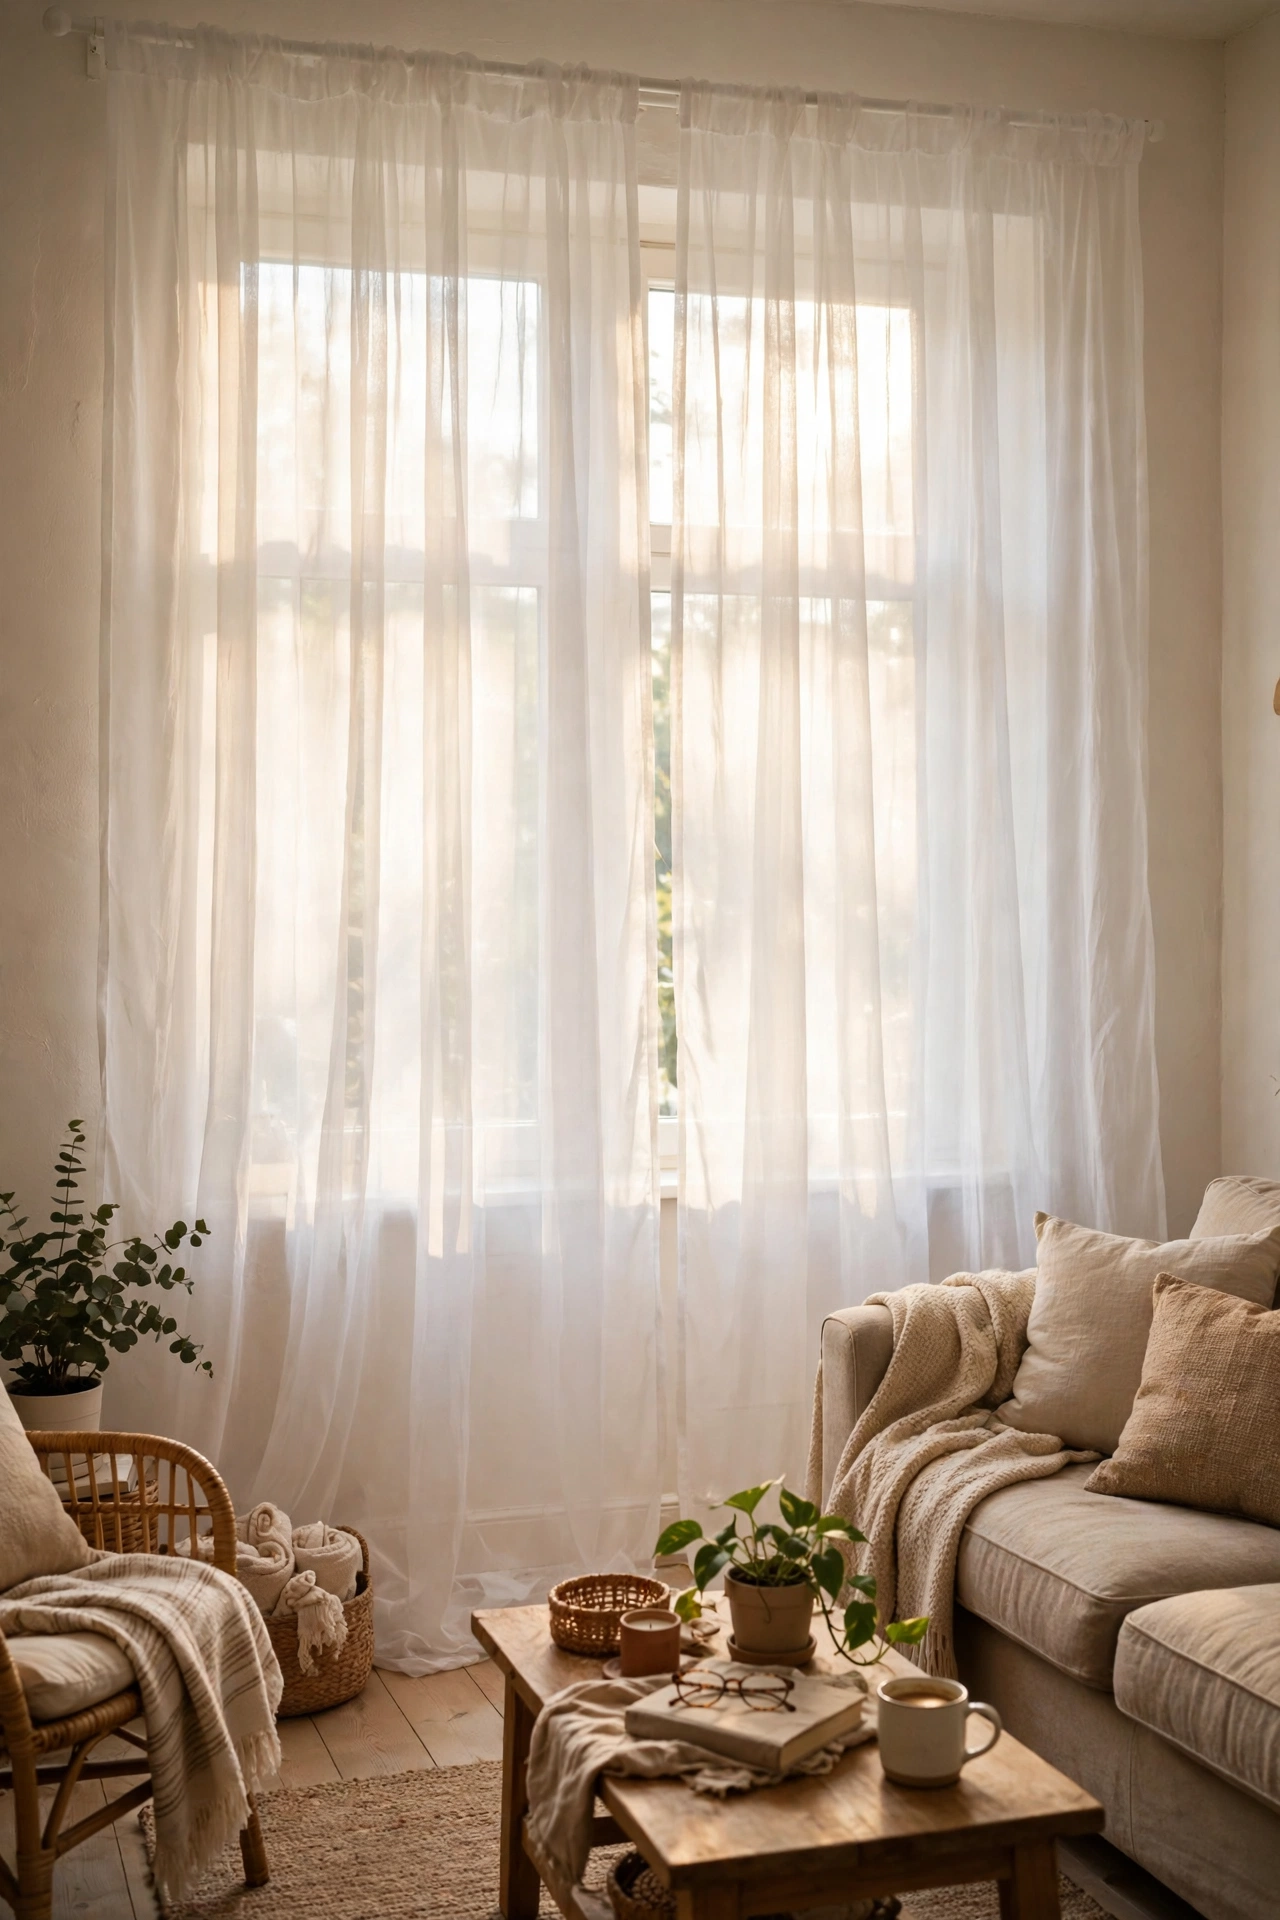
Swapping heavy curtains for sheer panels lets spring light flood the room. Cheap voile panels cost a few dollars each and transform a dark living room within minutes. Hang them high and wide so the window looks bigger, and let them pool slightly on the floor for a relaxed feel. I did this in my north-facing living room and it felt like gaining a new window. My mistake was buying panels too short; they ended at the sill and looked stingy. Full-length panels that just kiss the floor look far more expensive than they are.
Cost: ~$10-20 | Time: 30 minutes
16. DIY Butterfly Wall Art
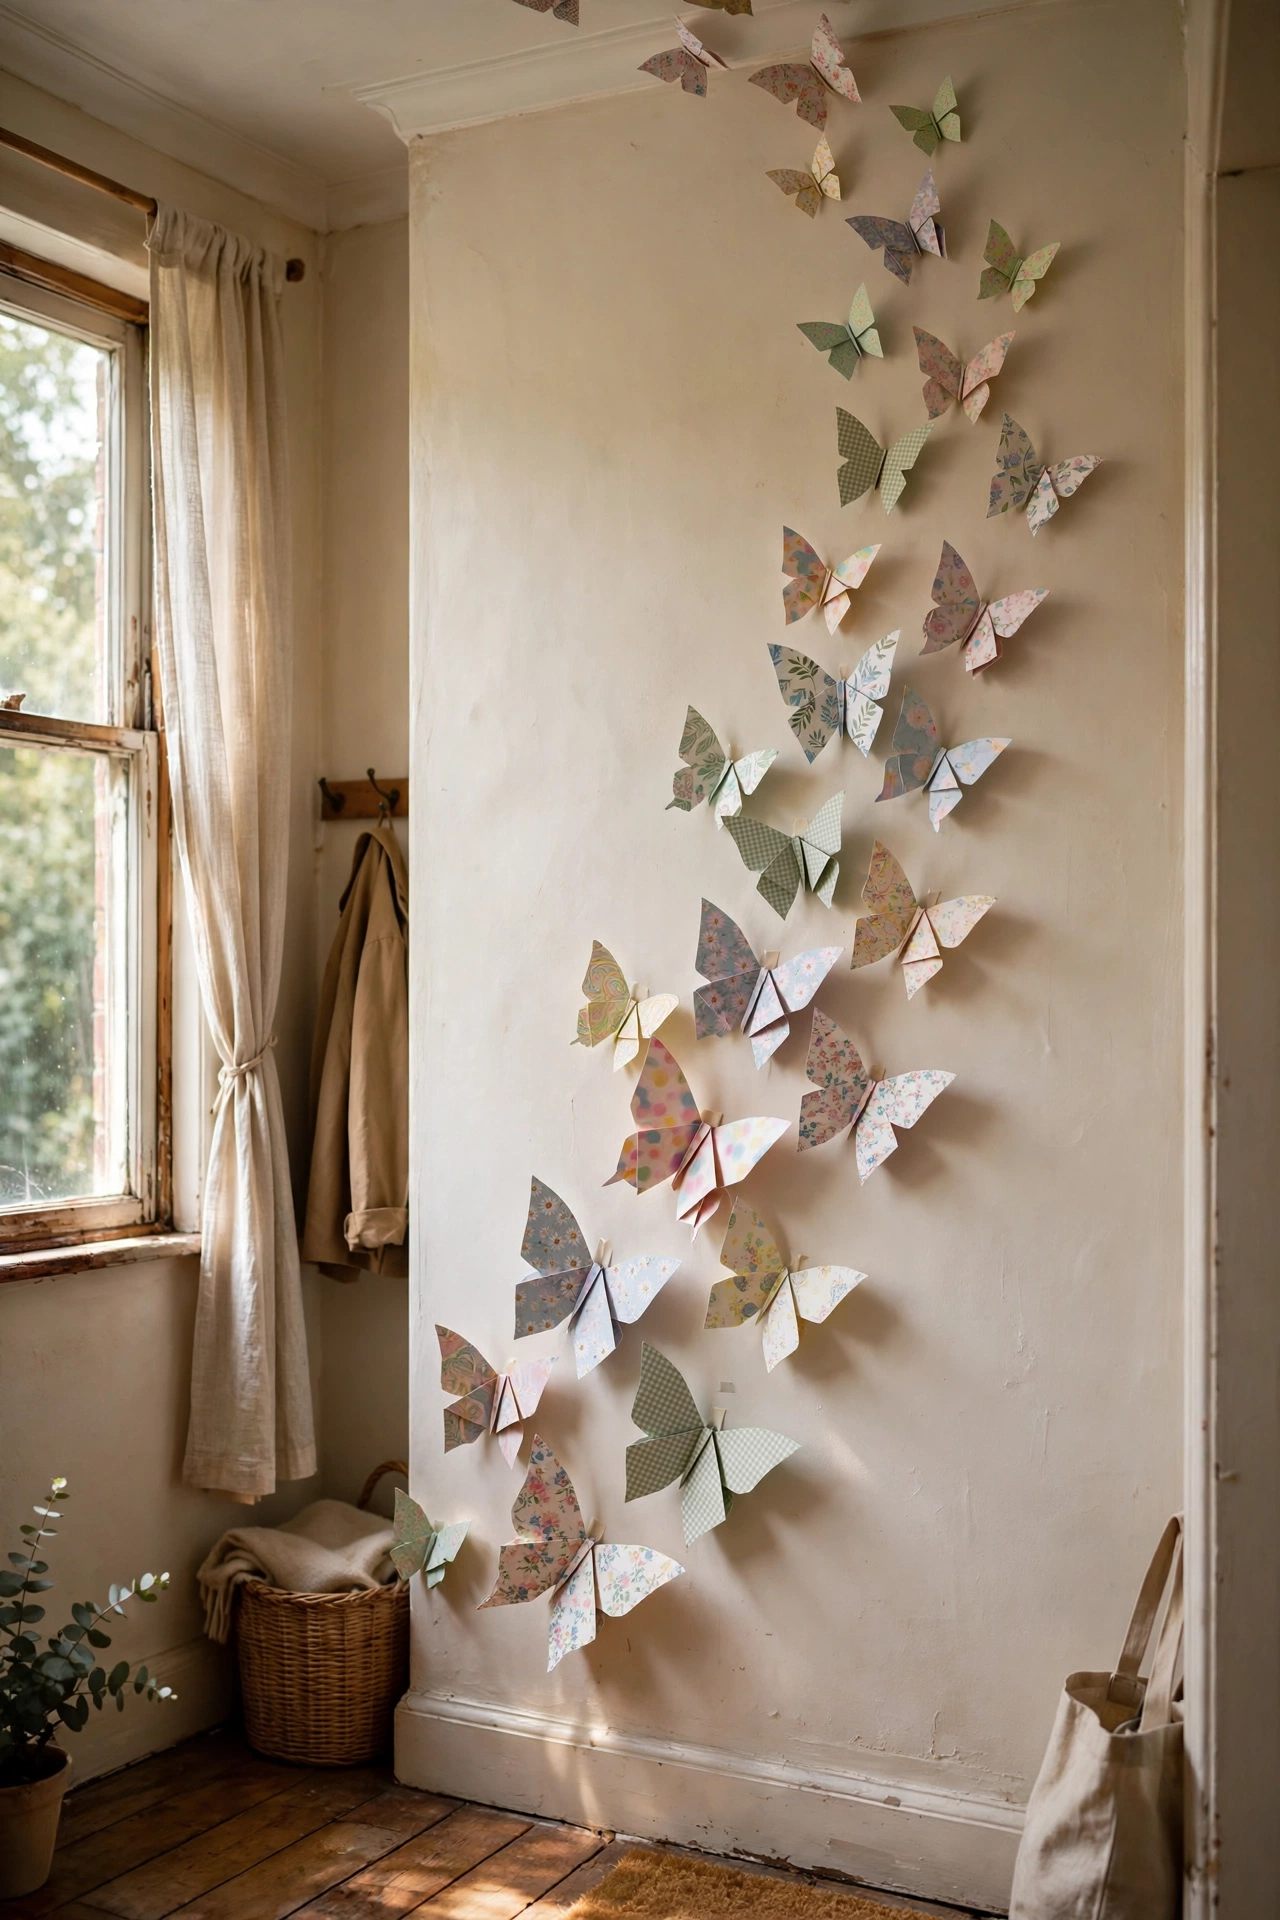
A flutter of paper butterflies climbing the wall is a joyful spring accent. Cut butterfly shapes from patterned card stock, fold each in half so the wings lift, and stick them to the wall with small removable adhesive dots. I arranged about forty in a loose trail up my hallway wall toward the ceiling. The fold is what makes them look alive, so do not skip it. Start with the biggest butterflies at the bottom and shrink the size as the trail rises for a natural drifting effect. They come off cleanly with the adhesive dots when the season ends.
Cost: ~$4-7 | Time: 1 hour
17. Twig-and-Twine Hanging Planter
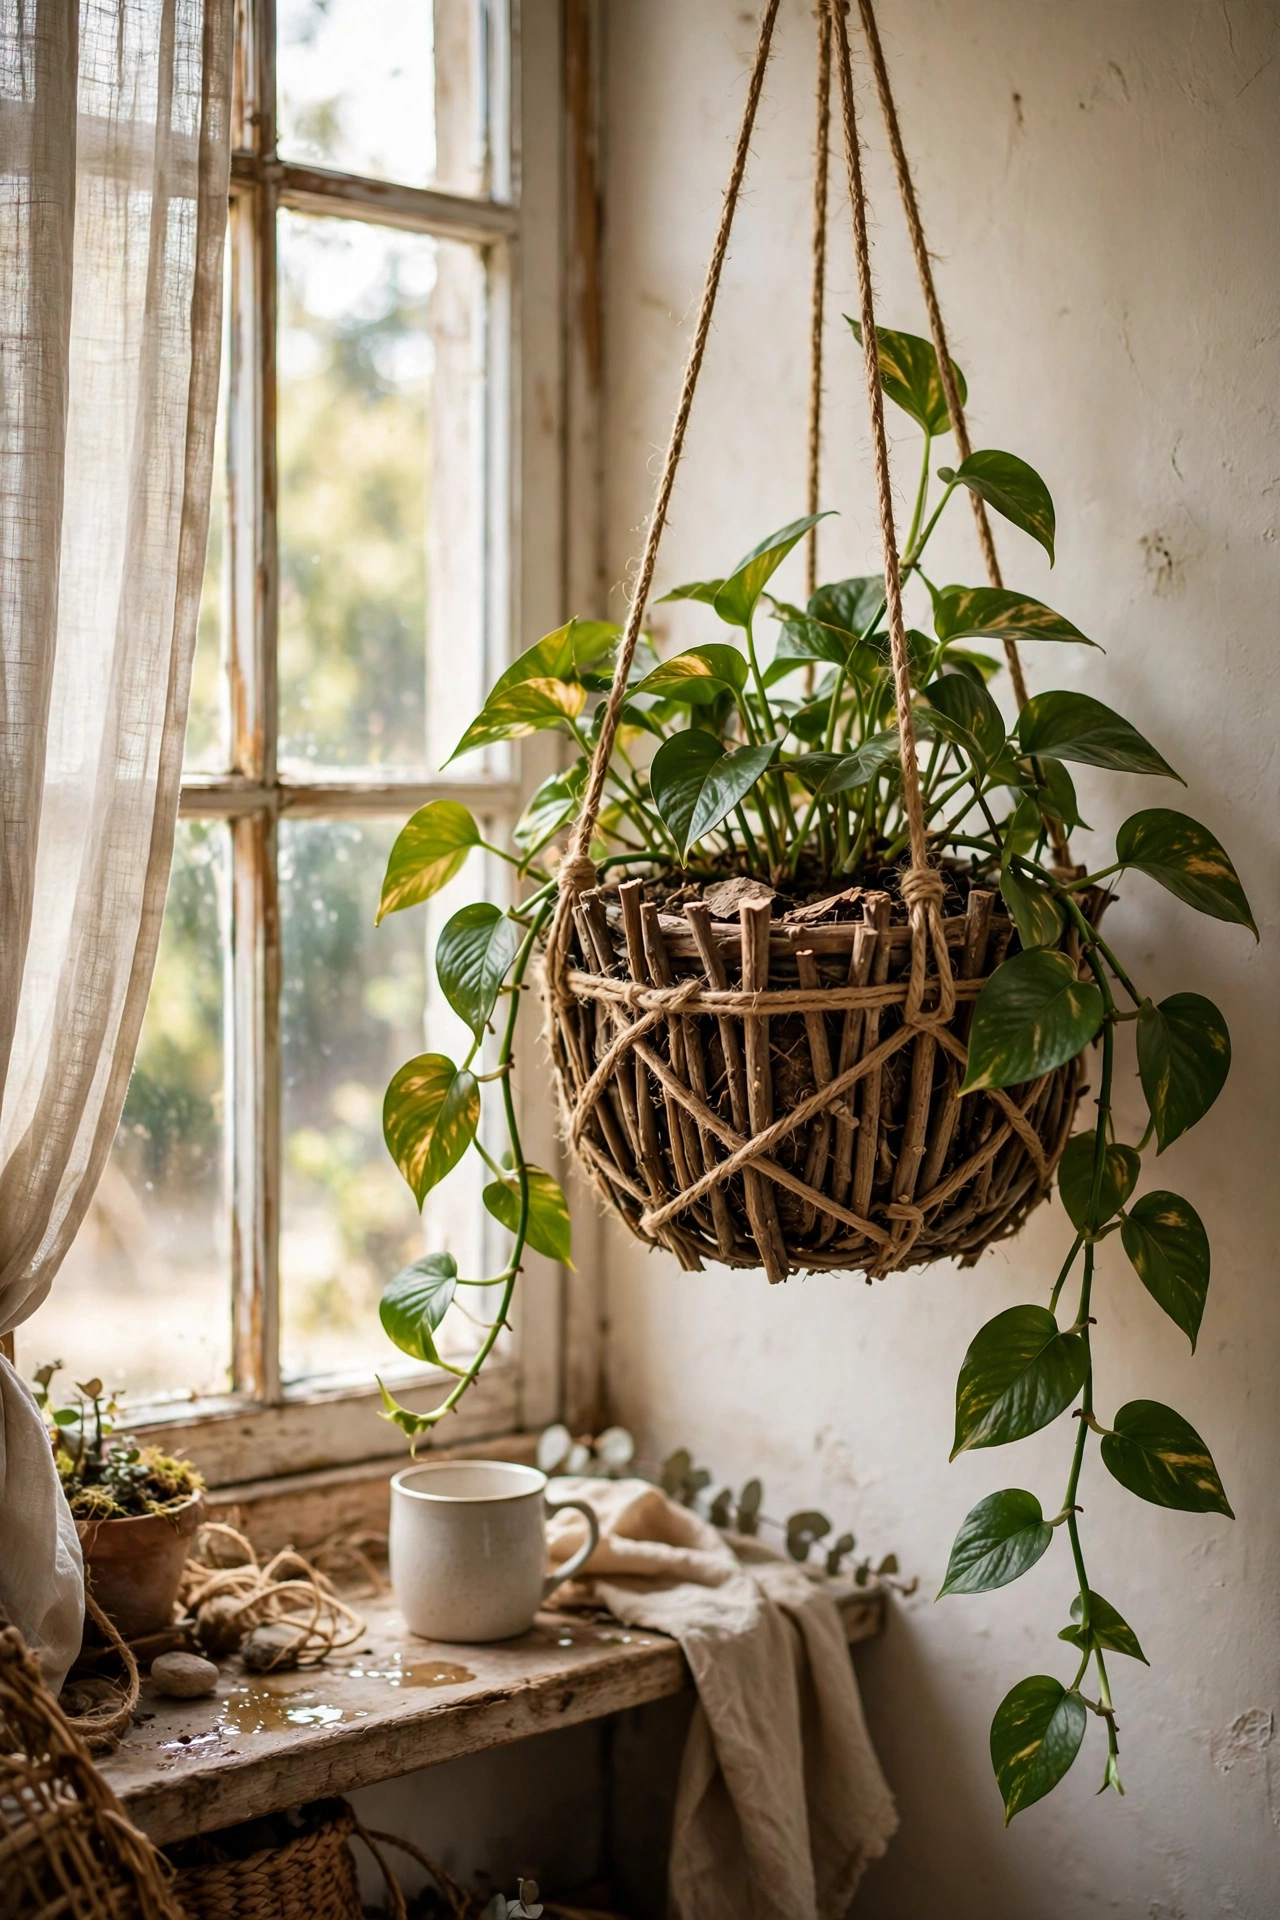
A bundle of twigs becomes a rustic hanging planter for spring greens. Gather straight twigs from the garden, trim them to equal lengths, and lash them into a slatted box shape with twine, lining the inside with moss or a small plastic pot. Hang it by a chain near a bright window and fill it with trailing ivy or pothos. I made mine from pruned apple branches and it looks like something from a garden centre. The trick is tight lashings; my first one was loose and the soil kept escaping. Wrap each joint twice before knotting.
Cost: ~$3-6 | Time: 1 hour
18. Floral Peel-and-Stick Backsplash Accent
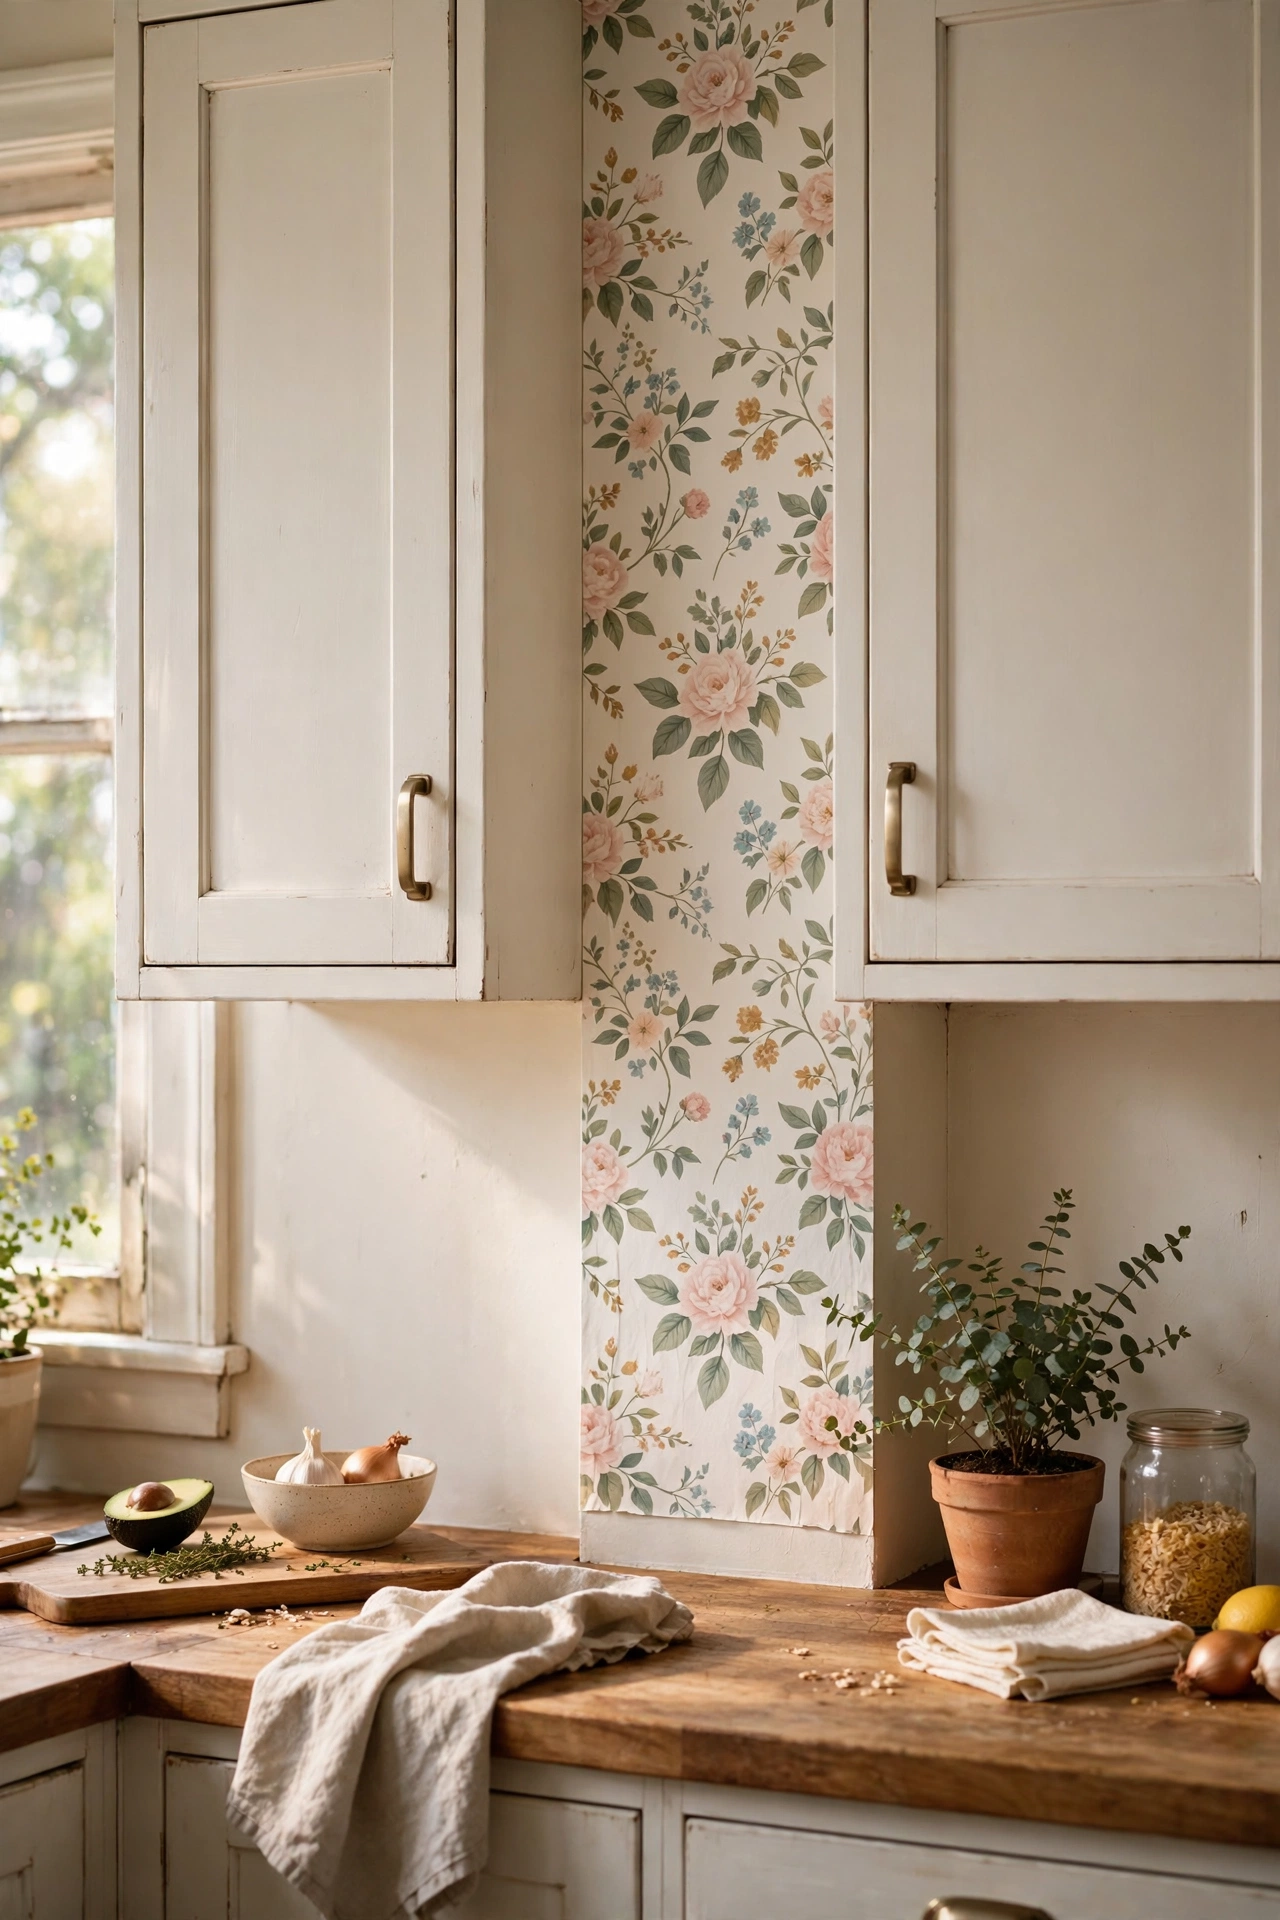
A strip of floral peel-and-stick wallpaper behind the stove or along the sink splash turns a plain kitchen spring-fresh. Measure the area, cut the paper with a craft knife and straight edge, and apply it slowly from the centre outward, smoothing bubbles with a credit card. I did a single accent strip between the upper cabinets in a delicate vine pattern. My first attempt taught me to start in the least visible corner while I got the hang of it. It peels off cleanly, which makes it perfect for renters.
Cost: ~$12-20 | Time: 1 hour
Porch, Patio & Garden
19. Pallet Garden Planter on the Patio
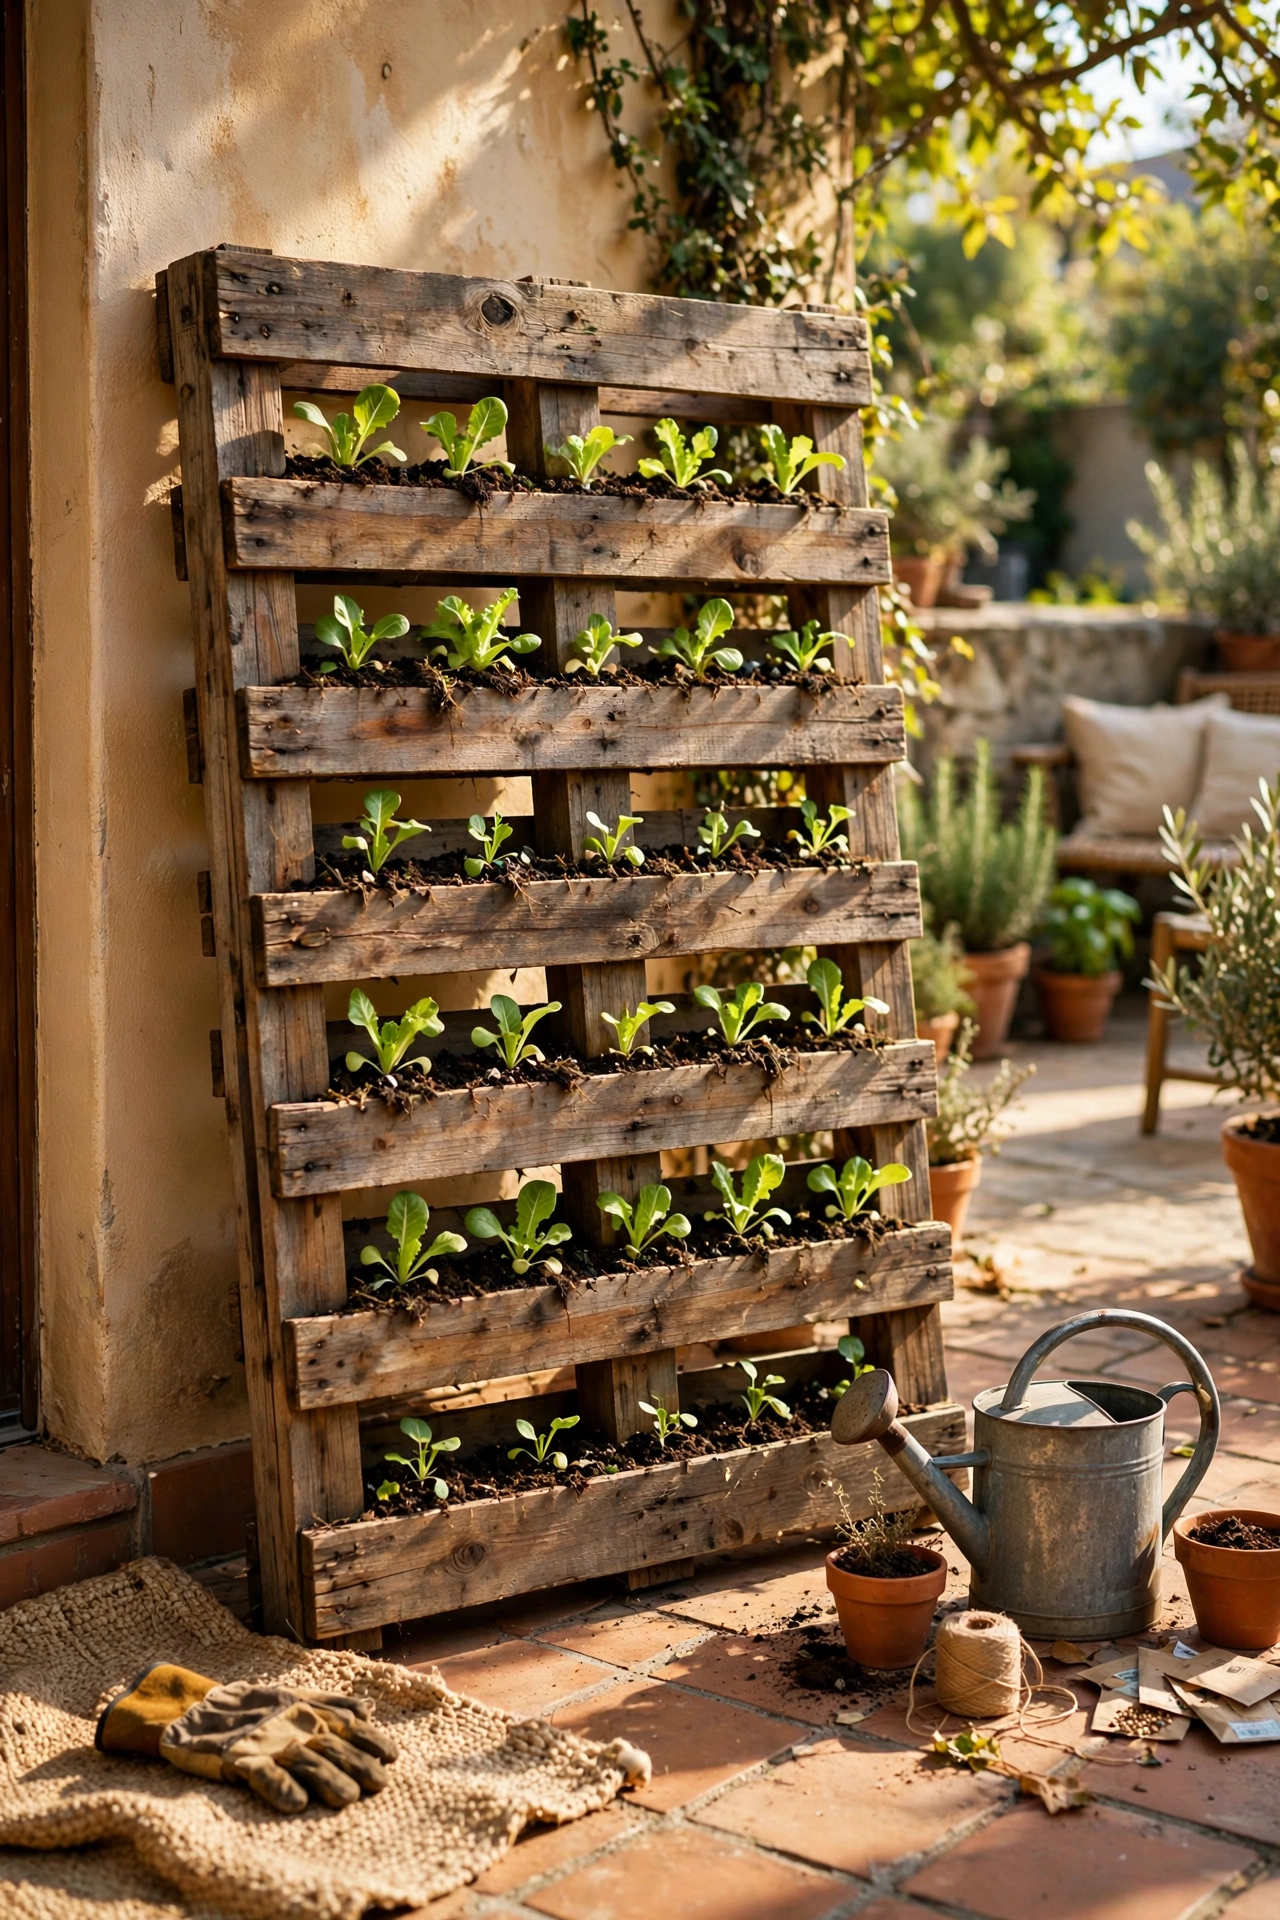
A wooden pallet stood upright makes a vertical planter for spring lettuces and flowers. Sand a clean pallet, staple landscape fabric to the back and bottom to form soil pockets, and lean it securely against a wall. Fill the pockets with potting soil and tuck in seedlings or pansy transplants. I grew salad leaves in mine all last spring and harvested handfuls for weeks. Anchor the pallet firmly to the wall, because a soil-filled pallet is heavy and I learned the hard way that a leaning stack is not the same as a fixed one. Water daily, since vertical planters dry out quickly.
Cost: ~$10-18 | Time: 2 hours
20. Teacup Bird Feeder
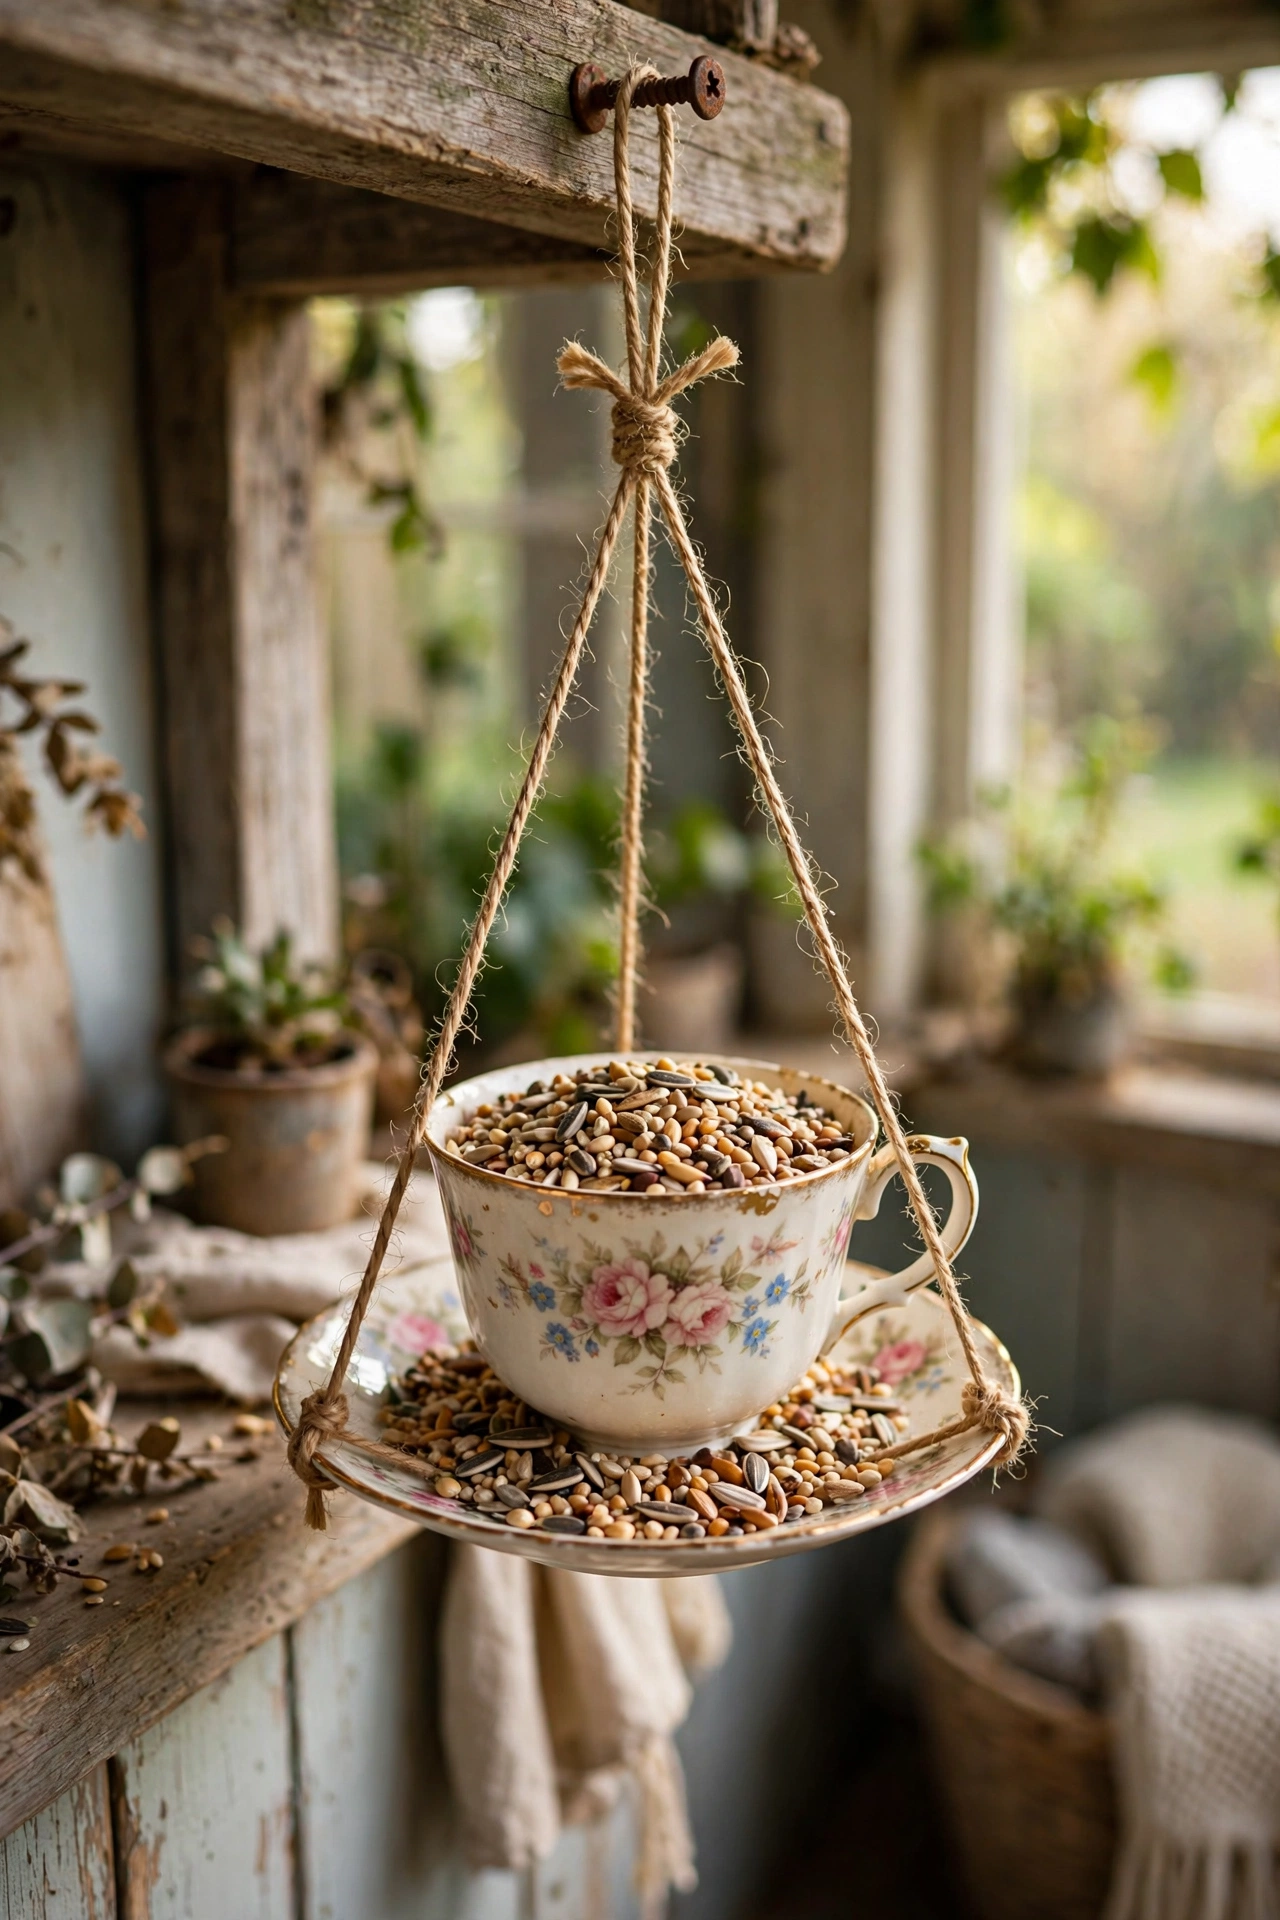
An old teacup and saucer glued together becomes a sweet little bird feeder. Glue the cup sideways to the saucer with strong outdoor adhesive so the cup forms a bowl, thread twine through the cup handle for hanging, and fill the cup with birdseed. I hung mine from a porch beam and the finches found it within a day. Give the glue a full 24 hours to cure before hanging it, because my first one dropped and shattered when I rushed it. Keep the feeder in a shaded spot and refill with small seed so nothing cakes in the cup.
Cost: ~$3-6 | Time: 30 minutes plus curing
21. Painted Garden Stone Markers
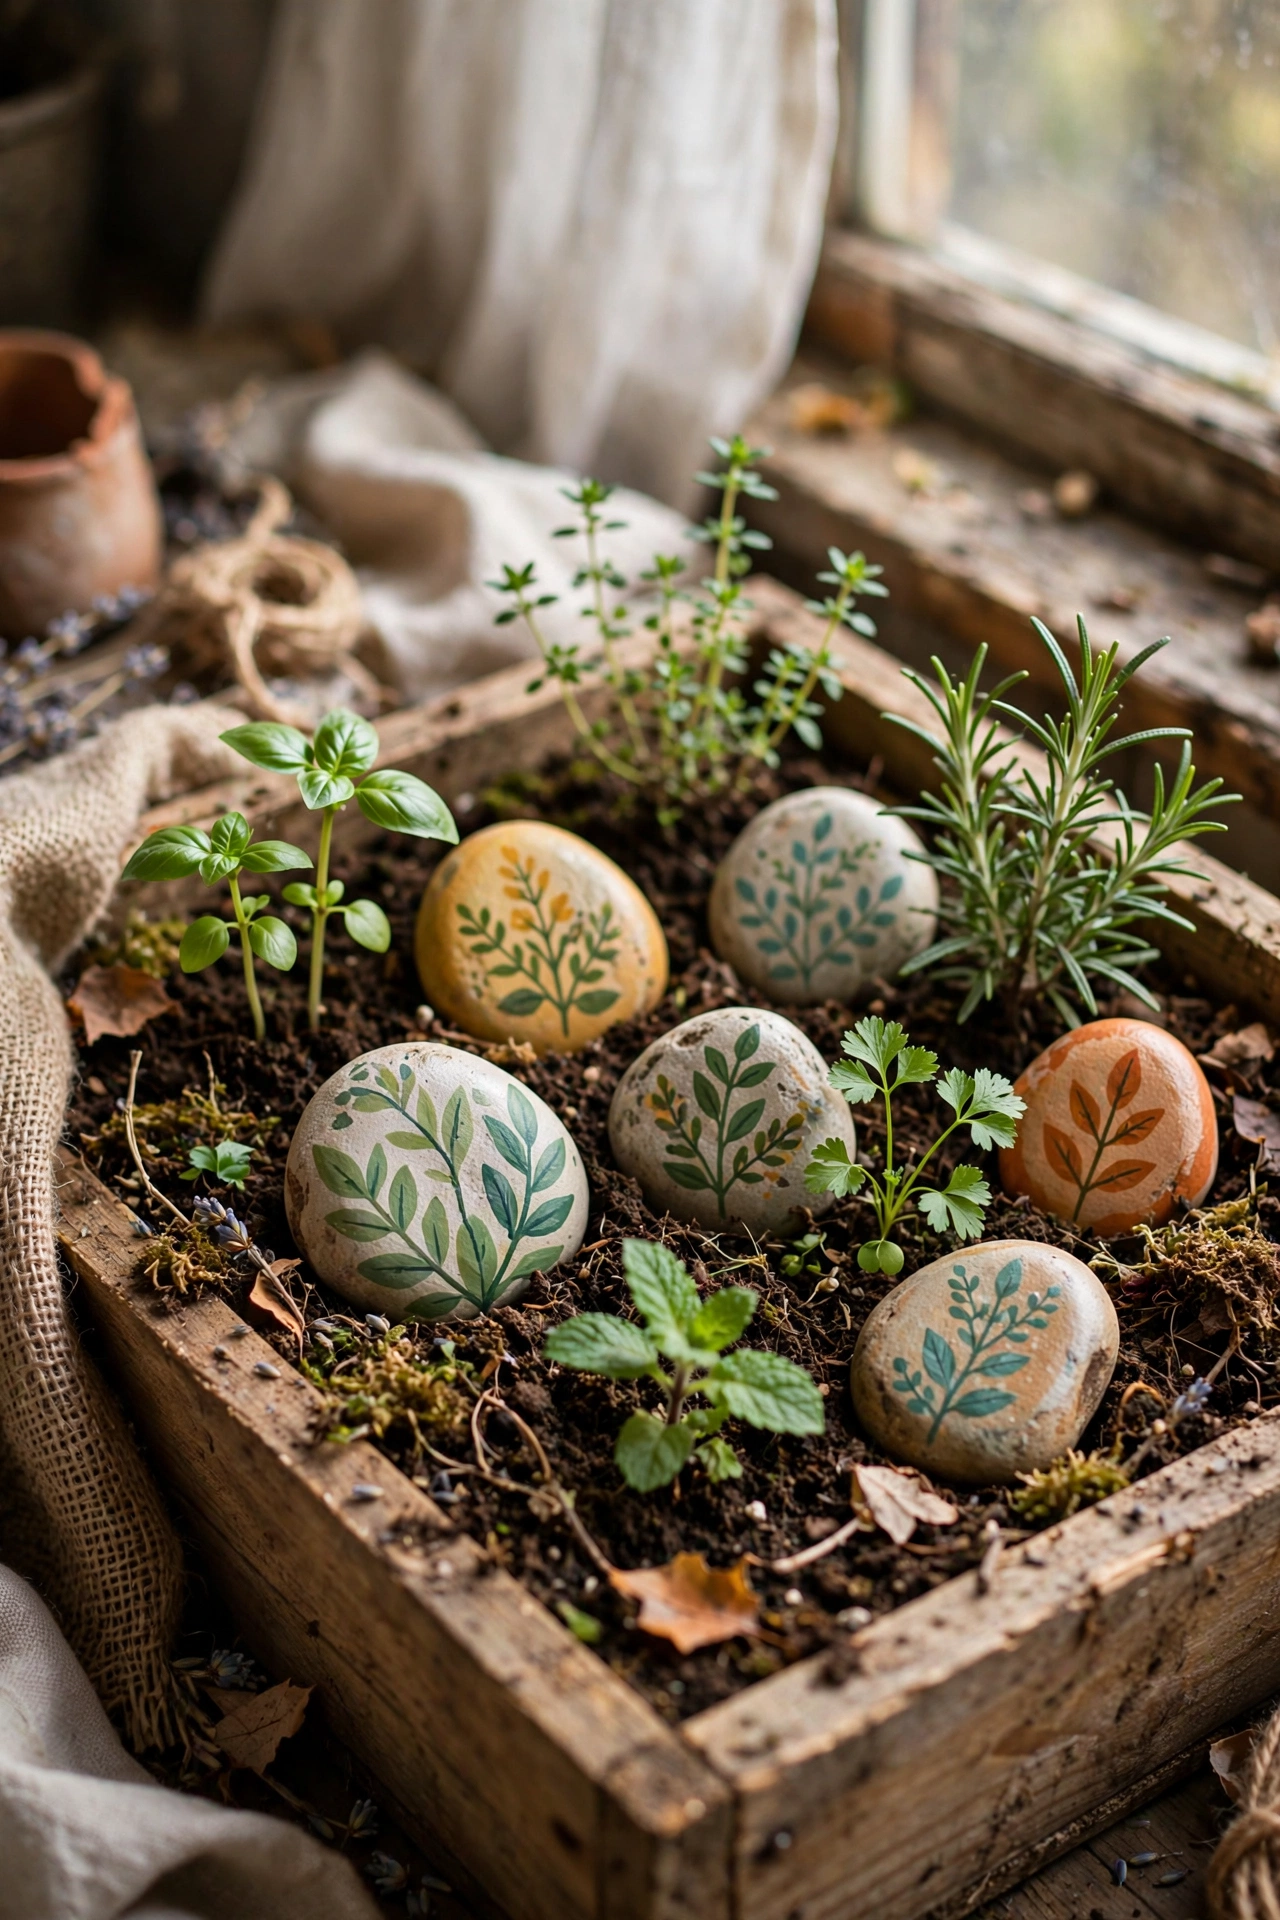
Hand-painted stones mark the herb bed and add colour while everything is still small. Collect smooth flat stones, paint the plant names or little pictures in outdoor acrylic, and seal them with a clear outdoor sealer. I painted mine with my niece last spring and they are still readable a year later. The sealer is the difference between one season and three; my unsealed batch faded by midsummer. Push the stones halfway into the soil so a strong rain does not wash them away. They also make sweet little gifts for gardening friends.
Cost: ~$3-6 | Time: 1 hour plus drying
22. Mason Jar Path Lights
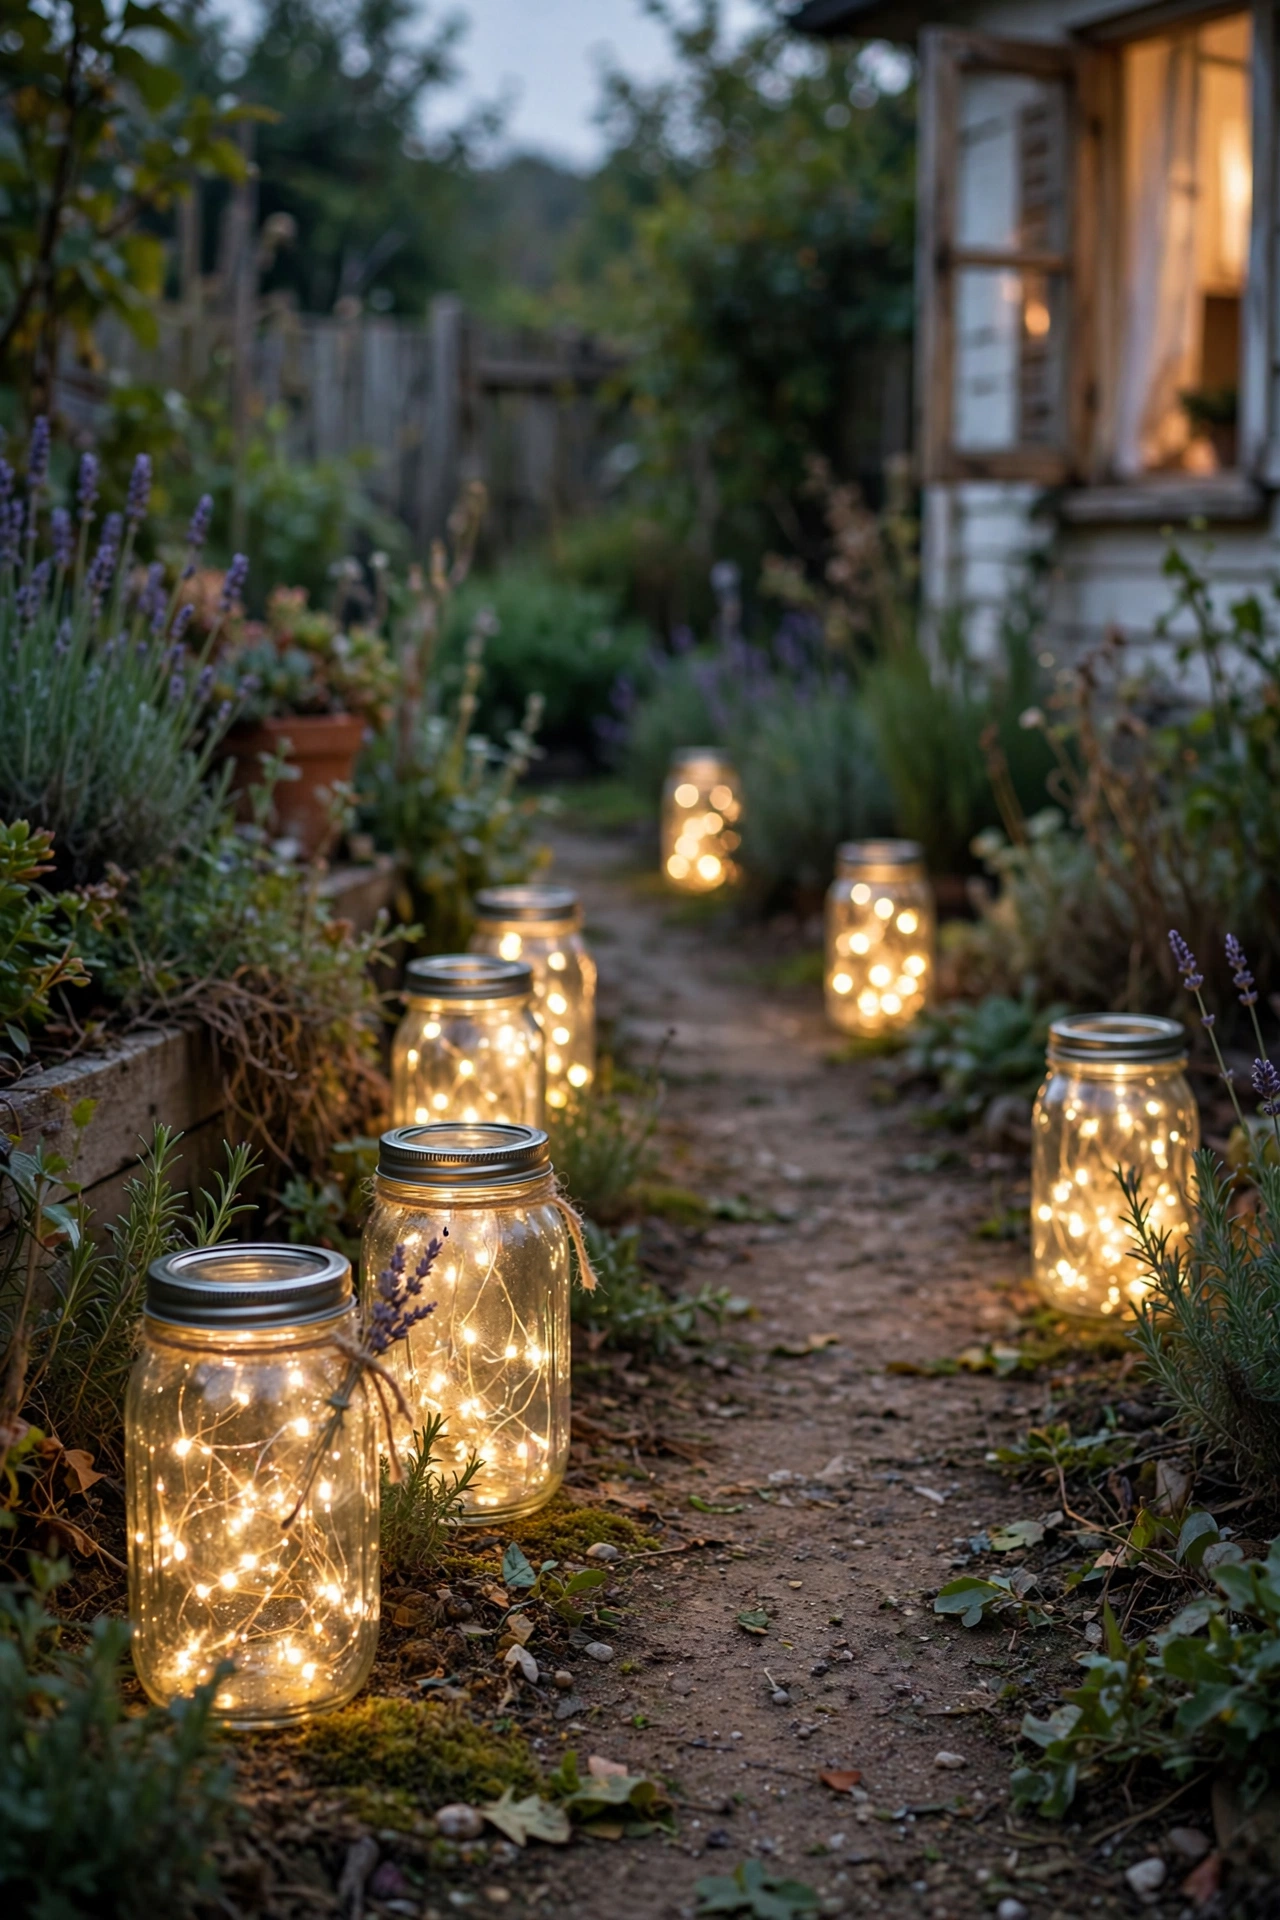
Glowing mason jars along a garden path make spring evenings feel magical. Fill each jar with a string of solar fairy lights, tuck them in loosely, and set the jars in short wire holders or nestle them into gravel along the path. The solar panels charge by day and switch on by dusk. I lined my front walk with eight of them and the whole street glows softly at night. Position the solar lids where they get direct sun; my first row sat under a hedge and never charged properly. Bring the jars in during heavy storms to keep them clean.
Cost: ~$12-20 | Time: 30 minutes
23. Drop-Cloth Outdoor Cushion Refresh
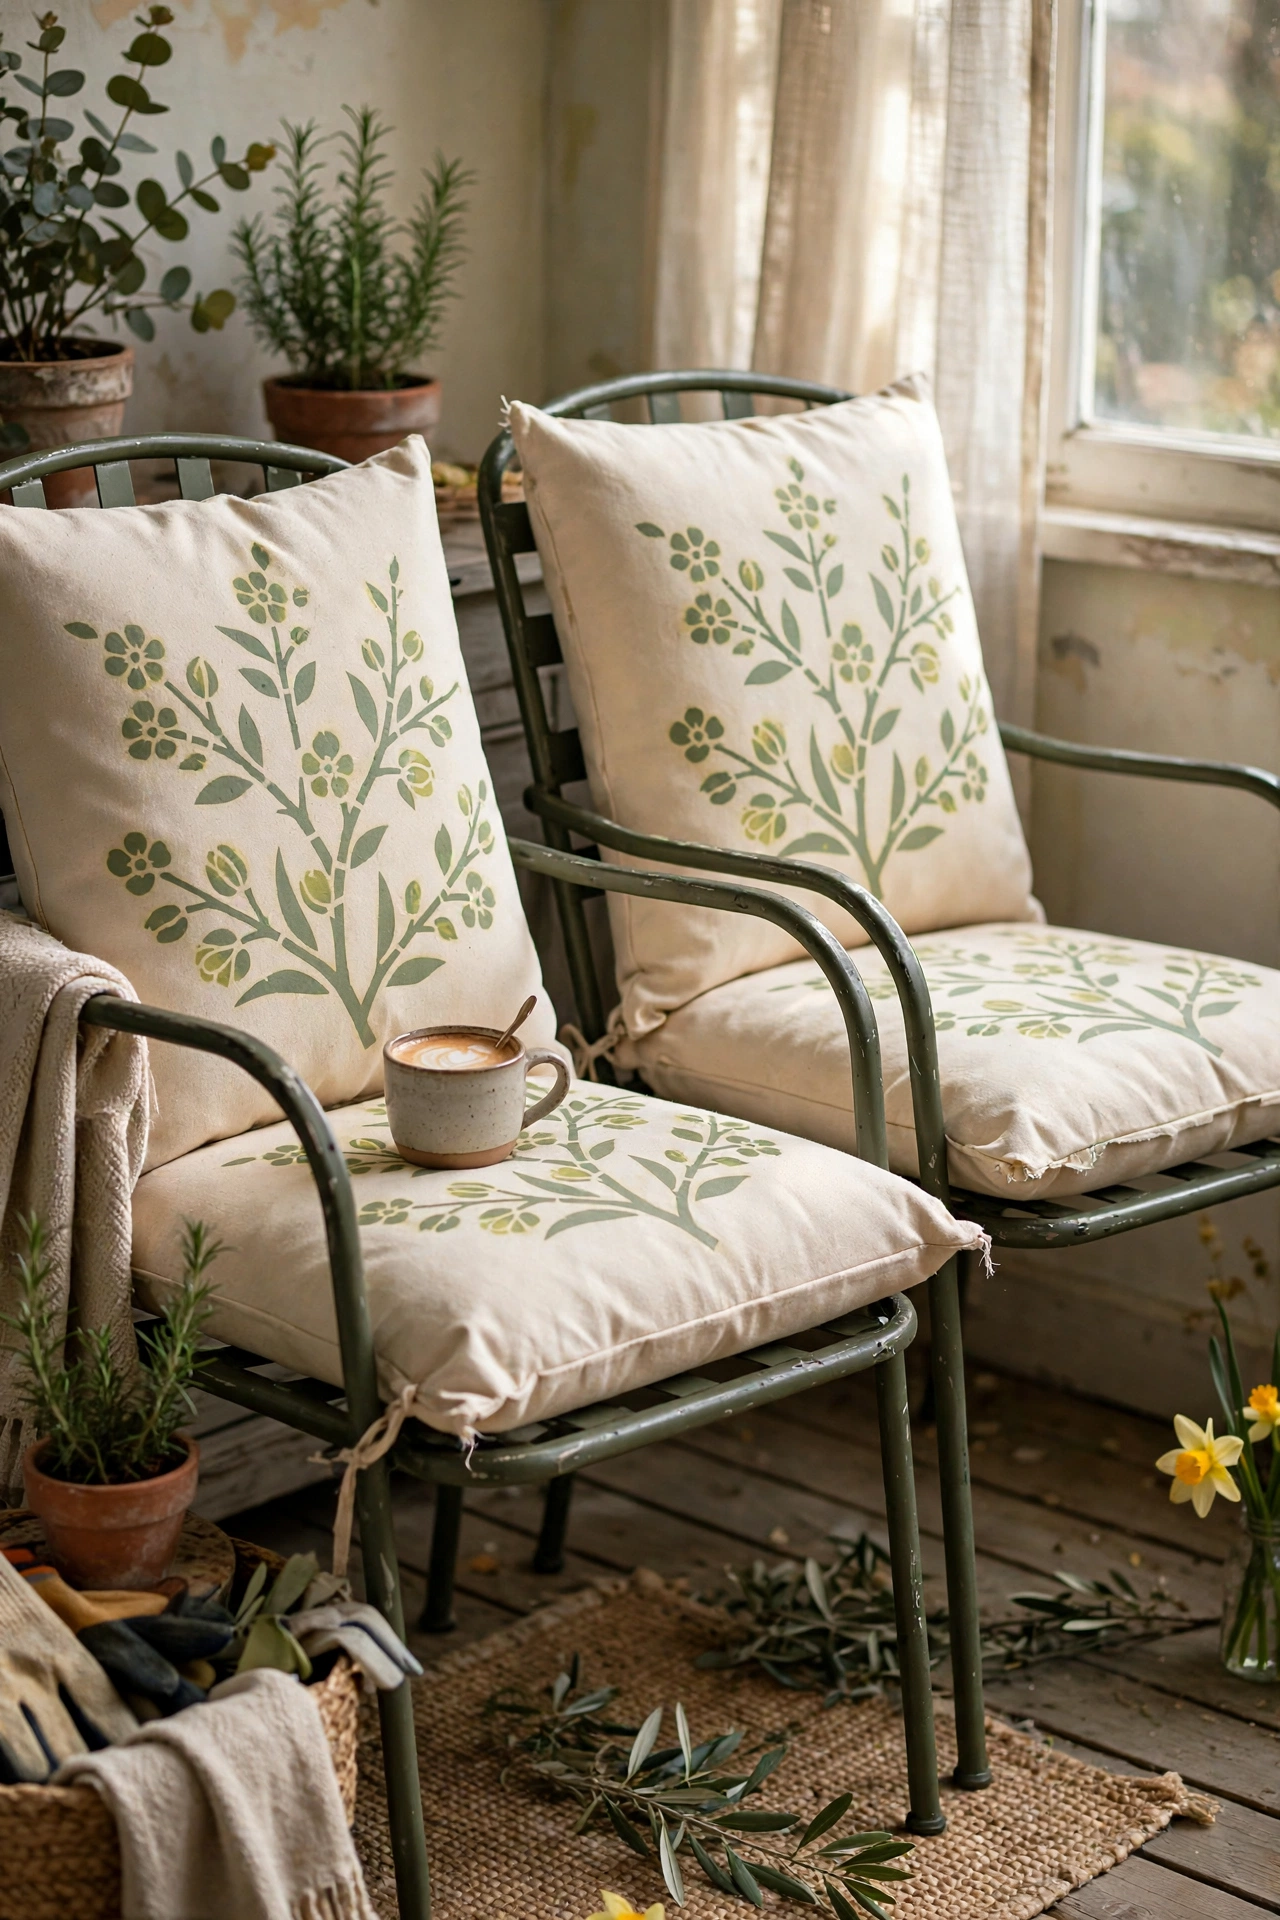
A painter’s drop cloth is the secret behind expensive-looking outdoor cushions. Cut the canvas to fit your patio cushions, sew simple envelope covers or staple them for a no-sew version, and stencil a spring motif on the front. The heavy cotton weaves up beautifully and weathers well. I recovered four chair cushions for the price of one new cushion cover. My no-sew stapled version lasted two full summers before the staples rusted, so if you want longevity, a quick machine seam is worth it. Spot clean with a hose and they are good as new.
Cost: ~$10-16 | Time: 2 hours
If you want more spring projects in this vein, browse (see also: spring-wreath-diy-guide), (see also: dollar-store-spring-decor-ideas), and (see also: budget-garden-decor-ideas) when you finish this list.
Quick Questions
Q: How early can I start DIY spring decor?
A: You can start indoors as early as late February with wreaths, cushion swaps, and floral accents. Keep garden and porch projects until after the last frost in your area, or use hardy plants like pansies that tolerate a cold snap.
Q: What is the cheapest way to decorate for spring?
A: Foraged branches, pressed flowers, and painted eggshells cost almost nothing. A grapevine wreath dressed with garden clippings and a set of cushion covers from sale fabric will refresh a whole room for under $20.
Q: How do I make faux flowers look realistic?
A: Use fewer stems than you think, bend them to different heights, and mix in a couple of real leafy branches. Keeping the arrangement loose and simple is what sells the illusion; a crowded bunch always looks artificial.
