23 DIY Wreath Ideas for Every Season
My front door used to look the same in July as it did in December, and I never noticed until a neighbour hung a gorgeous autumn wreath that made my bare door look forgotten. That weekend I made my first ever DIY Wreath Ideas for Every Season project out of a grapevine base and some dried flowers from the craft shop, and it cost me less than a takeaway. Now I swap my wreath with the seasons and the whole street seems friendlier. This list covers all four seasons, with projects from ten minutes to an afternoon, and none of them need floristry skills.
Every wreath below starts with a cheap base: a grapevine wreath, a wire frame, or a foam ring from the craft store, usually $3 to $6. You will also want a hot glue gun and some floral wire, and after that the season does the decorating for you. Keep your finished wreaths in bin bags between seasons and they will last for years.
1. Pastel Felt Ball Wreath
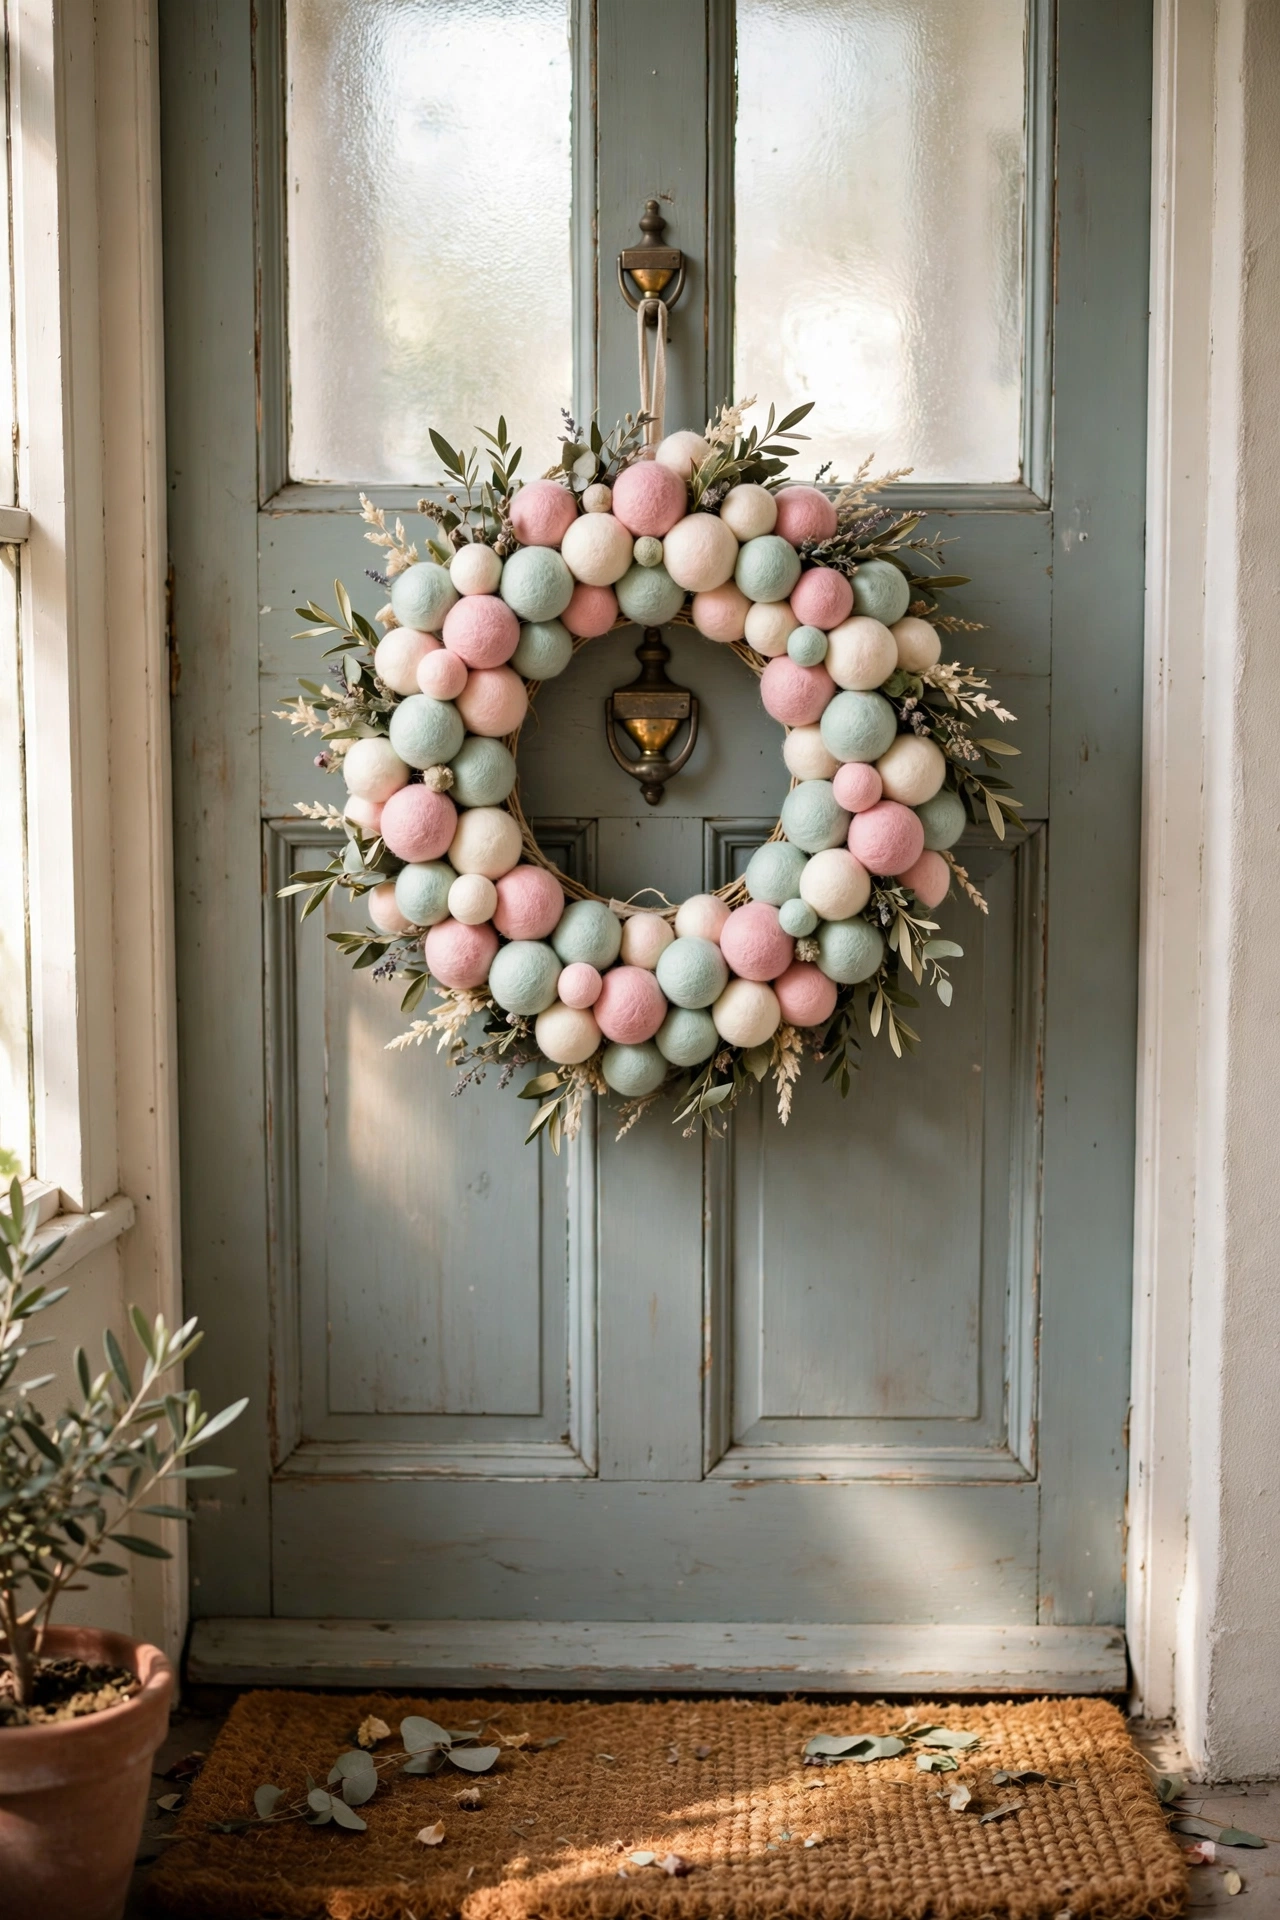
Soft felt balls in blush, mint, and cream make the friendliest spring wreath, and kids can help with the assembly. I bought two bags of mixed pastel felt balls online for $8, then hot-glued them one by one onto a 30cm foam ring, packing them tight so no foam shows. Work in small sections and press each ball for a few seconds, because felt balls are light and shift if the glue is still wet. Mine hangs on my front door from March through May and always gets comments. Store it in a box rather than a bag, because the balls squash flat under pressure.
Cost: ~$10-14 | Time: 1.5 hours
2. Cherry Blossom Branch Wreath
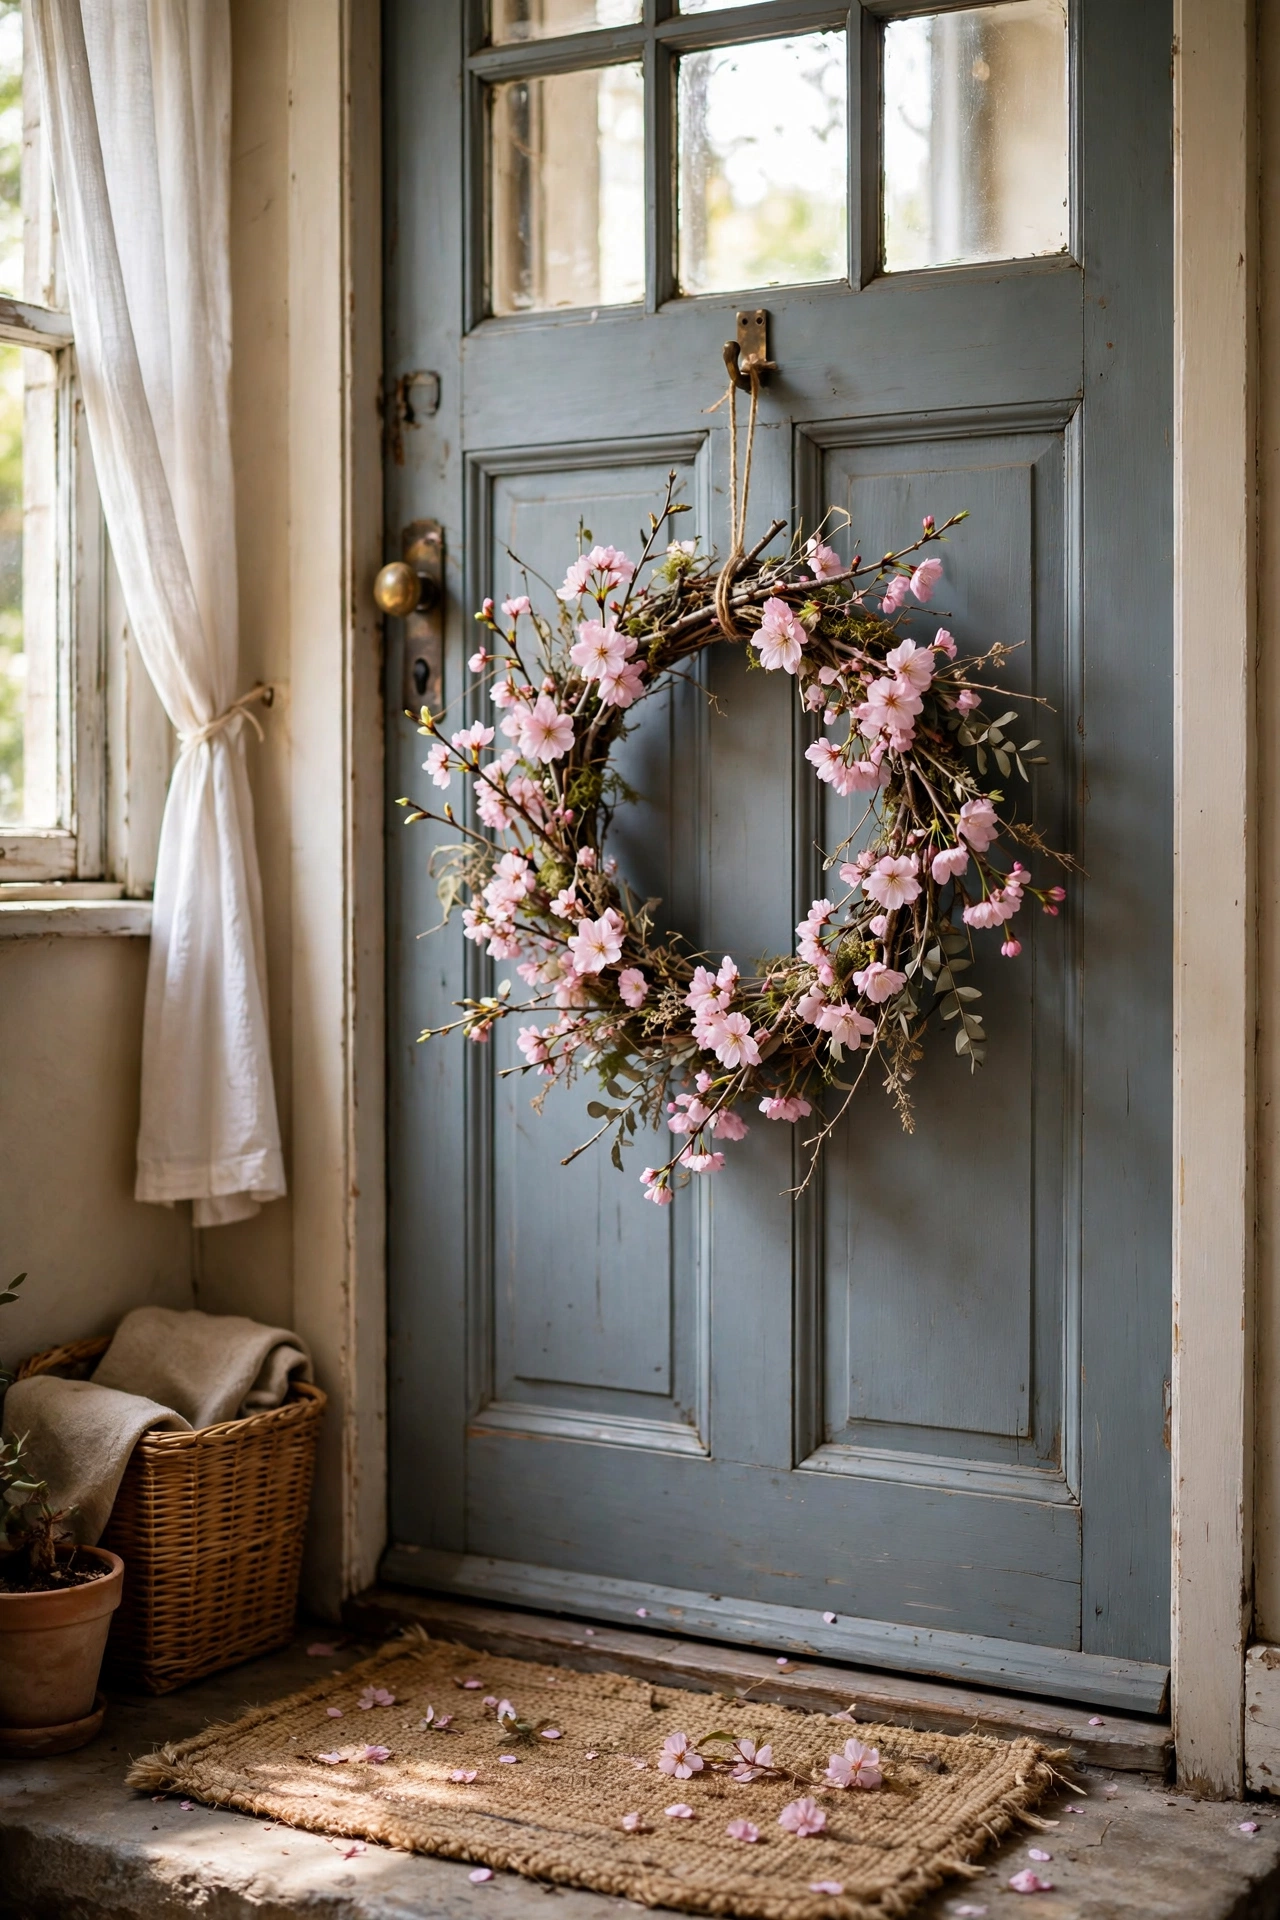
A few faux cherry blossom stems bent into a circle make a delicate spring wreath for almost nothing. I bought three long blossom garlands after Easter on clearance for $2 each, twisted them into a ring, and wired the ends together where they met. Fluff the branches outward so the ring looks full from the street, not just from straight on. Mine looked sparse at first, so I added a second layer of stems on the inside edge and it filled out beautifully. Hang it with a simple ribbon loop and it reads far more expensive than it was.
Cost: ~$6-10 | Time: 30 minutes
3. Fresh Herb Wreath
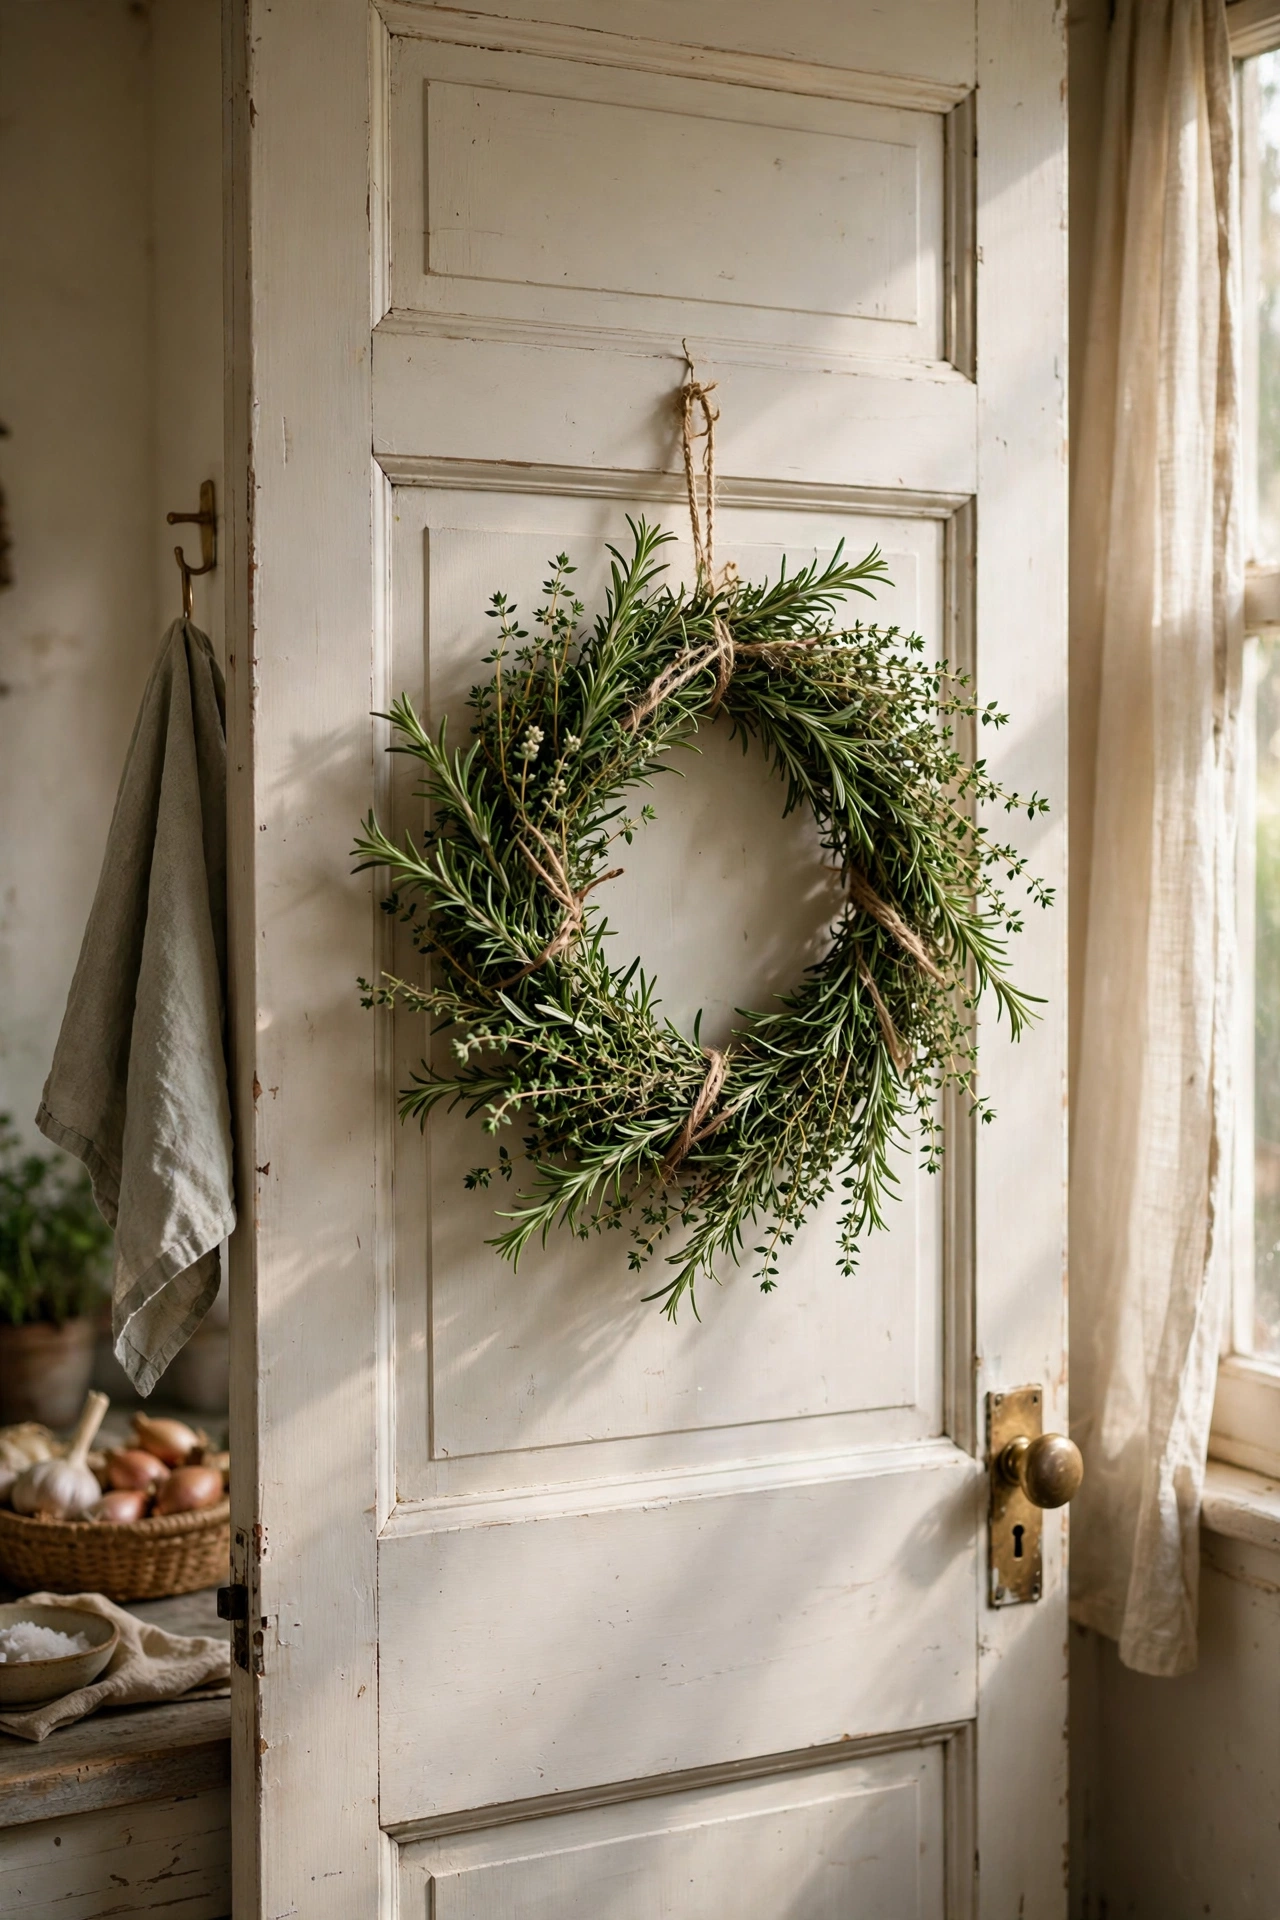
A wreath of fresh rosemary, thyme, and bay smells incredible and doubles as a kitchen supply. I bundled herbs from my garden into small bunches, wired each bunch to a wire frame overlapping the previous one, and worked all the way around. Use herbs with woody stems that dry well, because soft basil wilts within a day. Mine hung on my kitchen door for a month, slowly drying, and I snipped sprigs off for cooking the whole time. Mist it lightly every few days if you want it to stay green longer.
Cost: ~$5-12 | Time: 1 hour
4. Tulip Stem Wreath

Faux tulips in mixed colours wired onto a grapevine base give you a spring wreath that looks fresh for years. I bought a bunch of budget faux tulips, snipped the stems short, and poked them into the grapevine at angles so they faced outward like they were growing. A grapevine base is ideal here because the twigs grip the stems without glue. My mistake was using all one colour at first, which looked flat; mixing pink, yellow, and white made it come alive. A little trailing greenery at the bottom finishes it.
Cost: ~$12-18 | Time: 45 minutes
Budget check: four wreaths in and the average is about $10. Clearance faux flowers and garden herbs are the secret to keeping the spring projects this cheap.
5. Fabric Scrap Ruffle Wreath
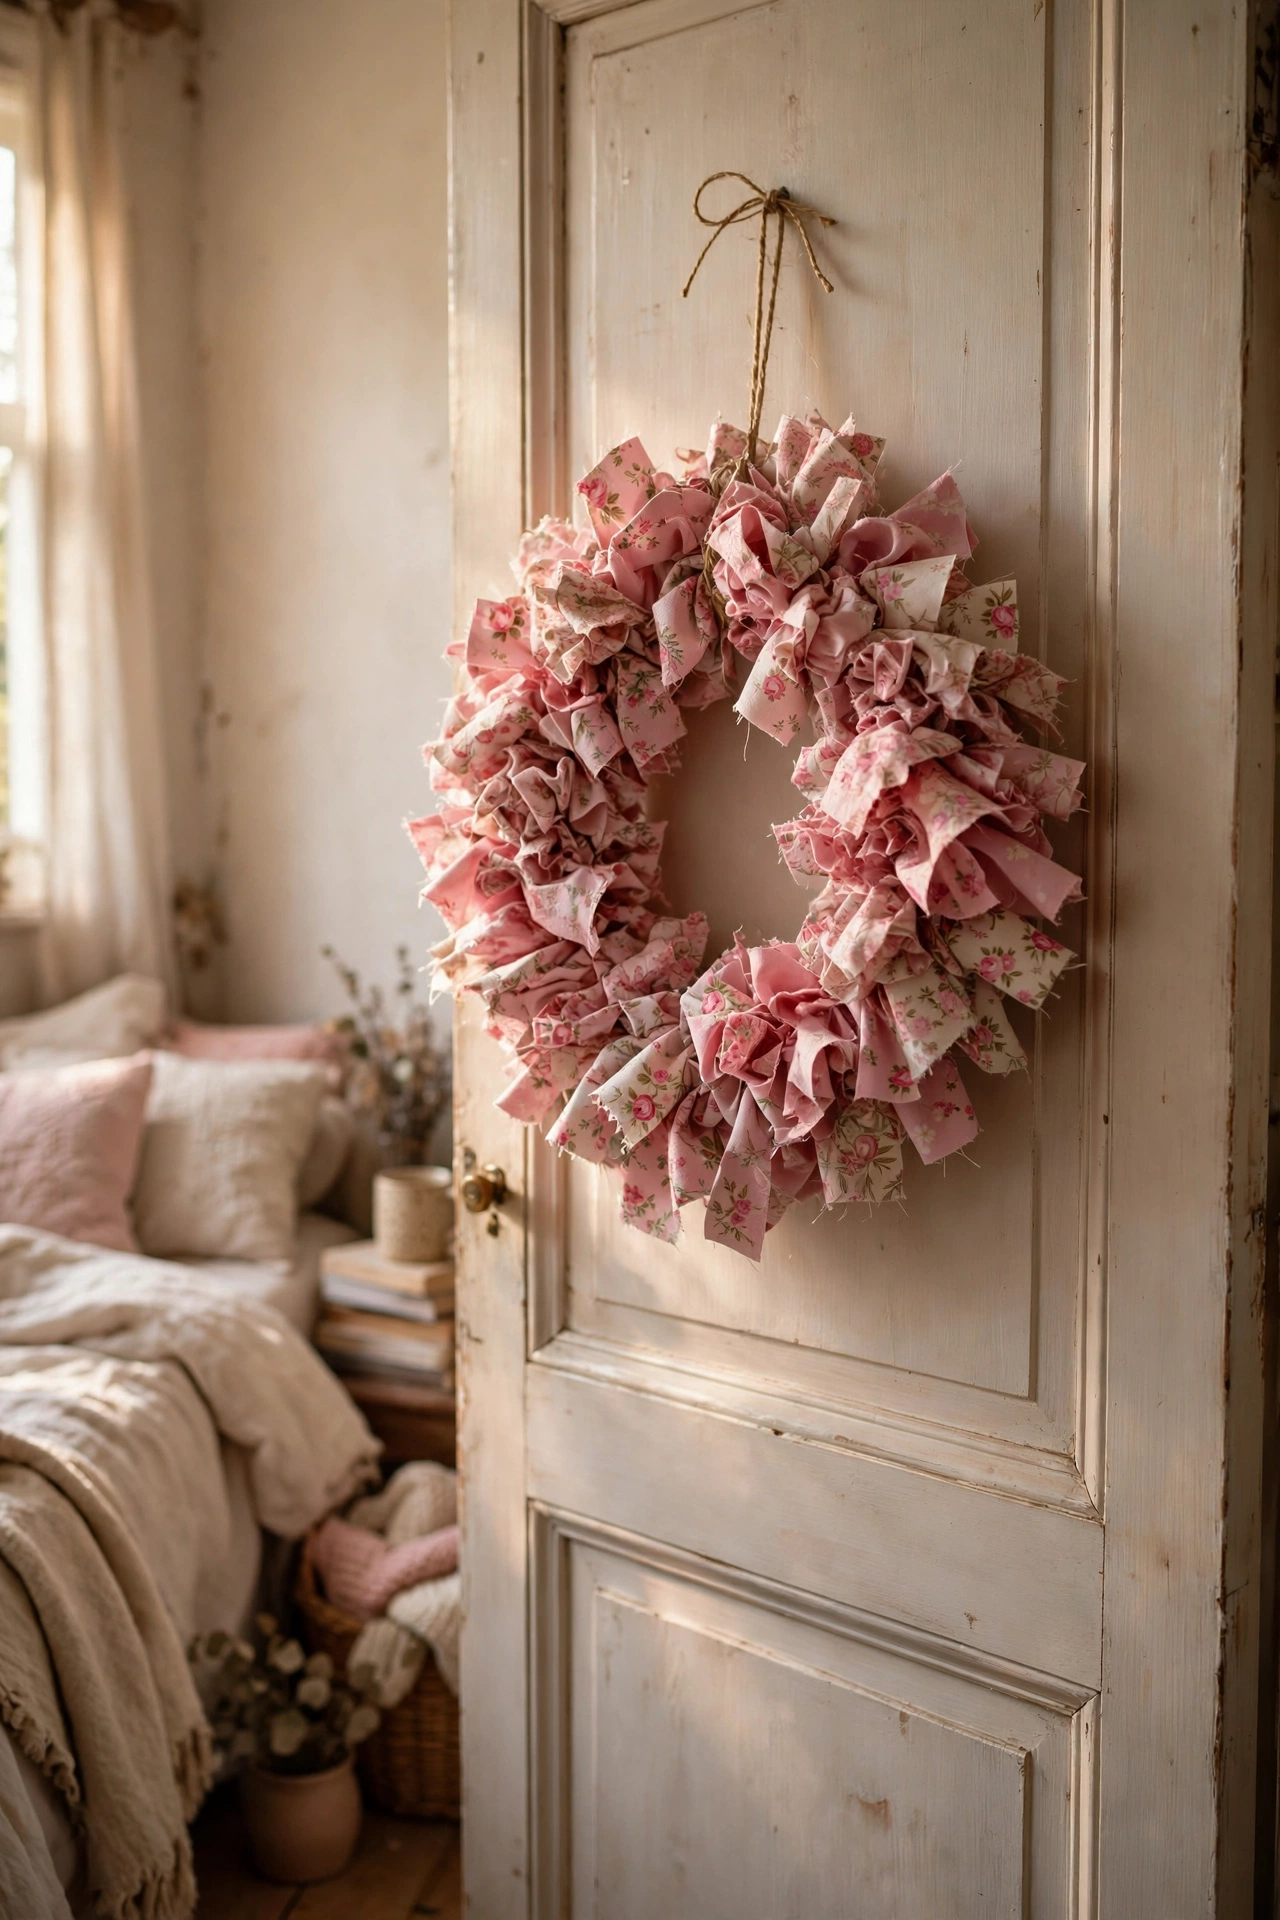
This is the wreath for anyone with a fabric scrap box. I cut floral cotton into 10cm squares, folded each one into a triangle, and pinned them onto a foam ring with the folded edge out, overlapping like roof tiles. It took one rainy afternoon and used up scraps I had been hoarding for years. Keep the pattern random for a cottage look, or sort your scraps by colour for something more deliberate. Mine is pink and cream and lives on my bedroom door. A light spray of fabric stiffener stops the points from flopping.
Cost: ~$4-8 | Time: 2 hours
6. Bird’s Nest Twig Wreath
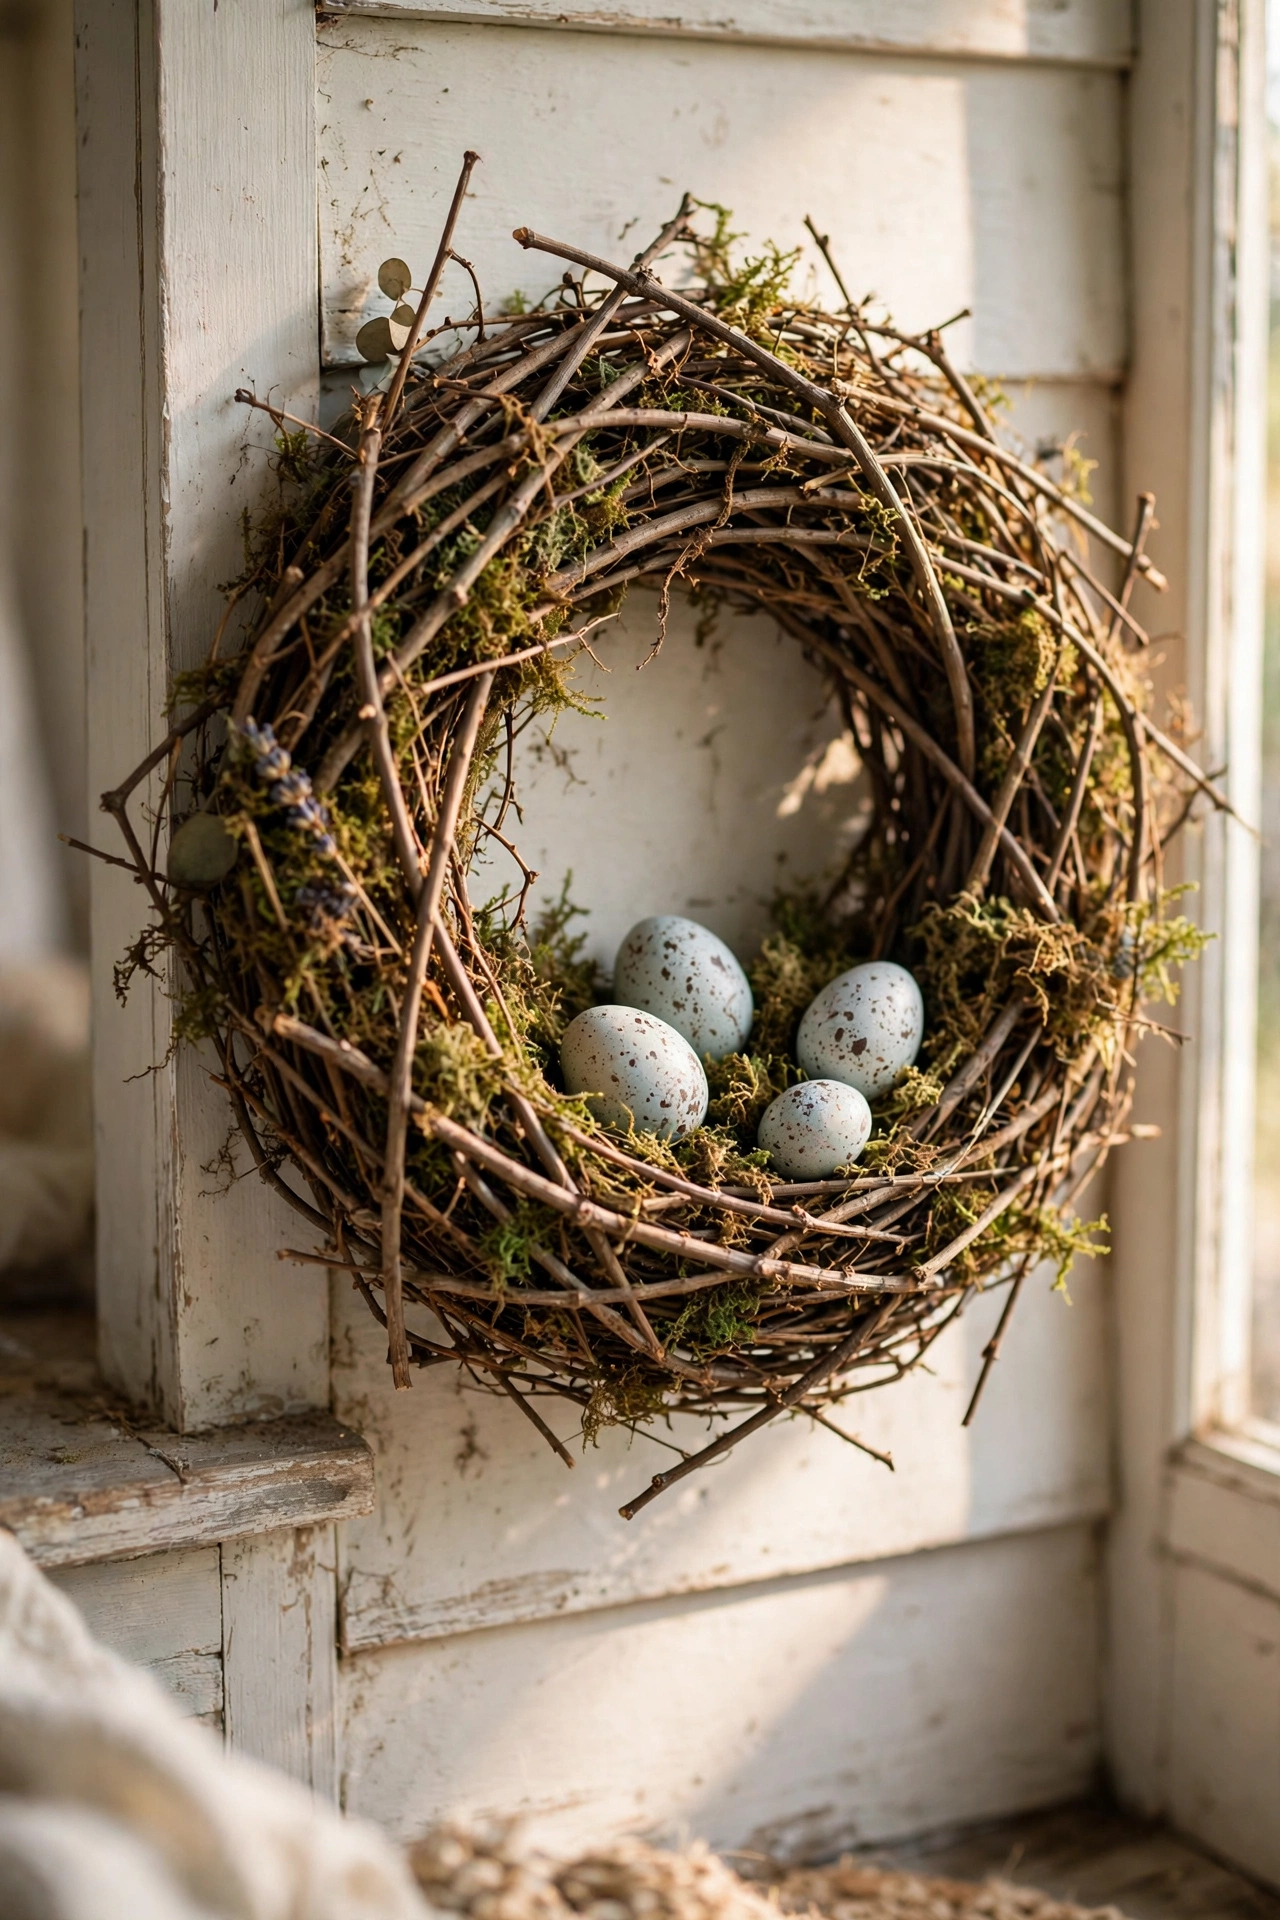
A grapevine wreath dressed up as a bird’s nest is the simplest spring project on this list. I tucked dried moss into a grapevine base, added three speckled faux eggs from the craft store, and wired on a couple of tiny faux birds. The moss hides any bare patches and gives it that just-built nest texture. I hung mine on the porch where the real birds nest every April, which felt appropriate. Keep it under cover, because the moss goes soggy in direct rain. Three eggs is the magic number; two looks sparse and four looks crowded.
Cost: ~$8-12 | Time: 30 minutes
7. Seashell and Driftwood Wreath
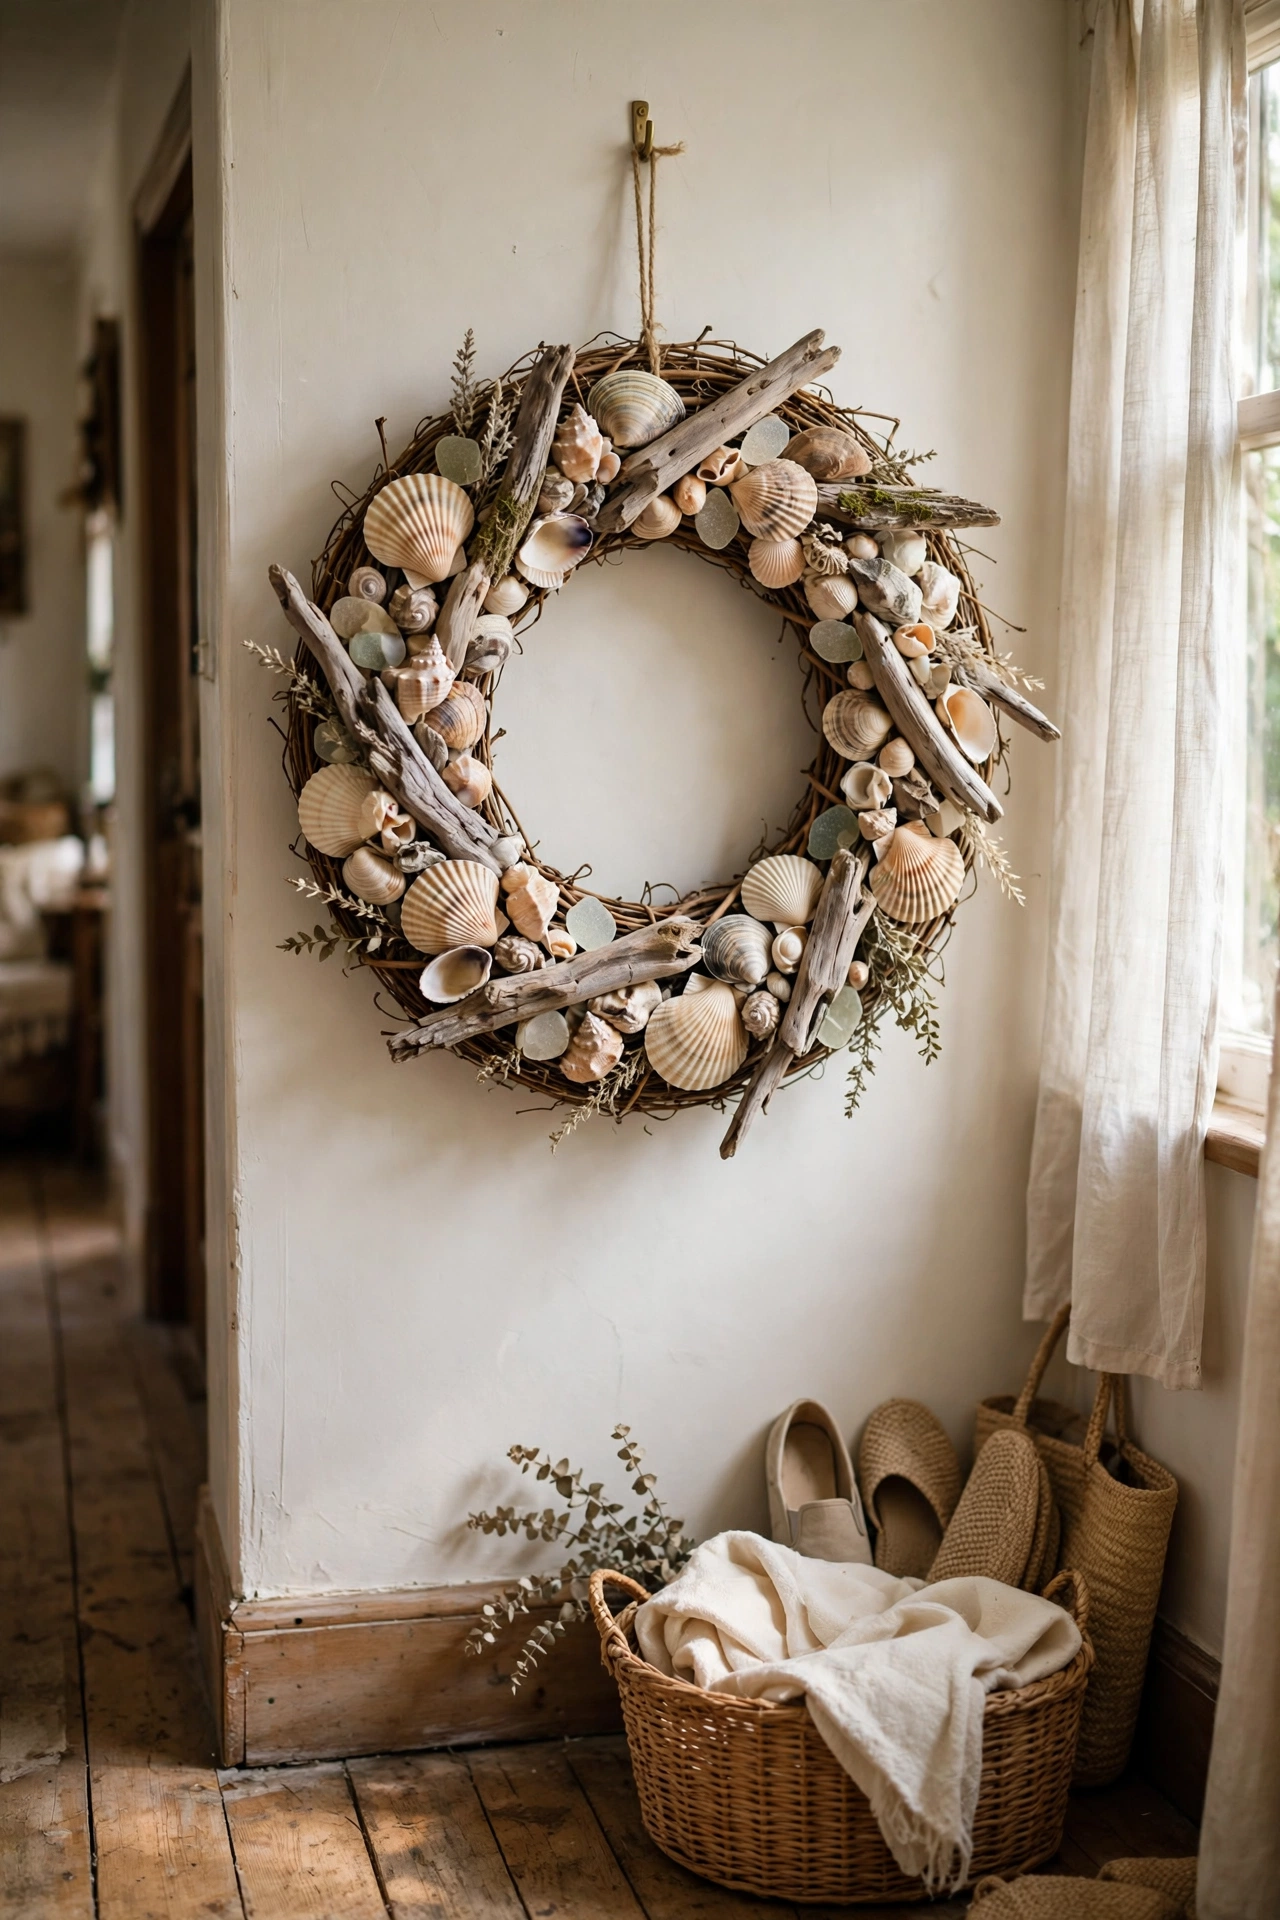
Shells collected on holiday make a summer wreath full of memories. I hot-glued my beach finds onto a grapevine base, starting with the largest shells and filling gaps with smaller ones, then tucked in a few pieces of driftwood for texture. Sort your shells by size first, because hunting through a bag mid-gluing wastes the glue’s open time. Mine hangs in my hallway year round and every shell reminds me of a specific beach. If you buy shells instead of finding them, the craft store bags are cheapest.
Cost: ~$5-10 | Time: 1.5 hours
8. Dried Lavender Wreath
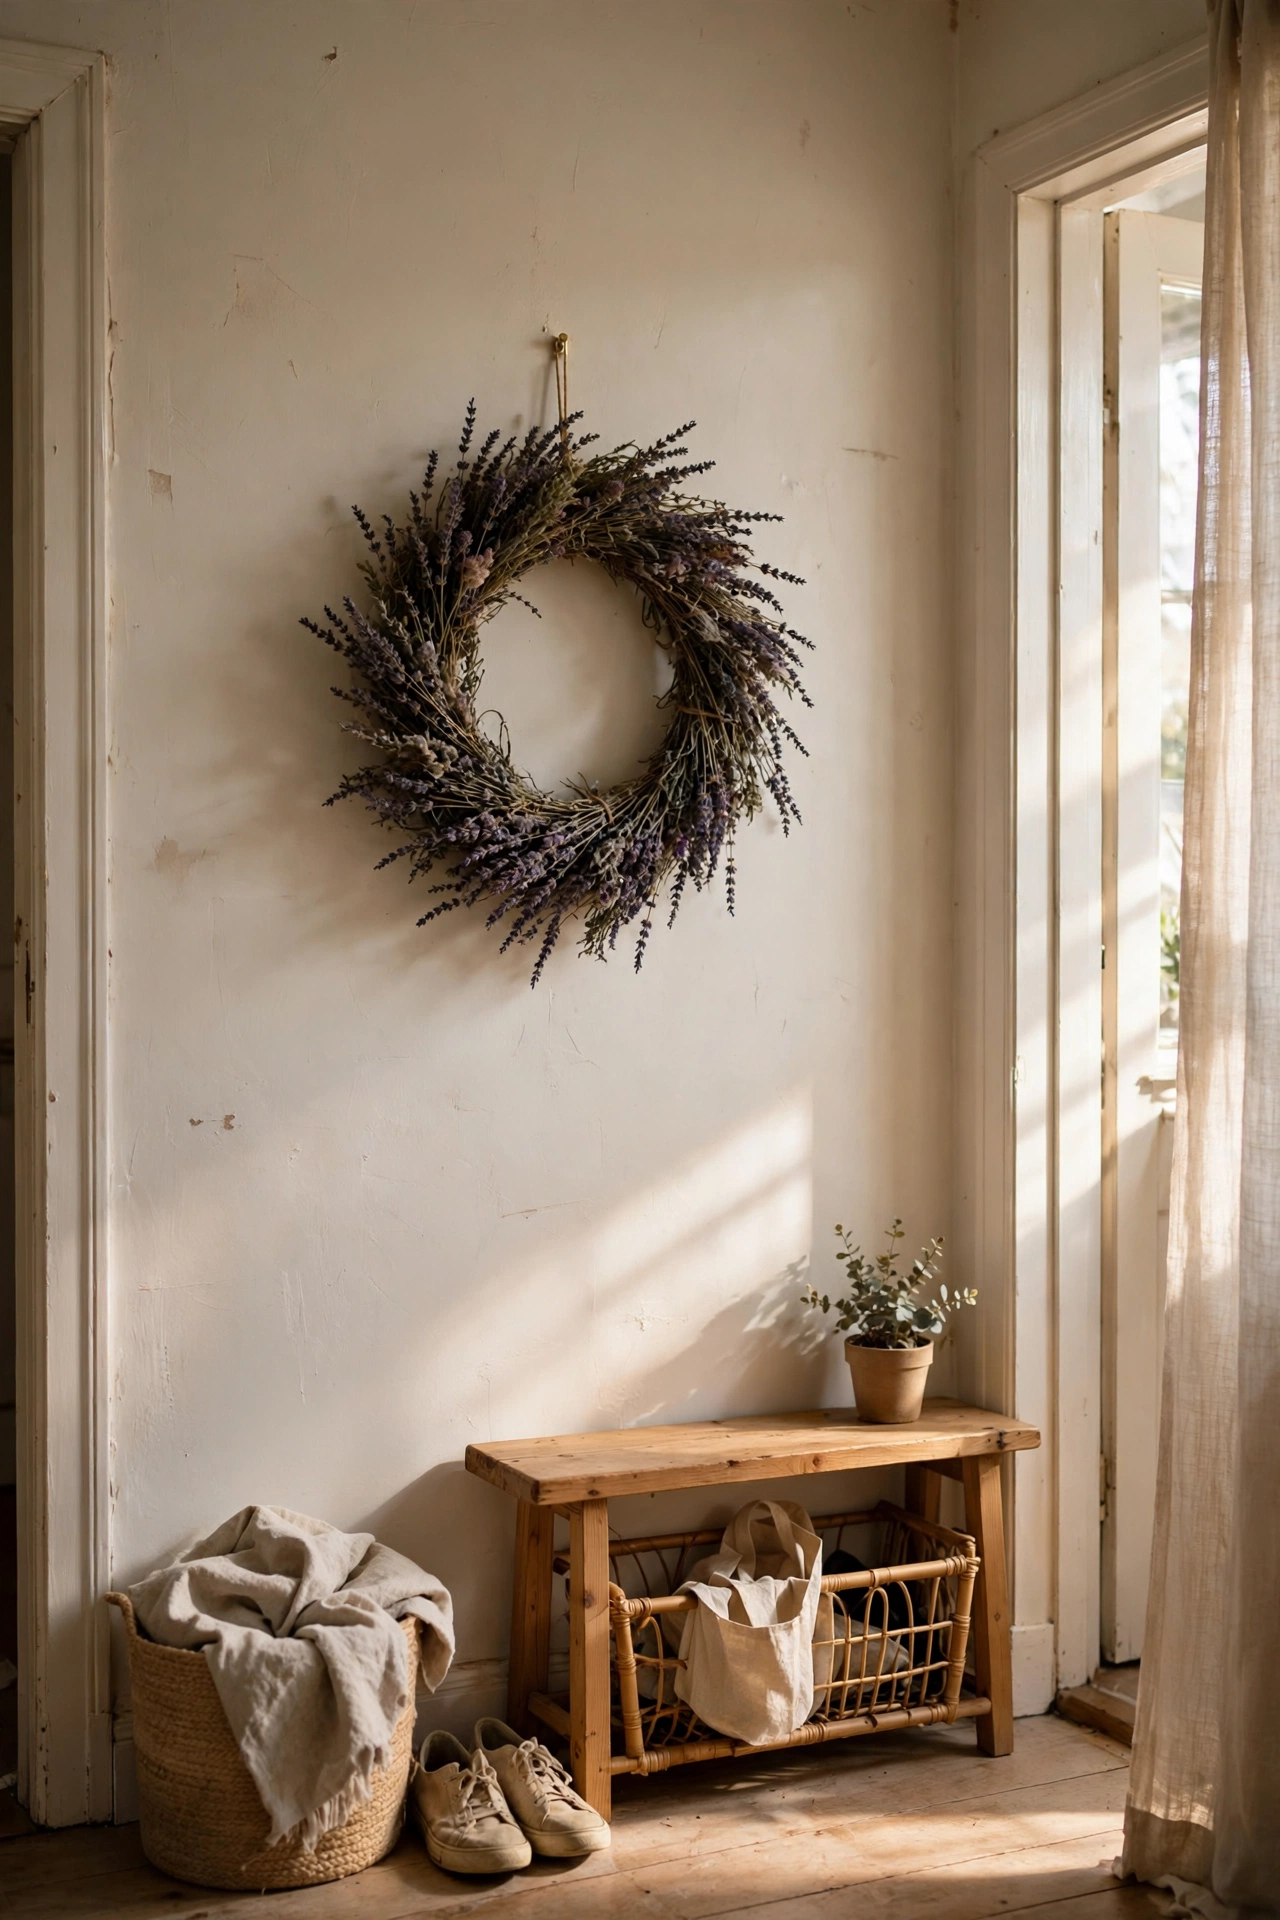
A ring of dried lavender is beautiful, fragrant, and keeps moths away from the linen cupboard where I hang mine. I bought two large bunches of dried lavender, cut them into 15cm sprigs, and wired small bundles onto a wire frame, overlapping so all the stems point the same way. Handle the buds gently, because they crumble if you squeeze them. My wreath scented the whole hallway for months. When the scent fades, a drop of lavender oil revives it, though mine still smells faintly after two years.
Cost: ~$10-16 | Time: 1 hour
Budget check: the summer wreaths lean on natural finds, which is why most land under $12. A walk on the beach or through a field is genuinely part of the budget strategy here.
9. Citrus Slice Wreath

Dried orange and lemon slices on a grapevine base make a cheerful summer wreath that looks good enough to eat. I dried my own slices in the oven at 90 degrees for three hours, flipping halfway, then wired them onto the base with thin floral wire through a small hole in each slice. Oven-dried slices go deep amber and last for years; the air-dried ones I tried first went mouldy. Overlap the slices like scales and tuck in a few bay leaves for contrast. Mine hangs in my kitchen and I love the warm colour it brings.
Cost: ~$4-8 | Time: 3 hours mostly oven time
10. Sunflower Head Wreath
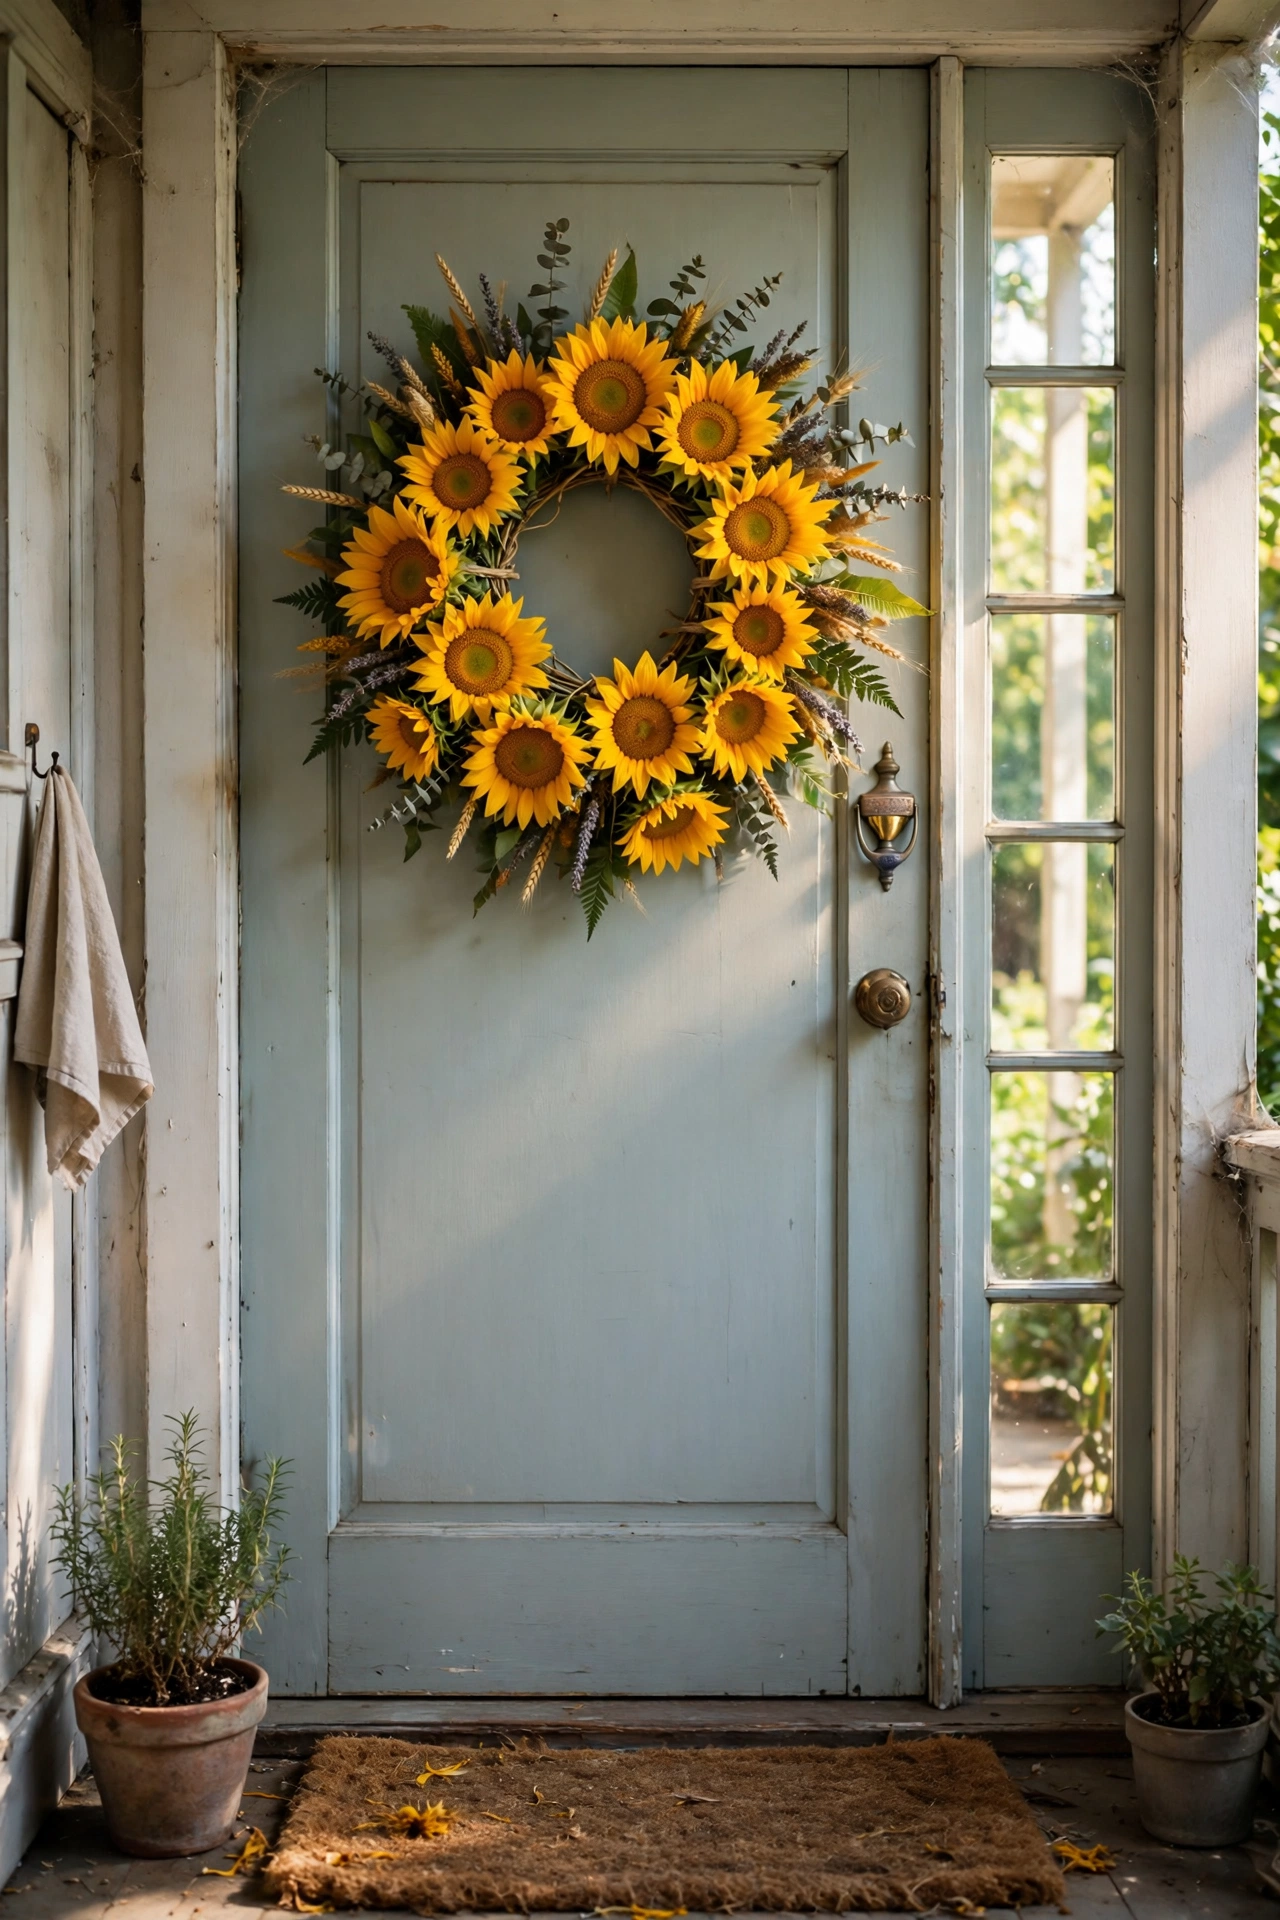
Big faux sunflower heads packed onto a straw base make the happiest summer wreath imaginable. I snipped the heads off a bunch of budget sunflowers, hot-glued them onto a straw wreath base in a tight spiral, and filled the gaps with faux greenery leaves. Pack the heads edge to edge, because any straw showing through ruins the effect. Mine took forty minutes and cost $11, and it looks like a proper florist piece from the pavement. A straw base is lighter than grapevine, which matters for a wreath this full.
Cost: ~$10-15 | Time: 45 minutes
11. Nautical Rope Wreath

Thick jute rope wrapped around a foam ring gives a coastal wreath that suits any neutral hallway. I wrapped 10 metres of 2cm rope around a foam ring, hot-gluing every few turns to keep it snug, then added a small anchor ornament and a navy bow at the top. Keep the tension even as you wrap, because loose rope sags and shows the foam underneath. Mine hangs beside my bathroom mirror and the texture is lovely up close. A strip of striped fabric tied as a bow works if you cannot find a rope-coloured one.
Cost: ~$8-12 | Time: 1 hour
12. Succulent Wreath
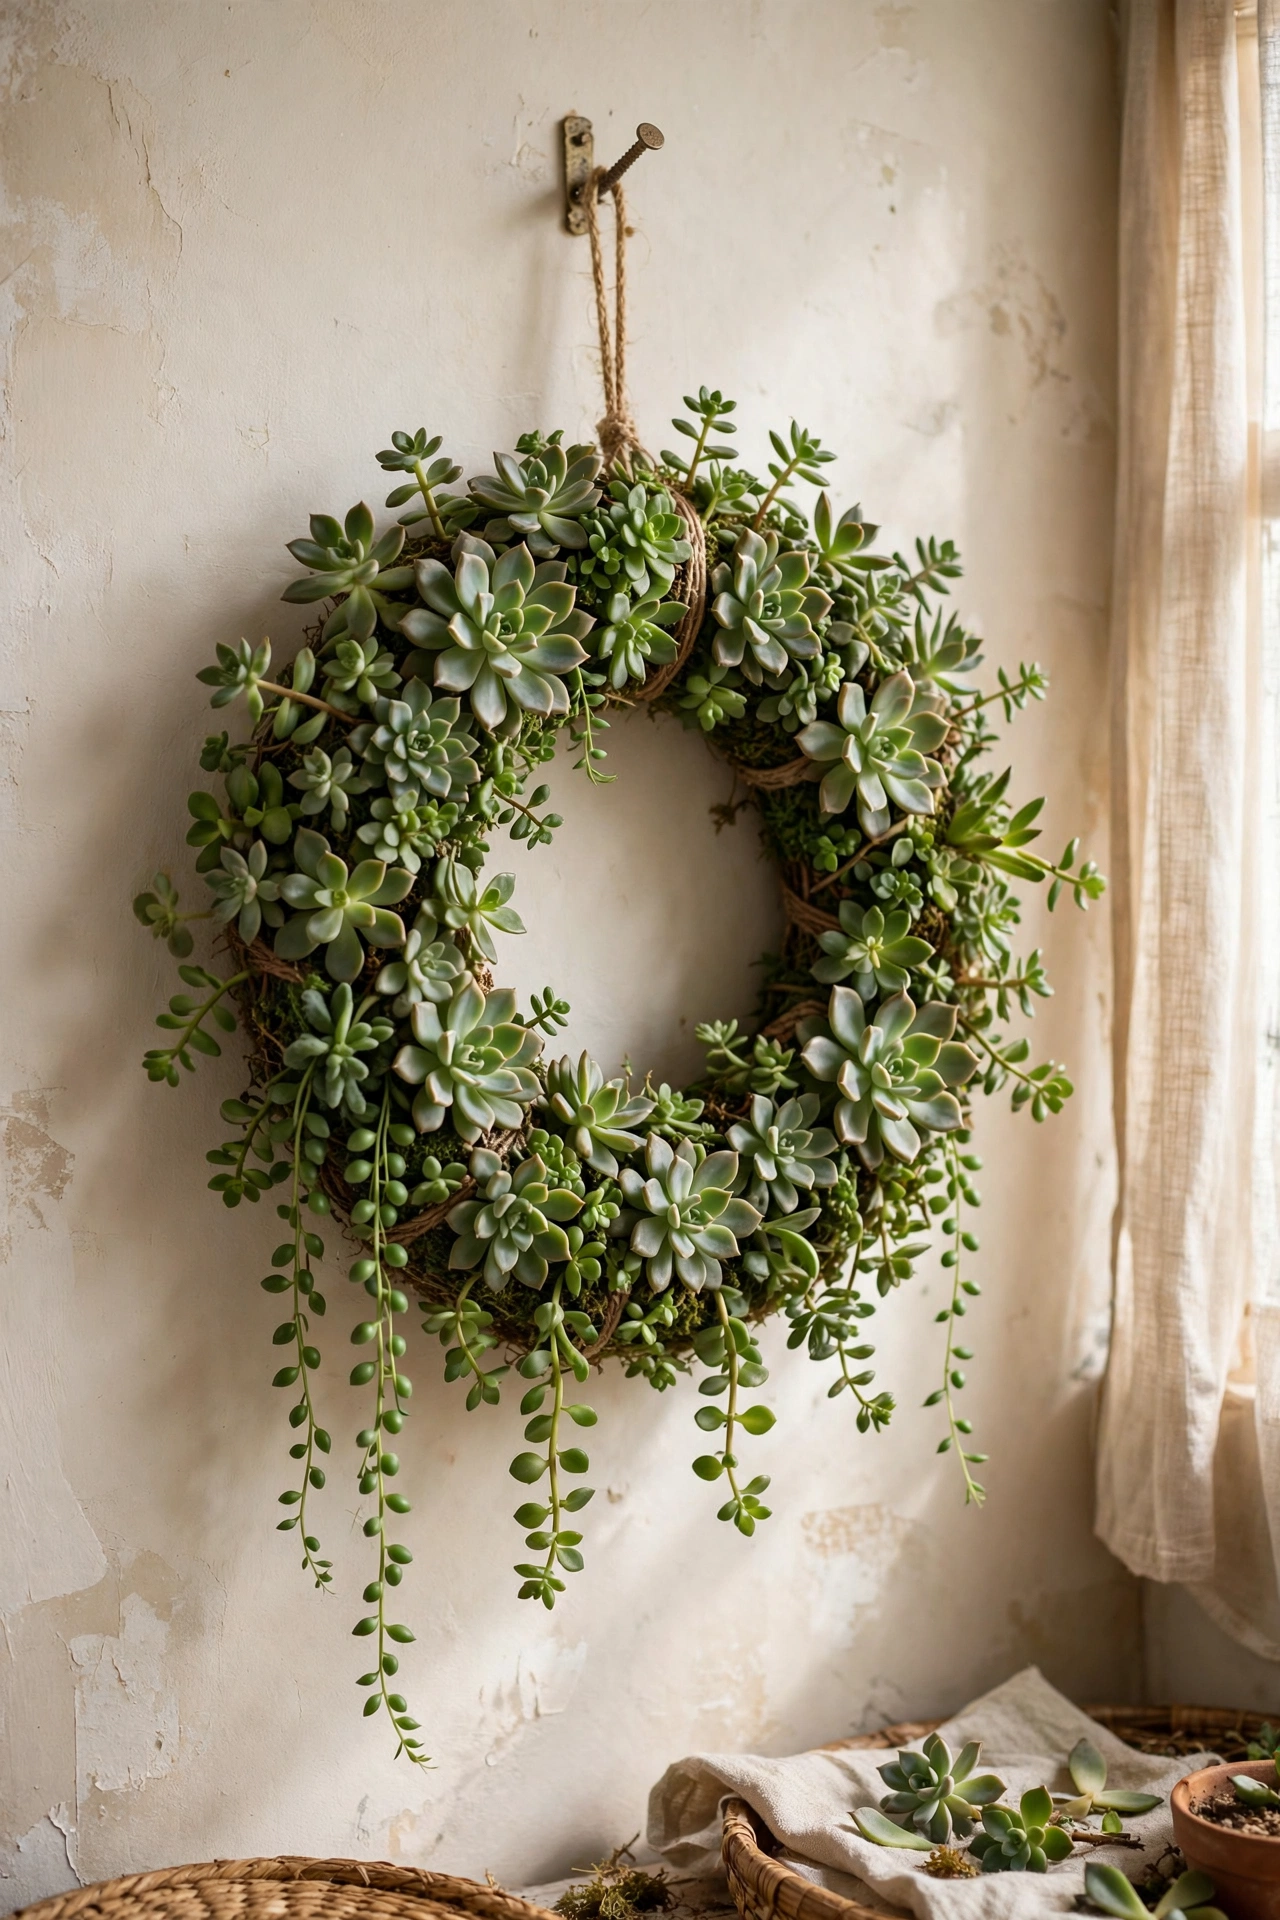
A living wreath of succulent cuttings is the project that impresses everyone who sees it. I filled a wire wreath frame with damp sphagnum moss, pinned in succulent cuttings with floral pins, and laid it flat for two weeks so the cuttings rooted before hanging. Water it by soaking the whole wreath in the sink once a fortnight. My first one failed because I hung it immediately and the cuttings fell out; the flat-rooting step is non-negotiable. Take cuttings from friends’ plants and this costs almost nothing.
Cost: ~$6-12 | Time: 1 hour plus rooting time
Budget check: twelve done, and the living succulent wreath might be the best value of the lot if you can beg cuttings. For more plant projects, (see also: 17-diy-planter-ideas-on-a-budget) has plenty.
13. Mini Pumpkin Wreath

Mini faux pumpkins wired onto a grapevine base make the classic autumn wreath, and faux means it lasts for years. I wired on twelve mini pumpkins in orange, cream, and green, alternating sizes, then tucked dried wheat stems and faux maple leaves into the gaps. Wire each pumpkin through its stem with floral wire rather than gluing, because glue pops off the waxy skin. Mine has survived four autumns on my front door. Buy the pumpkins after Halloween for next year and they cost pennies.
Cost: ~$10-16 | Time: 1 hour
14. Wheat Sheaf Wreath
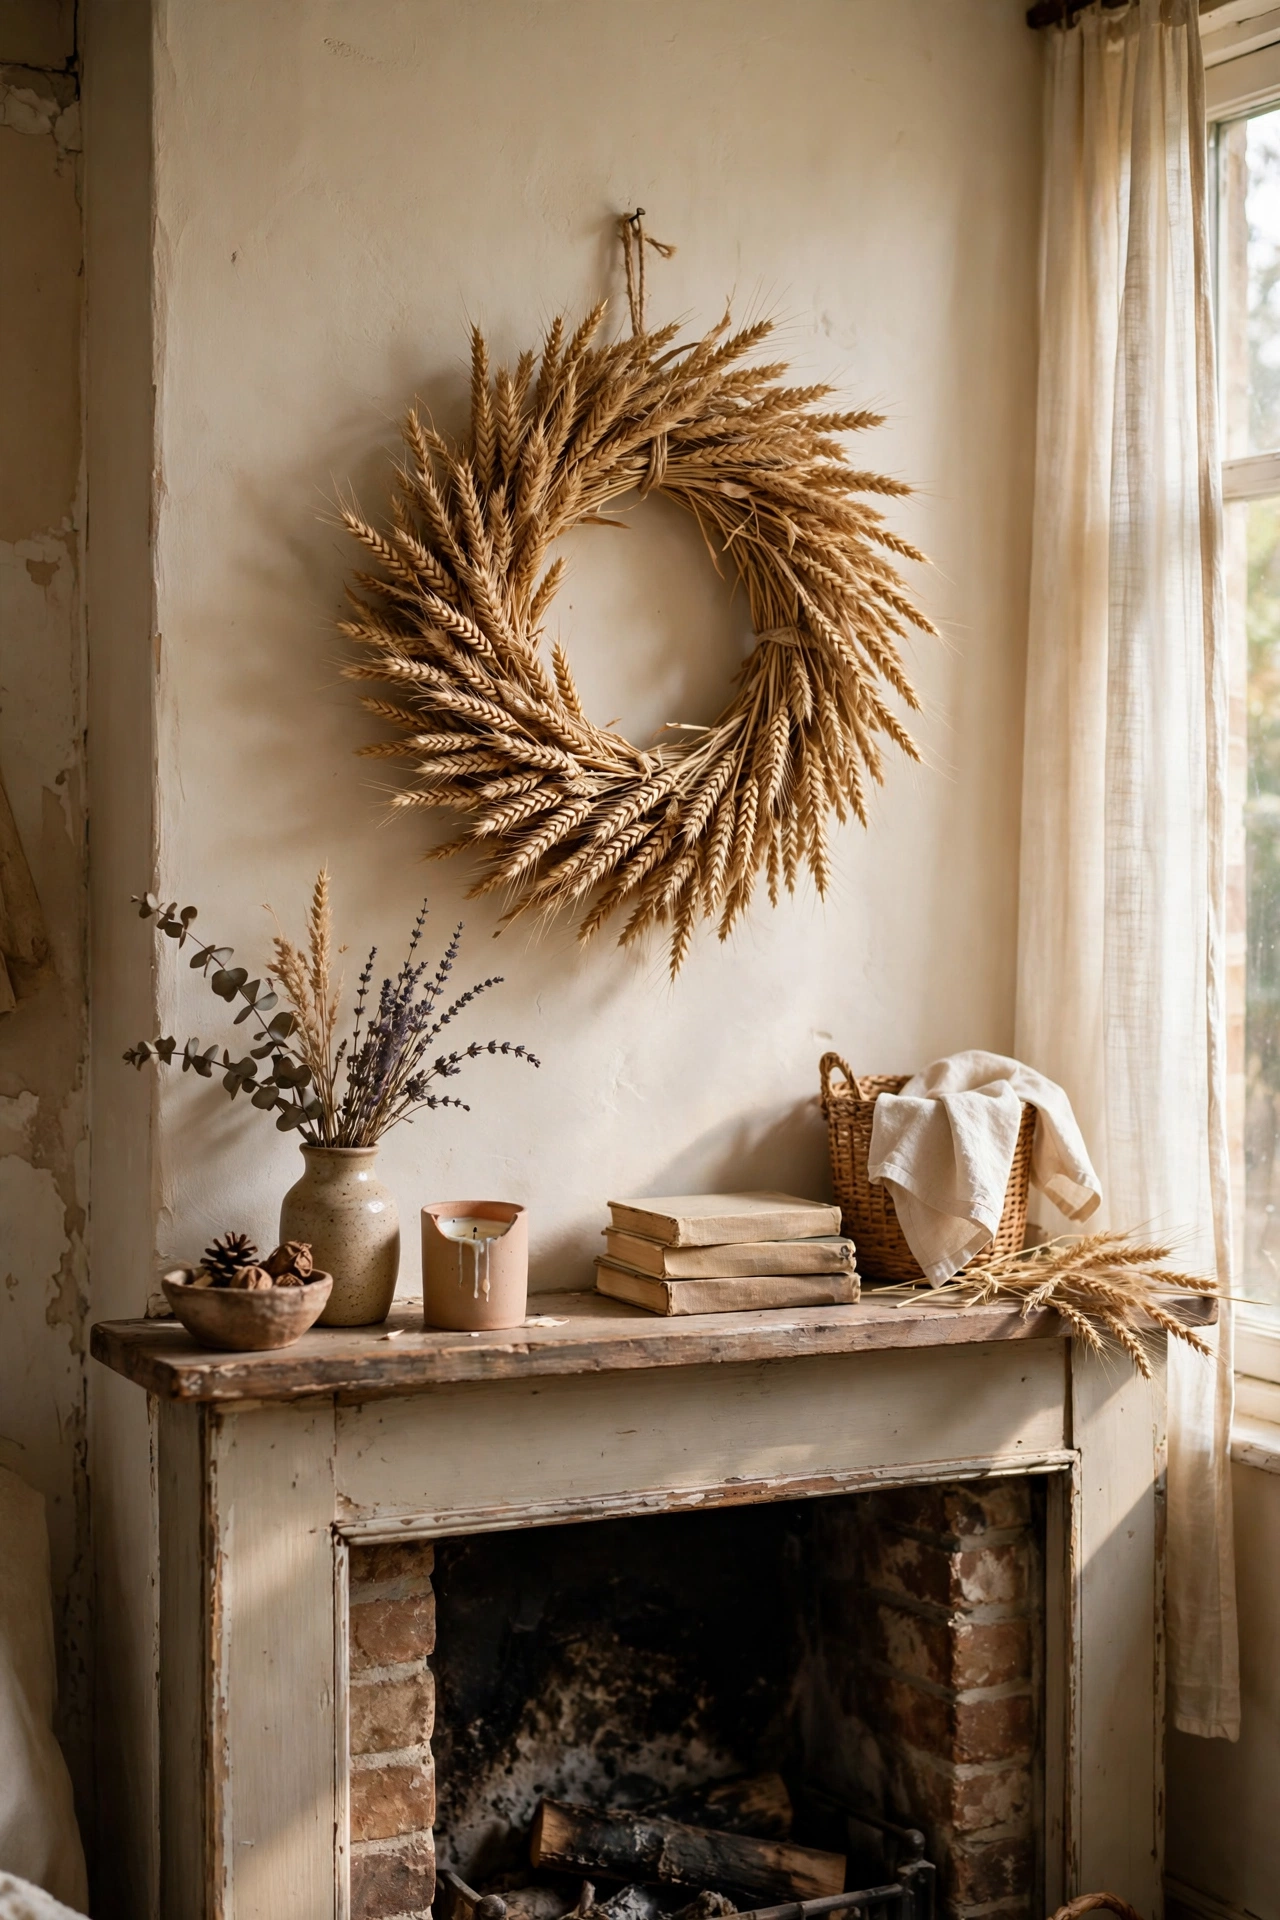
Bundles of dried wheat tied around a wire frame make an elegant autumn wreath with real harvest warmth. I bought three bunches of dried wheat, divided them into small sheaves, and wired each sheaf to the frame with the heads all pointing clockwise. Overlap generously, because wheat shrinks as it dries further and gaps appear. Mine hangs over my fireplace from September to November and the golden colour is perfect against the dark wood. Spray it lightly with hairspray to stop the grains shedding everywhere.
Cost: ~$8-12 | Time: 1 hour
15. Eucalyptus and Berry Wreath

Fresh eucalyptus and faux berries make an autumn wreath that smells wonderful as it dries. I wired eucalyptus stems onto a grapevine base in overlapping layers, then poked in clusters of burgundy faux berries with short wire stems. Eucalyptus dries beautifully in place, turning a silvery sage colour that lasts for months. My mistake was using too little eucalyptus at first; you need more than you think for a full look. This one bridges autumn and winter perfectly, so it earns its keep for a long season.
Cost: ~$12-18 | Time: 1 hour
16. Plaid Flannel Wreath
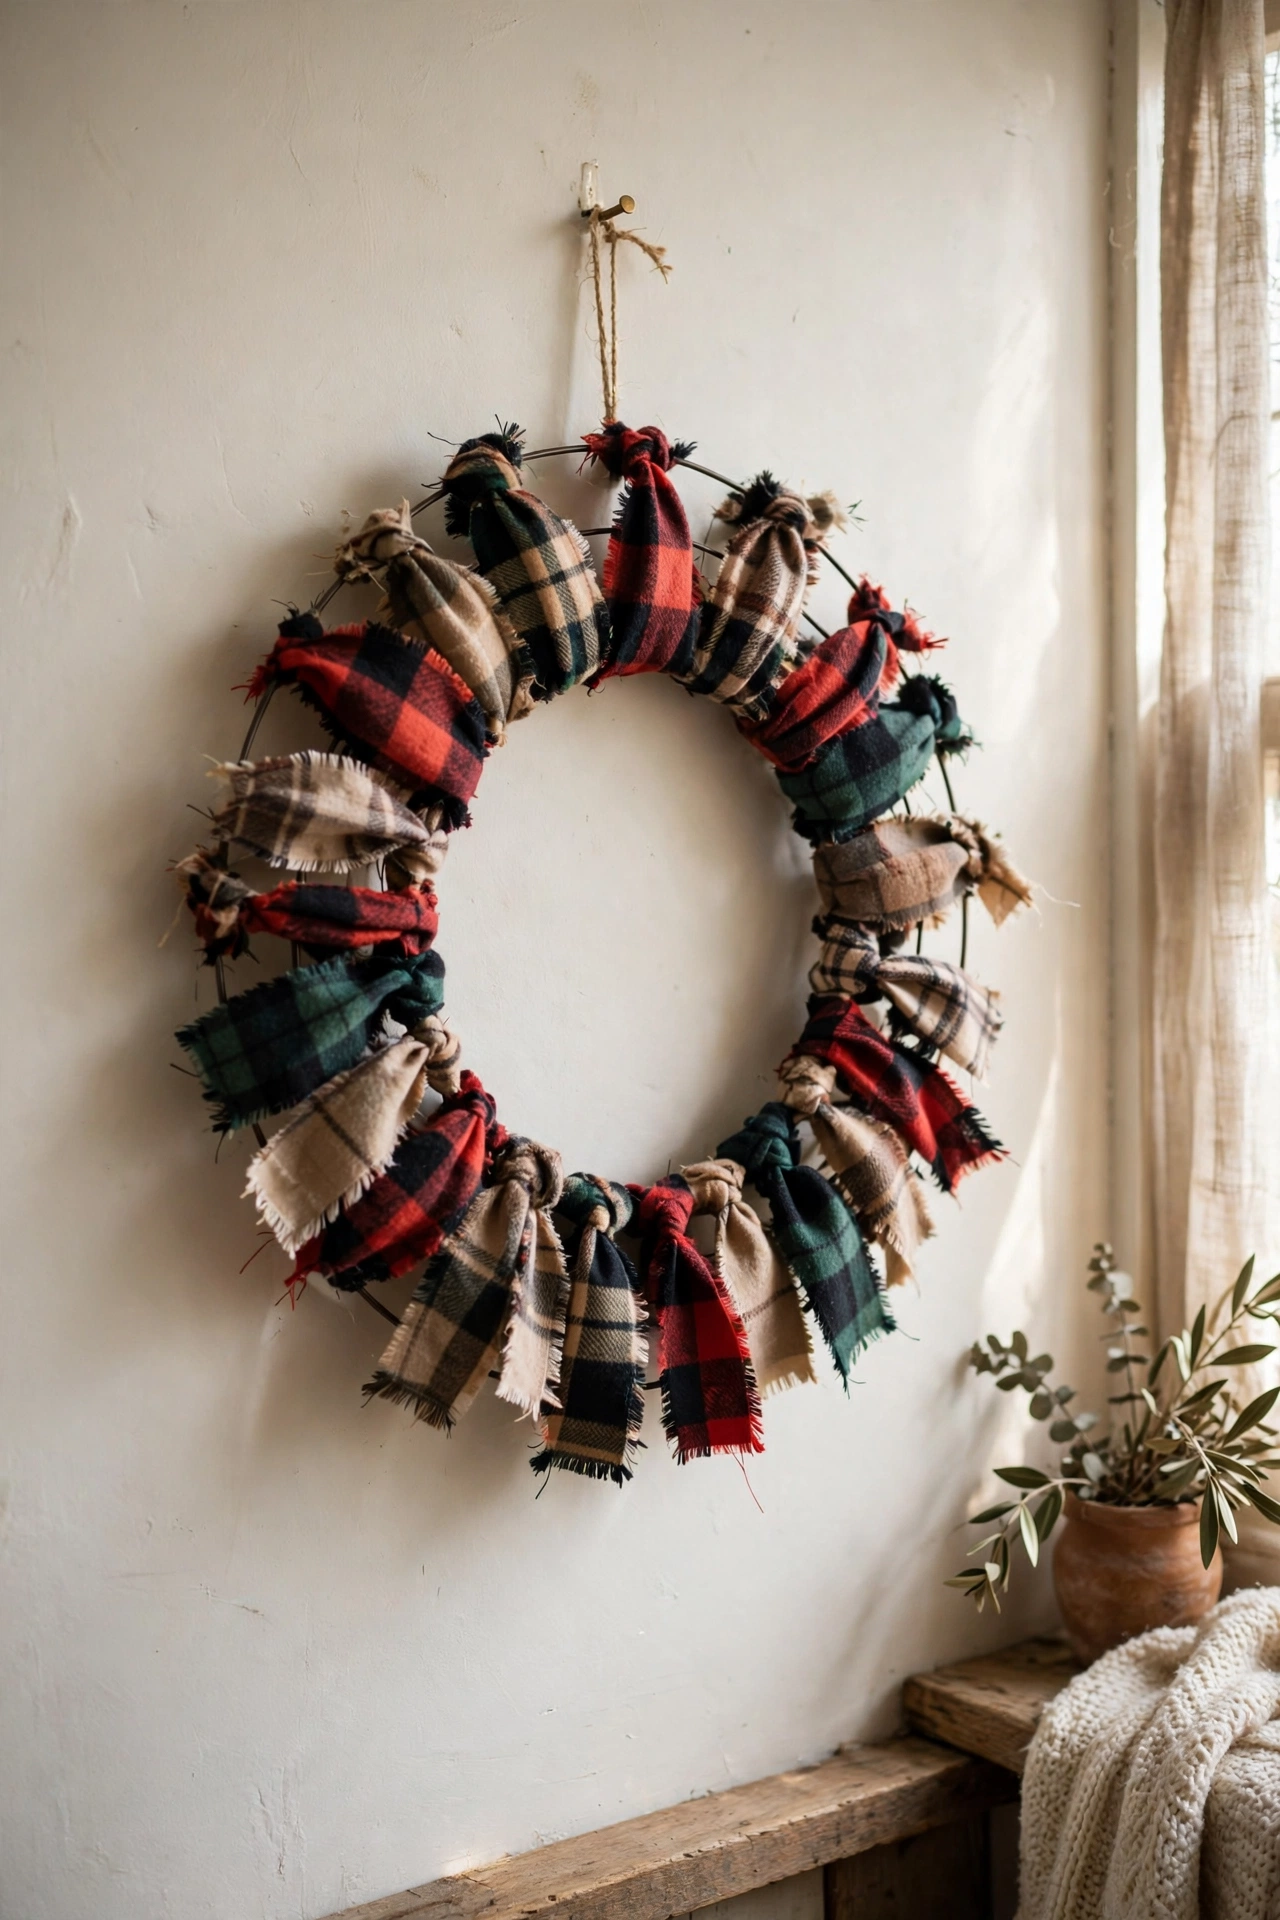
An old flannel shirt cut into strips makes the cosiest autumn wreath, and it costs nothing if the shirt is headed for the bin. I cut my husband’s worn-out plaid shirt into 15cm strips, tied each strip around a wire frame with a simple knot, and fluffed them out. Alternate the strip direction for fullness, and trim any ragged ends with pinking shears. Mine looks like a proper craft-store wreath and cost me zero. Two shirts in different plaids layered together look even better.
Cost: ~$3-6 | Time: 2 hours
Budget check: the autumn wreaths average about $11, and the flannel one was free. Old clothes are an underrated craft supply; keep a bag of them for projects like this.
17. Pinecone and Acorn Wreath
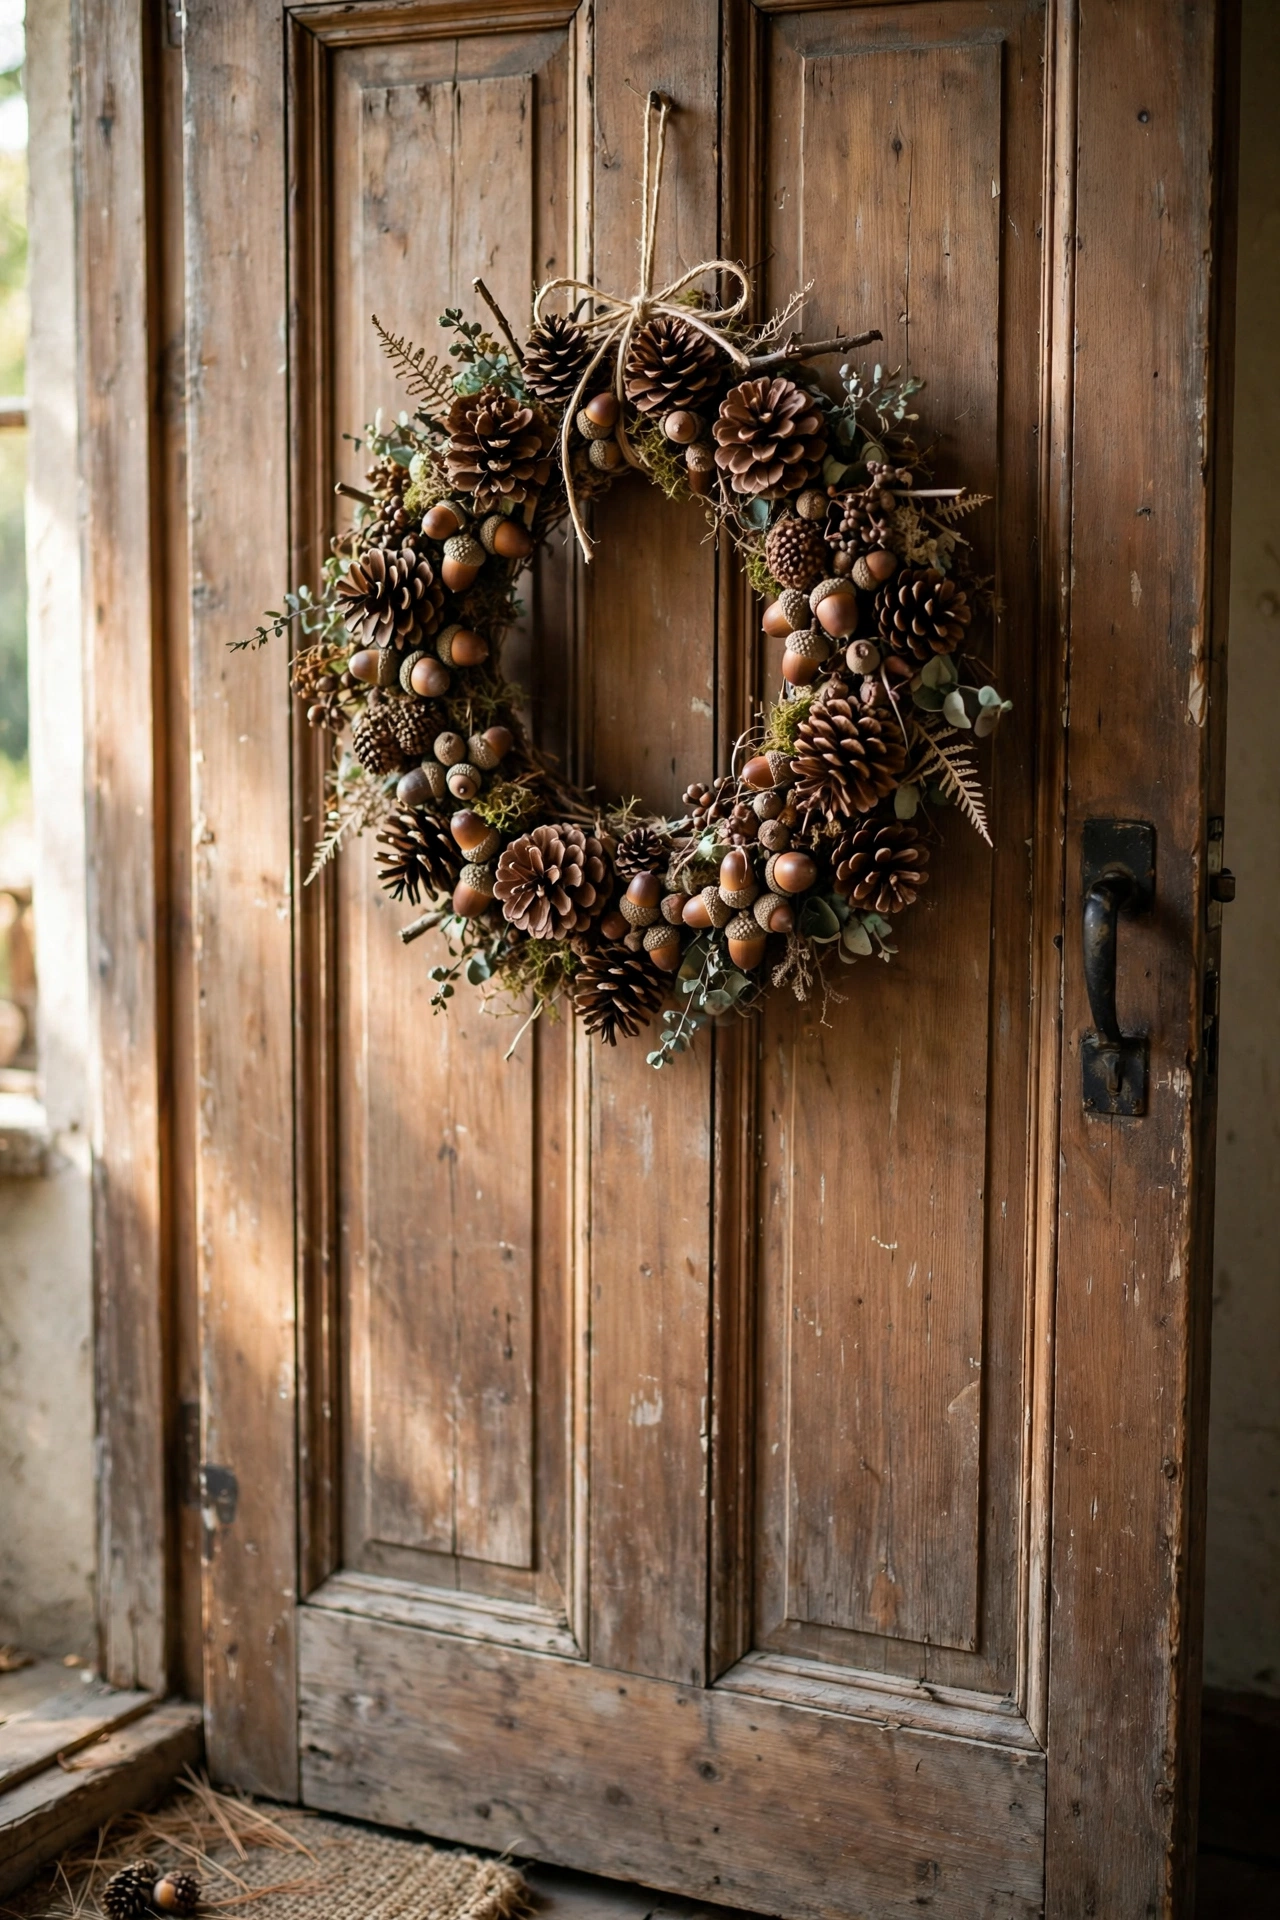
Pinecones gathered on an autumn walk make a wonderfully textured wreath for the price of a glue gun stick. I collected two bags of pinecones, baked them at 100 degrees for an hour to kill any bugs, and hot-glued them onto a straw base largest first. Bake them before you bring them inside; I skipped this once and found tiny insects in my craft box. Fill the gaps with acorns and a few dried leaves. Mine hangs on my shed door and looks properly woodland. A light dusting of gold spray paint on some cones adds a festive touch.
Cost: ~$4-8 | Time: 2 hours
18. Pressed Leaf Wreath
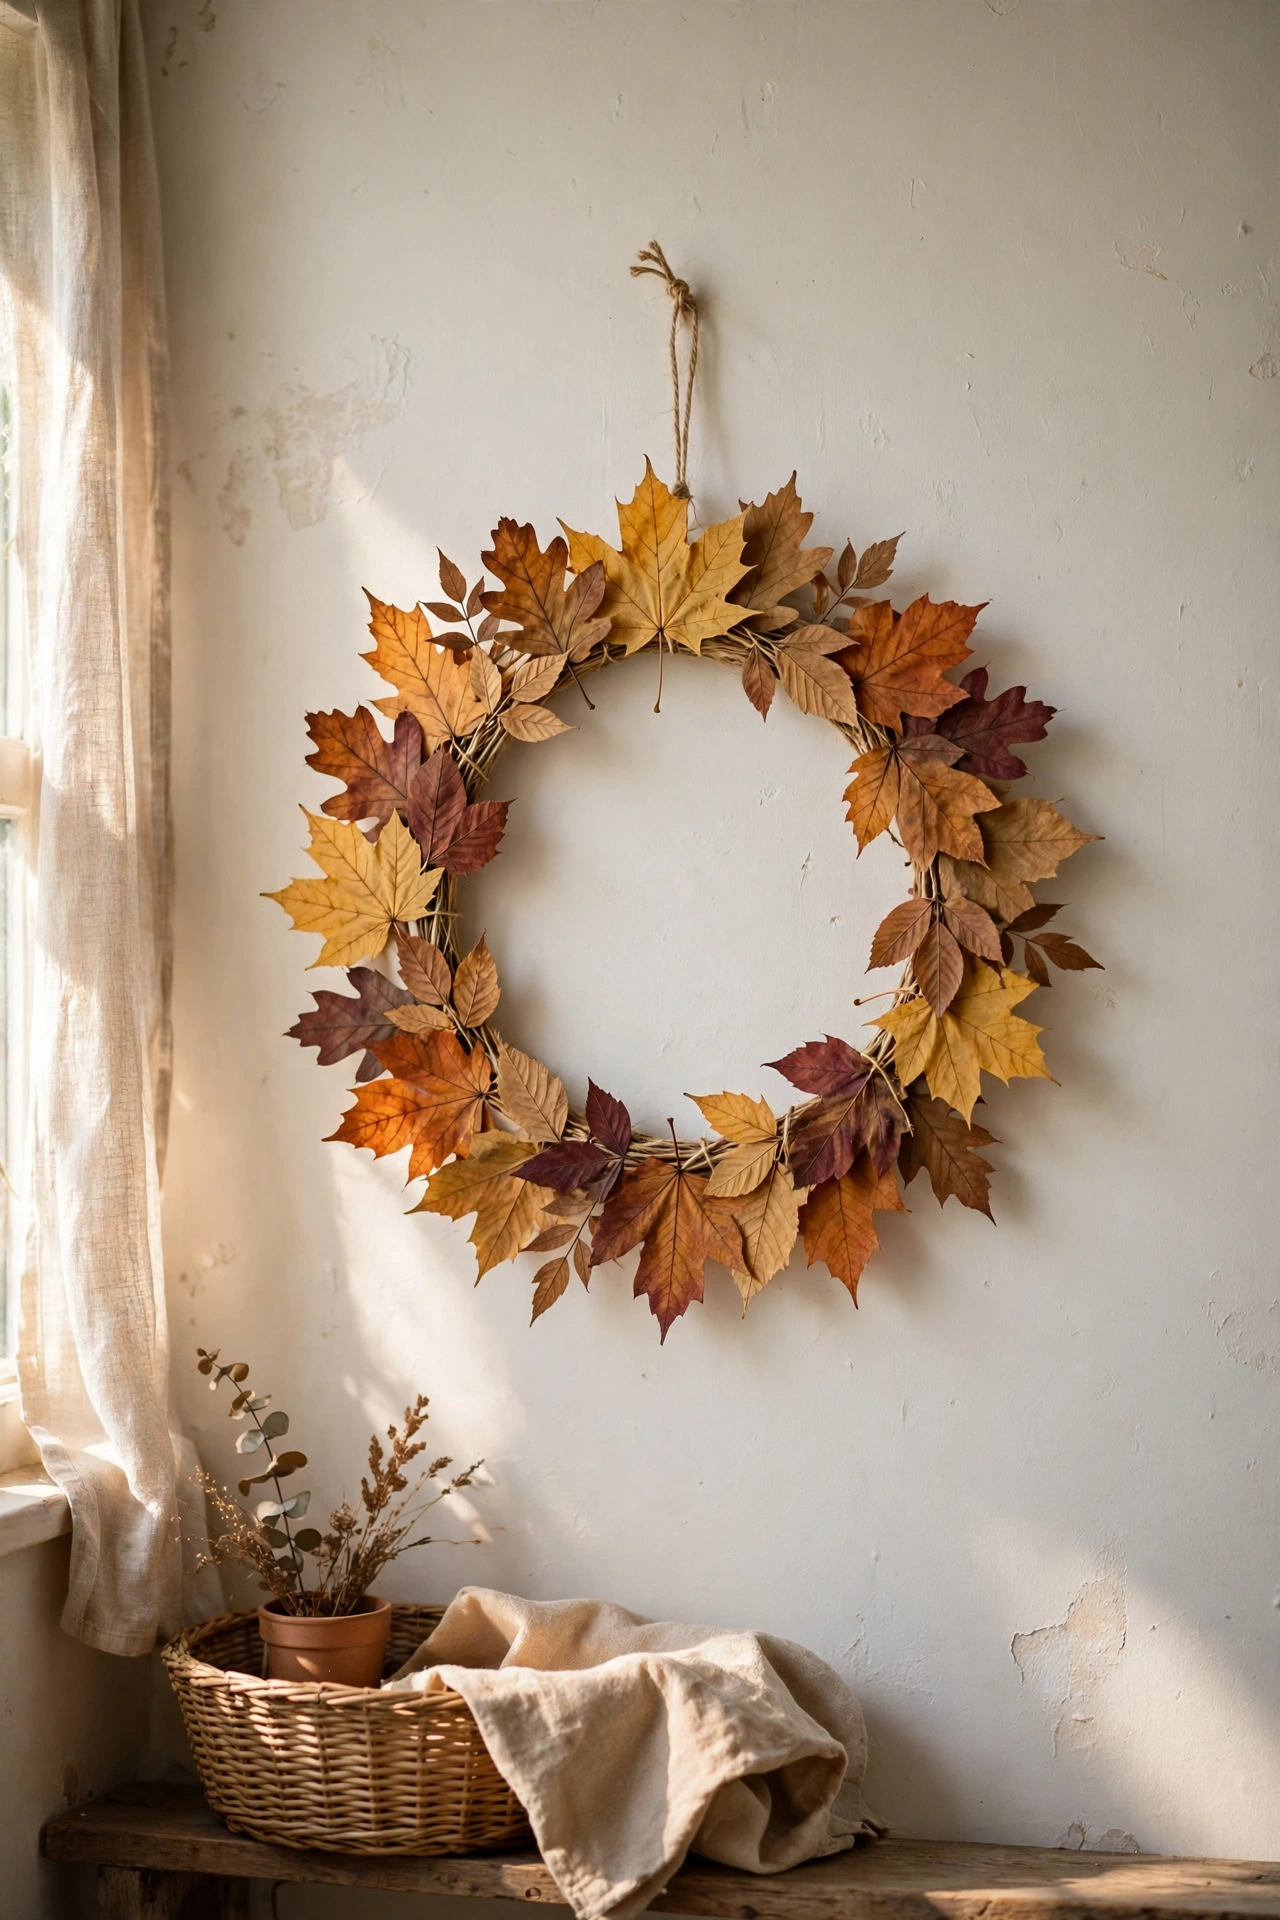
Real autumn leaves pressed and glued onto a card ring make a delicate wreath that costs nothing at all. I pressed maple and oak leaves between heavy books for a week, then glued them in overlapping rows onto a cardboard ring cut from a packing box. Work with tweezers, because dried leaves crumble if you press too hard. Mine lasted one season before fading, which felt right for something so autumnal. Spray with a clear matte sealer and it will hold its colour a few weeks longer.
Cost: ~$2-5 | Time: 1 hour plus pressing
19. Evergreen and Orange Slice Wreath

Fresh evergreen branches and dried orange slices make the Christmas wreath everyone assumes you bought. I wired cut evergreen boughs onto a wire frame in overlapping layers, then added dried orange slices and cinnamon sticks with floral wire. Ask a Christmas tree lot for trimmings; they usually give them away free. Mine cost me the price of the oranges and filled my hallway with the best smell of December. Mist the evergreens every few days and it will stay fresh through the holidays.
Cost: ~$5-10 | Time: 1.5 hours
20. Frosted Pine Wreath

A plain faux pine wreath dusted with white spray paint looks like it just came in from the snow. I bought a basic green wreath on sale, held a can of white matte spray paint at arm’s length, and misted just the outer tips of the branches. Less is more here; my first pass was too heavy and it looked dusty rather than frosted. Add a few pinecones and a red ribbon bow and it is done. Mine lives on my front door every December and the frost effect fools everyone.
Cost: ~$12-18 | Time: 30 minutes
Budget check: twenty wreaths down, and the winter ones are the cheapest yet. Free tree trimmings and a can of spray paint will carry you through December.
21. Book Page Paper Wreath
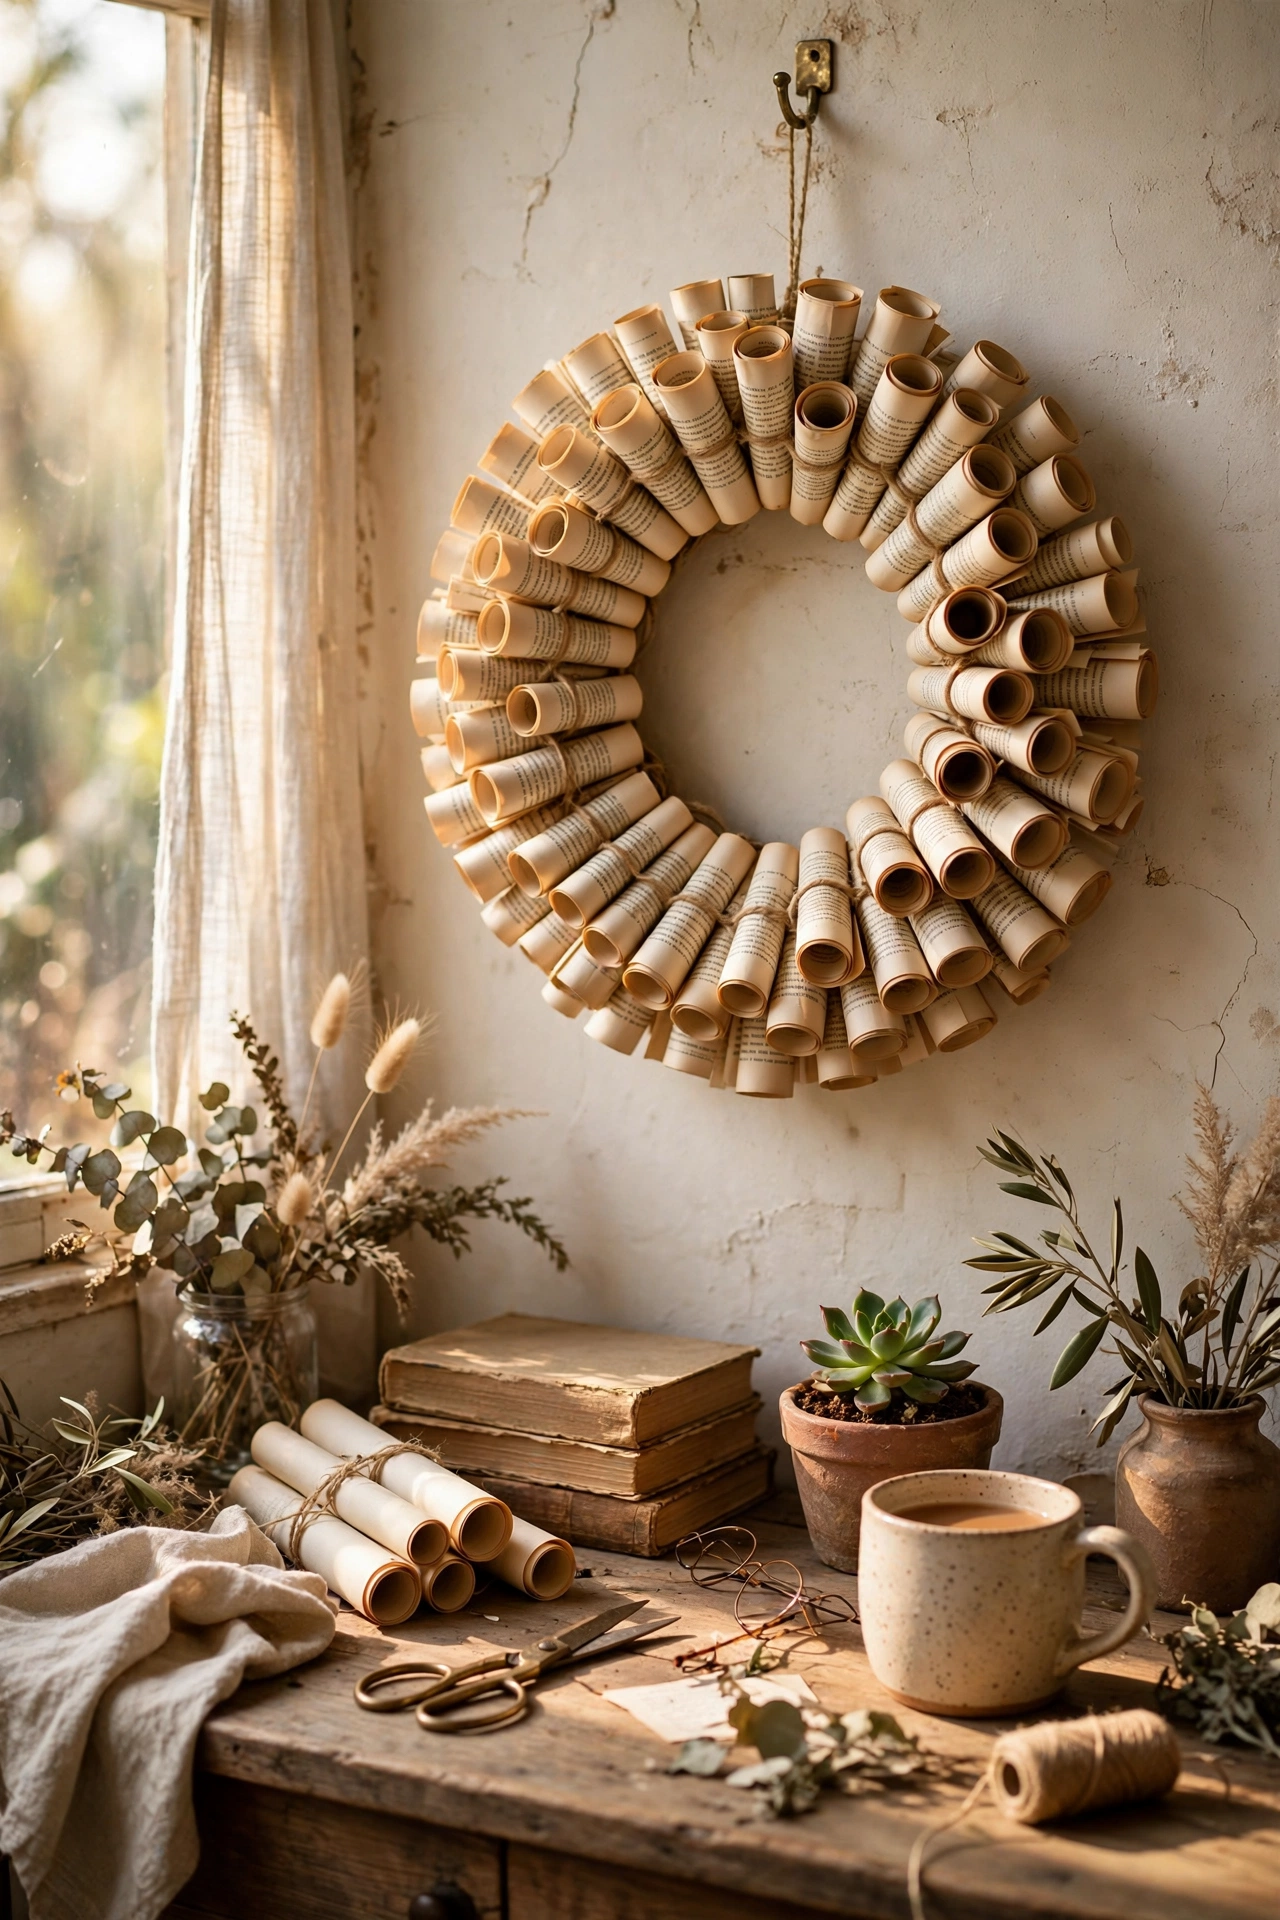
Rolled book pages make a stunning winter wreath that looks far harder than it is. I tore pages from a damaged paperback, rolled each one into a cone, and hot-glued the cones onto a foam ring with the points facing out. It took one long film night to finish, and the result is genuinely sculptural. Use a book you do not mind sacrificing; charity shops sell damaged paperbacks for pennies. Mine hangs above my desk all winter. A few gold-painted cones scattered through add a festive glint.
Cost: ~$4-8 | Time: 3 hours
22. Cinnamon Stick Wreath
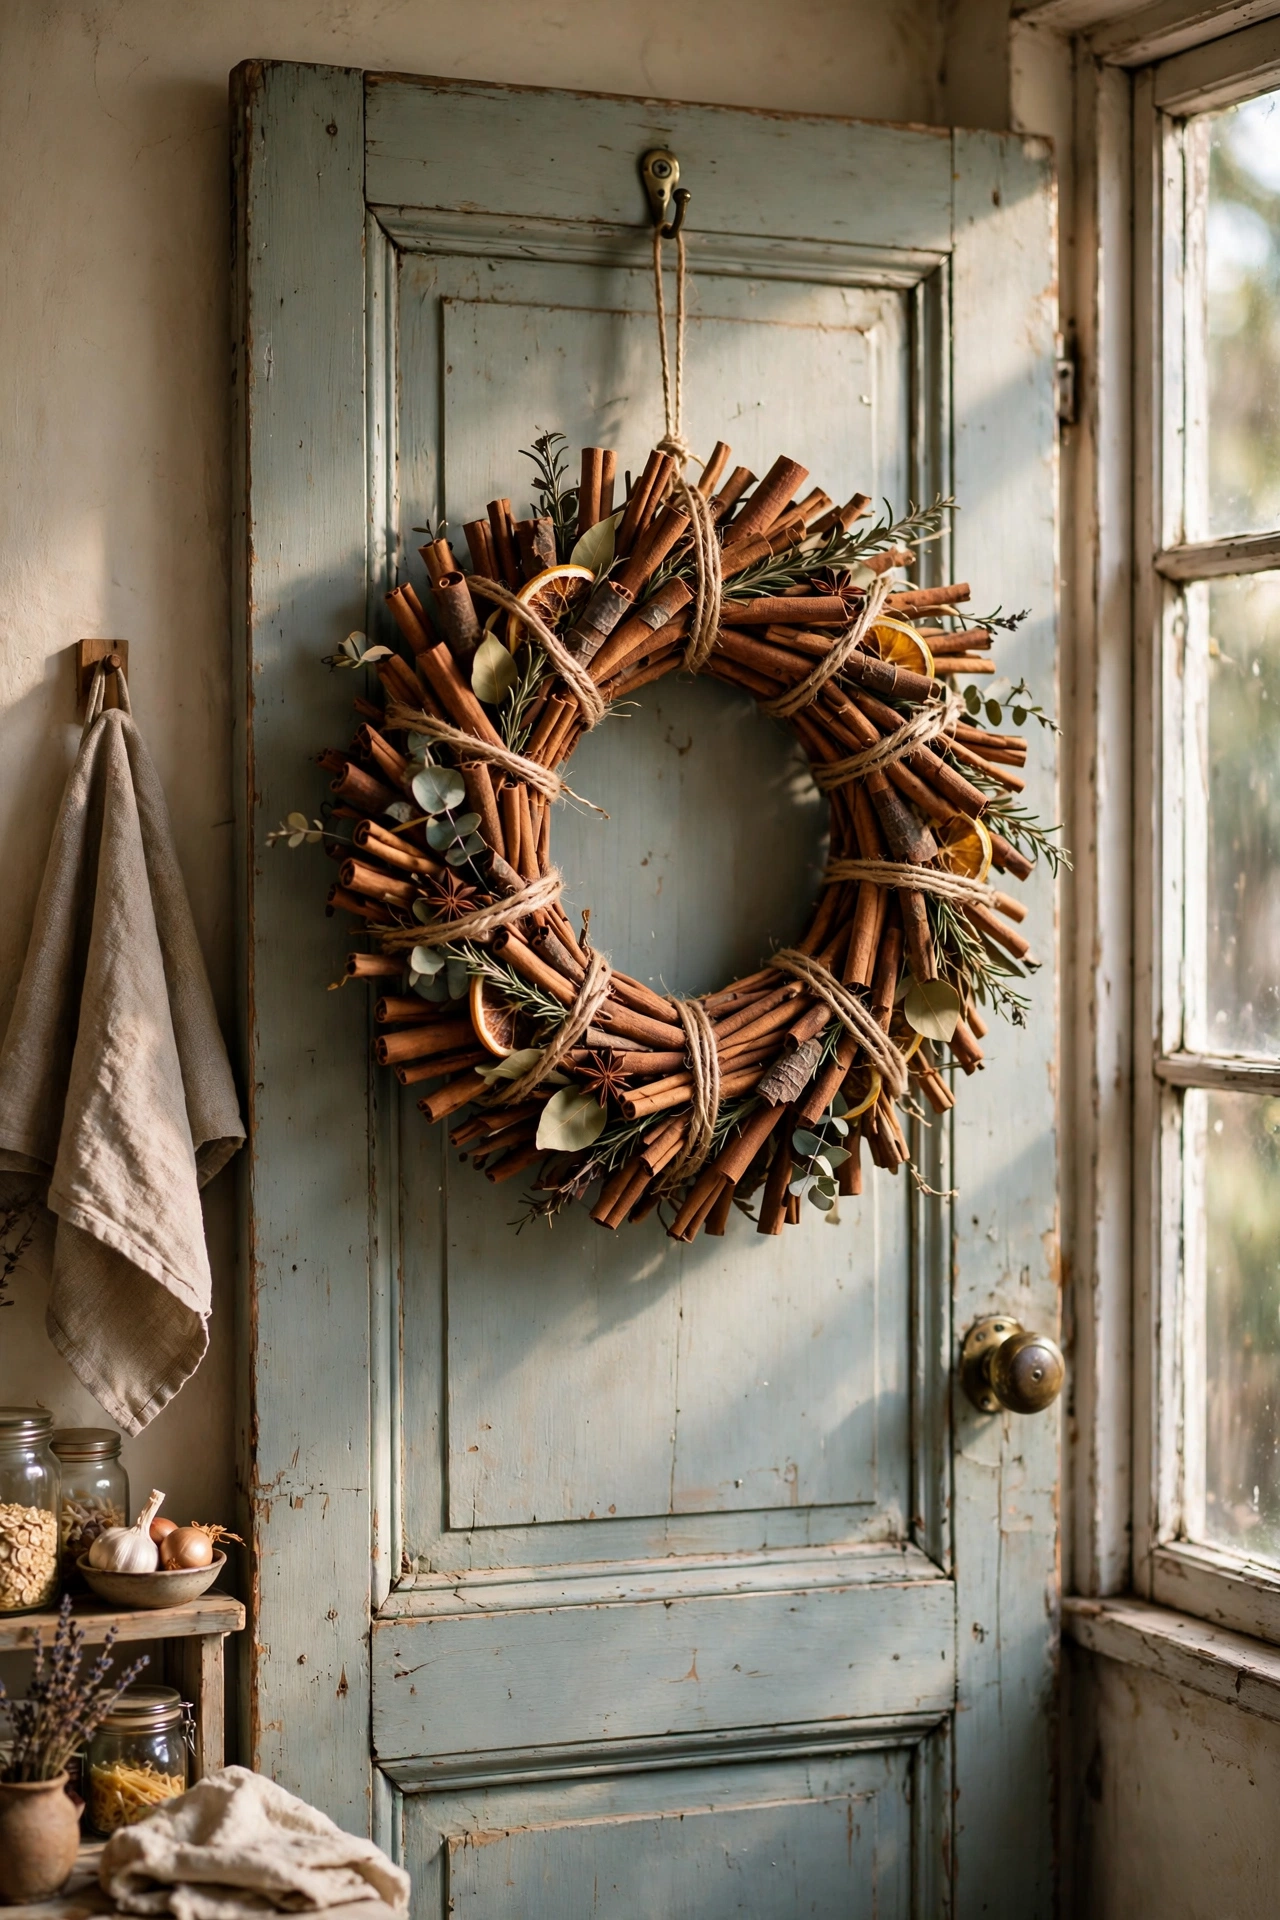
Bundles of cinnamon sticks wired into a ring smell like Christmas and look rustic and warm. I wired small bundles of five sticks together, then wired the bundles onto a wire frame so they overlapped like shingles. Buy cinnamon in bulk bags from the market rather than little jars; it is a fraction of the price. Mine hangs on my kitchen door every December and I swear my baking tastes better near it. The scent lasts for months, and you can refresh it with a drop of cinnamon oil.
Cost: ~$8-14 | Time: 1 hour
23. White Feather Wreath
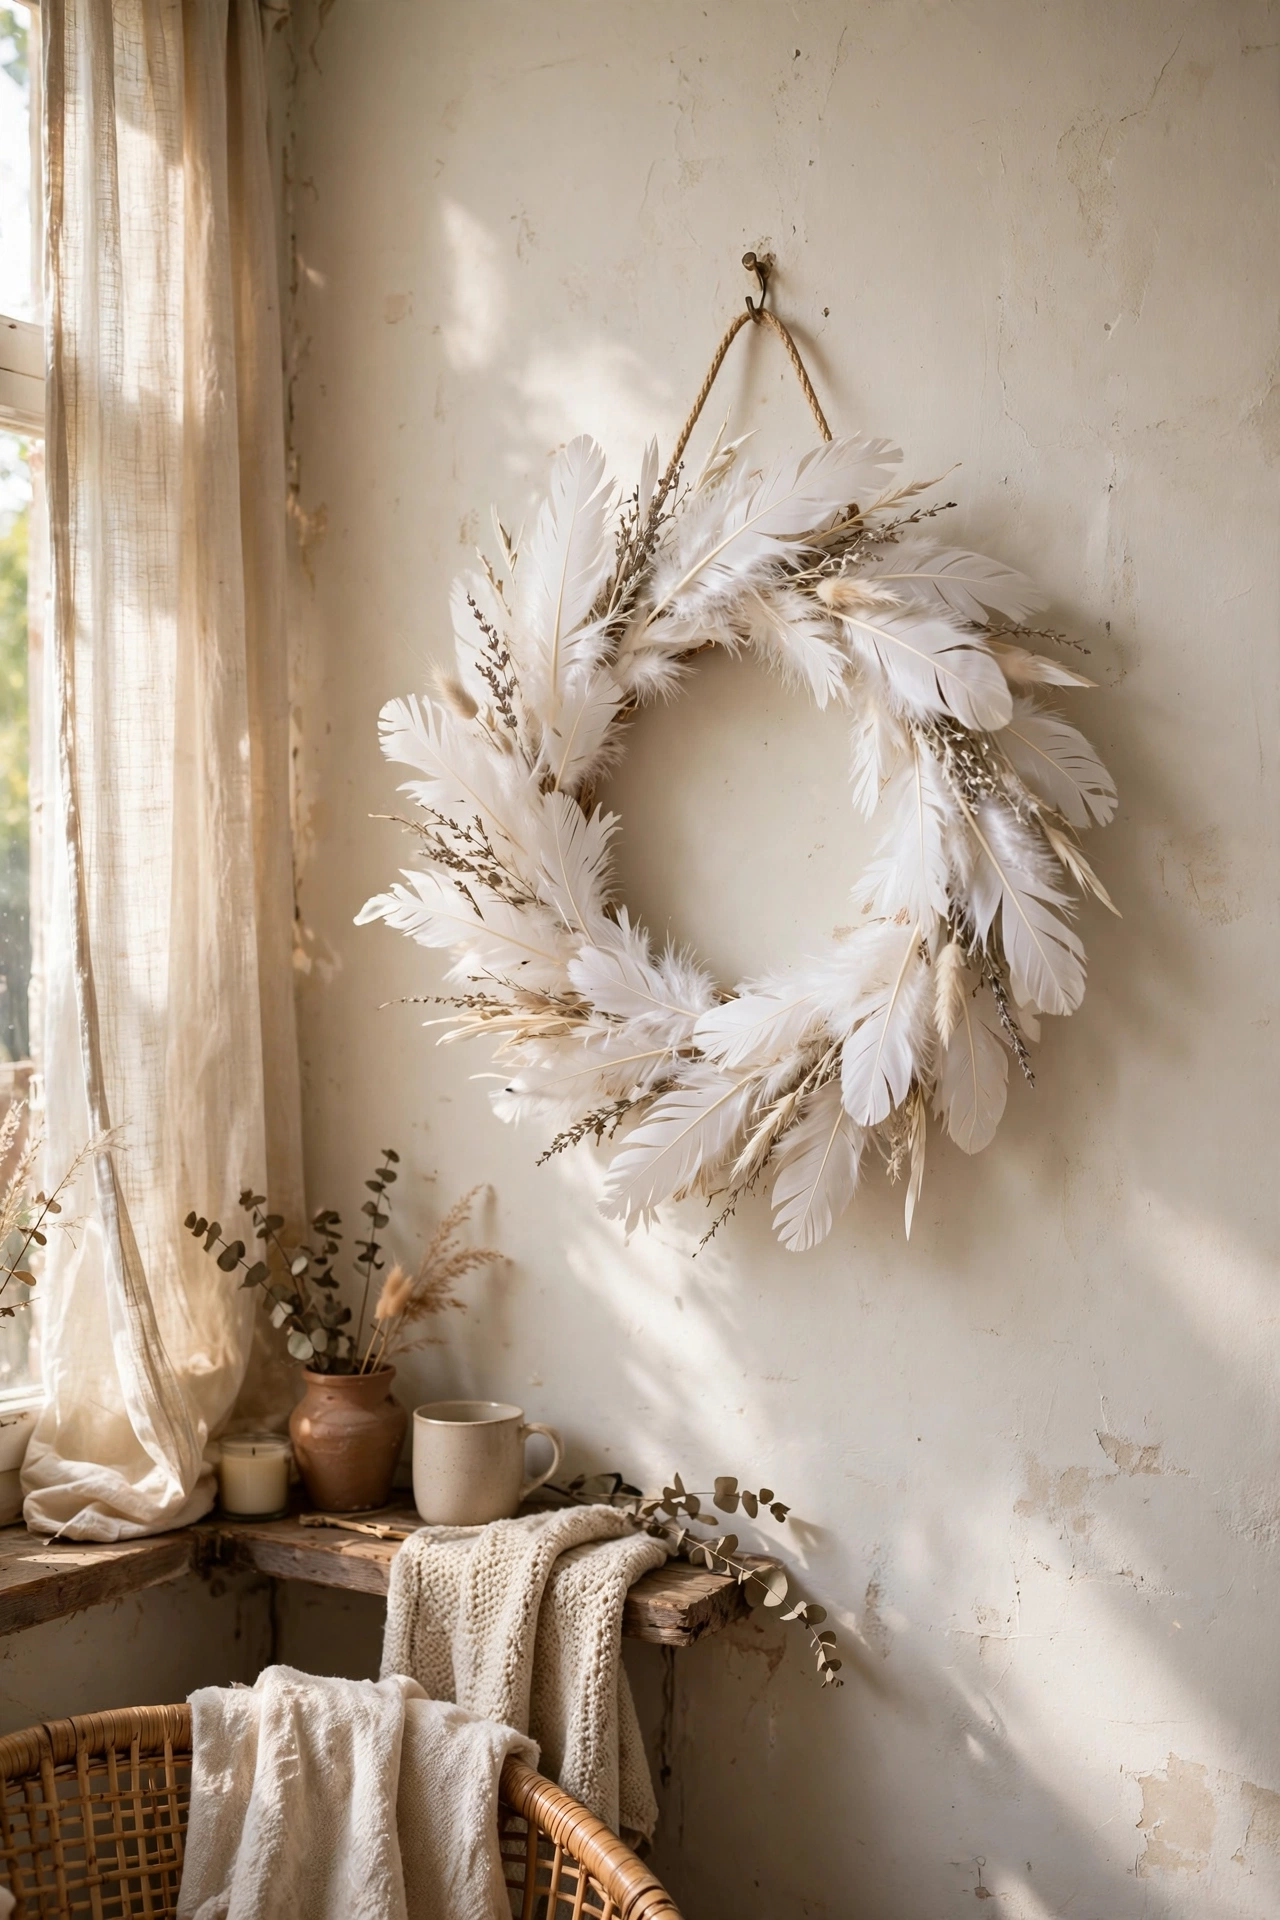
White craft feathers glued onto a foam ring make a soft, snowy winter wreath with real elegance. I glued the feathers in overlapping rows starting from the outer edge and working inward, keeping them all pointing the same direction. Handle them gently and do not over-glue, because clumps of glue show through the feathers. Mine cost $12 in feathers and looks like something from a boutique window. Keep it indoors away from draughts, because feathers shed in a breeze. If you love cosy winter styling, the candle projects in (see also: 25-diy-candle-decor-ideas-on-a-budget) pair perfectly with this one.
Cost: ~$10-16 | Time: 2 hours
That’s a full year of front doors covered. Save this one for your next rainy-day project list, and start with whichever season is closest.
Keep the DIY momentum going: (see also: 25-diy-candle-decor-ideas-on-a-budget) (see also: 17-diy-planter-ideas-on-a-budget) (see also: 17-weekend-diy-projects-you-can-finish-in-a-day)
