25 Minimalist-Style DIY Projects That Look Expensive
My living room used to have a shelf of knick-knacks I never really looked at. When I started trying Minimalist diy decor, I gave myself one rule: every project had to make a room feel calmer, not busier, and nothing could cost more than a pizza night. What I learned is that minimalism is not about empty rooms, it is about restraint, and restraint is cheap. A blank canvas with three brush strokes looks more expensive than a wall crammed with prints, because your eye finally gets to rest.
All 25 of these projects cost under $25, and most land under $12. You need basic supplies: acrylic paint, a can of matte spray paint, a glue gun, sandpaper. The hardest skill is knowing when to stop before you add one thing too many. Start with the walls, move through the house, and watch how a calmer room makes everything in it look considered.
Walls Without the Clutter
1. Abstract Beige Line Art Canvases
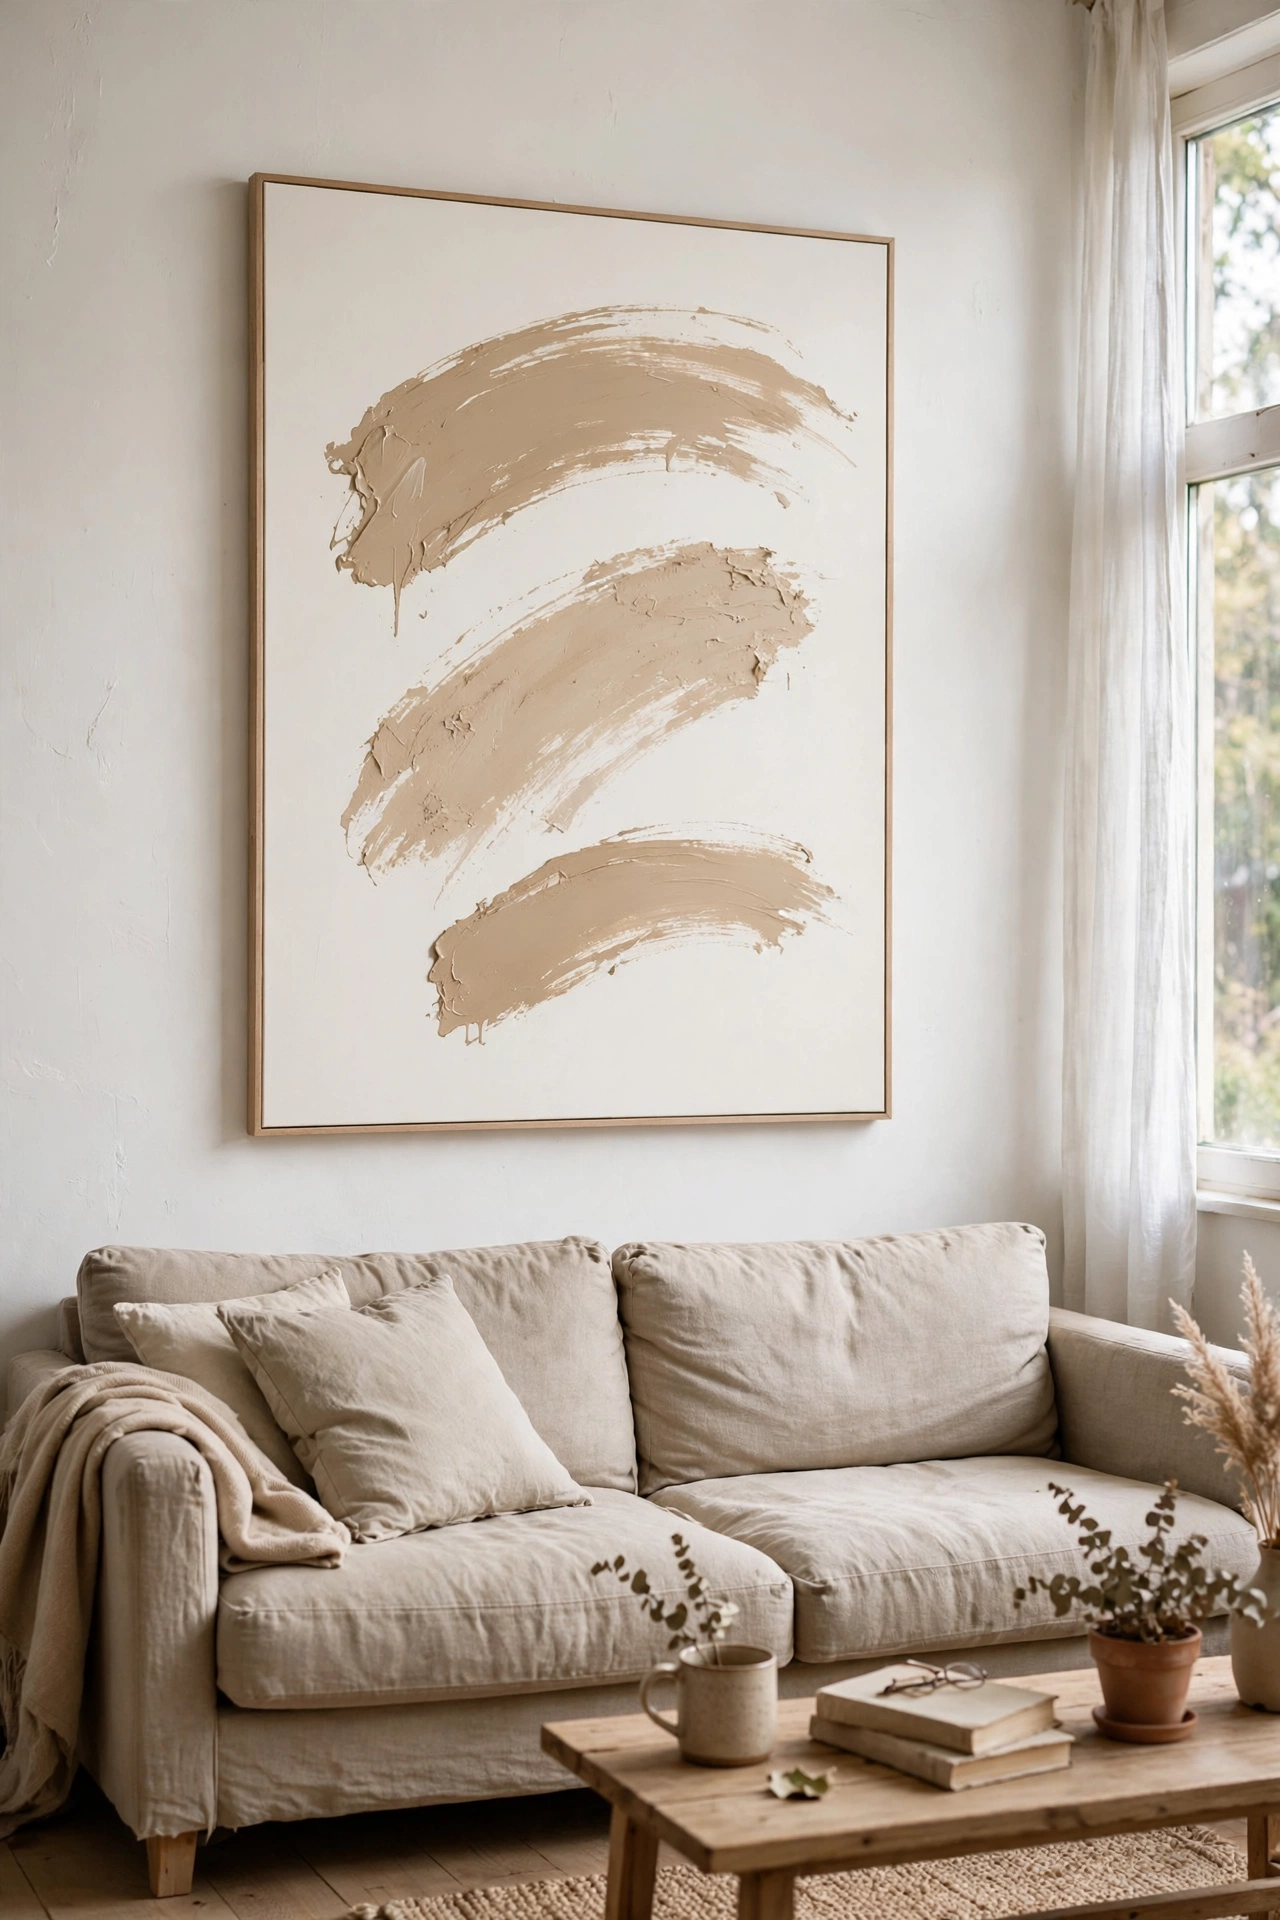
Large-scale abstract art is the fastest way to make a room feel designed, and three beige brush strokes on a blank canvas do the job for about $9. Paint the canvas warm white and let it dry fully, then mix beige acrylic with a little white and drag a wide brush across in one confident arc. Add two or three more strokes, hang the canvas on its own, and stop. I tried this as a pair over my sofa. The first canvas got five strokes and looked busy, so I painted over it and learned that restraint really is the design. Three strokes, generous negative space, and it passes for a gallery piece.
Cost: ~$8-12 | Time: 45 minutes plus drying
2. DIY Plaster-Look Relief Wall Panels
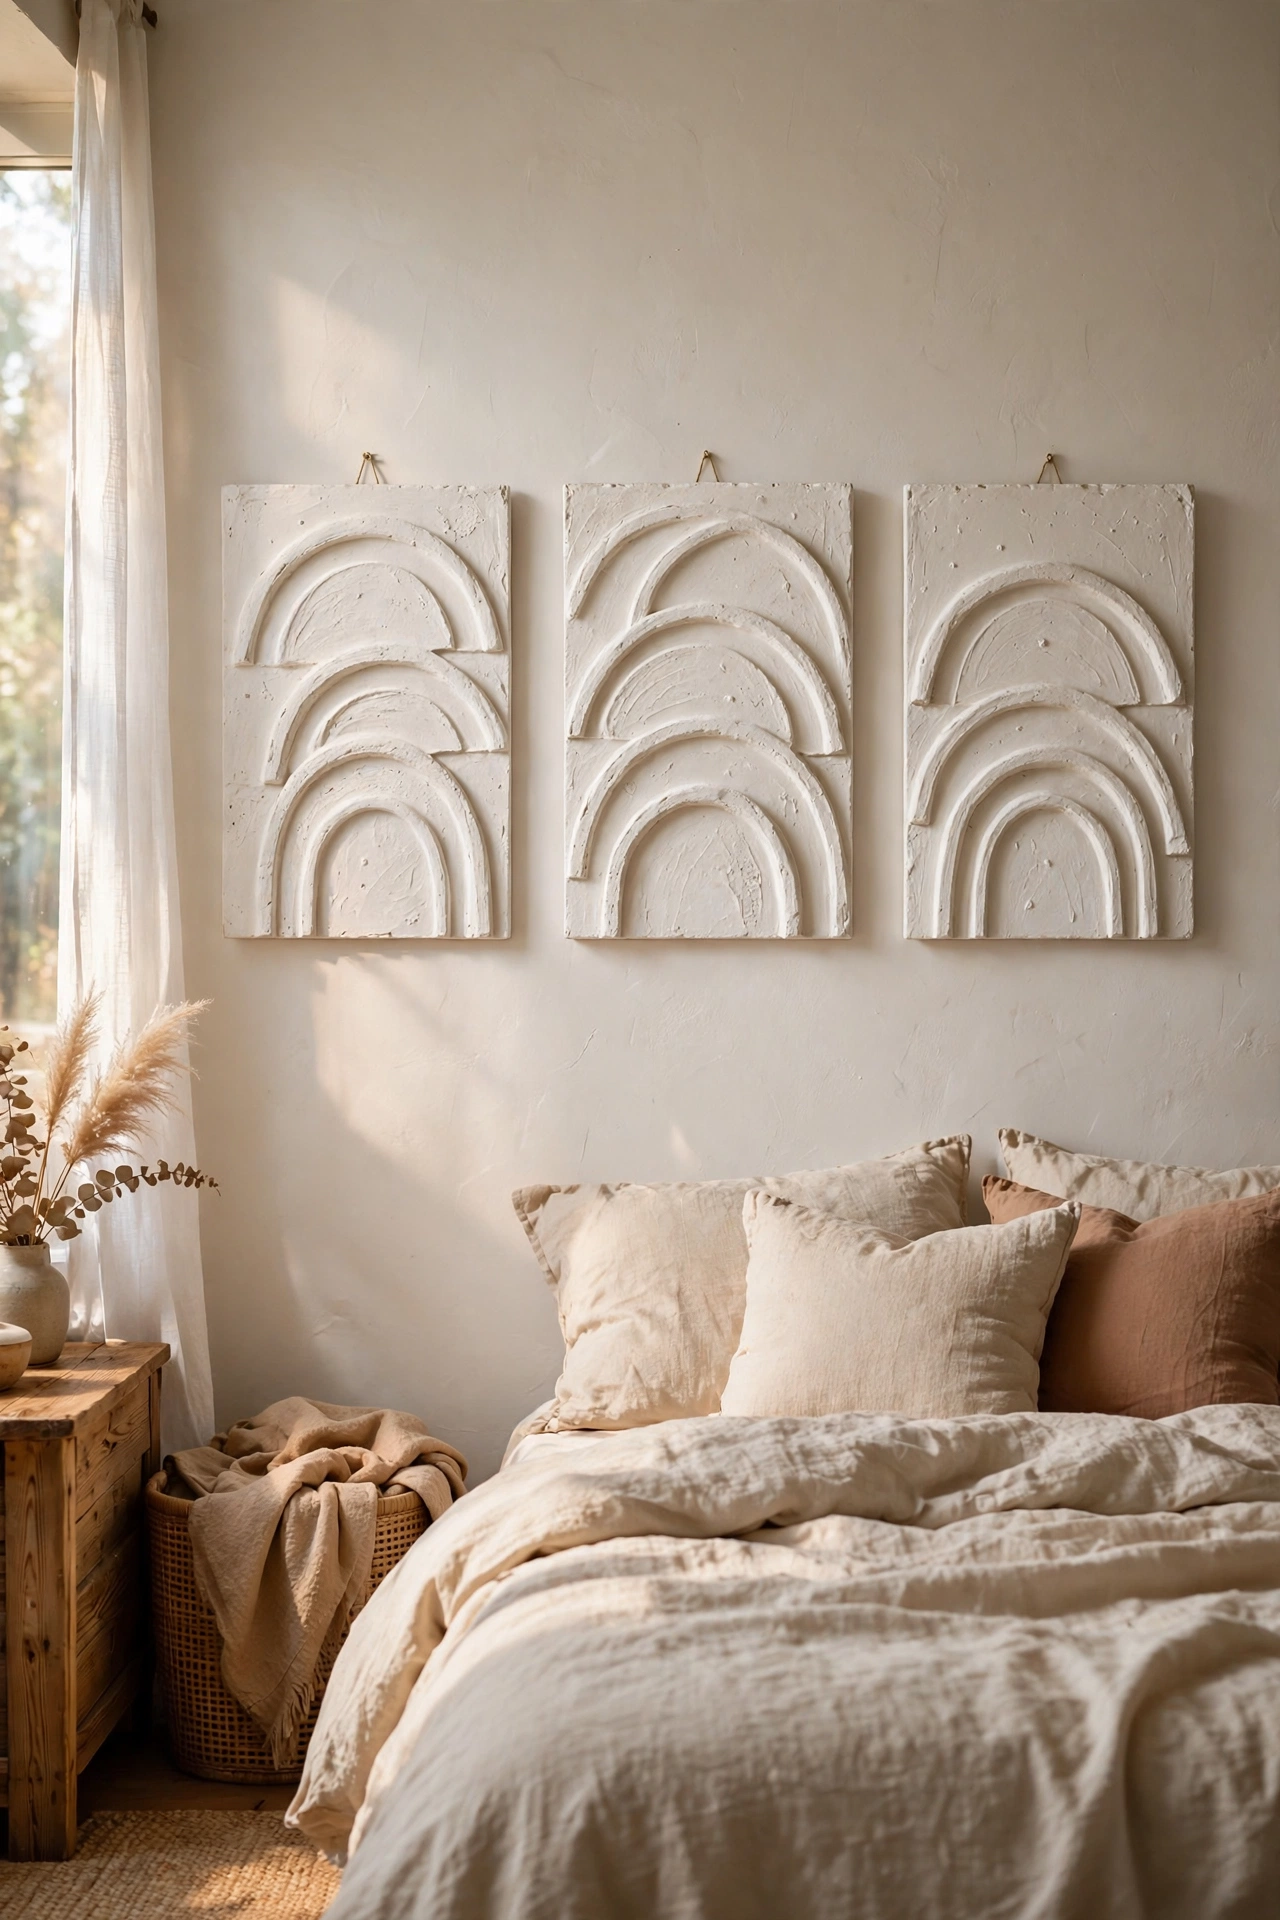
Textured plaster art sells for hundreds in shops, but a canvas and a tub of joint compound get you the same look for pocket money. Spread a thin layer of ready-mix compound over the canvas with a palette knife, carve slow arcs into the surface with the knife edge, and let it dry for a full day before painting it matte white. I made three panels in an afternoon. My mistake was pressing too hard on the first one, which cracked as it dried, so use light touches and keep the layer under half a centimetre. Hung together they read as one sculptural piece.
Cost: ~$10-15 | Time: 1 hour active, 24 hours drying
3. Floating Oak Picture Ledges
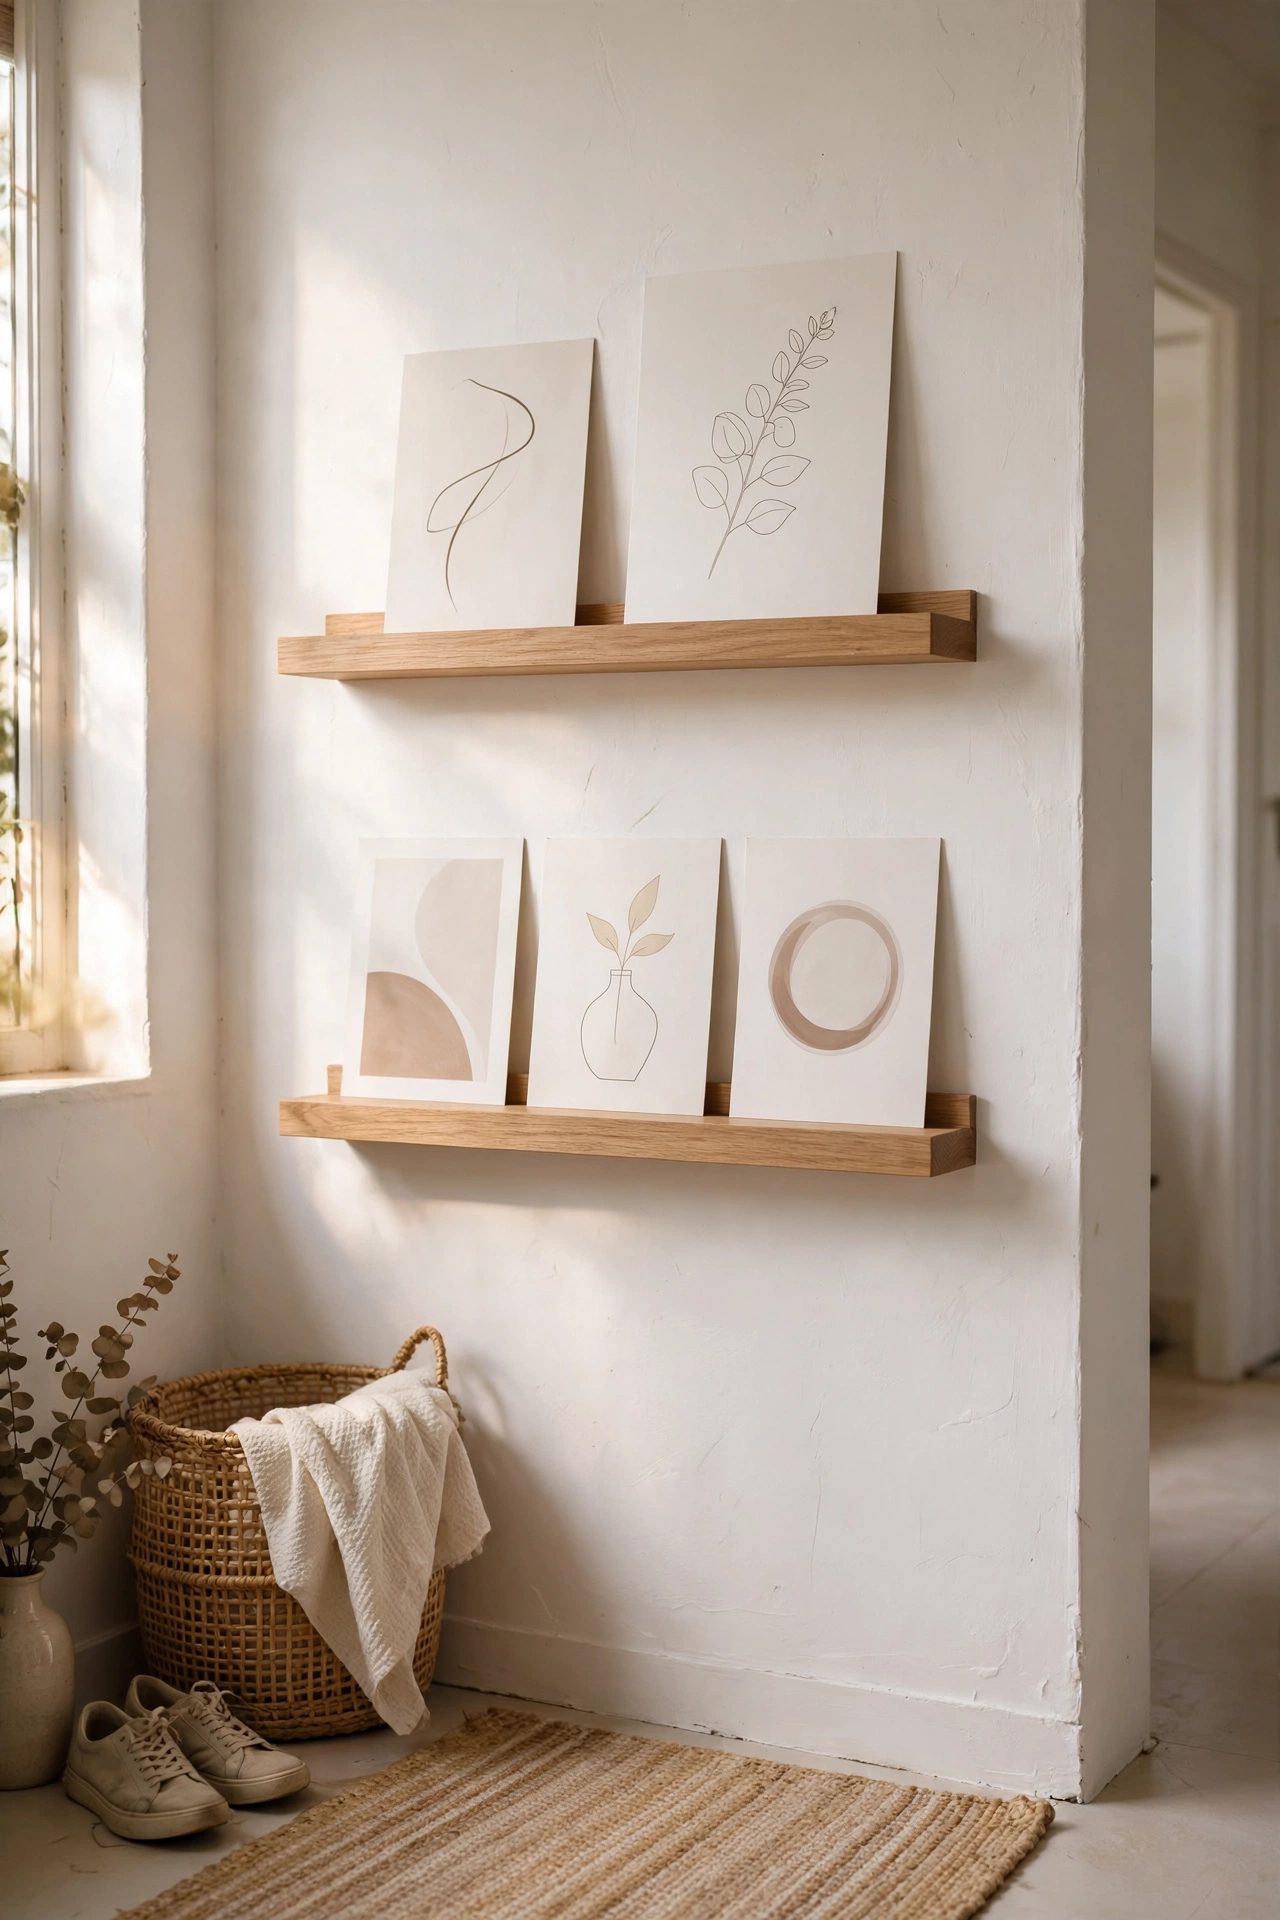
A narrow oak ledge lets you lean art without a single frame hanging on the wall, which keeps everything feeling airy. Cut a pine board to length, sand it smooth, stain it light oak, and mount it with concealed brackets so the board appears to float. I put two ledges in my hallway with thirty centimetres between them. My mistake was eyeballing the gap, so one sat crooked all week until I remeasured. Use a spirit level and a tape measure, not your instincts. Lean two or three simple prints against the ledge and the whole hallway looks curated.
Cost: ~$12-18 | Time: 1.5 hours
4. Painted Arch Behind an Existing Mirror
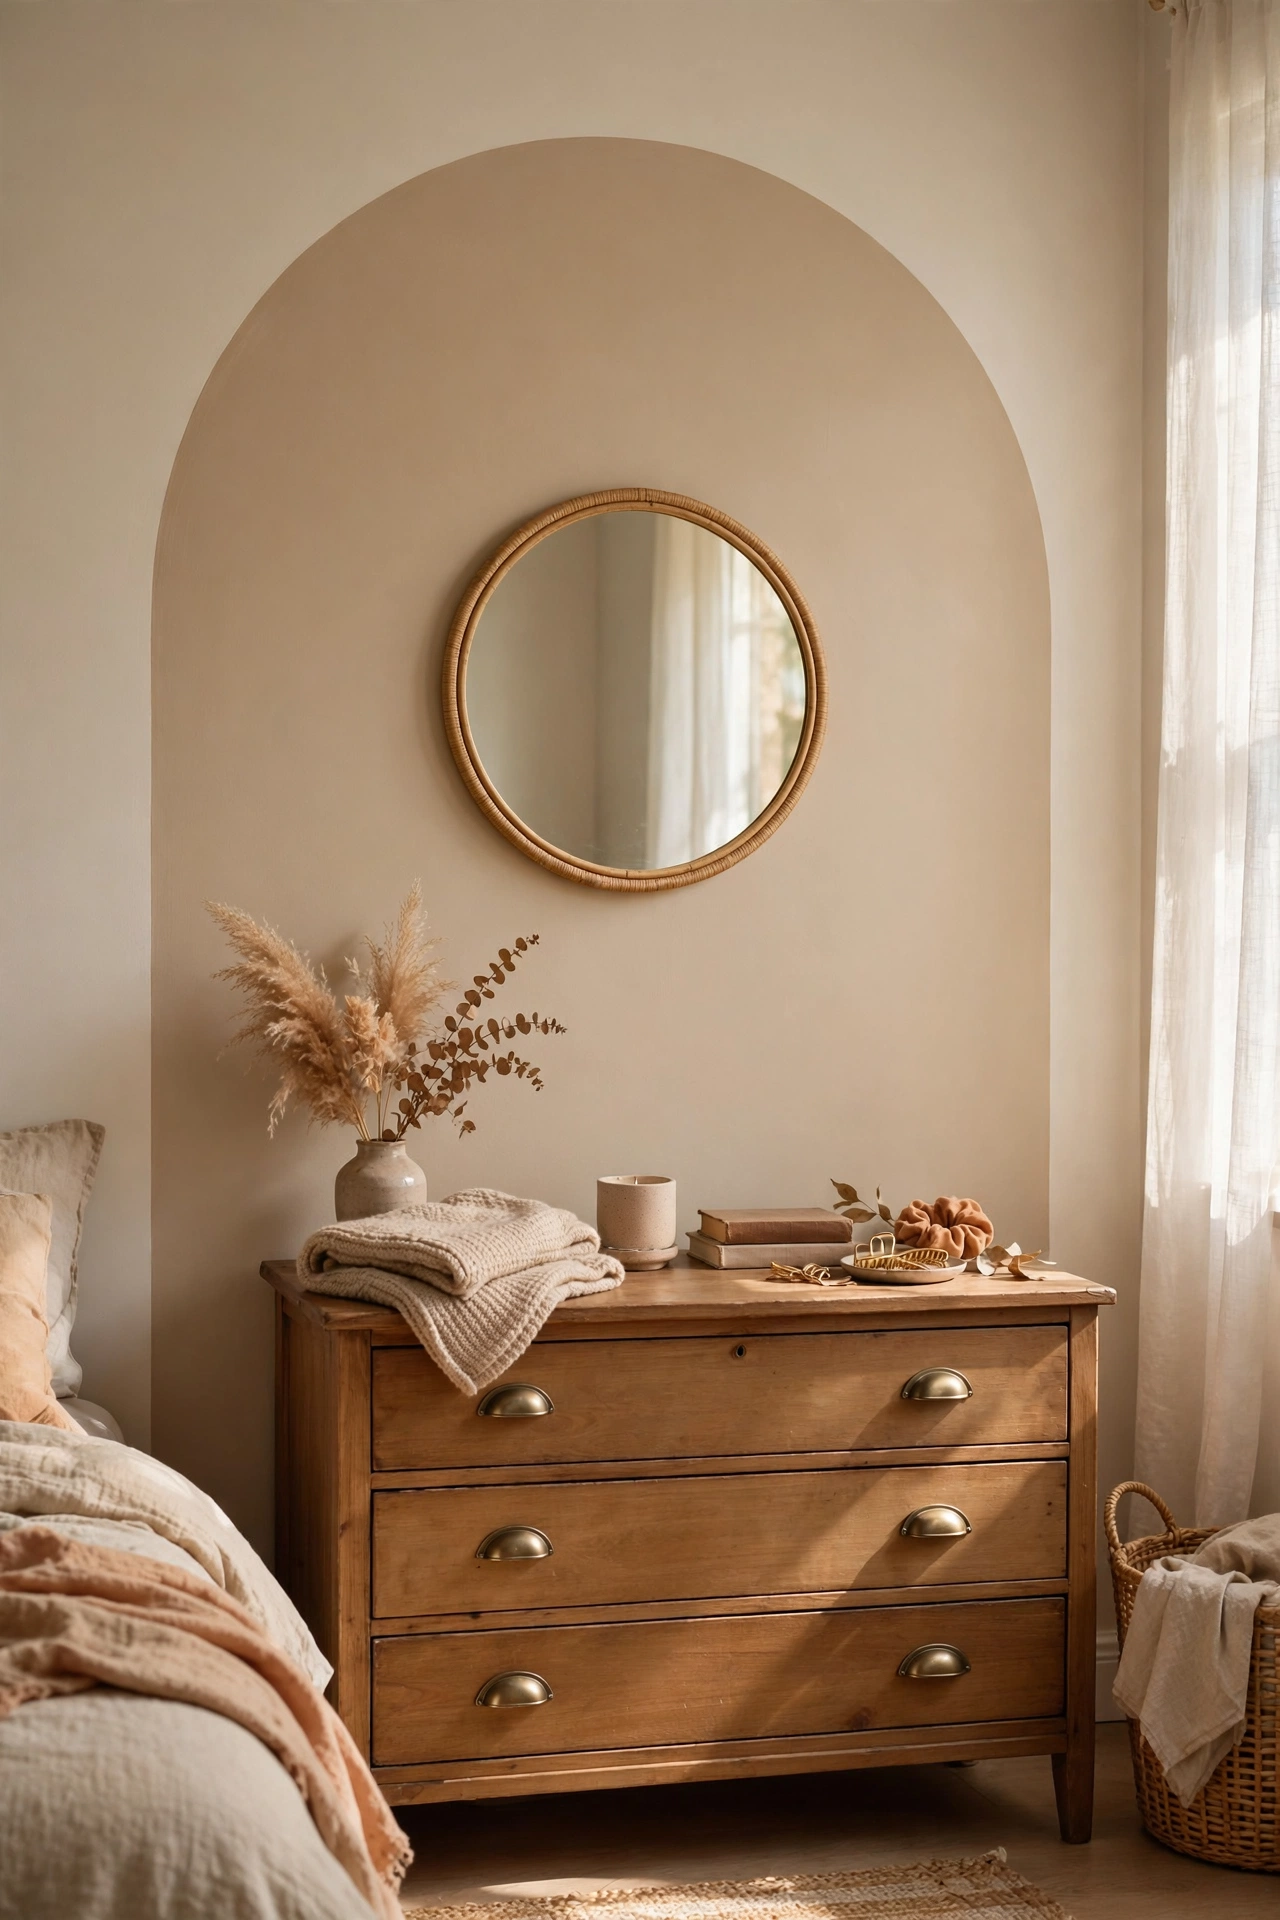
Painting a single arch on the wall behind a round mirror turns both into one intentional composition. Trace a large arch with a pencil on a string, fill it in with a muted paint colour like warm greige, and hang your mirror so its centre sits on the arch. I did this in my bedroom with leftover paint from another project, so the whole thing cost me nothing. My mistake was freehanding the curve, which wobbled; the pencil-on-string trick gives a perfect arc in two minutes. It looks like a deliberate design feature, not a cheap trick.
Cost: ~$5-10 | Time: 2 hours plus drying
5. Single-Line Wire Portraits
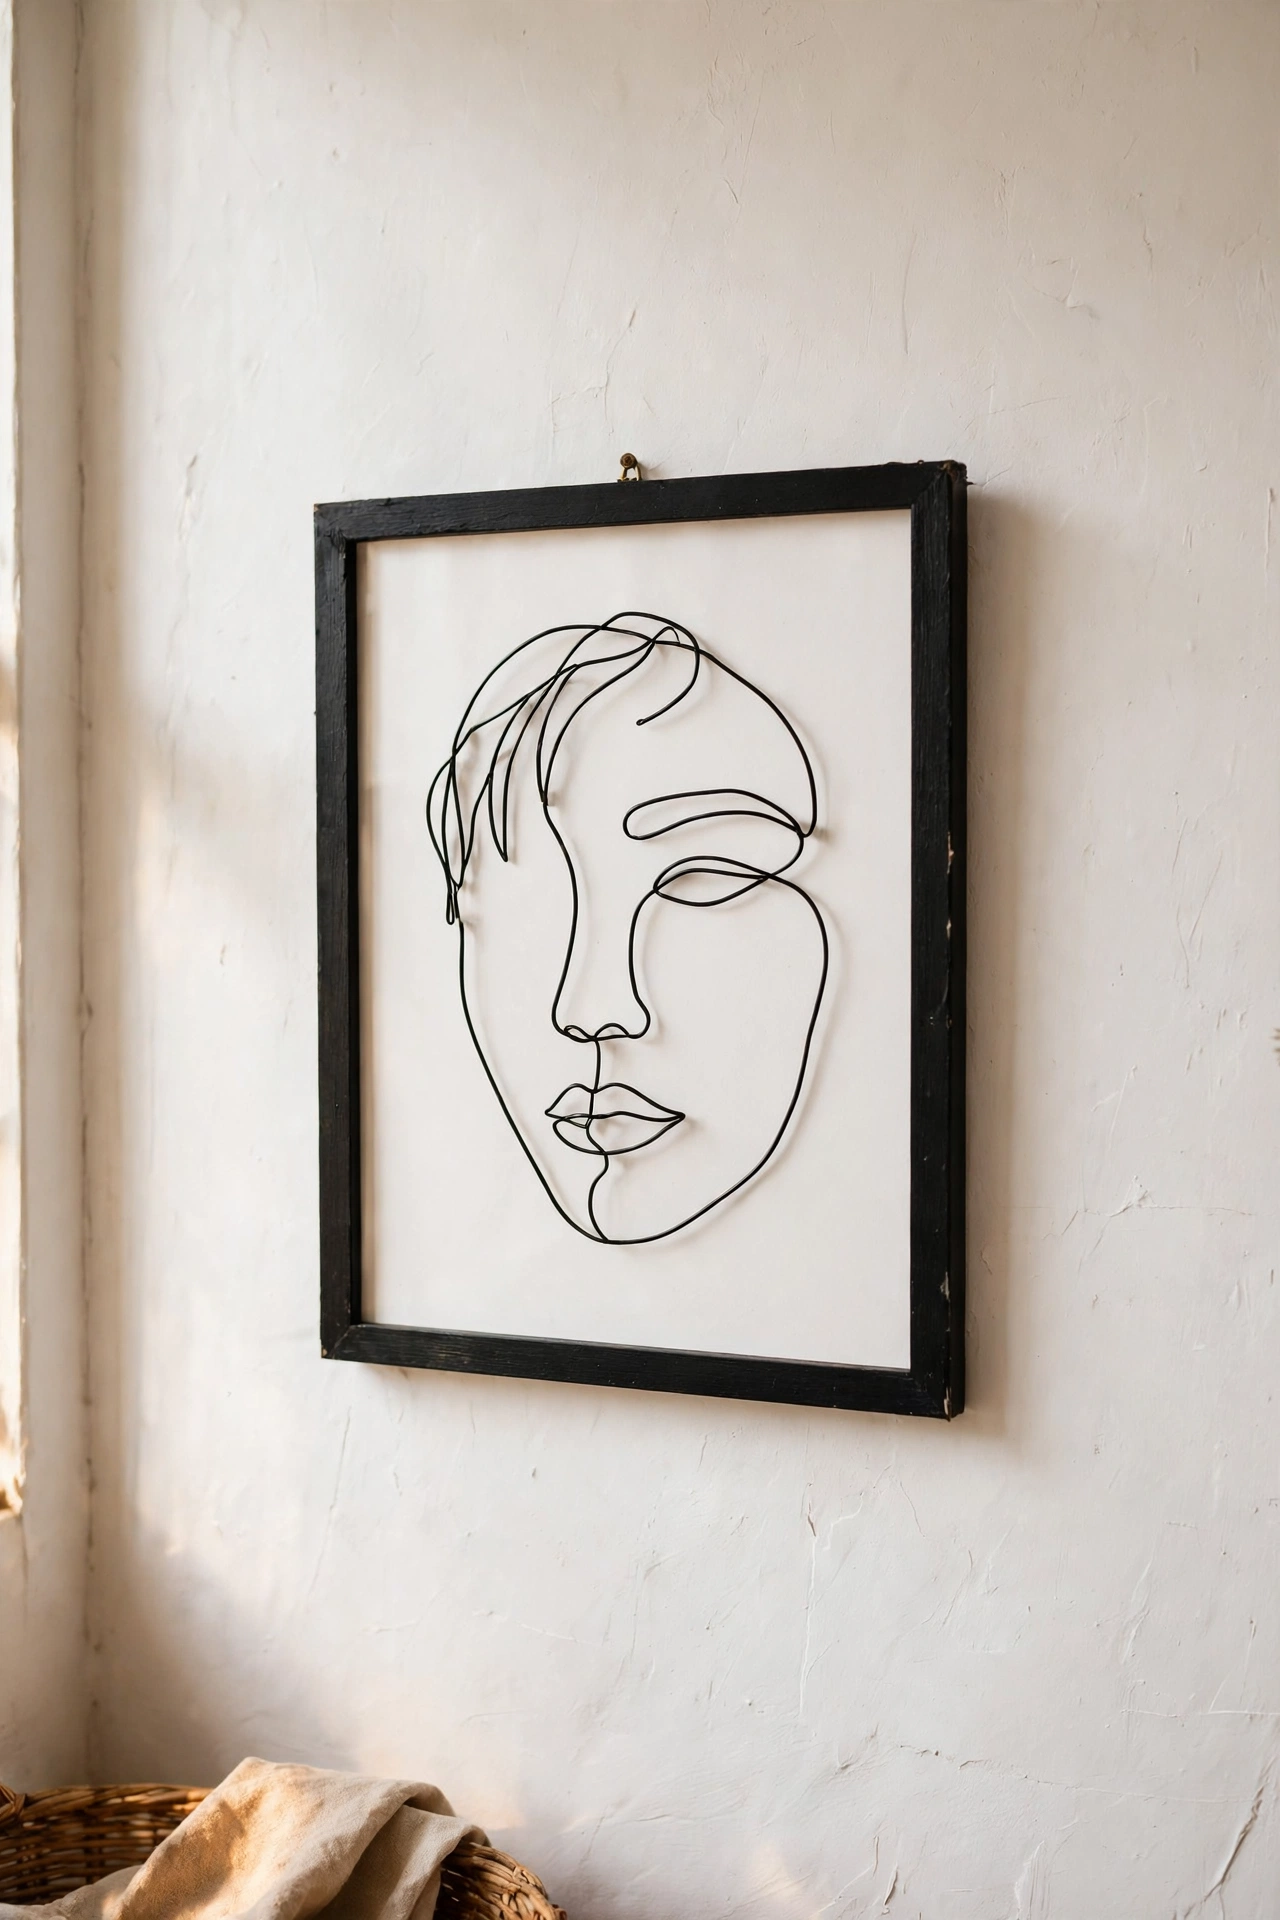
Continuous-line portraits have a gallery feel, and bending one from craft wire is simpler than drawing one. Print a reference profile, then slowly bend black-coated wire to follow the line of the face, twisting small loops to hold direction changes. I mounted mine on a plain white board inside a thin black frame. I tried this twice: the first attempt looked like a tangle because I rushed the nose, so work slowly and bend around a pencil for tight curves. One portrait on a bare wall is enough; minimalism means one statement, not five.
Cost: ~$6-10 | Time: 1 hour
6. Linen-Covered Pin Boards
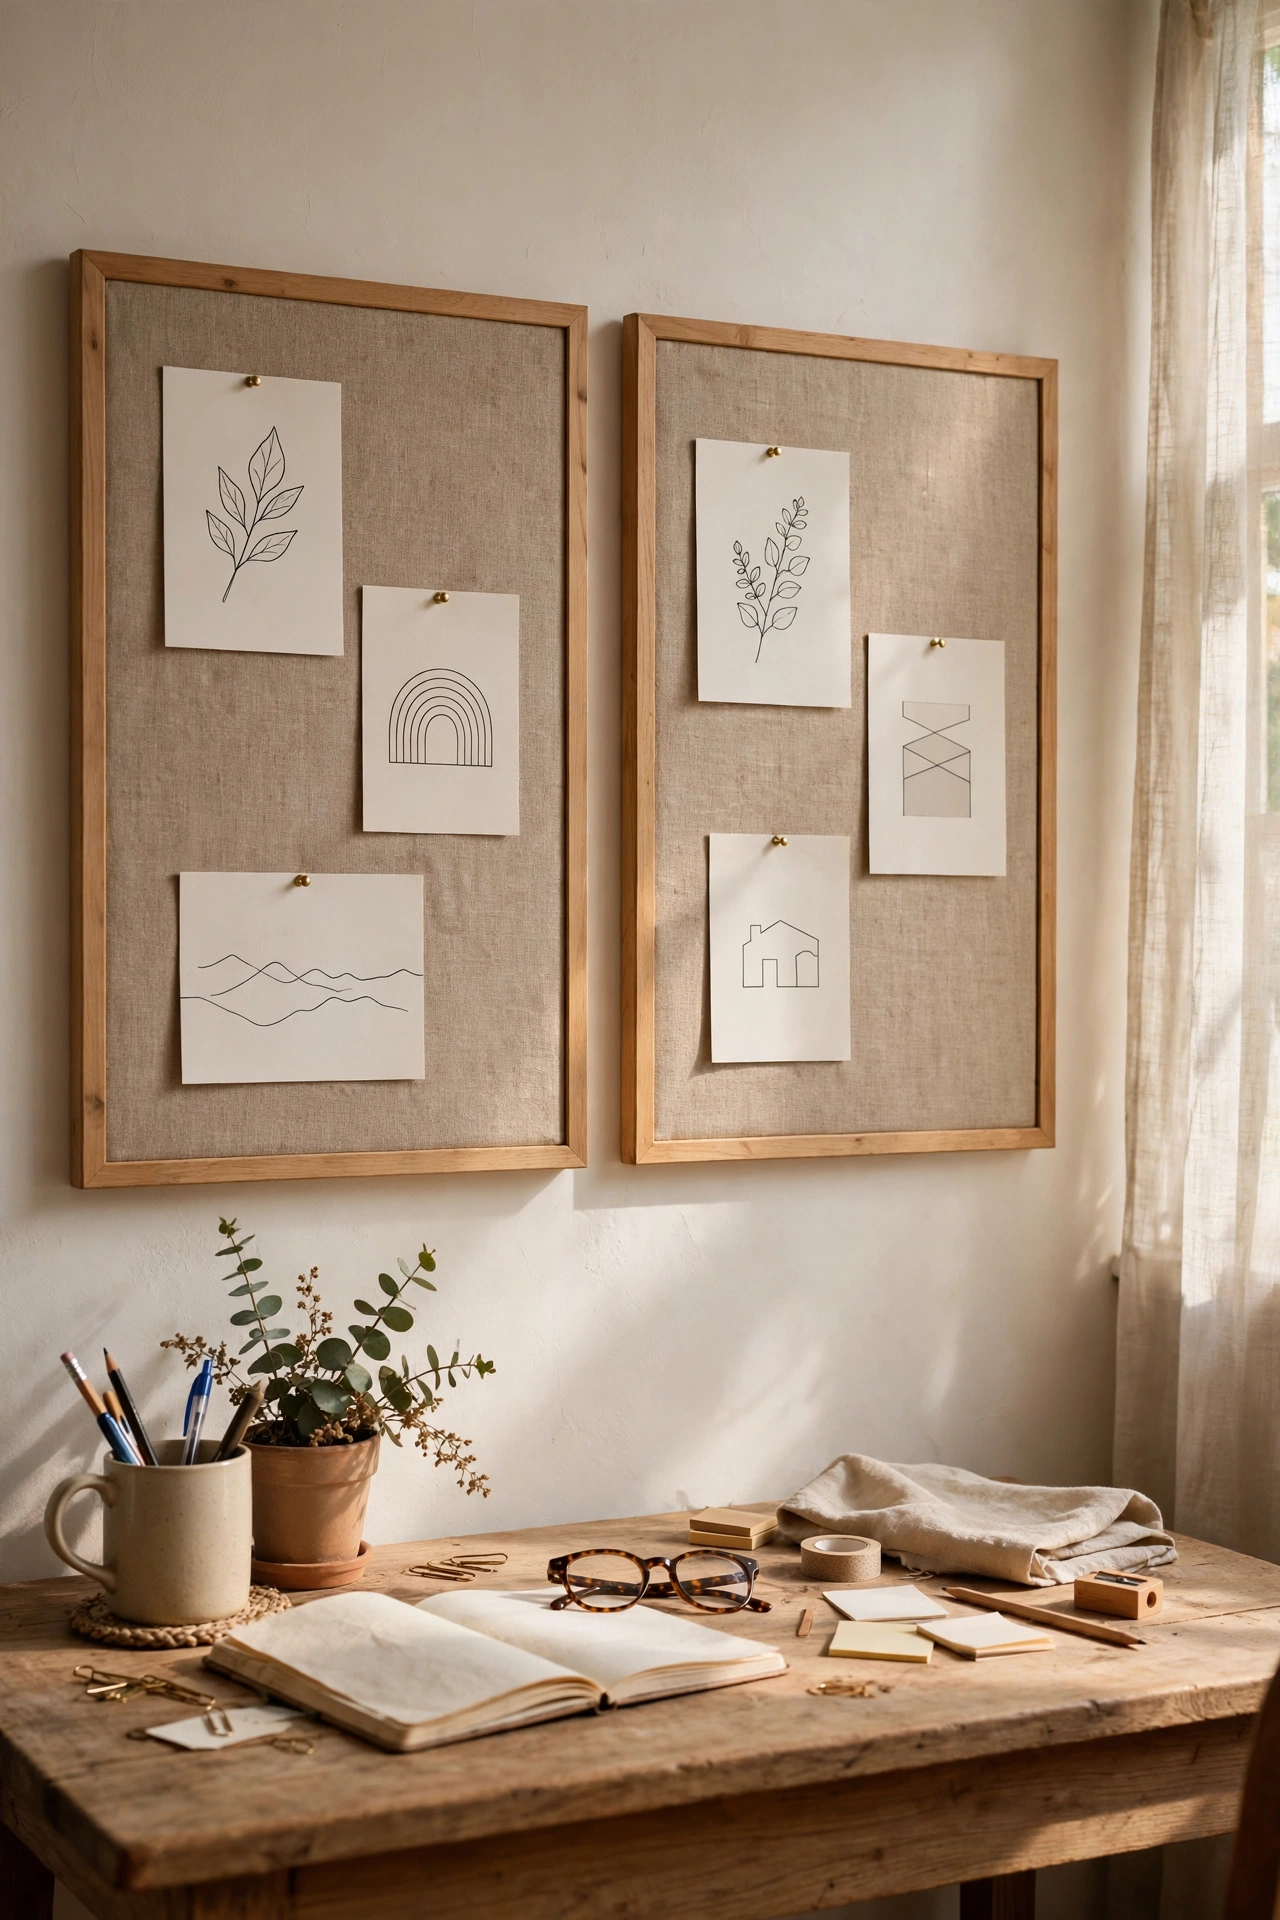
Pin boards usually look messy, but wrapped in natural linen they become soft, quiet wall texture. Stretch a linen tea towel or fat quarter over a cork tile, wrap it like a parcel, and staple the back. I made a pair for my home office and pinned only three prints to each, keeping the rest bare. My mistake was using a busy patterned fabric on the first one, which defeated the whole point. Plain flax linen, minimal pins, and the board itself becomes the decoration. It keeps the desk area calm instead of cluttered.
Cost: ~$8-12 | Time: 30 minutes
7. Oversized Mat DIY Frames
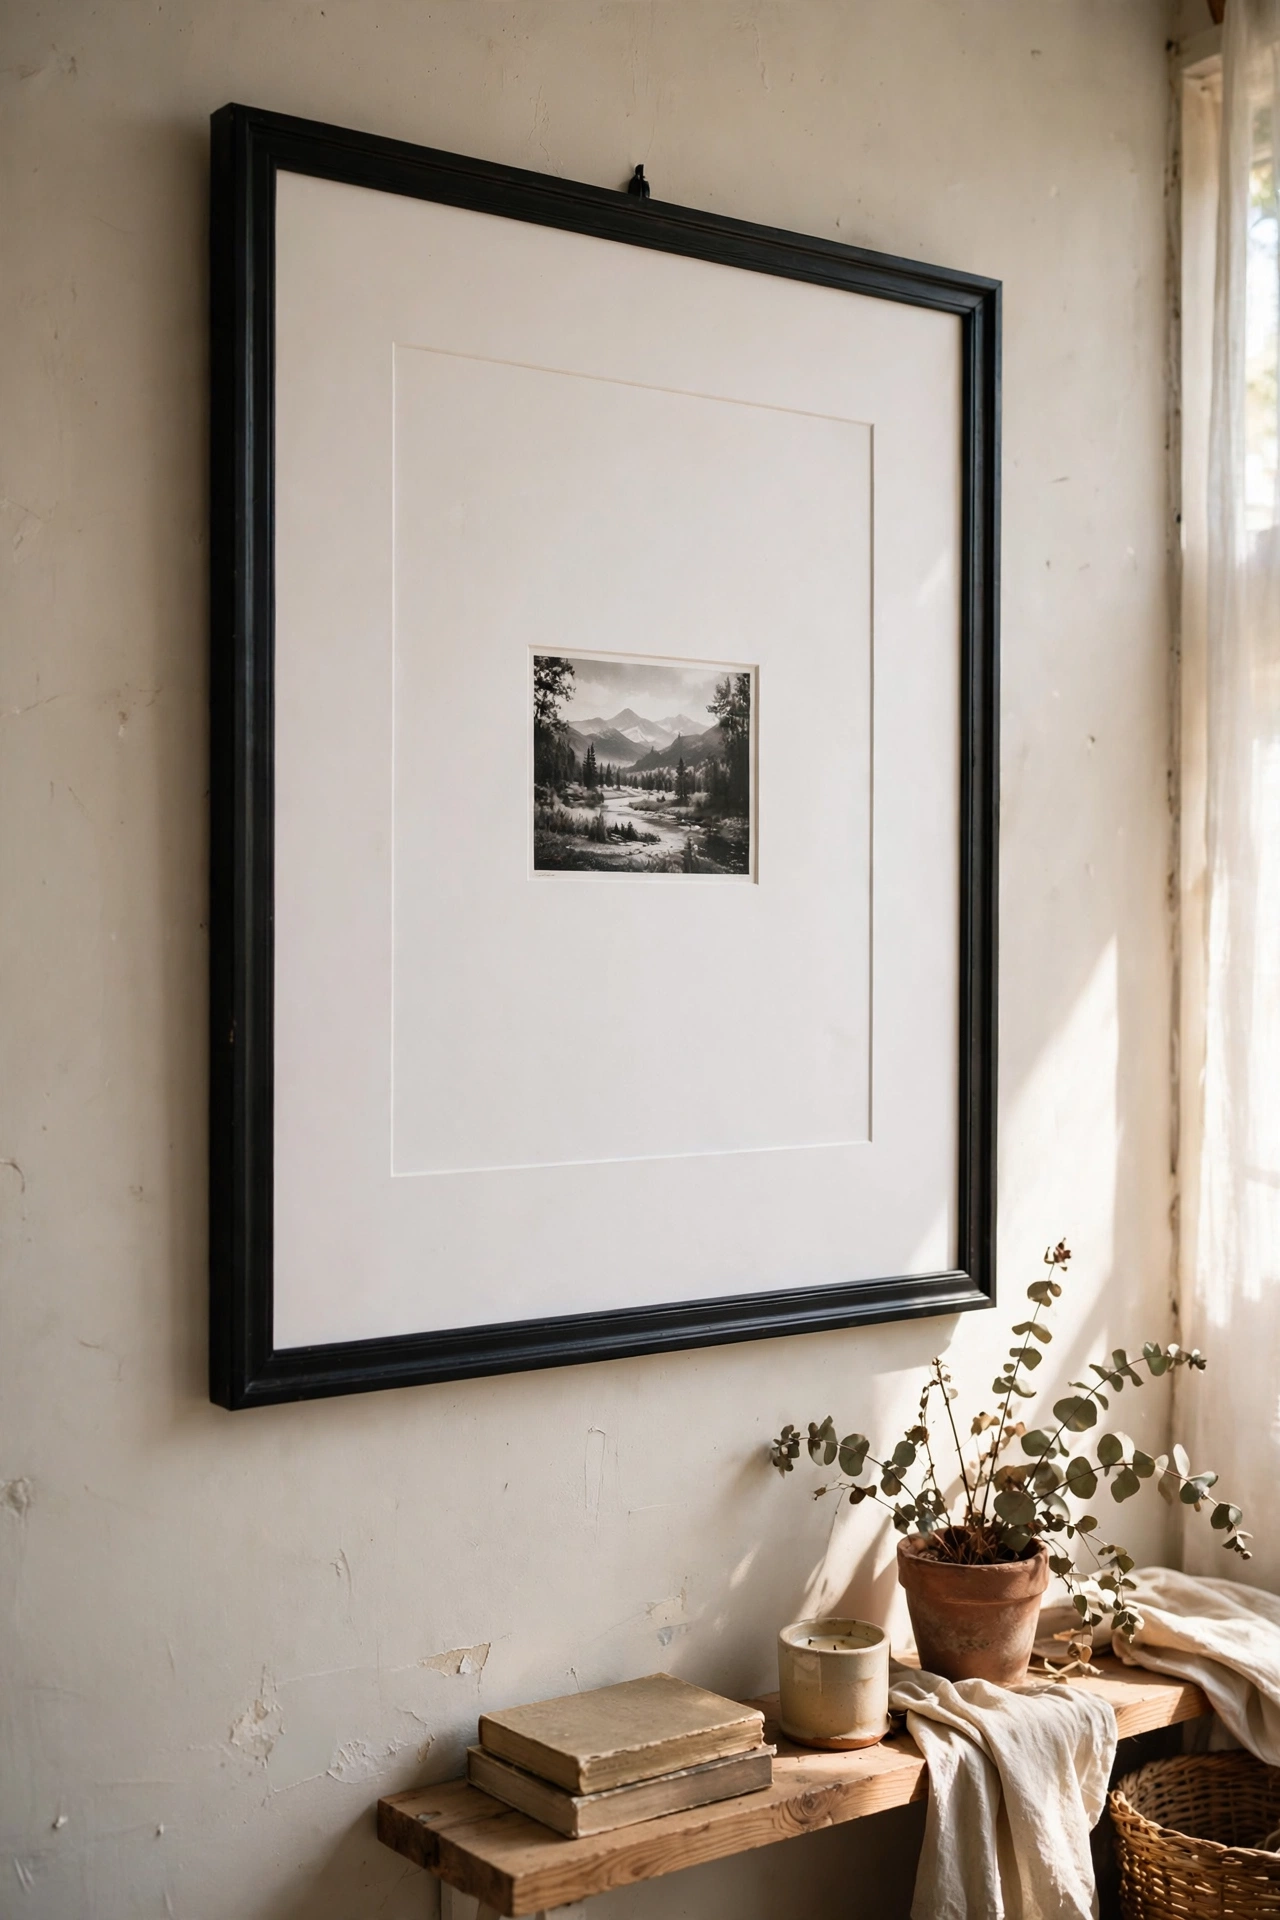
A huge mat with a tiny print inside is a classic gallery trick that makes even a free printable look expensive. Buy a large cheap frame, cut a mat from mount board with a craft knife so the window is small, and centre a small black-and-white print. I framed a phone photo of fog over hills this way. My mistake was cutting the window too big, which killed the drama; the print should be about a third of the frame. The white space does all the work, and guests assume it cost far more than it did.
Cost: ~$10-16 | Time: 45 minutes
8. Japanese-Style Washi Tape Grid
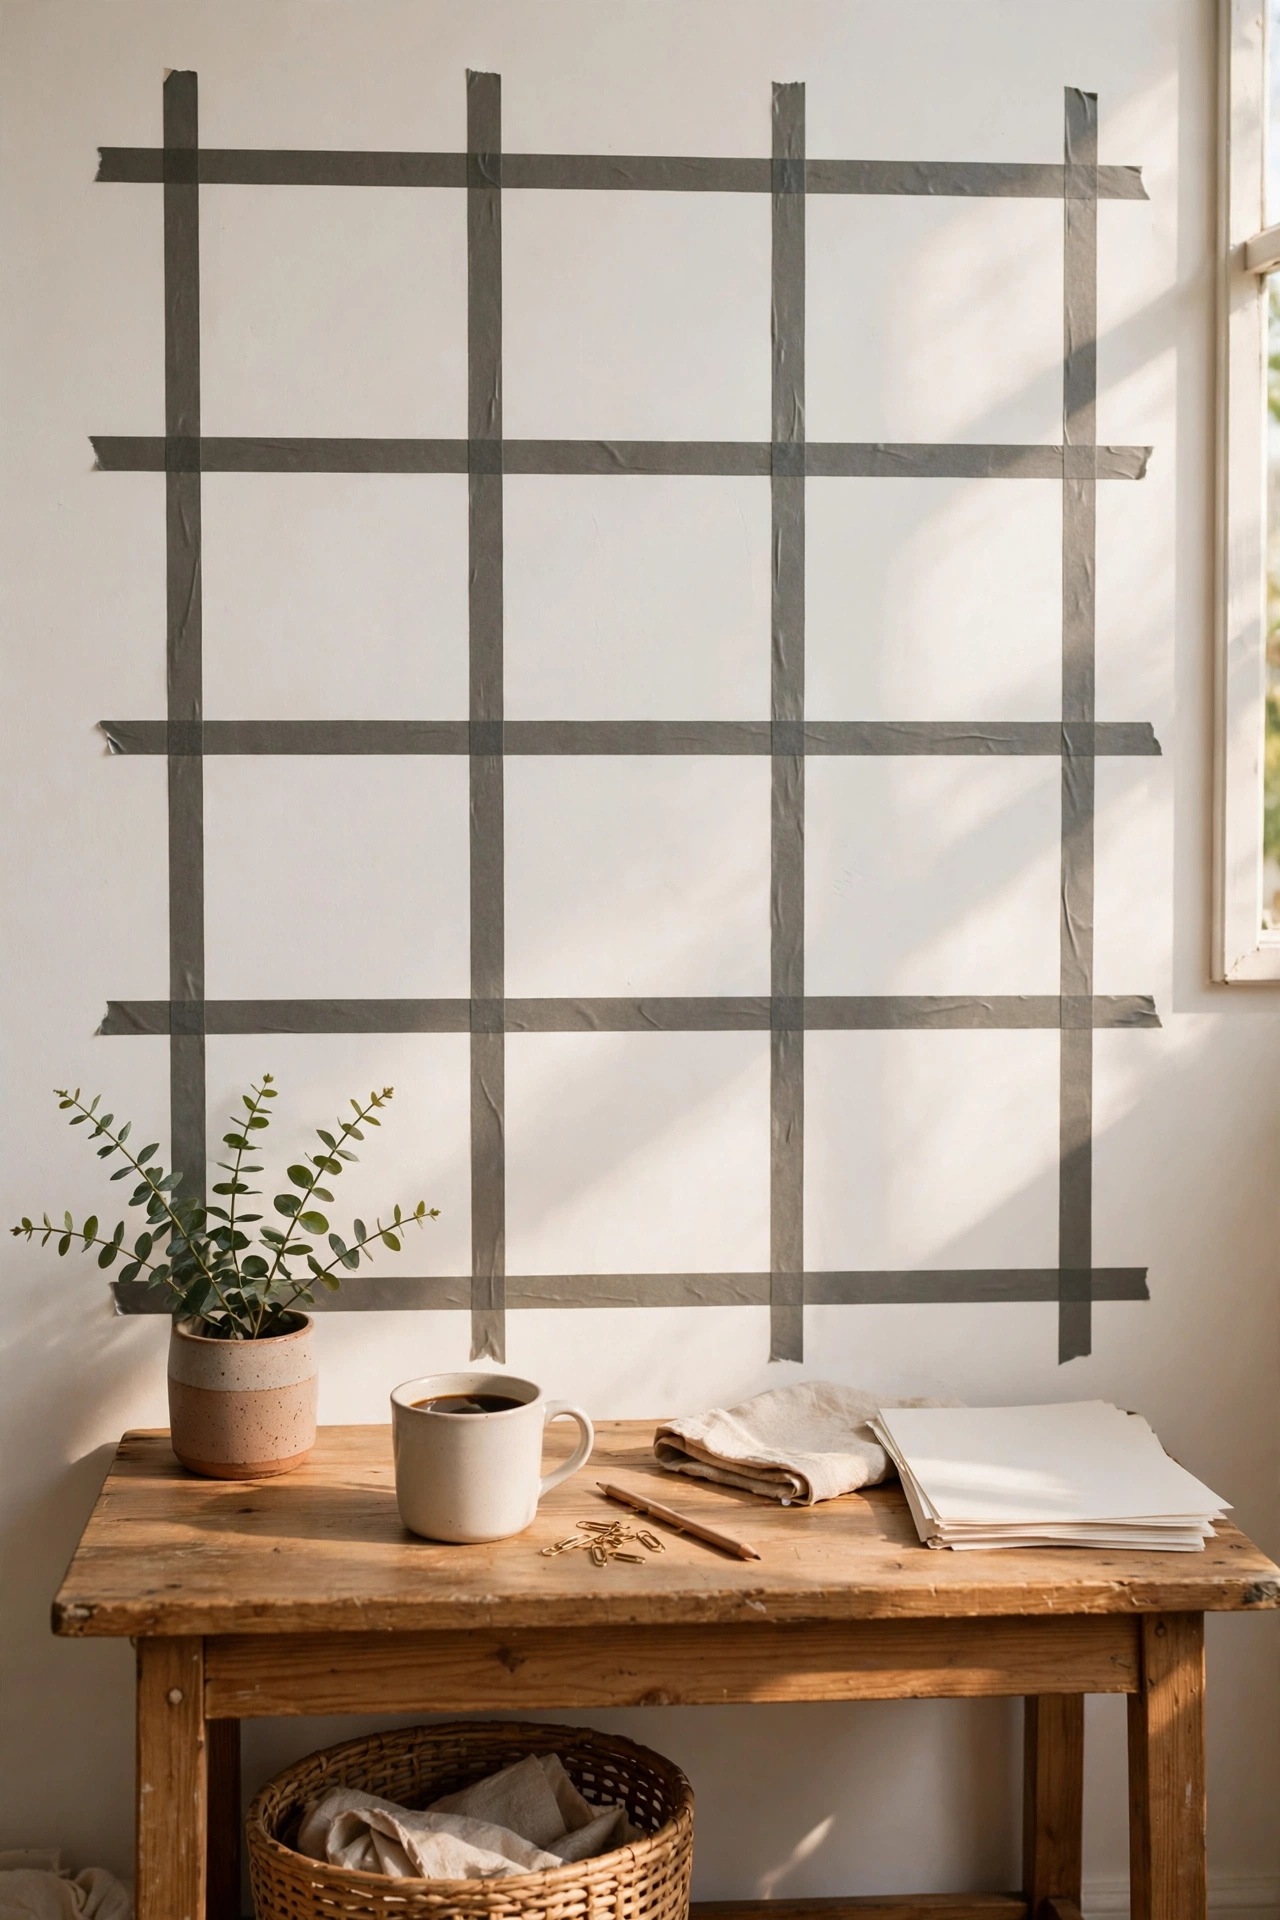
A precise washi tape grid on a blank wall gives the effect of panelling with zero commitment. Use matte washi tape in a neutral tone and lay out a grid of large squares with a spirit level, pressing the tape firmly so the lines stay crisp. I did this behind my desk in warm grey tape on a white wall. My mistake was using glossy tape first, which caught the light and looked cheap; matte tape disappears into the wall and reads as shadow lines. It peels off clean when you tire of it.
Cost: ~$5-8 | Time: 1 hour
Calm Corners and Shelving
9. Floating Timber Shelf Duo
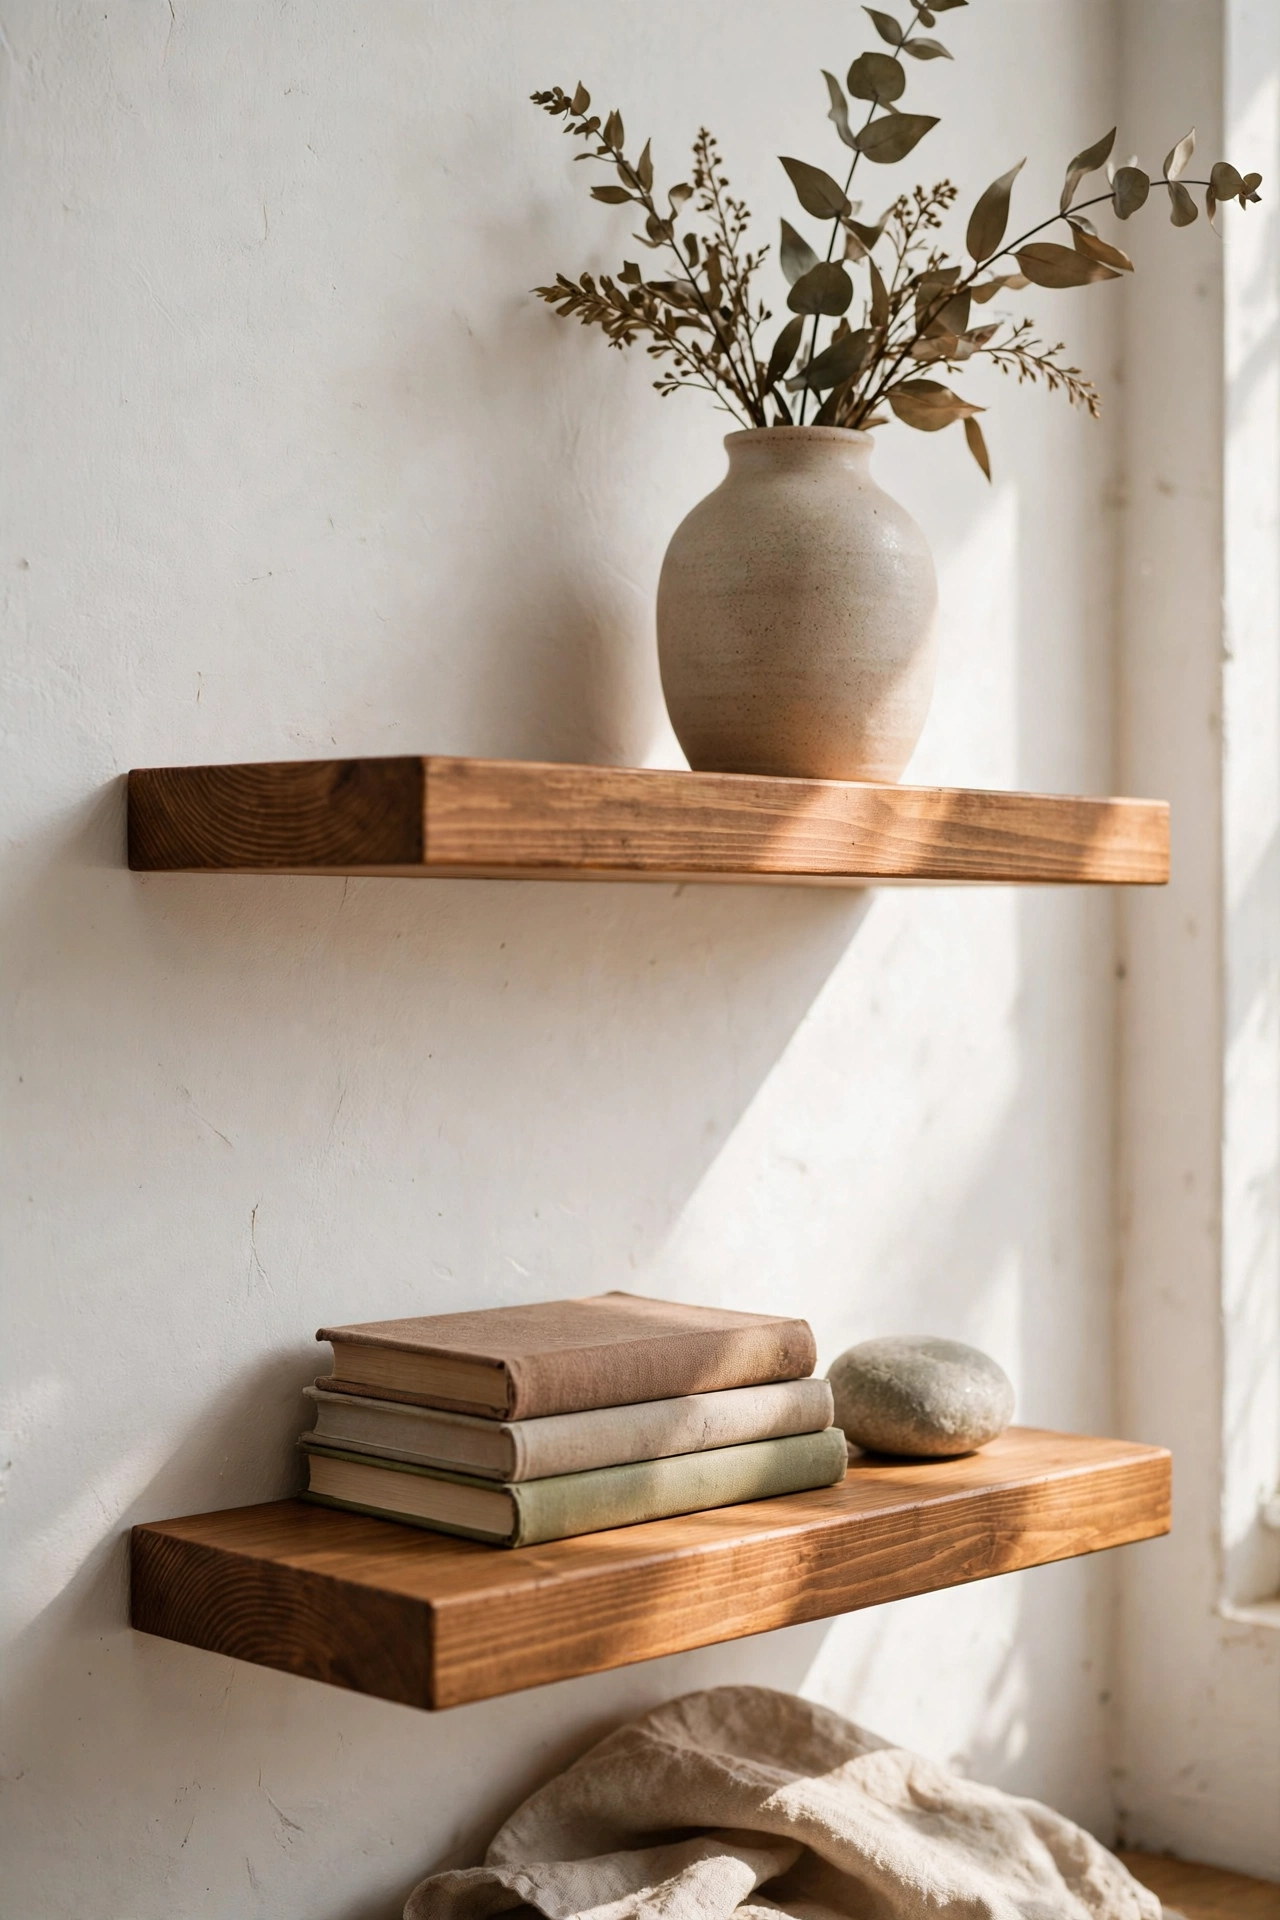
Two short floating shelves styled with restraint beat a whole bookcase of clutter. Mount solid pine shelves with hidden brackets, then style each with just three objects: something tall, something low, and something textural. I put a ceramic vase, a small stack of books, and a stone on mine. My mistake was filling every inch on the first attempt, which looked like a shop display; removing half the objects instantly made the remaining ones look more valuable. Sand and oil the wood for a soft sheen that reads far more expensive than raw pine.
Cost: ~$15-22 | Time: 2 hours
10. Styled Monochrome Book Stacks
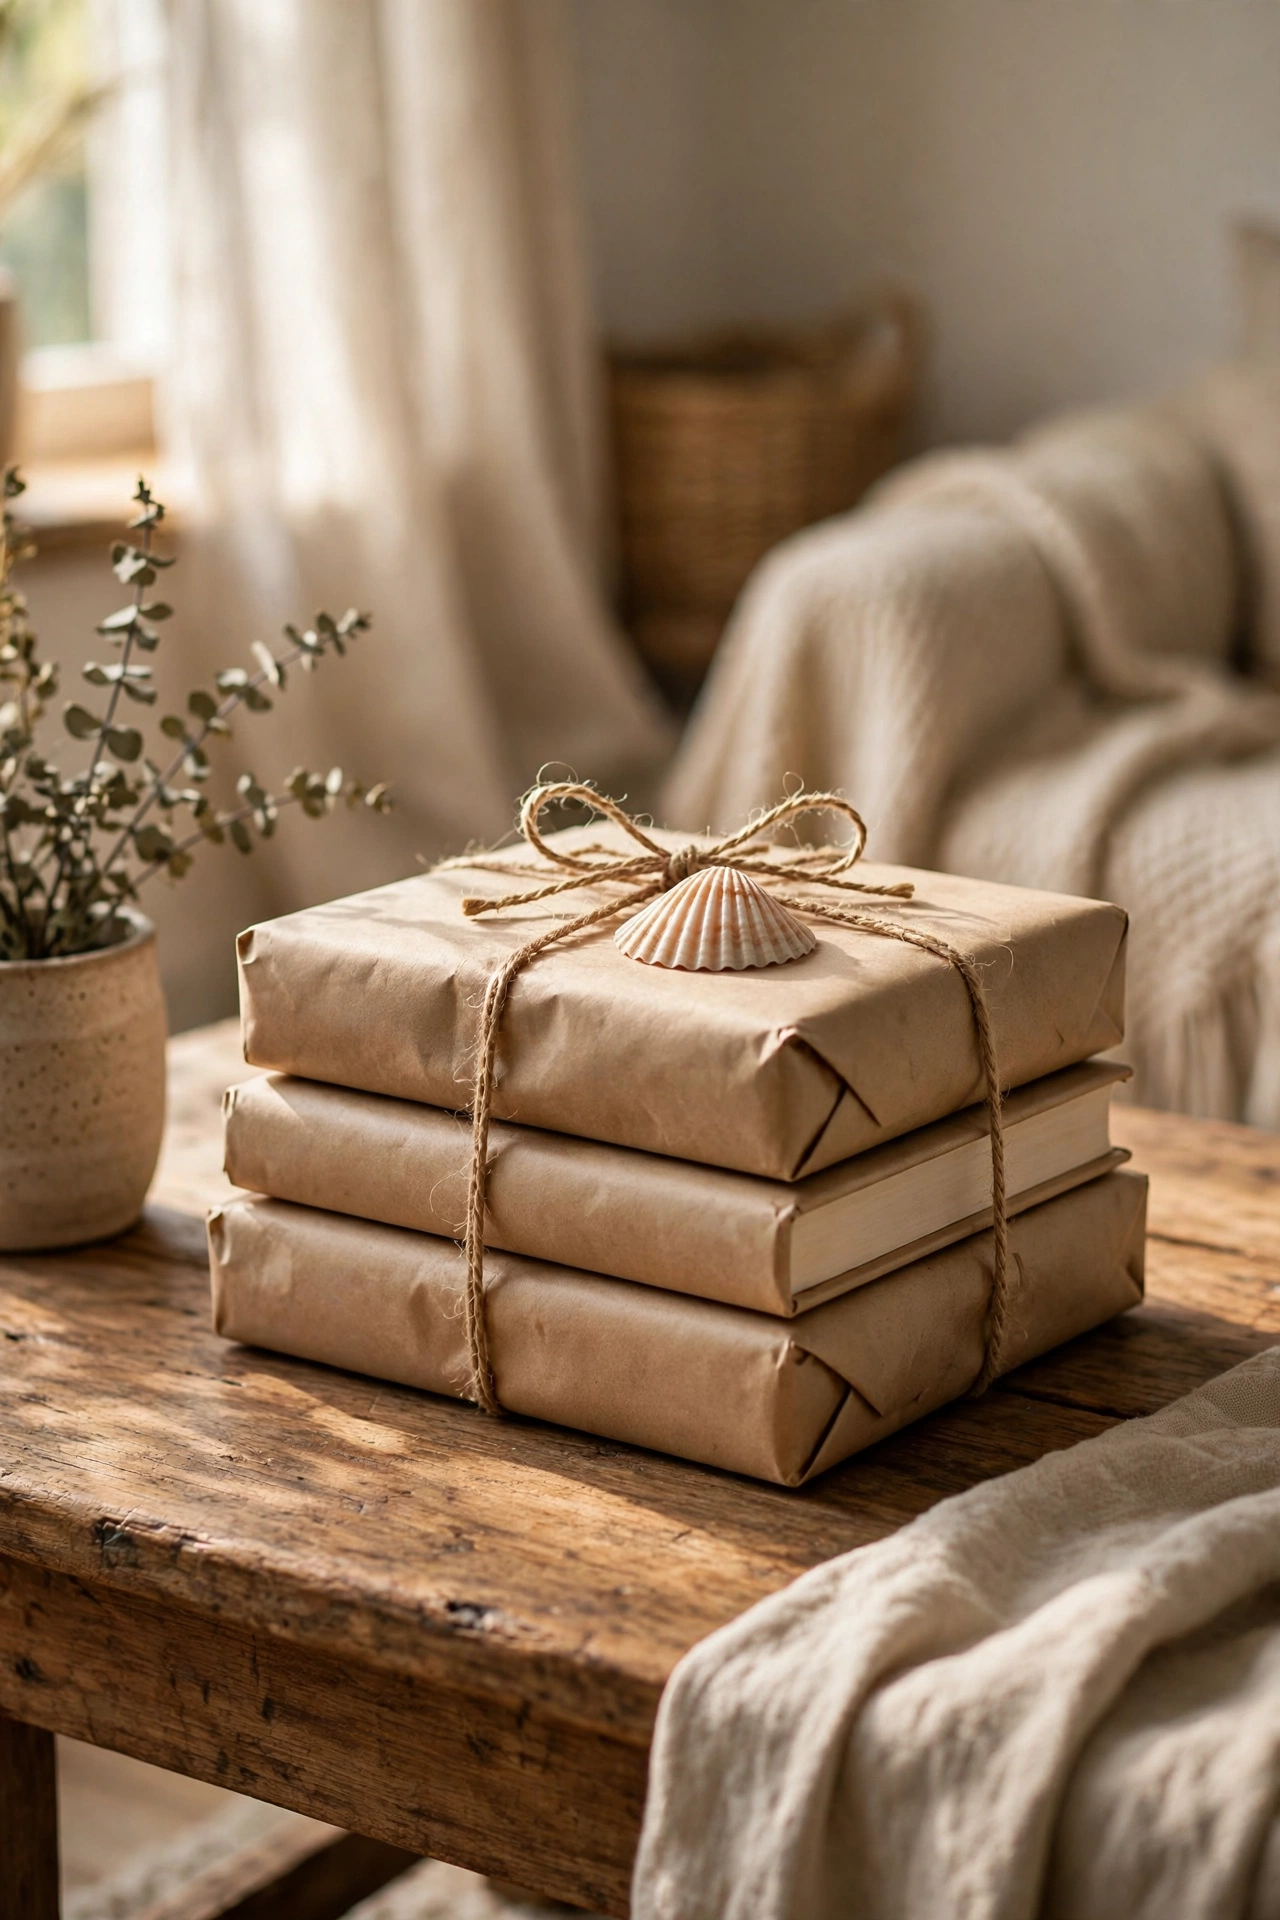
Books with clashing covers make shelves look noisy, but turned spine-in or wrapped in plain paper they become calm sculptural stacks. Remove the dust jackets, or wrap covers in kraft paper tied with twine, and stack four or five by size. I did this with the books on my coffee table. My mistake was mixing glossy paperback spines into the stack, which ruined the uniformity; keep every cover the same finish. A single small object on top, like a shell or candle, finishes the composition.
Cost: ~$3-6 | Time: 30 minutes
11. Stone-Effect Painted Plant Pots
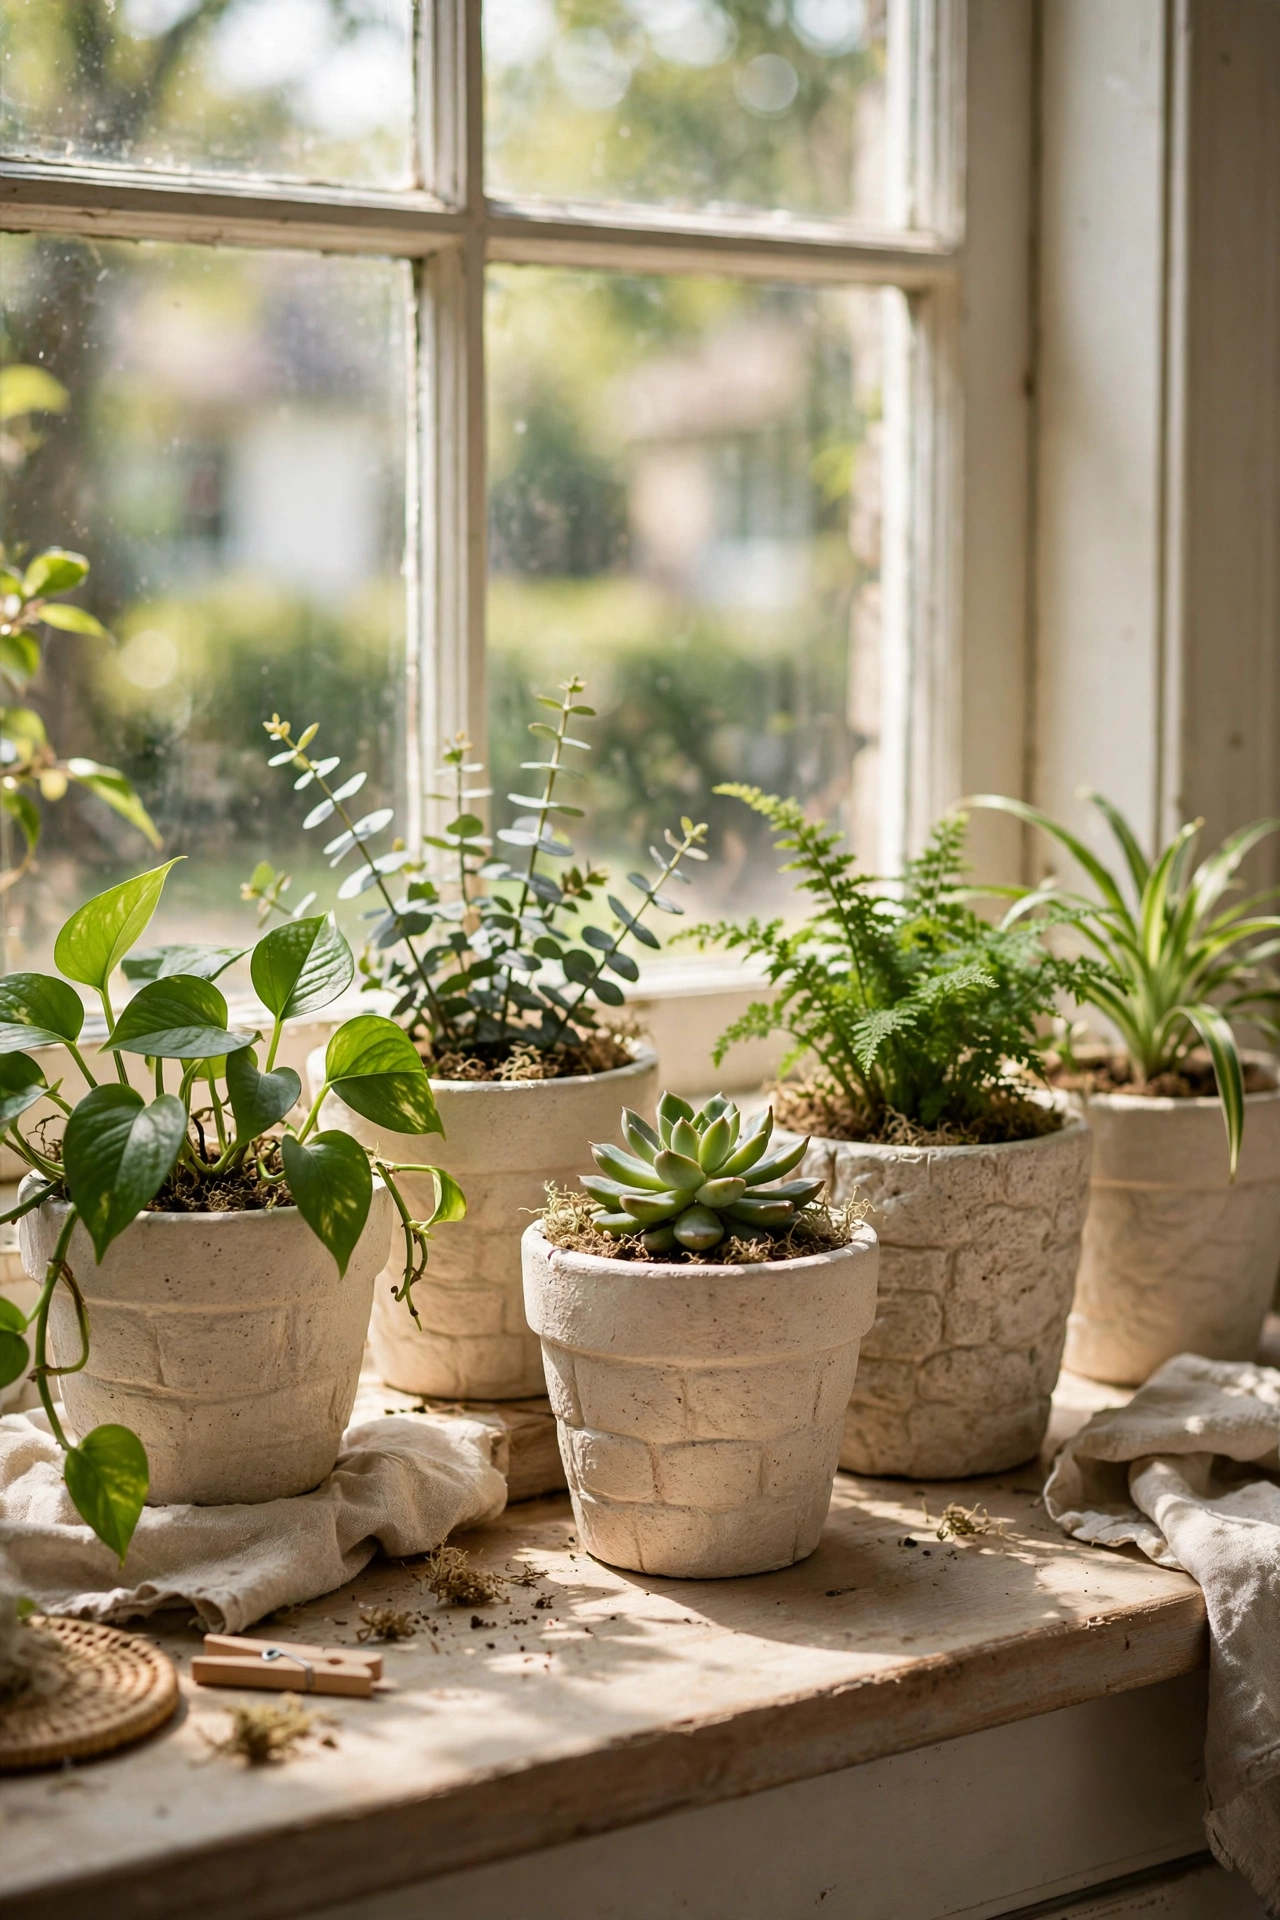
Handmade-looking stone pots cost a fortune, but mixing baking soda into matte paint gives any cheap pot the same chalky, textured finish. Stir two tablespoons of baking soda into a cup of matte beige or grey paint, brush on two uneven coats, and let it cure overnight. I transformed four plastic nursery pots this way. My mistake was using glossy paint on the first pot, which stayed shiny and fake-looking; matte paint plus the soda grit is what sells the stone effect. Group them in odd numbers for a stylist’s touch.
Cost: ~$8-12 | Time: 45 minutes plus drying
12. Minimalist Twig Arrangements
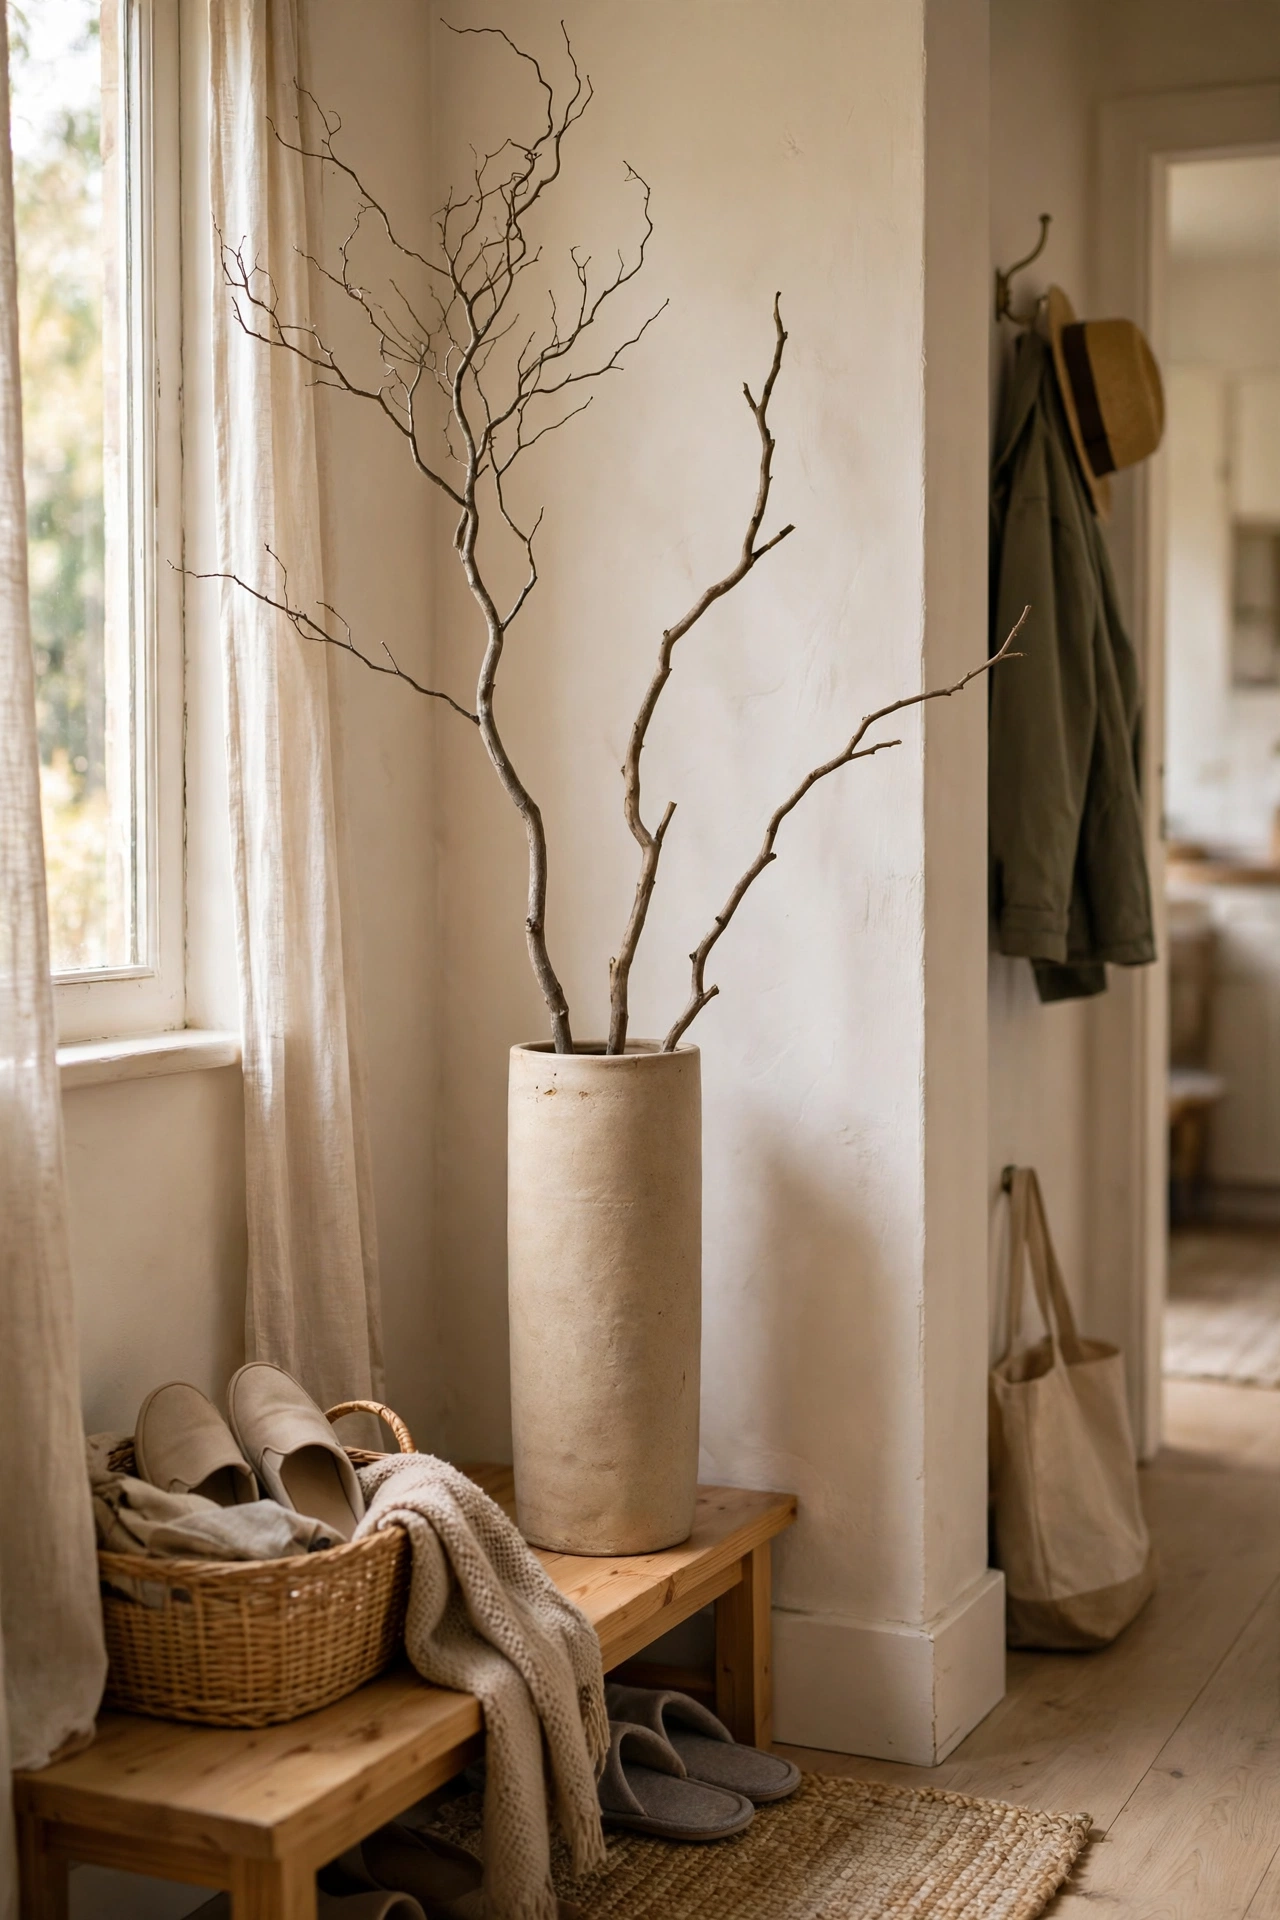
Three bare branches in a tall vase are the cheapest sculptural arrangement there is, and they suit minimalist rooms better than any bouquet. Choose straight, interesting branches, trim them to different heights, and stand them in a simple cylindrical vase with no water. I keep a set in my entryway that I collected on a walk. My mistake was adding too many branches at first, which looked like a nest; three to five stems with space between them reads elegant. Change them with the seasons for free freshness.
Cost: ~$5-10 | Time: 15 minutes
13. Cotton Stem Bundles in Ceramic Vases
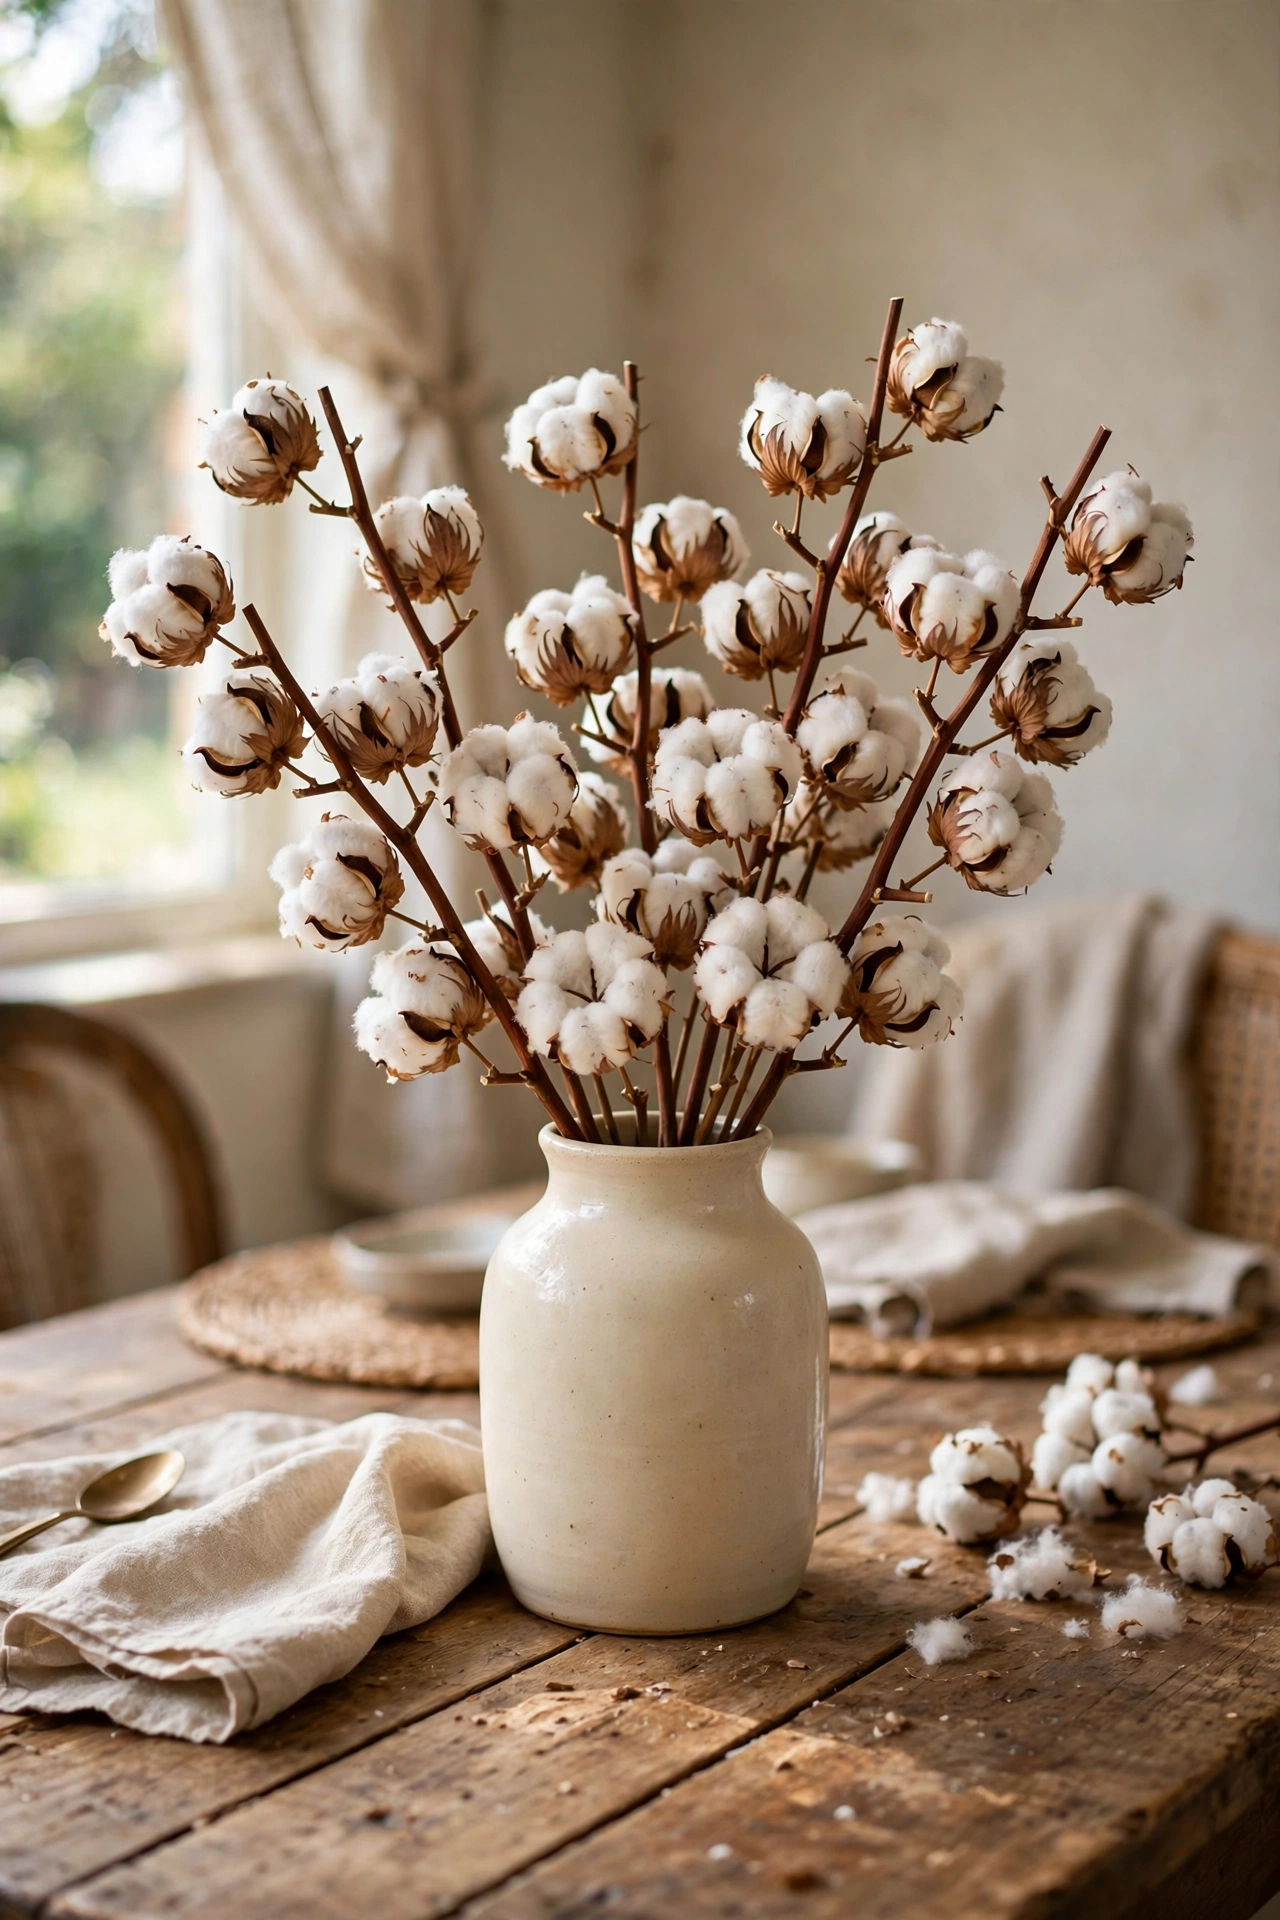
A bundle of dried cotton stems in a handmade-look ceramic vase is peak quiet luxury for under $15. Buy a bunch of dried cotton online or at a craft store, trim the stems to one height, and fan them in a simple cream vase. I styled one on my dining table and people assume it was a florist arrangement. My mistake was cramming the whole bunch into a narrow neck, which splayed them awkwardly; a wider vase lets the stems relax into a natural dome. They last for years with zero care.
Cost: ~$10-15 | Time: 10 minutes
14. DIY Wooden Serving Tray
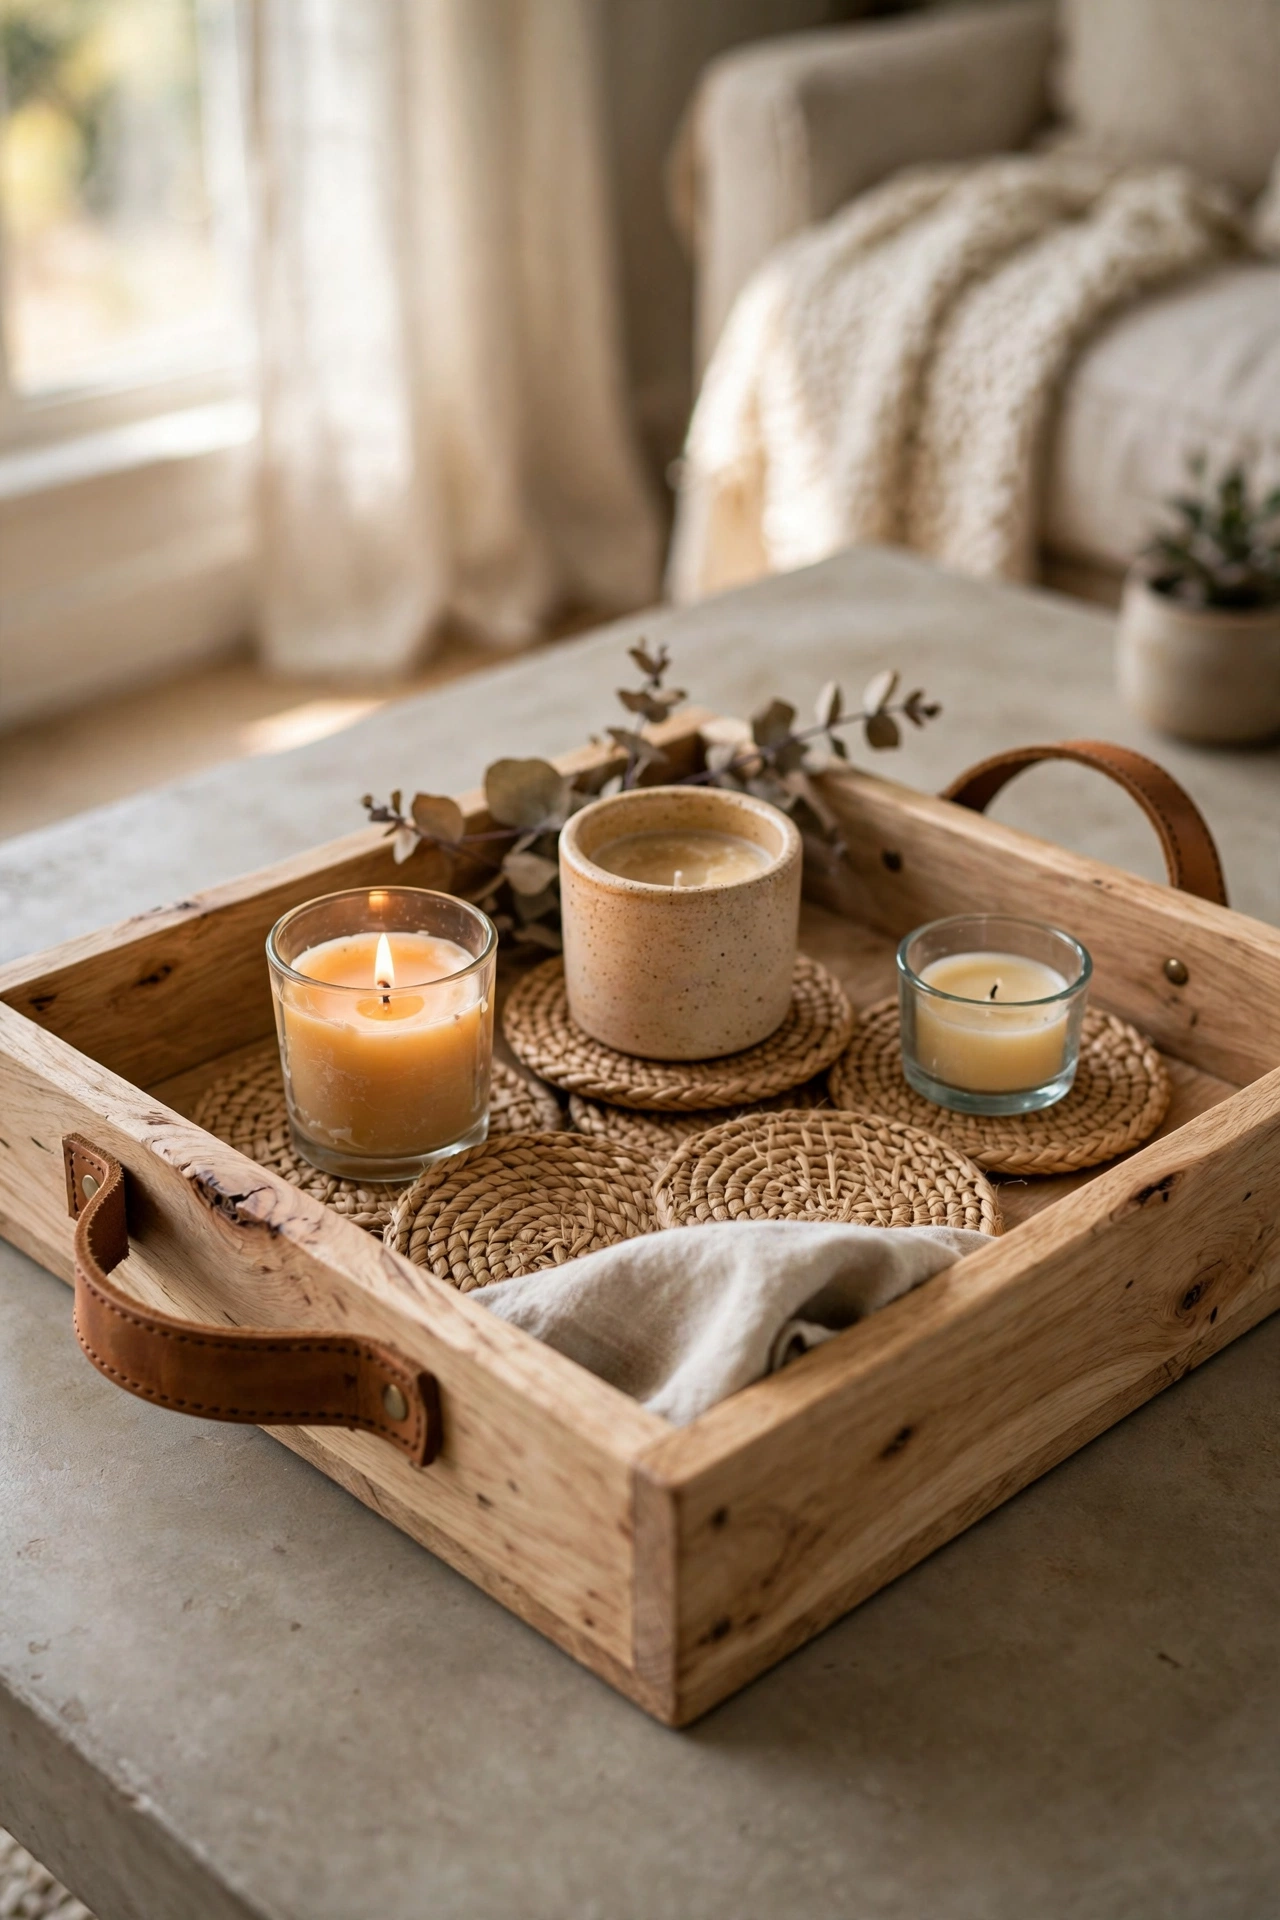
A simple oak-stained tray gathers scattered coffee table objects into one calm composition. Cut a shallow box from pine, sand it smooth, stain it light oak, and add two leather pulls as handles. I made mine to corral candles and a coaster stack. My mistake was skipping the sanding on the inside corners, which left rough edges that caught the cloth; ten minutes with fine sandpaper makes it feel shop-bought. One tray on the table, and the whole living room instantly looks more orderly.
Cost: ~$12-18 | Time: 2 hours
15. Invisible Floating Book Shelf
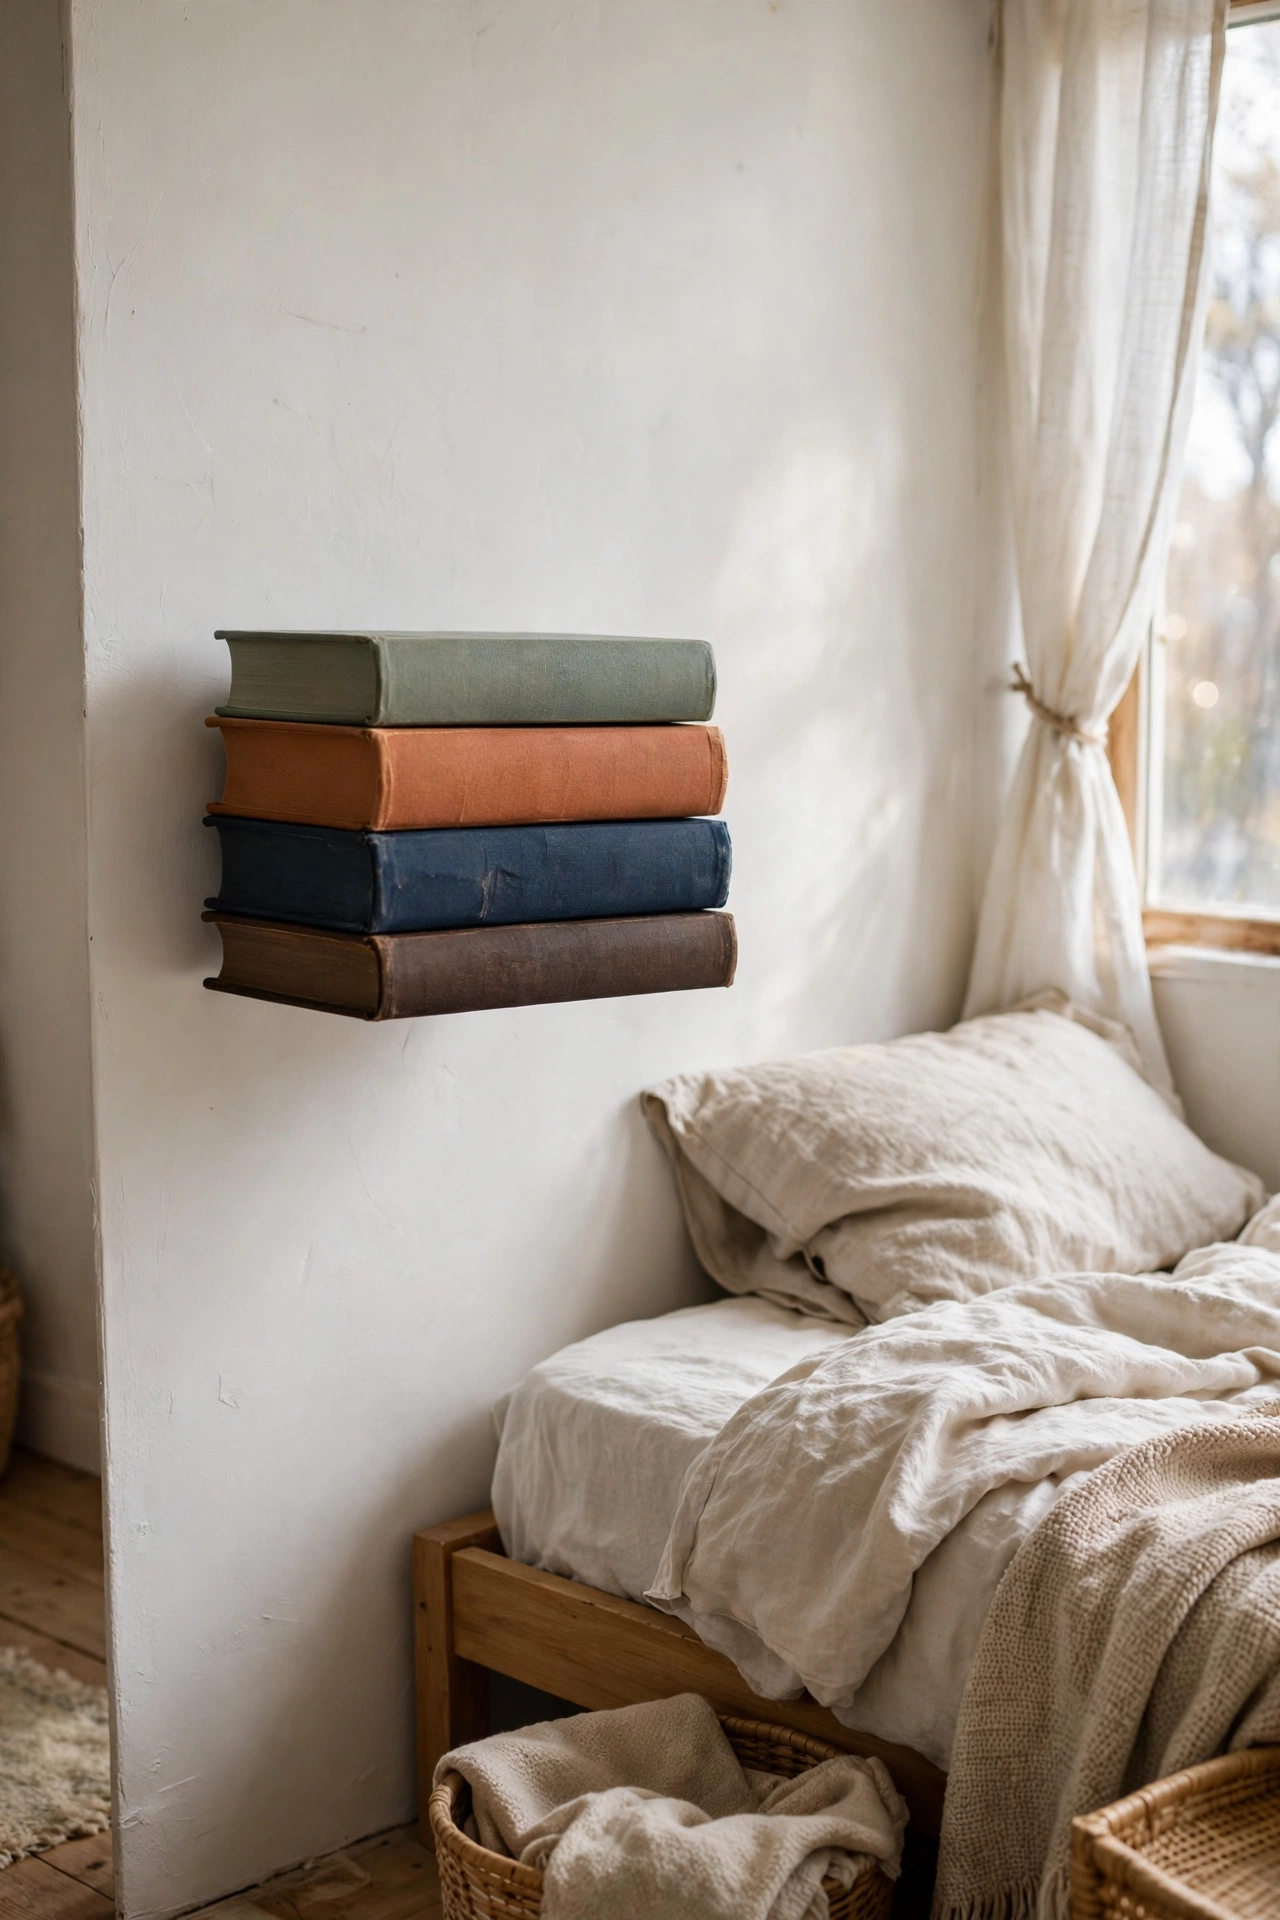
A single L-bracket hidden inside a book cover creates the illusion of books floating on the wall, a trick that always gets comments. Screw a small metal bracket to the wall, glue the inside of a hardback cover around it, and stack books on top so the bracket disappears. I made a stack of four by my bed. My mistake was using a flimsy paperback as the base book, which sagged; a sturdy hardback is essential. Keep the stack small, because the whole charm is the impossibility of it.
Cost: ~$5-8 | Time: 20 minutes
16. Flat Pebble Coaster Sets
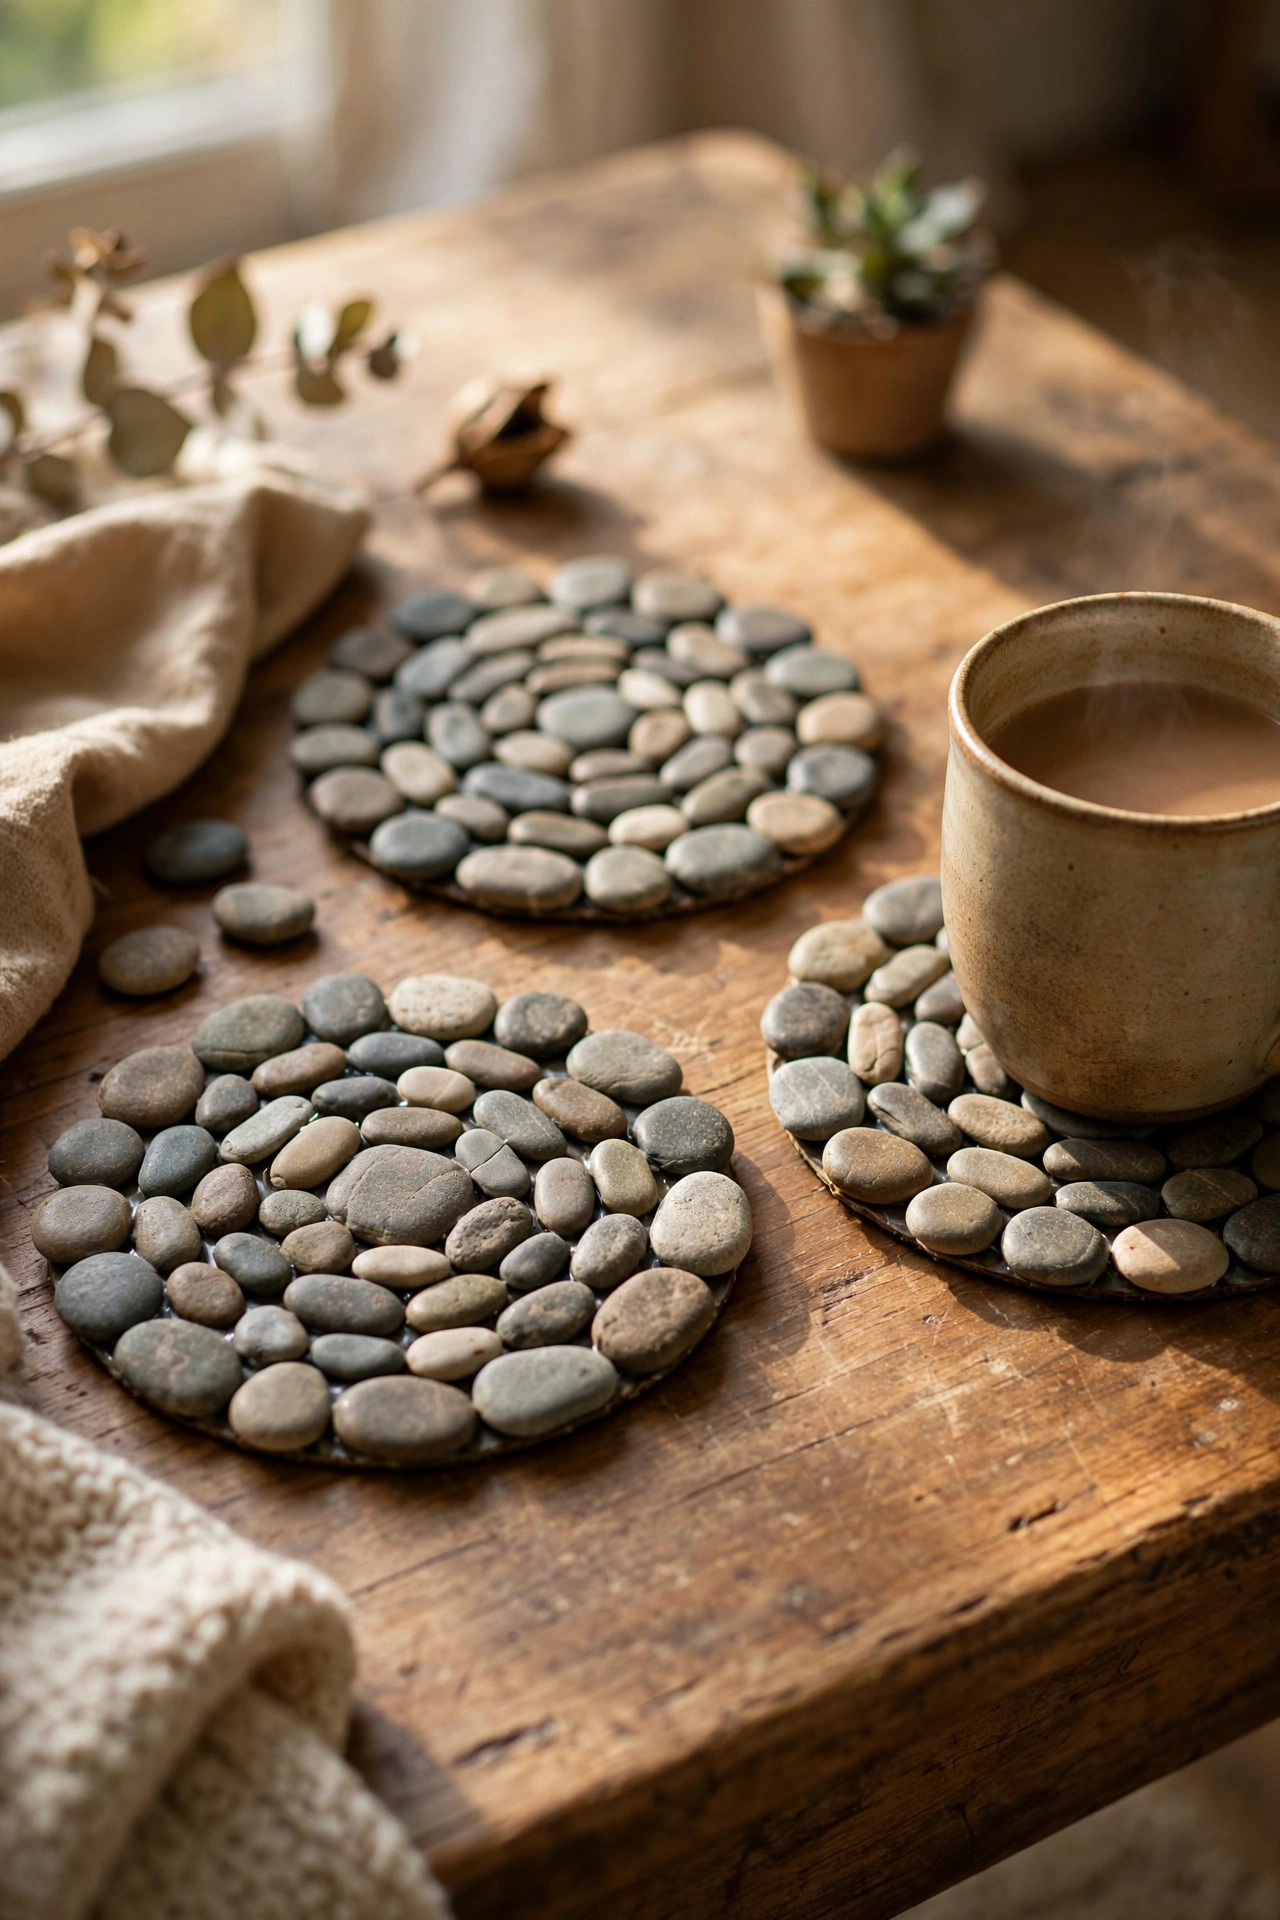
Smooth flat pebbles glued into coasters look like something from a spa boutique. Collect or buy flat river pebbles, arrange six in a circle on felt backing, and glue them edge to edge with strong craft glue. I made a set of four for my coffee table. My mistake was using rounded pebbles on the first try, which rocked and wobbled; flat stones sit steady. A coat of clear matte sealer deepens their colour. They protect the table and add natural texture that minimalist rooms crave.
Cost: ~$5-9 | Time: 1 hour
Simple Textiles and Lighting
17. No-Sew Linen Cushion Covers
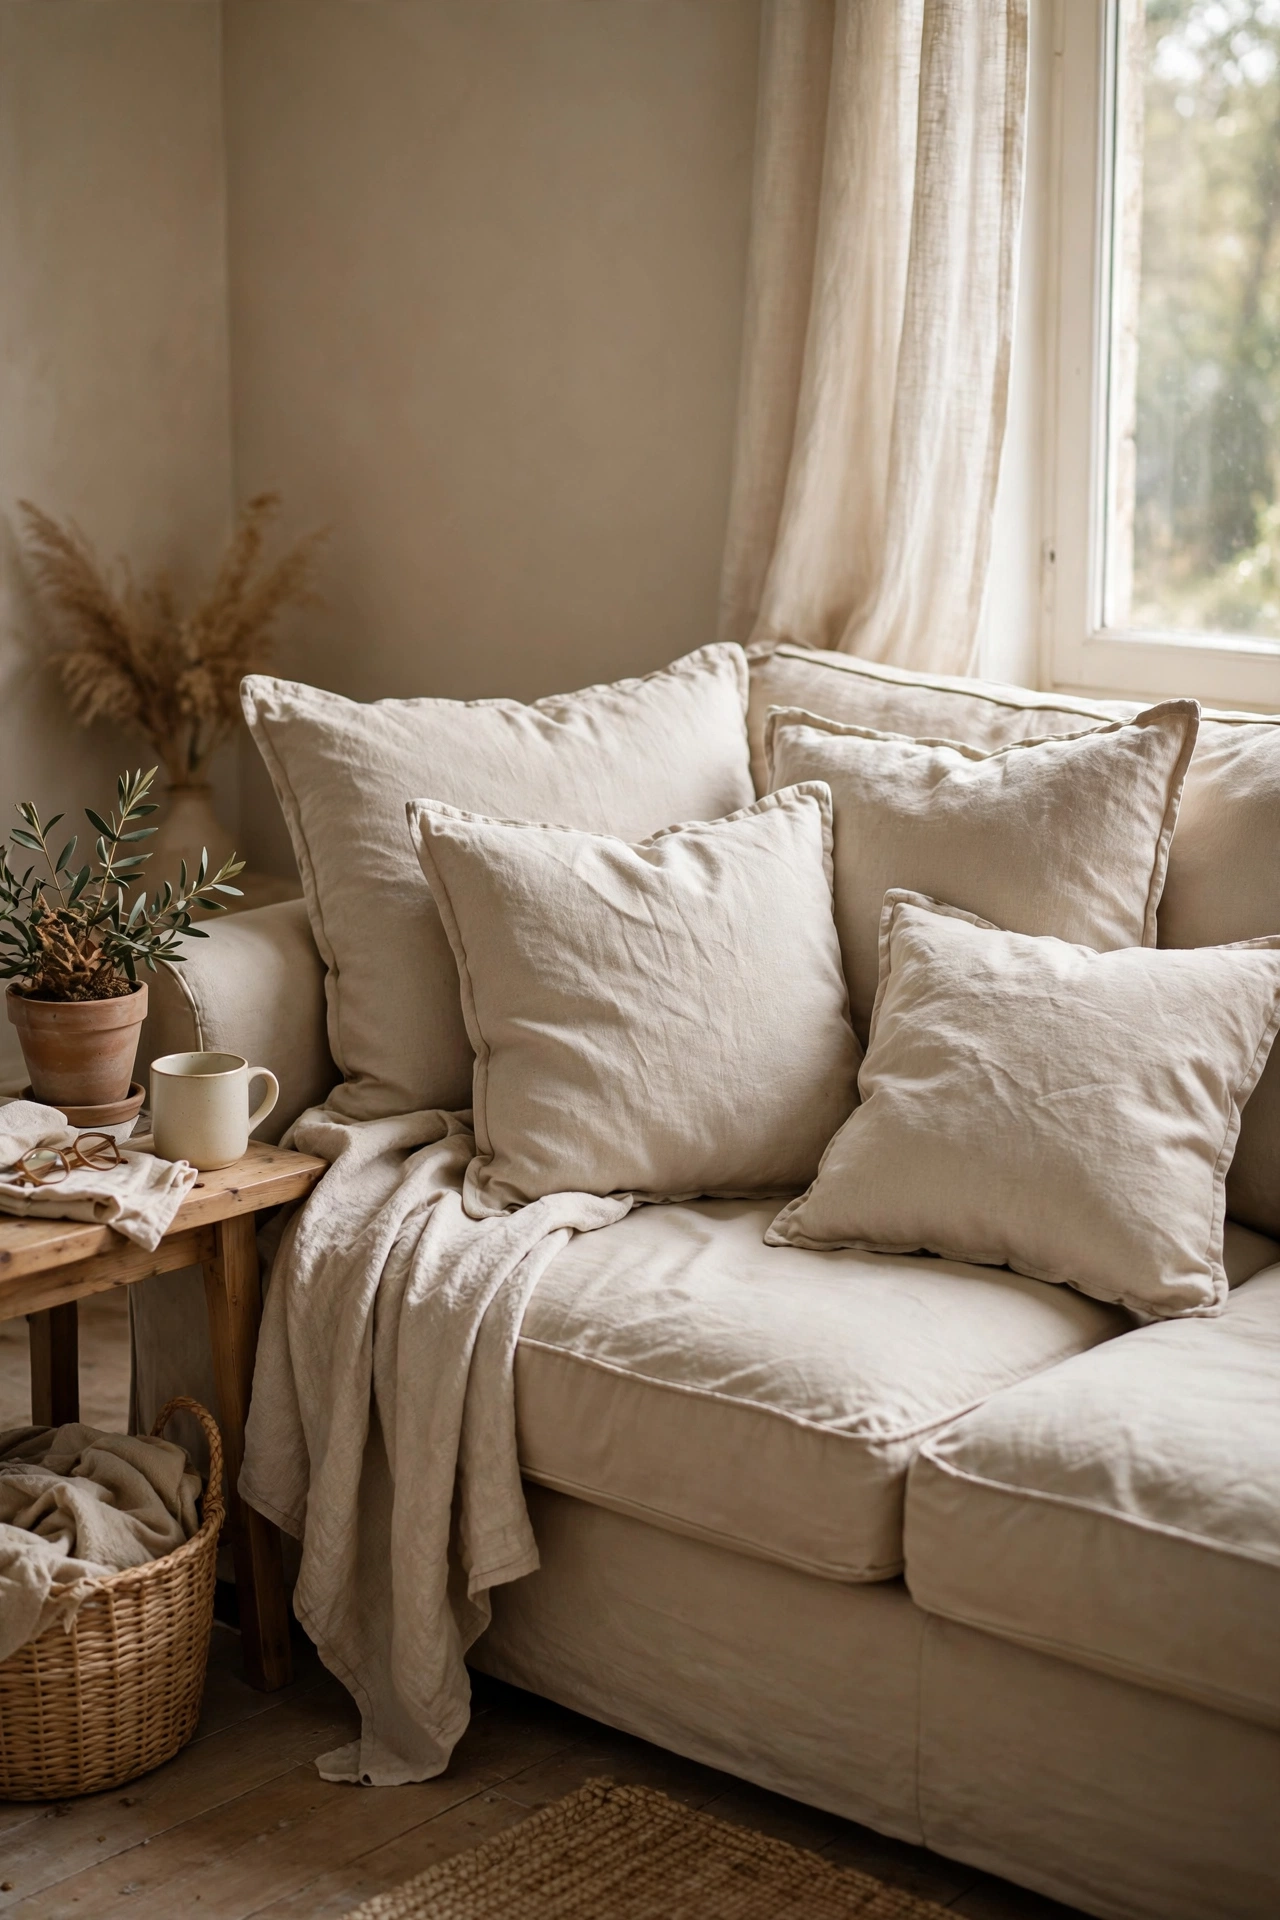
Linen-look cushion covers in oatmeal or natural flax instantly calm a sofa, and iron-on hem tape means no sewing machine. Cut fabric to wrap the cushion with overlap, press hem tape along each edge, and fold it envelope-style. I made four covers in an evening. My mistake was using thin fabric on the first one, which showed the cushion’s pattern through it; a medium-weight linen or cotton duck is worth the extra pound or two. The natural wrinkles are part of the charm, so do not iron them to death.
Cost: ~$10-16 | Time: 1 hour for four
18. Hemmed Drop-Cloth Curtains
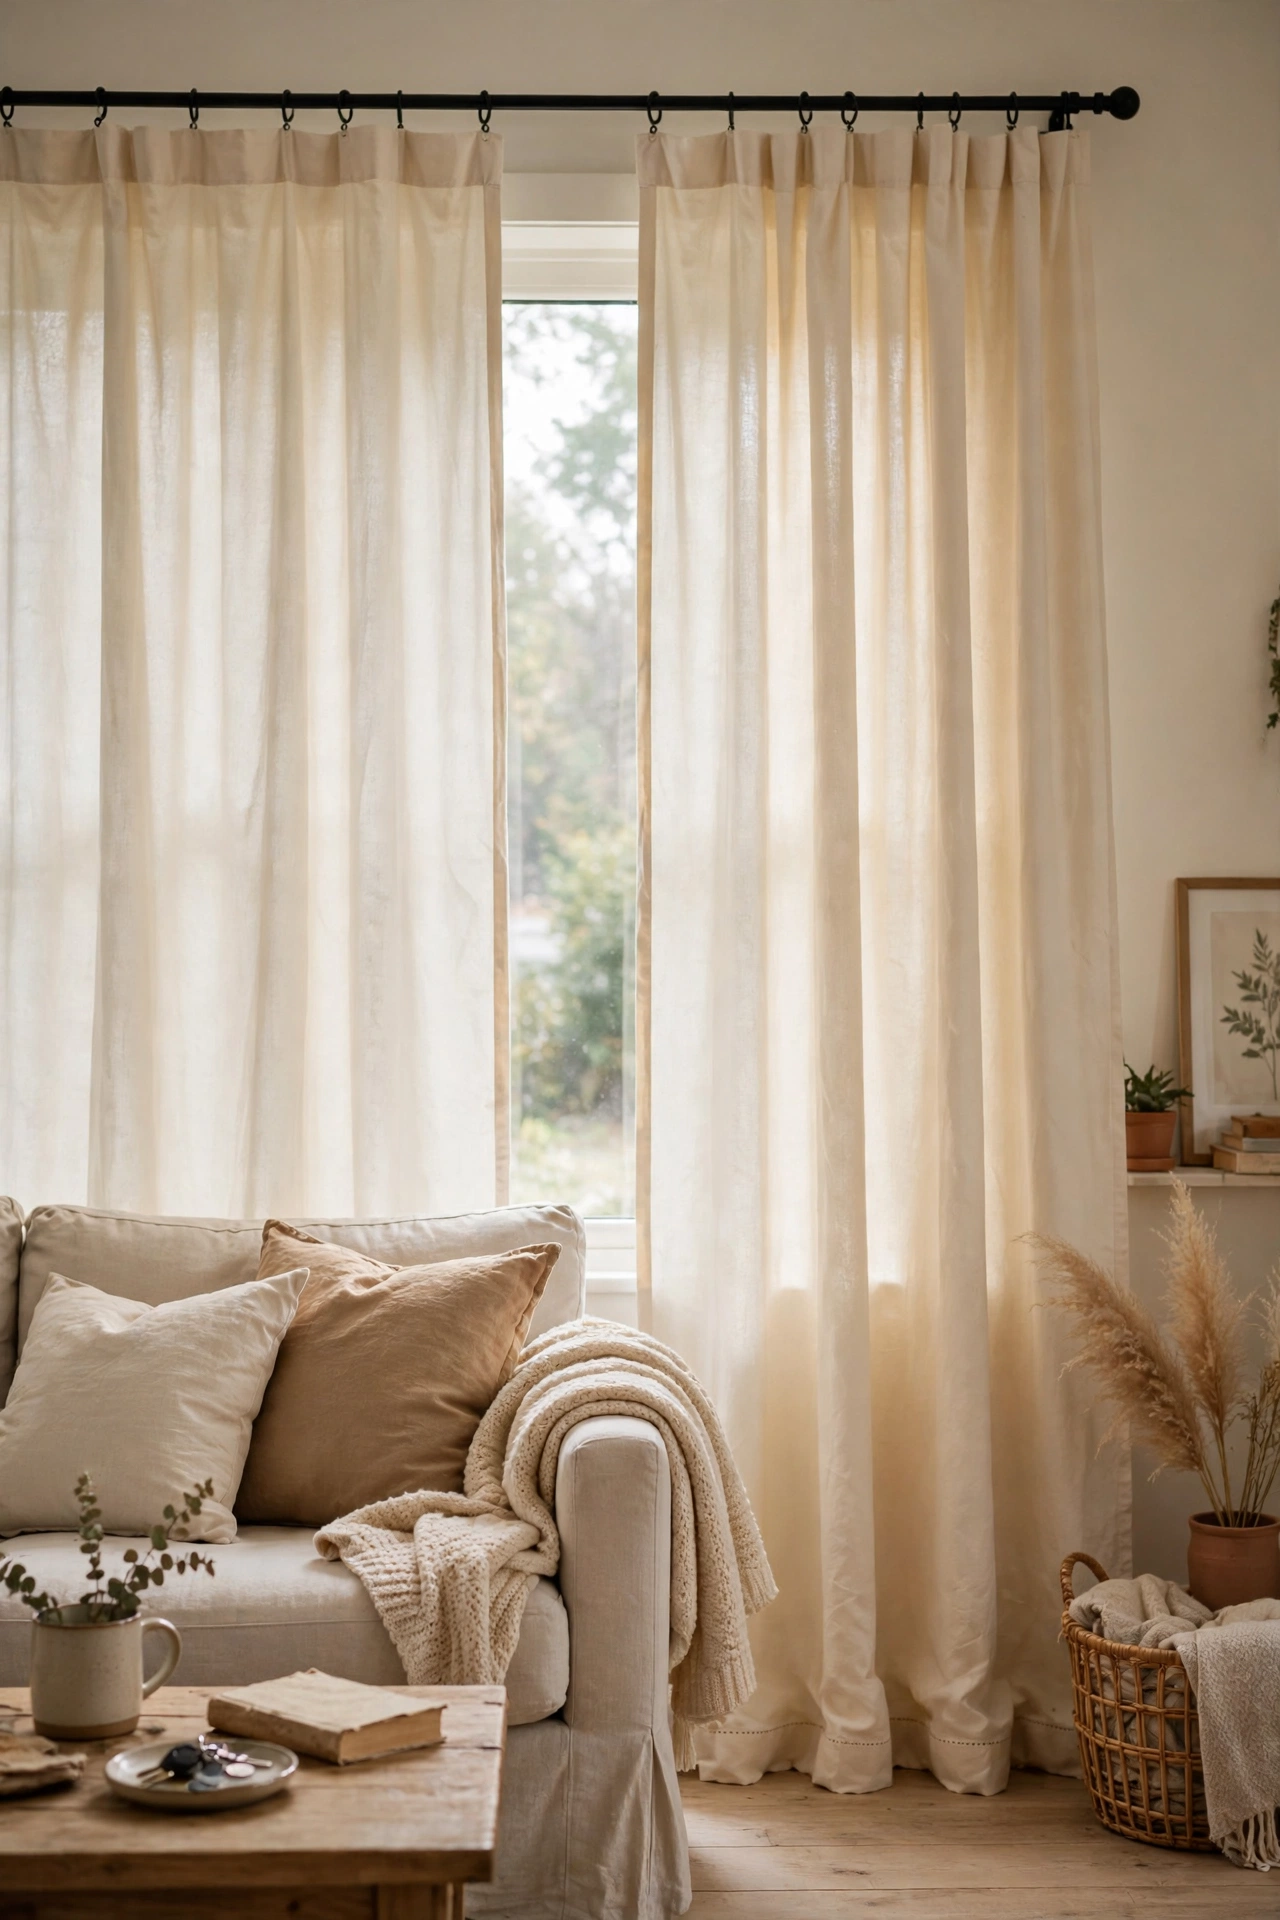
Painter’s drop cloths are heavyweight cotton canvas for the price of budget fabric, and they hang like expensive Belgian linen. Wash them twice to soften, hem the edges with iron-on tape, and hang them on simple black rods. I did my whole living room for less than one ready-made curtain panel. My mistake was hanging them straight from the packet, when they were stiff and smelled of sizing; two washes and a tumble dry fixed both. The weave is loose enough to let light filter softly.
Cost: ~$15-22 | Time: 1.5 hours plus washing
19. Wool Throw with Hand-Knotted Fringe
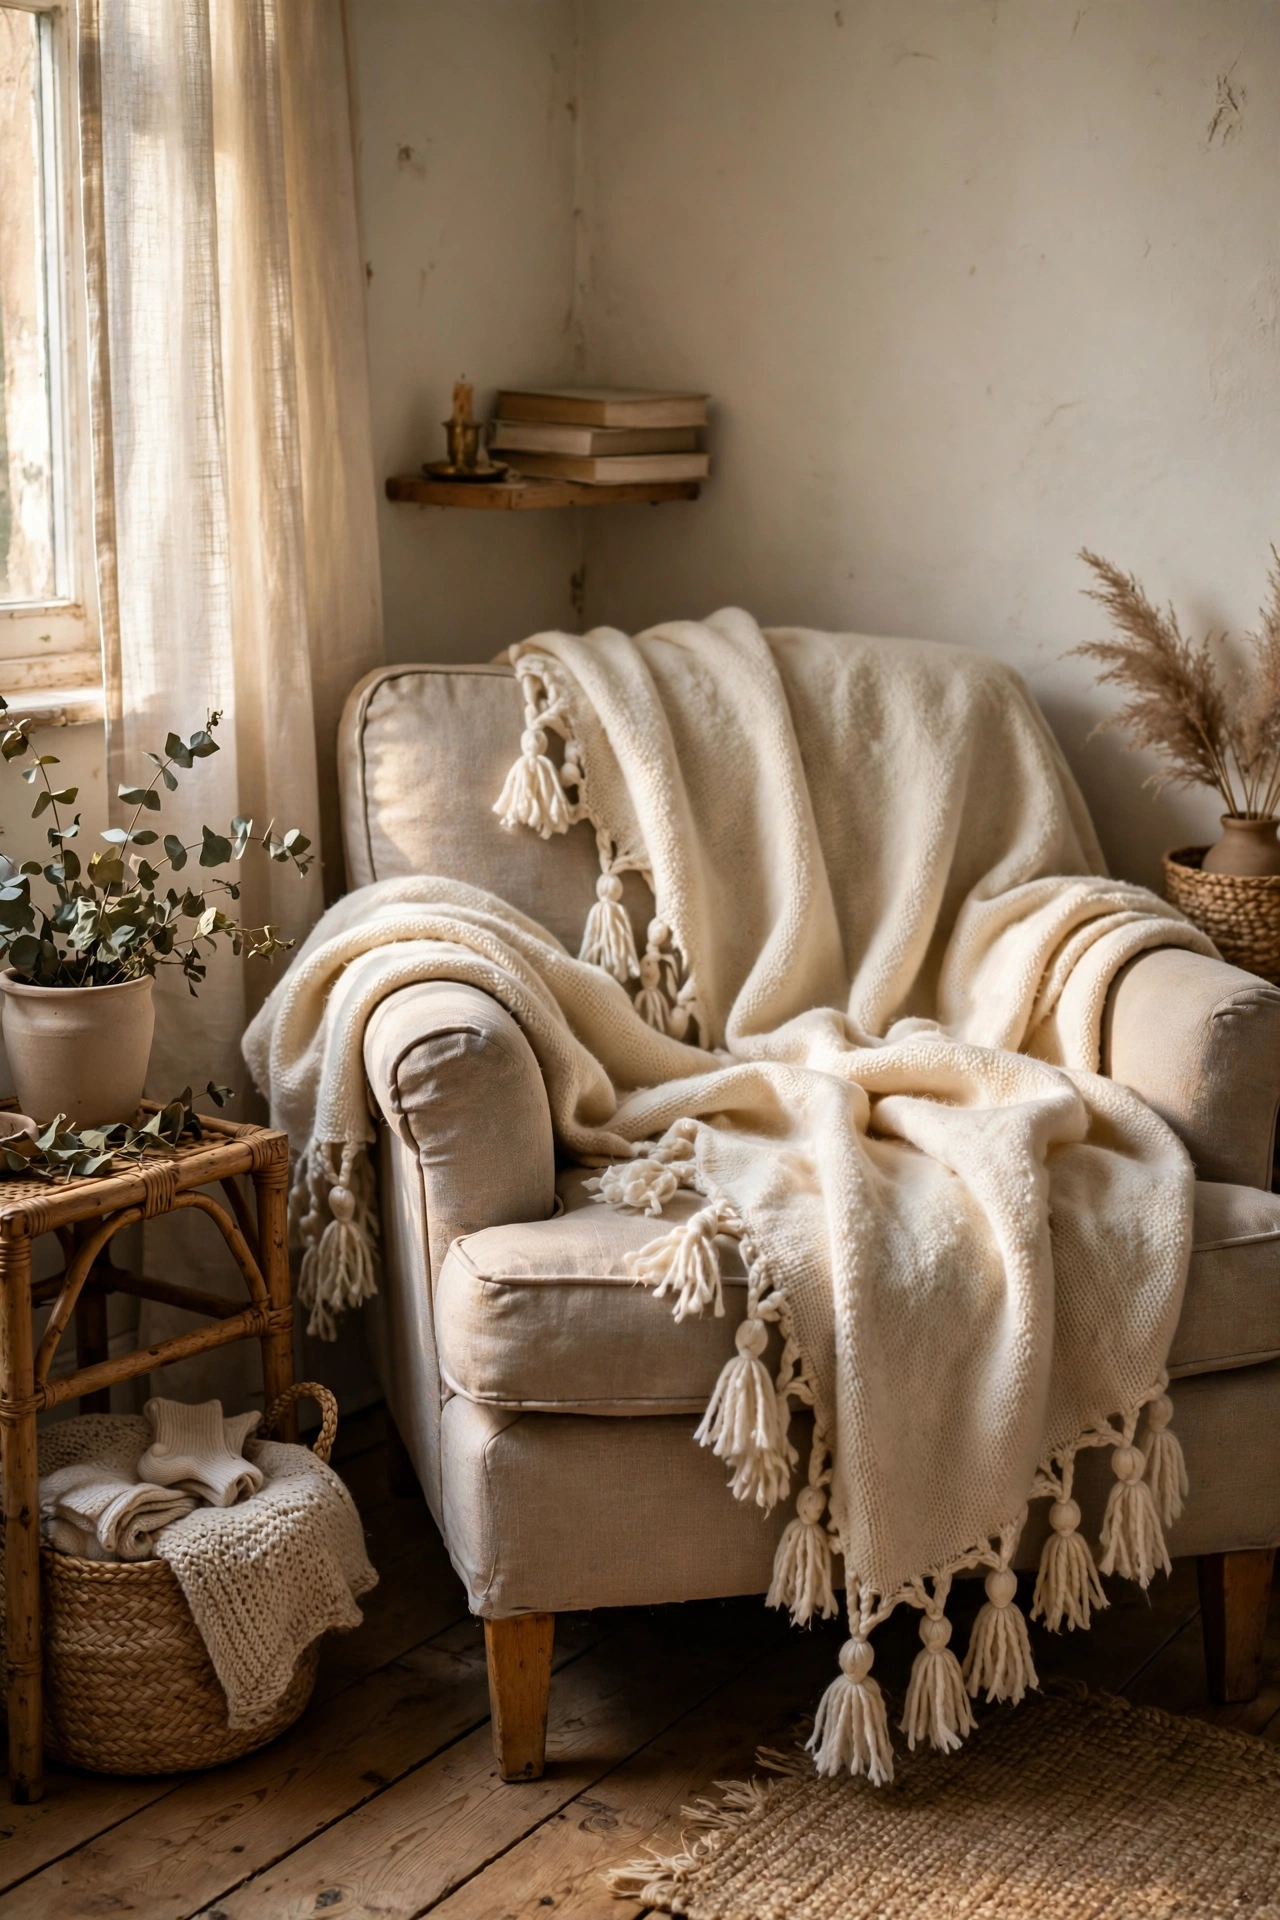
A plain wool blanket becomes a designer throw when you add hand-knotted fringe to the ends. Buy an inexpensive undyed wool blanket, cut the end hem to release the weft threads, and tie them into small knots in groups of three. I did this on a cream blanket draped over my armchair. My mistake was pulling the knots too tight, which puckered the edge; gentle, even knots keep the edge flat. It looks handwoven and adds the softness a minimalist room needs to avoid feeling cold.
Cost: ~$12-20 | Time: 2 hours
20. Ribbed Candle Trio
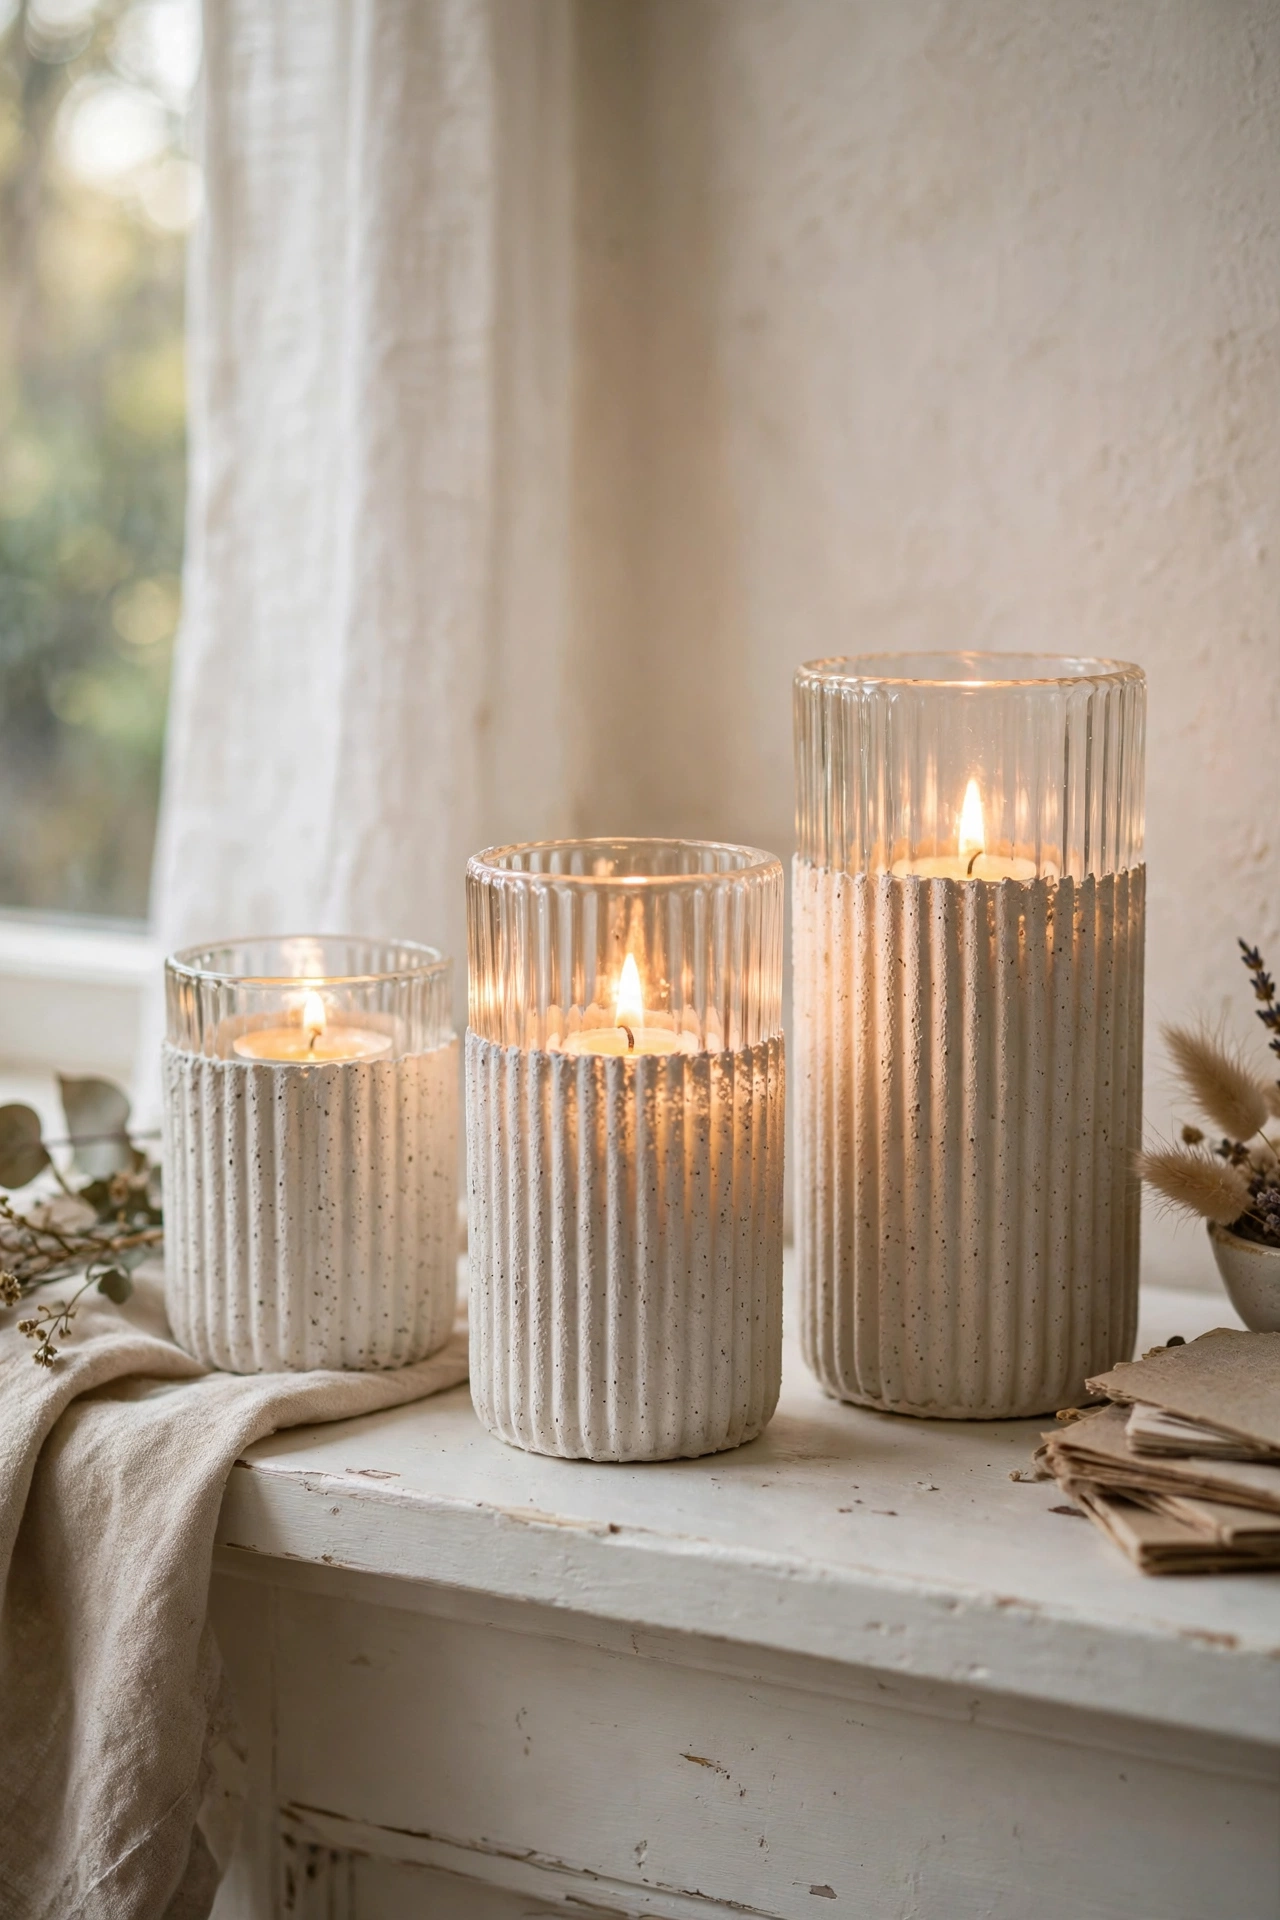
Ribbed glass candles are everywhere in interiors shops, and you can fake the texture by coating plain jars in plaster-tinted paint. Brush two coats of matte paint mixed with a spoonful of plaster of Paris onto simple glass tumblers, leaving the rim clean, and drop in tea lights. I made a trio for my mantel in warm white. My mistake was painting the first jar all the way up, which blocked the candlelight; leaving an inch clear at the top lets the glow spill out. They look hand-thrown, not handmade.
Cost: ~$8-12 | Time: 45 minutes plus drying
21. Parchment Paper Pendant Shade
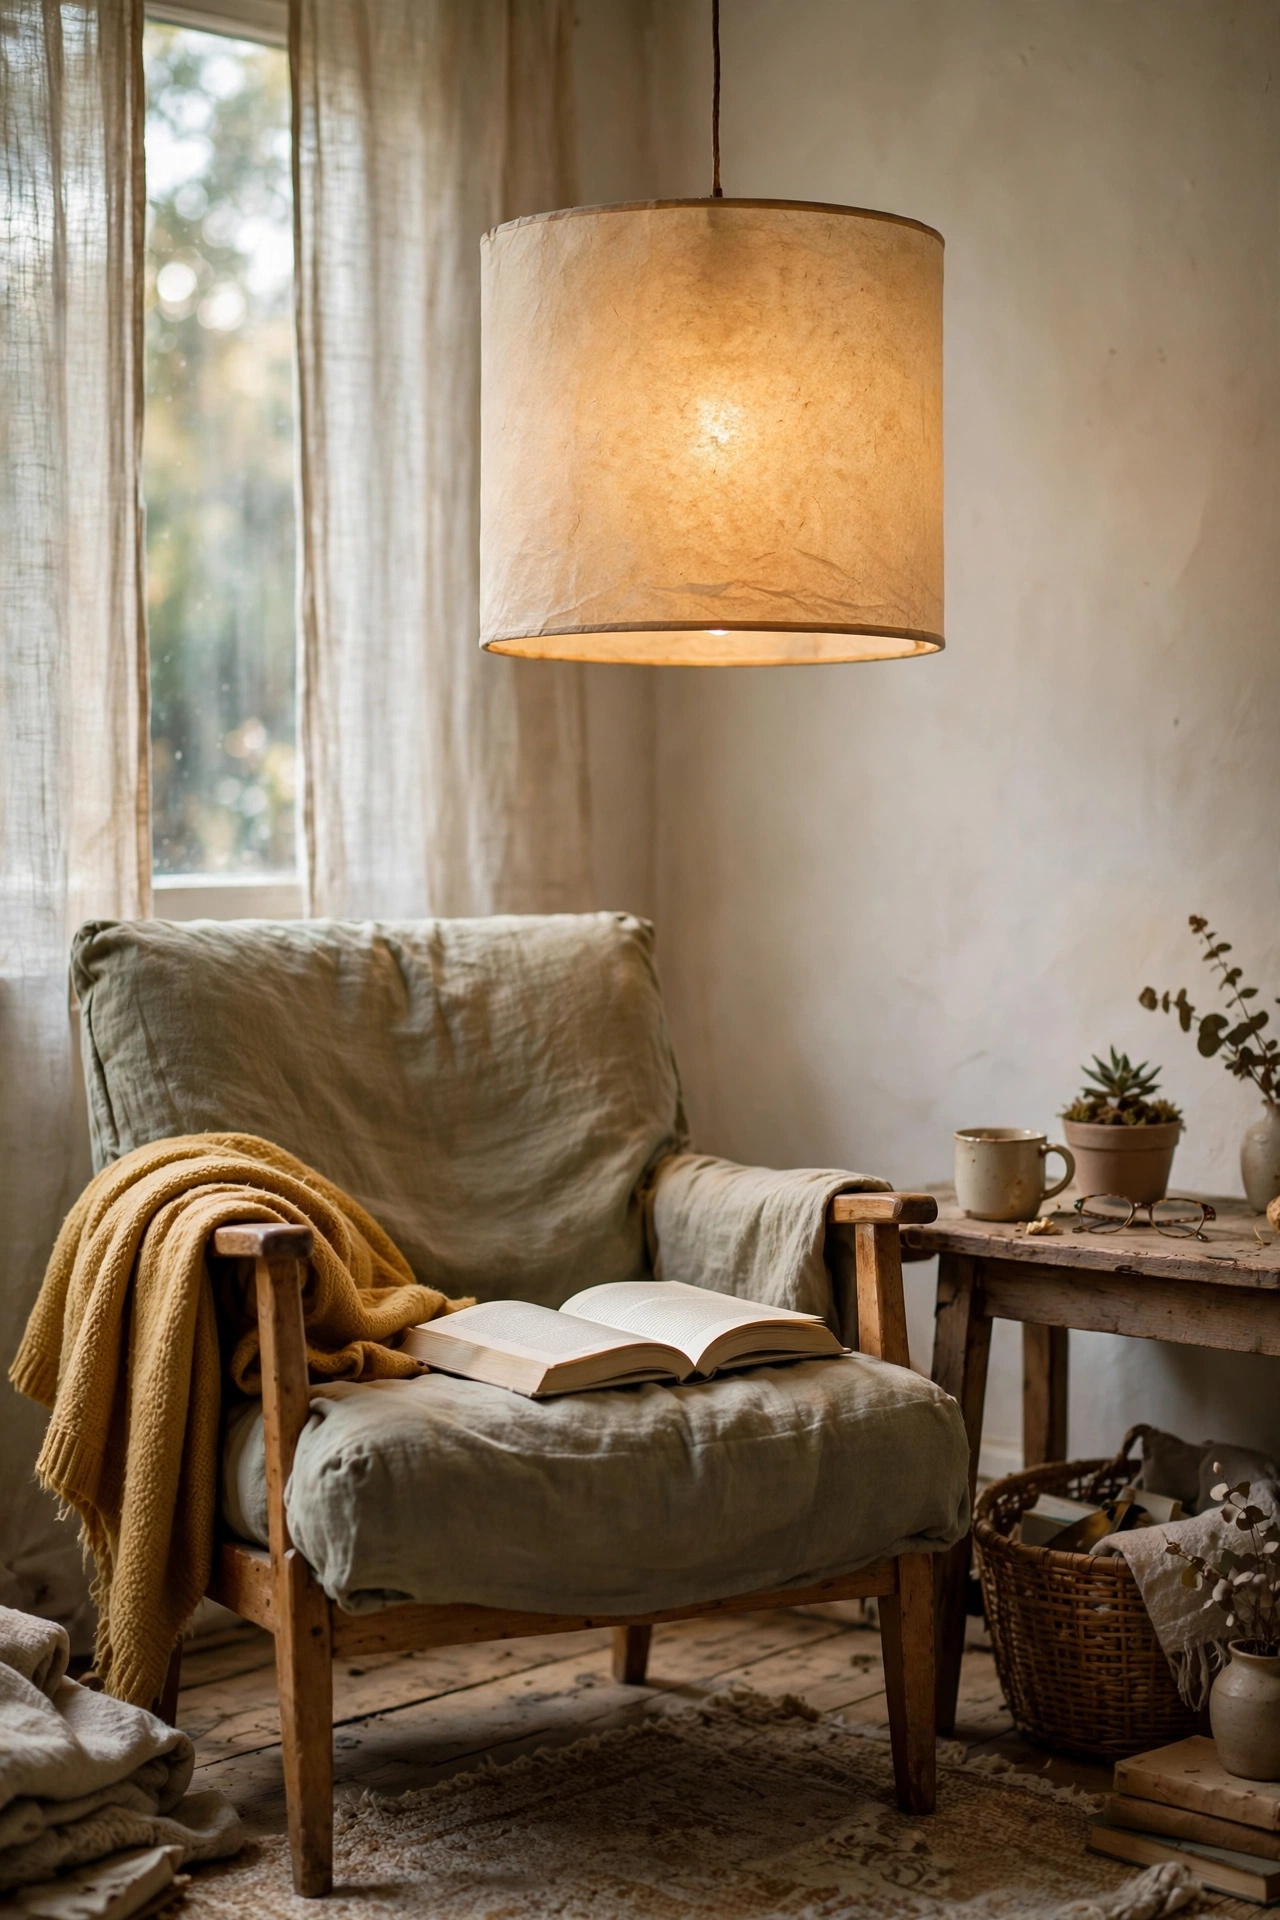
A parchment shade diffuses light into a warm, even glow that flatters a whole room. Cut baking parchment into a wide tapered band, glue the seam, and slip it over a pendant cord so it hangs like a drum shade. I hung one over my reading chair. My mistake was using a high-wattage bulb, which made me nervous about heat; a cool LED bulb is essential and stays completely safe. The paper’s natural colour warms the light beautifully, and the whole shade costs less than a takeaway coffee.
Cost: ~$8-12 | Time: 30 minutes
22. Cotton Cord Wrapped Vase
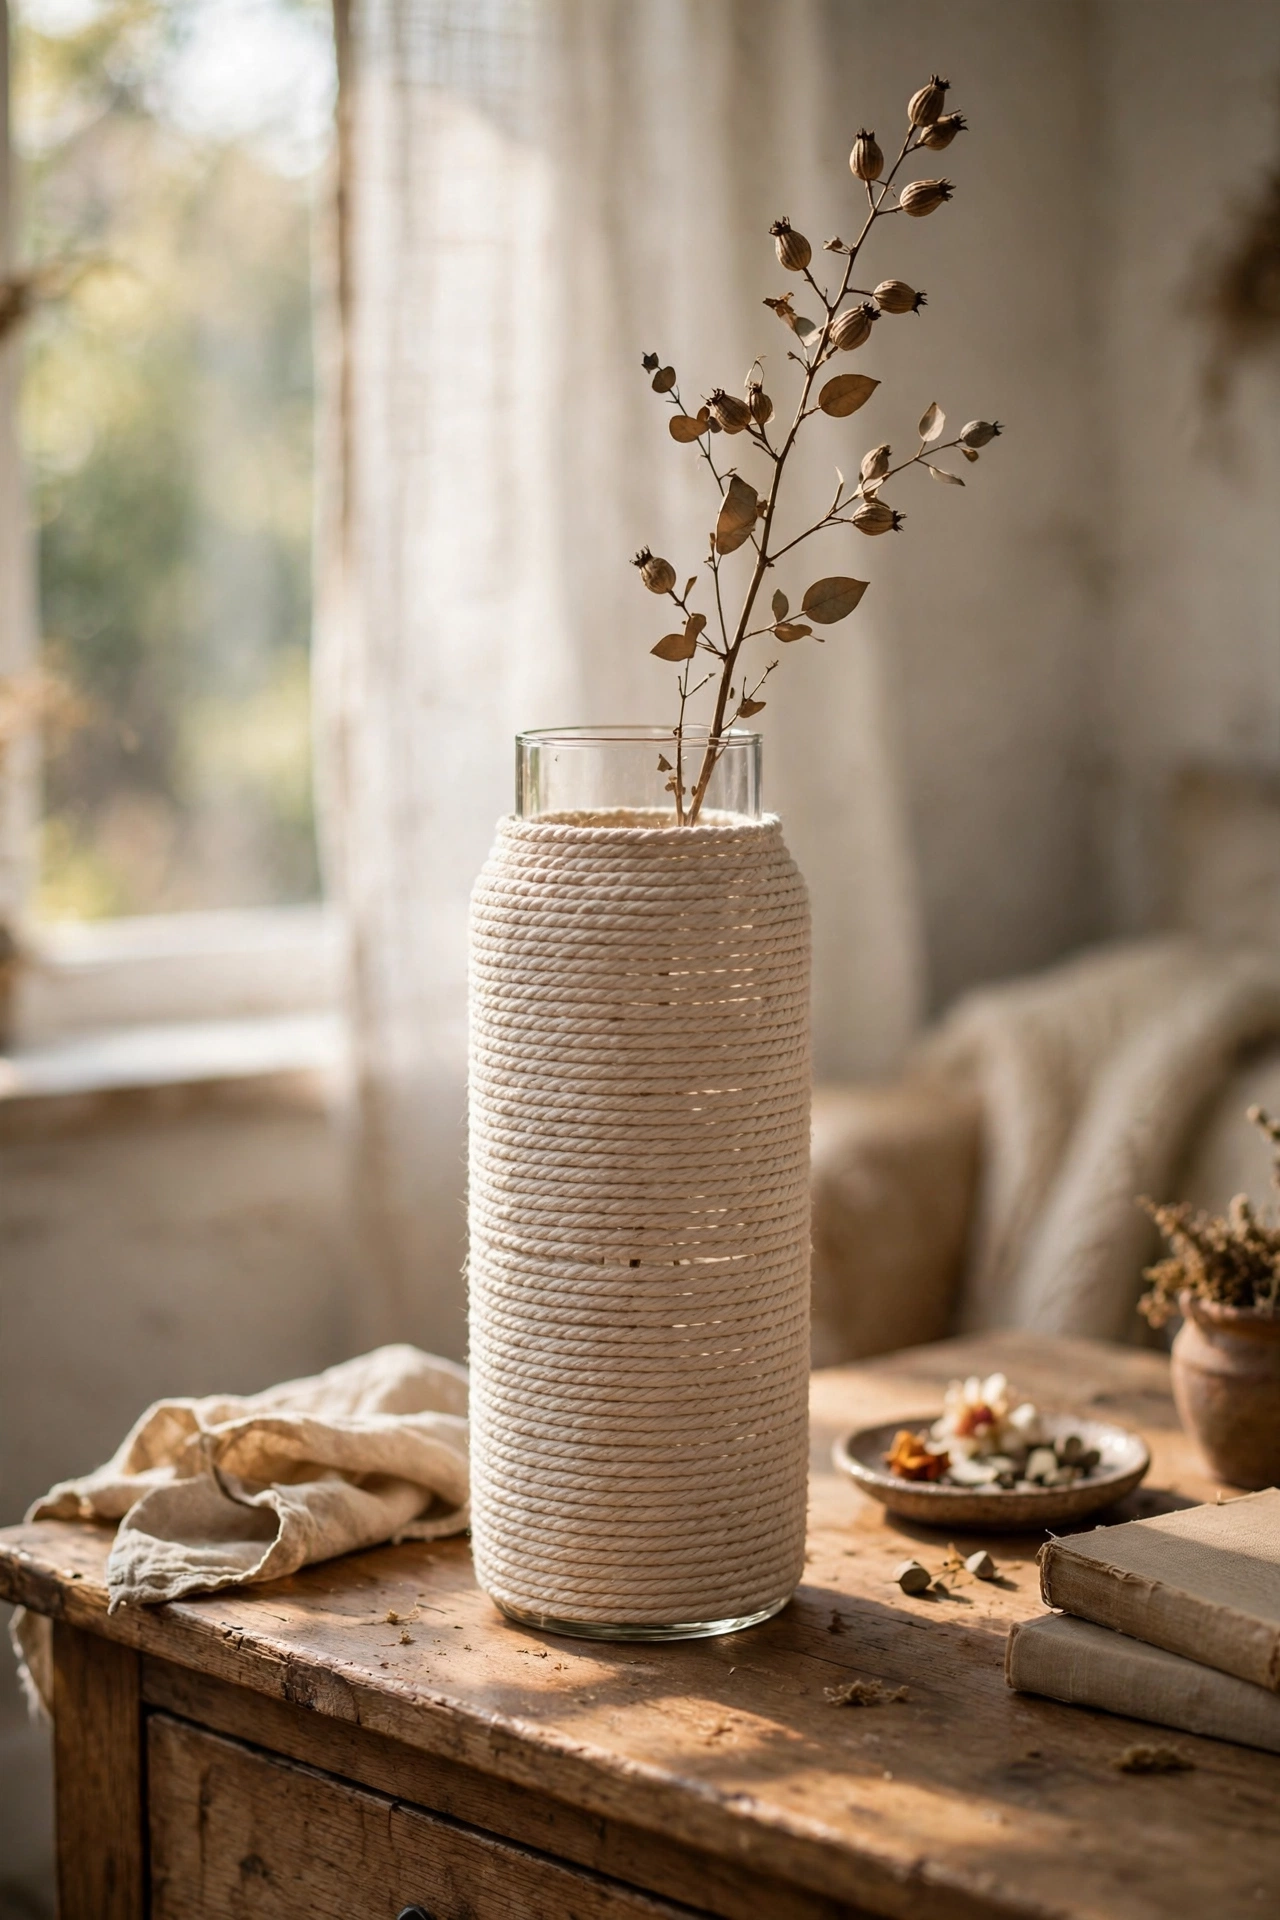
Wrapping a plain cylinder vase in natural cotton cord turns it into a textured, tactile object with real presence. Start at the base with a dab of hot glue, wind the cord tightly in neat rows up the vase, and finish with another dab of glue tucked under the last row. I made two in an afternoon while watching television. My mistake was leaving gaps on the first vase, which showed the glass underneath and spoiled the illusion; keep each row snug against the last. One dried stem is all the decoration it needs.
Cost: ~$6-10 | Time: 1 hour
Finishing Touches That Fool Everyone
23. Matte Black Sprayed Drawer Handles
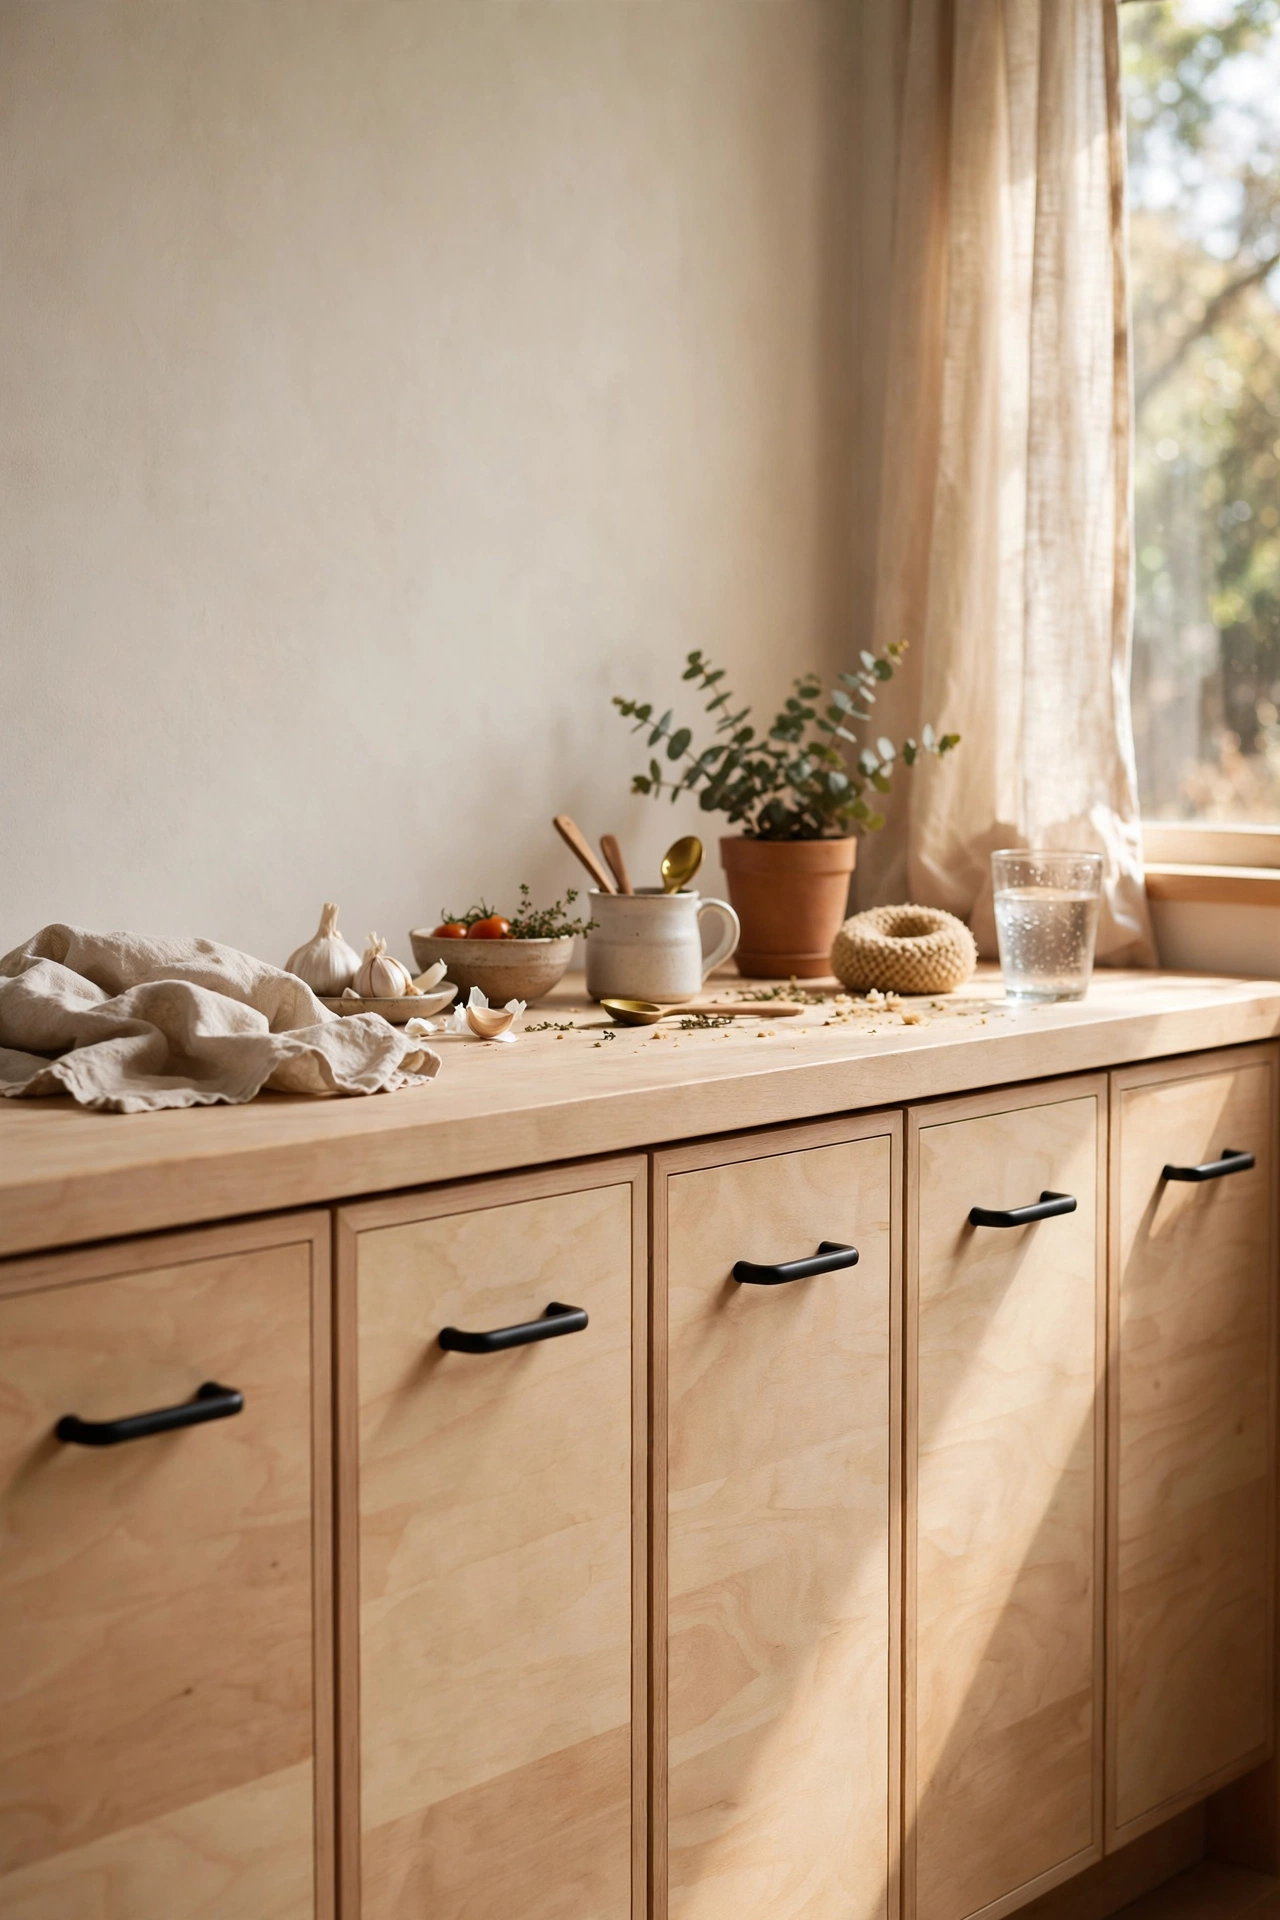
Swapping shiny brass handles for matte black is the cheapest kitchen refresh I know. Unscrew the existing handles, clean them with sugar soap, and give them two light coats of matte black spray paint, letting each coat dry fully. I did every handle in my kitchen for the price of one can. My mistake was painting them in place on the first drawer, which left a sticky halo on the wood; always remove them and spray on cardboard. It reads as a full hardware upgrade and takes an afternoon.
Cost: ~$6-10 | Time: 2 hours plus drying
24. Hidden Cable Boxes
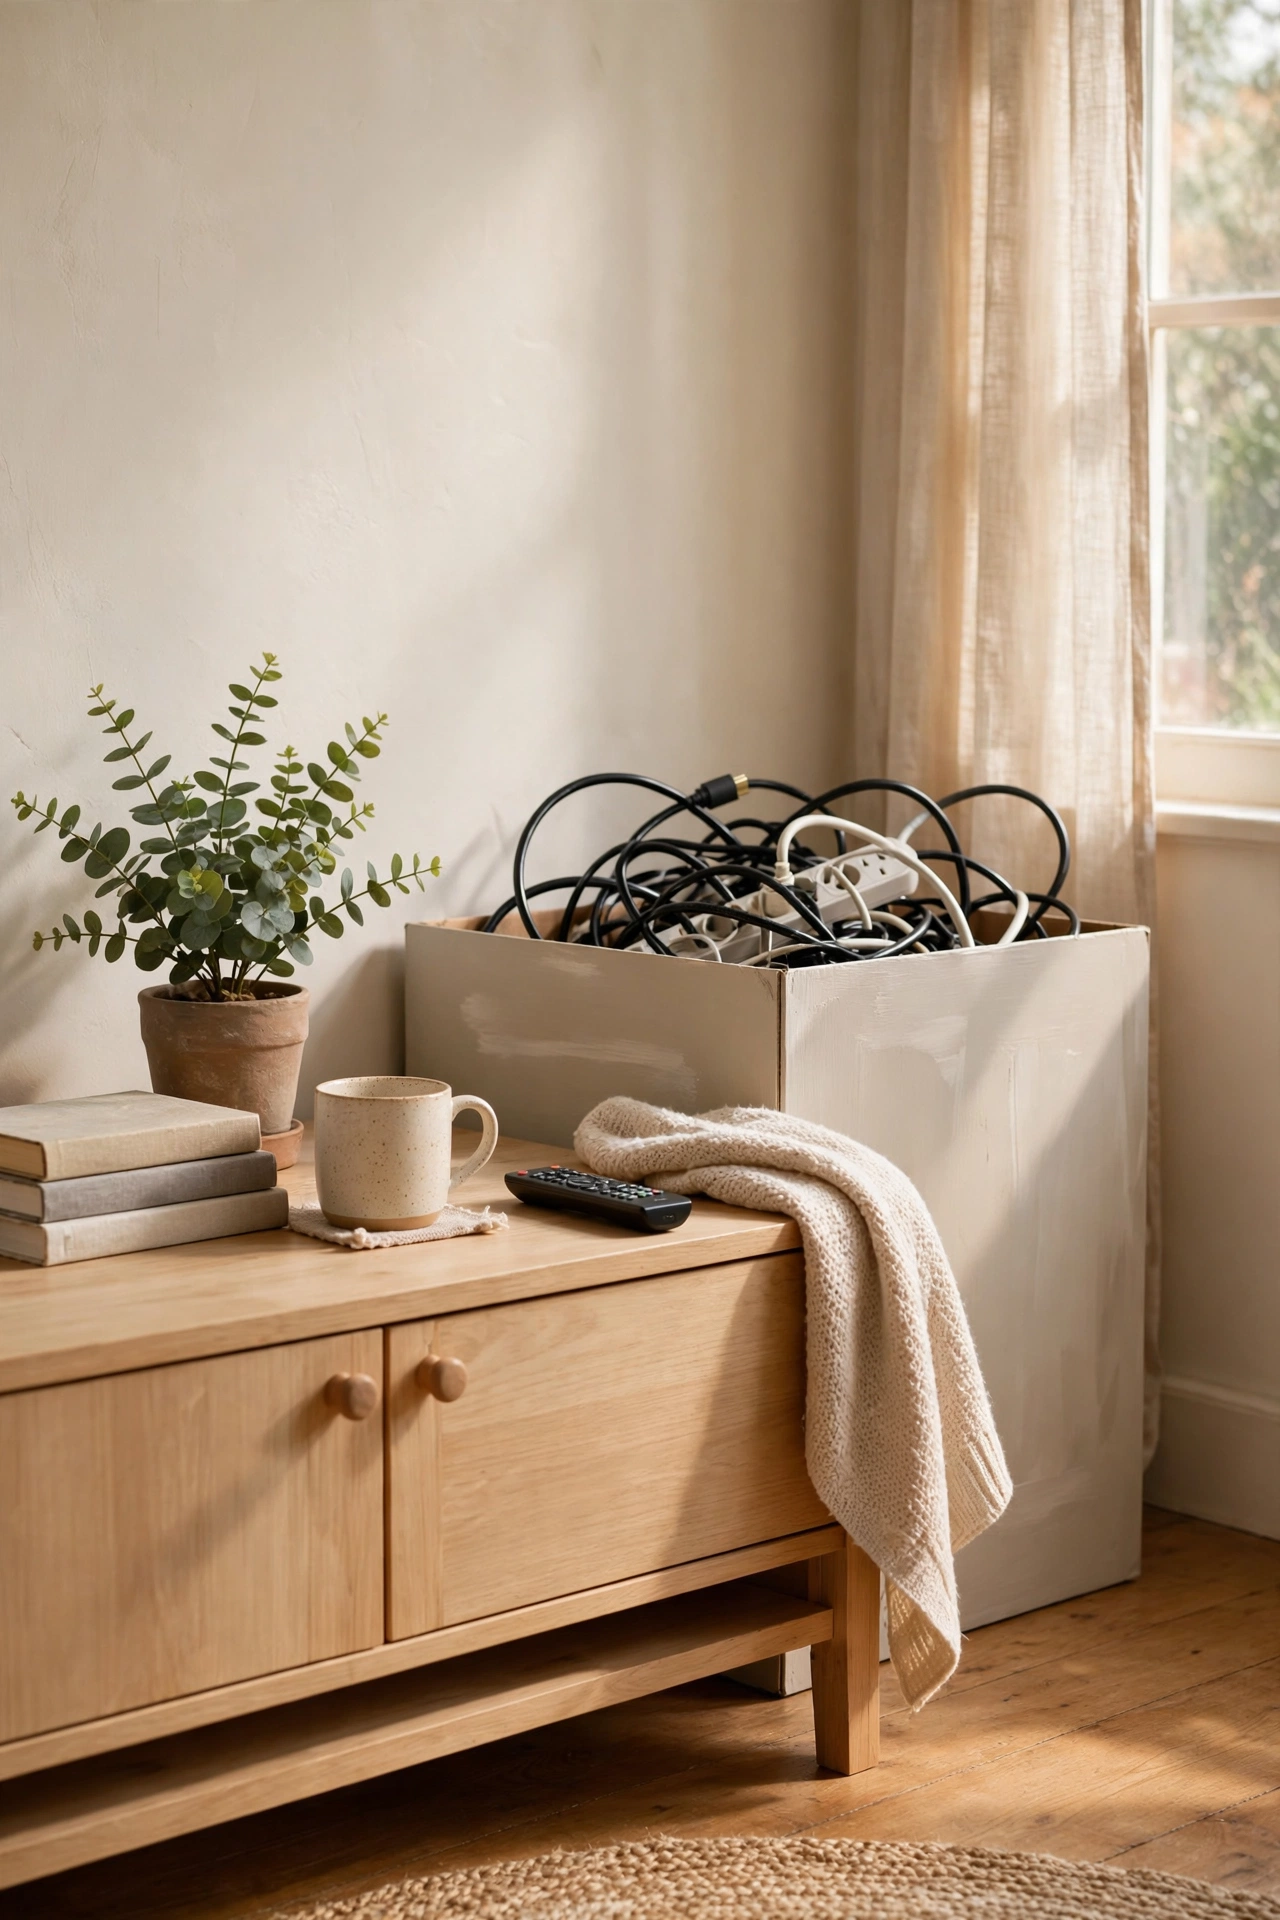
Nothing ruins a calm room faster than a tangle of cables, and a painted box hides them completely. Take a sturdy shoe box, cut a slot in the back for cords, paint it the same colour as the wall or a soft neutral, and tuck the power strip inside. I made one for behind my television. My mistake was making the slot too small, which meant unplugging everything to thread cables through; cut it generous. With the box painted to match the wall, the clutter simply vanishes.
Cost: ~$3-6 | Time: 30 minutes
25. Uniform Basket System for Open Shelving
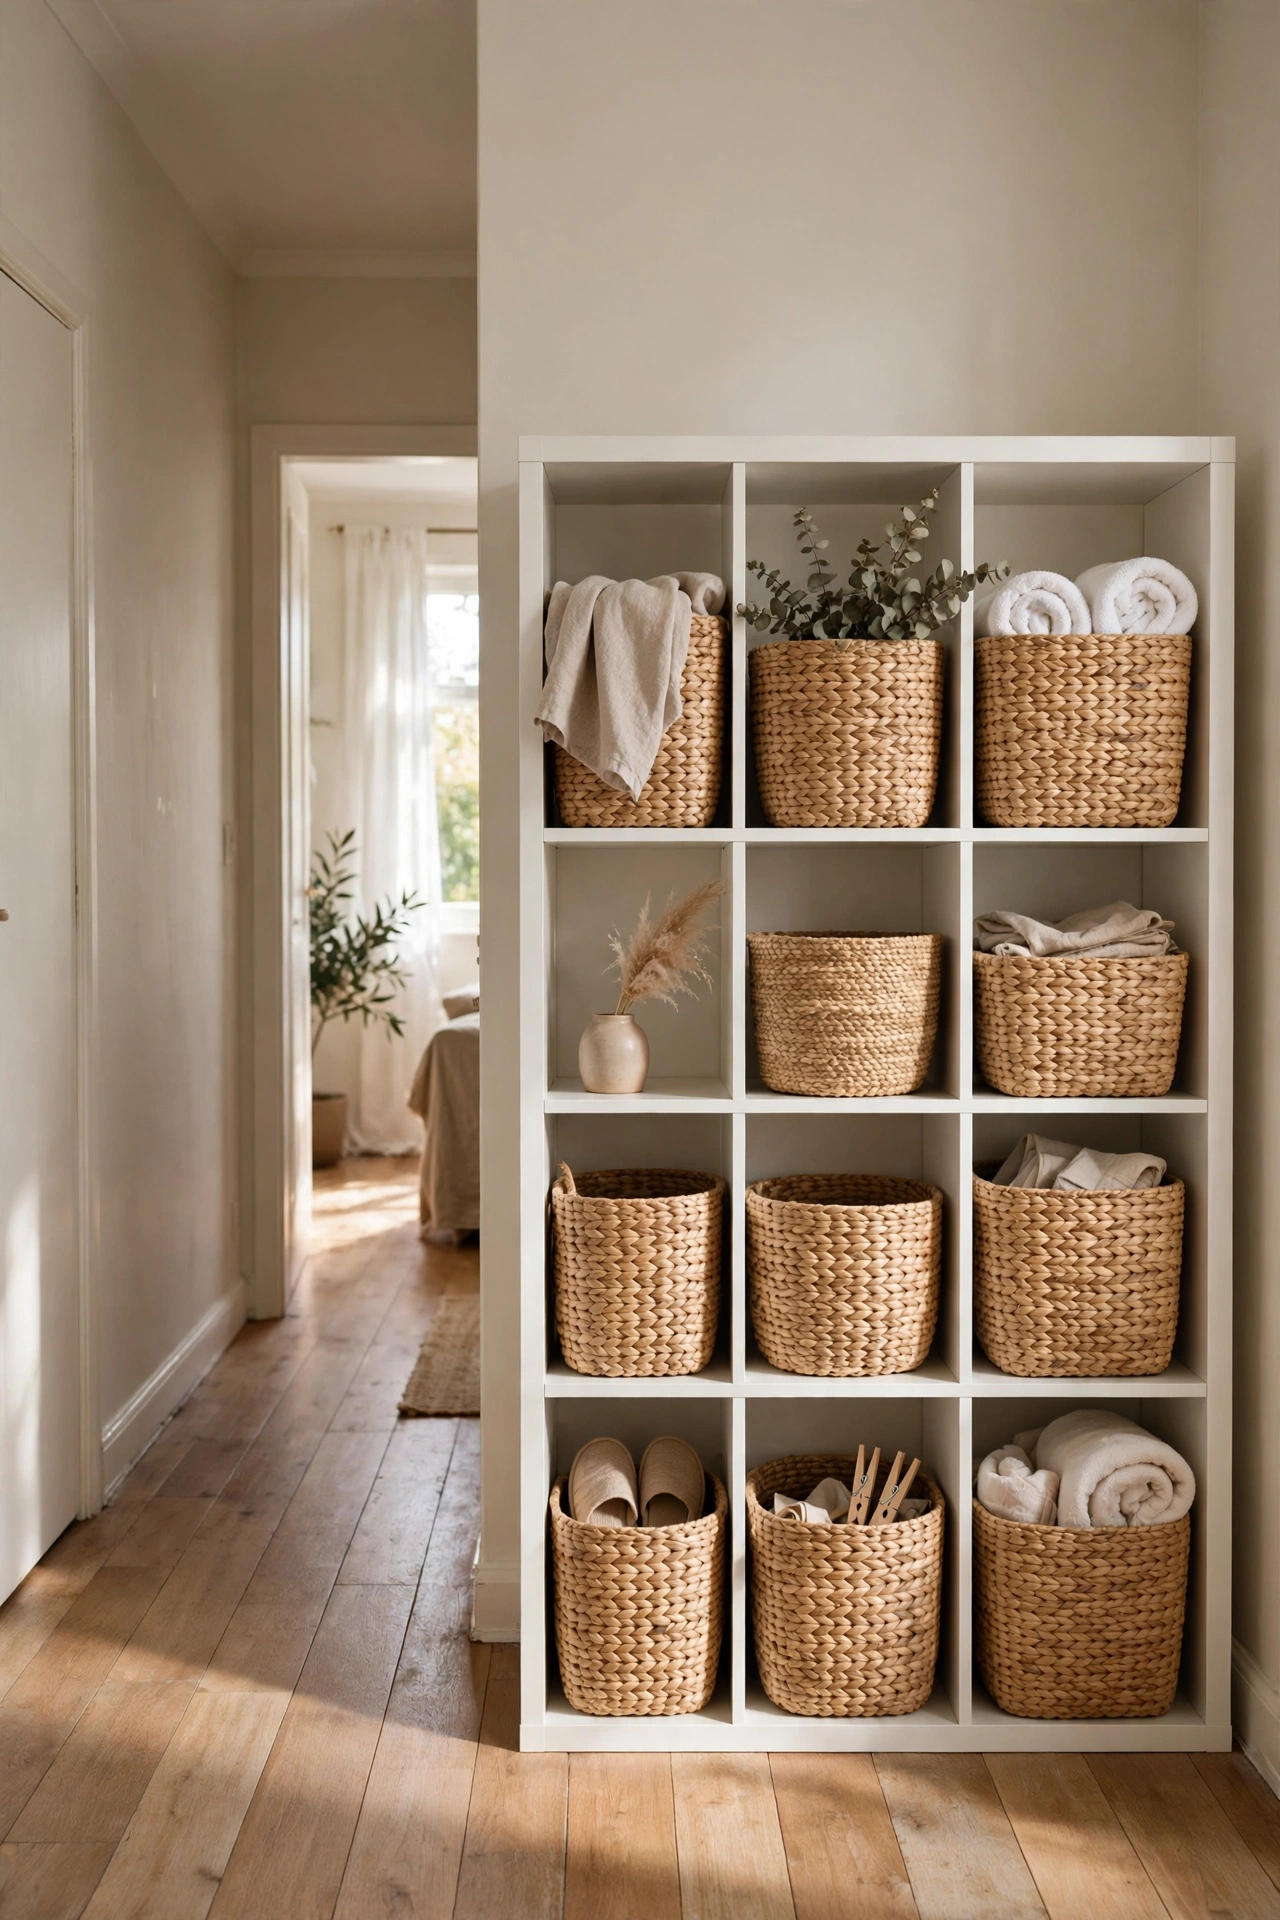
Matching baskets are the minimalist’s secret weapon: everything messy goes inside, and the shelf looks serene. Buy a set of identical seagrass or cotton rope baskets to fit your shelving cubes, and decant all the small clutter into them. I did this with my hallway unit and it went from chaotic to calm in an hour. My mistake was buying mixed baskets on sale first, which looked even busier than before; uniformity is the whole point. Label nothing, because blank baskets are the look.
Cost: ~$15-24 | Time: 1 hour
For more calm-room ideas, see (see also: 15-minimalist-style-diy-projects-on-a-budget) and (see also: 19-easy-diy-home-decor-projects-for-beginners-under-30), plus (see also: 19-dollar-store-decor-ideas-that-look-expensive) for more looks-expensive tricks.
Save this one for your weekend project list.
Quick Questions
Q: Can minimalist decor still feel cosy?
A: Yes, minimalism fails when it is only hard surfaces. Add texture through linen, wool, wood, and warm light, and keep colours warm rather than stark white. A calm room with soft textiles feels restful, not cold.
Q: What is the cheapest way to make a room look expensive?
A: Edit first, buy nothing. Remove half the objects from every surface, group what remains in odd numbers, and add one large-scale piece of simple art. Restraint costs nothing and reads as luxury every time.
Q: How do I keep minimalist rooms from looking empty?
A: Think in layers of texture rather than quantities of stuff. One wooden tray, one linen cushion, one ceramic vase, and one branch arrangement give the eye plenty to enjoy without clutter. Scale matters too: fewer, larger pieces fill a room better than many small ones.
