17 DIY Nightstand Ideas for Beginners
My first flat came with a bedroom exactly wide enough for a bed and nothing else. For two years my phone charged on the floor and my book lived on the windowsill. When I finally moved somewhere with room for a proper bedside table, shop prices made me laugh out loud. Every diy Nightstand on this list costs less than one takeaway dinner, and most take under two hours.
These 17 builds need only beginner tools: a drill, sandpaper, and paint. No complicated joinery, no workshop. Pick the one that matches your bedroom and make it this weekend.
1. Stacked Crate Nightstand
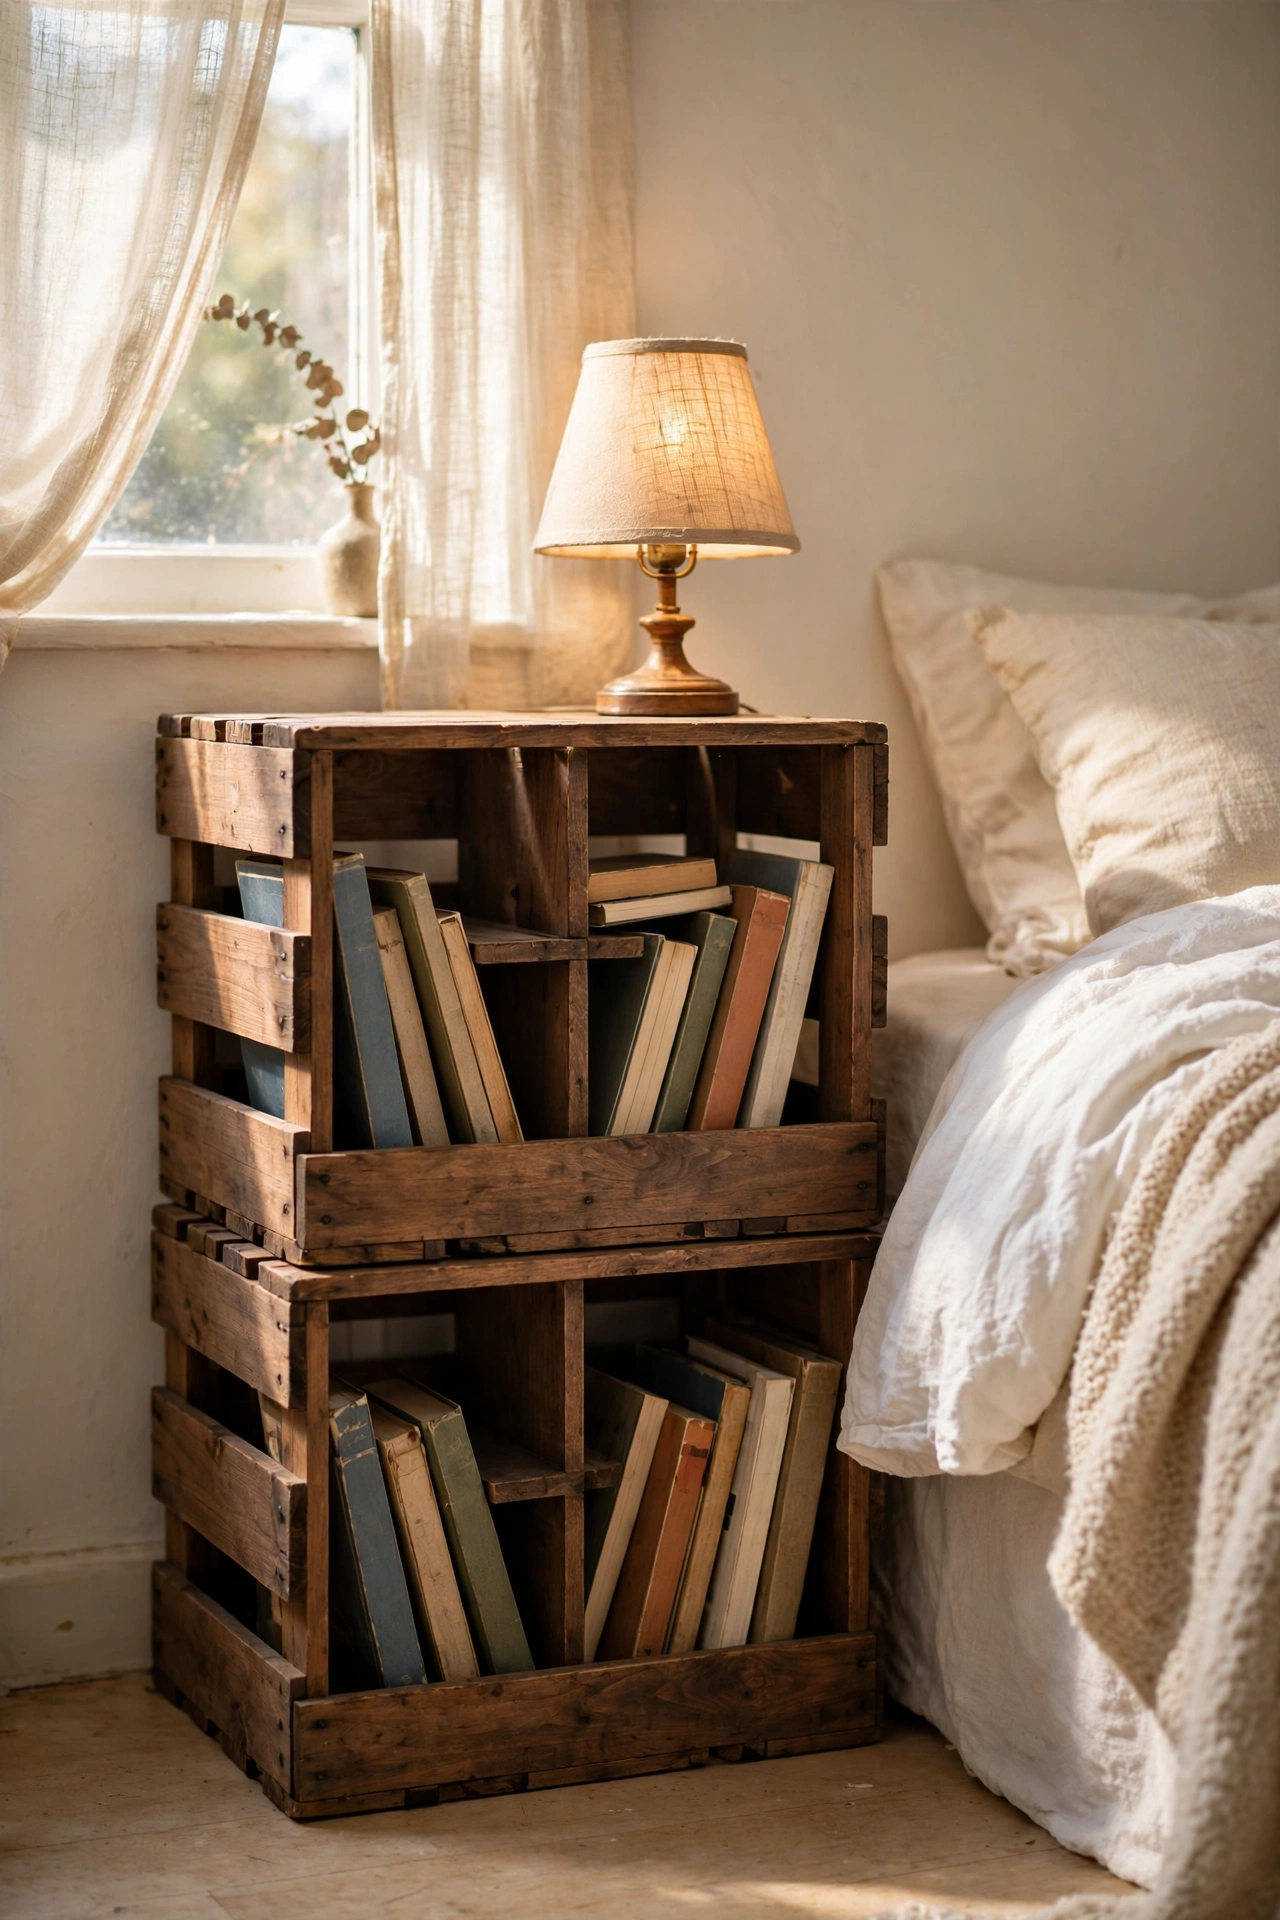
Two wooden crates stacked on their sides make a nightstand with built-in cubbies. I sanded two $8 apple crates, stained them walnut, and stacked them so the openings face forward. The top holds my lamp and the cubbies hold books and chargers. Screw the crates together from the inside so they cannot shift. My first stack wobbled until I joined them properly. Leave the wood natural for rustic bedrooms or paint them white for a cleaner look. Castor wheels on the bottom make it movable.
Cost: ~$16-24 | Time: 2 hours
2. Vintage Suitcase Nightstand
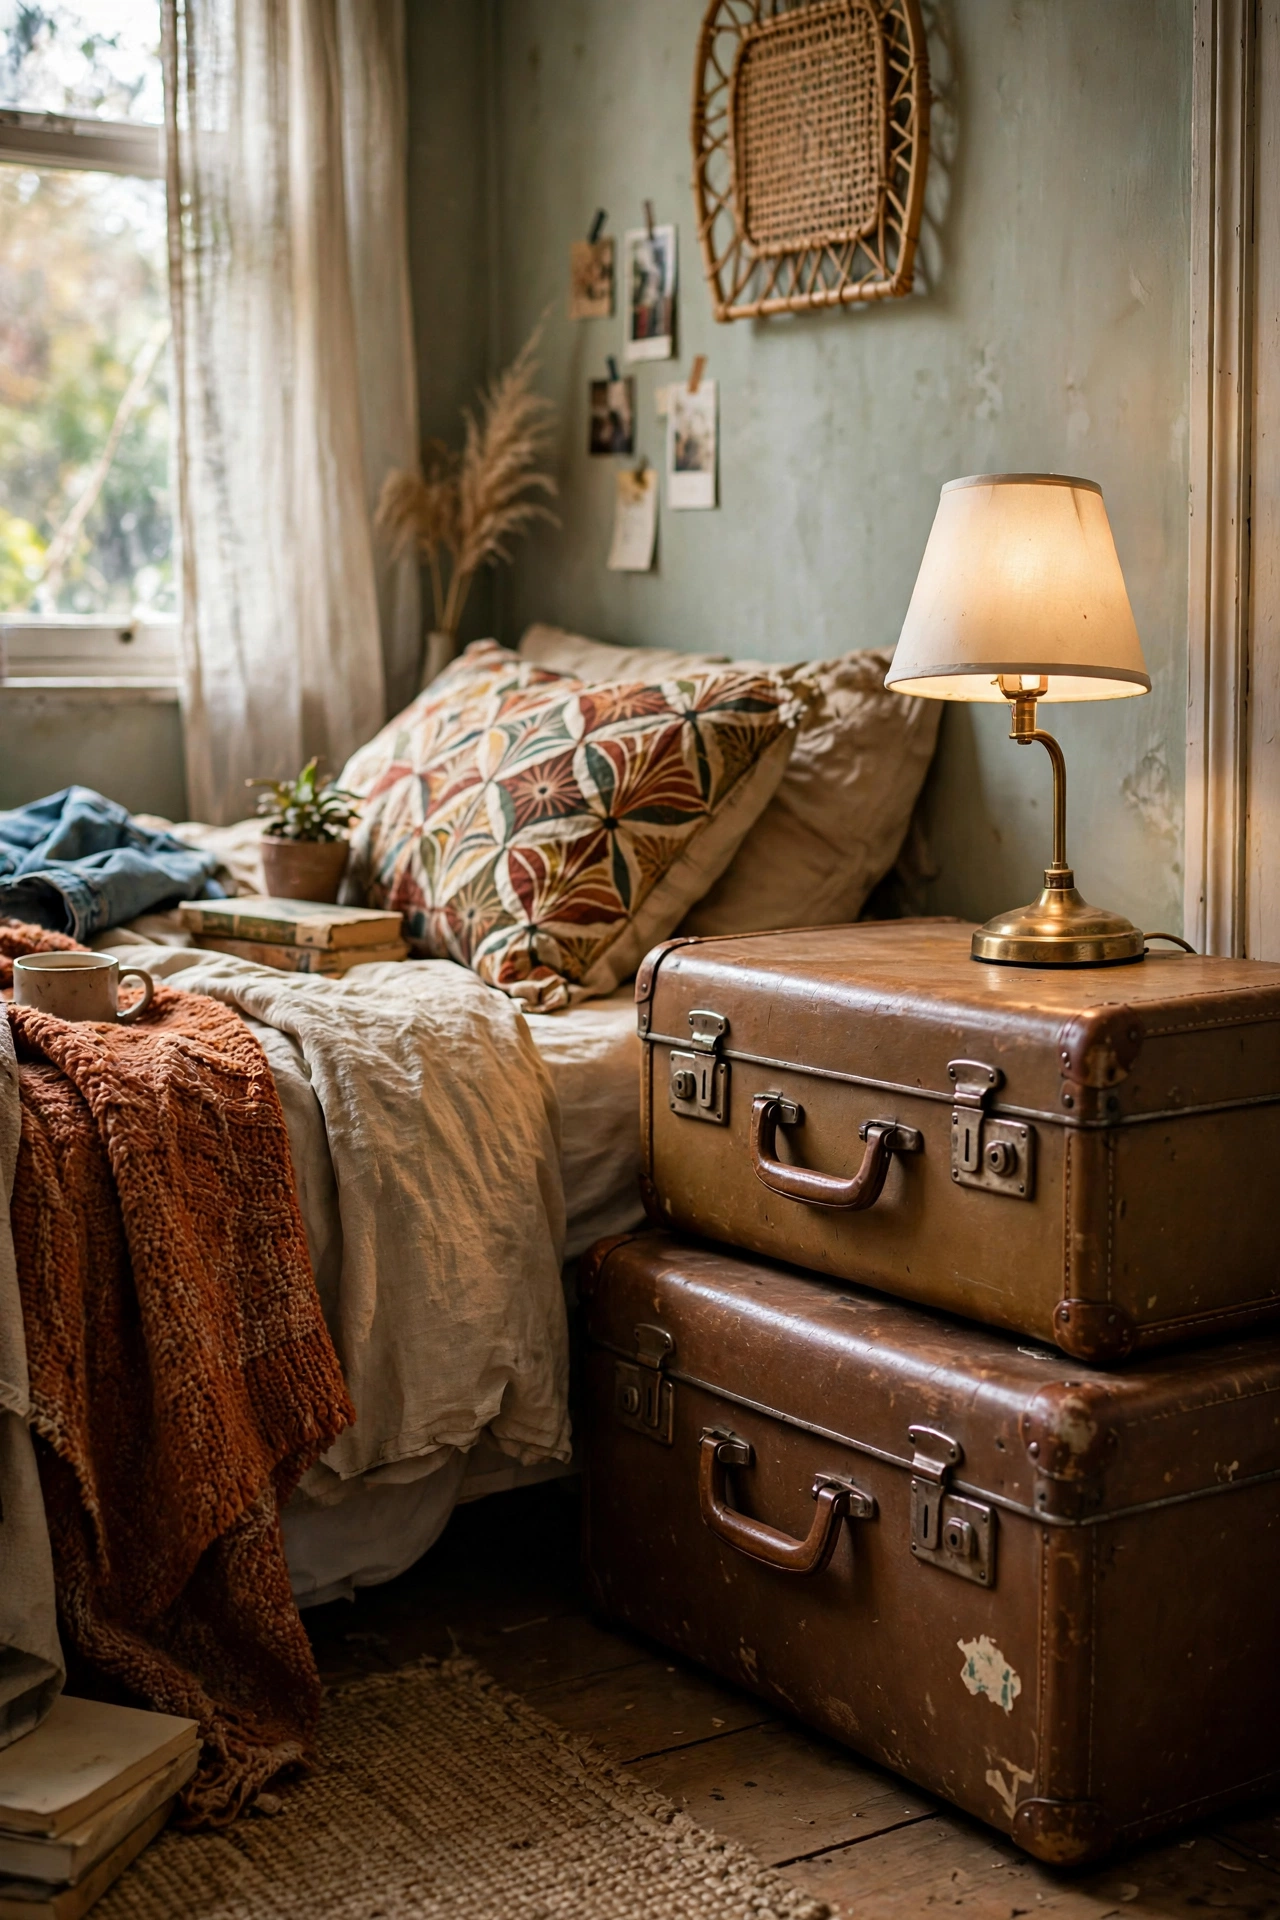
A stack of two vintage suitcases makes a nightstand with secret storage inside. I found two hard-shell cases for $10 total at a car boot sale, cleaned them thoroughly, and stacked the smaller on the larger beside my bed. The top case holds my lamp and the cases themselves store spare bedding. Check the latches close firmly and the cases sit level: warped vintage cases rock. I glued felt pads under the bottom one to protect the floor. This suits eclectic and vintage bedrooms perfectly.
Cost: ~$10-18 | Time: 30 minutes
3. Hairpin-Leg Plywood Nightstand
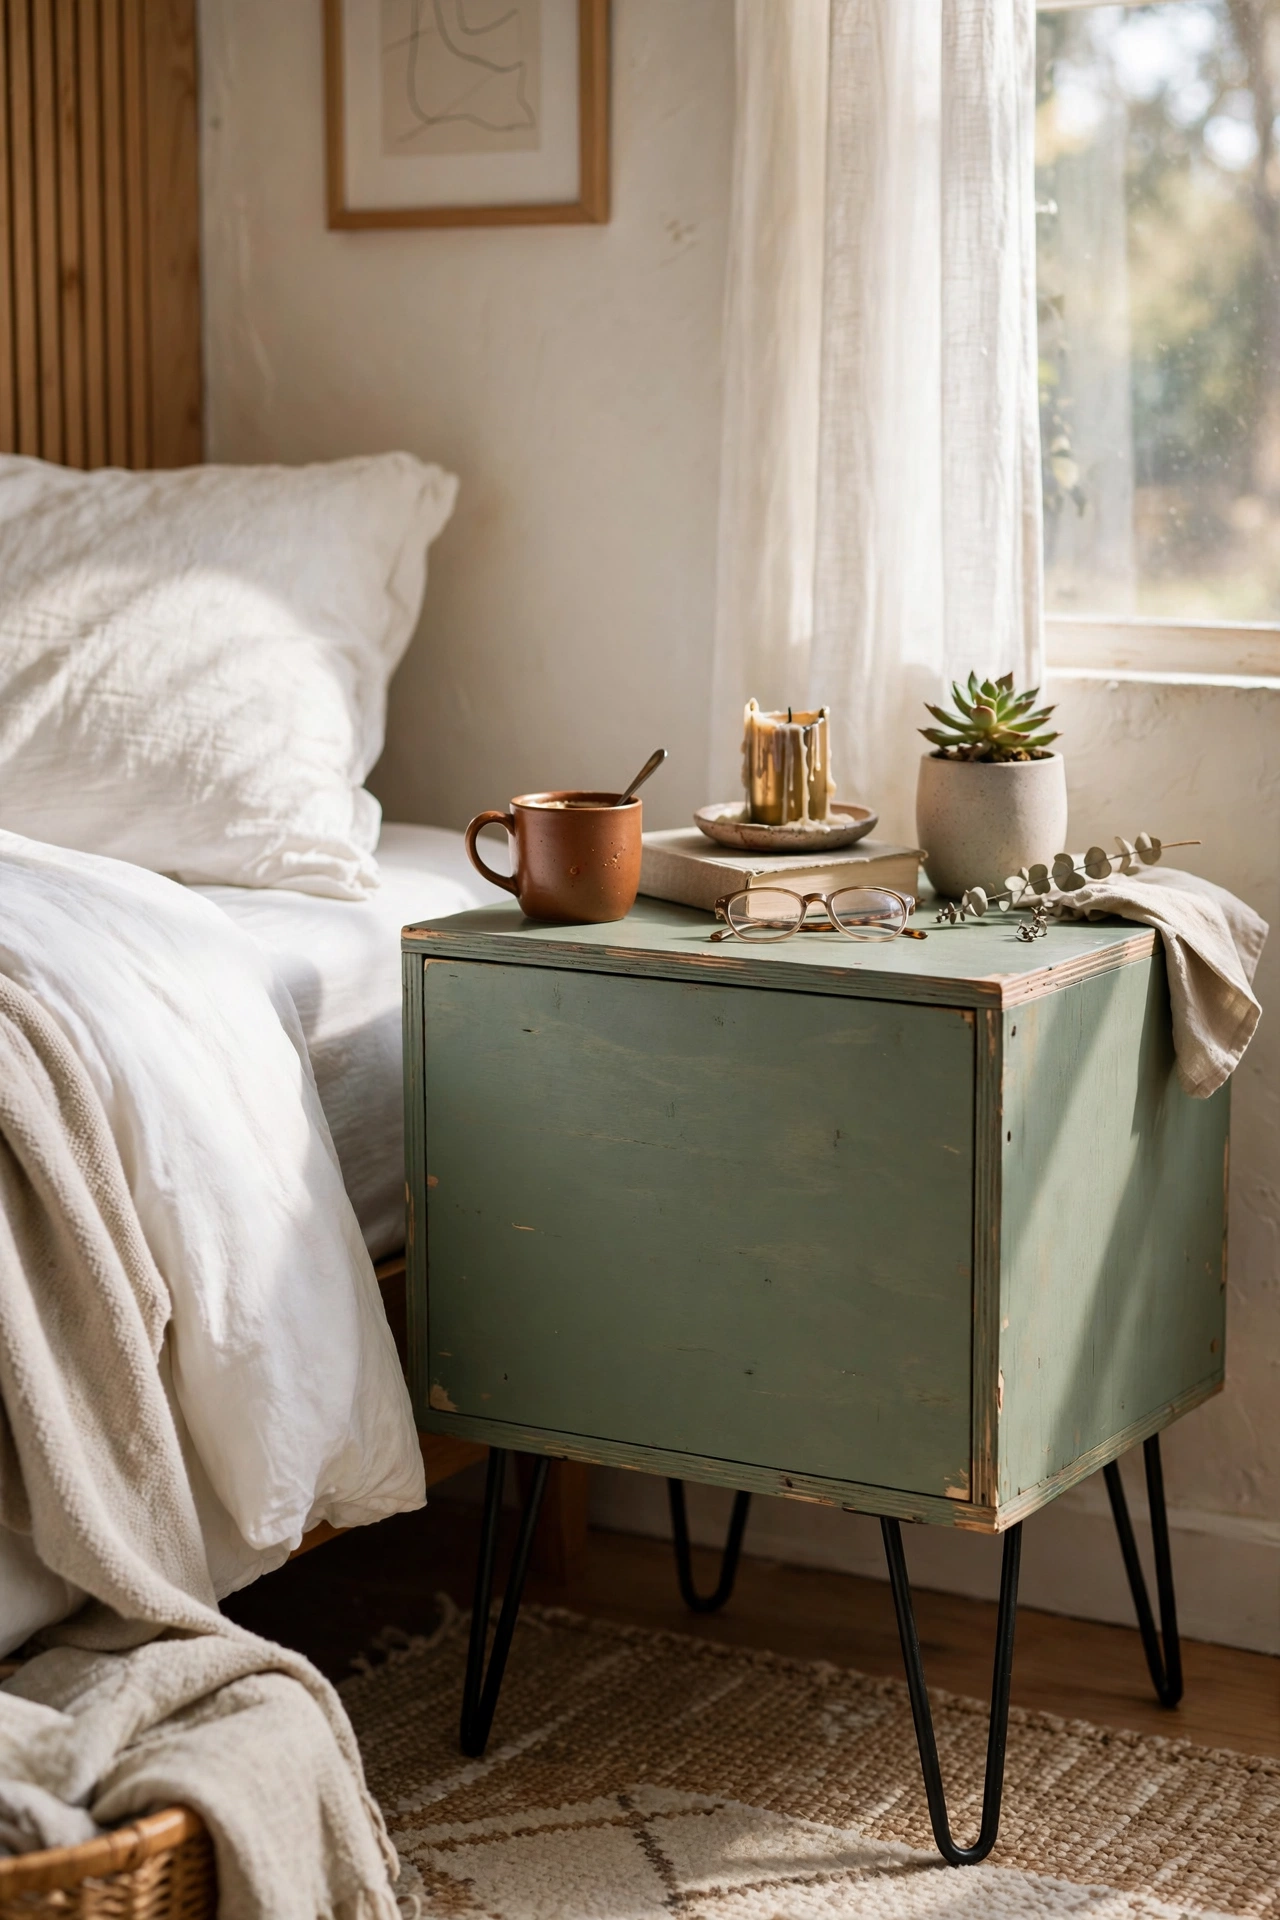
A plywood box on hairpin legs looks mid-century modern for very little money. I built a simple open box from 1.5-centimetre plywood, painted it sage green, and screwed on four 40-centimetre hairpin legs. The legs cost $16 for the set and do all the visual work. Sand the plywood edges smooth and fill screw holes before painting, because the simple shape shows every flaw. Mine holds a lamp on top and books inside. This is the best-looking beginner build on the list.
Cost: ~$25-35 | Time: 3 hours
Pro tip: A nightstand should sit within 5 centimetres of your mattress height. Too low and you will fumble for your lamp in the dark; too high and it looms over the bed. Measure your mattress top before you build.
4. Painted Wooden Stool Nightstand
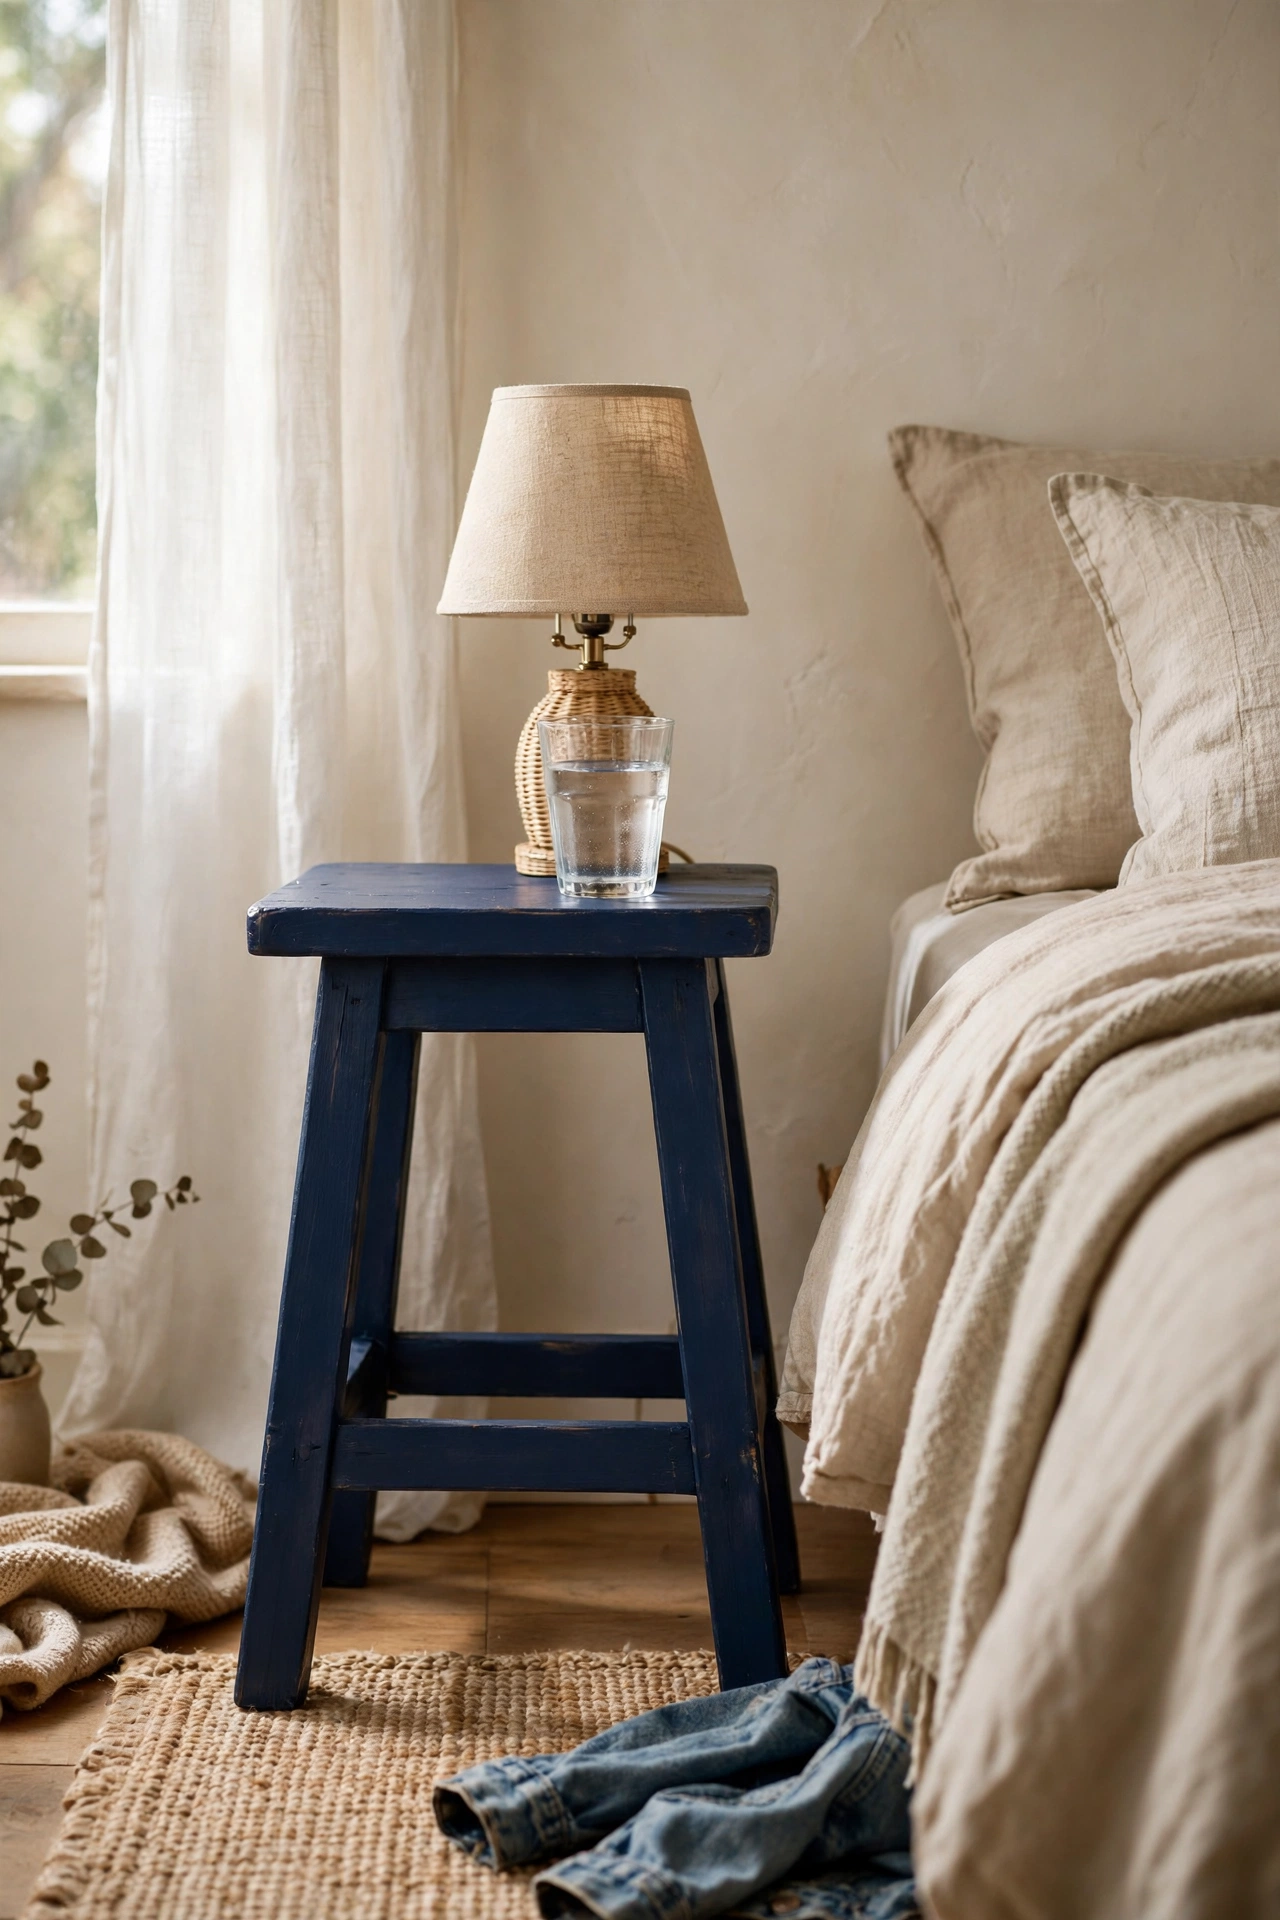
A sturdy wooden stool is already nightstand height in most cases. I bought a $6 pine stool, painted it deep navy with chalk paint, and waxed it for durability. The round top fits a lamp and a glass of water perfectly. Check the stool is solid and does not wobble before you commit: sit on it and shift your weight. I added a small lower shelf between the legs from an offcut for extra storage. This is the simplest project here and ideal for a first attempt.
Cost: ~$8-14 | Time: 2 hours
5. Floating Cube Shelf Nightstand
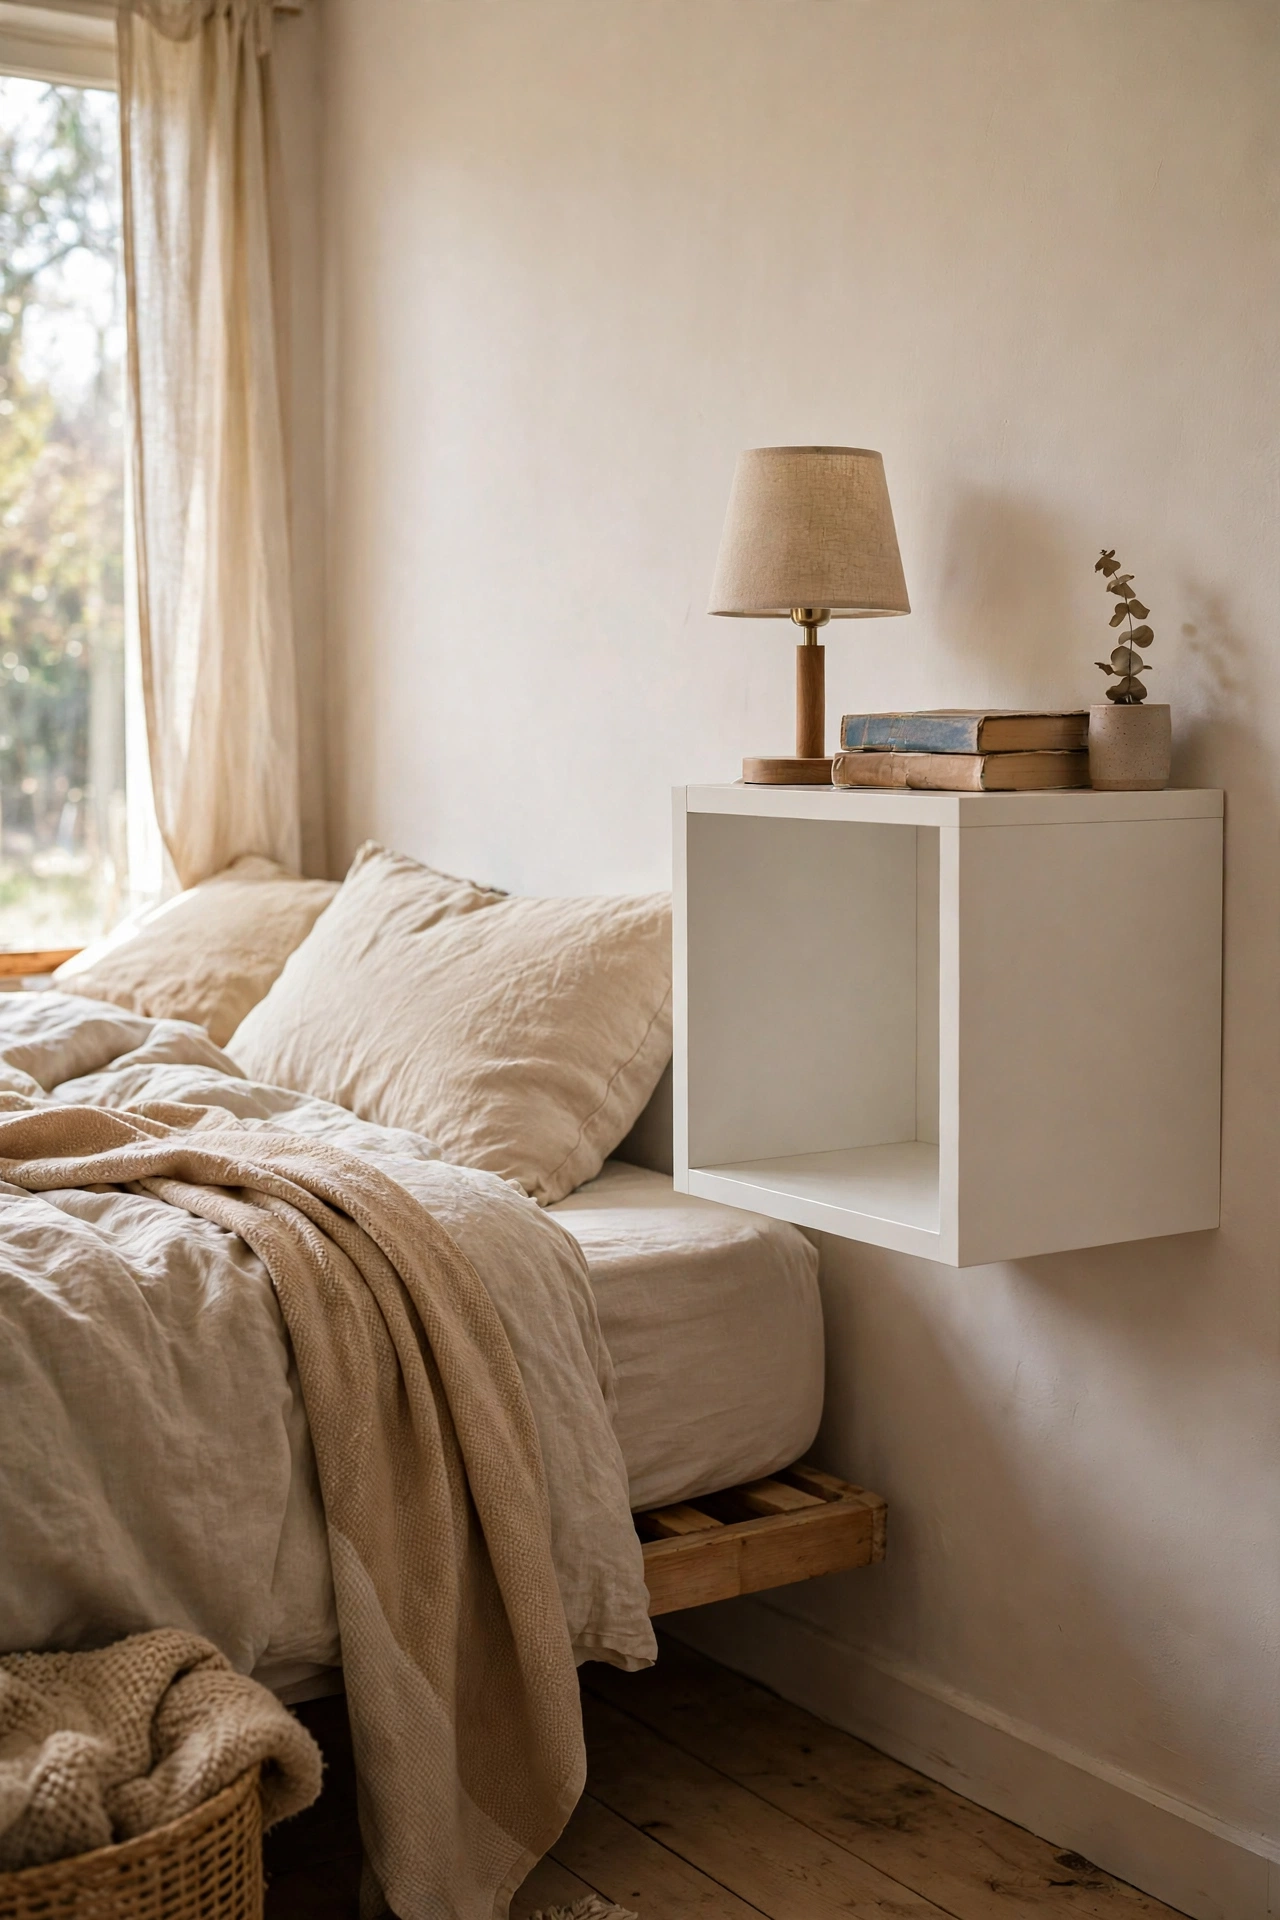
A single cube shelf mounted on the wall beside the bed floats without legs. I fixed a 35-centimetre cube shelf into a wall stud at mattress height and styled the top with a lamp and the inside with books. The floating look keeps a small bedroom feeling open and makes cleaning underneath easy. Use a proper stud fixing rated for the weight plus your lamp: a shelf that pulls out of drywall at 3am is no joke. I learned to always find the stud after one near miss.
Cost: ~$12-18 | Time: 45 minutes
6. Leaning Ladder Bedside Shelf
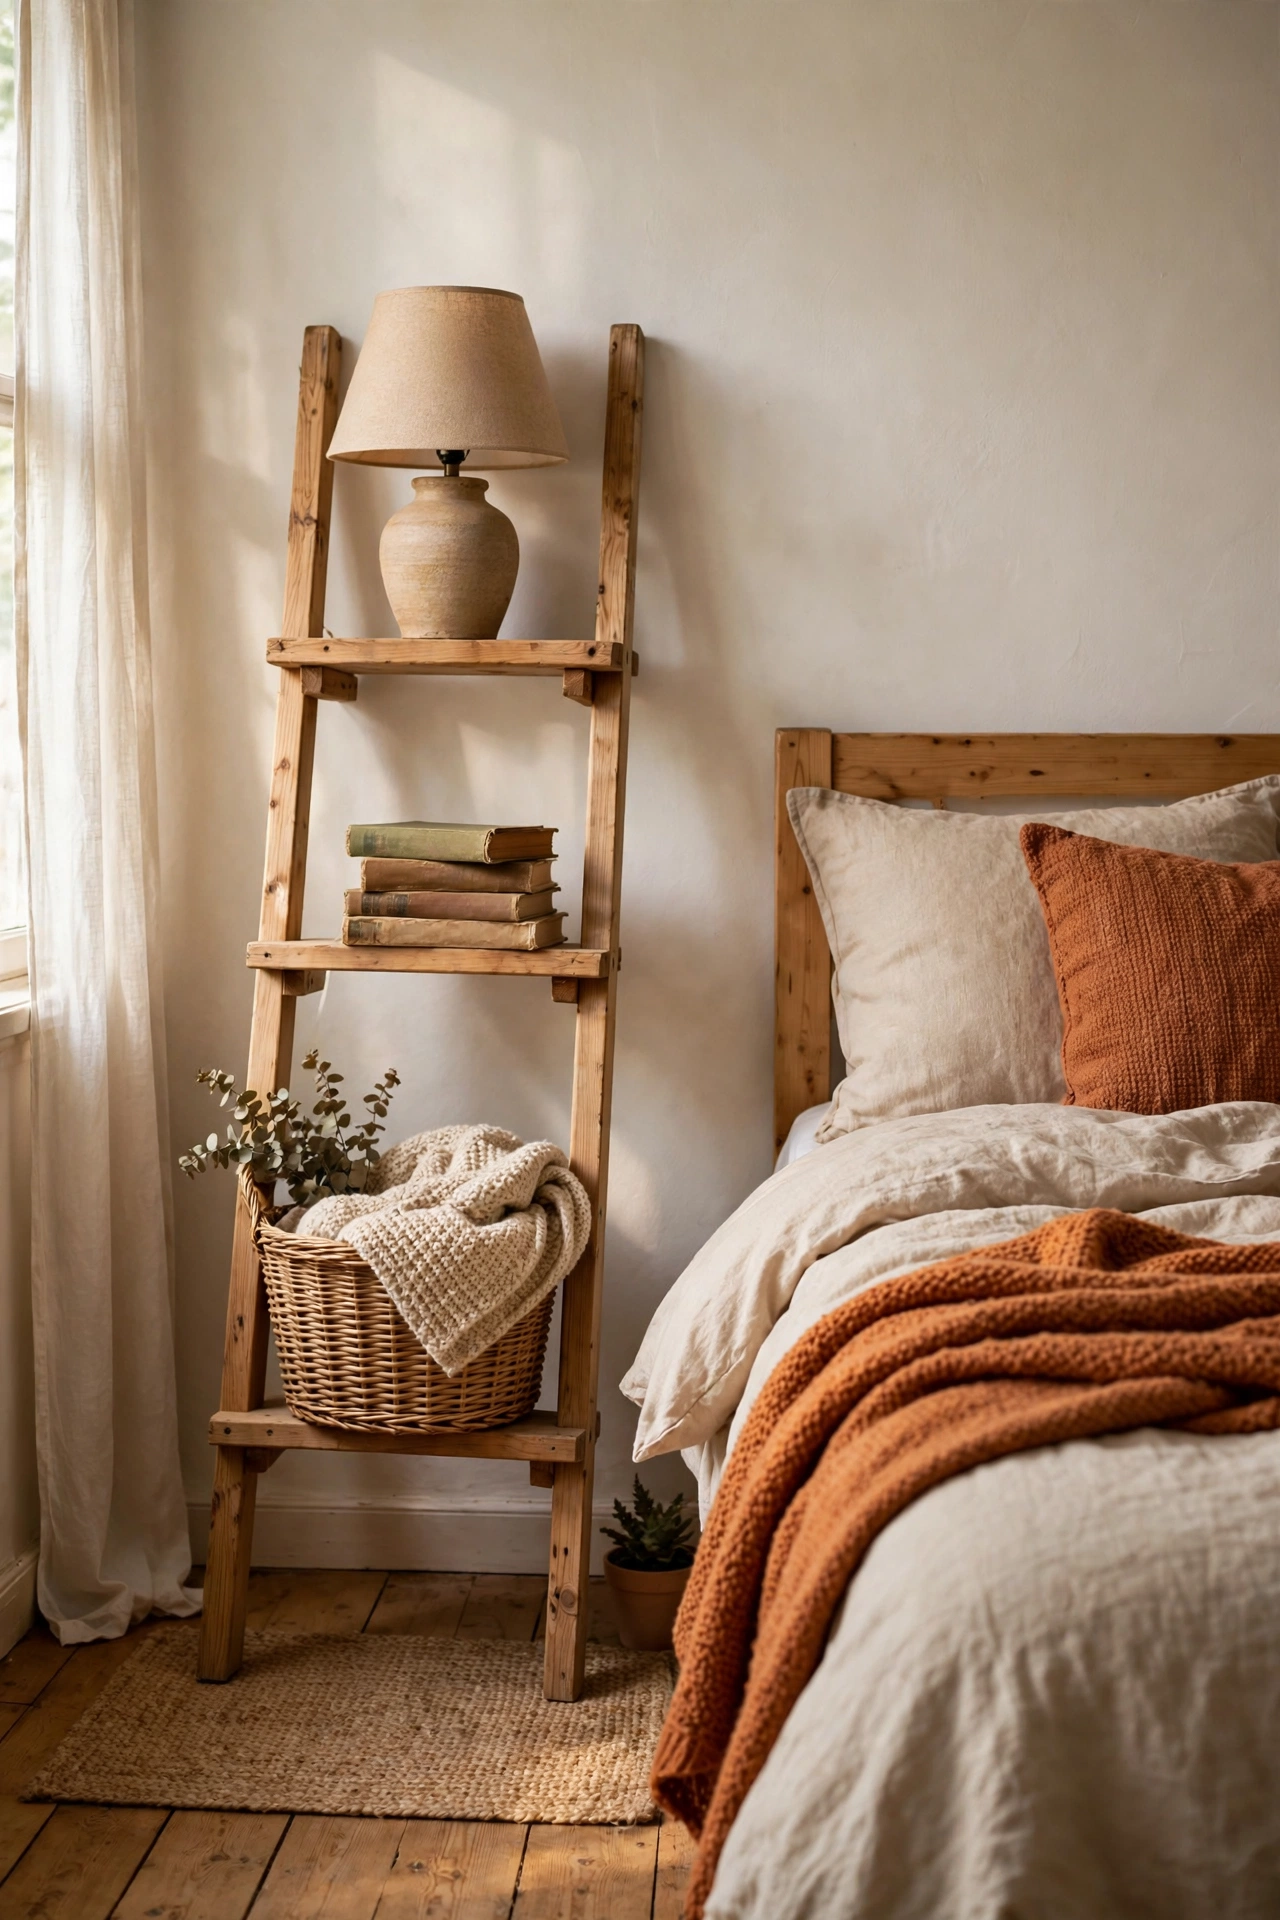
A small wooden ladder leaned against the wall gives you tiered bedside storage. I cut a 1.2-metre ladder from pine, added three wide rungs as shelves, and leaned it at a safe angle beside my bed. Each rung holds a different thing: lamp on top, books in the middle, basket at the bottom. Fix the top to the wall with a small bracket so it cannot slip. The ladder shape suits narrow spaces where a square table would crowd the bed.
Cost: ~$14-20 | Time: 2 hours
Pro tip: Whatever nightstand you build, add a small tray or dish on top for glasses, rings, and lip balm. A contained spot for tiny things is what separates a styled nightstand from a cluttered one.
7. Wooden Barrel Drum Nightstand
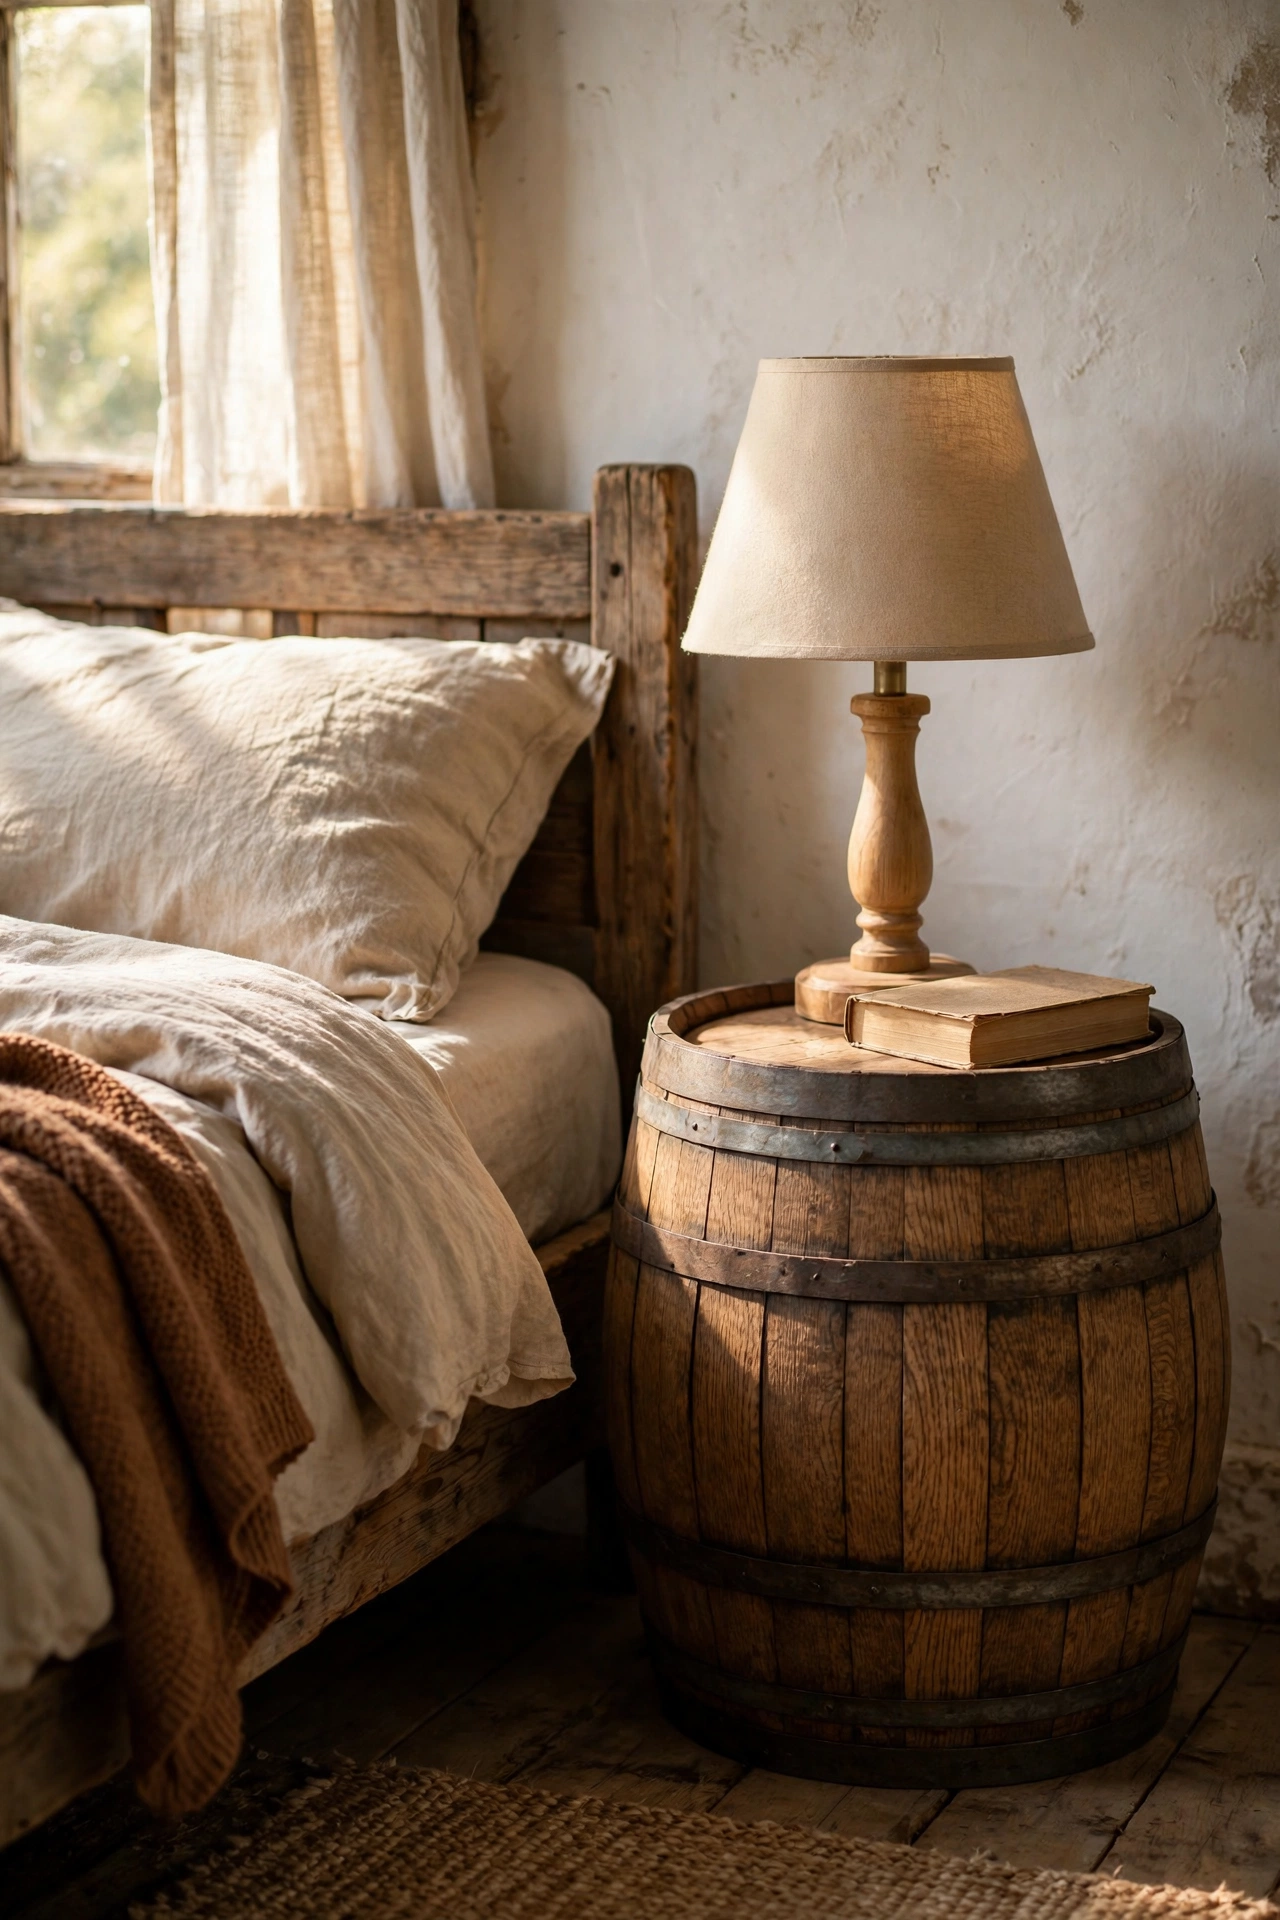
A small wooden barrel or drum table makes a characterful round nightstand. I found a 45-centimetre oak barrel for $20, sanded it, and sealed it with clear wax. The curved sides are the decoration. Check it sits perfectly level: barrels with uneven staves rock. I shimmed mine with a felt pad. The top fits a lamp and a book comfortably. This suits rustic and farmhouse bedrooms, and the hollow inside can hide clutter if you add a lid. I check the metal hoops for rust before sealing, because a rusty hoop leaves orange marks on everything it touches.
Cost: ~$20-30 | Time: 1 hour
8. Repurposed Drawer Nightstand
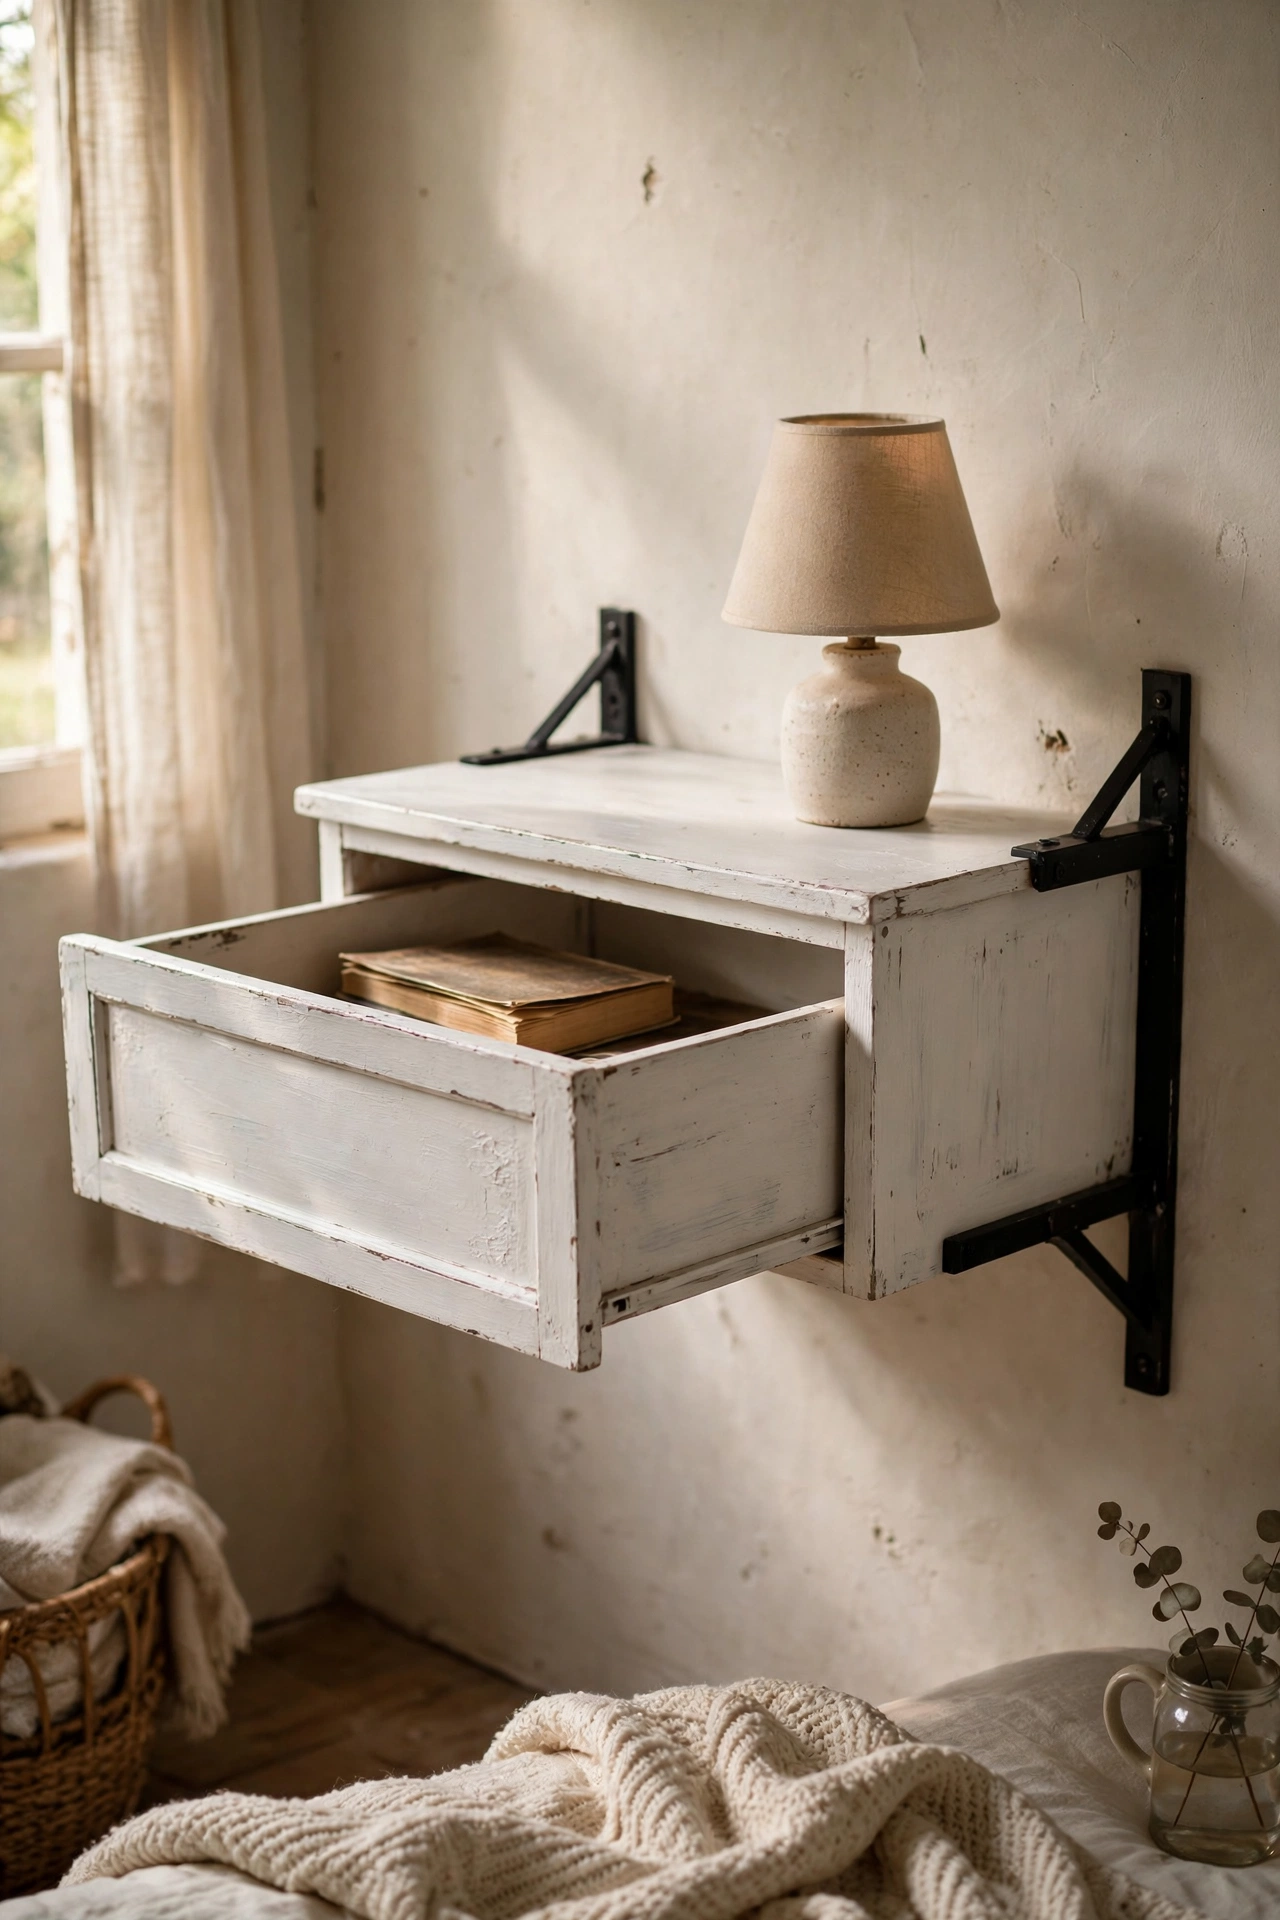
A single deep drawer from a broken dresser becomes a wall-mounted nightstand. I salvaged a solid drawer, painted it white, and mounted it on sturdy L-brackets at mattress height with the opening facing forward. The drawer cavity holds my book and charger while the top holds the lamp. Pull the drawer out and clean the runners first: old drawers stick. I waxed the runners with a candle and now it glides. Add a small knob to the front for the finished look.
Cost: ~$6-12 | Time: 1 hour
9. Concrete Block Nightstand
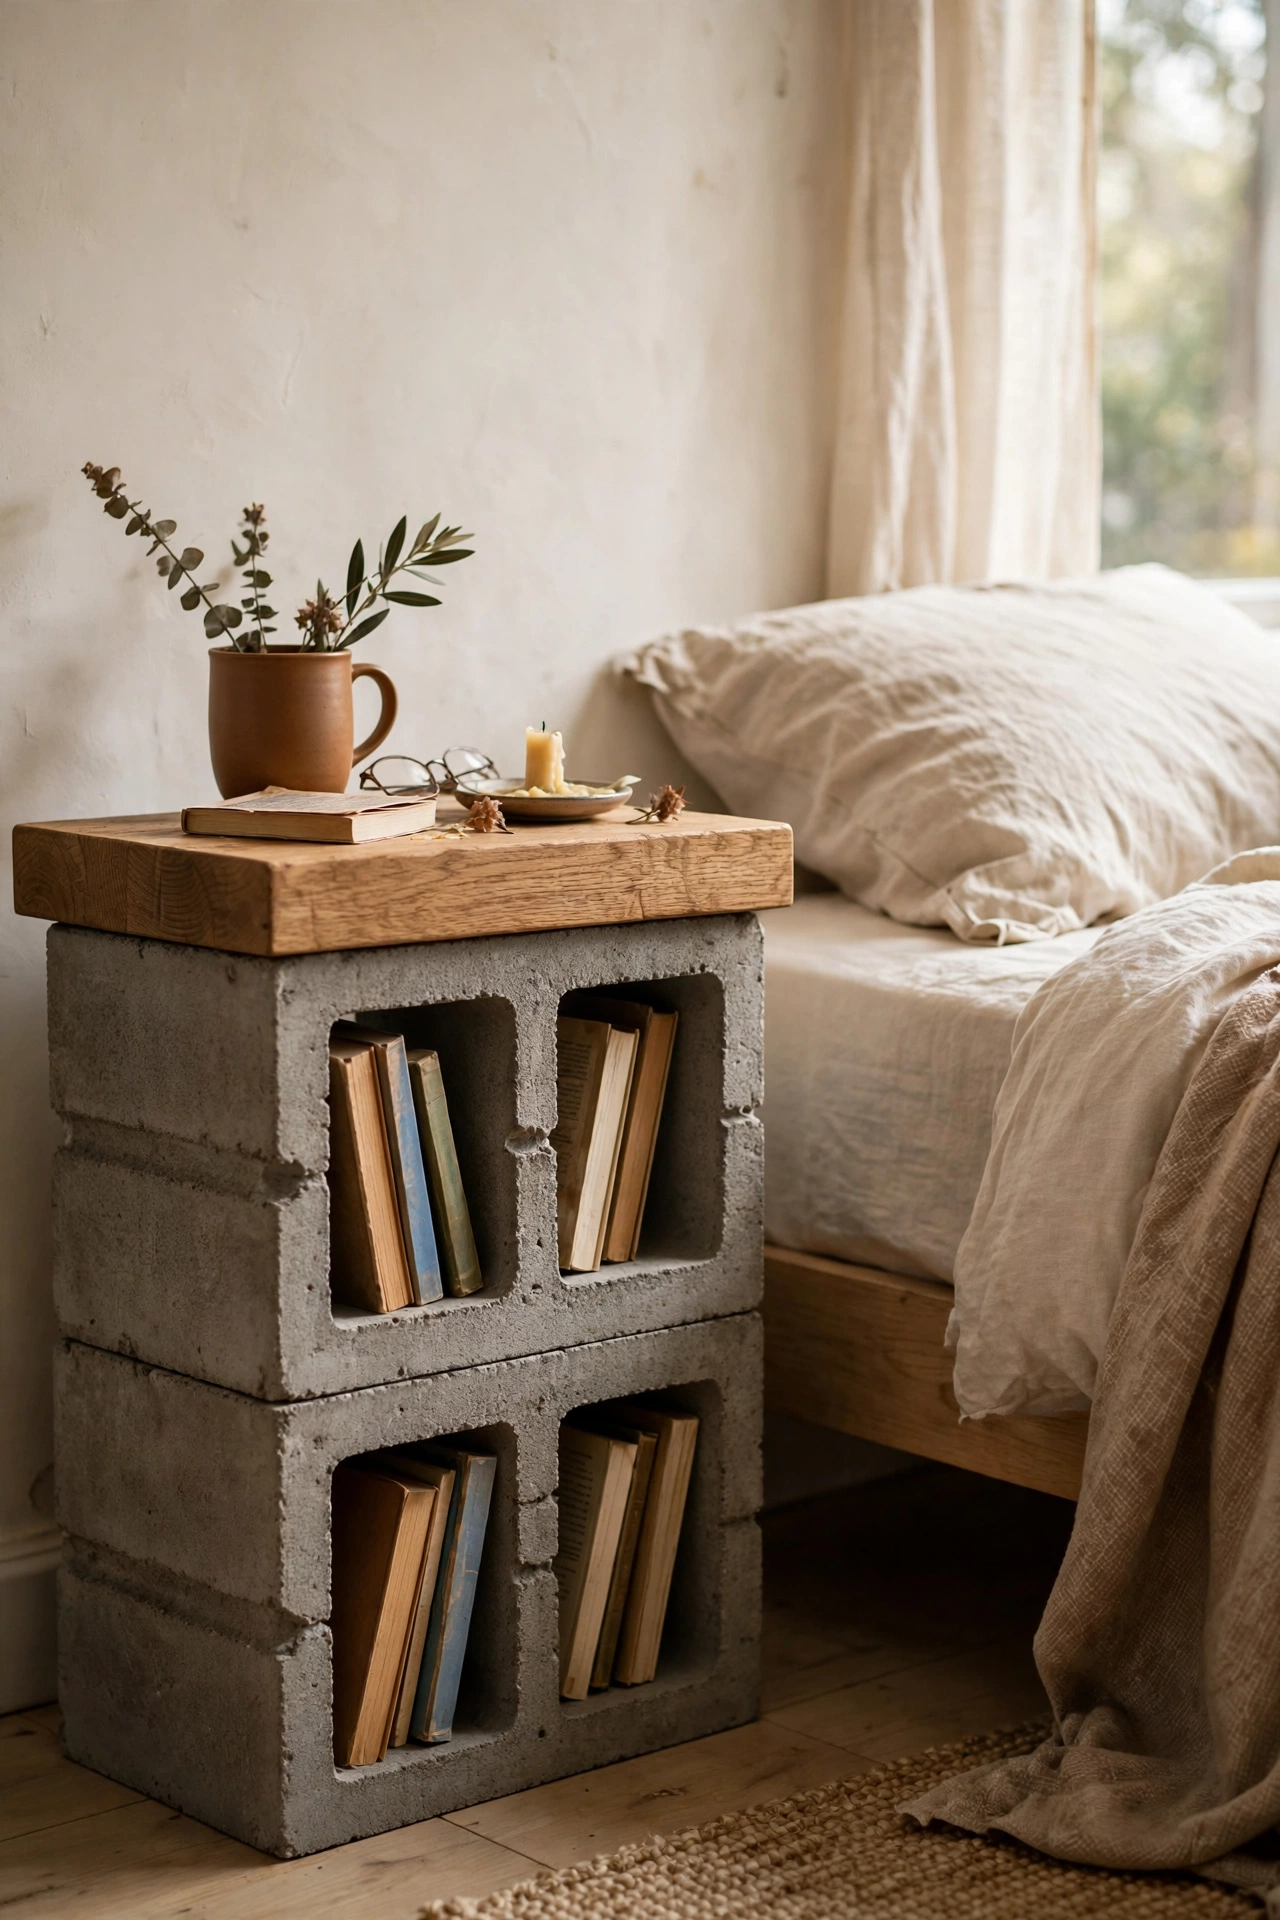
Two concrete blocks with a timber plank across the top make an industrial nightstand. I stacked two blocks, laid a 60-centimetre oak plank across them, and sealed the blocks with matte sealer to stop dust. The block holes face forward as cubbies for books. This is heavy, so build it in place and never drag it across floors. I put felt pads underneath. The raw industrial look suits modern bedrooms, and the whole thing cost less than a pizza. I sealed the blocks with two thin coats of matte sealer, then left them a full day before stacking anything on top.
Cost: ~$8-12 | Time: 30 minutes
Pro tip: Concrete blocks shed fine dust for weeks unless sealed. Two coats of matte concrete sealer on every surface, including inside the holes, stops the dust completely and deepens the grey colour nicely.
10. Tree Stump Nightstand
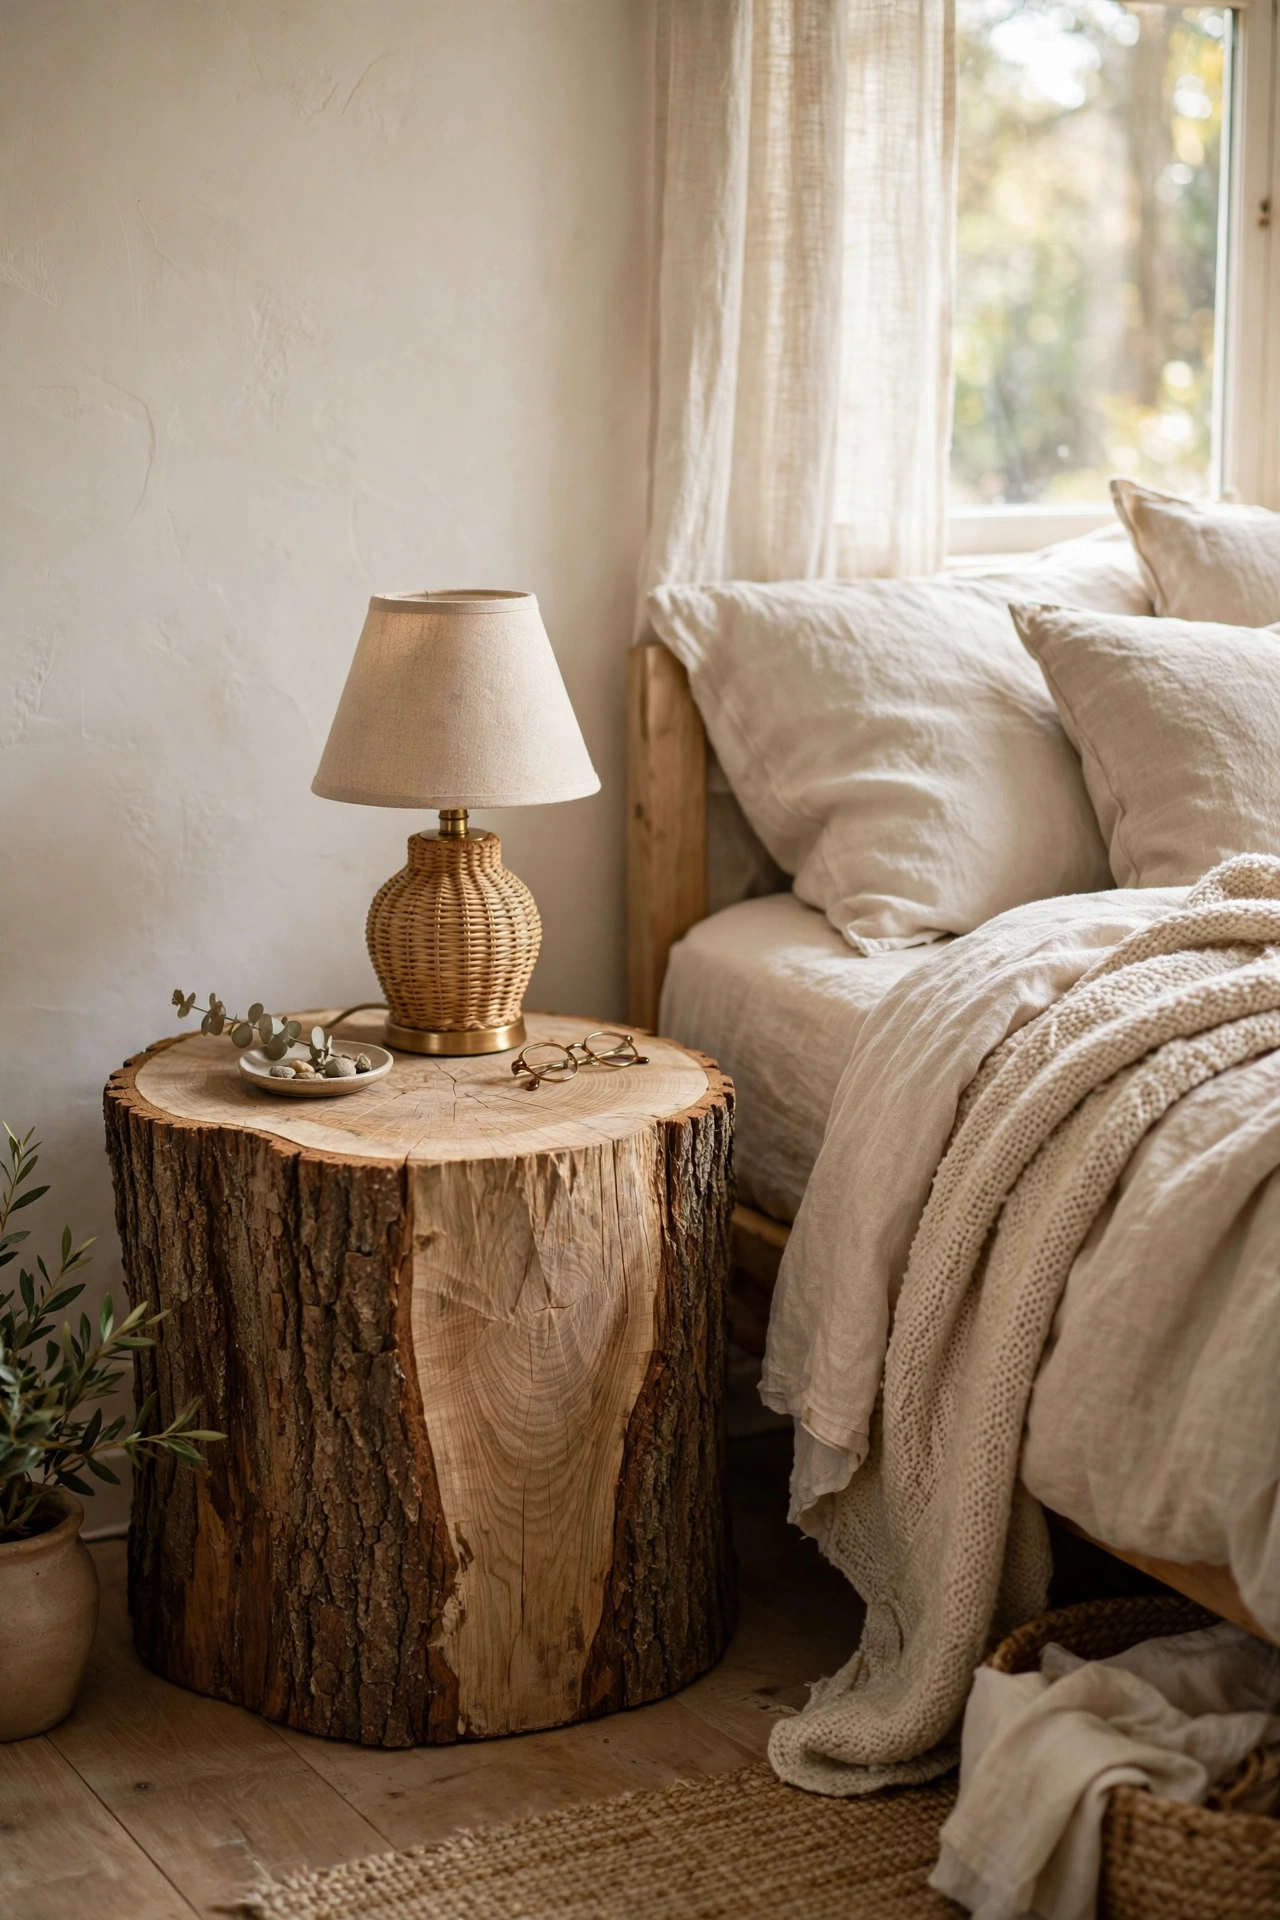
A cut tree stump makes a sculptural, organic nightstand. I bought a 45-centimetre oak stump from a tree surgeon for $15, sanded the top smooth, and sealed the whole thing with hardwax oil. Check the stump is fully dry and free of insects: knock on it and listen for hollow sounds or dust. Mine sat in my garage for two months before I brought it inside. The uneven top is part of the charm, but sand it flat enough that a lamp sits steady. Every stump is one of a kind.
Cost: ~$15-25 | Time: 2 hours
11. Rolling Bar Cart Nightstand
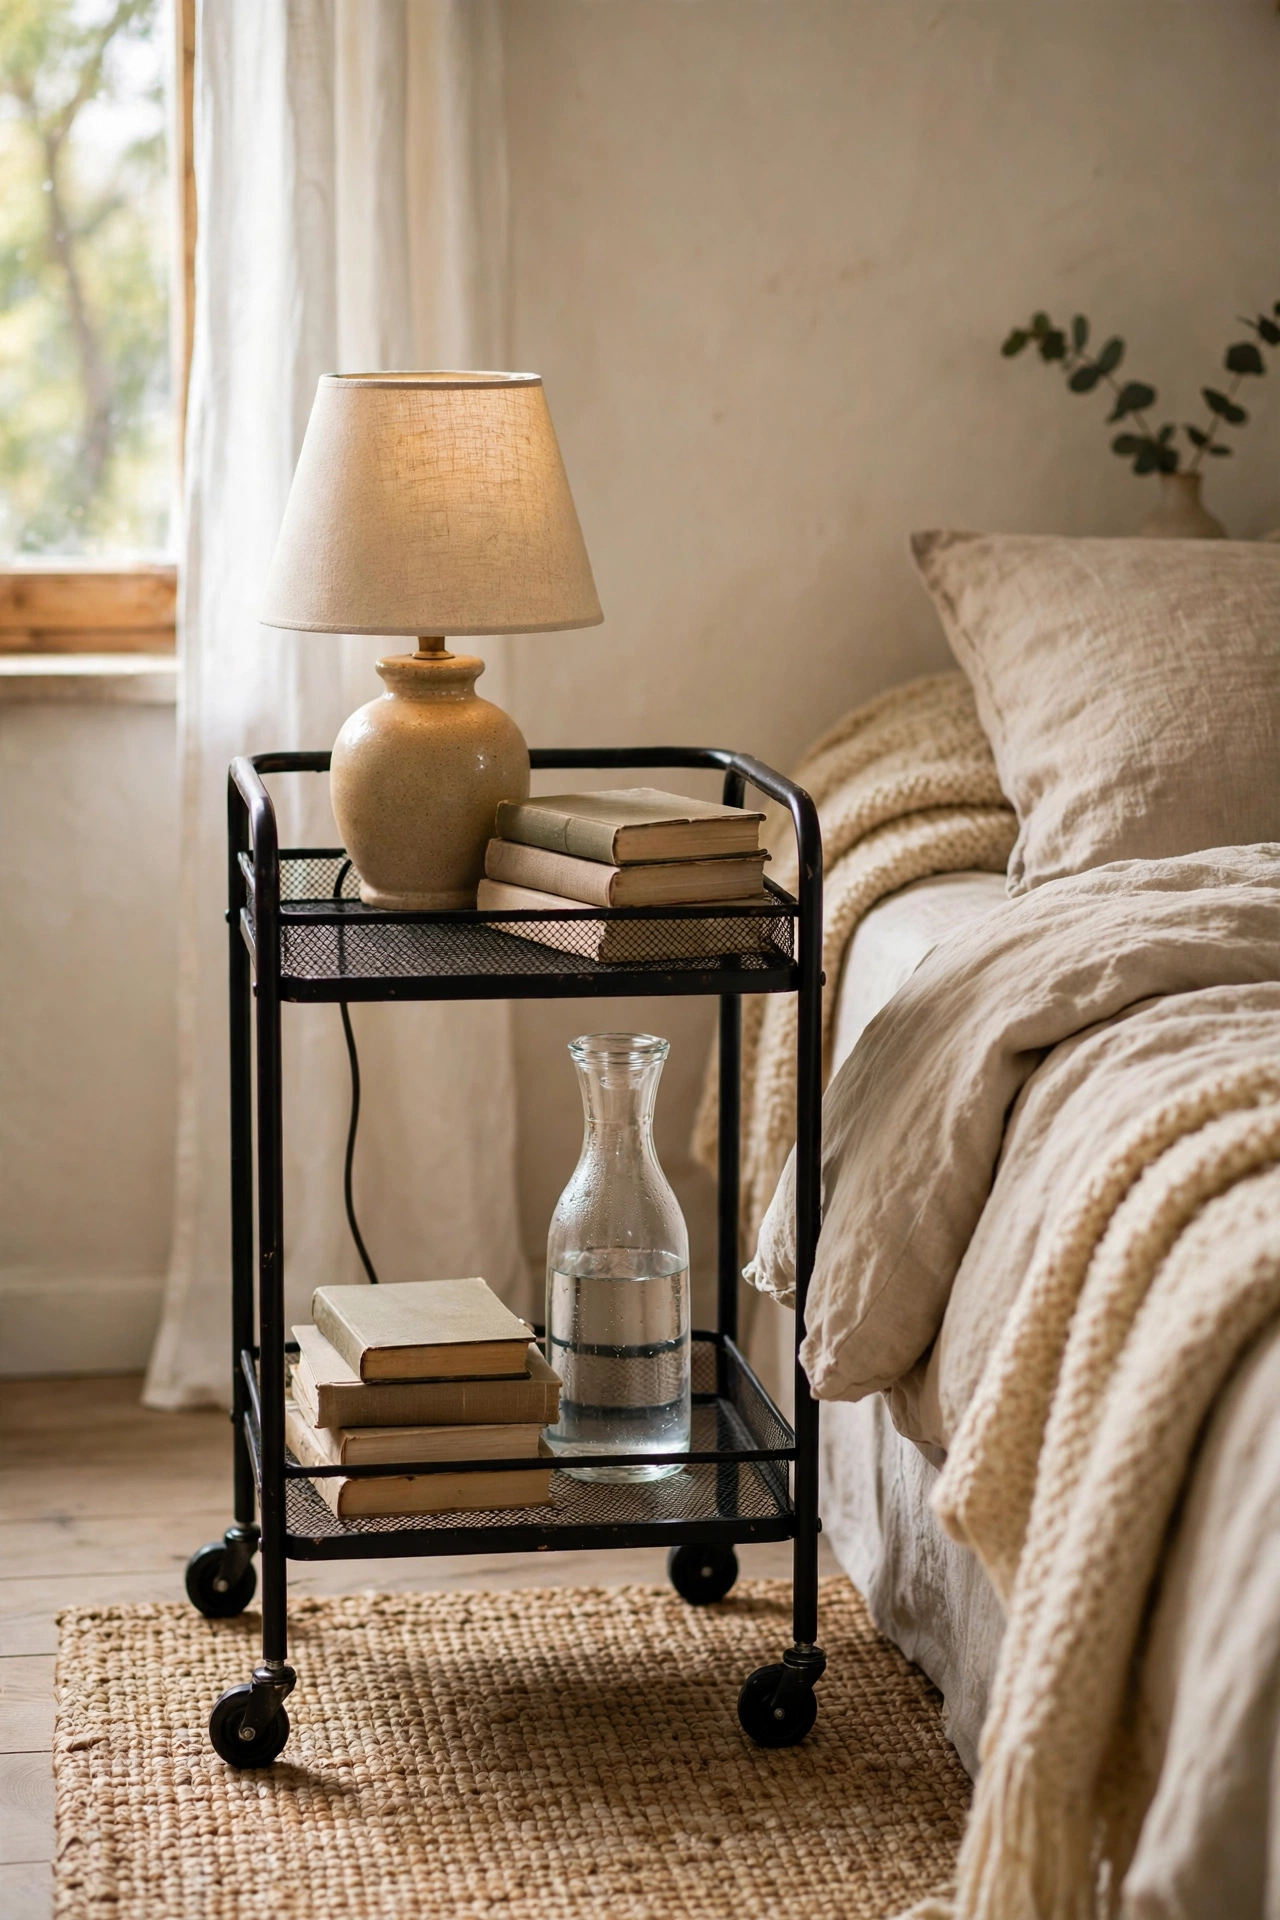
A small rolling cart works as a nightstand you can move for cleaning. I found a two-tier metal cart for $18, sprayed it matte black, and parked it beside my bed. The top holds my lamp and the lower tier holds books and a water carafe. Lock the castors once it is in place or it drifts when you reach for things in the night. I learned that at 2am. The open tiers keep everything visible, which forces me to stay tidy. Gold carts look glamorous; black looks modern.
Cost: ~$18-28 | Time: 1 hour
12. Wall-Mounted Fold-Down Nightstand
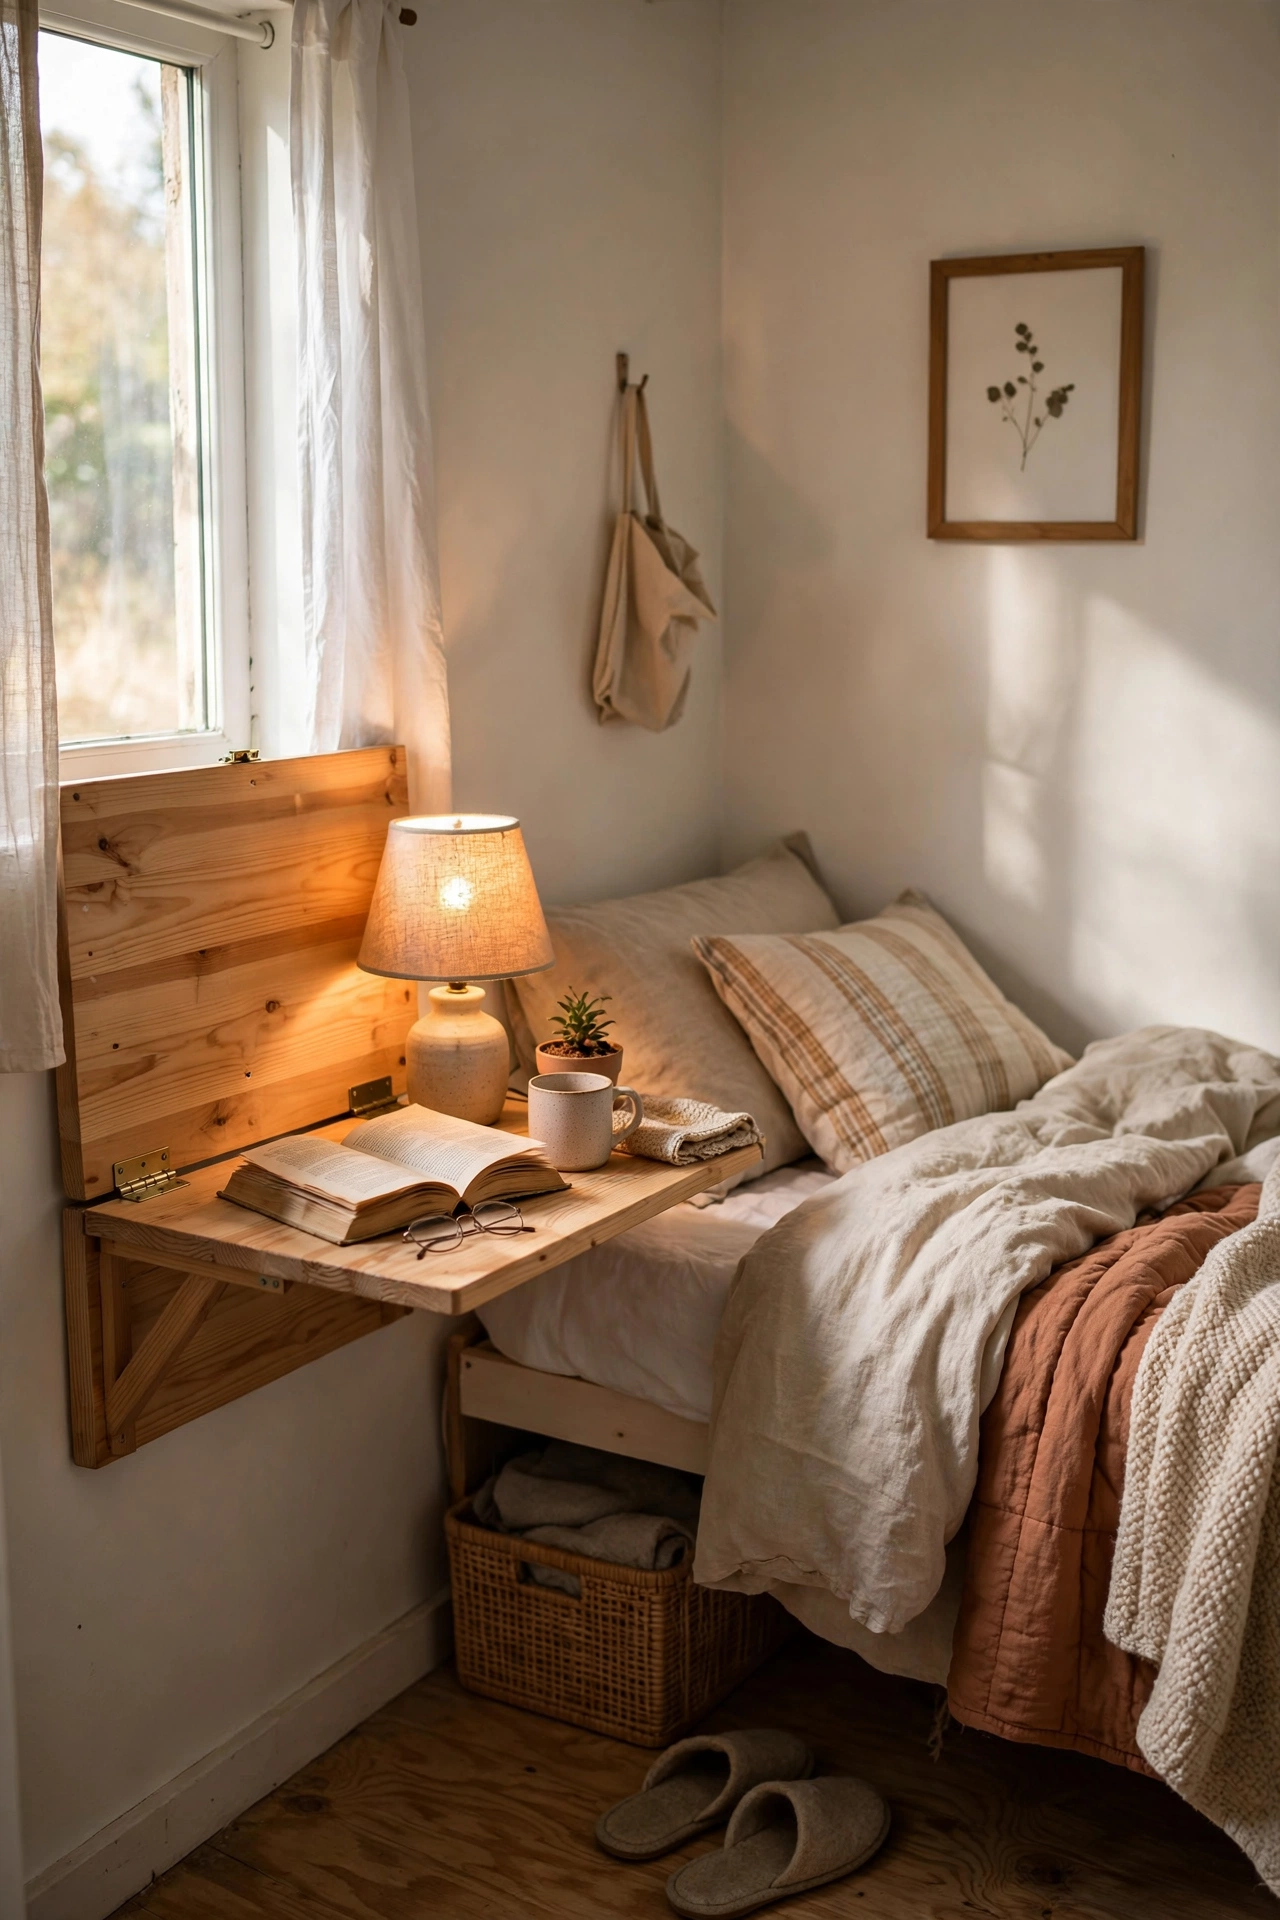
A fold-down wall table gives you a nightstand that disappears when you need floor space. I mounted a 40-centimetre pine shelf on hinges with folding brackets beside my bed, so it folds flat against the wall by day. The brackets lock open firmly and hold a lamp easily. Fix it into a stud, not drywall, because the leverage of a loaded fold-down shelf is significant. I use mine in a tiny guest room. Sand the edges round so the folded panel looks neat against the wall.
Cost: ~$15-22 | Time: 1 hour
Pro tip: In a very small bedroom, a fold-down or floating nightstand is worth more than a pretty one. Floor space beside the bed matters more than storage when the room is tight.
13. Thrifted Side Table Makeover
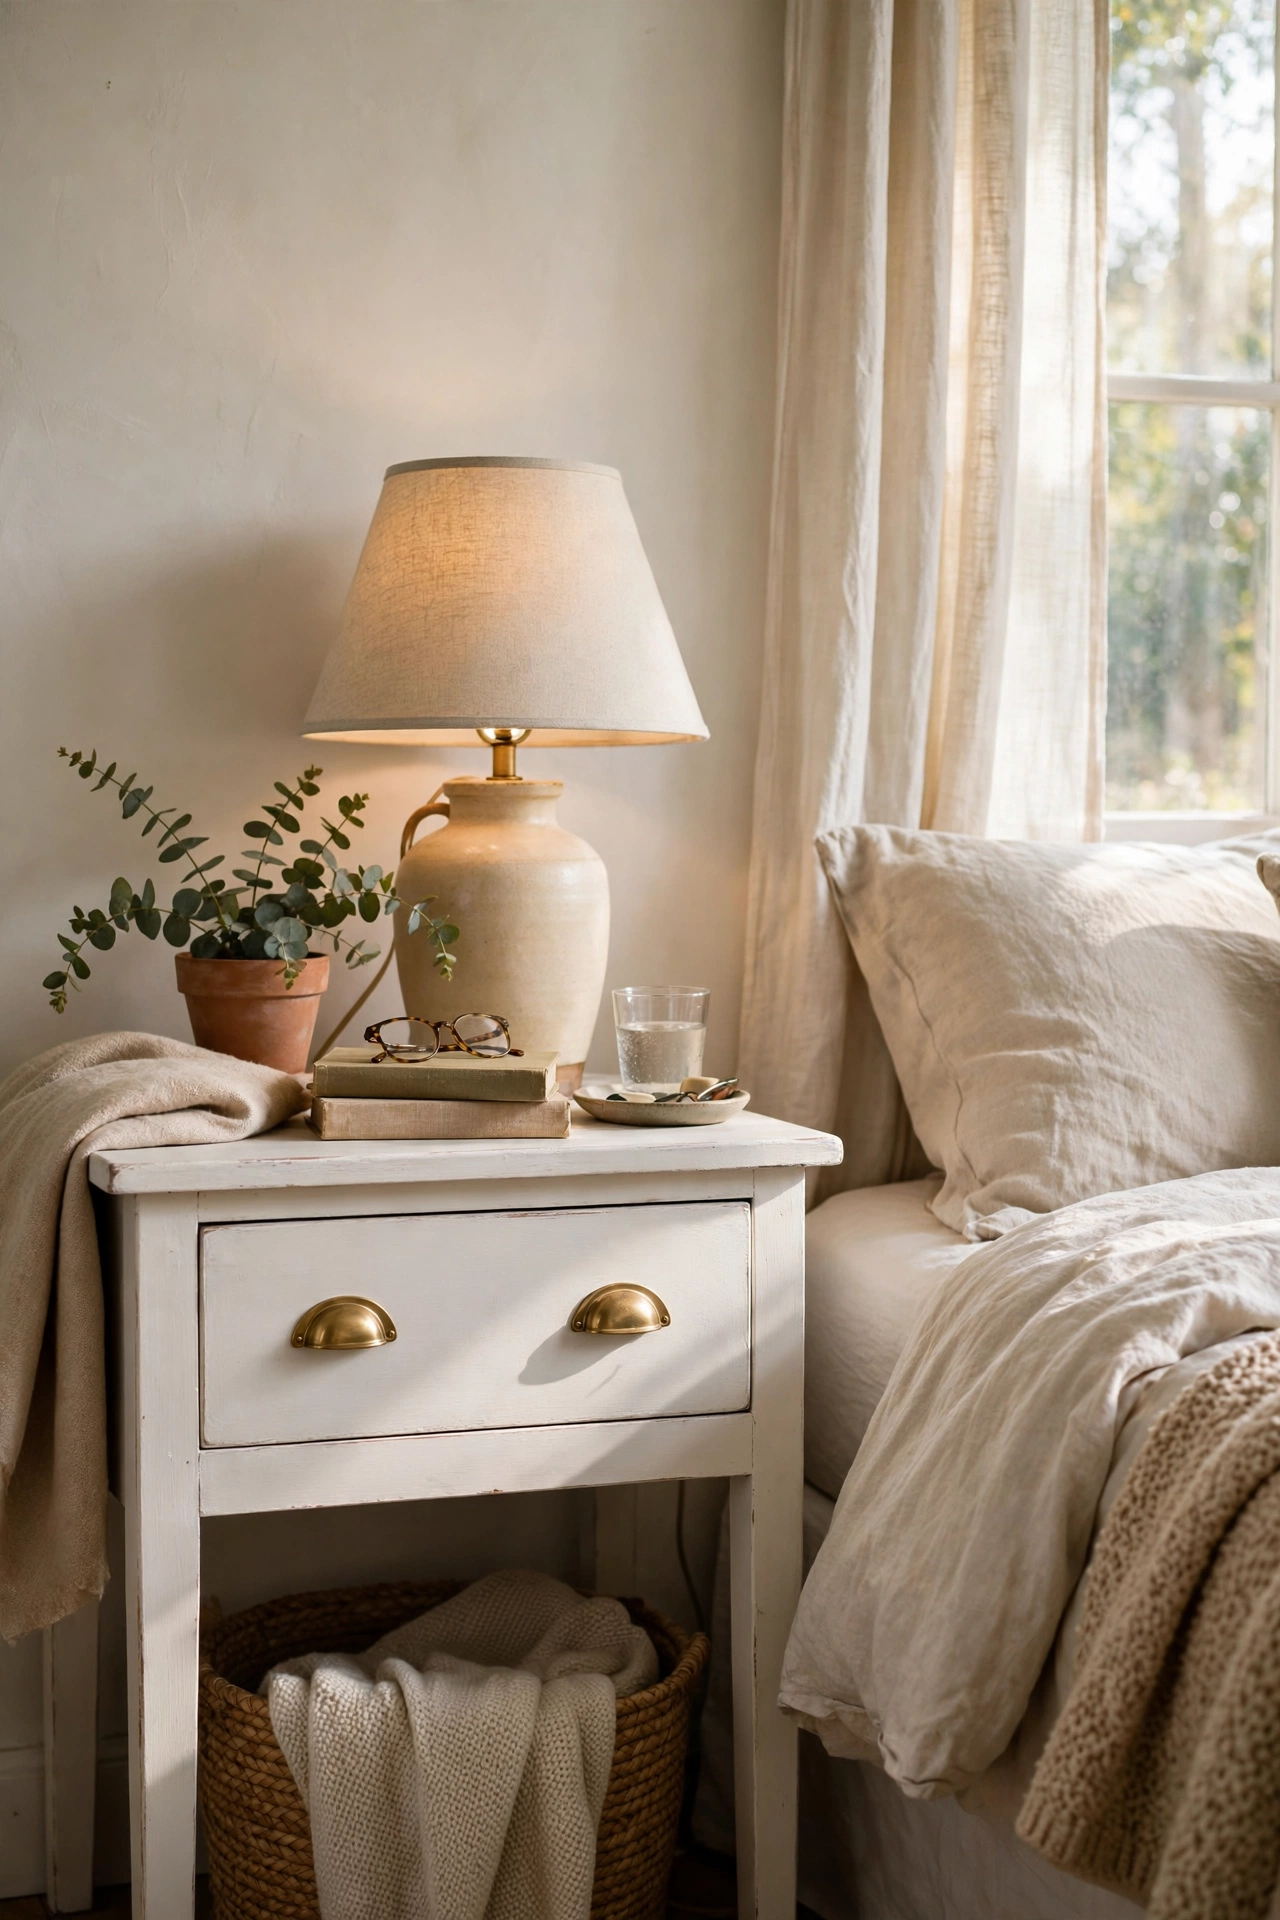
The charity shop side table is the classic nightstand waiting to happen. I bought a wobbly $5 table, tightened every joint with wood glue and screws, sanded it, and painted it warm white with new brass cup pulls on the drawer. Tightening first is essential: paint over a wobble just preserves it. I replaced the missing drawer knob with a $2 brass pull and it looks intentional. Check the height matches your mattress before you buy. This is the fastest route to a proper nightstand.
Cost: ~$10-16 | Time: 3 hours
14. Woven Seagrass Basket Nightstand
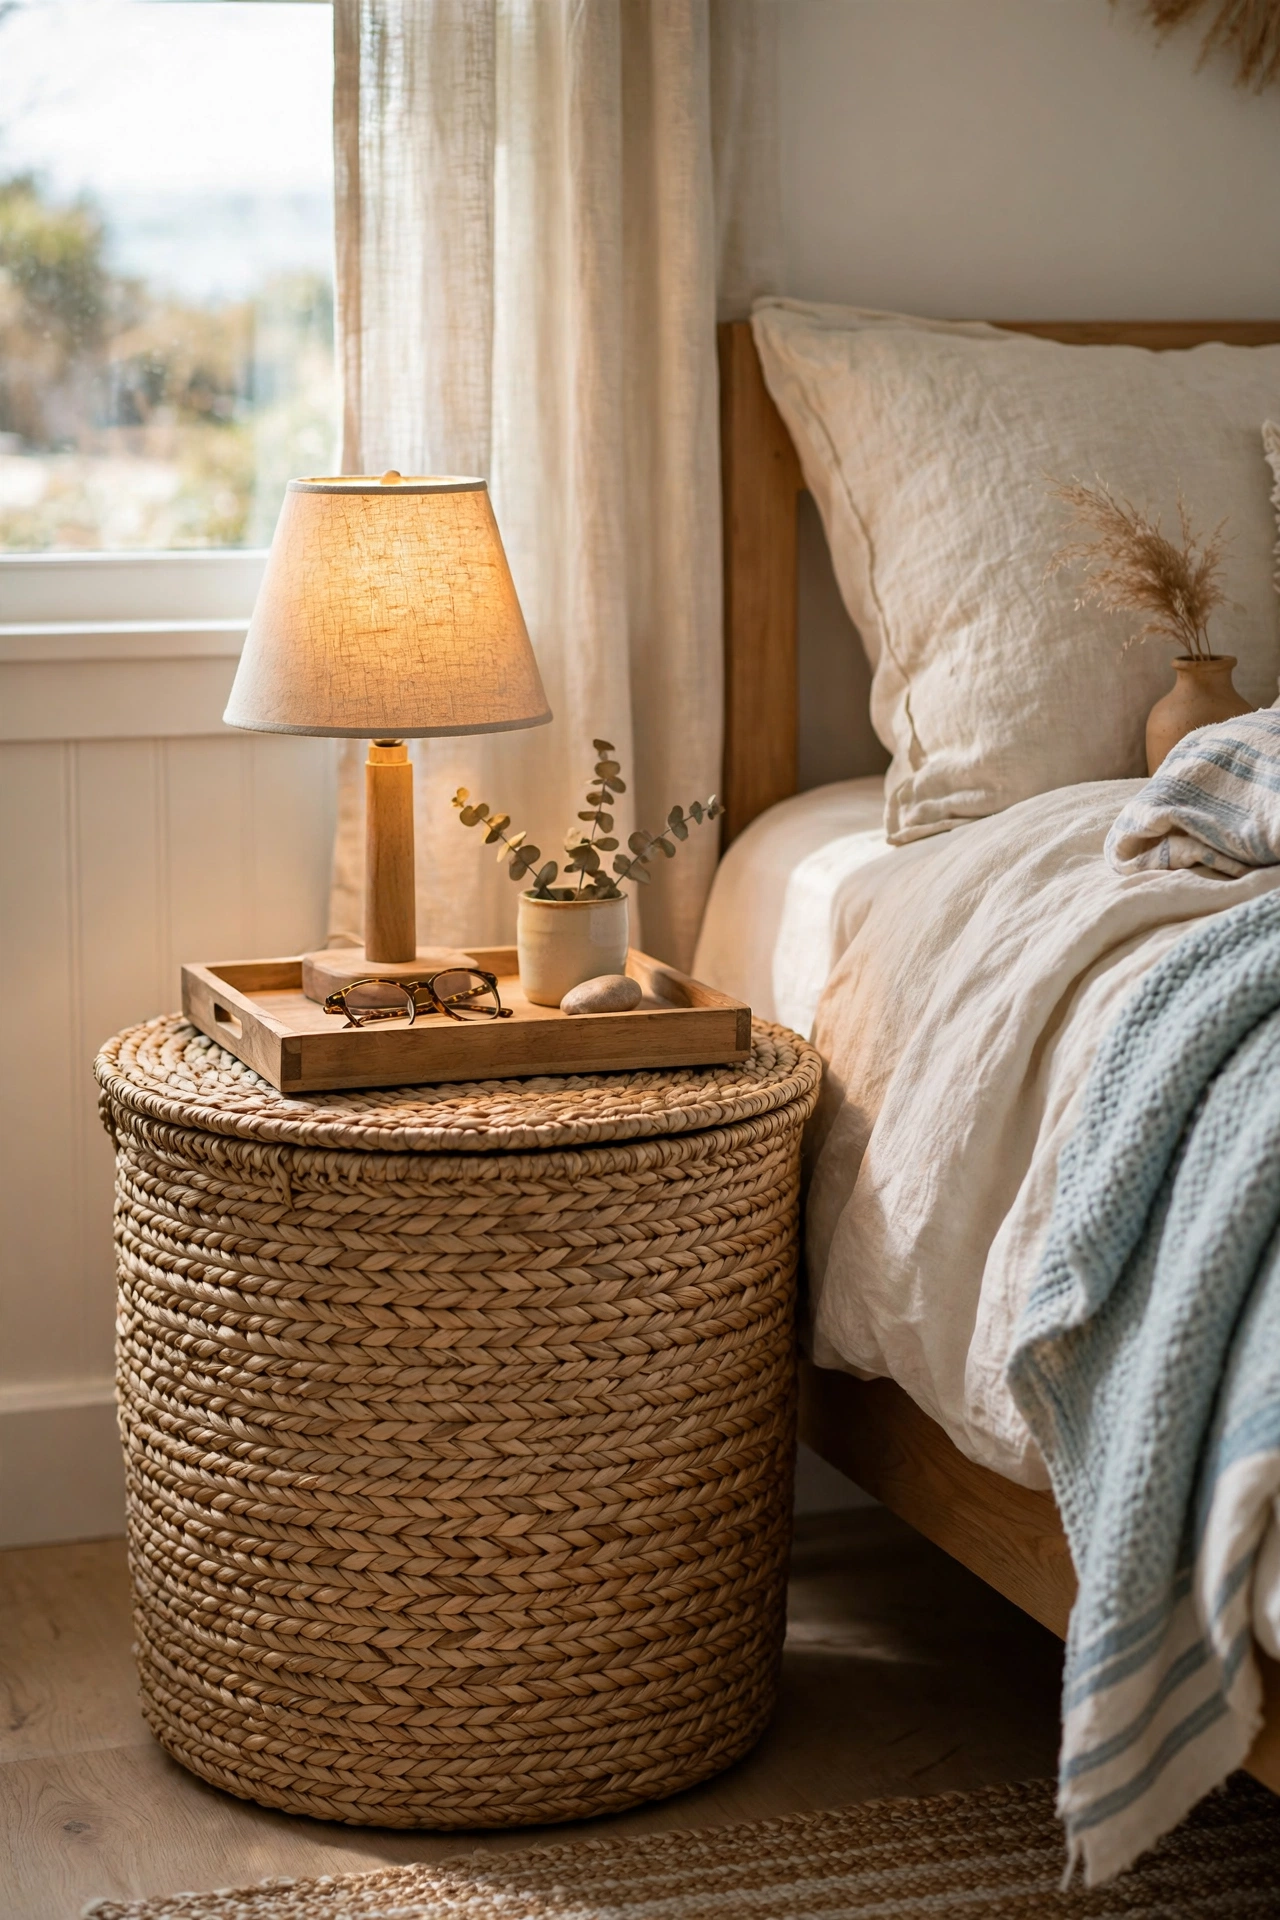
A large lidded seagrass basket makes a soft, textured nightstand. I bought a 50-centimetre lidded basket for $22 and set it beside my bed with the lid on as the table surface. The basket swallows spare blankets and the lid holds a lamp and book. Put a round wooden tray on the lid first so the lamp sits level on the woven surface. I did not at first and my lamp leaned drunkenly. This suits coastal and boho bedrooms beautifully.
Cost: ~$22-30 | Time: 10 minutes
15. Milk Crate Nightstand
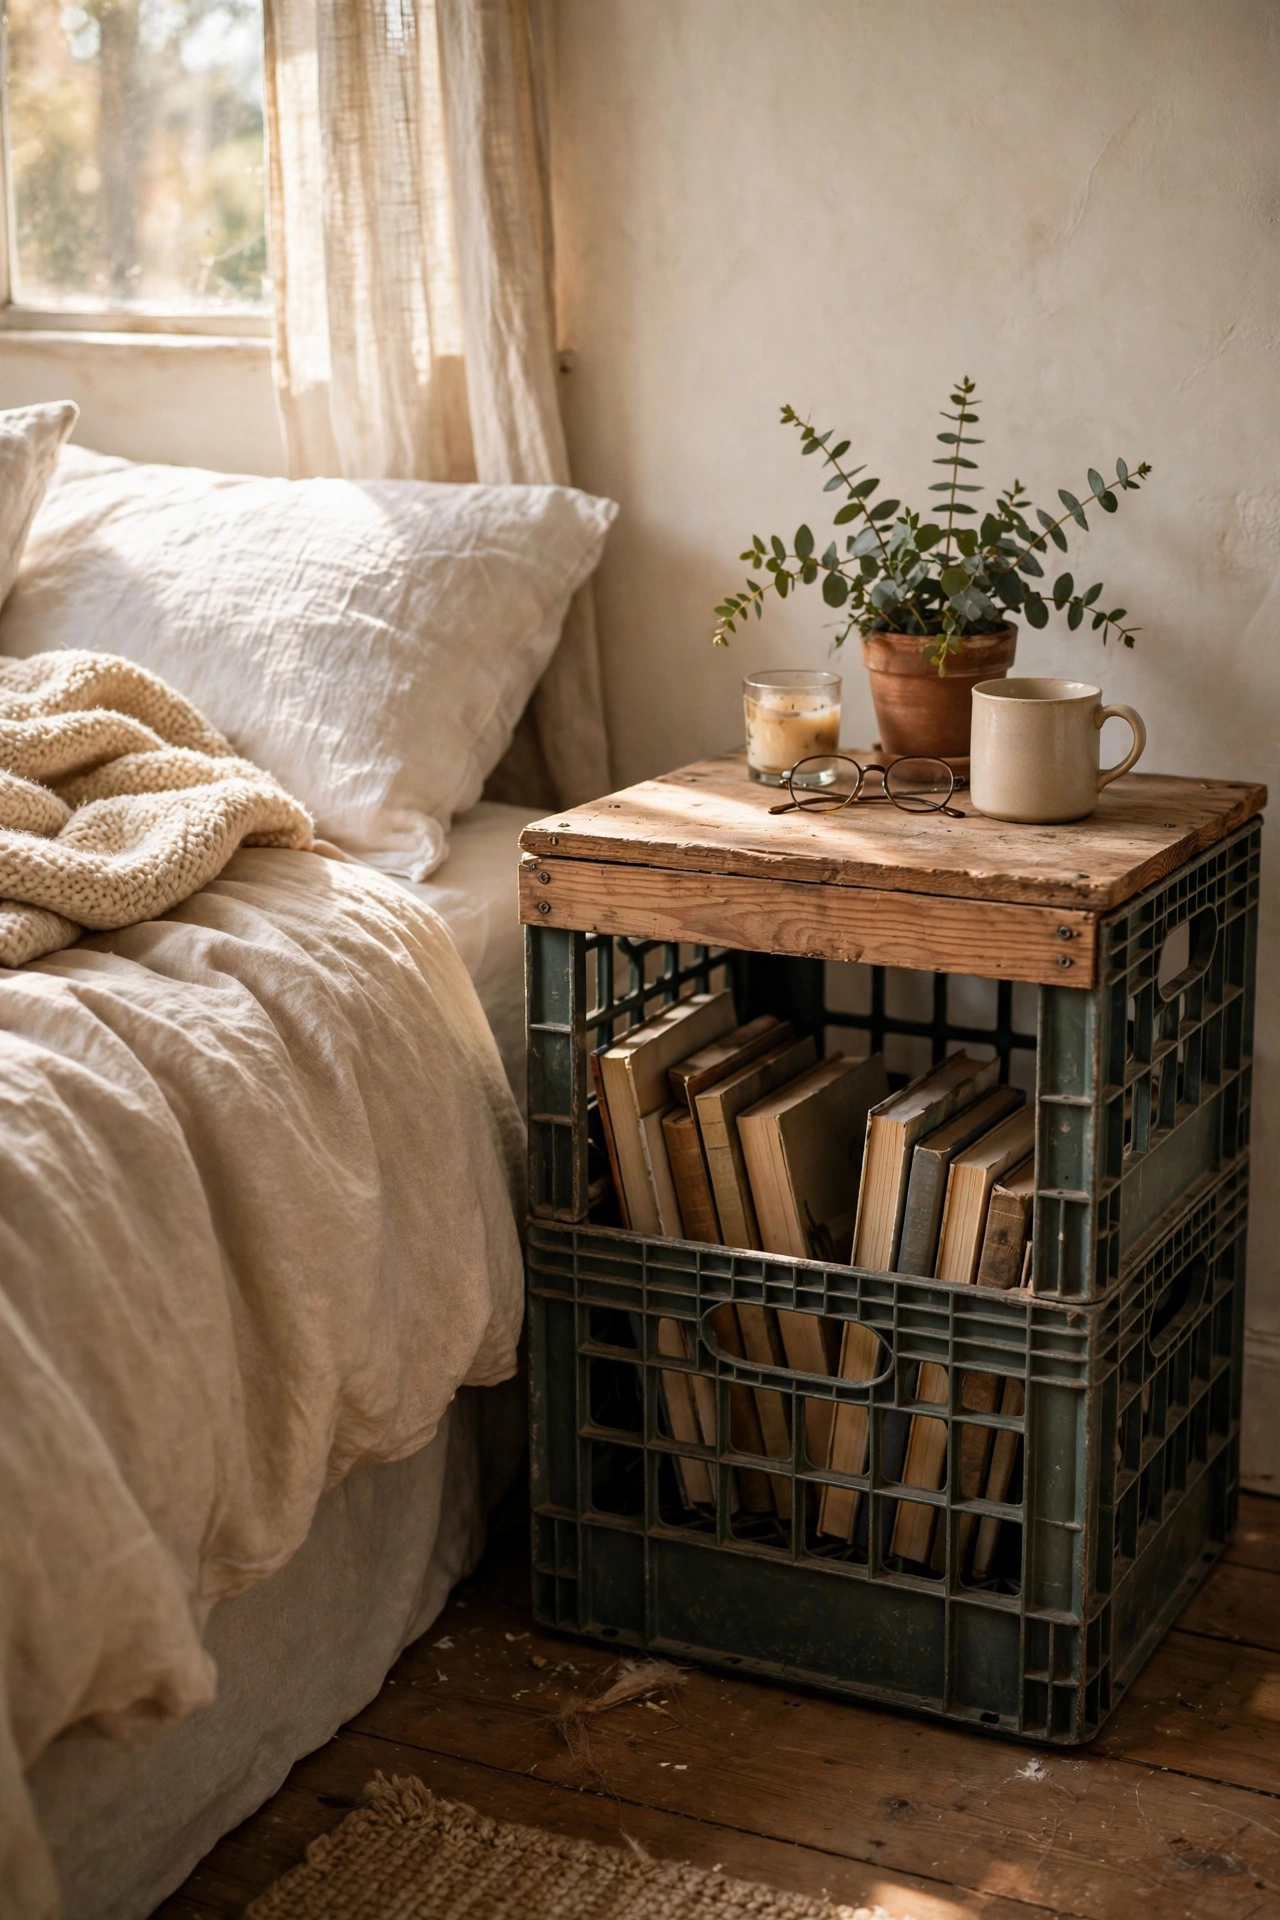
A vintage-style milk crate on its side is a nightstand with industrial charm. I bought a wooden-look crate for $12, stood it upright beside my bed, and laid a pine board across the top as a proper table surface. The crate interior holds books upright like a mini shelf. Screw the top board on so it cannot slide off in the night. Stack two crates for a taller nightstand next to a high bed. Paint it or leave it raw depending on your room.
Cost: ~$12-18 | Time: 30 minutes
Save this one for your weekend project list.
Pro tip: A board across the top of any crate or basket nightstand is the difference between rustic and unfinished. It gives you a level surface for a lamp and makes the whole piece read as furniture.
16. Sliced Log Round Nightstand
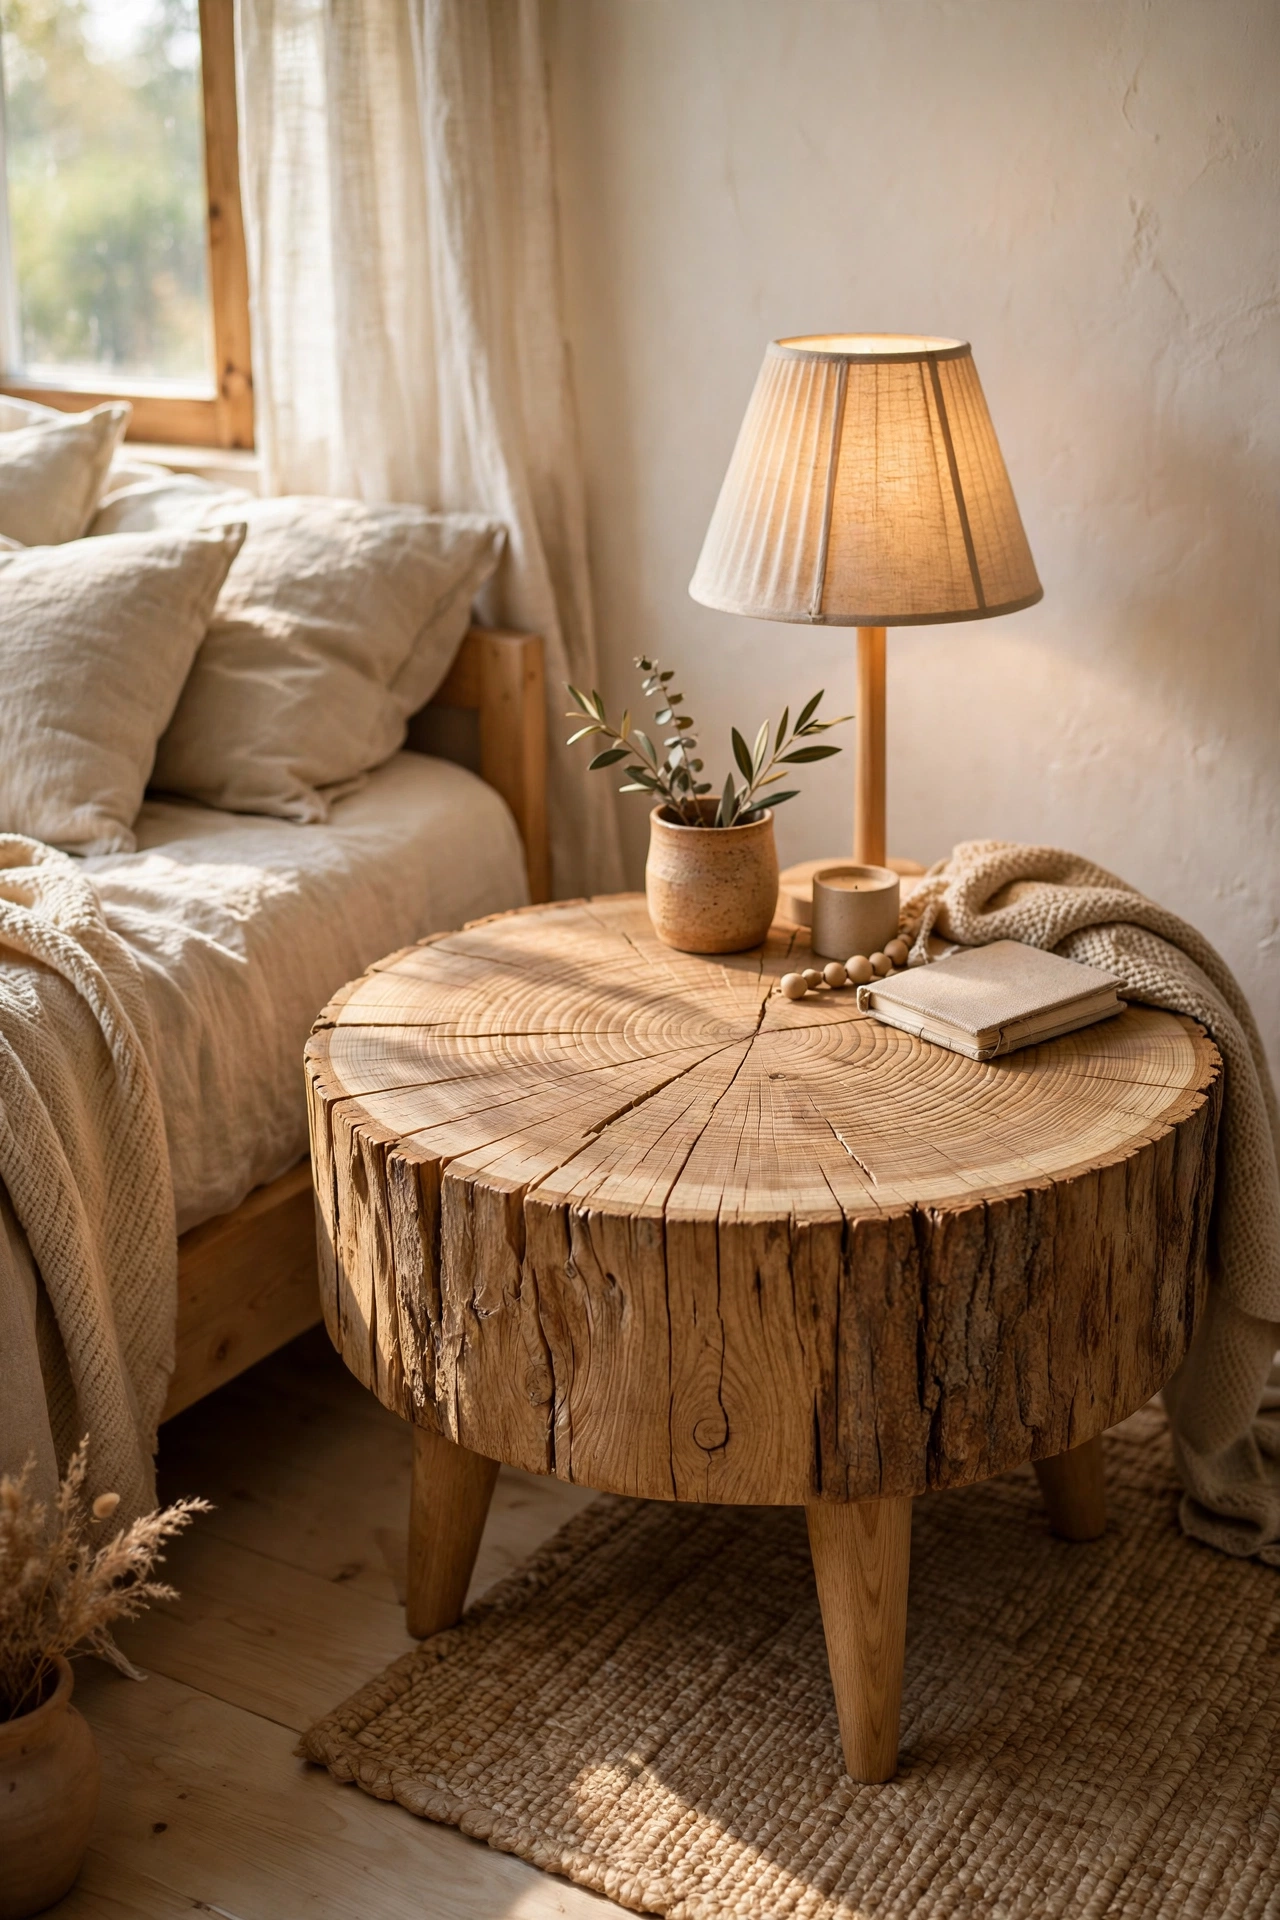
A thick slice of log on short legs makes a beautiful round nightstand. I bought a 40-centimetre oak round, 8 centimetres thick, for $18, sanded it smooth, and attached three short tapered legs. The growth rings are the decoration. Seal it well with hardwax oil, because end grain drinks finish unevenly and blotches. I applied three thin coats. Check the slice is cut flat and level: a rocking log round is infuriating. This suits Scandinavian and rustic bedrooms. I drilled three pilot holes before screwing in the legs, because oak splits fast if you skip that step.
Cost: ~$22-32 | Time: 2 hours
17. Painted Filing Cabinet Nightstand
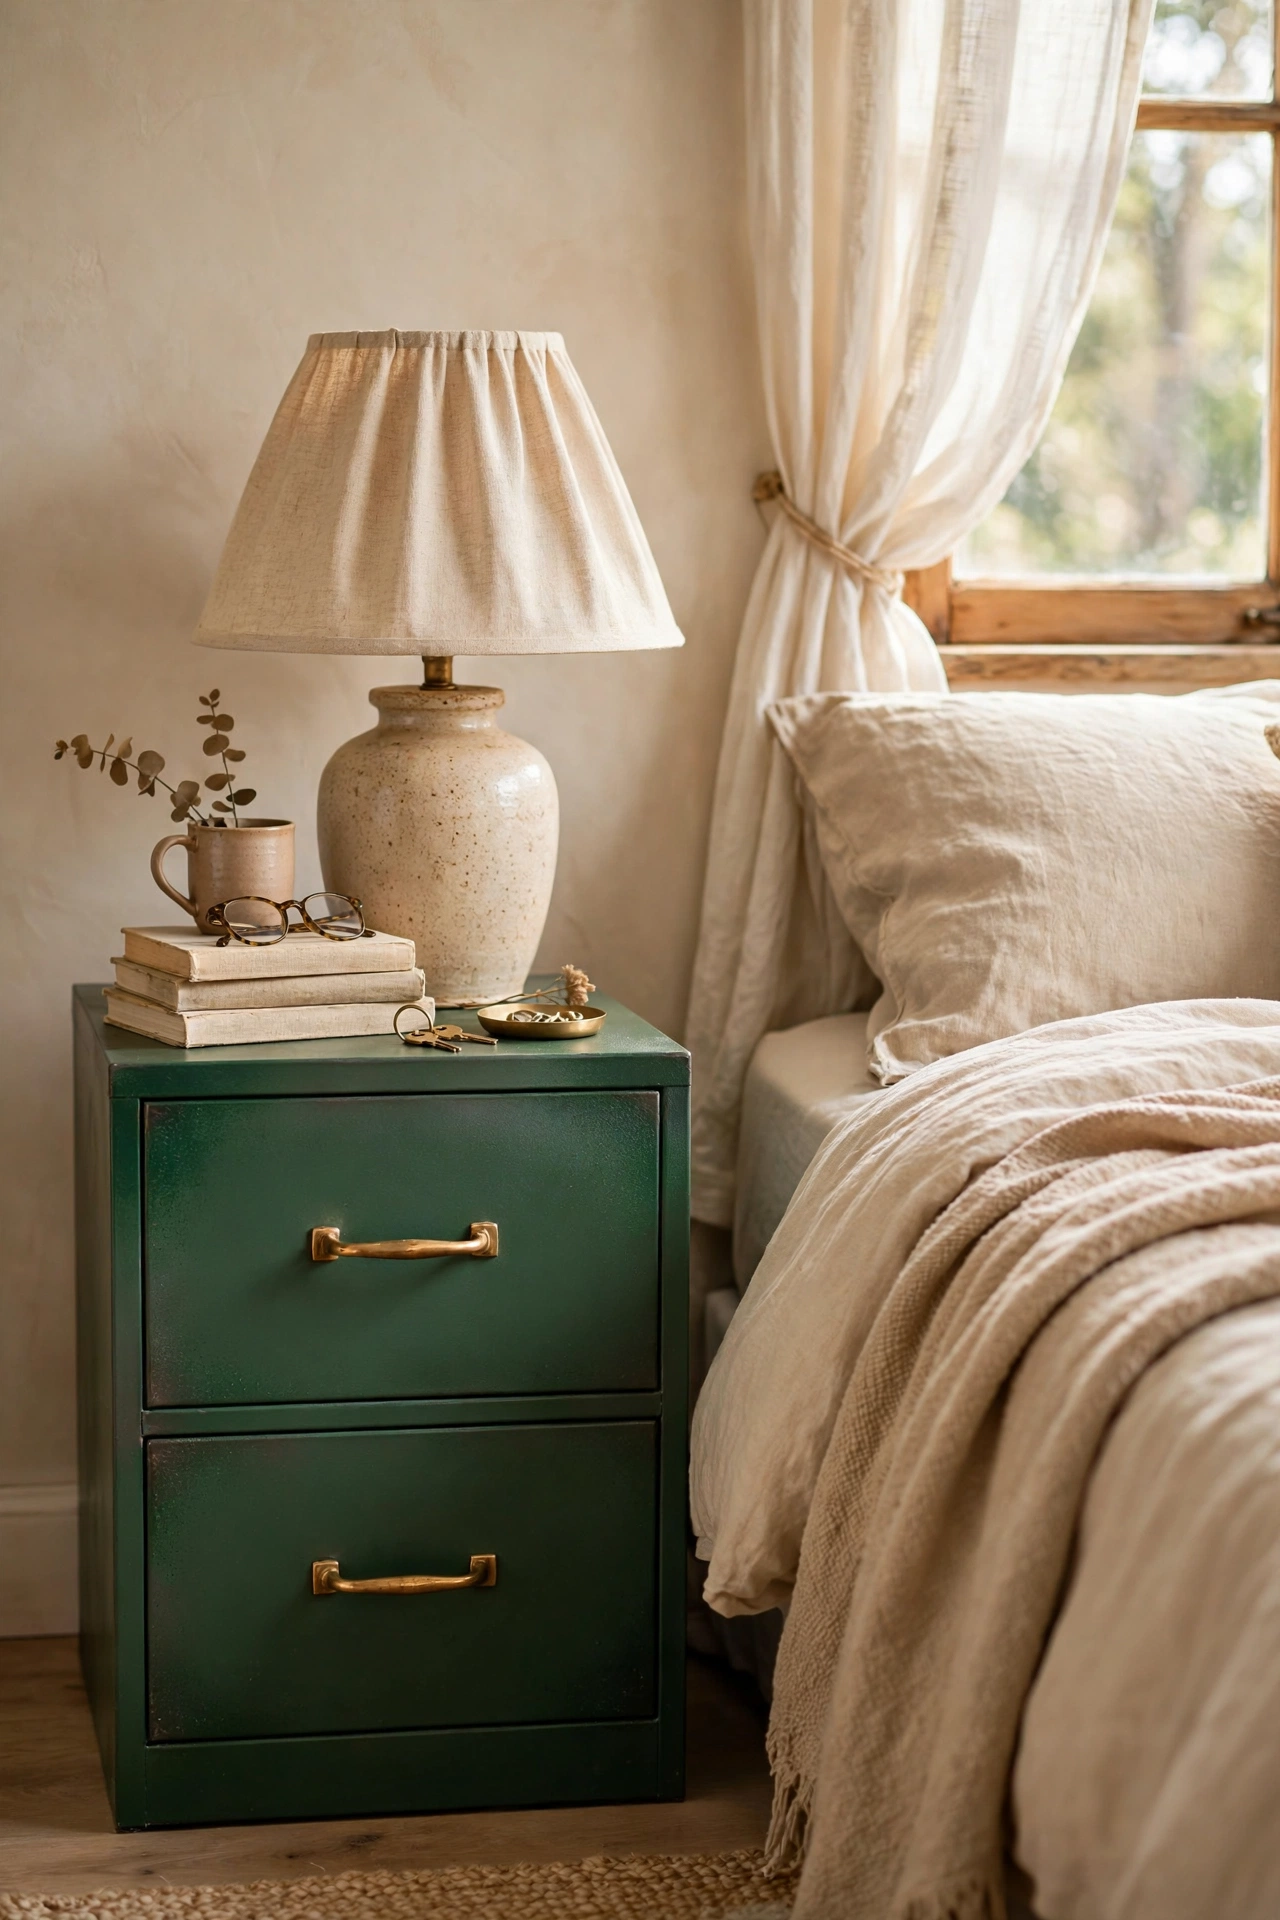
A small two-drawer filing cabinet painted in a rich colour makes a nightstand with serious storage. I found a metal cabinet for $10, sanded it lightly, sprayed it deep green, and added brass bar handles. The drawers swallow chargers, medicines, and all the bedside clutter. Remove the drawers and hardware before spraying, and spray in light coats to avoid drips. My cabinet now holds everything and looks like designer storage. This is the most practical build on the list.
Cost: ~$15-22 | Time: 3 hours
More bedroom builds: (see also: 15-diy-headboard-ideas-on-a-budget/) (see also: 15-diy-bedroom-updates-under-25-dollars/) (see also: 15-bedroom-storage-ideas-on-a-budget/)
Your book deserves better than the windowsill. Build one this weekend and reclaim your bedside.
