19 DIY Gallery Wall Ideas That Look Expensive
My first DIY gallery wall cost me less than a sandwich. Four dollars, to be exact, and that covered every single frame on the wall. A bag of mismatched frames from the charity shop, half a tin of leftover paint, one Saturday afternoon, and now guests assume I hired a stylist. I have since built six gallery walls in my own home, testing every idea on this list myself, and the expensive look has nothing to do with money. It comes from repetition, a restrained palette, and a handful of layout rules nobody tells beginners.
The secret I wish someone had told me earlier is that gallery walls fail on planning, not budget. Measure your wall, cut paper templates the size of each frame, and tape them up before you pick up a hammer. Every project below includes the steps I followed, the mistake I made the first time round, and a materials list so you can copy it exactly. Most cost under ten dollars, several cost nothing at all, and each one photographs like it belongs in a design magazine.
1. Uniform Spray-Painted Thrift Frames
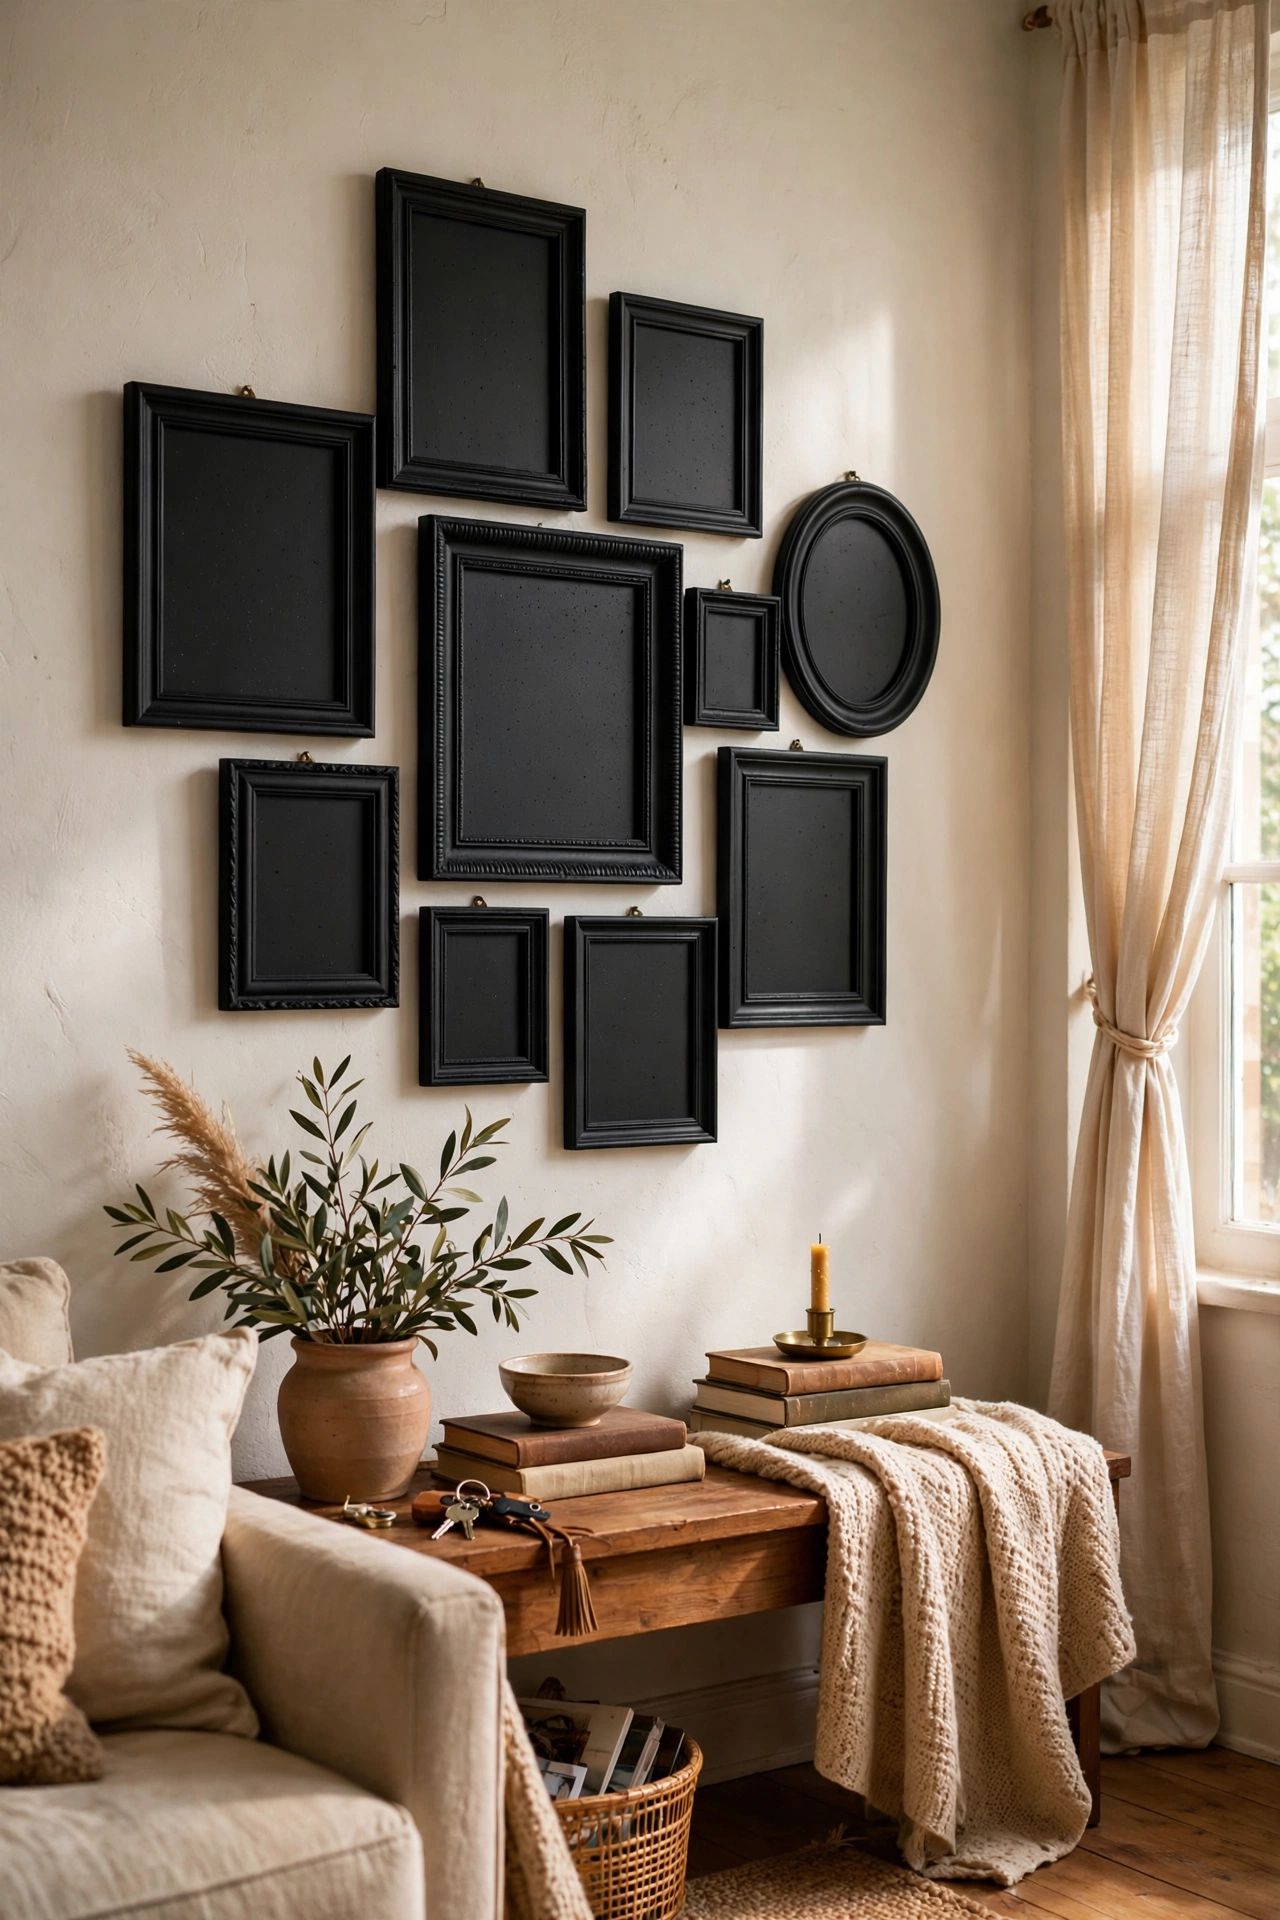
Charity shops sell picture frames for pennies, but the mixed colours scream jumble sale. The fix I use on every gallery wall now is simple: spray every frame the exact same colour. Take the glass and backs out, wipe each frame with a damp cloth, and lay them on newspaper outside. Give them two or three whisper-thin coats of matte black spray paint about ten minutes apart, and the change is honestly ridiculous. My first attempt went wrong because I sprayed too close and got drips down one side, so hold the can about 25cm away and keep your hand moving. Once dry, pop your prints back in and hang. Different shapes, one colour, and suddenly it reads as a curated set. If you love the secondhand hunt, my roundup of (see also: 17-thrifted-bedroom-decor-that-look-expensive/) has more frame sourcing tips.
Materials: Mismatched thrift frames, all-purpose spray paint, newspaper | Cost: ~$4-8 | Time: 1 hour plus drying
2. Stretched Fabric Scraps in a Grid
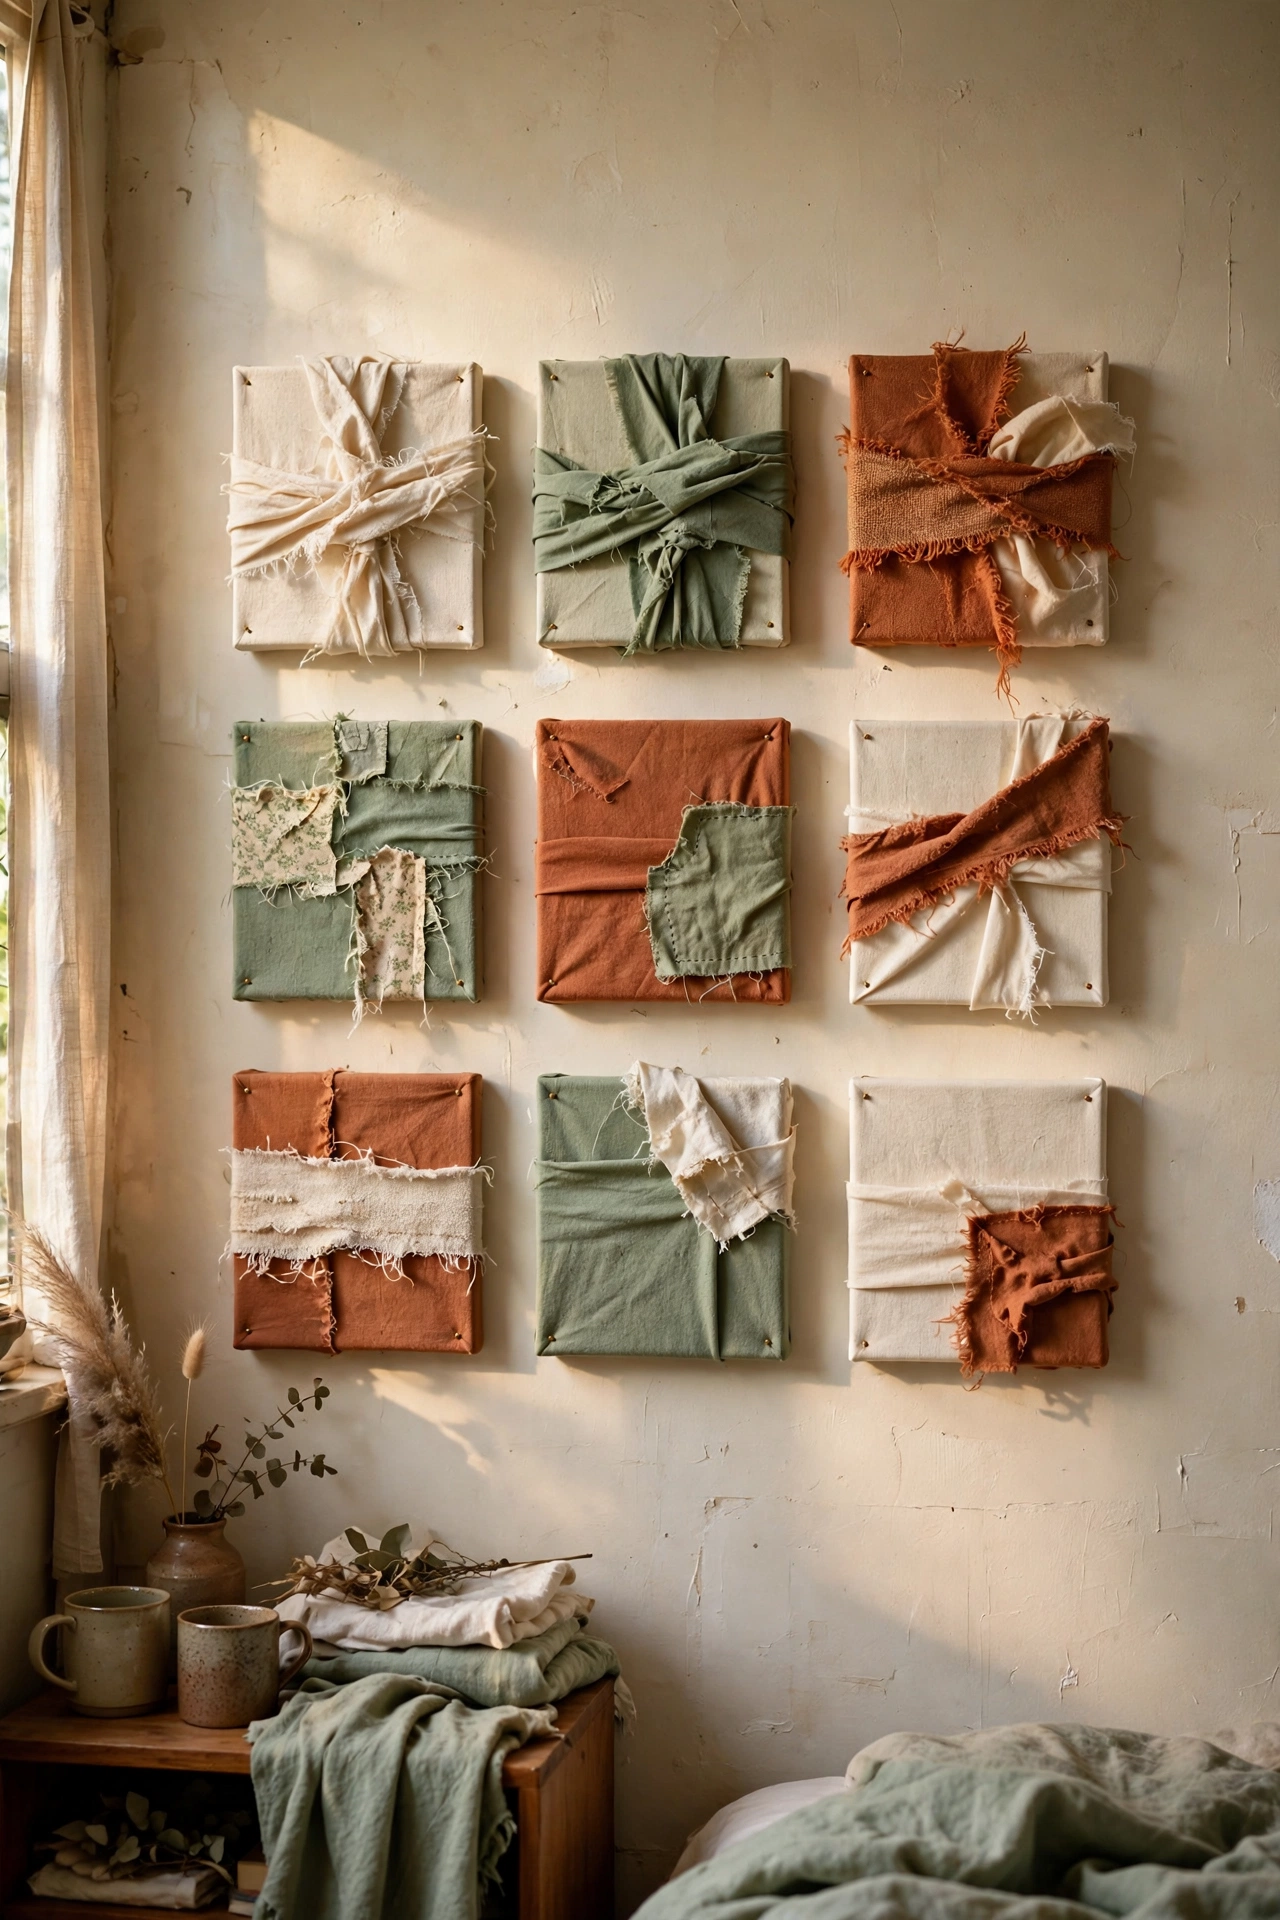
Leftover fabric becomes proper art the moment you stretch it tight. I cut squares from curtain offcuts and old shirts, wrapped them around cheap canvases, and stapled them at the back. A three-by-three grid of nine small squares in toning colours, I used creams, sages and one rust, looks deliberate and pricey, like textile art from a boutique. Cut each fabric square about 5cm larger than the canvas on every side, pull it drum tight, and staple the middle of each side first, then work toward the corners. My mistake was stapling the corners first on my first square, which left a saggy middle. The redo took two minutes. Hang in a tight grid with 4cm gaps and stand back.
Materials: Fabric scraps, 9 small canvases or stiff cardboard squares, staple gun | Cost: ~$3-6 | Time: 45 minutes
3. Pressed Botanical Prints in Cheap Frames
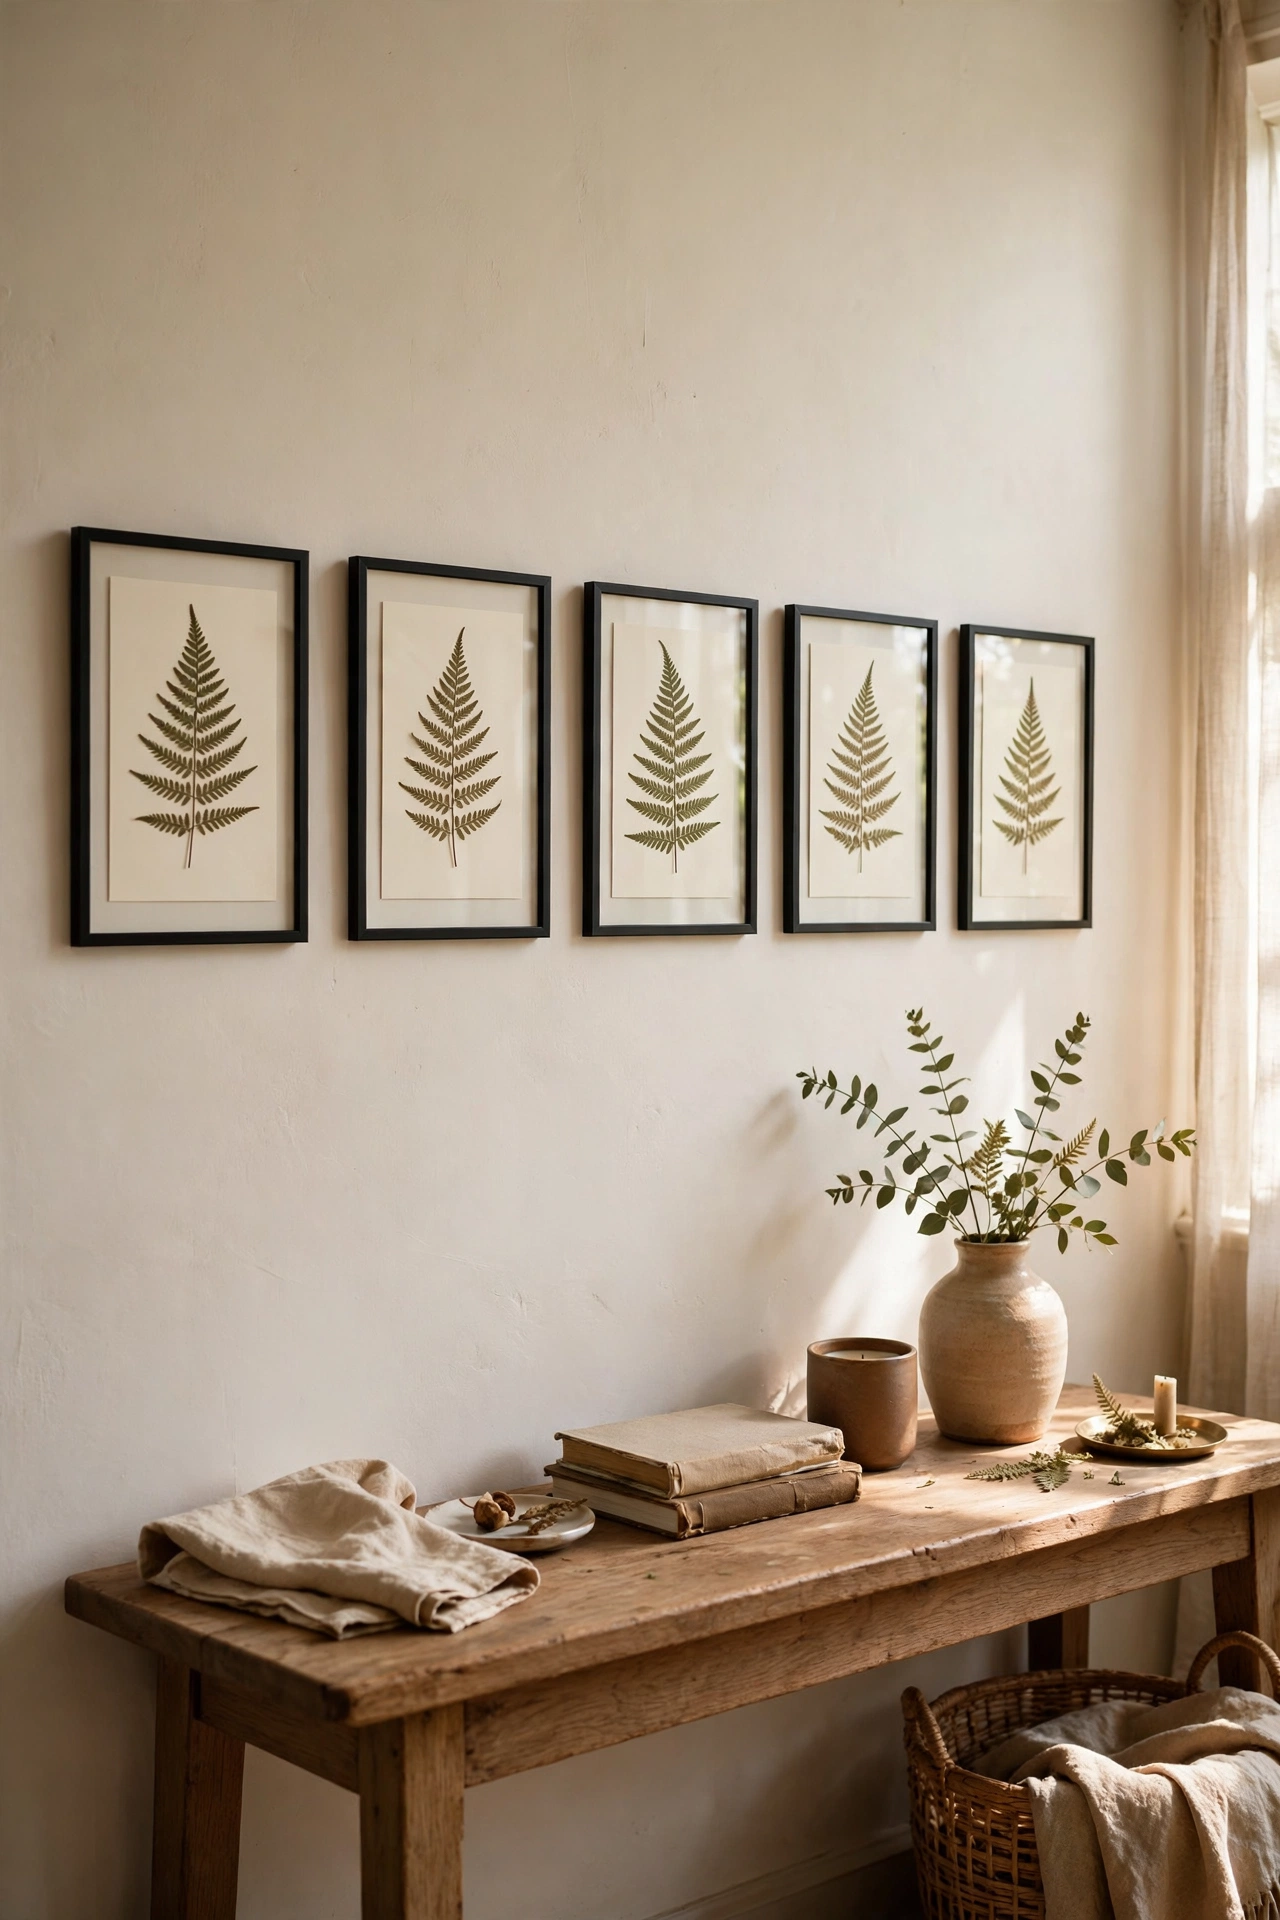
Real pressed leaves beat printed botanical posters because no two are alike. I gather ferns, eucalyptus sprigs and interesting weeds on walks, press them between heavy books lined with kitchen paper for a week, then arrange them on cream card inside the cheapest frames I can find. The trick that makes it look expensive is generous white space: one stem per frame, centred, with wide margins. My first batch failed because I framed them while still slightly damp and they curled within days, so wait until they are papery and crisp. A row of six identical slim frames above a console table looks like a set you would pay good money for.
Materials: Foraged leaves and ferns, heavy books, cream card, 6 slim frames | Cost: ~$6-10 | Time: 30 minutes plus a week of pressing
4. Hand-Drawn Line Art Series
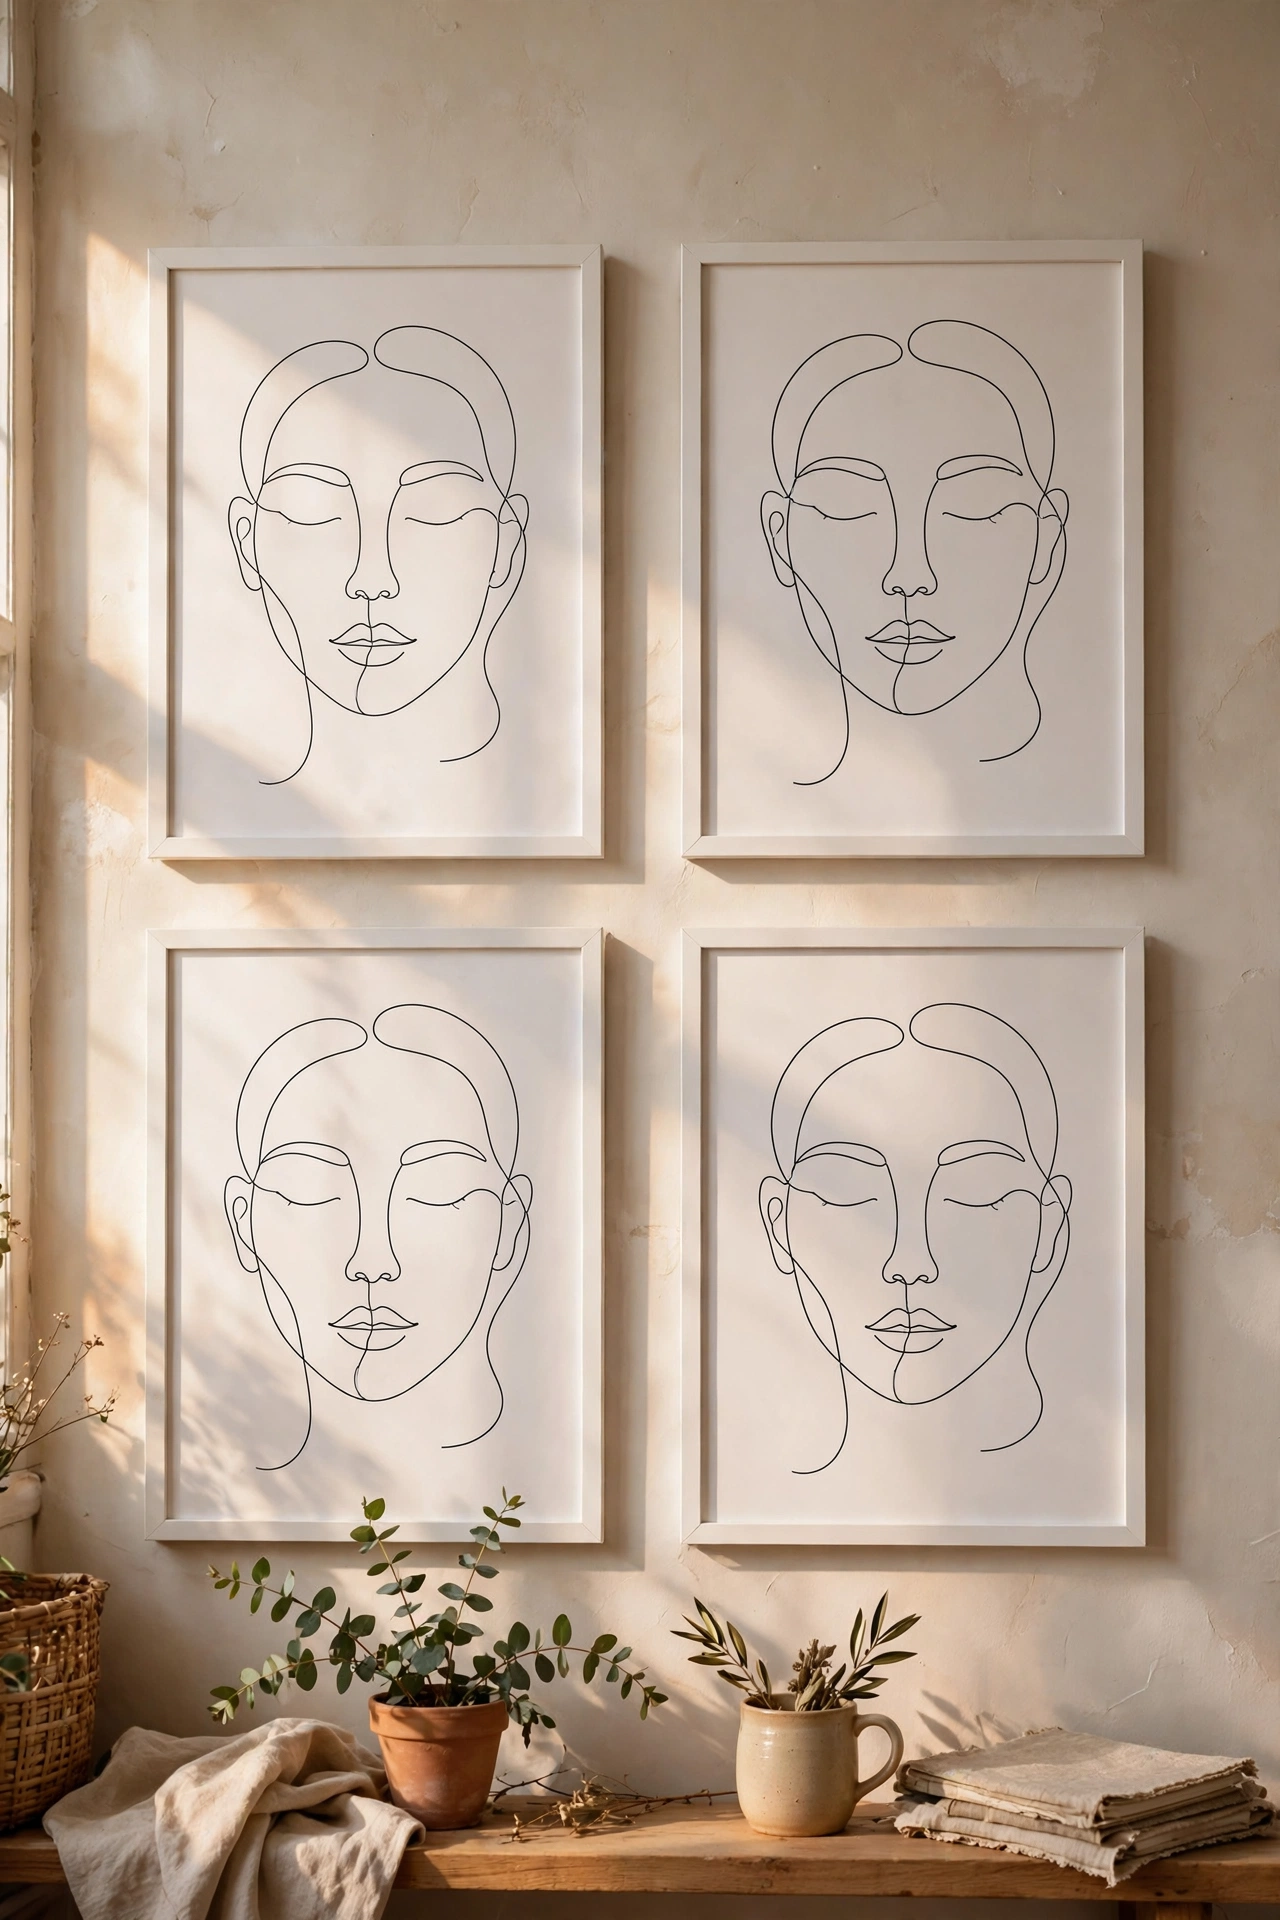
You do not need to be an artist for this one, and I am proof. Single continuous line drawings, where you never lift the pen, look intentional even when they are wobbly. I draw simple faces and hands with a black fineliner on white card, keeping each drawing to one unbroken line, then frame four or six of them identically. The uniformity of the frames does all the heavy lifting. My first set looked timid because I drew too small in the middle of big paper, so fill at least two thirds of the page. Imperfect lines are the whole point, they read as modern and confident. Guests always ask where I bought them.
Materials: Black fineliner pens, white card, 4-6 identical frames | Cost: ~$8-12 | Time: 1 hour
5. Black-and-White Photo Grid
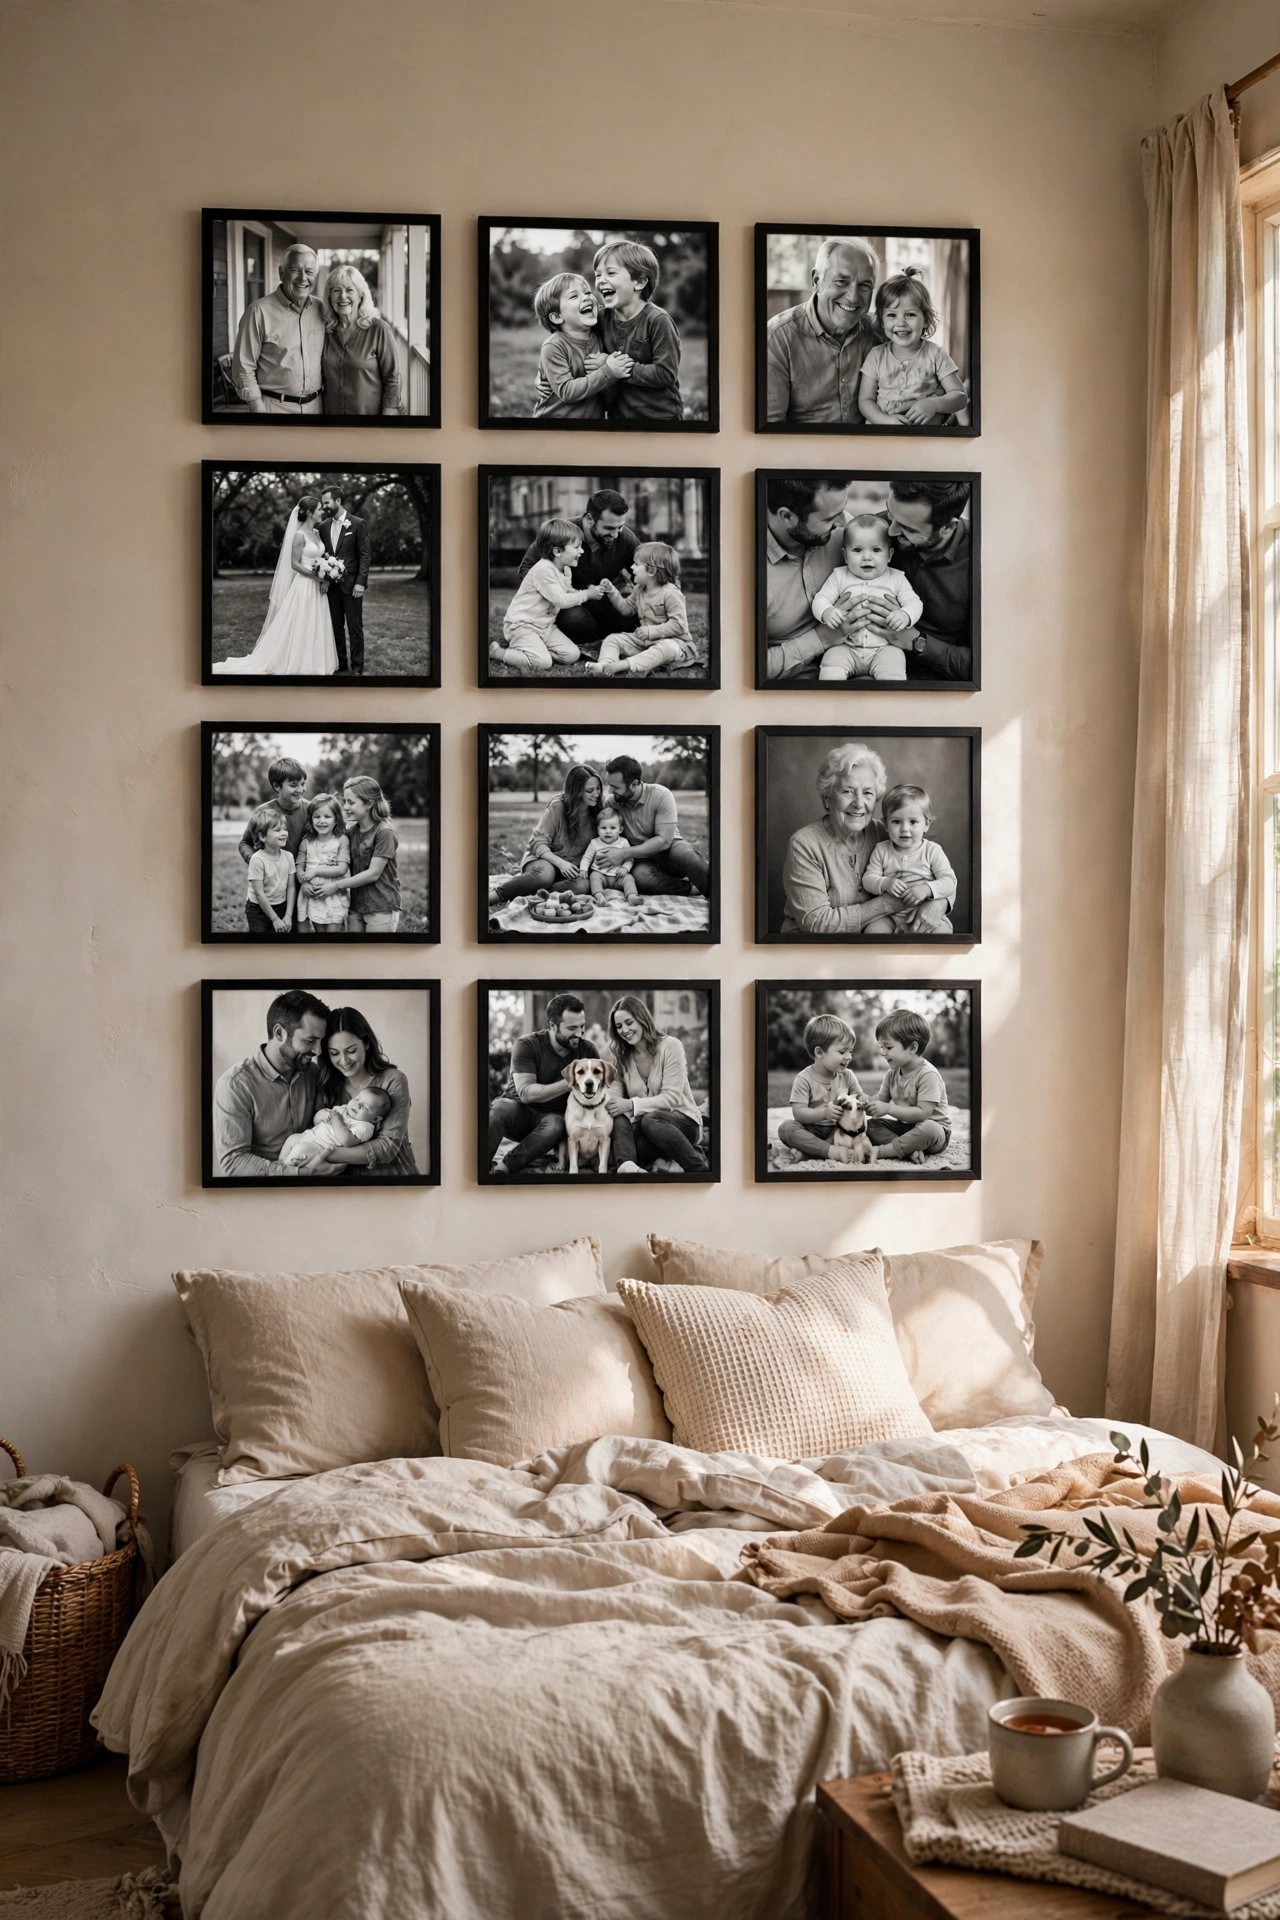
Colour photos from different phones and years clash, but convert them all to black and white and suddenly they belong together. I picked twelve favourite shots, had them printed as 5x7s at the local print shop, and put them in identical thin black frames from the discount store. The grid hangs above my bed and it is the wall everyone photographs. Two rules I learned the hard way: leave exactly the same gap between every frame, I use a cut piece of cardboard as a spacer, and keep the outer edges of the grid perfectly straight with a spirit level. It pairs beautifully with soft bedding, and if you want the full look, browse (see also: 23-above-bed-decor-ideas-that-cost-almost-nothing/) for the rest of the styling.
Materials: 12 photo prints, 12 identical frames, cardboard spacer, spirit level | Cost: ~$10-15 | Time: 1.5 hours
6. Thrifted Plate Wall Cluster
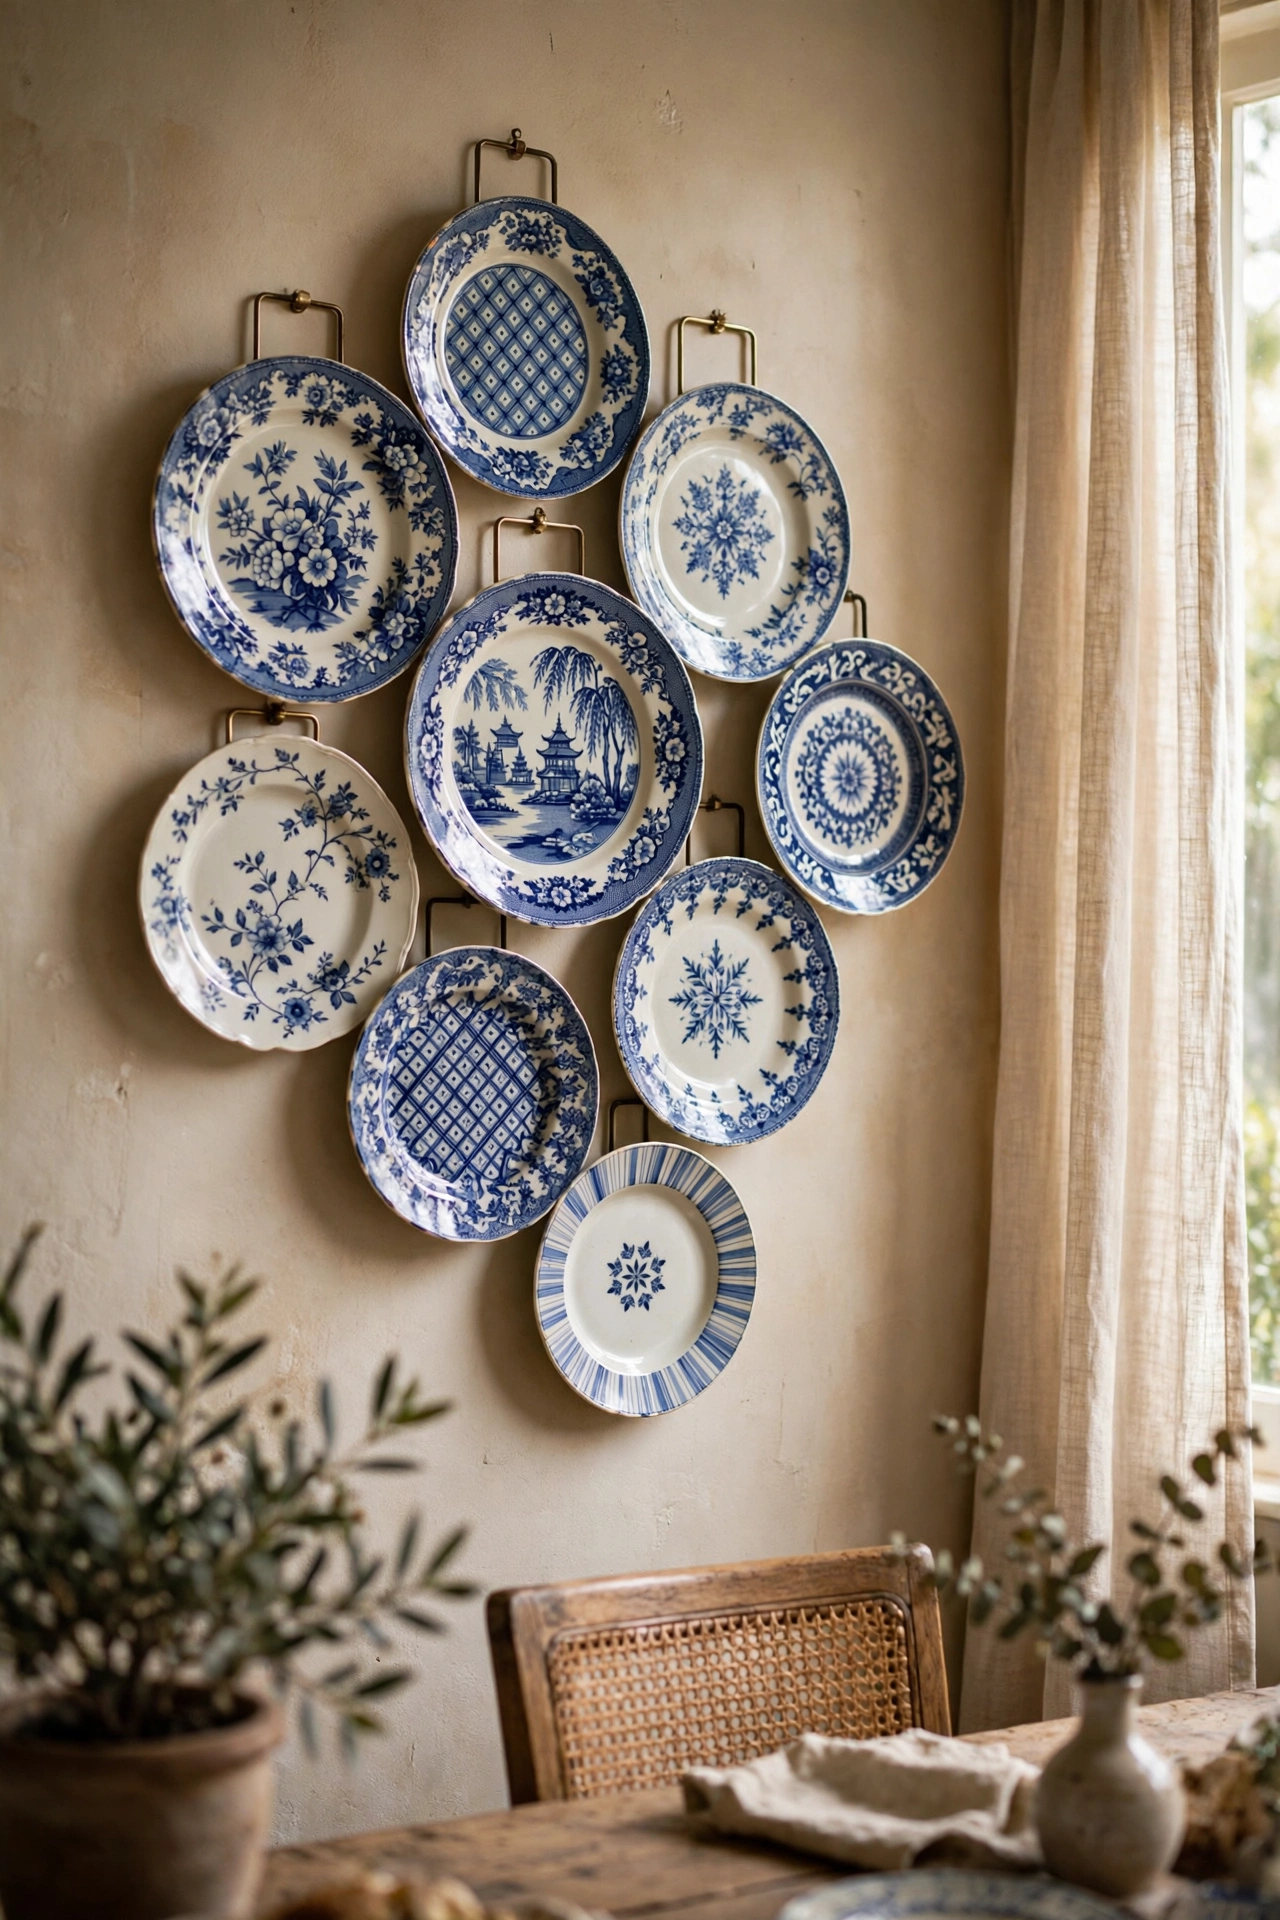
A cluster of decorative plates reads as collected and cultured, and charity shops are full of them for under a dollar each. I look for plates with blue and white patterns or pretty floral rims, ignoring the chipped ones, and hang them with self-adhesive plate hangers so there is no drilling into anything precious. The layout that worked best in my dining room is an organic cluster, largest plate slightly off centre, the rest spiralling out with 5 to 8cm gaps. My first attempt was too symmetrical and looked stiff, so I took a photo, shuffled two plates, and it instantly relaxed. Trace each plate on paper and tape the templates up first to avoid extra holes.
Materials: 5-9 thrifted plates, self-adhesive plate hangers, paper for templates | Cost: ~$5-9 | Time: 1 hour
7. Small Round Mirror Collection
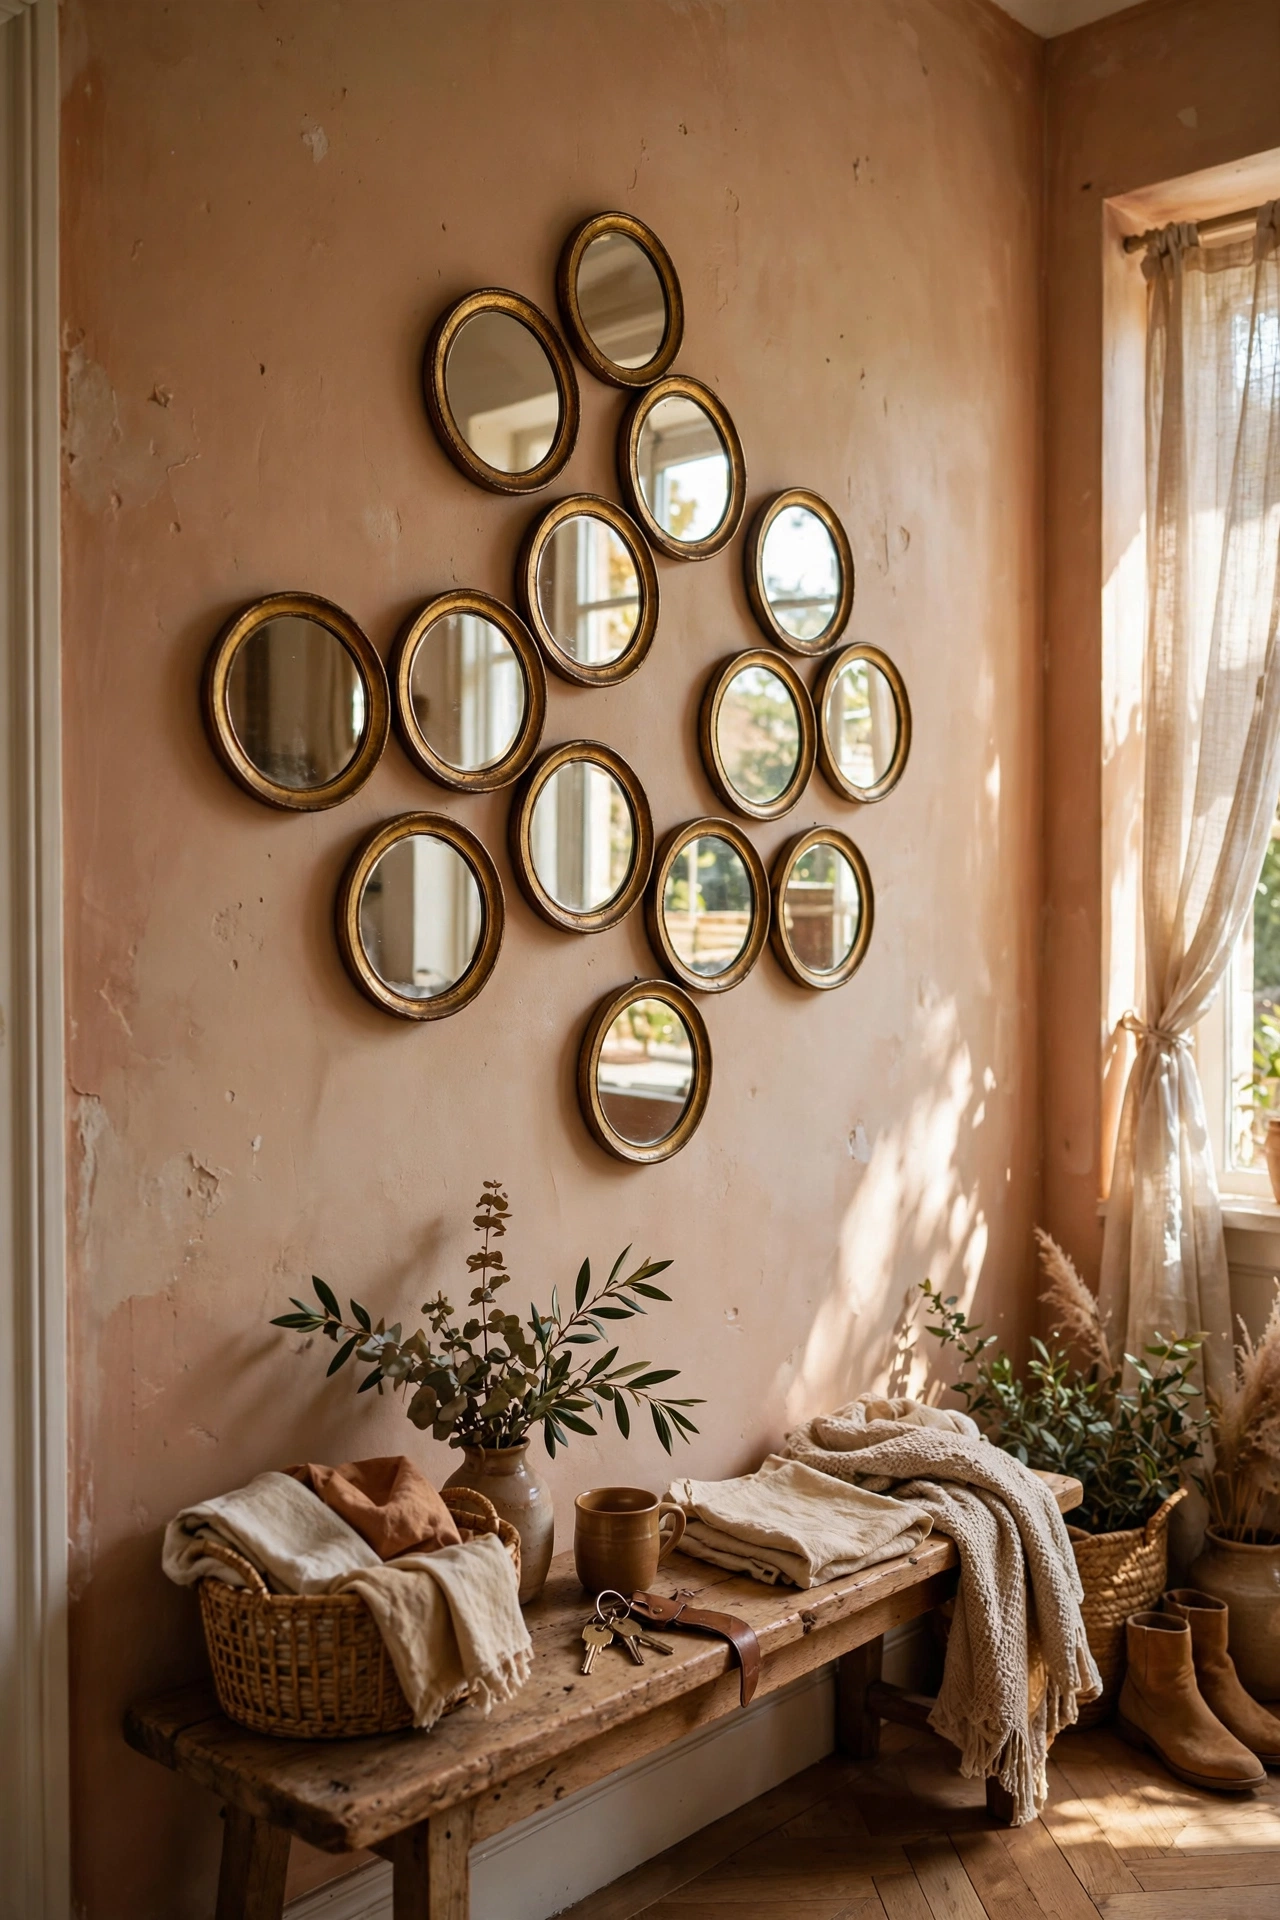
Small mirrors grouped together bounce light around and look far more expensive than they are. I collected seven round mirrors from charity shops over a month, most under two dollars, and sprayed all the rims the same antique gold. Hung in a loose honeycomb pattern in my dark hallway, they doubled the light from the front door. The mistake I made was hanging the first one with the sticky pad it came with, and it slid off within a week, so use proper picture hooks rated for the weight. Vary the sizes from 10cm to 25cm across, keep gaps even, and the whole thing glows.
Materials: 5-8 small round mirrors, antique gold spray paint, picture hooks | Cost: ~$8-14 | Time: 1 hour plus drying
8. Woven Basket Wall Display
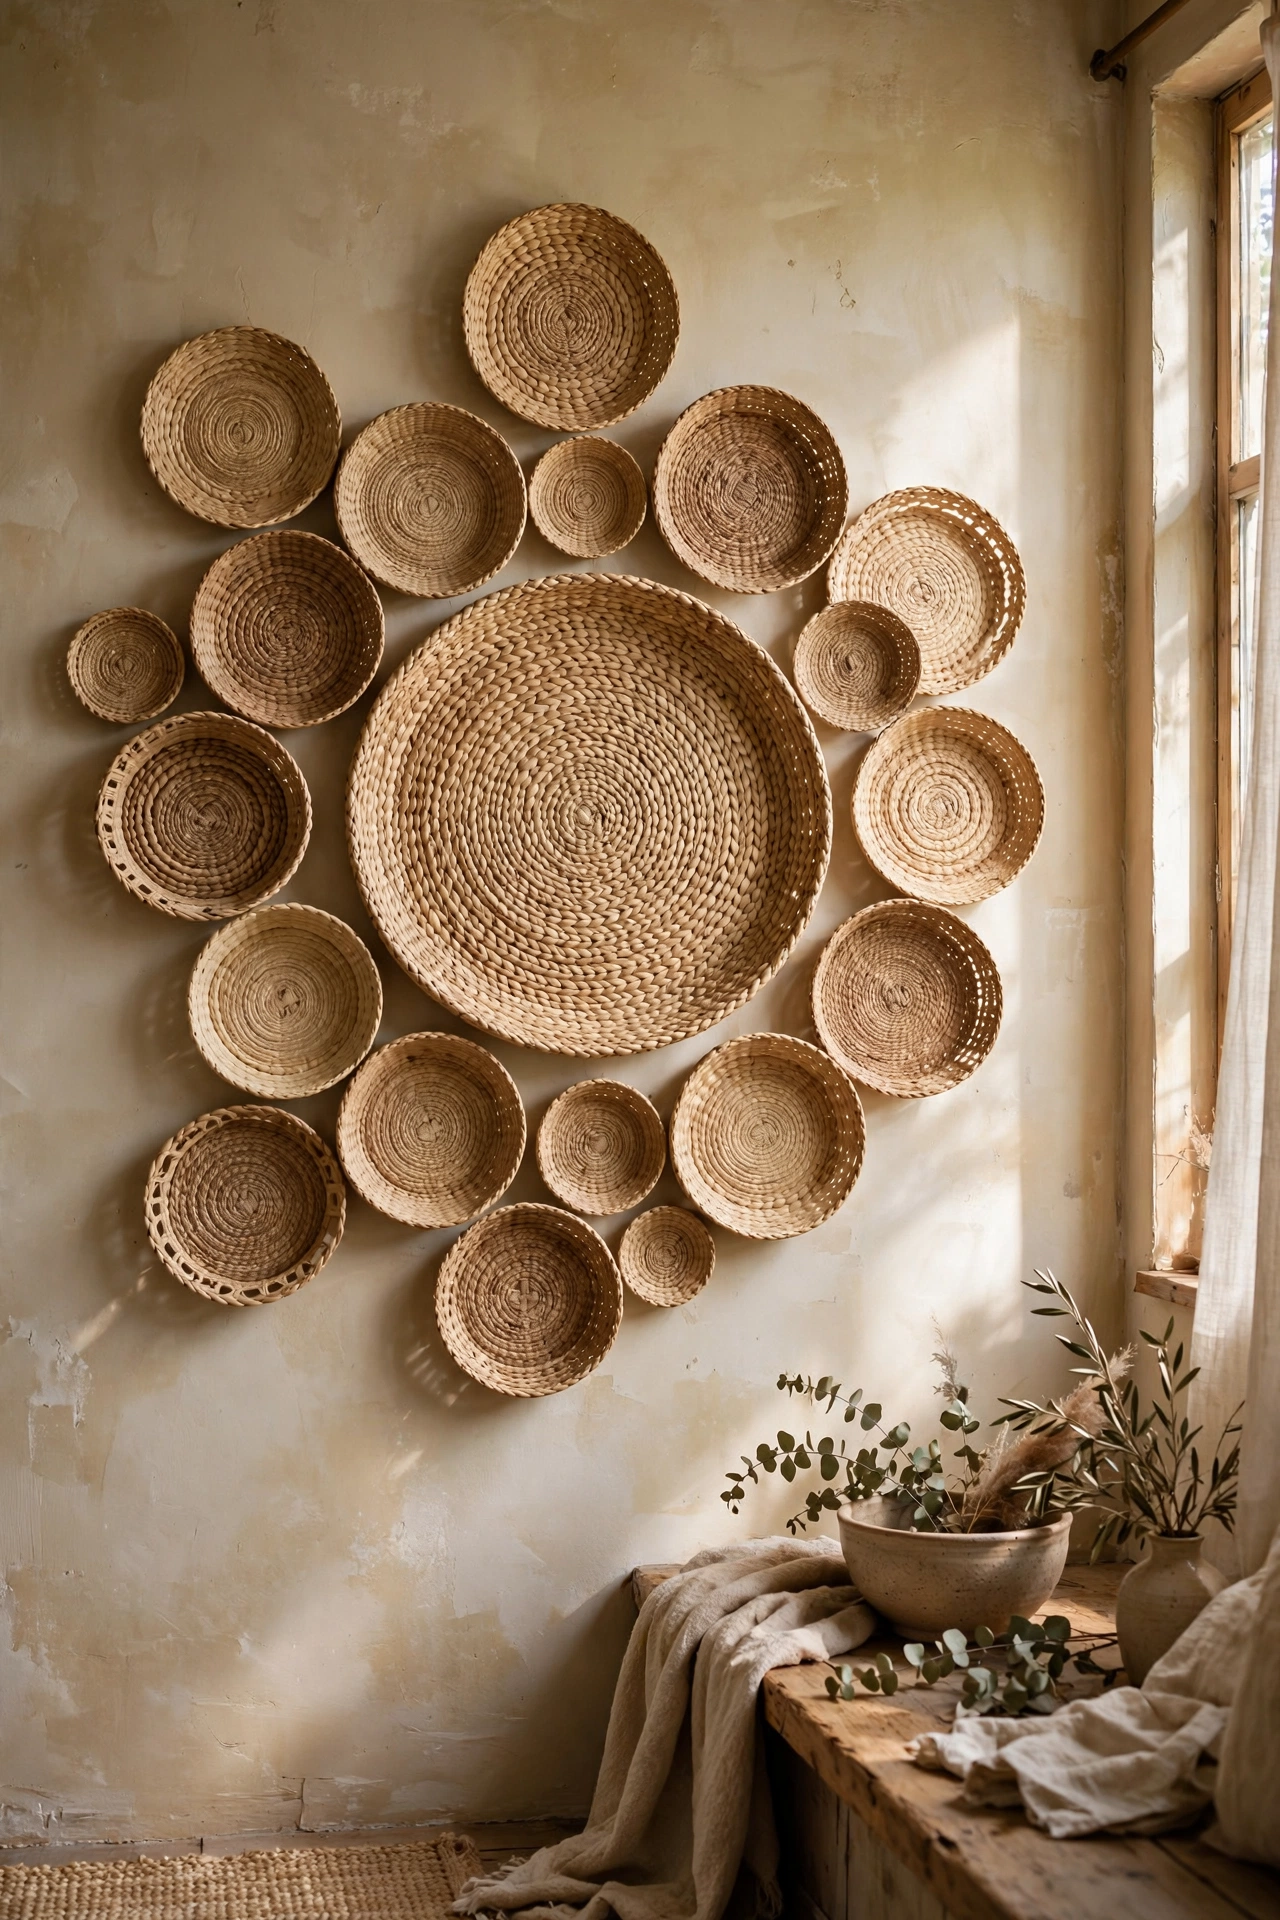
Flat woven baskets hung like art give a warm, global feel that framed prints never manage. I buy shallow seagrass and rattan baskets at car boot sales, usually a dollar or two each, and hang them with a single nail through the weave at the top. The arrangement that looks most expensive is a large basket in the centre with smaller ones radiating outward, all within a similar colour family. My first wall mixed bright dyed baskets with natural ones and it looked chaotic, so now I stick to natural tones with maybe one dark accent. It is the easiest gallery wall on this list to rearrange when you get bored.
Materials: 5-9 flat woven baskets, small nails or removable hooks | Cost: ~$5-12 | Time: 45 minutes
9. Painted Abstract Canvas Trio
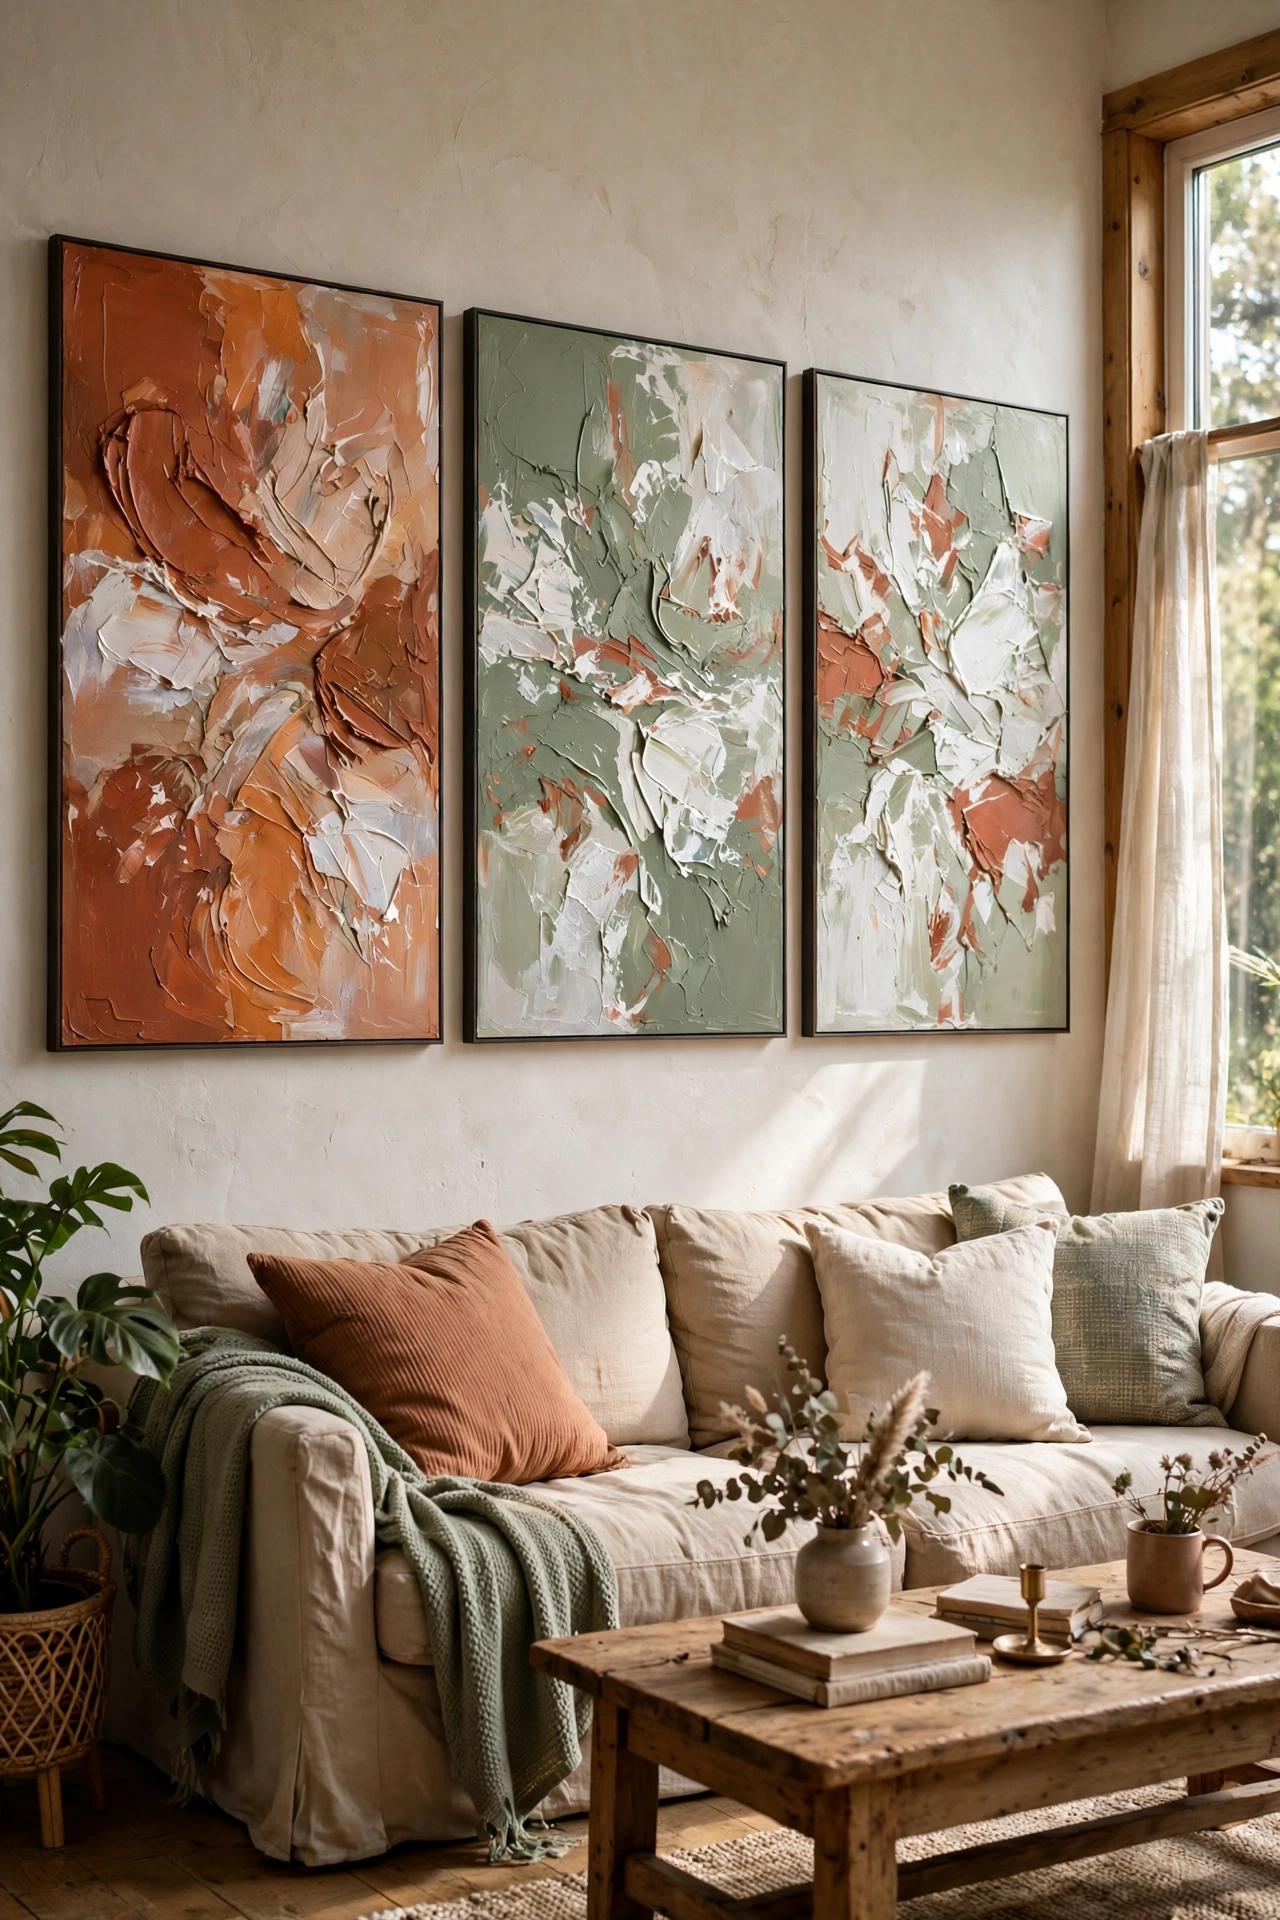
Three large abstract canvases in a row look like serious art, and they take twenty minutes each. I buy the cheapest big canvases I can find, squeeze out just two colours plus white, I used terracotta and sage, and drag a palette knife across in broad strokes. The rule that saves it: use the same two colours across all three canvases so they read as a set. My first trio used a different palette on each and they fought with each other. Let the first layer dry, add a few white highlights, and hang them with 8cm gaps. From across the room they genuinely pass for gallery pieces.
Materials: 3 large cheap canvases, 2 acrylic paint colours plus white, palette knife | Cost: ~$9-15 | Time: 1 hour plus drying
10. Vintage Book Page Art
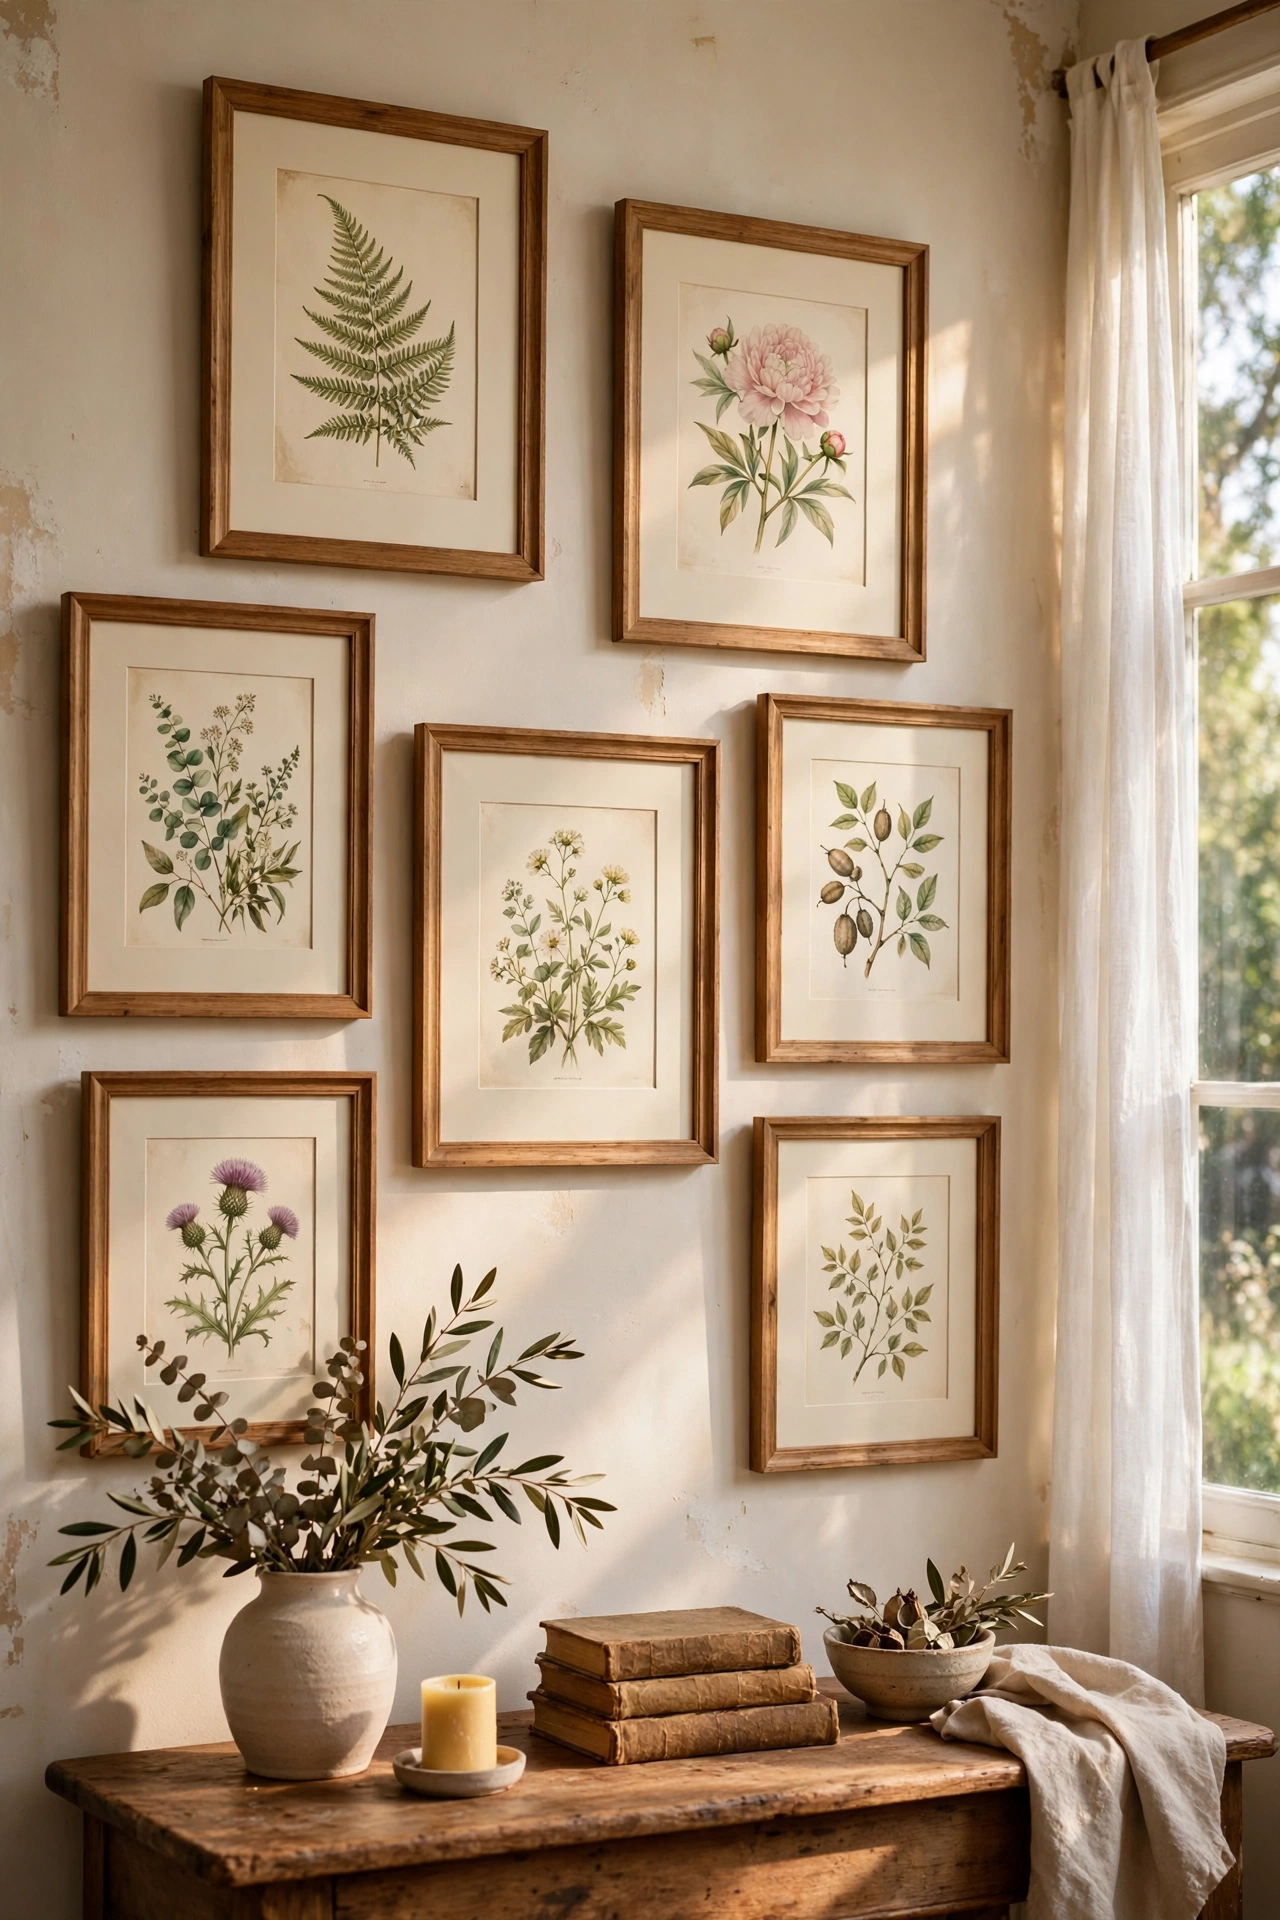
Pages from damaged old books make hauntingly pretty wall art, and nobody misses a book that was falling apart anyway. I frame dictionary pages, illustrated plates and old maps from books I find at jumble sales, usually fifty cents each. The expensive trick is matting: a wide cream mount around a small page makes it look museum quality. I cut my own mounts from mount board using a craft knife and a ruler, which took one practice attempt to get neat. My first frames skipped the mount and the pages looked lost. Choose pages with interesting type or illustrations, keep the palette of the frames consistent, and the wall tells a story.
Materials: Damaged old books, mount board, craft knife, frames | Cost: ~$6-12 | Time: 1.5 hours
11. Embroidery Hoop Textile Art
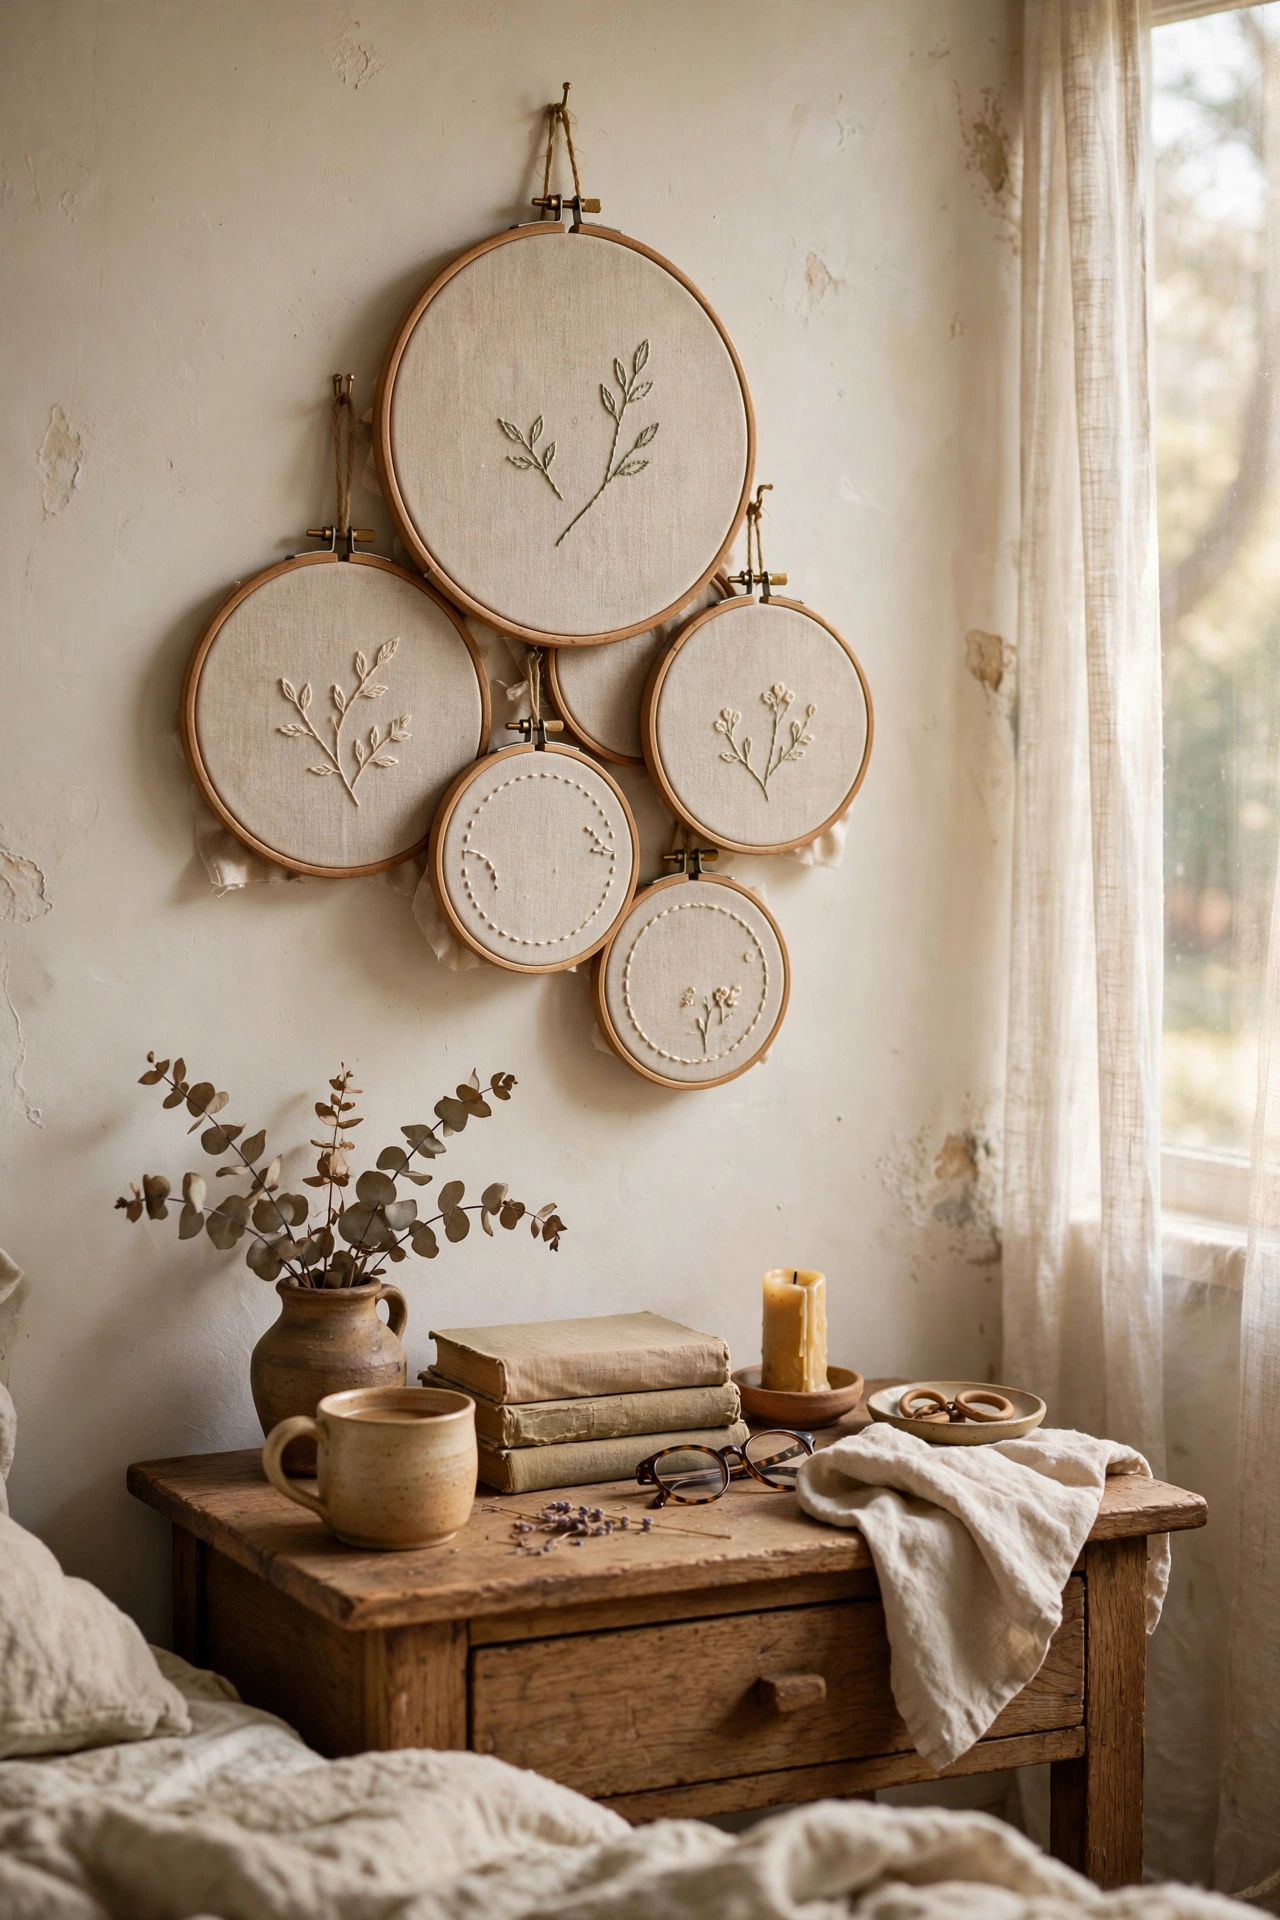
Wooden embroidery hoops are the cheapest frames that ever existed, and stretched fabric inside them looks soft and intentional. I fill hoops from 10cm to 30cm with linen offcuts, some plain, some with simple running-stitch patterns I sew while watching television. The trick is pulling the fabric truly tight and trimming the excess at the back, then hanging the hoops at slightly different heights so the wall feels collected rather than rigid. My first hoop sagged because I skipped tightening the screw properly, so give it a final twist before you hang. A cluster of seven hoops above a bedside table costs almost nothing.
Materials: 5-9 wooden embroidery hoops, fabric offcuts, needle and thread | Cost: ~$4-8 | Time: 1 hour
12. Dried Grass Stems in Slim Frames
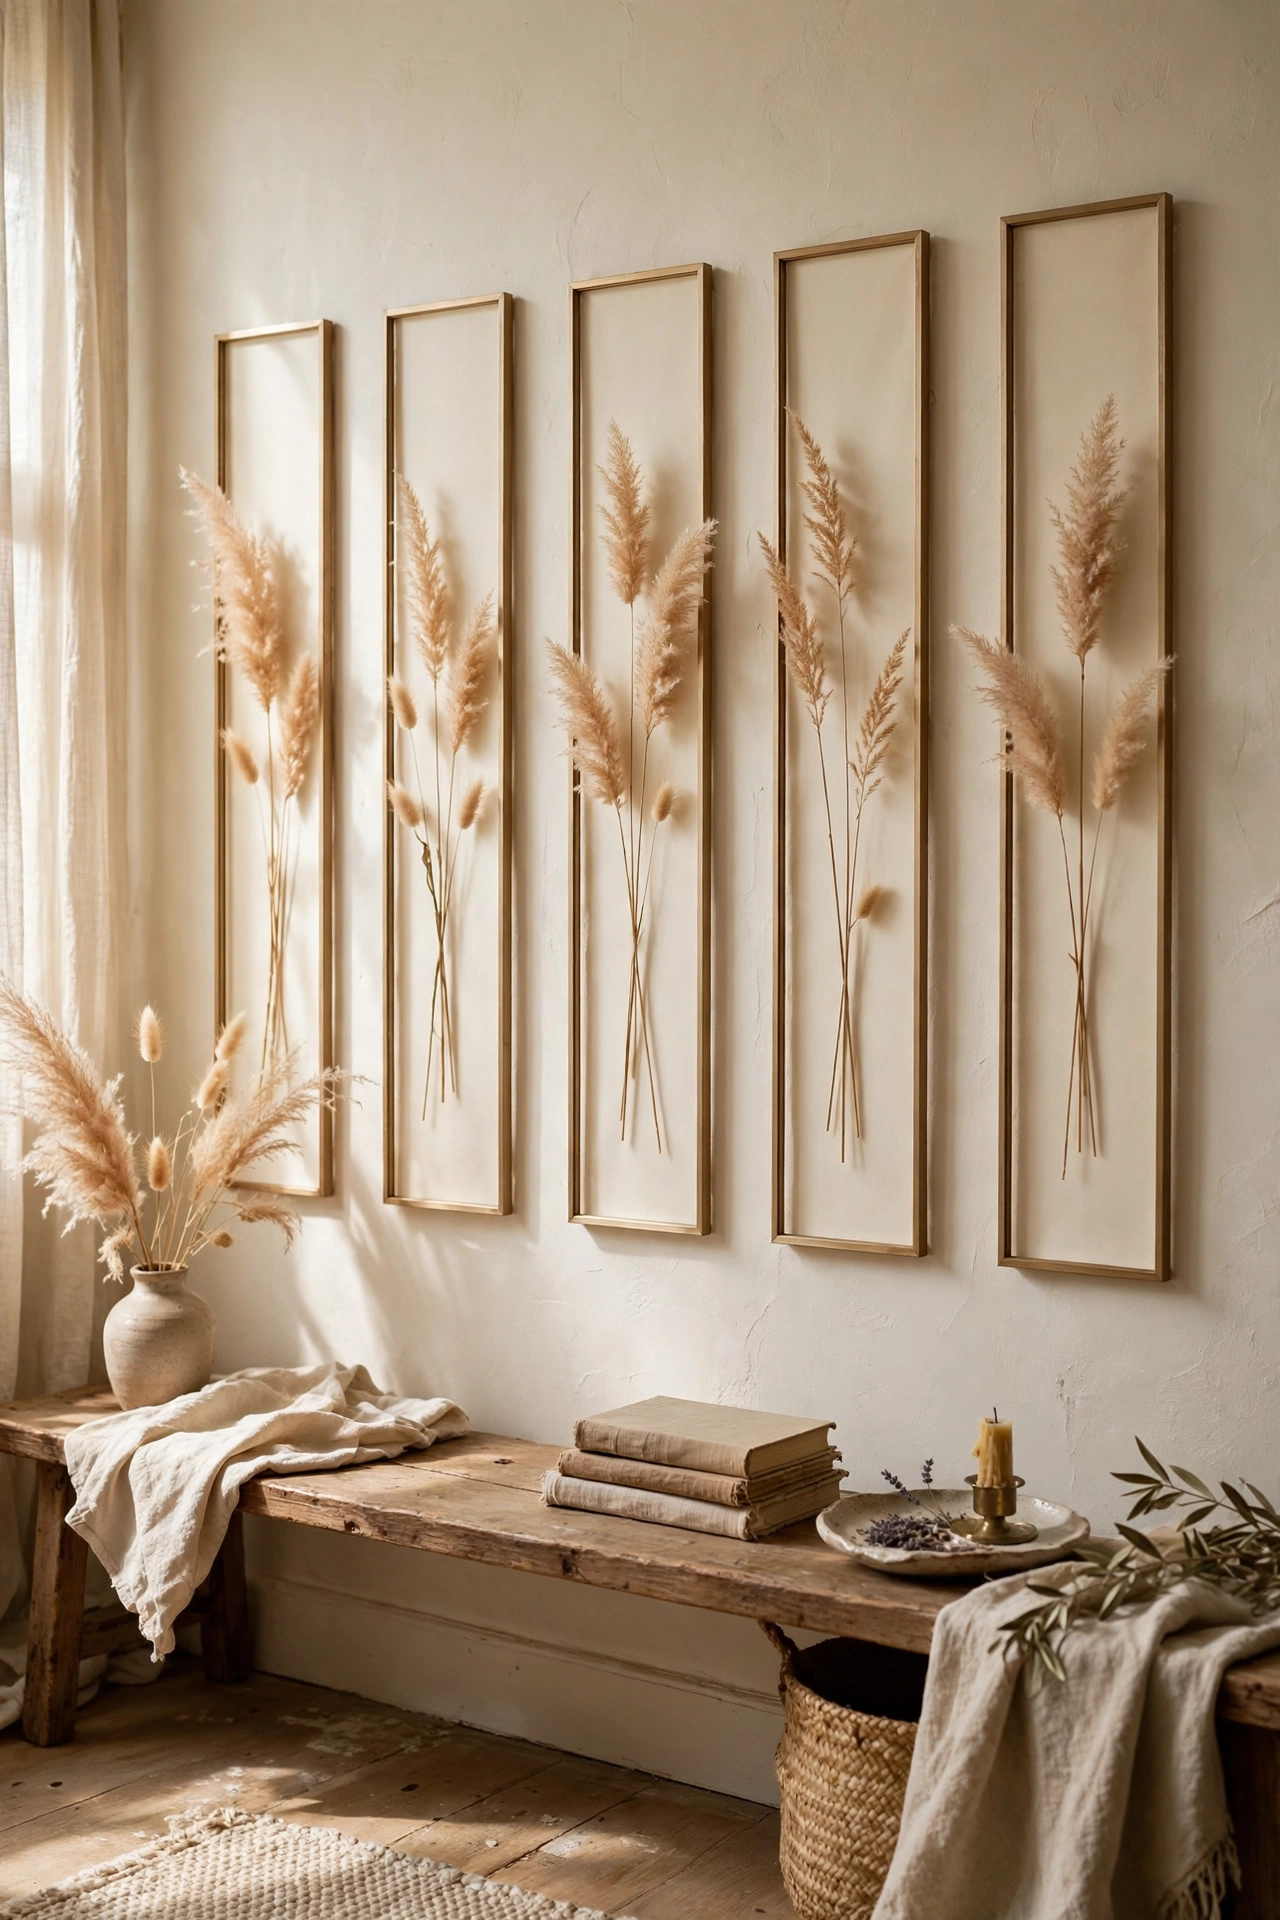
Tall slim frames filled with dried grasses give that airy, high-end look you see in boutique hotels. I pick pampas plumes and wheat stems in late summer, dry them upside down for two weeks, then lay two or three stems in each tall narrow frame against a cream backing. The stems need to be completely dry before framing or they go limp, which is exactly what happened to my first batch. Keep the arrangement minimal, a few stems with space around them, and line up four or five frames in a row. The vertical lines draw the eye up and make ceilings feel taller.
Materials: Foraged dried grasses, 4-5 tall slim frames, cream card backing | Cost: ~$6-10 | Time: 30 minutes plus drying time
13. Travel Postcard and Ticket Grid
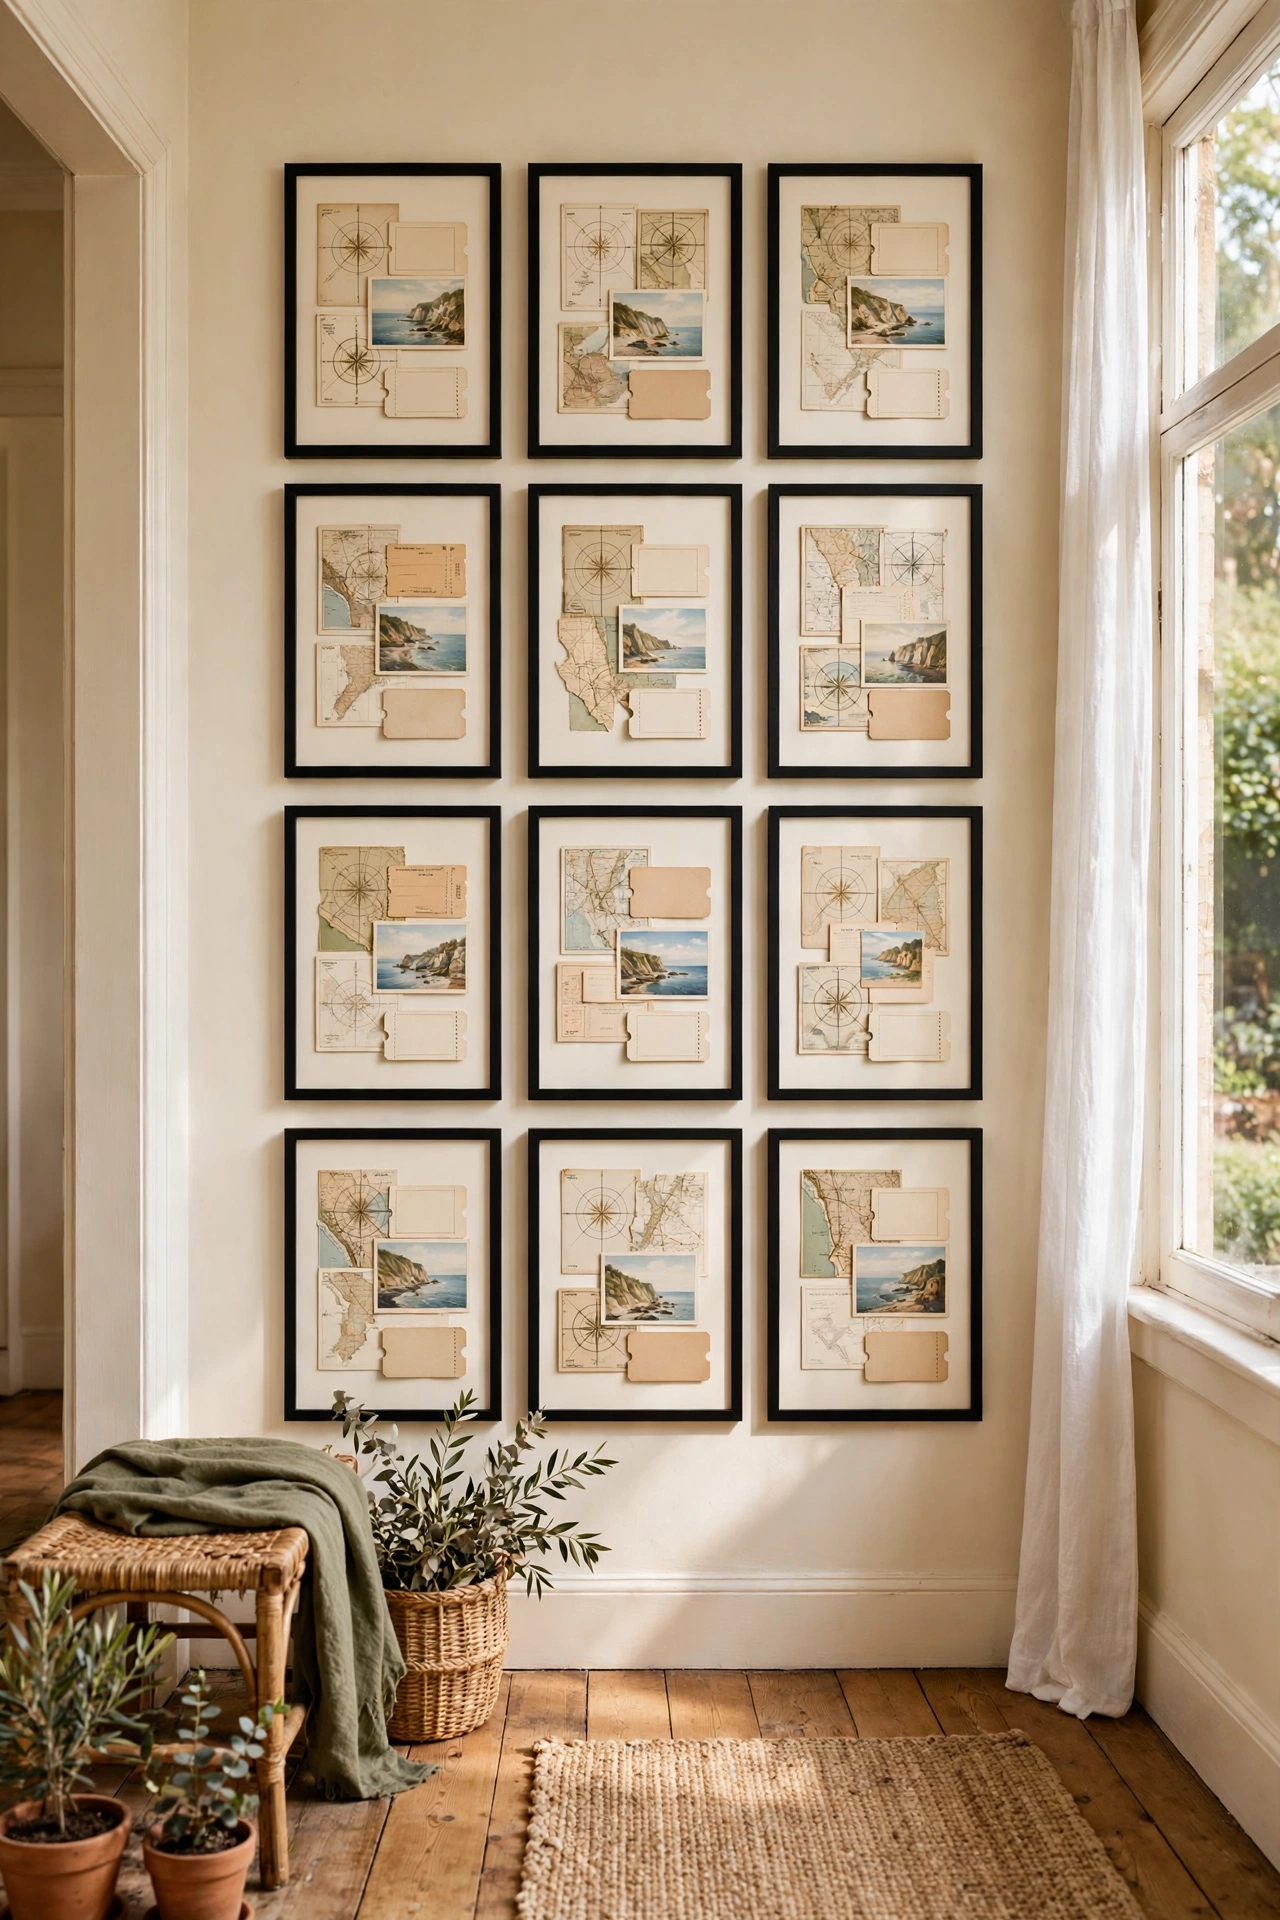
The most personal gallery wall I own is made of postcards, ticket stubs and maps from trips, and it cost me nothing but frames. I mounted each memento on cream card and put them in identical thin frames, arranged in a neat grid in the hallway. The uniform framing is what turns a pile of souvenirs into something that looks properly designed. My mistake was including too many dark ticket stubs at first, which made the grid feel heavy, so I balanced them with pale postcards and maps. If you are short on travel bits, vintage postcards from flea markets cost pennies and mix in perfectly.
Materials: Postcards, tickets and maps, cream card, identical thin frames | Cost: ~$8-12 | Time: 1 hour
14. Chalkboard Quote Frames
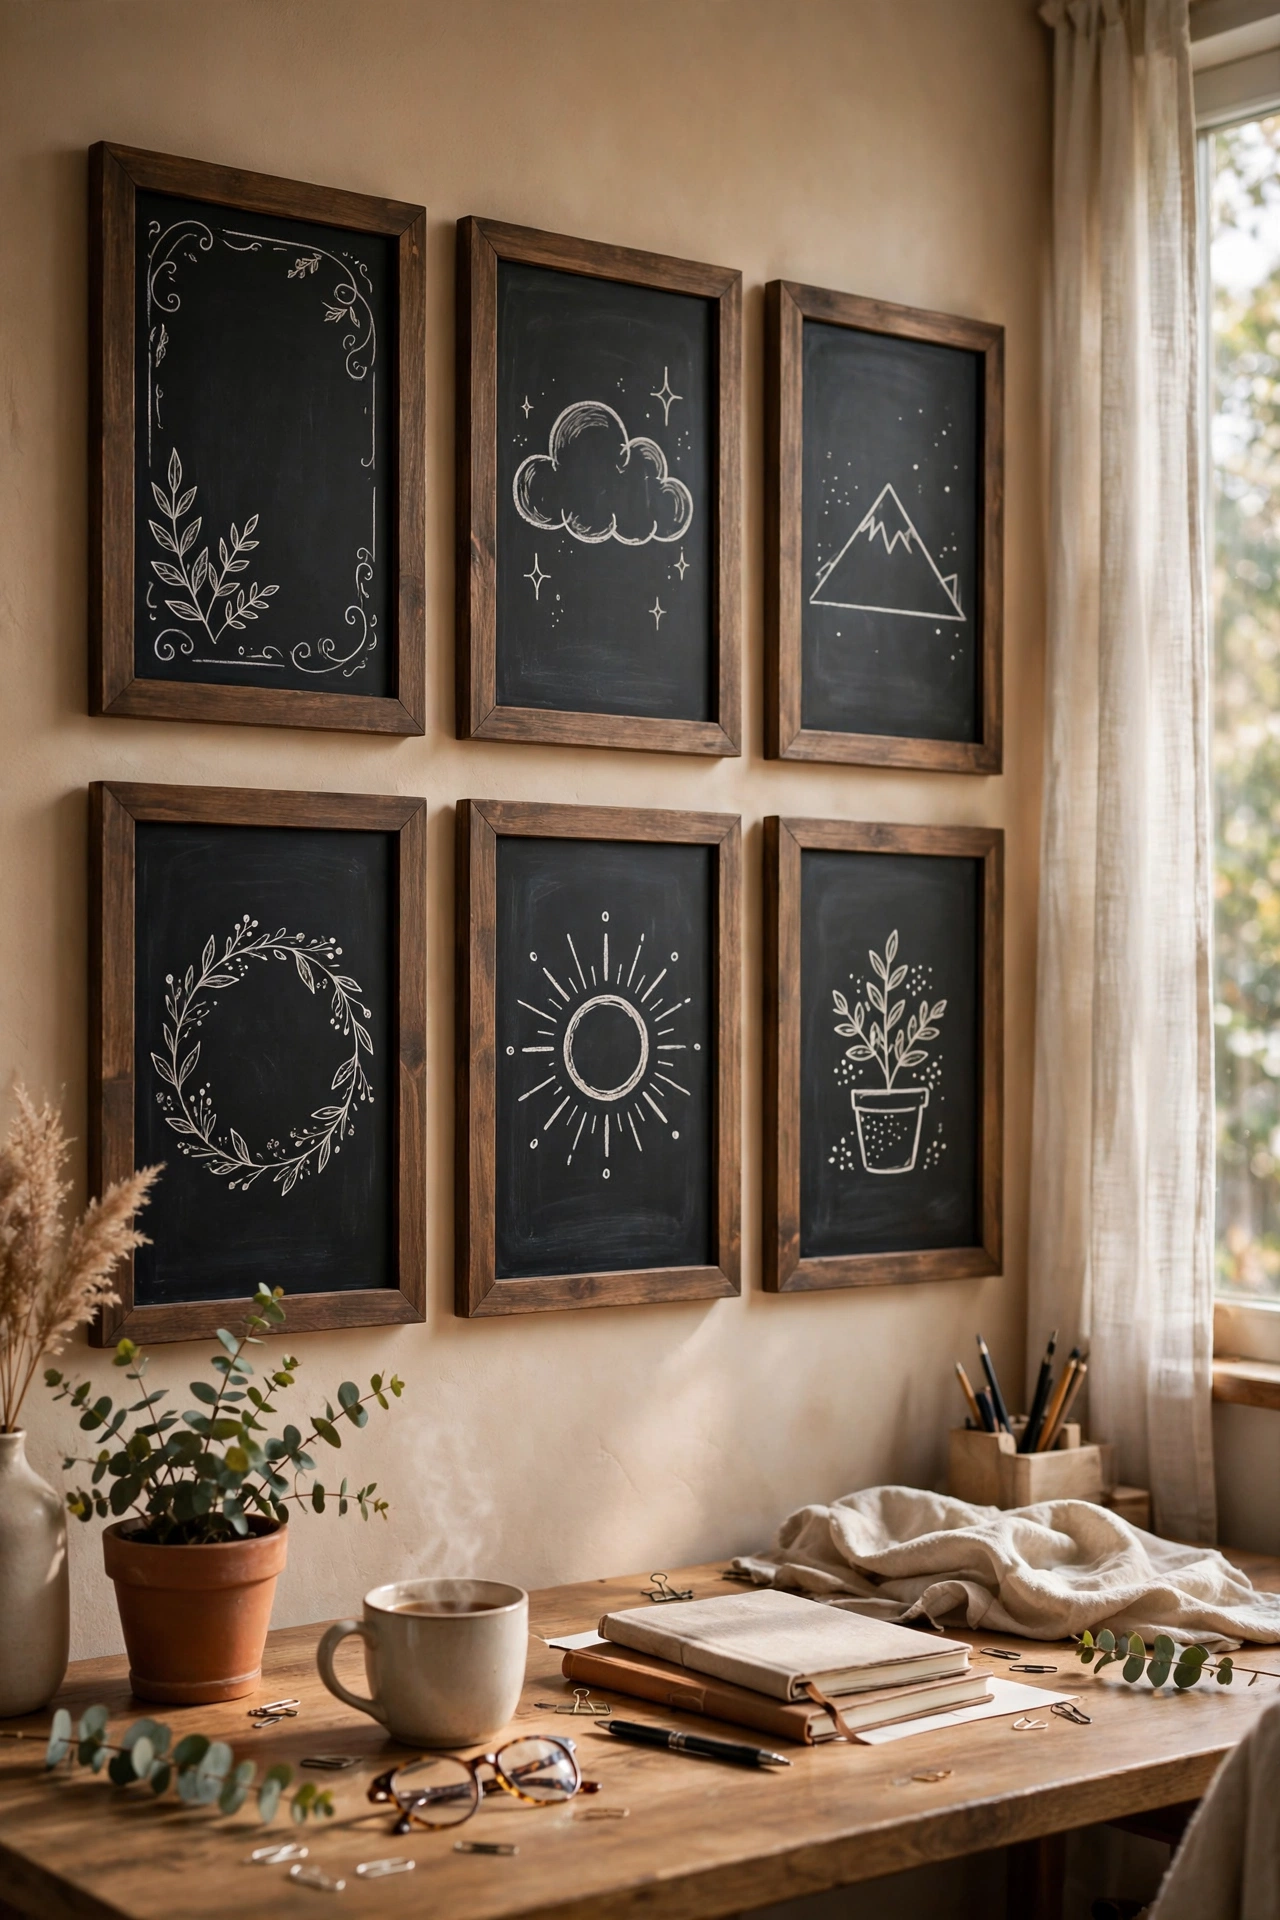
Frames filled with chalkboard paint give you a gallery wall you can rewrite whenever the mood changes. I painted the glass or backing boards of six matching frames with two coats of chalkboard paint, then wrote quotes and little drawings in chalk pens. The wall above my desk currently says something encouraging, and I change it with the seasons. My first attempt used real chalk which smudged every time someone brushed past, so chalk pens are the answer, they stay put but wipe off with a damp cloth. Keep the handwriting loose and the frames identical for the polished look.
Materials: 4-6 matching frames, chalkboard paint, chalk pens | Cost: ~$8-12 | Time: 1 hour plus drying
15. Vinyl Record Sleeve Row
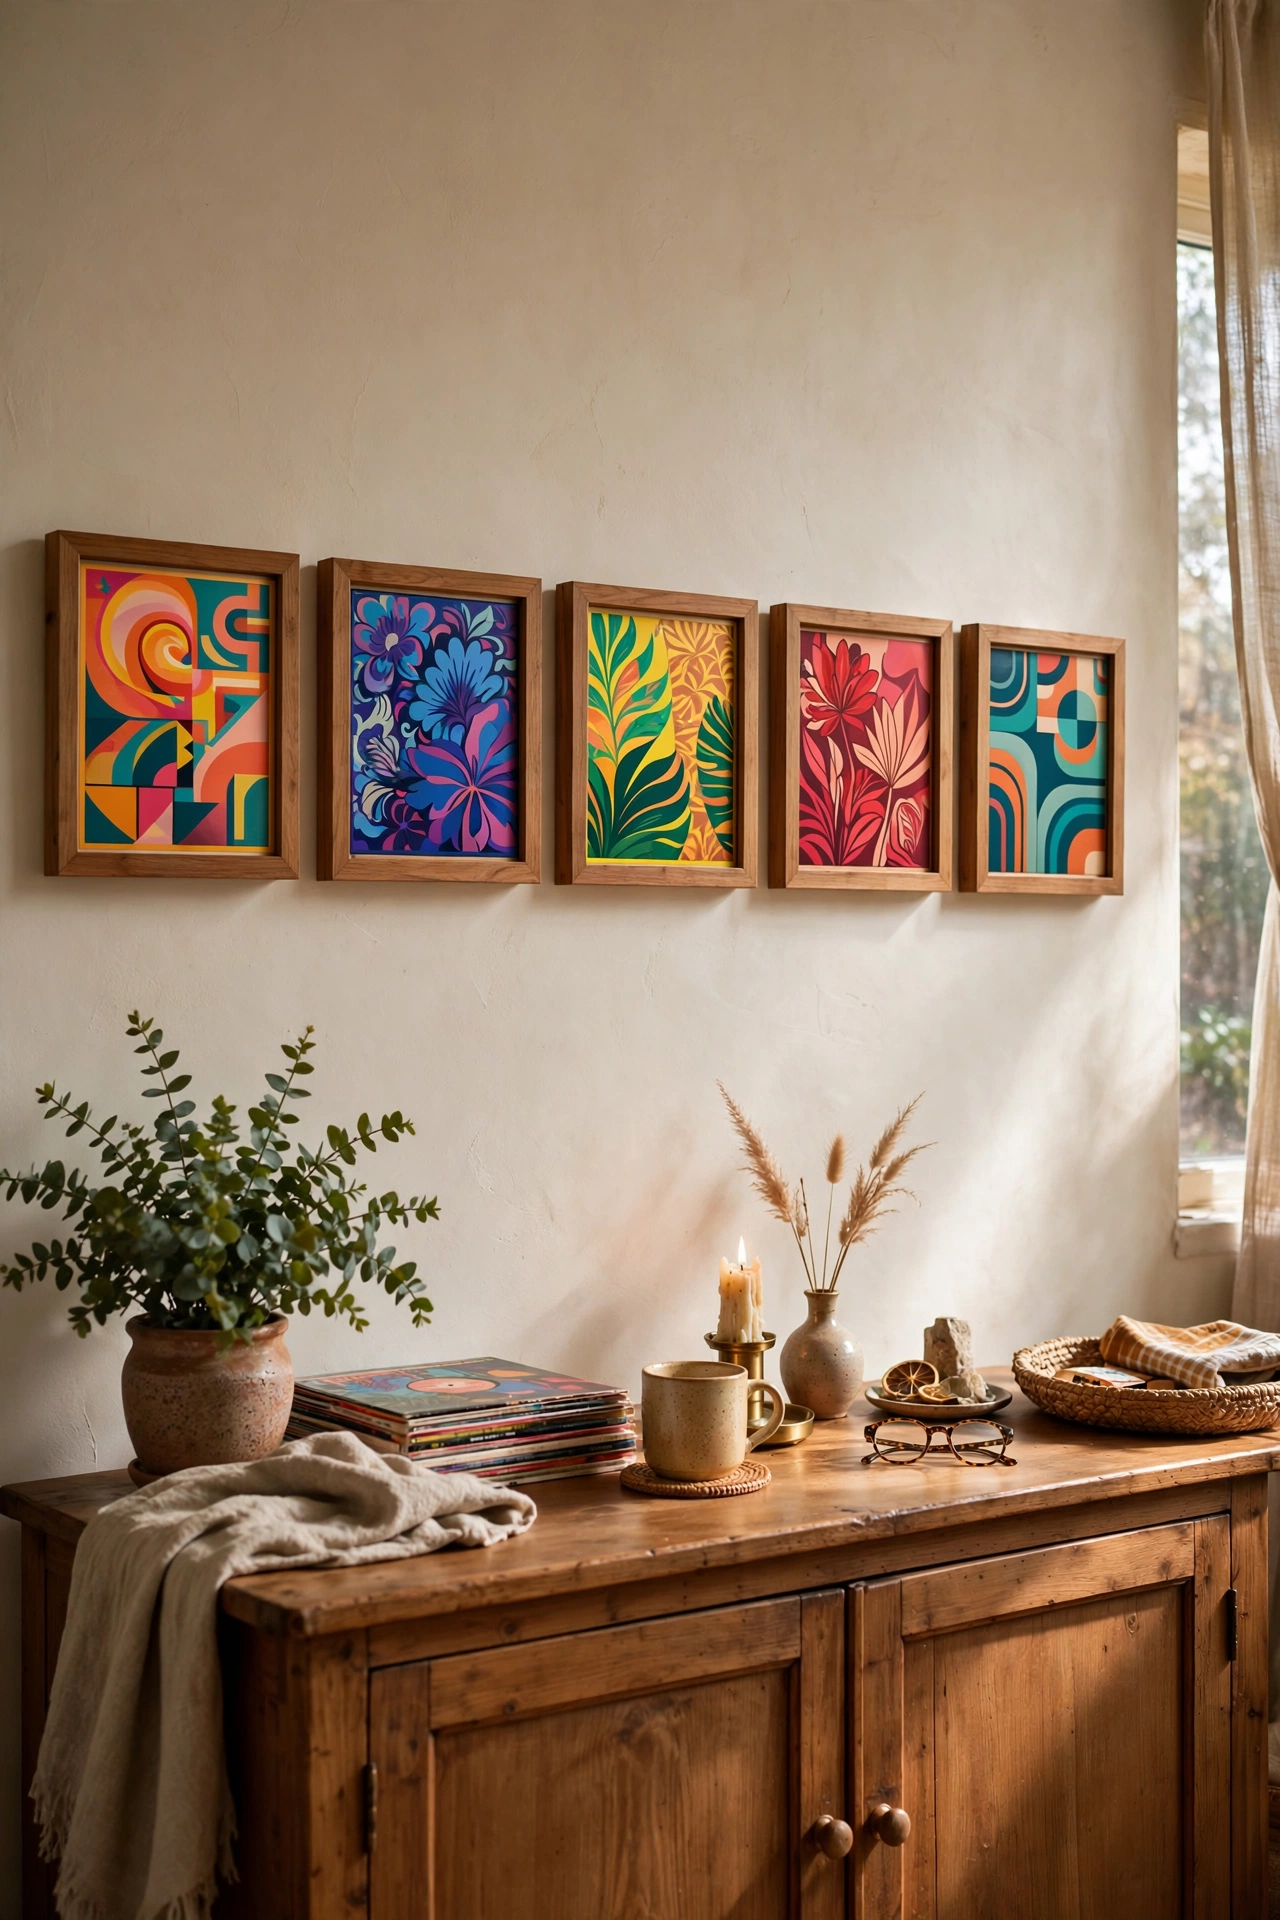
Record sleeves are square, bold and already designed by professionals, which makes them the easiest impressive art going. I hung eight favourite sleeves in cheap square frames in a single horizontal row above my sideboard, and it looks like a music lover’s shrine. Charity shops sell records with great covers for a dollar, and you do not even need to like the music. My first row mixed sleeve sizes and it looked messy, so I committed to 12-inch sleeves only and the rhythm of identical squares did the rest. Leave 5cm gaps and keep the row perfectly level.
Materials: 6-10 vinyl records with good covers, square frames, spirit level | Cost: ~$8-15 | Time: 45 minutes
16. Oversized Mats That Make Small Prints Look Priceless
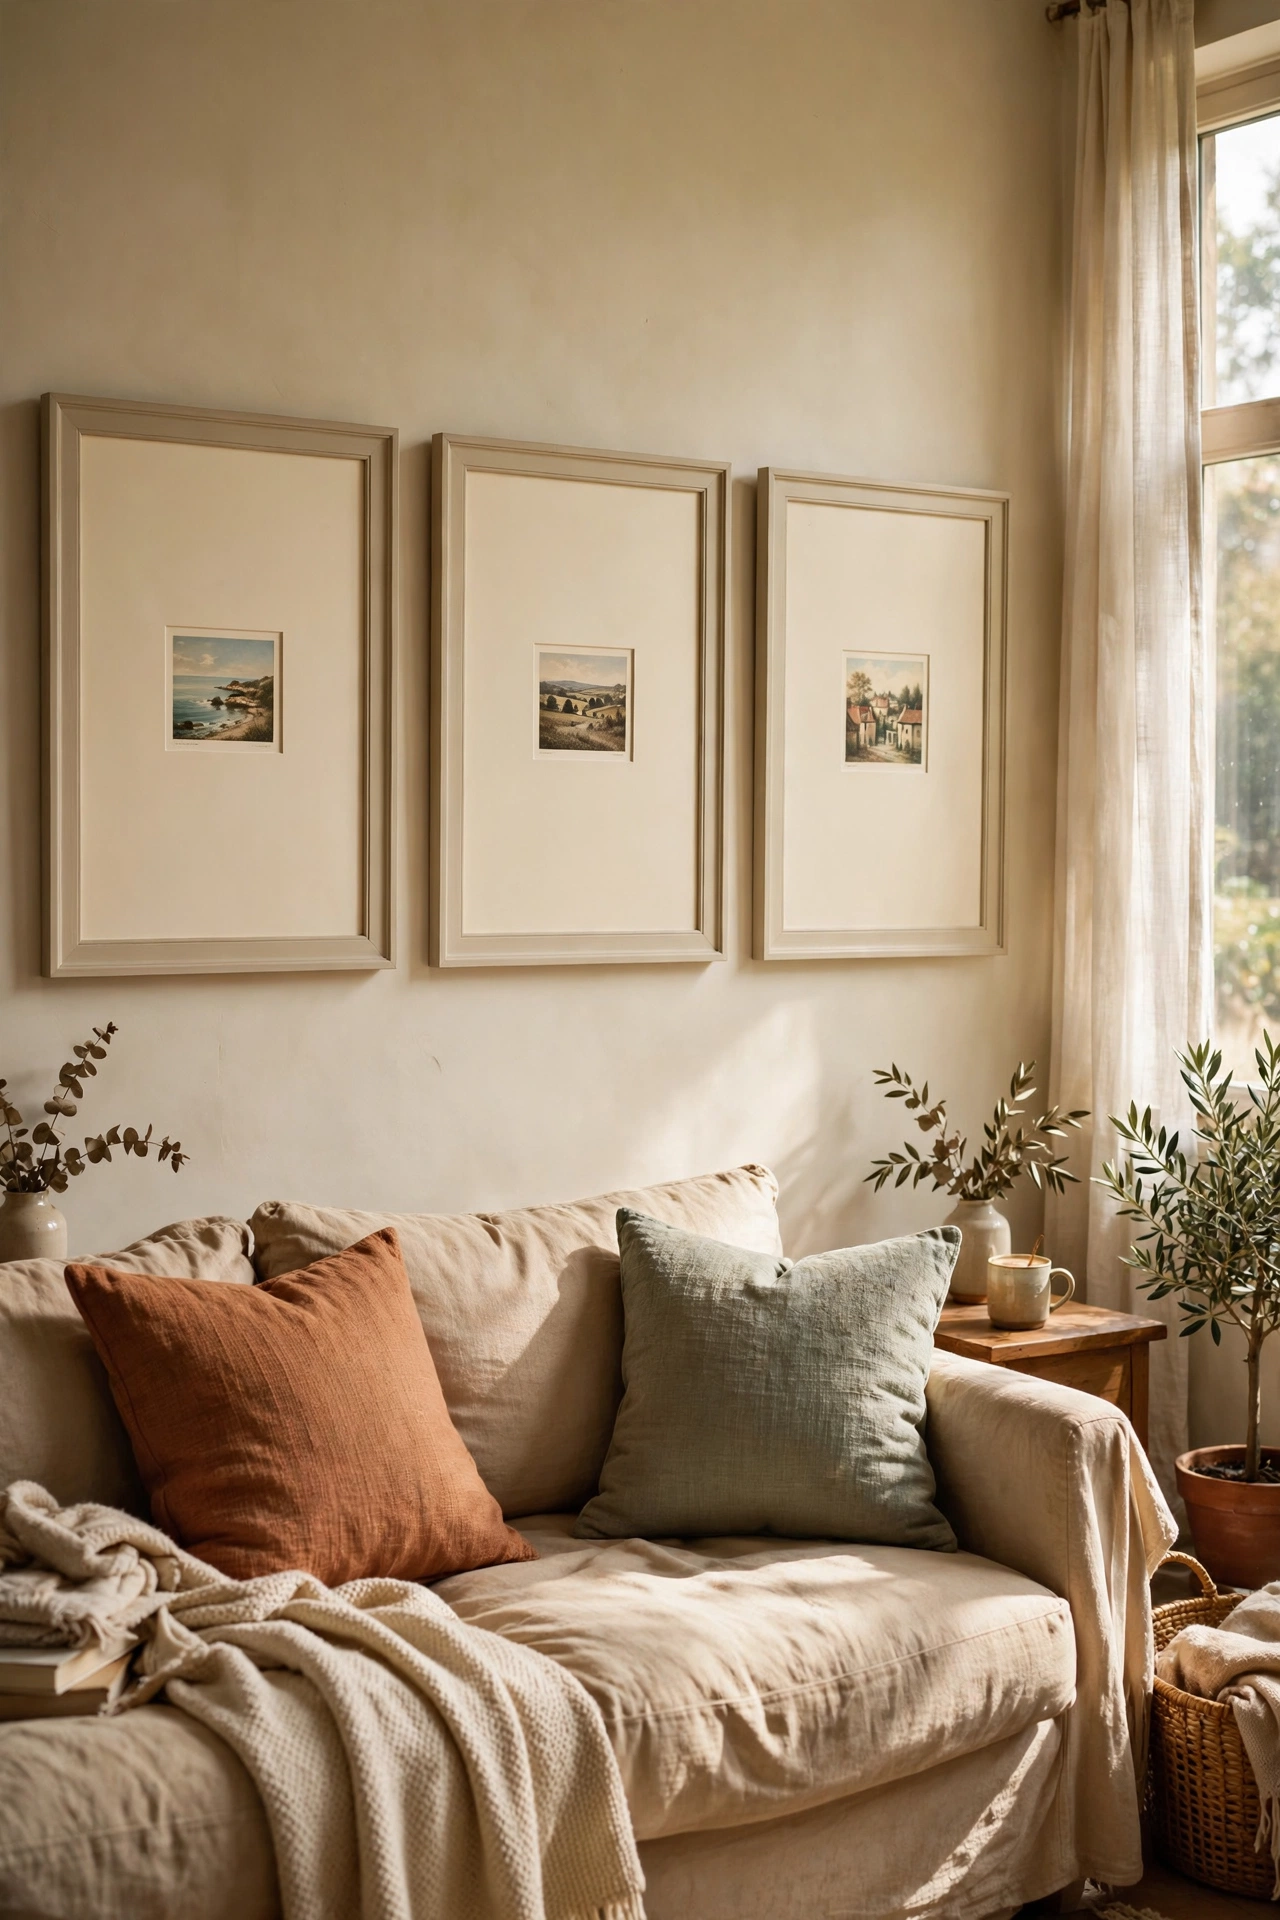
This is the single best trick I know: put a tiny print in a huge frame with a wide mat and it instantly looks like gallery art. I buy large frames from charity shops, cut my own mounts from mount board so the opening is small and centred, and pop in postcard-sized prints. The ratio of white space to art is what signals expensive. My first mounts were wonky because I measured the opening from the wrong edge, so always measure twice and cut the opening 5mm smaller than the print on each side so it overlaps. A row of three oversized-matted prints above a sofa looks like it cost hundreds.
Materials: 3 large frames, mount board, craft knife, small prints | Cost: ~$8-12 | Time: 1.5 hours
17. Reclaimed Window Frame Centrepiece
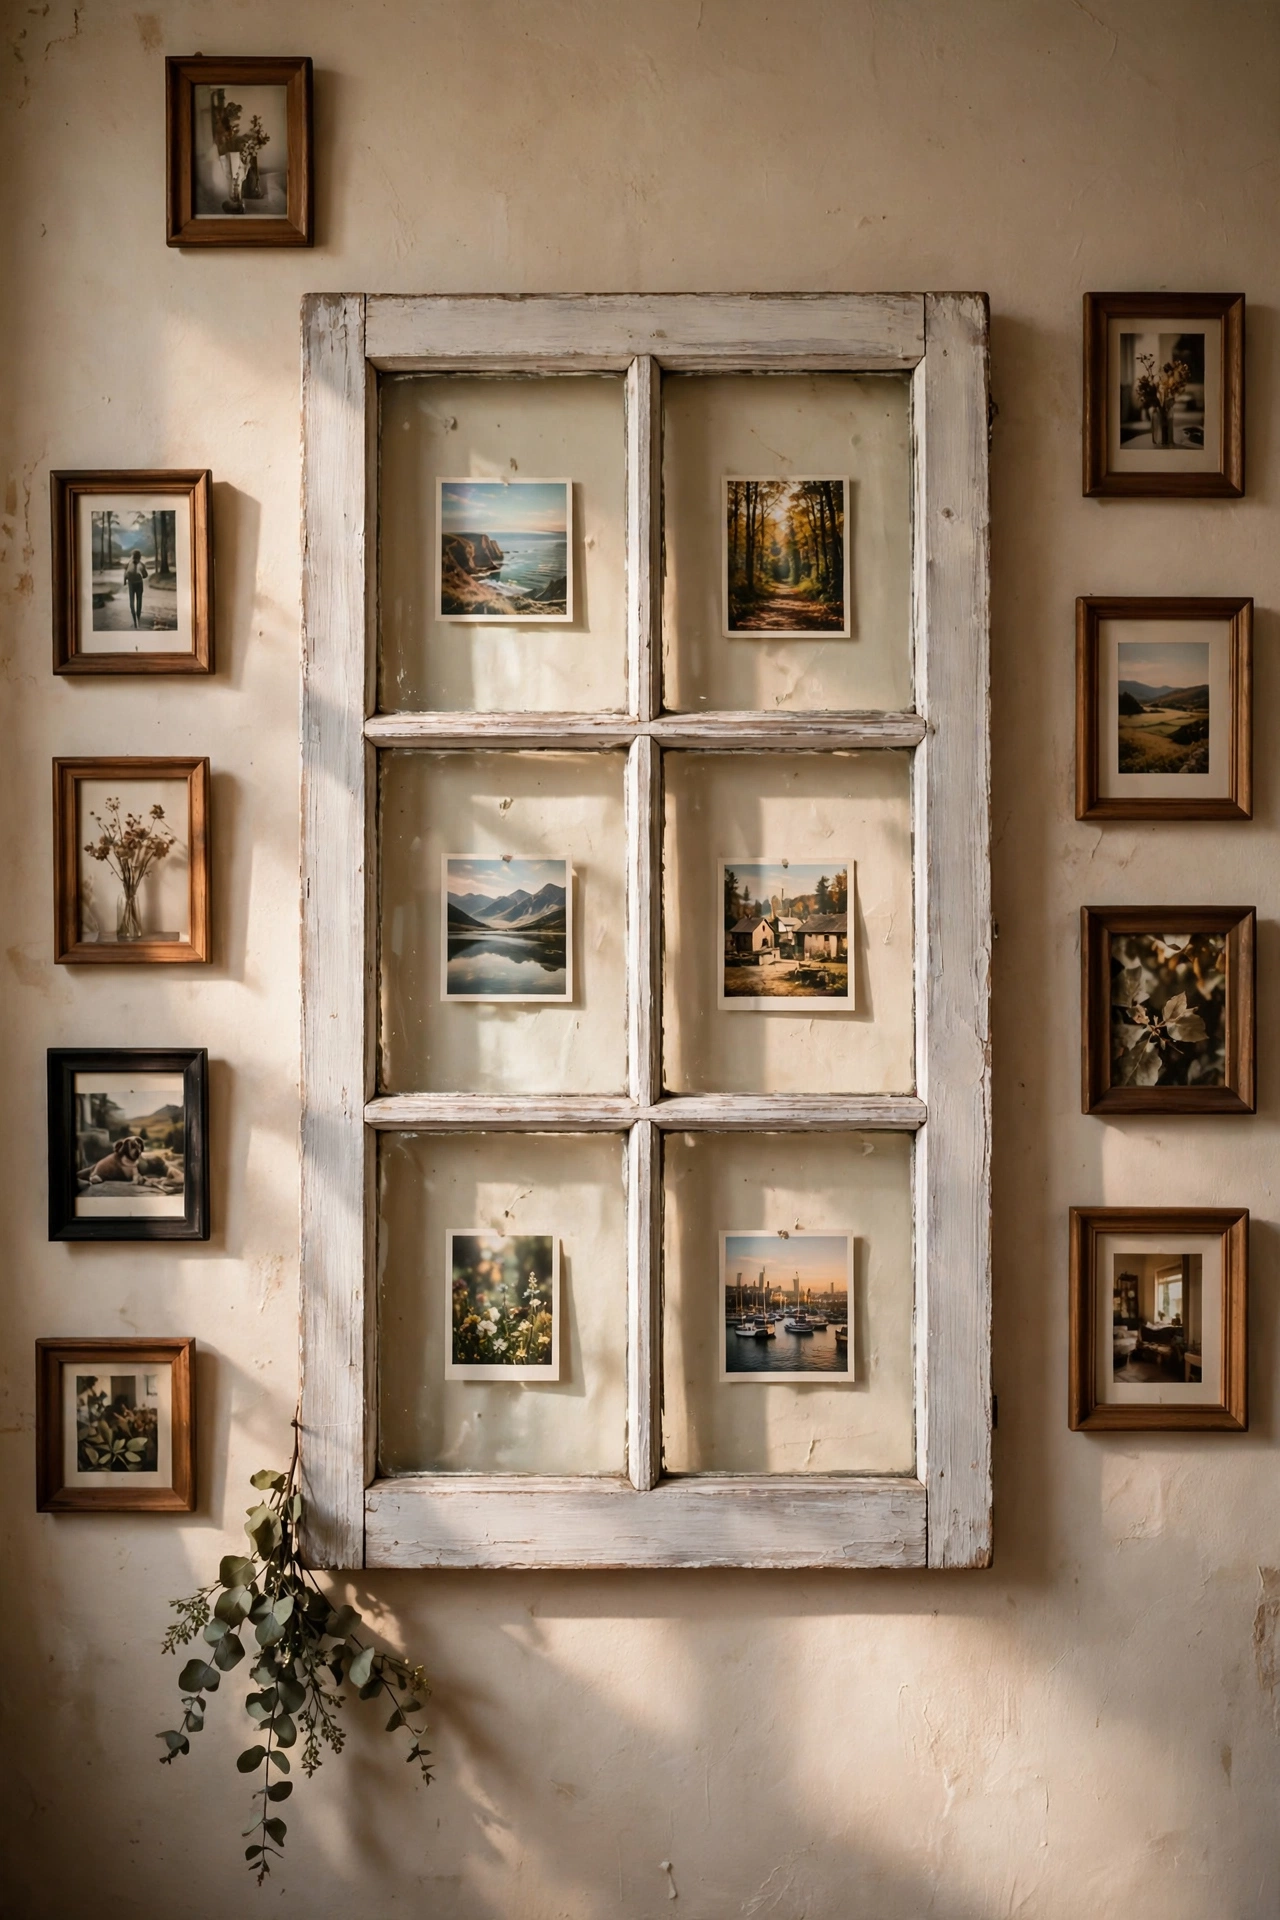
An old wooden window frame makes a gallery wall look architectural and storied. I found a six-pane window at a salvage yard for five dollars, cleaned it up with sugar soap, and gave it one coat of chalky white paint rubbed back at the edges for a worn look. It hangs in the centre of my wall with small photos and prints taped behind each pane, and smaller frames clustered around it. My first attempt hung it empty and it looked unfinished, so the photos behind the glass are essential. Check salvage yards and demolition listings, these frames are often given away free.
Materials: Old multi-pane window frame, sugar soap, chalky paint, small photos | Cost: ~$0-8 | Time: 2 hours plus drying
18. Washi Tape Frame Illusions
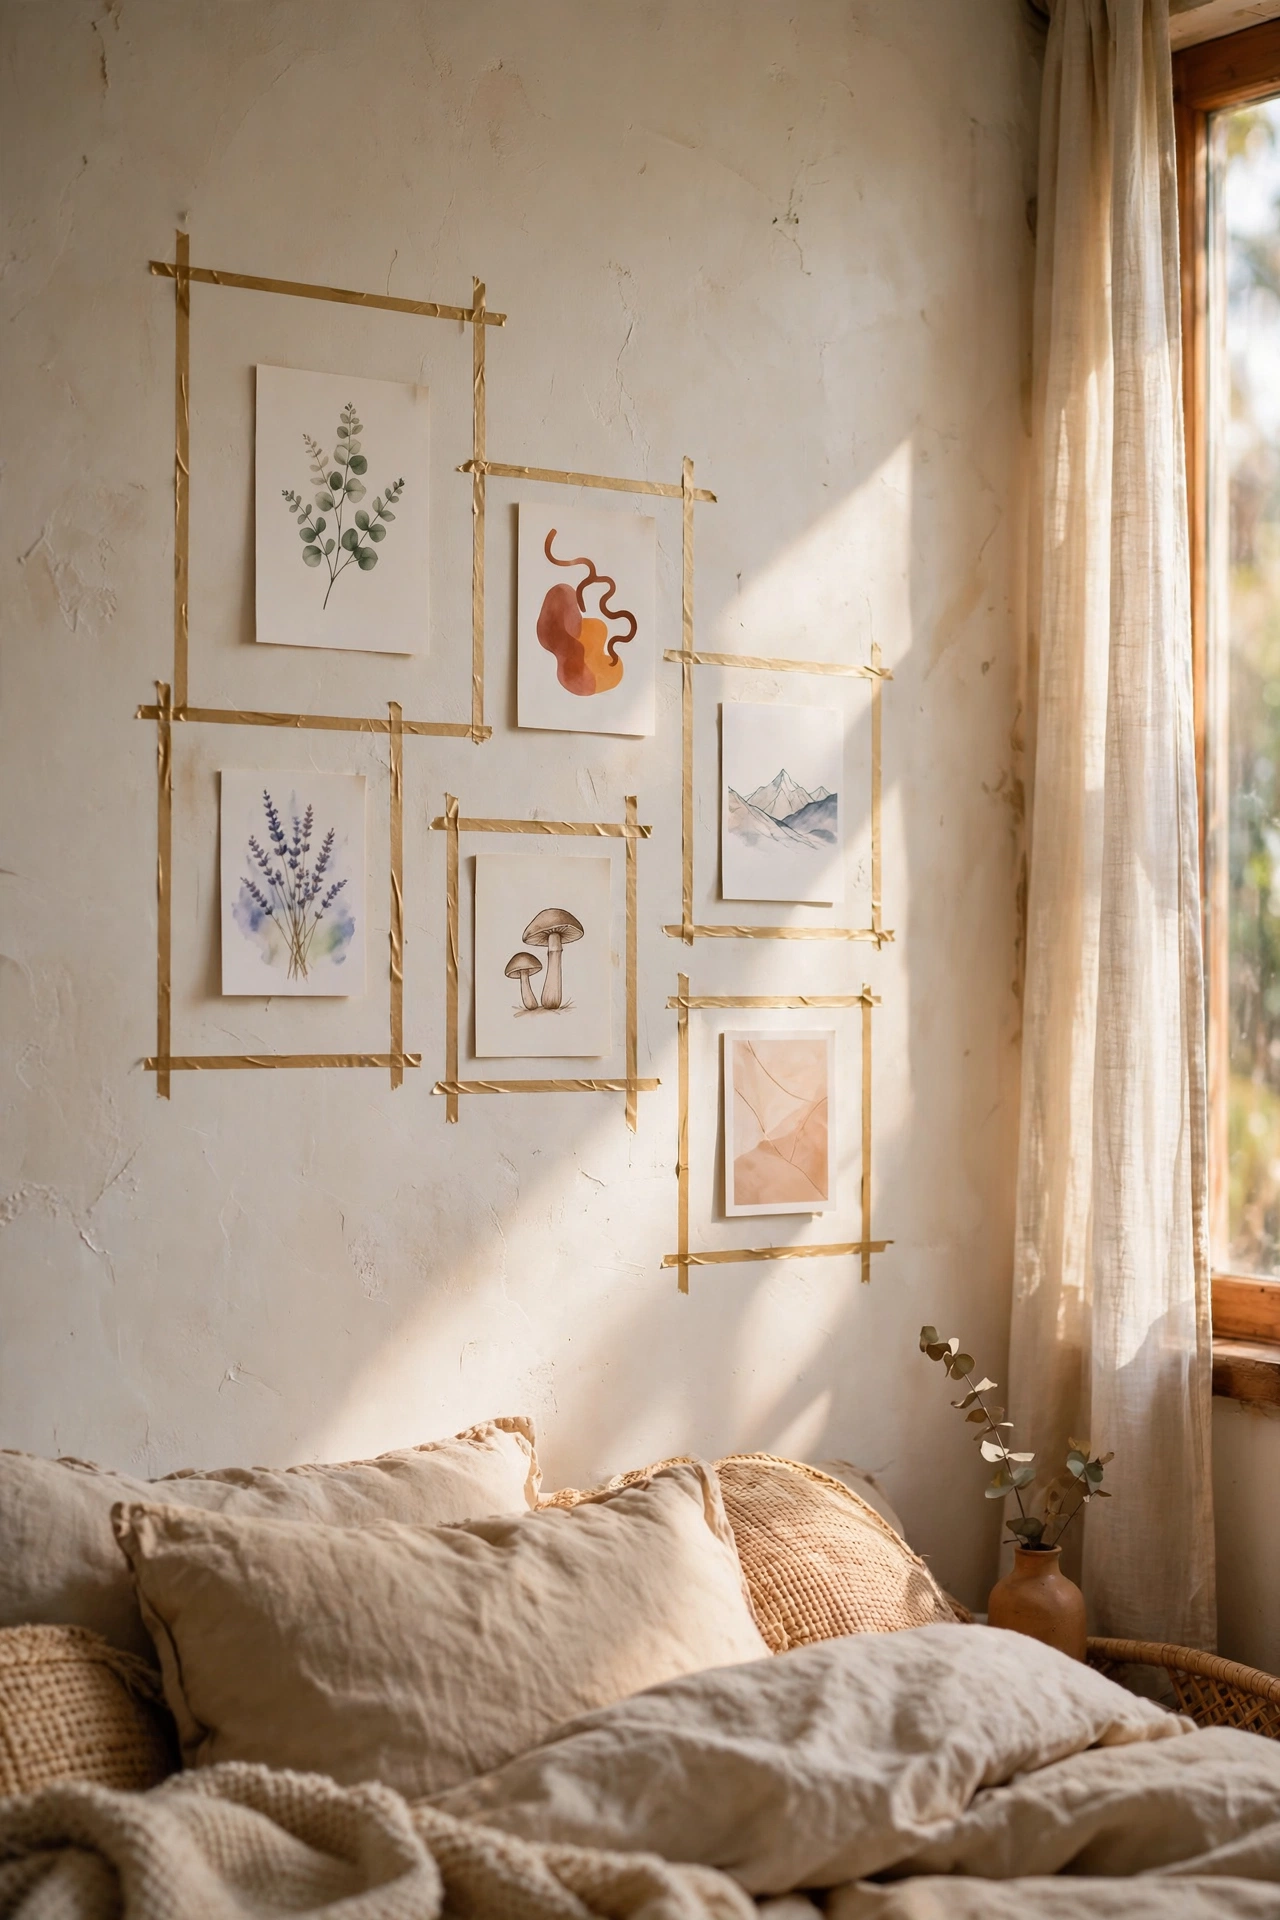
When you cannot afford frames at all, draw them on with washi tape. I outlined rectangles directly on the wall in thin gold washi tape and hung small unframed prints inside each outline with removable strips. From a few steps back the tape reads as slim gold frames, and the whole wall cost me the price of two tape rolls. The key is crisp corners, so I use a ruler and press the tape down firmly, overlapping slightly at the corners. My first wall used tape that was too wide and it looked chunky, so stick to tape under 1.5cm. It peels off cleanly when you redecorate, which renters will love.
Materials: Thin washi tape in gold or black, small unframed prints, removable strips, ruler | Cost: ~$3-6 | Time: 1 hour
19. Symmetrical Salon Hang with Paper Templates
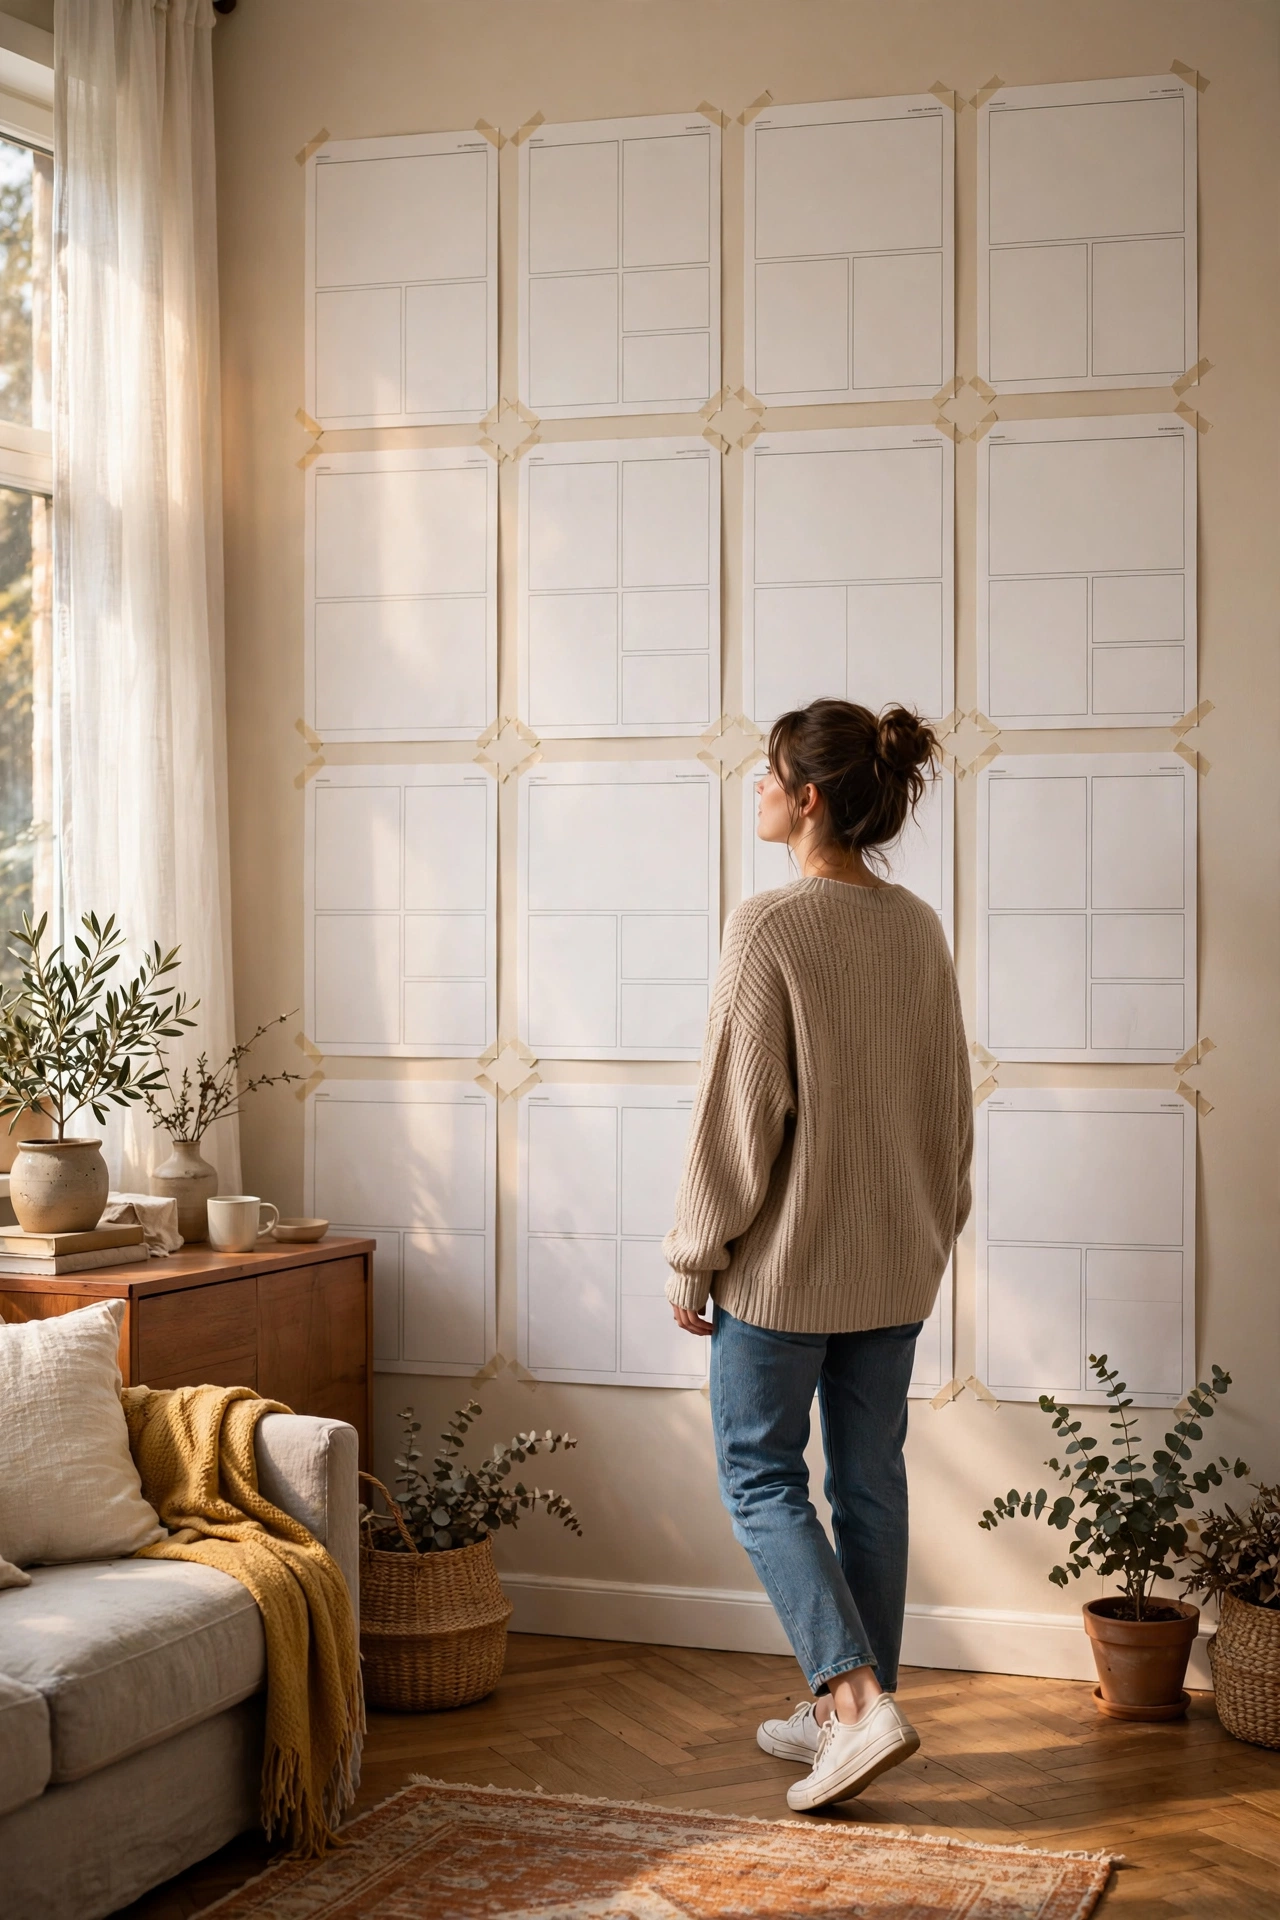
The final idea is not a craft but the hanging method that makes every other idea look professional. I trace every frame onto newspaper, cut the templates out, and tape them to the wall, moving them around until the arrangement feels balanced before a single nail goes in. For the classic expensive look, keep 5 to 8cm between frames, align either the tops or the centres, and step back to check from the doorway. My early walls failed because I hung the first frame then guessed the rest, and the drift was obvious. This method takes twenty extra minutes and saves every wall. Once the layout sings, hammer through the paper and tear it away.
Materials: Newspaper or kraft paper, masking tape, hammer, nails, spirit level | Cost: ~$0-3 | Time: 30 minutes planning plus hanging
Pin this post now so you can save this idea for your next weekend project! Start with the frames you own and pick one trick from this list. For the full room, see (see also: 23-bedroom-decor-ideas-under-50-for-a-cozy-retreat/) next.
