19 Weekend DIY Projects on a Budget
My love affair with weekend DIY home projects started with a front door disaster. I had a free Saturday, a can of navy paint, and absolute confidence. By 10am the door looked gorgeous. By Sunday morning it looked like a melted crayon, because I had used interior paint and nobody told me overnight dew was a thing. I scraped, reprimed, and repainted the whole thing with proper exterior paint the next weekend, and that second door lasted six years. The lesson stuck: a weekend project only works if you pick the right one and read the label first.
Since then I have finished dozens of weekend DIY home projects, and the ones in this list are the ones I would do again without hesitation. Each one fits into a single Saturday or a lazy two-day weekend, costs under $50, and actually changes how a room feels. No contractors, no special tools beyond the basics, and no projects that bleed into Monday. I have noted what went sideways for me on each one so yours goes smoother. Pick one, start Saturday morning, and enjoy the smug feeling of a finished room by Sunday night.
1. Paint the Front Door in Exterior Paint
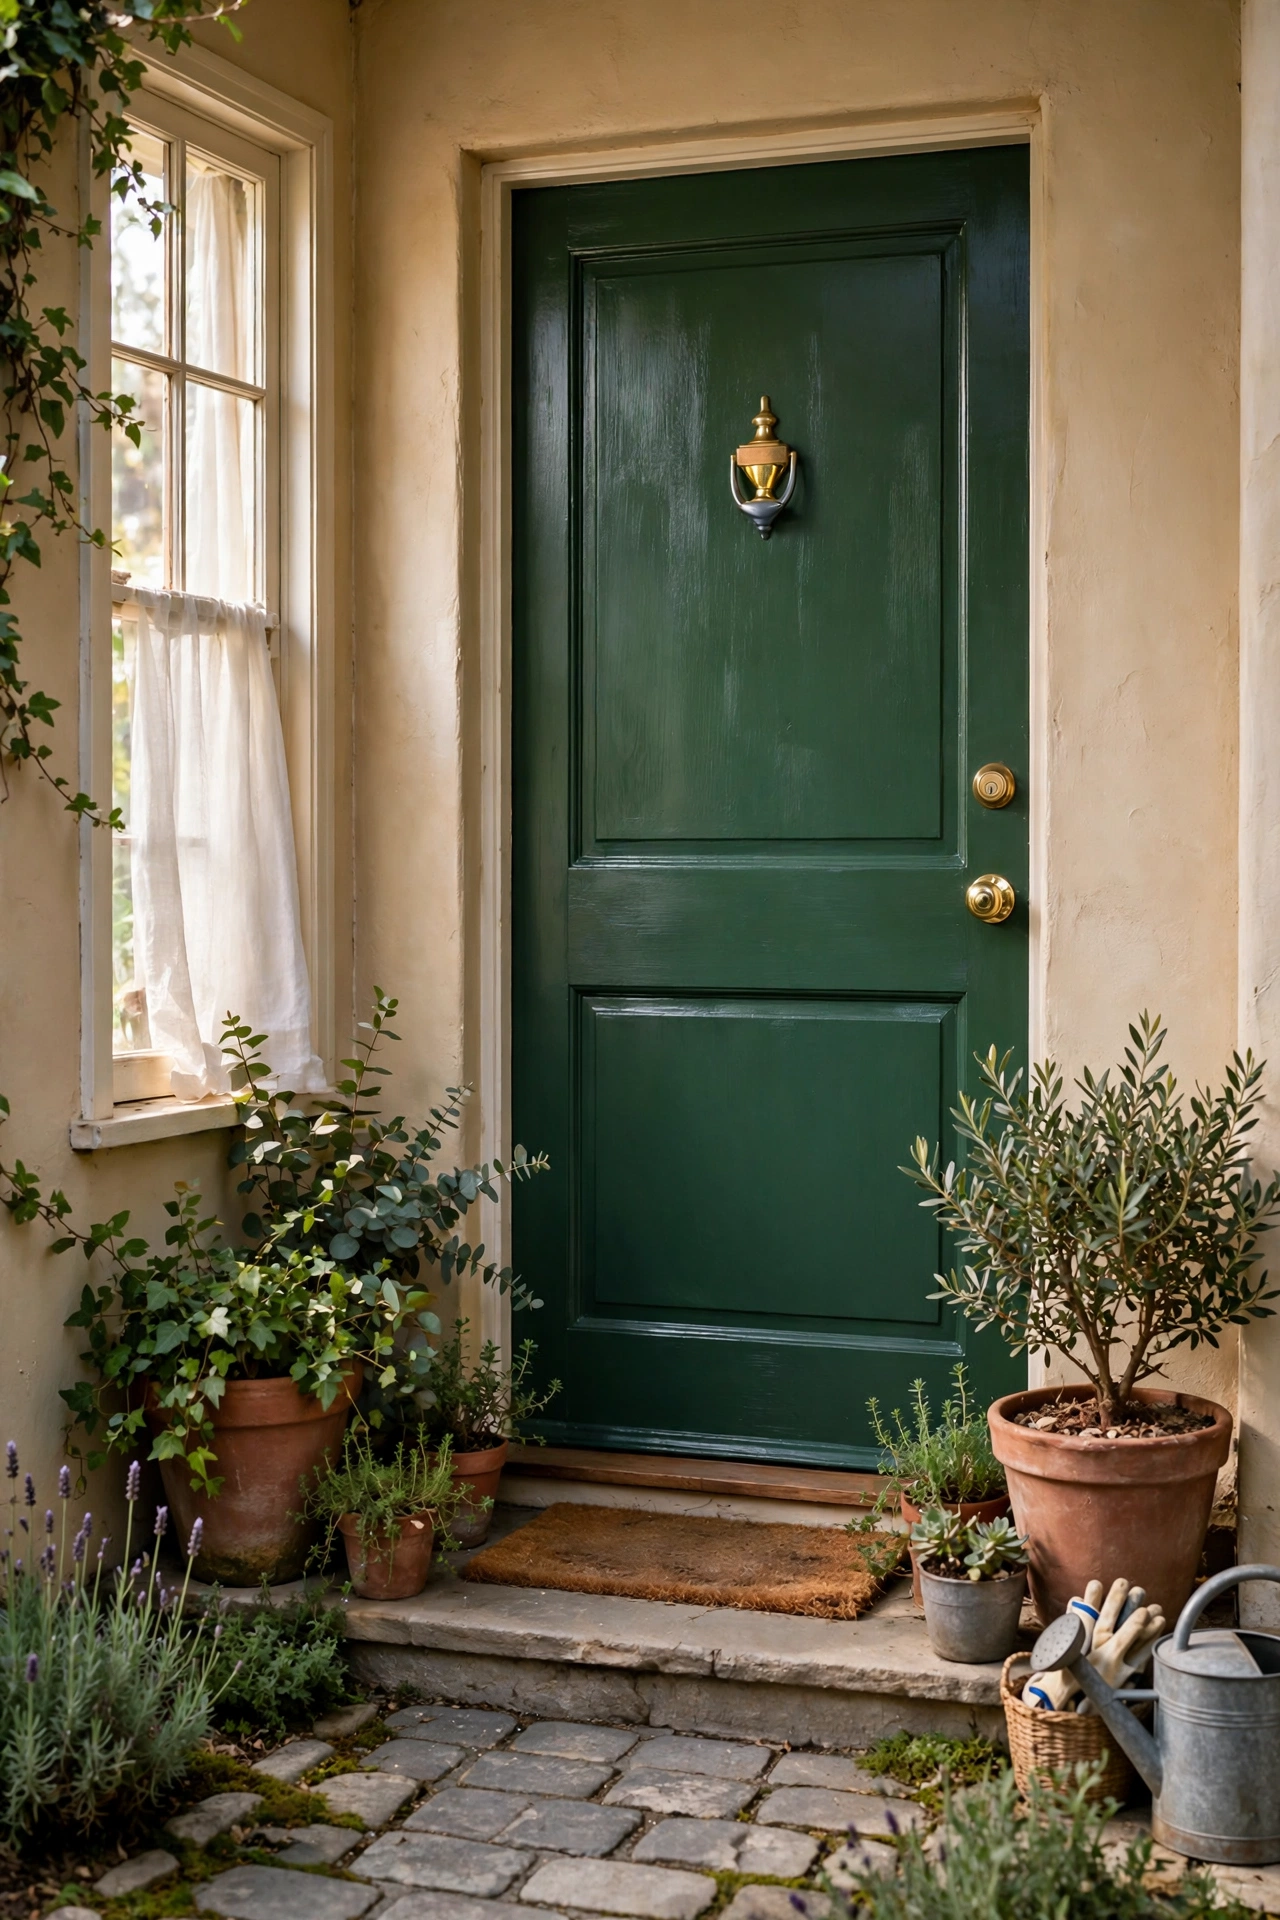
A painted front door is the highest-impact weekend DIY home project I know. Clean the door, sand lightly, and use a brush for the panels and a small roller for the flat sections. I chose a deep green for mine after the navy fiasco. Tape the hinges and hardware rather than removing them, because tiny screws vanish into the universe. Two thin coats beat one thick coat every time. My first attempt failed because I grabbed interior paint by mistake, so check the label twice before you open the can. Remove the tape while the second coat is still slightly tacky for a clean line. Saturday afternoon, one door, and your whole house looks different from the street.
Cost: ~$25-40 | Time: 4 hours plus drying
2. Peel-and-Stick Kitchen Backsplash
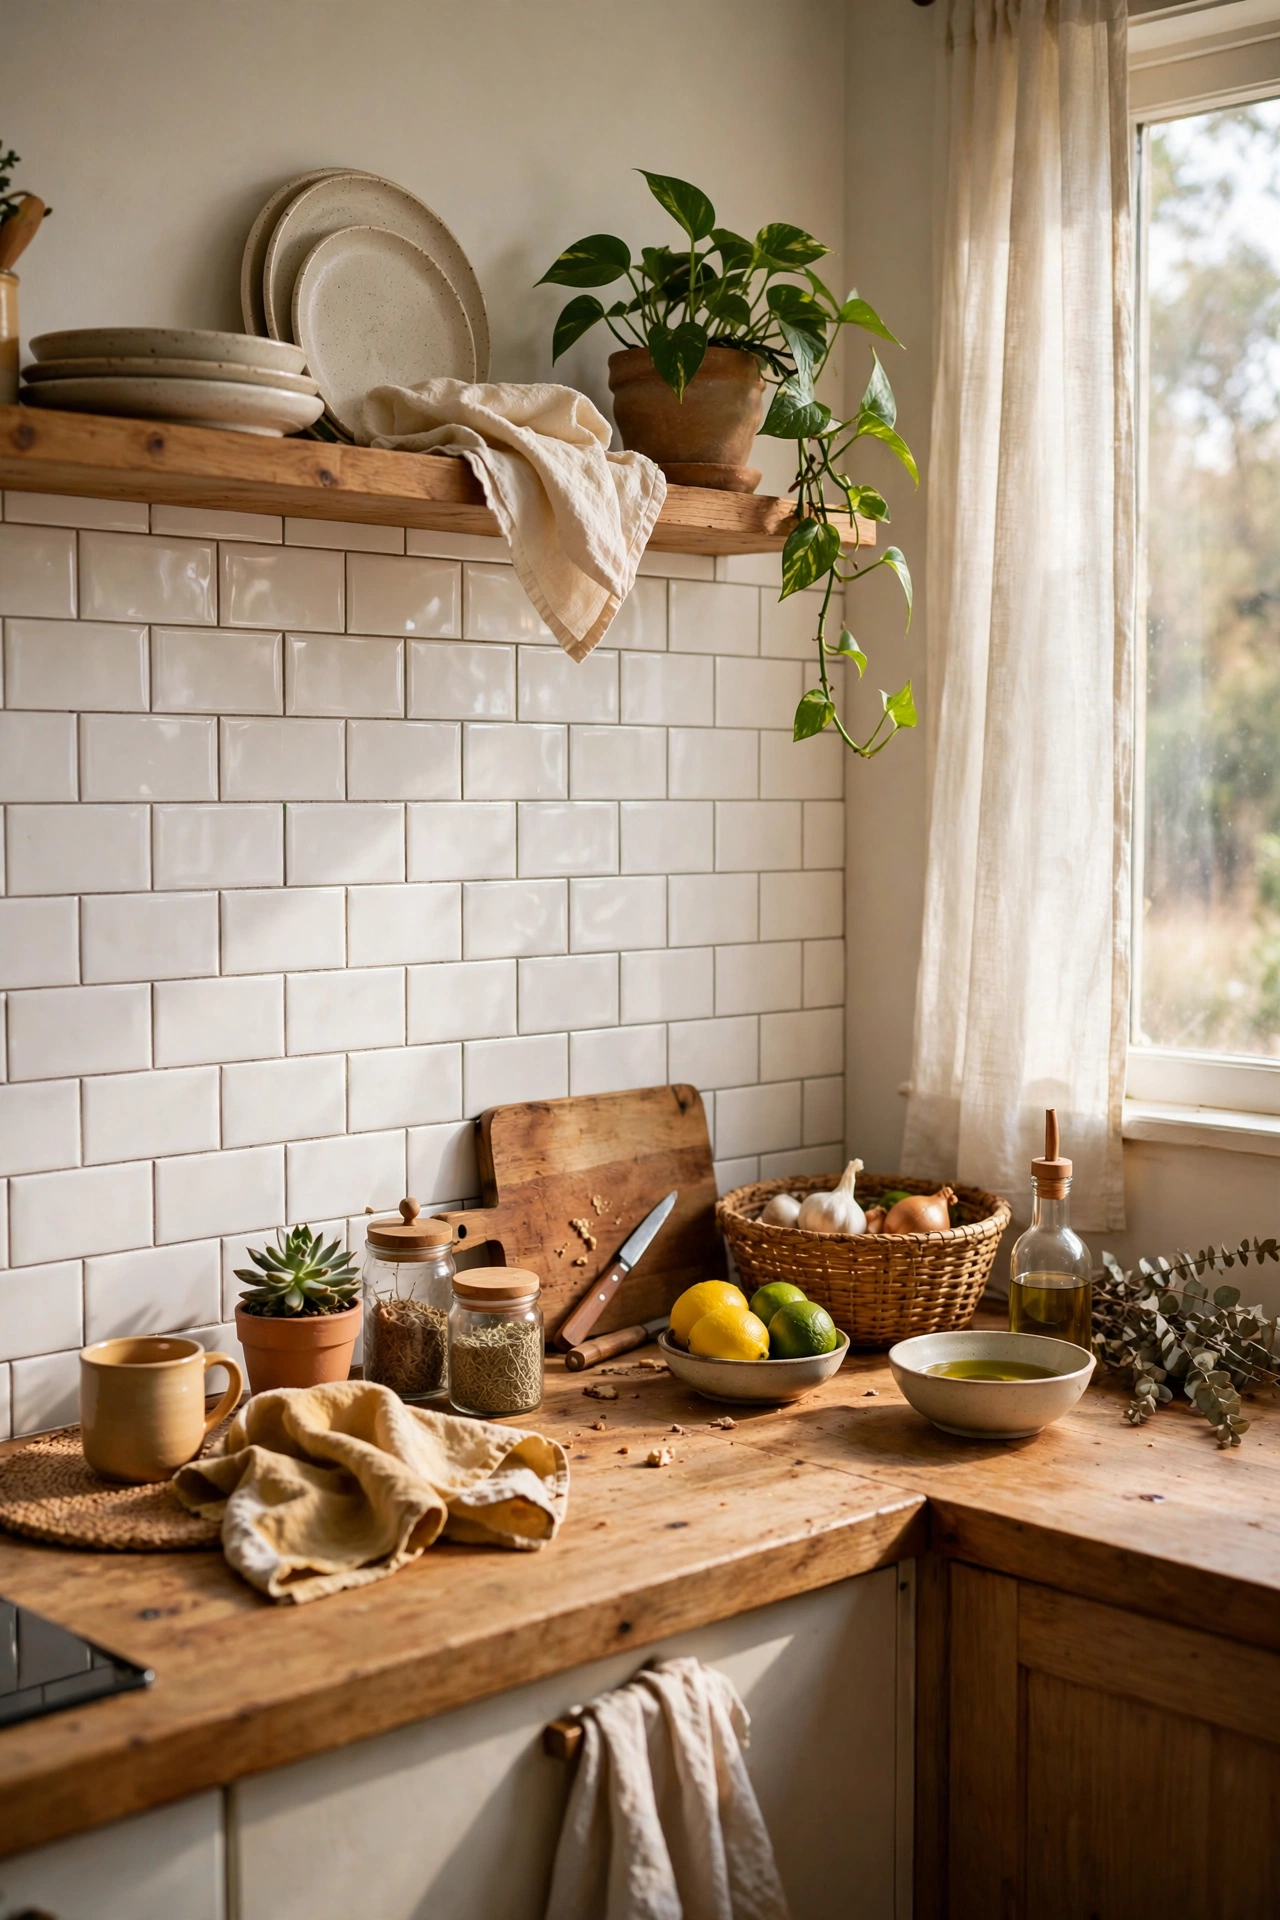
Peel-and-stick tile panels turned my rental kitchen from sad beige to white subway tile in one afternoon. Start at the most visible corner and work outward, pressing each panel firmly from the centre out to push out air bubbles. A hairdryer on low helps the adhesive grip stubborn corners. I cut panels with kitchen scissors and a ruler, and a utility knife scored cleaner lines for outlets. My mistake was starting in the middle, which left a sliver of panel visible at the edge. Start at the corner and the slivers hide where nobody looks. The whole backsplash cost me $38 and survived two years of cooking splatter before I moved out.
Cost: ~$30-45 | Time: 3 hours
3. Build a Gallery Wall from Thrifted Frames
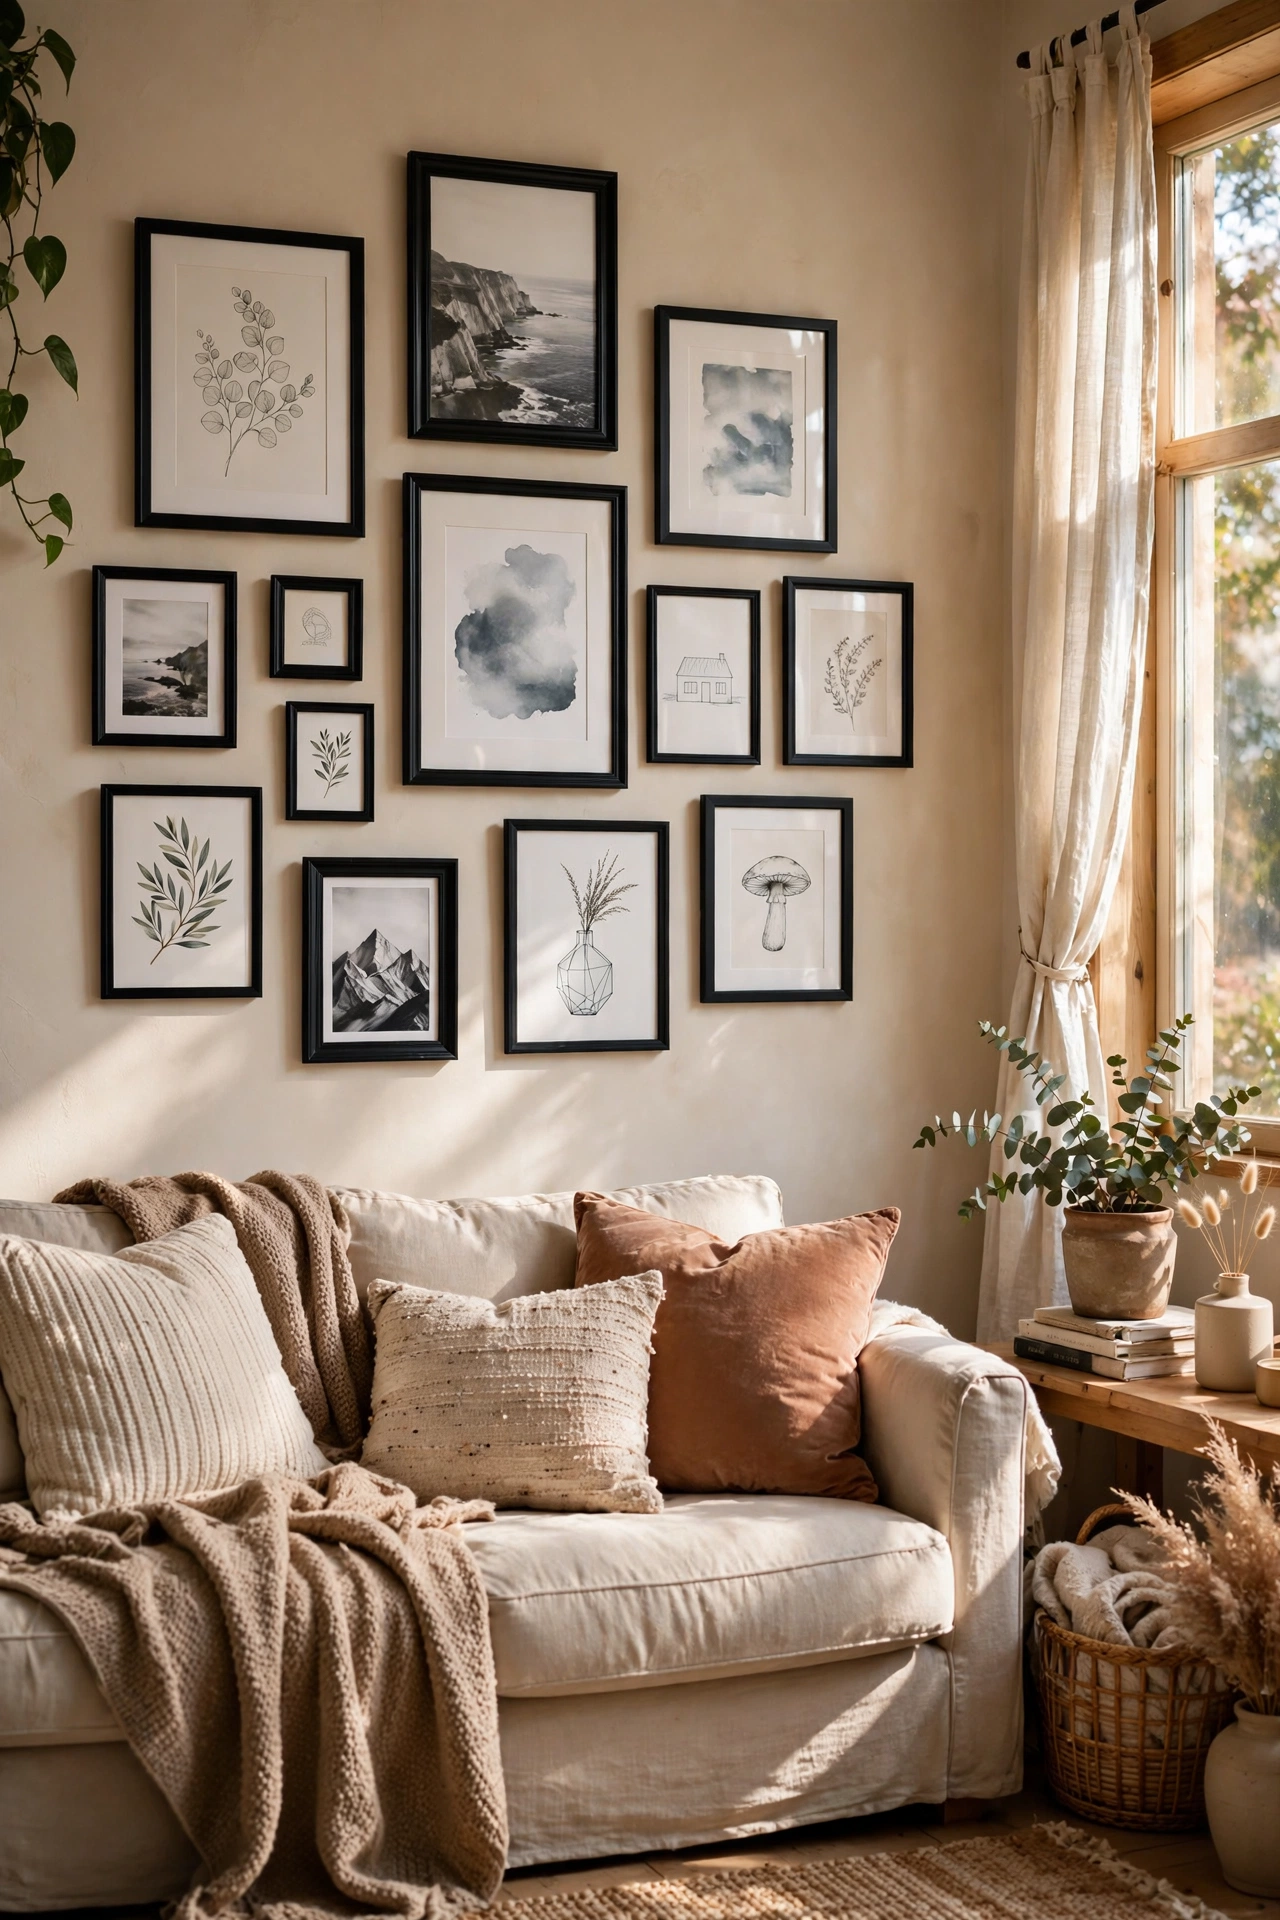
My living room wall was blank for eight months until I spent one Saturday on a gallery wall. I bought eleven mismatched frames from a charity shop for $14 total and spray-painted them all matte black so they looked like a set. Trace each frame on kraft paper, tape the paper shapes to the wall, and live with the layout for an hour before you hammer a single nail. That paper step saved me from three crooked arrangements. I filled the frames with free printables, postcards, and one pressed flower I had flattened in a book. The whole wall cost under $30 and people always ask about it first.
Cost: ~$20-30 | Time: 3 hours
4. Swap Every Cabinet Knob and Pull
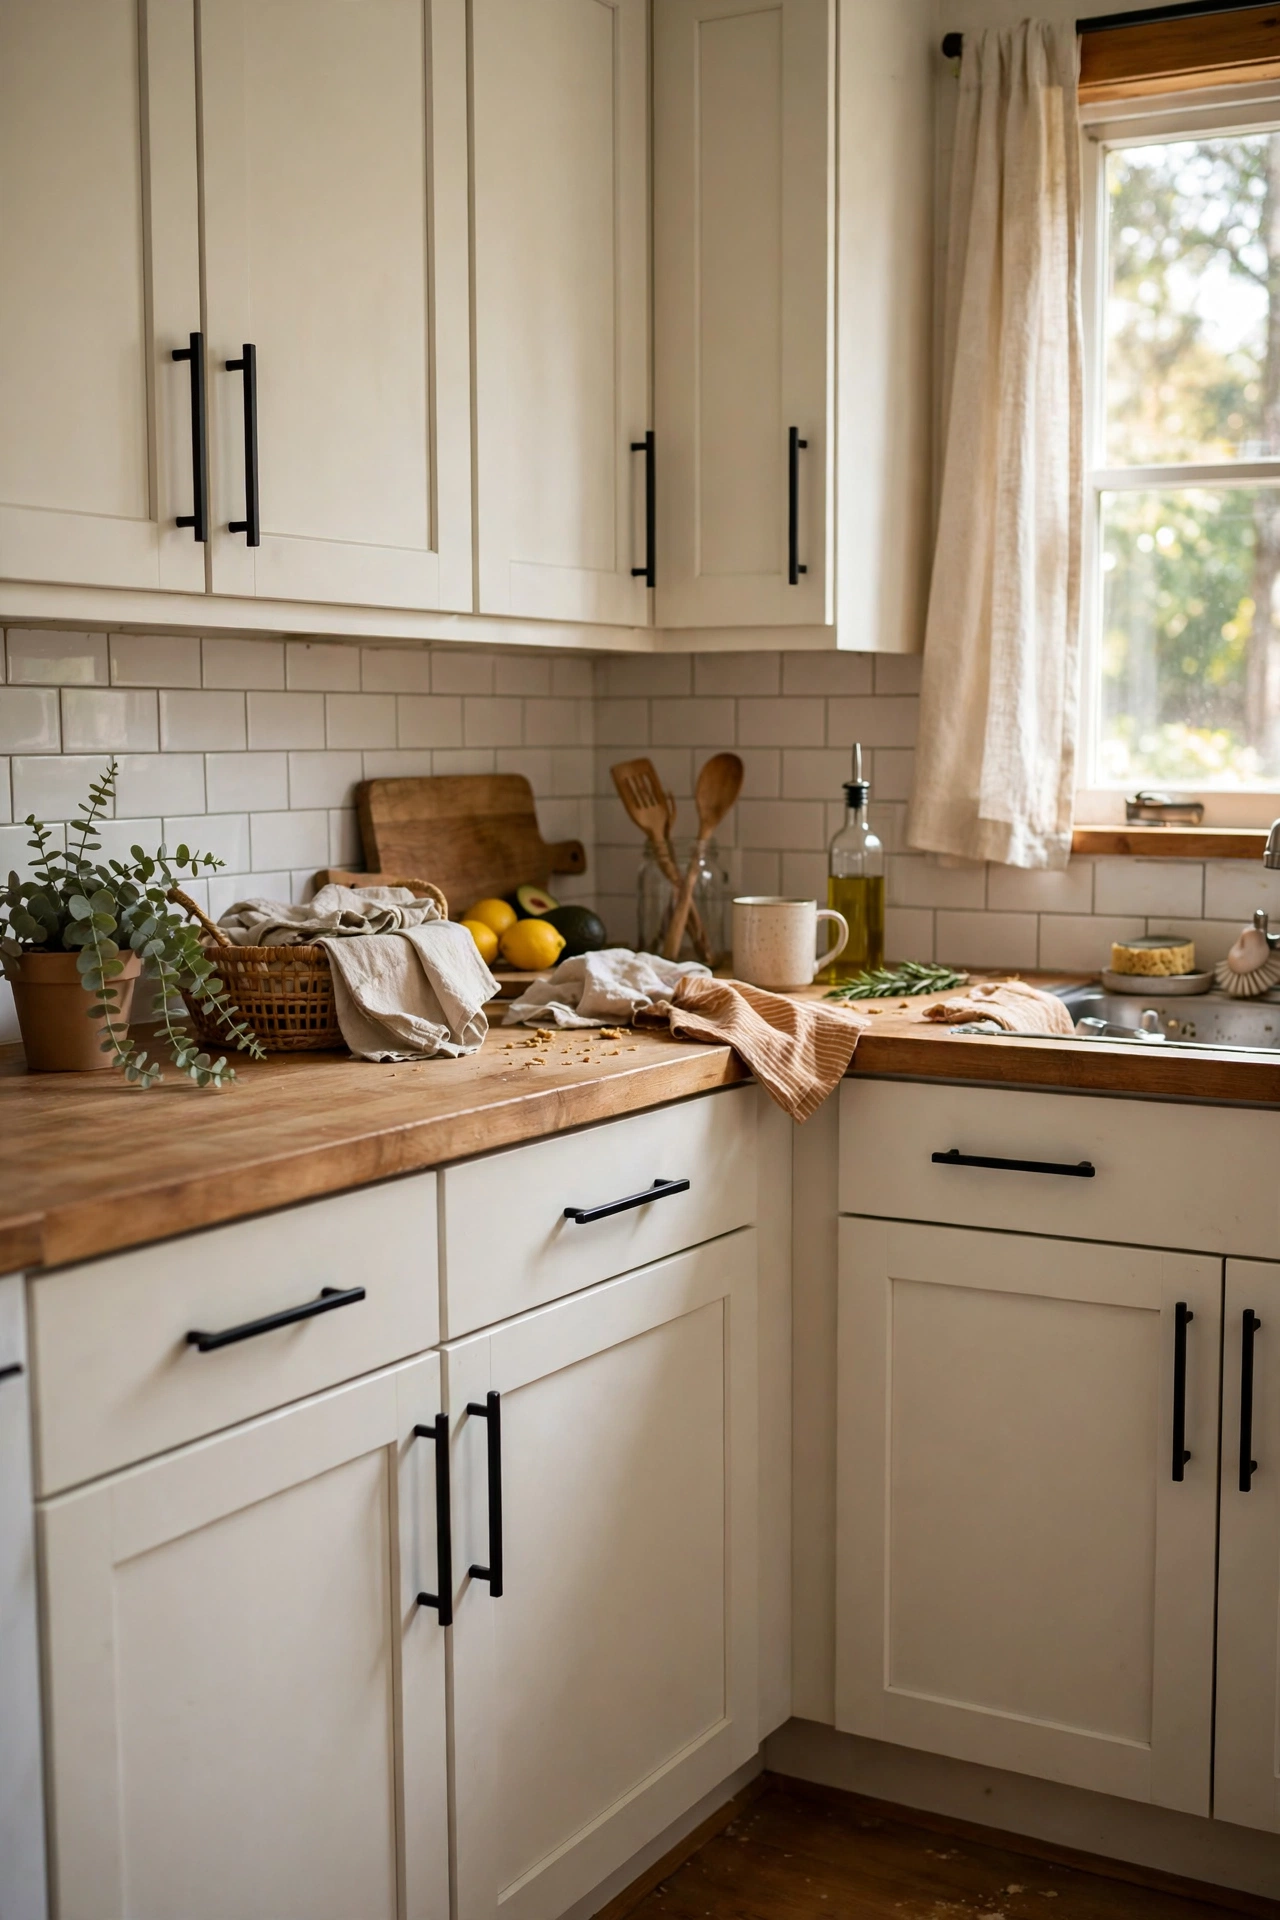
Swapping cabinet hardware is a thirty-minute job that makes a kitchen feel renovated. I replaced twenty-two dated brass knobs with matte black pulls for $28, and the kitchen looked five years newer. Measure the hole spacing on pulls before ordering, because the 3-inch and 4-inch versions look identical in photos and are not interchangeable. Keep the old hardware in a labelled bag in case you rent or sell. My mistake was eyeballing the spacing on three drawers and drilling new holes, which I then had to fill and touch up. Unscrew, screw in, done. It is the closest thing to a free kitchen makeover.
Cost: ~$20-35 | Time: 45 minutes
5. Flip a Thrifted Dresser with Chalk Paint
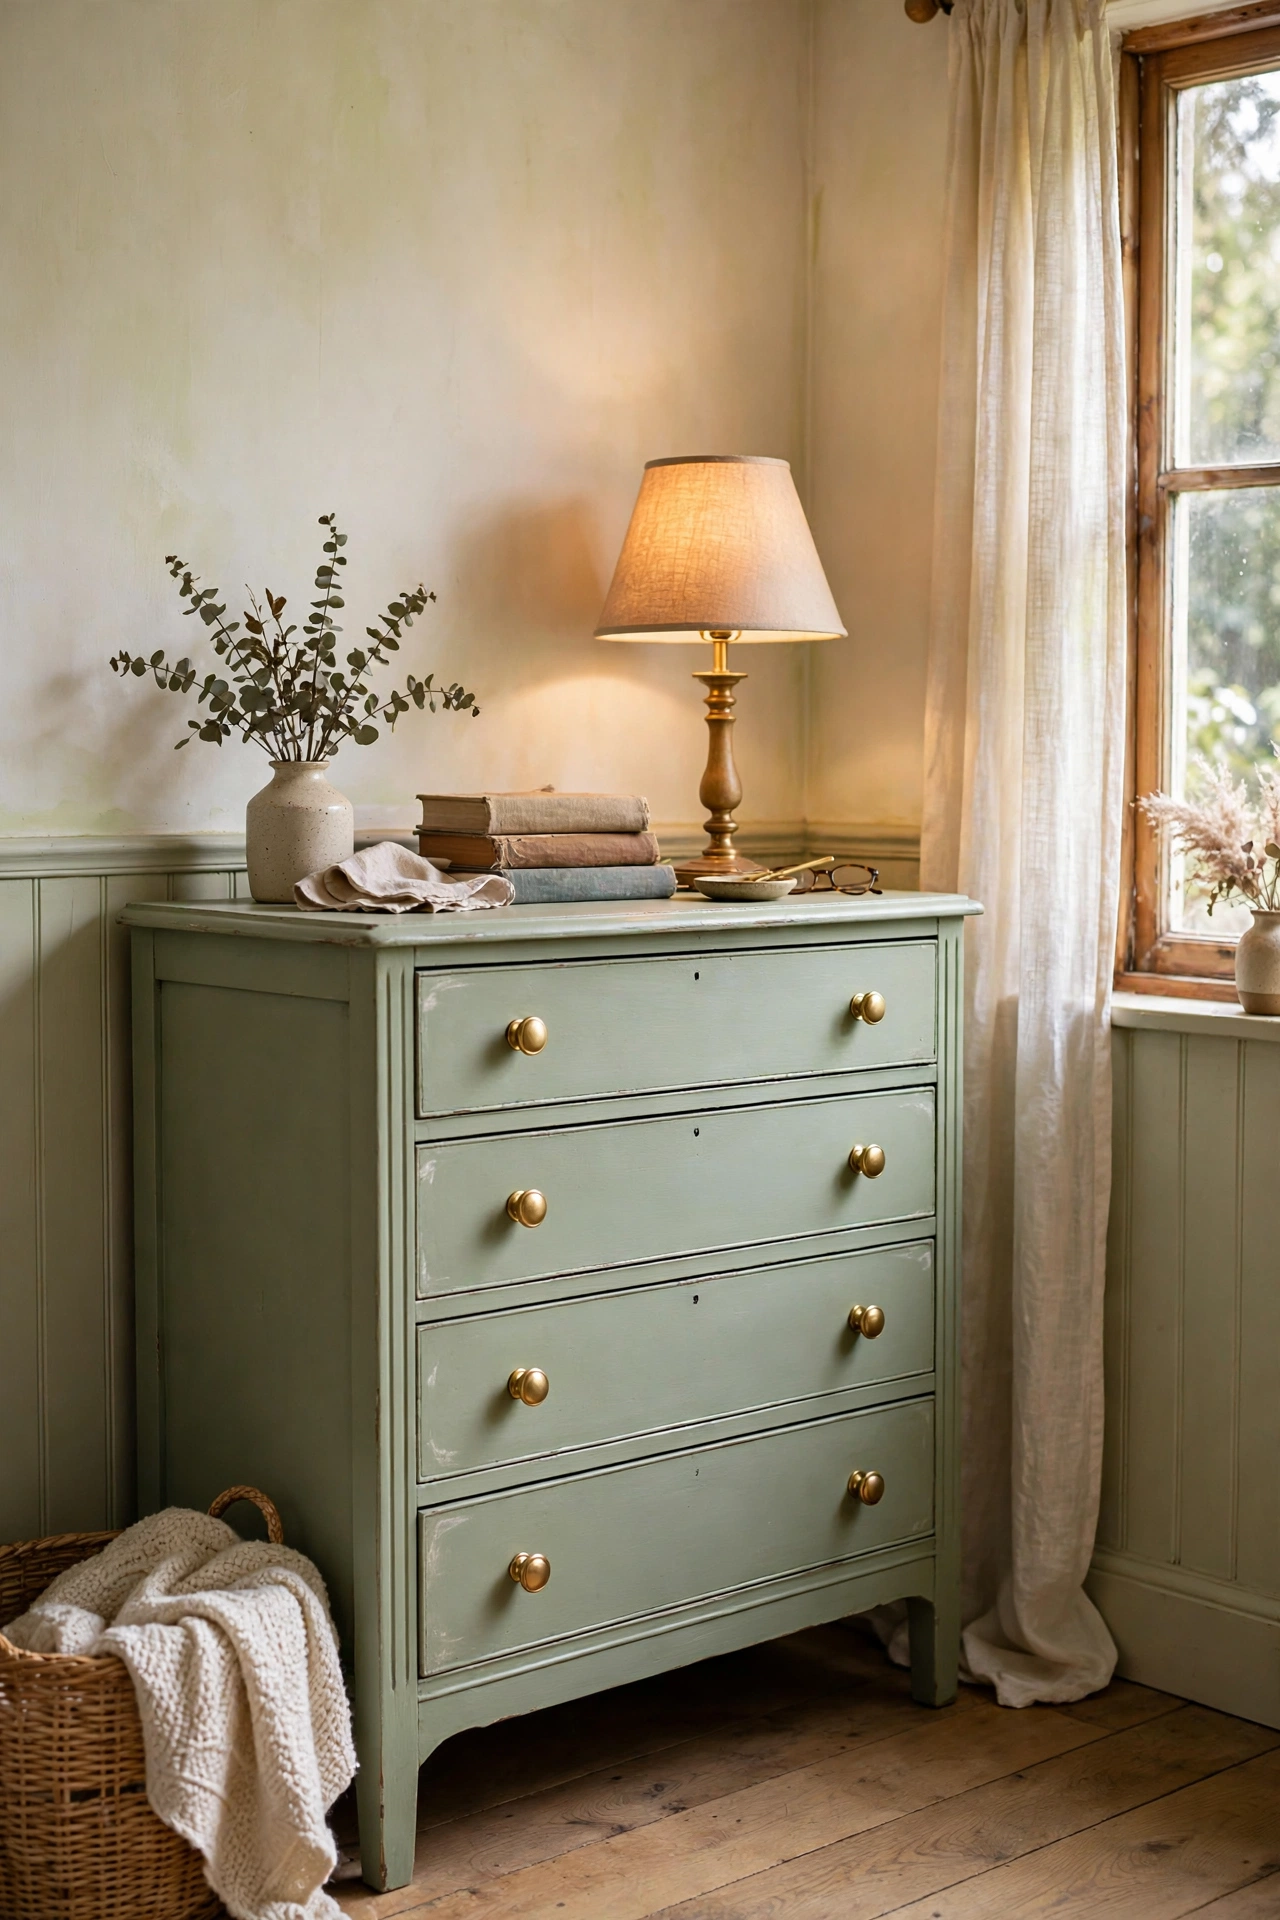
A $20 thrifted dresser plus a $16 tin of chalk paint is a whole new piece of furniture by Sunday night. Chalk paint skips the sanding step, which is why it is perfect for a weekend. I painted my dresser a soft sage, distressed the edges lightly with a sanding sponge, and sealed it with clear wax. The wax step is not optional. I skipped it on a side table once and every water glass left a ring. Brush with the grain, let each coat dry fully, and do the wax in thin layers with a lint-free cloth. The result looked like a piece from a boutique that would charge ten times the price.
Cost: ~$35-50 | Time: 5 hours plus drying
6. Hang No-Sew Curtains from Drop Cloths
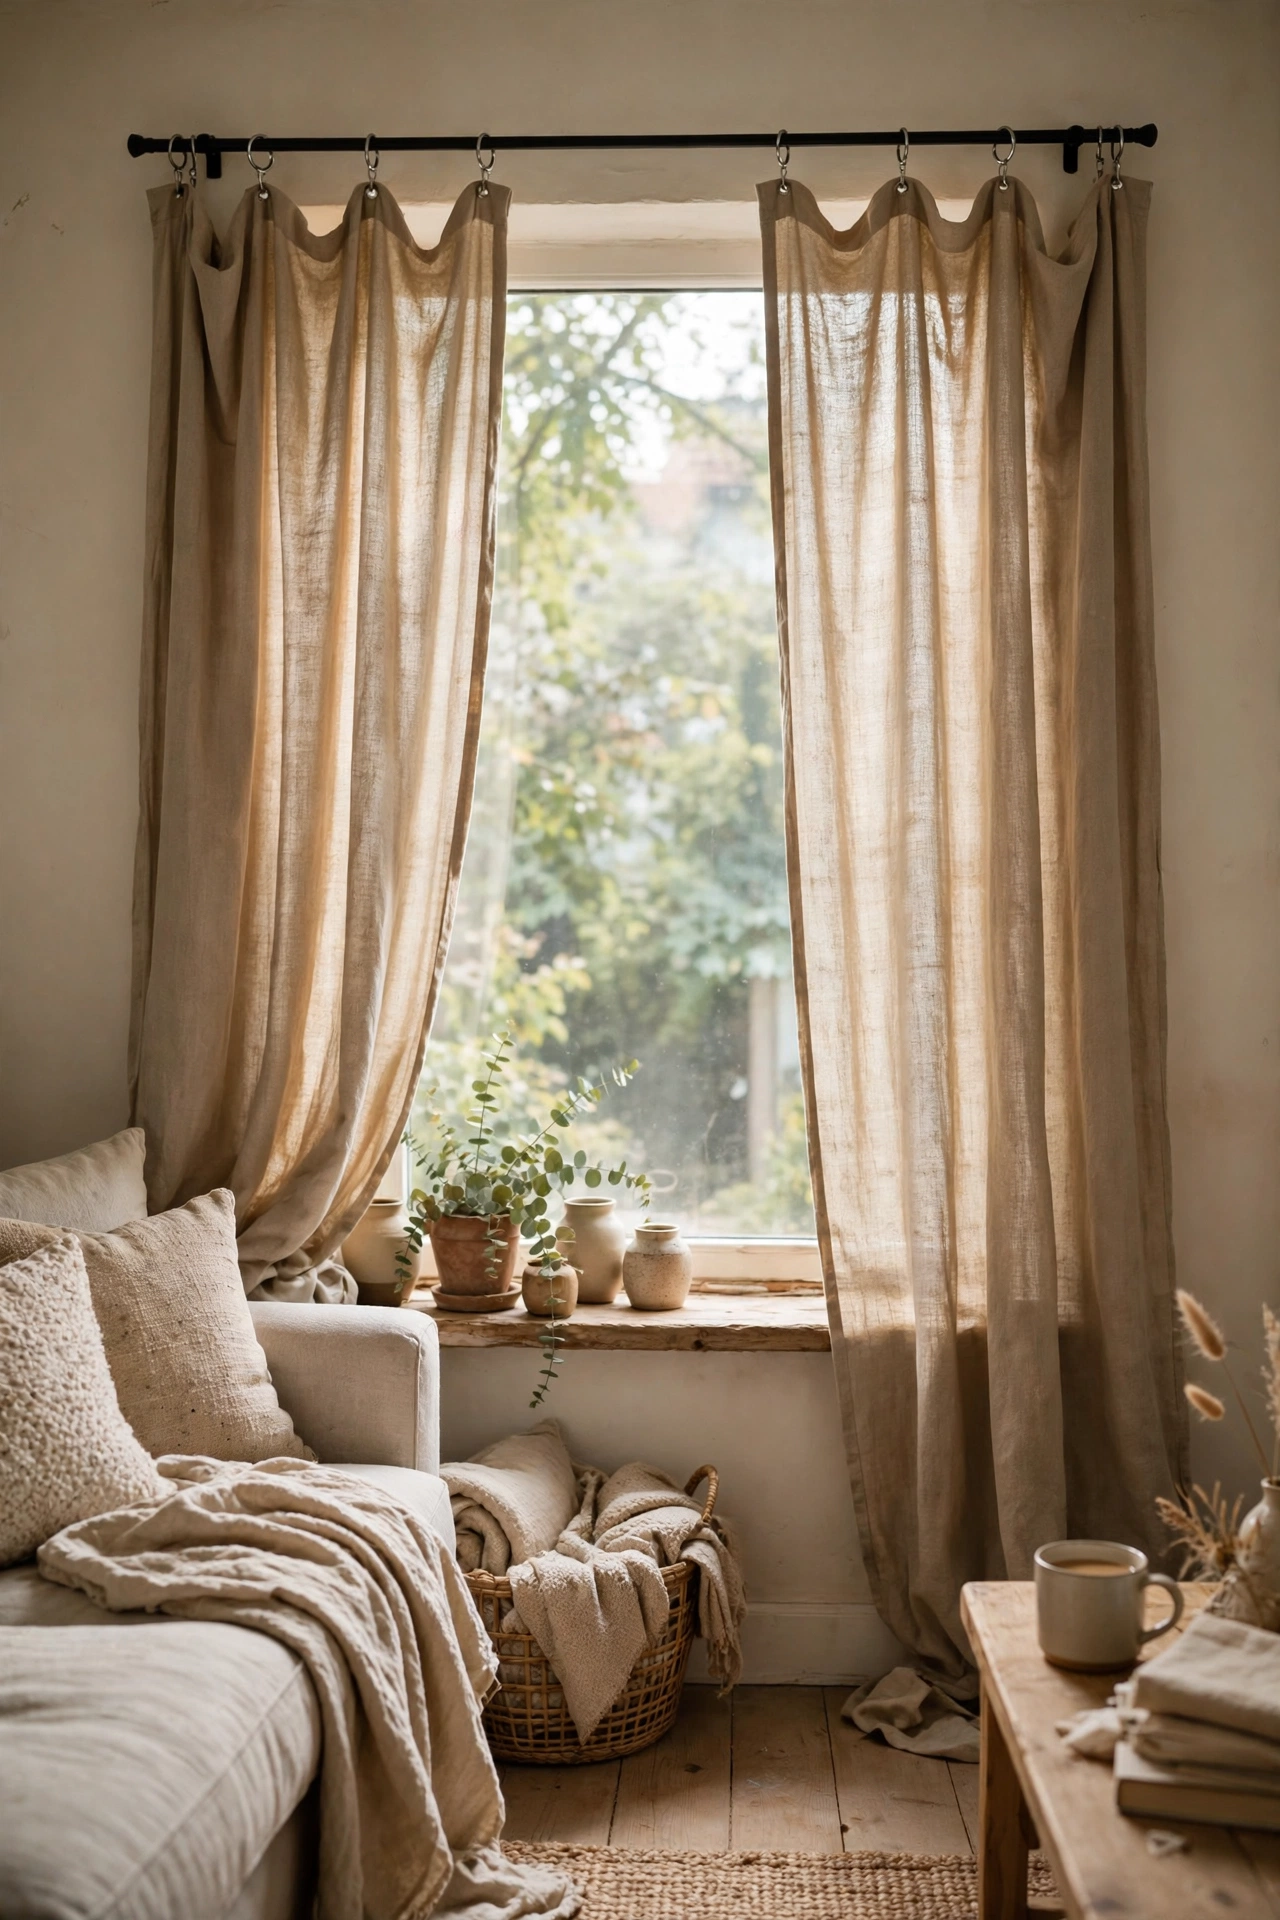
Canvas drop cloths make the best budget curtains I have found. I bought two 9×12 drop cloths for $18 each, cut them to length, and hemmed the raw edge with iron-on hem tape in twenty minutes. No sewing, no machine. Wash them first or they arrive smelling like a hardware store, which mine did. I hung them with clip rings so they slide easily, and the natural canvas colour warmed up my whole living room. Iron-on tape holds up to washing if you let it cool fully before you hang them. Two panels, one afternoon, and the windows finally look finished.
Cost: ~$30-40 | Time: 2 hours
7. Install Chunky Floating Shelves
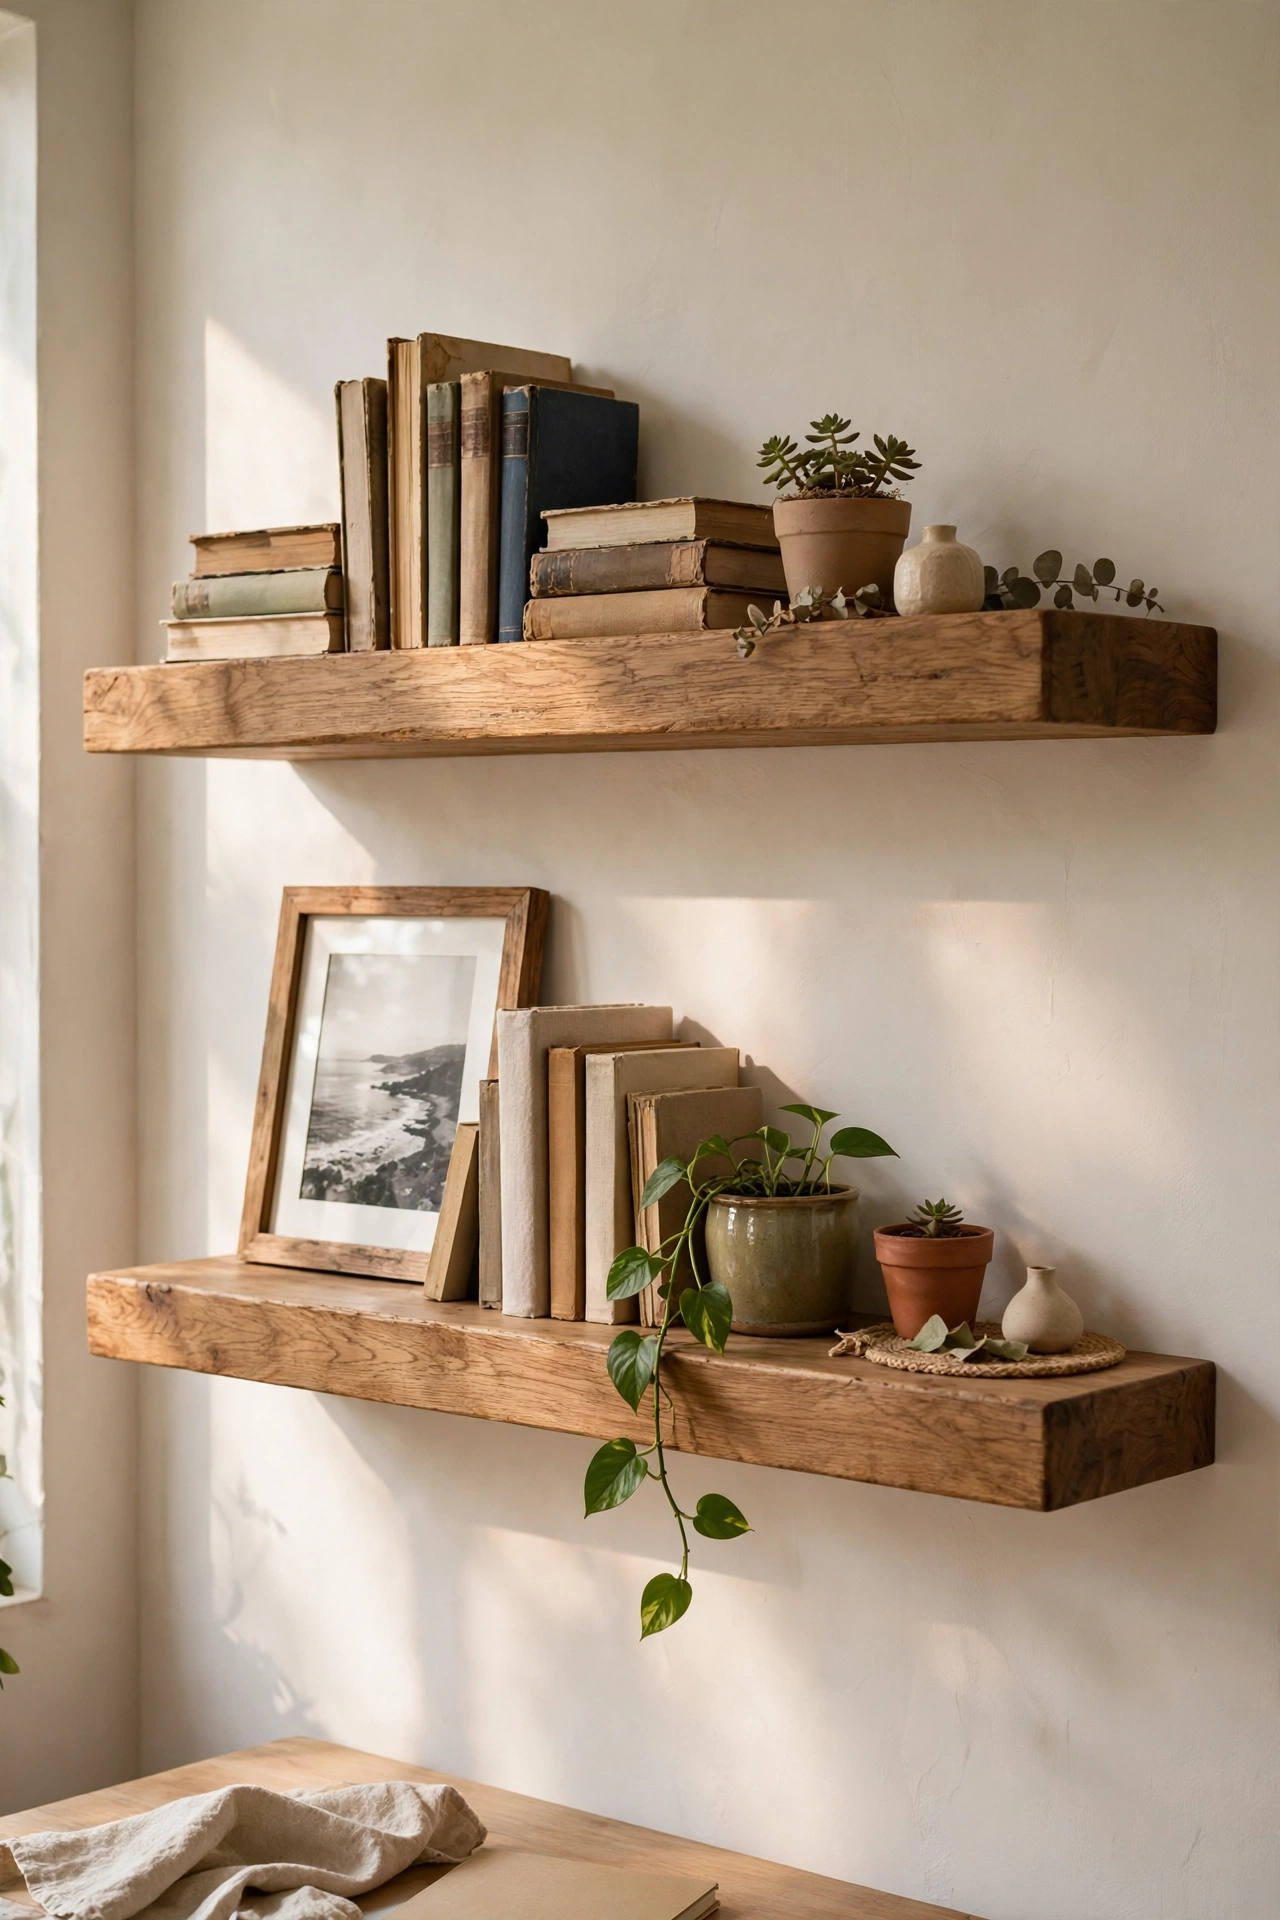
Two floating shelves above my desk turned a dead wall into my favourite corner of the apartment. Buy the bracket-style shelf kits where the hardware hides inside the shelf, because visible brackets look cheap. Drill into studs or use proper wall anchors. I learned this the hard way when a shelf of books ripped clean out of drywall with cheap plastic anchors. Sand and stain unfinished wood shelves yourself to save money; a $6 tin of stain covers four shelves. Style them with books, a small plant, and one framed photo. They take an hour to install and look like built-ins.
Cost: ~$30-50 | Time: 2 hours
8. Give a Plain Mirror a Wood Frame
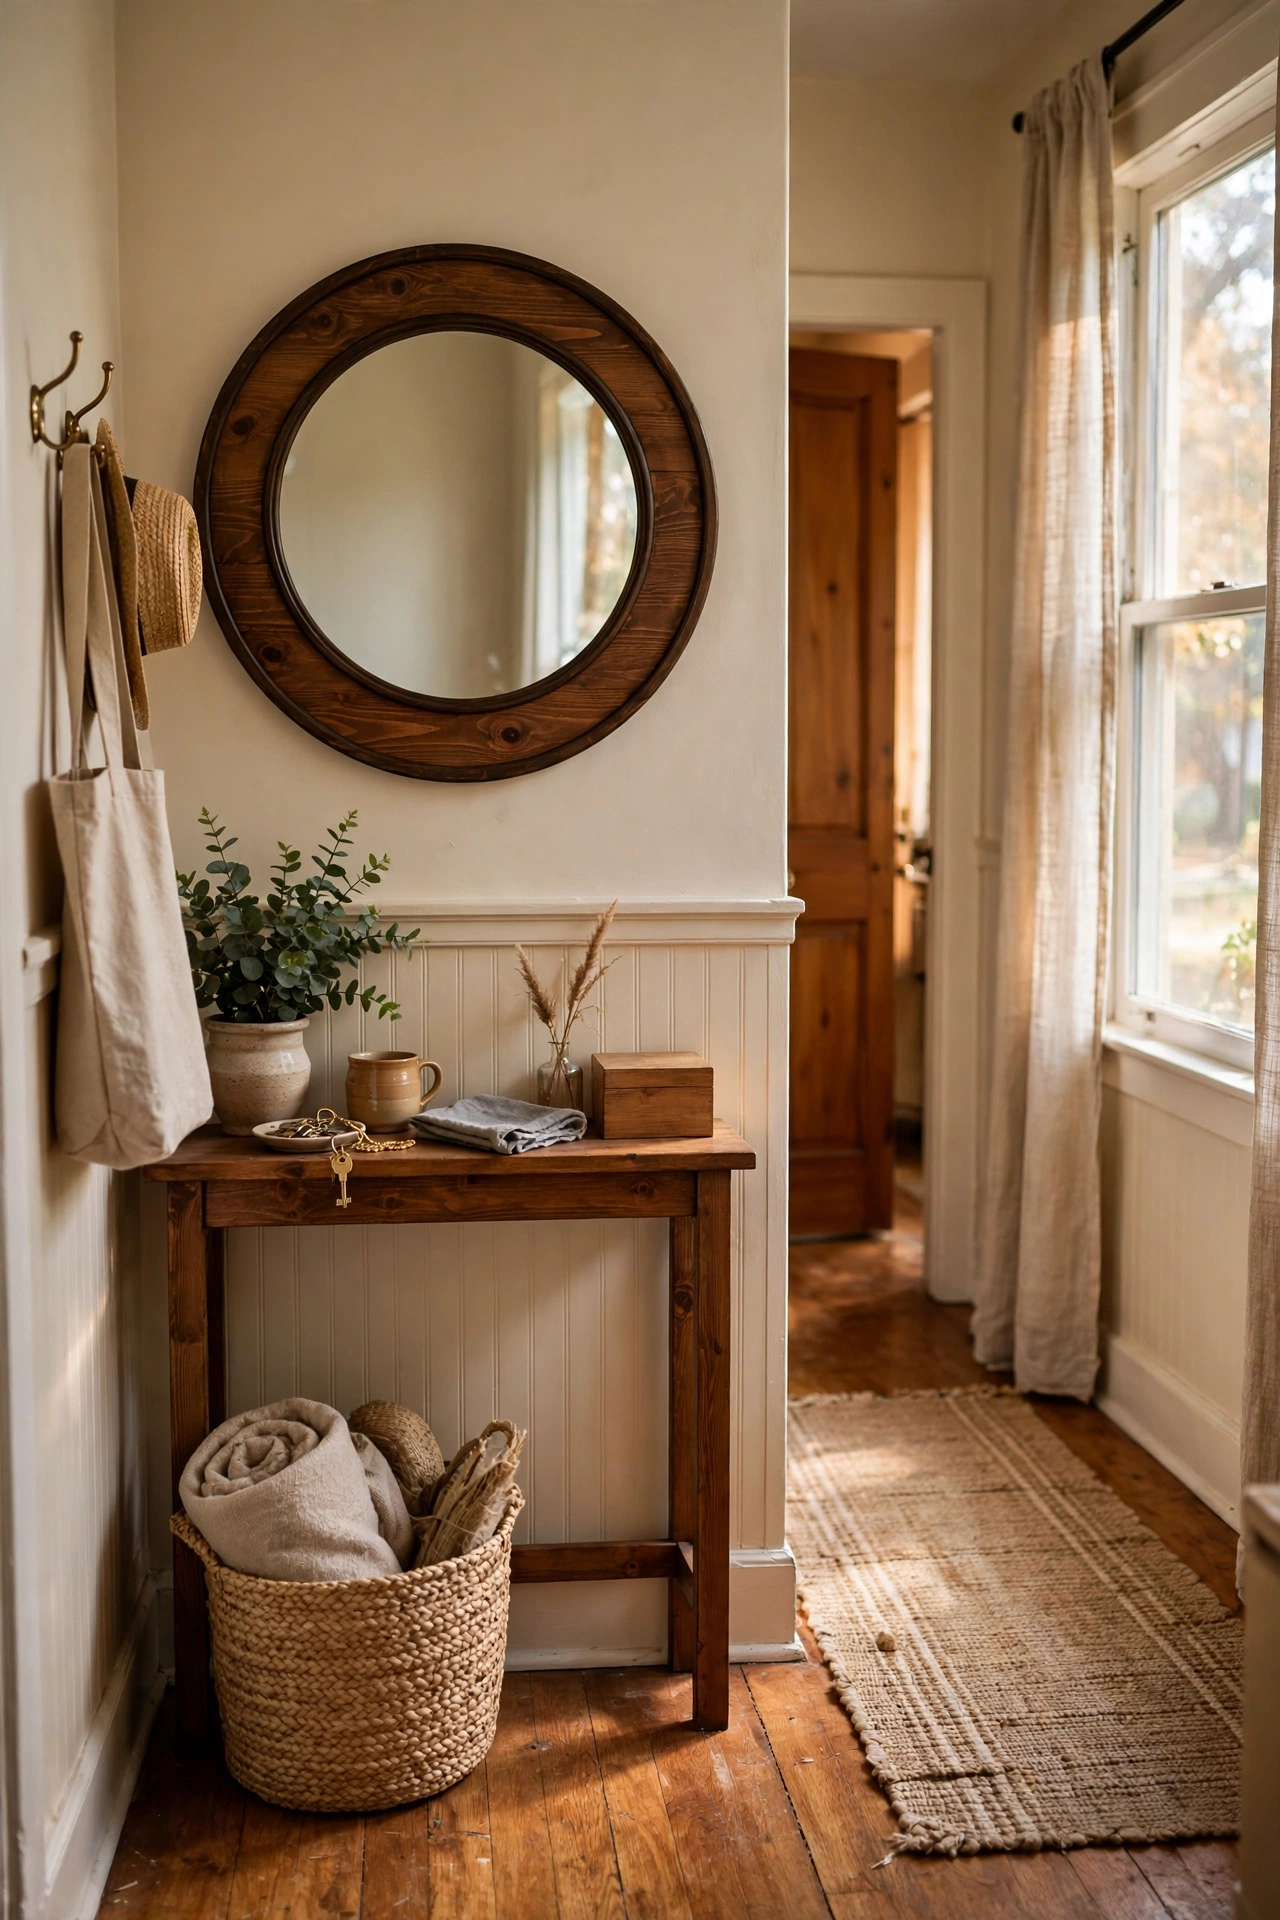
I framed a $12 frameless mirror with $9 of pine trim and it looks like a $120 mirror. Measure the mirror, cut four trim pieces at 45-degree mitres, and glue them directly to the mirror face with construction adhesive. Clamp or tape the corners while it cures overnight. I stained mine dark walnut to match my furniture, but white or black paint works just as well. My first attempt used thin craft wood that warped within a month, so buy real pine trim from the hardware store, not the craft aisle. The framed mirror has hung in my hallway for three years without a wobble.
Cost: ~$20-30 | Time: 2 hours plus overnight cure
9. Stencil One Accent Wall
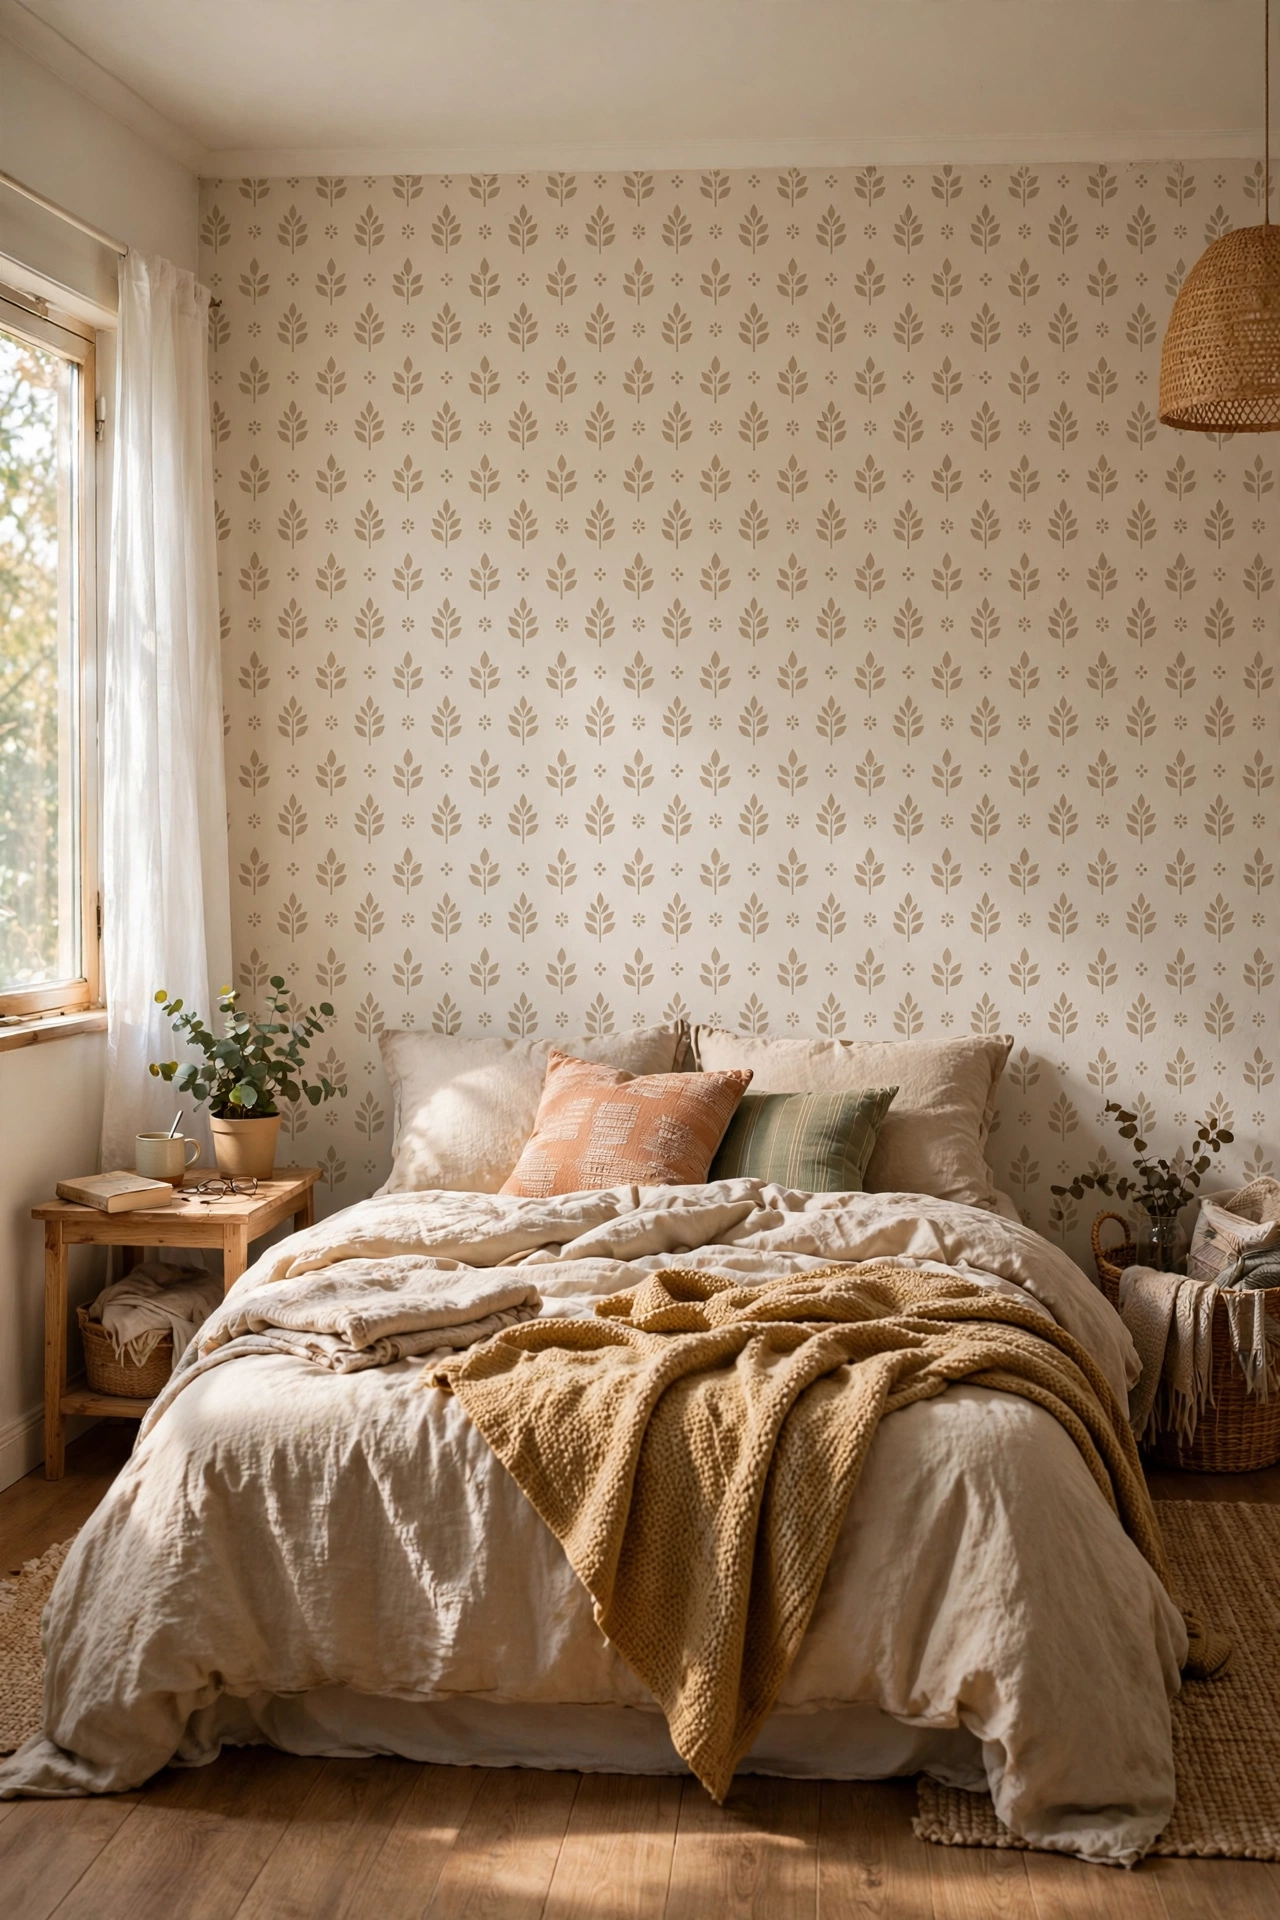
A $15 stencil gave my bedroom the patterned wallpaper look for a tenth of the price. Paint the wall a solid base colour first, then stencil a repeating motif in a slightly deeper tone. Use a dense foam roller with almost no paint on it, because excess paint bleeds under the stencil. I learned that on the first row and had to repaint two squares. Repositionable spray adhesive on the back of the stencil keeps it flat against the wall. It took me a full Saturday for one wall, working row by row, but the result looks like expensive hand-painted wallpaper.
Cost: ~$20-35 | Time: 6 hours
10. Restyle Every Bookshelf in the House
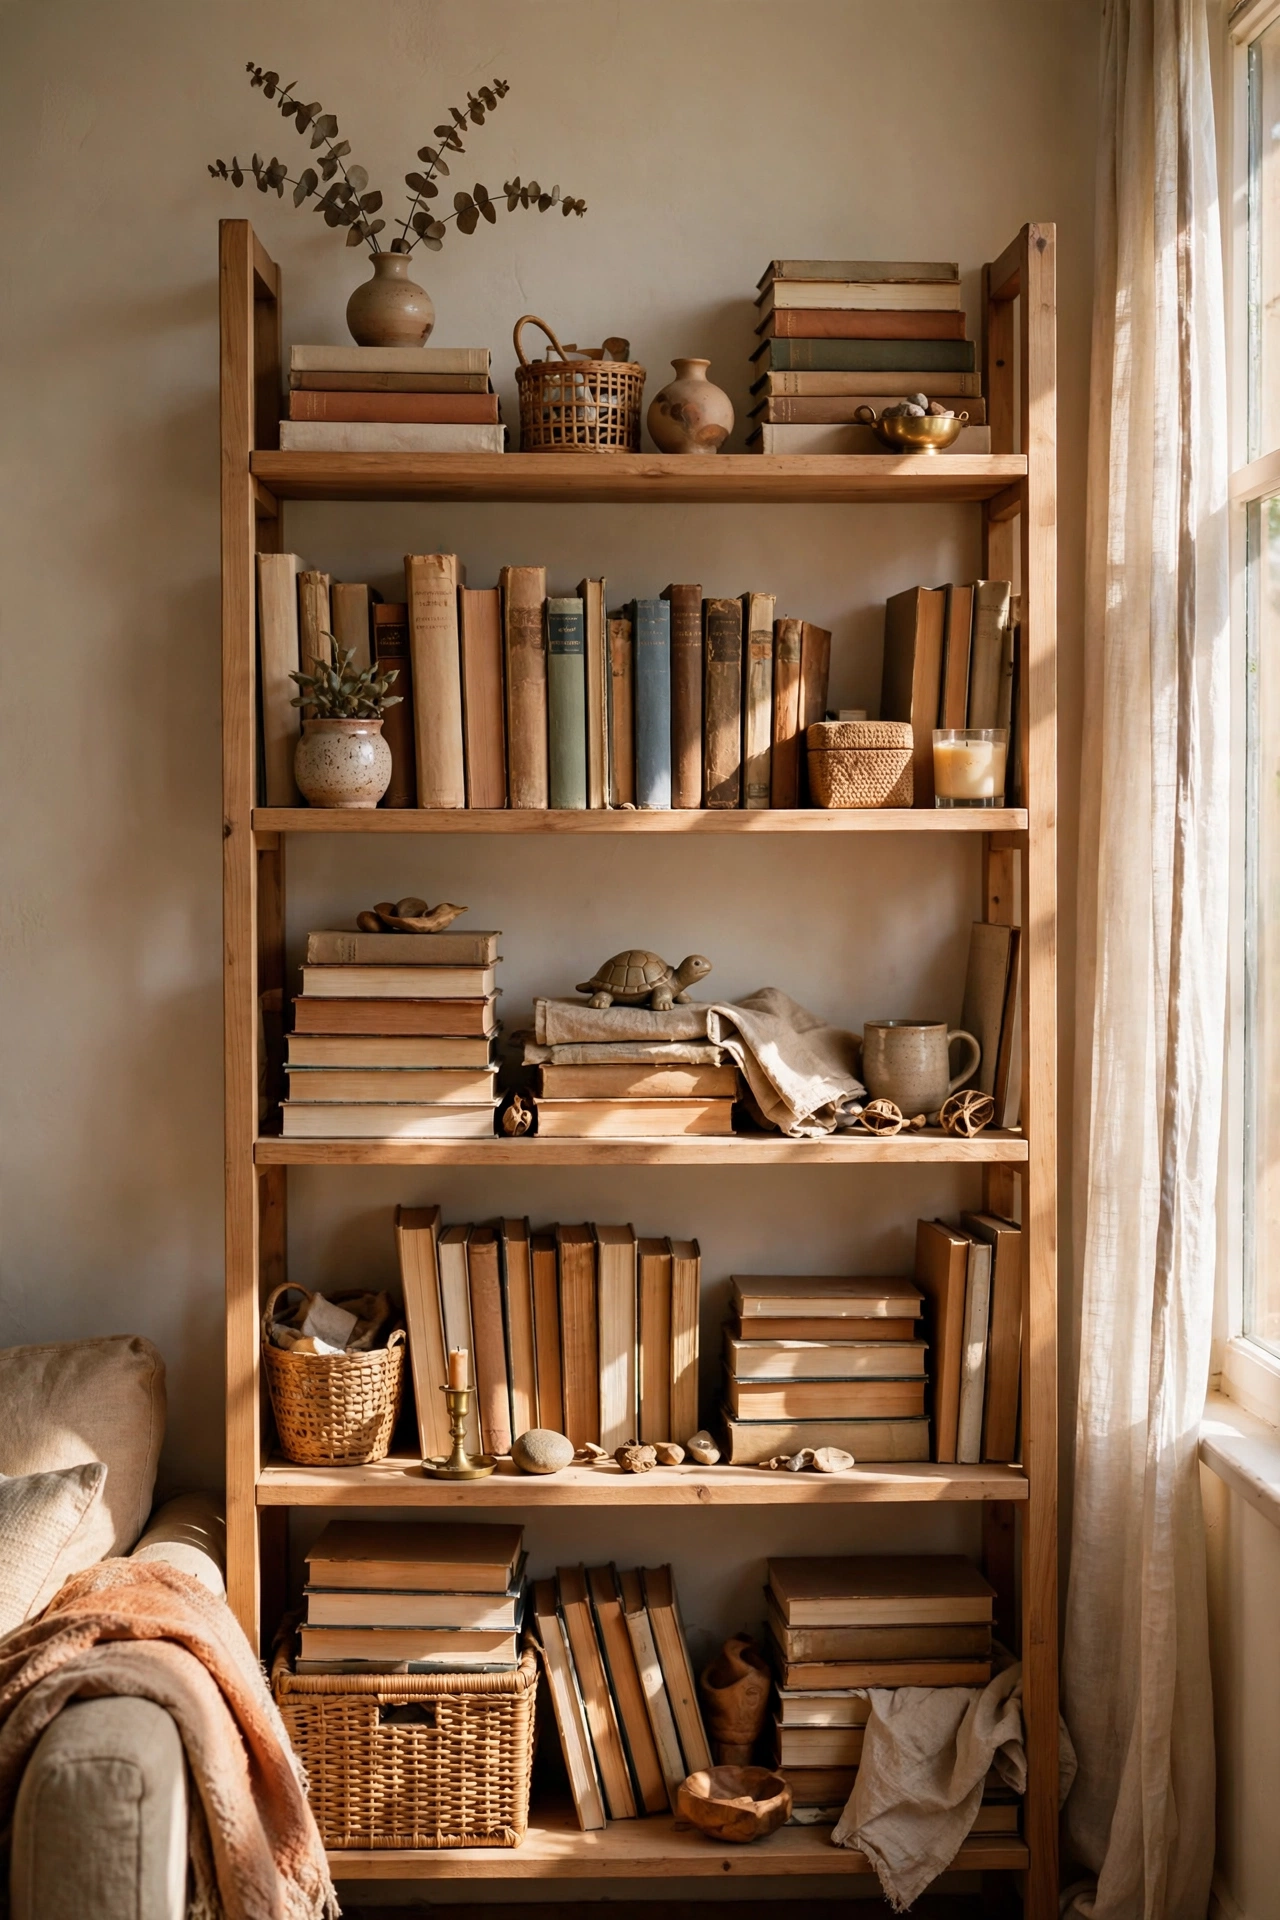
Bookshelf restyling costs nothing and takes a Saturday morning. I pulled every book off my shelves, dusted, and rebuilt them with the 60-30-10 rule: sixty percent books, thirty percent open space, ten percent objects. Stack some books horizontally to break up the rows, turn a few covers facing out, and leave breathing room between clusters. My shelves looked cluttered because every inch was filled; removing a third of the books made the rest look curated. I donated a bag of books I would never reread and the shelves finally looked like a styled home instead of a storage unit.
Cost: ~$0 | Time: 3 hours
11. Refresh a Tired Chair with Chalk Paint and Fabric
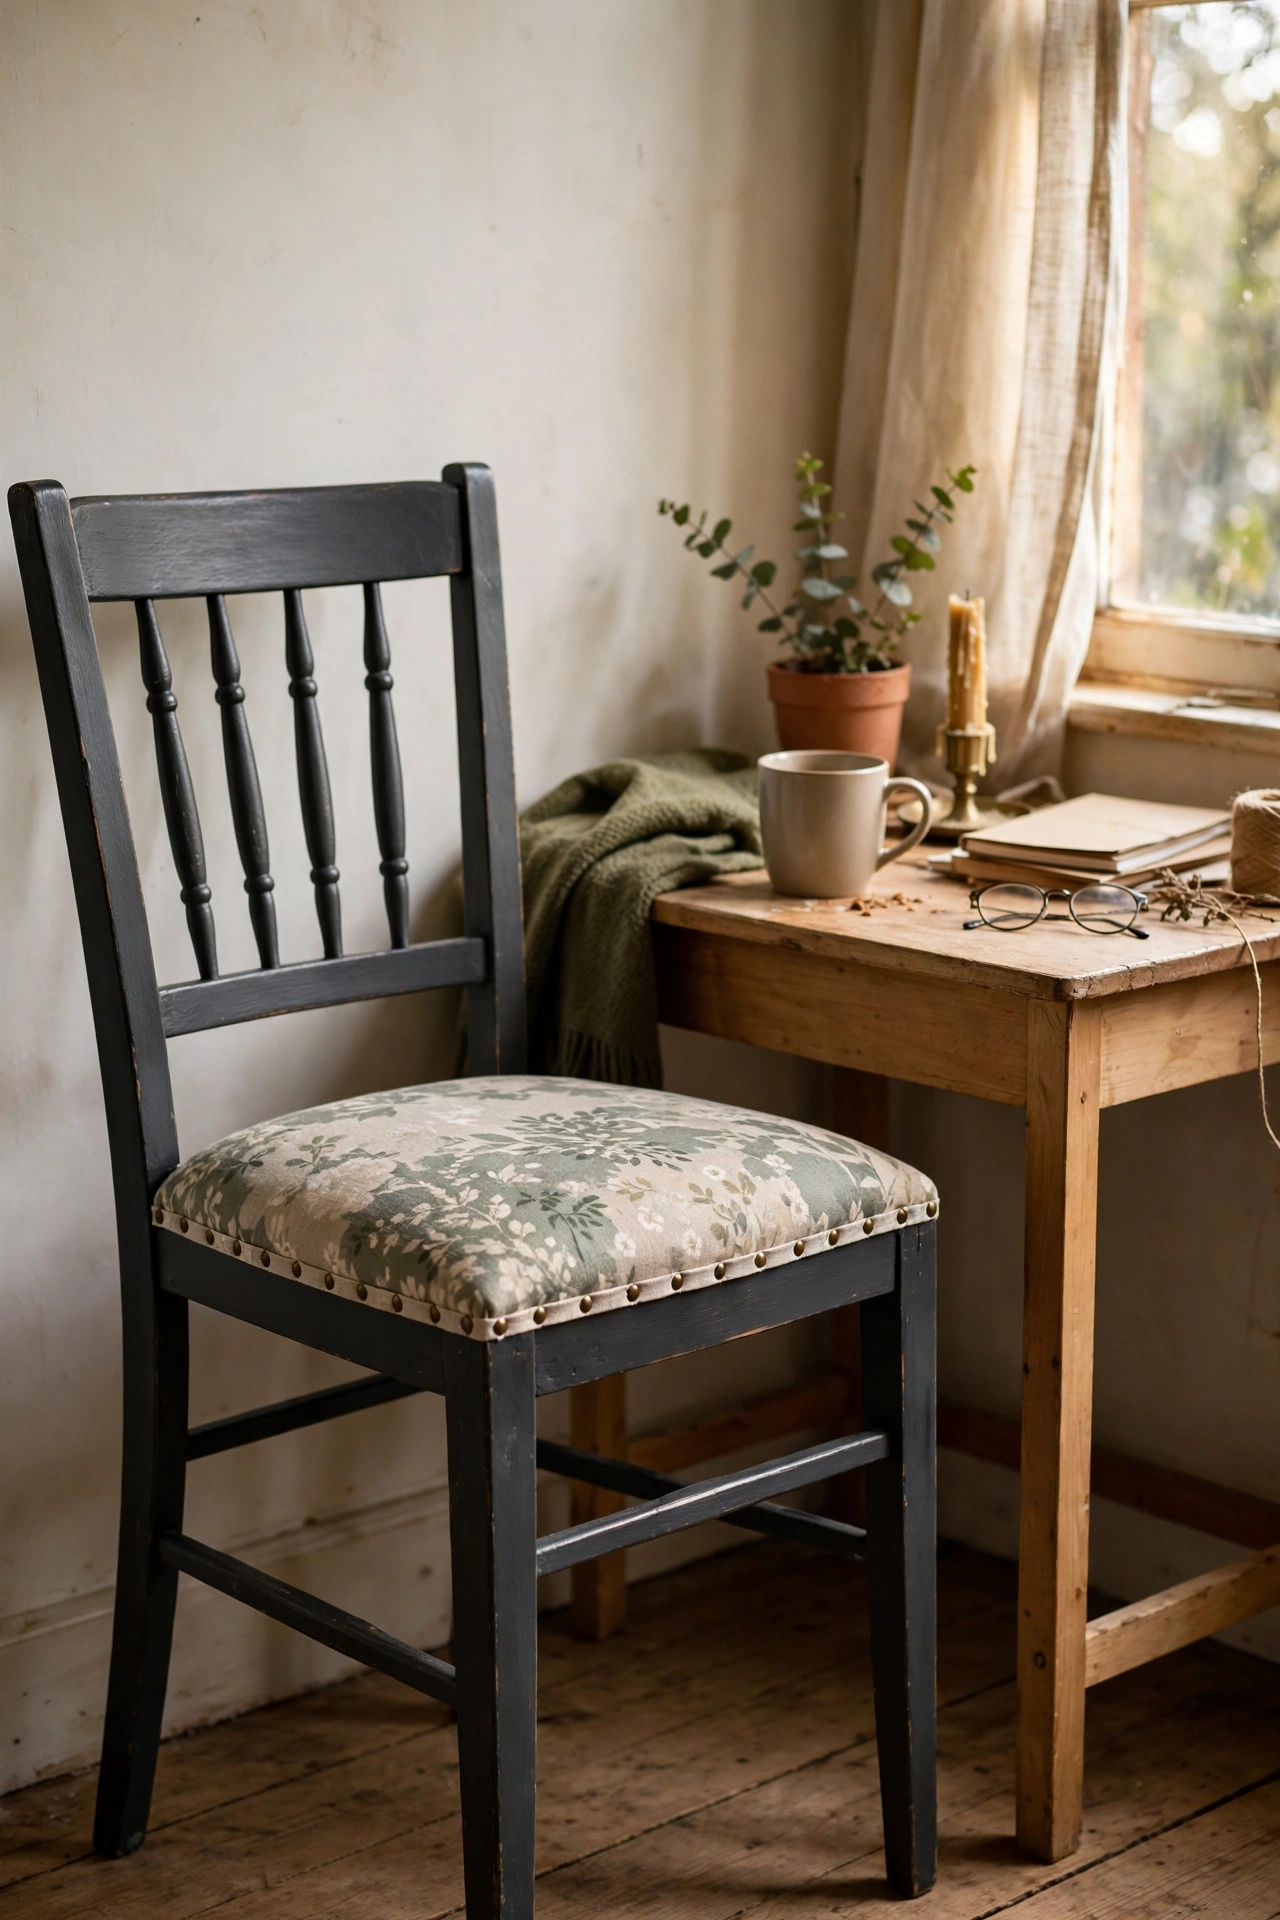
A wooden chair from the kerbside plus chalk paint and a $7 remnant of fabric became my desk chair. I painted the frame charcoal, then recovered the seat by unscrewing the cushion, wrapping it in fabric like a present, and stapling underneath with a staple gun. Pull the fabric tight and staple the middles first, then work toward the corners. My first seat was lumpy because I stapled one side fully before the other, which pulled everything sideways. Work in opposites and the fabric stays smooth. One chair, one afternoon, and it looks completely intentional.
Cost: ~$25-40 | Time: 4 hours
12. Replace Switch Plates and Outlet Covers
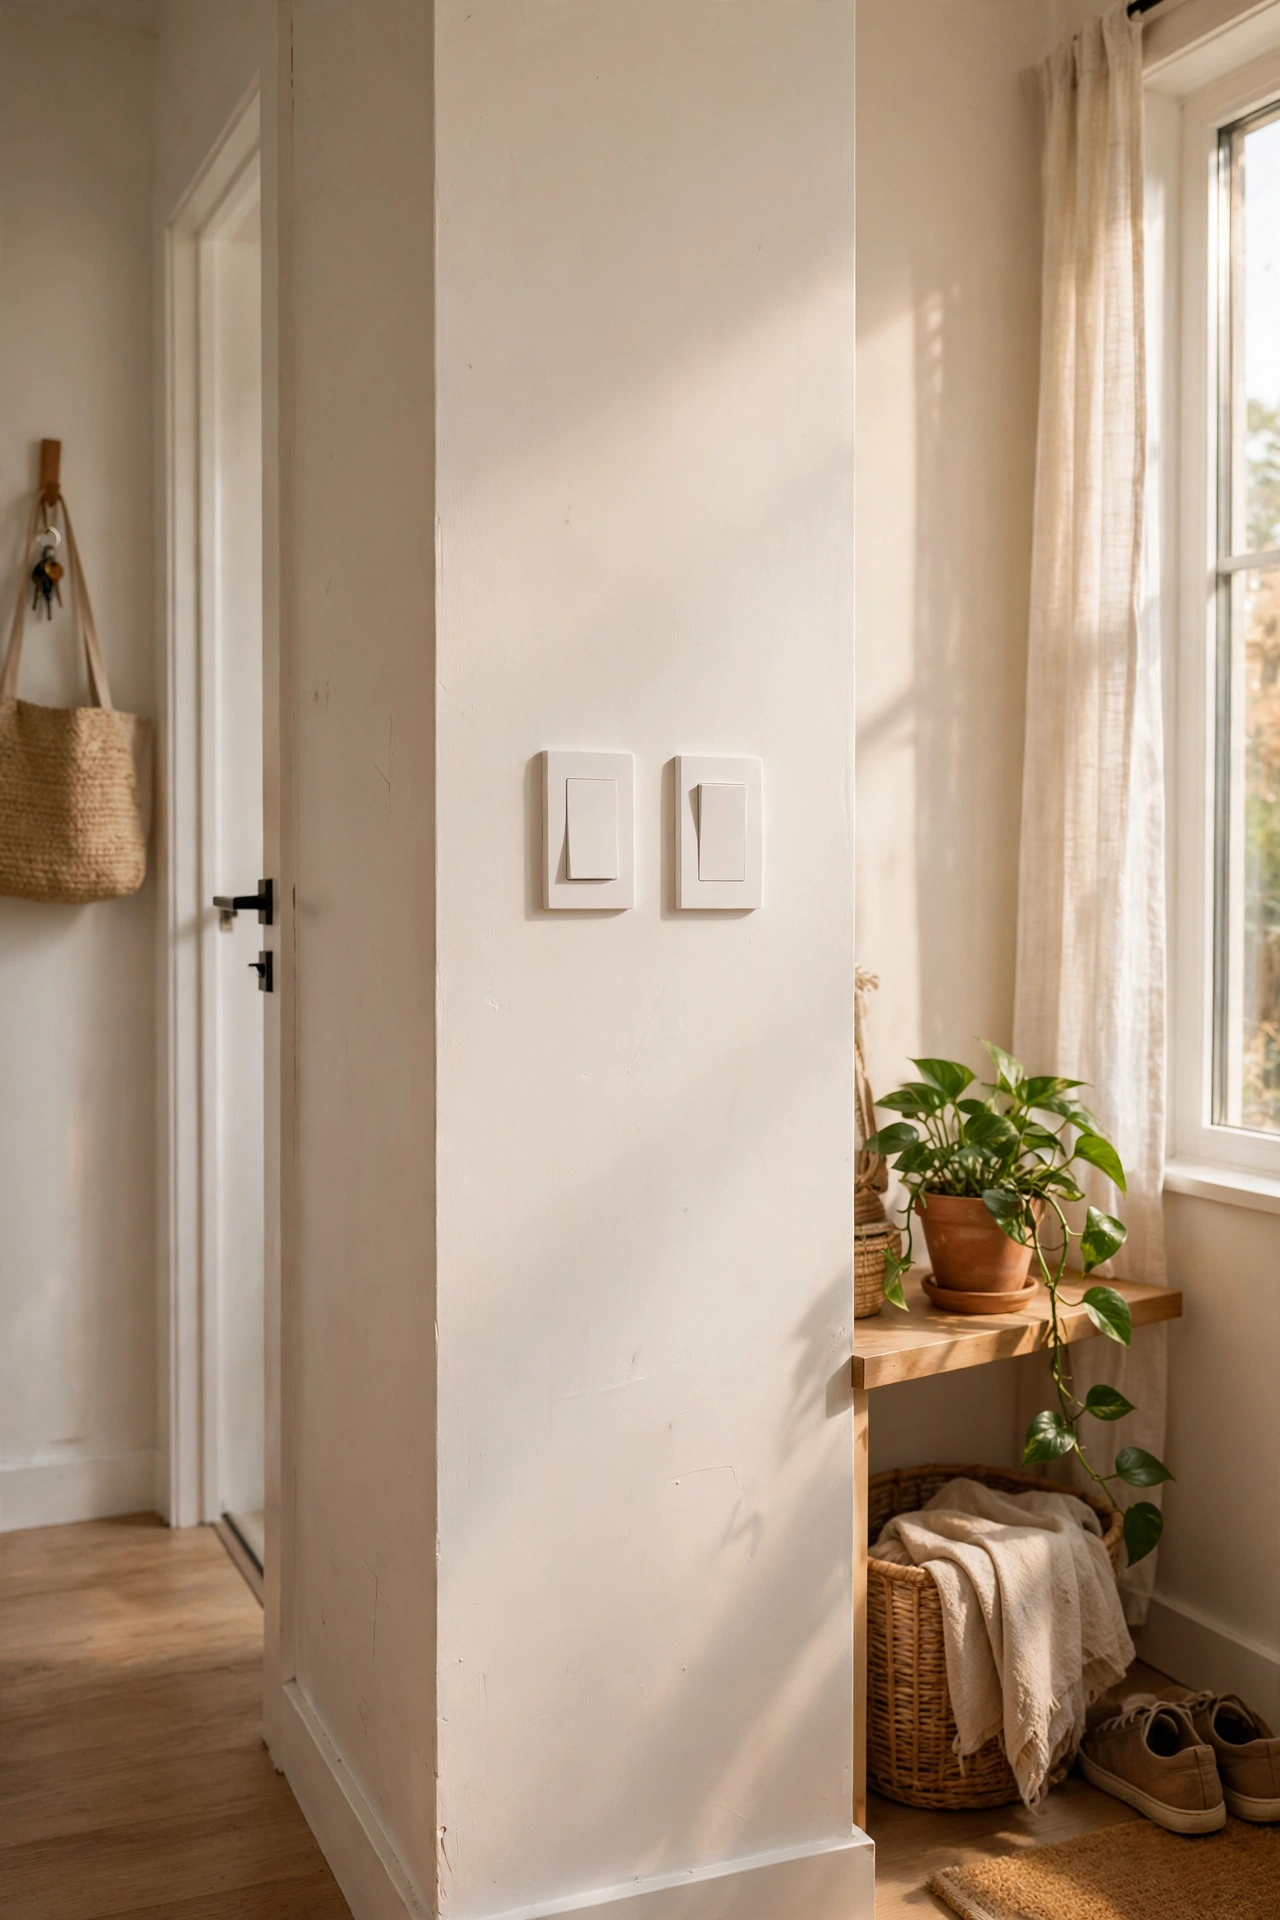
Yellowed plastic switch plates were dragging down my whole hallway. I swapped twelve of them for white screwless plates at about $3 each, and the hallway instantly looked cleaner. Turn off the breaker first, because the wires behind are live even if the switch is off. I paint-matched one plate that did not sit flush, which turned out to be a crooked box. A screwless plate hides it completely. This is a thirty-minute project that you notice every single day, which is more than I can say for most weekend DIY home projects.
Cost: ~$25-40 | Time: 45 minutes
13. Turn Woven Baskets into Planter Covers
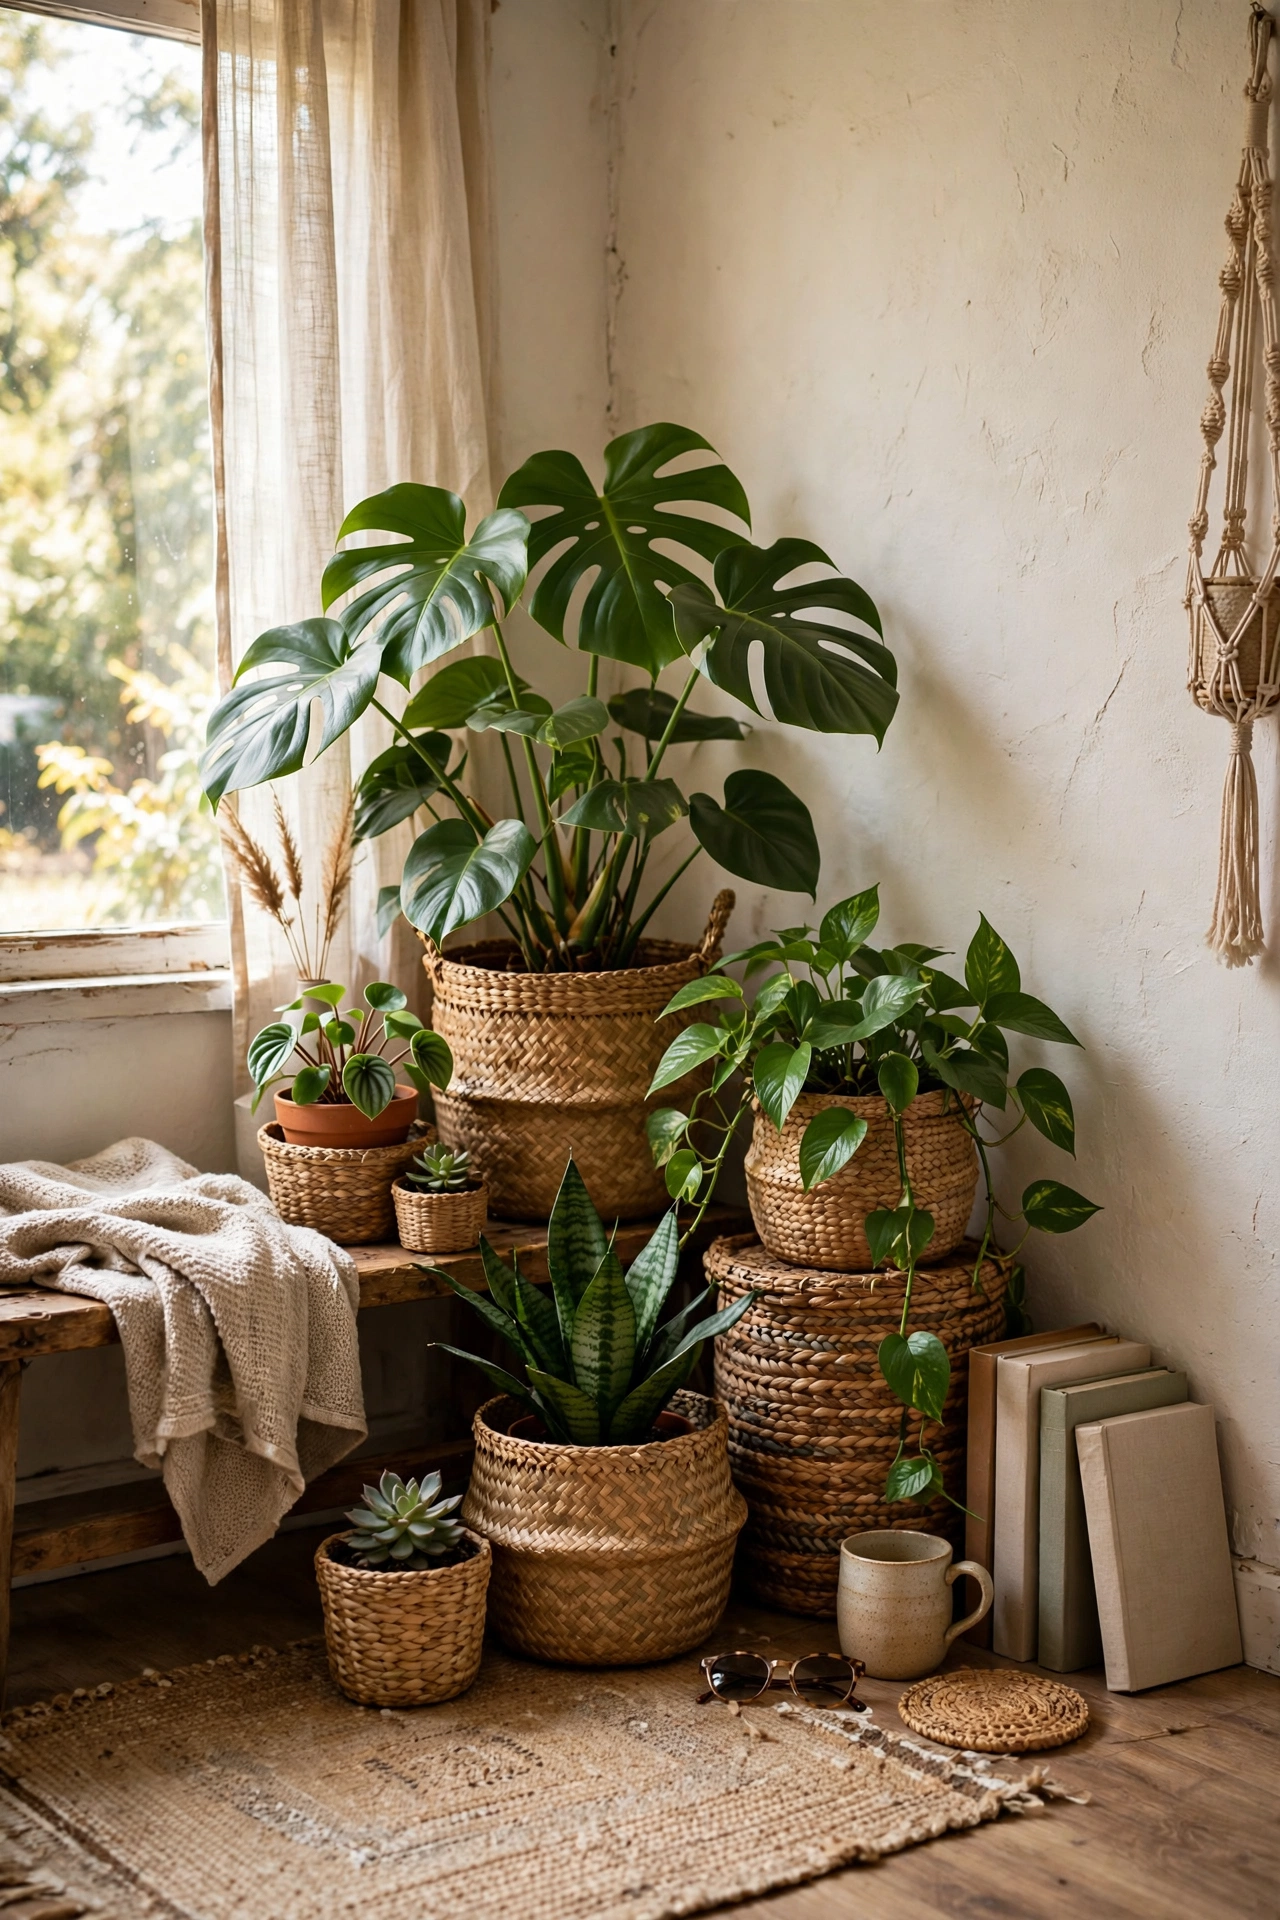
Three thrifted baskets for $9 total became the prettiest planters in my living room. Line each basket with a plastic bag, set the nursery pot inside, and fold the excess plastic below the rim. The basket hides the ugly plastic pot and adds texture the room was missing. I killed the first plant by watering directly into an unlined basket, so the liner is the whole trick. Group three baskets of different heights together for a styled corner. It took me twenty minutes and the plants finally look like decor instead of an afterthought.
Cost: ~$10-20 | Time: 30 minutes
14. Make Simple Roman Shades from Mini Blinds
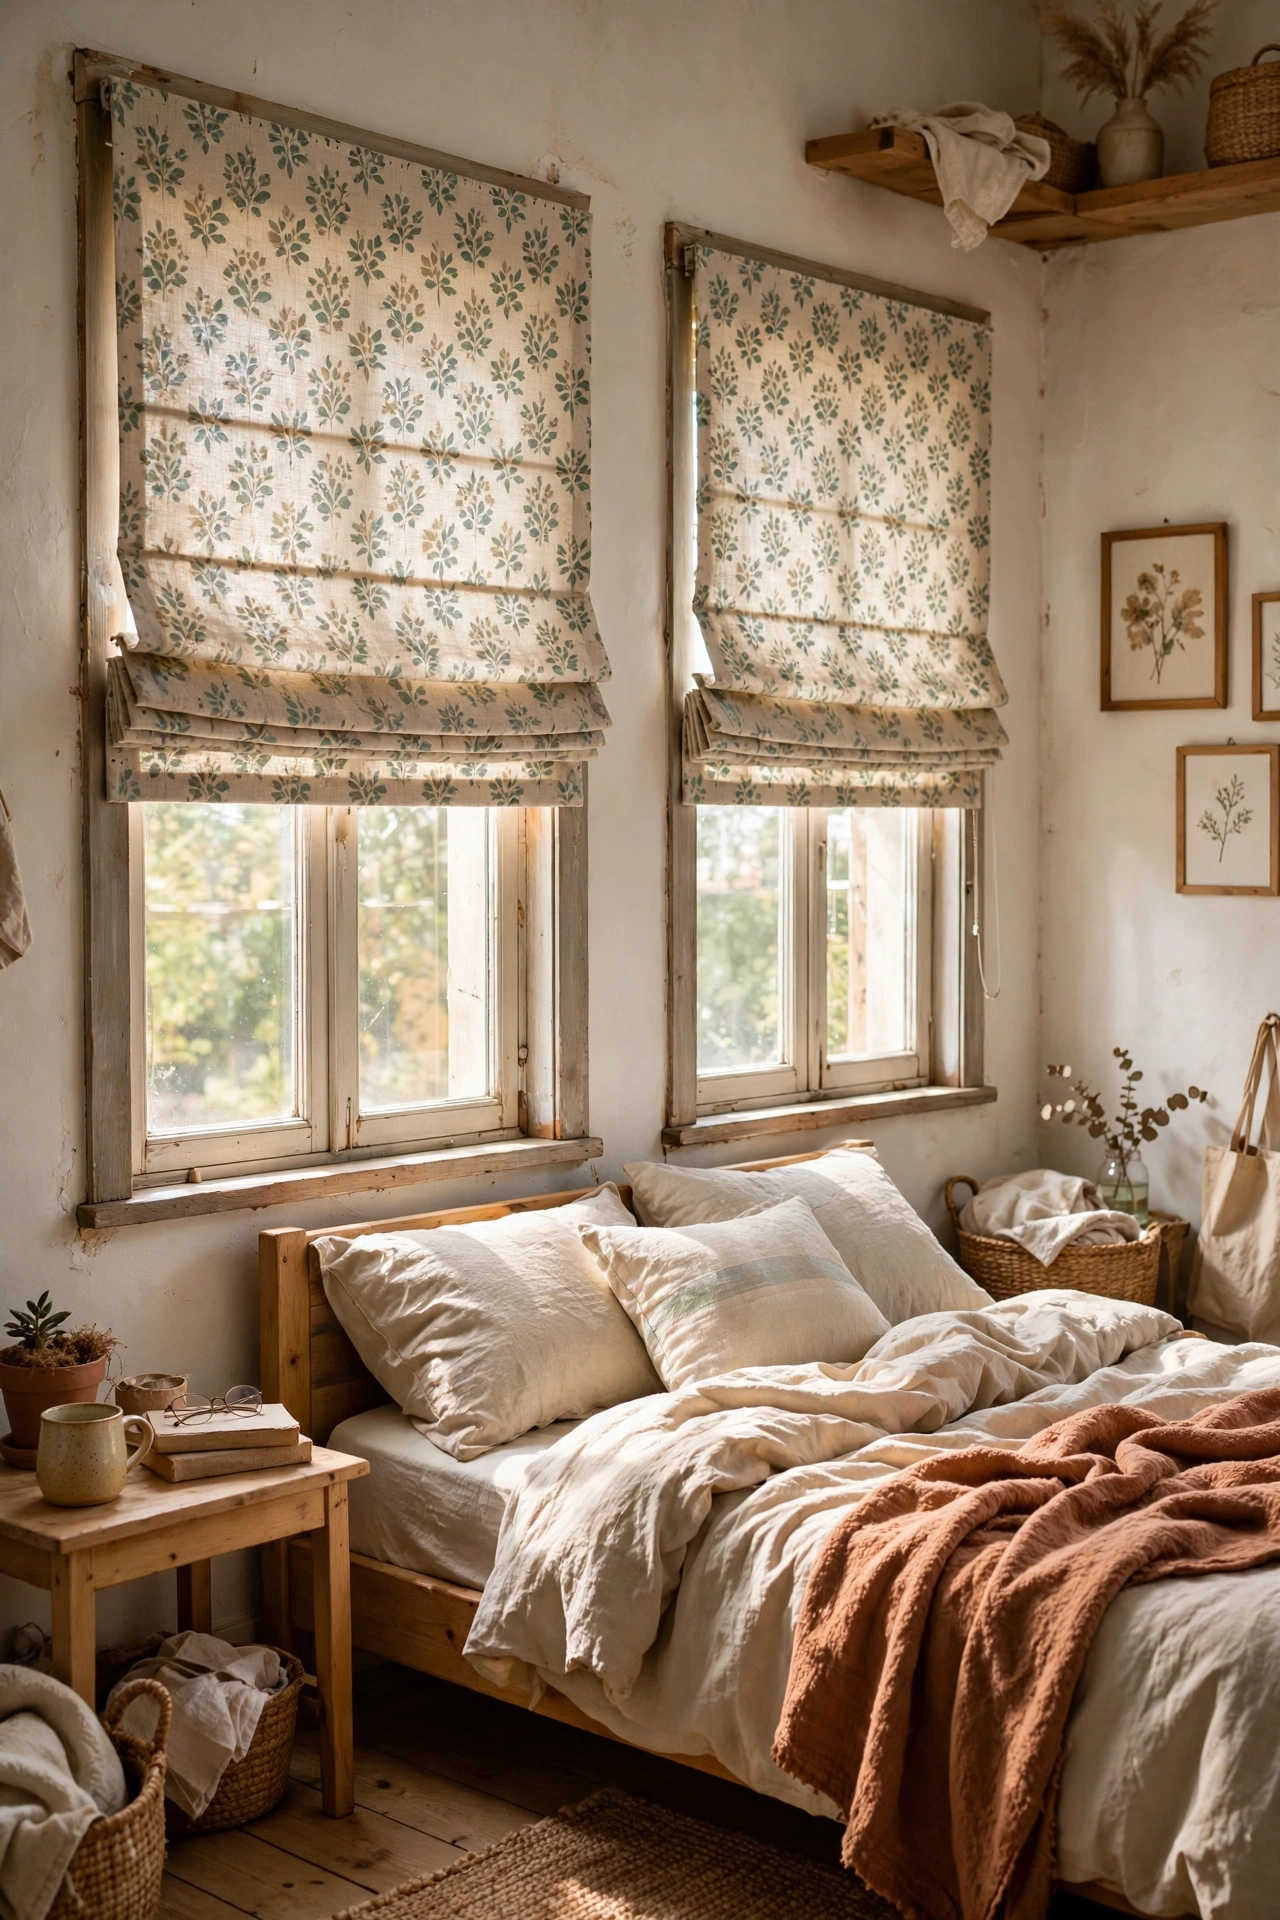
I turned $8 mini blinds into fabric roman shades using curtain fabric and fabric glue. Remove most of the slats, glue fabric to the remaining slats, and the blind mechanism still raises and lowers the shade. It sounds fiddly but took me one afternoon for two windows. My first shade bunched because I glued the fabric too tightly between slats, so leave a little slack for the folds. They look like custom shades that cost hundreds. Measure the window inside the frame so the blinds mount cleanly, and pick a fabric with a pattern you will not tire of.
Cost: ~$15-25 per window | Time: 2 hours per window
15. Layer Rugs for a Designer Look
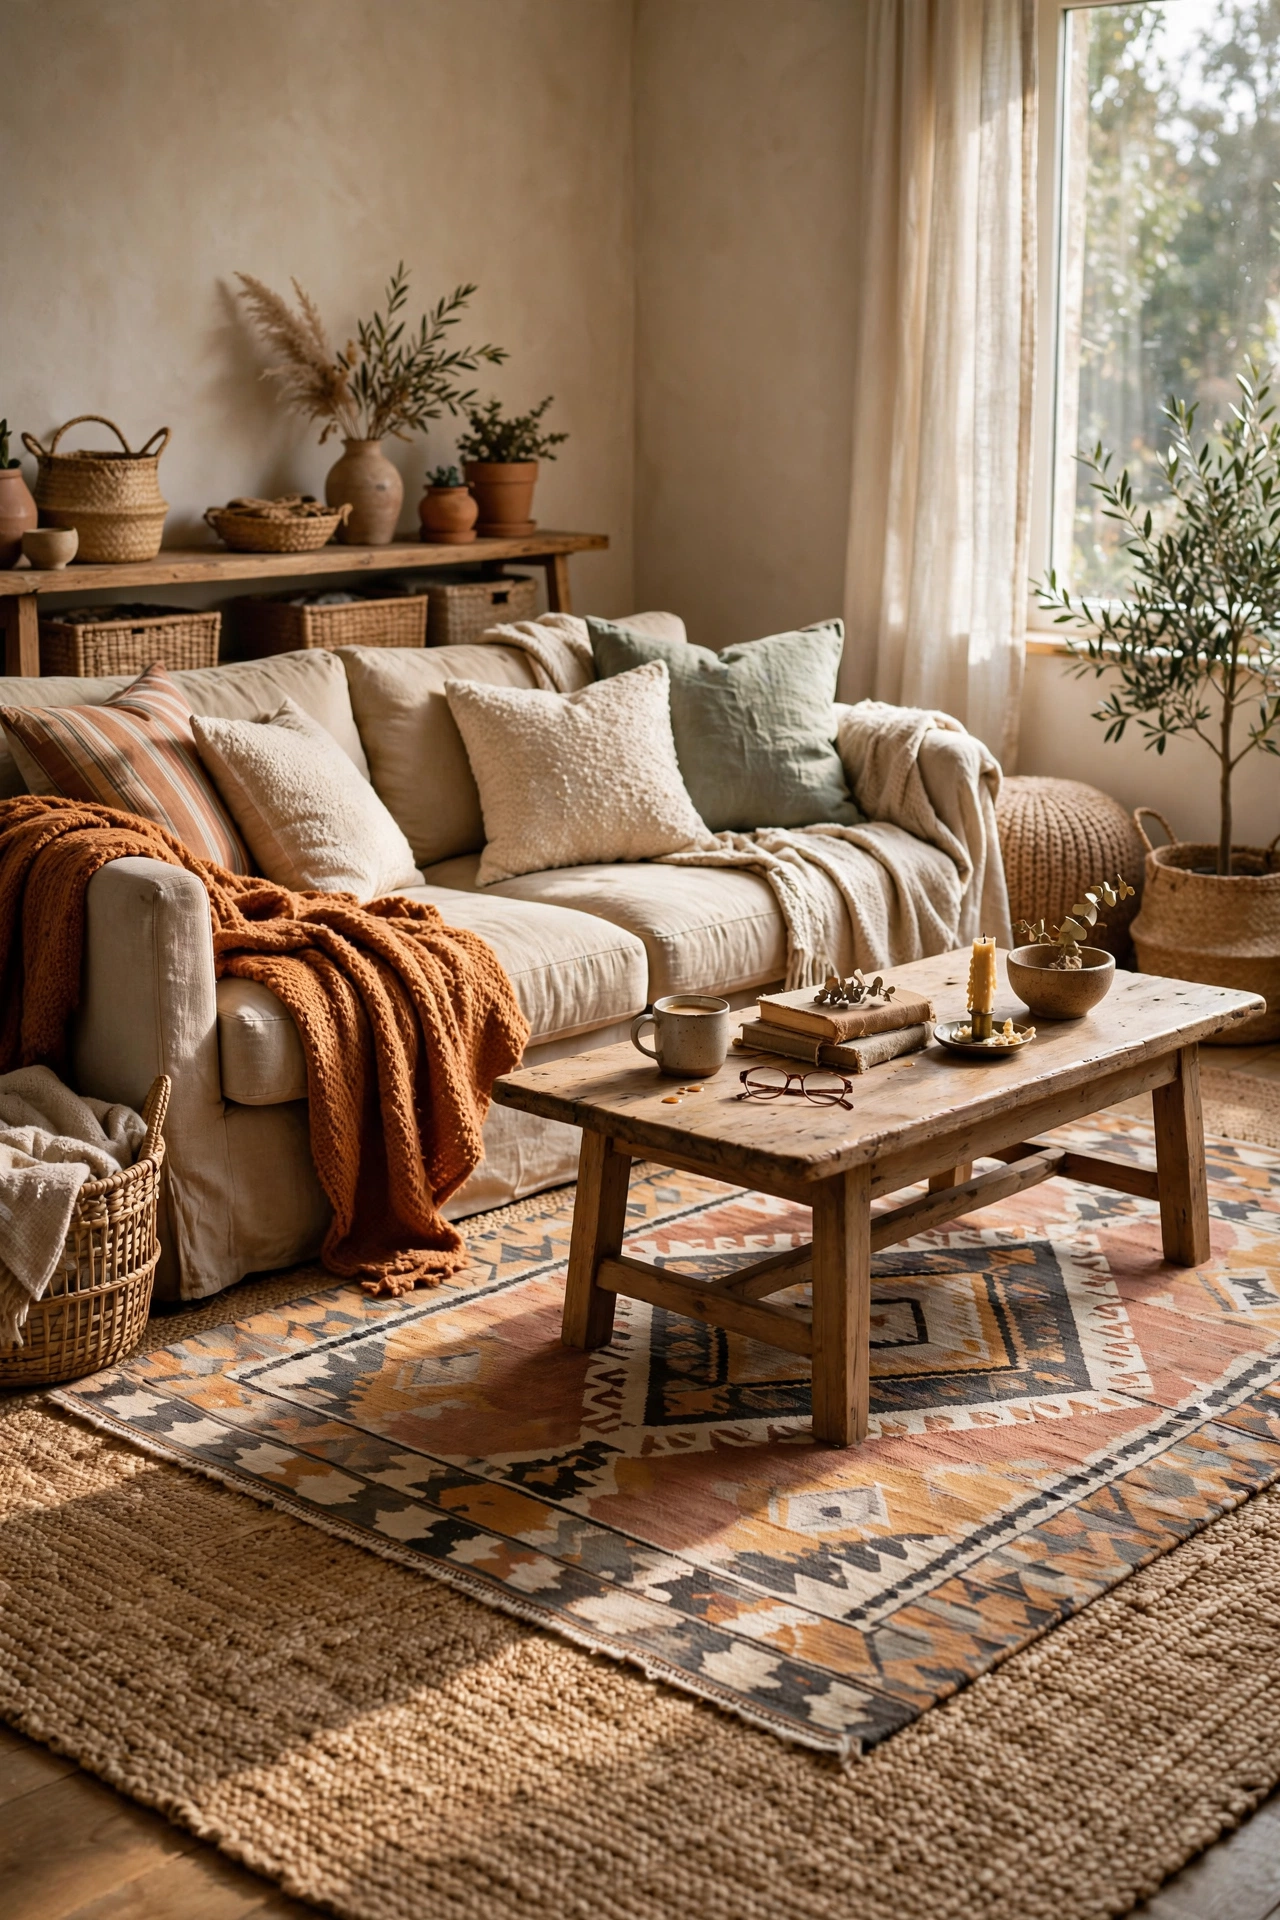
Layering a small patterned rug over a big jute rug made my living room look styled by someone with actual taste. I put down a 5×7 jute rug for $60, then layered a $25 patterned flat-weave on top at a slight angle. The jute adds texture and size for cheap, while the patterned rug brings the personality. Anchor both with rug tape so the top layer does not slide and become a trip hazard. Mine shifted for a week before I taped it, which was annoying. The layered look reads expensive and took me ten minutes once the rugs arrived.
Cost: ~$40-50 | Time: 15 minutes
16. Wallpaper the Inside of a Powder Room
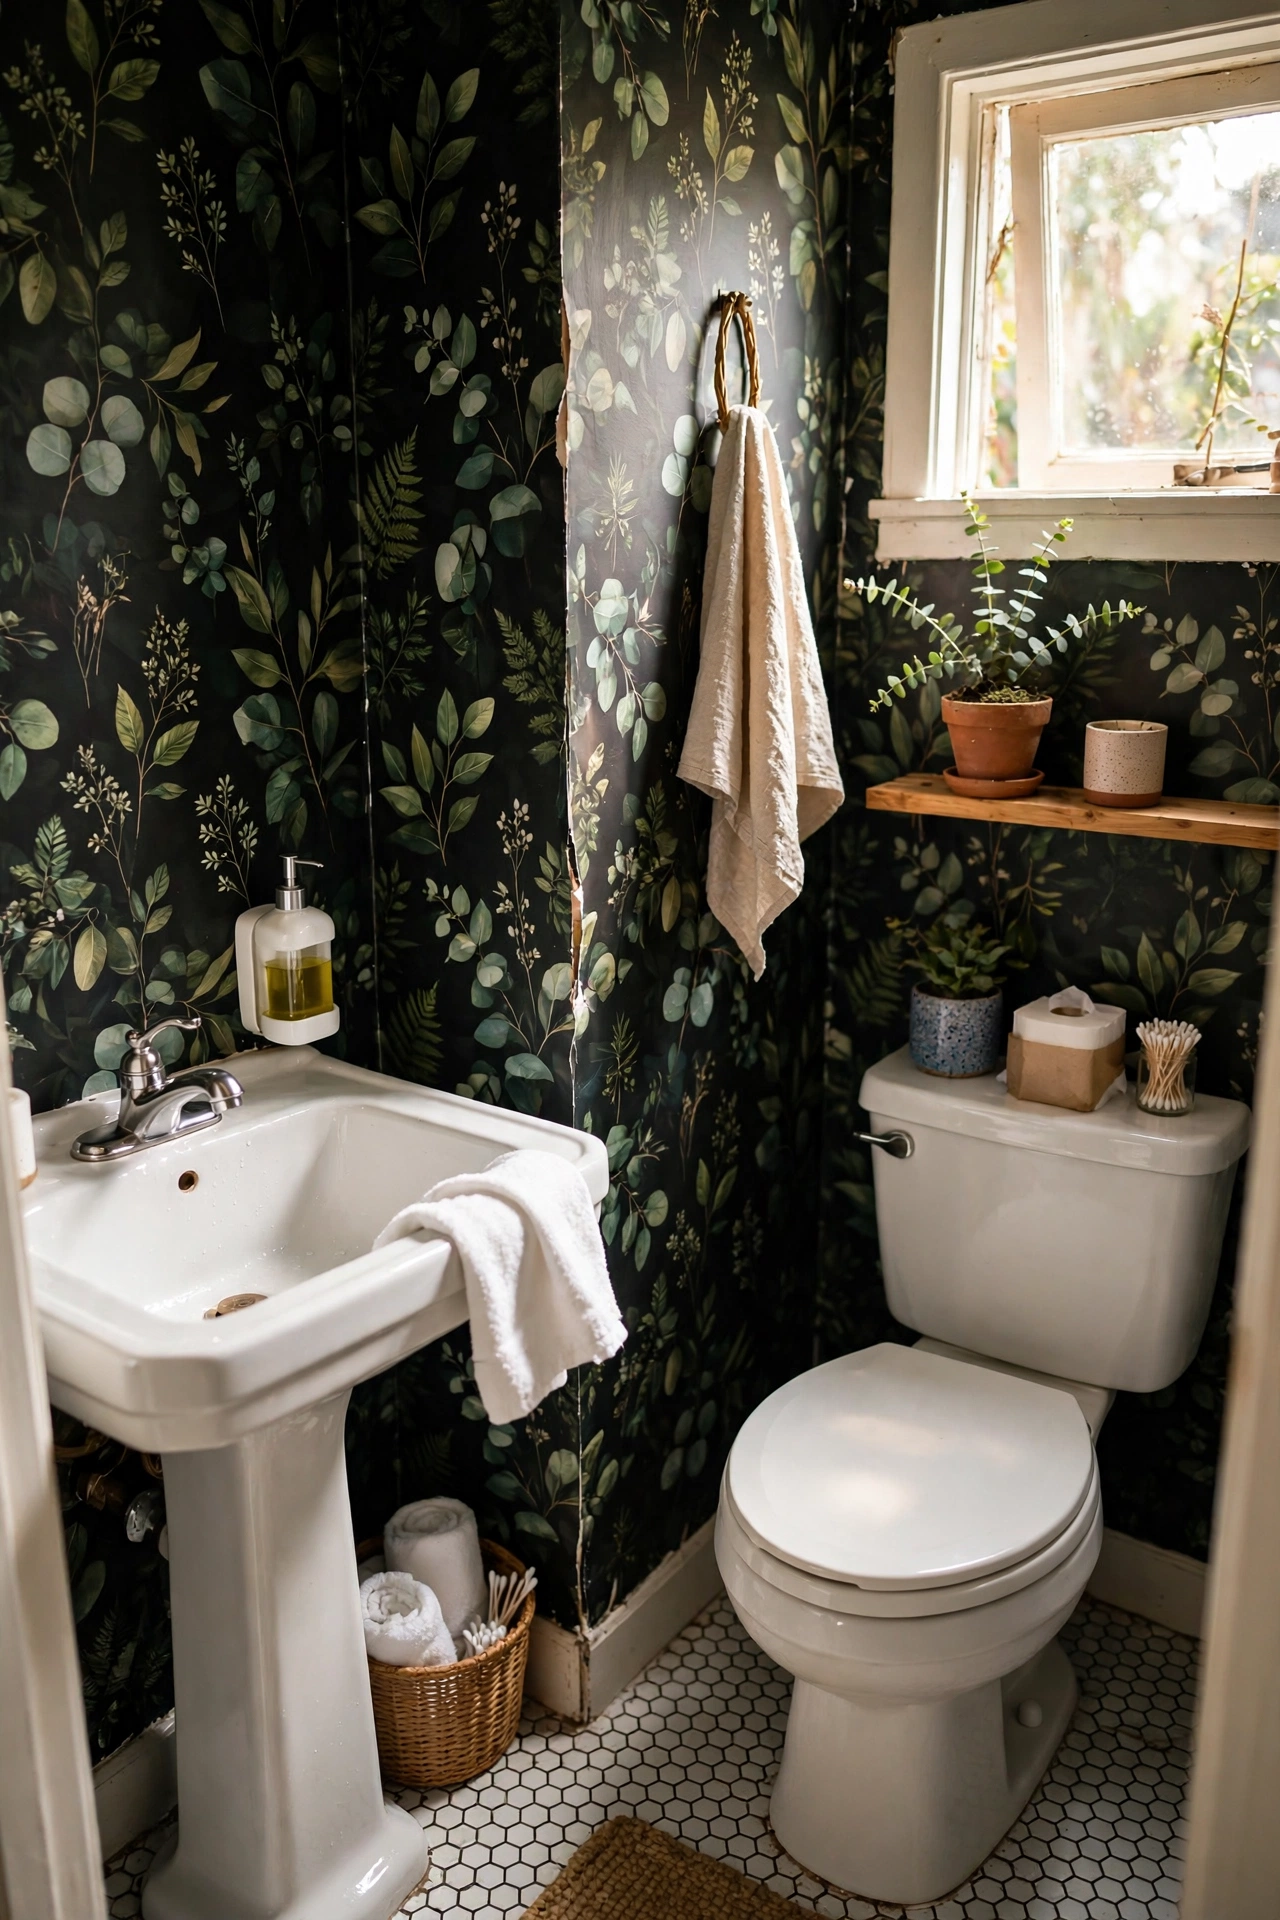
A tiny powder room is the perfect place for bold peel-and-stick wallpaper, because one roll does the whole job. I papered mine in a dark botanical print for $45, and guests always comment on it. Small rooms are forgiving to paper because the pattern repeats before your eyes get bored. Cut each strip four inches longer than you need, smooth from the centre out, and trim top and bottom with a sharp knife. My first strip went on crooked because I skipped the level. Draw a light pencil line for the first strip and the rest follow it. One afternoon, one roll, total transformation.
Cost: ~$40-50 | Time: 4 hours
17. Build Under-Bed Storage from Crates
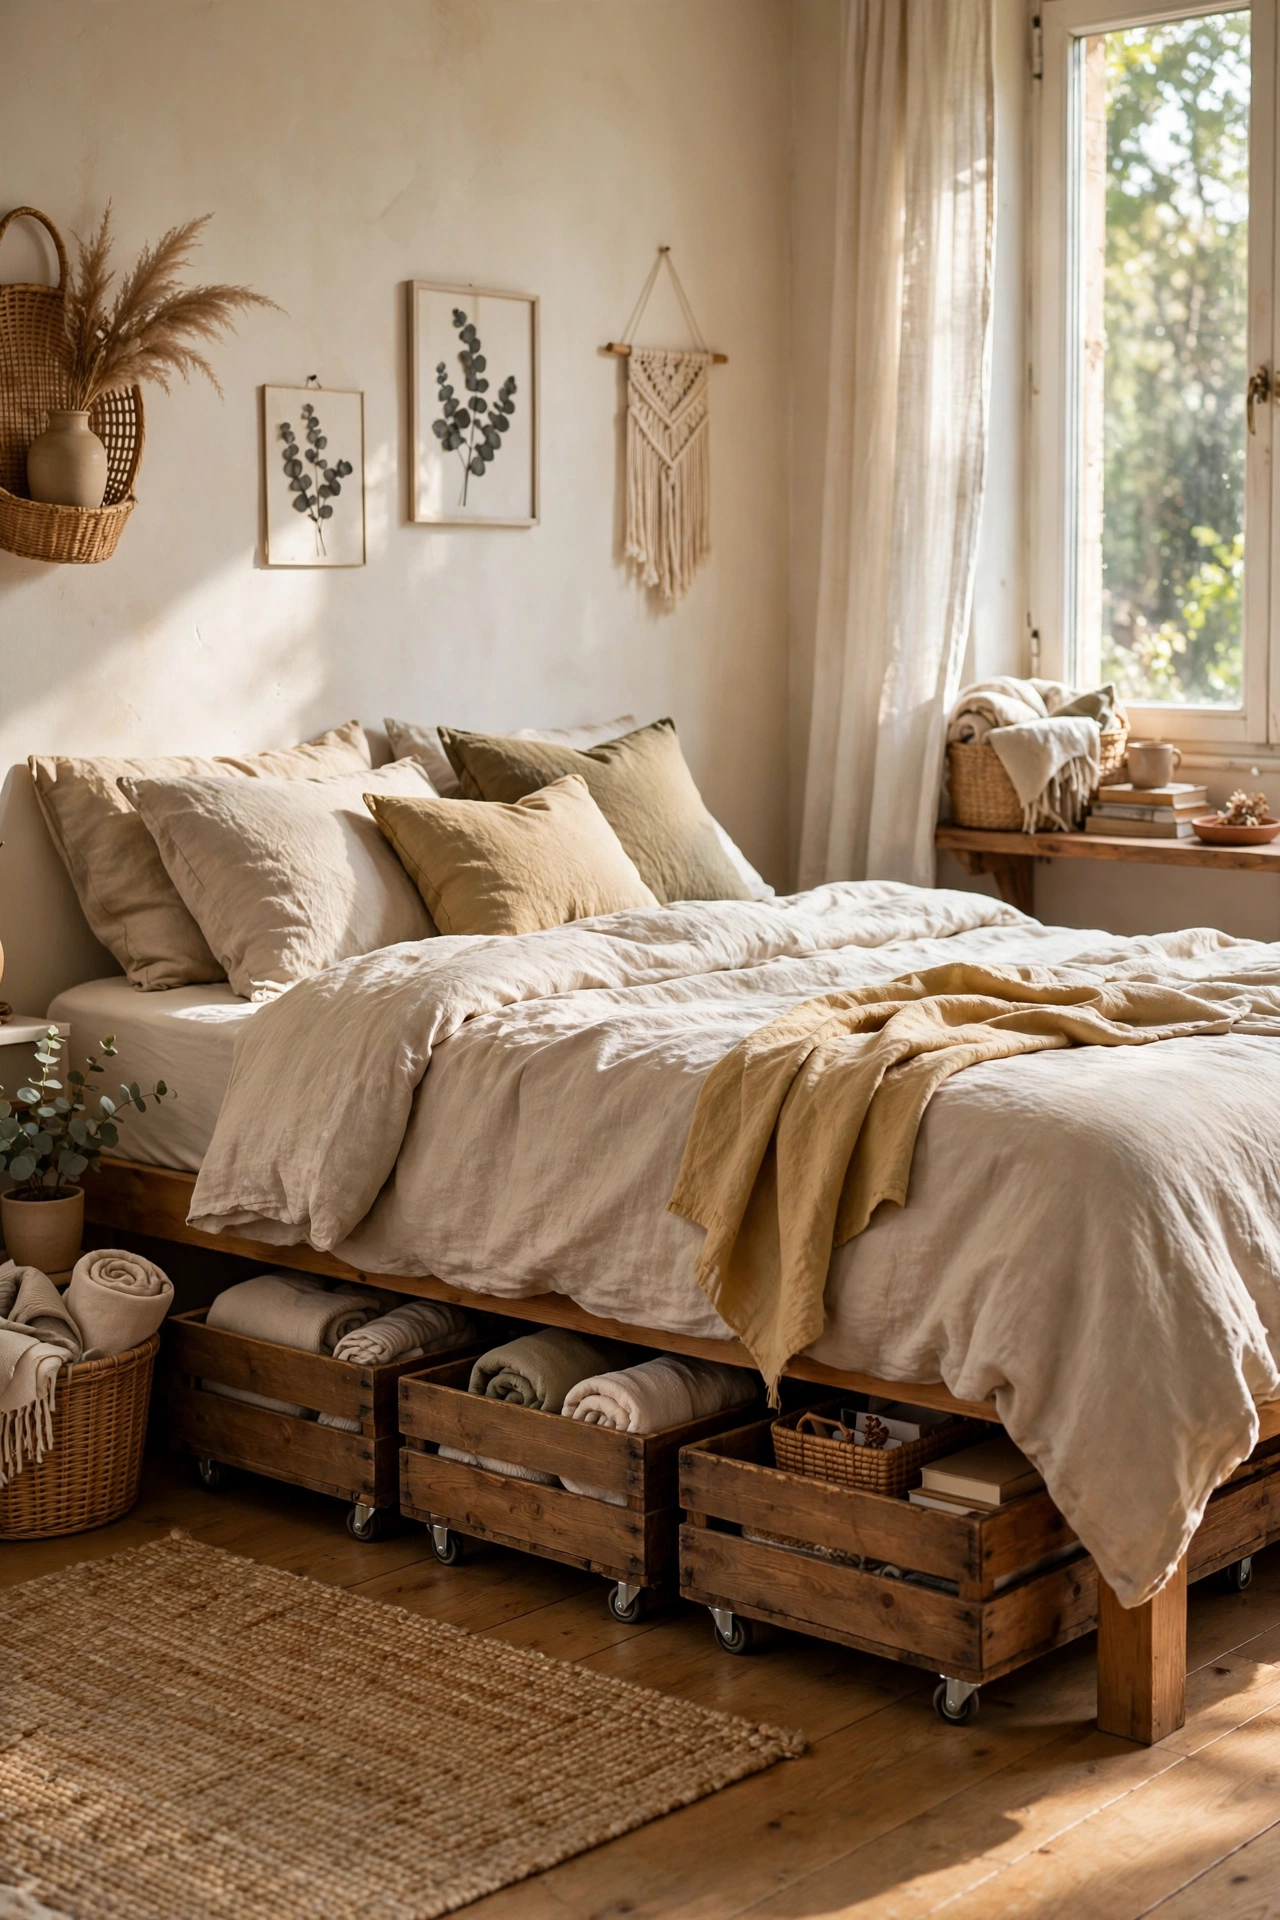
Four wooden crates on castor wheels became rolling under-bed storage for my off-season clothes. I stained the crates dark walnut, screwed on $3 castors each, and they glide under the bed like expensive drawers. Measure your bed clearance first. Mine had exactly six inches, and the first set of castors I bought was too tall, which meant a return trip. Sand the crates smooth or your sheets will catch on splinters. I added simple label holders to the fronts so I actually know what is in each one. A Saturday morning project that tamed my closet chaos.
Cost: ~$35-50 | Time: 3 hours
18. Spray-Paint Old Vases and Lamp Bases
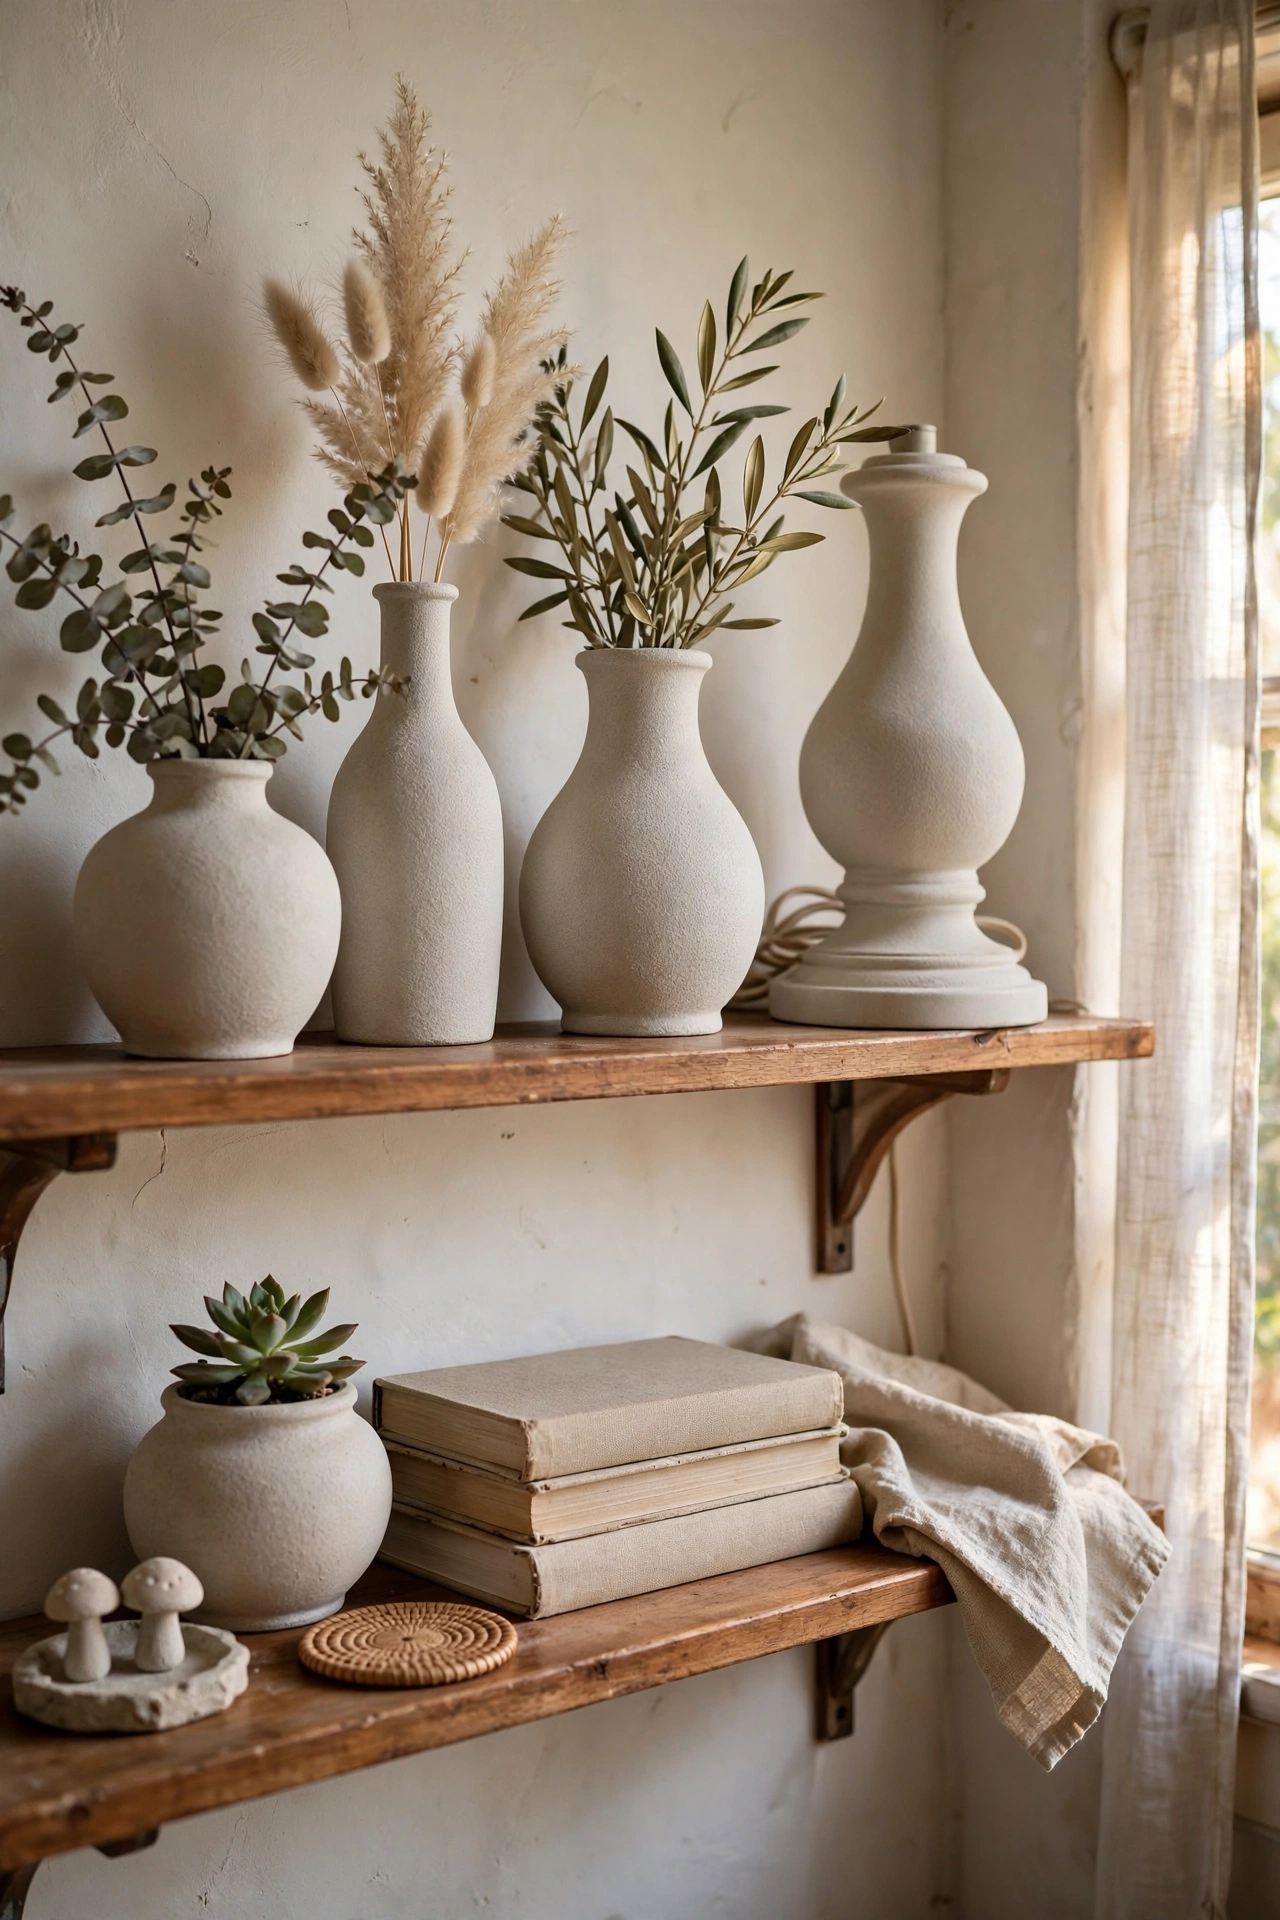
A $4 can of matte spray paint turned my collection of dated vases into a matching ceramic-look set. Clean each piece, spray light coats from ten inches away, and let each coat dry fully. Three light coats beat one heavy coat, because heavy coats drip. I learned that with a run down the side of my favourite lamp base, which I had to sand and redo. Matte stone-finish spray paint mimics expensive pottery beautifully. Group the pieces in odd numbers and the shelf looks styled. Ten minutes of actual work, and the before-and-after is dramatic.
Cost: ~$8-15 | Time: 1 hour plus drying
19. Refresh the Porch with Paint and Plants
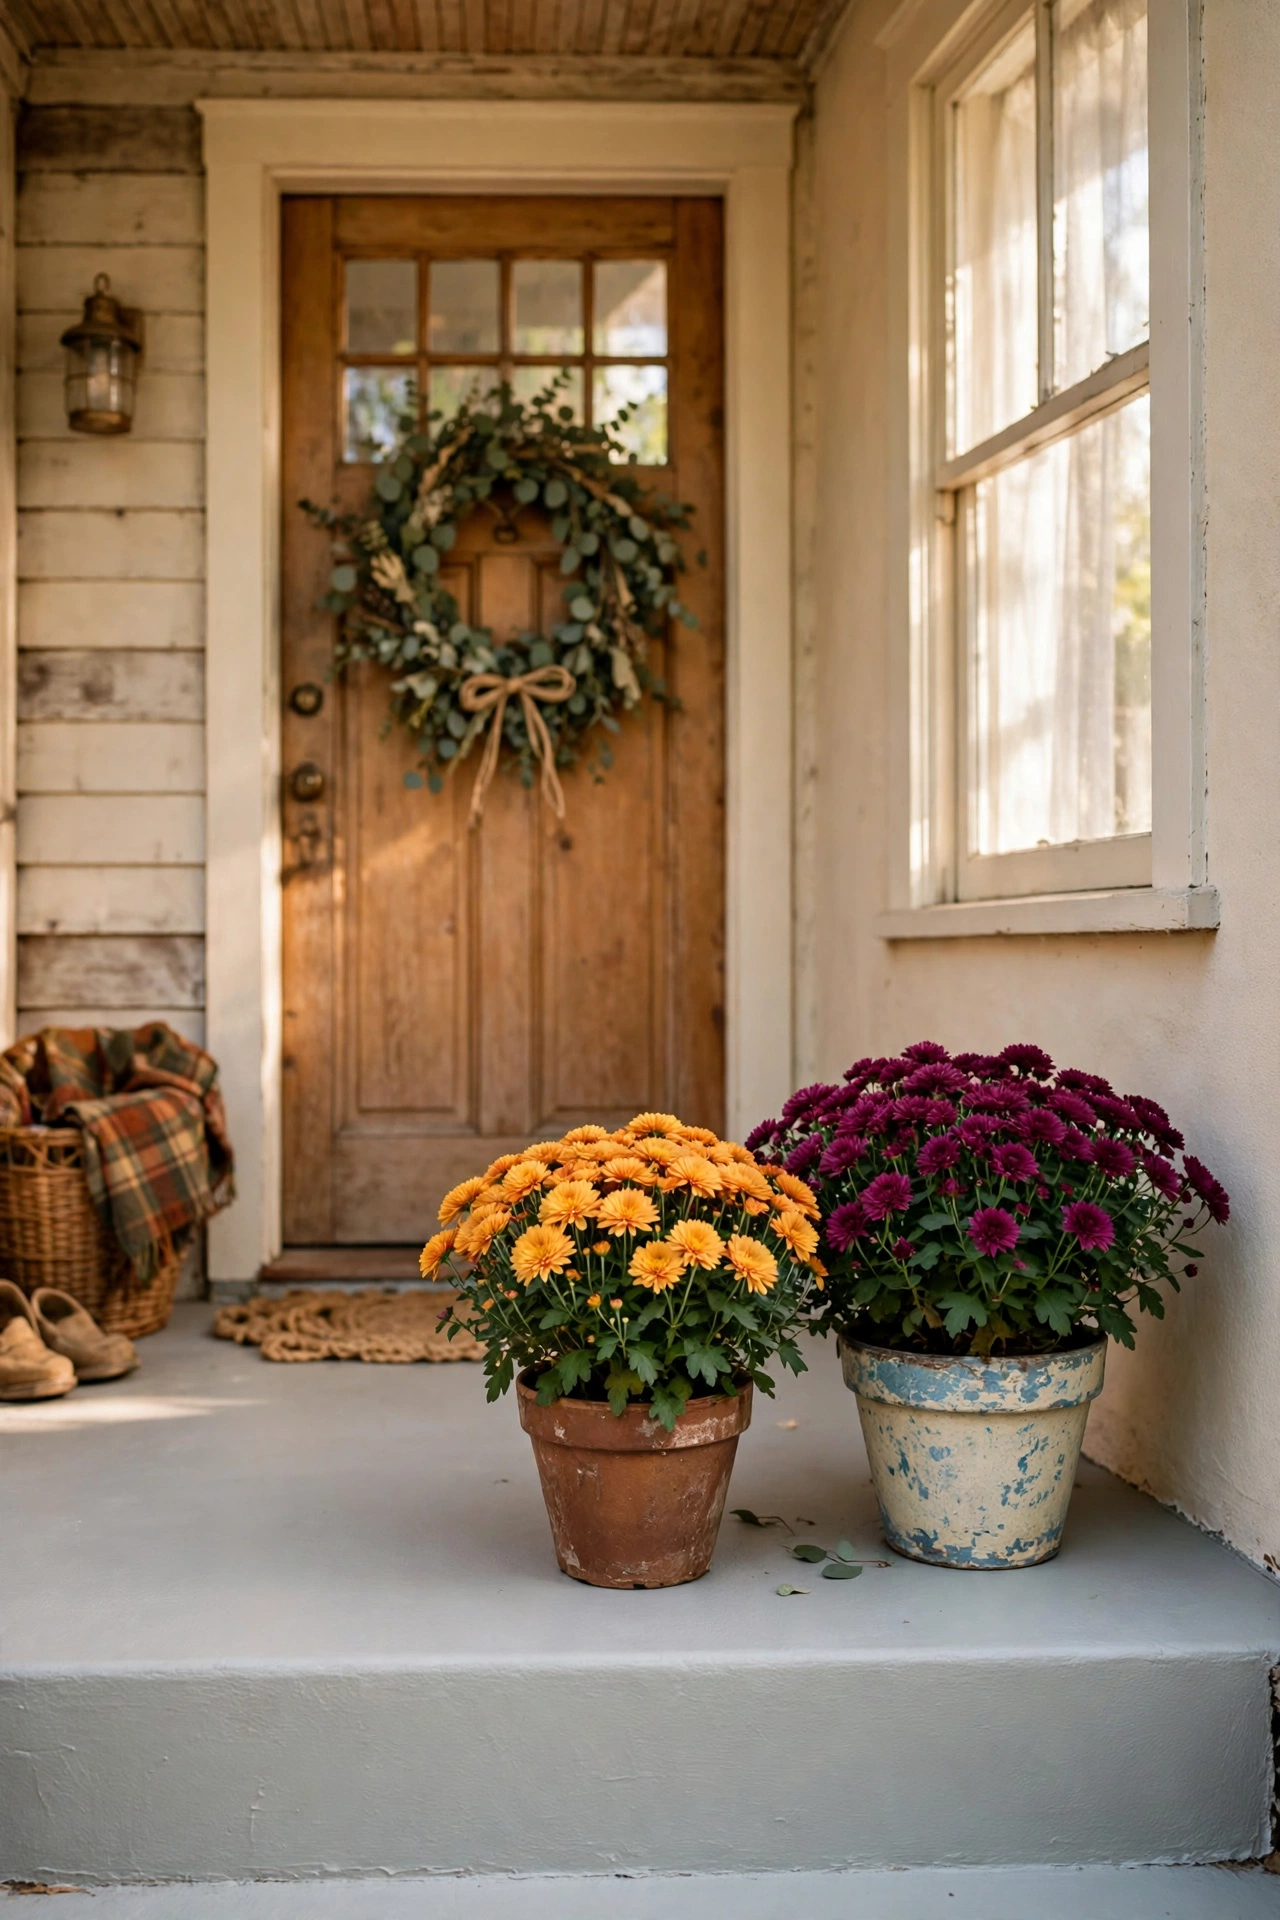
My front porch took one Sunday morning: I painted the concrete step in porch paint, added two $8 mums in thrifted pots, and hung a simple wreath I made from a grapevine form and faux eucalyptus. Use proper porch and floor paint on concrete or it peels within a month. Mine peeled, and I am telling you this so yours does not. Sweep and degrease the concrete first, because paint sticks to clean surfaces, not dusty ones. The whole porch makeover cost $42 and it is the first thing I see every evening when I come home.
Cost: ~$35-50 | Time: 3 hours plus drying
Quick questions, answered
How do I pick a weekend DIY project that actually gets finished?
Choose projects with fewer than ten steps and no special tools you would have to buy. If the materials list is longer than the instructions, pick something else. One room, one surface, one weekend is the formula that finishes.
What is the biggest mistake with weekend DIY home projects?
Starting Saturday at 3pm. Begin Saturday morning so drying and curing time happens overnight, and Sunday stays a buffer for touch-ups. Rushing the drying step ruins more projects than bad technique.
Can weekend DIY home projects really stay under $50?
Yes, if you thrift the base pieces and buy only paint, hardware, or adhesive new. The expensive part of DIY is usually buying a whole new item; the cheap part is transforming something that already exists.
📌 Finished a project from this list? Pin this post now so you can save this idea for your next weekend.
Keep the momentum going: (see also: 25-weekend-diy-projects-that-instantly-refresh-your-home) (see also: 15-easy-diy-home-decor-projects-for-beginners-under-25) (see also: 19-dollar-store-diys-that-look-designer)
