17 DIY Lamp Ideas in a Weekend
Lighting is the fastest way to change how a room feels, and it’s the one thing I ignored for years. I bought cheap overhead lights, lived with harsh white bulbs, and wondered why my living room never felt cosy. Then I made my first DIY lamp — a thrifted base with a coat of paint — and it clicked: warm, layered light makes every corner feel intentional. These DIY lamp ideas will get you there in a single weekend.
Every project on this list is beginner-friendly, needs nothing more than basic tools, and costs well under $40 in materials. I built most of them with a Saturday afternoon free and a trip to the hardware store. Safety first though: always unplug before you work, and if a project involves actual wiring, a plug-in lamp kit keeps it simple and safe.
1. Chalk-Painted Thrift Lamp Makeover
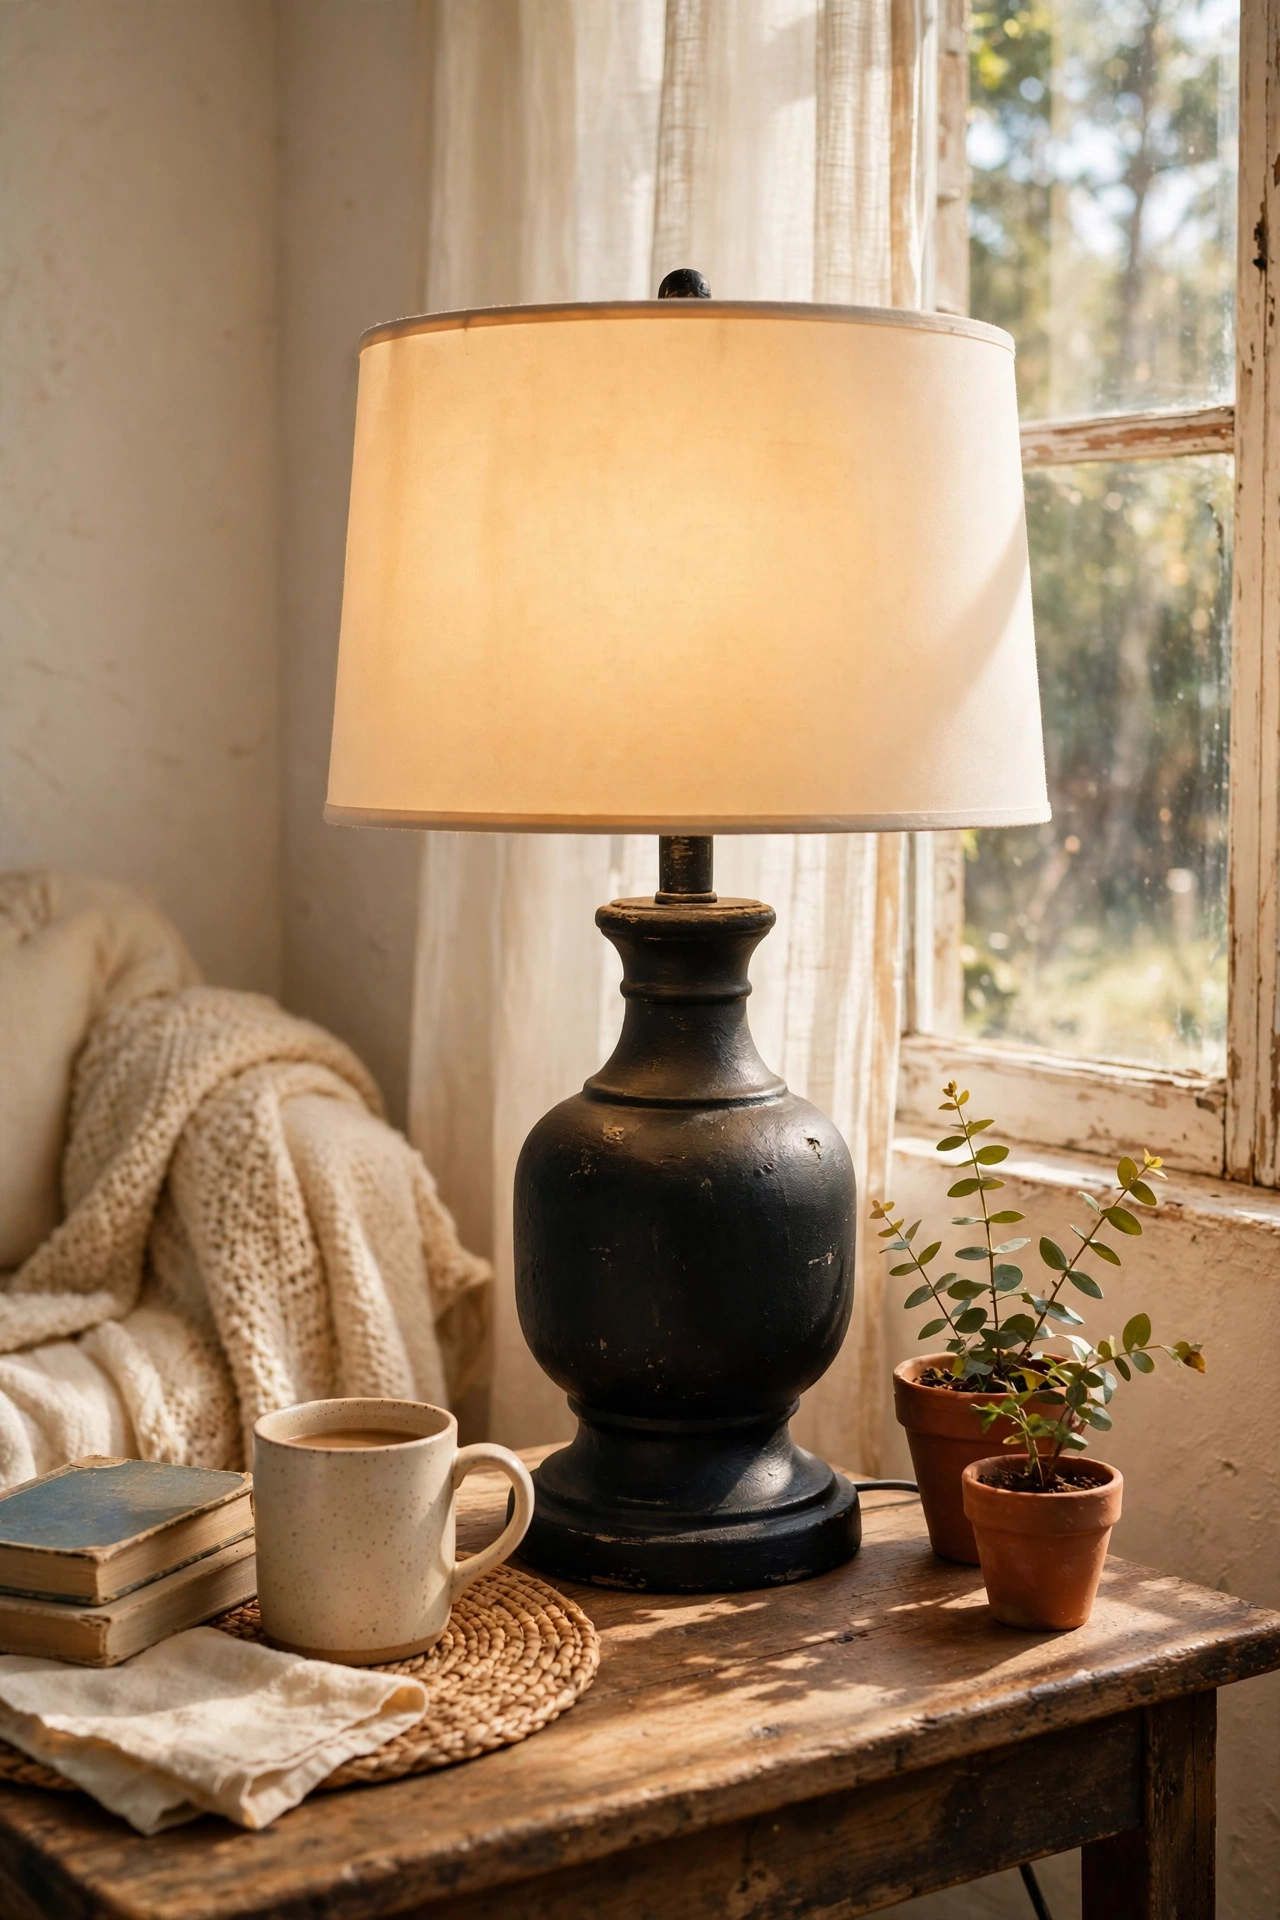
The humble thrift-store lamp is my favourite decorating cheat. I found a brass lamp with a dated shade for $4, brushed the base with two thin coats of matte black chalk paint, and swapped the shade for a clean drum shade from a discount store. The whole thing cost under $15 and looks like a boutique find. Unplug the lamp first and tape off the socket and cord. My mistake the first time was painting right over the grime — a quick wipe with rubbing alcohol makes the paint grip properly and last.
Pro tip: choose a shade that’s wider than the base for balance; a shade too narrow makes any lamp look top-heavy.
Cost: ~$14 | Time: 1 hour plus drying
2. Mason Jar Pendant Light
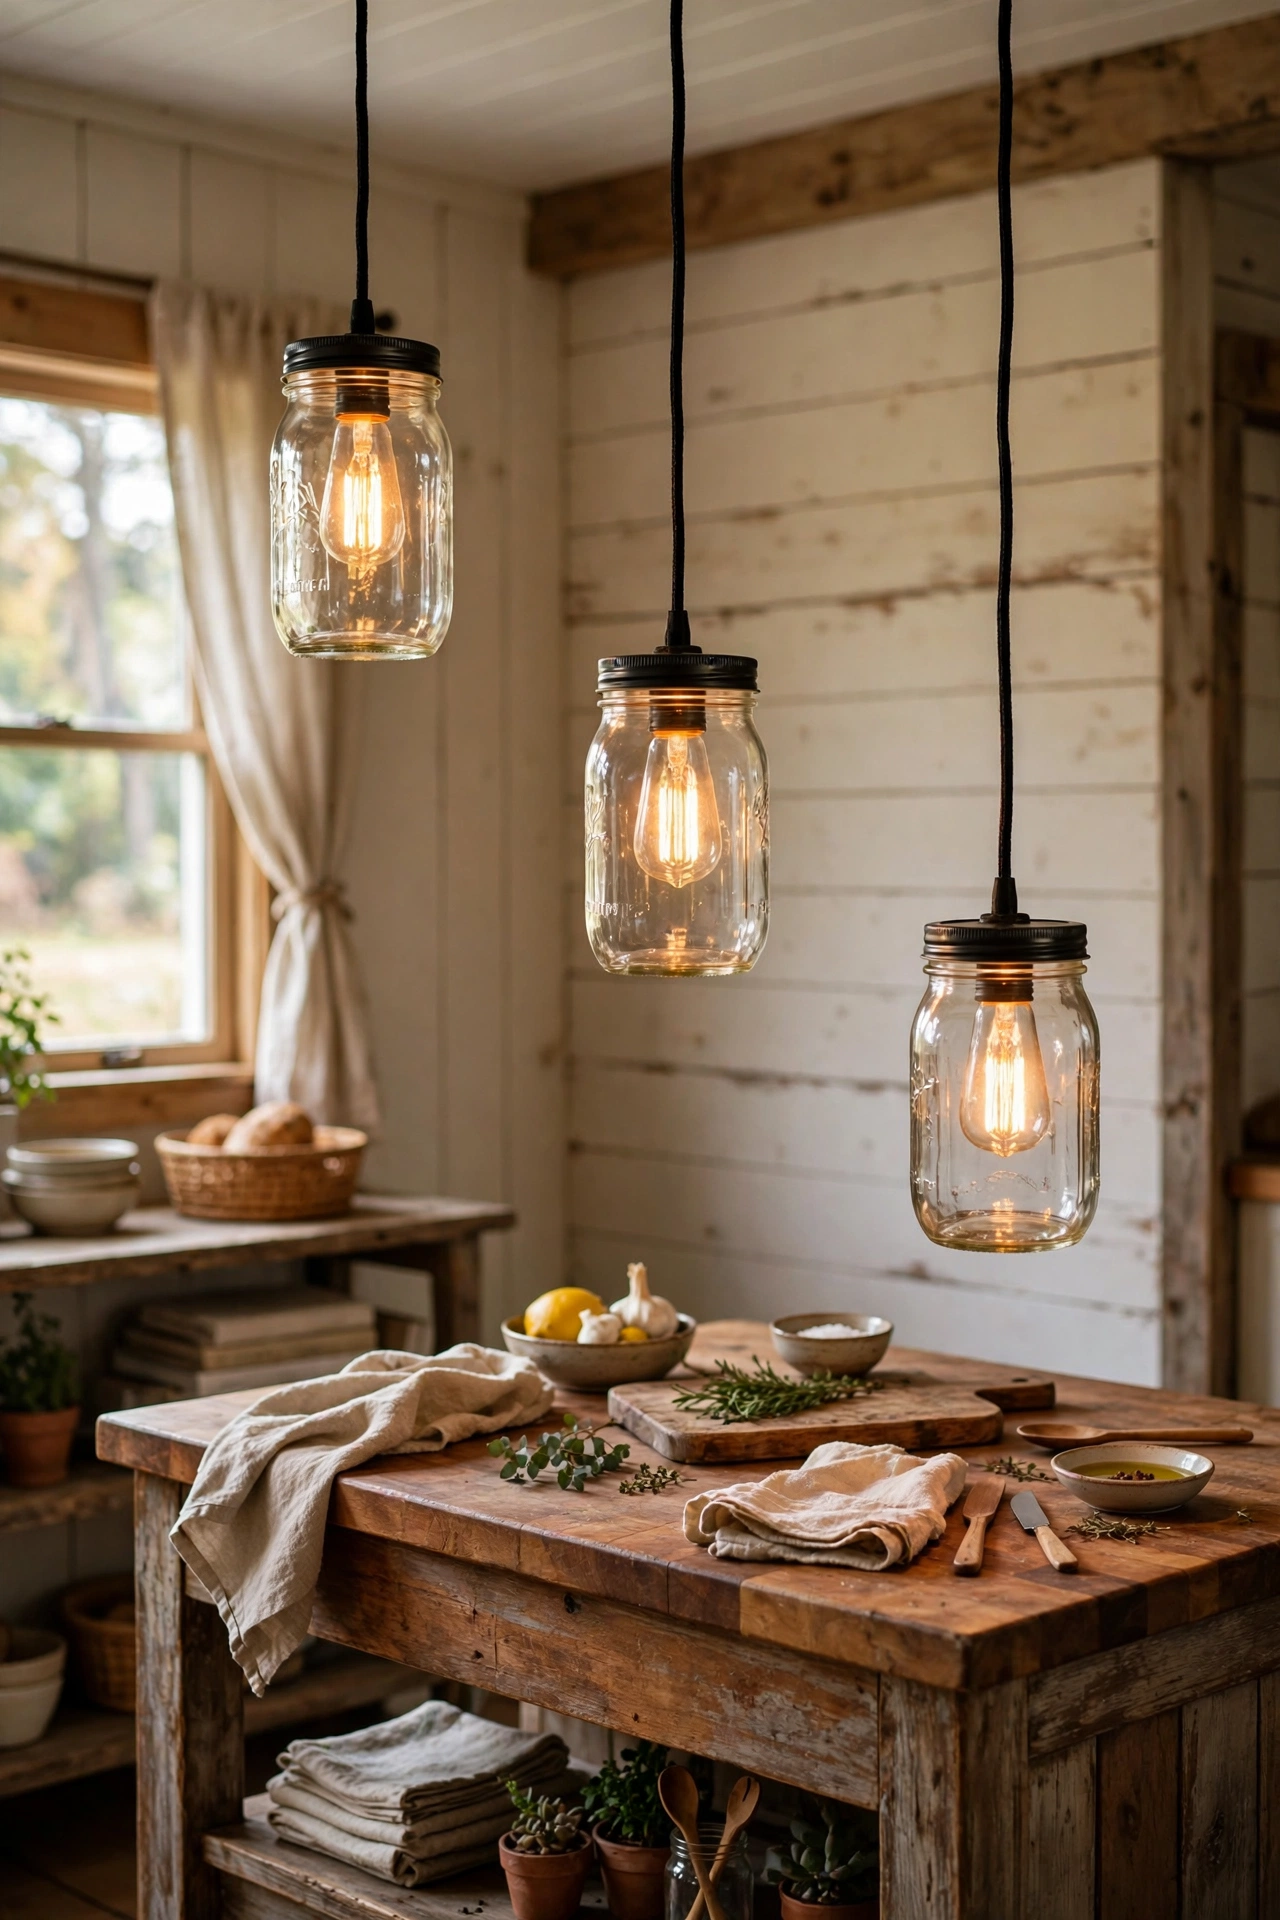
A mason jar, a pendant light kit, and twenty minutes — that’s all this takes. Drill or punch a hole in the jar lid (a step bit makes this clean), thread the pendant cord through, screw in an LED Edison bulb, and hang it from a ceiling hook or over an existing outlet using a swag kit. I hung three over my kitchen island at staggered heights and the glow is wonderful. Use LED bulbs only — real incandescents get hot and mason jars trap that heat. Keep the jar loose on the socket so air can circulate.
Pro tip: frost the inside of the jar with glass spray paint for a softer, diffused glow.
Cost: ~$18 | Time: 30 minutes
3. Basket Pendant Light
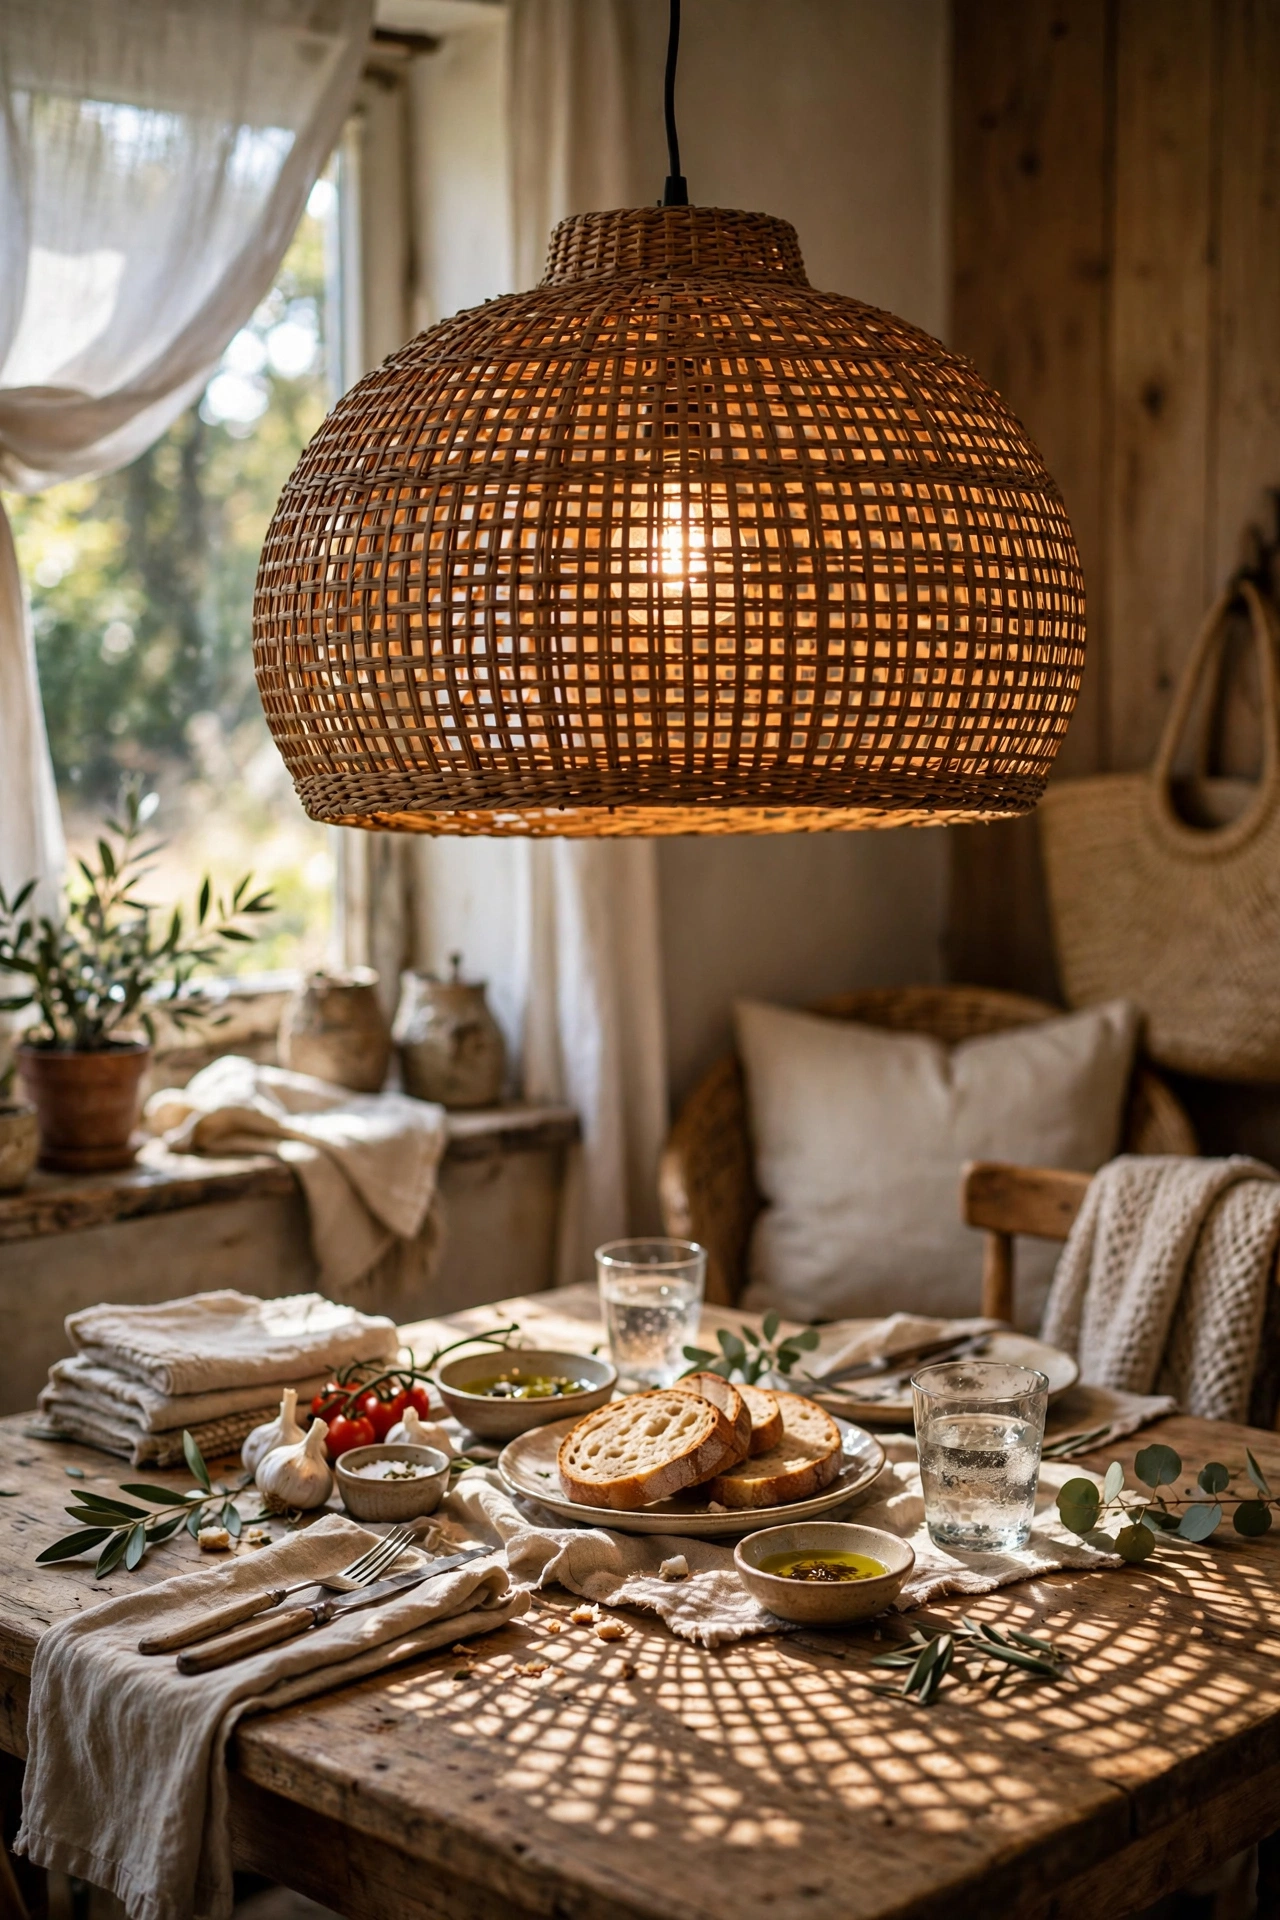
A large woven basket flipped upside down becomes a pendant shade with beautiful texture and light pattern. Cut a small opening in the base centre, thread a pendant cord through, and hang it with a swag hook. I made one for my dining room from a $10 market basket and it casts the prettiest woven shadows on the ceiling. Choose a basket with an open weave so the light escapes; a tight weave blocks too much and the bulb overheats. A low-wattage LED bulb keeps everything cool and safe.
Pro tip: line the inside with a cheap paper lantern insert to soften the light and hide the cord.
Cost: ~$22 | Time: 45 minutes
4. Fabric-Recovered Lampshade
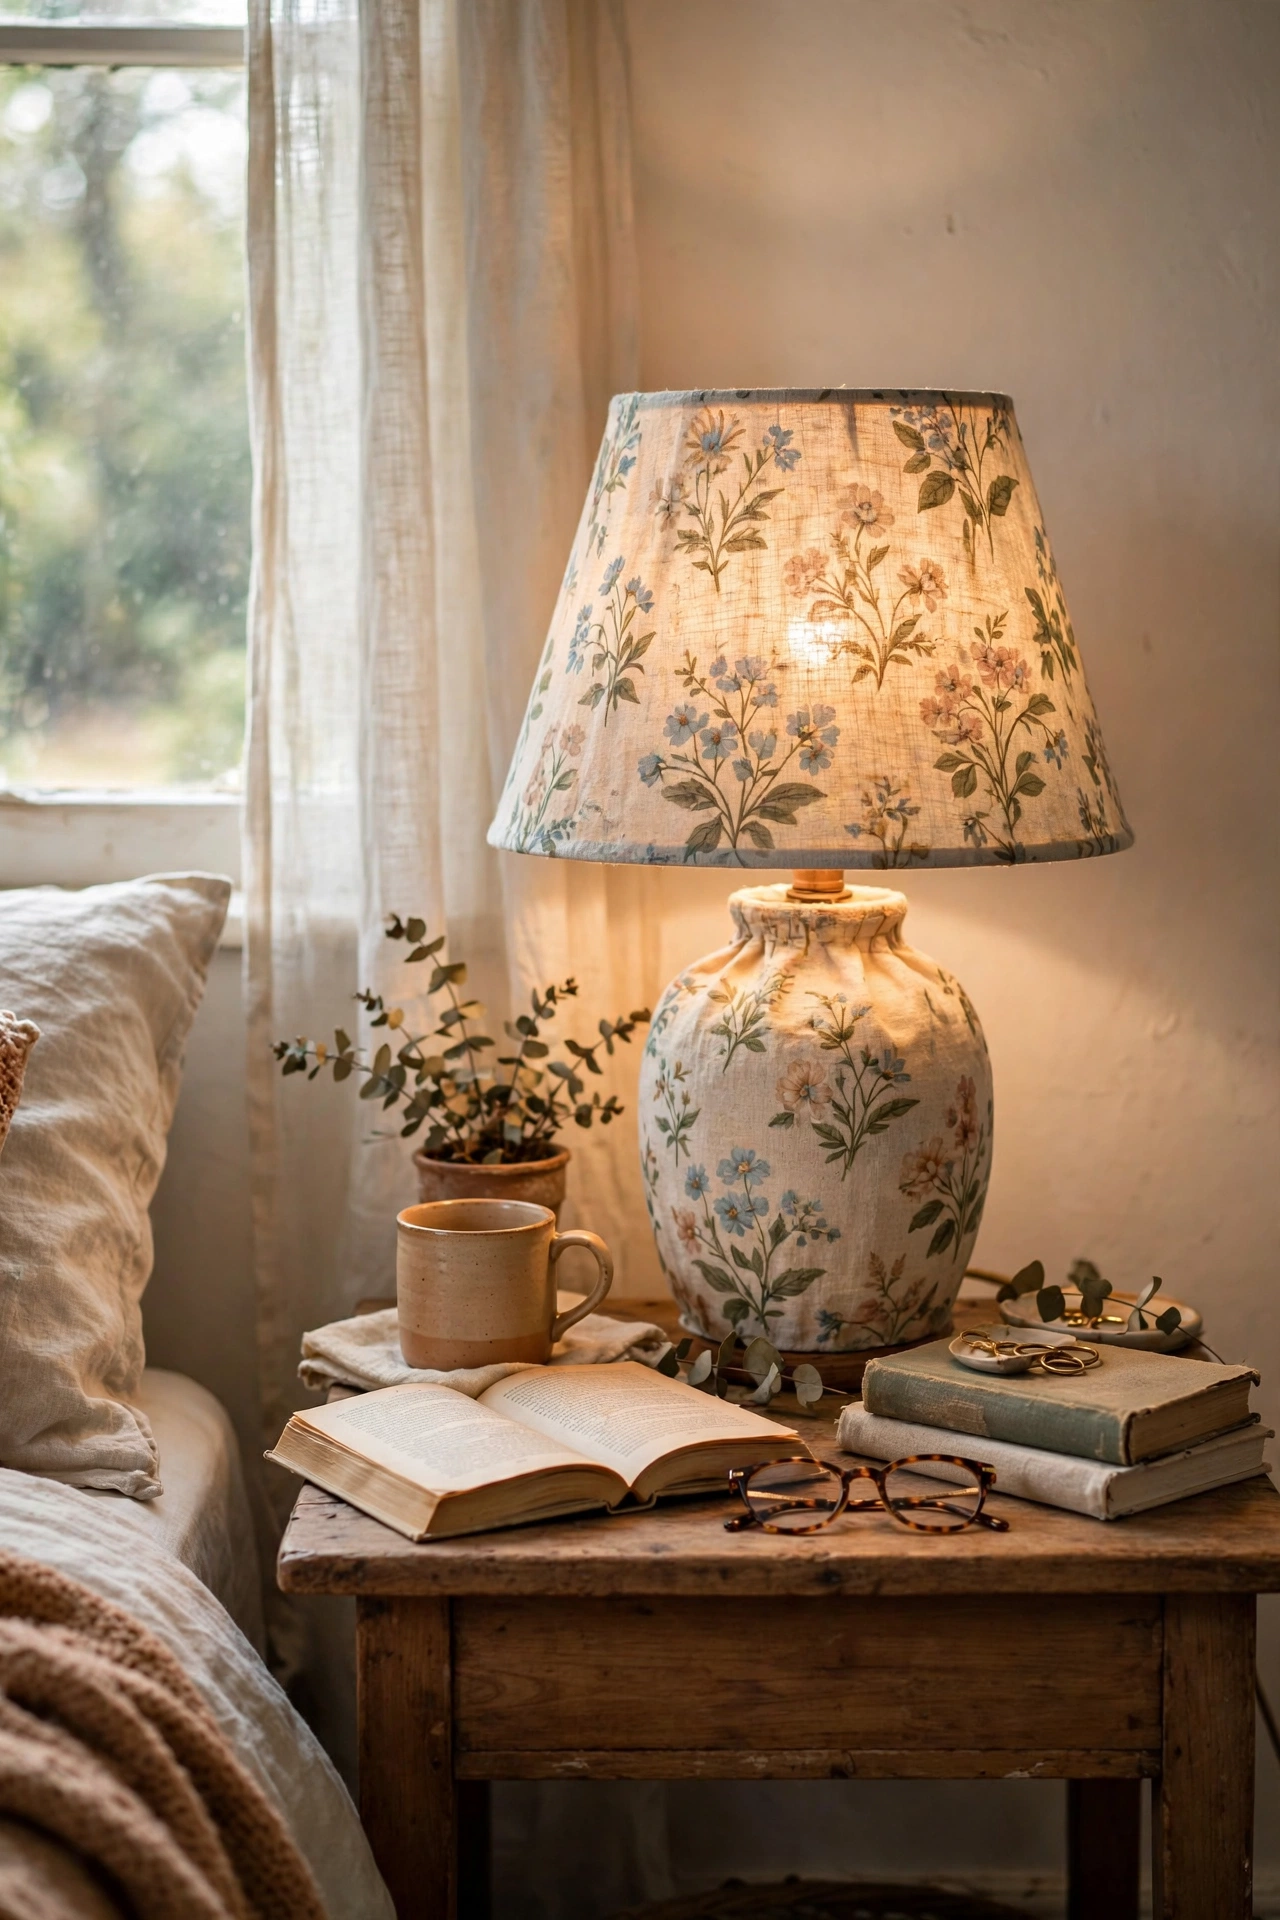
Recovering a lampshade with fabric is easier than it looks. Measure the shade, cut fabric an inch larger all round, spray the shade lightly with adhesive, and roll it on smoothly, folding the edges under at top and bottom. I used a remnant of floral linen on a plain white shade and it completely changed my bedroom corner. Don’t use thick upholstery fabric — light won’t pass through and you’ll get a dark, gloomy lamp. Medium-weight cotton or linen is the sweet spot.
Pro tip: iron the fabric before you start; wrinkles under adhesive are permanent.
Cost: ~$10 | Time: 1 hour
5. Concrete-Base Table Lamp
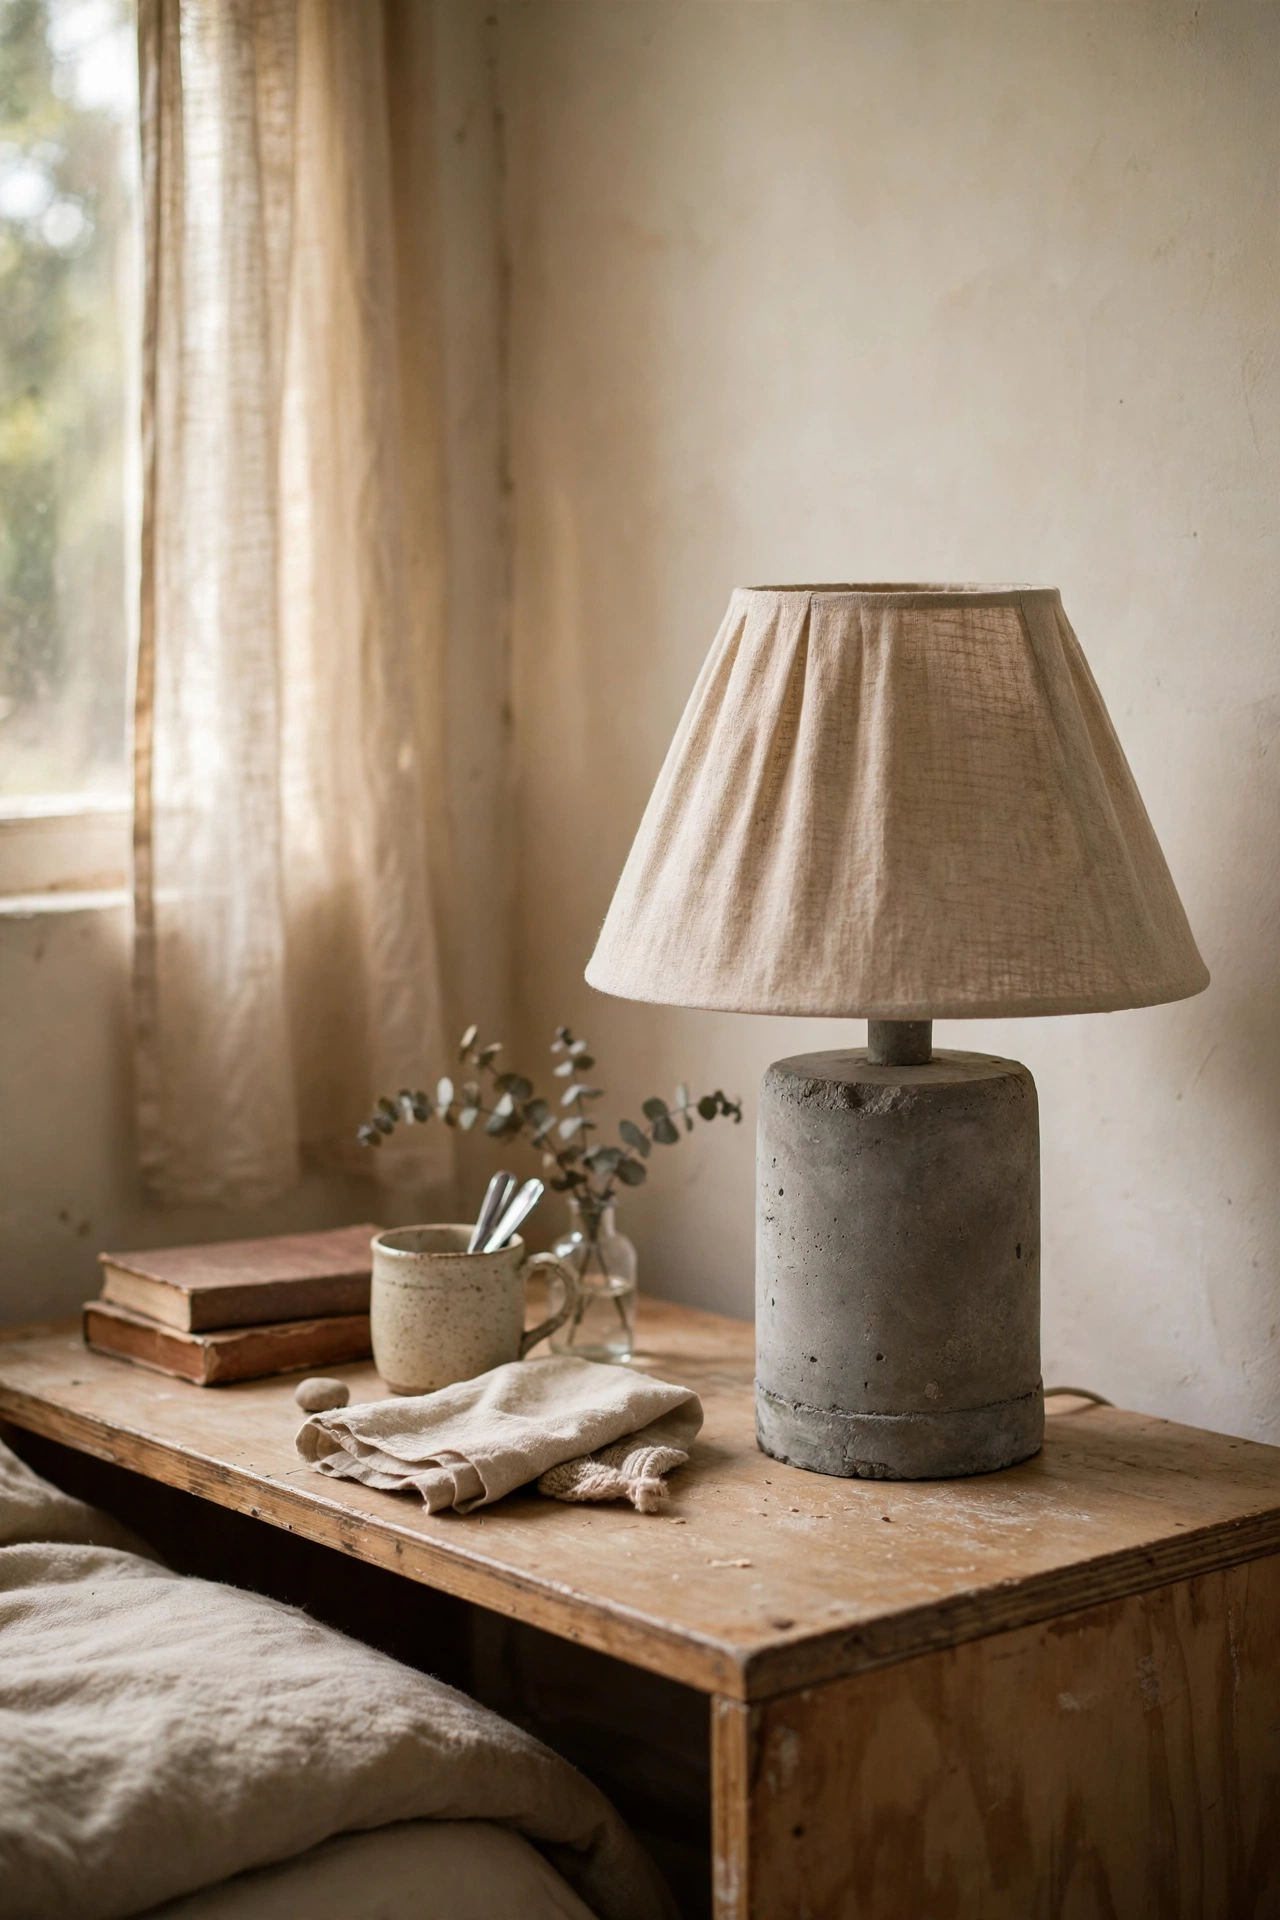
A concrete lamp base sounds industrial and expensive, but you can cast one for about $12. Pour quick-set concrete into a plastic food container as a mould, insert a bottle-lamp kit stem before it sets, and pop it out once cured. Sand the edges smooth and seal with concrete sealer. I made a pair for my bedside tables and the weight and texture feel genuinely high-end. My first attempt I used the lamp kit after the concrete set — drill it in beforehand while the mix is wet, or you’ll be drilling cured concrete.
Pro tip: add a drop of grey or black concrete pigment to the mix for a designer charcoal finish.
Cost: ~$16 | Time: 1 hour plus curing overnight
6. Bottle Lamp Conversion Kit
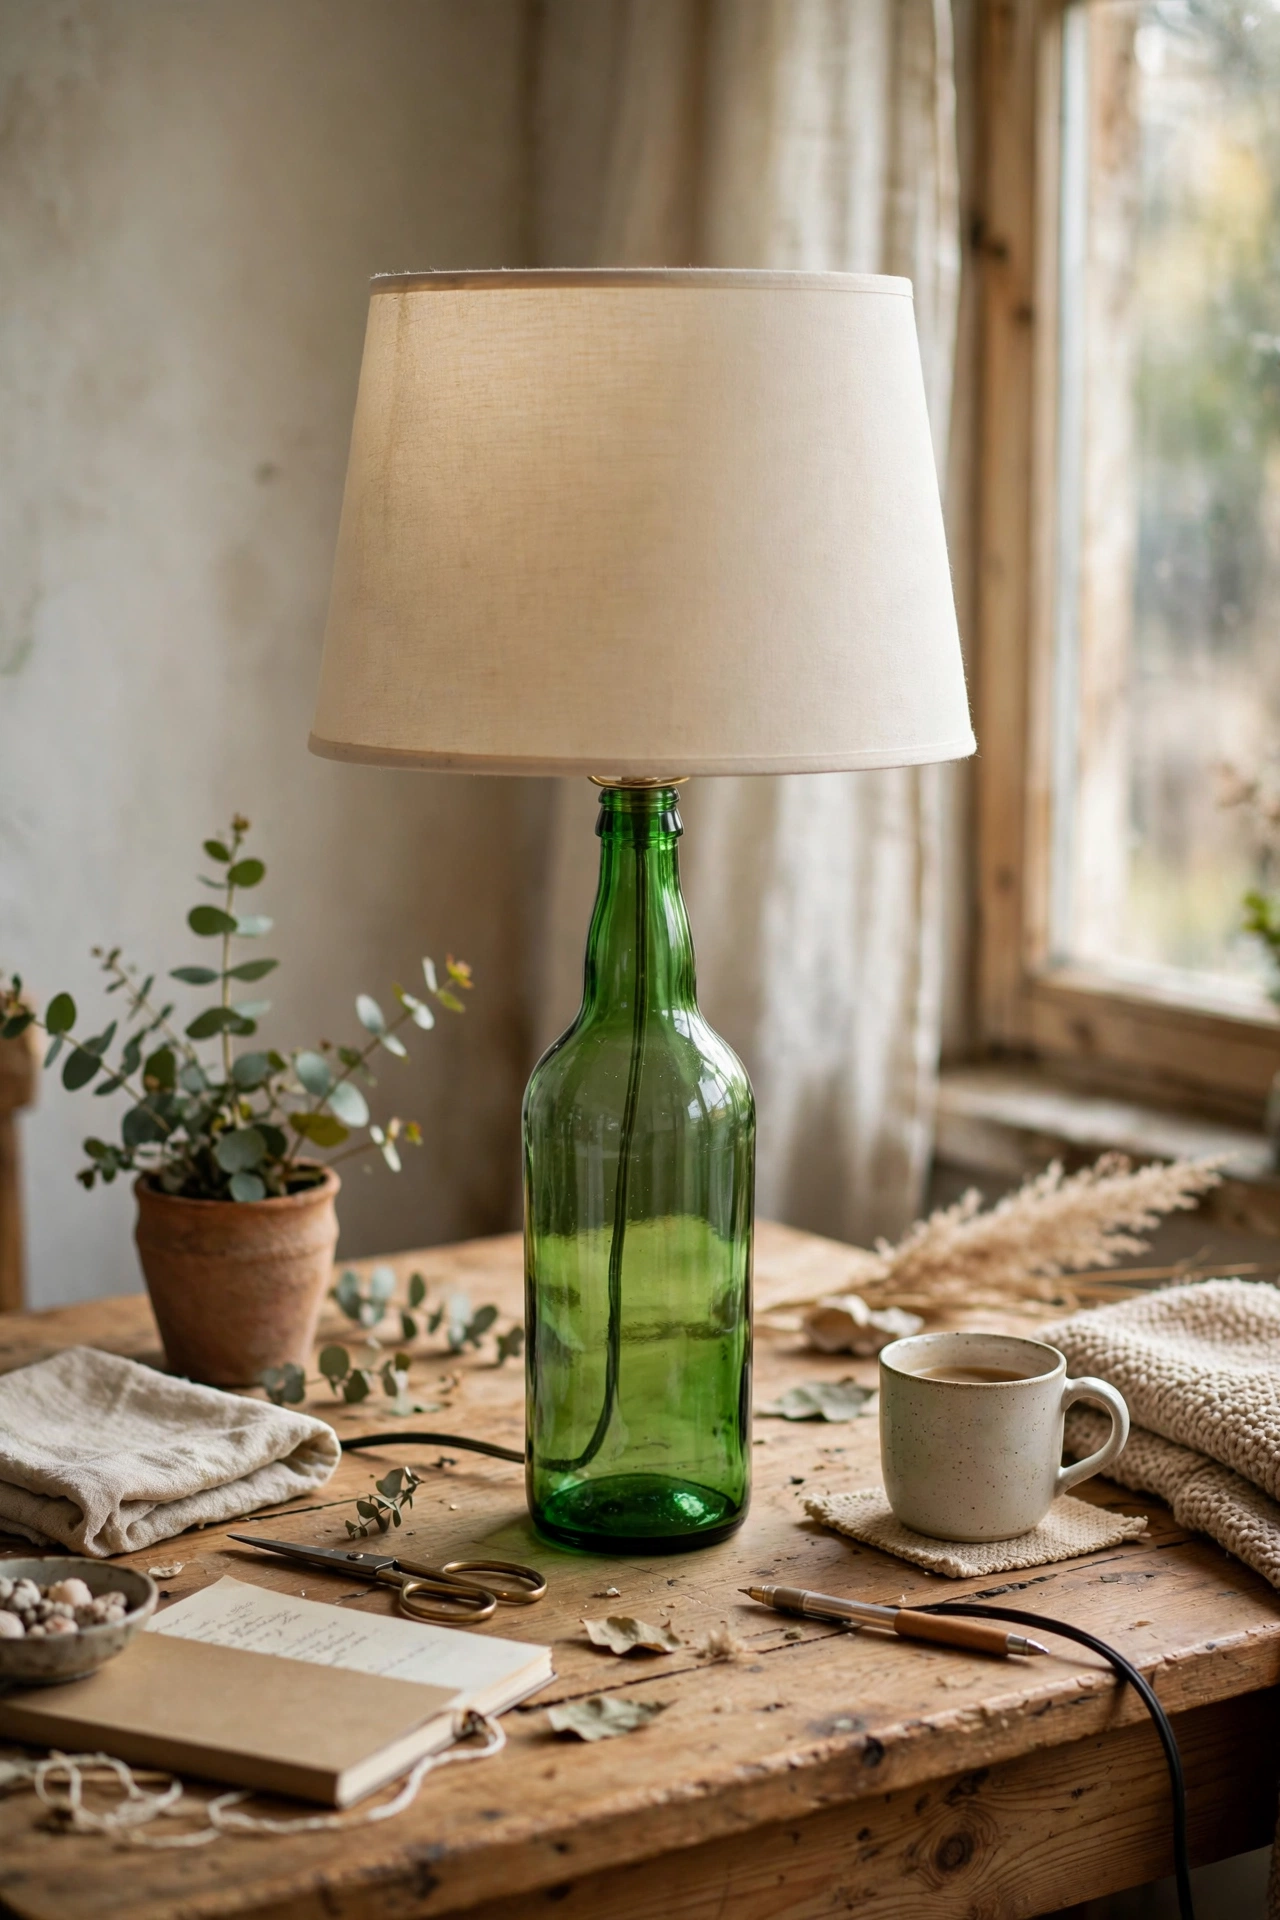
Any sturdy bottle — wine, olive oil, even a pretty old milk bottle — becomes a lamp with a bottle-lamp kit. The kit includes a drilled rubber stopper, socket, and cord; you just feed the cord through and assemble. I converted a green glass bottle I couldn’t throw away and it’s now my favourite reading lamp. Pick a bottle with a wide, stable base; narrow bottles tip over with a shade on top. Pair it with a small drum shade in a complementary colour.
Pro tip: fill clear bottles with dried beans, corks, or fairy lights for extra personality.
Cost: ~$15 | Time: 20 minutes
7. Natural Branch Floor Lamp
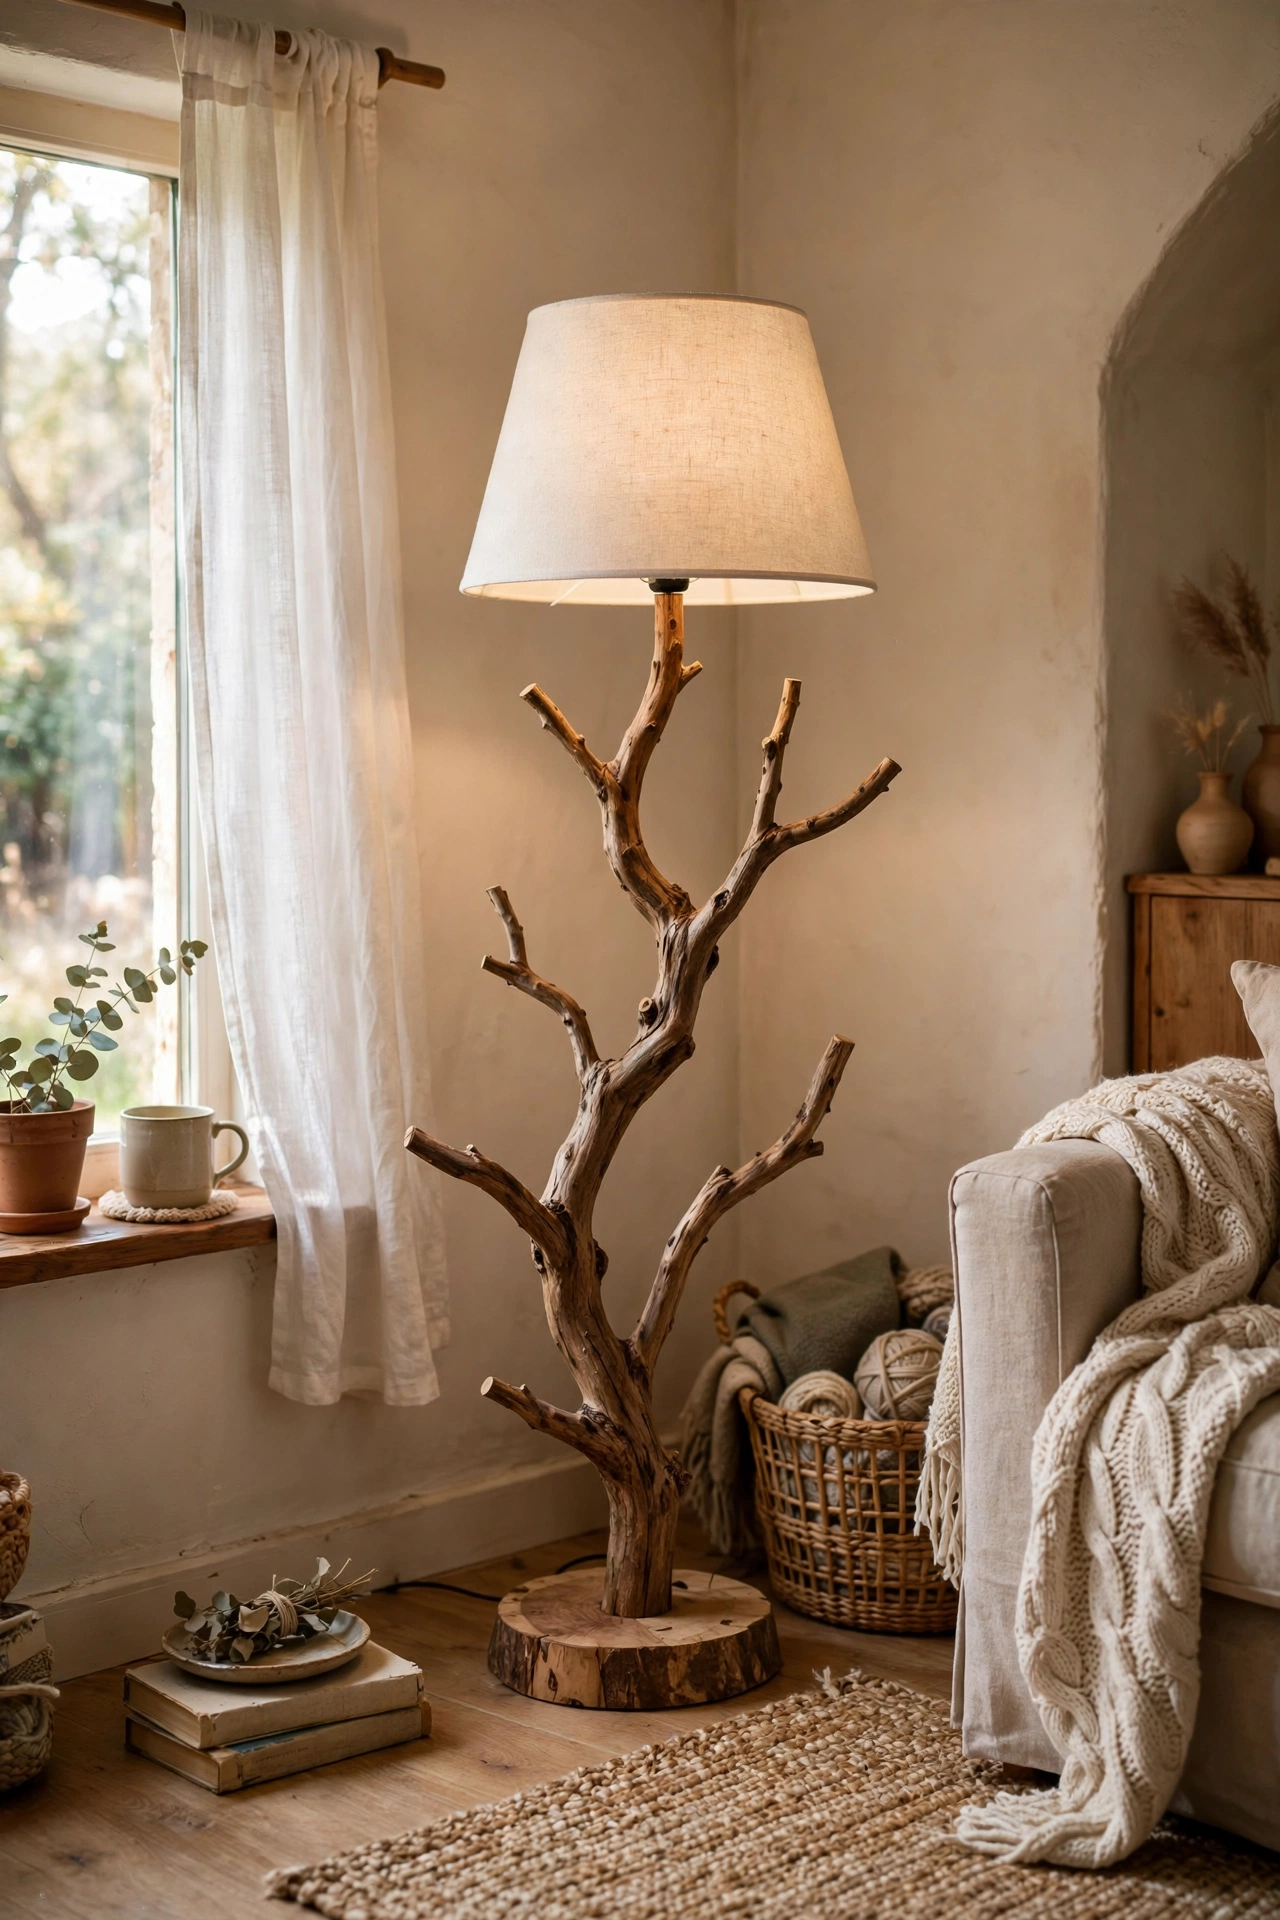
A sturdy fallen branch mounted on a heavy wooden base makes a sculptural floor lamp. Find a branch with interesting shape, strip loose bark, sand it smooth, and screw it into a weighted base — a round wooden plaque with a hidden metal plate underneath works well. Run a lamp kit up the back with cable clips and top with a simple shade. I made one from a branch found on a walk and guests always ask where I bought it. Make sure the branch is fully dry before you start; green wood warps and splits as it dries indoors.
Pro tip: seal the branch with matte polyurethane to stop bark flaking onto your floors.
Cost: ~$20 | Time: 2 hours
8. Paper Lantern Cluster
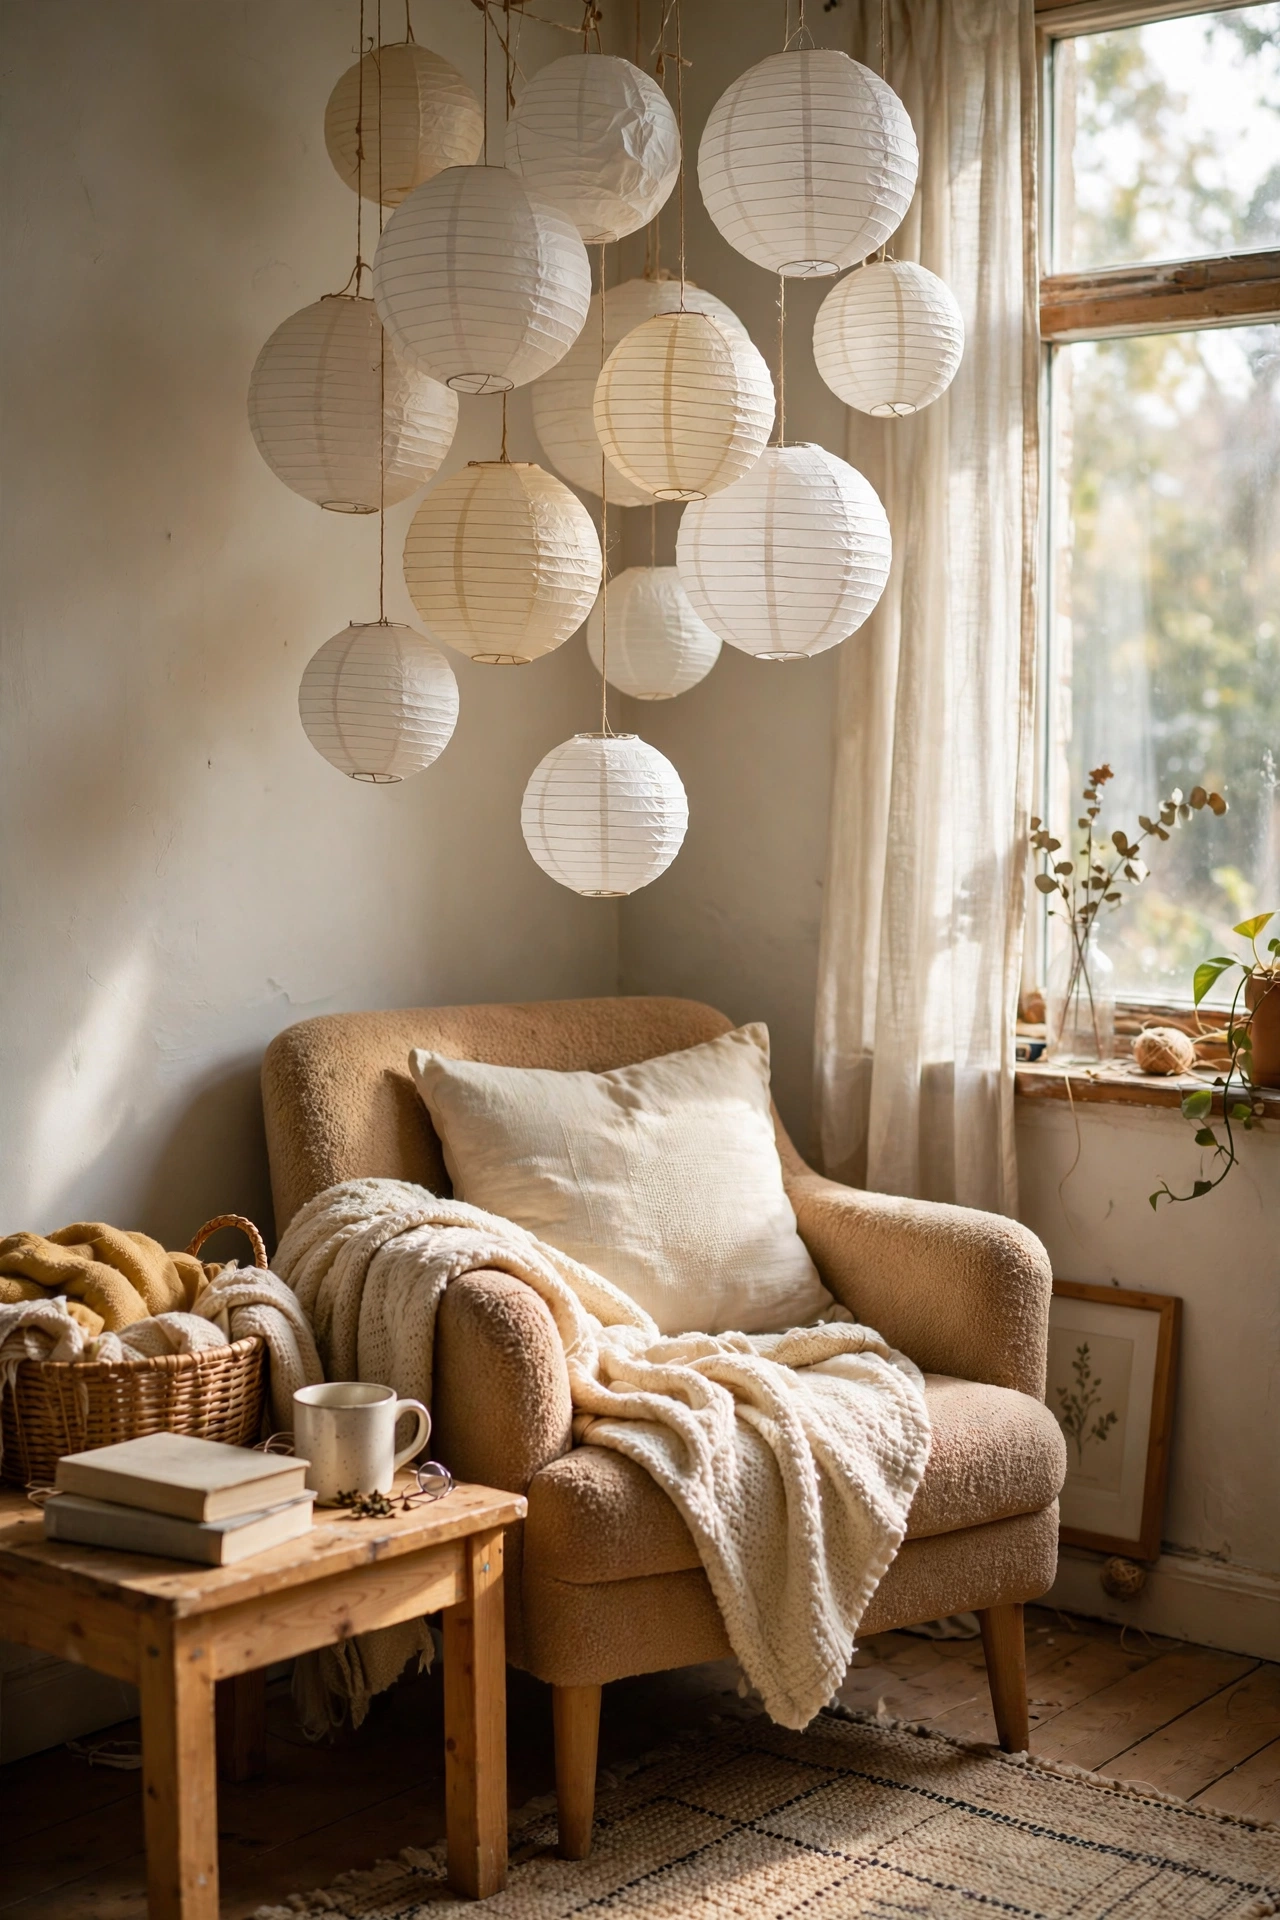
Hang three to five paper lanterns at different heights from the ceiling and you have an instant statement light. Use a multi-socket pendant cord or individual swag kits, and vary the lantern sizes for a collected look. I clustered white and cream lanterns over my reading corner and the soft, diffused light is perfect for evenings. Don’t hang them anywhere they’ll bump into doors or heads — measure your drop lengths against the tallest person in the house. LED bulbs keep the paper safe and cool.
Pro tip: add one lantern in a muted colour like sage or terracotta among the whites for depth.
Cost: ~$25 | Time: 1 hour
9. Macrame Pendant Shade
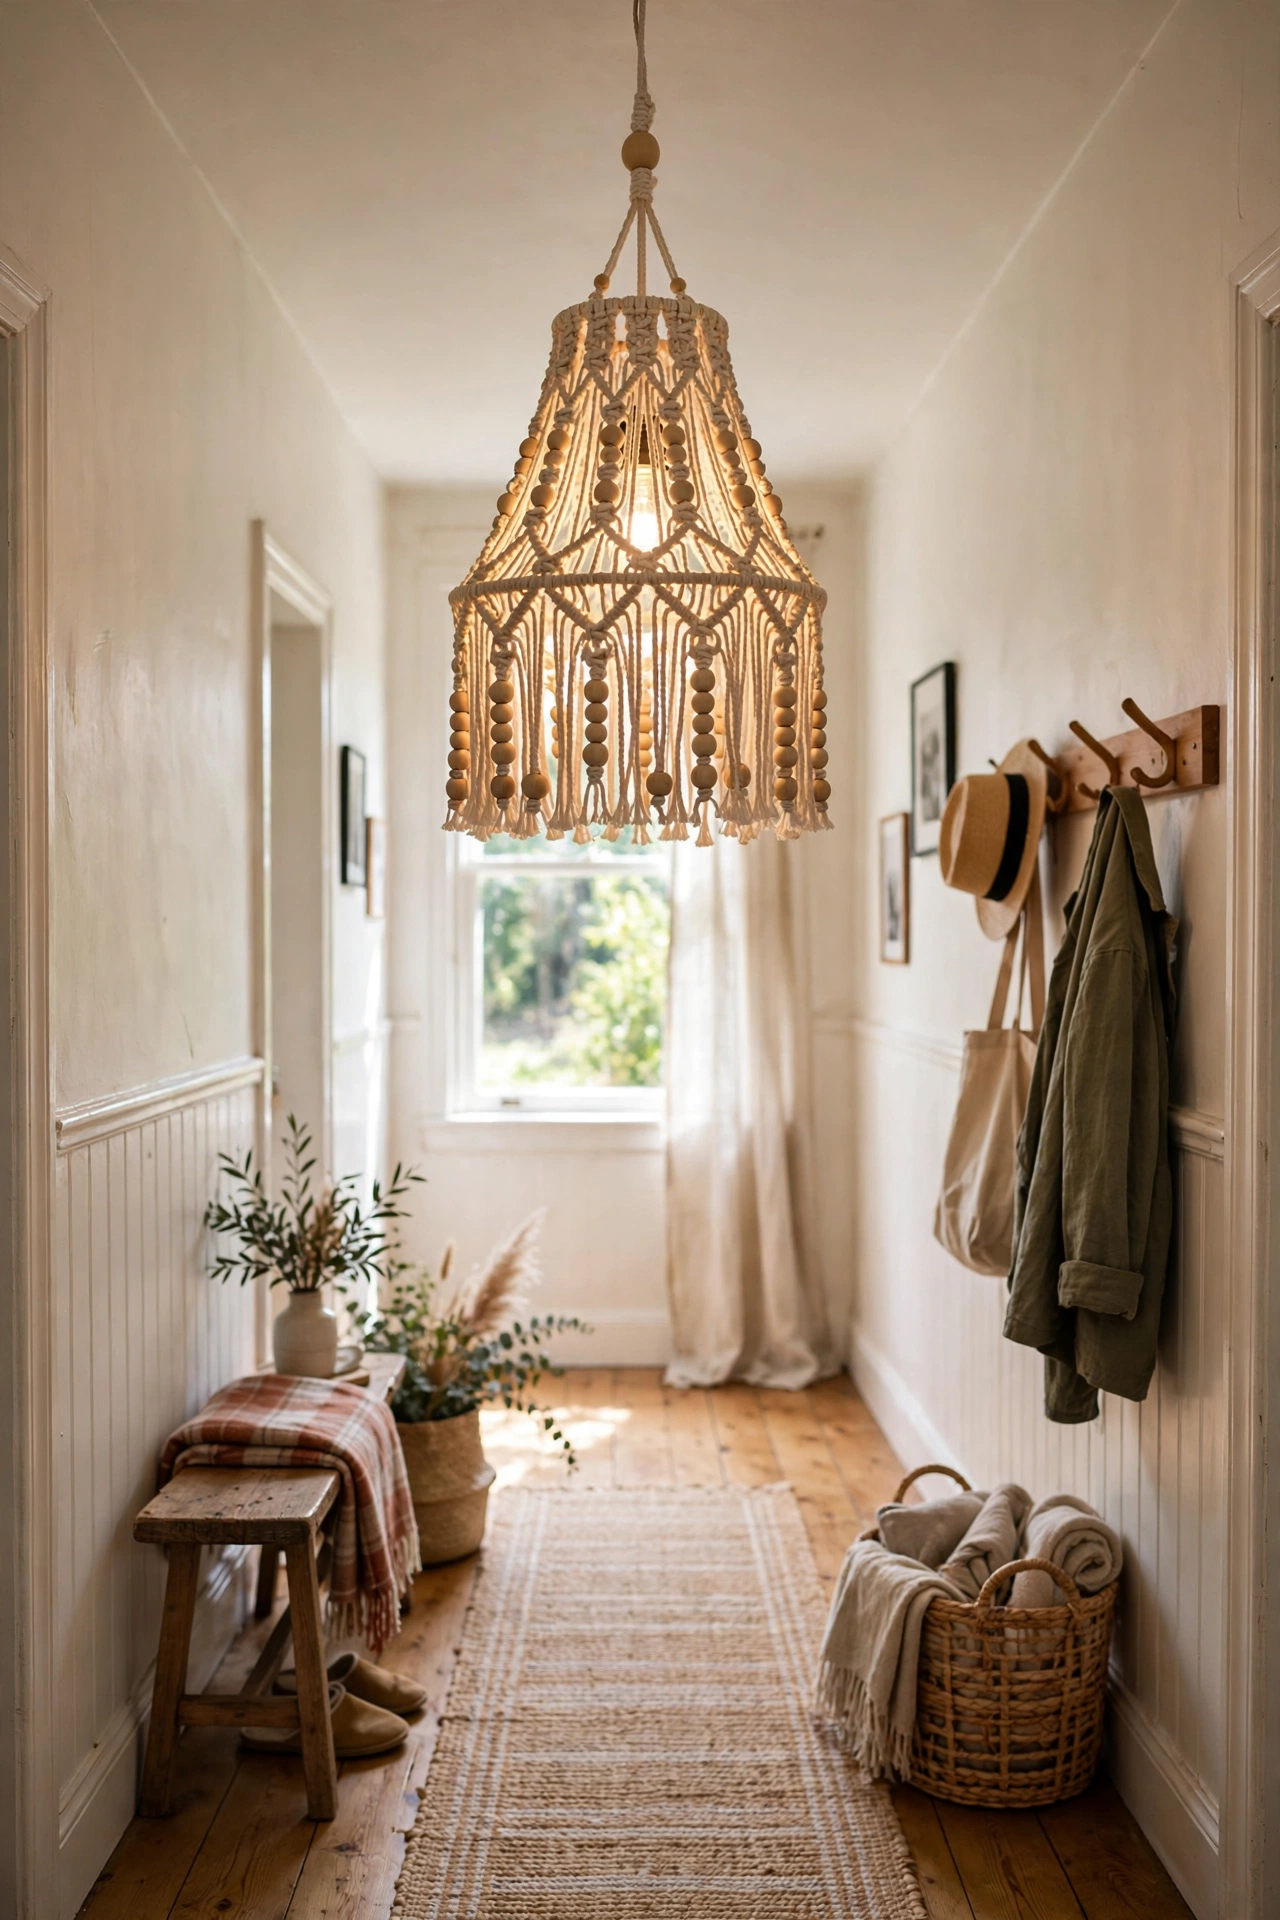
You don’t need to be a macrame expert for this — a simple net of square knots over a wire frame works beautifully. Tie cotton cord in a diamond pattern around a lampshade ring or an old shade frame, leaving the bottom open, and hang from a pendant kit. I made my first one following a twenty-minute tutorial and it now hangs in my hallway. Keep the knots even and the cord tension consistent; loose, uneven knots are what make beginners’ macrame look messy. Wooden beads threaded on a few cords add a lovely finish.
Pro tip: use 3mm cotton cord — thinner tangles, thicker looks chunky and blocks too much light.
Cost: ~$14 | Time: 2–3 hours
10. Copper Pipe Table Lamp
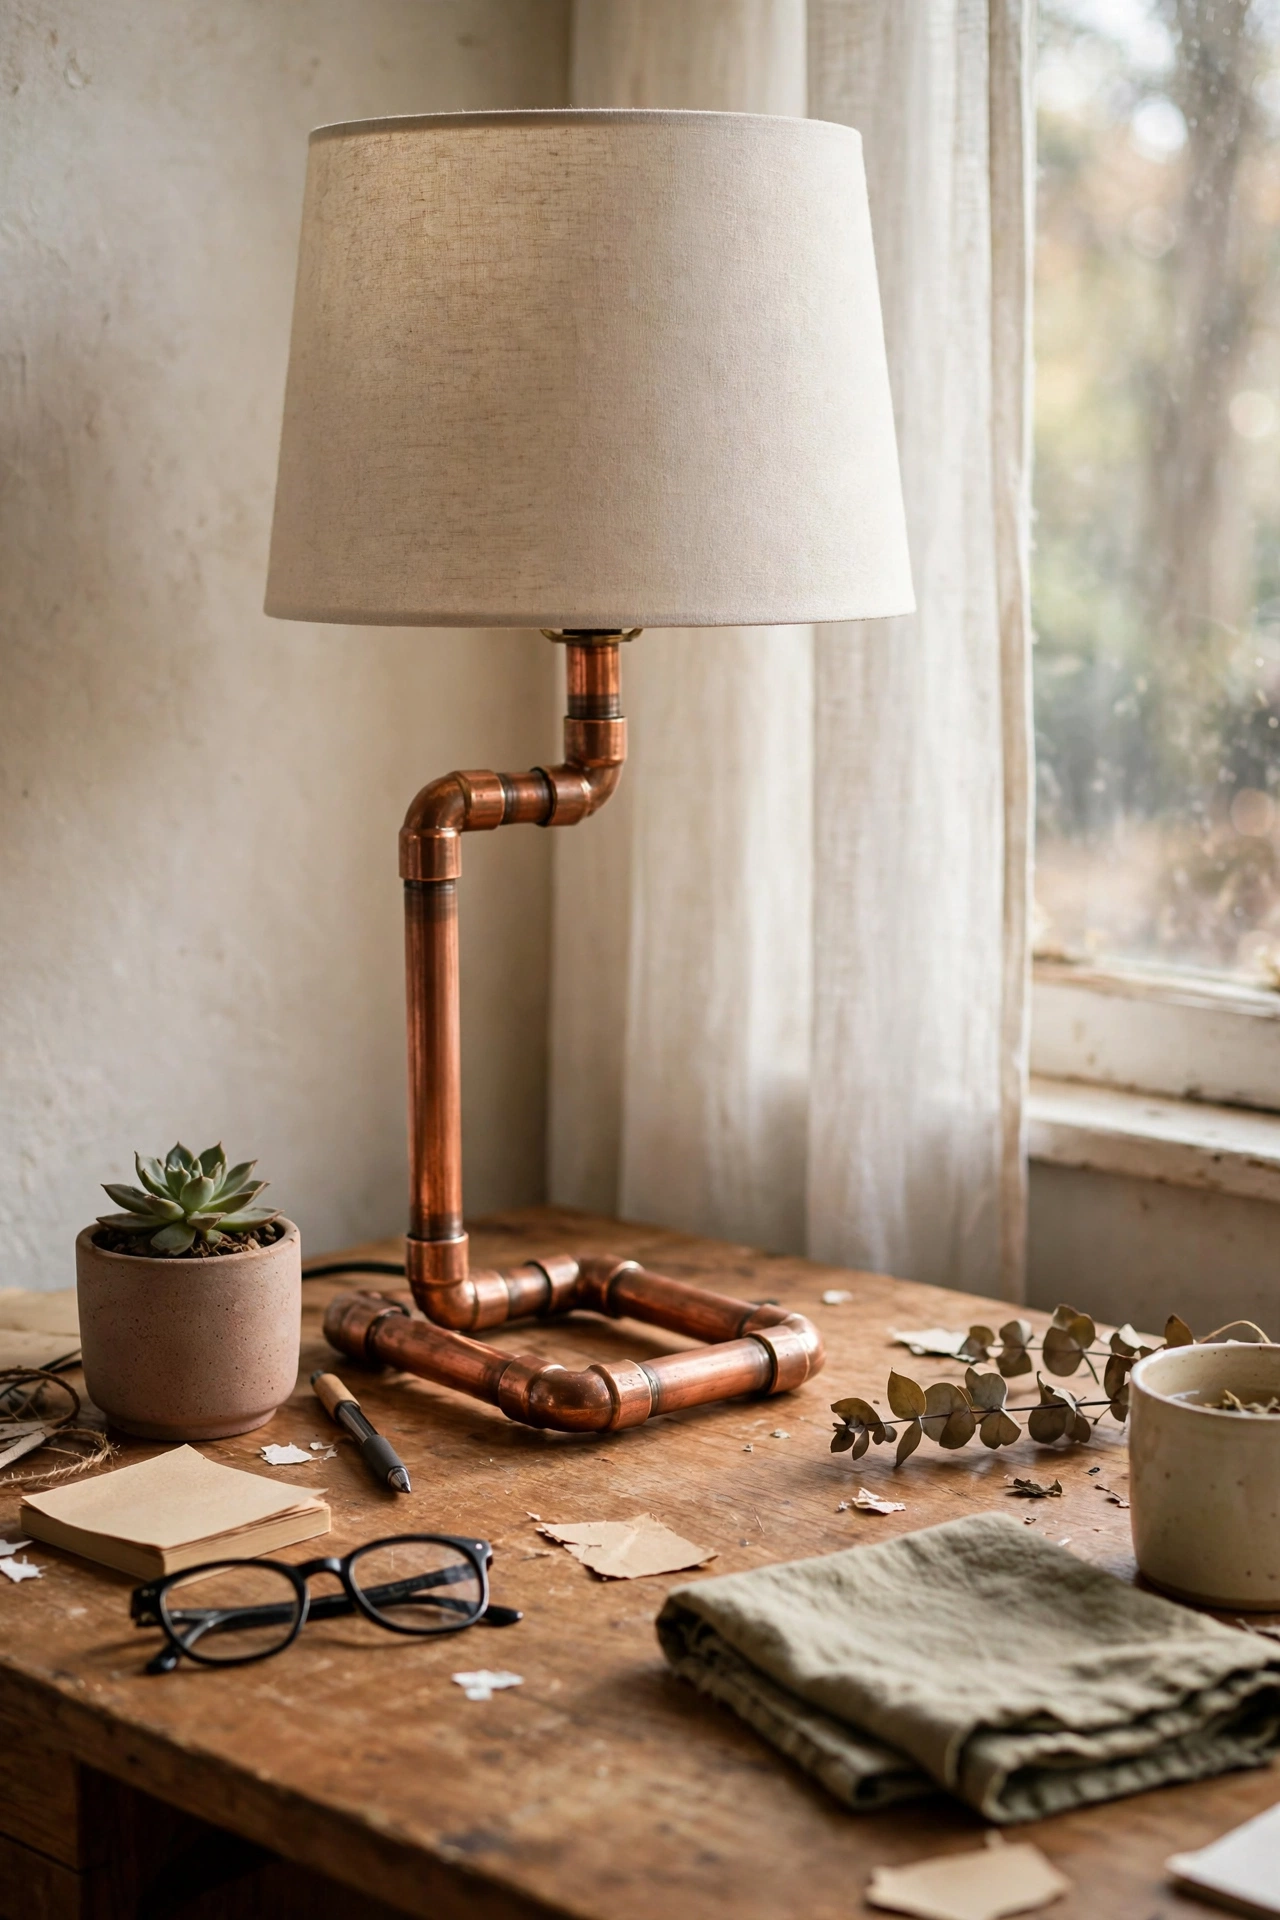
Copper pipe fittings from the plumbing aisle make a striking modern lamp base. Connect elbows and straight lengths into an L or tripod shape — push-fit fittings mean no soldering — mount on a small wooden base, thread a lamp kit through, and top with a simple shade. I built one for my desk and the warm copper against the wood looks far more expensive than it was. Dry-fit everything before you commit; copper fittings grip hard once pushed together and are a pain to pull apart.
Pro tip: polish the copper with vinegar and salt, then seal with clear lacquer so it keeps its shine.
Cost: ~$28 | Time: 1.5 hours
11. Rattan-Wrap Shade Update
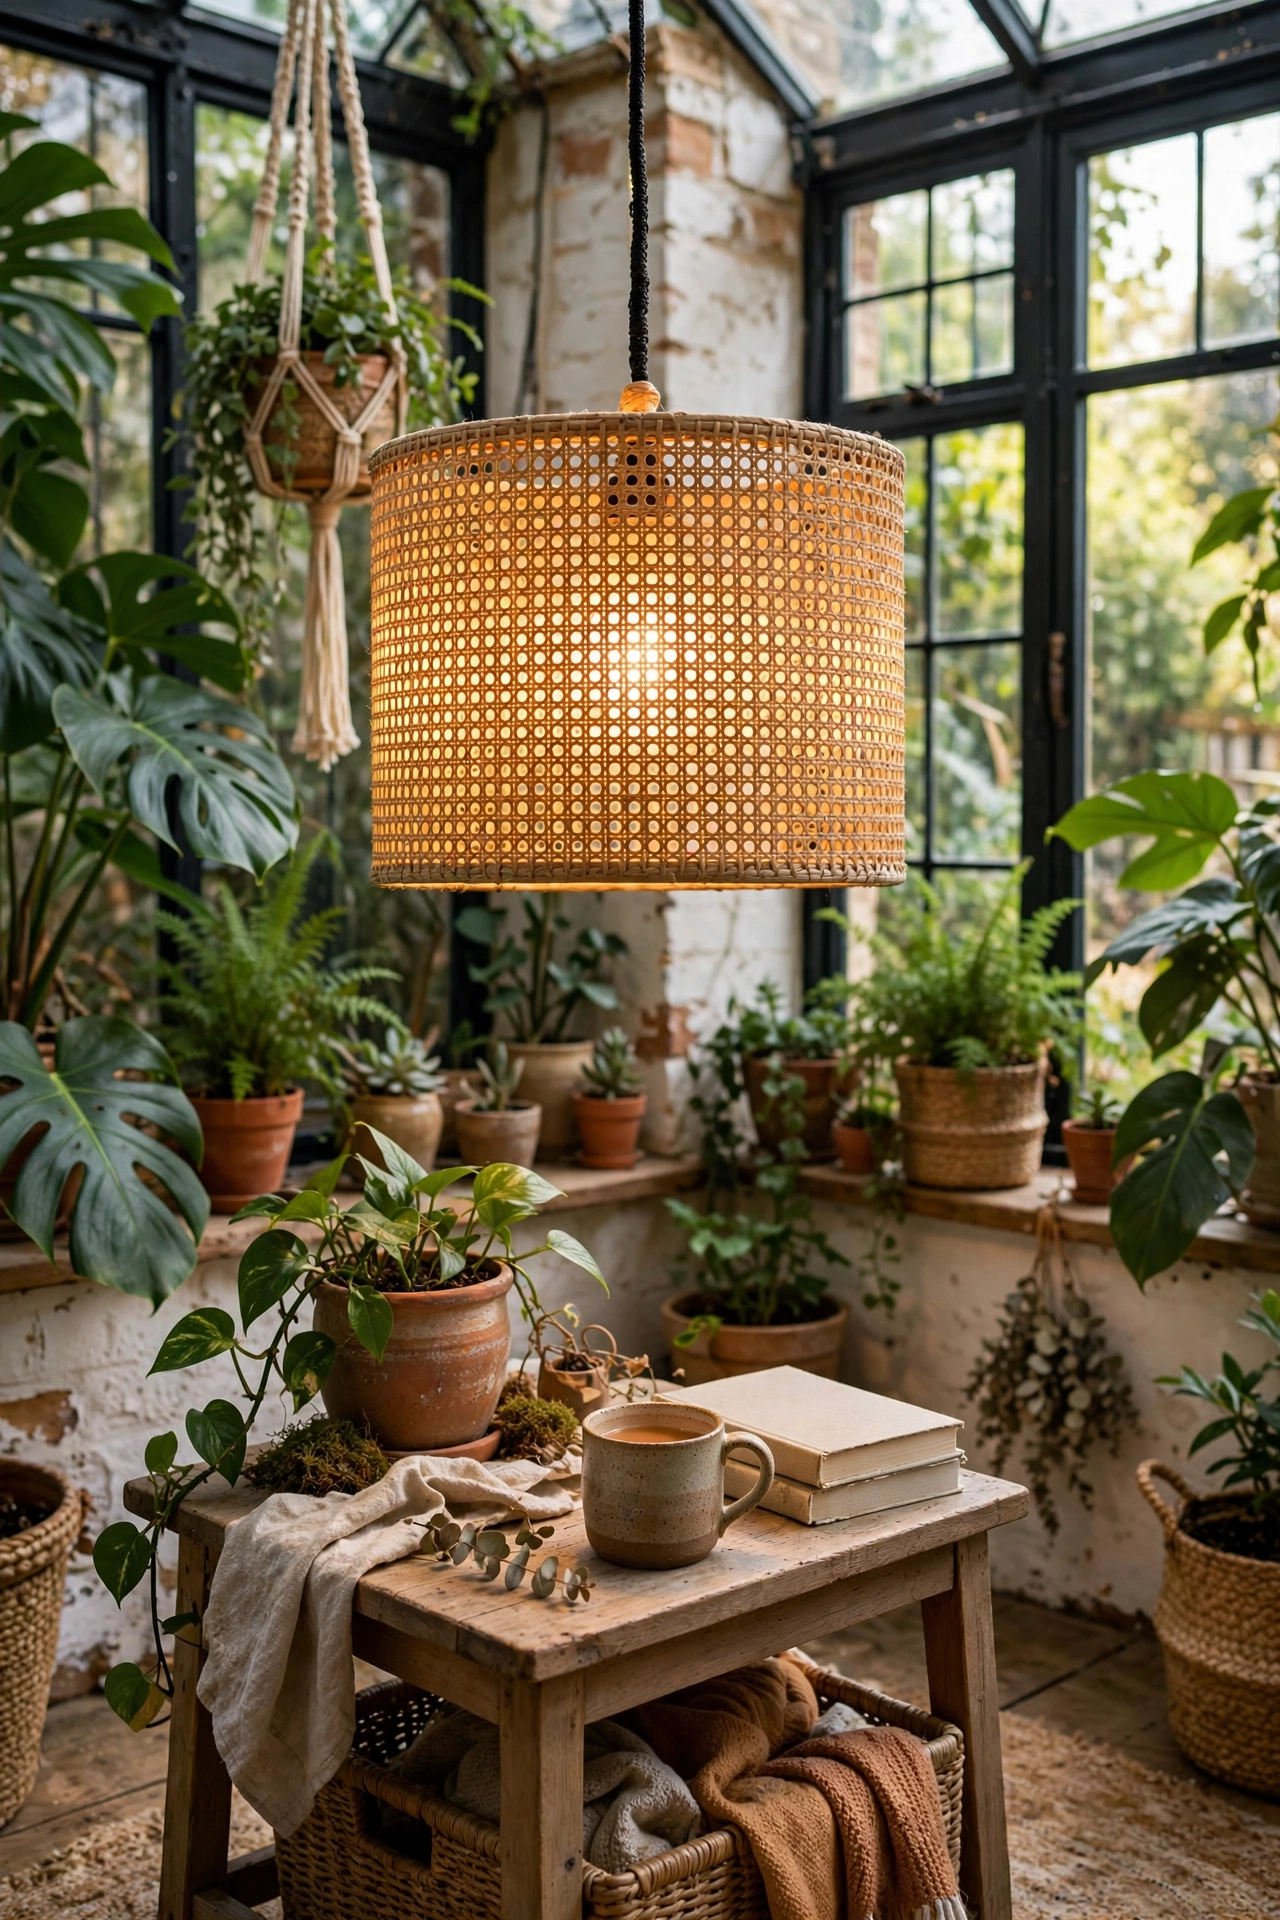
Wrap a plain drum shade with cane webbing or thin rattan strips for an instant rattan-look lamp. Cut the webbing to the shade’s circumference, glue the seam at the back, and trim top and bottom edges neatly. I updated a tired white shade in my conservatory this way and it reads as a proper rattan piece. Soak the cane webbing in warm water for twenty minutes first — it becomes pliable and moulds to the shade without cracking.
Pro tip: leave a thin band of the original shade visible at the top for a neat, finished edge.
Cost: ~$16 | Time: 45 minutes
12. Edison Bulb String Light Feature
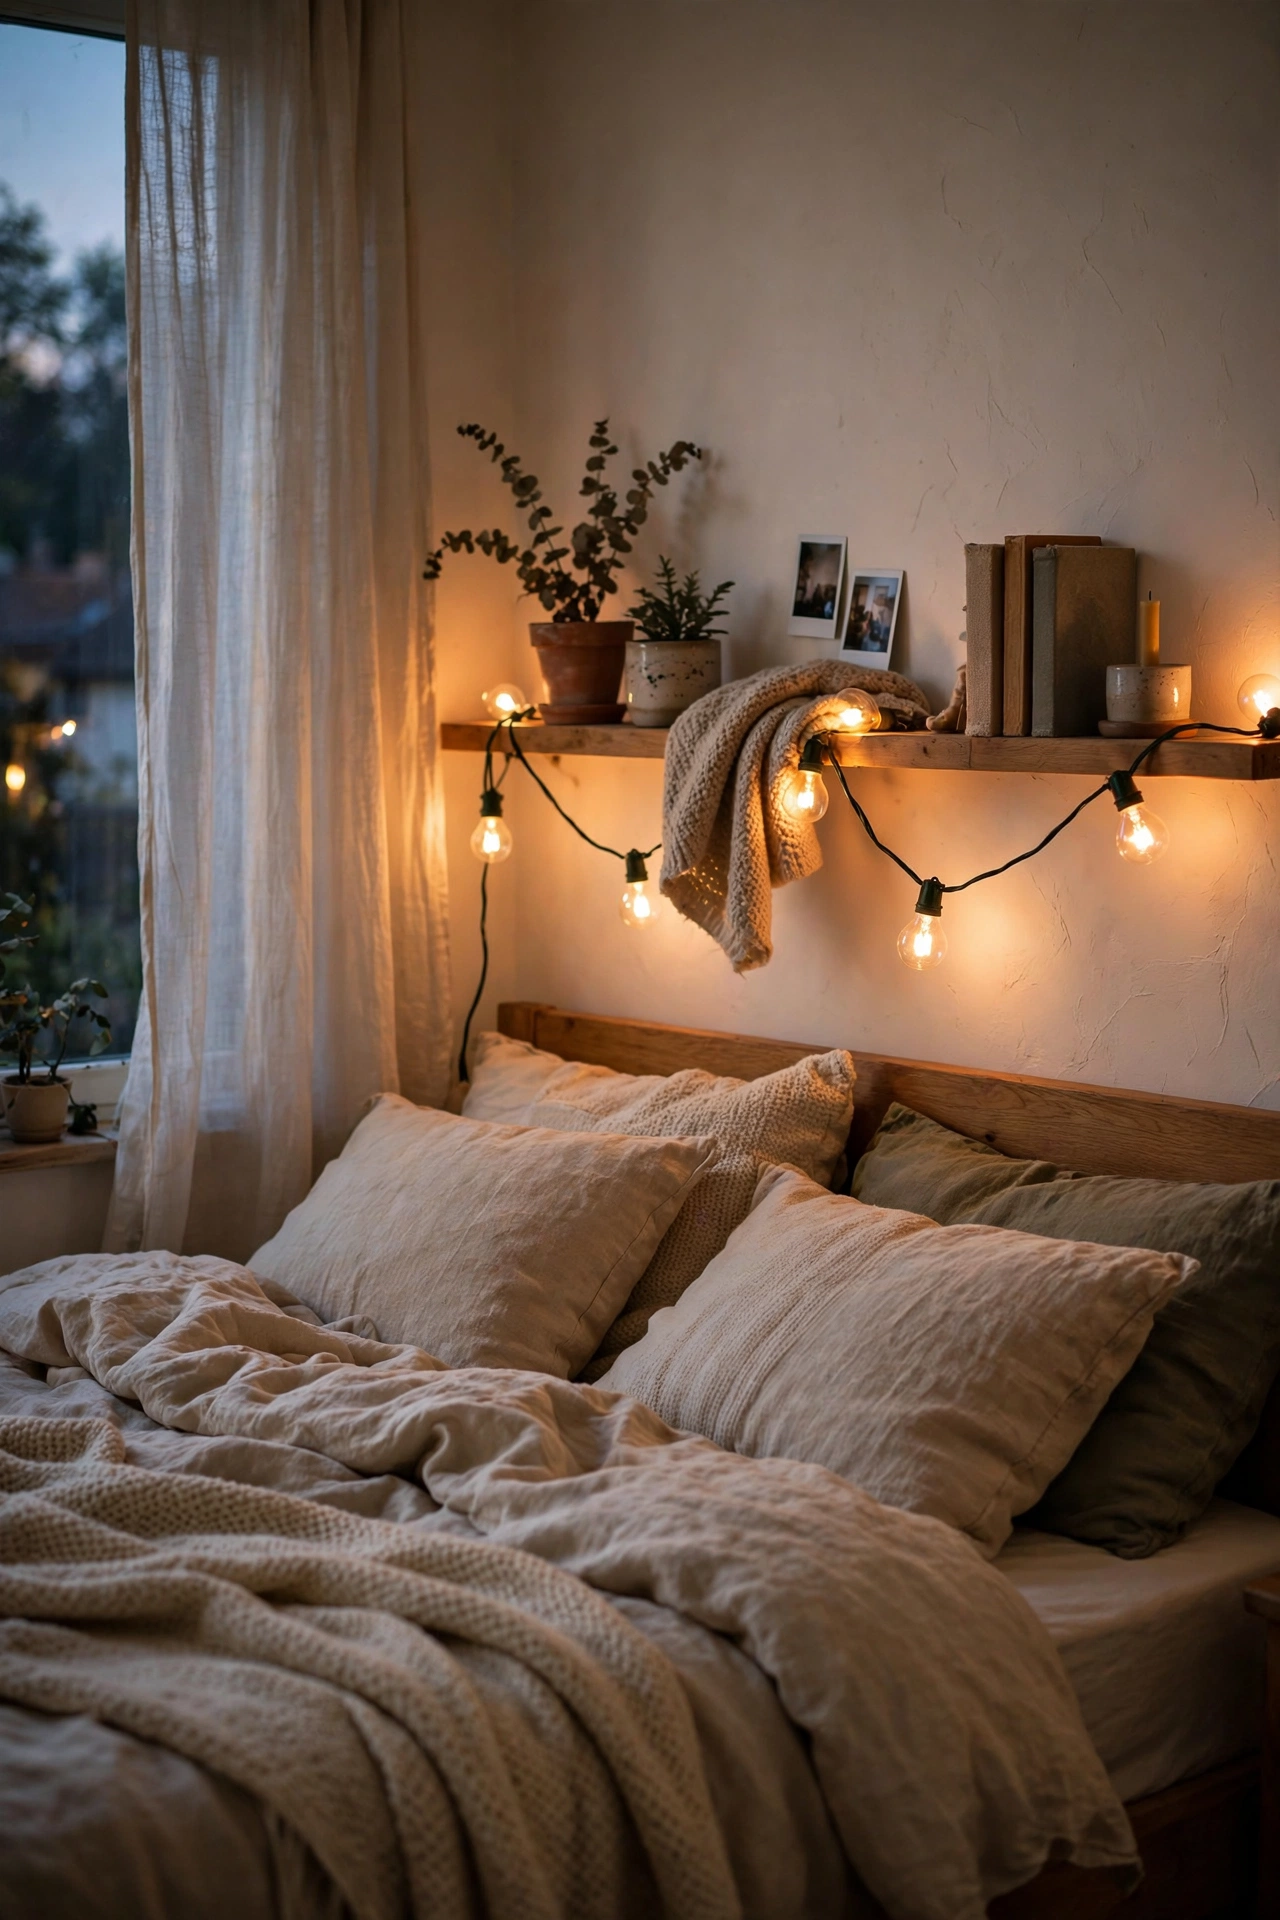
A string of Edison-style bulbs draped over a headboard, along a shelf, or across a bare wall is the easiest mood lighting there is. Buy a commercial-grade string with LED filament bulbs — the cheap fairy-light versions tangle and the bulbs die fast. I ran one along my bedroom picture ledge and it replaced my bedside lamp entirely. Don’t drape them where they’ll be yanked — use small clear hooks every couple of feet so the weight is supported.
Pro tip: choose warm white (2700K) bulbs; anything cooler kills the cosy Edison glow.
Cost: ~$24 | Time: 30 minutes
13. Wine Crate Table Lamp
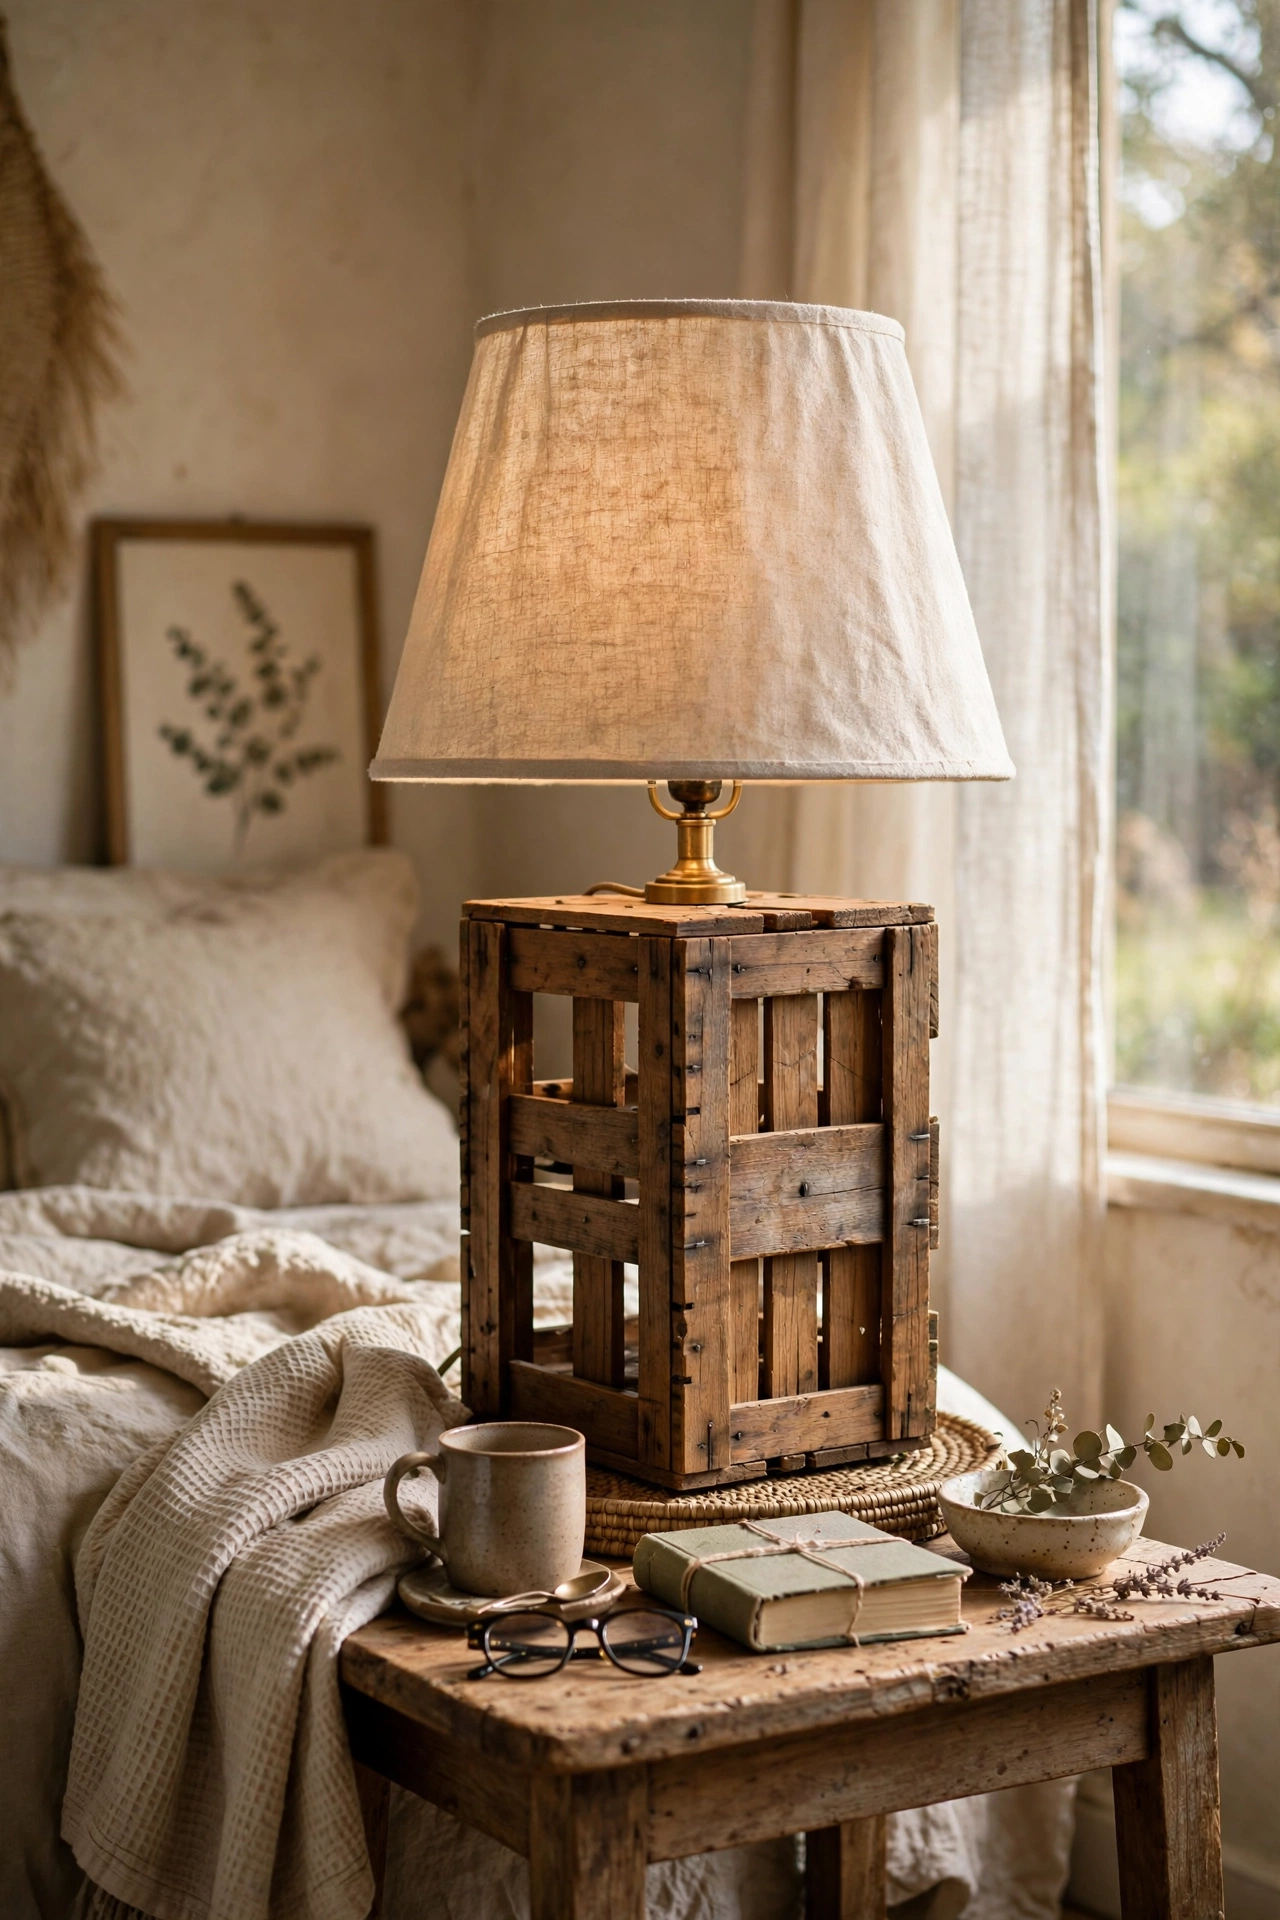
A wooden wine crate stood on end becomes a rustic lamp base with built-in character. Sand it, stain or whitewash it, drill a hole in the top for a lamp kit, and add a linen shade. The slatted sides let a little light through, which looks gorgeous in the evening. I made one for my guest room and visitors always comment on it. Check the crate is sturdy before you start — wobbly slats need a dab of wood glue first or the whole thing rattles.
Pro tip: line the inside with a piece of linen to diffuse the light glowing through the slats.
Cost: ~$18 | Time: 1 hour
14. Rice Paper Ball Refresh
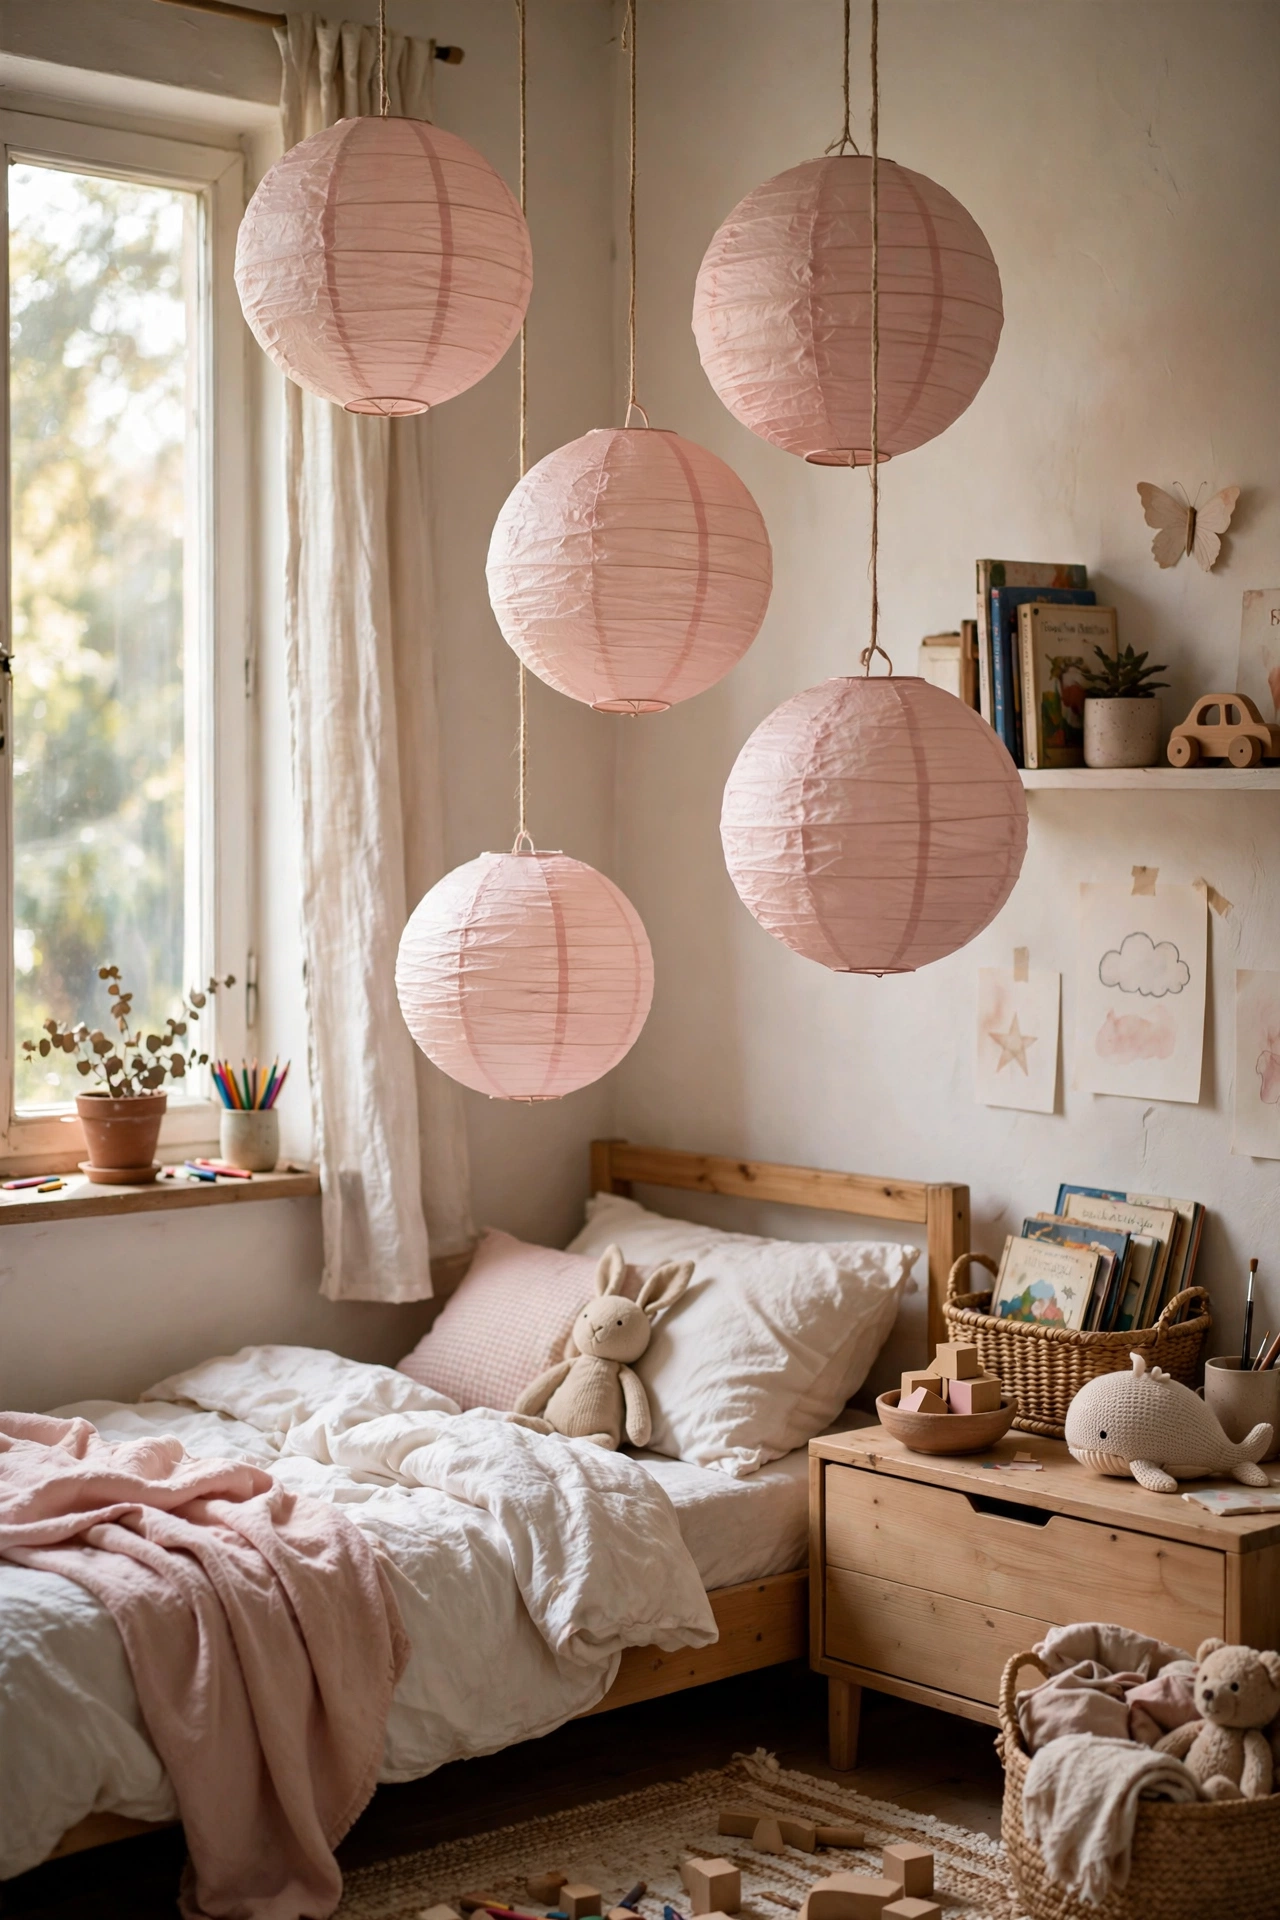
Those cheap rice paper ball lanterns get a bad reputation, but dressed up they’re genuinely lovely. Paint yours with watered-down acrylic in soft colour washes, add a fabric tassel at the bottom, or wrap the lower third in washi tape stripes. I colour-washed three in blush pink for my daughter’s room and they look boutique. Don’t use undiluted paint — it’s too heavy and the paper sags. A watery wash keeps the paper light and lets the glow through.
Pro tip: hang at three different heights in a corner to turn a forgotten spot into a feature.
Cost: ~$12 | Time: 45 minutes
15. Painted Ceramic-Look Base
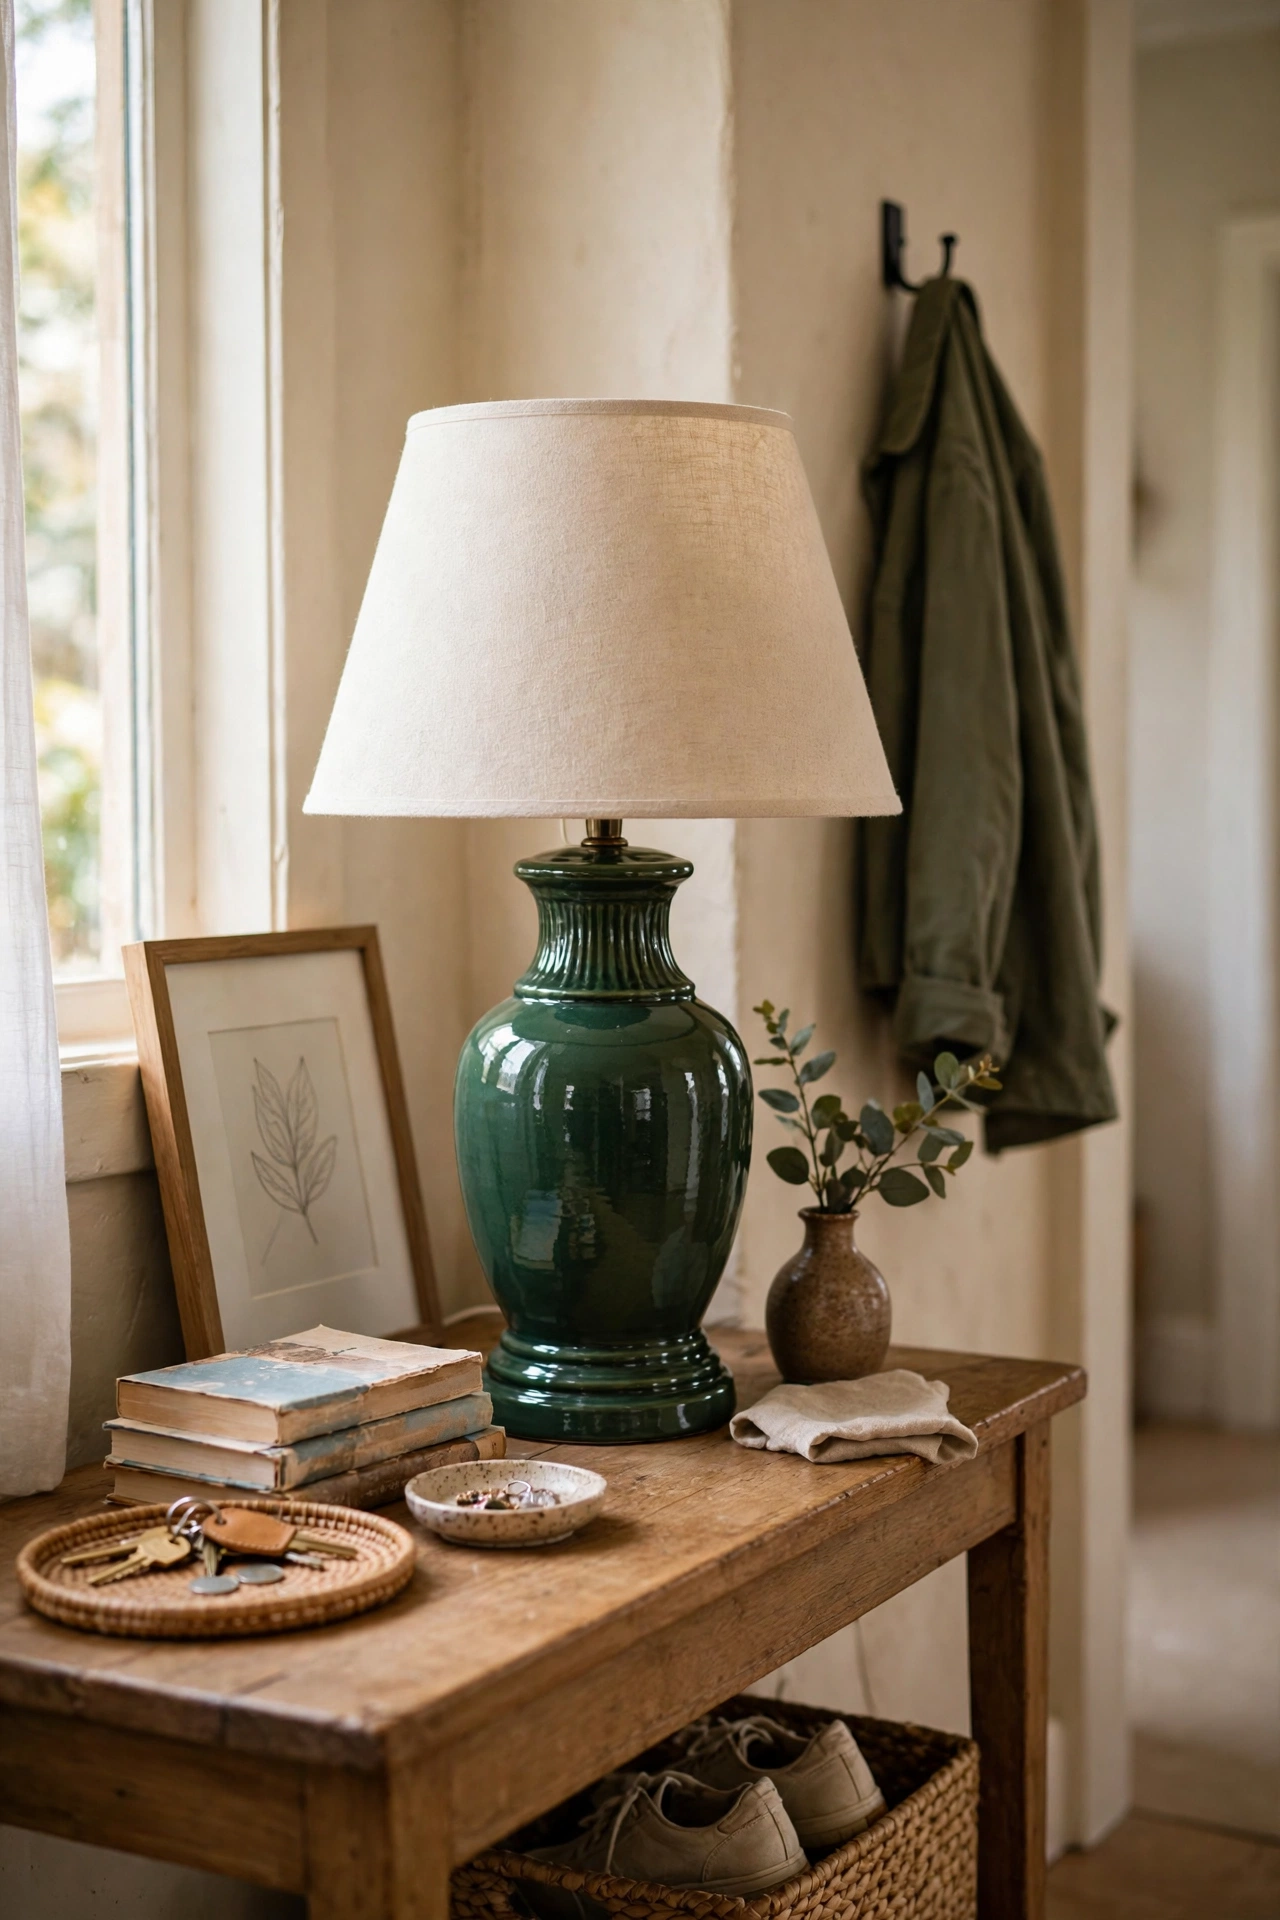
Give a plain lamp base a hand-glazed ceramic look with layered paint. Brush on a base coat, then dab on a second colour with a dry brush for texture, and finish with a high-gloss varnish. The gloss is what sells the ceramic illusion. I turned a scratched white charity-shop base into a deep green “glazed” lamp for my hallway console. Work in thin layers — thick paint drips on curved bases and ruins the effect. Two thin coats beat one thick one every time.
Pro tip: deep green, navy, or aubergine gloss reads most convincingly as glazed ceramic.
Cost: ~$11 | Time: 1 hour plus drying
16. Terracotta Pot Table Lamp
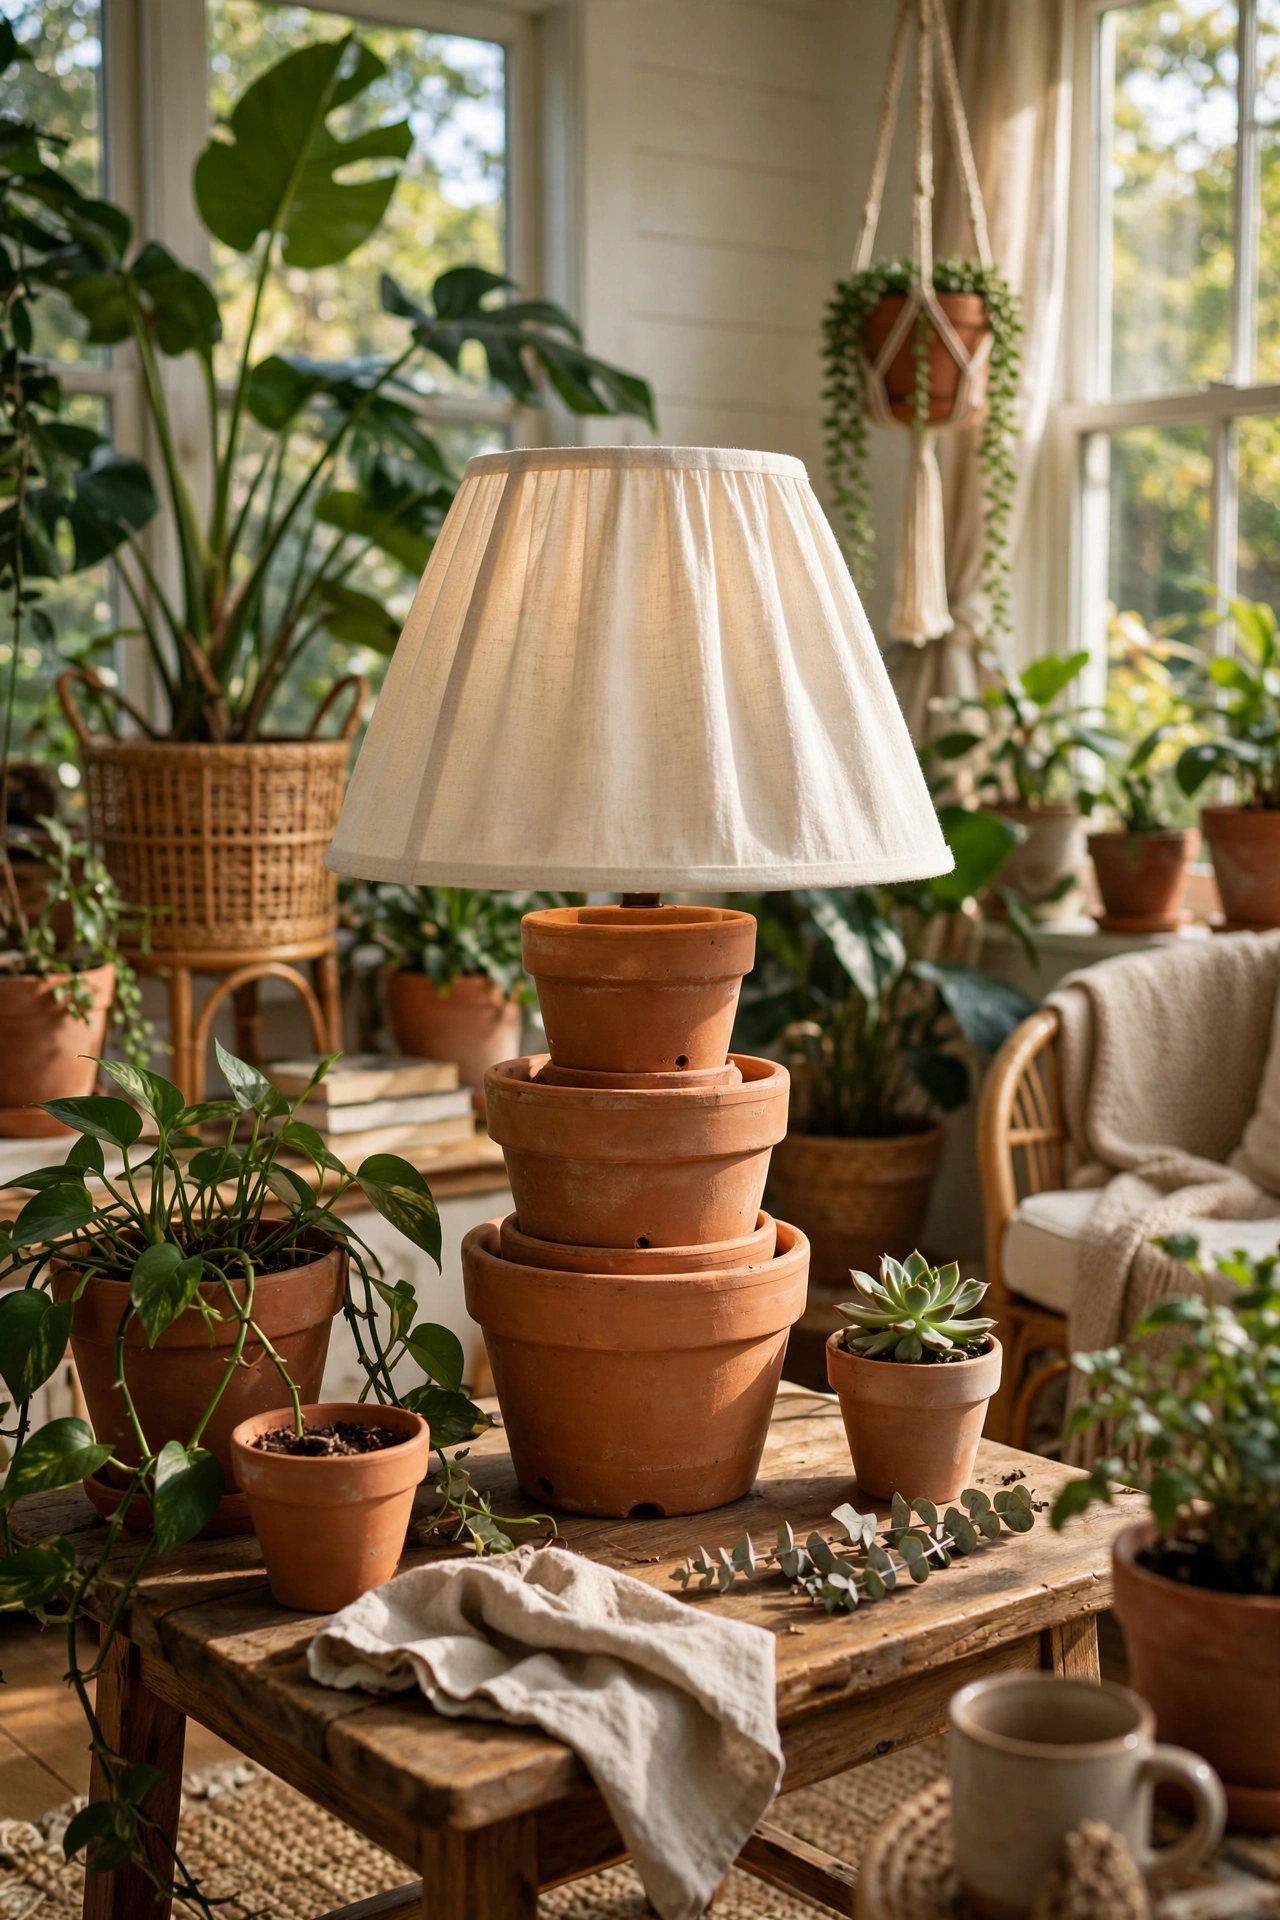
Stack two terracotta pots — one inverted as the base, one upright on top — thread a lamp kit through the drainage holes, and you have an earthy, handmade-look lamp. Paint the pots or leave them natural; both look great. I made a pair for my sunroom in natural terracotta and they suit the plants perfectly. The drainage holes are rarely centred, so use a rubber grommet to keep the cord from rubbing against sharp ceramic edges.
Pro tip: glue a felt pad under the base pot to protect surfaces and stop scratching.
Cost: ~$14 | Time: 45 minutes
17. Dried Flower Fairy-Light Cloche
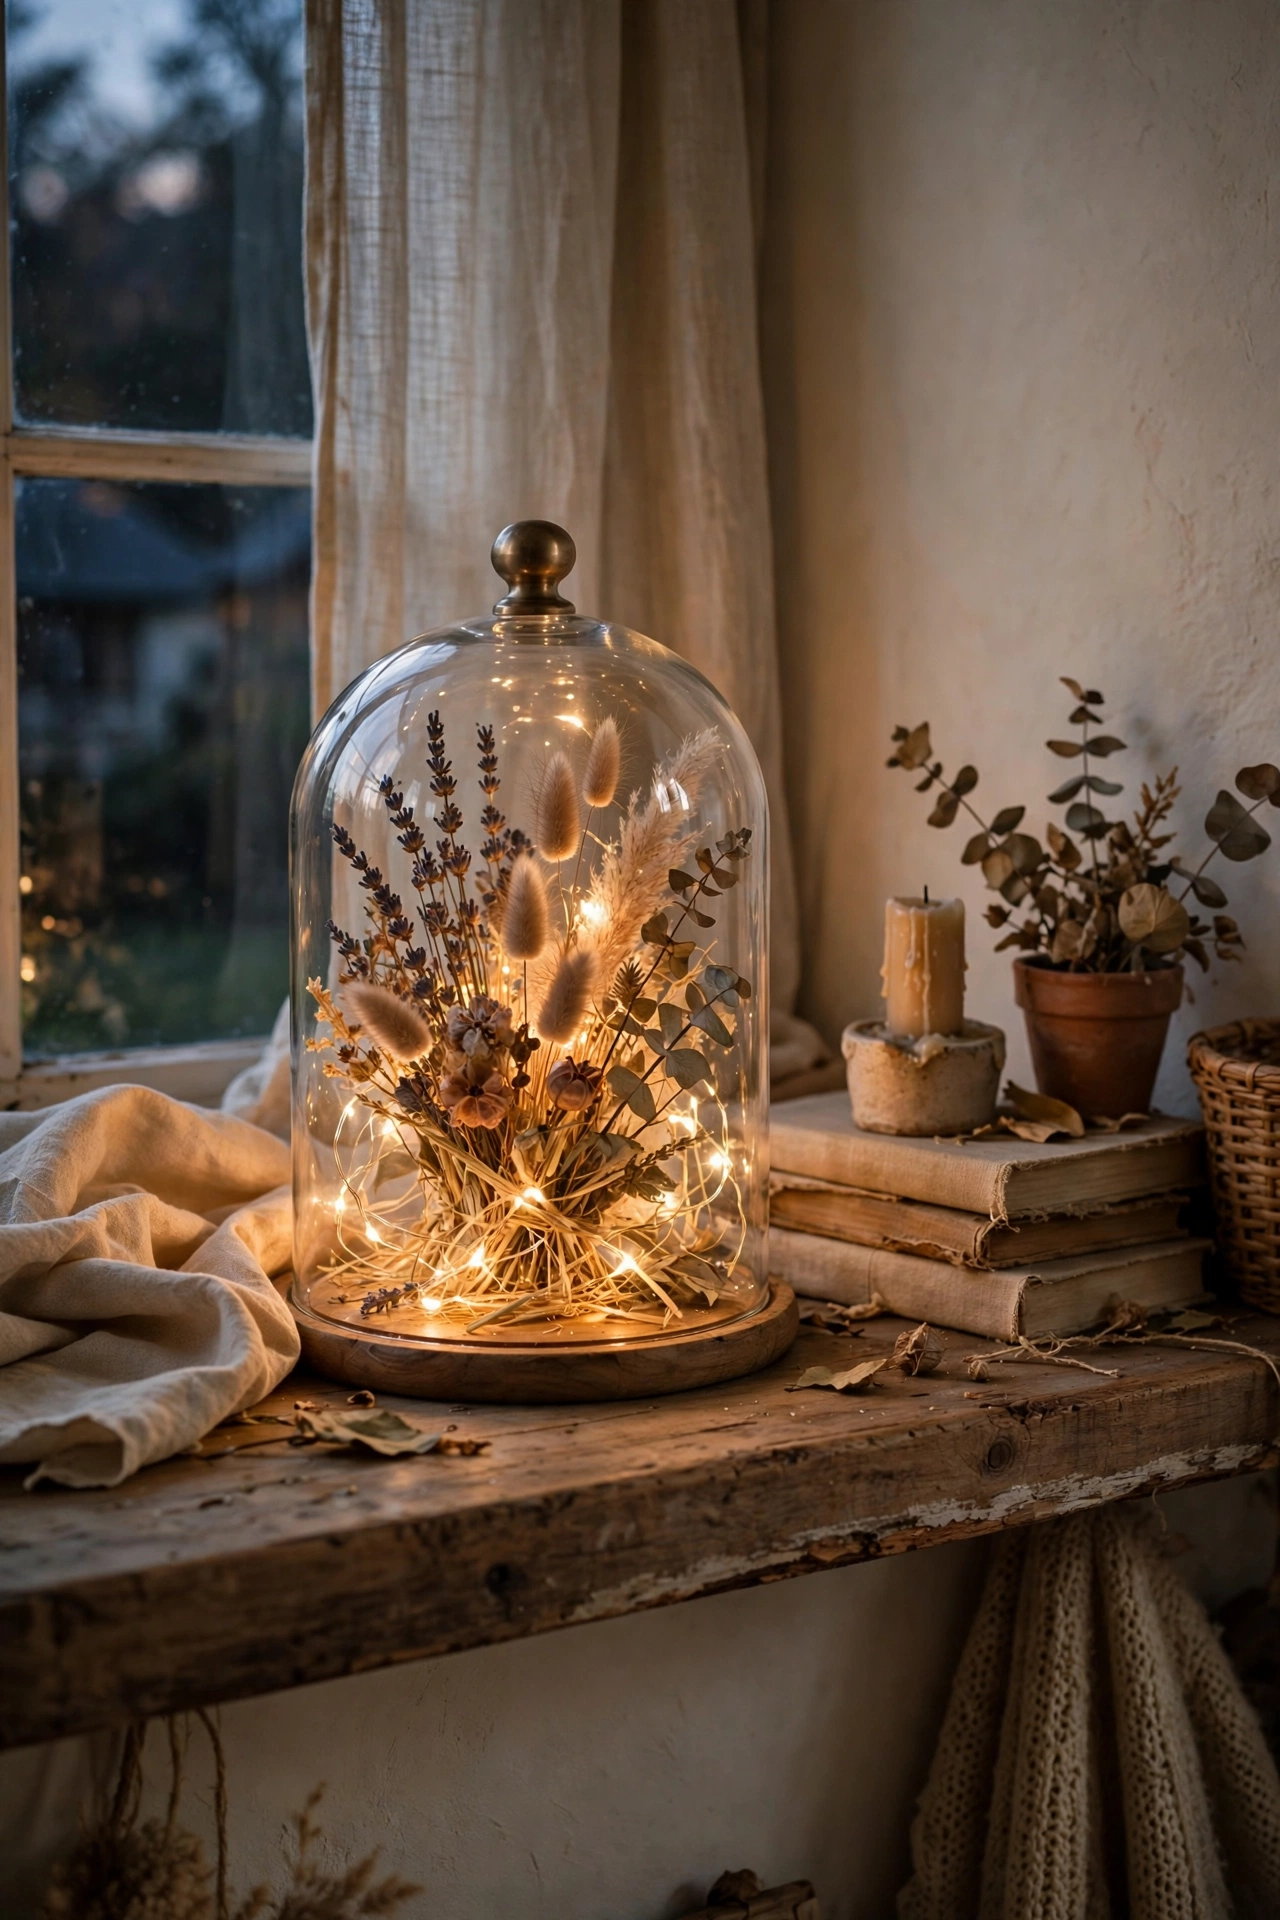
Arrange dried flowers inside a glass cloche or large jar, tuck in a string of battery fairy lights, and you have a lamp that’s pure magic. Layer the stems so they look full from every angle, coil the lights through the middle, and hide the battery pack under the flower base. I made one for my mantel and it glows like a captured meadow in the evening. Keep the lights LED — anything warmer will dry out and brown the flowers faster.
Pro tip: use a timer battery pack so it switches on automatically each evening.
Cost: ~$19 | Time: 40 minutes
Quick questions, answered
Is it safe to make my own lamps?
Yes, if you use proper lamp kits and LED bulbs, and never work on anything plugged in. Plug-in kits are designed for beginners and avoid mains wiring entirely. If a project needs hardwiring into the ceiling, that’s a job for an electrician.
What bulb should I use in DIY lamps?
LED, always — they run cool, which matters when bulbs sit near paper, fabric, wood, or dried flowers. Choose 2700K warm white for living spaces; it gives that cosy, golden glow every one of these projects is designed around.
Where do I find cheap lamp bases and shades?
Charity shops are goldmines for lamp bases — I rarely pay more than $5. Discount home stores sell plain drum shades cheaply, and online marketplaces are full of people giving away dated lamps that are perfect for a makeover.
📌 Loving this look? Pin this post now so you can save this idea for your next weekend refresh.
Keep the calm going with these next: (see also: 17-diy-lamp-ideas-on-a-budget/) (see also: 23-diy-mirror-ideas-that-look-expensive/) (see also: 15-diy-wall-art-ideas-on-a-budget/)
Good lighting is the difference between a room and a refuge. Start with the project that caught your eye, unplug that tired old lamp, and give it the weekend it deserves — your evenings will thank you.
