17 DIY Nightstand Ideas in a Weekend
When I moved into my flat, I spent my entire furnishing budget on the mattress and then slept for three weeks with my phone charging on the floor. A decent diy Nightstand seemed like a small thing until I started pricing them: even the plain flat-pack ones were forty pounds or more, and they all looked identical. So one Saturday I raided the charity shop, the garage, and a pile of wooden crates I had been hoarding, and by Sunday night I had a bedside table I actually liked. This list is every idea that made the cut, each one buildable in a weekend with basic tools.
Every diy Nightstand below costs $35 or less, and most land under $15. You will want a drill, some sandpaper, and wood glue at minimum; a paintbrush and a staple gun open up half the list. Start with whichever project matches what you already own, because the cheapest nightstand is always the one built from stuff in your house.
1. Crate-Stacked Bedside Table
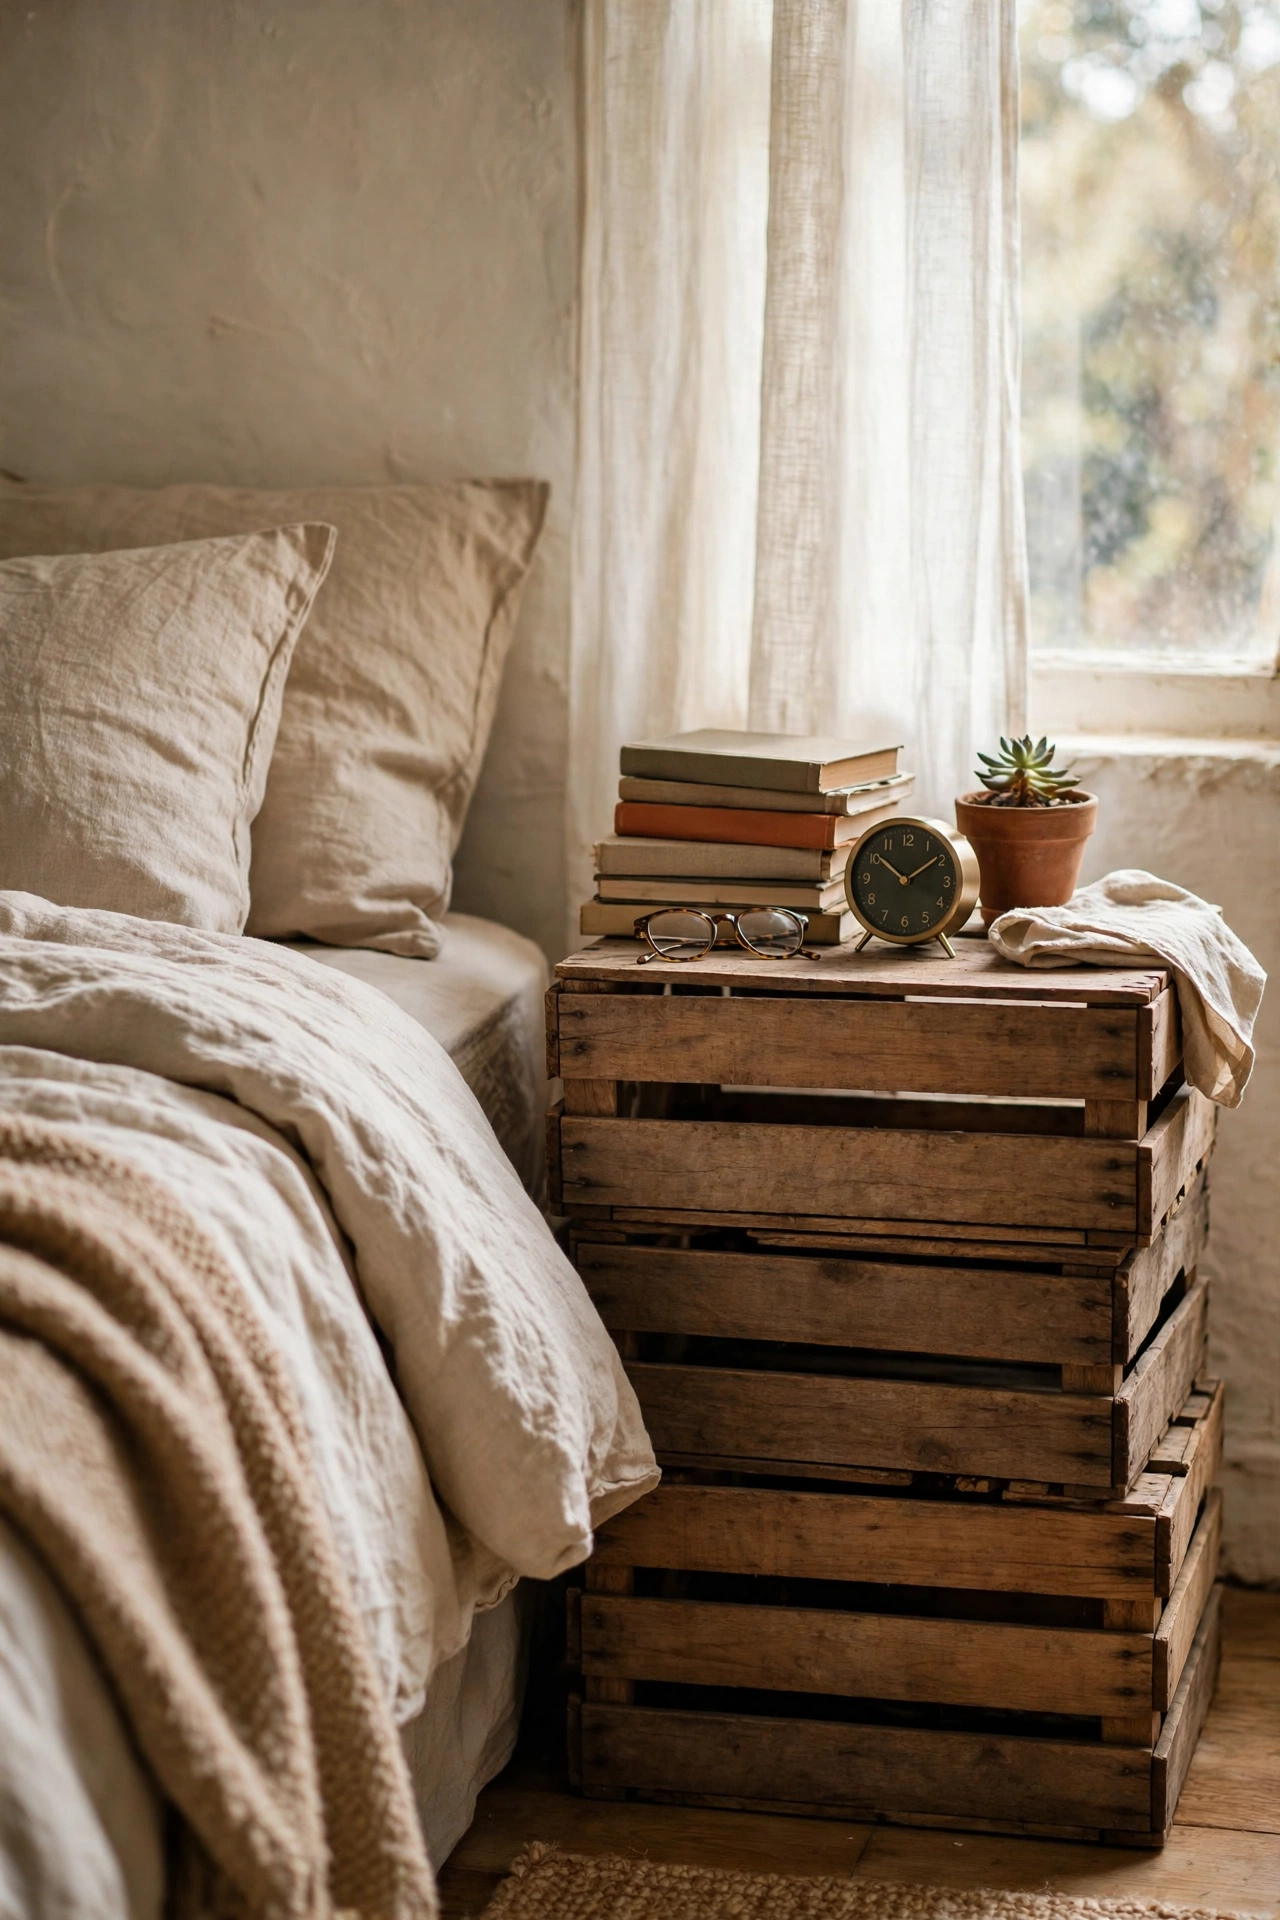
Two or three wooden crates stacked beside the bed make a nightstand with built-in cubbies for books and chargers. I found my crates at a flea market for $4 each, sanded the rough edges, and stained them a warm walnut. Stand one crate upright for a tall cubby and lay another on its side on top for a wide shelf. Screw the crates together from the inside so no screws show, and add small felt pads underneath so the stack does not scratch the floor. I keep my alarm clock on top and paperbacks in the cubbies, and the whole thing took about an hour including drying time.
Cost: ~$8-15 | Time: 1 hour plus drying
2. Floating Wall-Mounted Nightstand
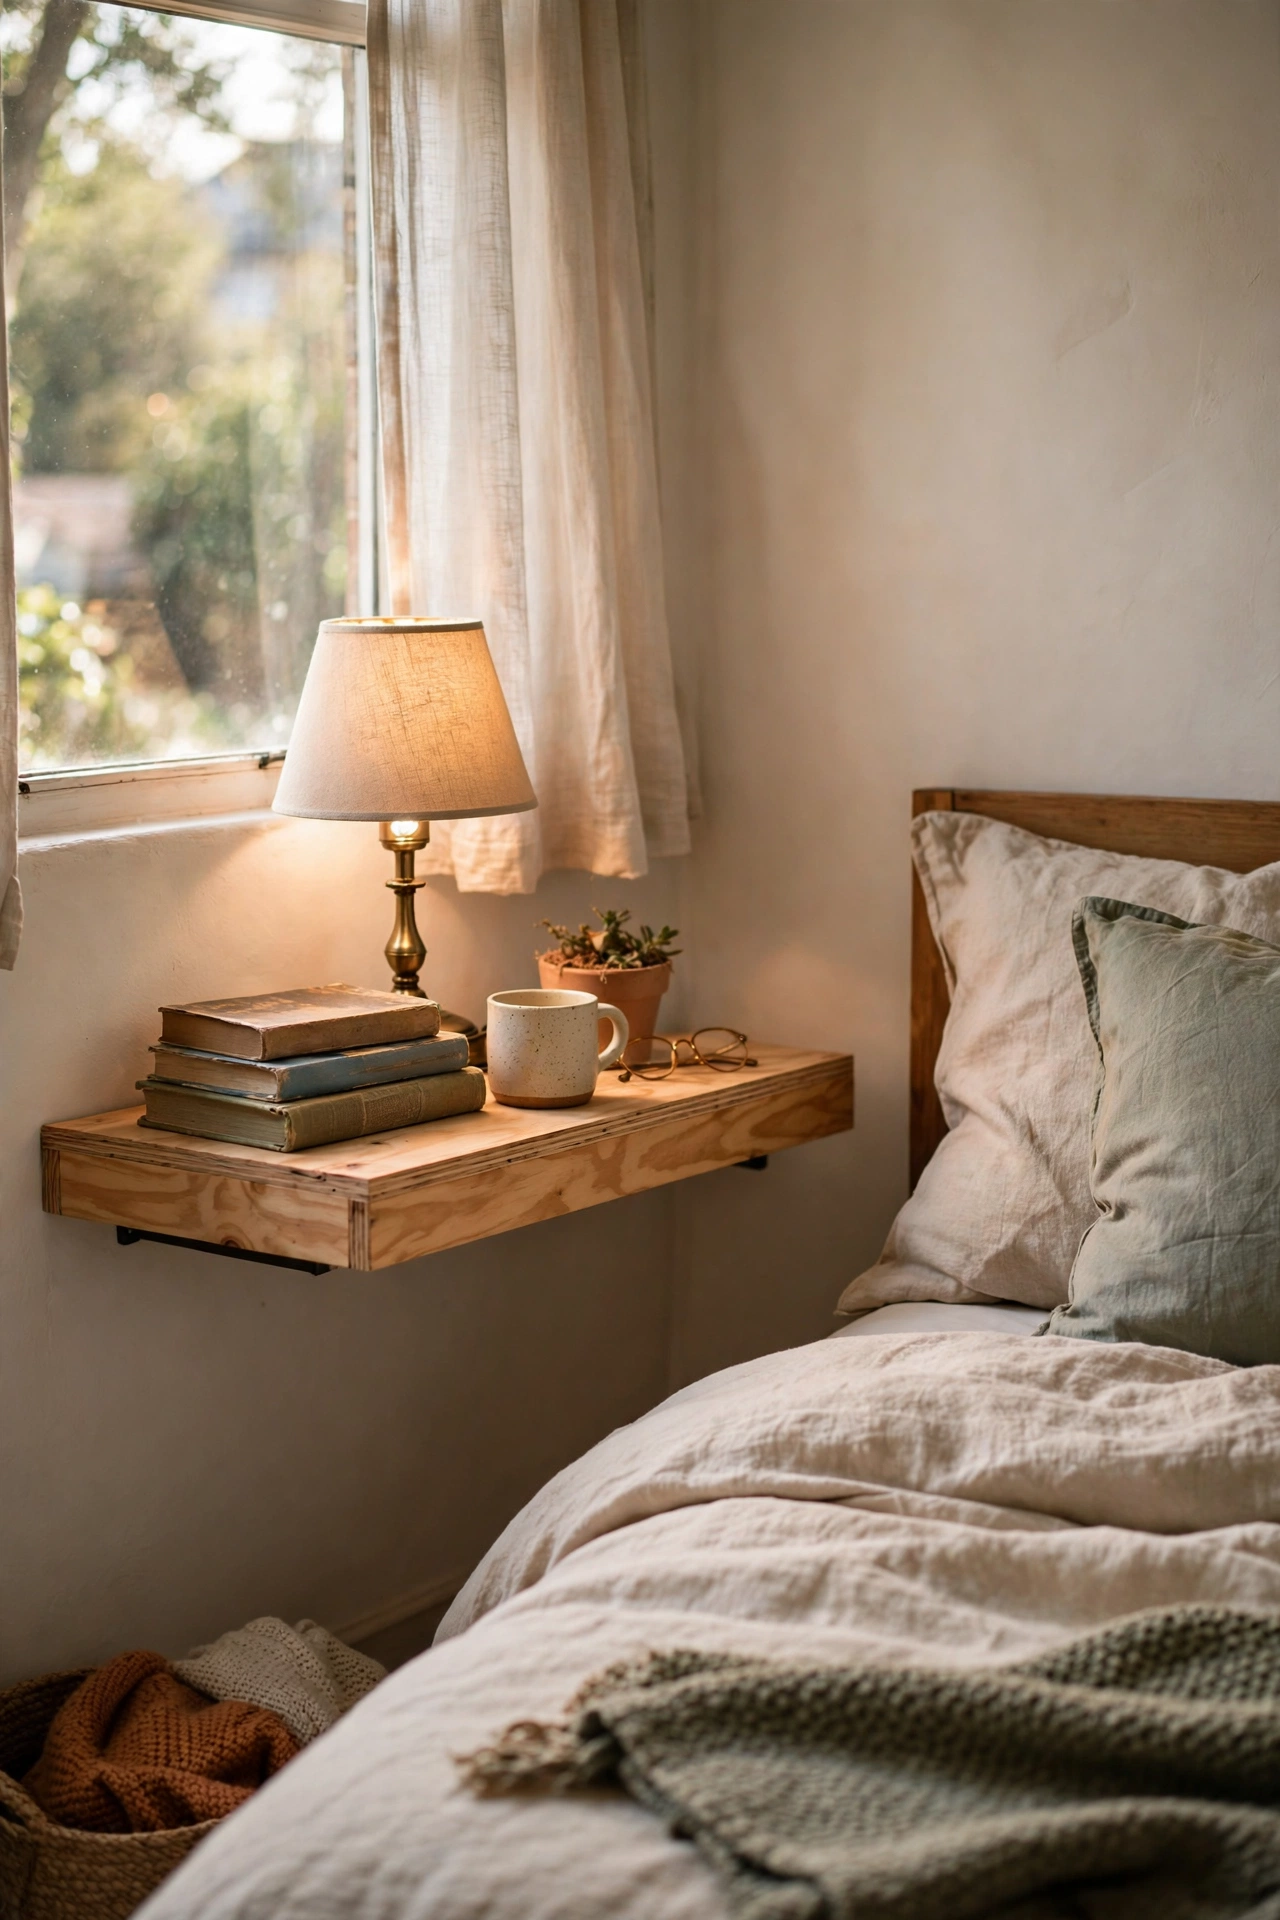
A simple board screwed to the wall at mattress height is the cleanest diy Nightstand for small bedrooms because it leaves the floor completely clear. I used a 60cm oak-look shelf board and two black steel brackets from the hardware store, mounted into wall studs so it can hold a lamp and a stack of books without sagging. Measure twice before you drill, because patching holes in a rented wall is no fun. Mine sits at exactly mattress level so I can reach my water glass without sitting up. Add a small cable clip underneath to keep the charger cord tidy.
Cost: ~$12-18 | Time: 45 minutes
3. Painted Thrifted Side Table
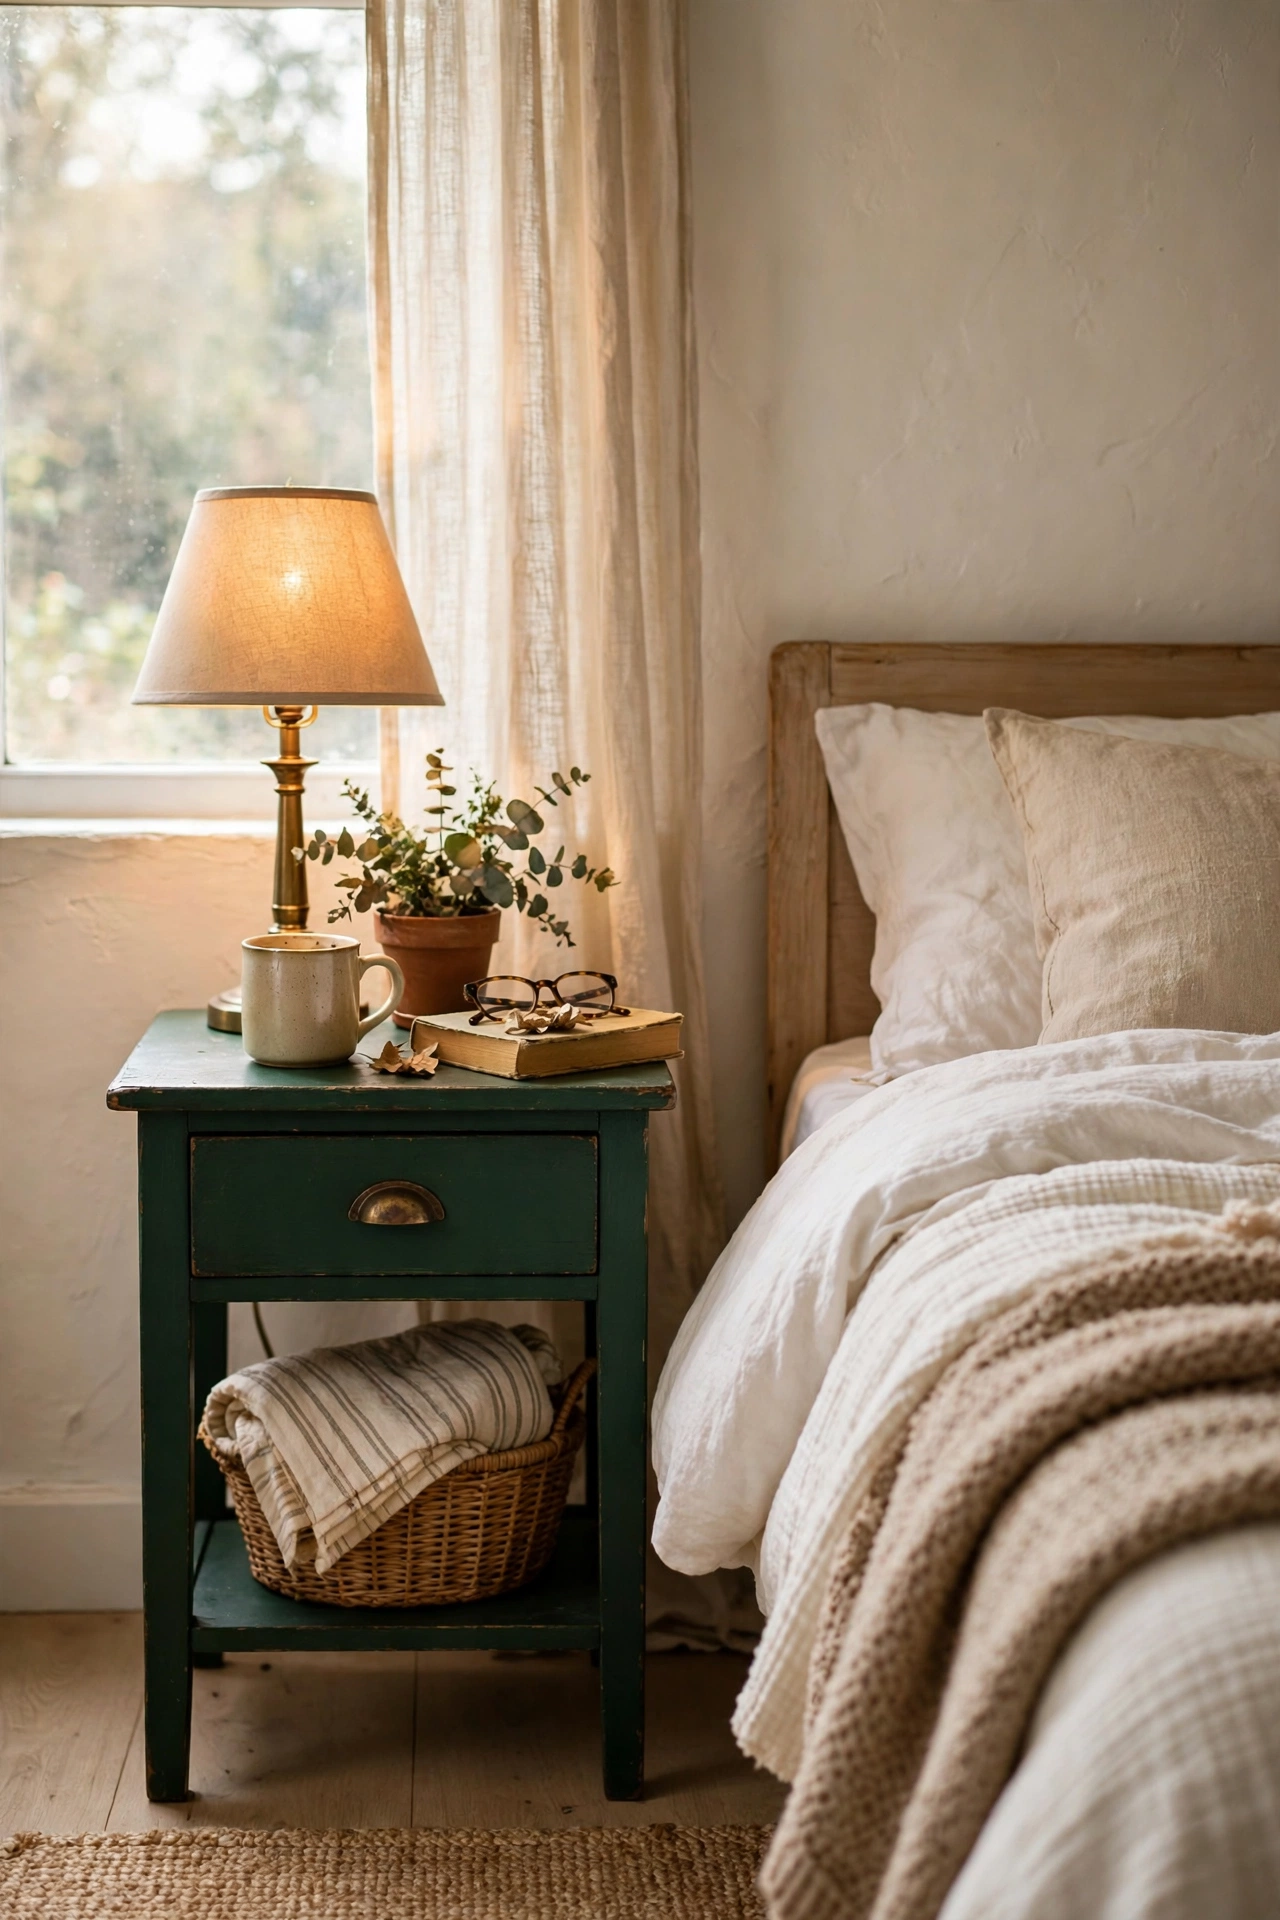
The charity shops near me always have sad little side tables for under $10, and paint makes them unrecognisable. I bought a wobbly pine table for $6, tightened the legs with wood glue and new screws, sanded it lightly, and painted it deep forest green with leftover cabinet paint. The secret is two thin coats instead of one thick one, which I learned after my first attempt dripped everywhere. A clear wax topcoat protects the surface from coffee rings. This one cost me almost nothing and it is the piece guests ask about most.
Cost: ~$8-14 | Time: 2 hours plus drying
4. Leather-Pull Drawer Refresh
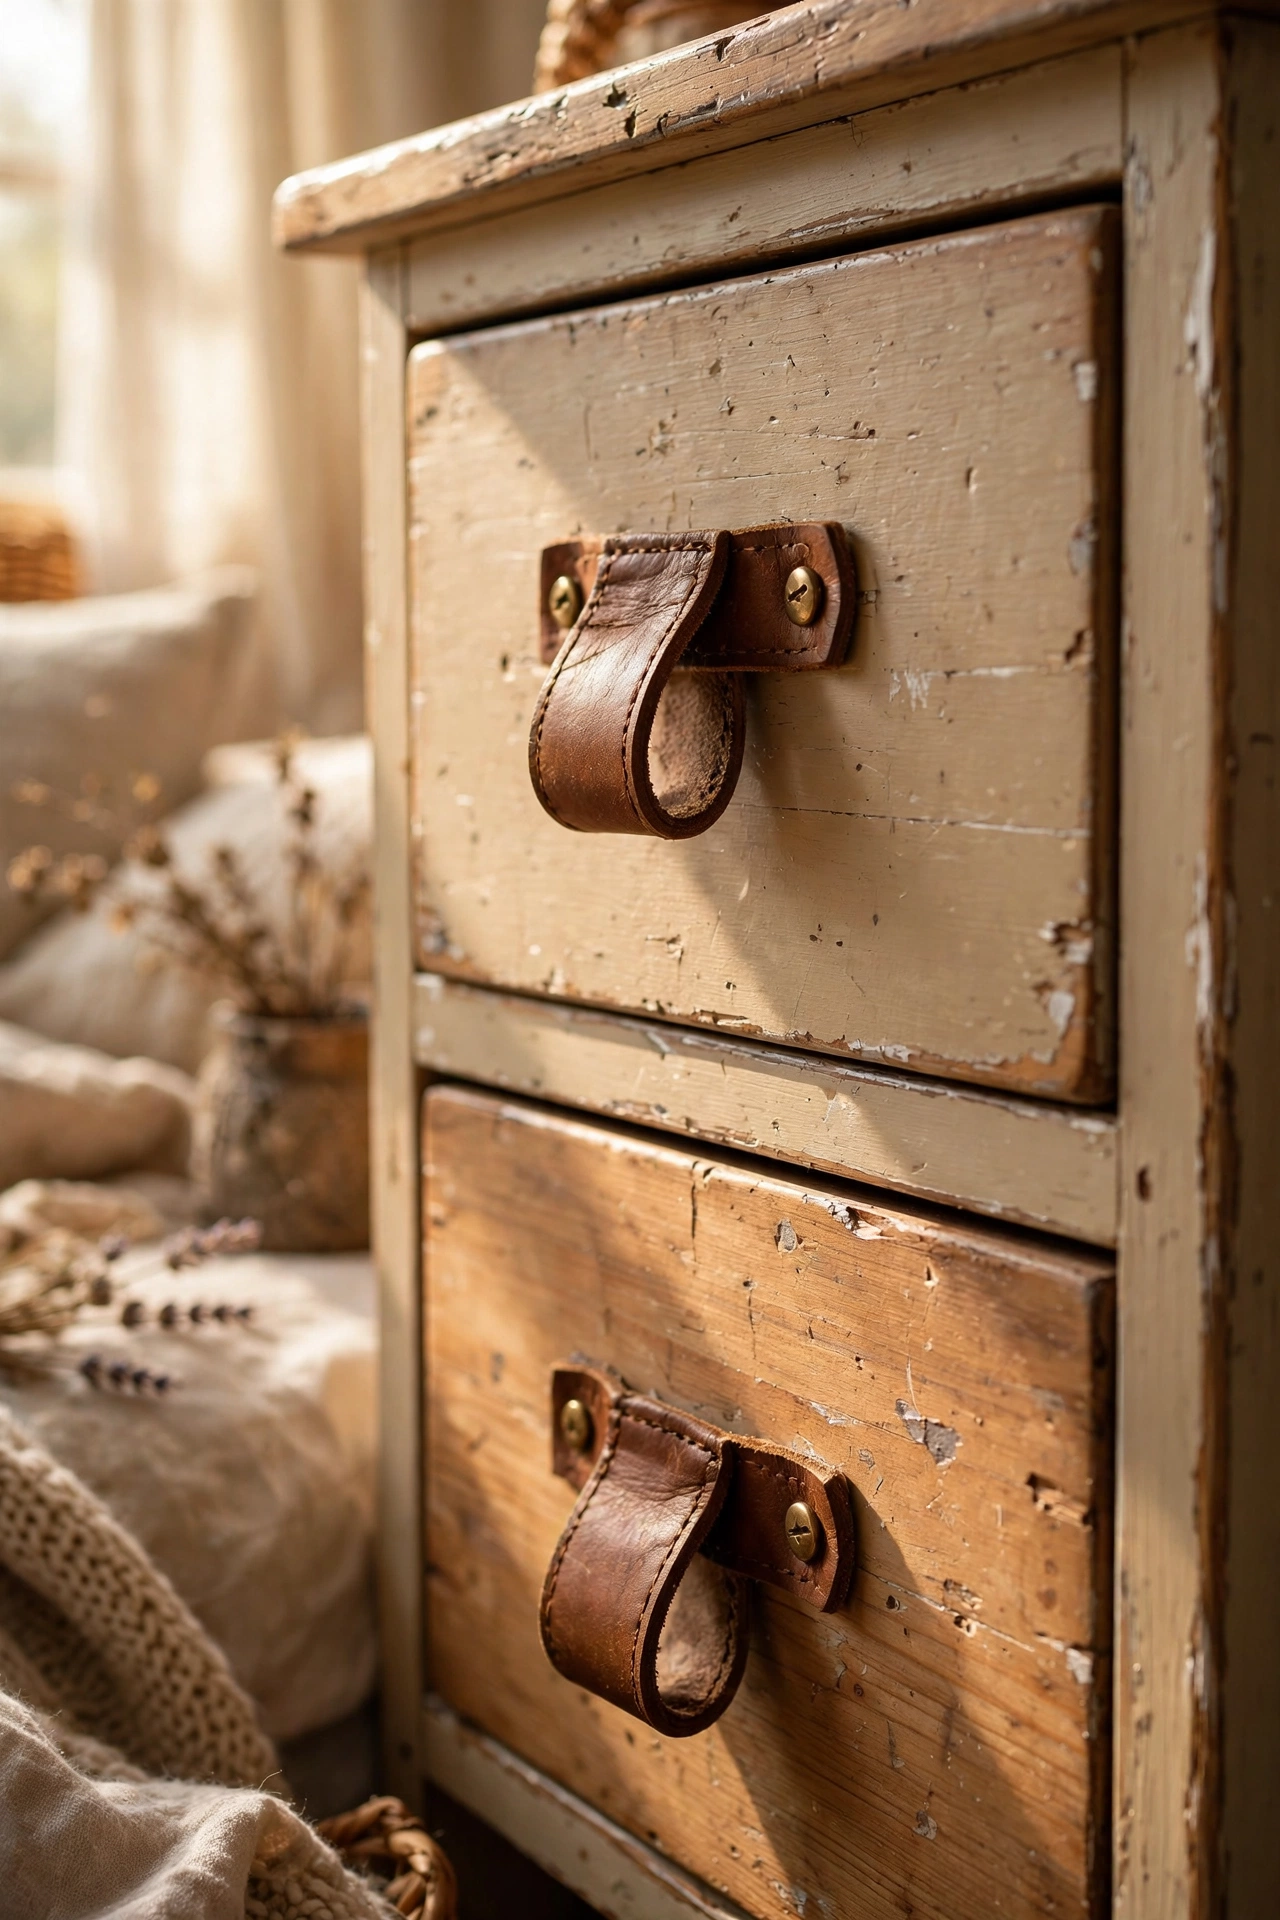
If you already own a plain nightstand with tired knobs, new pulls change the whole thing. I cut strips from an old leather belt, punched a hole in each end, and screwed them on as loop pulls with brass screws. The whole refresh cost $3 because the belt was headed for the bin. The trick is cutting both pulls exactly the same length, which I did by stacking the leather and cutting through both layers at once. Leather pulls suit wood, rattan, and painted furniture equally well, and they feel lovely in the hand at 3am.
Cost: ~$3-8 | Time: 20 minutes
Budget check: the first four projects average about $11 each, and two of them reuse something you probably already own. Shop your own house first for anything paintable and you will stay well under budget.
5. Stacked Books Nightstand
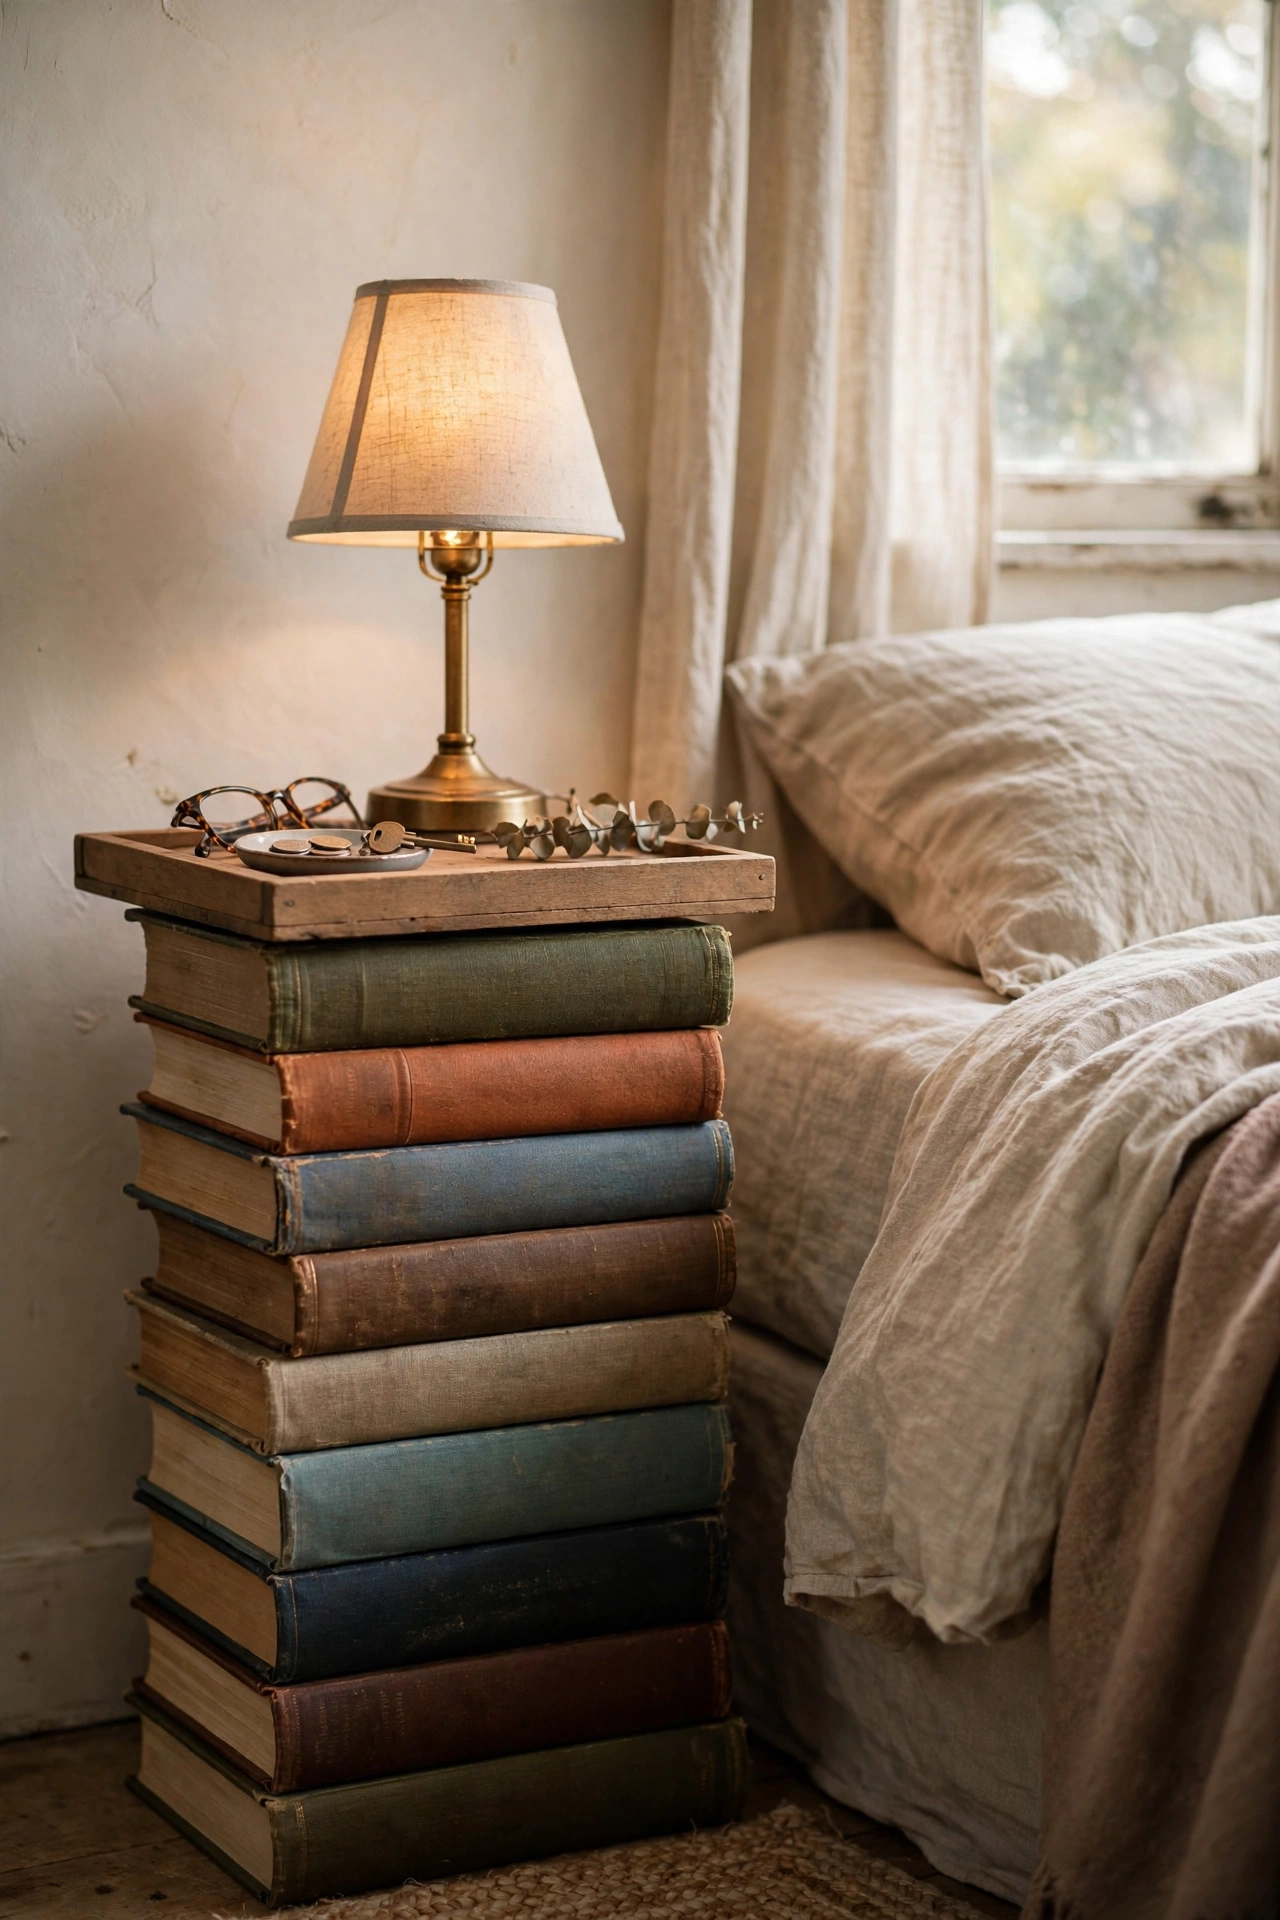
A pillar of hardback books you will never read again makes a charming diy Nightstand with real personality. I stacked my tallest hardbacks largest to smallest, ran a threaded rod through the centre with washers and nuts top and bottom, and tightened everything so the stack is rock solid. Top it with a small wooden tray to make a flat surface for a lamp. My mistake was drilling the holes before stacking them, which meant the holes did not line up; stack first, then drill through the whole pile. Choose books with attractive spines because you will see them every morning.
Cost: ~$5-10 | Time: 1 hour
6. Stool-Turned-Bedside Table
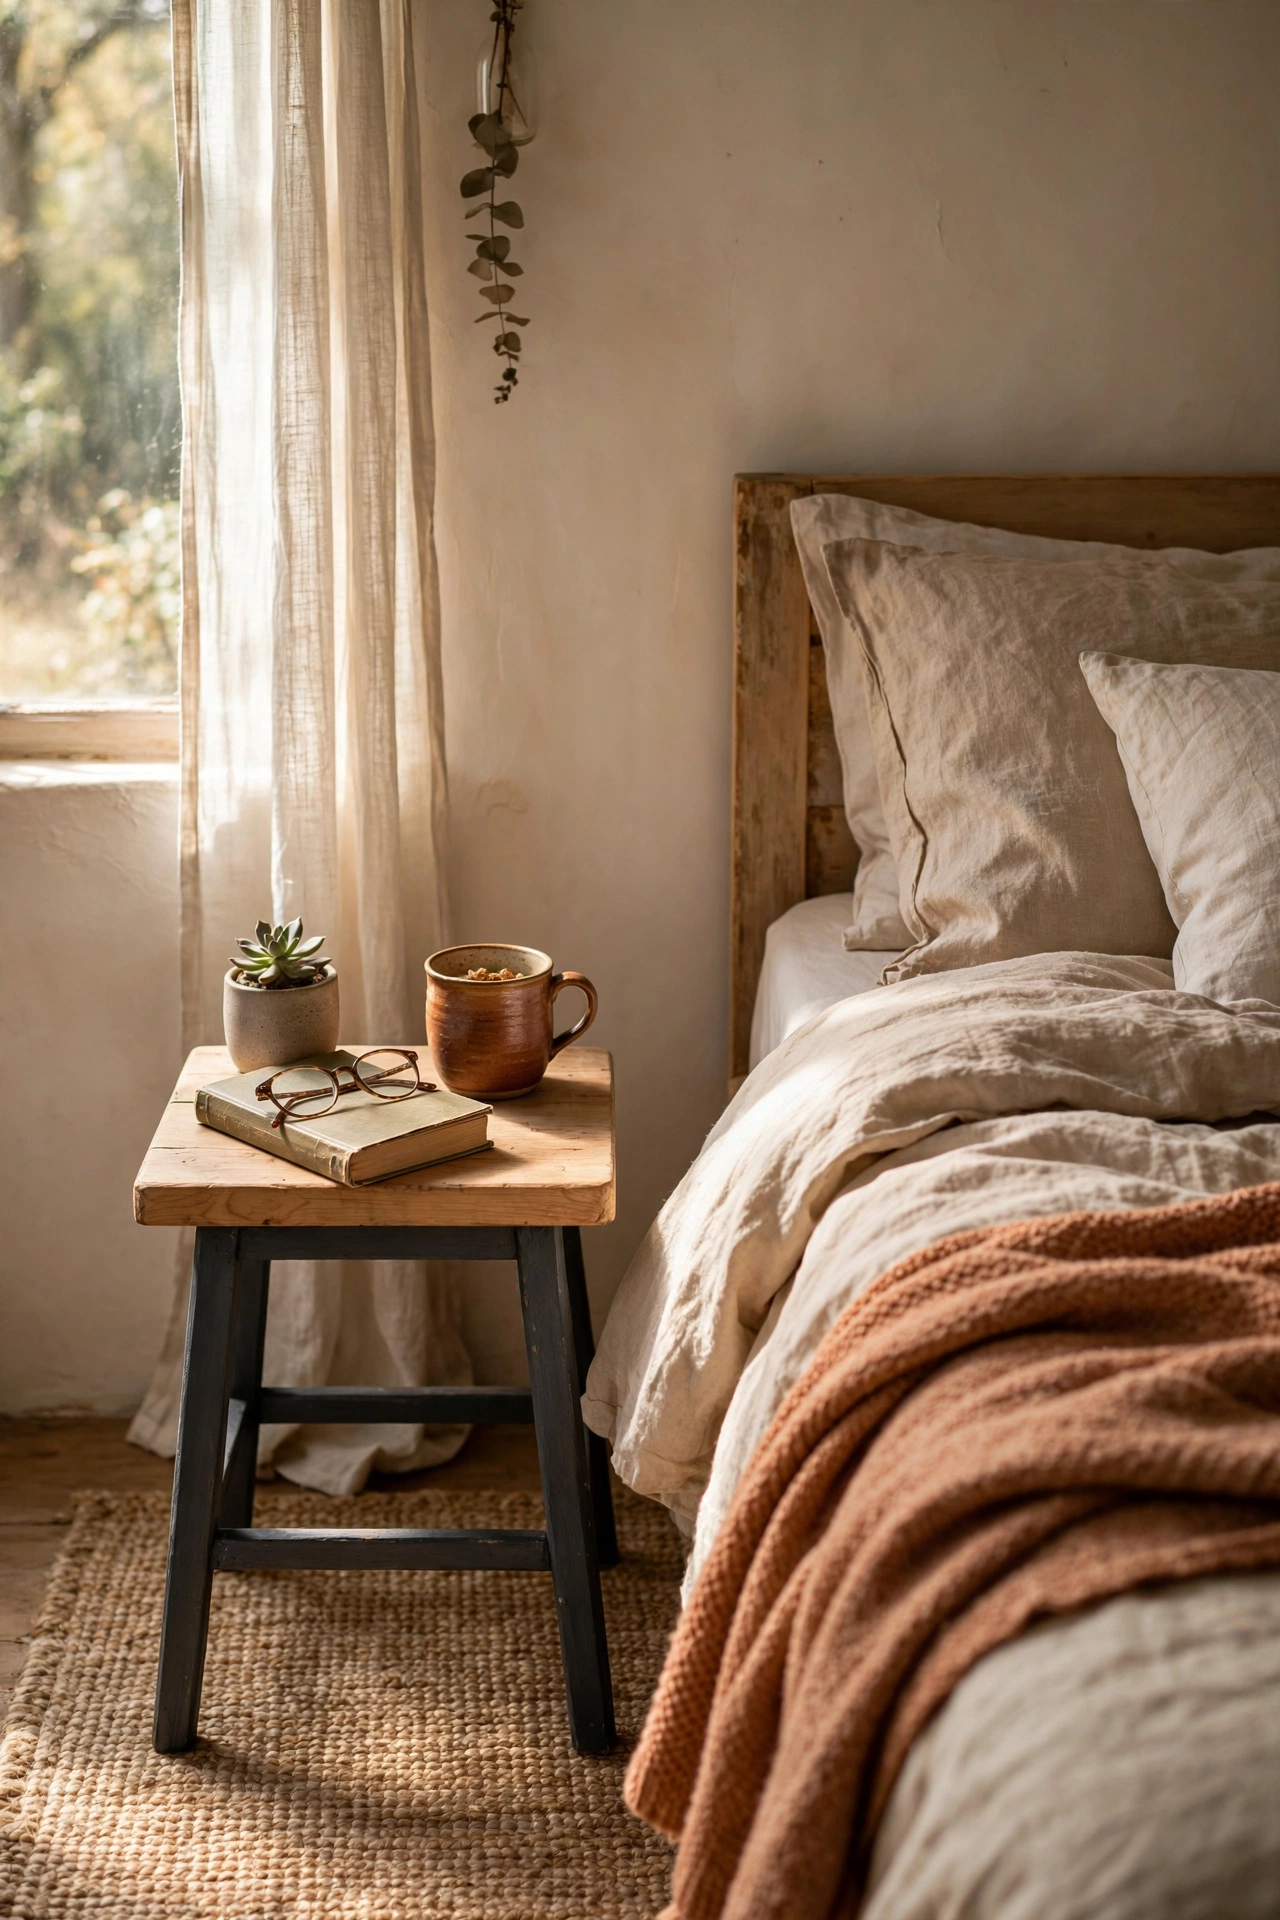
A sturdy wooden stool is already nightstand height, which makes this the fastest project on the list. I grabbed a $5 pine stool from a car boot sale, sanded it smooth, painted the legs charcoal and left the seat natural wood. A stool with a lower rung doubles as a spot for a book or a basket. Check the stool is level before you commit, because an uneven stool makes your morning water glass a hazard. I added felt pads under the legs and it has been my nightstand for two years without a wobble.
Cost: ~$5-12 | Time: 1 hour plus drying
7. Wall Basket Bedside Shelf
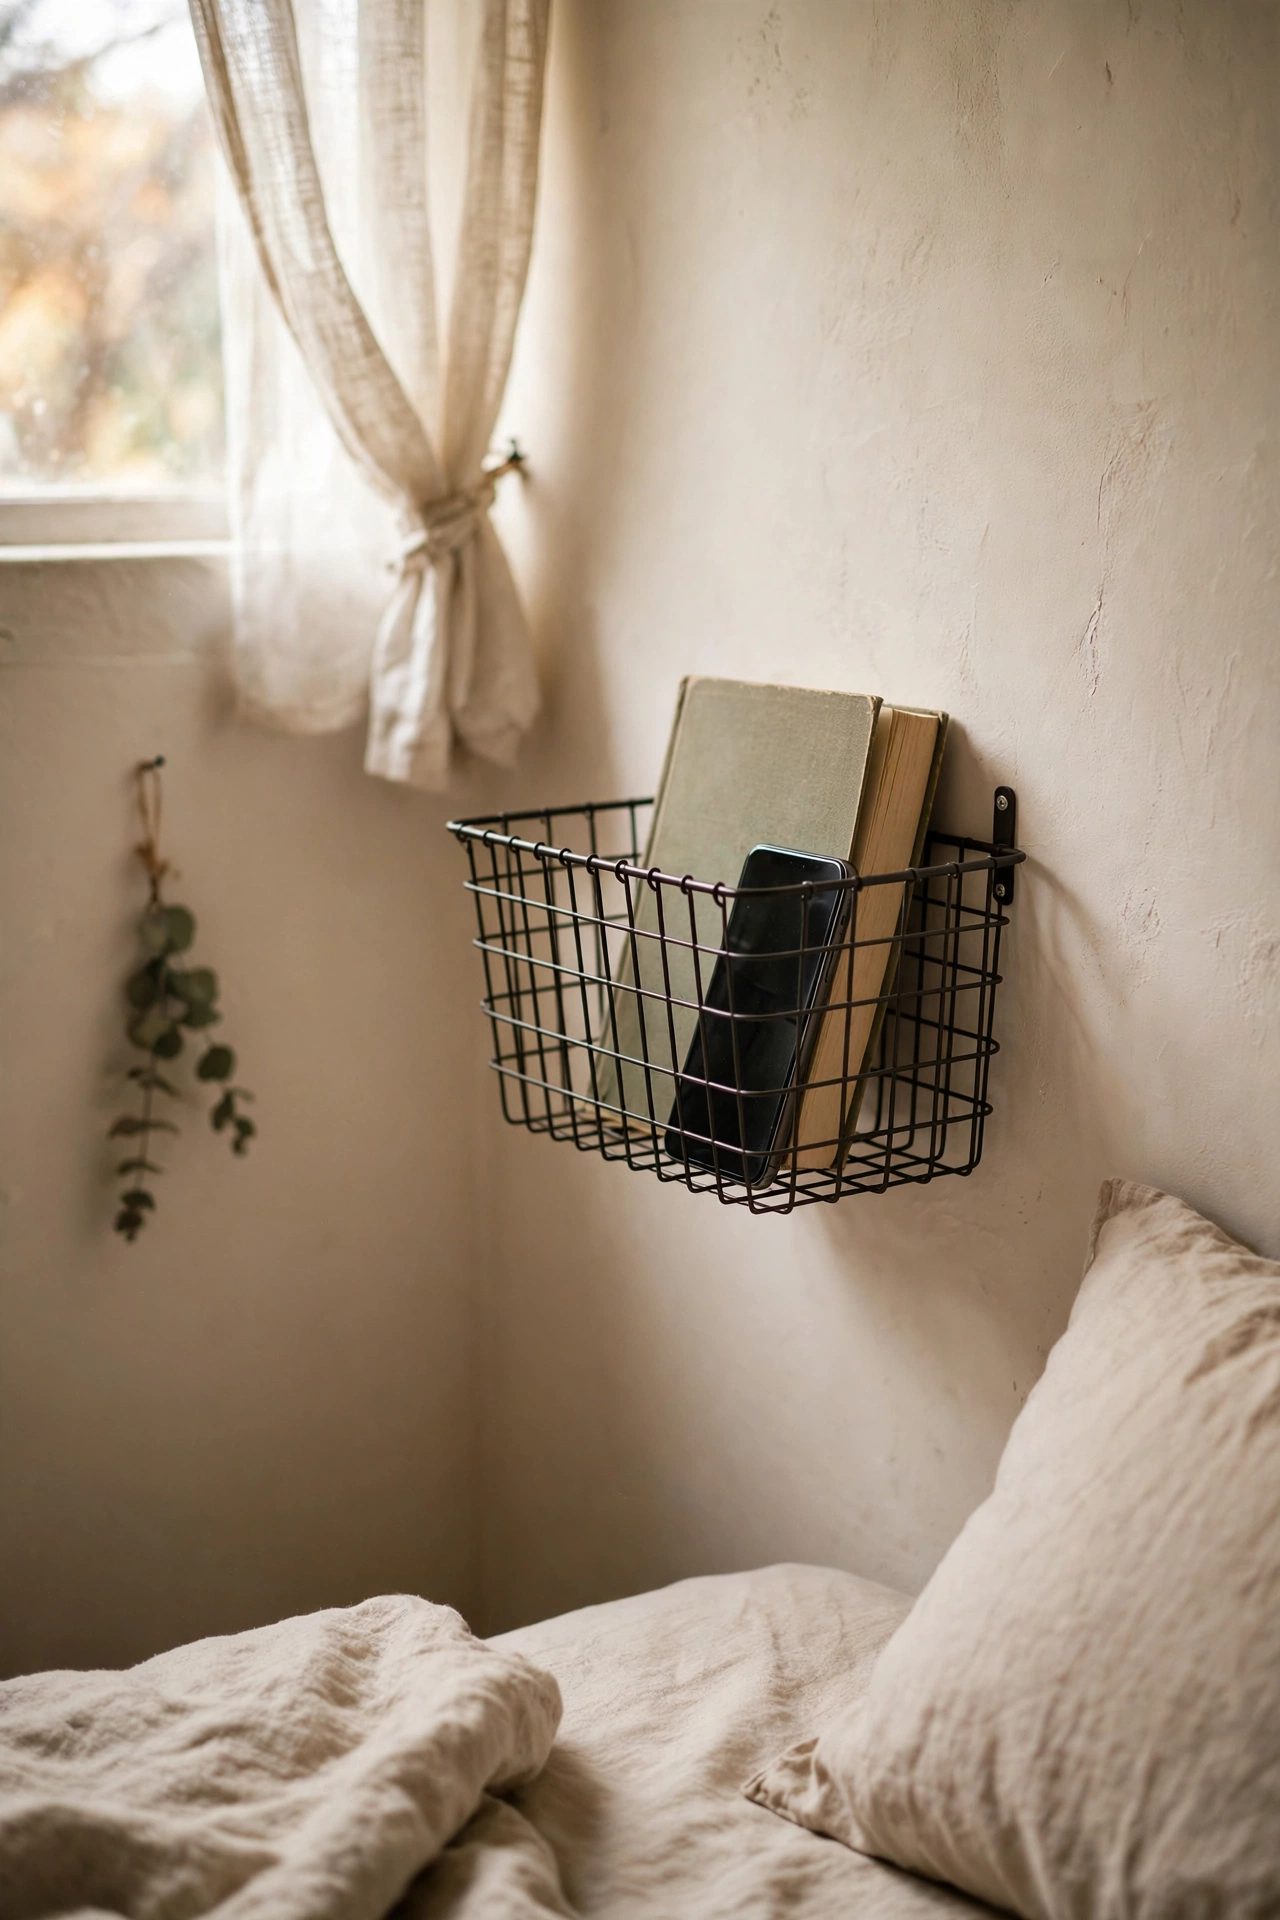
In a tiny bedroom there is no room for legs, so I mounted a deep wire basket to the wall beside my bed instead. A sturdy metal basket hung on two heavy-duty hooks holds my phone, a book, and lip balm, and it takes up zero floor space. Use proper wall anchors rated for the weight, because a basket of books is heavier than it looks. Mine cost $6 for the basket and came from a discount home store. If the basket feels too utilitarian, line it with a folded tea towel so the metal does not clang against your phone at night.
Cost: ~$6-10 | Time: 20 minutes
8. Chalk-Painted Vintage Crate
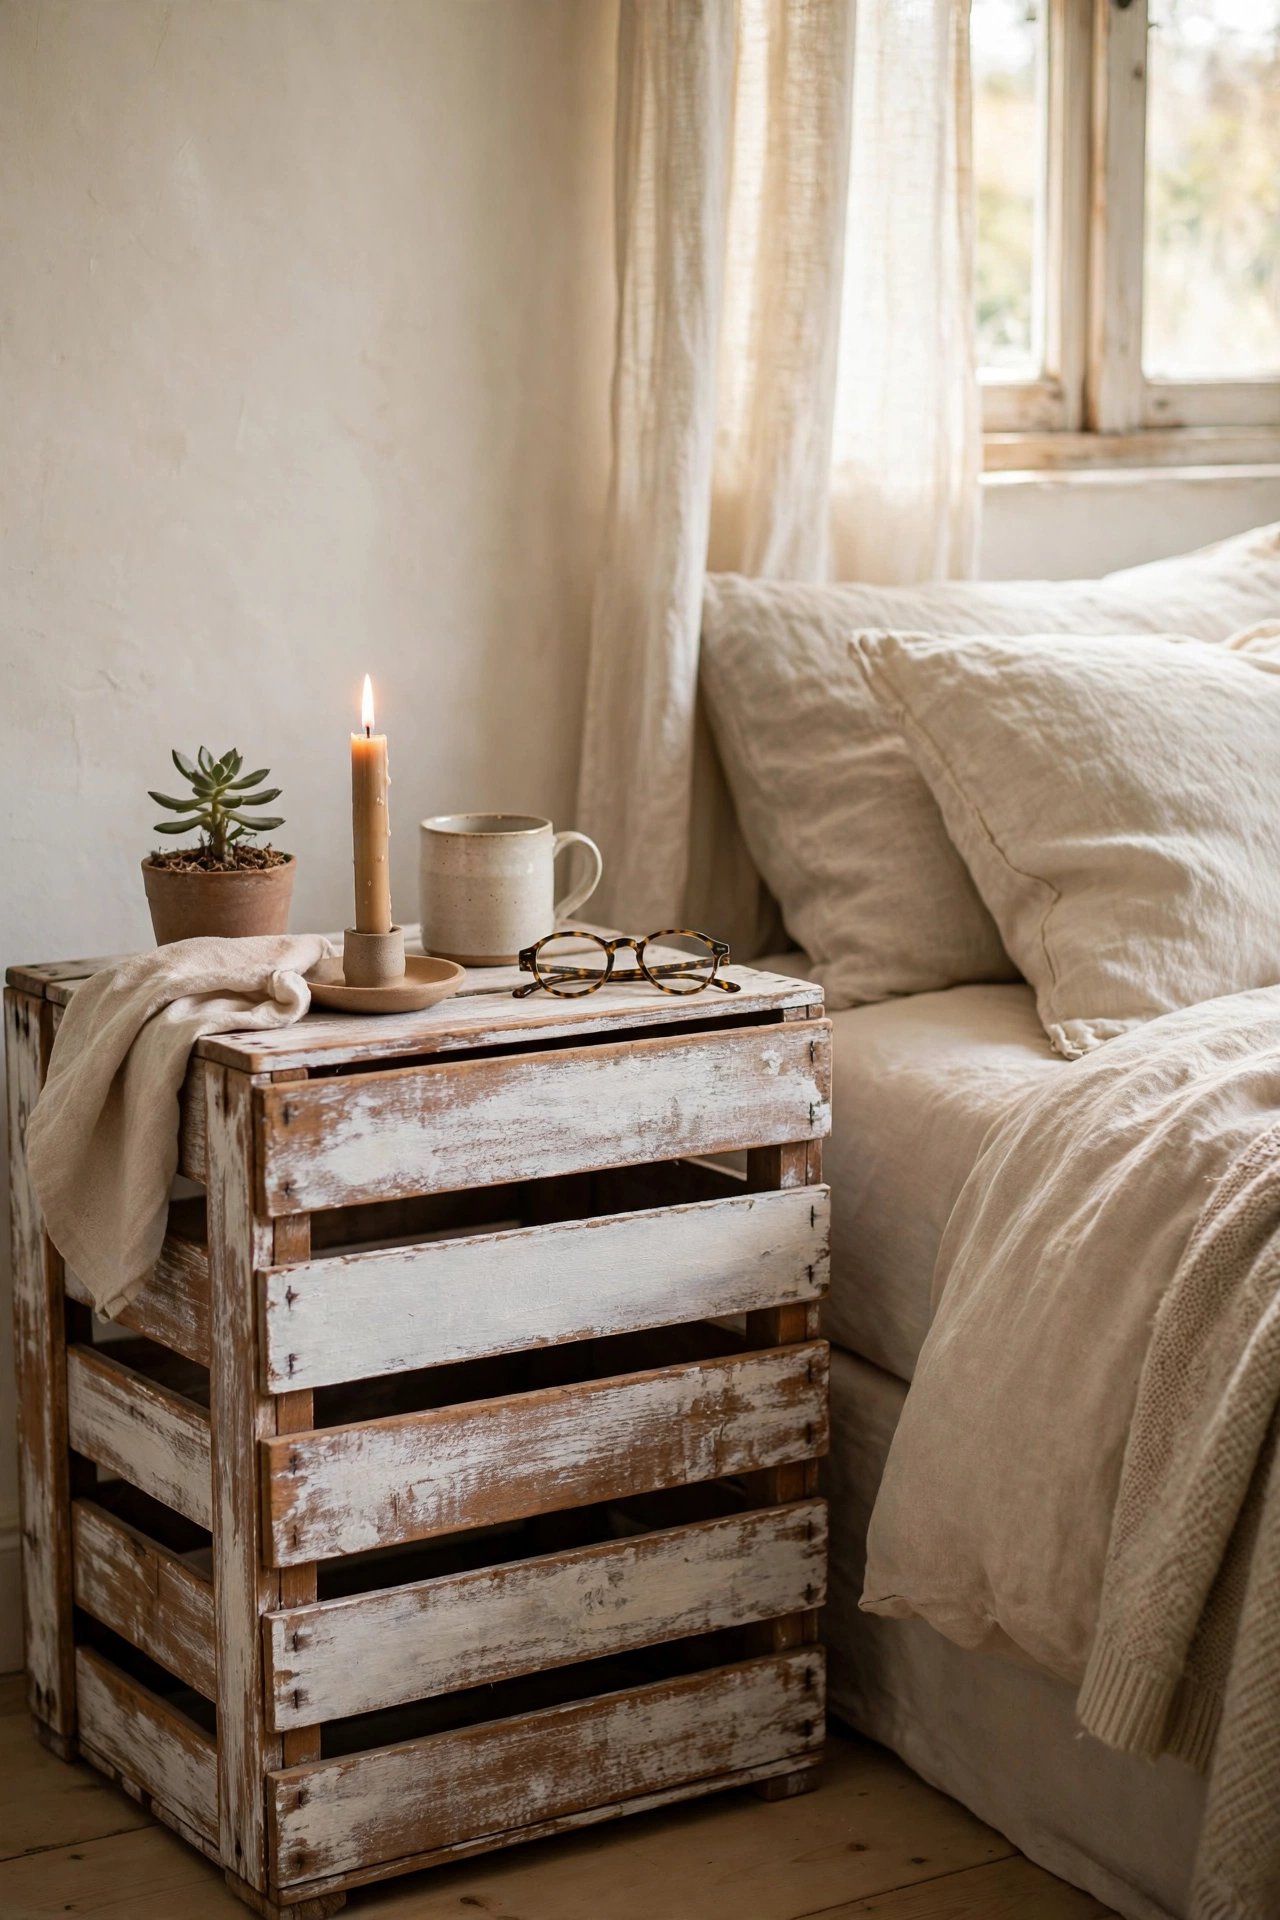
One deep vintage crate on its side is all you need for a farmhouse-style diy Nightstand. I found an old apple crate at an antique stall for $8, cleaned it with a stiff brush, and dry-brushed it with white chalk paint so the wood grain showed through. Chalk paint needs barely any prep, which is why it is perfect for rough old wood. I waxed it lightly for protection and now it holds my lamp on top and magazines inside. Check the crate for splinters and loose nails first, and hammer any proud nails flat.
Cost: ~$8-14 | Time: 1 hour plus drying
Budget check: ideas five through eight keep the streak going, with nothing over $14. If you want even more cheap bedroom upgrades, (see also: 17-weekend-diy-projects-you-can-finish-in-a-day) is packed with them.
9. Hairpin-Leg Nightstand
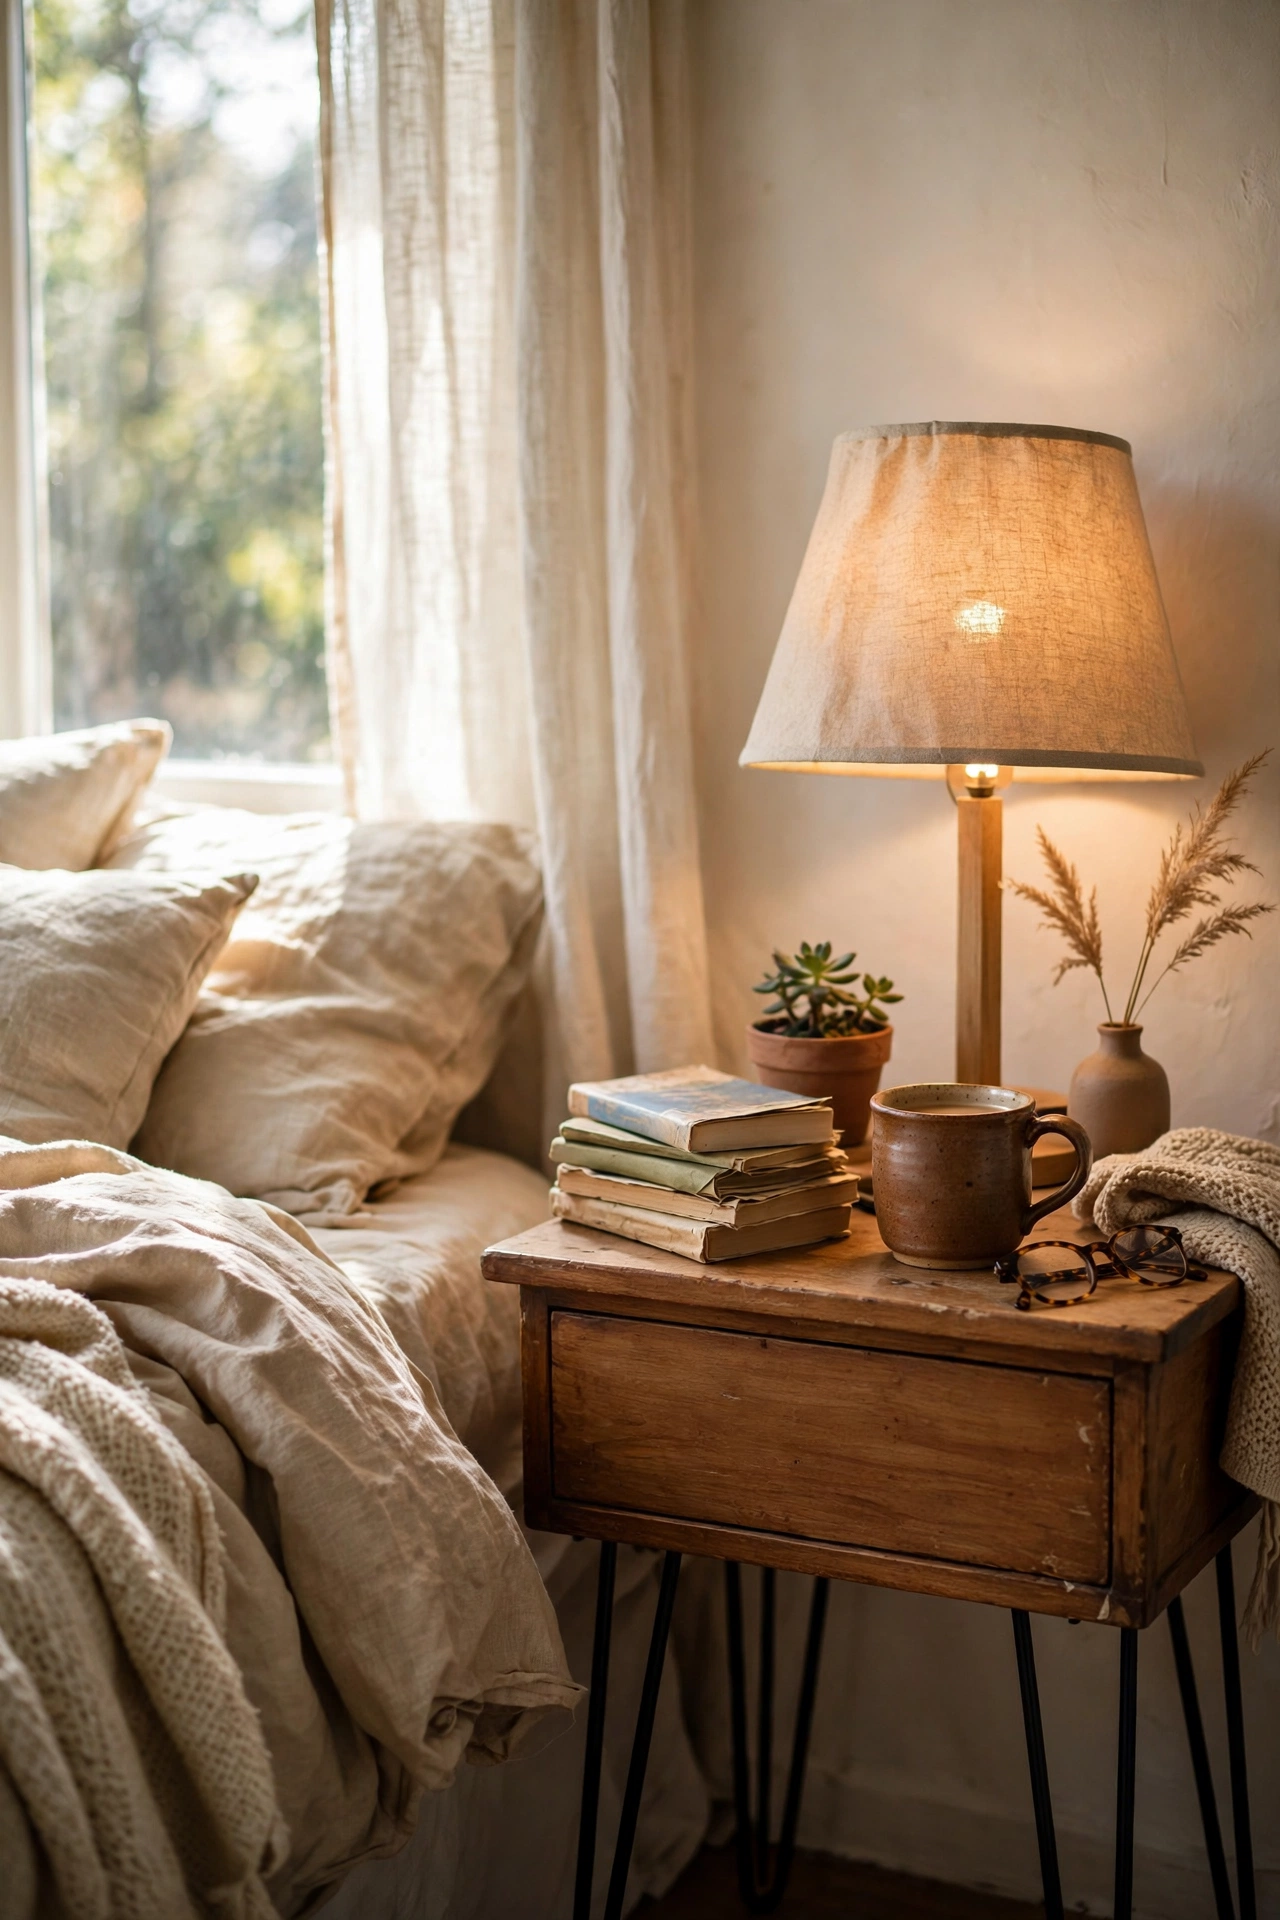
Hairpin legs give any flat top a mid-century look, and a set of four costs less than one takeaway dinner online. I screwed mine into a 45cm square of butcher-block offcut I got free from a worktop installer, then finished the wood with Danish oil. The legs arrive with screws and mounting plates, so all you need is a drill. Mark your screw holes with a pencil first and pre-drill, because screwing straight into hard wood without a pilot hole will split it. Mine looks like a designer piece next to the bed.
Cost: ~$20-30 | Time: 1 hour
10. Ladder-Rung Bedside Shelf
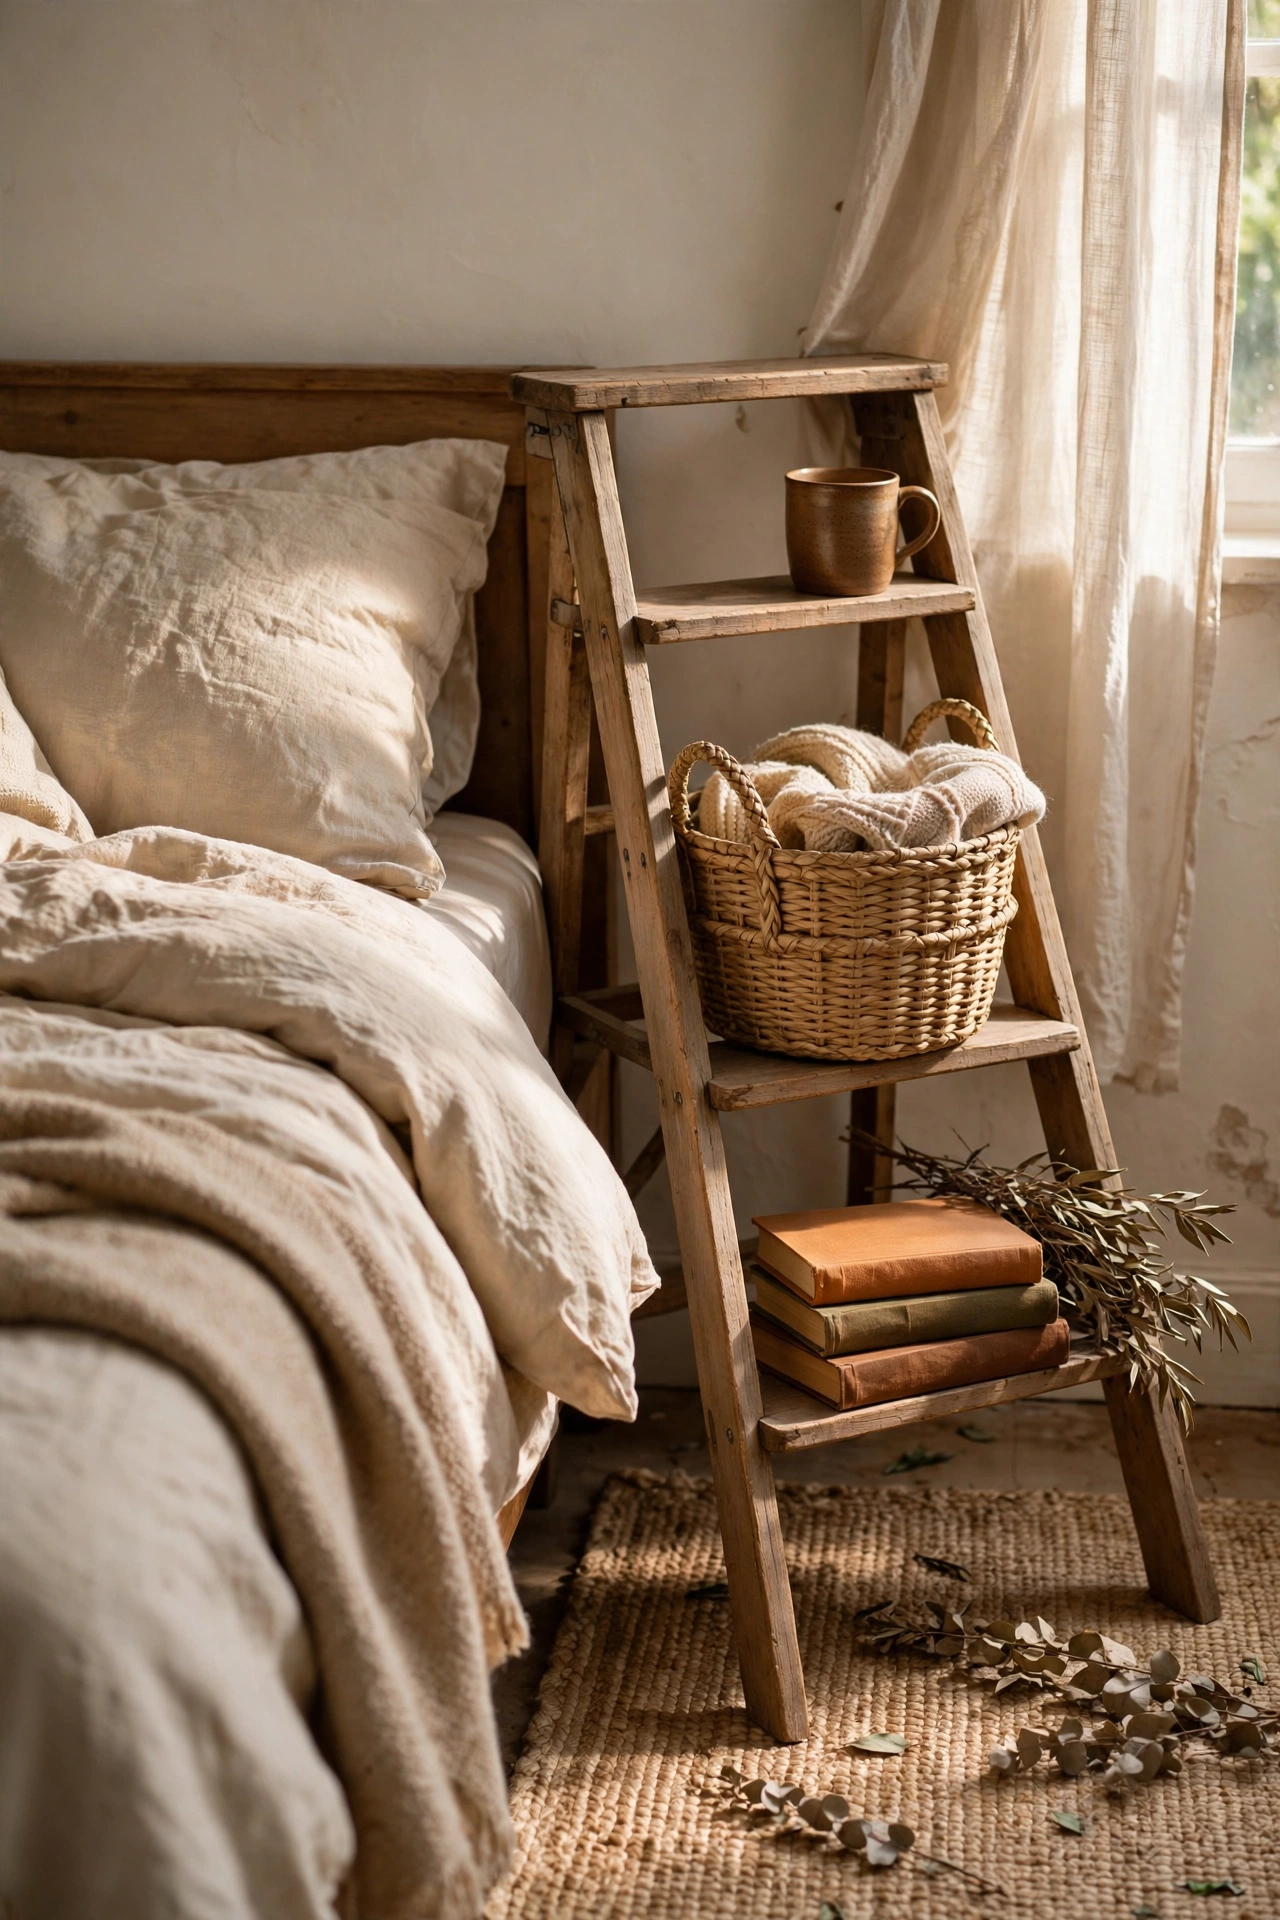
A small wooden ladder leaned against the wall gives you three or four shelves for the price of one nightstand. I bought a half-price decorative ladder from a home store, sanded it, and stained it dark to match my bed frame. Lay a narrow board across two rungs to make a proper shelf for a lamp, and hang a small basket from another rung for charging cables. Make sure the ladder sits at a safe angle and does not wobble, because a toppling ladder at night is no joke. Mine doubles as blanket storage on the lower rungs.
Cost: ~$15-25 | Time: 1.5 hours
11. Decoupaged Drawer Fronts
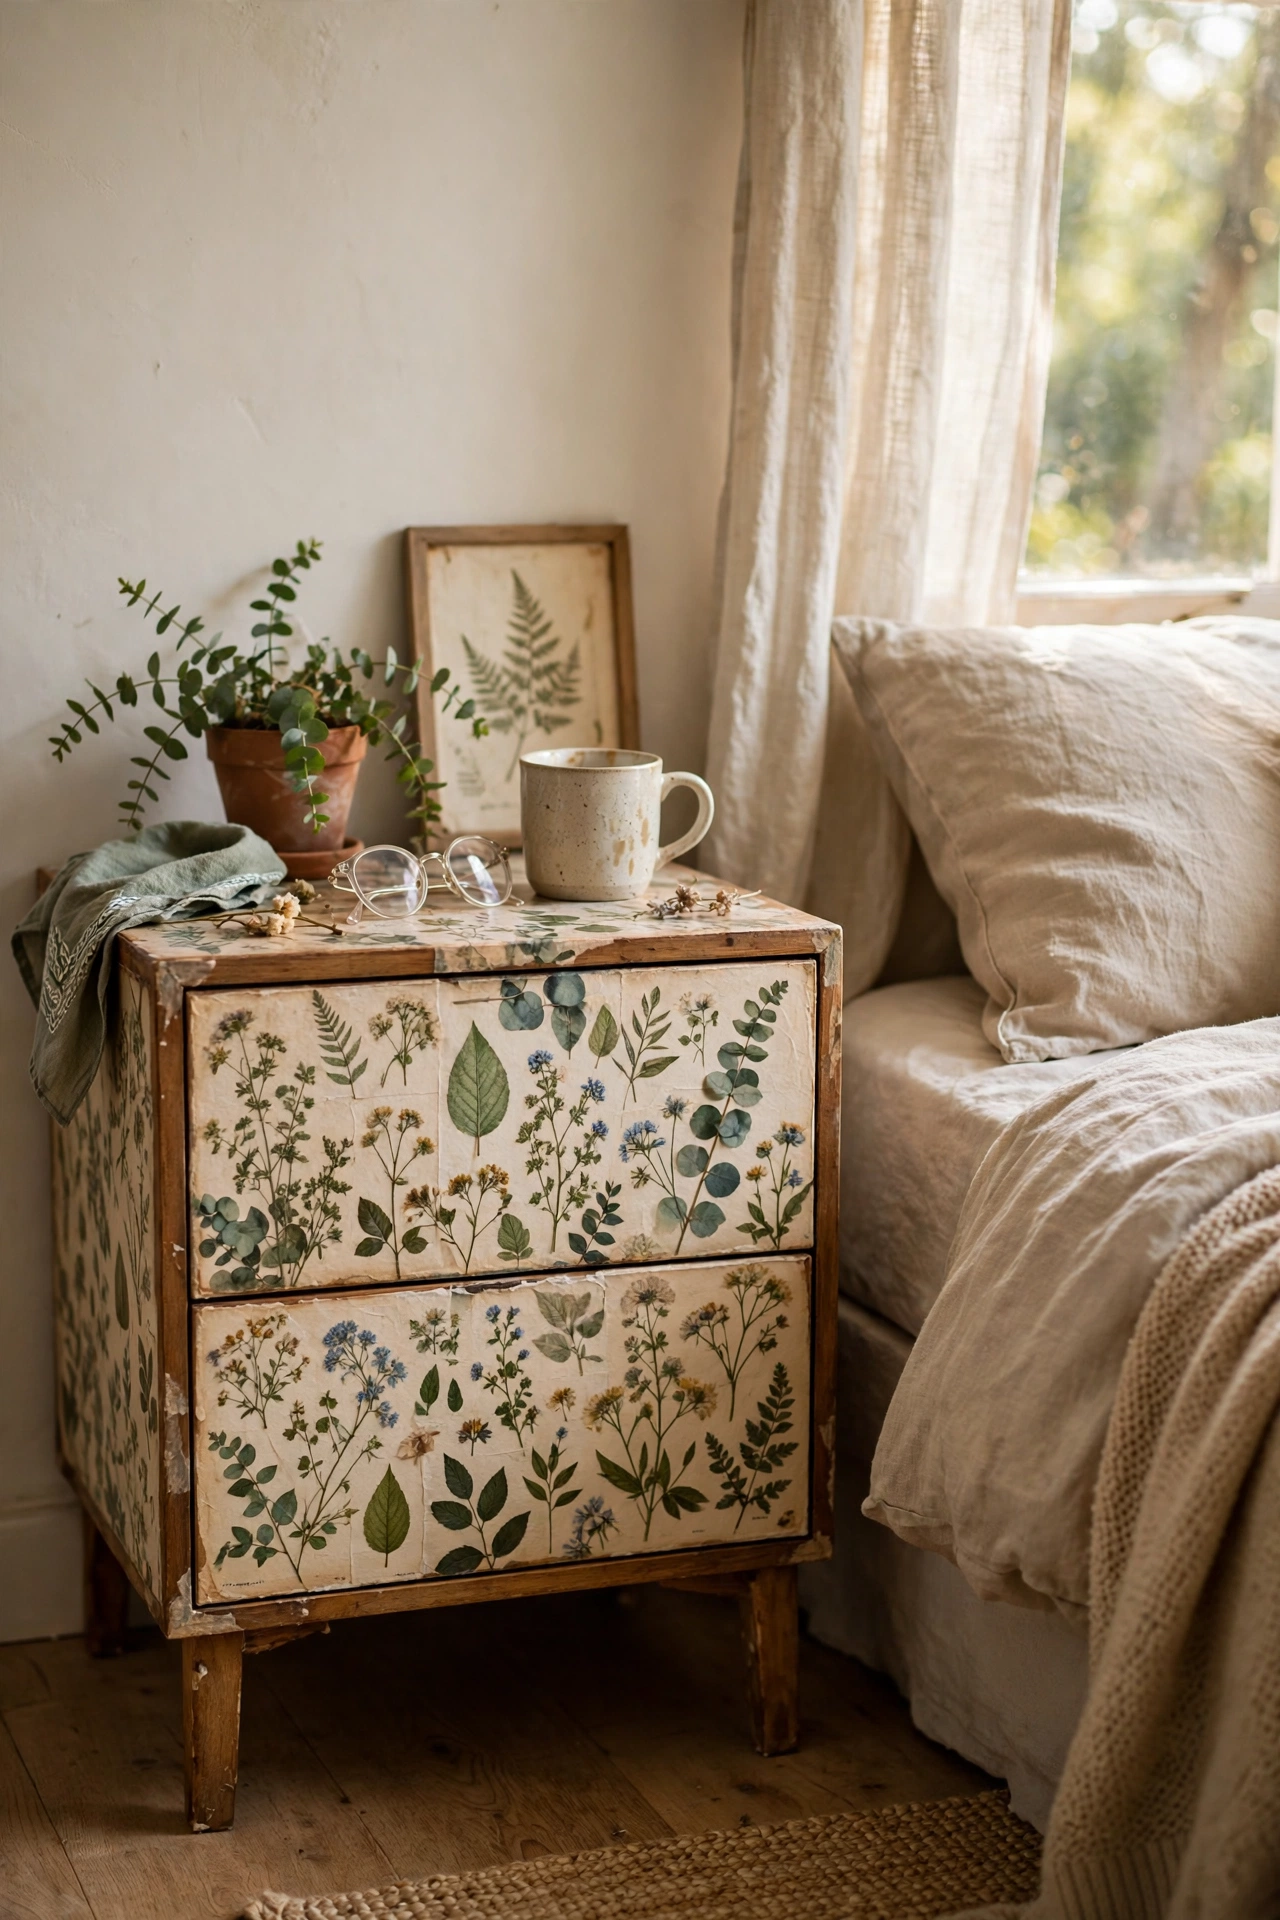
Decoupage turns plain drawer fronts into something that looks hand-painted. I covered the two drawers of my nightstand with vintage botanical paper napkins using decoupage glue, brushing the glue under and over each layer and smoothing out bubbles with a damp cloth. Trim the paper with a craft knife once dry, then seal with two coats of clear varnish so it survives daily use. My first drawer wrinkled because I rushed the glue; the second one went on perfectly once I slowed down. Maps, sheet music, and floral prints all work beautifully.
Cost: ~$5-10 | Time: 2 hours plus drying
12. Pipe-Fitting Industrial Nightstand
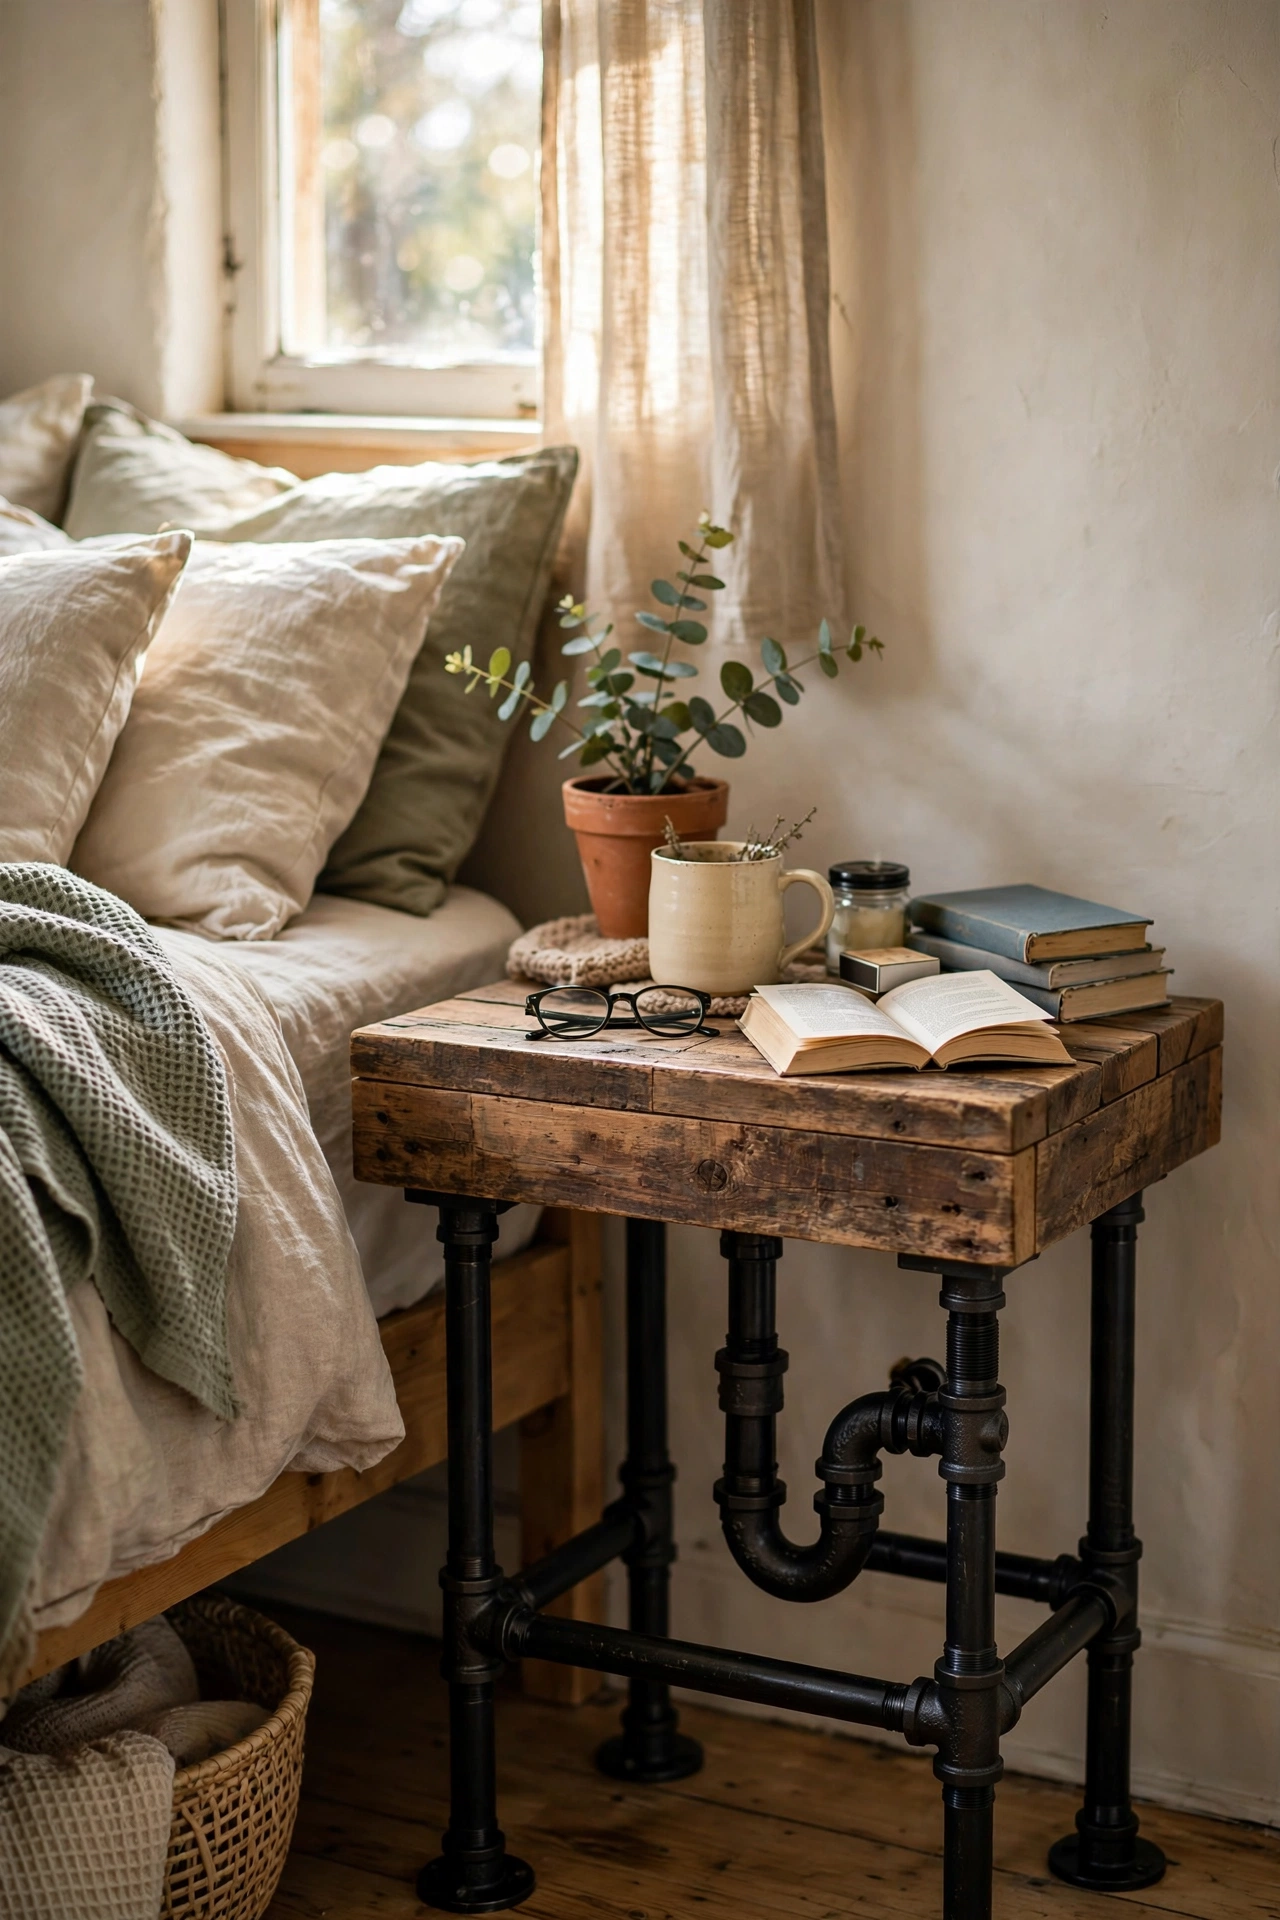
Plumbing pipe and flanges screwed into a wooden top make an industrial diy Nightstand that suits modern bedrooms. I dry-fitted four 25cm pipe legs with elbow joints to get the stance right, then screwed the flanges to a reclaimed pine board. Wrap the threads with plumber’s tape before assembling so the joints sit tight and do not loosen over time. Spray the pipes matte black for a softer look or leave the galvanised finish raw. Mine cost less than a pizza and has survived three house moves.
Cost: ~$15-25 | Time: 1.5 hours
Budget check: halfway home, and the priciest build so far is still $30. The decoupage and leather-pull ideas show how far a five-dollar refresh can go when the bones are already there.
13. Two-Tone Dip-Dyed Legs
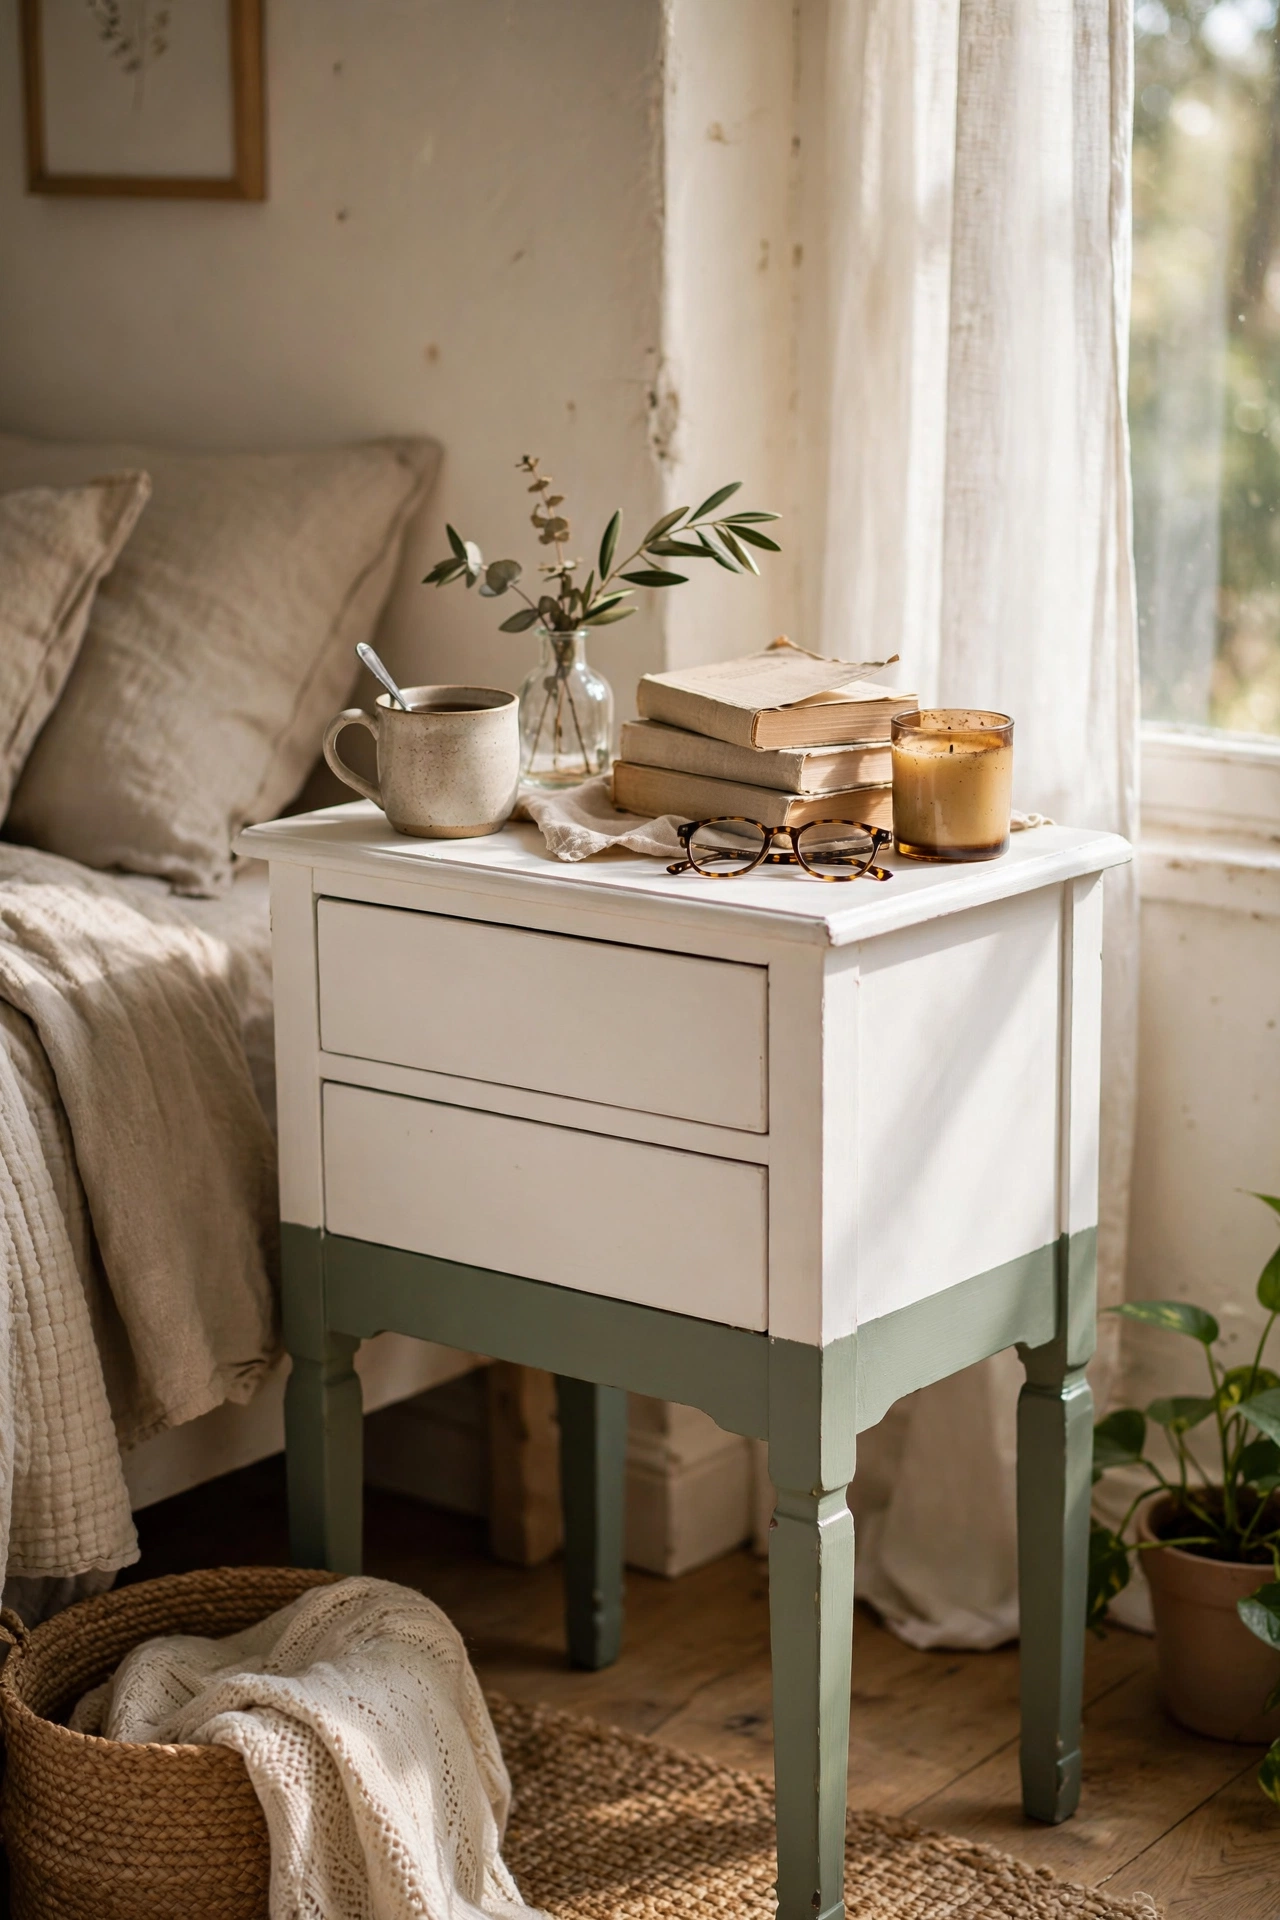
If your nightstand legs are fine but boring, paint-dipping the lower half gives a designer two-tone effect for the price of a tester pot. I taped a crisp line around each leg of my plain white nightstand with painter’s tape, then brushed on two coats of sage green below the line. Peel the tape while the paint is still slightly tacky for the sharpest edge; I waited too long on one leg and pulled paint off with the tape, so learn from that. Match the dipped colour to your bedding and the whole room feels more pulled together.
Cost: ~$4-8 | Time: 1 hour plus drying
14. Suitcase Stack Nightstand
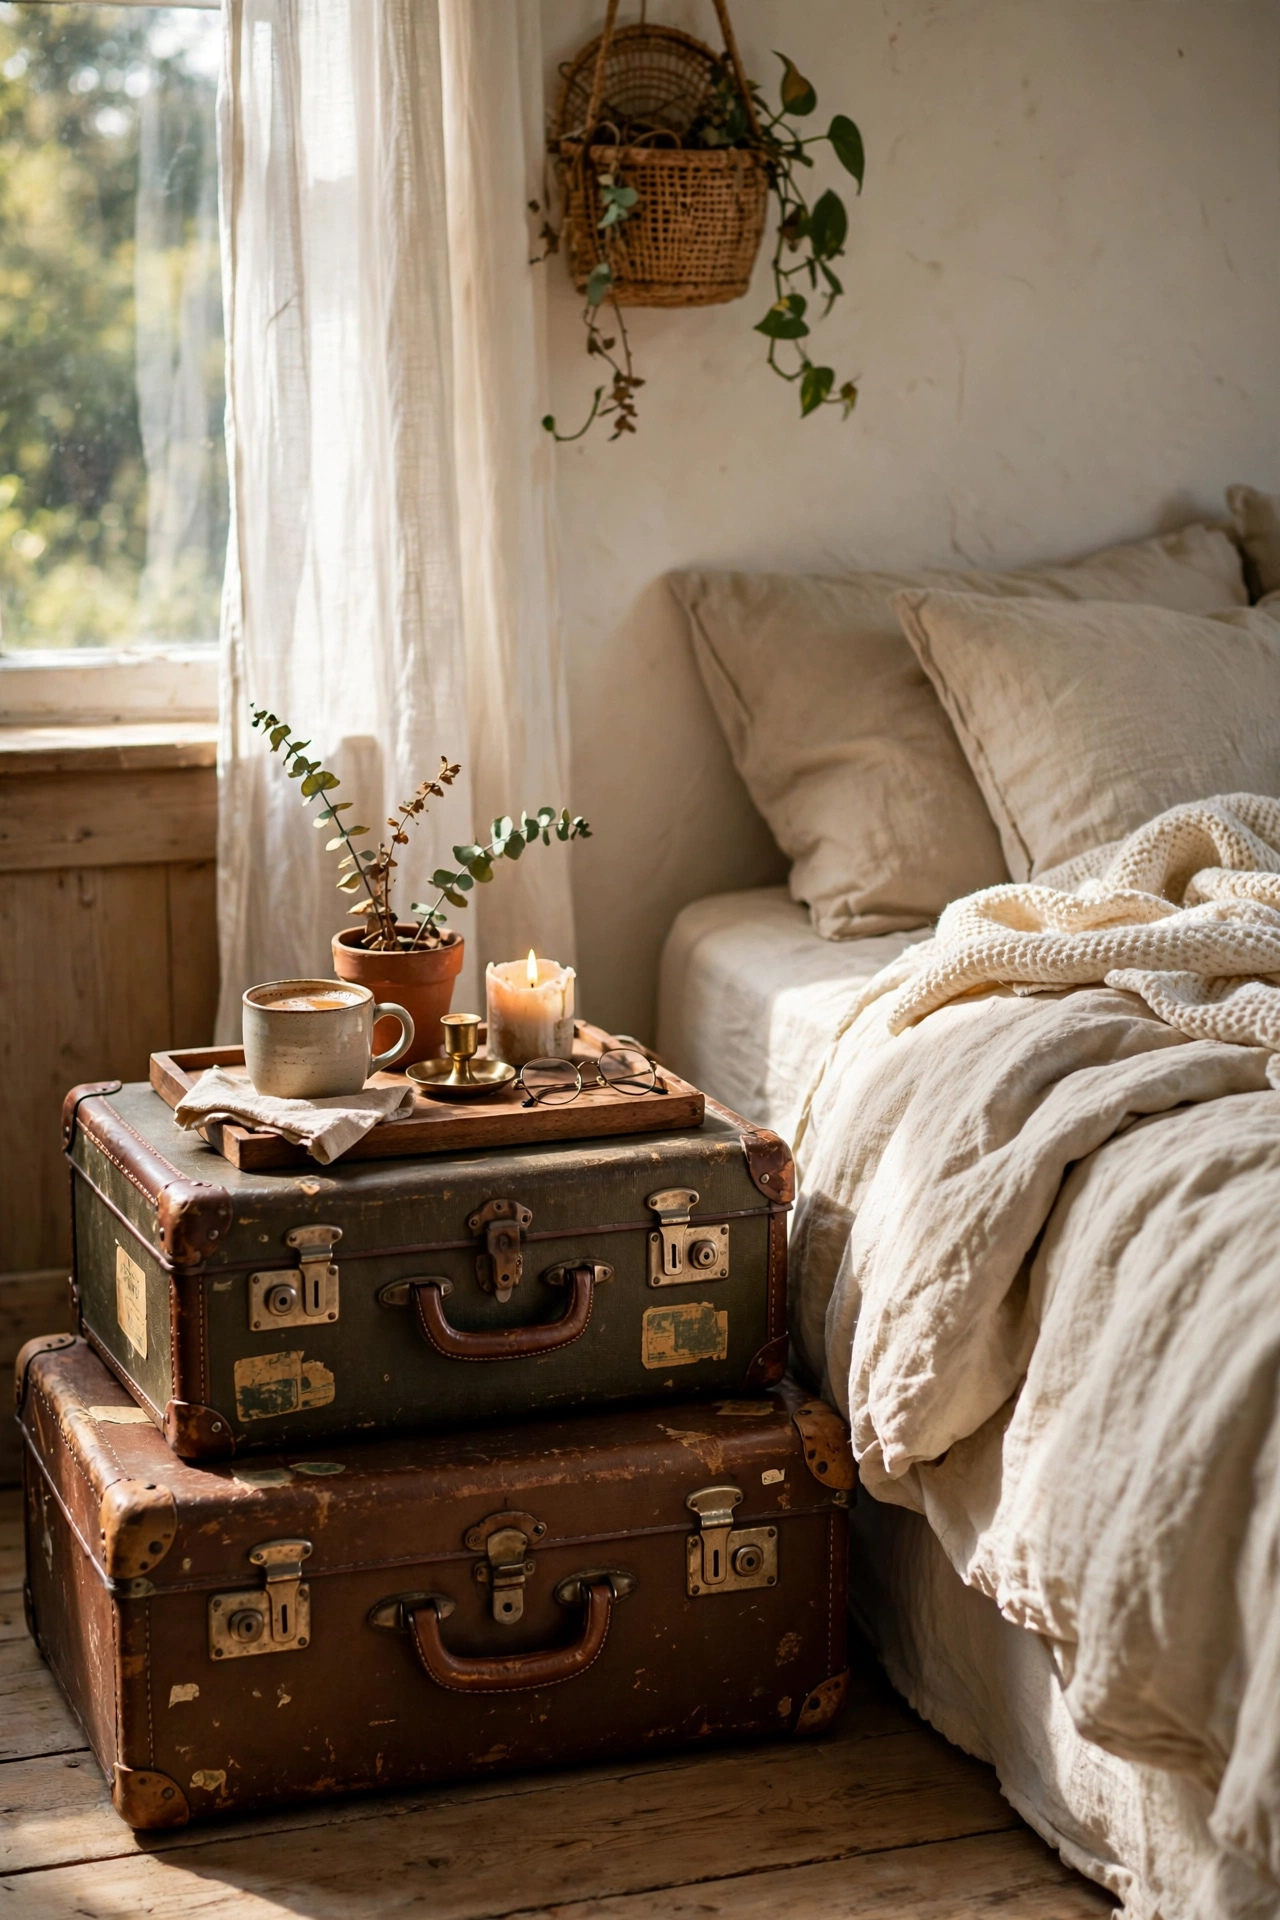
Two vintage suitcases stacked on the floor make a nightstand with hidden storage and serious character. I found mine at a flea market for $10 the pair, wiped them down, and stacked the larger underneath. The inside of the top suitcase stores chargers and spare batteries out of sight, which keeps the bedroom looking calm. Stack them with the latches facing forward so the top one stays shut, and put a tray on top if you want a flat surface for a lamp. Mine is the first thing people photograph in my bedroom.
Cost: ~$10-18 | Time: 20 minutes
15. Reclaimed Pallet Nightstand
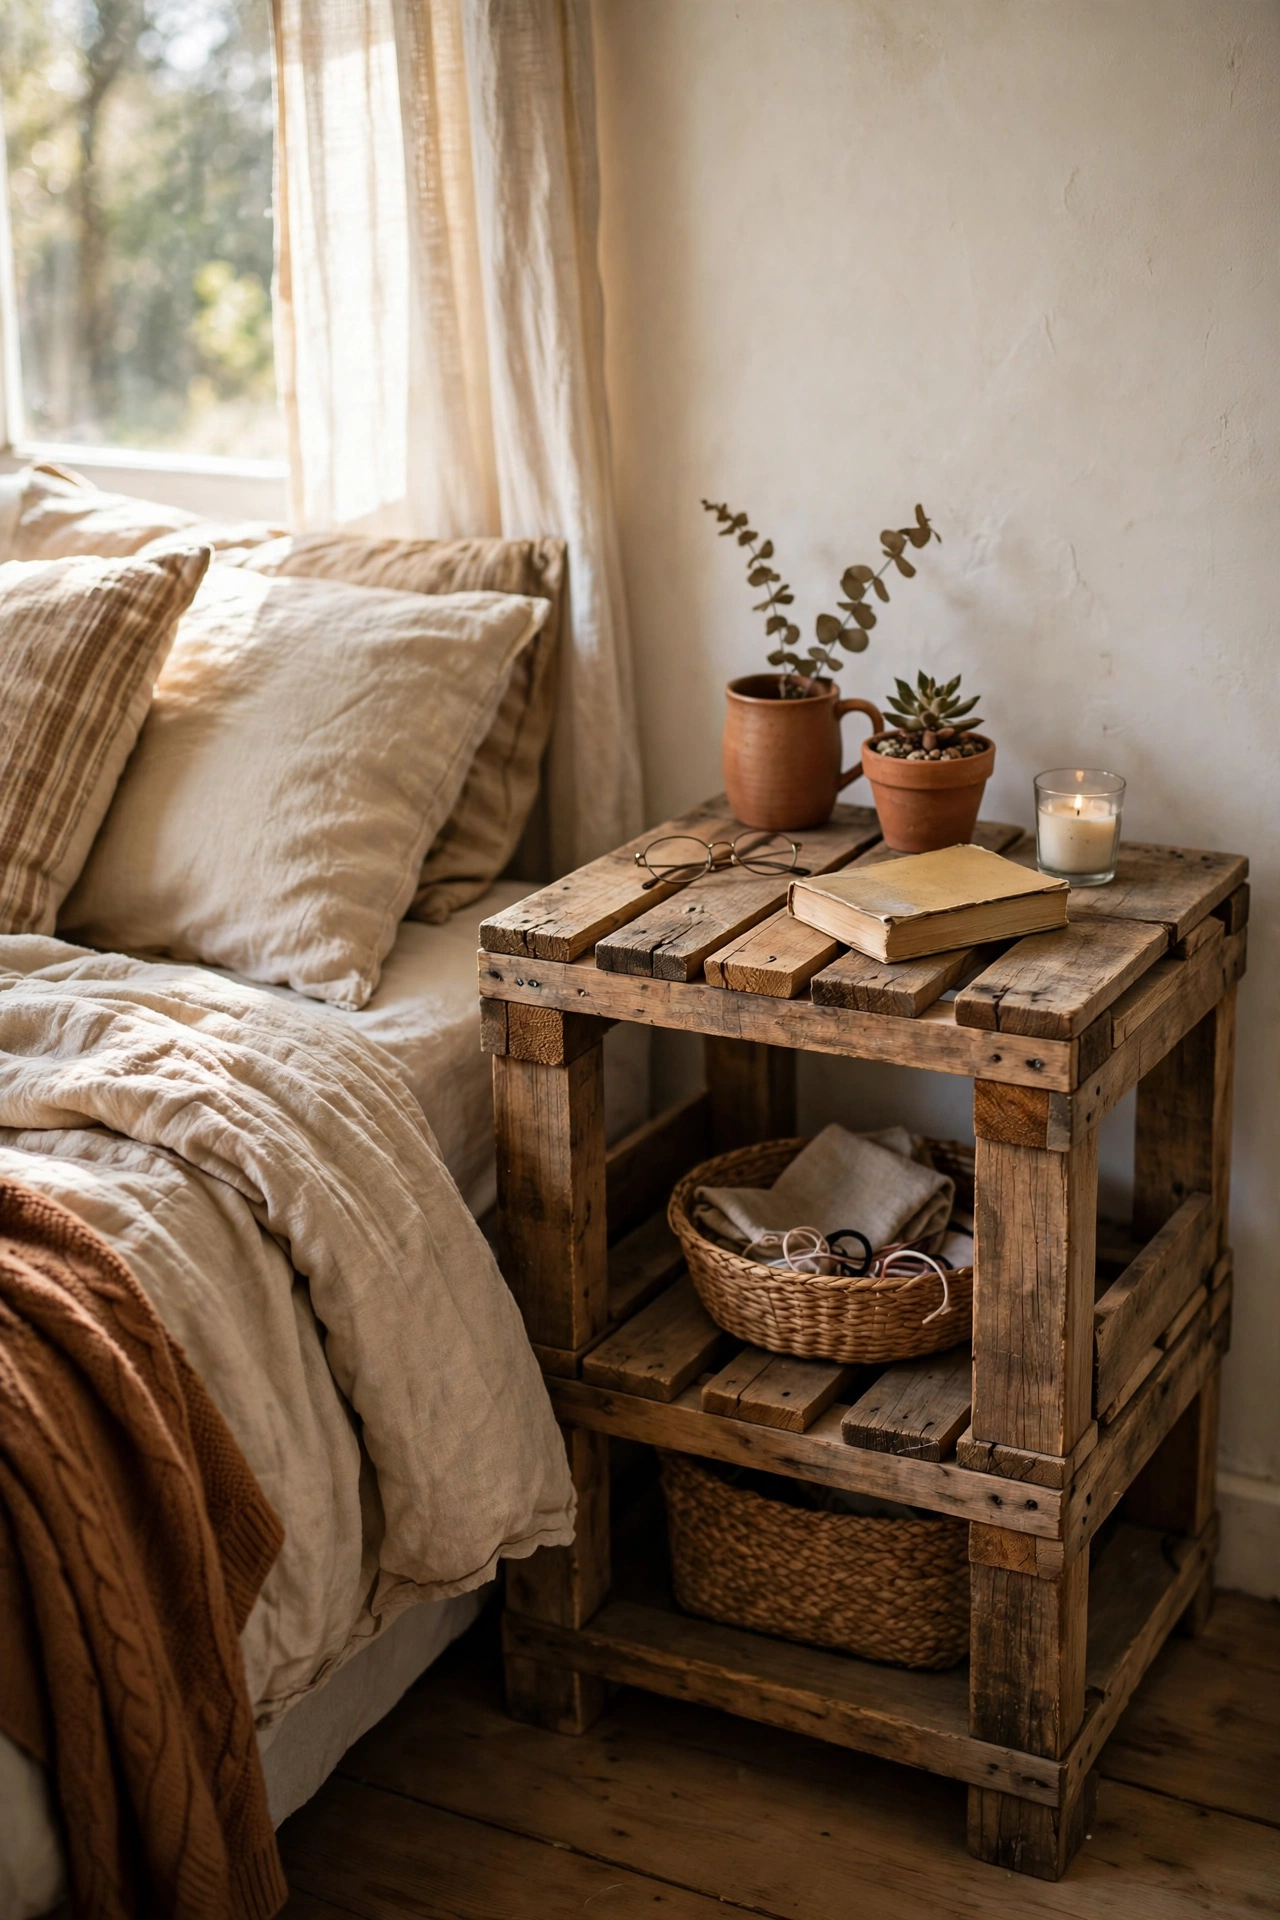
Pallet wood is free, sturdy, and full of character once you sand it properly. I broke down two pallets, picked the straightest boards, and built a simple open box with a shelf in the middle using wood glue and screws. Sand everything thoroughly, because pallet wood is rough and splinters are the enemy of bare feet at night. A coat of clear matte varnish keeps the rustic look while making it wipeable. Mine took a Saturday afternoon and has outlasted two flat-pack tables.
Cost: ~$3-8 | Time: 3 hours
16. Wall-Mounted Fold-Down Nightstand
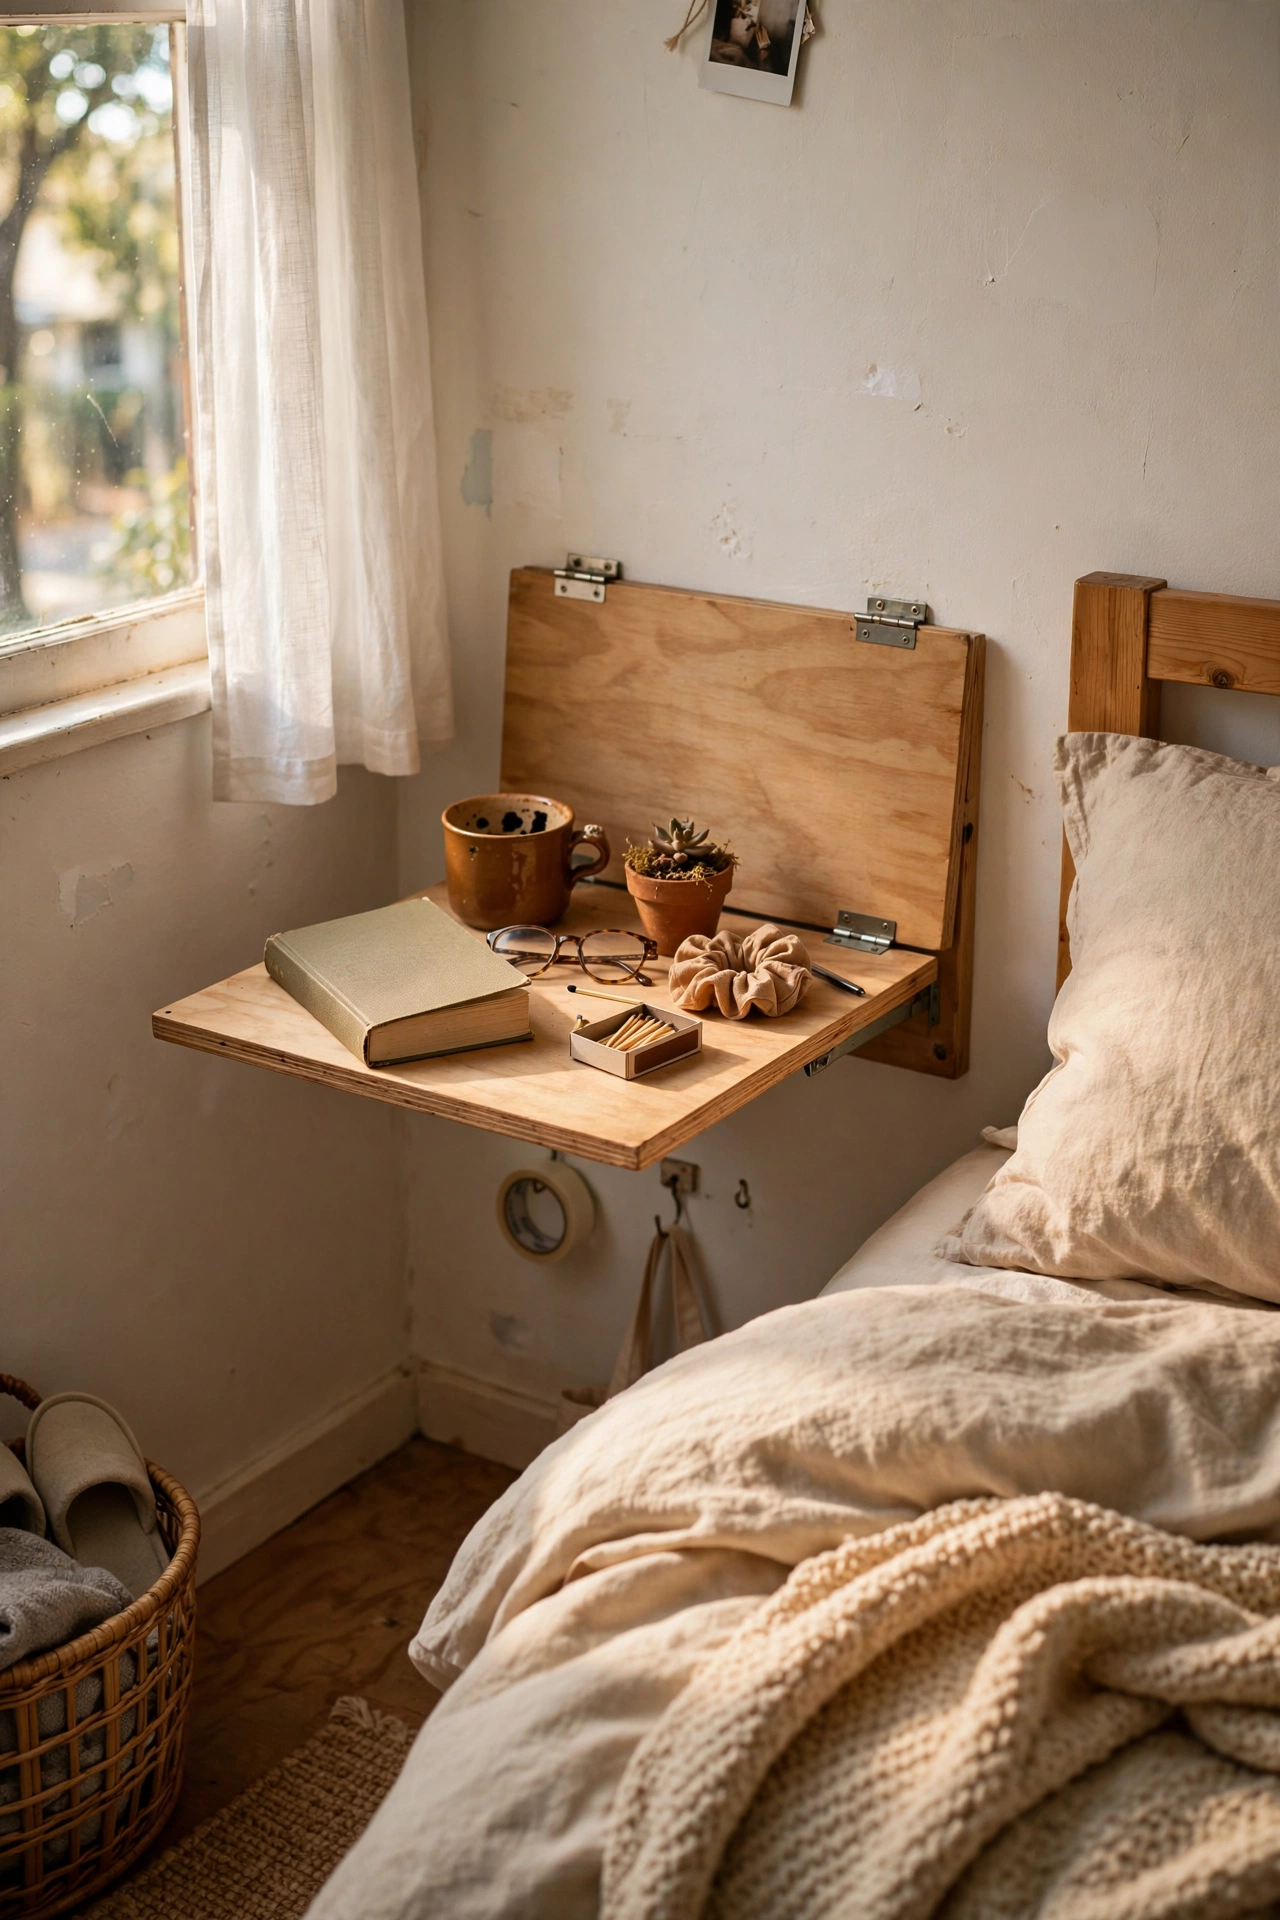
A hinged shelf that folds flat against the wall is perfect for a guest room or a truly tiny bedroom. I mounted a 50cm board on two sturdy hinges with a folding bracket underneath, so it holds a book and a lamp when down and disappears when folded up. Test the bracket’s weight rating before you trust it with a lamp, because cheap brackets sag. Mine cost $14 in hardware and took under an hour to install. Guests always ask where the nightstand went when they see it folded away.
Cost: ~$10-18 | Time: 1 hour
Budget check: four to go, and the running average is still under $14 a project. The pallet build proves the cheapest materials can make the sturdiest furniture when you put in an afternoon.
17. Basket-on-Stand Nightstand
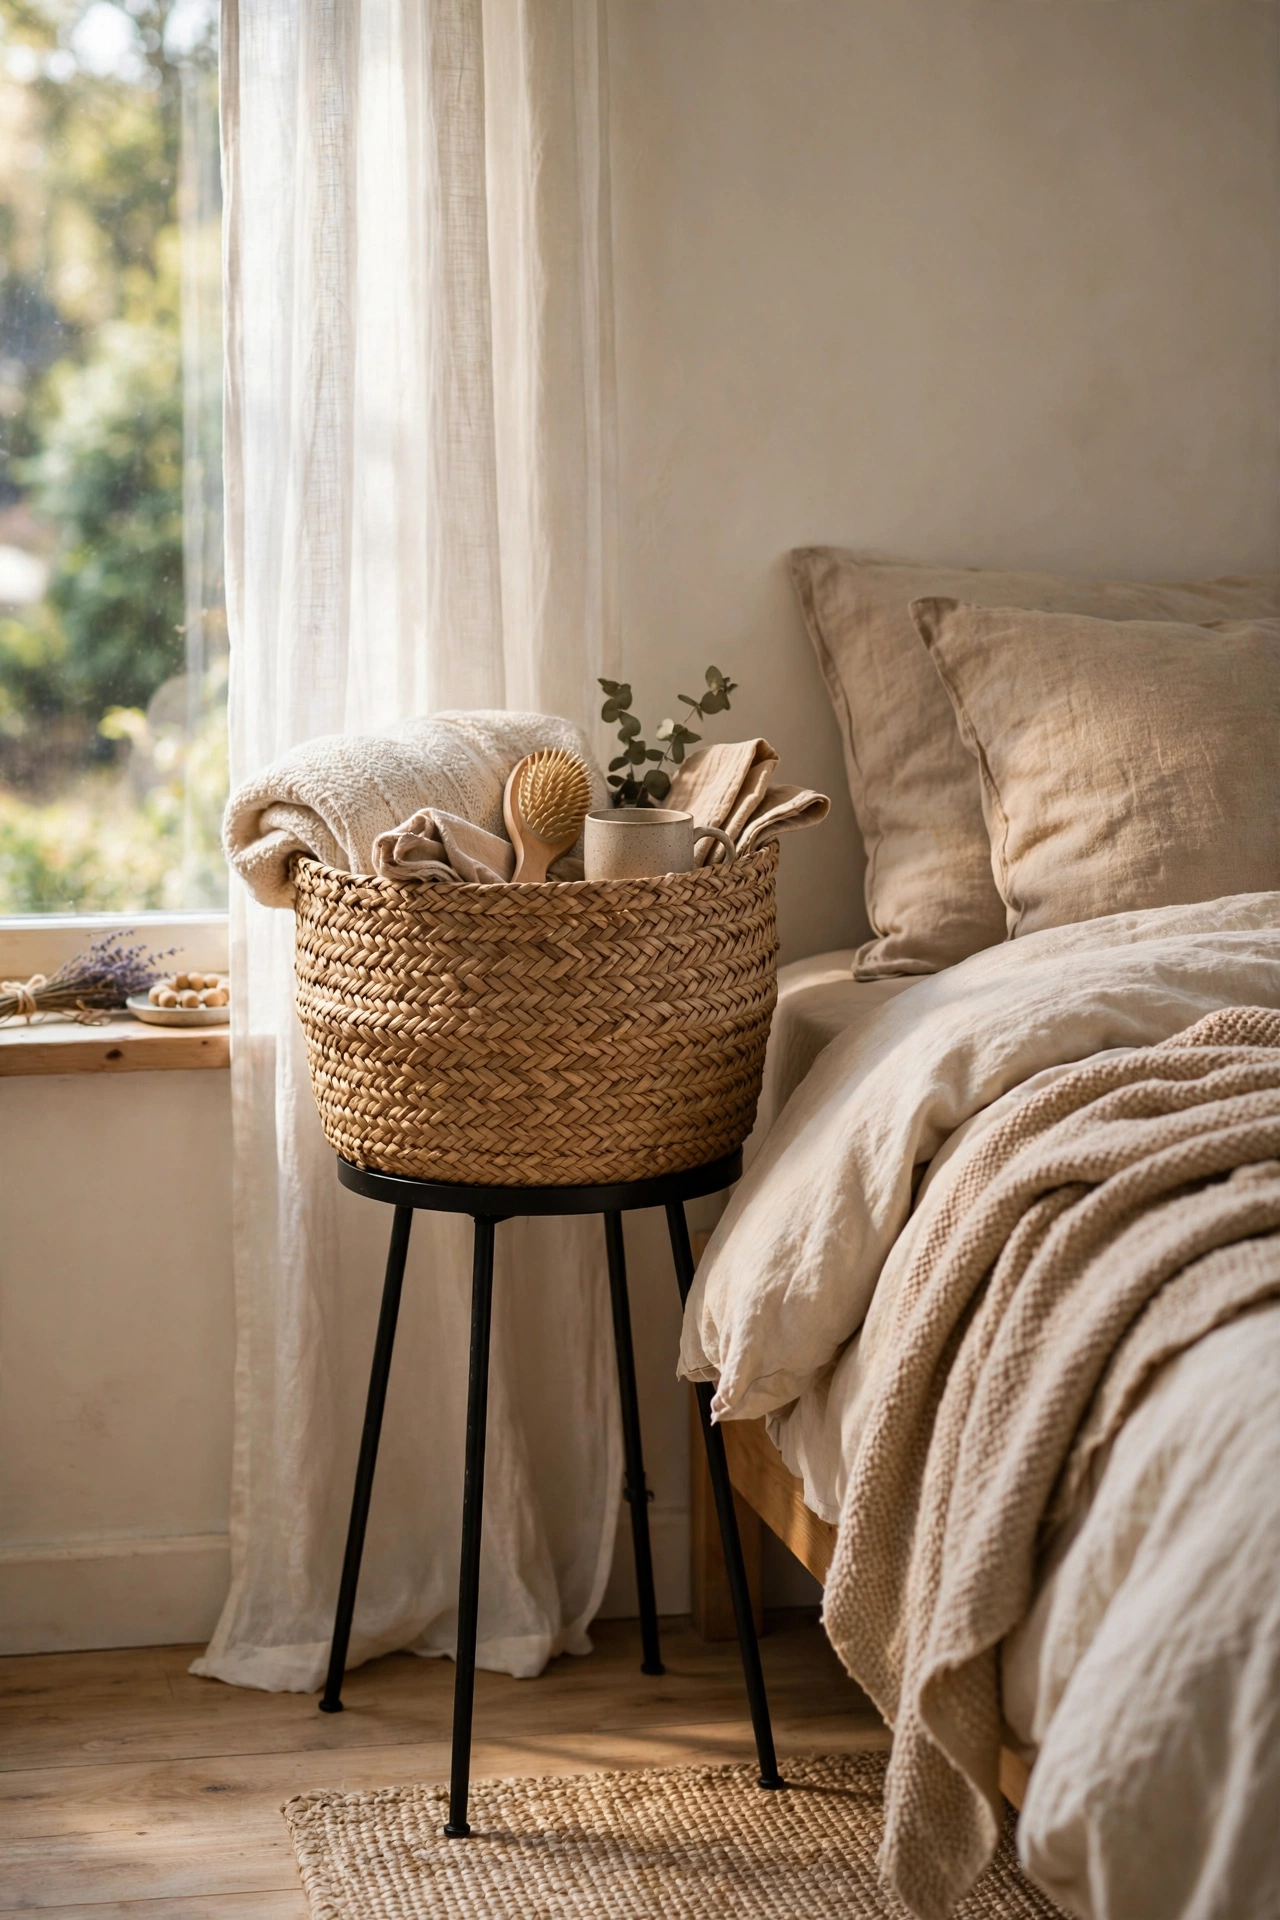
A large woven basket sitting on a cheap plant stand makes a soft, textural diy Nightstand that is also a laundry hamper in disguise. I bought a $9 seagrass basket and set it on a folding metal plant stand I already owned, and the rim sits at the perfect height for a bedside. The basket swallows pyjamas, extra blankets, and charging cables whole, which is a blessing in a small room. Choose a basket with a tight weave so nothing pokes through, and make sure the stand is stable before you load it up. If you ever want soft evening light nearby, the candle ideas in (see also: 25-diy-candle-decor-ideas-on-a-budget) pair beautifully with this one.
Cost: ~$10-18 | Time: 10 minutes
Loved these builds? Save this one for your next rainy-day project list, so the ideas are waiting when the weekend finally frees up.
Keep the DIY momentum going: (see also: 17-weekend-diy-projects-you-can-finish-in-a-day) (see also: 25-diy-candle-decor-ideas-on-a-budget) (see also: 17-diy-planter-ideas-on-a-budget)
