25 DIY Coffee Table Ideas in a Weekend
I built my first DIY coffee table on a rainy Saturday in March, and it was dry enough to carry my pizza that same evening. Total spend: about ten pounds on screws and a sander pad. Total time: five hours including the drying breaks. That table lasted me four years and two house moves, and nobody ever believed it cost less than a takeaway. The truth about a DIY coffee table project is simpler than most people think: the build is straightforward, and a weekend is genuinely all you need.
Every idea below is designed to start and finish within a weekend, and most within a single day. I have grouped them by build style, from pallets and crates through to proper timber builds, and each one lists the honest cost and time. Grab a drill, clear a bit of floor space, and pick the build that suits the timber you can actually get hold of this week.
Pallet and Crate Weekend Builds
1. The Classic Two-Pallet Coffee Table
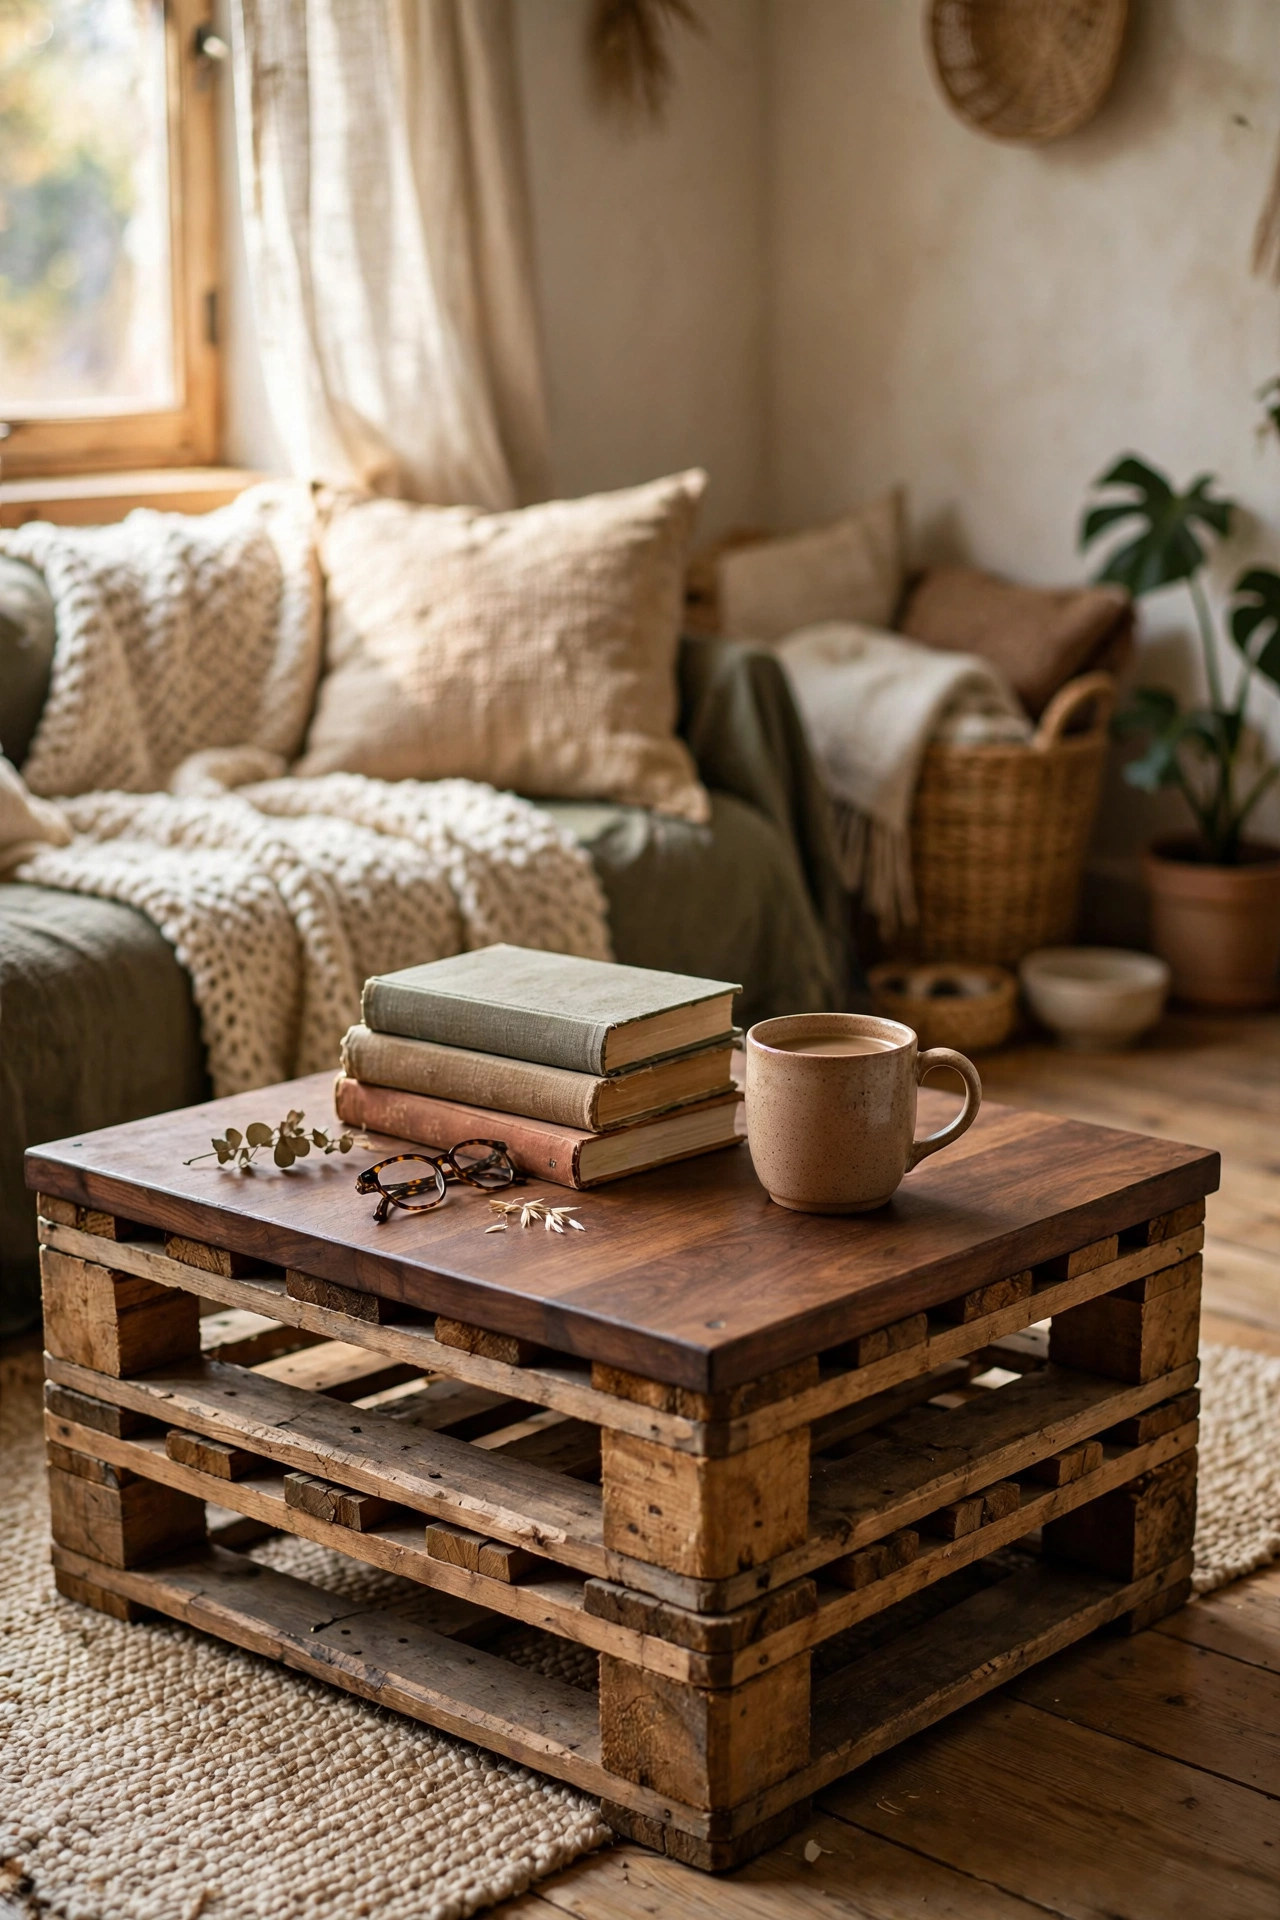
Stack two heat-treated pallets (look for the HT stamp), screw them together, sand the top smooth, and you are done. Sand with 80 grit then 120 grit so nobody gets splinters with their morning cuppa. I stained mine with a walnut wood stain and it looked like a proper rustic piece. I tried skipping the sanding once — never again, because a splinter in a guest’s hand ruins the whole mood. Measure your sofa seat height first: two standard pallets stack to about 28cm, which suits most low sofas. Finish with a coat of clear wax so the stain does not rub off onto the rug.
Cost: ~$10-20 | Time: 3 hours
2. Wine Crate Grid Table on Castors
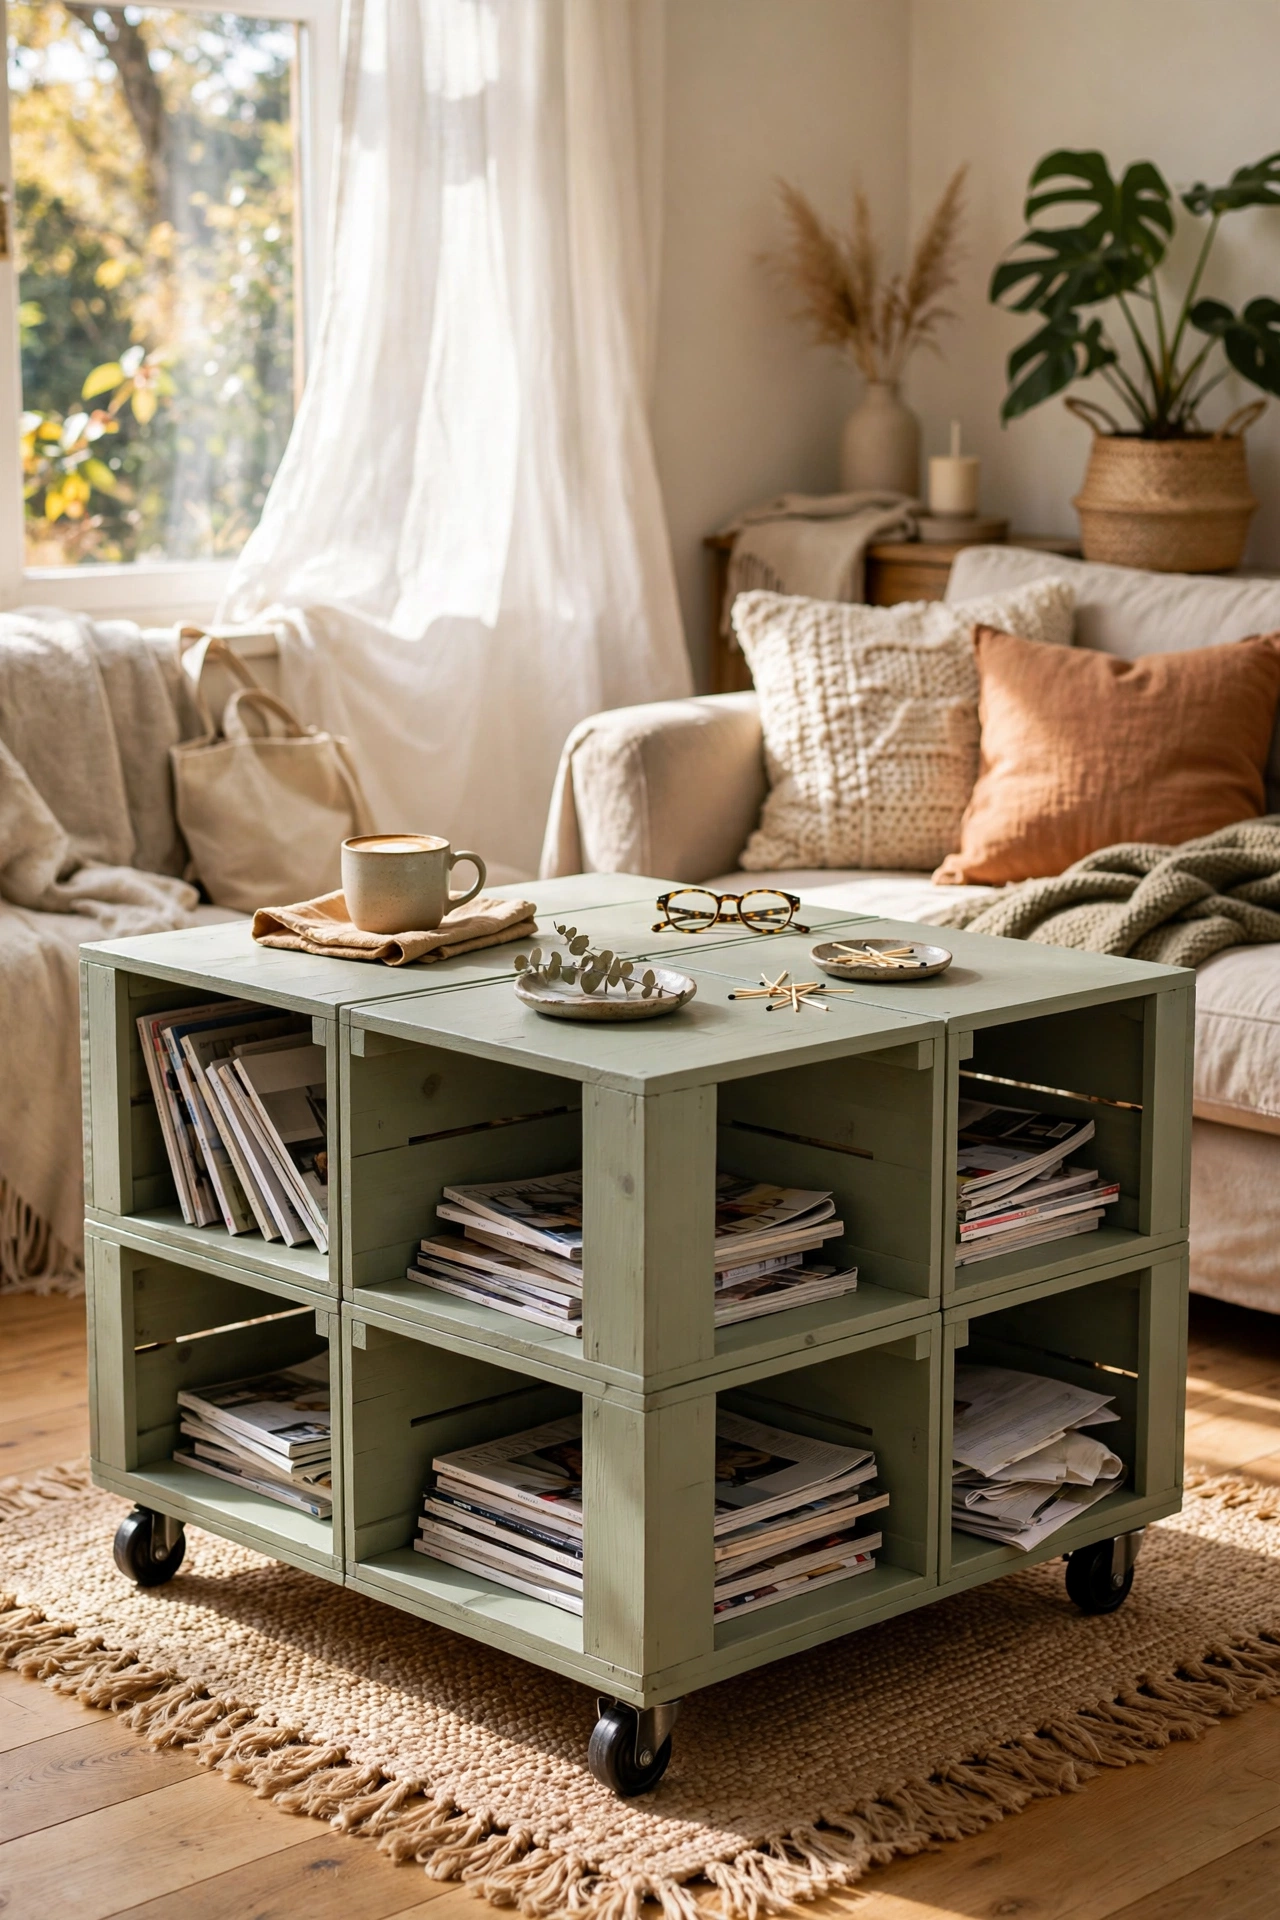
Six wine crates arranged in a two-by-three grid, open sides facing out, screwed together, with four castor wheels underneath. Each crate becomes a cubby for remotes, magazines, and coasters. Sand the crate edges first — old wine crates have rough lips that catch sleeves. I painted mine a soft sage green and waxed the tops. I tried standing the crates tall-side up at first and the proportions looked all wrong; laying them long-side down gives a proper coffee table footprint. Screw the castors into a base board rather than straight into the thin crate bottoms, or they will pull out. Put locking castors on two corners so it does not wander across the rug.
Cost: ~$25-40 | Time: 4 hours
3. Pallet Top with a Glass Centre Insert
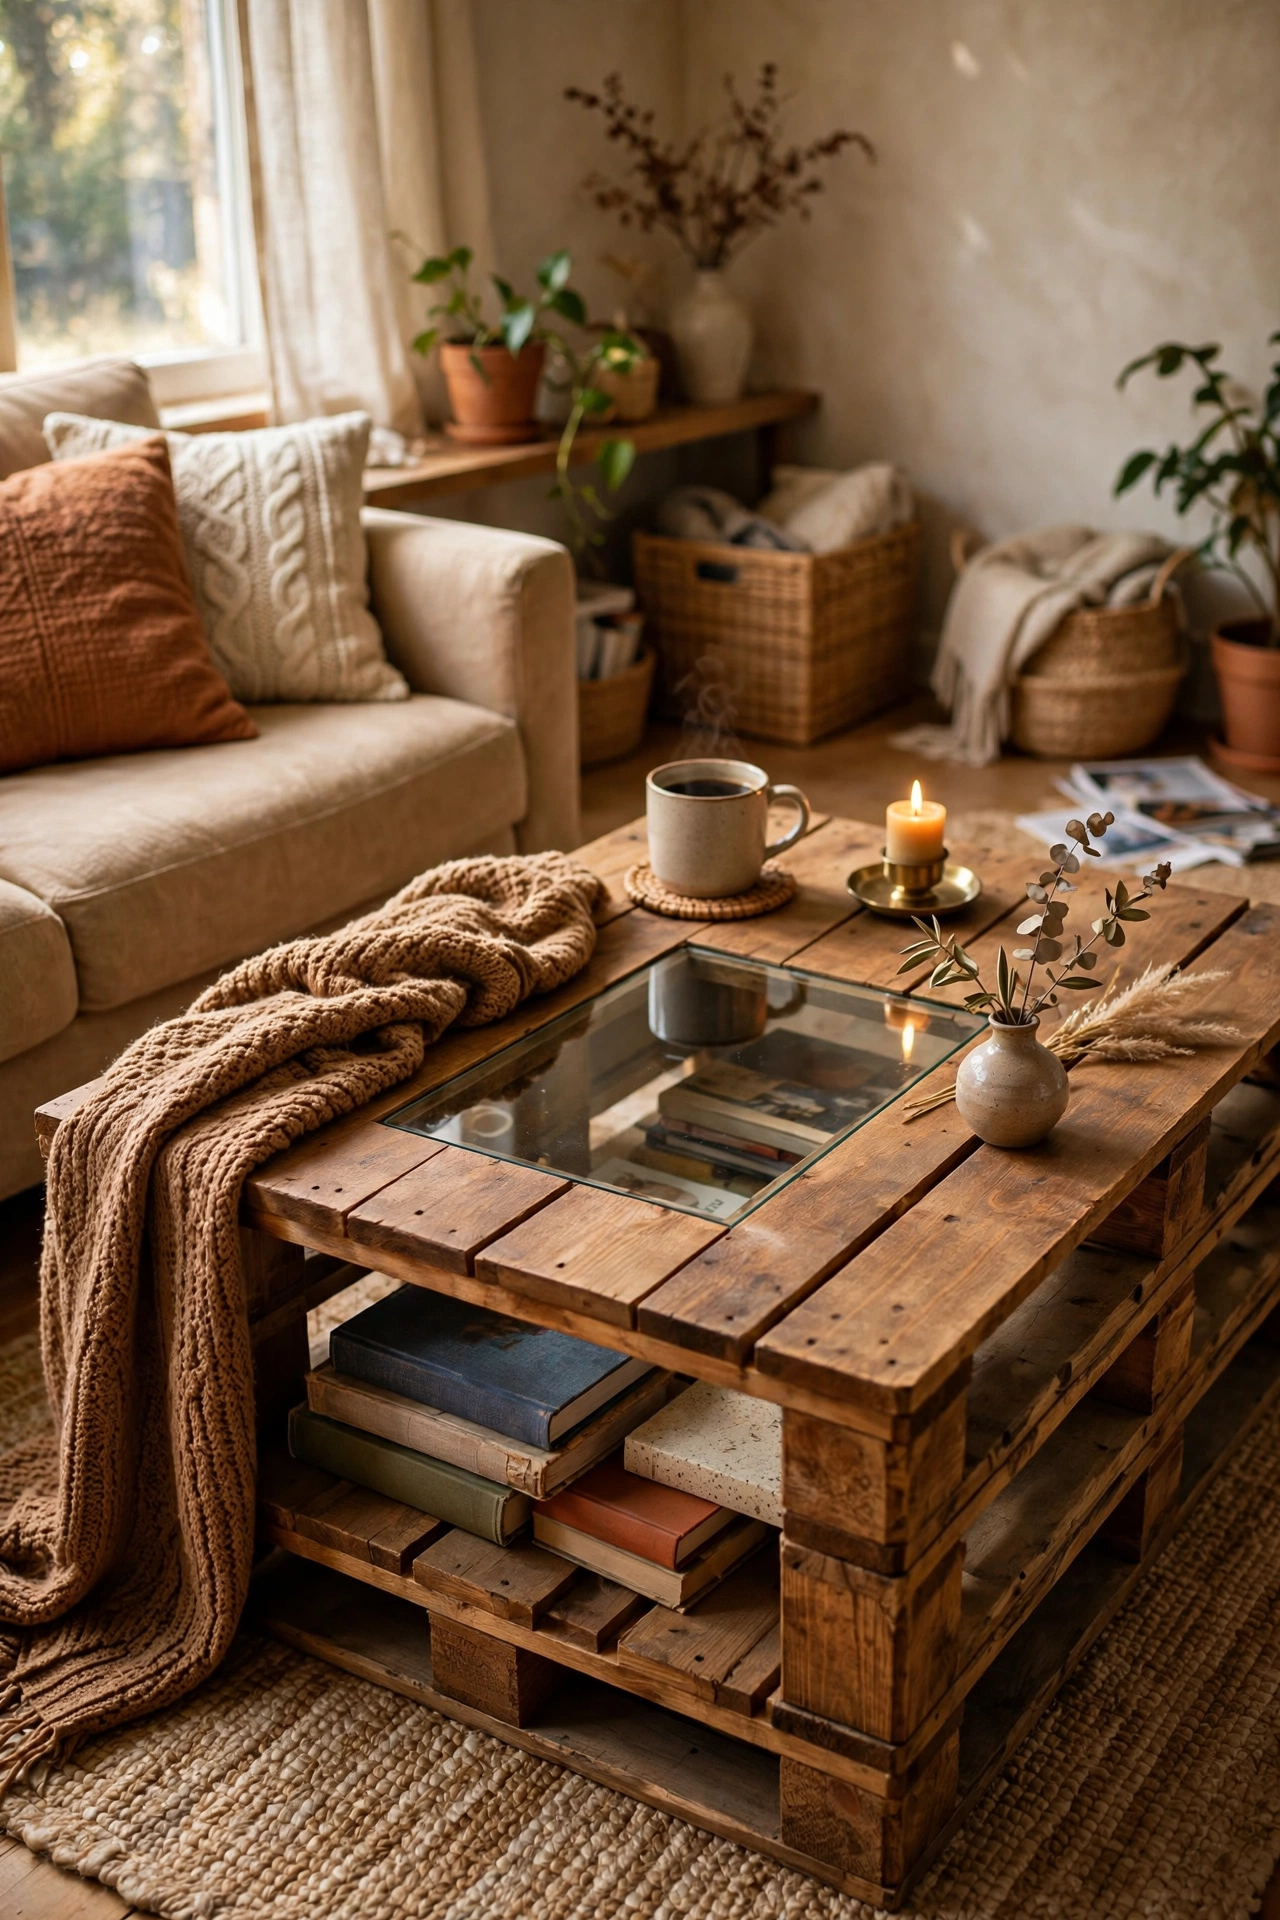
One pallet, sanded and stained, with the middle slats removed and a cut-to-size glass panel dropped into the gap. The glass shows off the storage underneath — I keep a stack of coffee table books visible through mine. Order the glass 5mm thick with polished edges from a local glazier; mine cost less than the stain did. I tried resting the glass on the raw slat edges and it rocked; batten two thin support strips underneath so it sits perfectly level. Clean the glass on both sides before you drop it in, because you will not want to lift it out every week for dusting.
Cost: ~$30-45 | Time: 4 hours
4. Stacked Wine Crate Storage Table
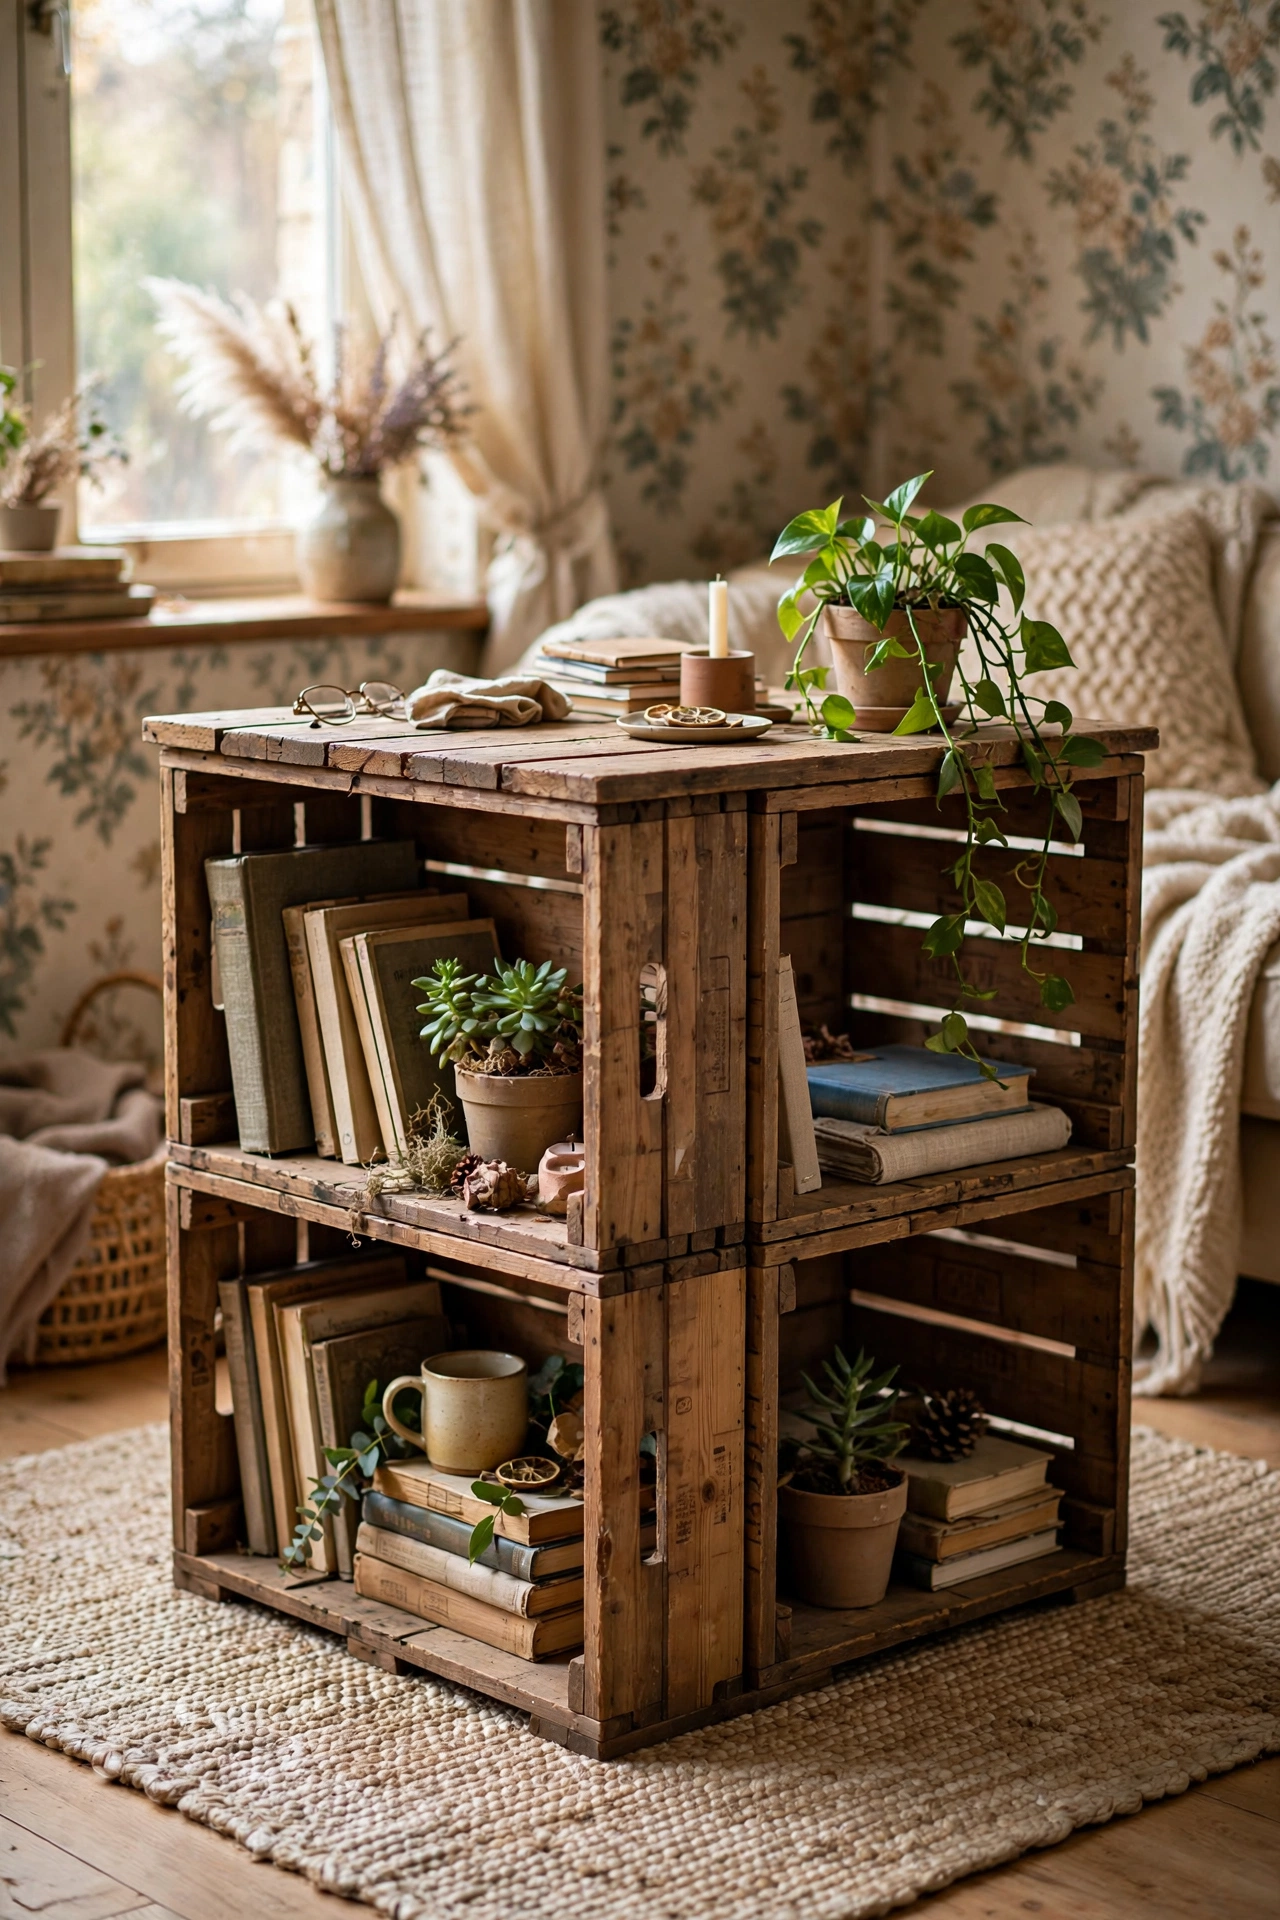
Four wine crates stacked two-by-two, screwed through the sides, with the open fronts facing out like little shelves. It works as a coffee table and a bookcase at the same time. I lined the insides with leftover wallpaper for a finished look — it costs nothing and looks completely deliberate. I tried glueing them first; screws are what keep it rigid when you lean a heavy book against it. Stack with the heaviest items low so it never feels top-heavy. Lay a single plank across the top as a lid and you have a proper flat surface for mugs.
Cost: ~$15-25 | Time: 3 hours
5. Single Pallet Table on Hairpin Legs
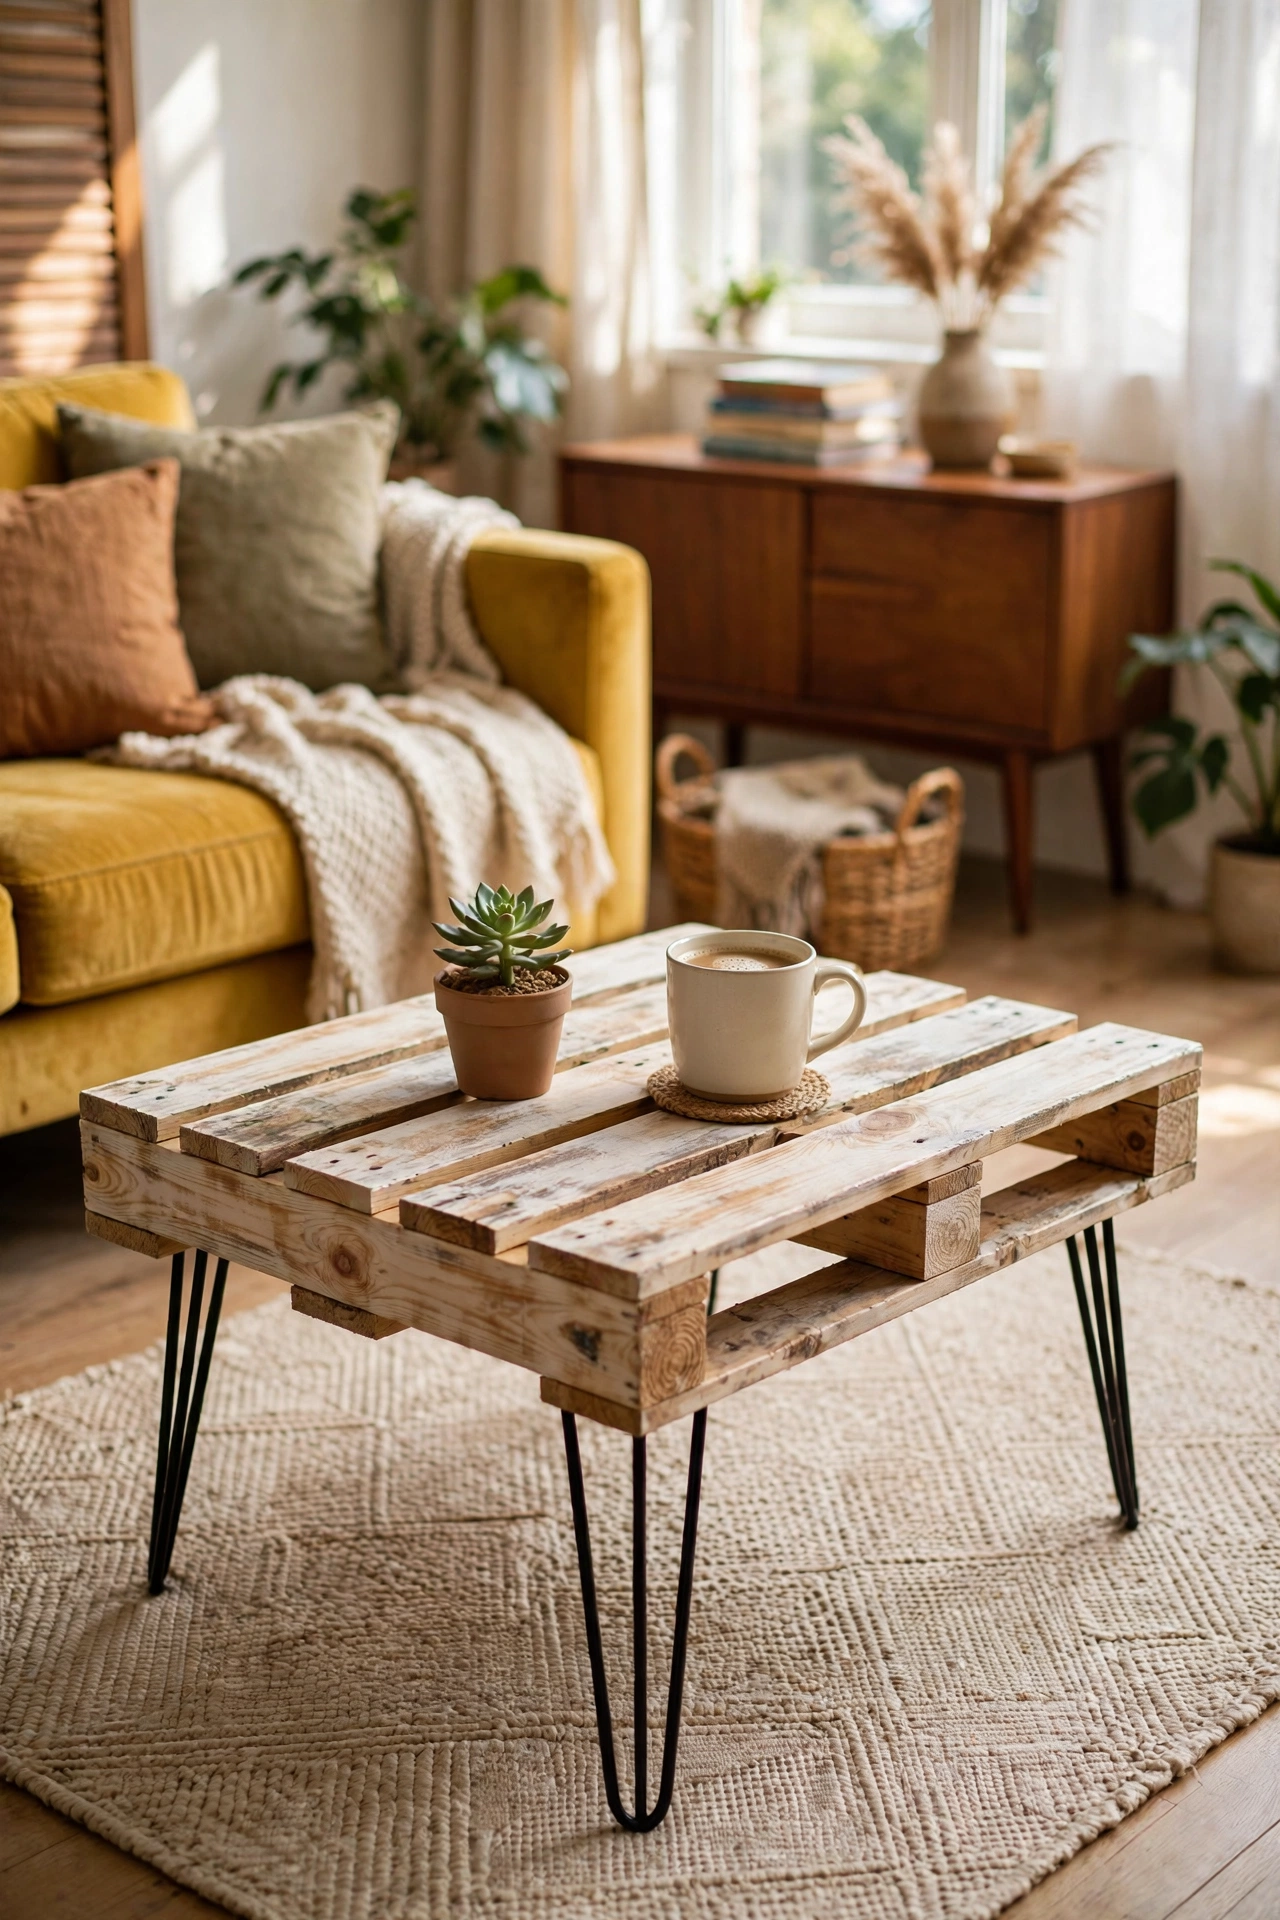
One sanded pallet on four 40cm hairpin legs — the mid-century look for the price of a pizza. The trick is buying legs with proper mounting plates, not the cheap screw-in pins that wobble. Mark your leg positions with a cardboard template so all four sit square. I learned the hard way: measure diagonally across the legs before tightening everything, because a wonky table rocks forever. Two coats of matte black paint on the legs, natural oil on the pallet top, and it genuinely looks shop-bought. Start the build on Saturday morning and it will be carrying your Sunday coffee.
Cost: ~$35-50 | Time: 3 hours
6. Painted Checkerboard Crate Table
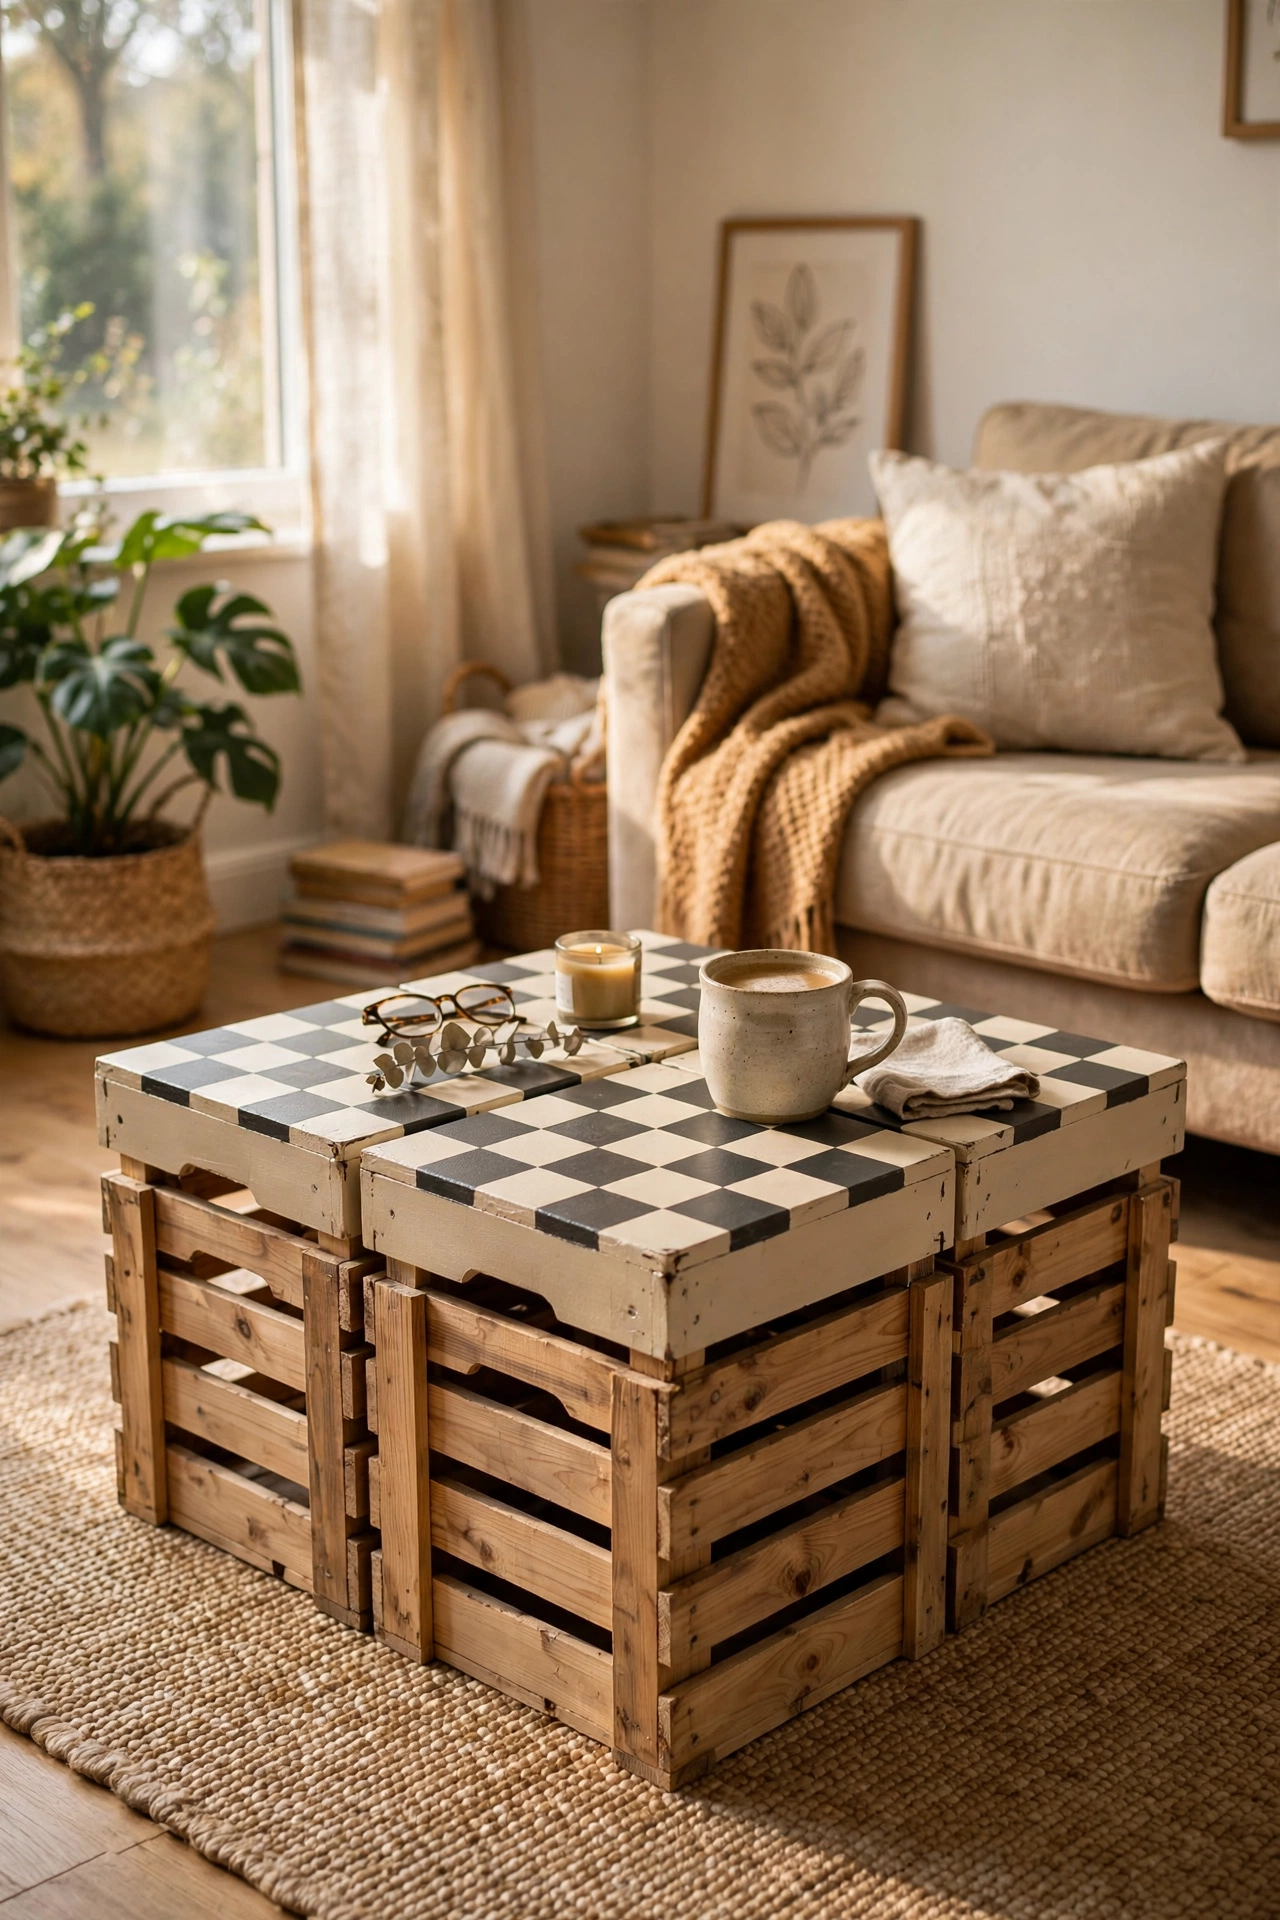
Four small crates set in a square, with the tops painted in alternating colours like a checkerboard — cream and charcoal works brilliantly. Use proper furniture paint so the top survives mug rings. I painted the crate bodies one colour and only the top slats in the alternating pattern, which keeps it from looking busy. I tried taping the squares with masking tape and the paint bled underneath; brush the edges freehand with a steady hand instead. Seal with two coats of clear matte varnish so the pattern does not scuff when you slide a mug across it.
Cost: ~$20-30 | Time: 5 hours with drying
Timber Board Builds for a Saturday
7. Scaffolding Board Slab Coffee Table
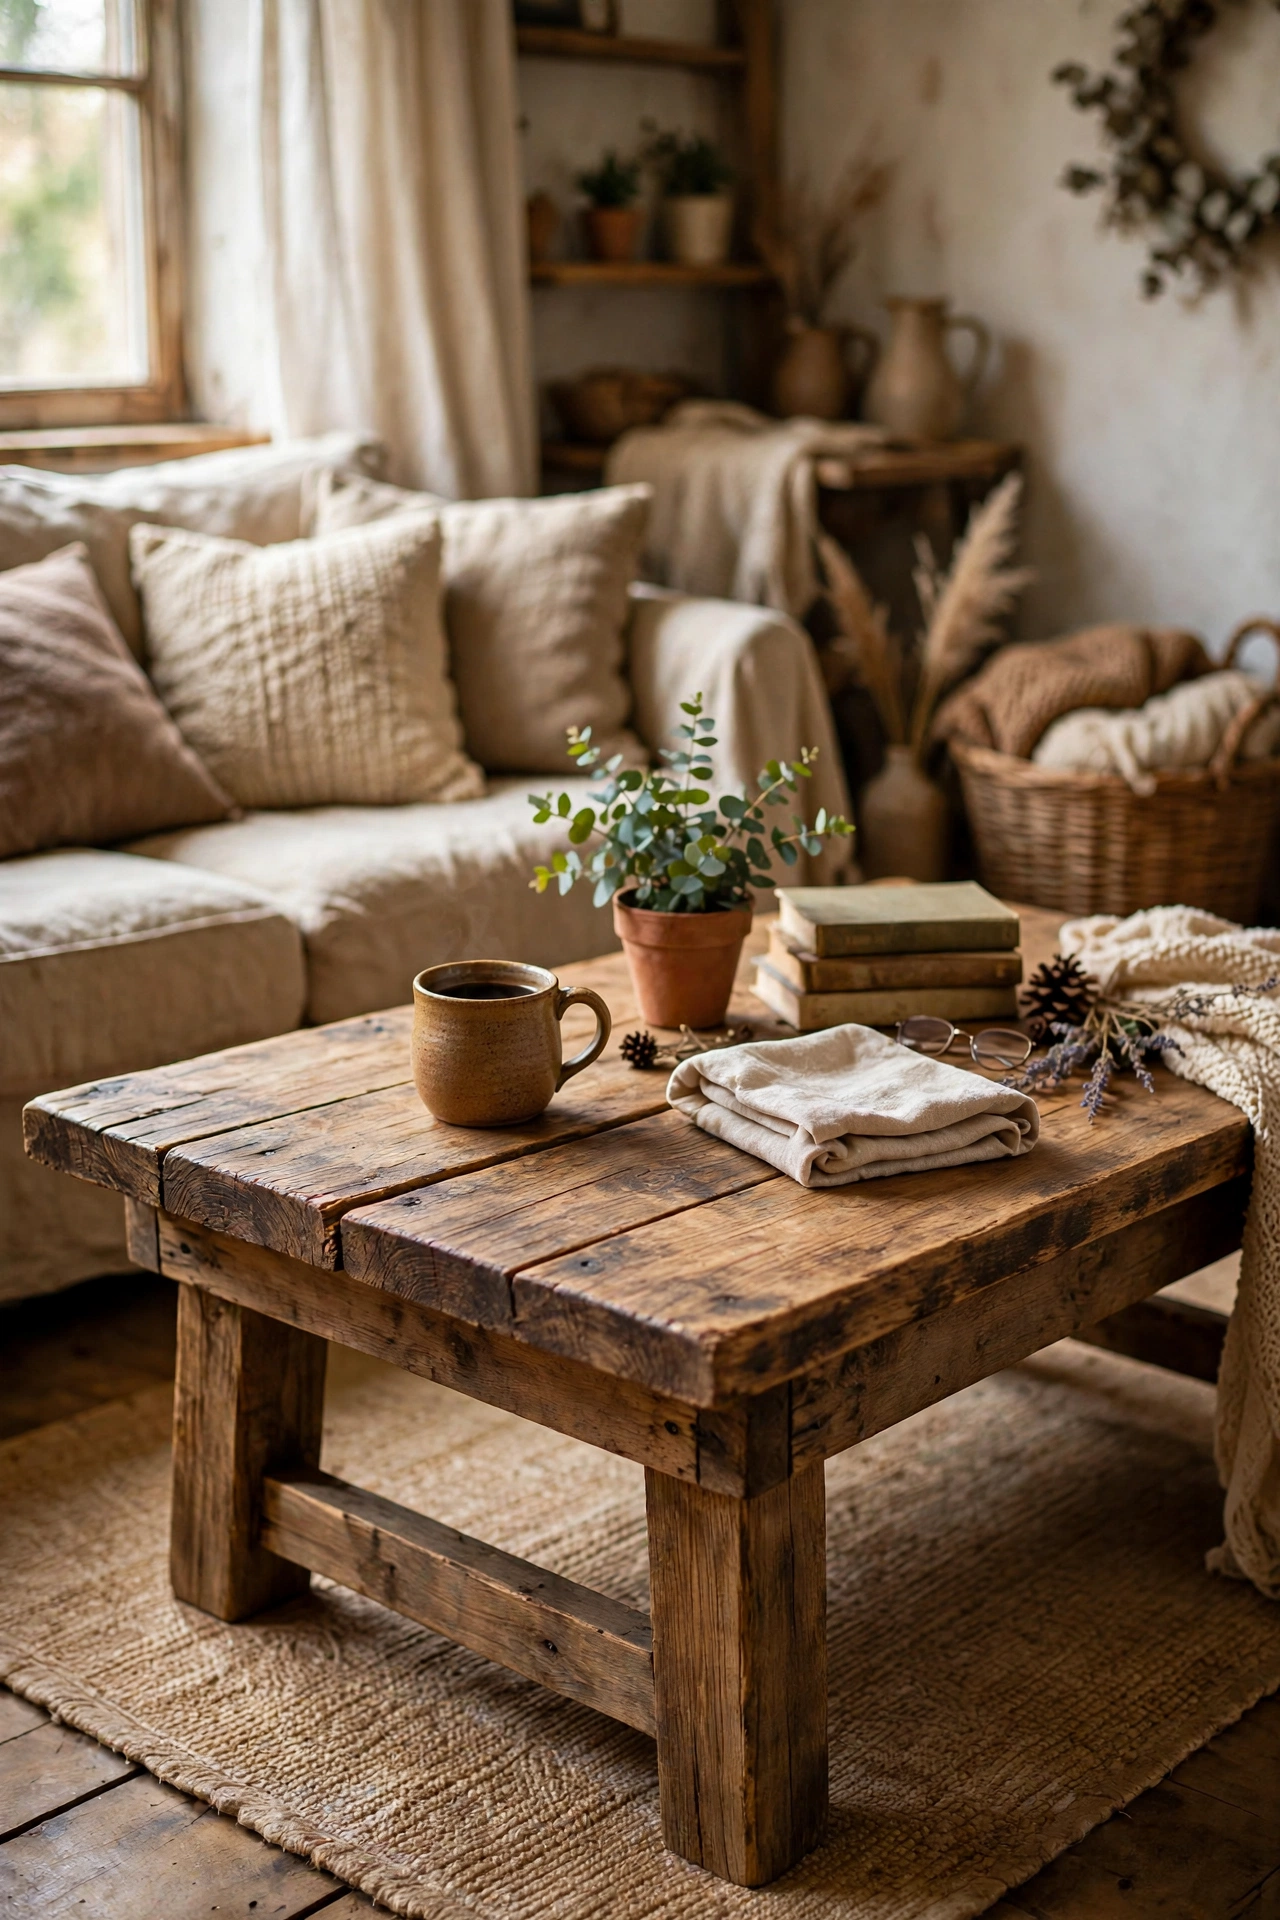
Two scaffolding boards side by side, joined with pocket screws and battens underneath, sitting on simple two-by-four legs. Scaffold boards are cheap, thick, and already look great. Sand them thoroughly — they arrive rough from building sites. I oiled mine with food-safe mineral oil because my toddler eats off everything. I tried glueing the boards edge to edge with no battens and the top bowed within a month; the underside battens are what keep it flat for years. Cut the legs to match your sofa: seat height minus about five centimetres is the comfortable rule.
Cost: ~$25-40 | Time: 4 hours
8. Framed Plank Top with Breadboard Ends
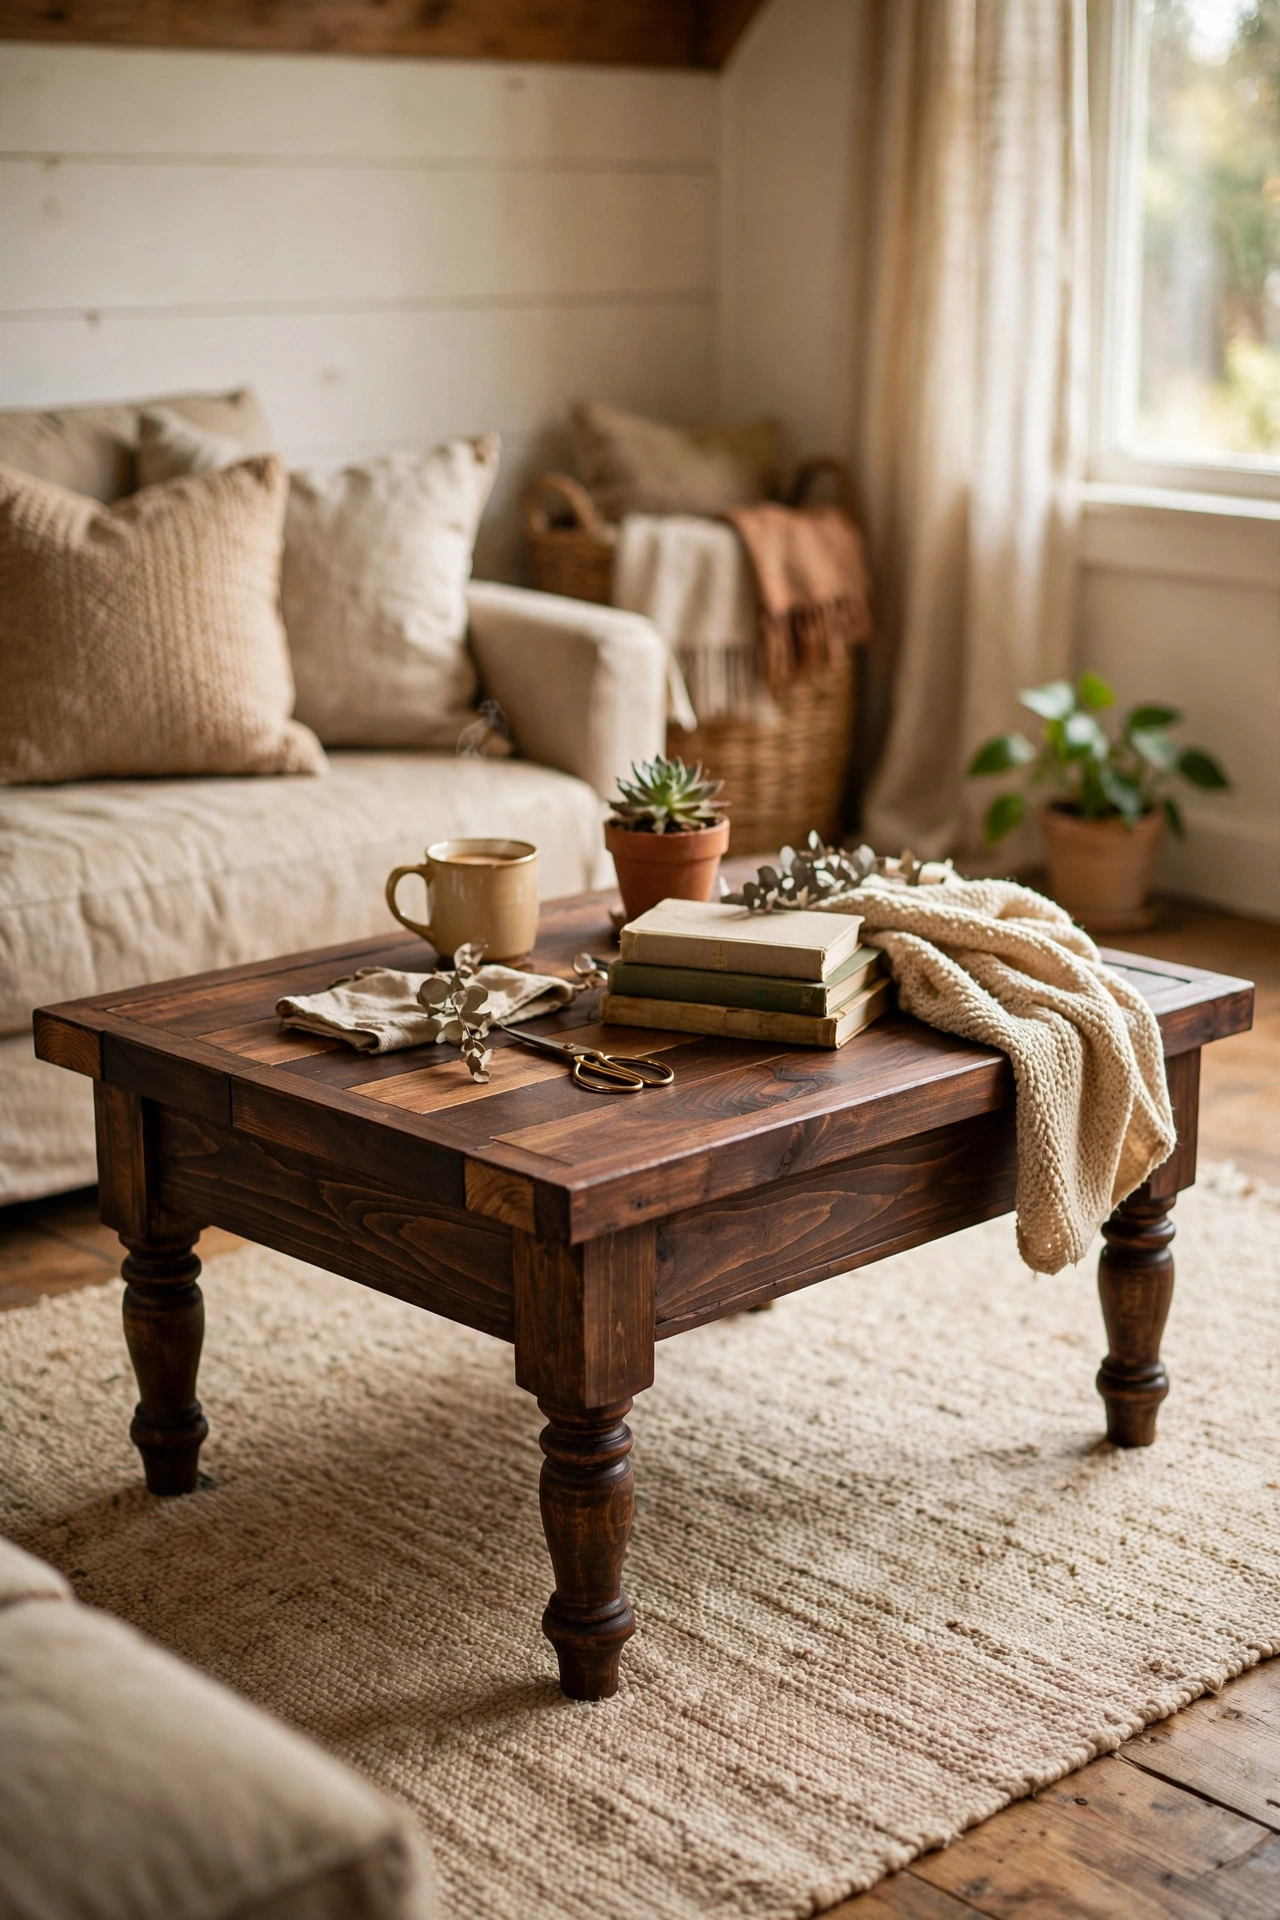
Planks laid side by side with a mitred frame around the outside and breadboard ends — the classic farmhouse look. The frame hides any uneven plank ends, which is forgiving if your cuts are not perfect. Glue and screw the planks to two battens underneath, then add the end caps with dowels so the timber can move with the seasons. I tried skipping the end caps on my first build and the top split along a grain line that winter; do not skip them. A dark walnut stain plus matte varnish makes budget pine look like a proper farmhouse table.
Cost: ~$30-50 | Time: 5 hours
9. Hexagon Plywood Coffee Table
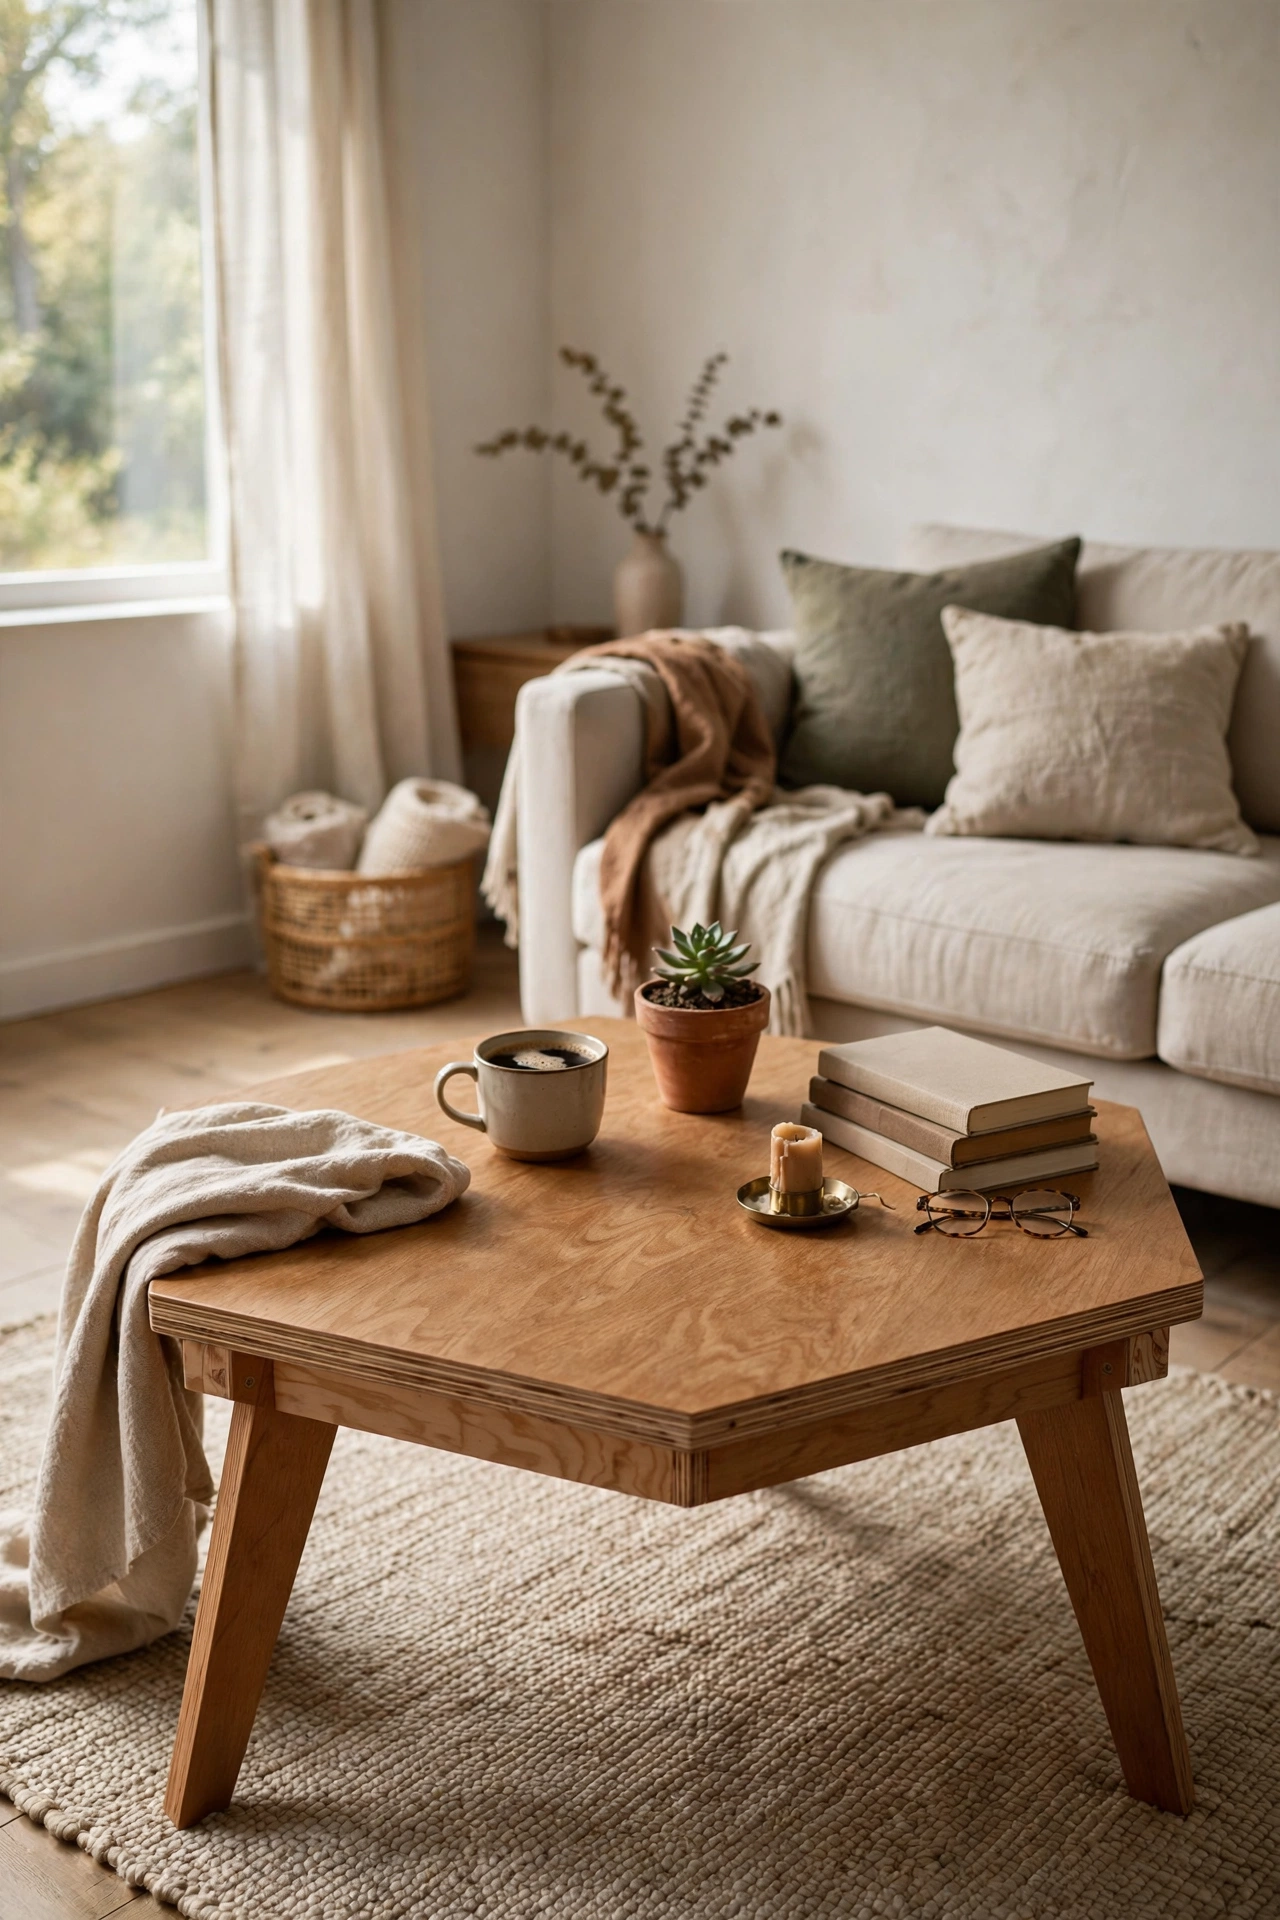
A hexagon top cut from good birch plywood — the geometric shape does all the design work for you. Draw the hexagon with a compass and a ruler, cut it with a jigsaw, and take your time on the corners. Iron-on edge banding hides the plywood plies and takes ten minutes. I stained the top a warm oak tone and fitted three angled legs; it looks like a designer piece. I tried cutting the hexagon freehand and the sides came out uneven; the compass layout is worth the extra ten minutes. Sand the corners soft and seal with three thin coats of water-based varnish for a hard, clear finish.
Cost: ~$30-45 | Time: 4 hours
10. Herringbone Timber Offcut Top
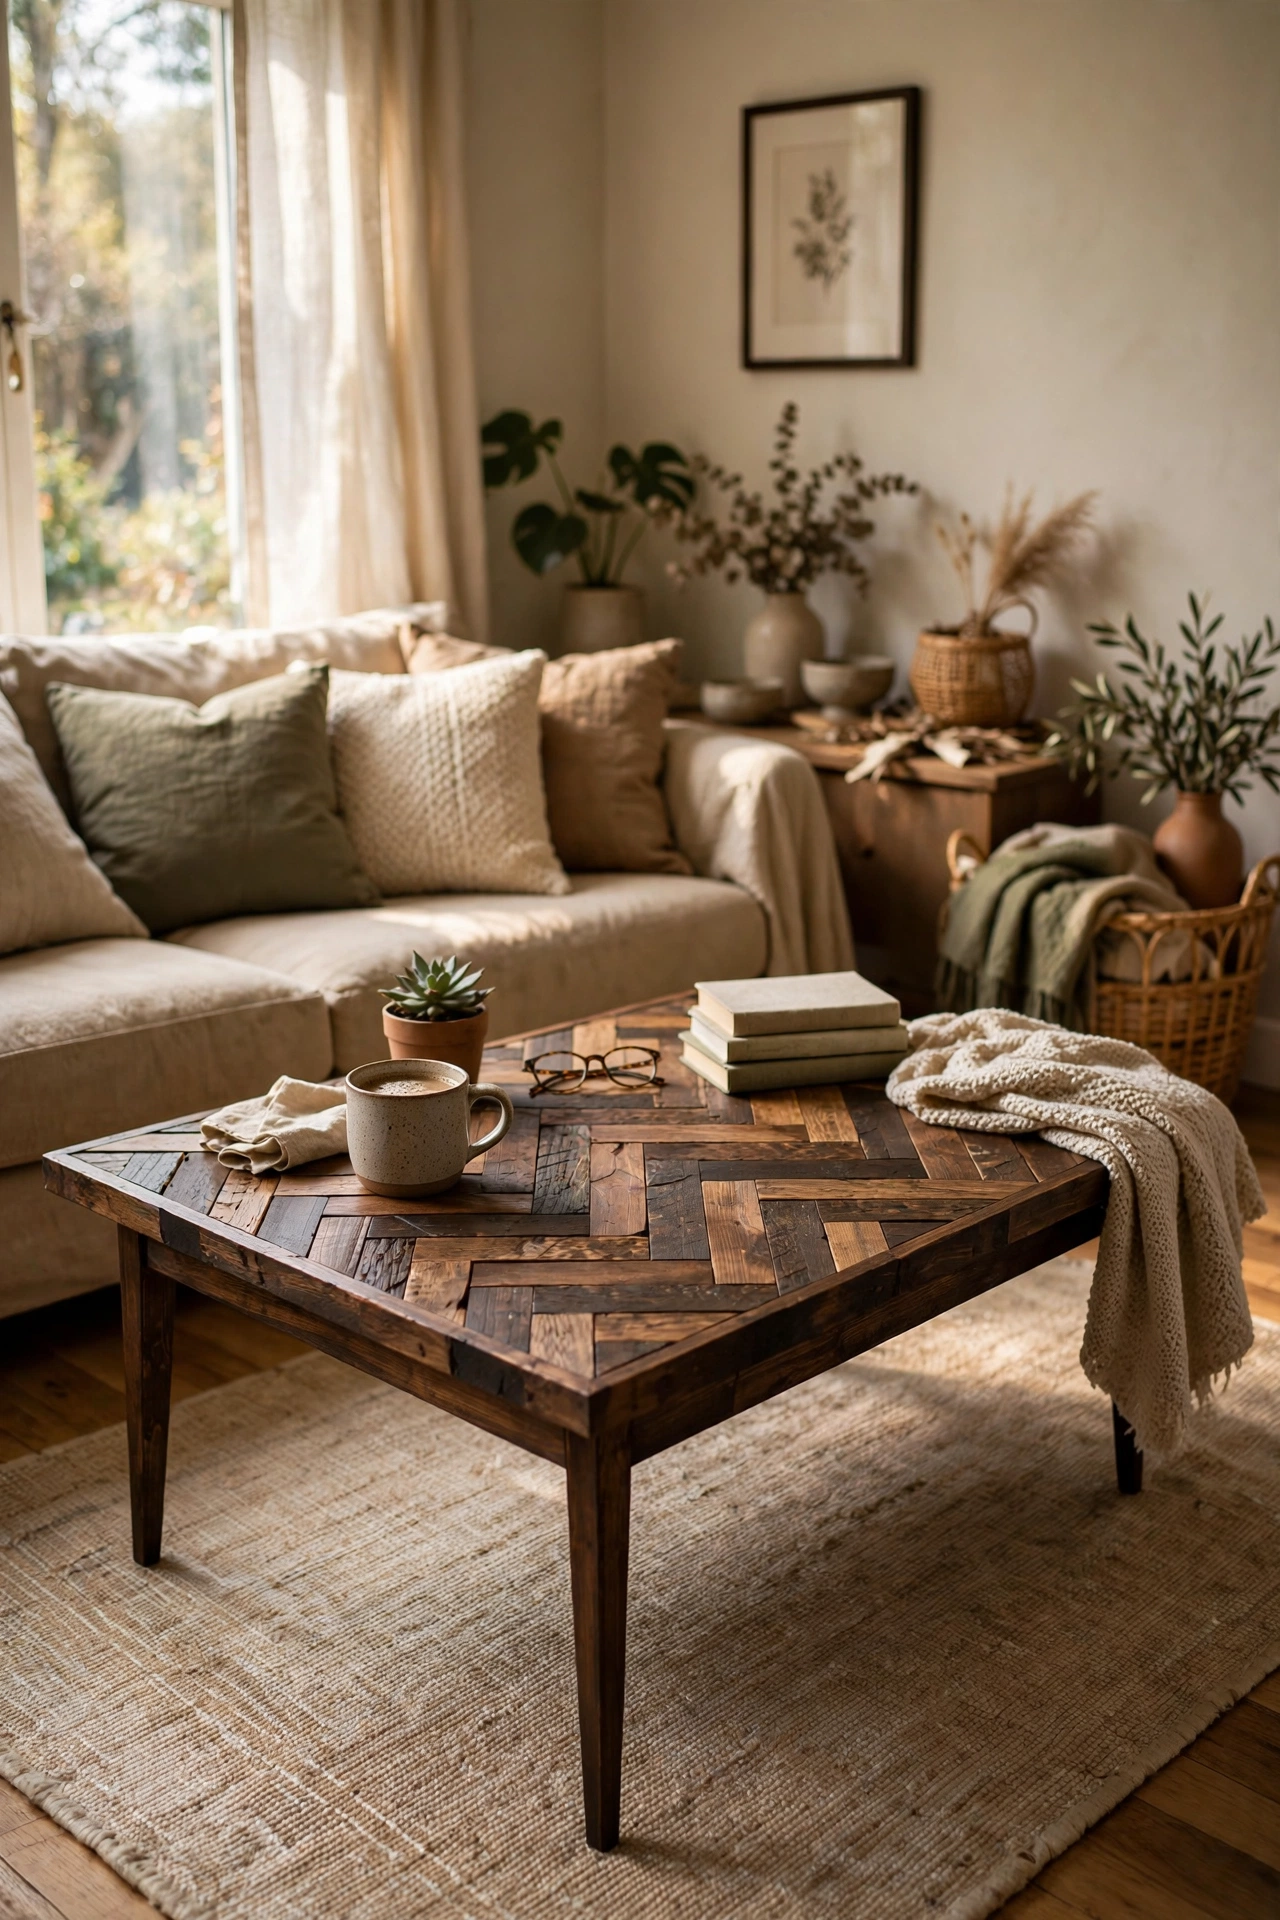
Short timber offcuts laid in a herringbone pattern and glued onto a plywood base — the fanciest-looking build on this list. Cut all the pieces to the same length first, then dry-lay the whole pattern before you glue a single piece. I used a carpenter’s square to keep the angles true; I tried eyeballing it and the rows drifted within a foot. Wood glue plus pin nails hold each piece while the glue sets. Sand the whole top flat afterwards and the pattern reads like a proper parquet floor. Stain it dark and it looks ten times what it cost.
Cost: ~$20-35 | Time: 6 hours
11. Slatted Timber Slat Coffee Table
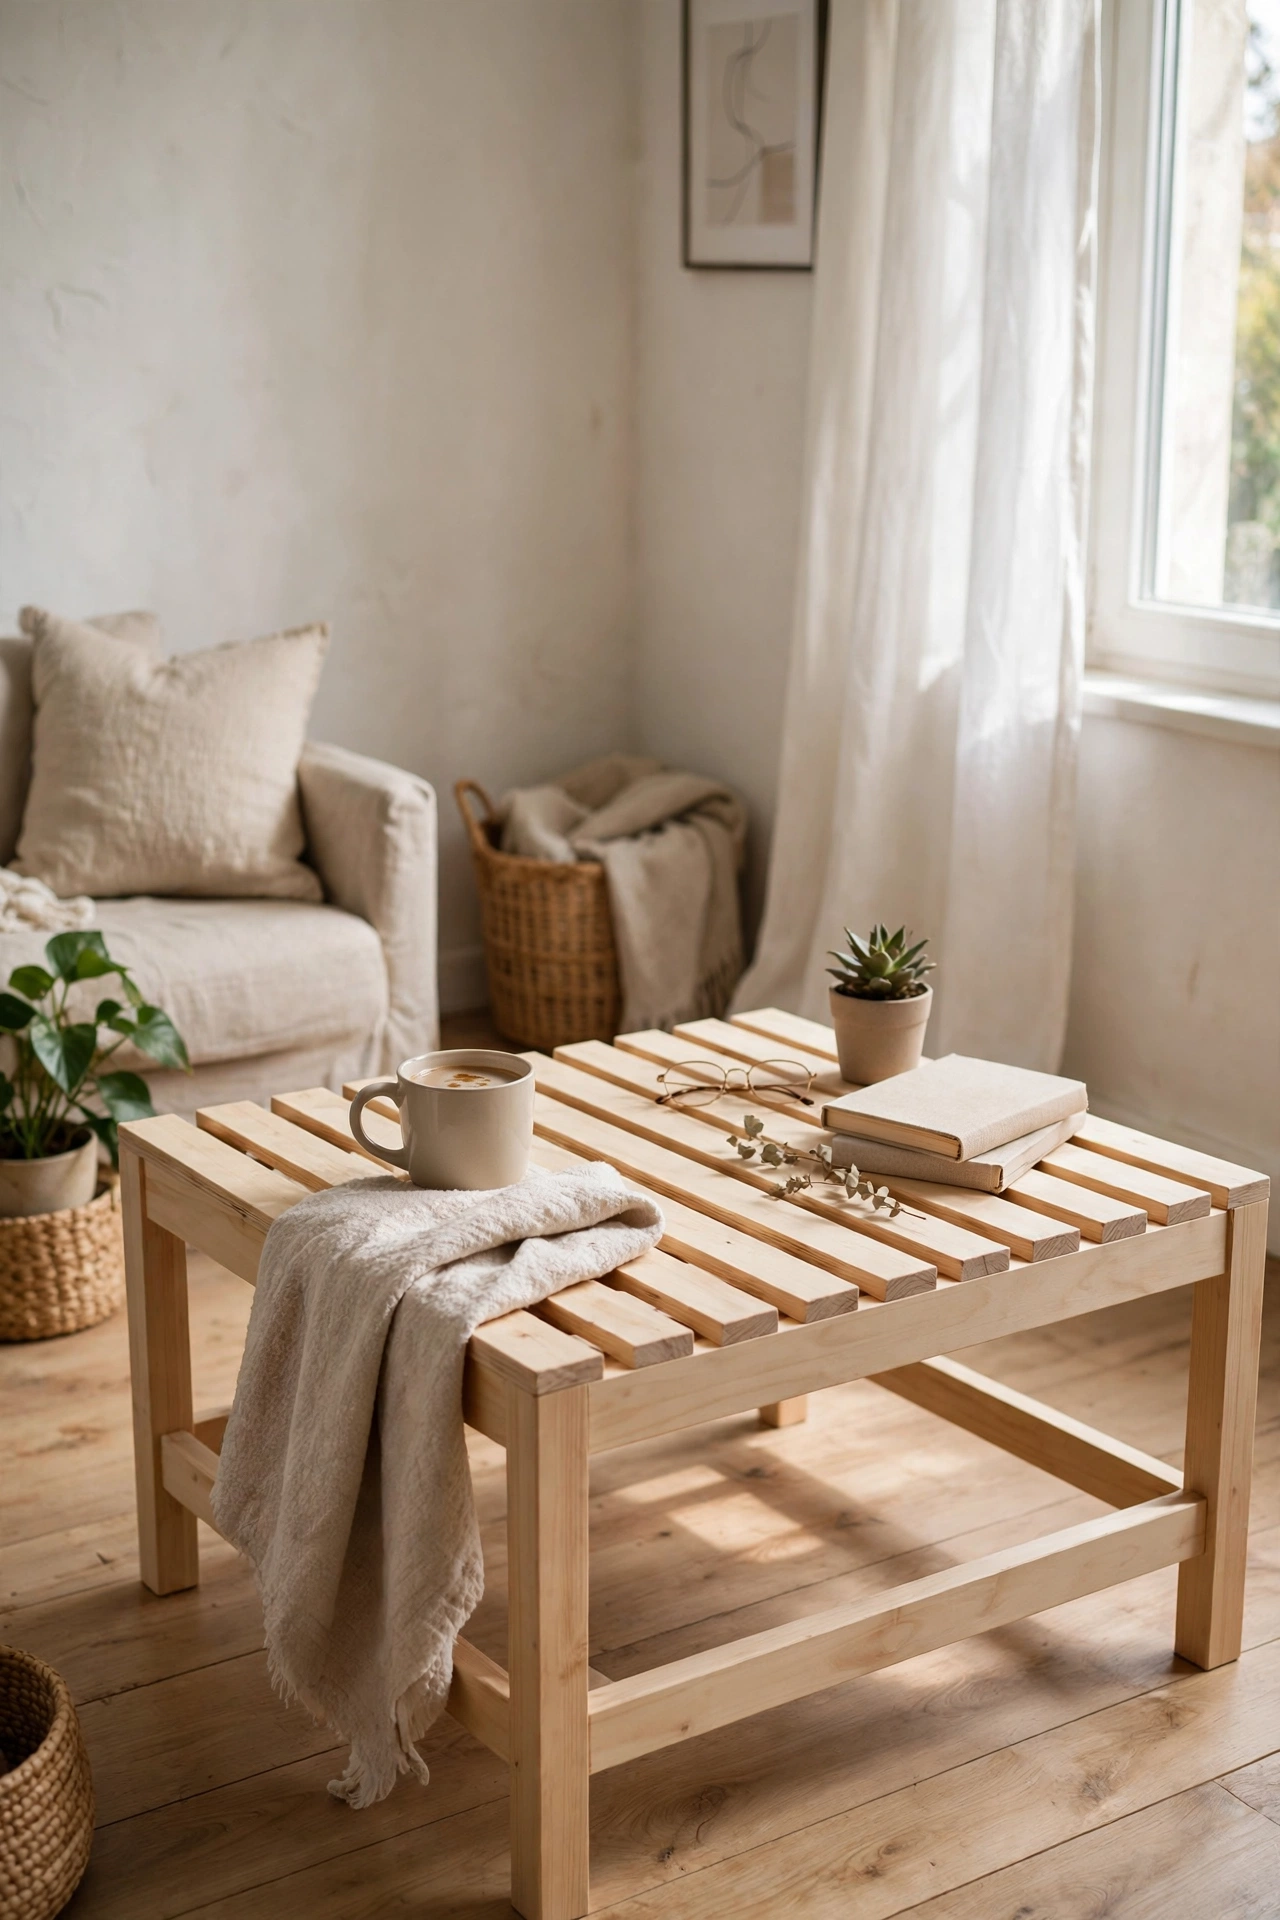
Evenly spaced slats across a simple frame, with small gaps between them — light, modern, and very forgiving to build. Cut your slats to the same width and use a spacer block to keep the gaps identical; the uniformity is what makes it look designed rather than thrown together. I glued and screwed each slat into the frame rails. I tried butting the slats tight with no gaps and it just looked like a pallet; the shadow gaps are the whole point of the design. Sand the slat edges soft and finish with a clear matte coat. Great for small rooms because you can see through the gaps.
Cost: ~$25-40 | Time: 4 hours
12. Chopping-Block Style Butcher Table
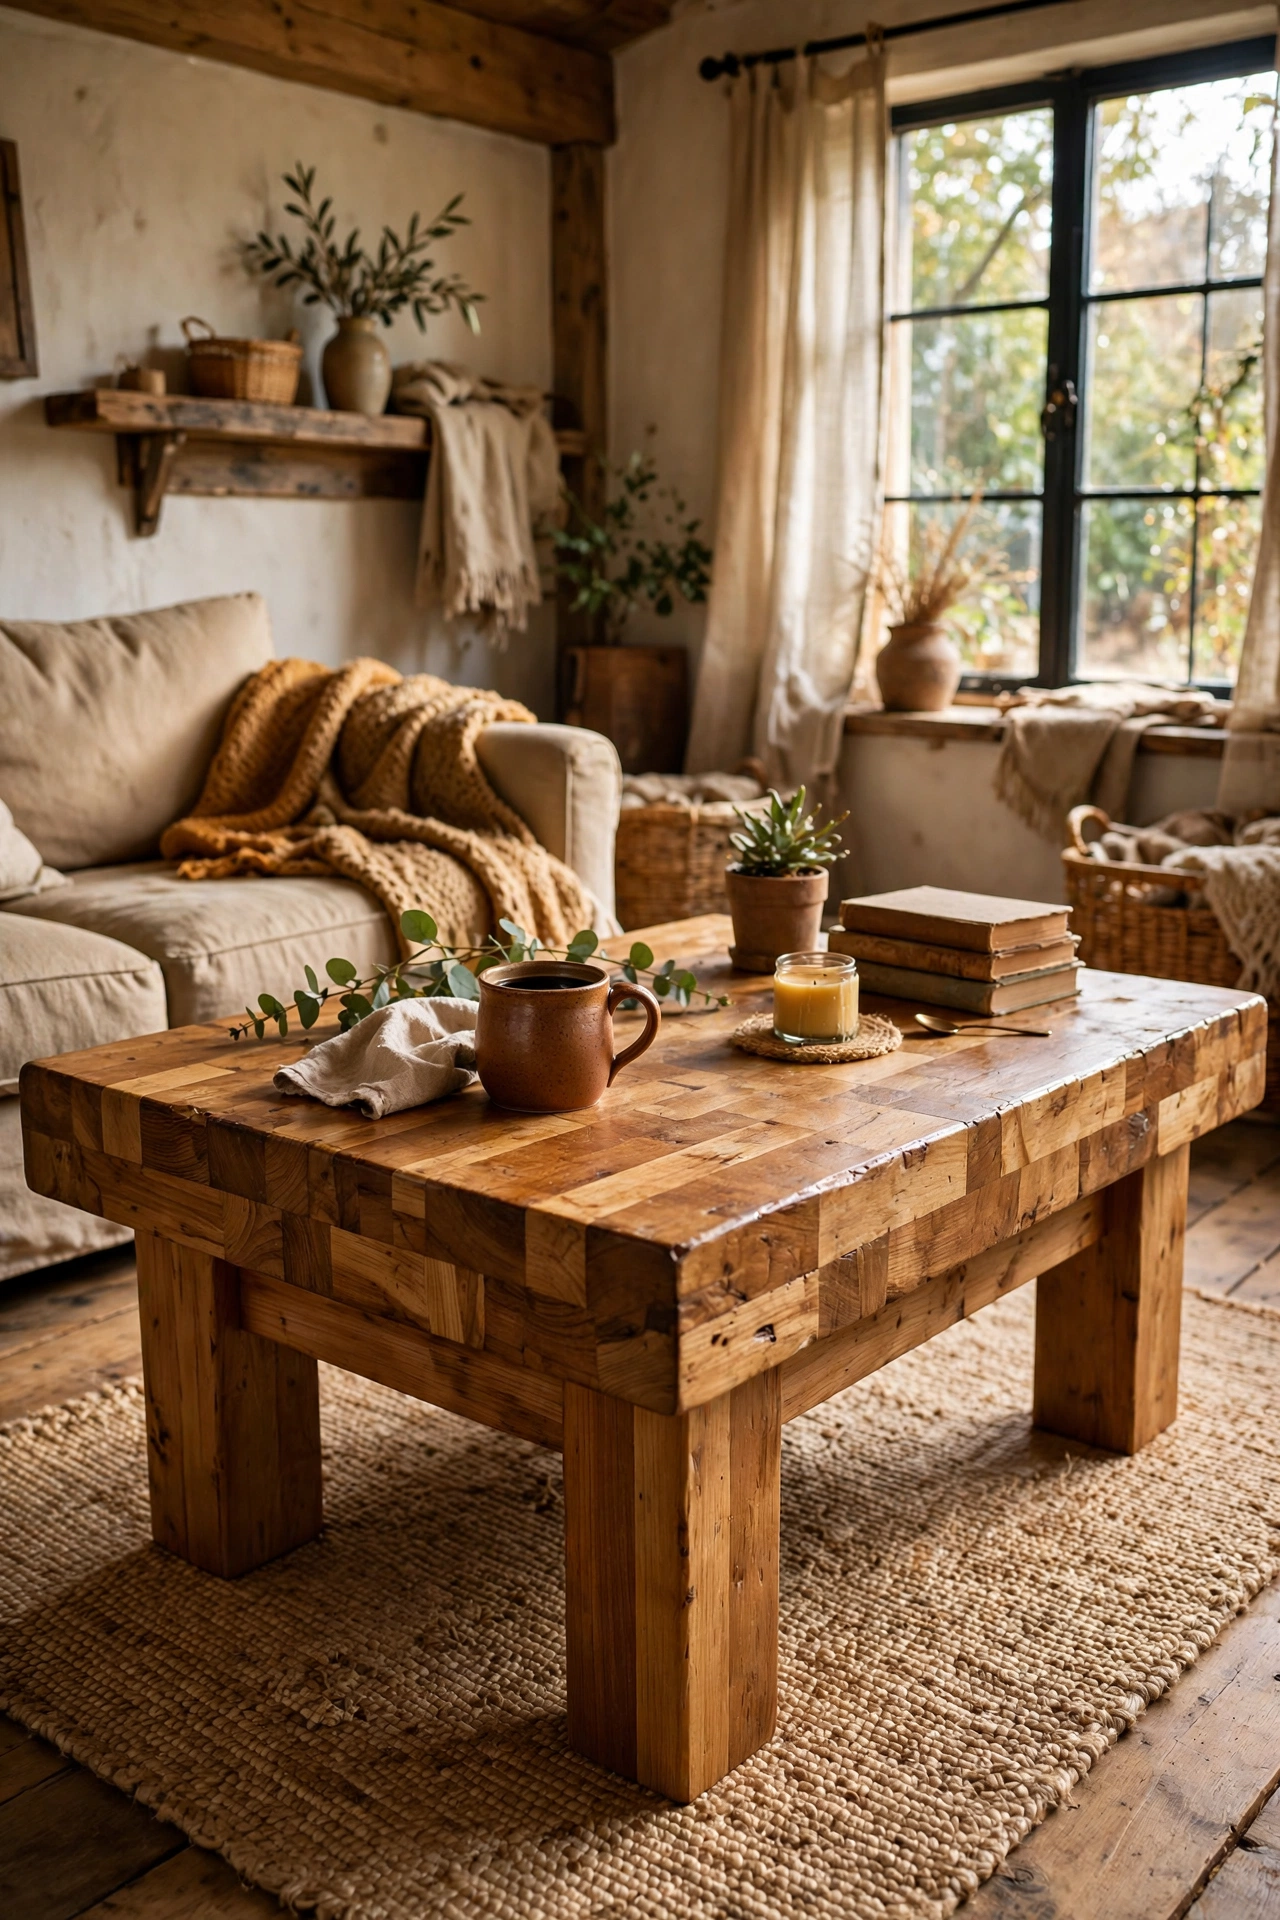
A thick, chunky top built from laminated timber strips, like a giant chopping block — heavy, solid, and deeply satisfying. Glue strips of two-by-four on edge, clamp them hard, and leave them overnight; the glue-up is the whole build. Plane or sand the top flat the next day. I did this one Saturday-to-Sunday because of the glue drying time, and it was worth the wait. I tried clamping with a single clamp in the middle and the ends sprang open; spread clamps every fifteen centimetres instead. A food-safe oil finish and chunky square legs make it look like it cost a fortune.
Cost: ~$30-50 | Time: 2 days with glue drying
13. Plywood Top with Chunky Pine Legs
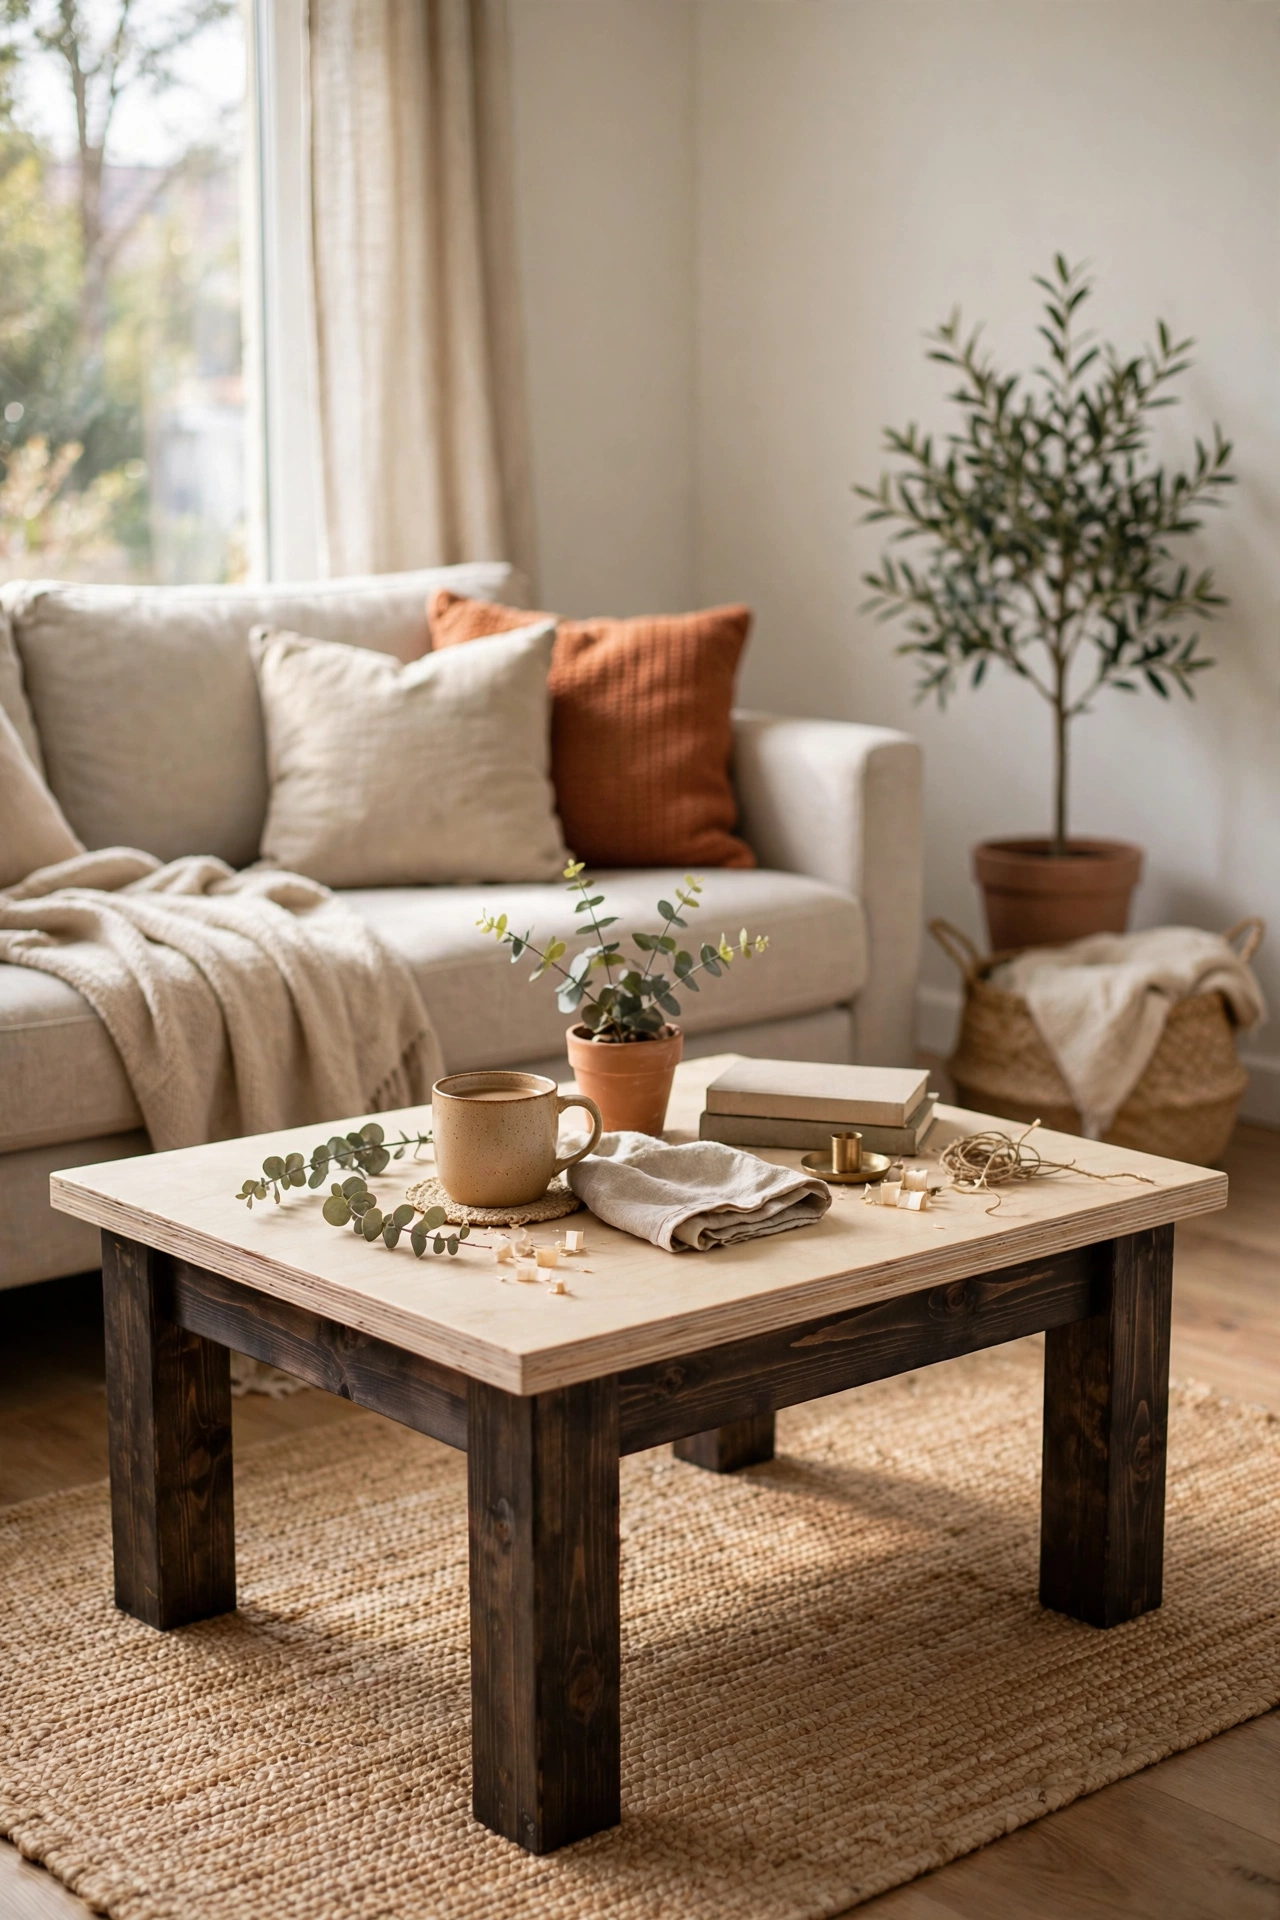
A single sheet of good birch plywood cut to size, edge-banded, on four chunky pine legs — the minimalist build. The trick is buying decent plywood rather than the splintery cheap stuff; the birch face sands glass-smooth. Iron-on edge banding hides the plies and takes ten minutes. I stained the legs dark and left the top natural — the contrast looks properly designed. I tried skipping the edge banding once and the raw ply edge looked unfinished no matter how much I sanded; band it. Seal the top with three thin coats of water-based varnish for a hard, wipeable finish.
Cost: ~$40-60 | Time: 3 hours
Upcycled Makeovers by Sunday Evening
14. Dresser-Drawer Shadow Box Table
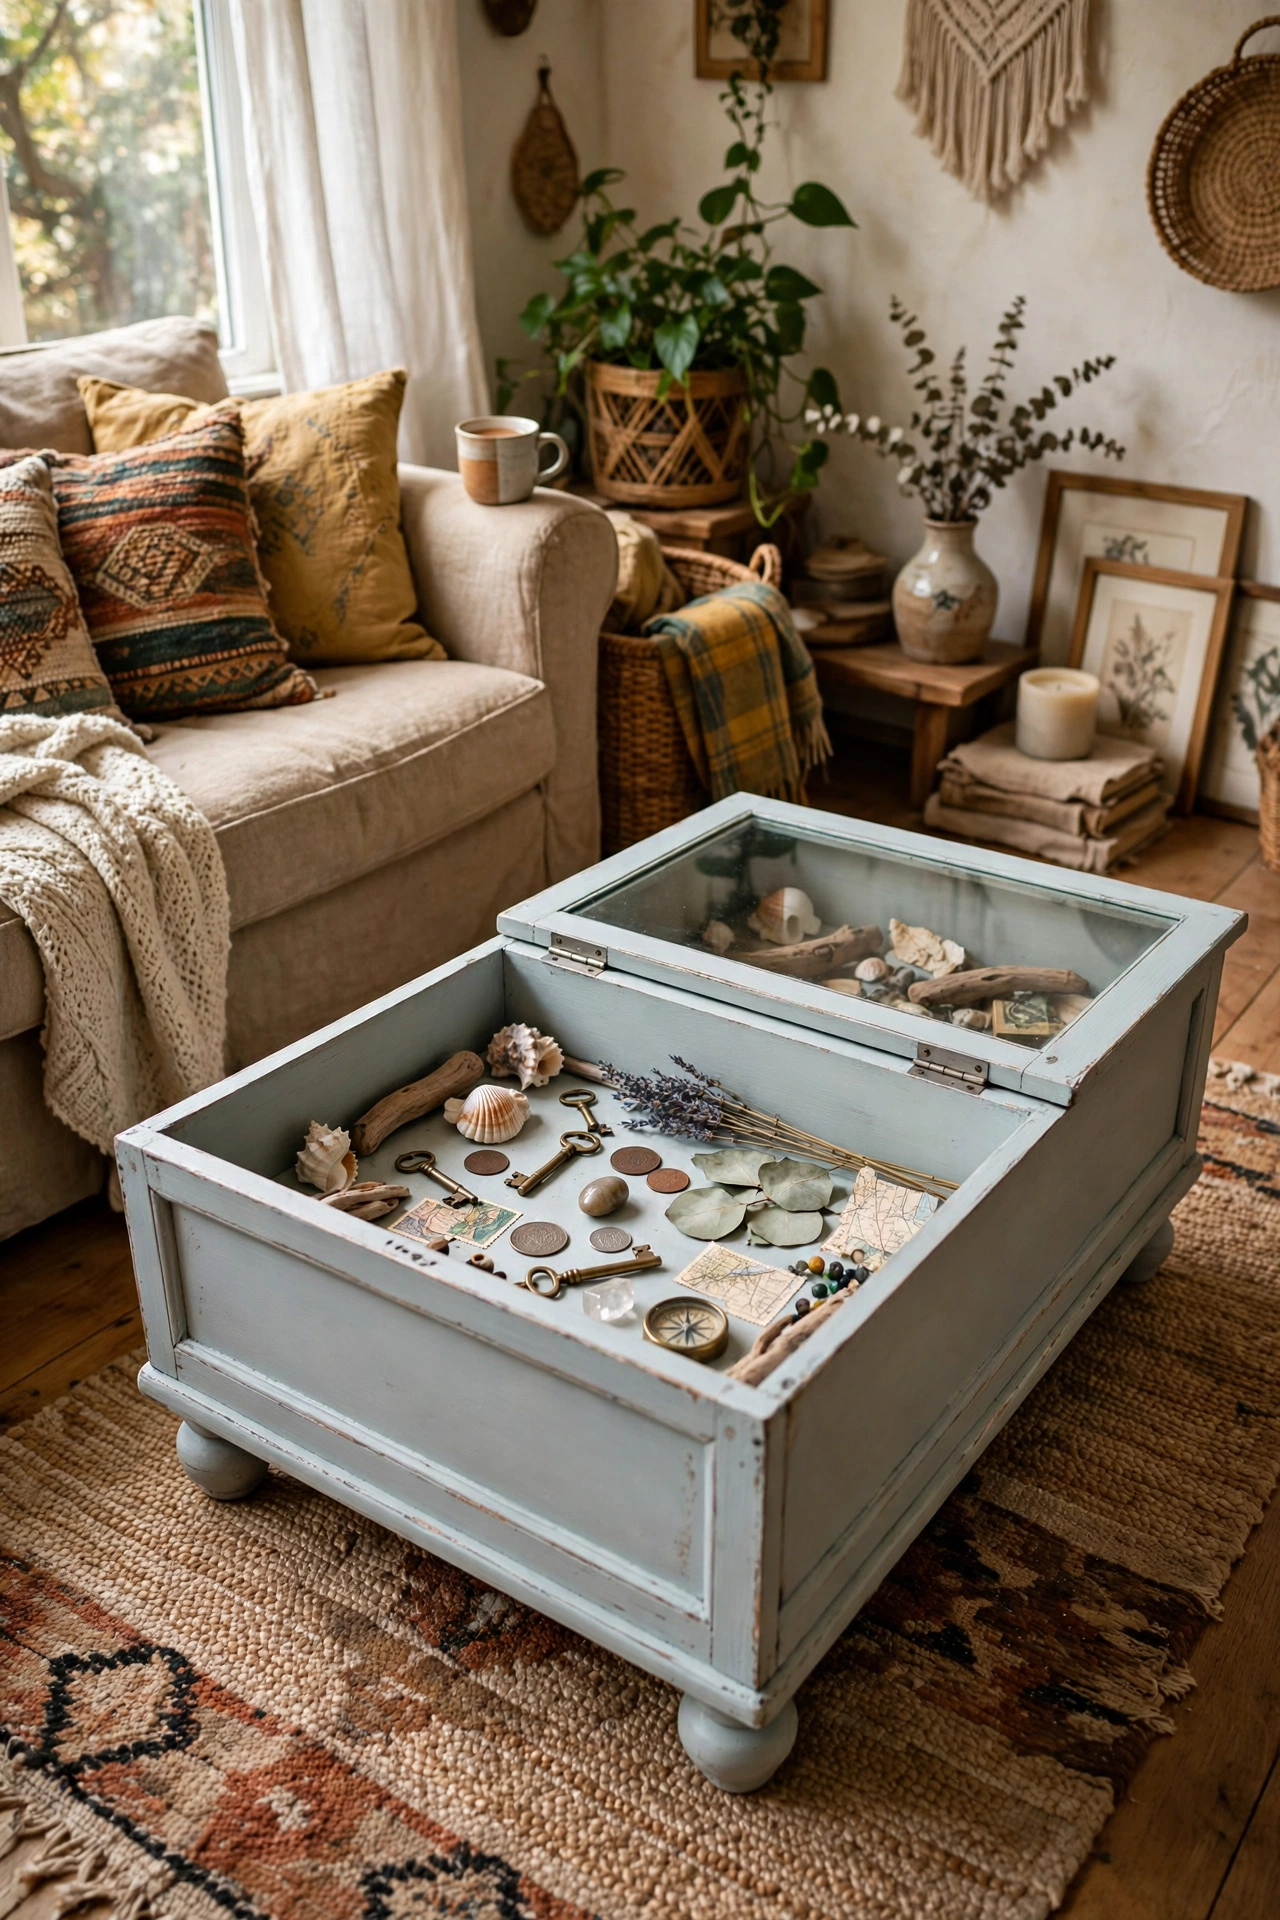
An old dresser drawer turned upside down on short legs, with a glass or plywood top — the inside becomes a display box. Hinge the top so it opens and you can arrange treasures inside; I rotate mine with the seasons. Sand and paint the drawer in a chalky finish, and line the inside with a colour that pops. I tried a plain glass top with no frame and it slid about; frame the glass with thin beading screwed to the drawer rim. Short bun feet from the hardware shop finish it off. It is a coffee table and a conversation piece in one.
Cost: ~$20-35 | Time: 4 hours
15. Vintage Trunk Coffee Table Refresh
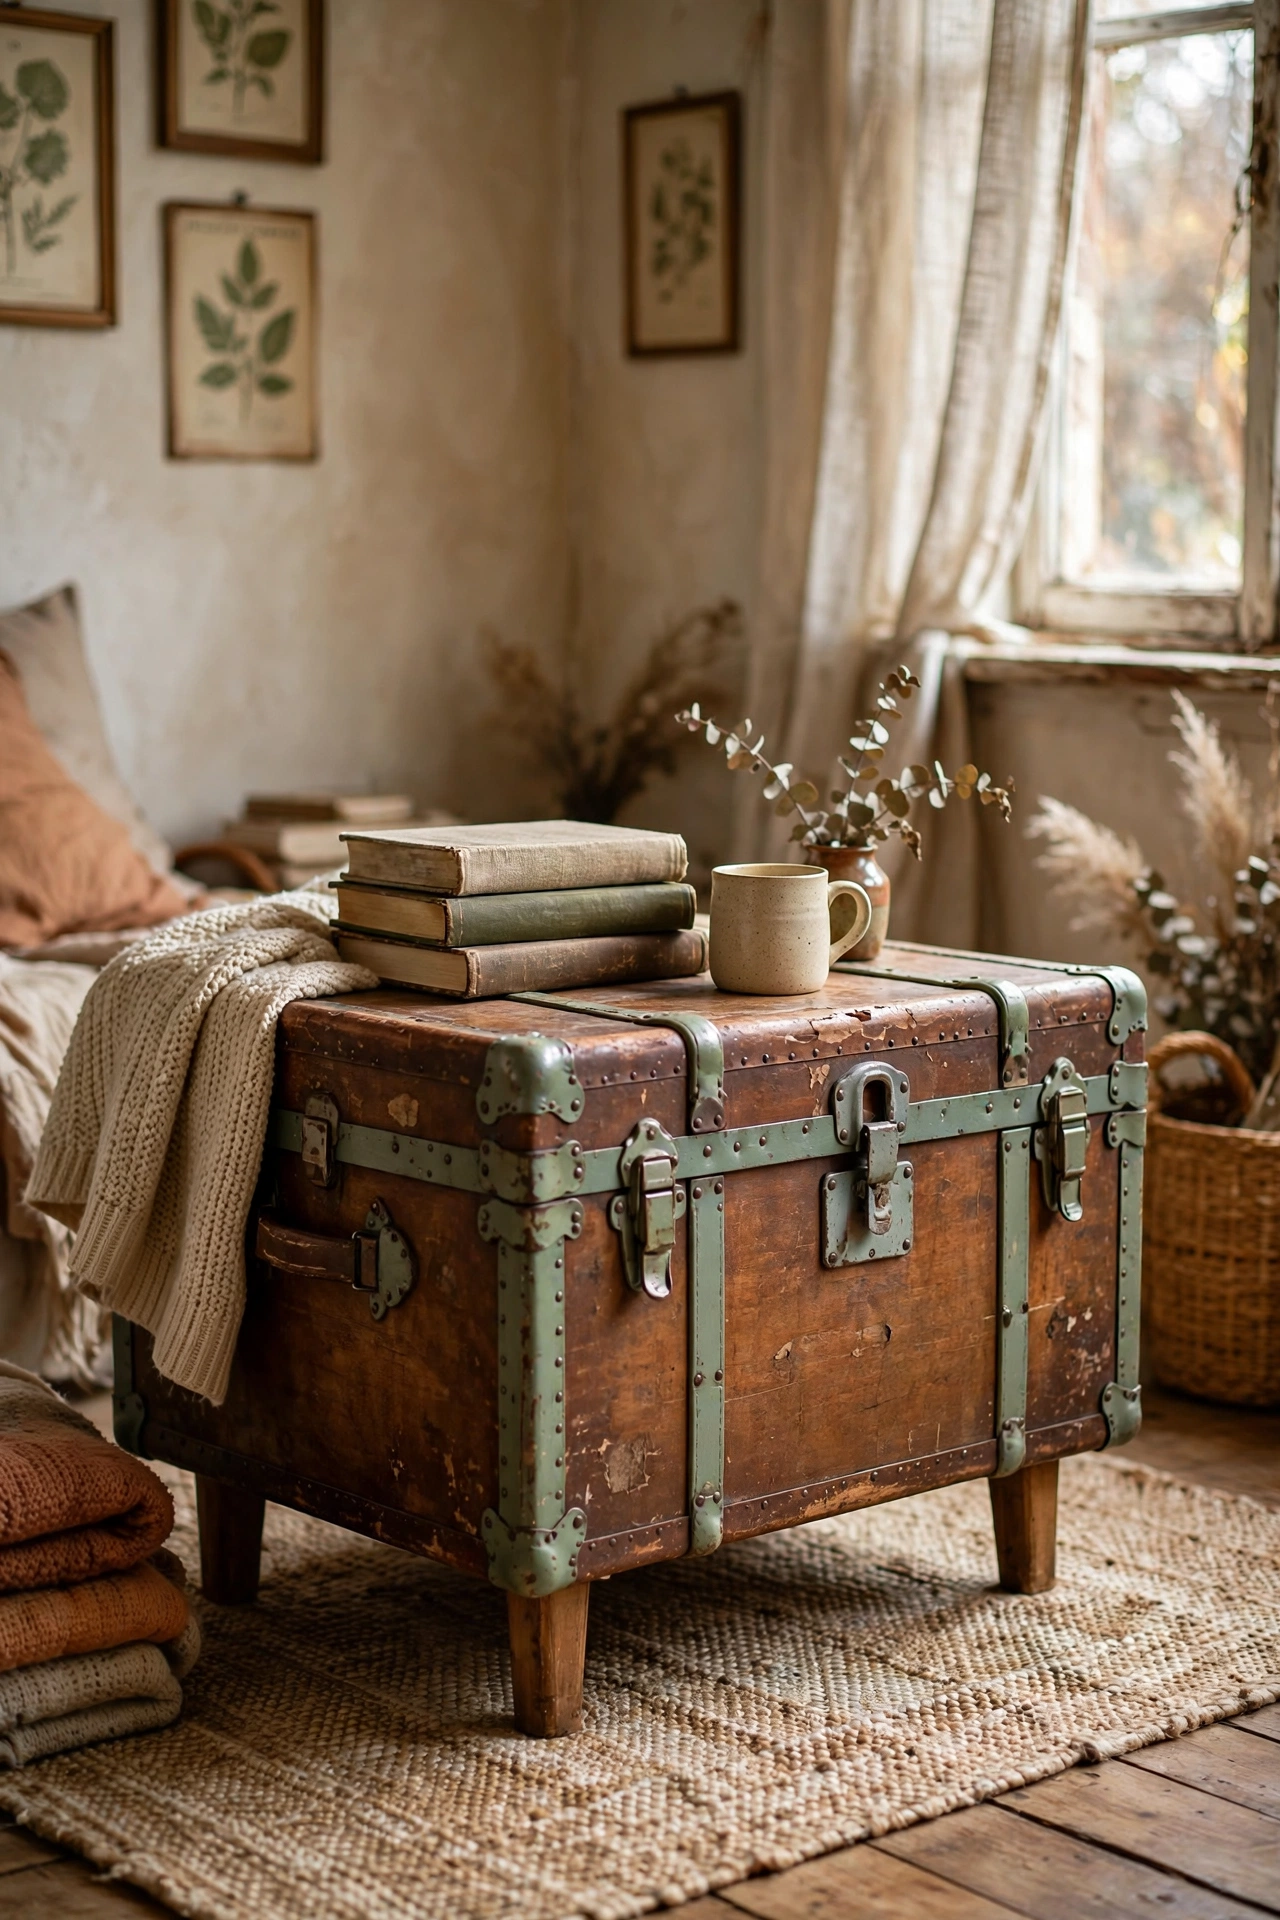
A battered old trunk, cleaned up and set on the right legs — an instant coffee table with the best storage you will ever own. Check the trunk is structurally sound first, and replace any rotten base boards with plywood. I lined mine with fresh paper and fitted a tray inside for remotes. I tried keeping the original rusty hardware and it stained the rug; spray the metalwork with a rust-proof paint instead. Add four short legs or castors so it clears the rug pile. The patina on the outside is the whole point — do not over-sand it.
Cost: ~$30-50 | Time: 4 hours
16. Old Door Panel Table Top
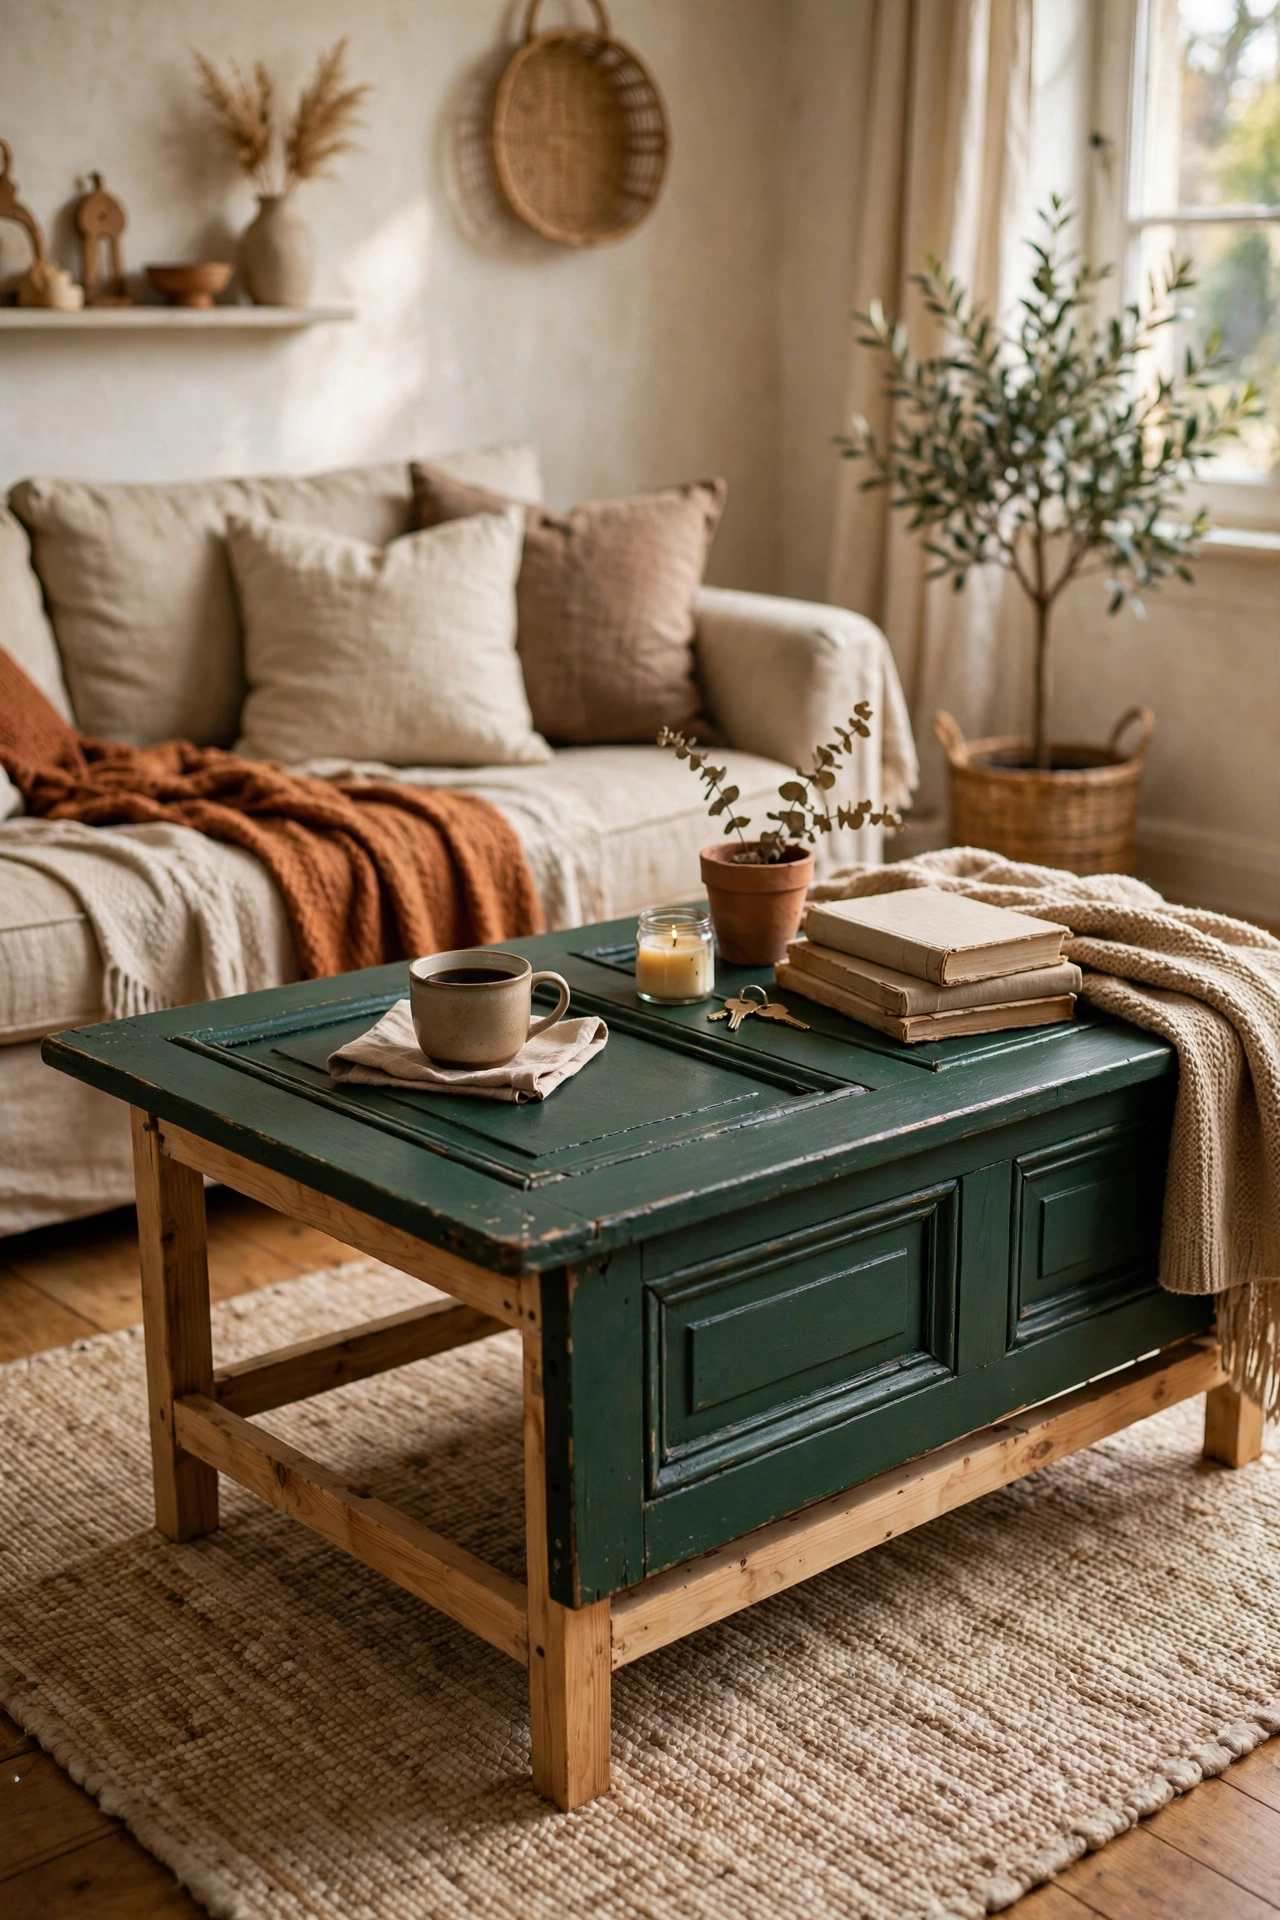
A panelled interior door, cut to length, on a simple leg frame — the mouldings make it look like a proper piece of furniture. Remove the handle hardware and fill the holes with wood filler. Sand lightly so the paint keys properly, then apply two coats of furniture paint. I used a deep green and it looked incredible against a neutral rug. I tried leaving the door full length and it overwhelmed the room; cutting it to about 120cm is the sweet spot. A glass sheet over the top is optional — I skipped it, and the paint has held up fine with coasters.
Cost: ~$20-35 | Time: 5 hours
17. Thrifted Desk Cut Down to Coffee Table Height
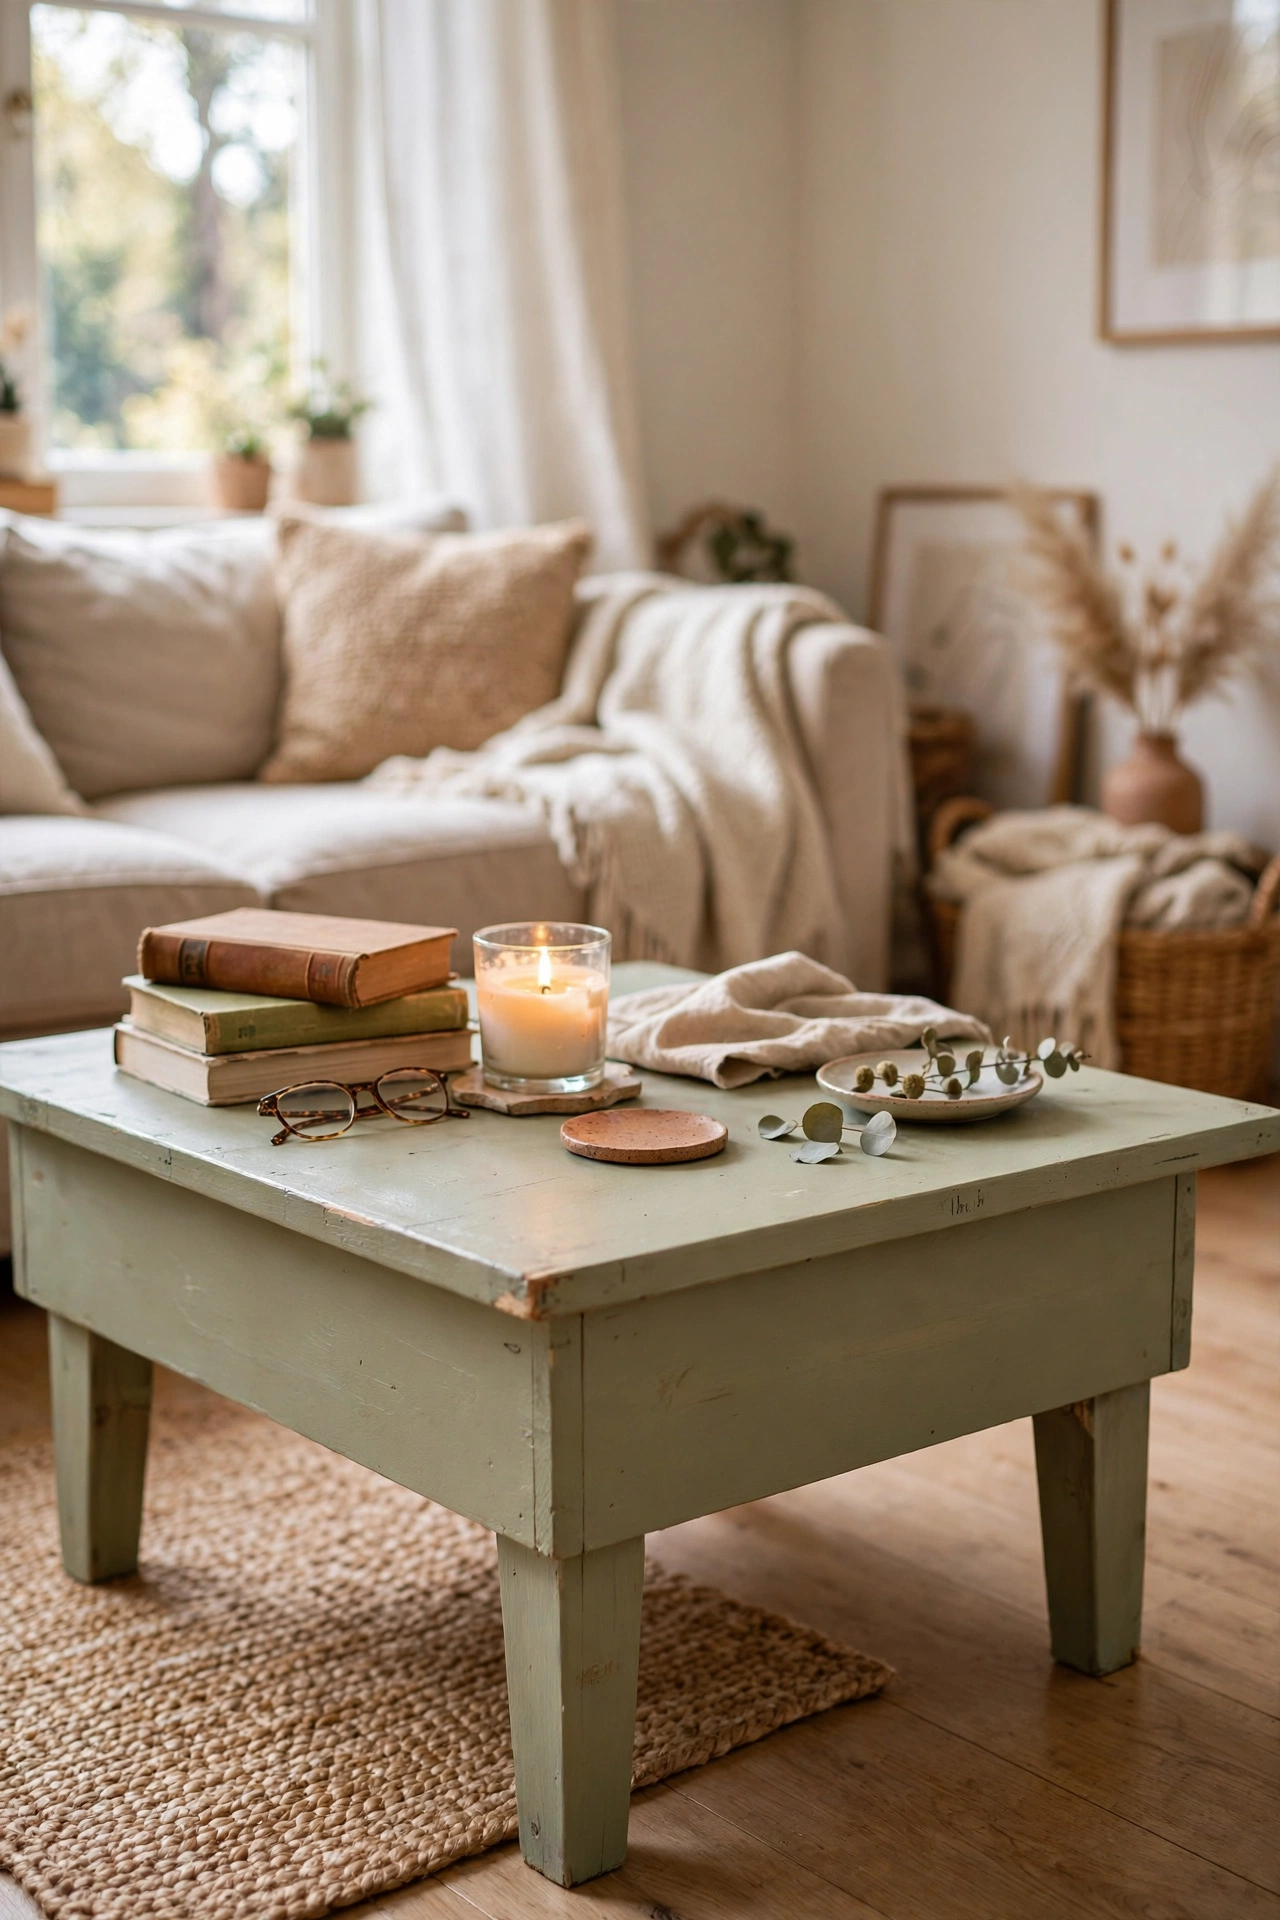
A cheap second-hand desk, legs sawn down to 40cm — desks are sturdier than most coffee tables anyway. Measure twice, cut once, and cut all four legs together with a stop block so they come out identical. Sand the cut ends smooth and touch up with paint. I found a solid pine desk for a few pounds at a charity shop; sawn down, it looks like a proper low table. I tried cutting freehand the first time and the wobble drove me mad for a month; use a stop block. Fill any old screw holes, repaint, and nobody will ever know it started life as a desk.
Cost: ~$15-30 | Time: 3 hours
18. Suitcase Stack on a Timber Frame
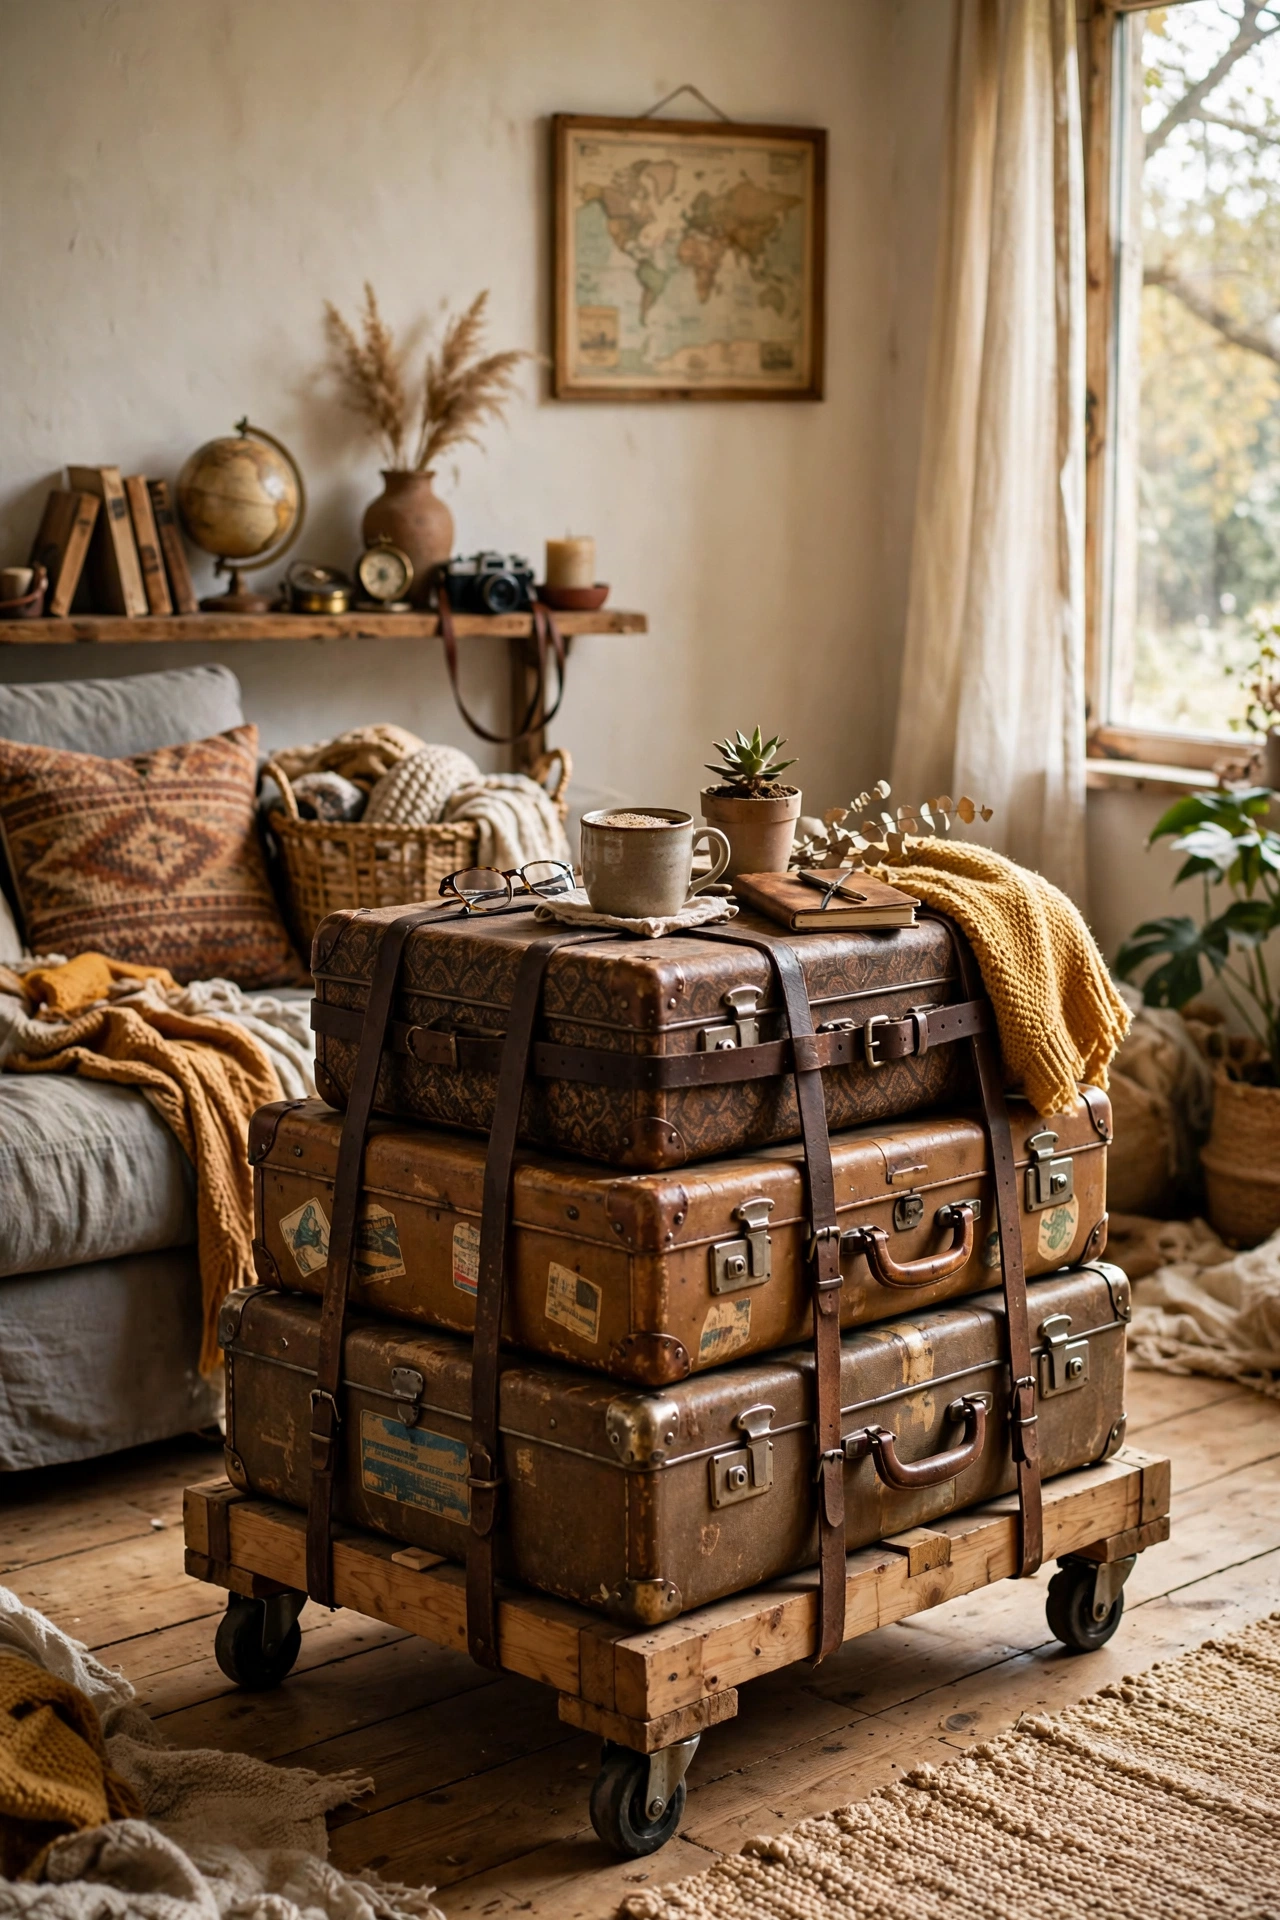
Two or three vintage suitcases strapped to a simple timber frame with castors — quirky, useful, and genuinely cheap. Check the suitcases open and close properly first; broken latches ruin the look. Bolt a plywood base under the bottom case and fix the frame to it. I strap mine together with leather belts so they cannot slide. I tried stacking them loose and the top one walked off within a week; the straps are essential. Keep the cases closed and latched if you have curious toddlers — mine once filled one with toys and I could not find the remote for days.
Cost: ~$20-40 | Time: 3 hours
19. Shutter Panel Sliding-Top Table
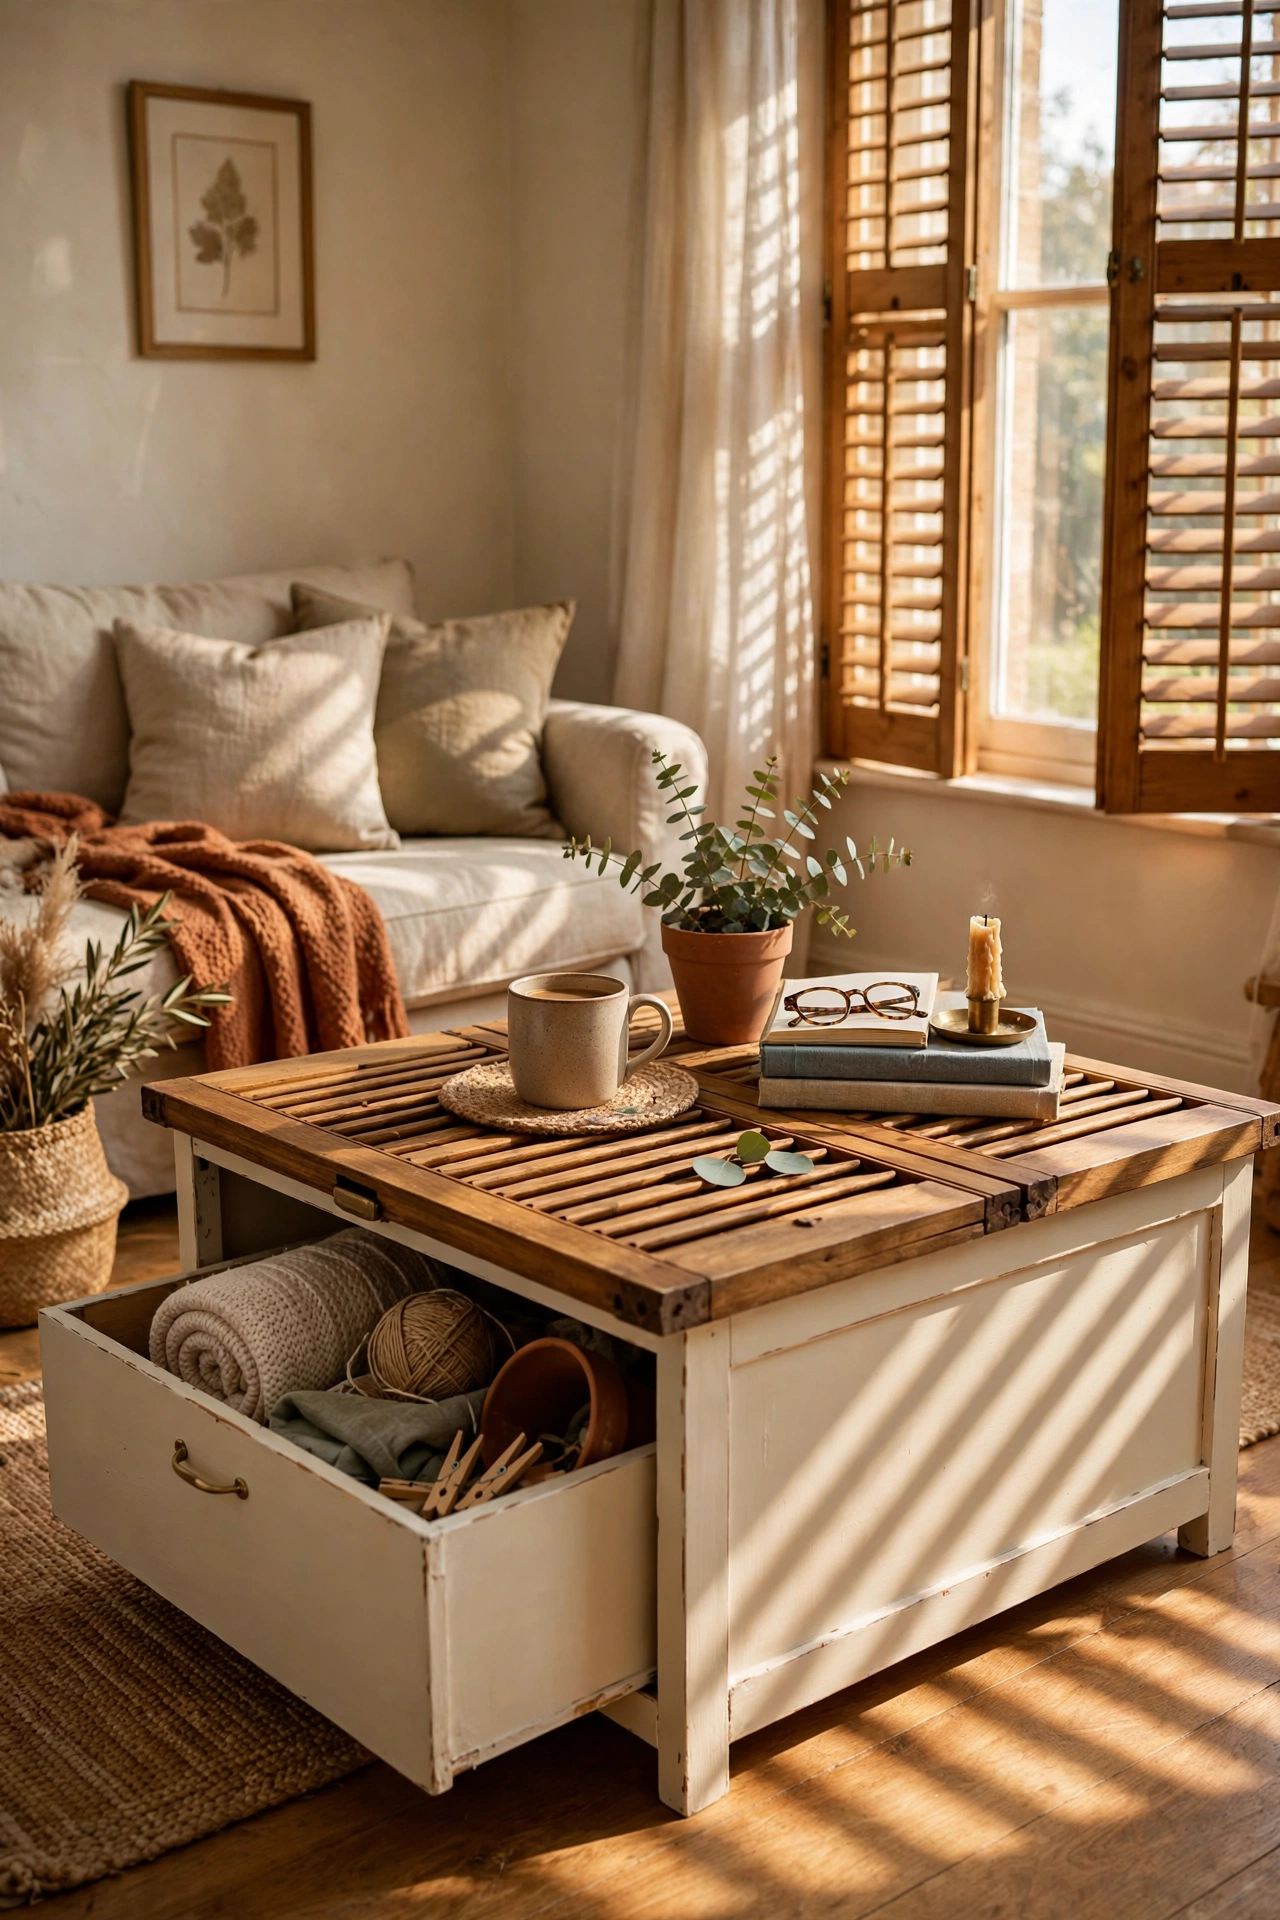
Old window shutters hinged as a sliding top over a box base — push the shutters aside to reach the storage inside. The louvres look fantastic and the sliding action delights everyone who tries it. Mount the shutters on simple drawer runners inside a plywood box frame. I painted mine cream and the shadows through the louvres are gorgeous in afternoon light. I tried butt hinges first and they sagged under the weight; proper drawer runners carry it square. Sand the louvre edges or they will shed dust onto everything you store inside.
Cost: ~$25-45 | Time: 6 hours
Weekend Statement Tables
20. Tiled Mosaic Top Coffee Table
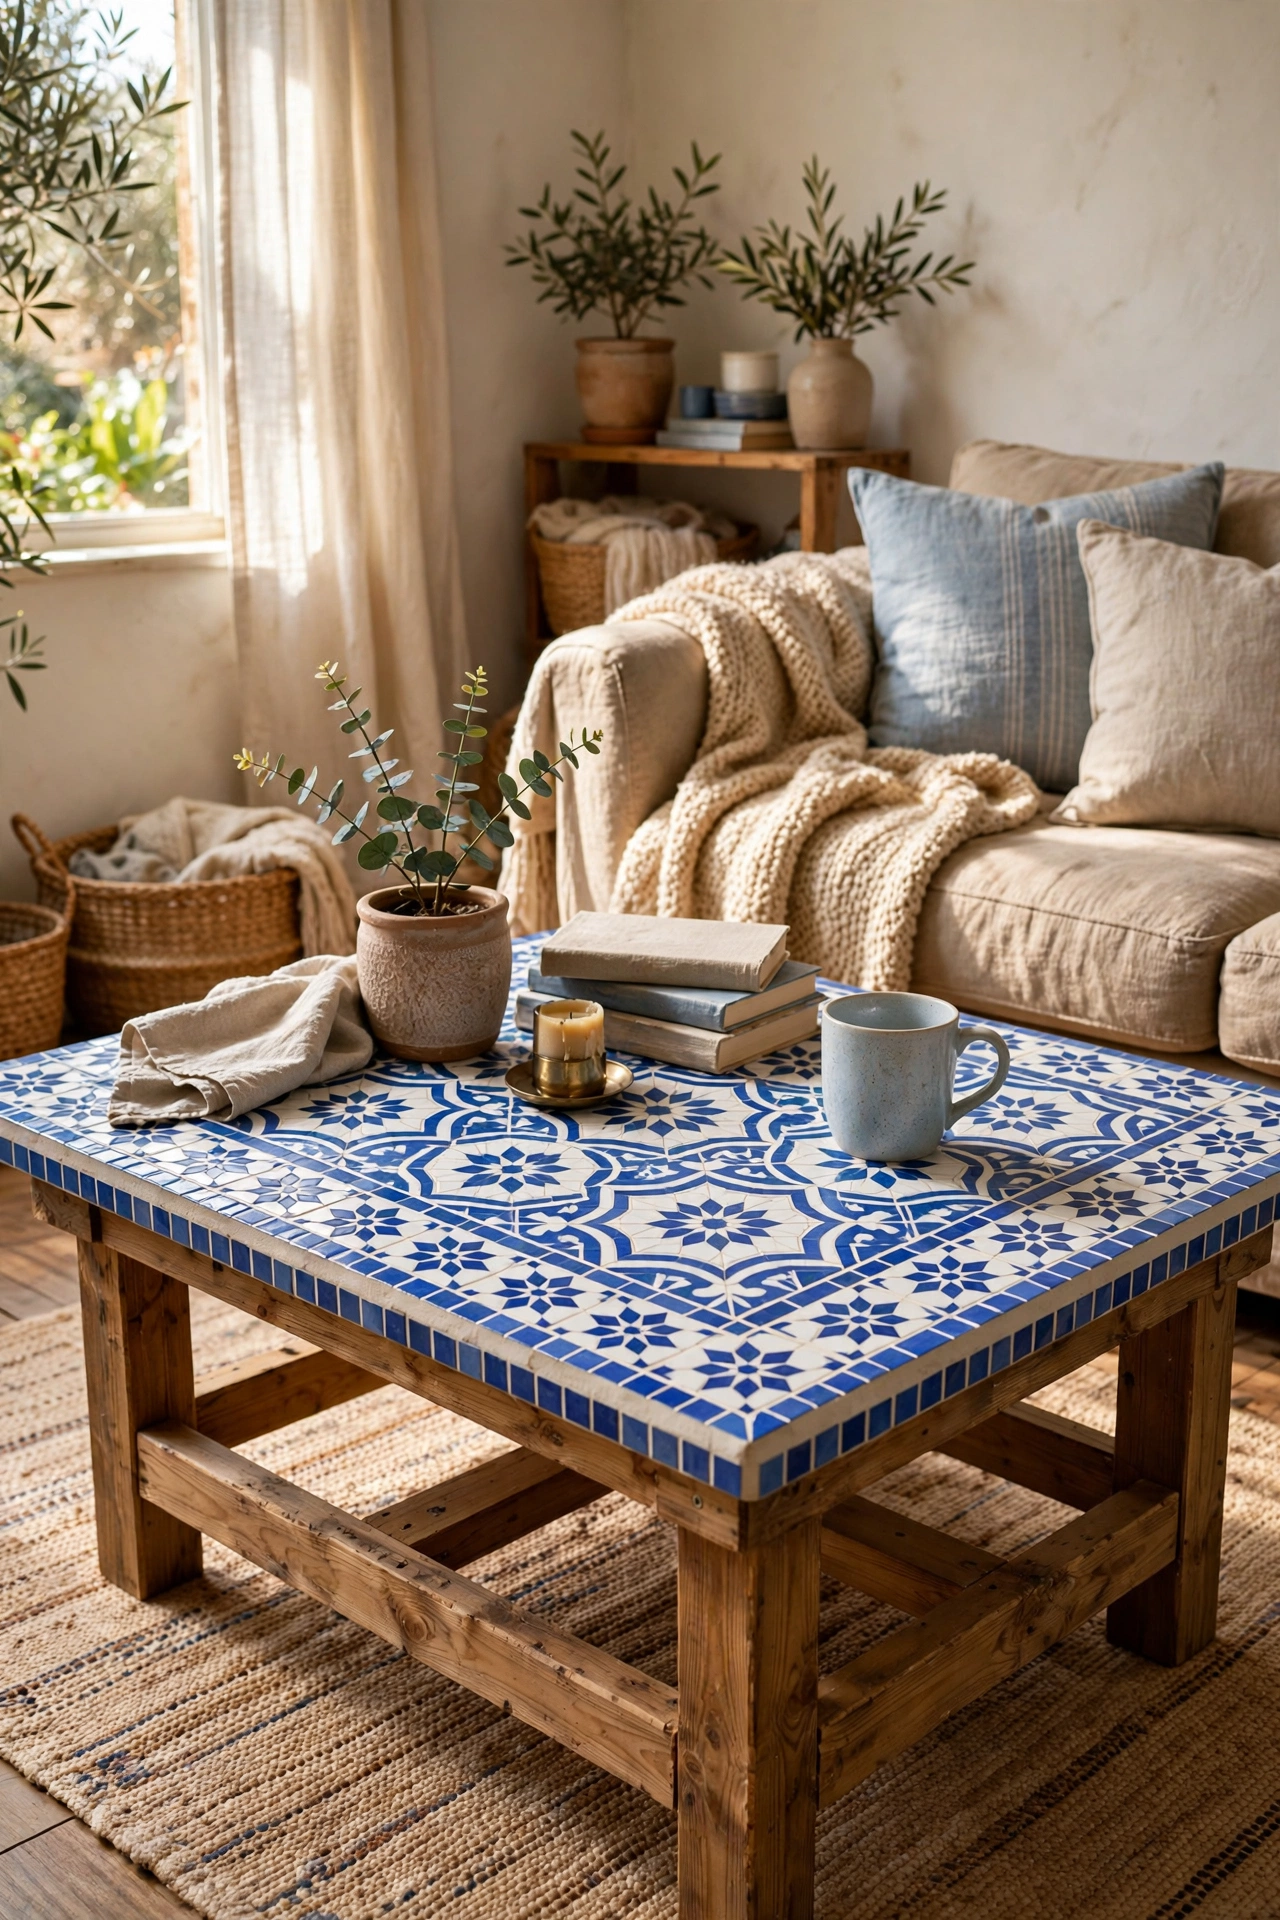
A plywood top covered in mosaic tiles — the most satisfying weekend project I know. Butter tile adhesive onto the ply with a notched trowel, press the mosaic sheets in so they sit level, then grout the next day. I did a simple white and blue pattern and it looks like something from a Mediterranean hotel. I tried grouting the same day and the tiles shifted; let the adhesive cure overnight first. Seal the grout and it is as practical as it is pretty. It is heavy once finished, but absolutely worth the effort.
Cost: ~$35-55 | Time: 2 days with drying
21. Microcement Finish over a Plain Top
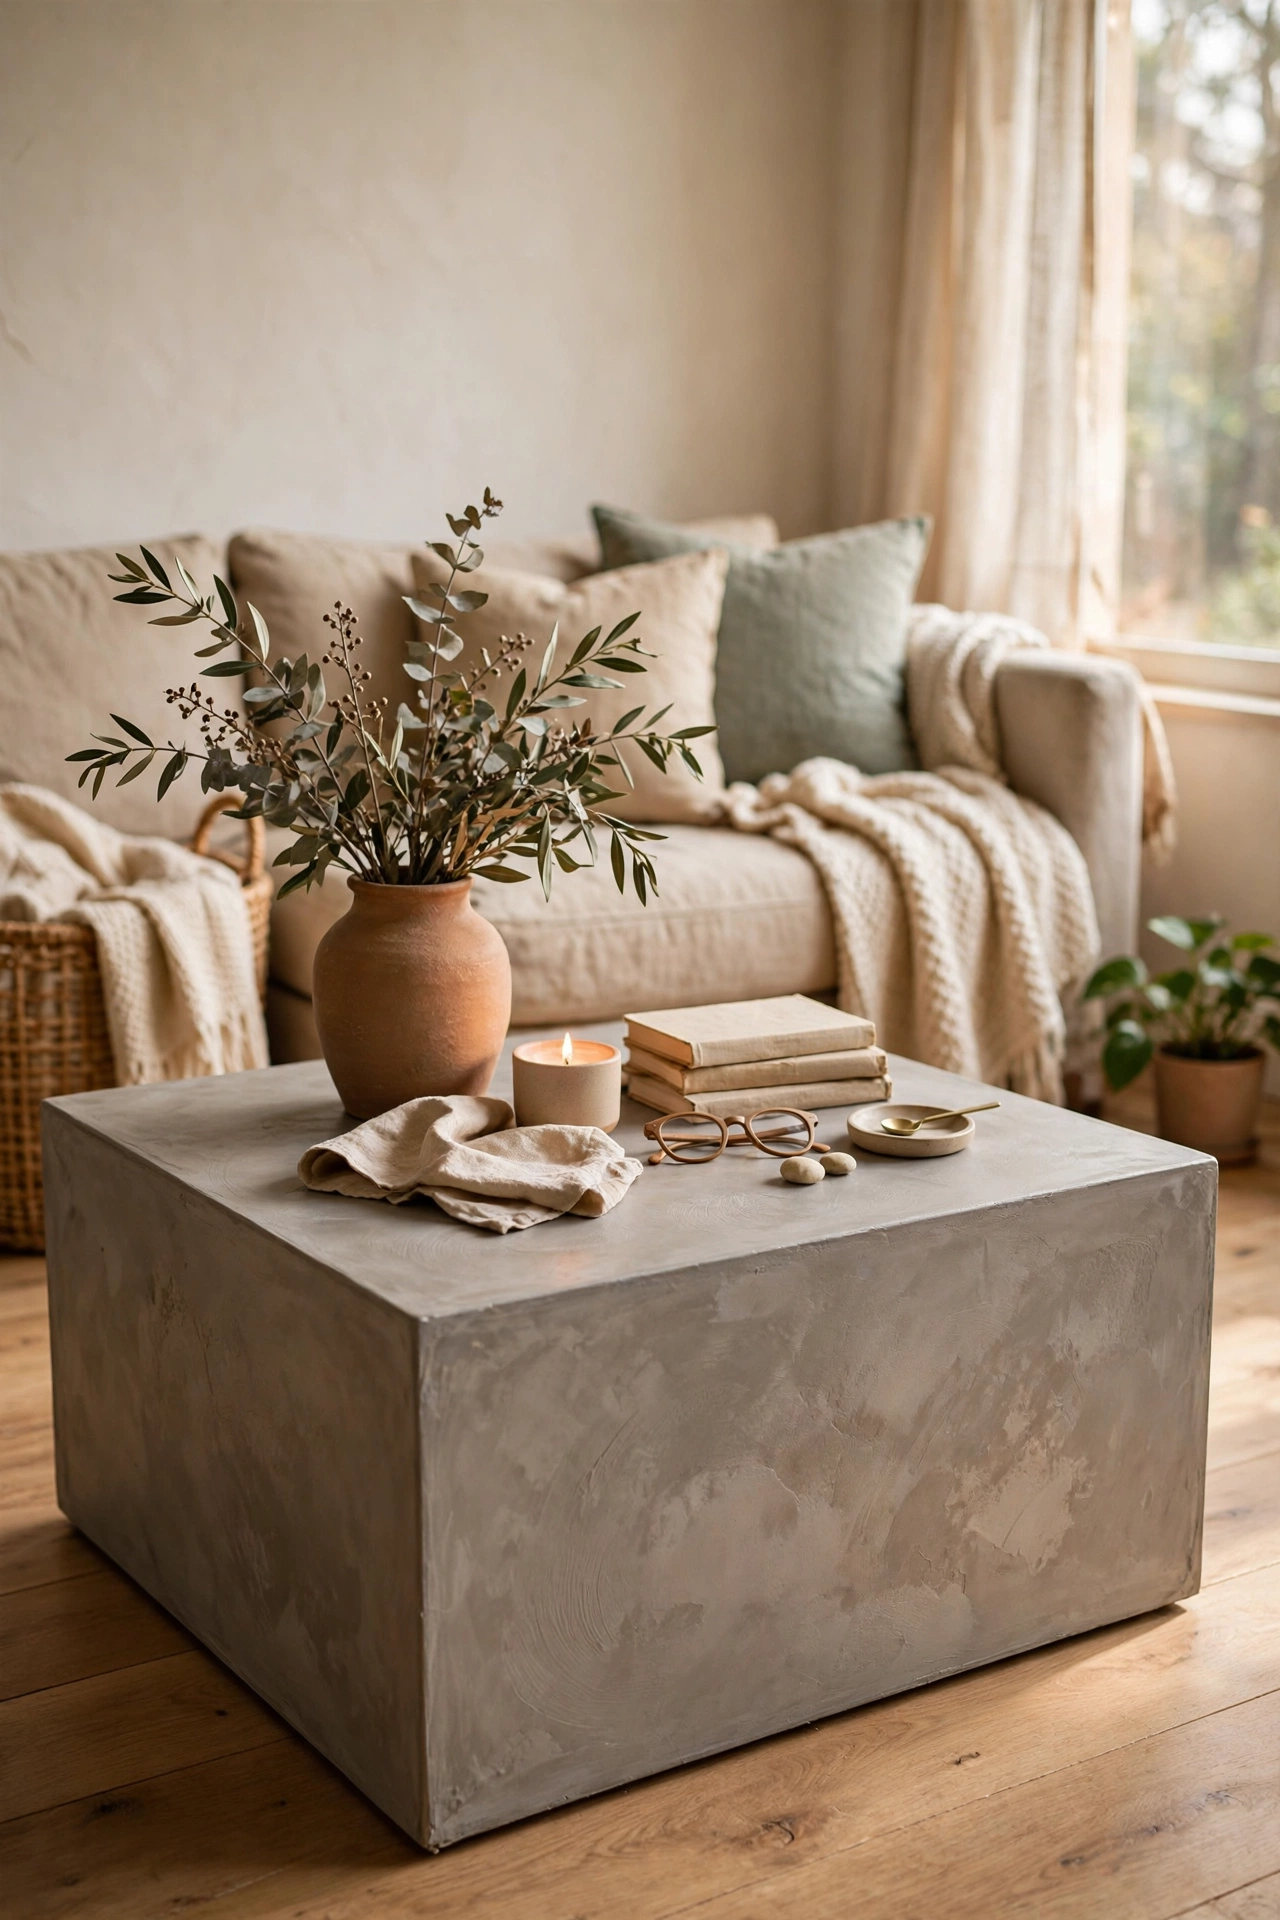
A plain MDF or plywood top skimmed with microcement — the concrete look without the concrete weight. Two thin coats with a trowel, a light sand between coats, then the proper sealer. The trowel marks are part of the look, so do not overwork it. I did mine in a warm grey and guests keep asking where I bought it. I tried one thick coat and it cracked as it cured; thin coats are the rule. The sealer is what makes it wipeable, so do not skip it. This works over any flat top, even an ugly old one.
Cost: ~$40-60 | Time: 2 days with drying
22. Fluted Timber Panel Table
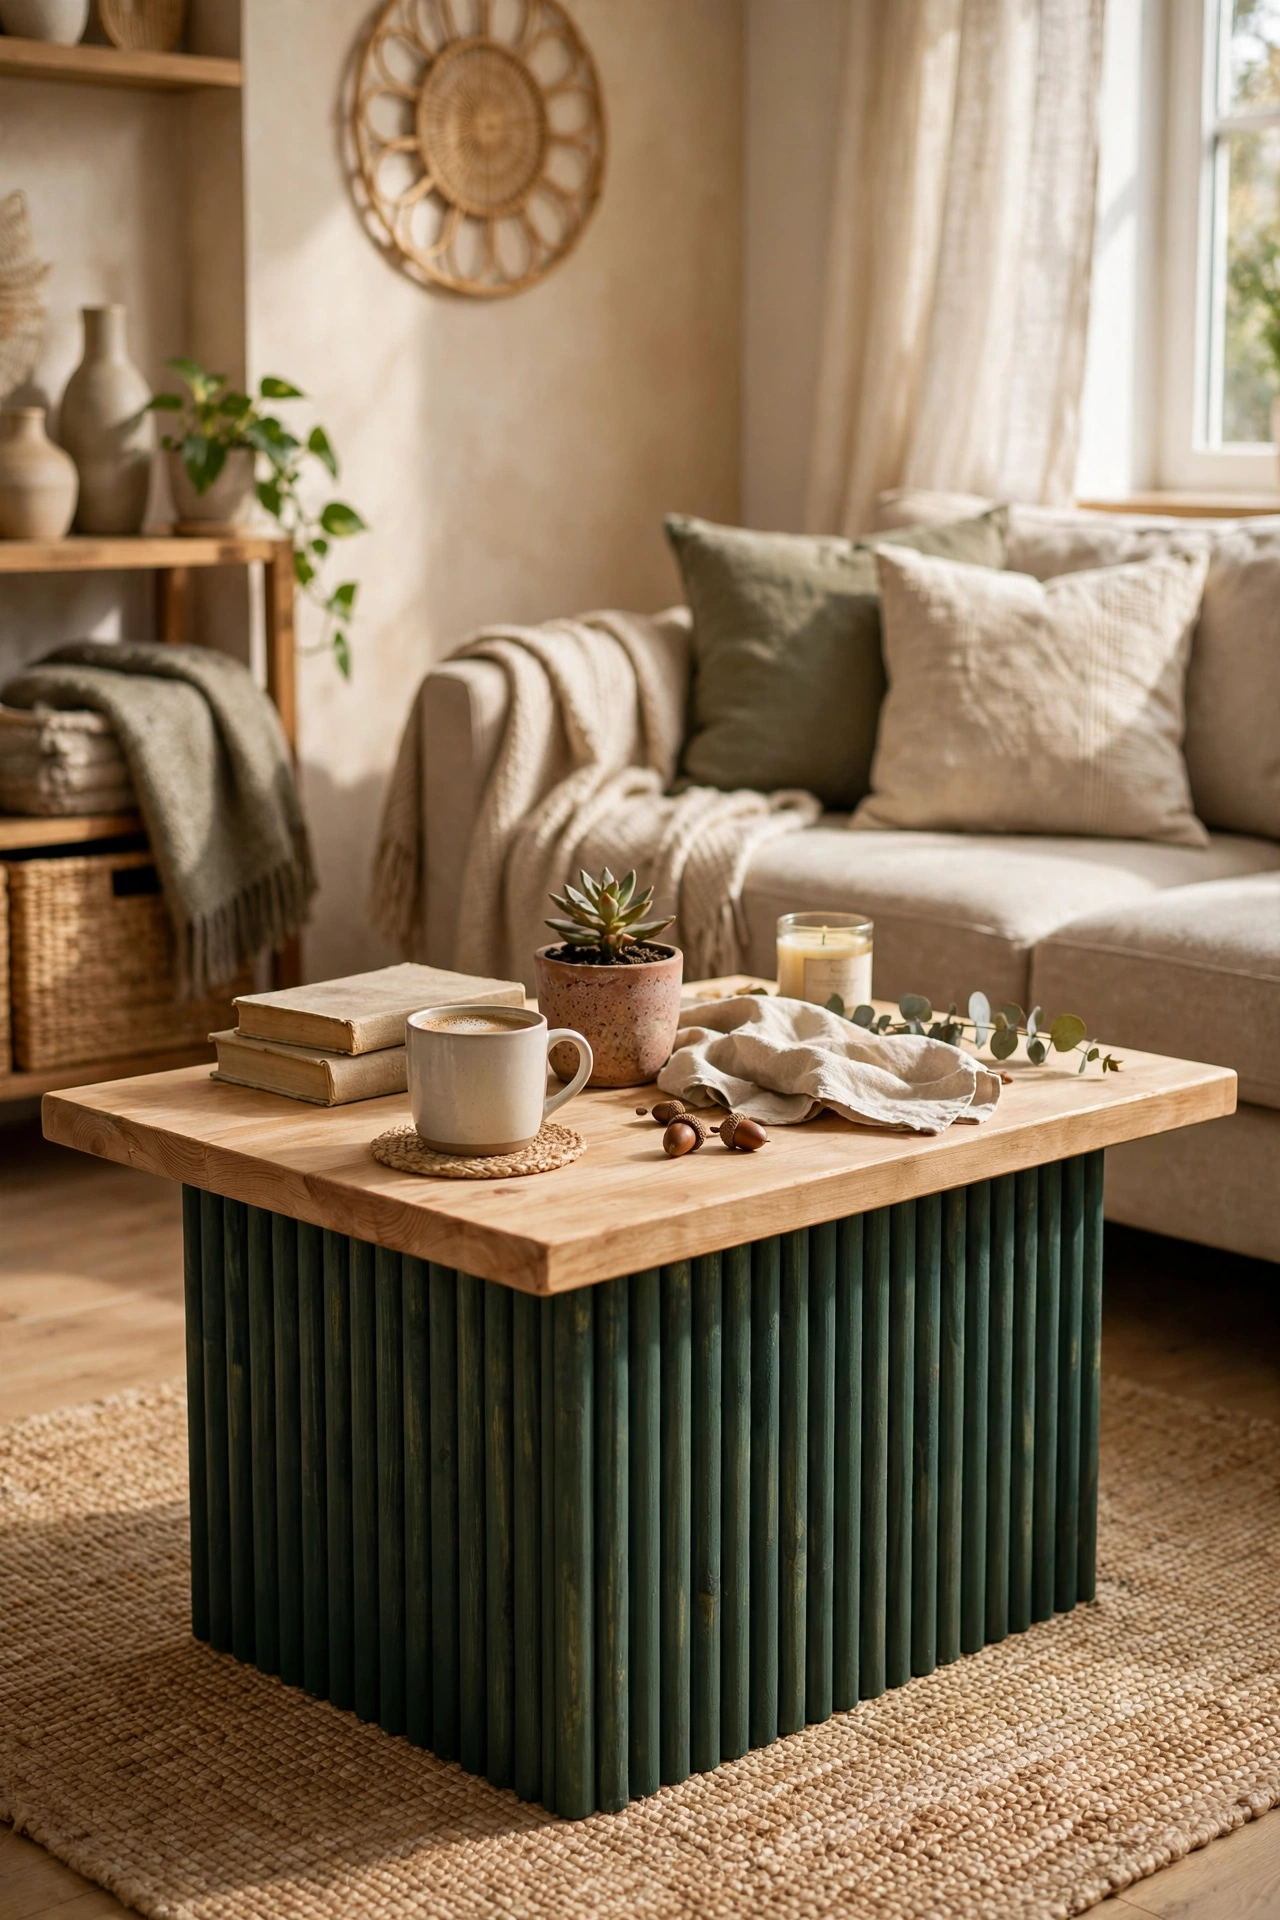
Half-round dowels glued vertically around a box base — the fluted look that fills the shops right now, built in a weekend. Cut the dowels to identical length with a stop block, then glue them tight together around a plywood core. I used 20mm dowels and the rhythm looks expensive. I tried spacing them out and it looked homemade; tight and even is the key. Prime and paint in one colour so the flutes read as texture rather than stripes. A dark green or black looks phenomenal under a timber top.
Cost: ~$35-55 | Time: 6 hours
23. Rattan Webbing Front Coffee Table
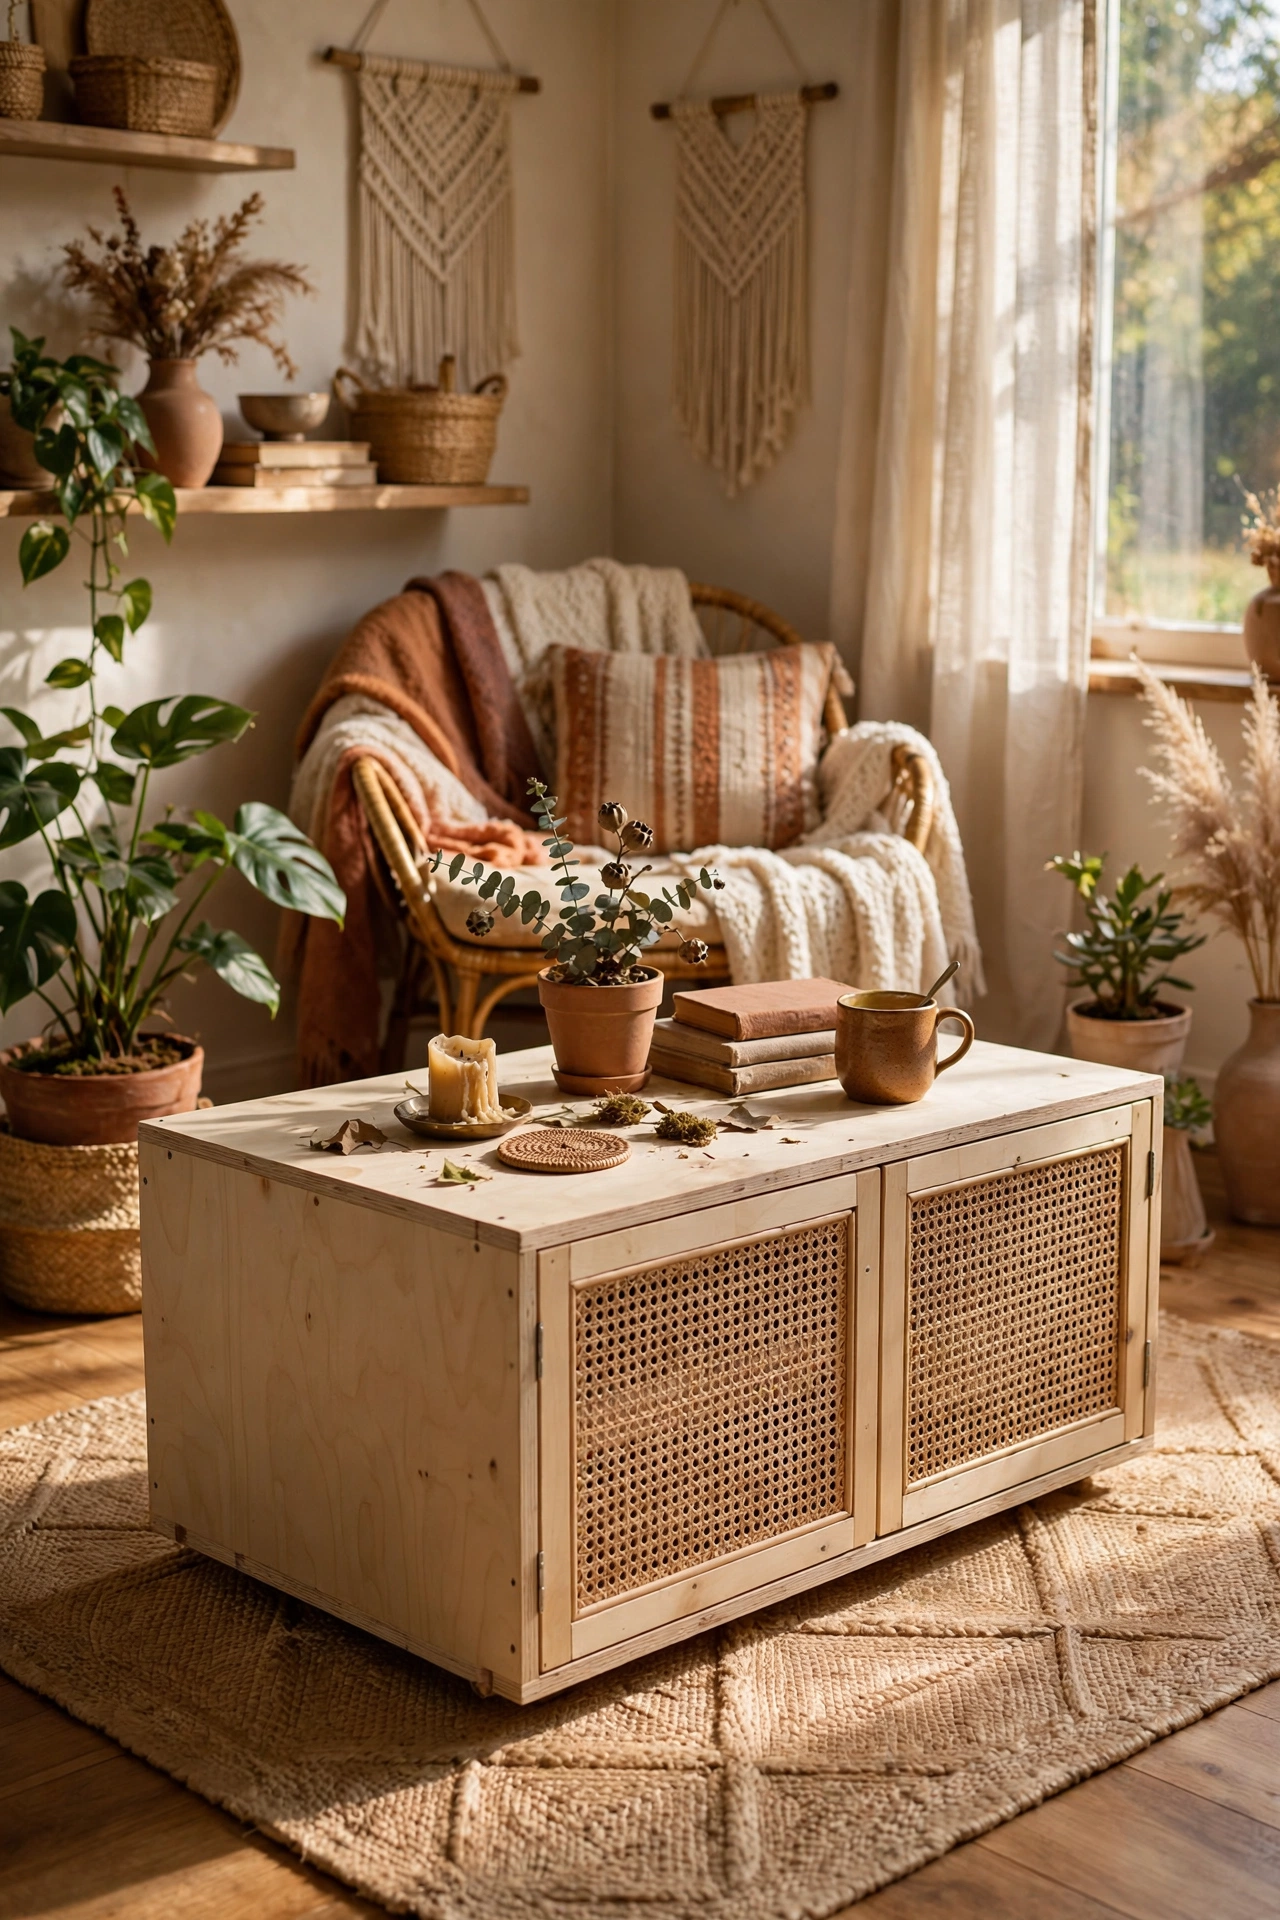
A simple box table with rattan cane webbing panels on the front — the texture lifts the whole piece. Soak the webbing before fitting so it tightens as it dries. Frame each panel with thin beading to hide the raw edges. I built the box from birch ply and the cane does all the visual work. I tried stapling the cane on dry and it buckled; the soak-then-dry trick pulls it drum-tight. Two coats of clear matte on the wood, and leave the cane natural. Gorgeous in a living room with plenty of plants.
Cost: ~$40-65 | Time: 5 hours
24. Whisky Barrel Stave Table
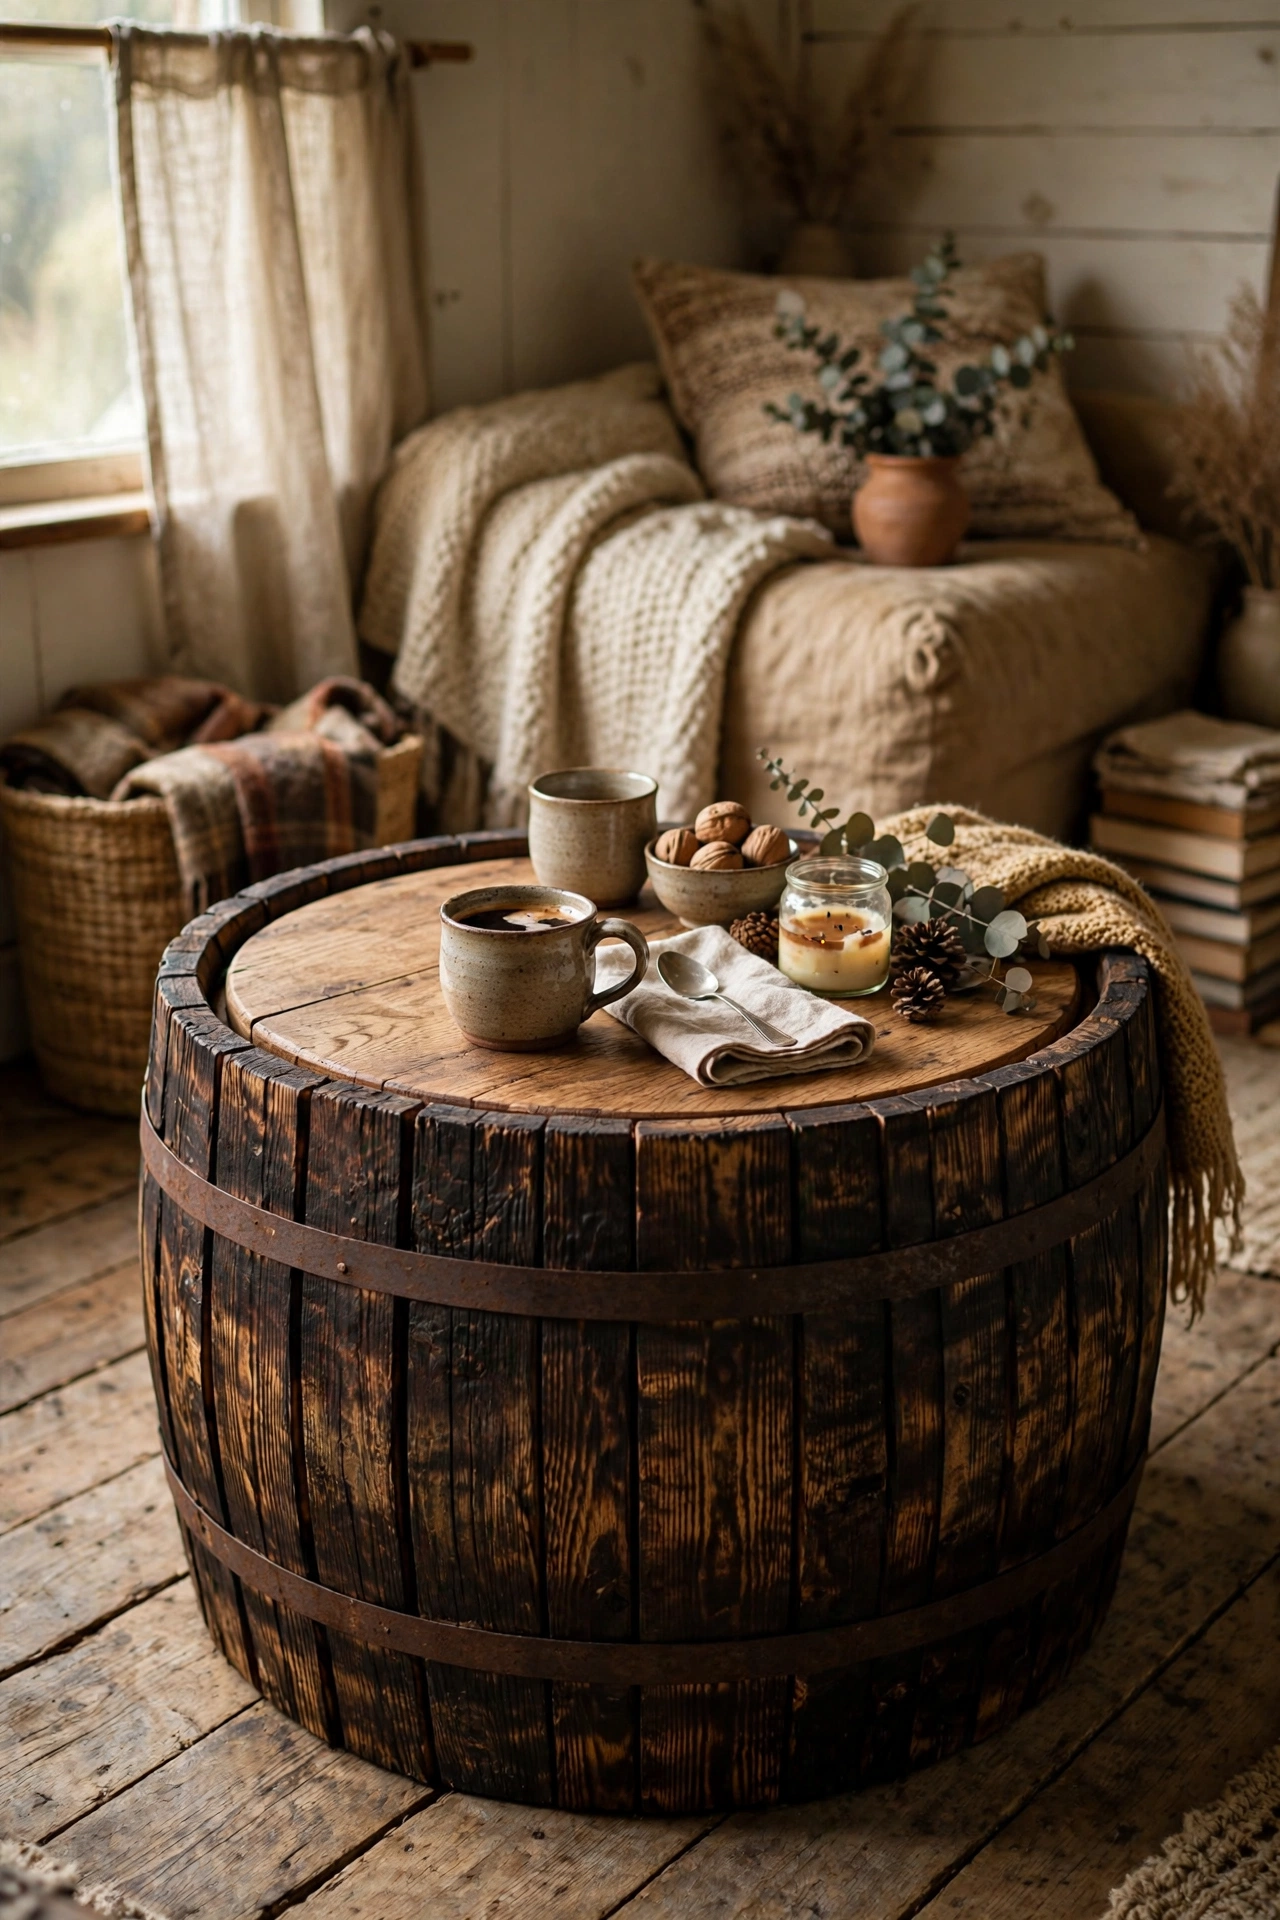
Barrel staves banded back into a round and topped with glass or timber — rustic and completely unique. Source the staves from a barrel supplier; they arrive pre-curved, which is half the job done. Band them with metal strapping at the top and bottom, then wedge a round timber top inside the rim. I varnished the outside and the charred oak looks incredible. I tried assembling without the bands first — do not, because it springs apart immediately. Give the staves a good scrub before you start, especially if the barrel previously held spirits.
Cost: ~$40-70 | Time: 5 hours
25. Industrial Pipe and Timber Table
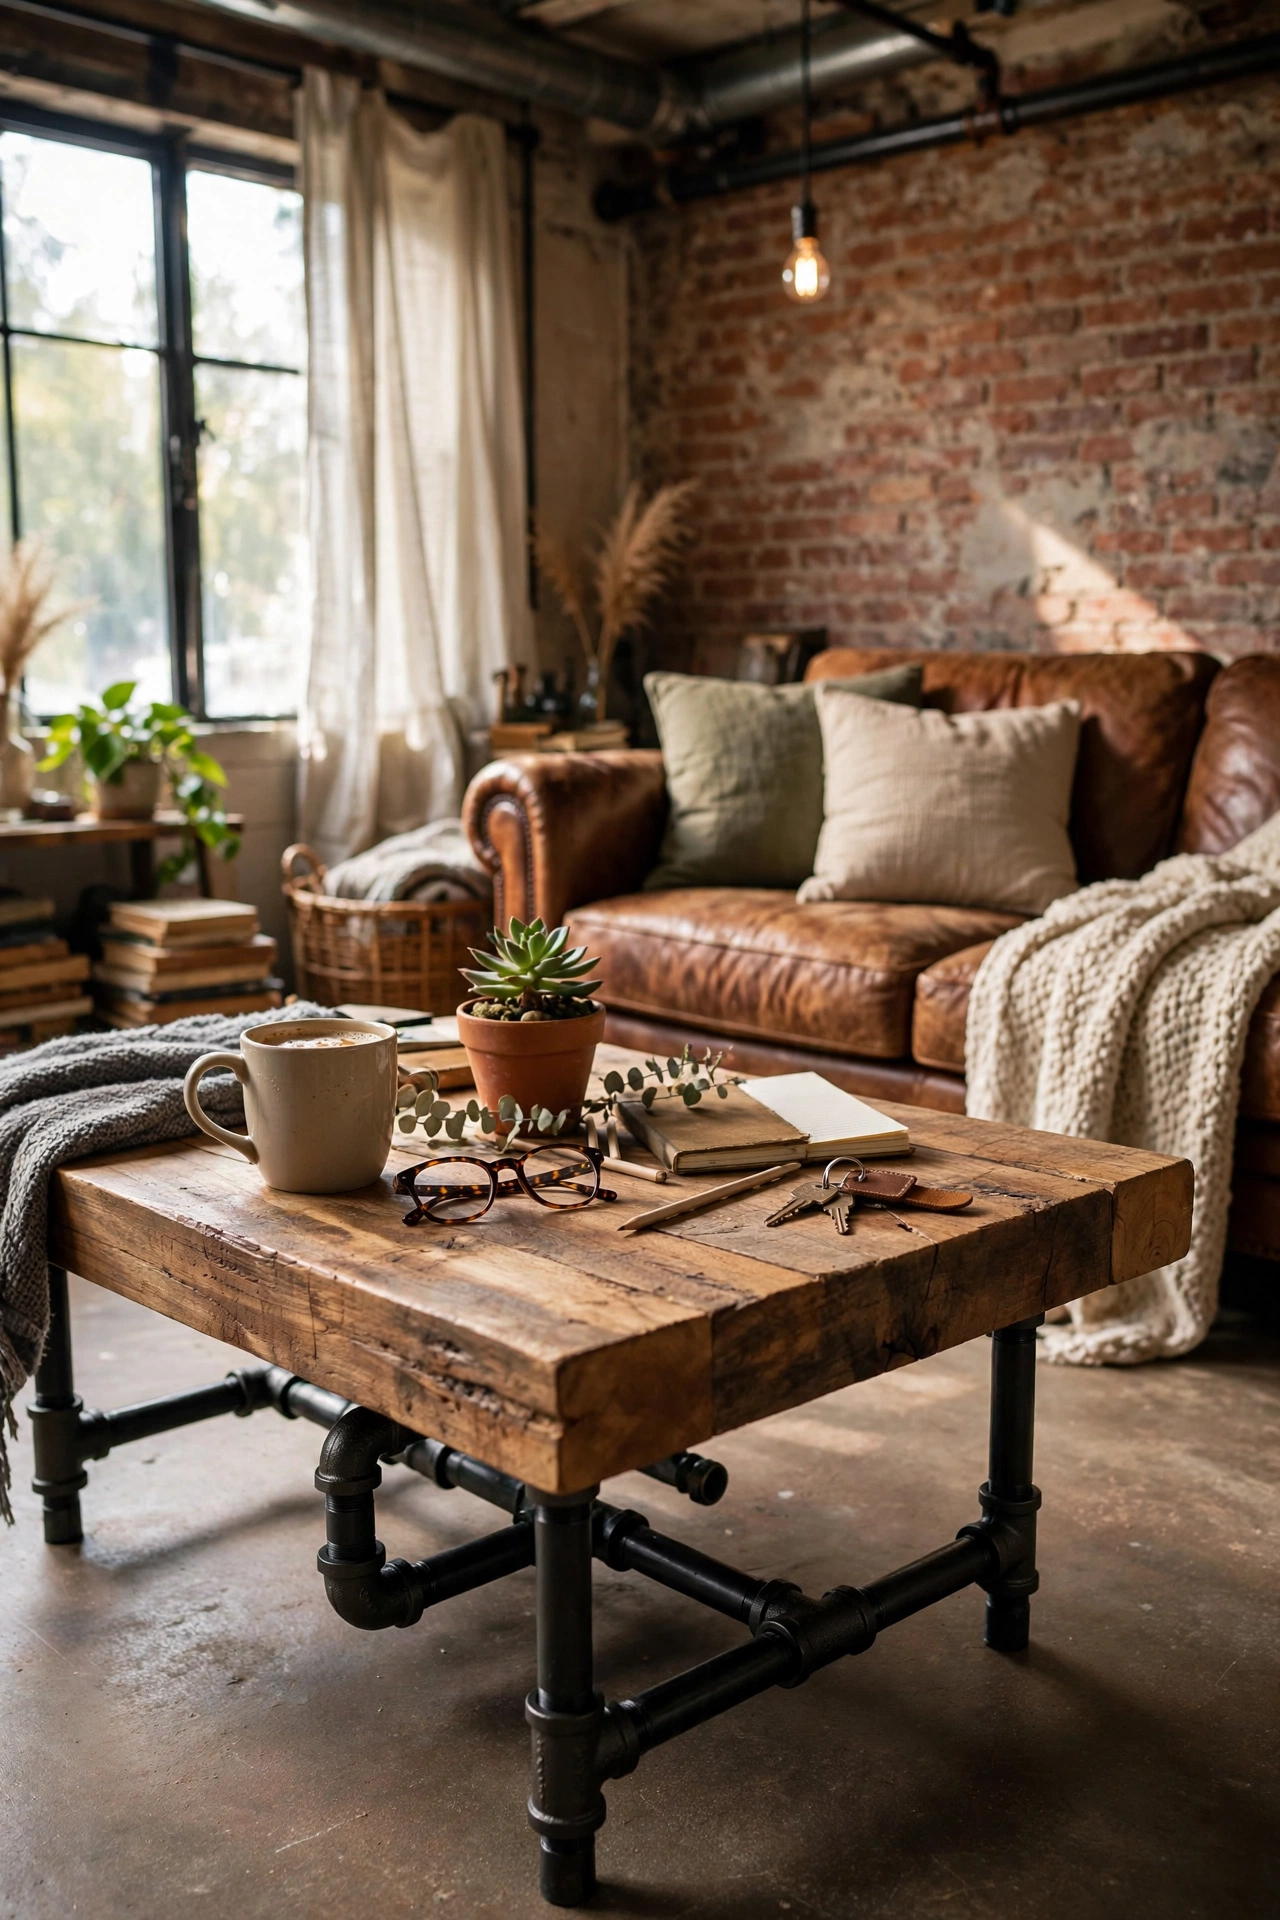
Plumbing pipe fittings as the base with a thick timber top — the industrial look, built like a tank. Dry-fit all the pipes first, then assemble with thread tape so nothing loosens over time. Spray the pipes matte black before assembly. I used 32mm pipe and the proportions look right with a five-centimetre thick top. I tried assembling first and painting after, and the paint missed every joint; paint first. The whole thing is heavy, so build it where it is going to live. Rock solid — my kids climb on it and it does not flinch.
Cost: ~$50-80 | Time: 4 hours
Quick questions, answered
What tools do I need for a weekend DIY coffee table?
A drill, a saw (hand or circular), sandpaper, and a tape measure cover nearly every build here. A pocket-hole jig helps for the timber builds but is not essential. Borrow what you do not own — most of these need nothing exotic.
What height should a DIY coffee table be?
Match your sofa: the table top should sit level with your seat cushions, or two to five centimetres below them. For most sofas that is 35 to 45cm. Measure your sofa before you cut a single leg.
How do I stop a DIY coffee table wobbling?
Cut legs identically using a stop block, check the diagonal measurements are equal before tightening, and always fix legs to a frame or apron rather than straight into the top. Felt pads under the legs finish the job.
📌 Love one of these tables? Save this post now so you have the build ready for this weekend.
More coffee table ideas to browse next: (see also: 15-diy-coffee-table-ideas-on-a-budget) (see also: 19-diy-coffee-table-ideas-that-look-expensive) (see also: 25-diy-coffee-table-ideas-for-beginners)
