25 DIY Mirror Decor Ideas on a Budget
The first piece of diy mirror decor I ever made was a plain, slightly scuffed rectangle mirror I bought at a car boot sale for three pounds. I nearly walked past it. It looked tired, the frame was chipped, and honestly it seemed like someone else’s problem. But a tester pot of paint and one free afternoon later, it was hanging above my hallway console looking like something I’d paid ten times more for. That is the magic of mirrors: they bounce light around, make small rooms feel twice the size, and they forgive a lot of DIY wobbles because the glass itself does most of the talking.
Every idea below is one I’ve either made myself or helped a friend make, and none of them need fancy tools or a big budget. You’ll mostly need a plain mirror (charity shops are full of them), something to frame or decorate it with, and basic supplies you probably already own. Work through them slowly, pick the ones that suit your style, and don’t stress about perfection. Mirrors are very forgiving.
1. Peel-and-Stick Timber Frame Mirror
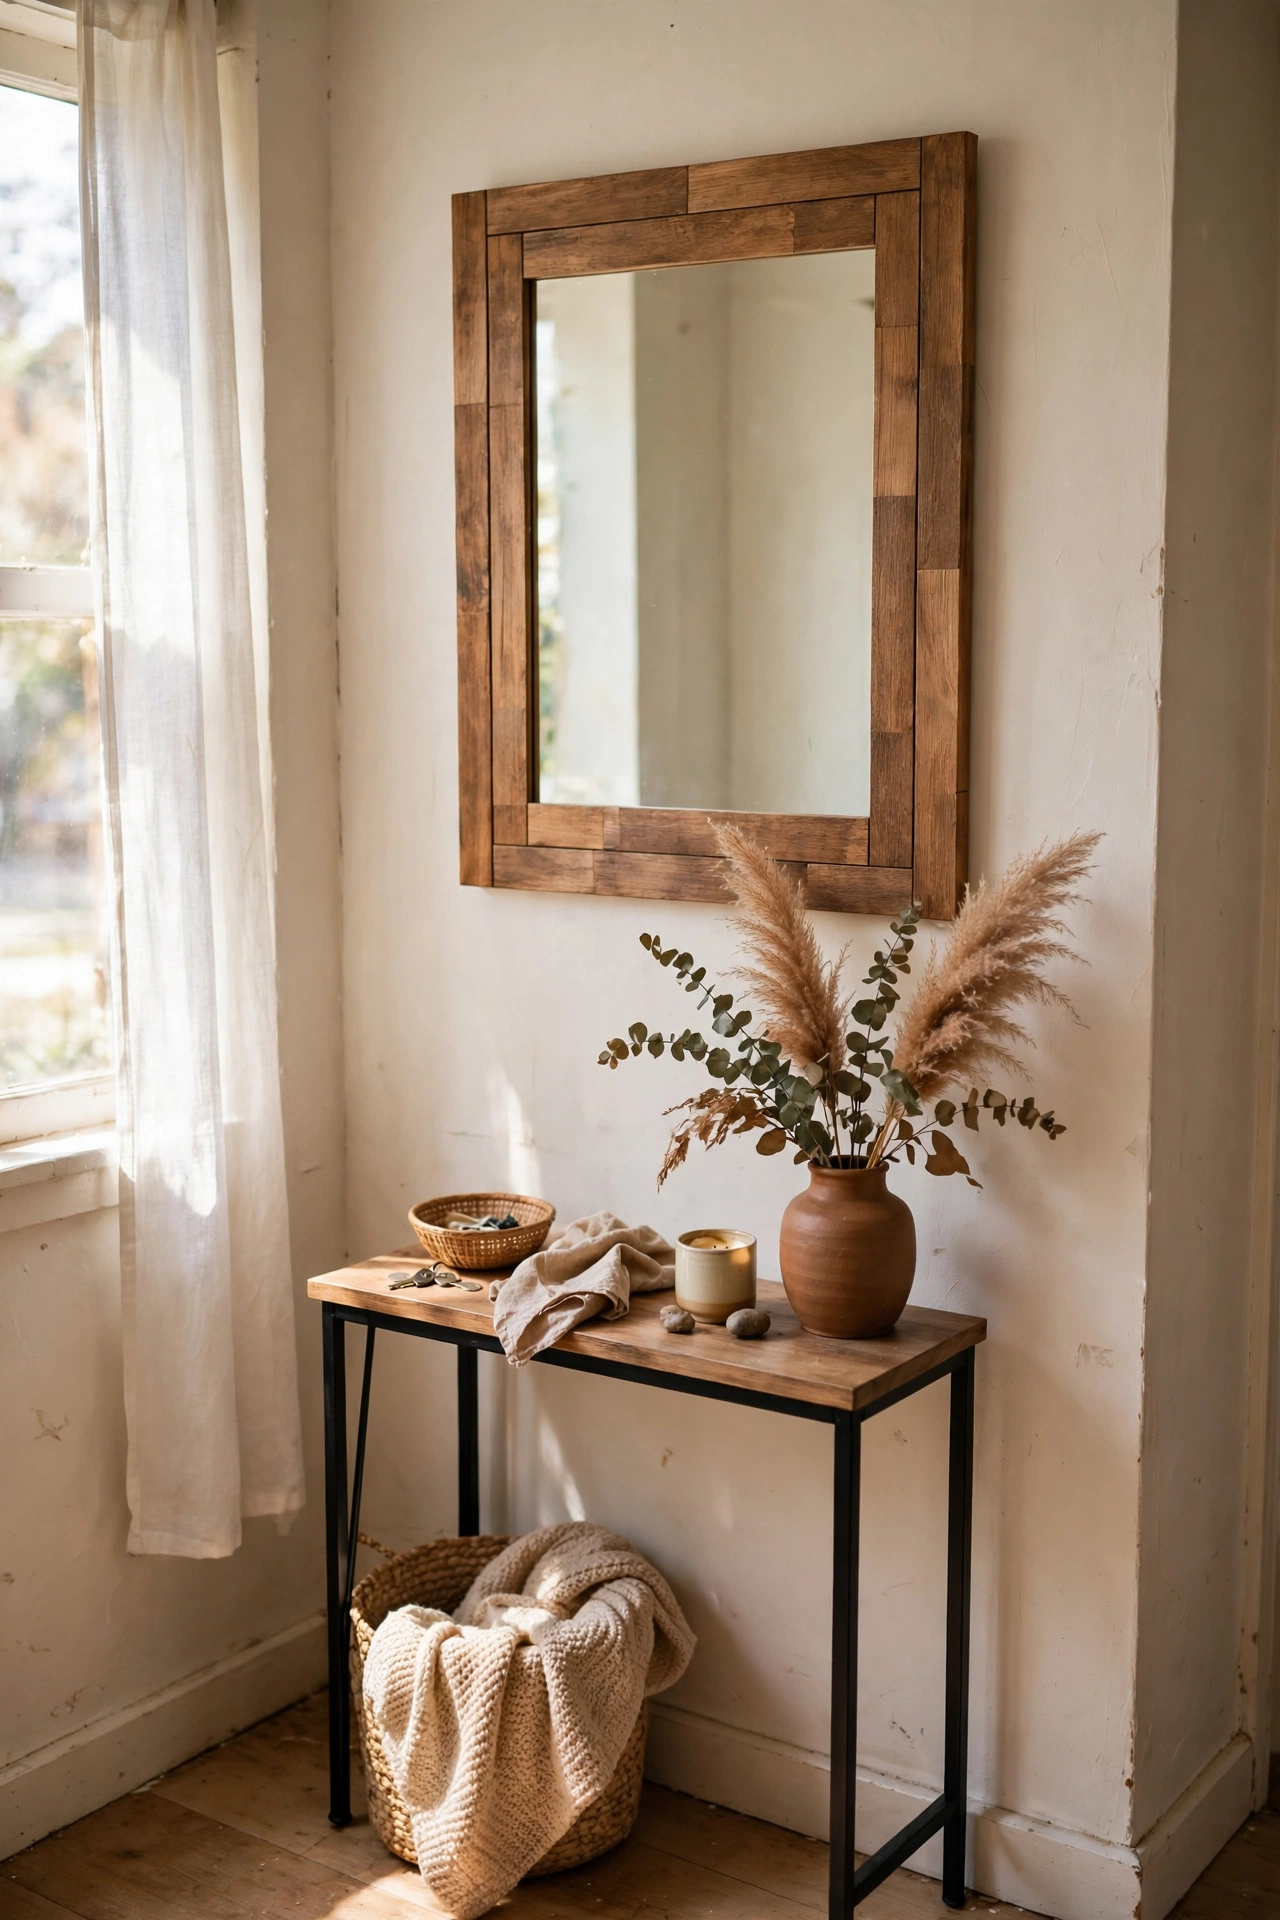
This is the fastest way to make a boring frameless mirror look custom. Buy a roll of peel-and-stick timber-effect vinyl and cut it into strips to frame the mirror’s edges, overlapping the corners like a picture frame. Clean the mirror edge first so the vinyl grips, then press each strip down firmly and trim the corners at 45 degrees with a craft knife for a neat mitre look. I tried this on a bathroom mirror and it genuinely looked like a solid wood frame from two steps back. Do line the strips up on a flat table before sticking them — I rushed the first strip and it sat crooked, which made every other strip worse. Don’t stretch the vinyl as you press it down, or it shrinks back overnight and leaves gaps.
Pro tip: warm the vinyl slightly with a hairdryer as you press it around corners — it stops the edges lifting in a steamy bathroom.
Cost: ~$7 | Time: 45 minutes
2. Rope-Trimmed Round Mirror
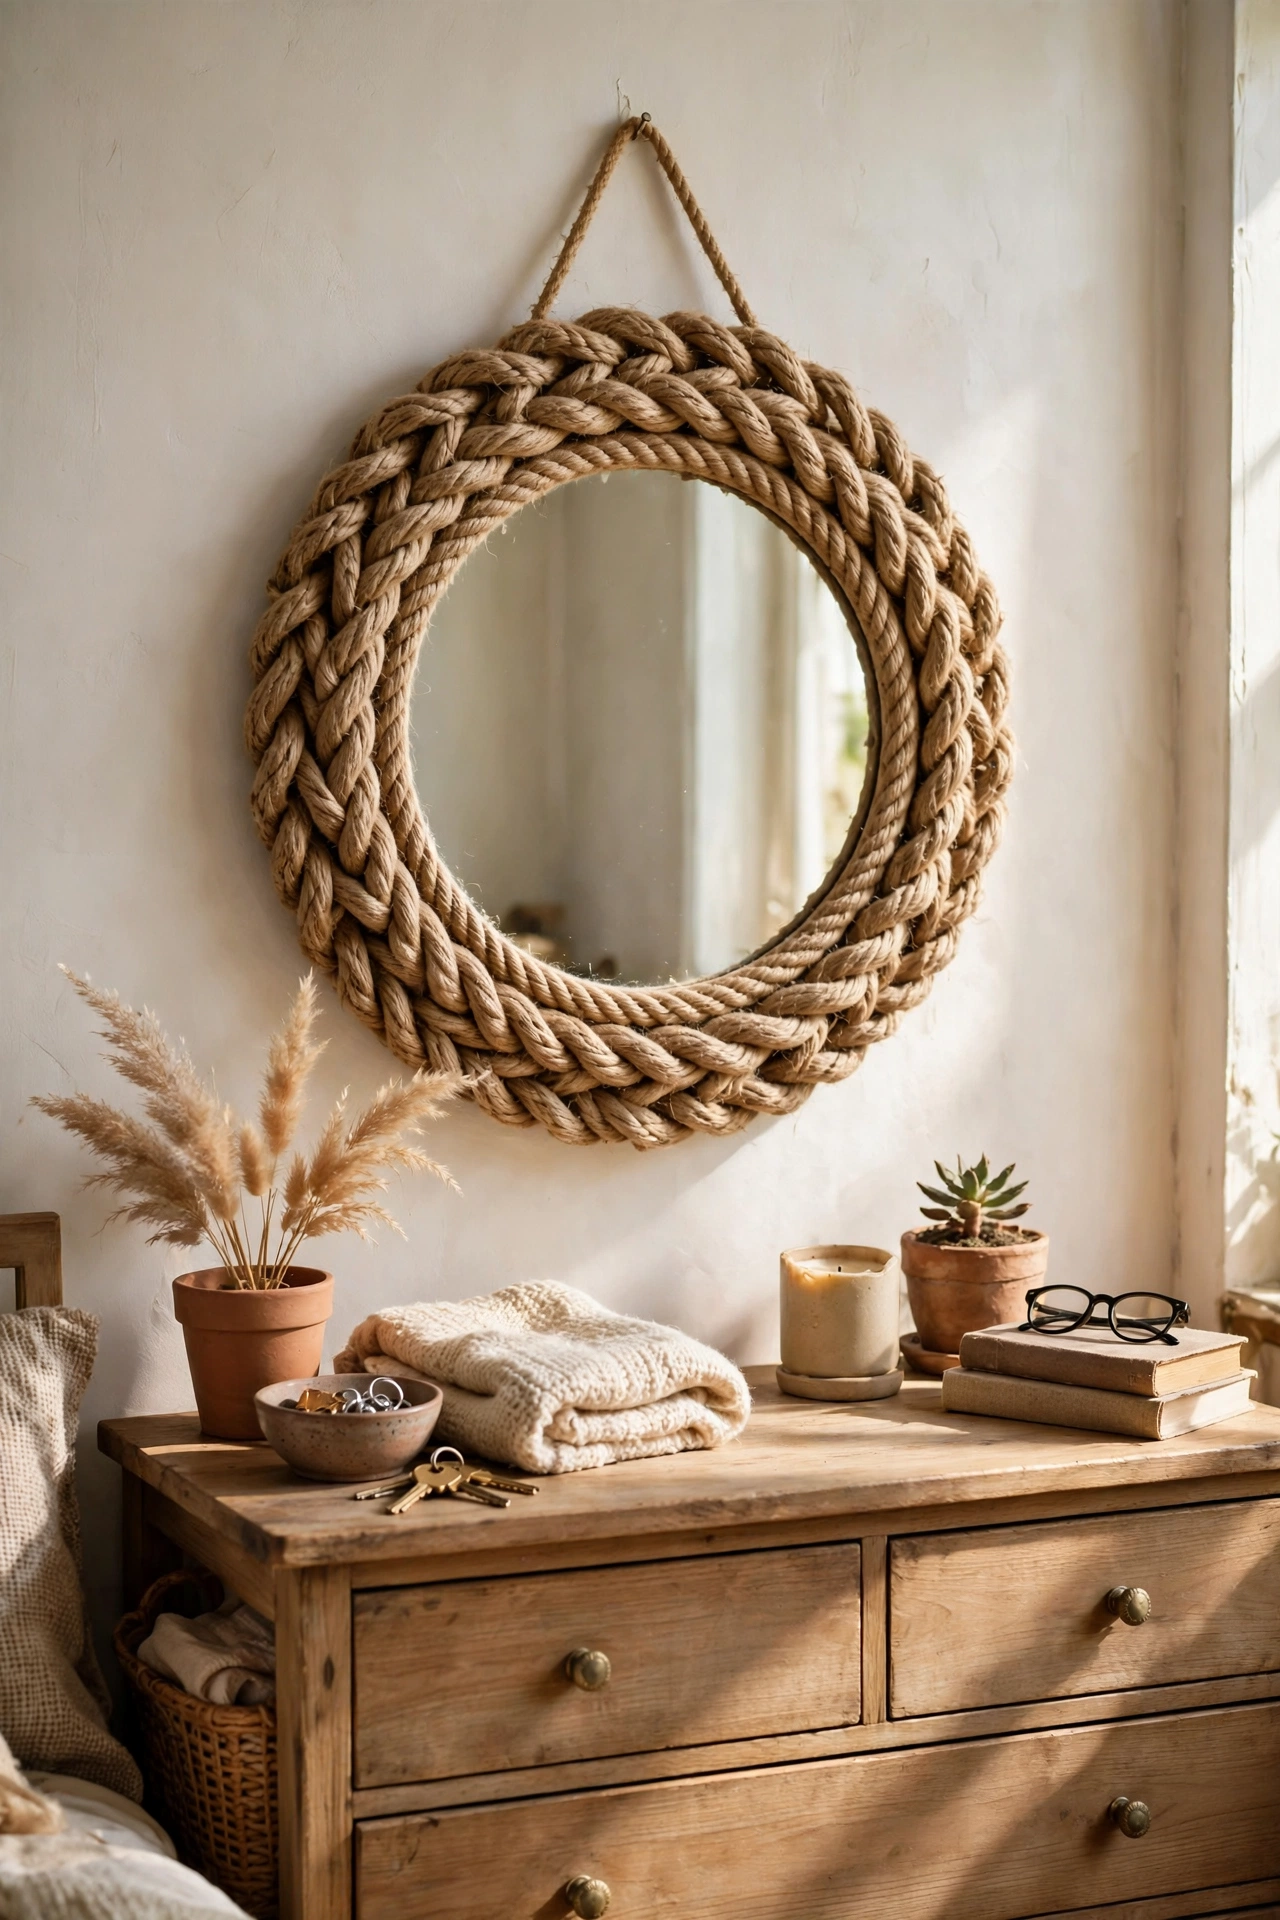
A plain round mirror plus a coil of natural jute rope becomes a relaxed, coastal-style statement. Starting at the back of the mirror, run a line of hot glue around the outer edge and press the rope into it, working in a spiral until the whole edge is wrapped. Keep the coils tight together so no mirror edge peeks through. I made one of these for my spare room and visitors always assume it came from a homeware shop. I tried using thin twine first and it looked scruffy — the thicker 8mm jute gives that chunky, expensive finish. Do wear a thimble or use the end of a spoon to press the rope in; hot glue plus fingertips is a painful combination.
Pro tip: dab the rope ends with clear nail varnish before you start so they don’t unravel while you work.
Cost: ~$9 | Time: 1 hour
3. Half-Moon Antique-Effect Mirror
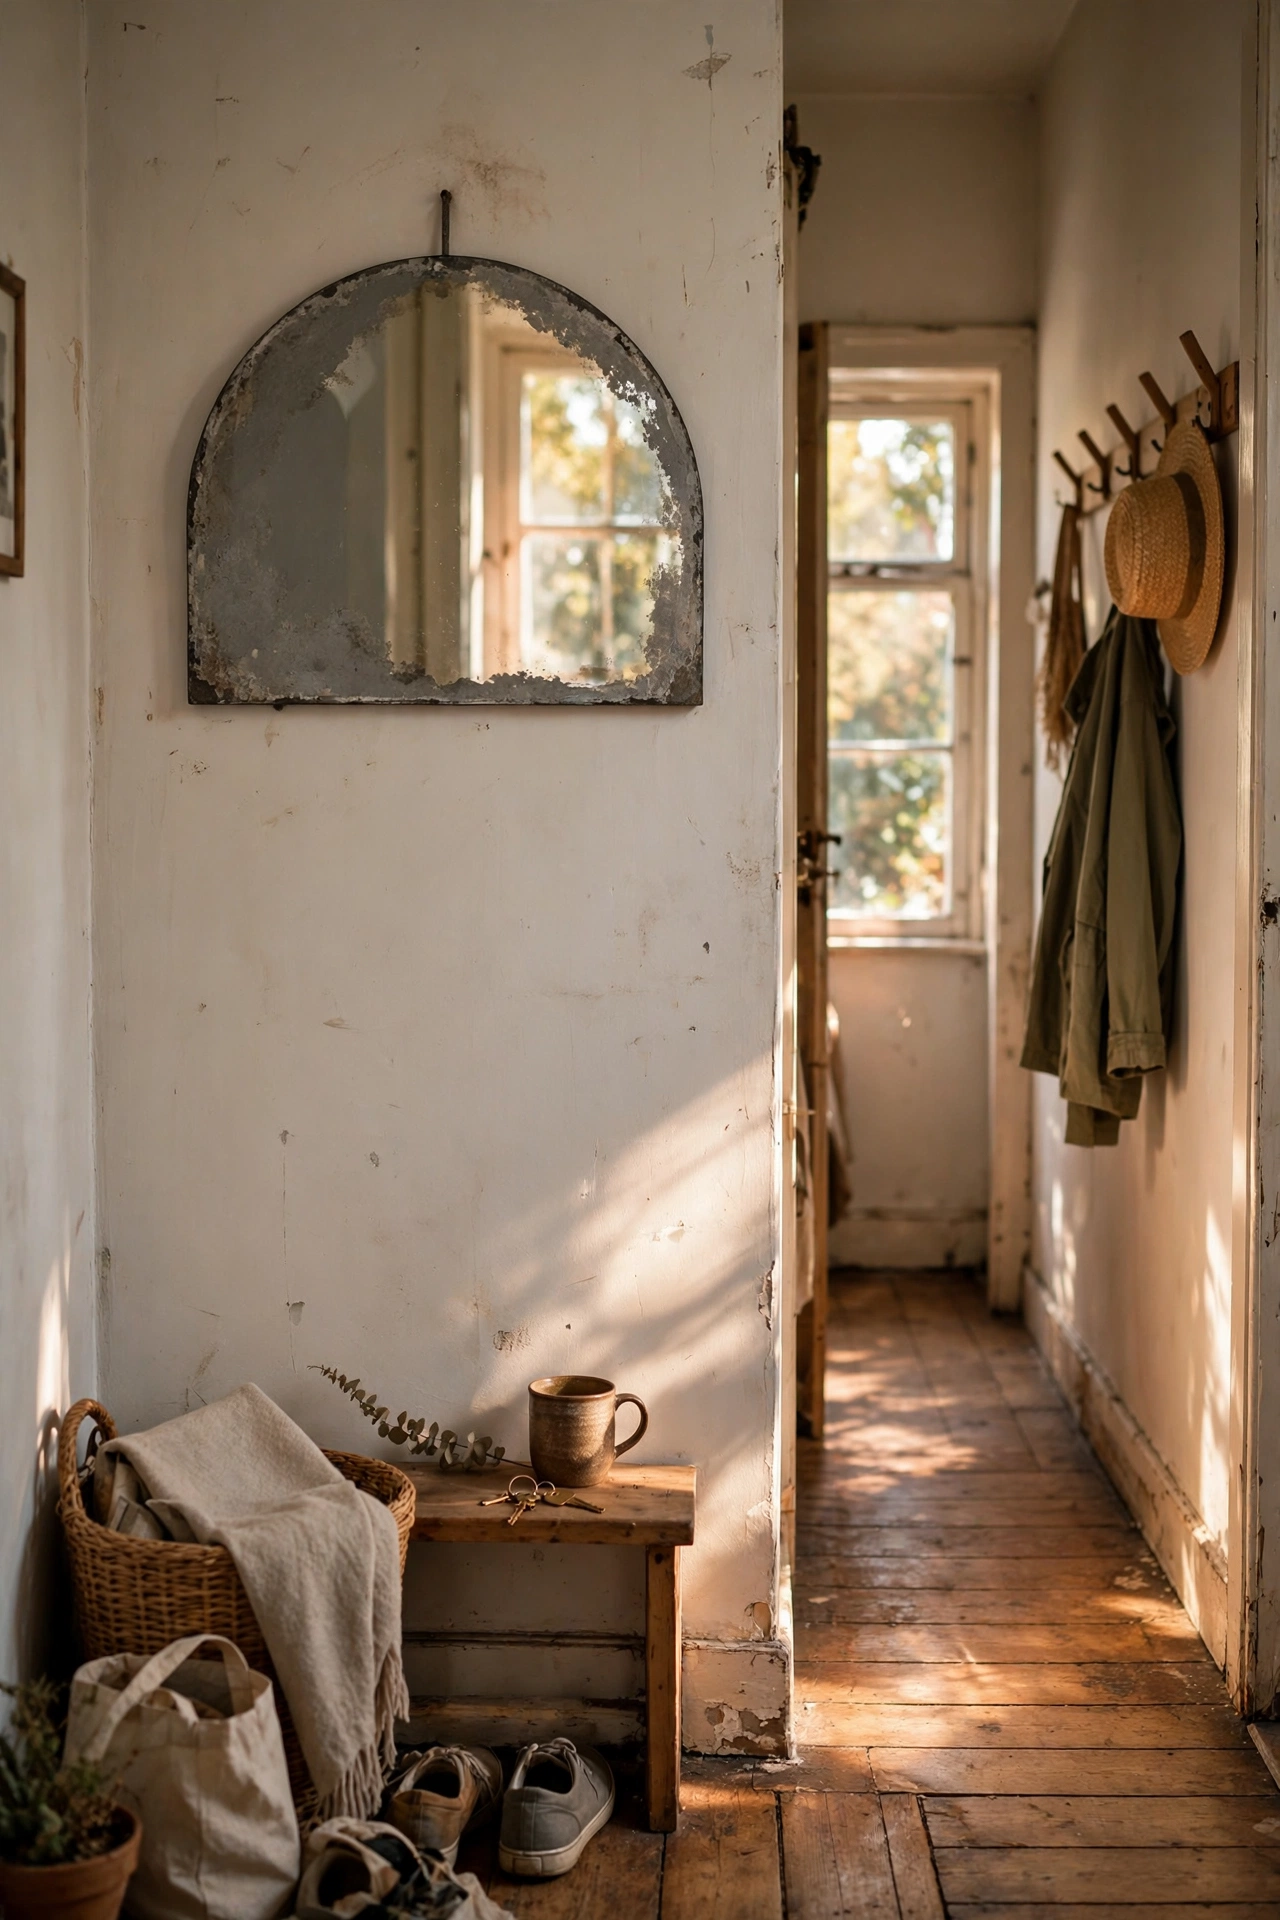
You can fake an aged, foxed antique mirror with a cheap half-moon mirror and some vinegar-based ageing solution, or simply a light misting of grey and gold spray paint behind the glass edge. Mask off the centre of the mirror, then lightly spray the outer border so it fades from grey at the edge to clear glass in the middle. Blot with a cloth while wet for a mottled, aged look. Mine hangs in the hallway and the mottled edges catch the afternoon sun beautifully. I tried spraying too heavily the first time and it just looked dirty — two feather-light passes beat one heavy coat every time. Don’t skip the masking; overspray on the middle ruins the effect.
Pro tip: practice your misting technique on an old piece of glass or a picture frame’s glazing before touching the real mirror.
Cost: ~$12 | Time: 1 hour plus drying
4. Thrifted Frame Mirror Gallery Wall
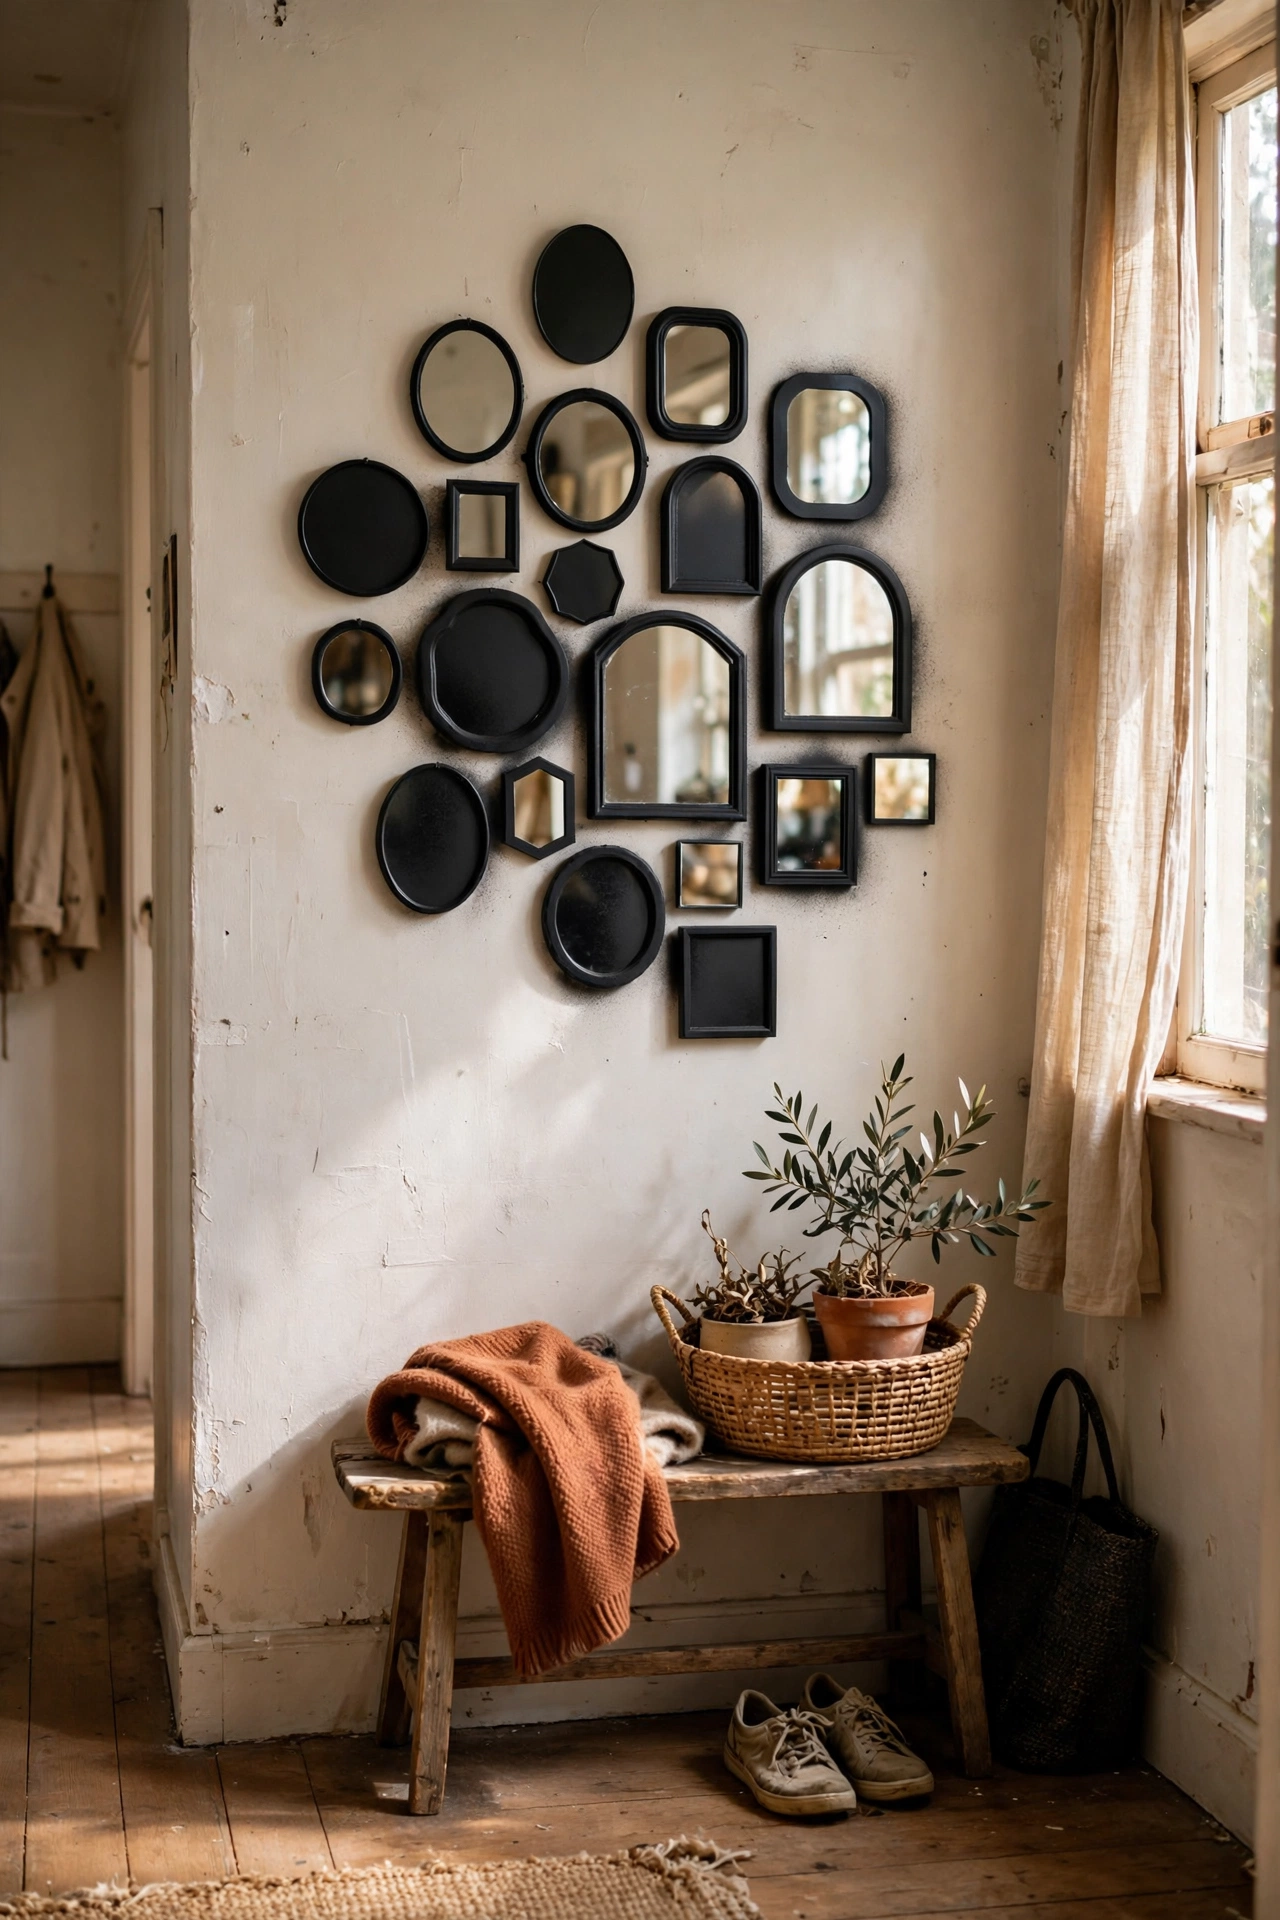
Collect five to seven small framed mirrors from charity shops — they don’t need to match — and hang them as a gallery cluster. Spray the frames all one colour (matte black or antique gold) so the mismatched shapes feel intentional. Lay the arrangement on the floor first, photograph it, then transfer it to the wall using paper templates. I built mine over three months of charity-shop hunting and the wall now bounces light down my darkest corridor. Do vary the sizes and shapes for a collected-over-time feel. Don’t hang them in a rigid grid unless that is your style; the charm here is the organic, slightly wonky arrangement.
Pro tip: use command strips rated for the weight if you are renting — small mirrors are ideal for damage-free hanging.
Cost: ~$20 for the lot | Time: an afternoon
5. Gold Leaf Edged Mirror
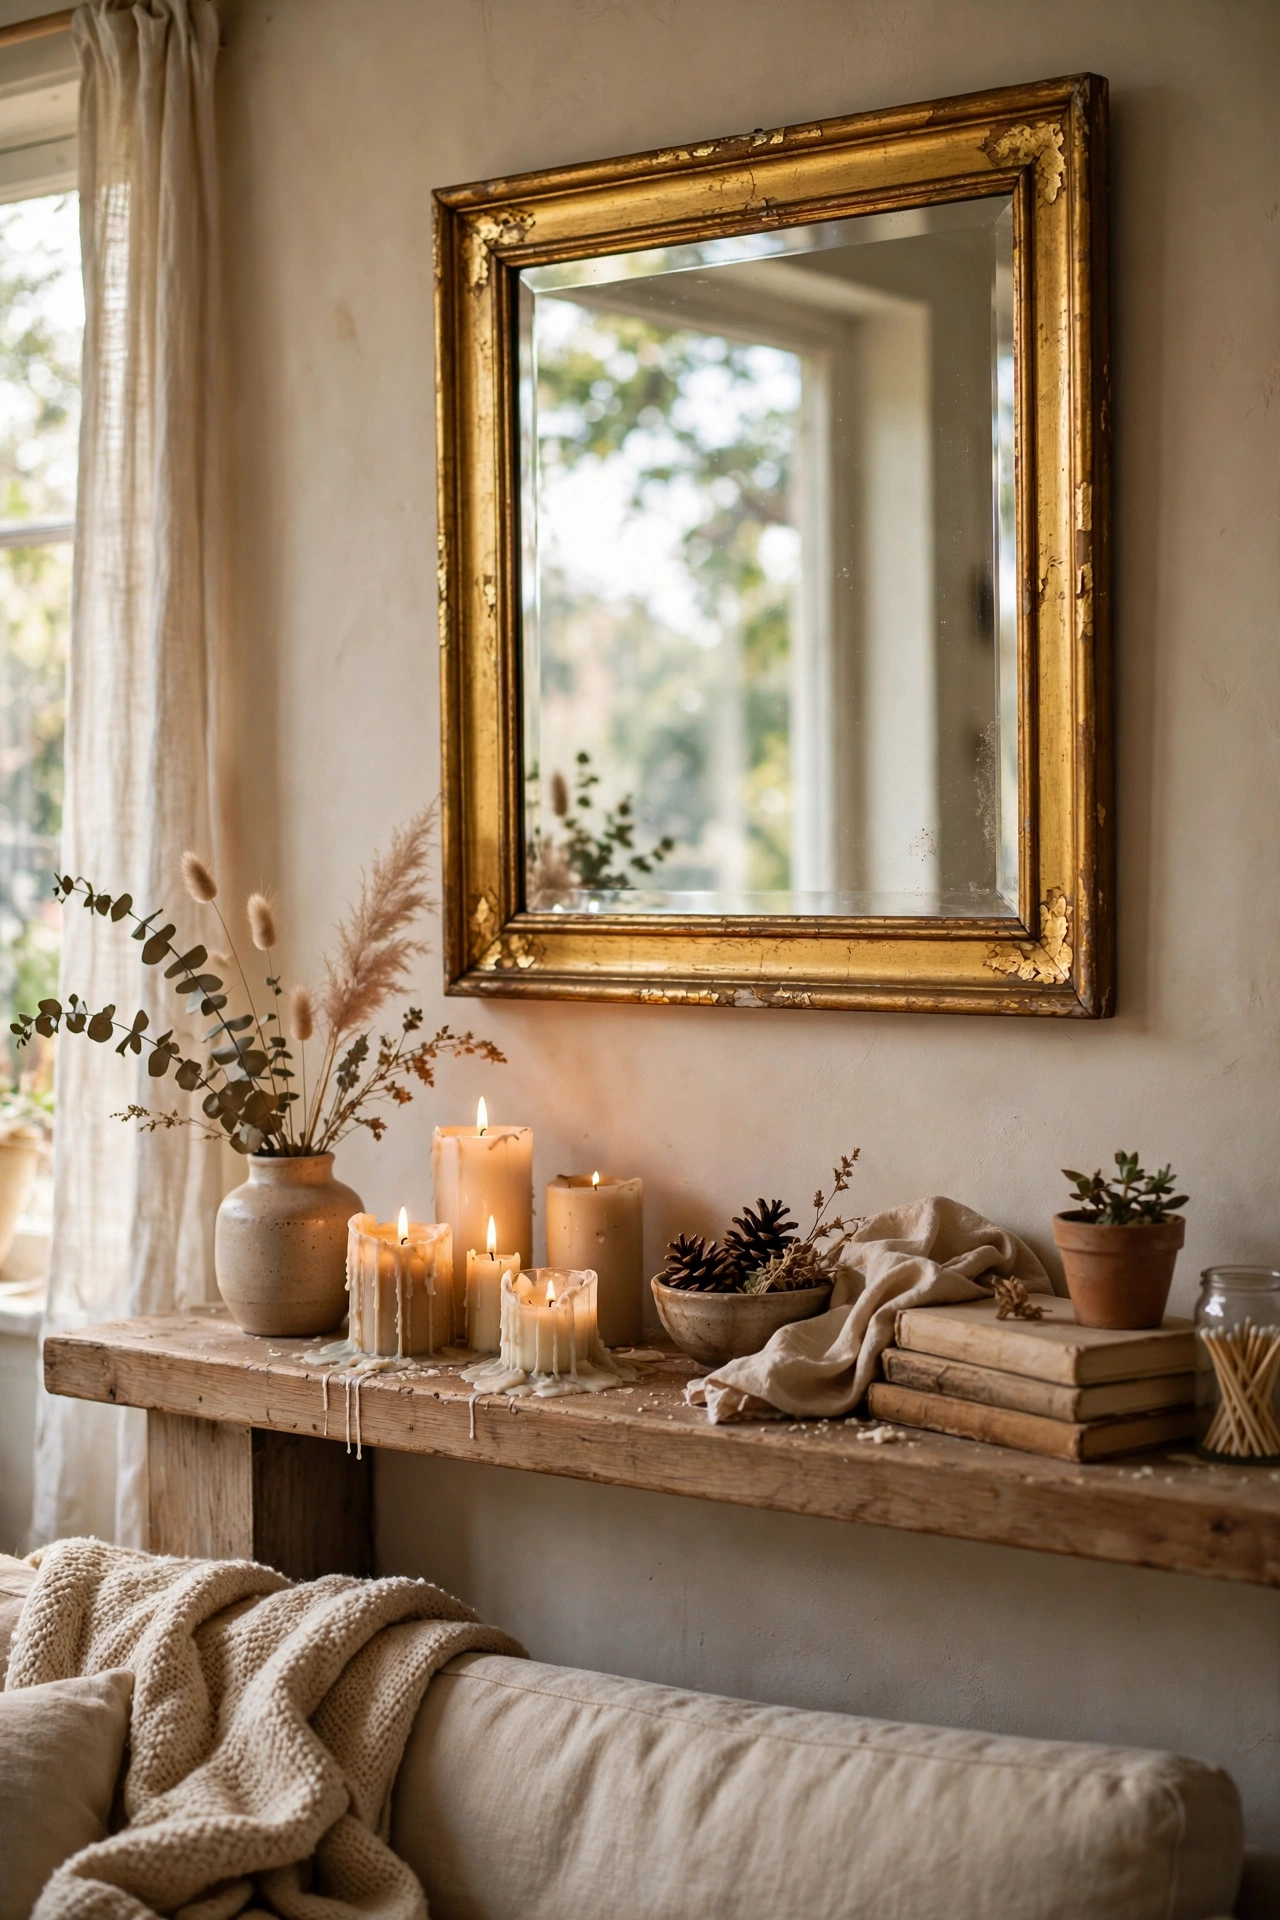
Gold leaf sheets are cheap and make a plain mirror look genuinely luxurious. Brush gold size (the sticky adhesive) around the mirror’s frame or edge, wait until it goes tacky, then press the leaf sheets on with a soft brush and brush away the excess. Seal it with a clear topcoat so it doesn’t flake. I gilded the frame of a mirror I found on the pavement and it now looks like an heirloom. I tried skipping the sealant once and within a month the leaf was flaking off onto the shelf below — seal it, always. Do work away from draughts; gold leaf is so light it floats off the table if someone walks past.
Pro tip: you only need one pack of imitation gold leaf — real gold leaf is beautiful but wildly over budget for this.
Cost: ~$10 | Time: 2 hours
6. Washi Tape Border Mirror
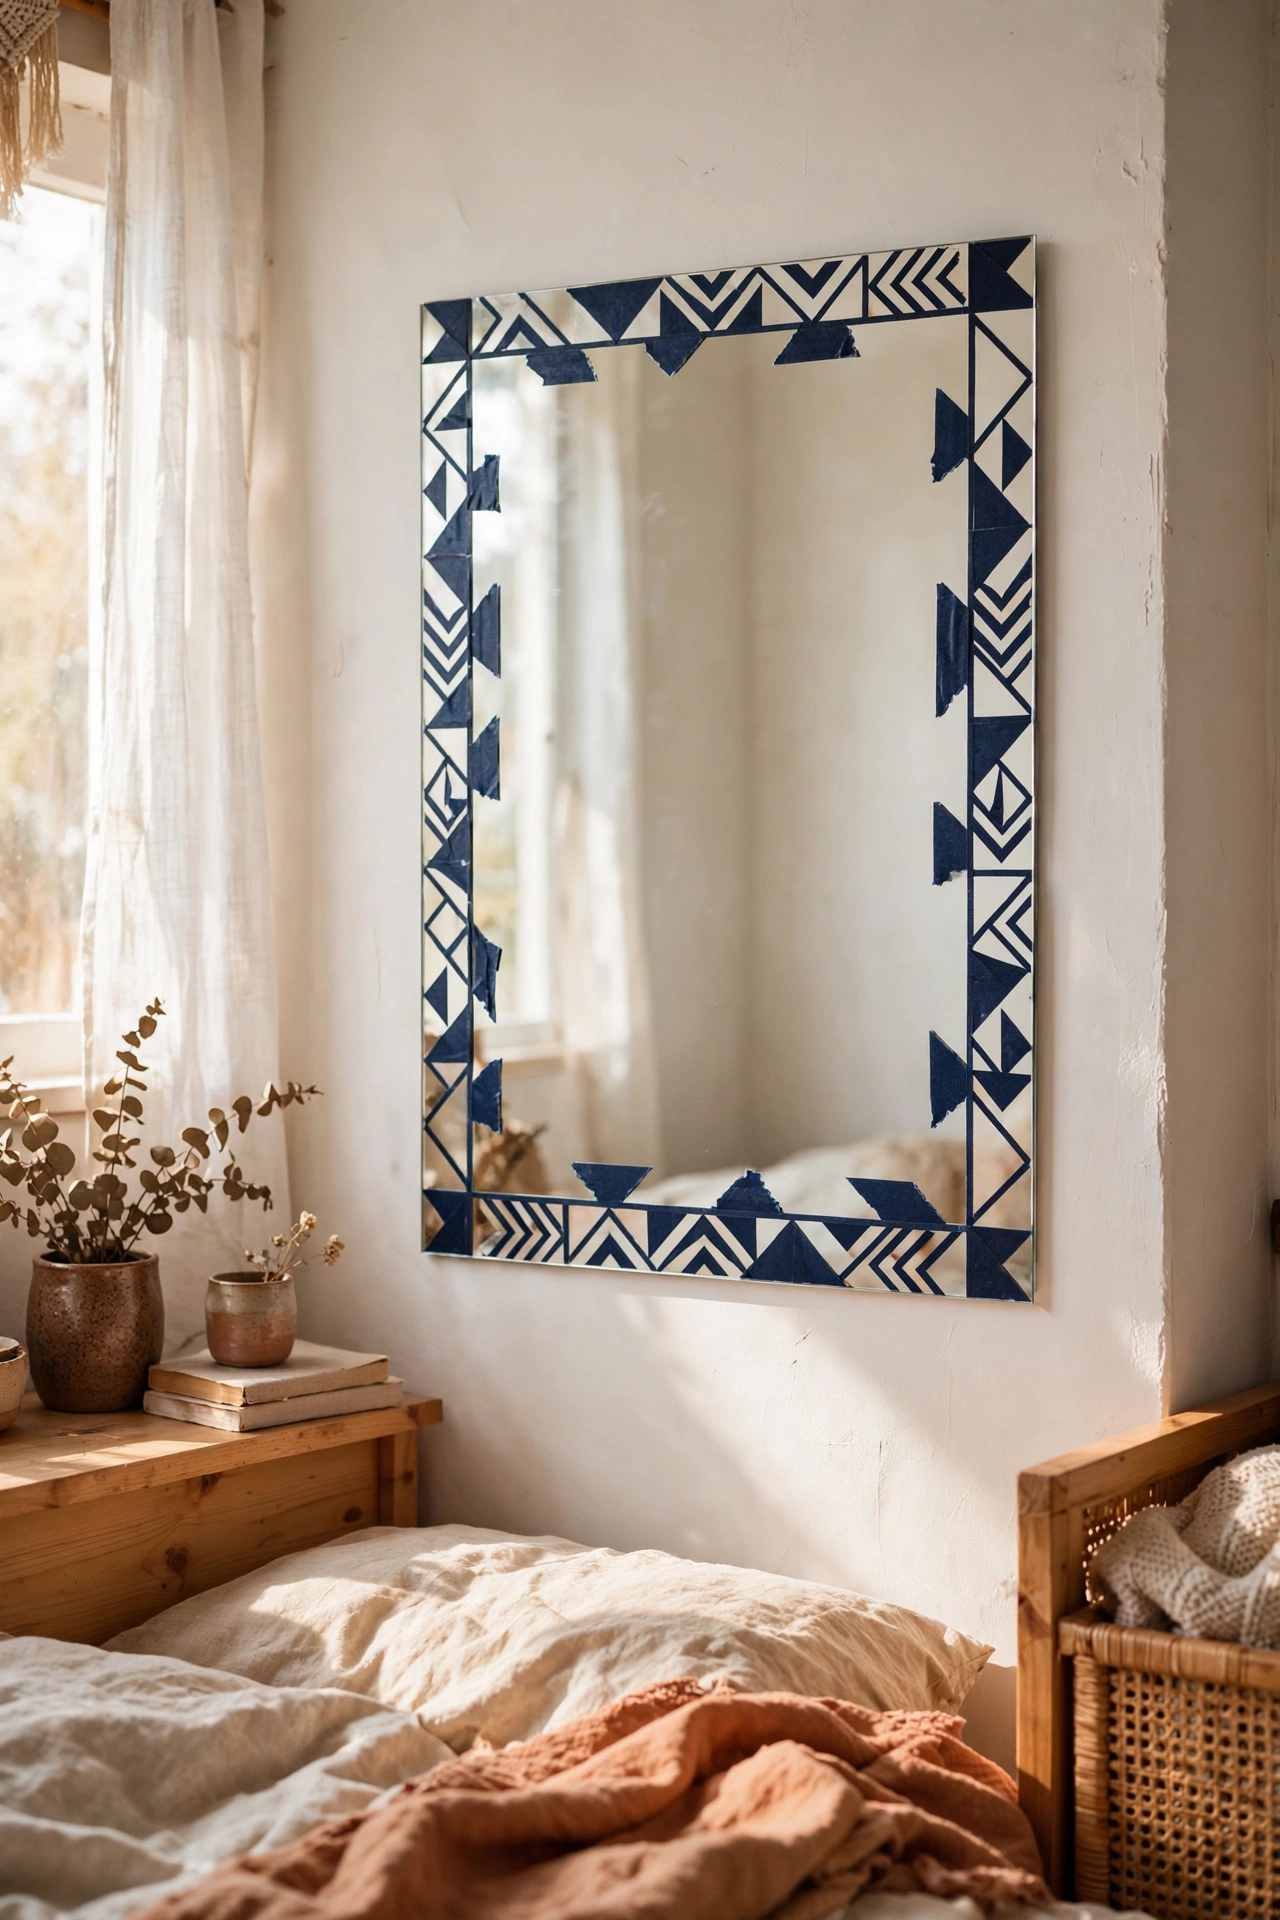
This is the renter-friendly, zero-commitment option: frame your mirror with patterned washi tape stuck straight onto the glass around the border. Choose a tape with a bold pattern, measure equal margins on all four sides, and lay the tape in one smooth pass per side, trimming corners neatly. It peels straight off when you move. I used a navy geometric tape on my bedroom mirror and changed it to a floral print in spring. Do press the tape down firmly with a credit card to avoid air bubbles. Don’t use cheap tape that leaves residue — spend the extra pound on a decent brand and test a corner first.
Pro tip: layer two widths of tape, one inside the other, for a double-frame effect that looks much more deliberate.
Cost: ~$5 | Time: 30 minutes
7. Arched Mirror with Painted MDF Frame
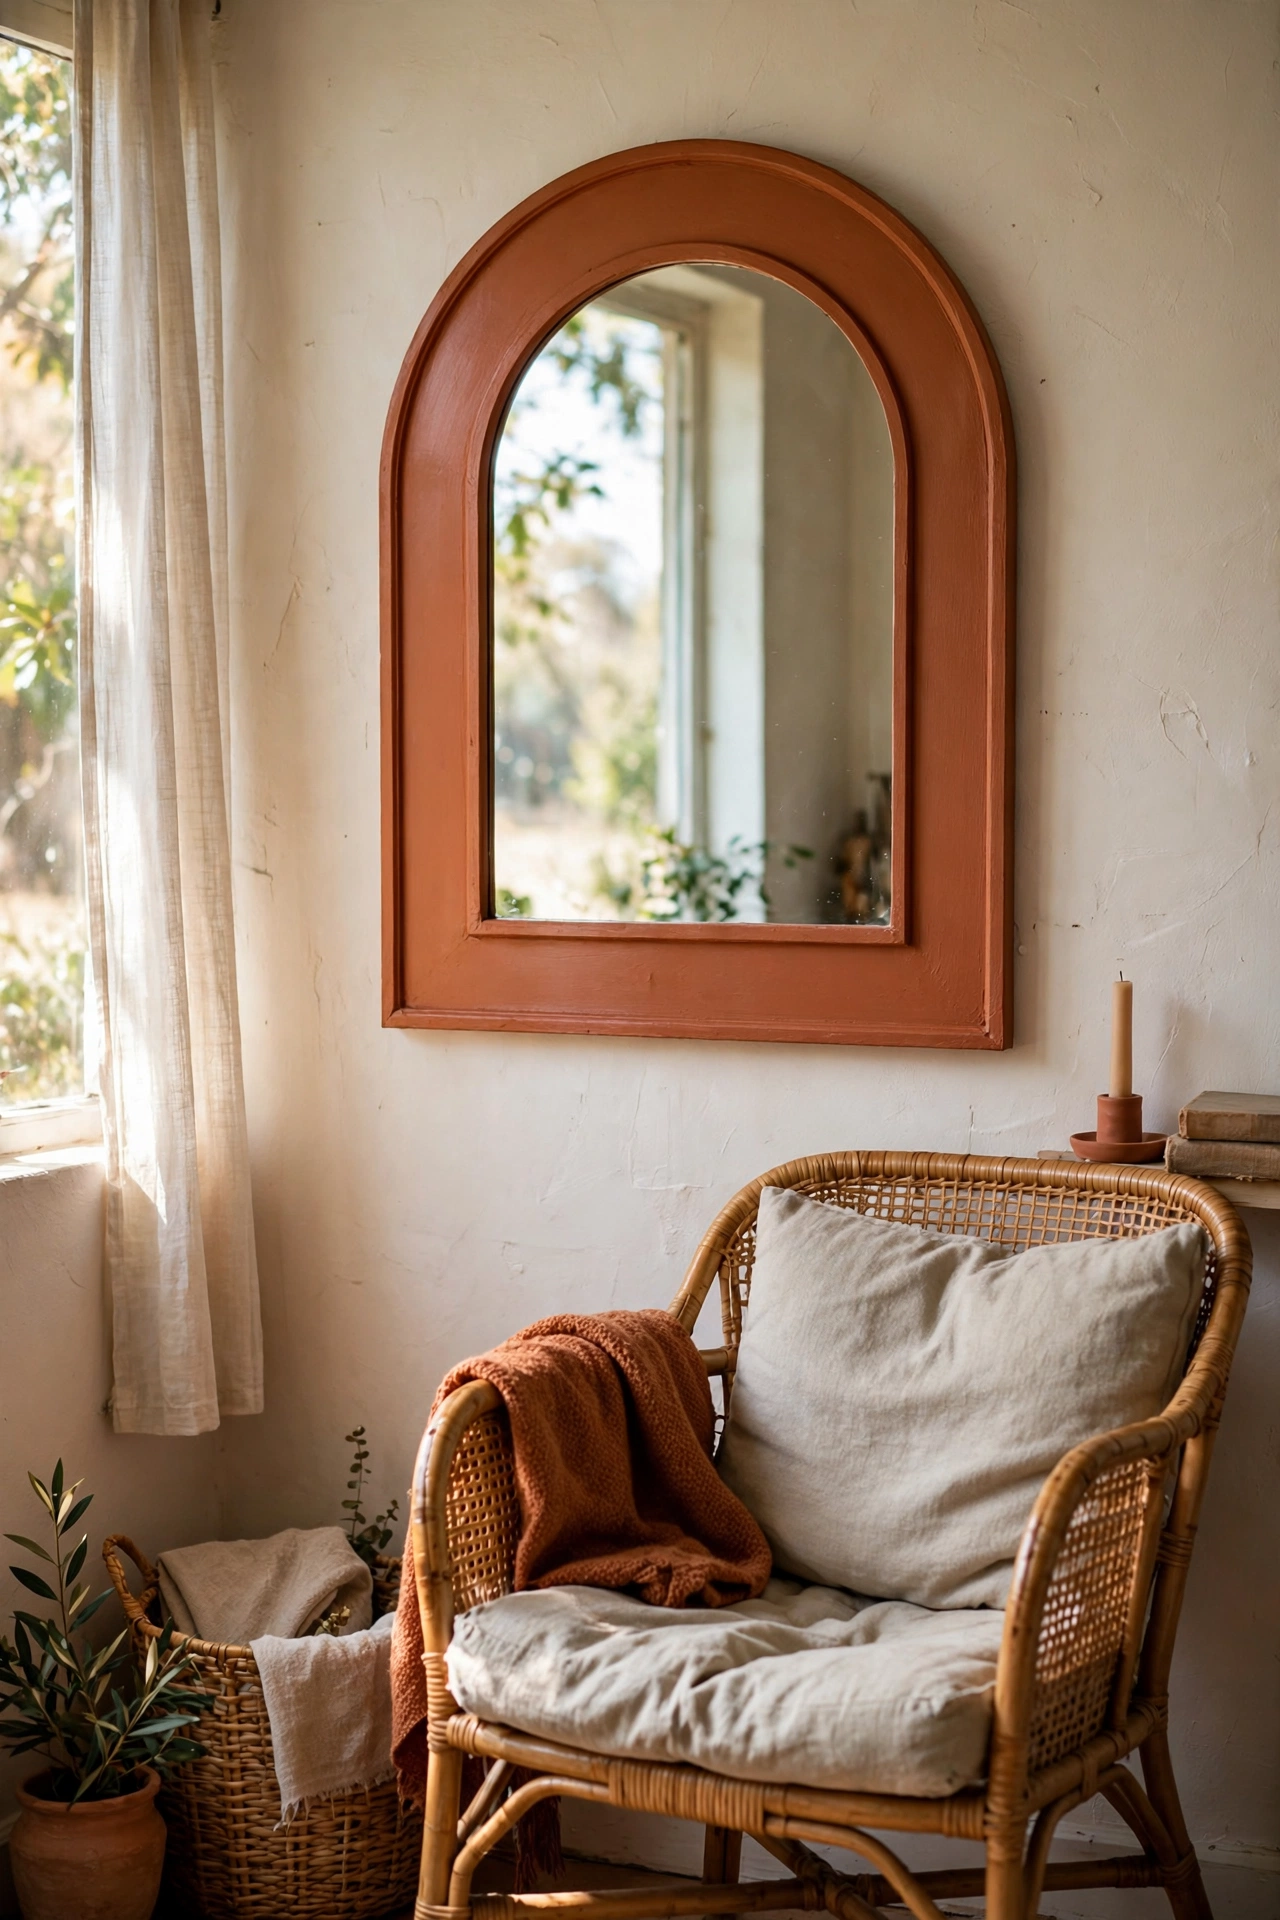
Arch mirrors are everywhere in shops and cost a fortune, so make the frame yourself. Cut an arch shape from thin MDF — or cheat and buy a ready-cut arch board from a craft shop — paint it in a rich colour like forest green or terracotta, and glue a plain rectangular or arched mirror to the front. The painted border reads as the arch frame. I made a terracotta one for my living room and it is the single most complimented thing I own. I tried gluing the mirror with hot glue and it sagged overnight; use proper mirror adhesive, which stays flexible. Do sand the MDF edges smooth before painting or the finish looks rough.
Pro tip: trace the arch with a pencil tied to a string pinned at the centre point — it gives you a perfect curve every time.
Cost: ~$15 | Time: 2–3 hours plus drying
8. Mirrored Tray from a Thrifted Frame
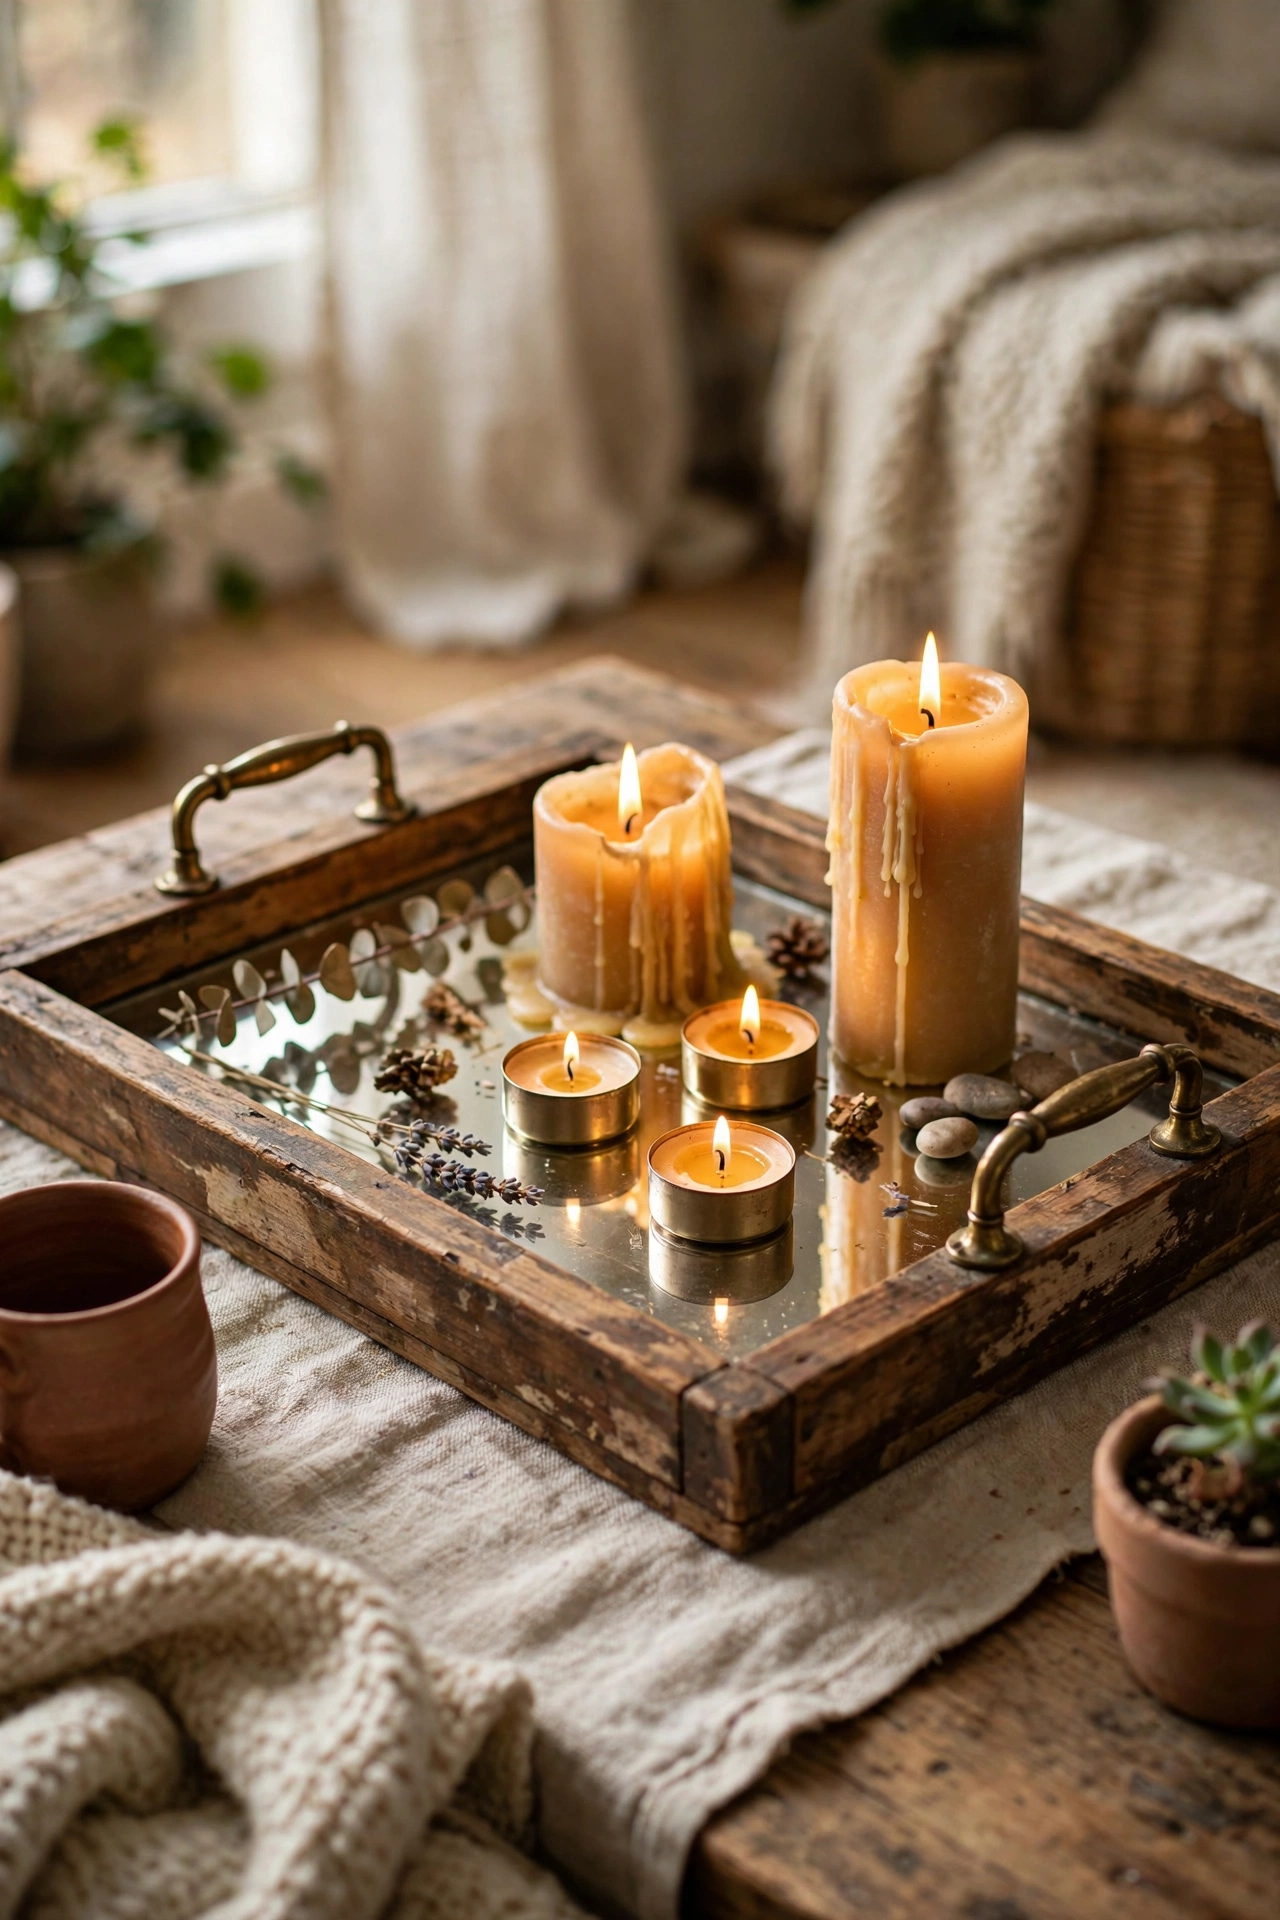
Turn an old picture frame into a mirrored tray by removing the backing and art, and laying a piece of mirror-cut glass (or mirrored acrylic) into the frame instead. Screw two small handles onto the sides — cupboard handles from the hardware shop work perfectly — and add felt pads underneath. Mine lives on my coffee table holding candles and looks far more expensive than the four pounds it cost. I tried using a flimsy frame first and the mirror bowed; pick a frame with some depth and weight to it. Do measure the inside of the frame and get the mirror cut to size at a glass shop — it costs very little.
Pro tip: mirrored acrylic is lighter and shatter-safe, ideal if the tray will move around the house.
Cost: ~$12 | Time: 1 hour
9. Starburst Mirror from Wooden Skewers
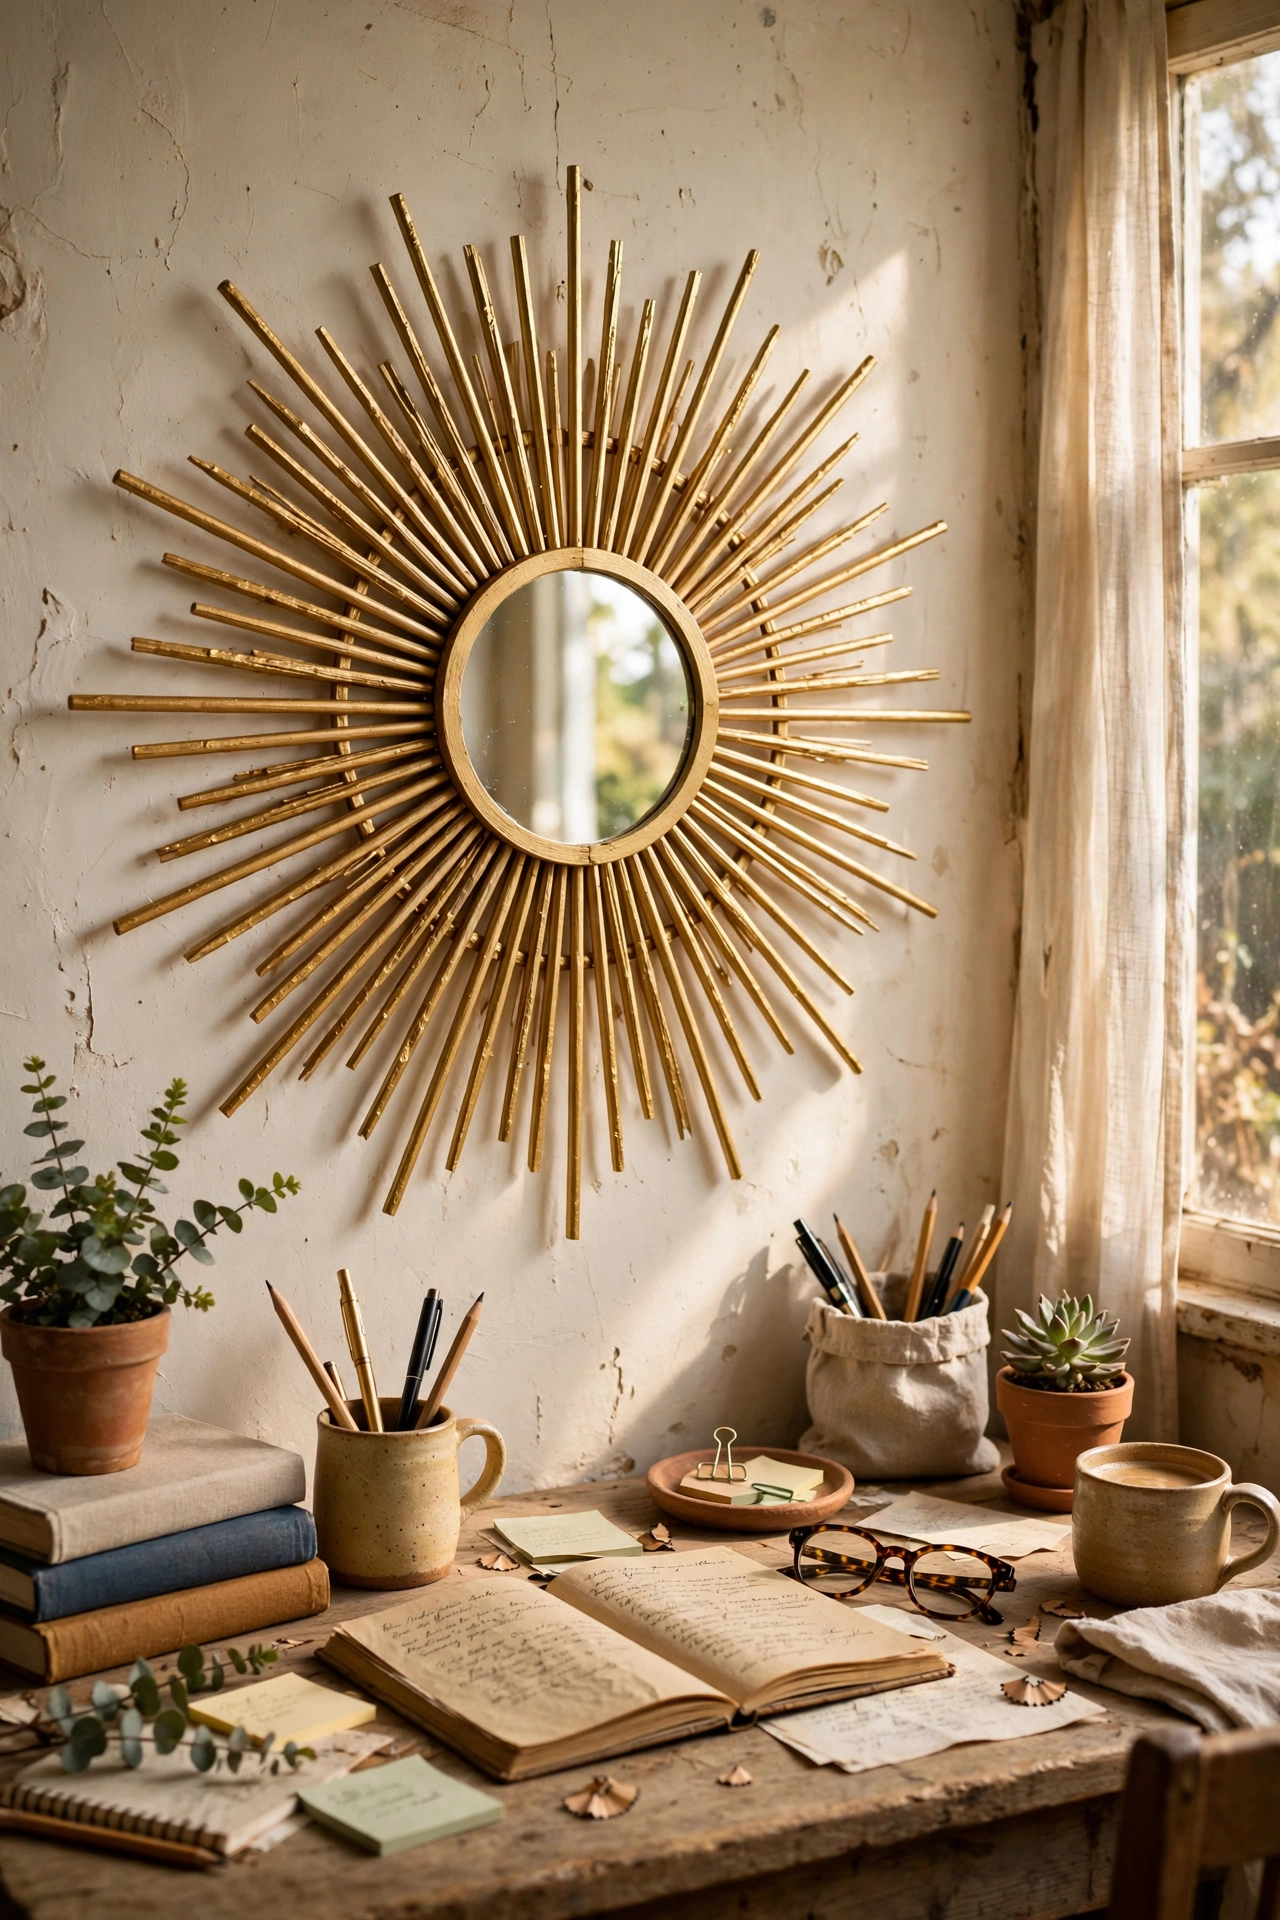
The classic mid-century starburst is just a small round mirror with sticks radiating from behind it. Glue wooden barbecue skewers (or dowels cut to varying lengths) around the back of a small round mirror in a sunburst pattern, then spray the whole thing gold, black, or white. Hang it so the sticks are visible around the glass. I made a gold one above my desk and it took one evening. Do vary the stick lengths for that authentic sunburst look — uniform lengths read as cheap. Don’t glue the sticks to the front of the glass; they must attach behind the mirror’s edge so the glass sits clean.
Pro tip: paint the skewers before gluing them on — trying to spray around the mirror afterwards wastes paint and risks overspray on the glass.
Cost: ~$8 | Time: 1–2 hours
10. Dried Flower Framed Mirror
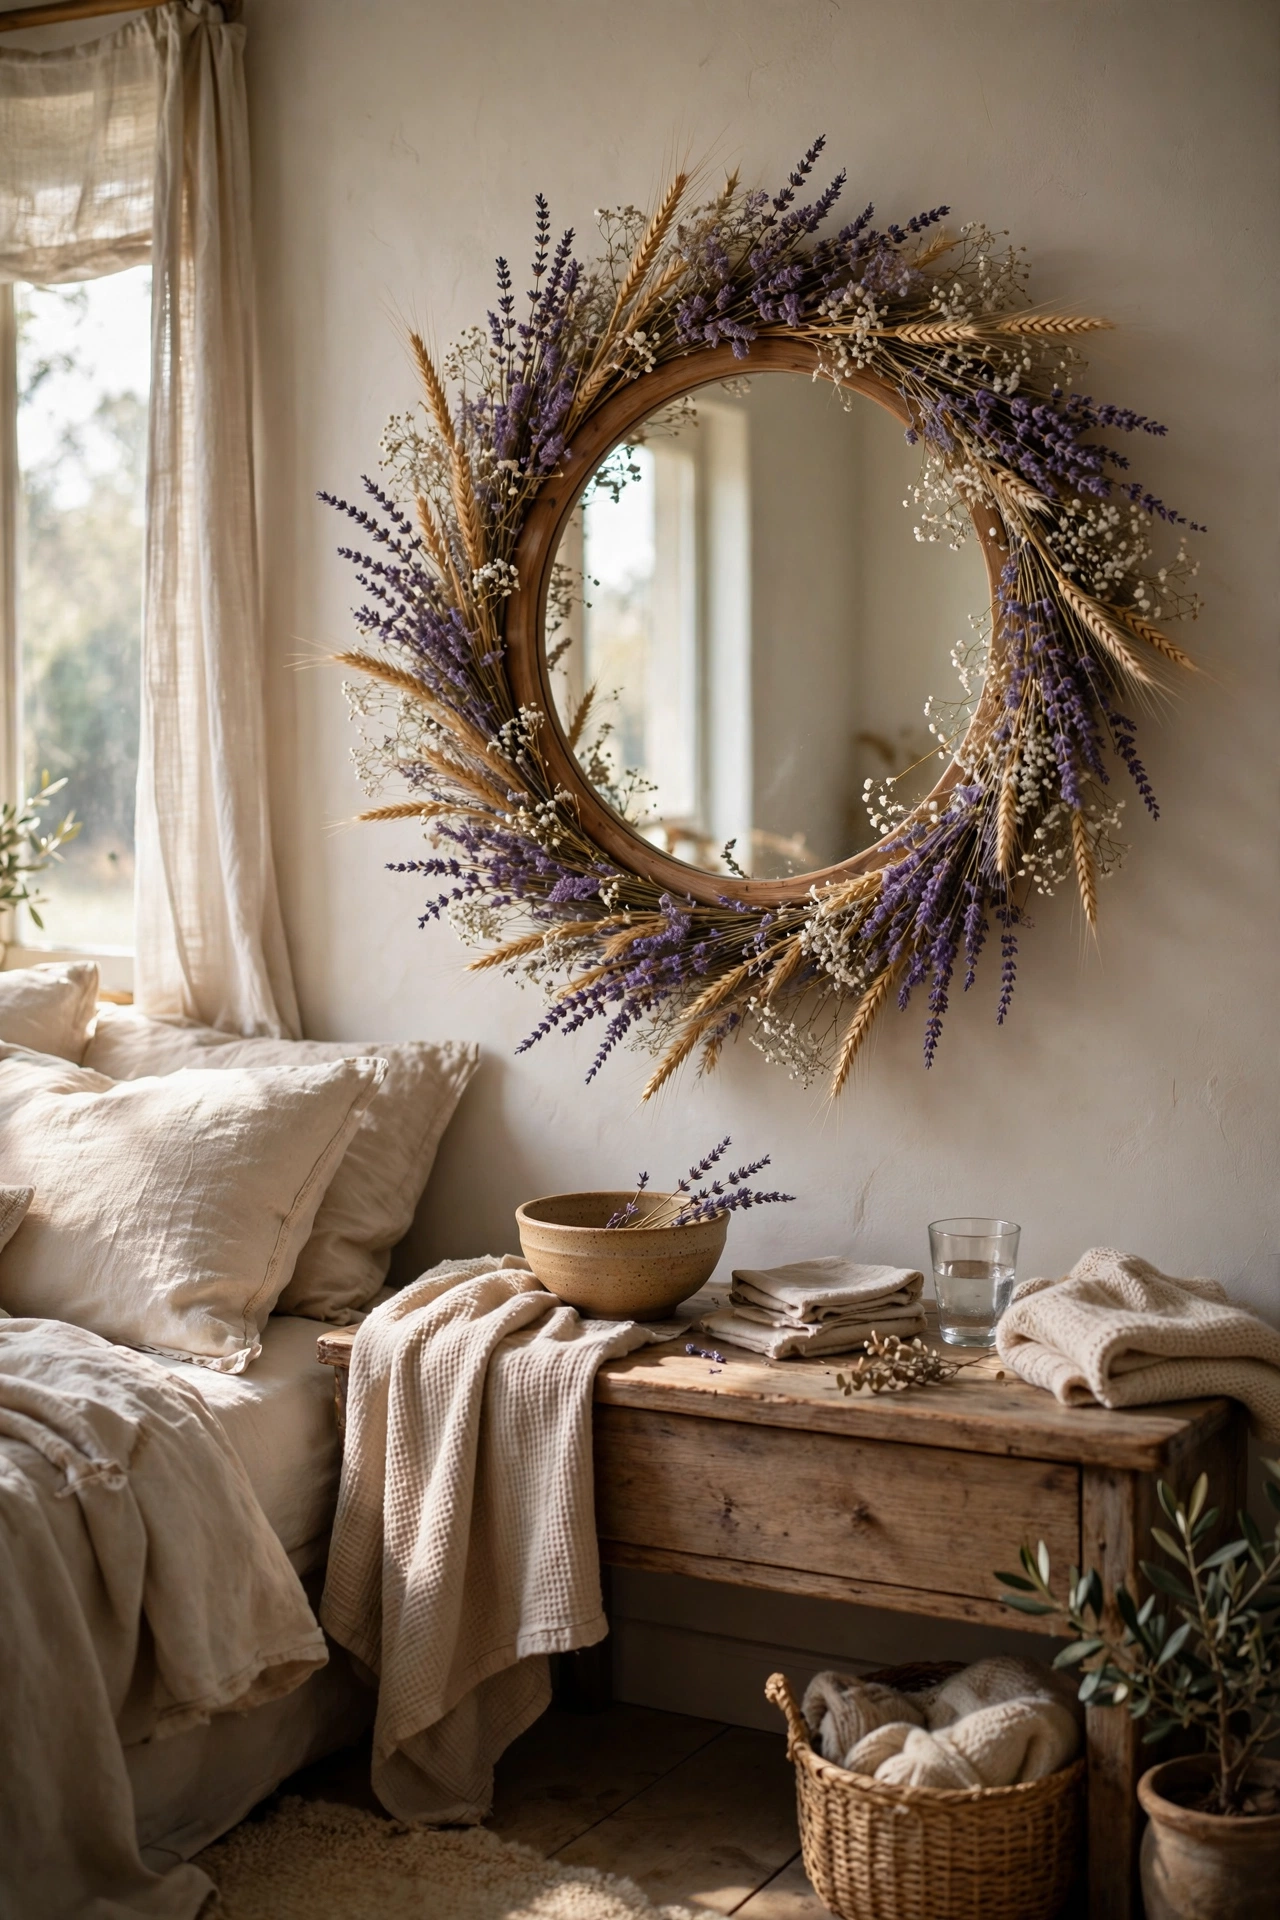
Glue dried flowers and grasses around the frame of a plain mirror for a soft, romantic look that costs almost nothing if you dry your own. Start with a base of dried grasses or wheat stems glued flat around the frame, then layer in dried lavender, baby’s breath, and seed heads, working from the outside in. A dot of hot glue on each stem holds them. Mine hangs in the guest room and guests always touch it to check the flowers are real. I tried using fresh flowers first — they wilted within days and looked sad. Do use fully dried stems only. Don’t hang it in direct sun or the colours bleach out within a season.
Pro tip: give the finished frame a very light mist of hairspray — it keeps delicate petals from crumbling when you dust.
Cost: ~$6 | Time: 1–2 hours
11. Write-On Chalk Border Mirror
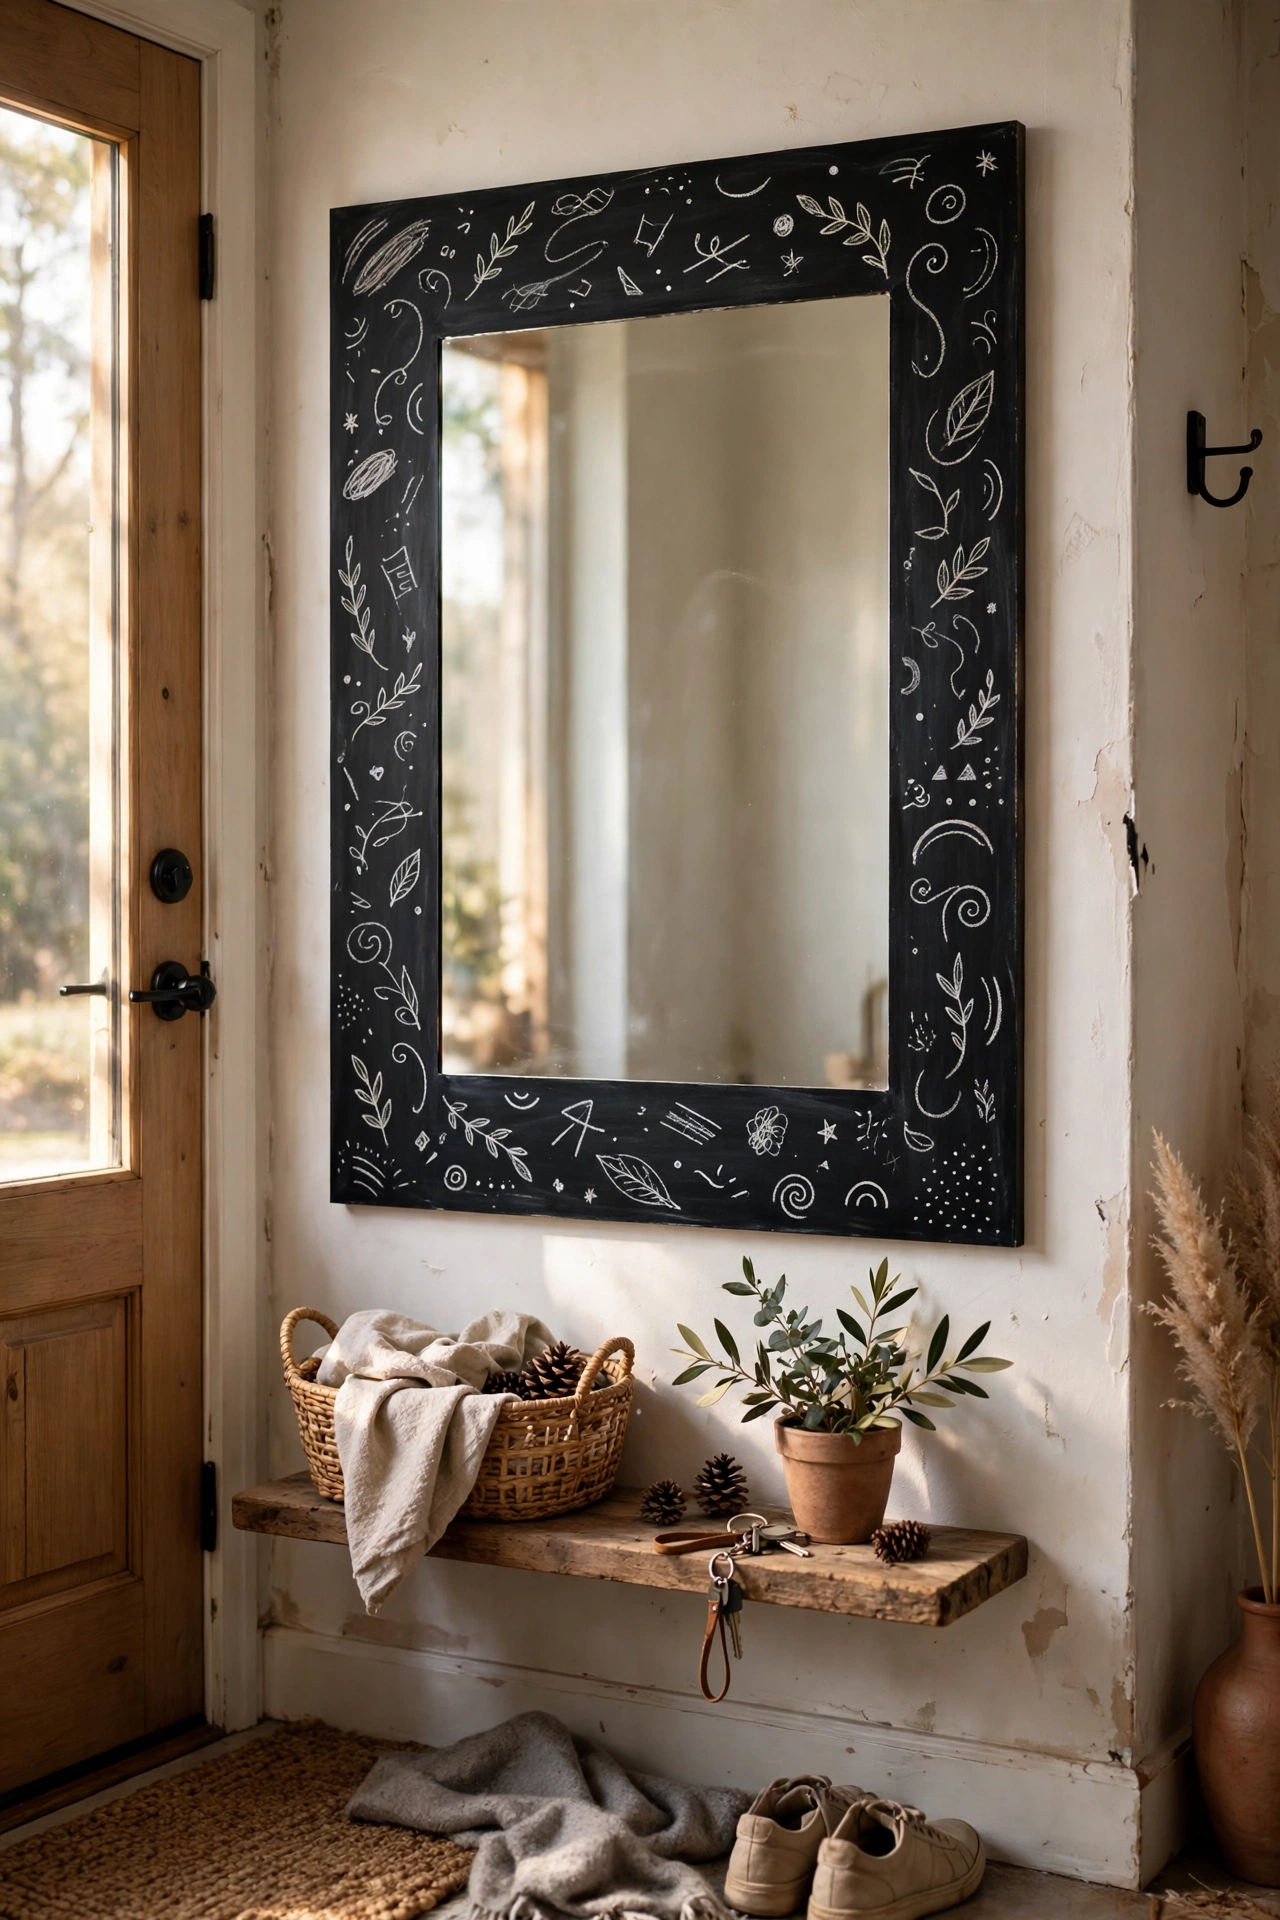
Paint a chalkboard border directly onto the glass around your mirror’s edge and you get a mirror plus a memo board in one. Mask off the centre, then apply two or three thin coats of chalkboard paint around the border, letting each coat dry fully. Once cured, scribble over the whole border with chalk and wipe it off to season it. I did this on the mirror by my front door and we now leave each other little notes and reminders on it. Do use proper chalkboard paint, not matte black acrylic — chalk won’t erase cleanly from acrylic. Don’t write with chalk markers unless you test them first; some stain permanently.
Pro tip: keep a small dish of chalk sticks on the shelf below the mirror so the habit actually sticks.
Cost: ~$9 | Time: 2 hours plus curing
12. Cane Webbing Edge Mirror
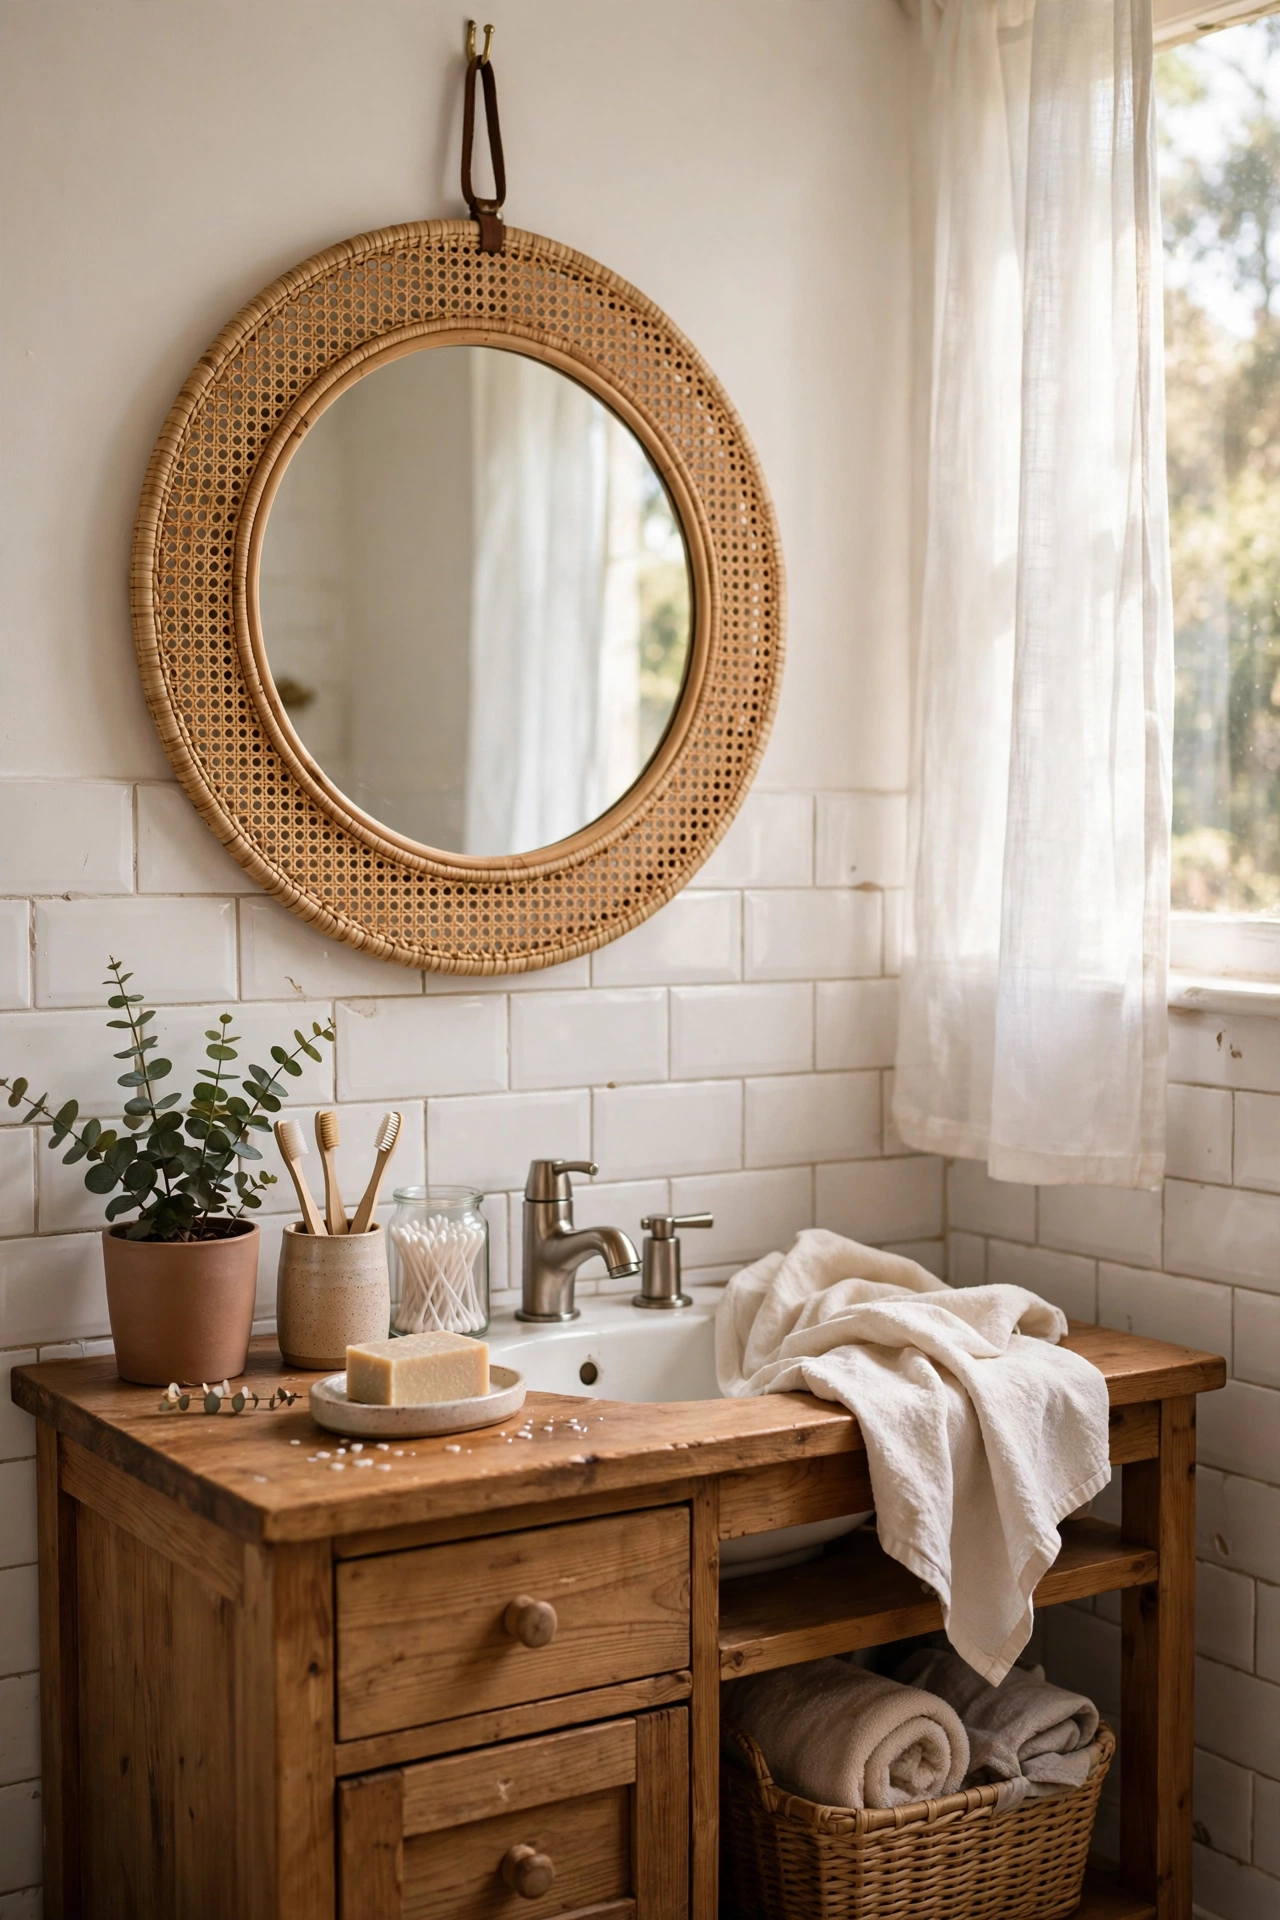
Cane webbing — the woven rattan sheet sold by the metre — wraps beautifully around a round mirror for that breezy, natural look. Cut a wide strip of webbing long enough to circle the mirror, soften it by soaking it in warm water for ten minutes, then glue it around the edge so it overlaps slightly at the back. Clamp or tape it until the glue sets. Mine is in the bathroom and has survived two years of steam without a wobble. I tried gluing it dry and it cracked at the curve — the warm soak really matters. Do wear gloves; wet cane can give you tiny splinters.
Pro tip: seal the finished webbing with a clear matte varnish so it resists bathroom moisture.
Cost: ~$14 | Time: 1–2 hours
13. Broken Tile Mosaic Mirror
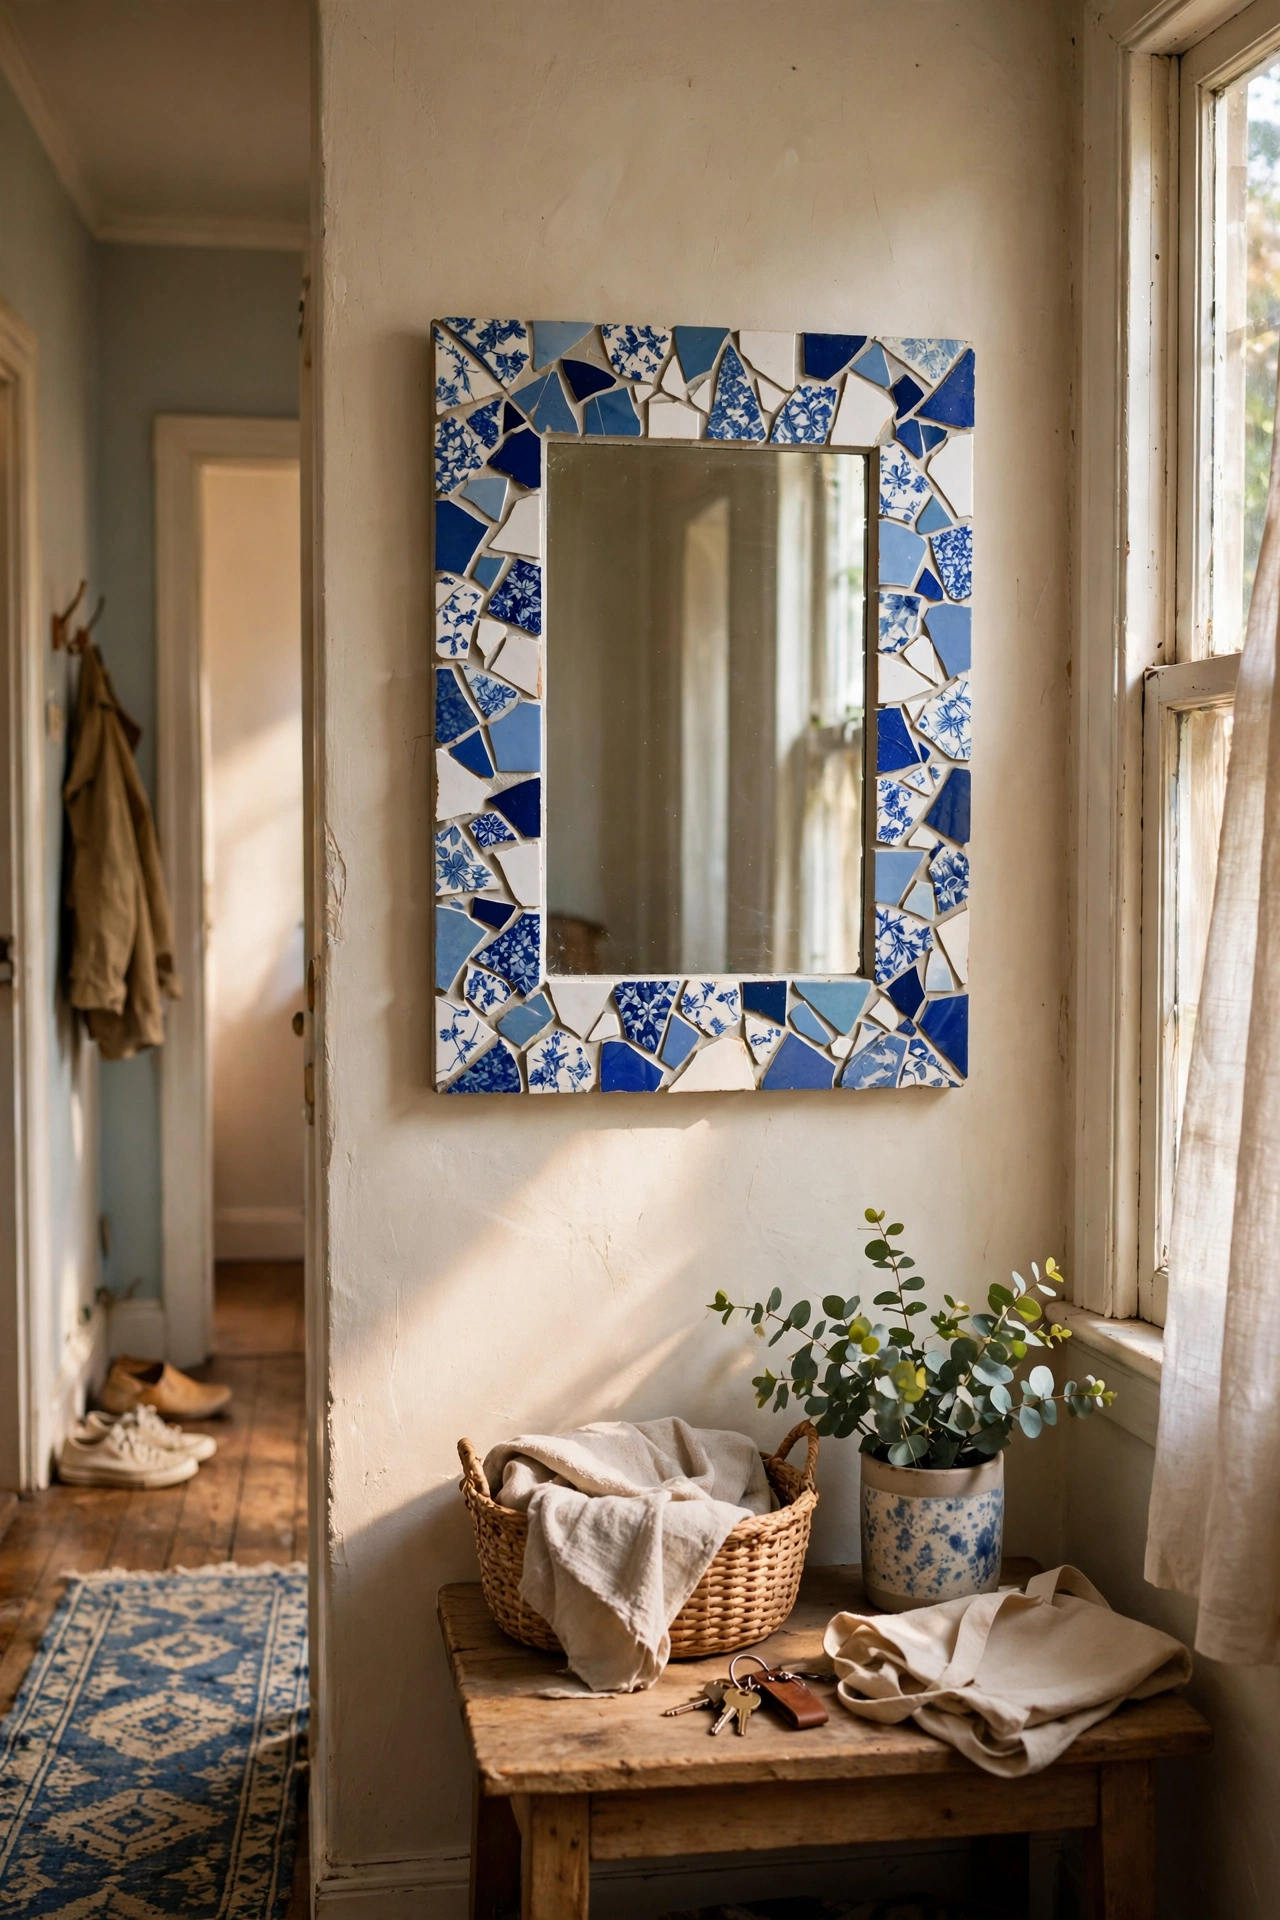
Smash (carefully) old ceramic tiles or chipped crockery and mosaic the pieces around a mirror frame. Spread tile adhesive on a plain wooden frame, press the shards in leaving small gaps, let it set, then grout the gaps and wipe clean. Wear safety glasses and gloves when breaking the tiles — wrap them in an old towel and tap with a hammer. I made one from a box of cracked charity-shop plates and the mix of floral patterns is gorgeous. Do keep the pieces roughly the same thickness or the frame feels lumpy. Don’t grout until the adhesive has fully cured overnight.
Pro tip: pick tiles in one colour family (all blues, all neutrals) — random rainbow mosaics look messy rather than artful.
Cost: ~$10 | Time: an afternoon plus overnight set
14. Fairy-Light Framed Mirror
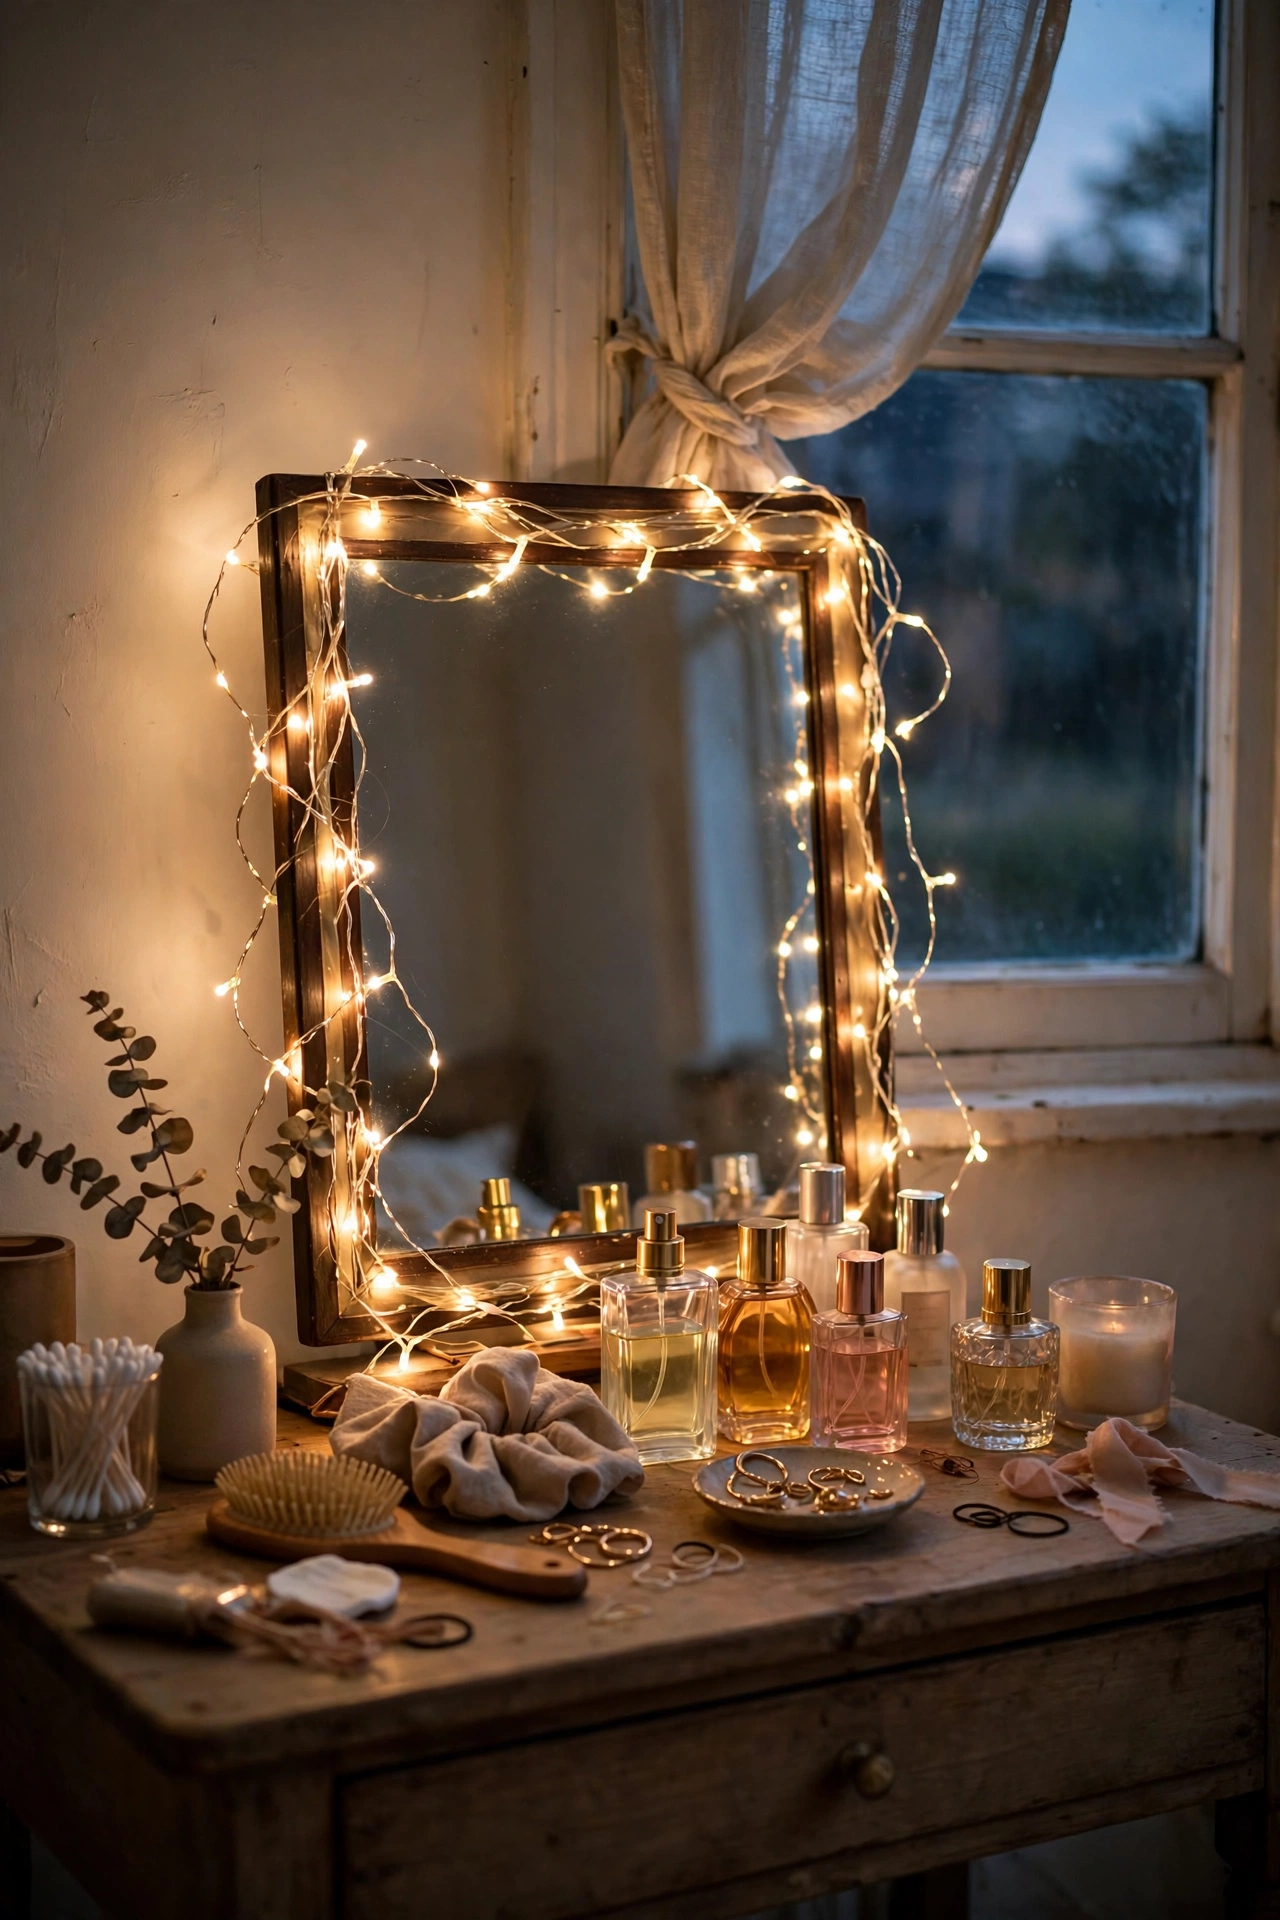
Wrap warm-white fairy lights around a mirror’s frame for instant evening glow. Use battery fairy lights with a timer so they switch on automatically, and wind the wire around the frame’s outer edge, tucking the battery pack behind the mirror with a command strip. A thin frame works best so the wire sits neatly. Mine frames my dressing-table mirror and the light is flattering for getting ready. I tried cool-white lights first and they gave the room a clinical feel — warm white (2700K) is the cosy choice. Do buy lights with a built-in 6-hour timer so you never have to remember to switch them off.
Pro tip: hide the battery pack behind the mirror with a small adhesive hook, and keep a spare set of batteries in the drawer below.
Cost: ~$8 | Time: 30 minutes
15. Painted Wall Arch Behind a Mirror
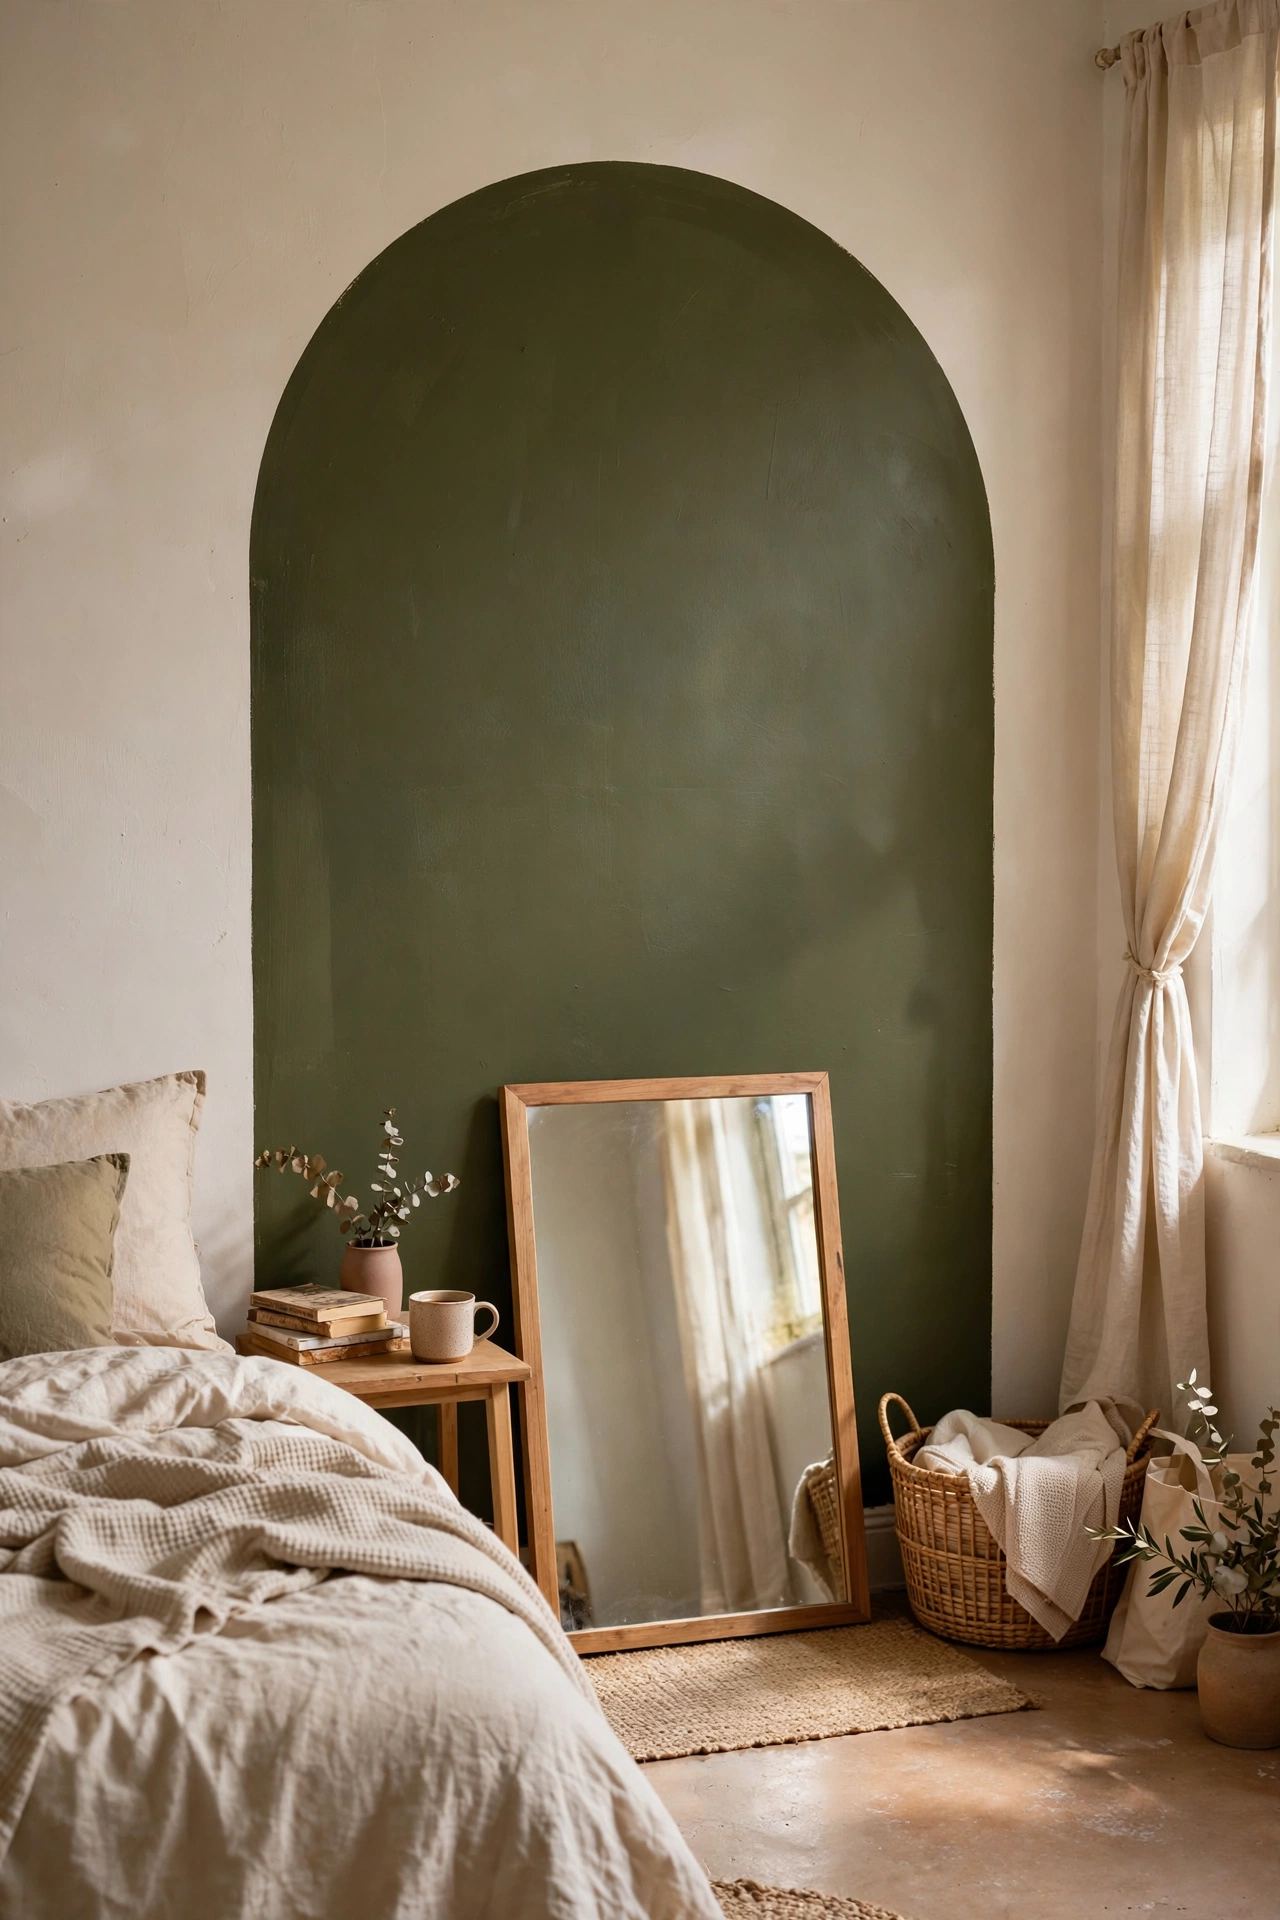
Paint a bold arch directly on the wall and lean a plain mirror in front of it — the painted shape becomes the frame. Mark the arch with a pencil and string, paint it in a rich colour, and let it dry for two days before leaning the mirror against it. The contrast between the flat painted arch and the reflective glass looks incredibly high-end. I did a deep olive arch in my bedroom and it cost one tester pot. Do use painter’s tape for the straight bottom edge of the arch for a crisp line. Don’t lean a heavy mirror on fresh paint — wait the full cure time or the frame marks the wall.
Pro tip: make the arch about 15cm wider than the mirror on each side so it reads as a deliberate frame, not a mistake.
Cost: ~$6 | Time: 2 hours plus drying
16. Concrete-Look Frame Mirror
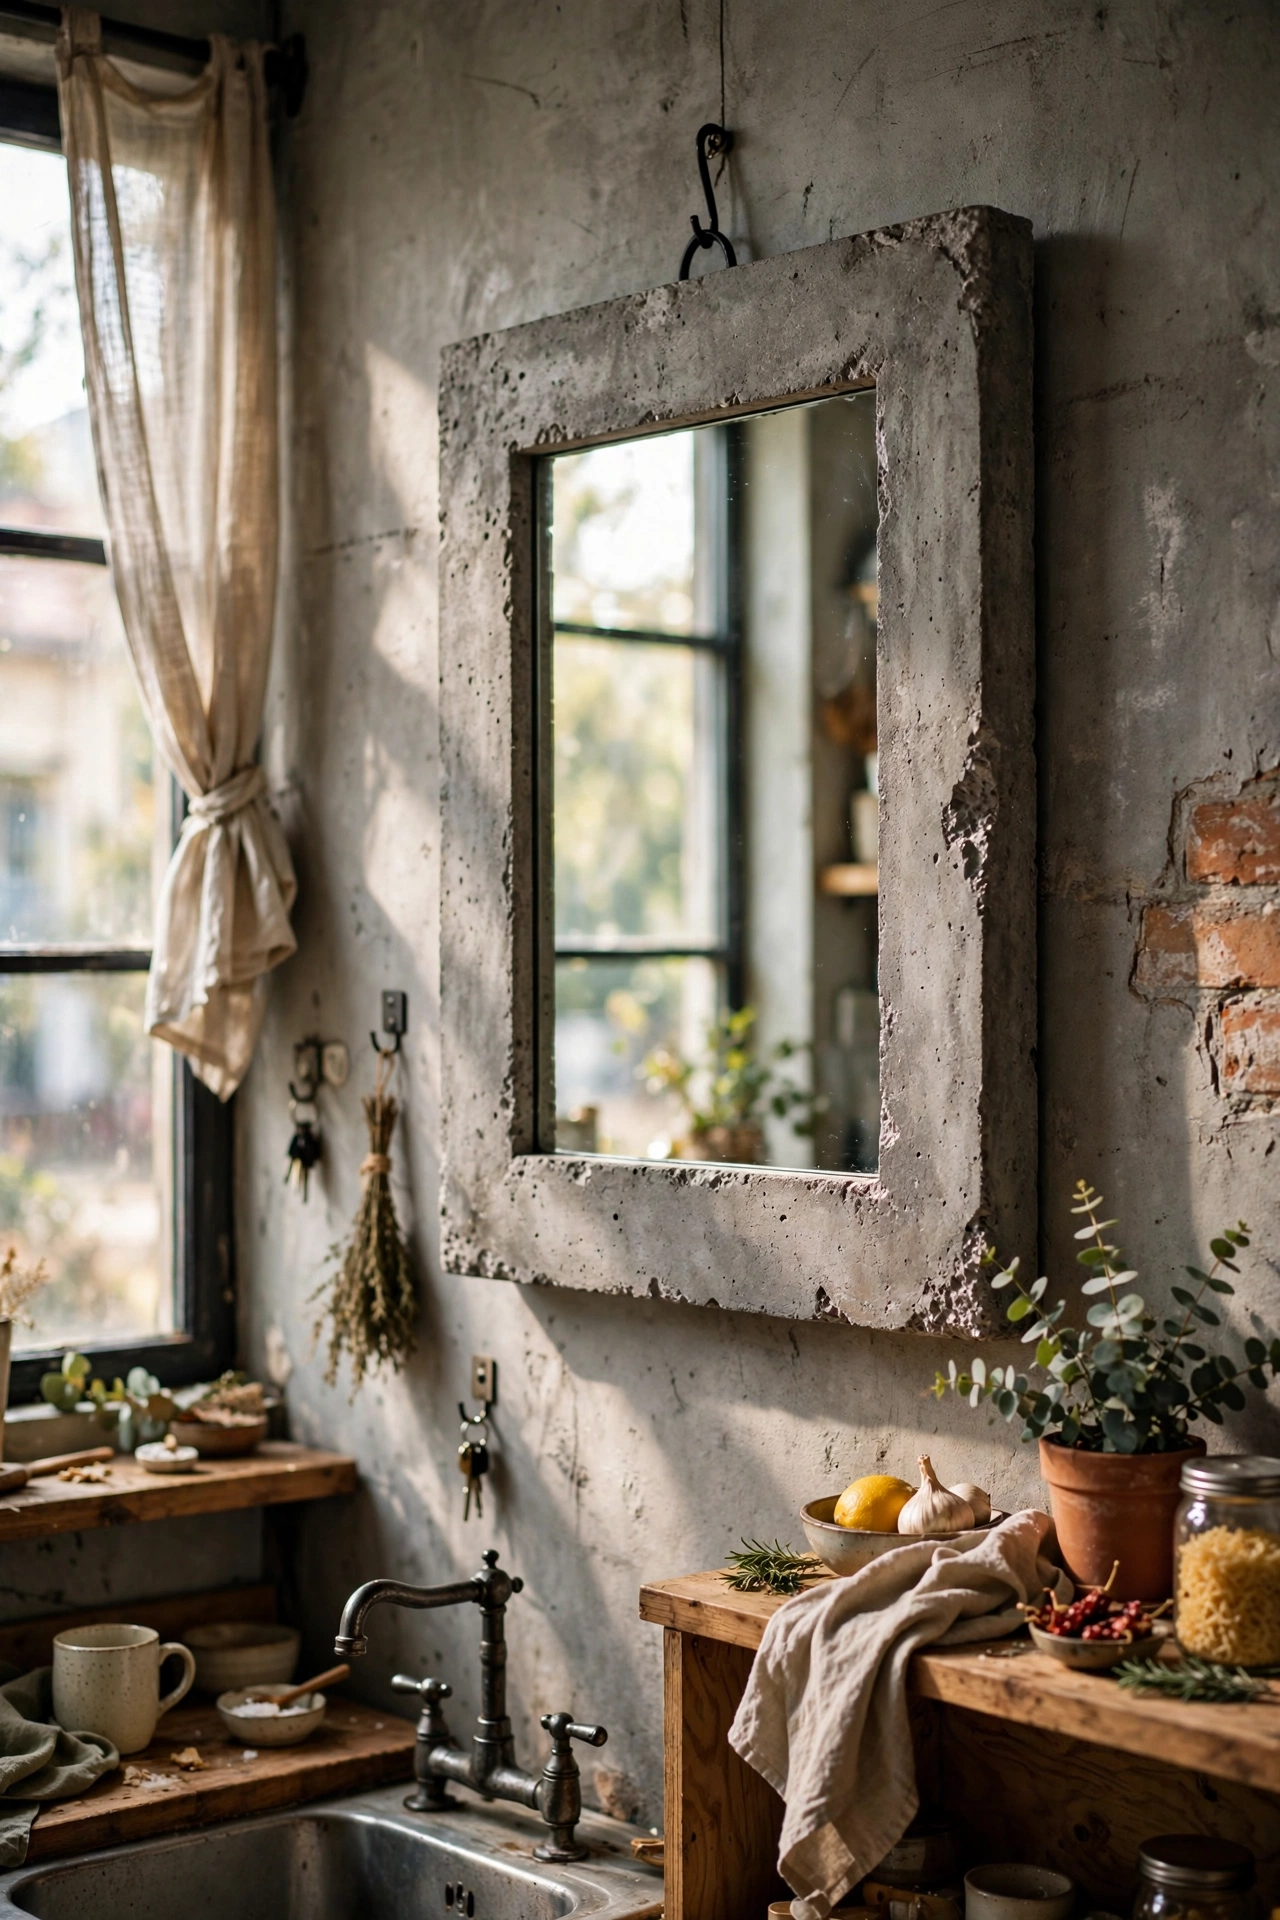
Give a wooden mirror frame a raw concrete look with textured paint or a concrete-effect paste. Sand the frame lightly, apply the paste with a palette knife in thin layers, and once dry, sand back the high spots for a weathered finish. Seal with matte varnish. Mine hangs in my industrial-style kitchen and looks like cast stone. I tried applying the paste too thickly and it cracked as it dried — two thin coats always beat one thick one. Do work in a ventilated space; the paste smells strongly while wet.
Pro tip: dry-brush a little dark wax into the crevices after sealing to bring out the texture.
Cost: ~$11 | Time: 2 hours plus drying
17. Wooden Bead Garland Framed Mirror
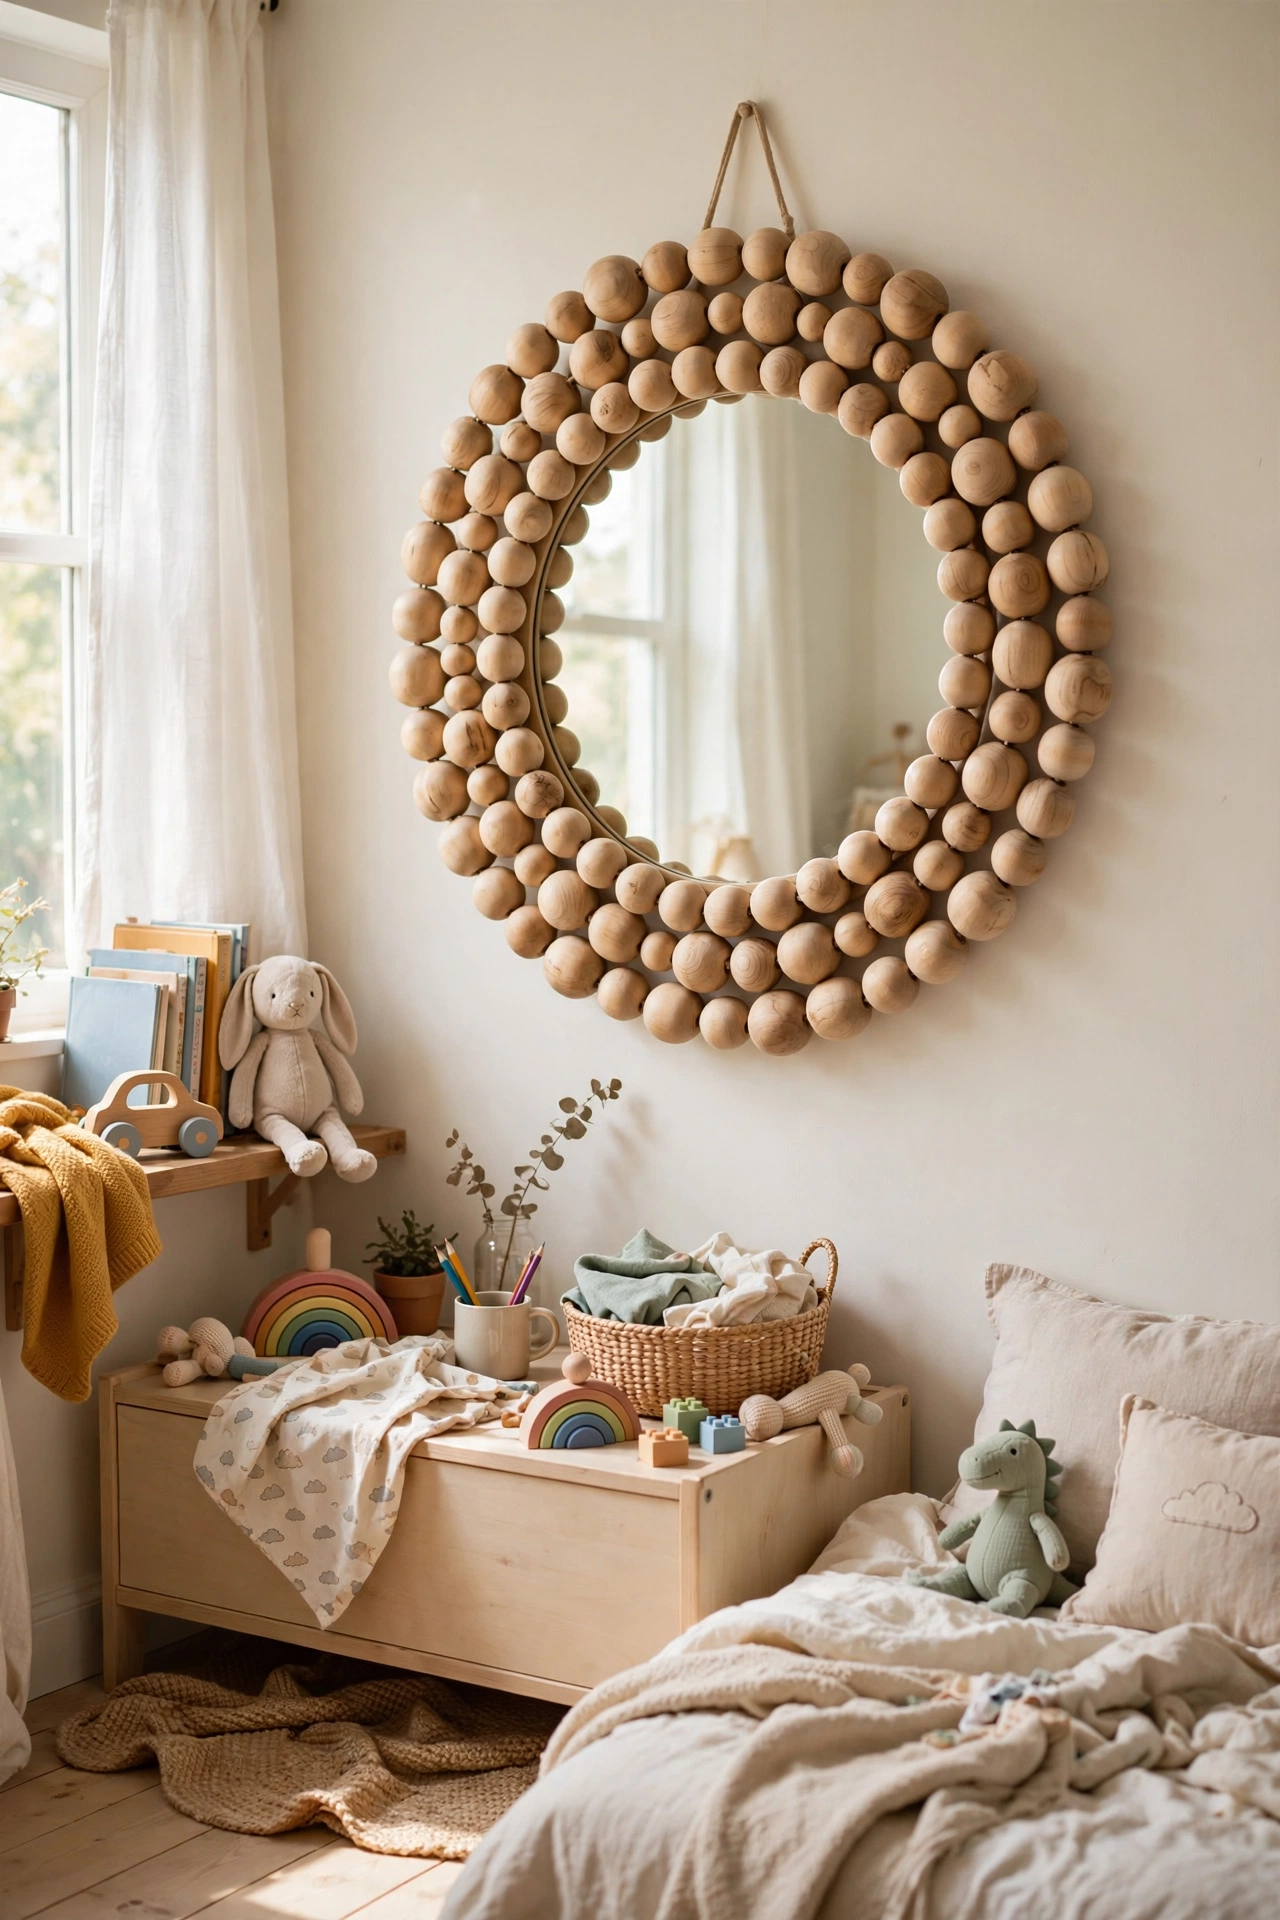
String large wooden beads onto cord and glue the garlands around a round mirror for a soft, Scandi-style frame. Make three or four strands of beads, then hot-glue each strand around the mirror’s edge, staggering them so they form a beaded border. You can leave the wood natural or stain half the beads darker for pattern. I made a natural-bead one for my daughter’s room in under an hour. Do use a strong craft glue rather than relying on the cord alone — gravity pulls beaded strands down over time. Don’t use tiny beads; 20mm beads give the chunky look that photographs well.
Pro tip: mix in a few painted beads every fifth bead for a subtle patterned rhythm.
Cost: ~$9 | Time: 1 hour
18. Driftwood Sunburst Mirror
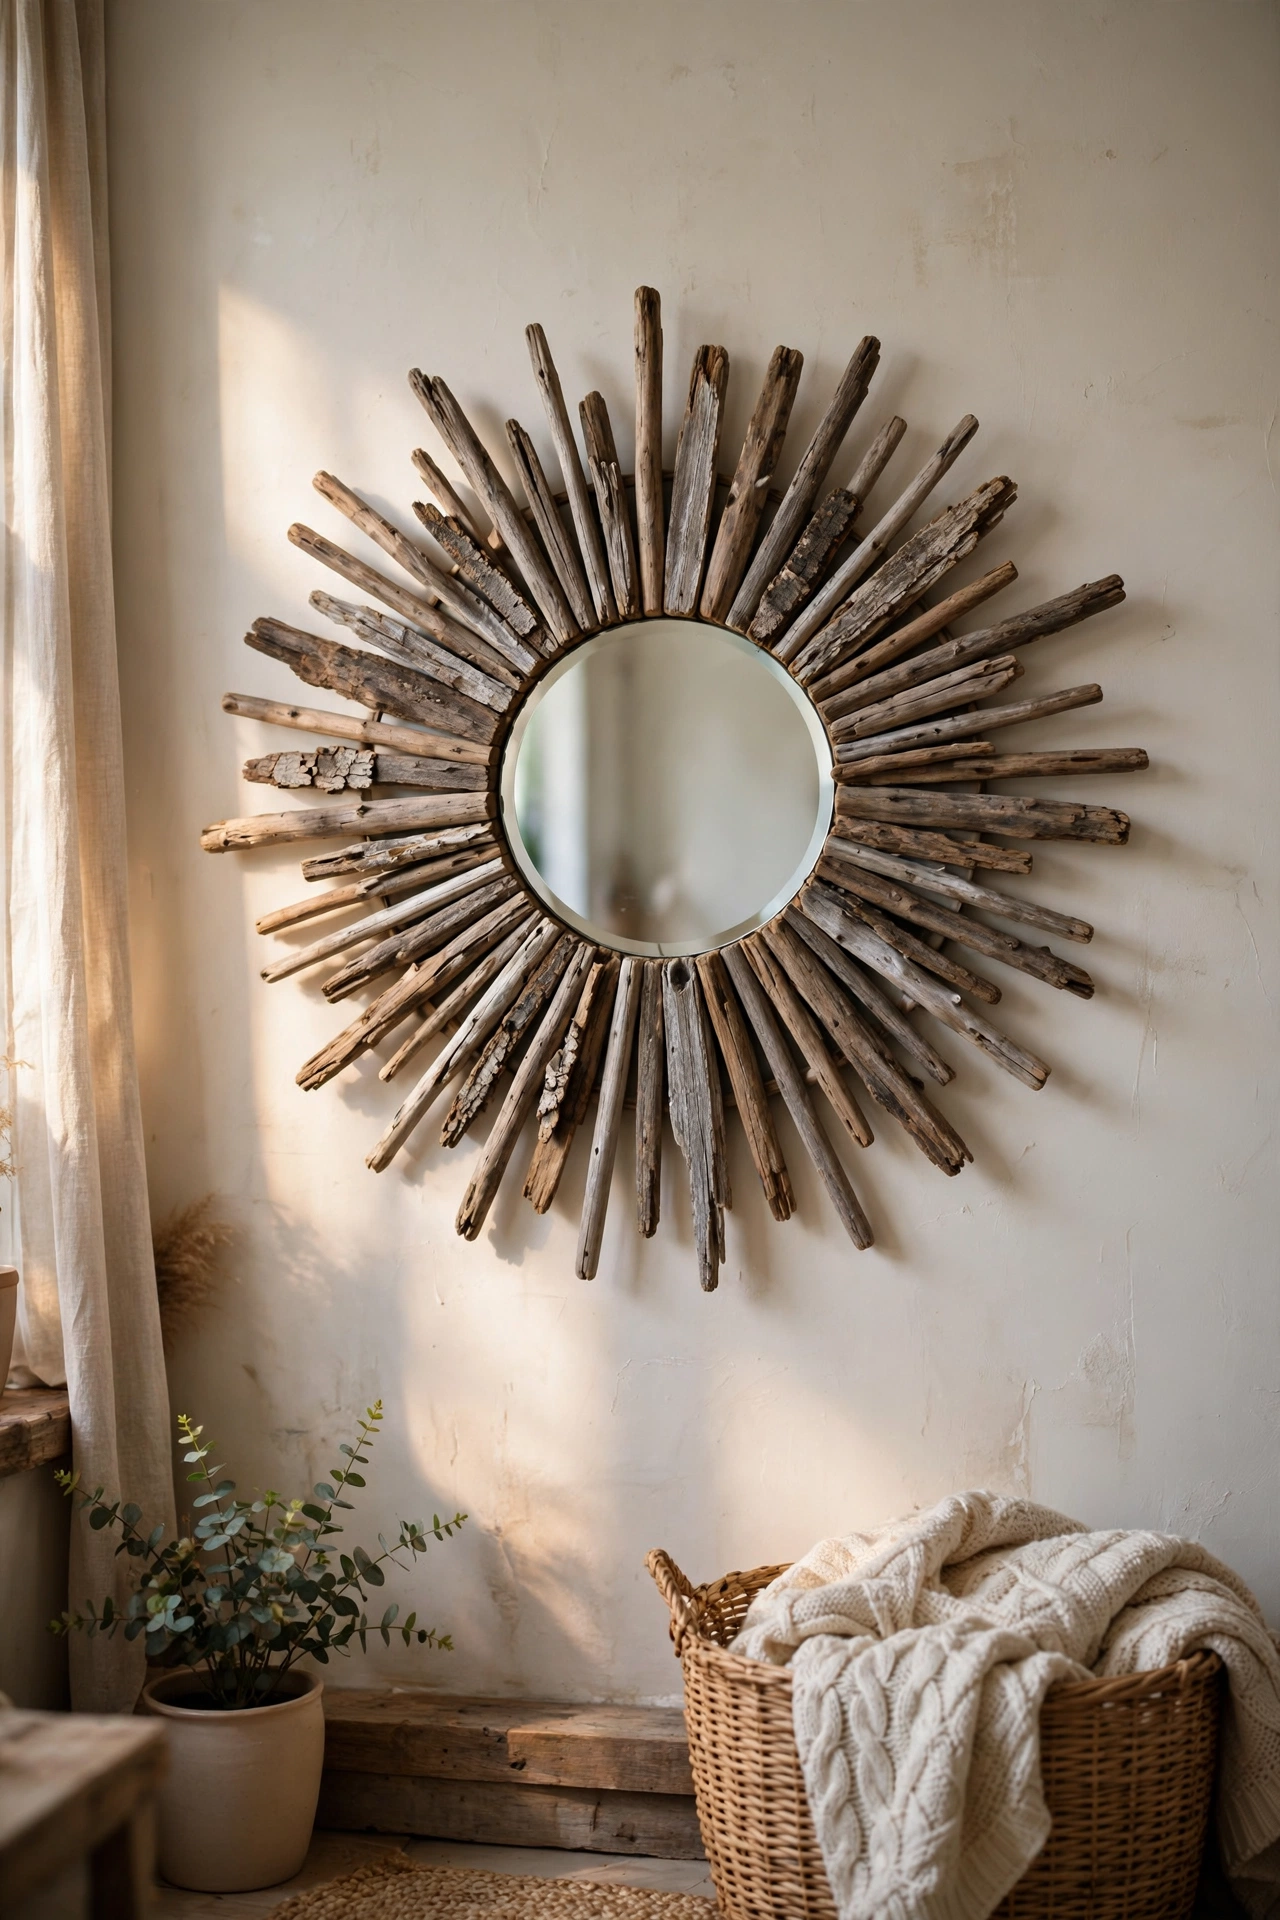
Collect straight-ish pieces of driftwood (or garden sticks) and radiate them from behind a round mirror for an organic sunburst. Cut the wood to varied lengths, sand the ends, and glue them to a plywood disc slightly smaller than the mirror. Then glue the mirror to the front of the disc so the wood fans out behind it. Mine came from one beach walk and cost nothing but glue. I tried skipping the plywood disc and gluing sticks straight to the mirror back — it wobbled and looked uneven. Do let the wood dry fully indoors for a week before building; damp wood warps. Don’t hang it somewhere it gets knocked; driftwood is brittle.
Pro tip: a light whitewash over the driftwood unifies different tones without hiding the grain.
Cost: ~$5 | Time: 2 hours
19. Faux Brass Frame with Metallic Paint
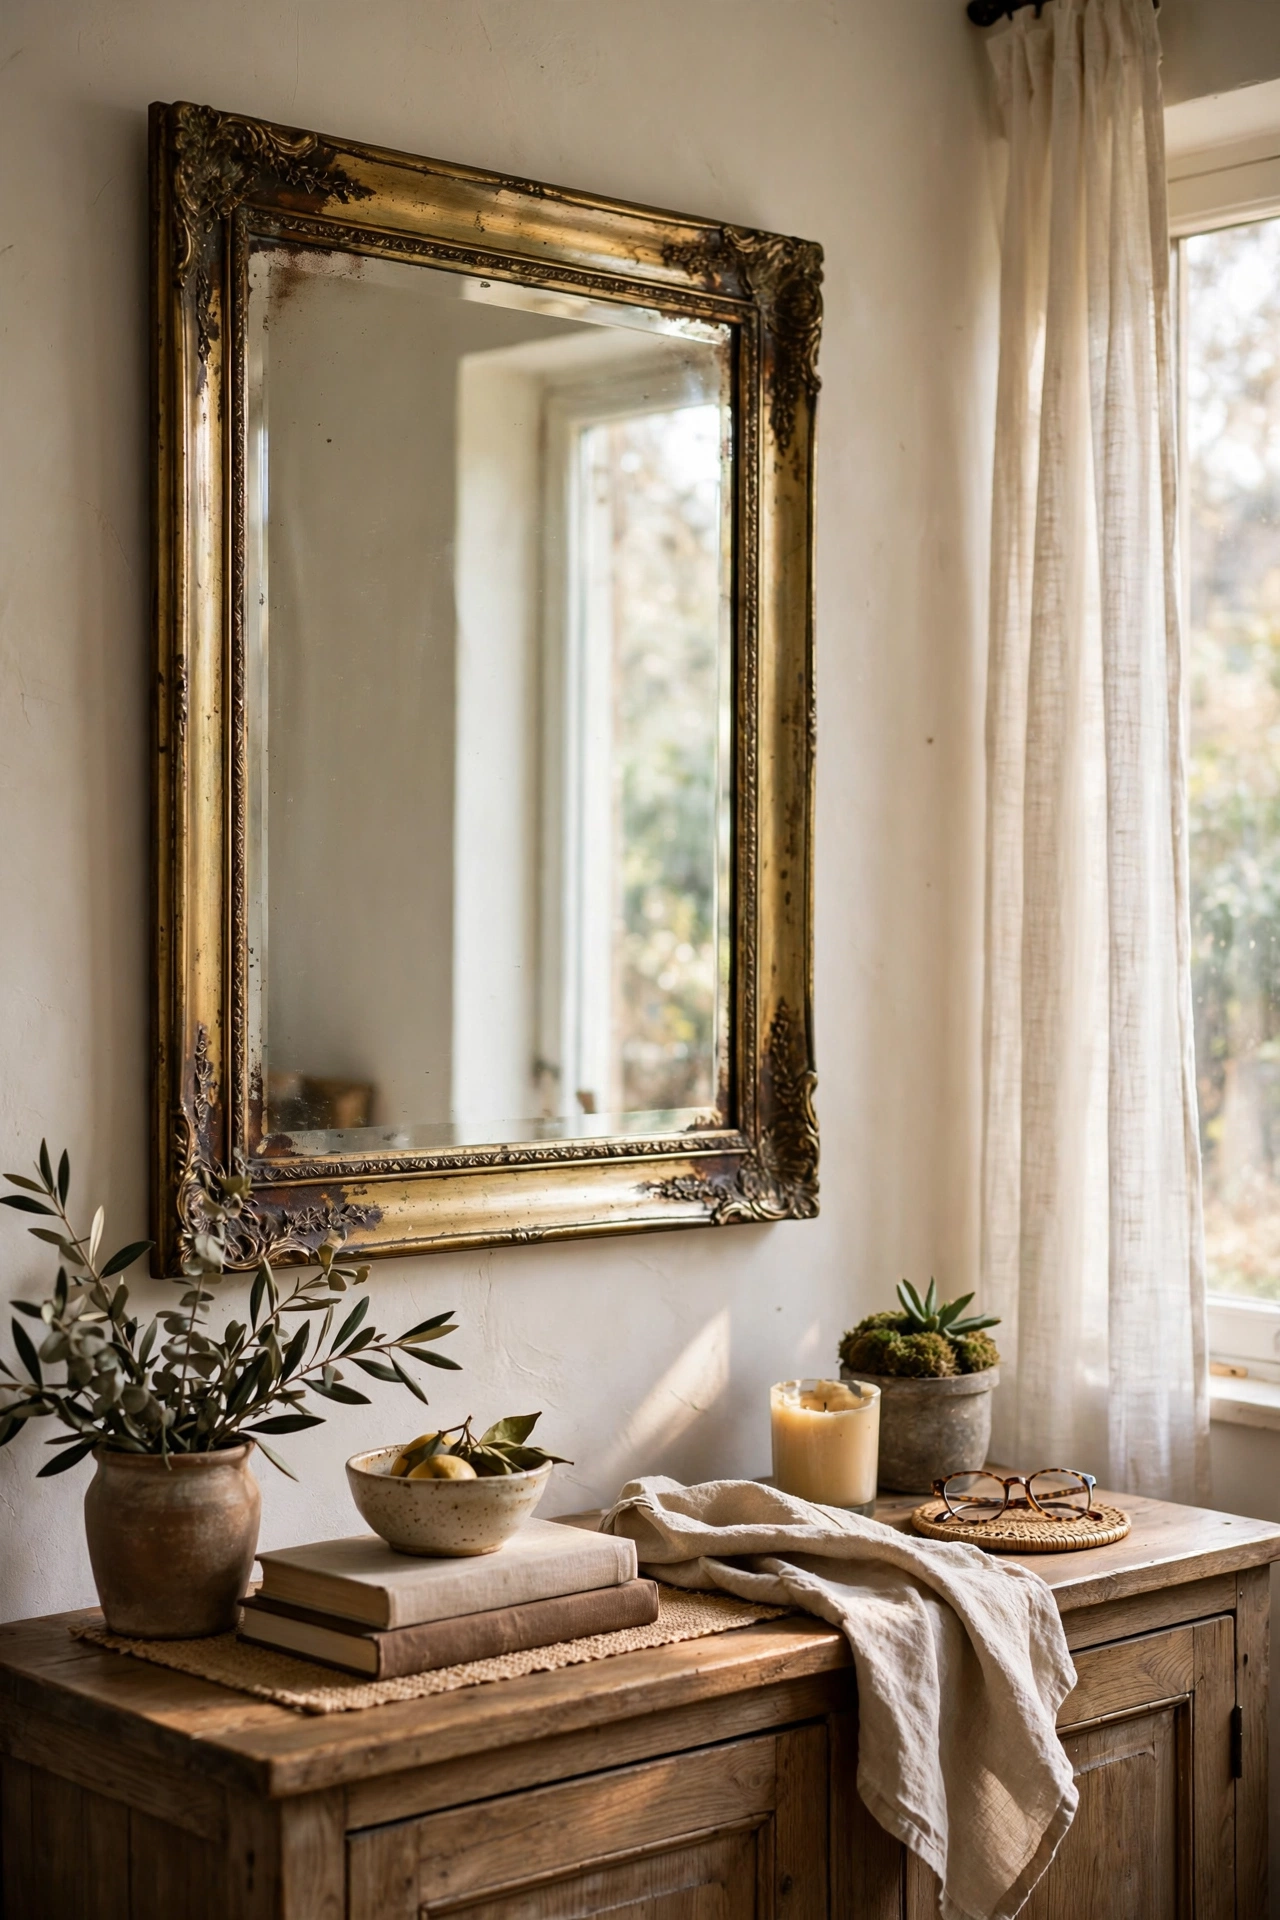
Turn a plastic or pine frame into convincing brass with metallic spray paint and a dark glaze. Spray two thin coats of metallic gold, then rub a tiny amount of dark antiquing glaze into the crevices and wipe the high points clean — this aged-metal trick is what sells it. I did this to a five-pound pine frame and nobody believes it isn’t brass. I tried skipping the glaze once and it looked like shiny plastic; the dark wax in the details makes all the difference. Do spray in light passes from 25cm away to avoid drips. Don’t handle it until fully cured or fingerprints mark the metallic finish.
Pro tip: finish with a clear lacquer so the metallic sheen doesn’t dull when you dust it.
Cost: ~$12 | Time: 1 hour plus curing
20. Bathroom Cabinet Mirror Refresh
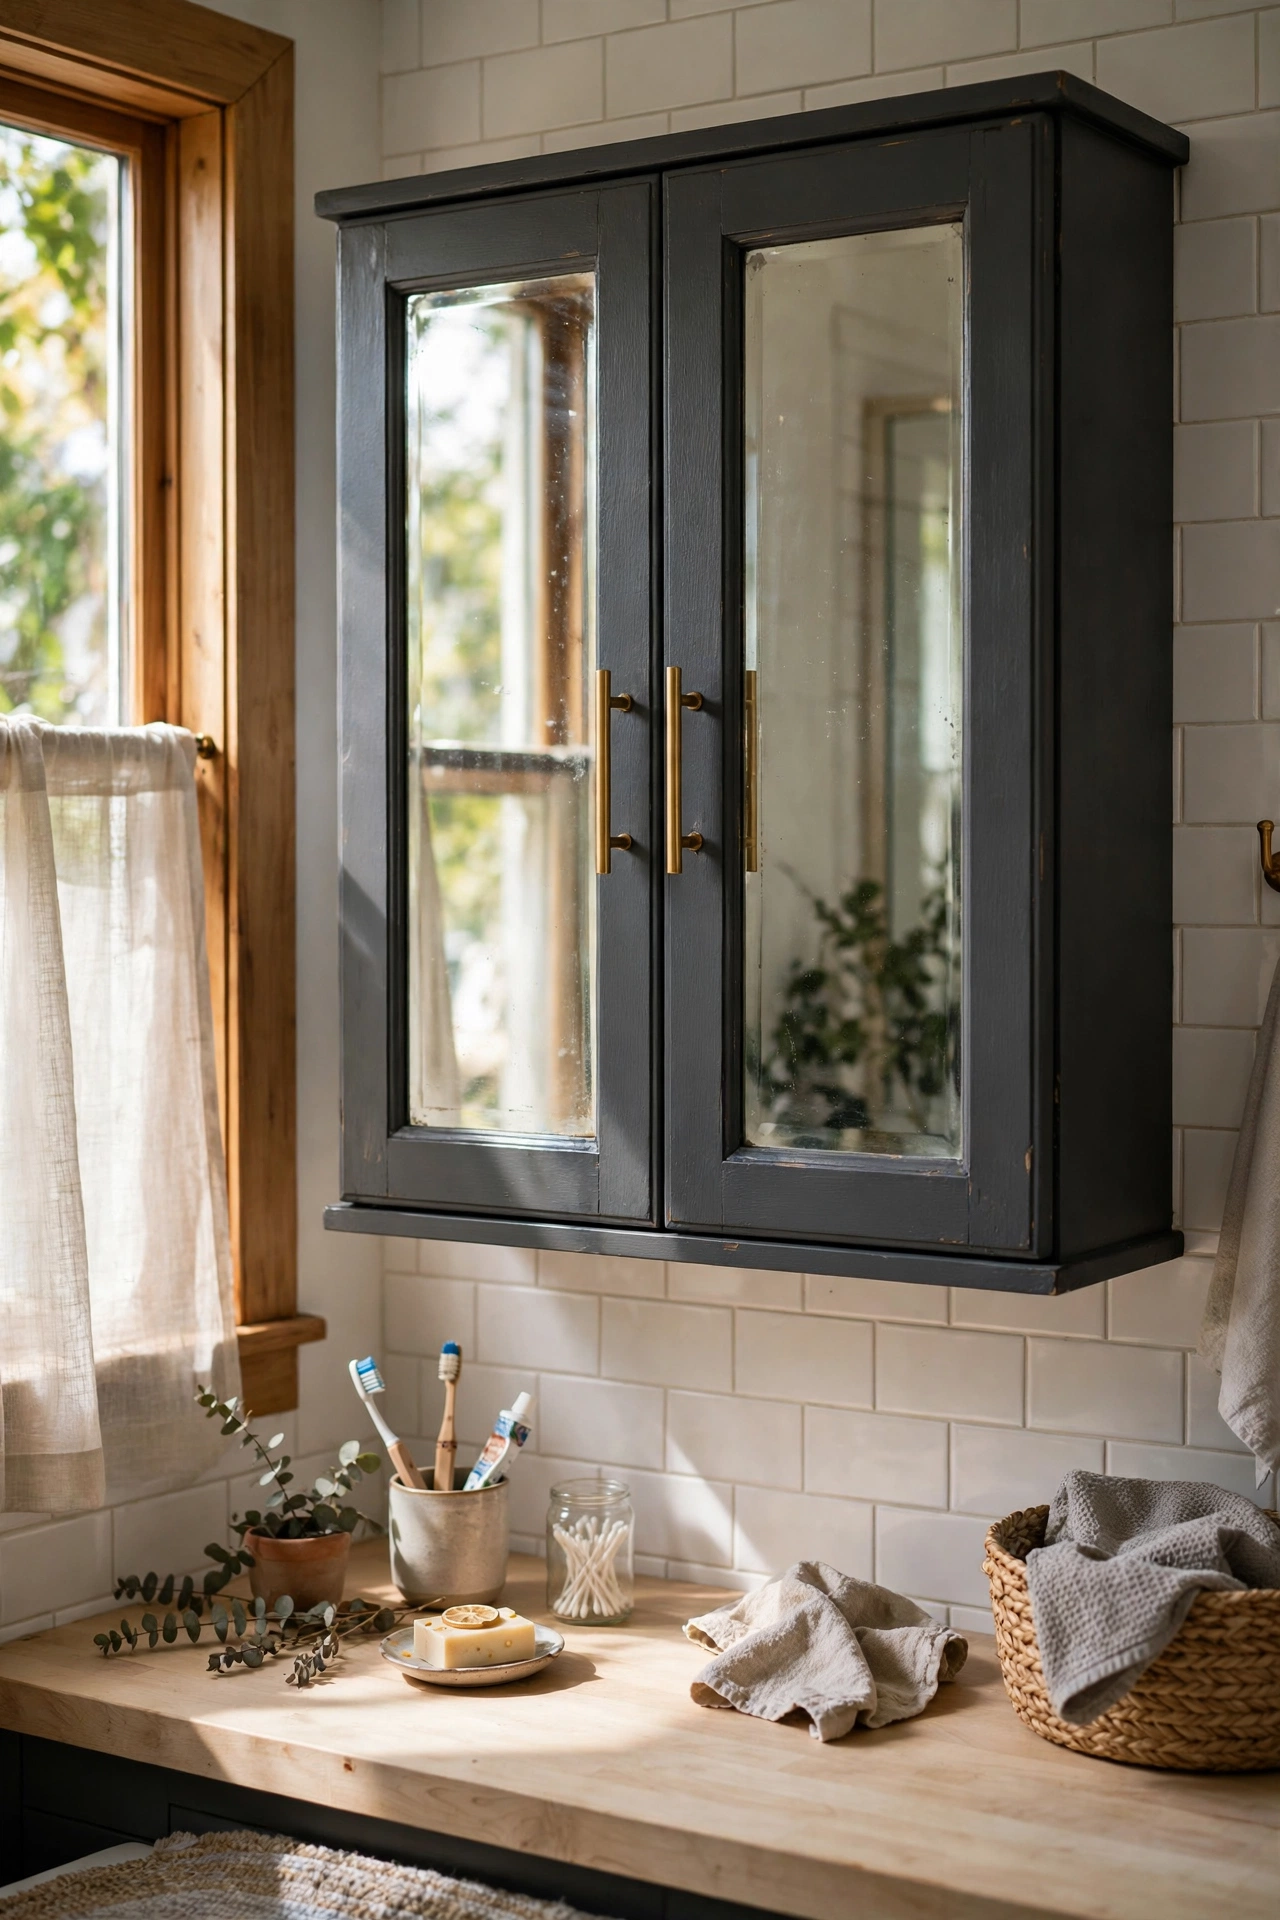
That dated mirrored bathroom cabinet gets a new life with paint and new knobs. Mask the mirror glass carefully, then paint the cabinet body in a deep colour like charcoal or navy with a paint rated for humid rooms. Swap the handles for something modern — brass bar pulls transform these instantly. I refreshed mine instead of replacing it and saved well over a hundred pounds. Do use a bonding primer first; bathroom cabinets are often laminate and paint peels straight off without it. Don’t rush the masking — paint on mirror glass is miserable to scrape off.
Pro tip: paint the inside of the cabinet too while you are at it — you see it every morning and it feels surprisingly luxurious.
Cost: ~$18 | Time: an afternoon plus drying
21. Double Thrifted Mirror Floor Leaner
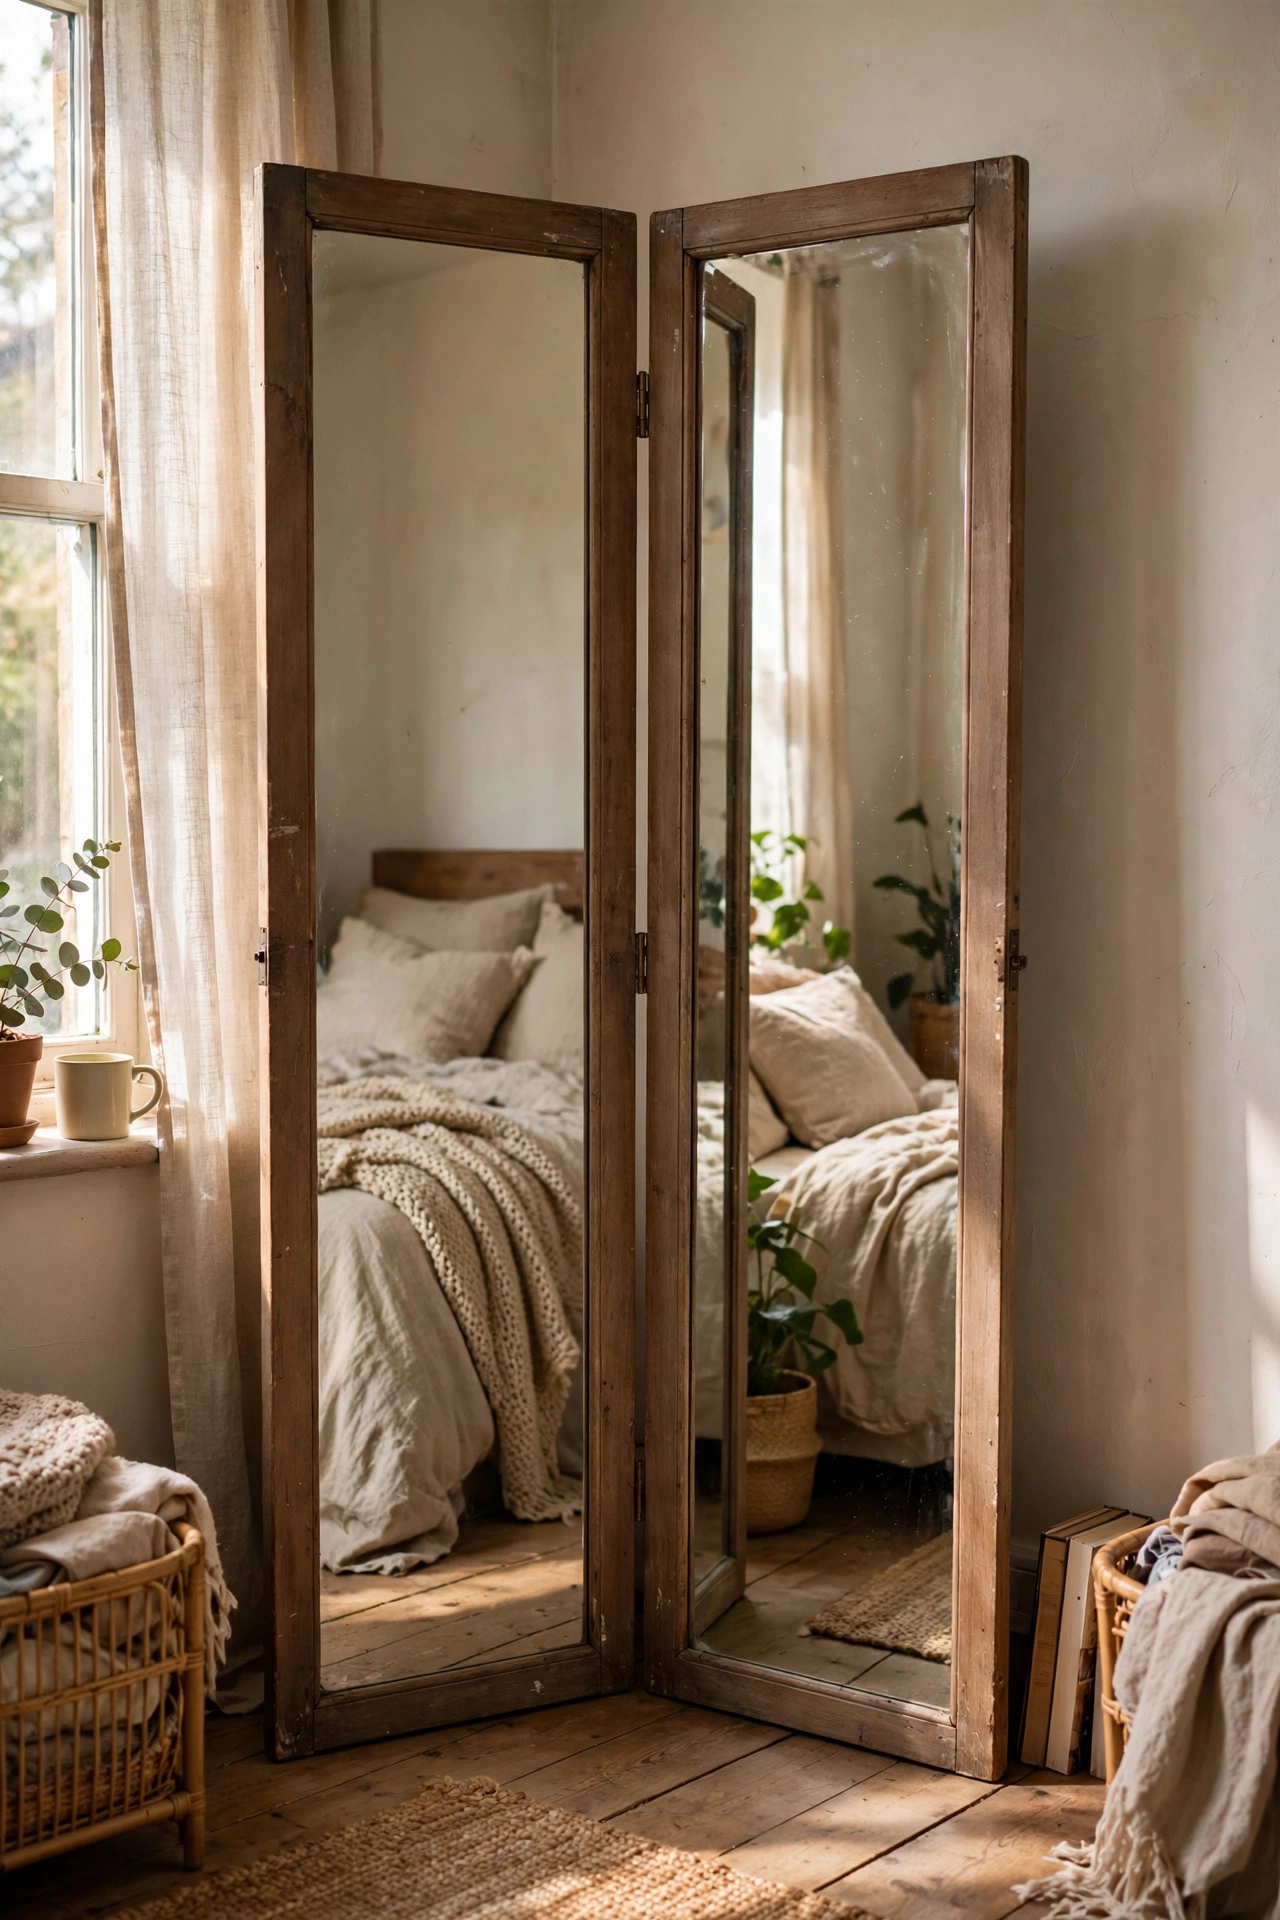
Two tall, narrow charity-shop mirrors hinged together make a freestanding dressing screen that doubles as a full-length mirror. Join the frames back-to-back along one long edge with small hinges so they fold like a screen, then stand it in a corner. I use mine in the bedroom and the double reflection makes the room feel enormous. Do check both mirrors are the same height or the hinge line looks wrong — I had to add small wooden feet to level mine. Don’t place it where it can be knocked over by pets or kids; anchor the back to the wall with a discreet bracket.
Pro tip: paint both frames the same colour before hinging so they read as one intentional piece.
Cost: ~$16 | Time: 2 hours
22. Shell-Framed Coastal Mirror
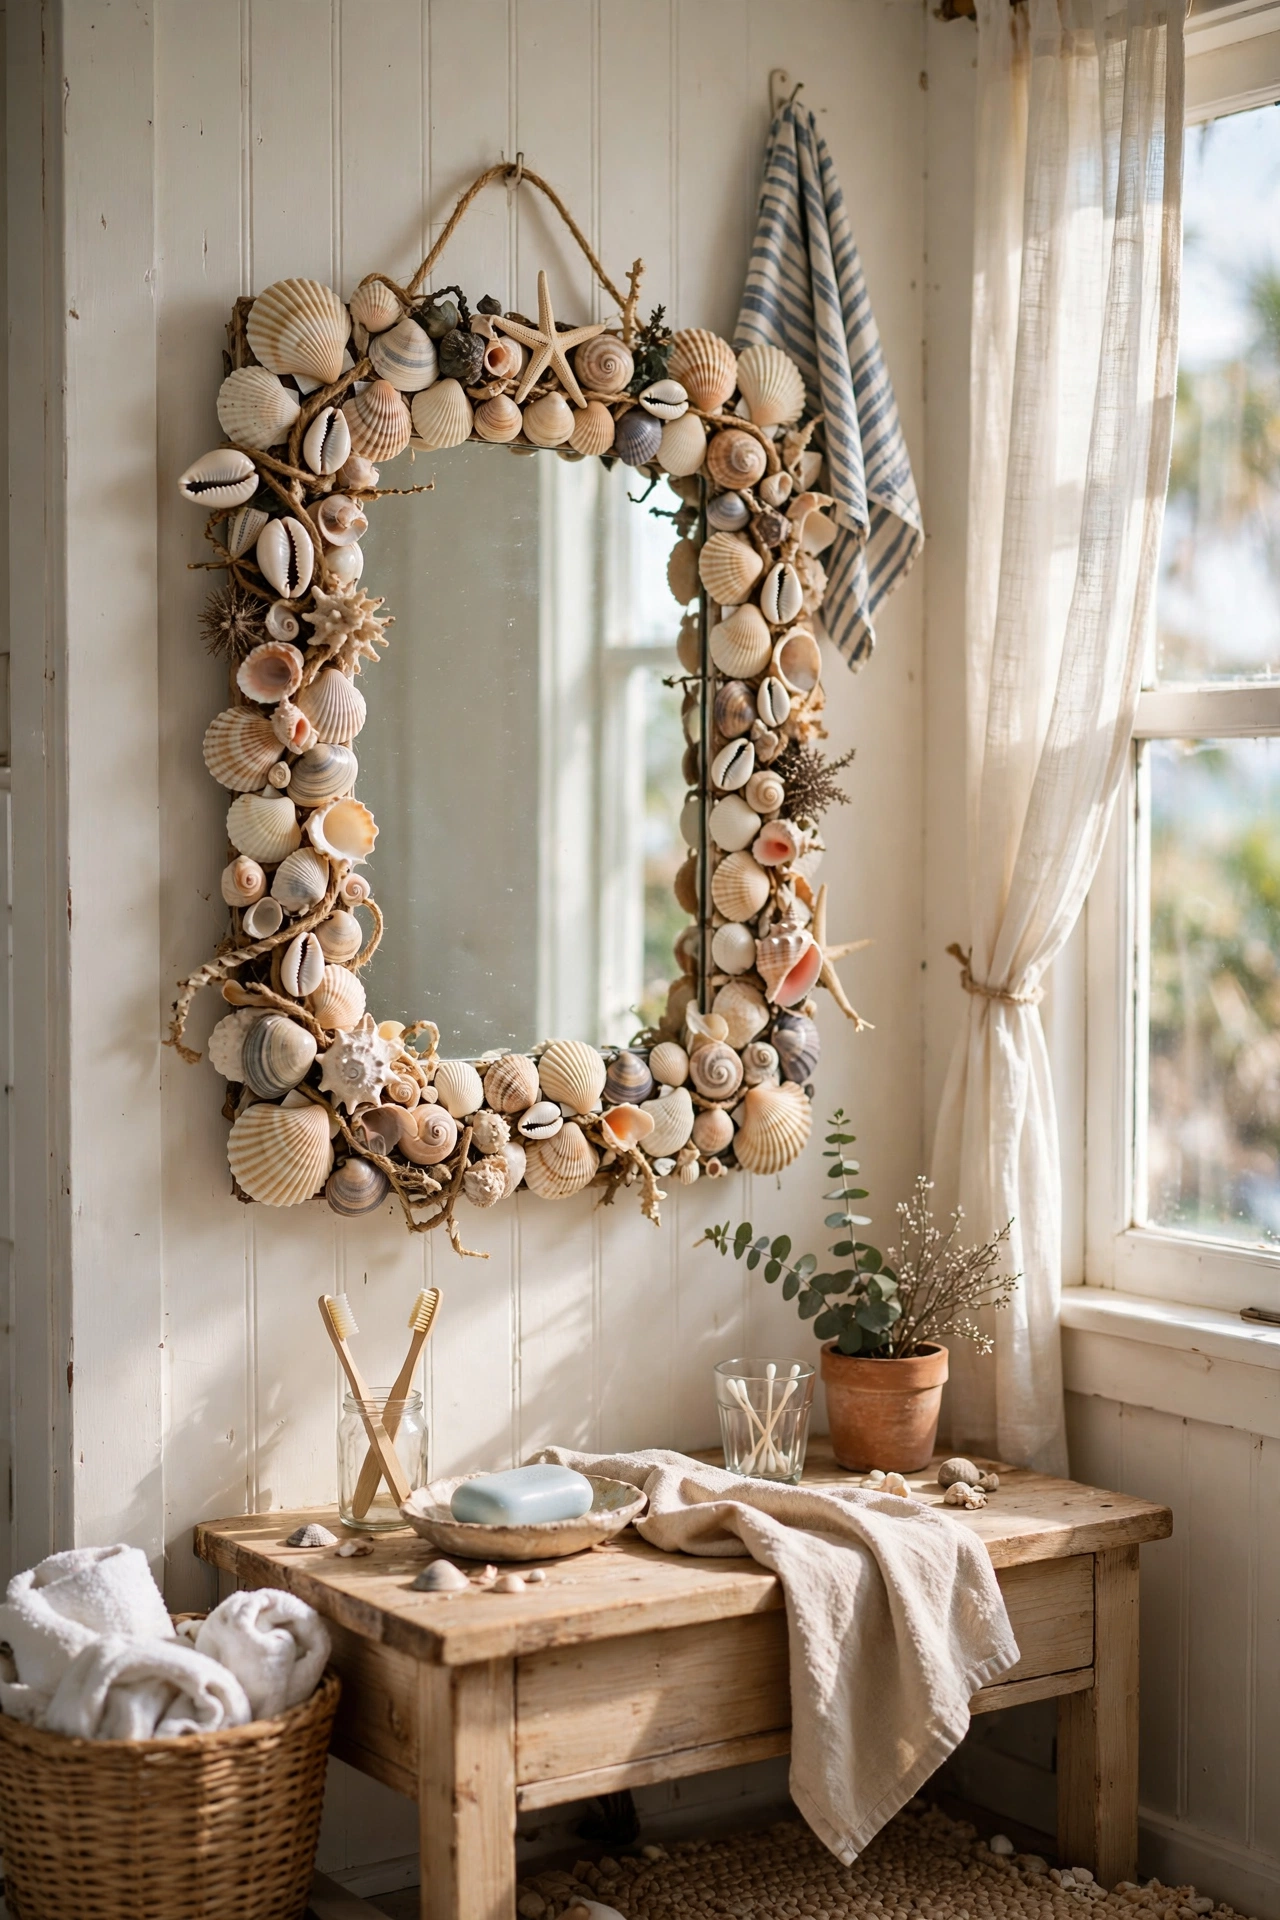
Glue collected shells around a mirror frame for a proper coastal feel — a bag of mixed shells from a craft shop is cheap if you don’t live near a beach. Start with the largest shells spaced evenly around the frame, then fill the gaps with smaller ones, overlapping slightly. A dot of strong glue on each shell holds them. Mine hangs in the guest bathroom and always gets comments. I tried using only tiny shells and the frame looked flat — the mix of big and small is what gives it depth. Do rinse beach-collected shells in soapy water and dry them fully first; they can smell otherwise.
Pro tip: paint the frame underneath a sandy beige first so any gaps between shells look intentional.
Cost: ~$10 | Time: 2 hours
23. Old Window Windowpane Mirror
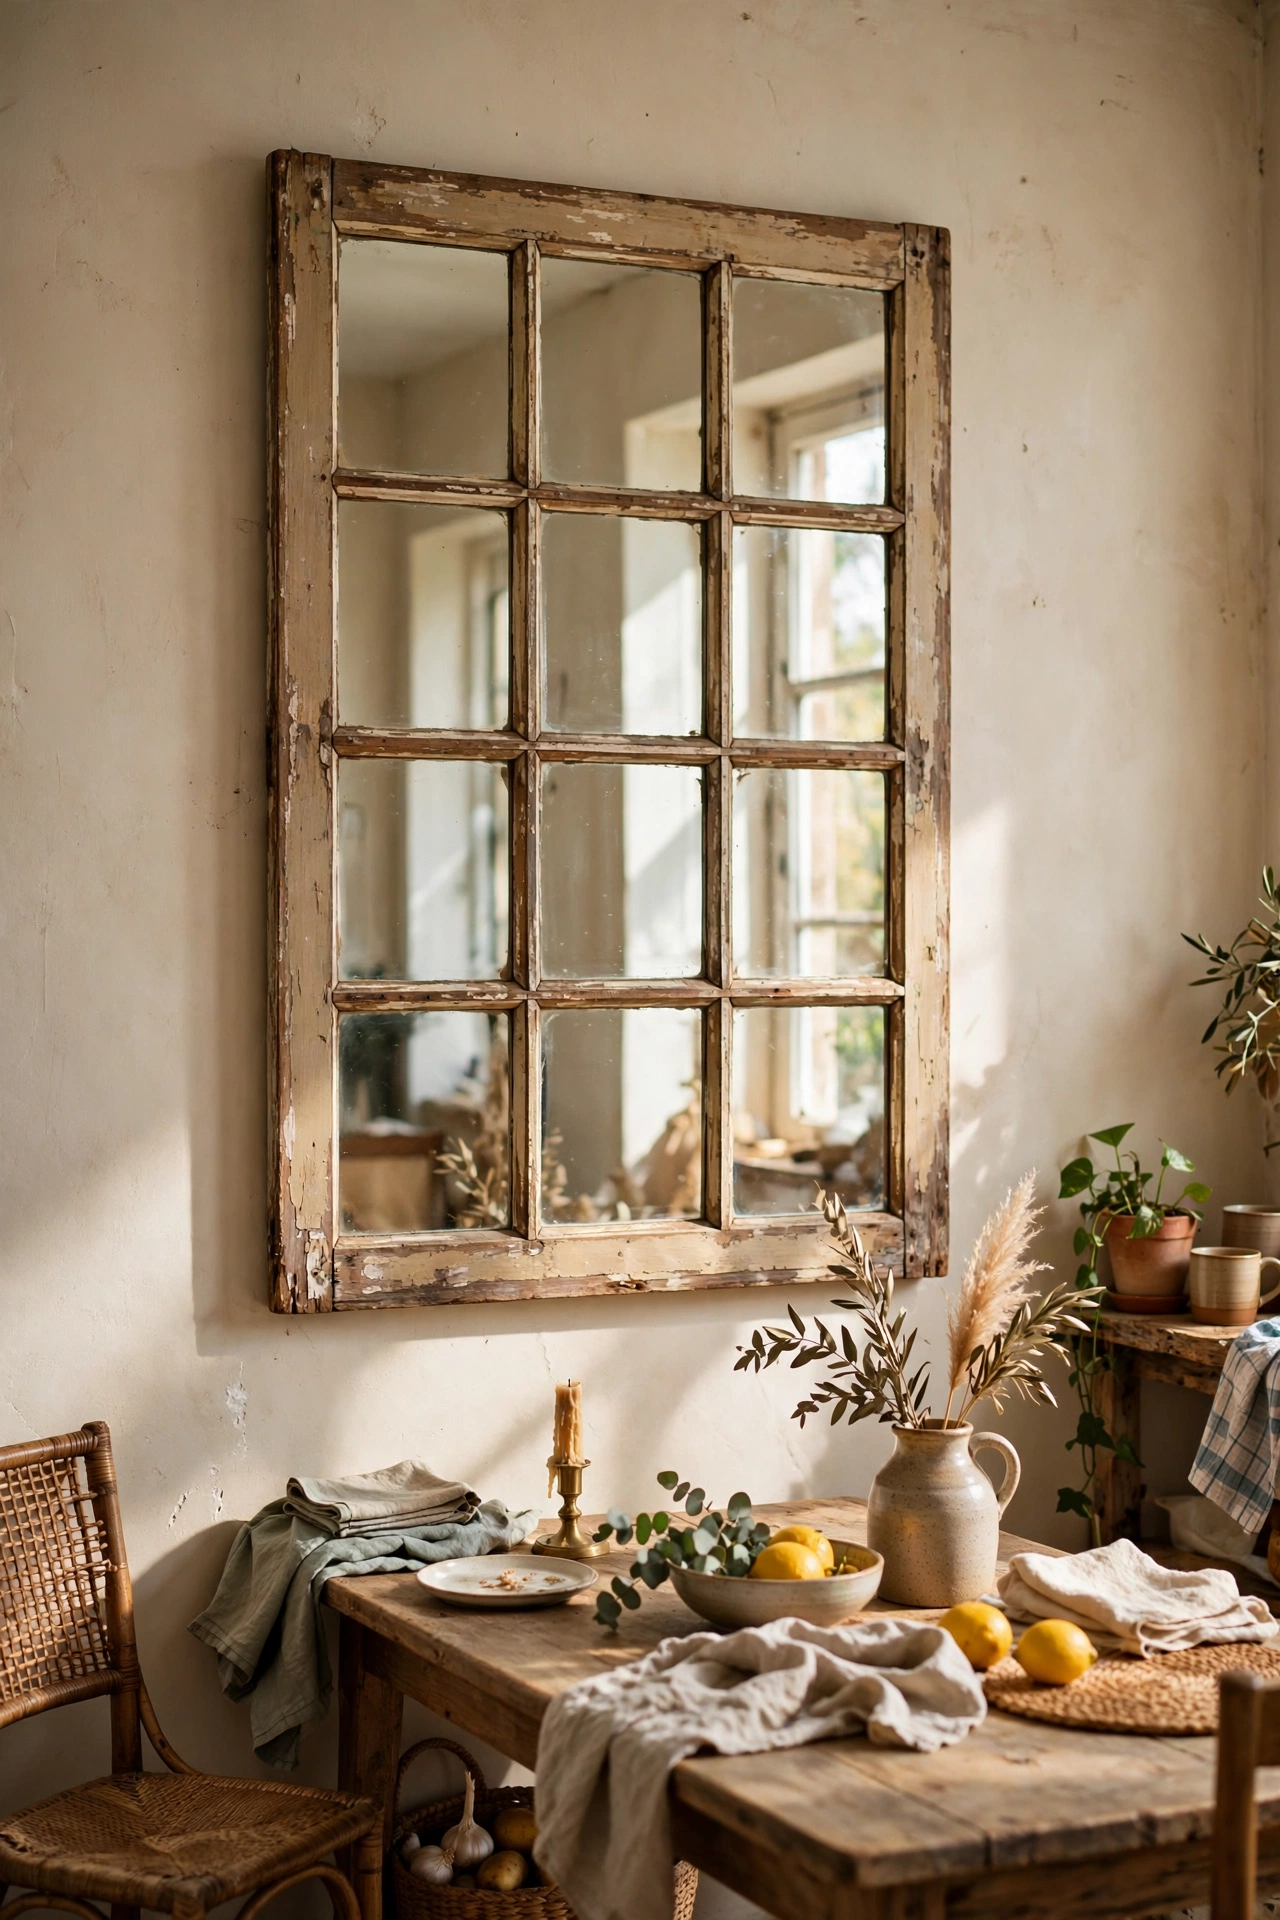
An old multi-pane window becomes a gorgeous windowpane mirror when you fit mirror behind the glazing bars. Find a wooden window at a salvage yard, clean it up, paint the frame, then have mirror cut to fit the whole back — one sheet behind all the panes reads as one mirror divided by the bars. I found my window for eight pounds and it is now the focal point of my dining room. Do check old windows for lead paint and seal or strip them safely before bringing them indoors. Don’t try to cut the mirror yourself unless you know how; a glass shop does it cheaply.
Pro tip: leave the original wavy glass in a couple of panes and mirror the rest for a charming half-and-half effect.
Cost: ~$25 | Time: an afternoon
24. Frosted-Etch Corner Detail Mirror
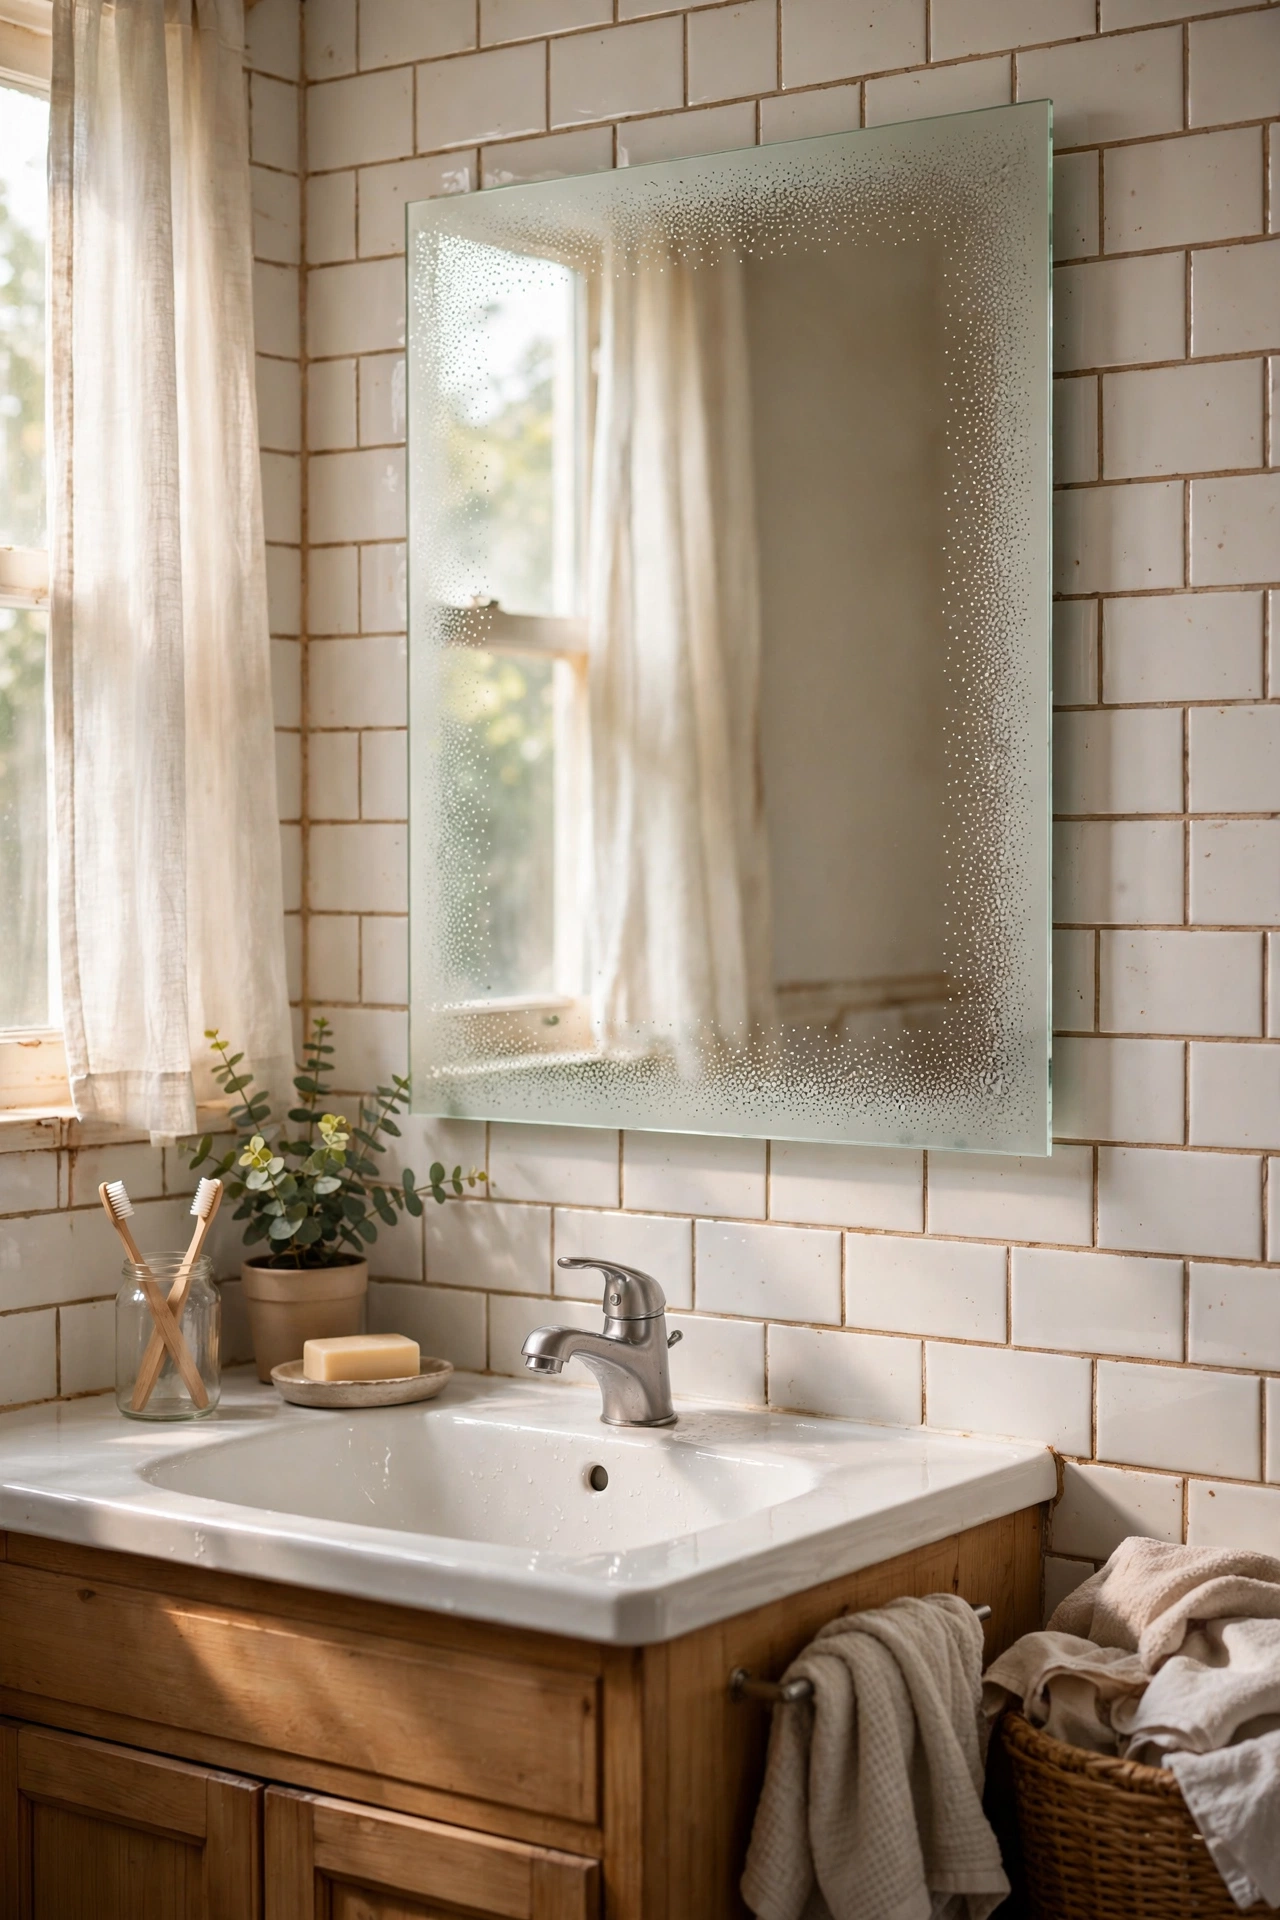
Frosted glass spray and a stencil let you etch a delicate border onto a plain mirror. Cut a simple border stencil from contact paper — dots, leaves, or a Greek key pattern — stick it on the mirror, and spray light coats of frosted glass spray over it. Peel the stencil while the last coat is tacky. Mine has a dotted border in the bathroom and it looks like custom etched glass. I tried freehanding the pattern and it looked shaky — the stencil is worth the ten minutes. Do spray in very light passes; heavy coats run and look cloudy.
Pro tip: the frosted spray wipes off with a razor blade if you mess up, so this is a very low-risk project.
Cost: ~$11 | Time: 1 hour
25. Entryway Mirror with Hook Board
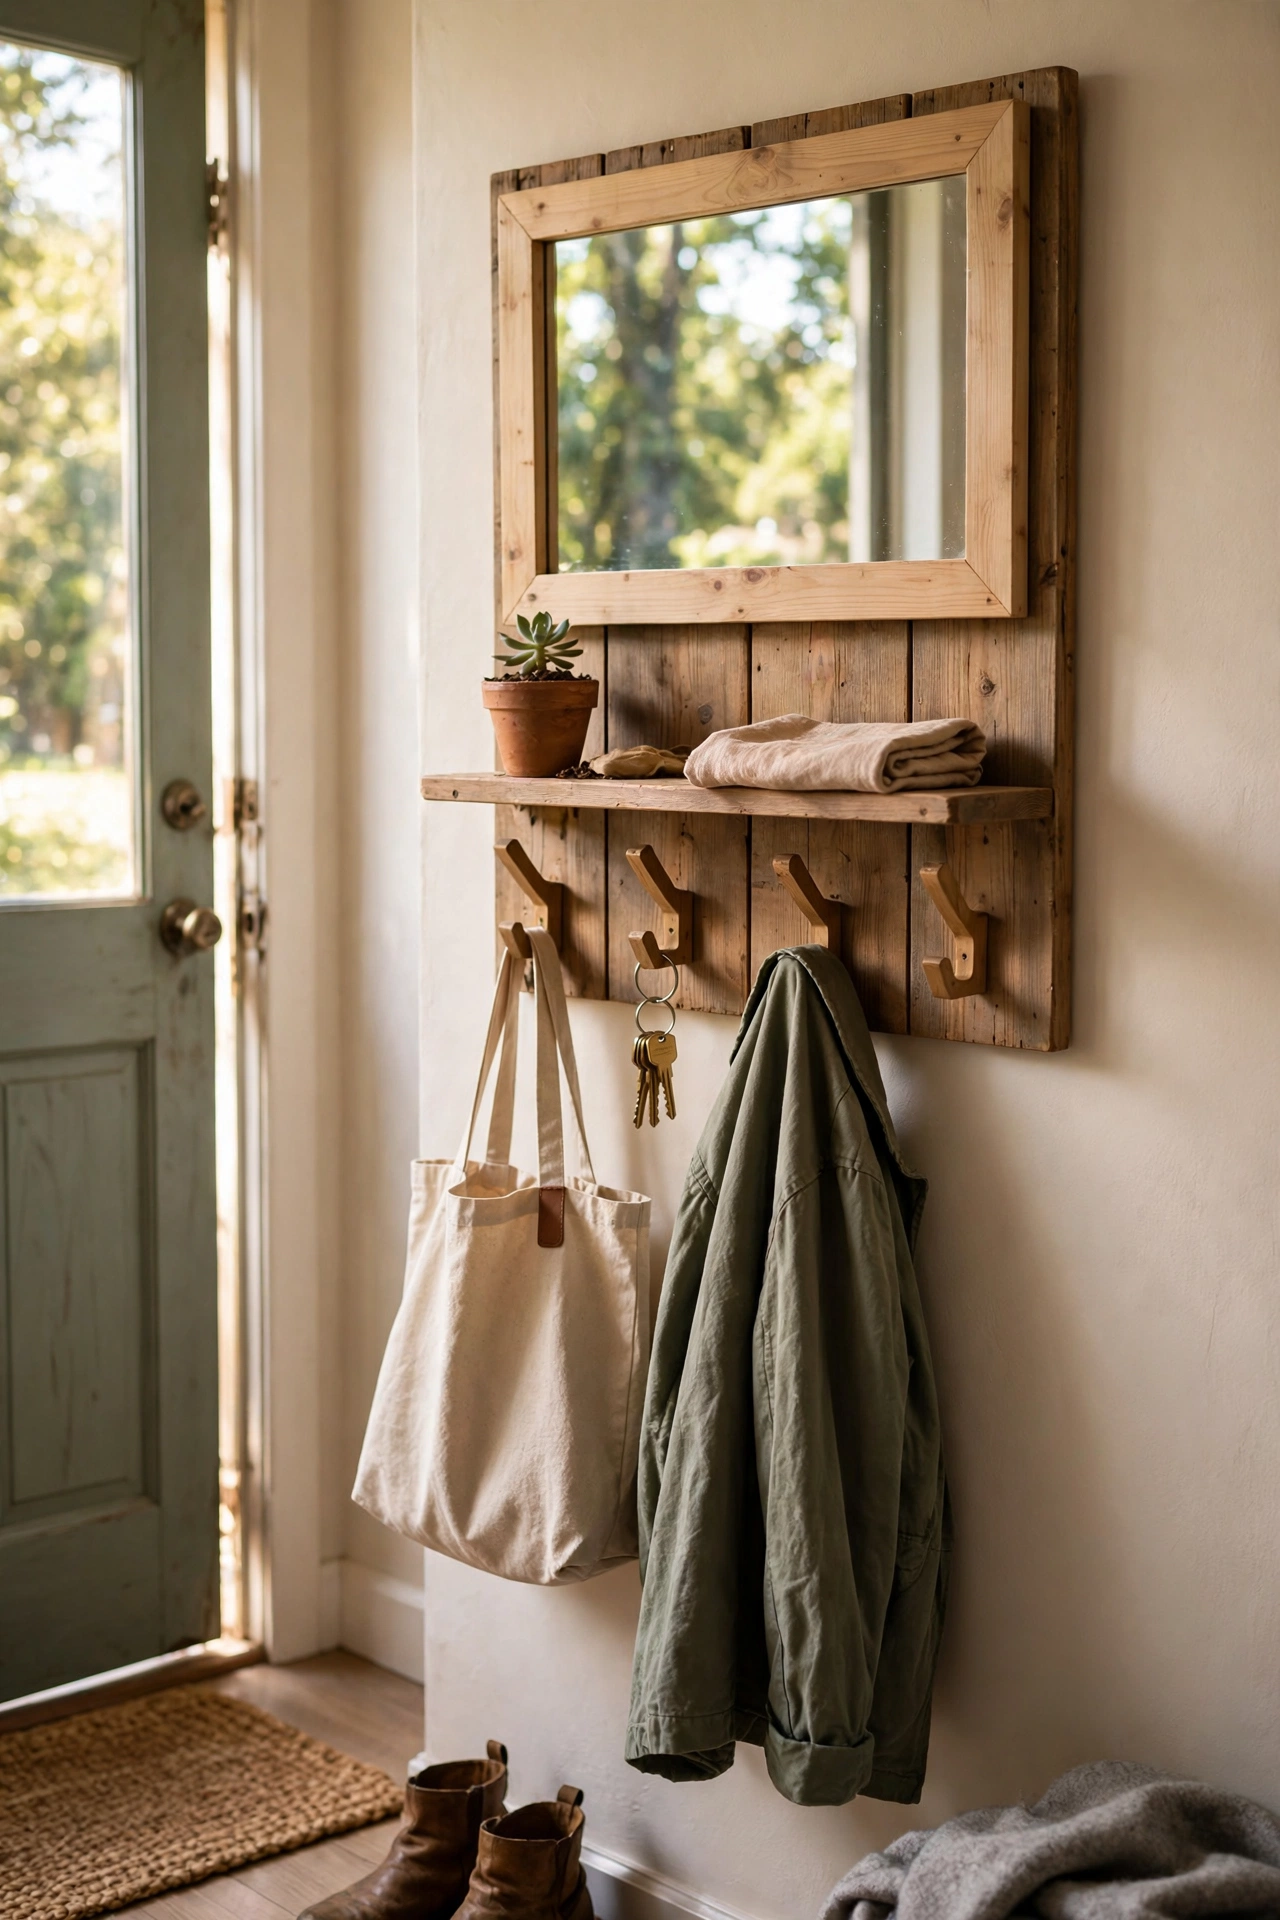
Mount a mirror on a simple wooden board fitted with coat hooks and you have an entryway station that looks built-in. Screw a rectangle mirror to the centre of a stained or painted board, then fix three or four hooks below it for keys, bags, and dog leads. Hang the whole board on proper wall fixings. Mine by the front door gets used every single day and I built it from an offcut and a charity-shop mirror. Do use wall plugs rated for the total weight — mirrors plus a loaded hook board are heavier than you think. Don’t skip sanding the board; splinters and coat hooks are a bad mix.
Pro tip: add a small shelf along the top of the board for sunglasses and post — it turns the mirror into a proper drop zone.
Cost: ~$15 | Time: 2 hours
That’s the full set — twenty-five ways to make mirrors work harder in your home without spending much at all. Start with the simplest one that caught your eye; momentum beats perfection every time.
📌 Loving this look? Pin this post now so you can save this idea for your next weekend refresh.
Quick questions, answered
What is the cheapest way to frame a plain mirror?
Washi tape or peel-and-stick vinyl costs under ten pounds and takes less than an hour. Both stick straight onto the glass or frame edge, and both come off cleanly if you change your mind.
Can I hang a heavy mirror without drilling?
For light mirrors, high-weight command strips work well on smooth walls. For anything heavy, drilling into a stud or using proper plasterboard anchors is the only safe option — a falling mirror is not worth the risk.
How do I stop a DIY mirror frame looking homemade?
Two things make the difference: neat mitred corners (measure twice, cut once) and a consistent finish. One unifying coat of paint or stain across the whole frame hides a multitude of construction sins.
Keep the calm going with these next: (see also: 23-diy-mirror-ideas-that-look-expensive/) (see also: 23-diy-gallery-wall-ideas-on-a-budget/) (see also: 17-diy-lamp-ideas-on-a-budget/)
