25 Painted Furniture Ideas for Beginners
The first piece of furniture I ever painted was a wobbly stool I nearly threw out, and learning these painted furniture ideas for beginners turned it into something I still use. Painting furniture is forgiving: paint covers sins, and a bad coat can be sanded off. Start small, work up to the dresser, and by the end of this list you will have the skills for all of it.
Prep and First Projects
1. Liquid Deglosser Instead of Sanding
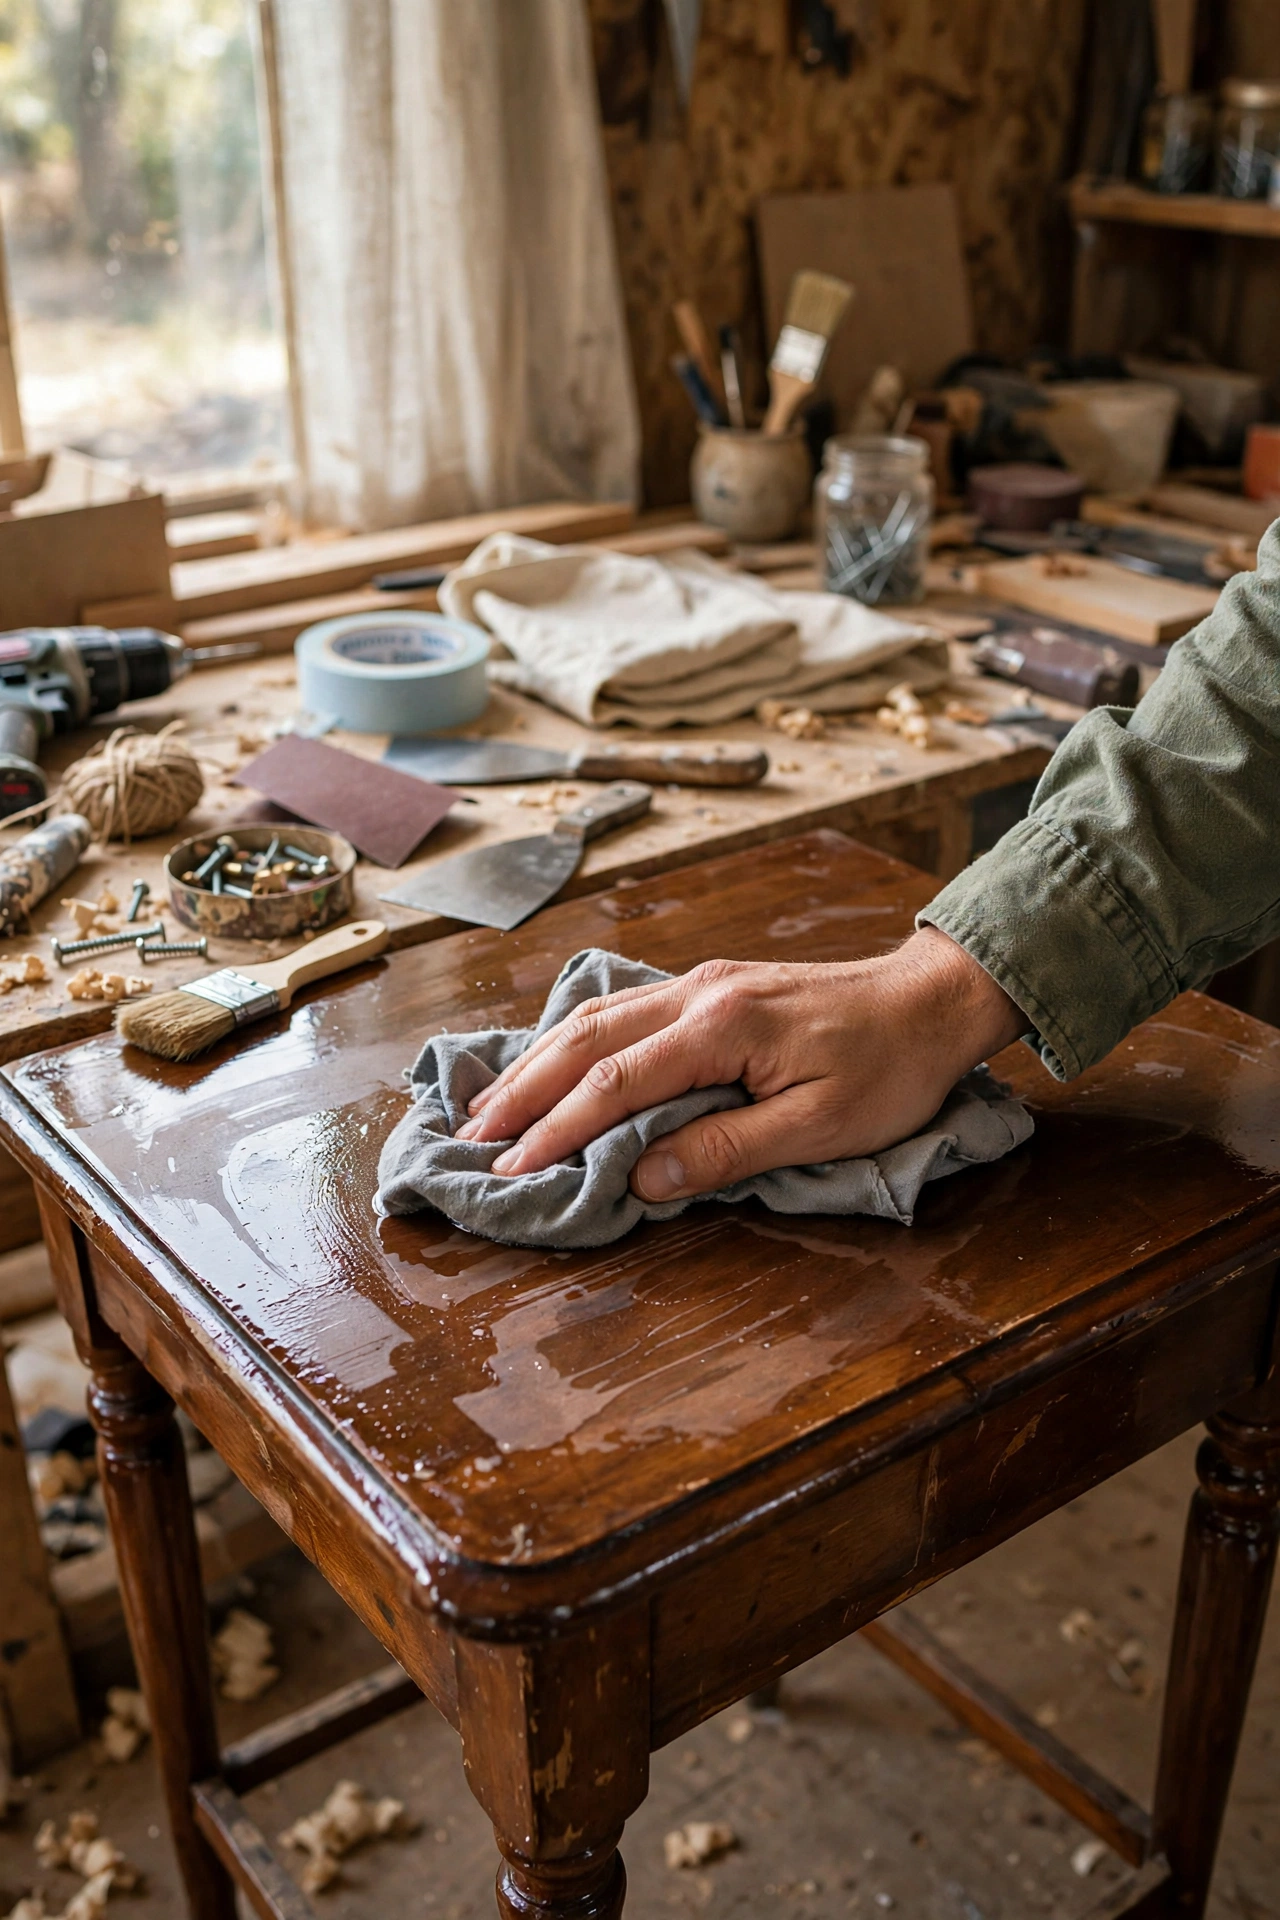
Liquid deglosser lets you skip sanding on glossy furniture. Wipe it on with a rag, wait ten minutes, and the surface is ready for paint. I used it on a shiny 90s side table and the paint stuck perfectly. This is the beginner’s best friend because sanding is where most people quit. Work in a ventilated room and wear gloves. One bottle handles several small pieces. If the finish is flaking, though, you still need to sand the loose bits first.
Cost: ~$8-12 | Time: 30 minutes prep
2. Two-Coat Chalk Paint Finish
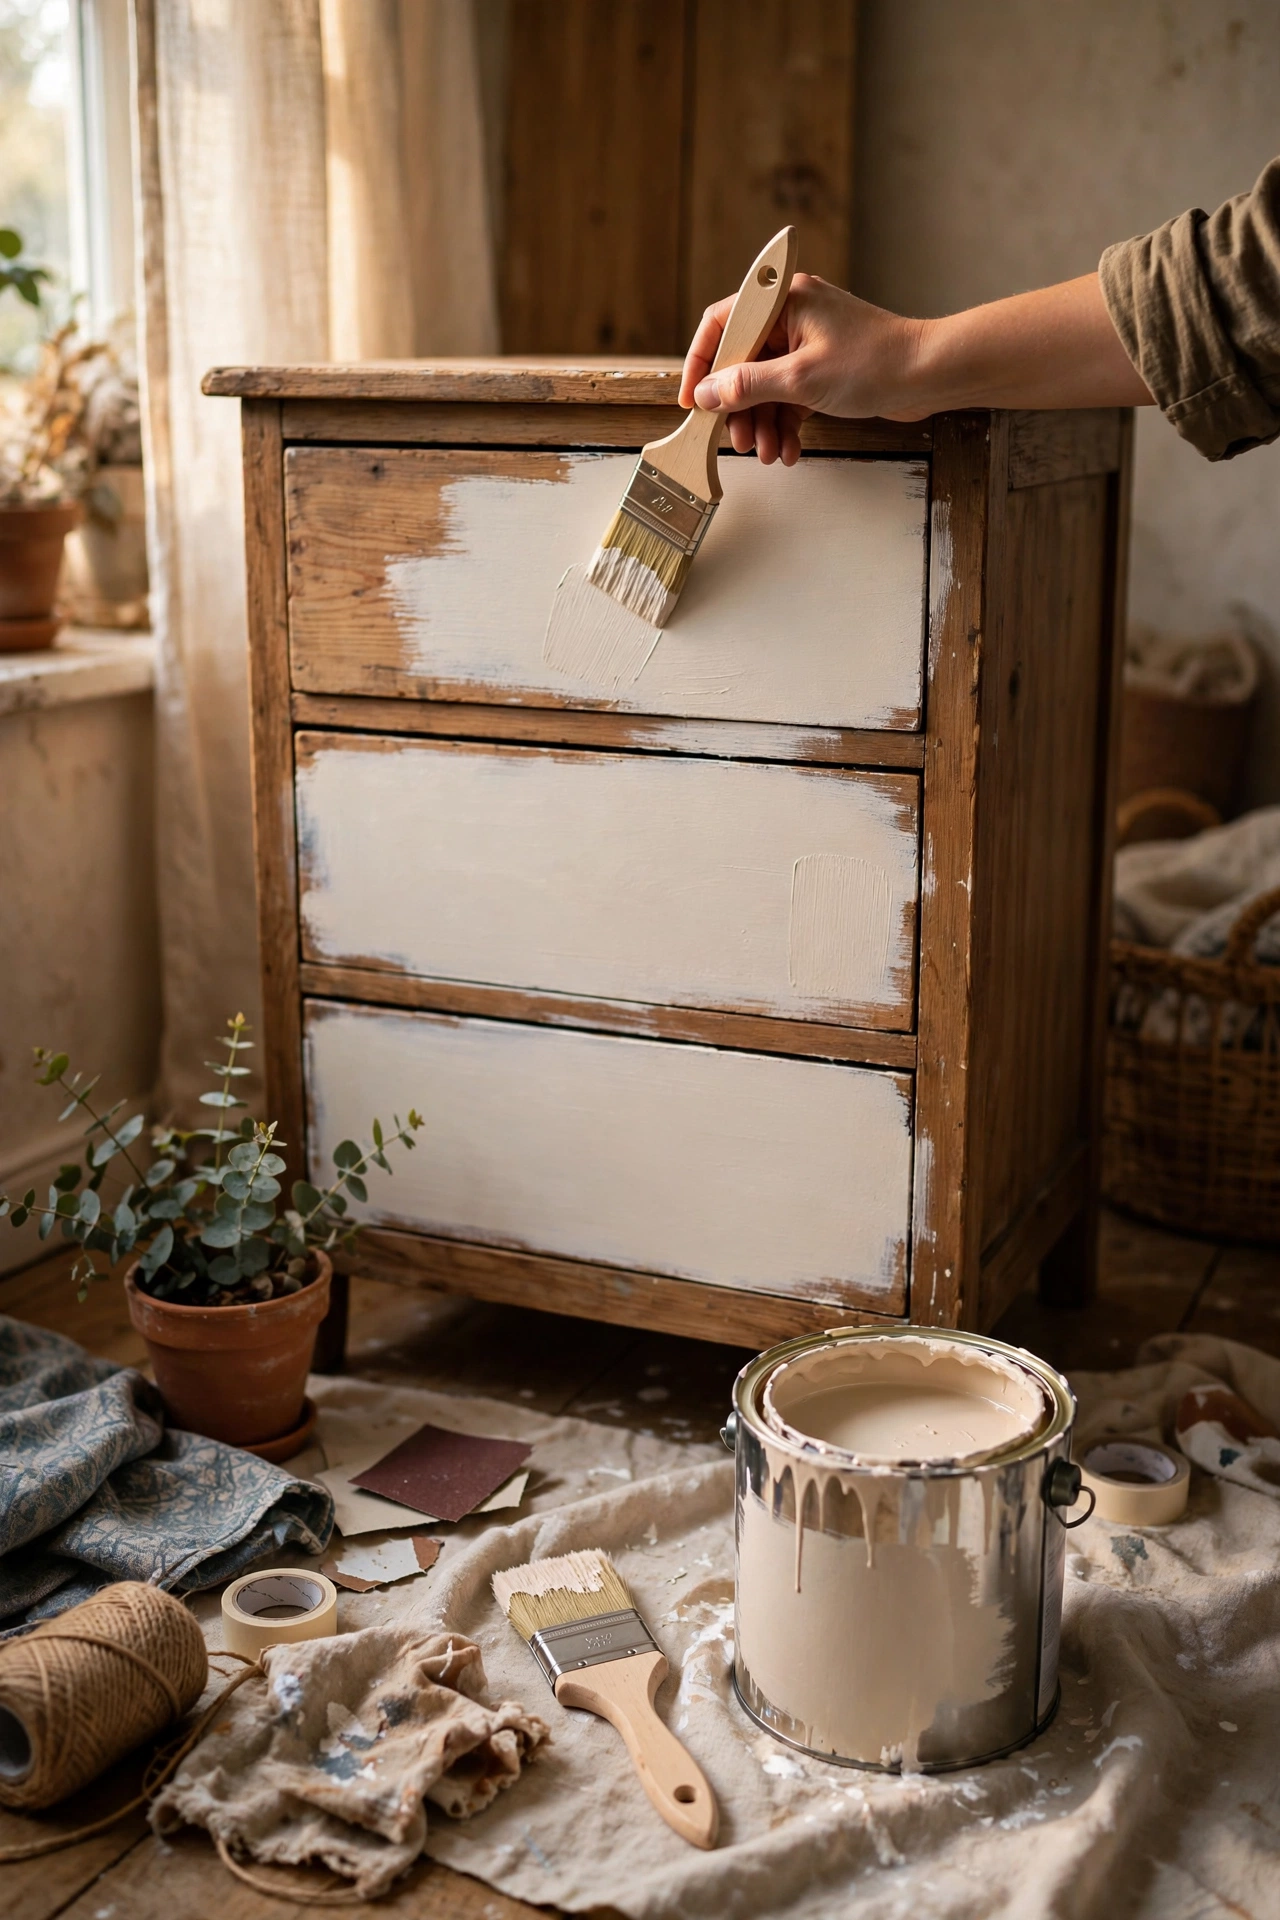
Chalk paint is the most forgiving paint for beginners because it sticks to almost anything with minimal prep. Brush on a thin first coat, let it dry, then apply a second coat for full coverage. I painted my first dresser this way with zero sanding. The matte finish hides brush marks. My mistake was laying it on thick; thin coats dry faster and look smoother. Seal it with wax or a matte topcoat or it will scuff. I find myself smiling every time I walk past it.
Cost: ~$12-18 | Time: 2 hours plus drying
3. Small Wooden Stool Practice Project
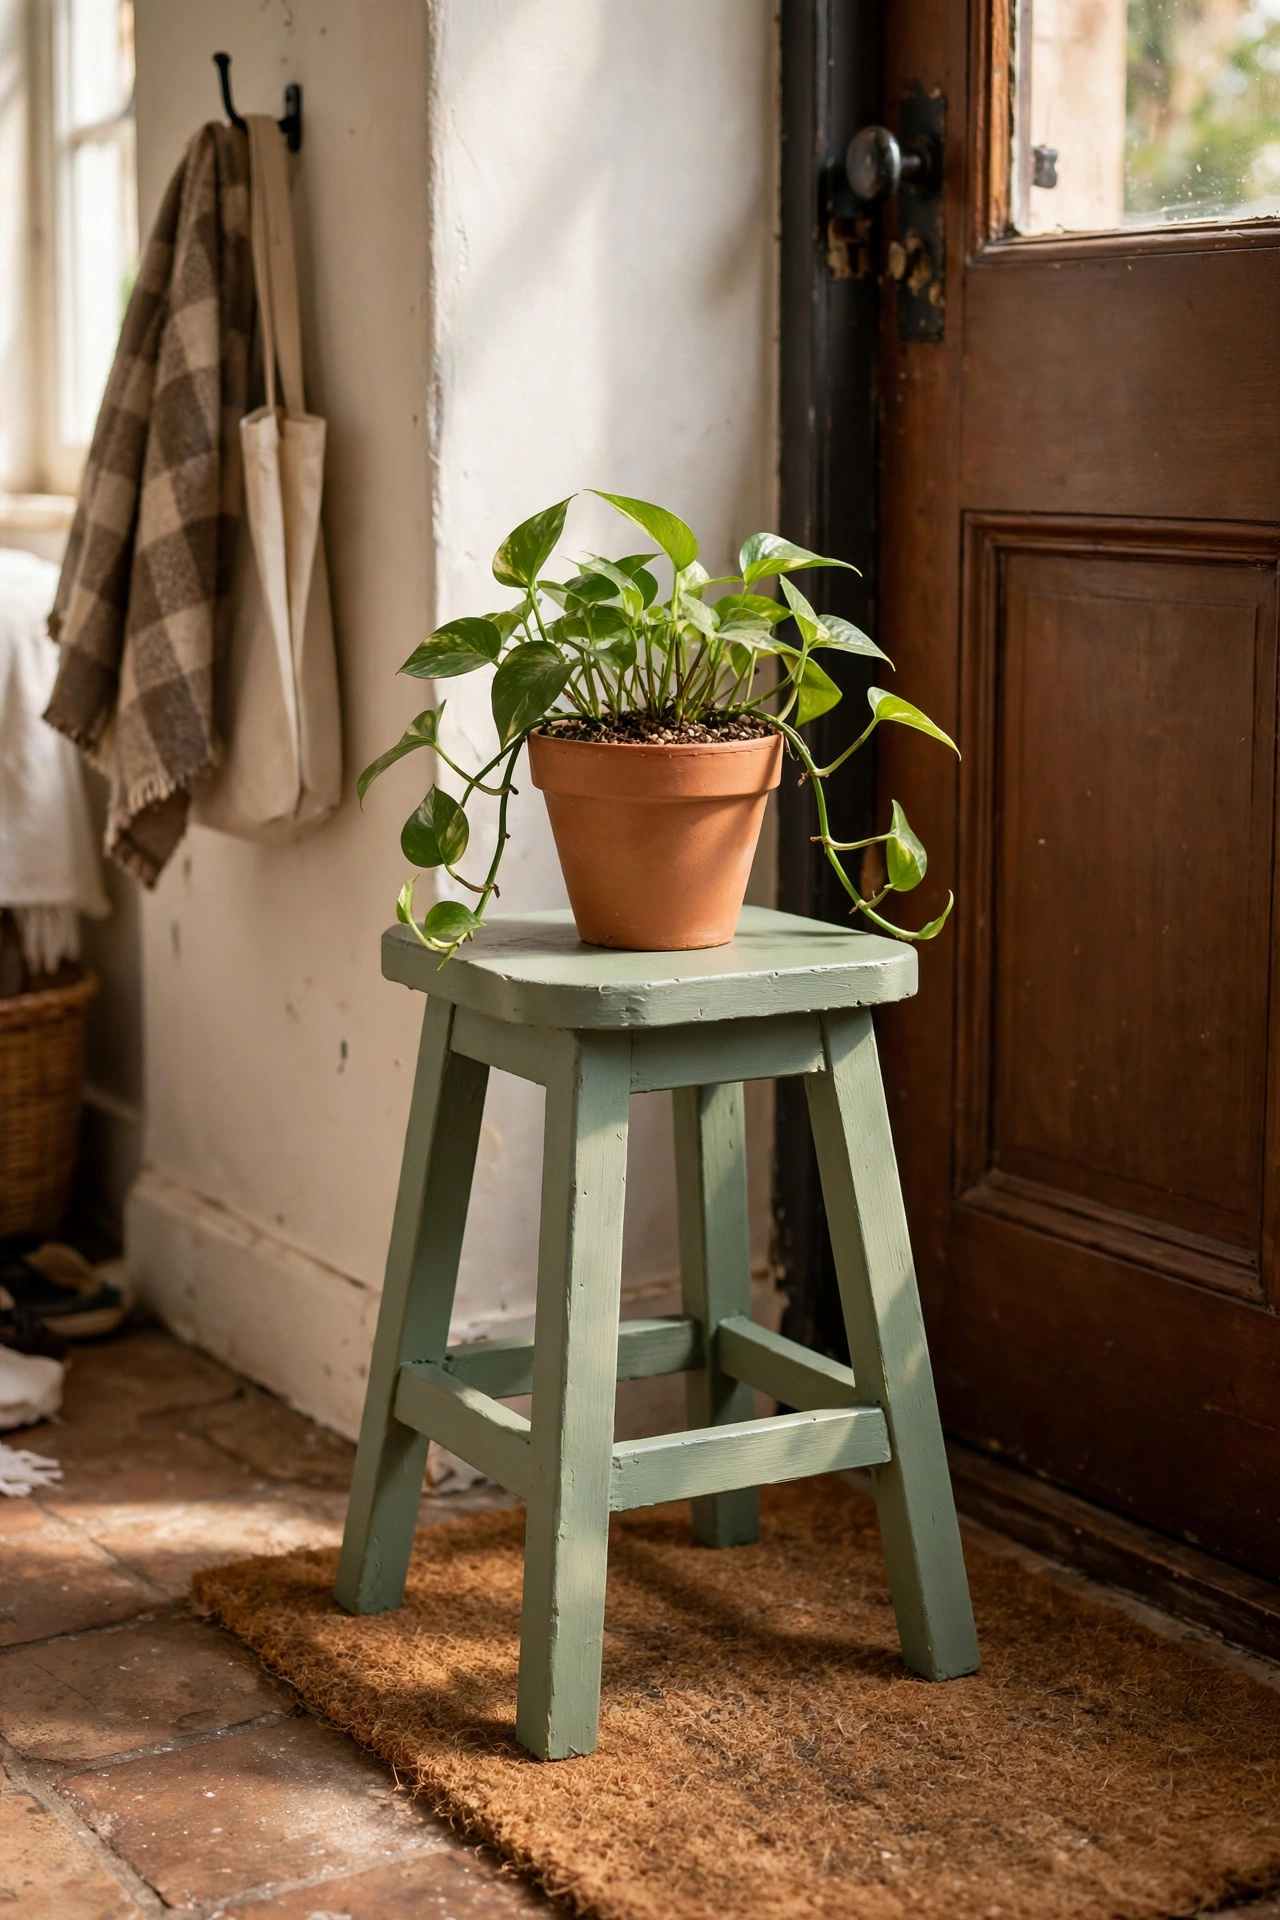
Every beginner should paint a stool before touching real furniture. It has legs, a seat, and curves, so you learn every technique in miniature. I painted mine sage green and it now lives by my front door holding a plant. Sand lightly, prime, and do two thin coats. If you mess up, you have wasted $3 of paint, not a dresser. I still test every new colour on a stool first. It takes an afternoon and builds real confidence. This has become one of my favourite corners of the house.
Cost: ~$5-8 | Time: 2 hours
4. Spray-Painted Picture Frames
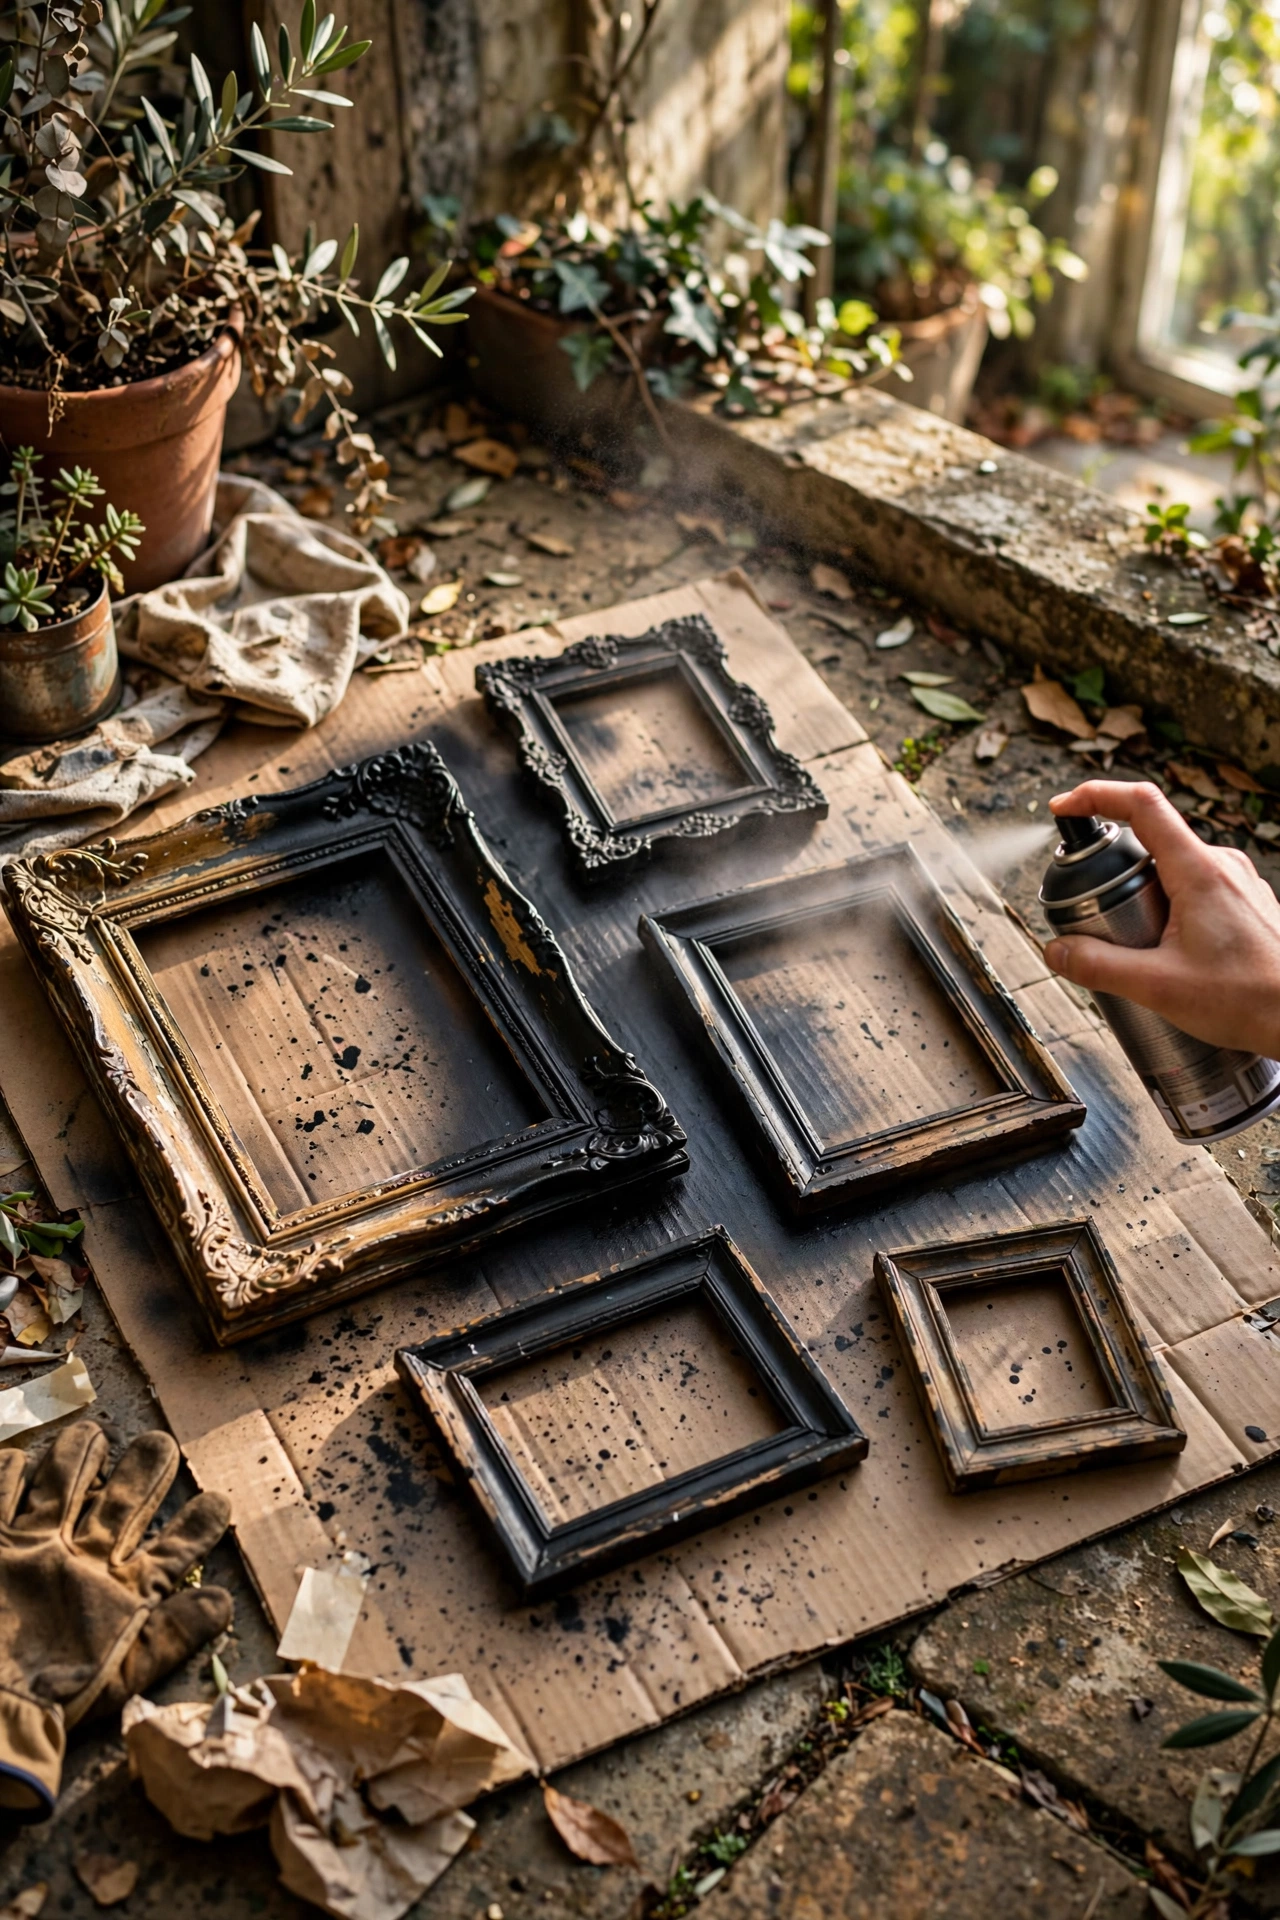
Spray painting old frames is the easiest painted project that exists. Lay them on cardboard, spray light coats from ten inches away, and flip when dry. I turned a box of gold plastic frames into matte black ones for my hallway gallery. The trick is patience between coats. I got impatient once and the paint pooled in the corners. Two light coats beat one heavy coat every time. Do it outside on a calm day. I did this on a whim and it turned out to be a keeper.
Cost: ~$5-8 | Time: 45 minutes
5. Painted Wooden Crate Storage
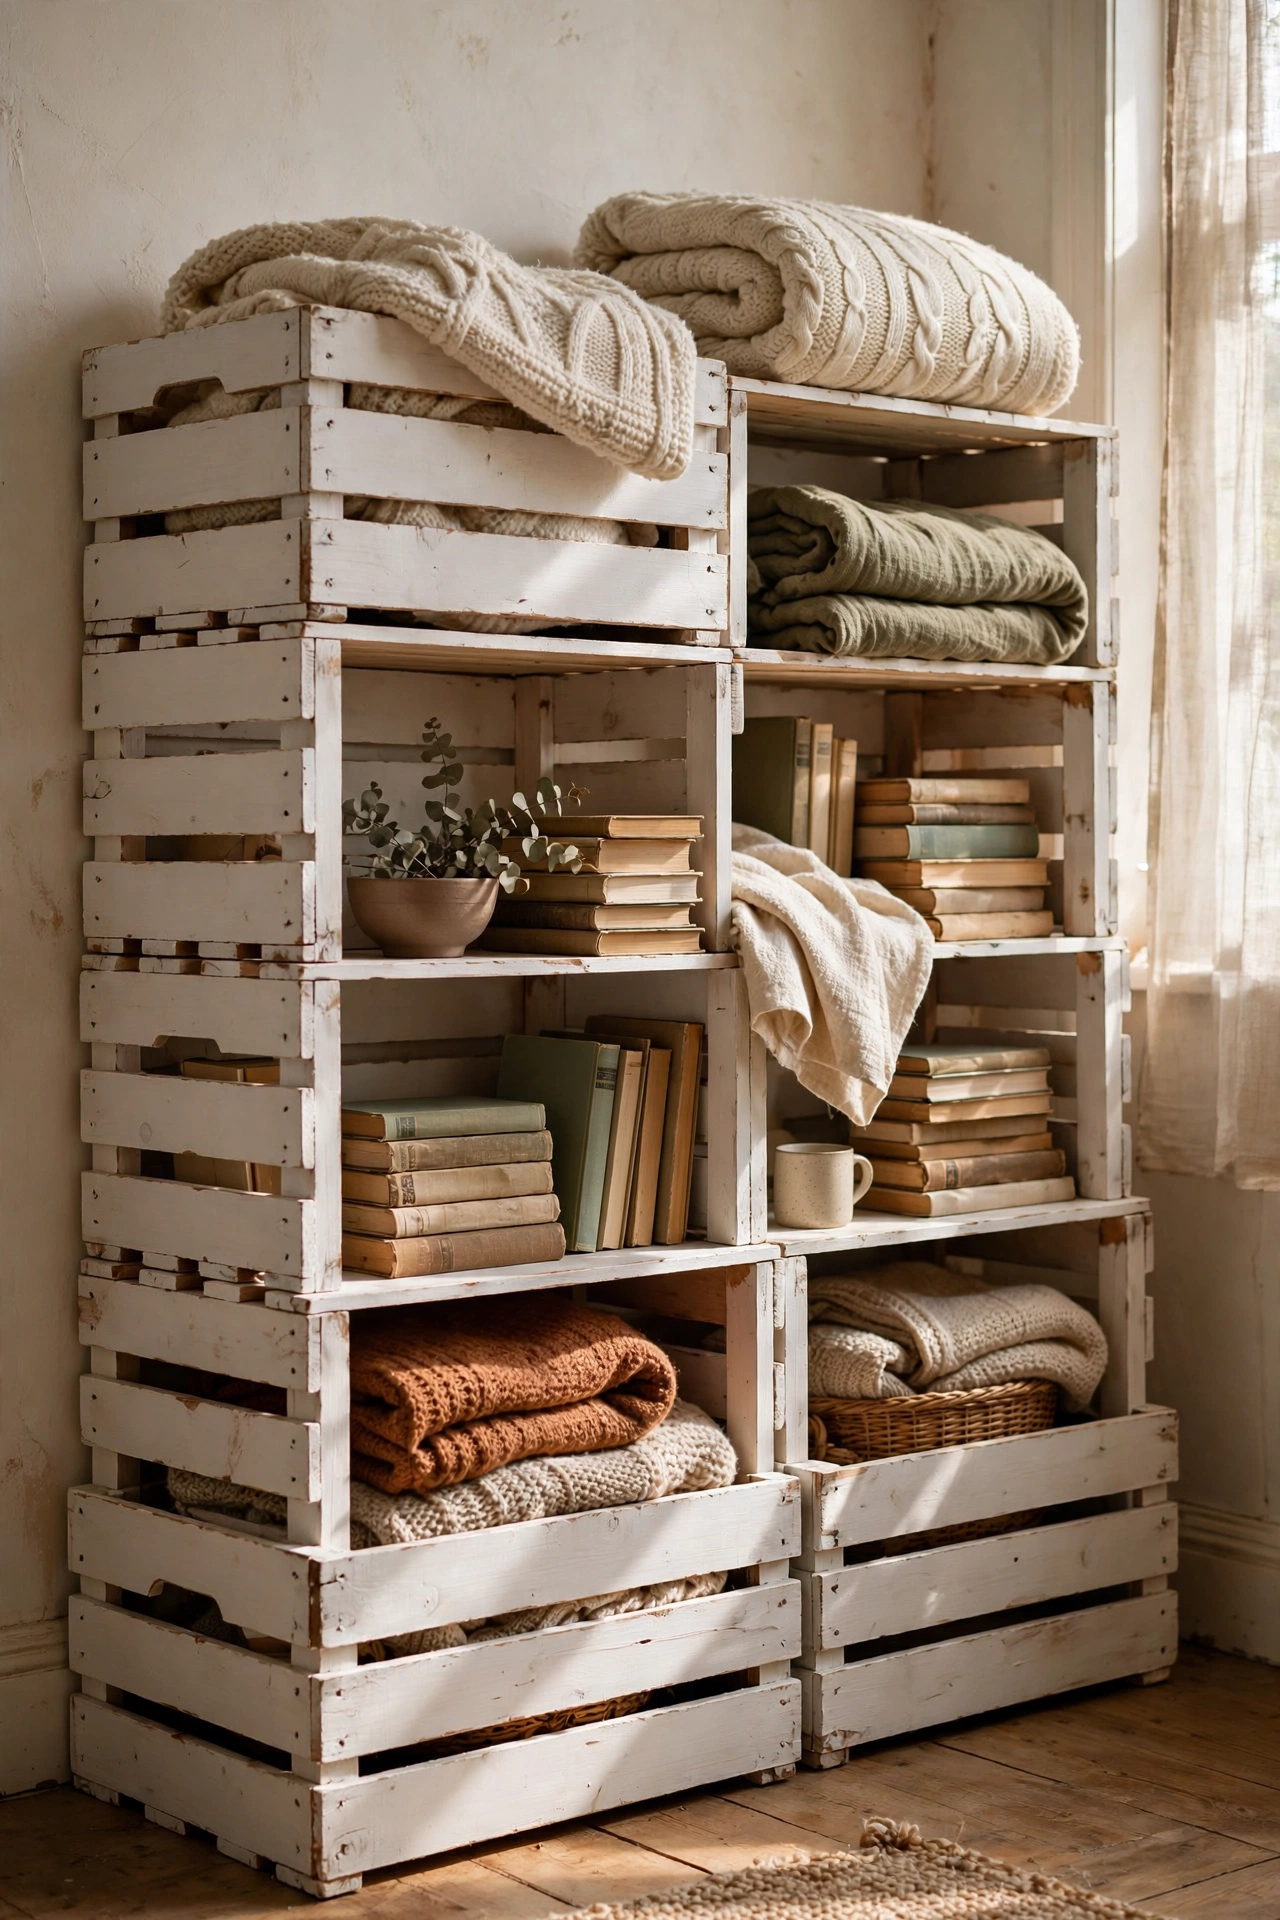
Wooden crates painted in a house colour make charming storage everywhere. I painted three crates warm white, stacked two and laid one sideways as a bookshelf. Sand the rough edges first or you will get splinters. A single coat of chalk paint is enough since the rustic look suits crates. I keep one by the sofa for blankets and one in the bathroom for towels. Screw them together if you stack them high. It blends in so well that visitors think it was always there.
Cost: ~$8-12 | Time: 1.5 hours
6. One-Colour Nightstand Refresh
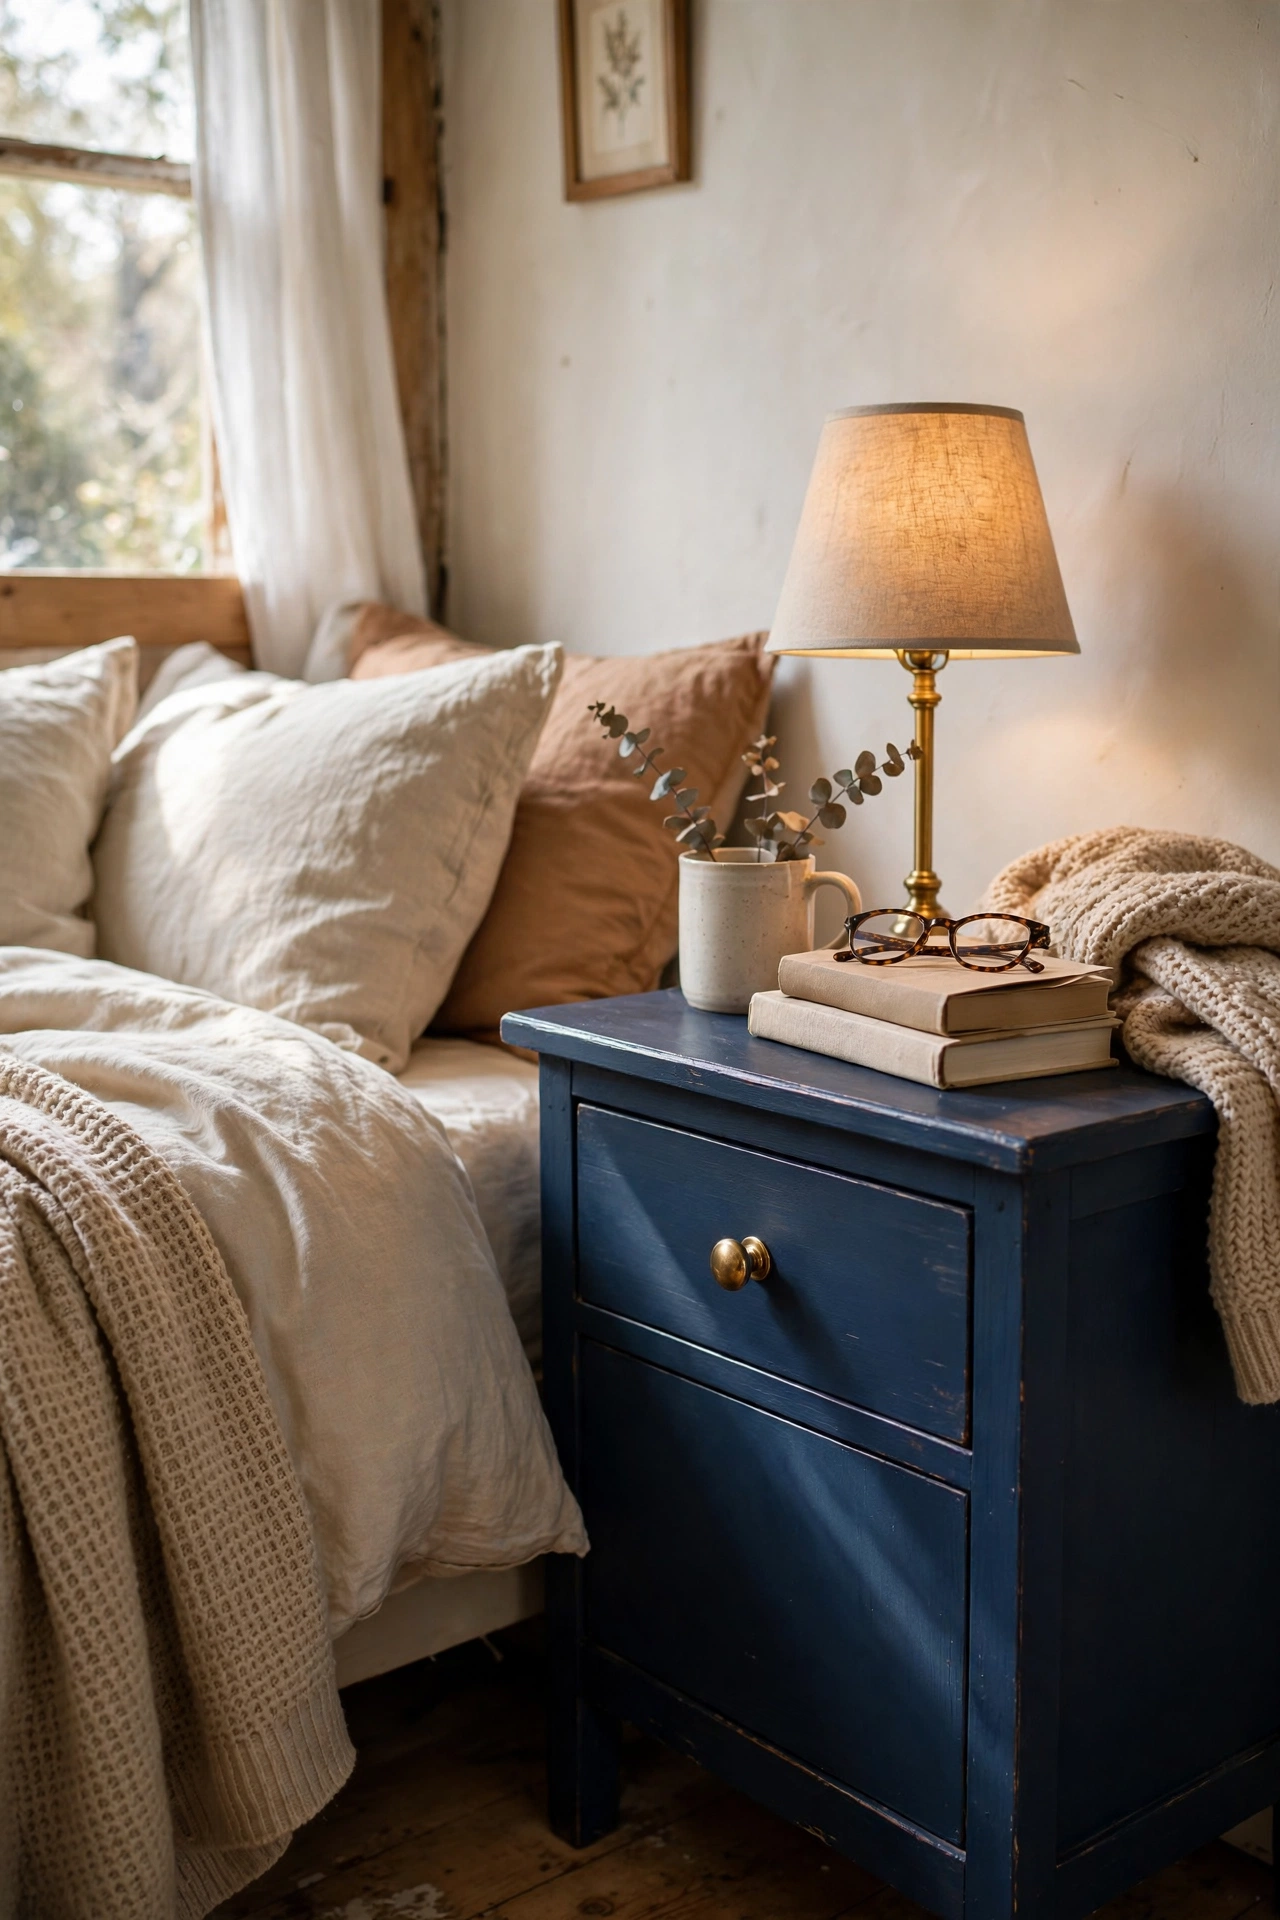
A nightstand is the perfect first real furniture piece: small enough to finish in a day. Remove the hardware, clean it well, and paint it one solid colour. I did mine in deep navy and swapped the knob for brass. The whole room felt more expensive. Paint the drawer fronts separately so you can lay them flat. My first nightstand had drips because I painted it upright. Lay pieces flat whenever you can. The upkeep is basically zero, which suits me perfectly.
Cost: ~$10-15 | Time: 3 hours plus drying
7. Painted Drawer Pulls and Knobs
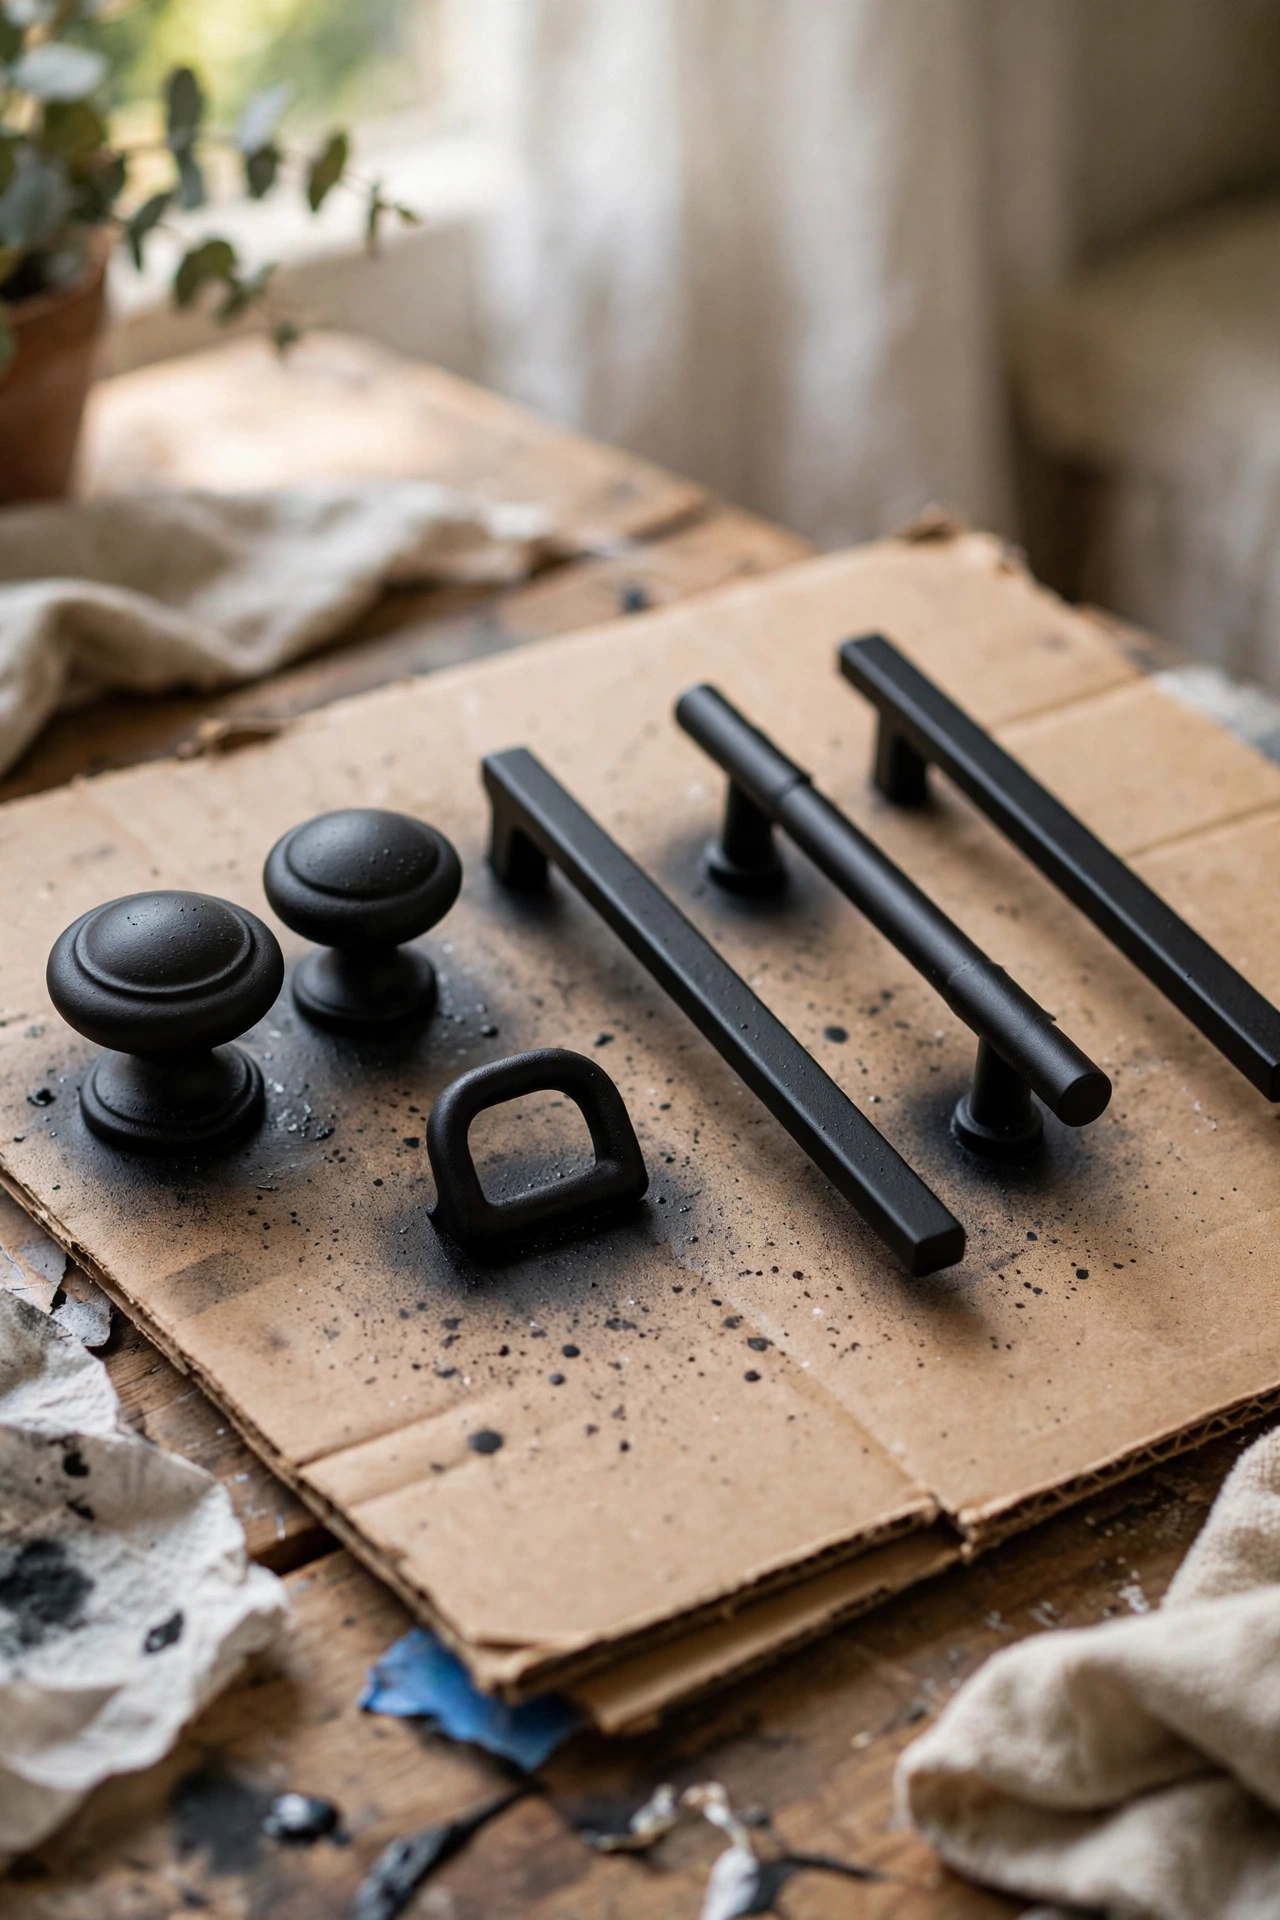
Spray painting old knobs is a tiny project with outsized impact. I sprayed dated brass pulls matte black on my kitchen drawers and the cabinets looked ten years newer. Remove them, clean with soapy water, and spray two light coats. Let them cure for a full day before reinstalling or the paint will chip. I rushed this once and had to redo half of them. Patience here saves real work later. I keep meaning to do a second one for another room.
Cost: ~$5-8 | Time: 1 hour plus curing
Pro tip: Clean every piece with a degreasing cleaner before you paint. I skipped this once and the paint peeled off in sheets within a month. Kitchen and bedroom furniture holds years of oily residue.
Tables and Storage Pieces
8. Two-Tone Painted Coffee Table
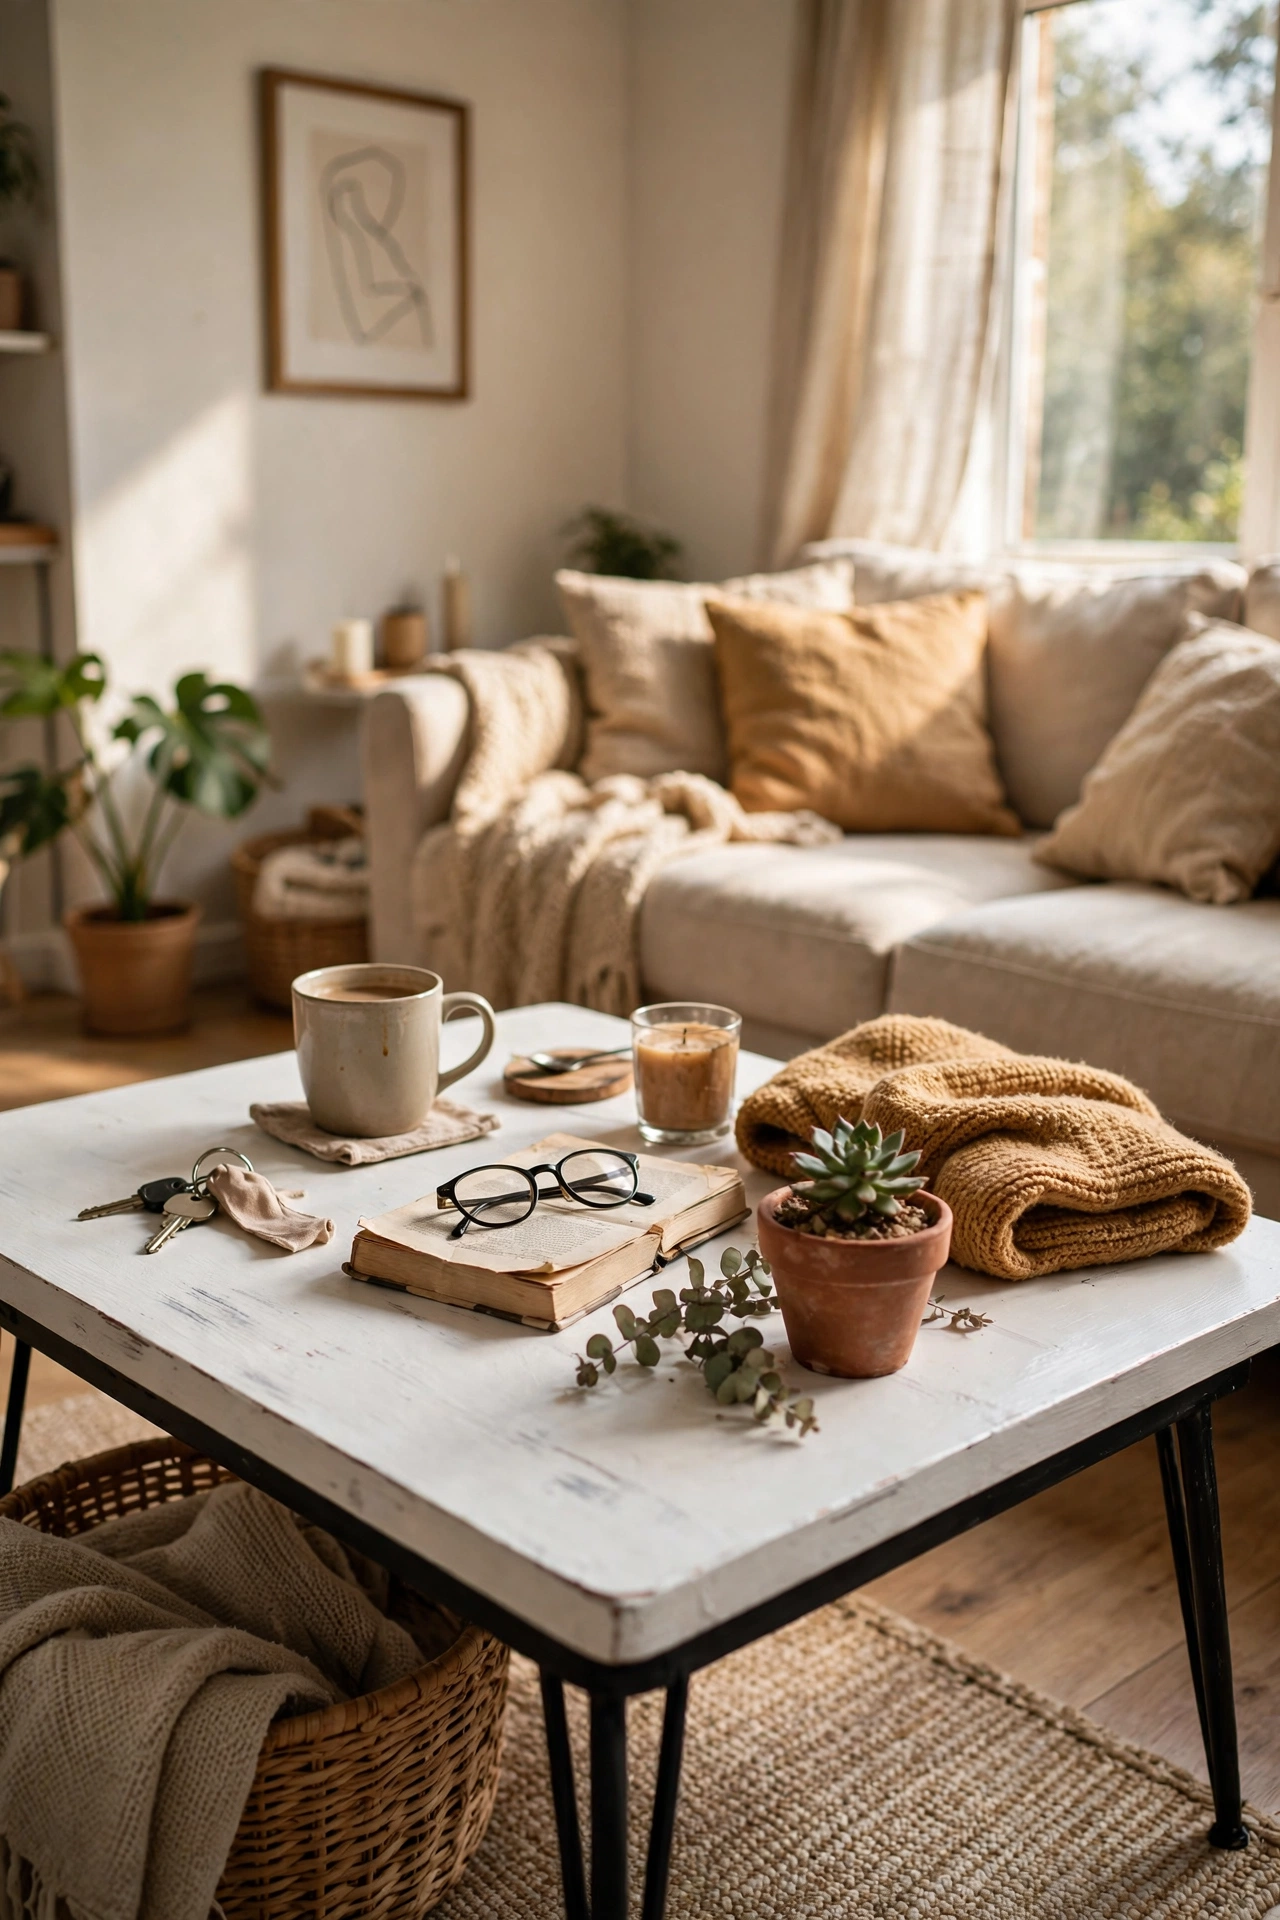
Painting the top and base in different tones gives a coffee table a custom look. I painted my table top warm white and the legs soft black, and it suddenly looked like a designer piece. Use painter’s tape for a crisp line where the colours meet. Seal the top with extra topcoat because coffee tables take abuse. My first two-tone attempt bled because I removed the tape too late. Pull the tape while the paint is still slightly tacky for the sharpest line.
Cost: ~$12-18 | Time: 3 hours plus drying
9. Painted Dresser with New Hardware
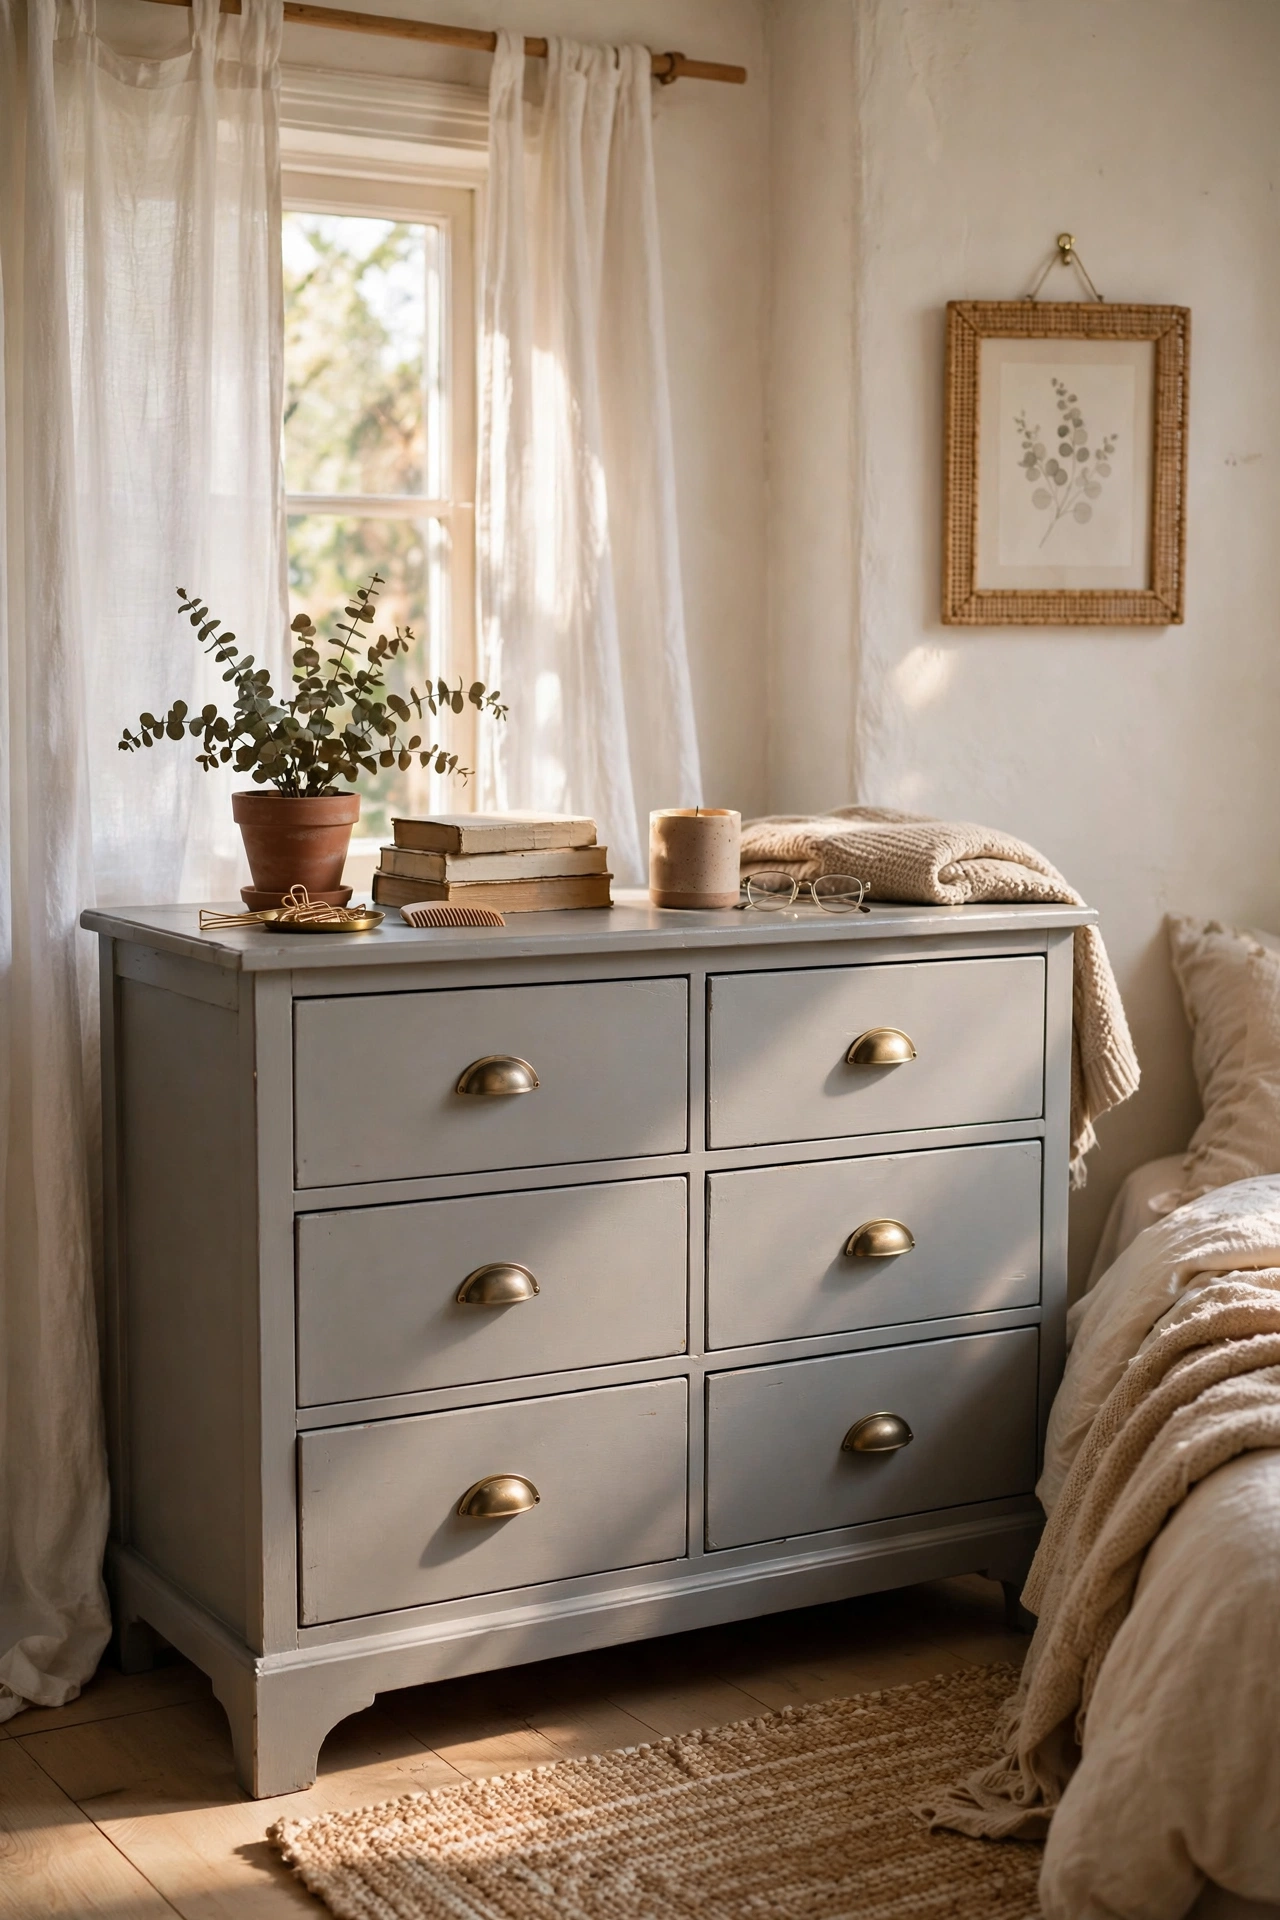
The classic dresser makeover: solid paint colour plus new pulls. I found a six-drawer dresser for $20, painted it soft grey, and added brushed brass cup pulls. The hardware cost more than the dresser but it was worth it. Remove all drawers and paint them separately. Label the drawers on the back with tape so they go back in the right slots. I skipped labelling once and spent an hour sanding drawers to fit. Learn from me. It was the finishing touch the space had been missing.
Cost: ~$25-35 | Time: 4 hours plus drying
10. Colour-Dipped Table Legs
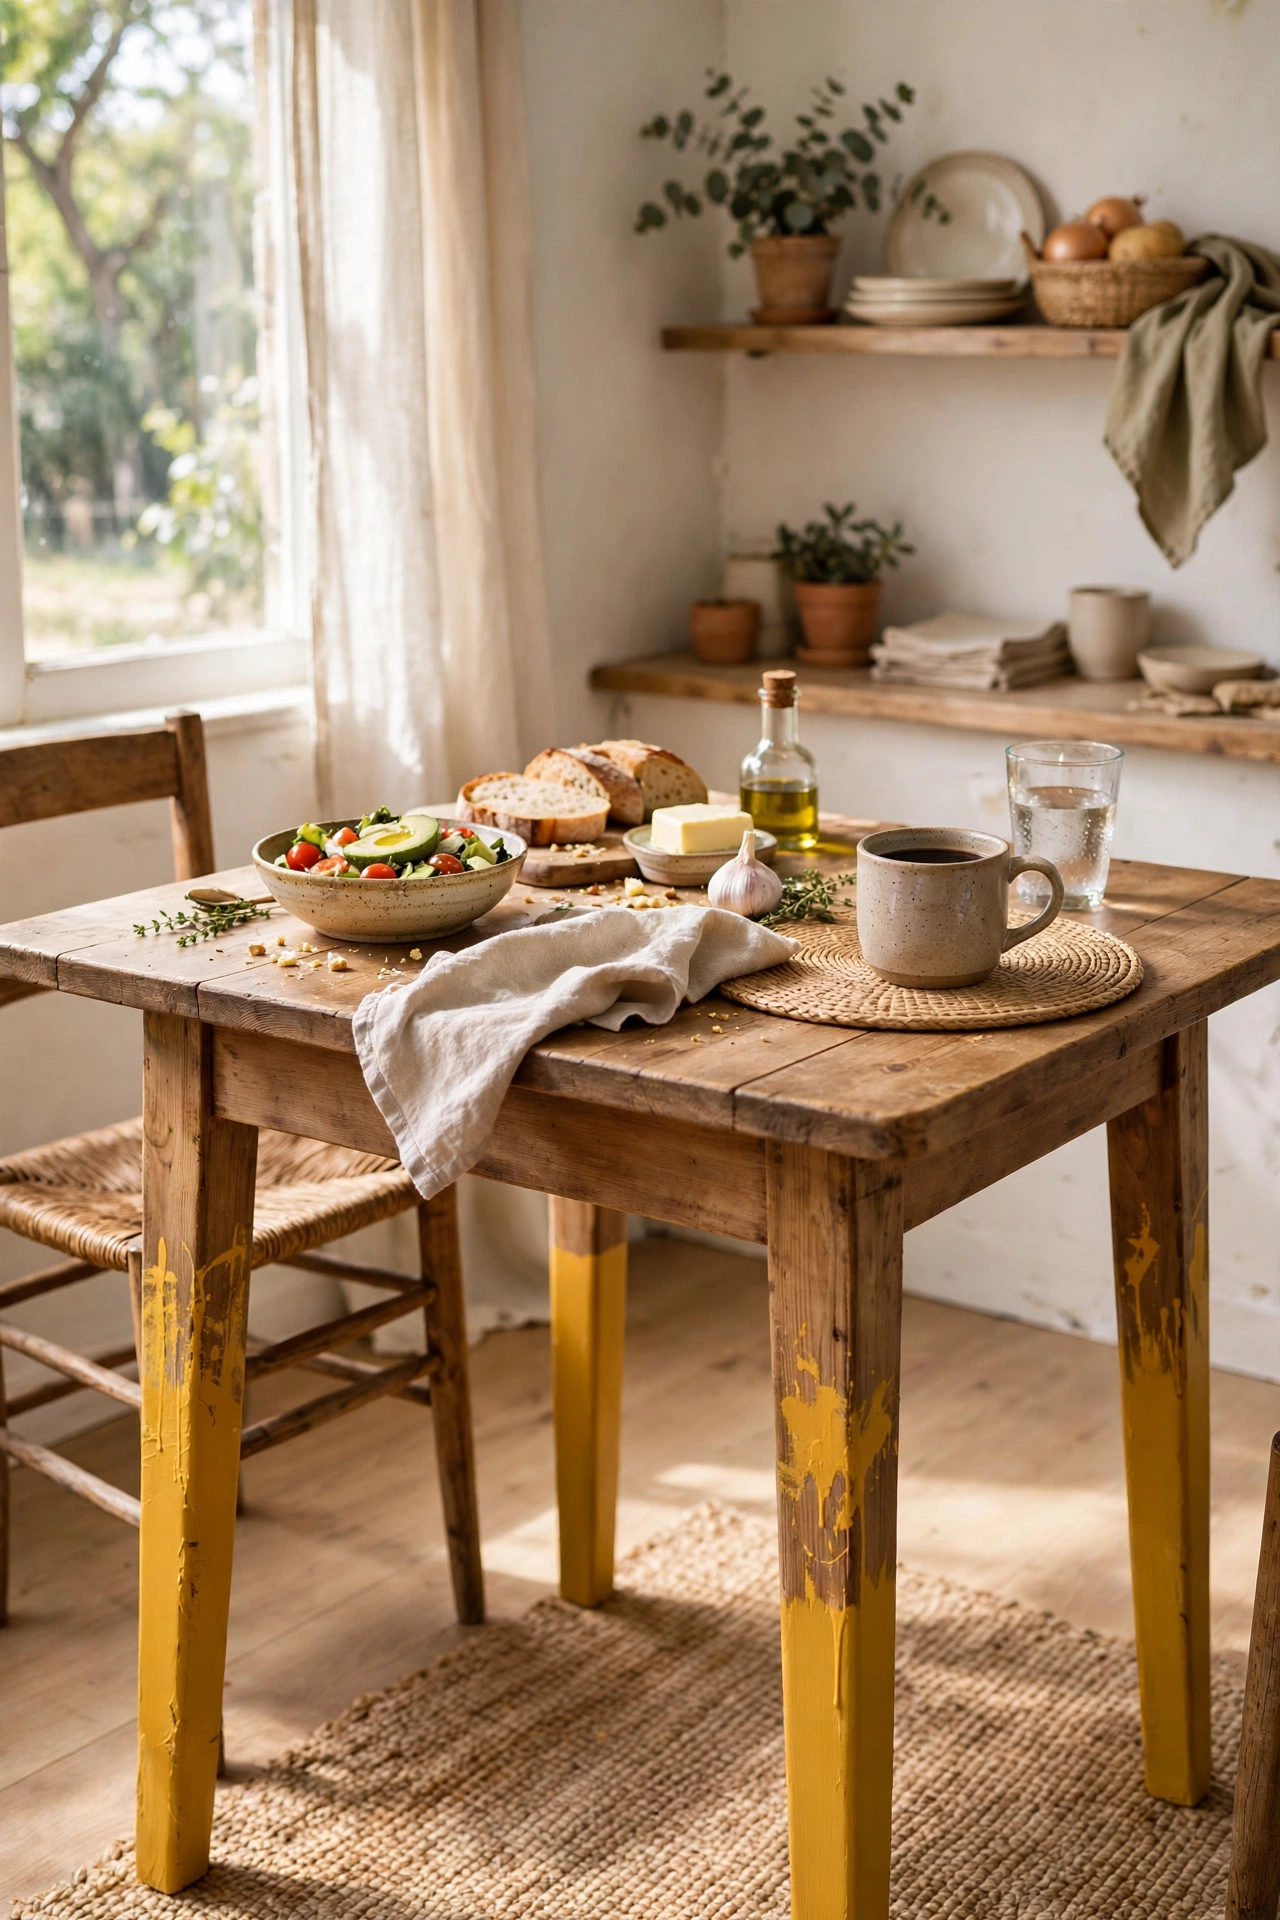
Dipping just the bottom of table legs in paint is a playful modern touch. Tape a straight line around each leg, paint below the line in a bold colour, and remove the tape. I dipped my dining table legs in mustard yellow and it became the talking point of the room. The tape line is everything, so press it down firmly. Measure the dip height on every leg so they match. Uneven dips look like a mistake, even dips look like design.
Cost: ~$8-12 | Time: 2 hours
11. Painted Bookshelf Back Panel Pop
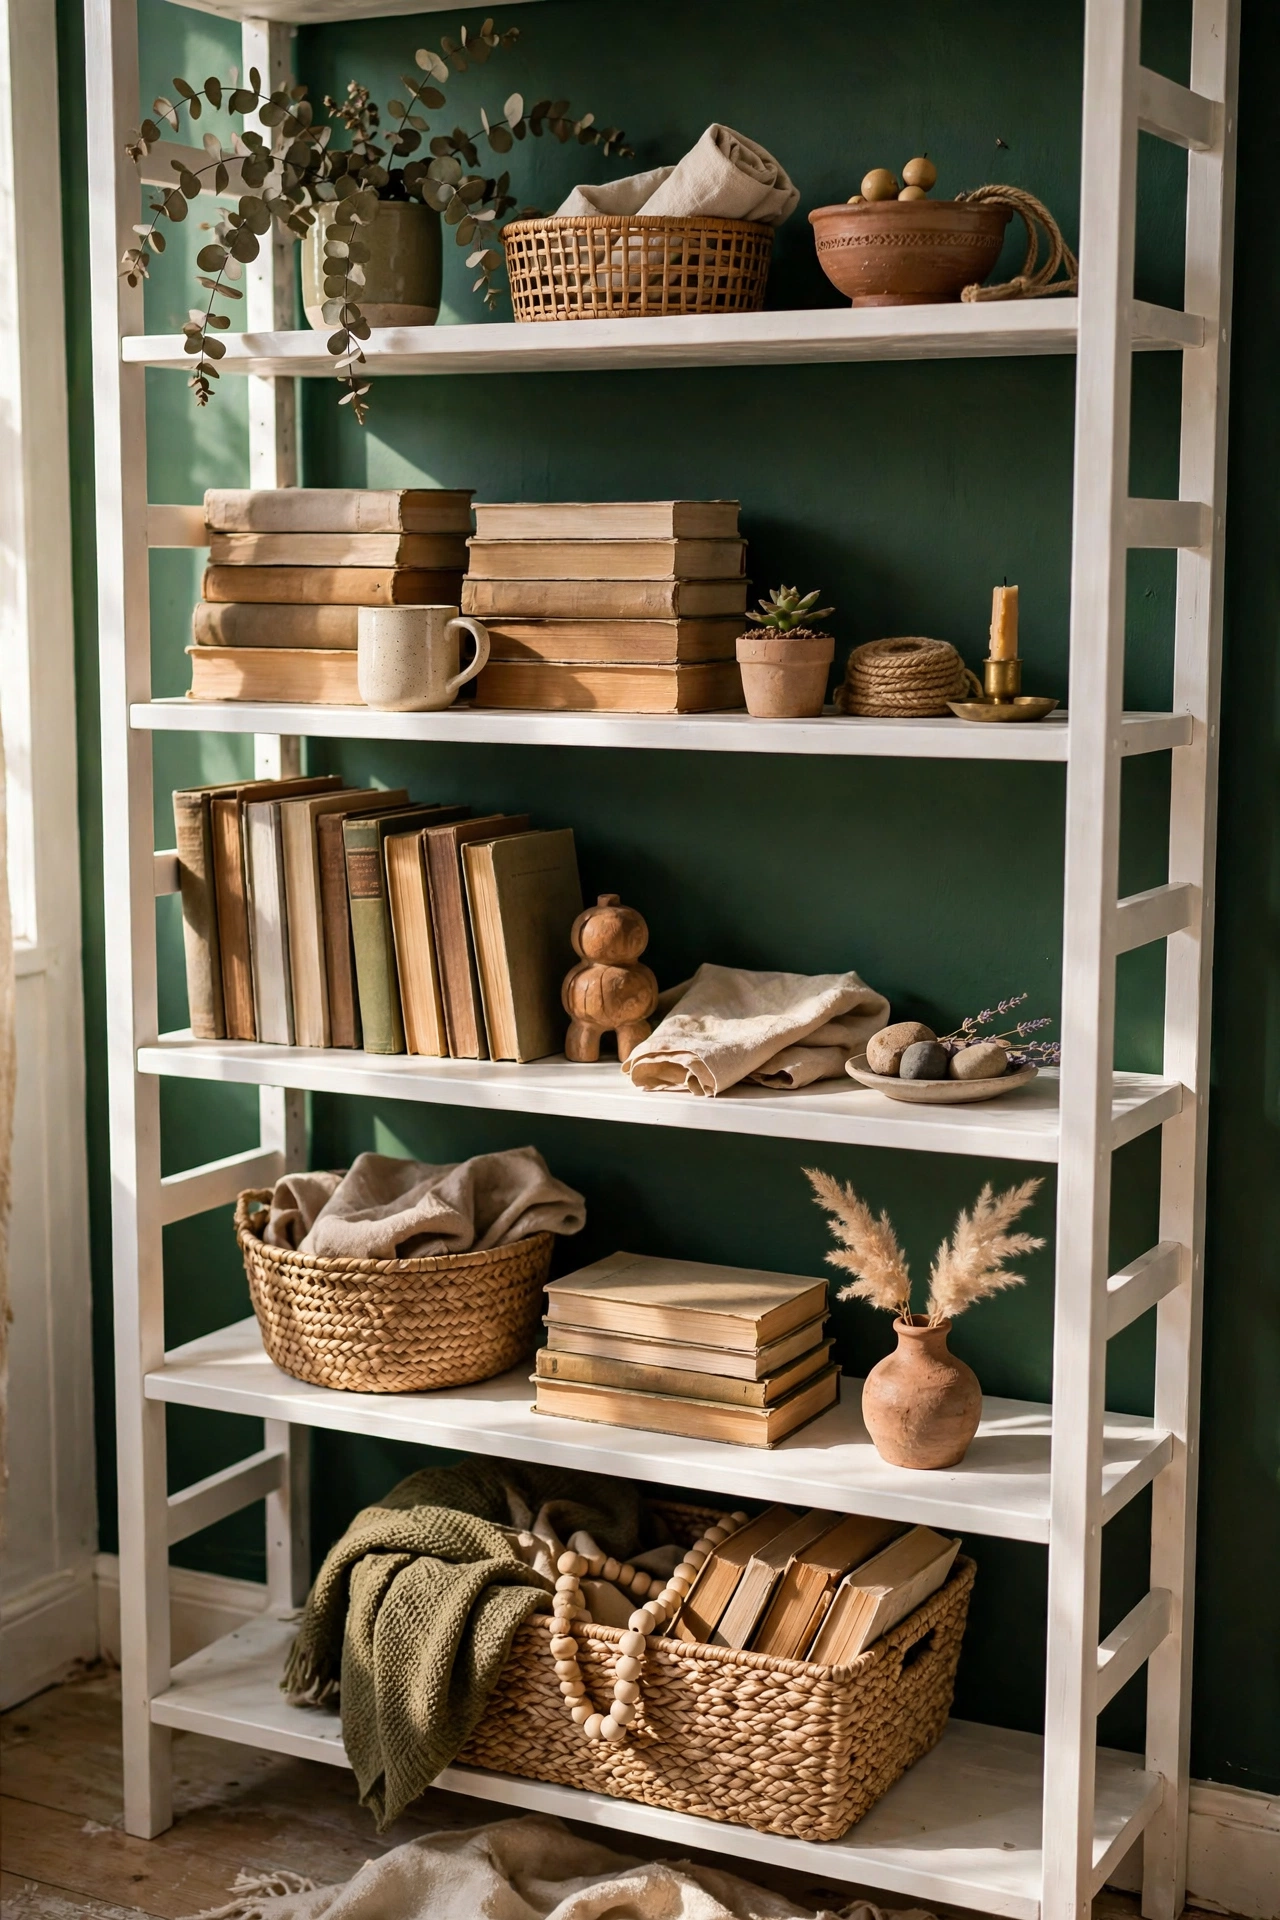
Painting just the back panel of a bookshelf adds colour without committing the whole piece. I painted the back of my white bookshelf deep green and my books suddenly looked styled. Remove the back panel if you can and paint it flat. If it is fixed, tape carefully and use a small roller. This is a great renter-friendly trick too. The contrast makes everything on the shelves pop. I get compliments on this more than any other project. Honestly, it looks like something from a much pricier shop.
Cost: ~$8-12 | Time: 2 hours
12. Chalk-Painted Filing Cabinet
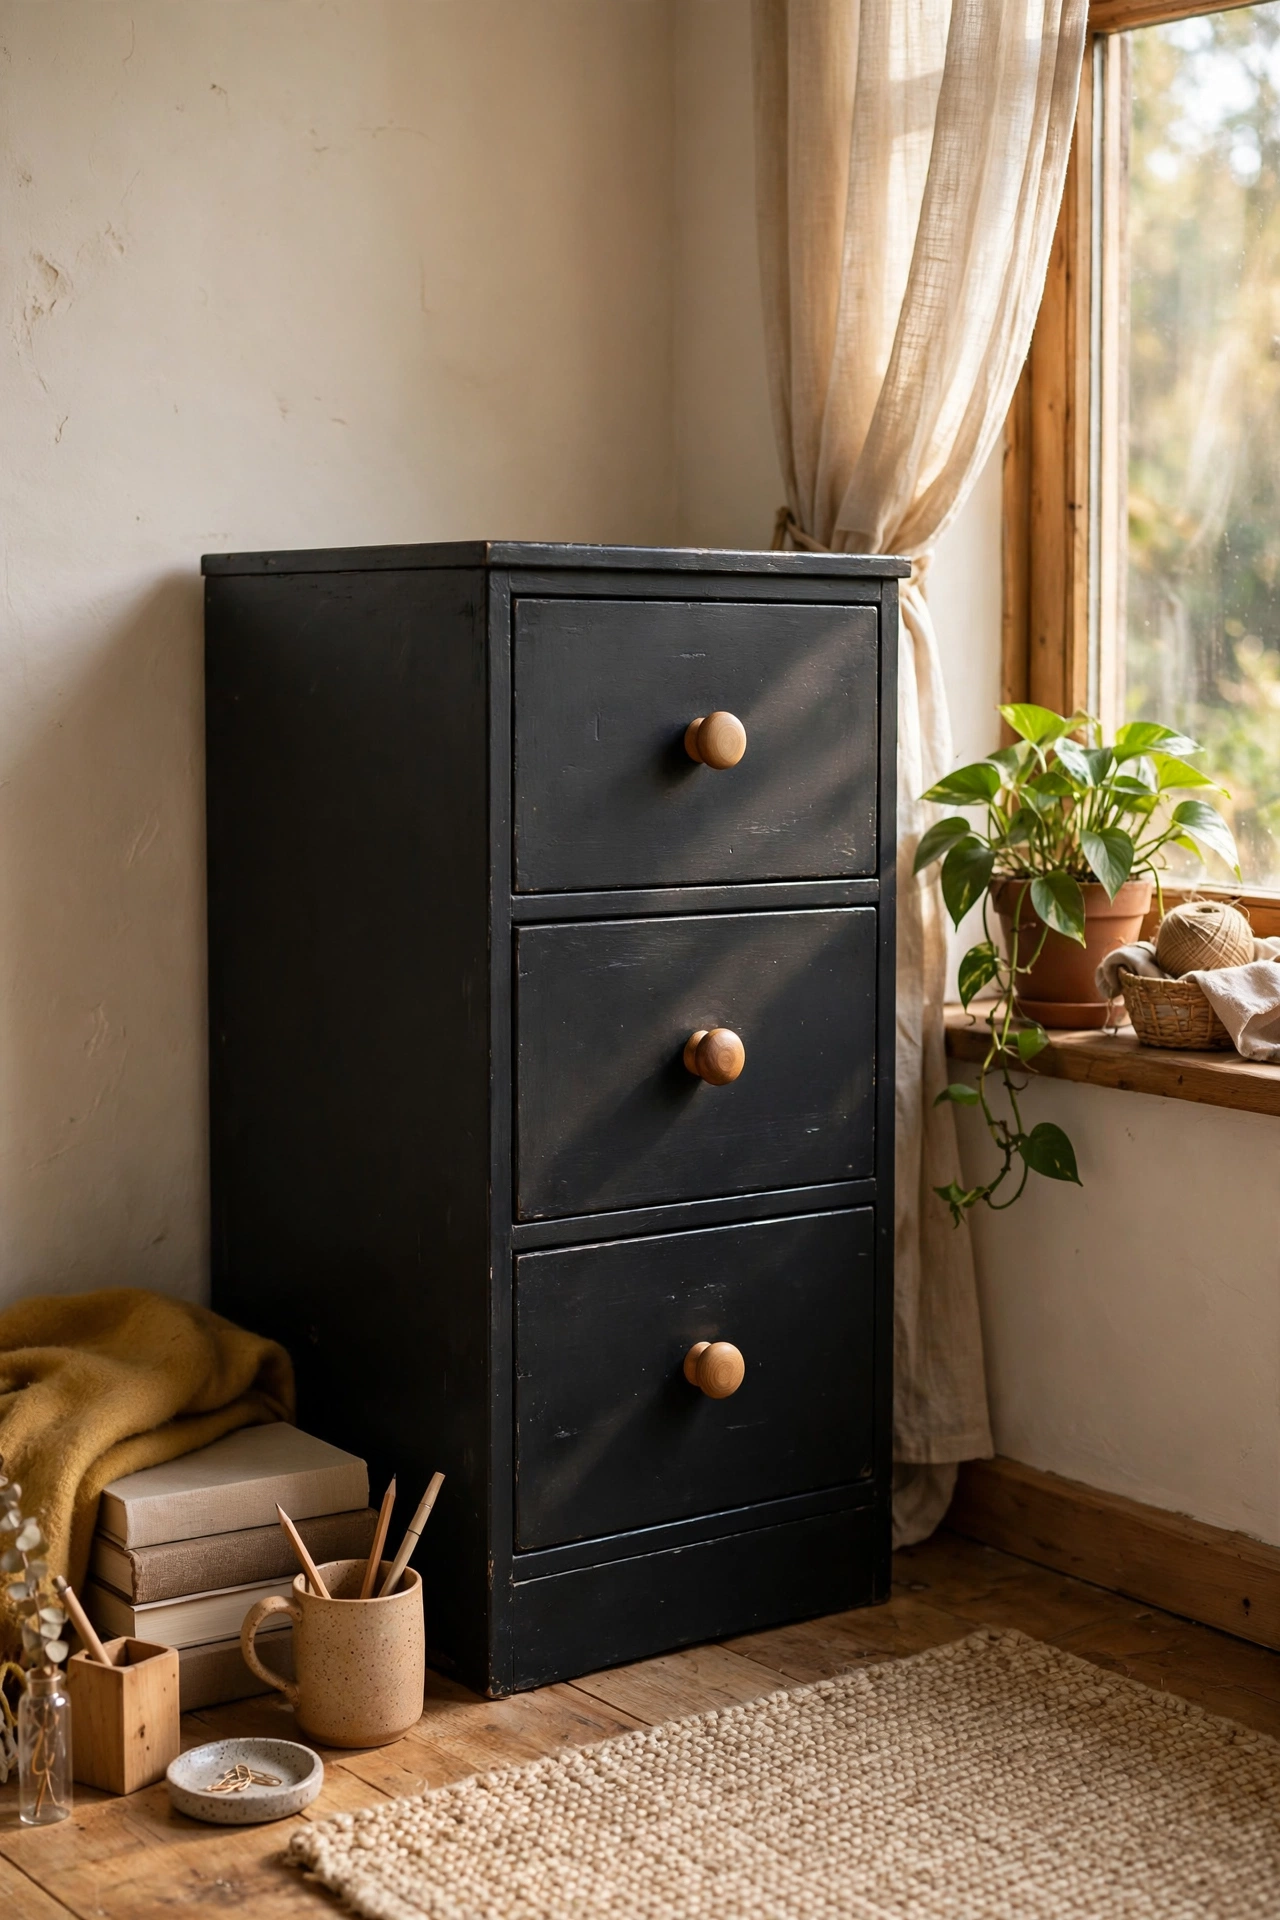
An ugly metal filing cabinet becomes office decor with chalk paint. Clean it well, spray a metal primer, then brush on two coats of chalk paint. I turned a beige cabinet into a soft black one that looks like expensive office furniture. The drawers slide fine if you paint thinly and let them cure. My first cabinet stuck because I closed the drawers too soon. Leave them open for two days. Add wooden knobs for warmth. I catch myself admiring it more than I expected.
Cost: ~$14-20 | Time: 3 hours plus curing
13. Painted TV Stand in Soft Black
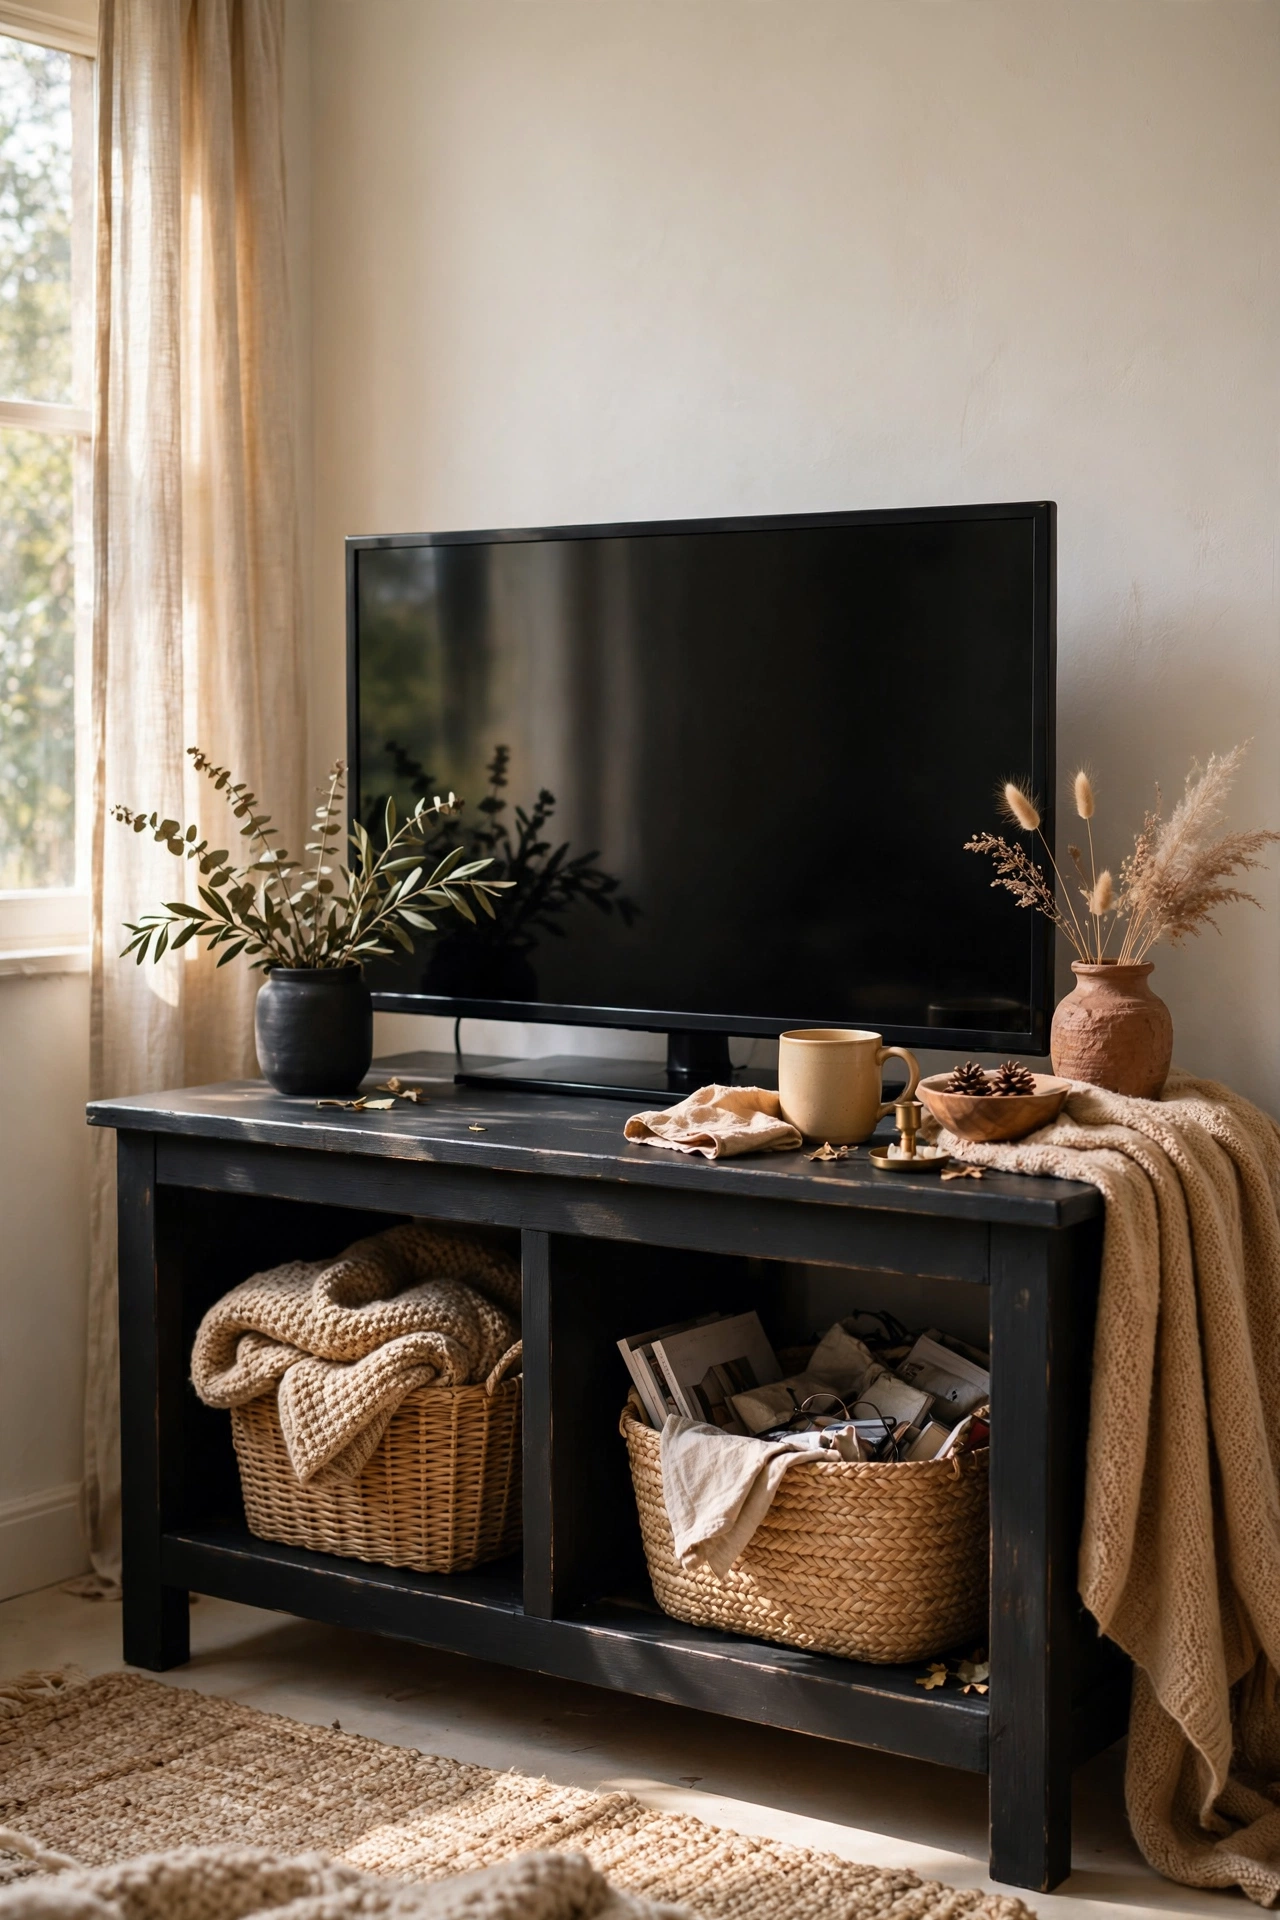
Soft black paint makes a TV stand disappear against the screen and looks far more expensive than brown wood. I painted mine in a warm black and the whole media wall calmed down. Use a foam roller for the flat surfaces to avoid brush marks. Drill cable holes in the back before you paint if you need them. I forgot once and had to touch up after drilling. Plan the cables first, paint second. It has survived kids, pets, and daily life without a scratch.
Cost: ~$14-20 | Time: 3 hours plus drying
14. Linen Cabinet Painted Sage Green
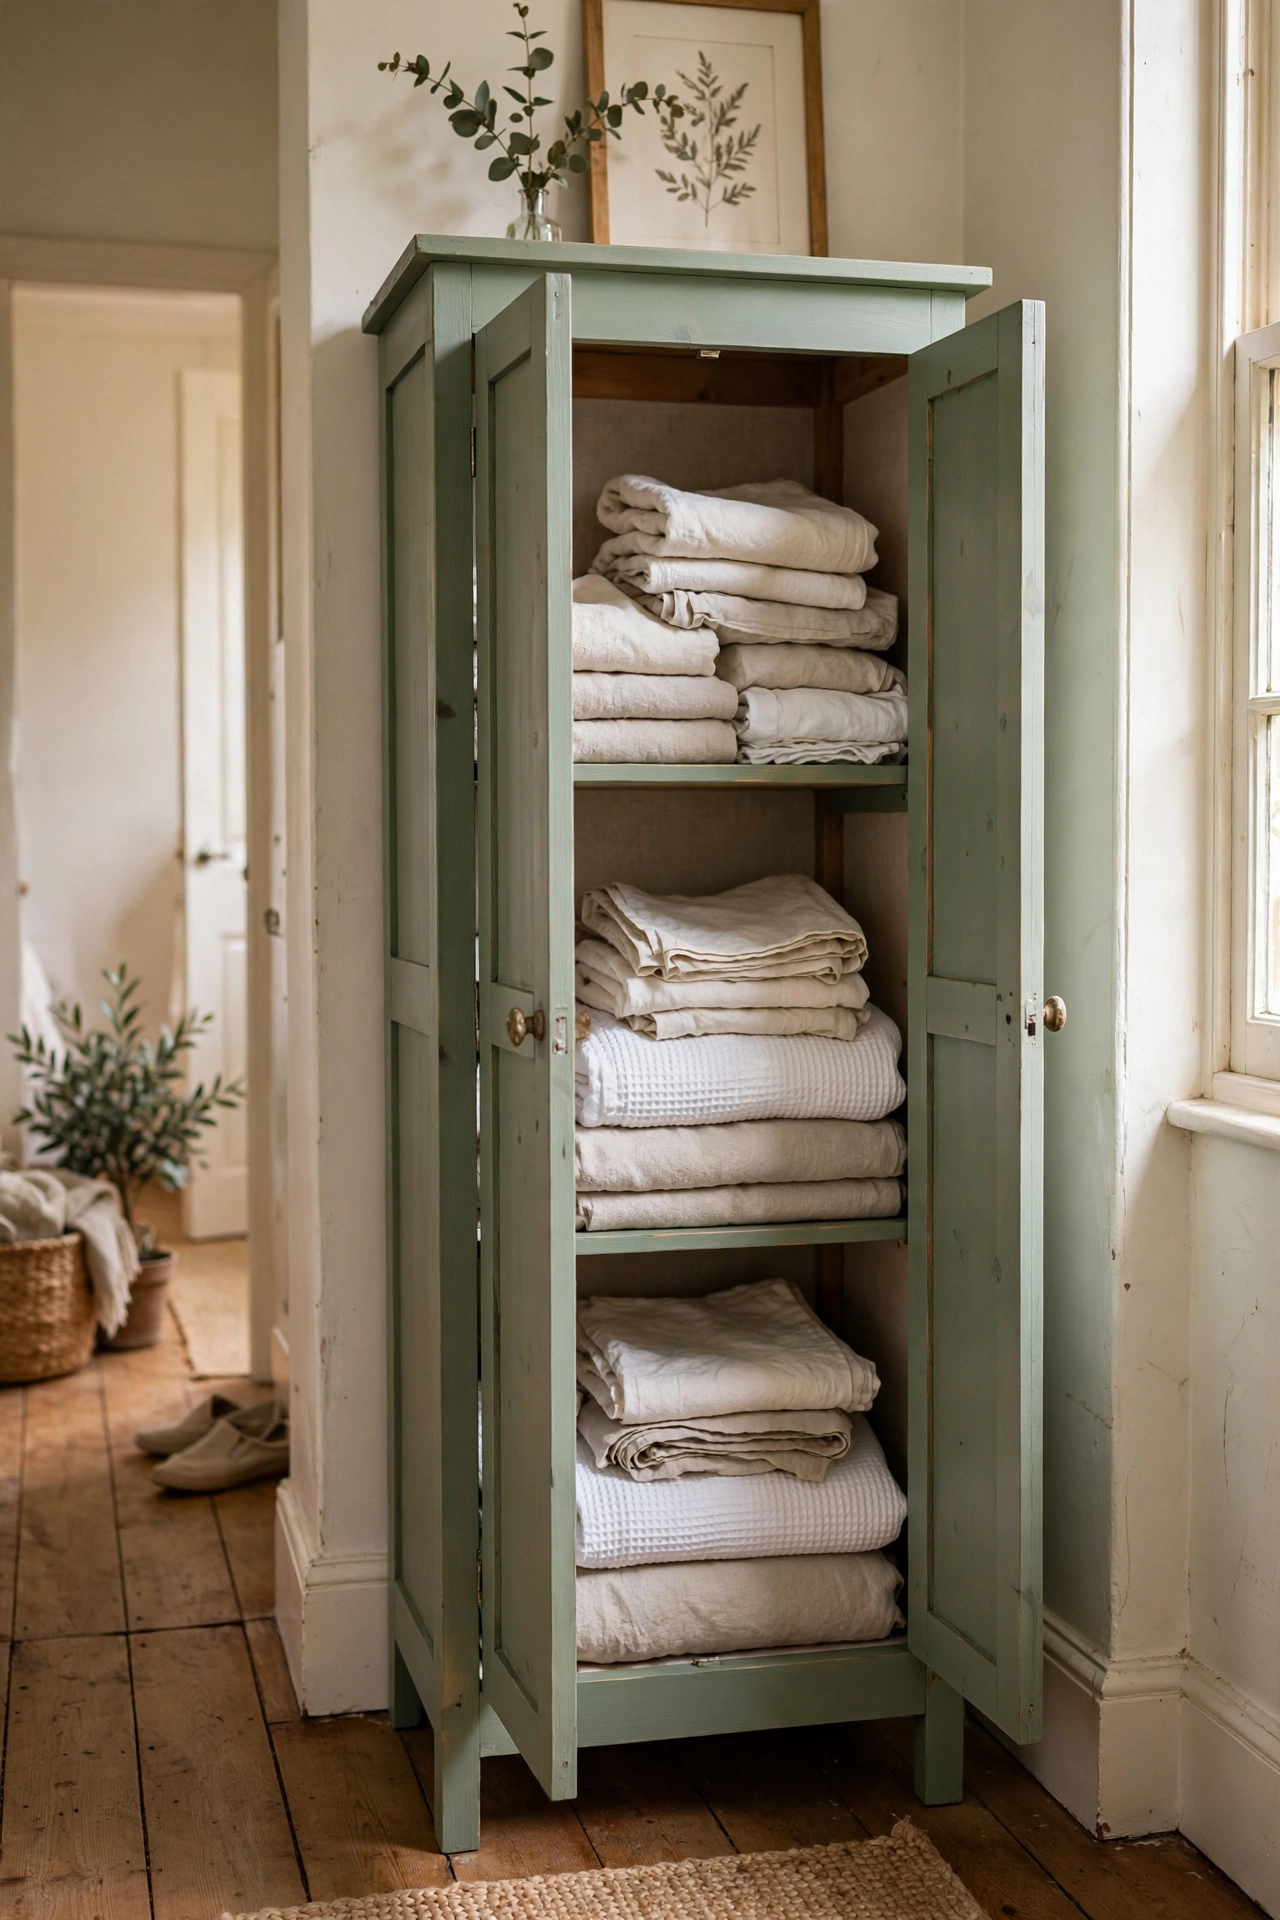
Sage green is the friendliest colour for beginners because it suits every wood tone around it. I painted a pine linen cabinet sage and it finally looked intentional in my hallway. The colour hides brush strokes better than white. Do the inside of the doors too, because you see them every time you open it. I left mine unpainted at first and it looked unfinished. Two coats inside and out makes it feel professional. I would do this again in a heartbeat.
Cost: ~$14-20 | Time: 4 hours plus drying
Pro tip: Buy a good angled brush for furniture. My cheap brushes shed bristles into the paint on every early project. One decent brush, cleaned properly, lasts for dozens of pieces.
Chairs and Seating
15. Painted Dining Chairs in One Bold Colour
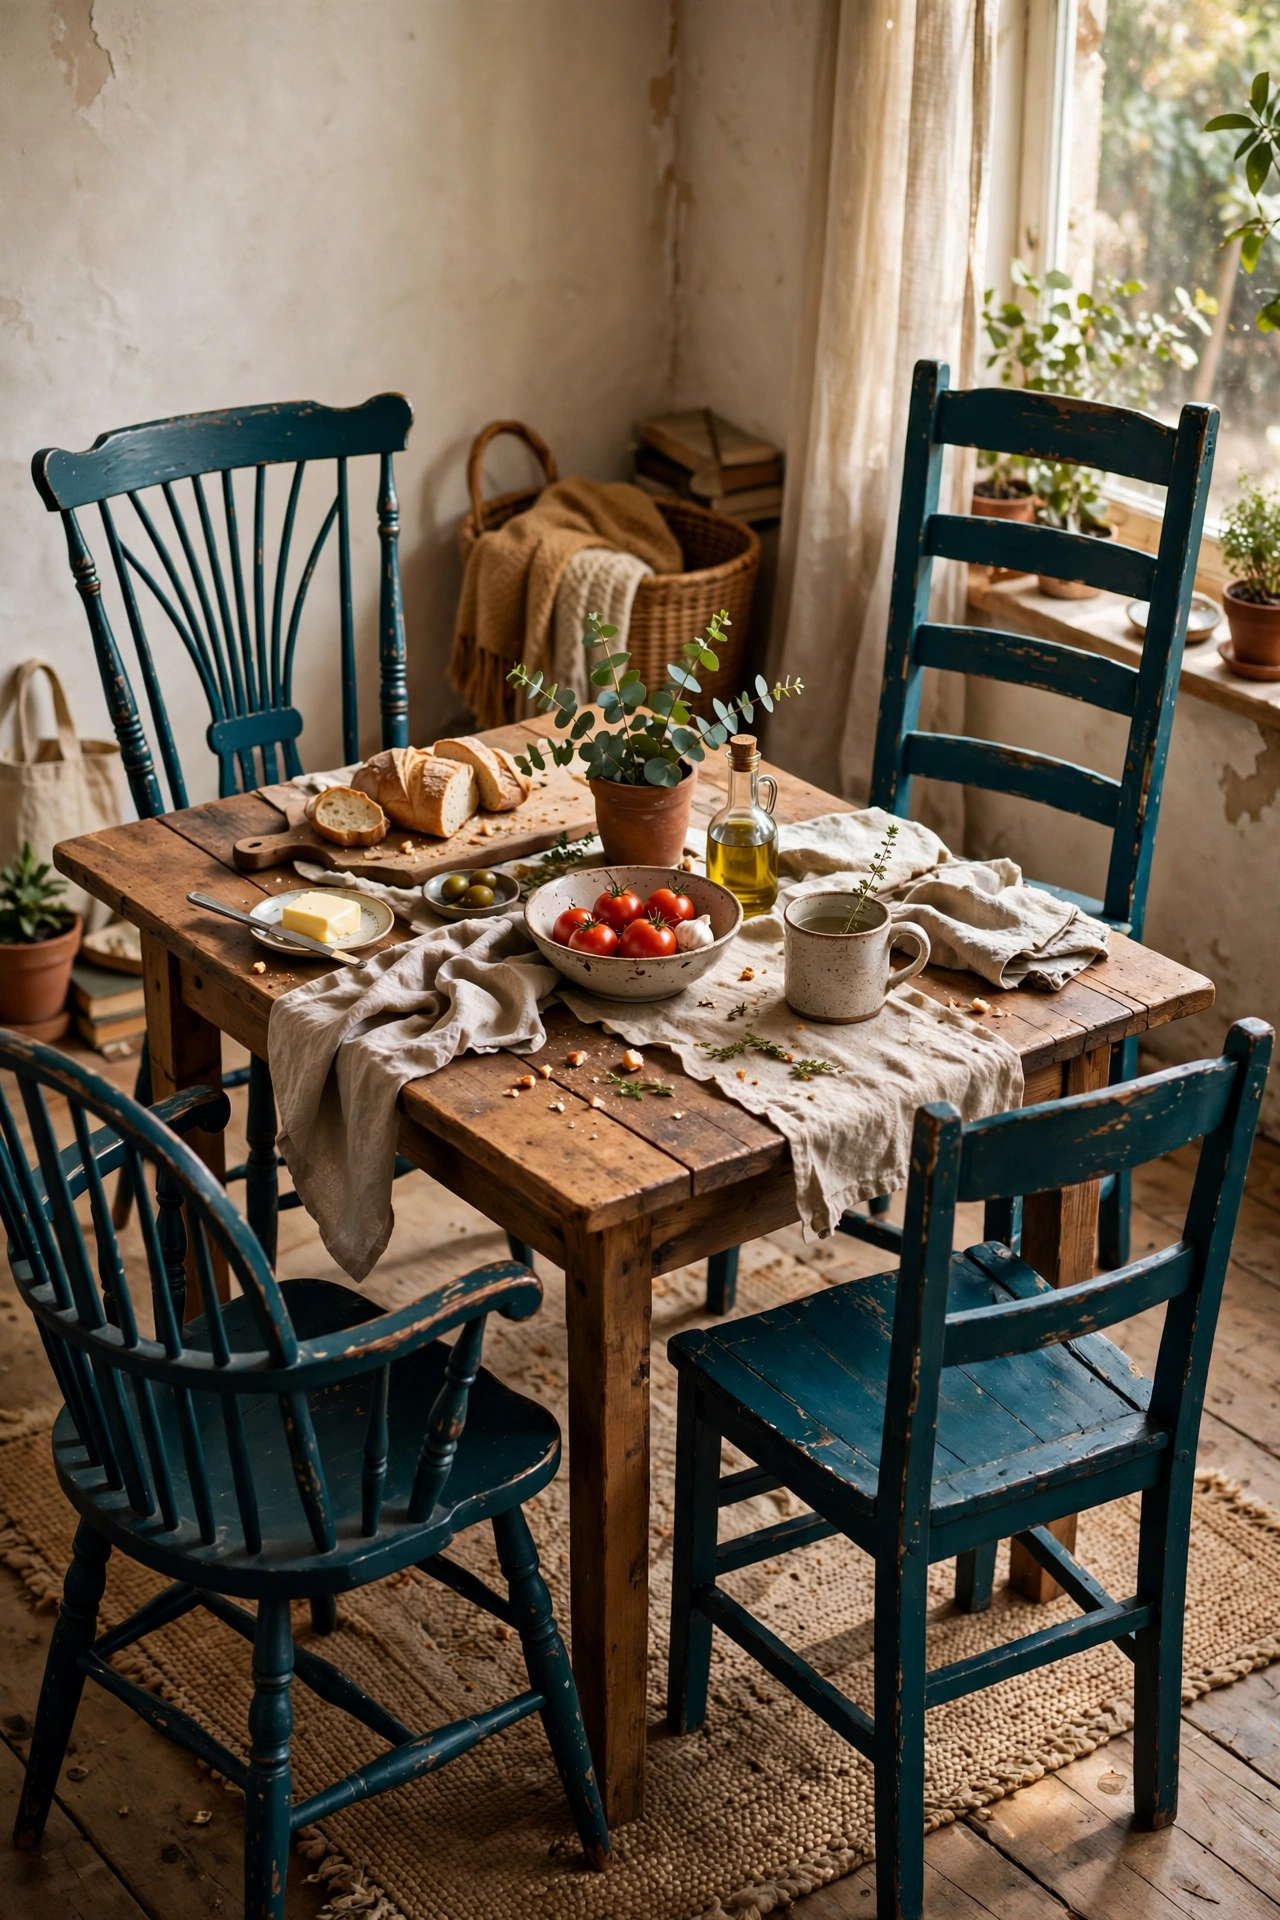
Mismatched dining chairs painted one bold colour look like a deliberate set. I collected four different wooden chairs and painted them all deep teal. Suddenly they belonged together. Spindles are fiddly, so use a small brush and thin paint. Spray paint is faster for chairs with lots of spindles. I brushed my first set and it took all day; the second set I sprayed and finished in an hour. Same paint family, different method, huge time saving. I get asked about this one more than anything else in the room.
Cost: ~$14-20 | Time: 3-4 hours
16. Two-Tone Painted Rocking Chair
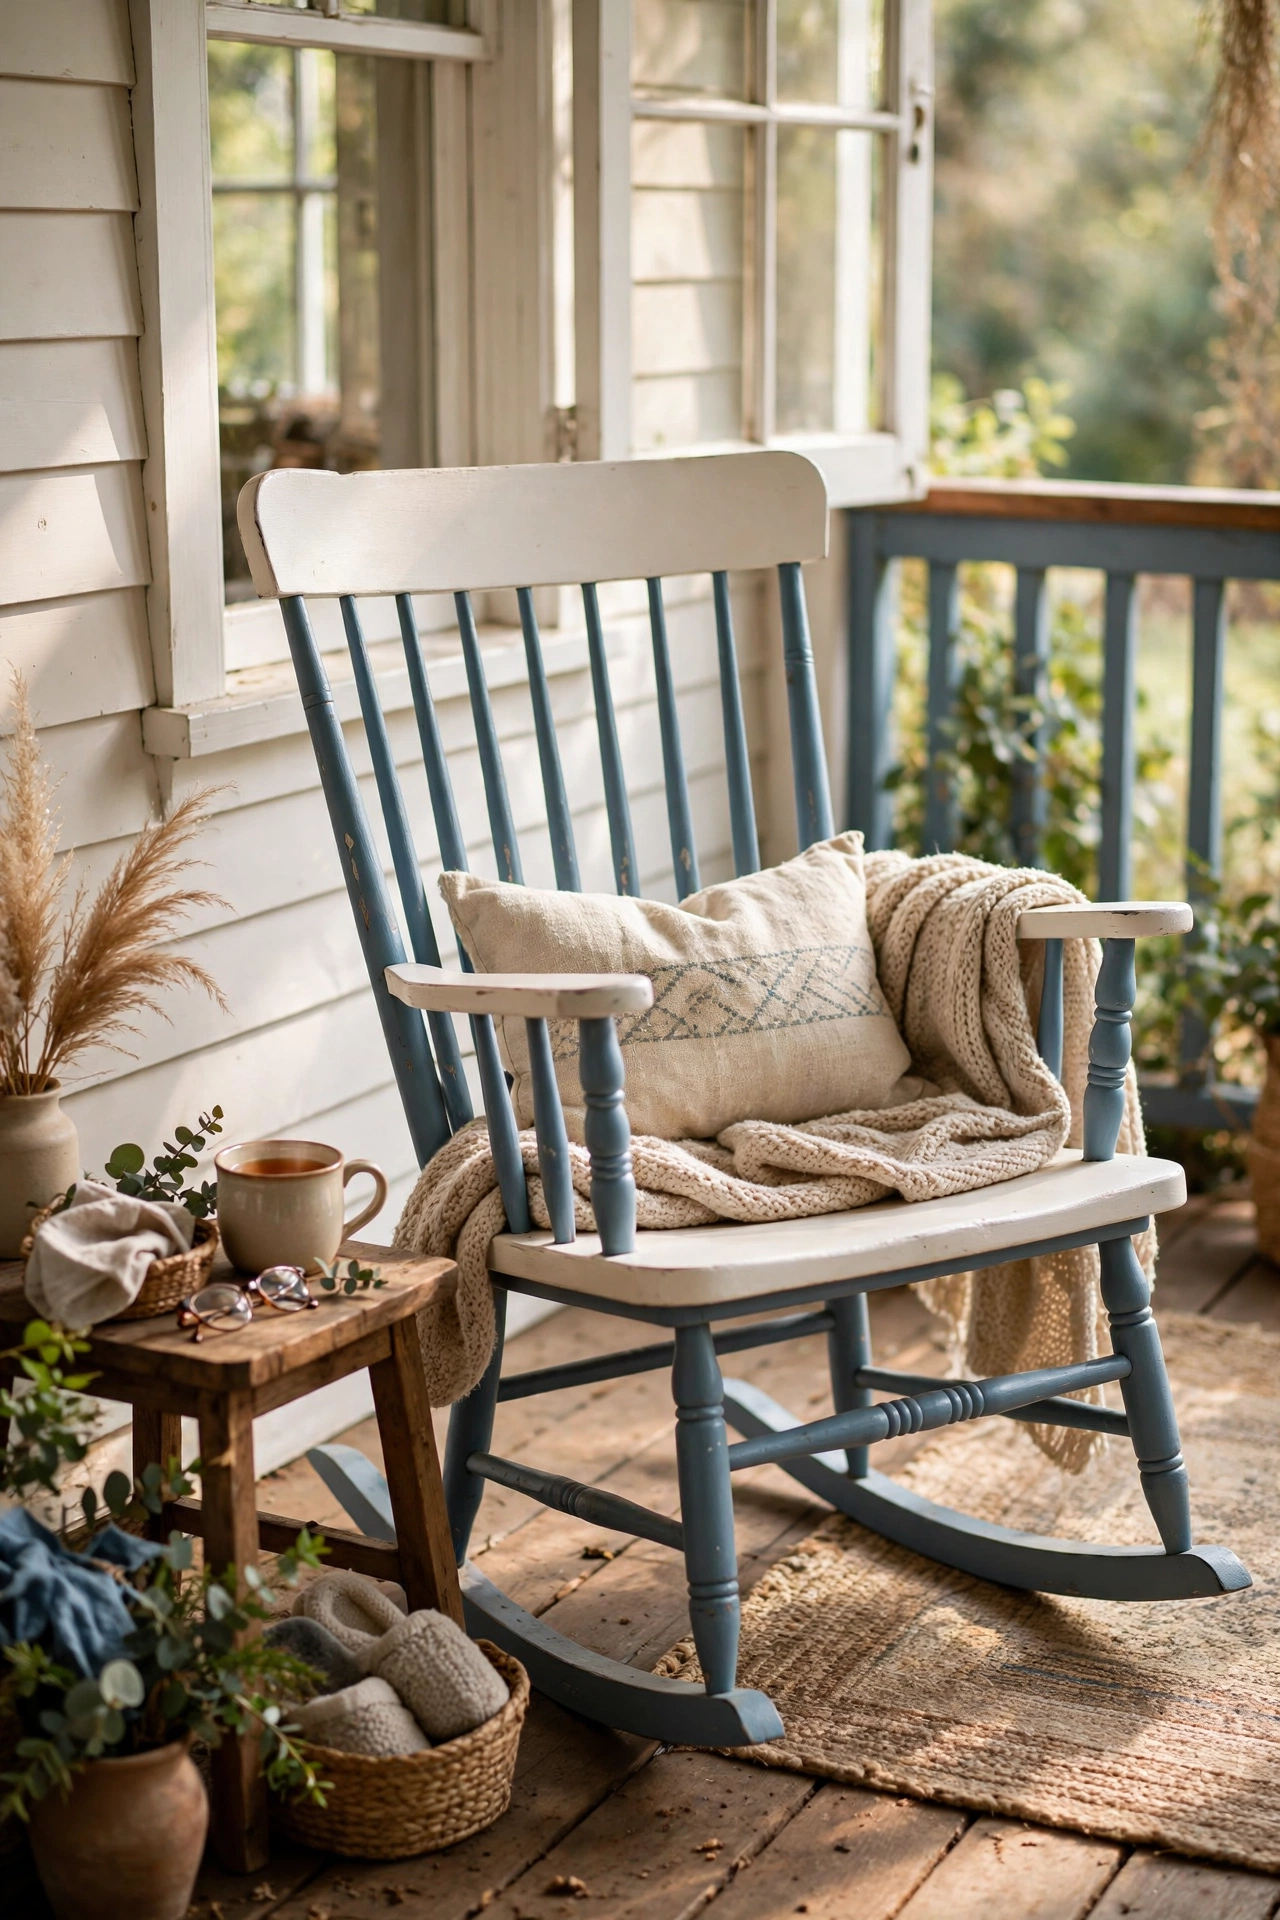
A rocking chair painted two tones, seat one colour and spindles another, looks charming on a porch. I painted the seat warm white and the spindles dusty blue. Tape the joints carefully. Rockers get heavy use, so use exterior-grade paint even for a covered porch. Mine has survived three summers. Sand the armrests extra smooth because hands notice roughness there. This was my grandmother’s chair and the paint gave it a second life. It has held up beautifully through months of daily use.
Cost: ~$12-18 | Time: 4 hours plus drying
17. Painted Wooden Bench with Cushion
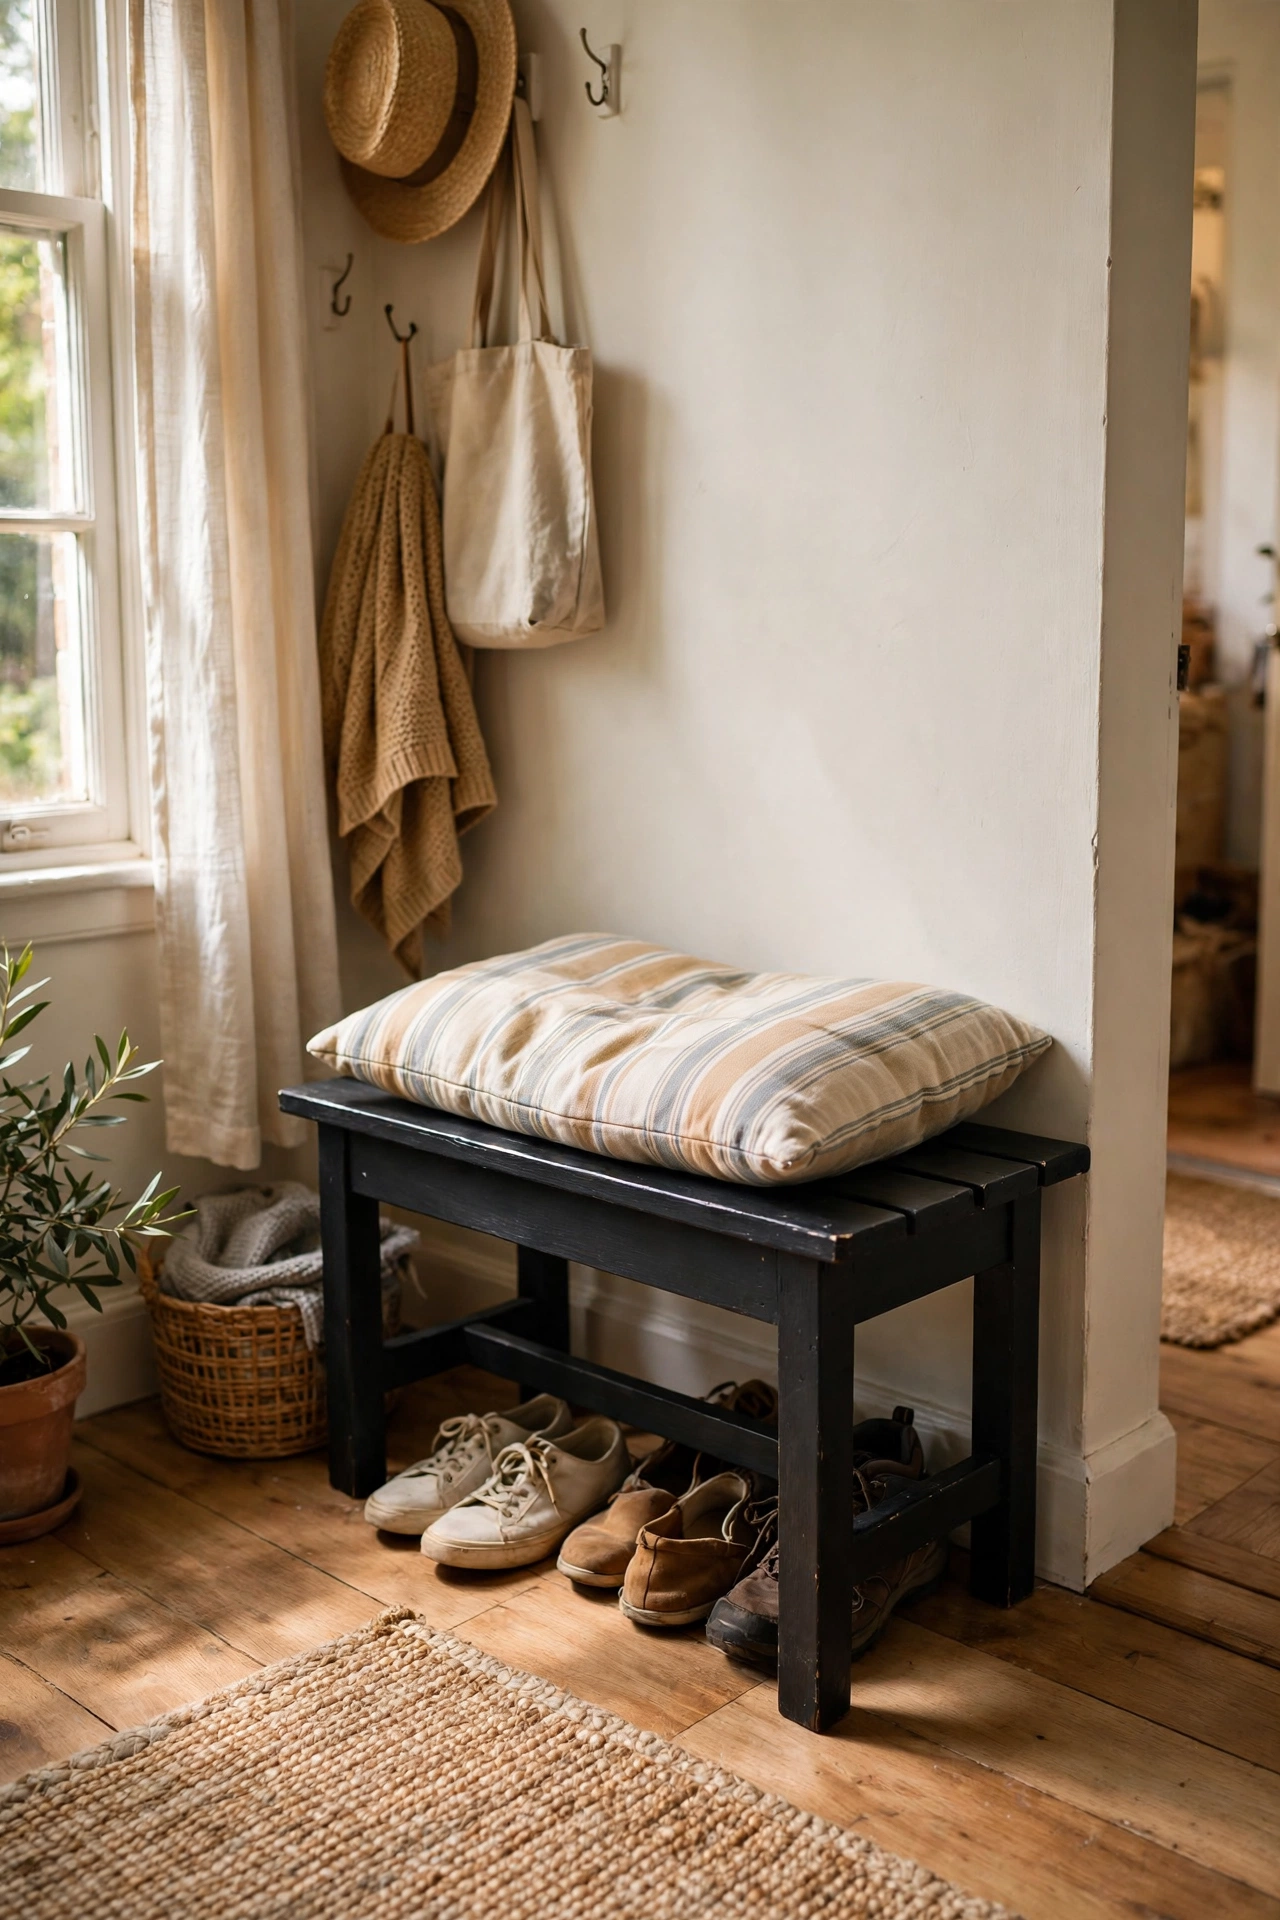
A simple wooden bench painted a fresh colour plus a cushion becomes an entryway hero. I painted mine soft black and topped it with a striped cushion. The bench holds shoes underneath and bags on top. Sand the seat smooth and seal it well because it takes daily wear. I put felt pads under the legs to protect the floor. It is the hardest-working piece in my hallway and cost almost nothing. Guests always assume it cost far more than it did.
Cost: ~$14-20 | Time: 3 hours plus drying
18. Accent-Painted Bar Stools
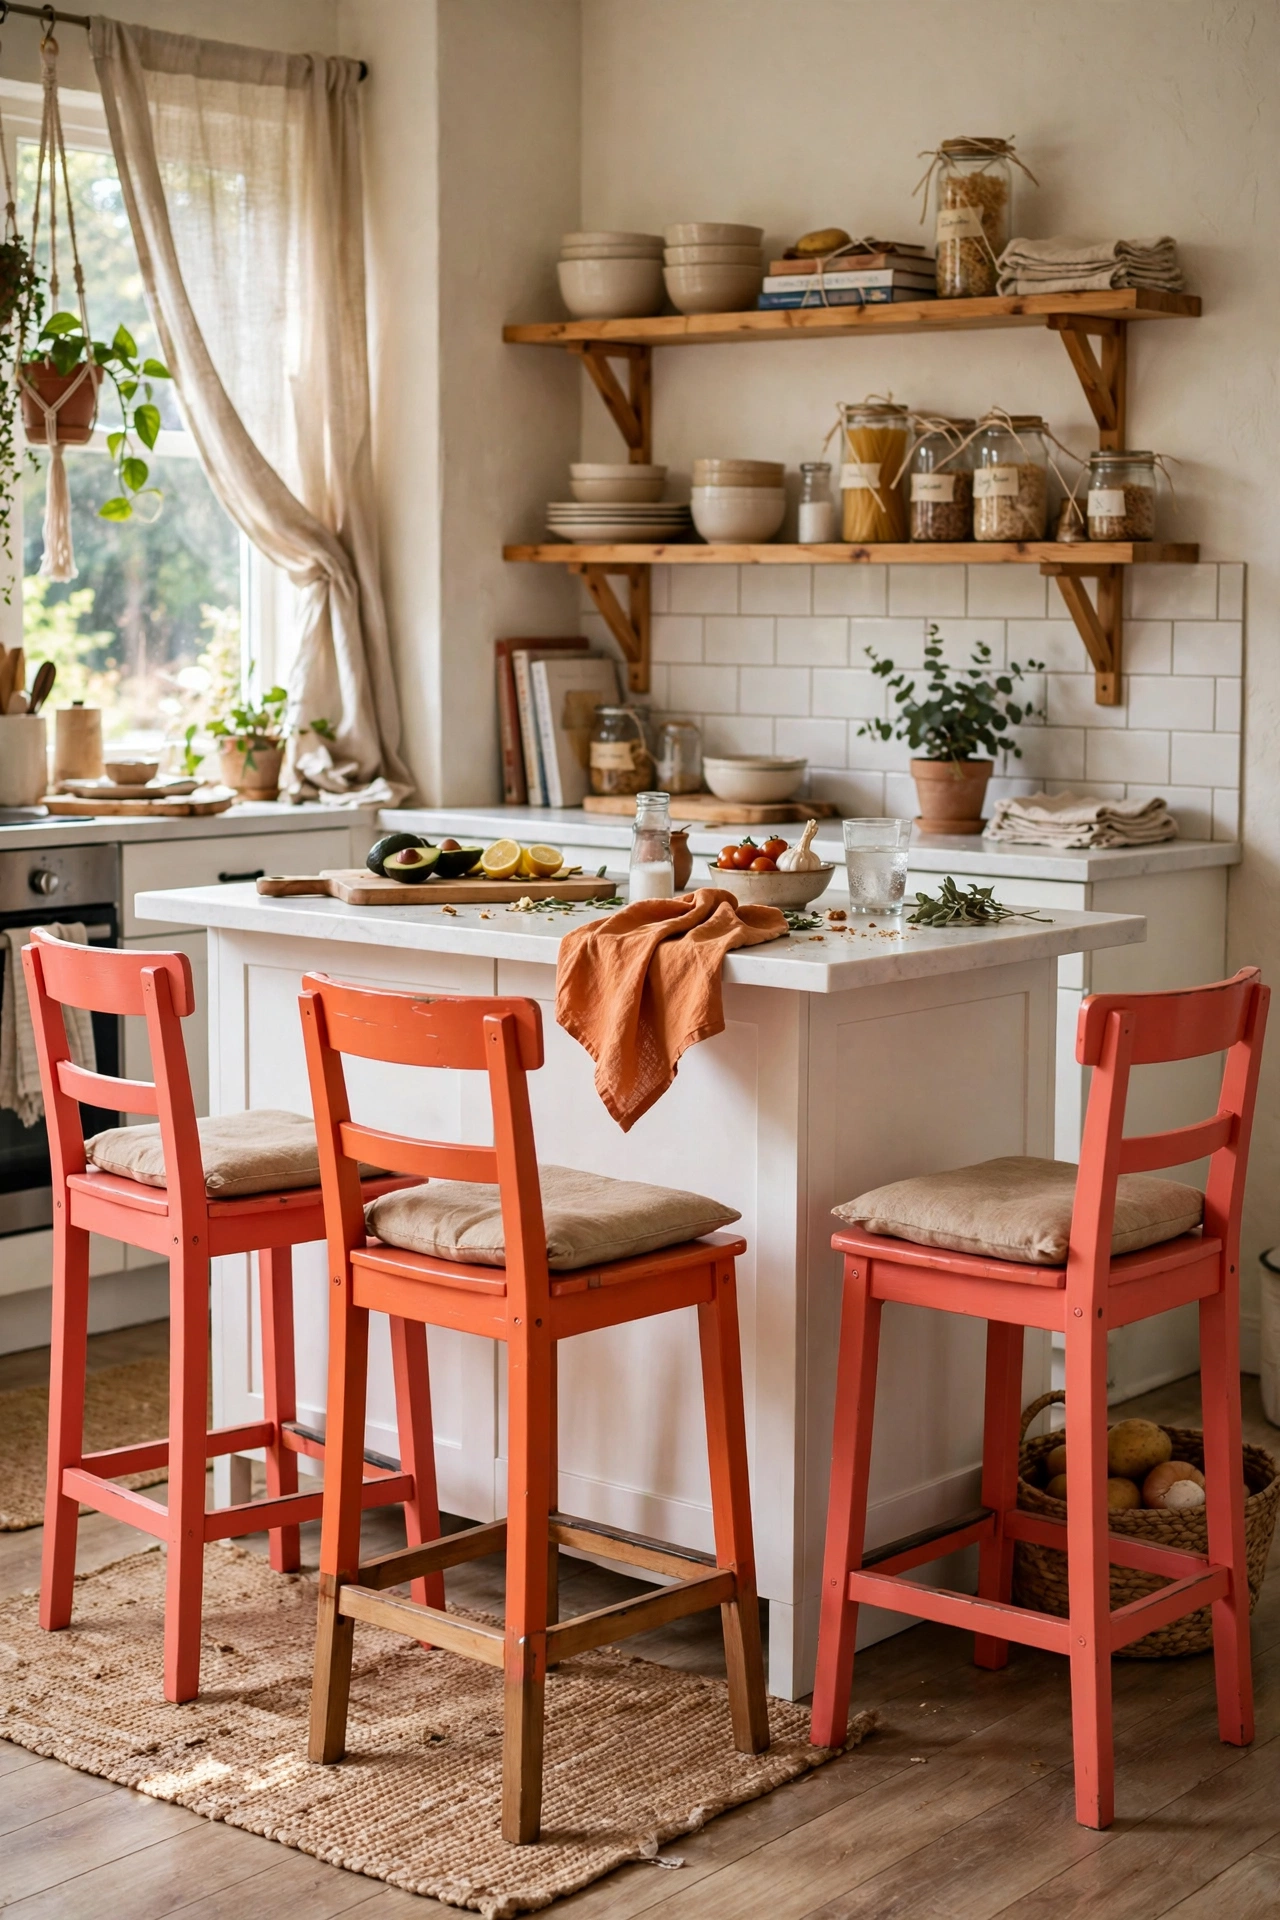
Bar stools painted a bright accent colour wake up a kitchen island. I painted two plain stools coral and the kitchen finally had personality. Metal stools need a metal primer first. Test the colour with one stool before you commit to the set. I painted all four first and hated it, then had to repaint. One test stool saves you that regret. Seal the seats well because they get sat on daily. This is one of those small changes I wish I had made years ago.
Cost: ~$10-16 | Time: 3 hours
19. Painted Wicker Chair Refresh
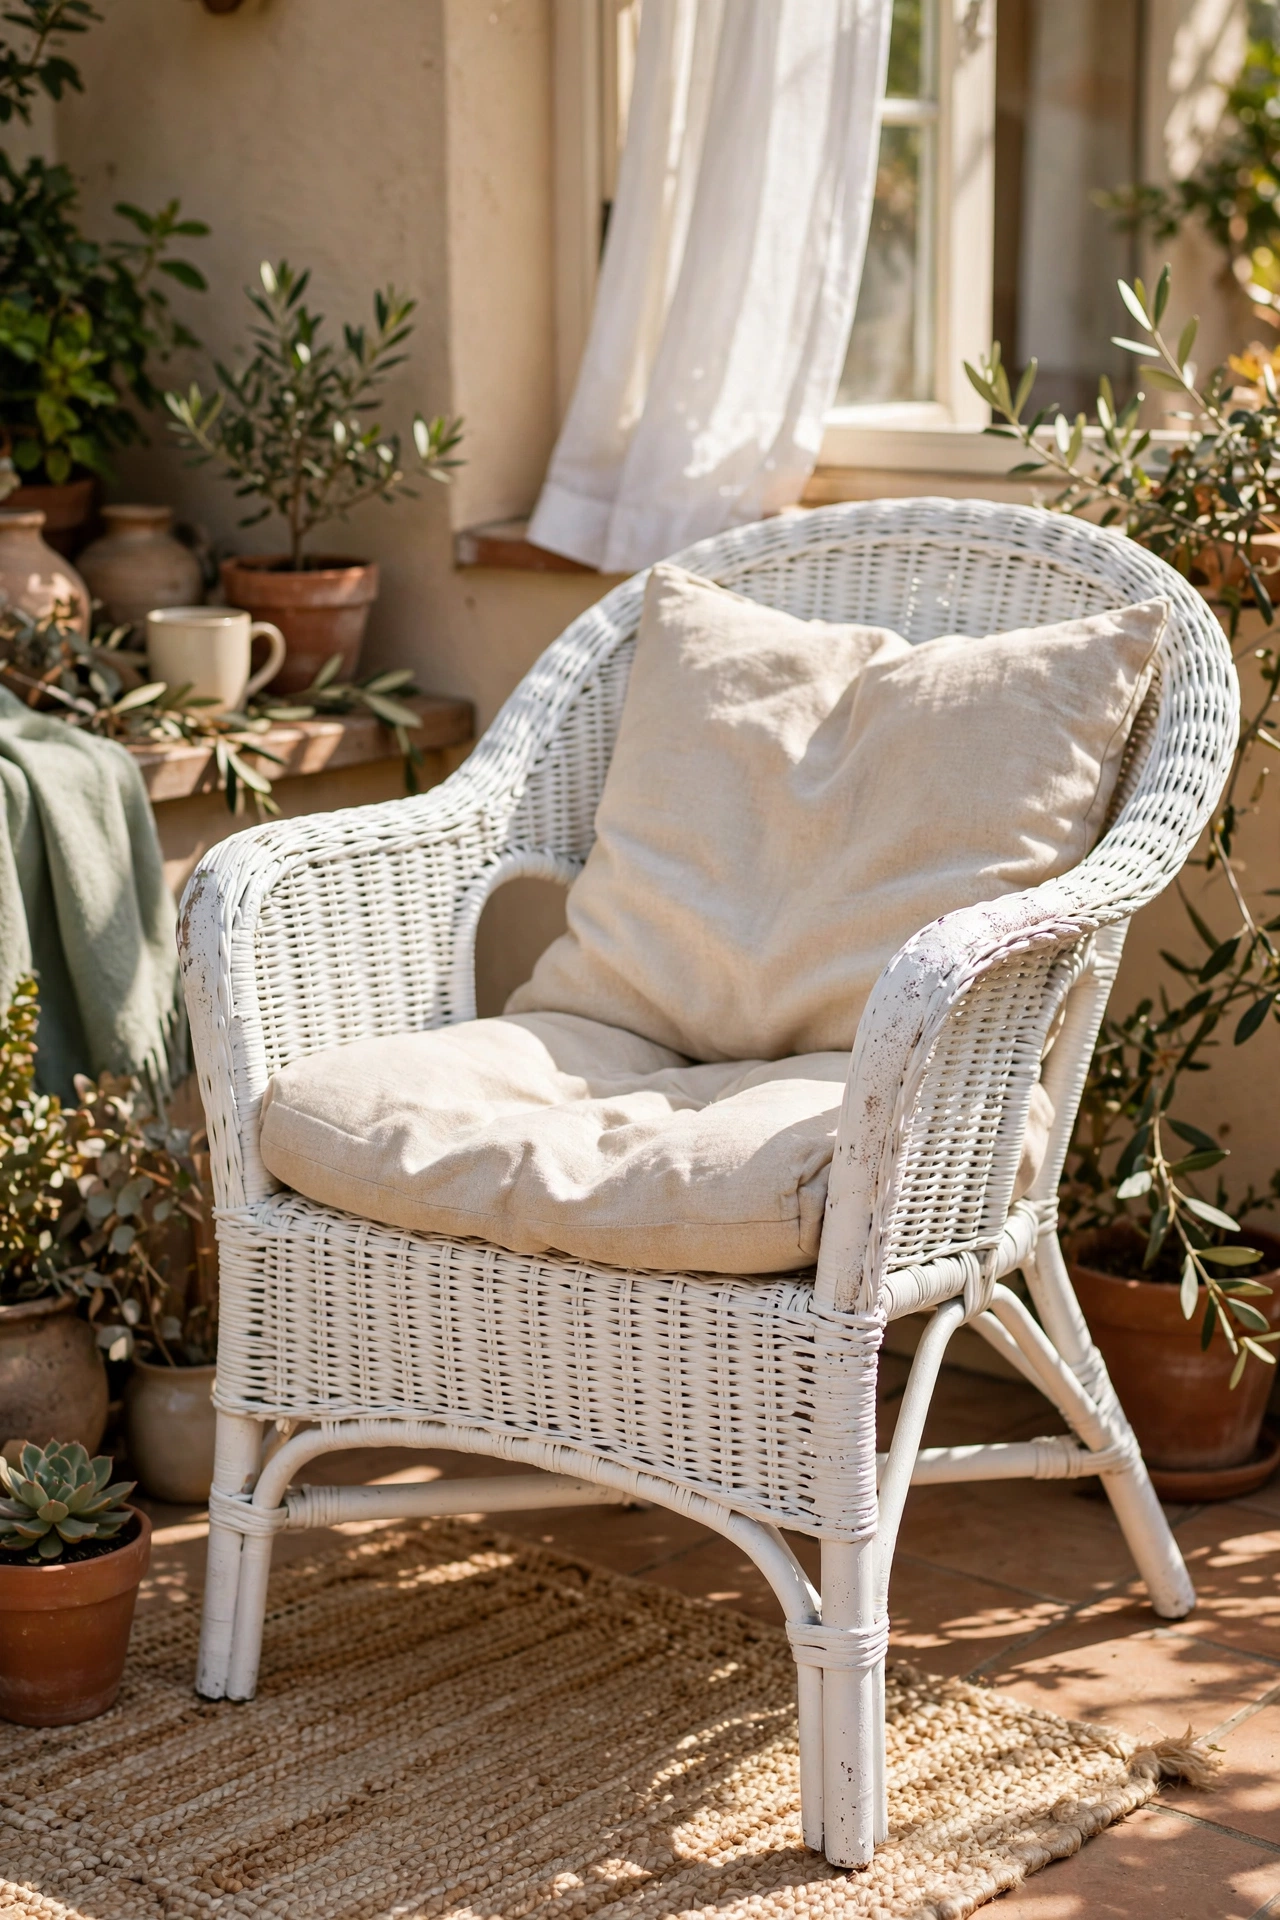
Spray paint brings tired wicker back to life beautifully. I sprayed a grey wicker chair crisp white and it looked brand new on my patio. Use exterior spray paint and do many light coats, because wicker drinks paint. Get into all the weave gaps or the old colour shows through. My first attempt looked patchy from across the yard. Three light coats fixed it. Let it cure fully before sitting or the paint will stick to clothes. It took me less time to do than to decide to do it.
Cost: ~$10-14 | Time: 2 hours plus curing
Finishing Techniques That Look Pro
20. Dry-Brushing for Subtle Texture
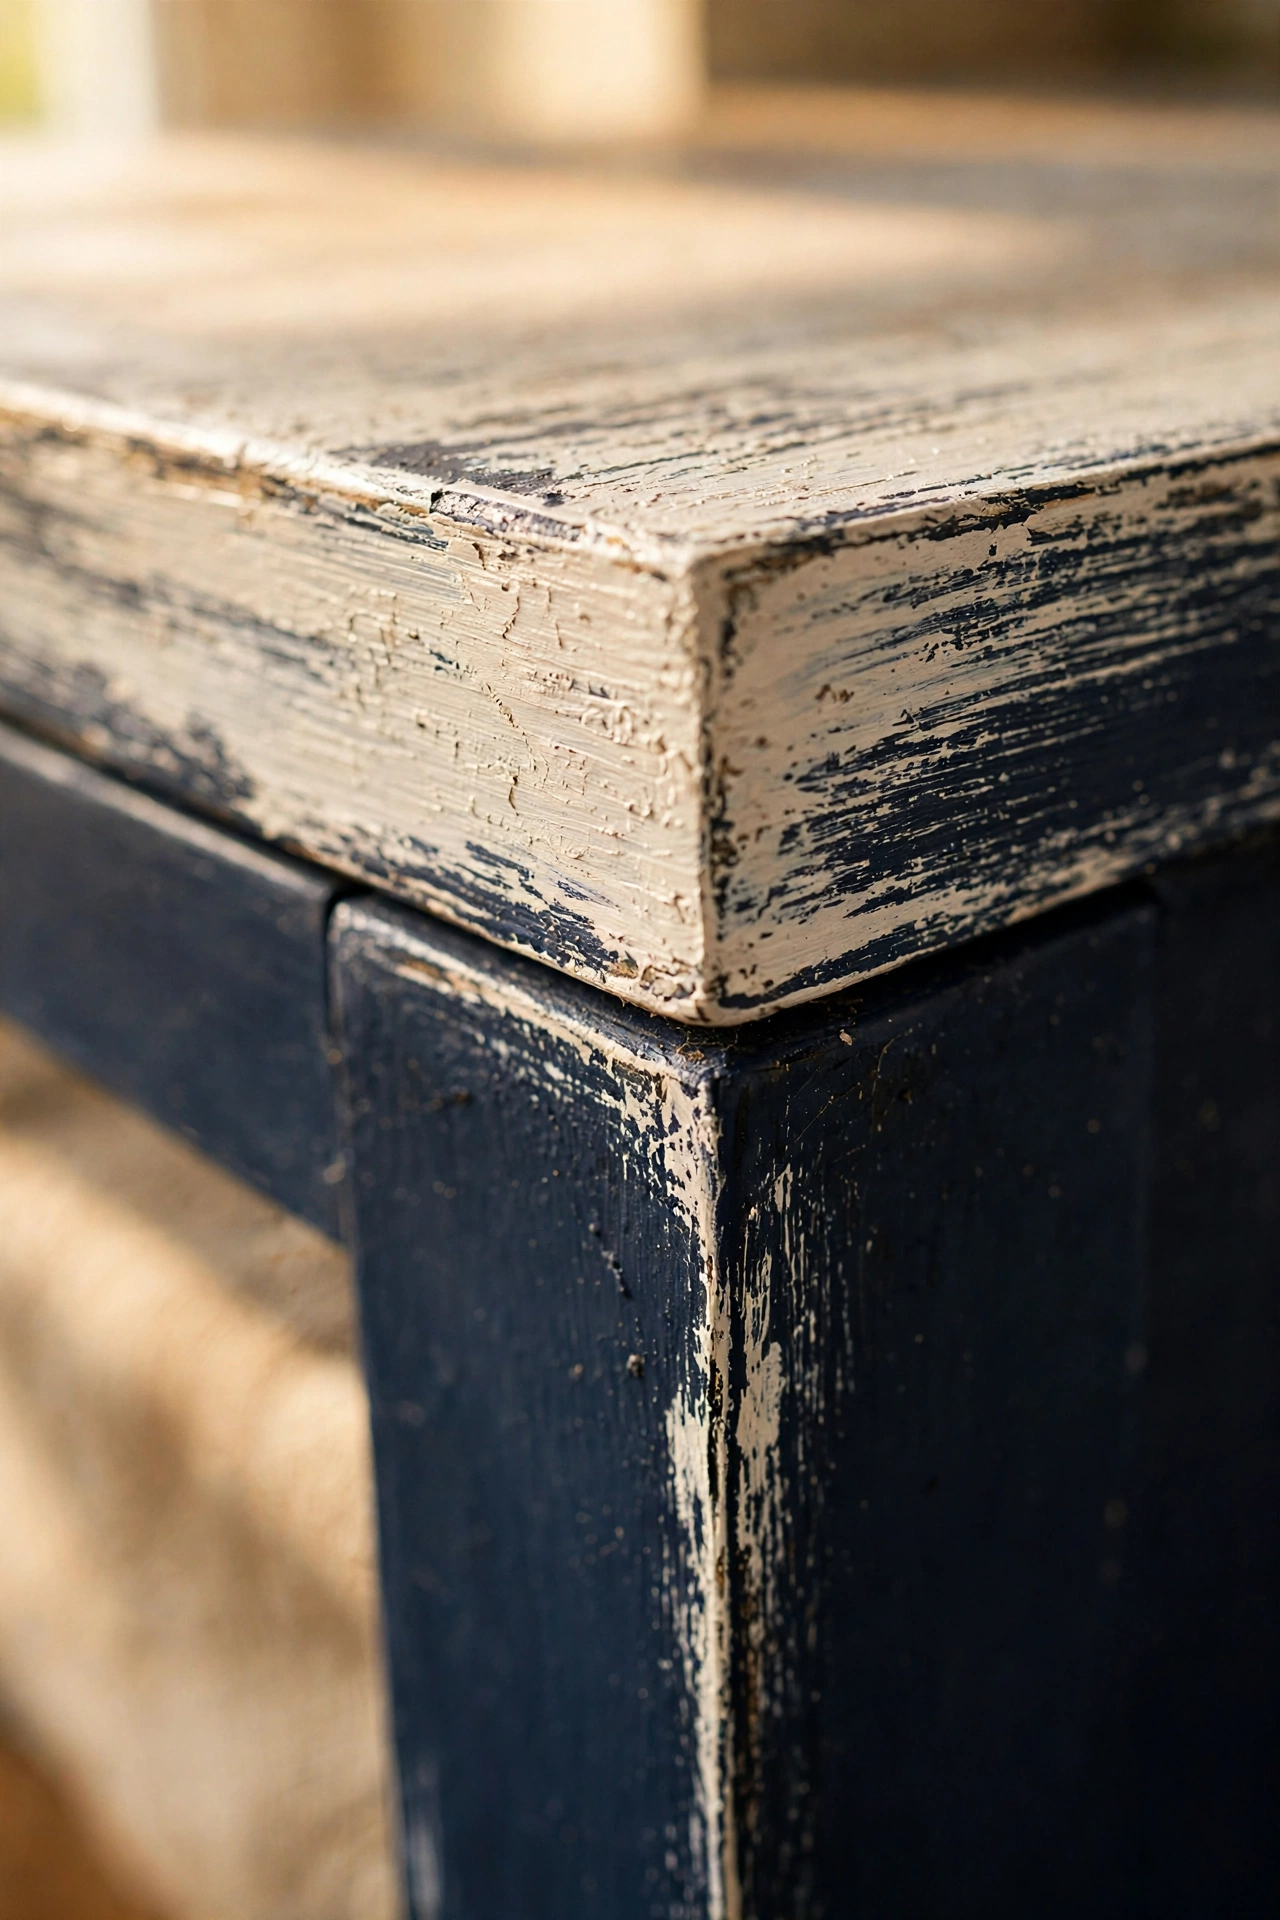
Dry-brushing adds texture by dragging a nearly dry brush over a painted surface. Dip the brush, wipe almost all the paint off, and lightly sweep the edges and details. I dry-brushed white over a navy dresser and it gave the piece beautiful depth. Less is more here; you can always add another pass. My first attempt used too much paint and looked streaky. Practice on cardboard first until the stroke feels right. I have recommended this to three friends already.
Cost: ~$4-6 | Time: 30 minutes
21. Distressed Edges for Farmhouse Charm
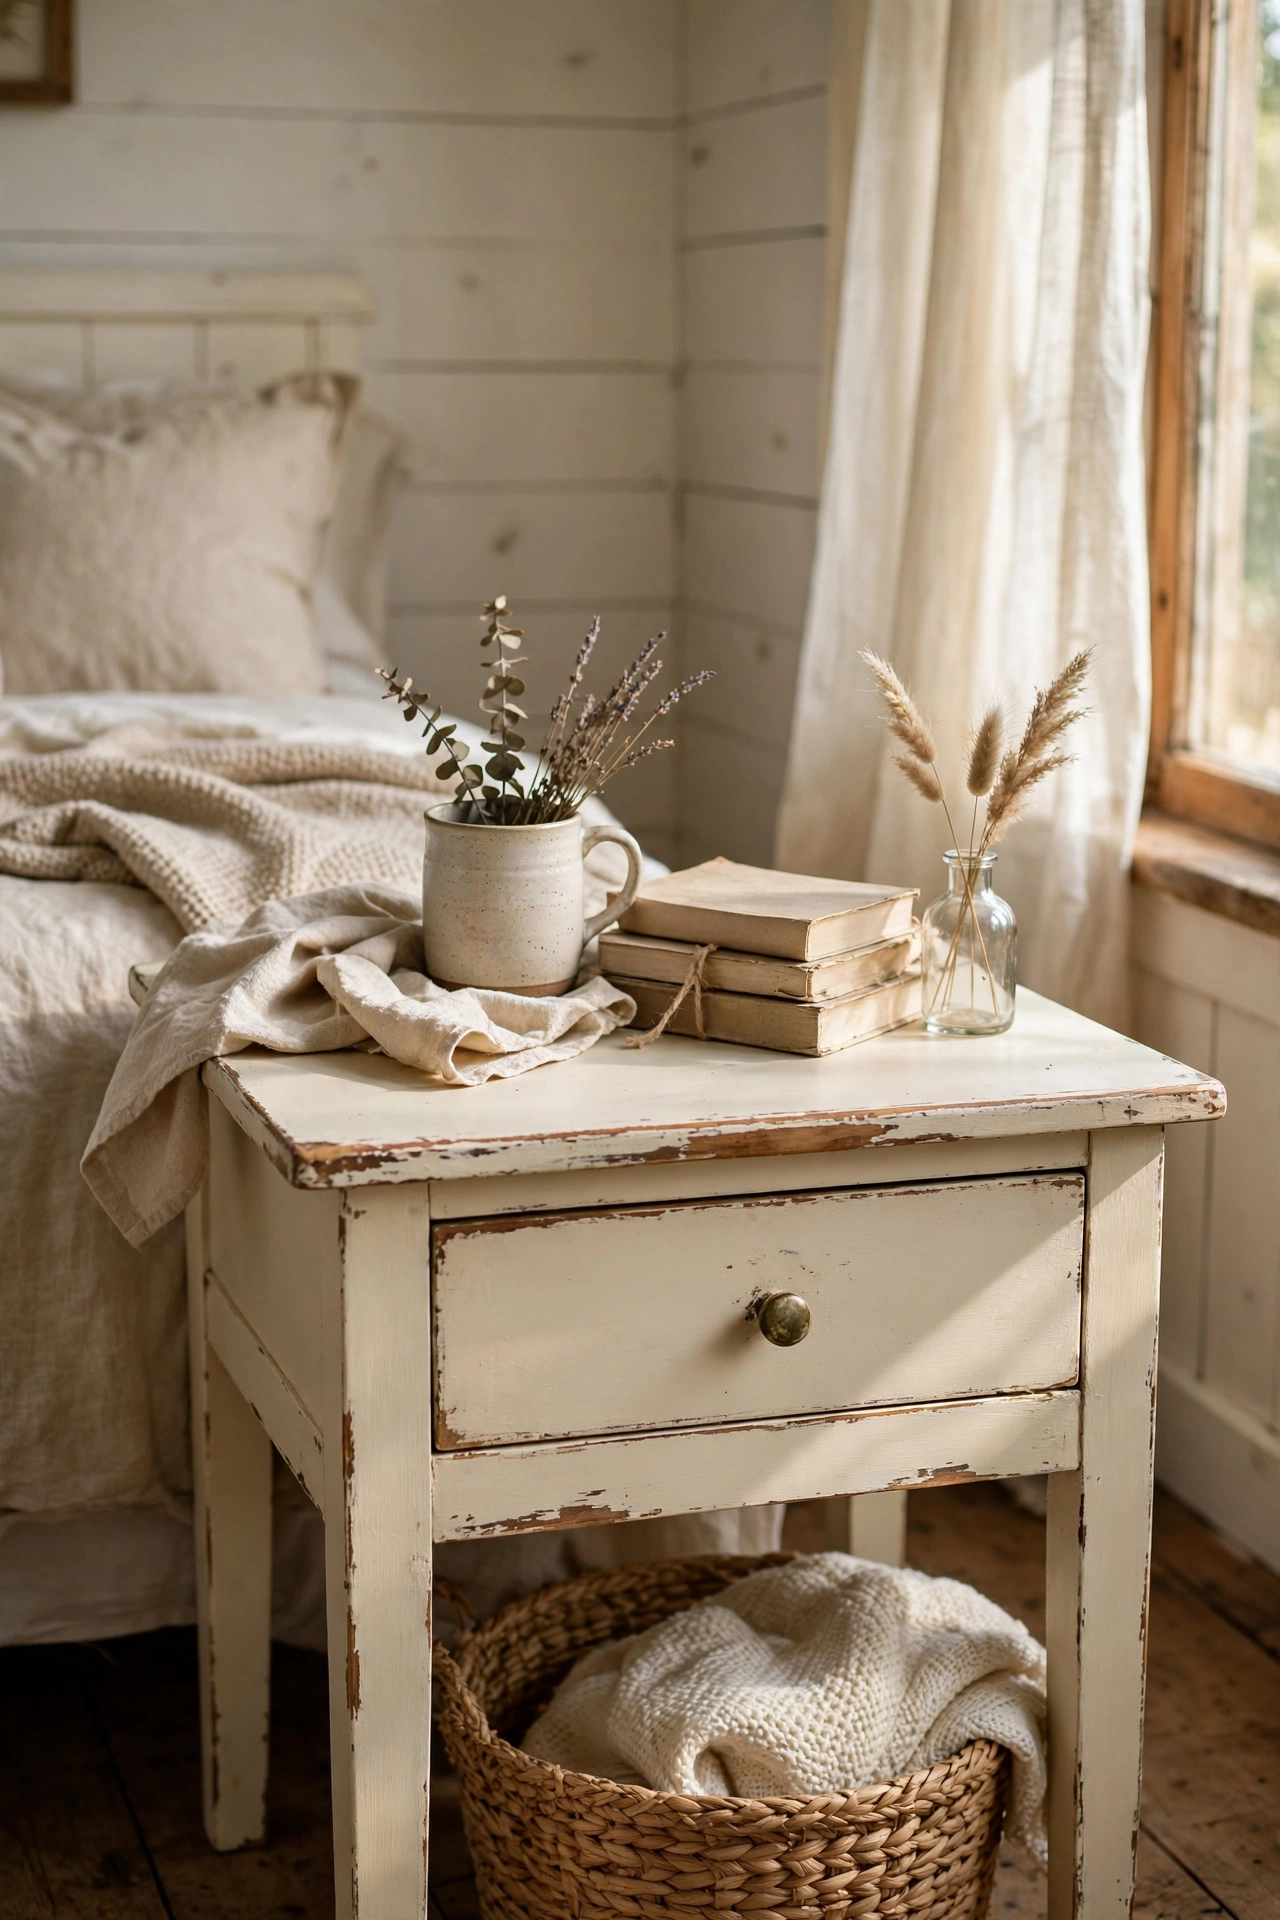
Distressing means sanding paint off edges and corners so the wood shows through. Paint your piece, let it dry, then sand the spots that would wear naturally: edges, corners, around knobs. I distressed a cream side table and it looked authentically aged. Stop sooner than you think; you can always distress more. My first piece looked attacked because I got carried away. Seal with wax after distressing. The difference it made honestly surprised me. It still looks as good as the day I set it up.
Cost: ~$4-6 | Time: 30 minutes
22. Colour Washing for a Soft Look
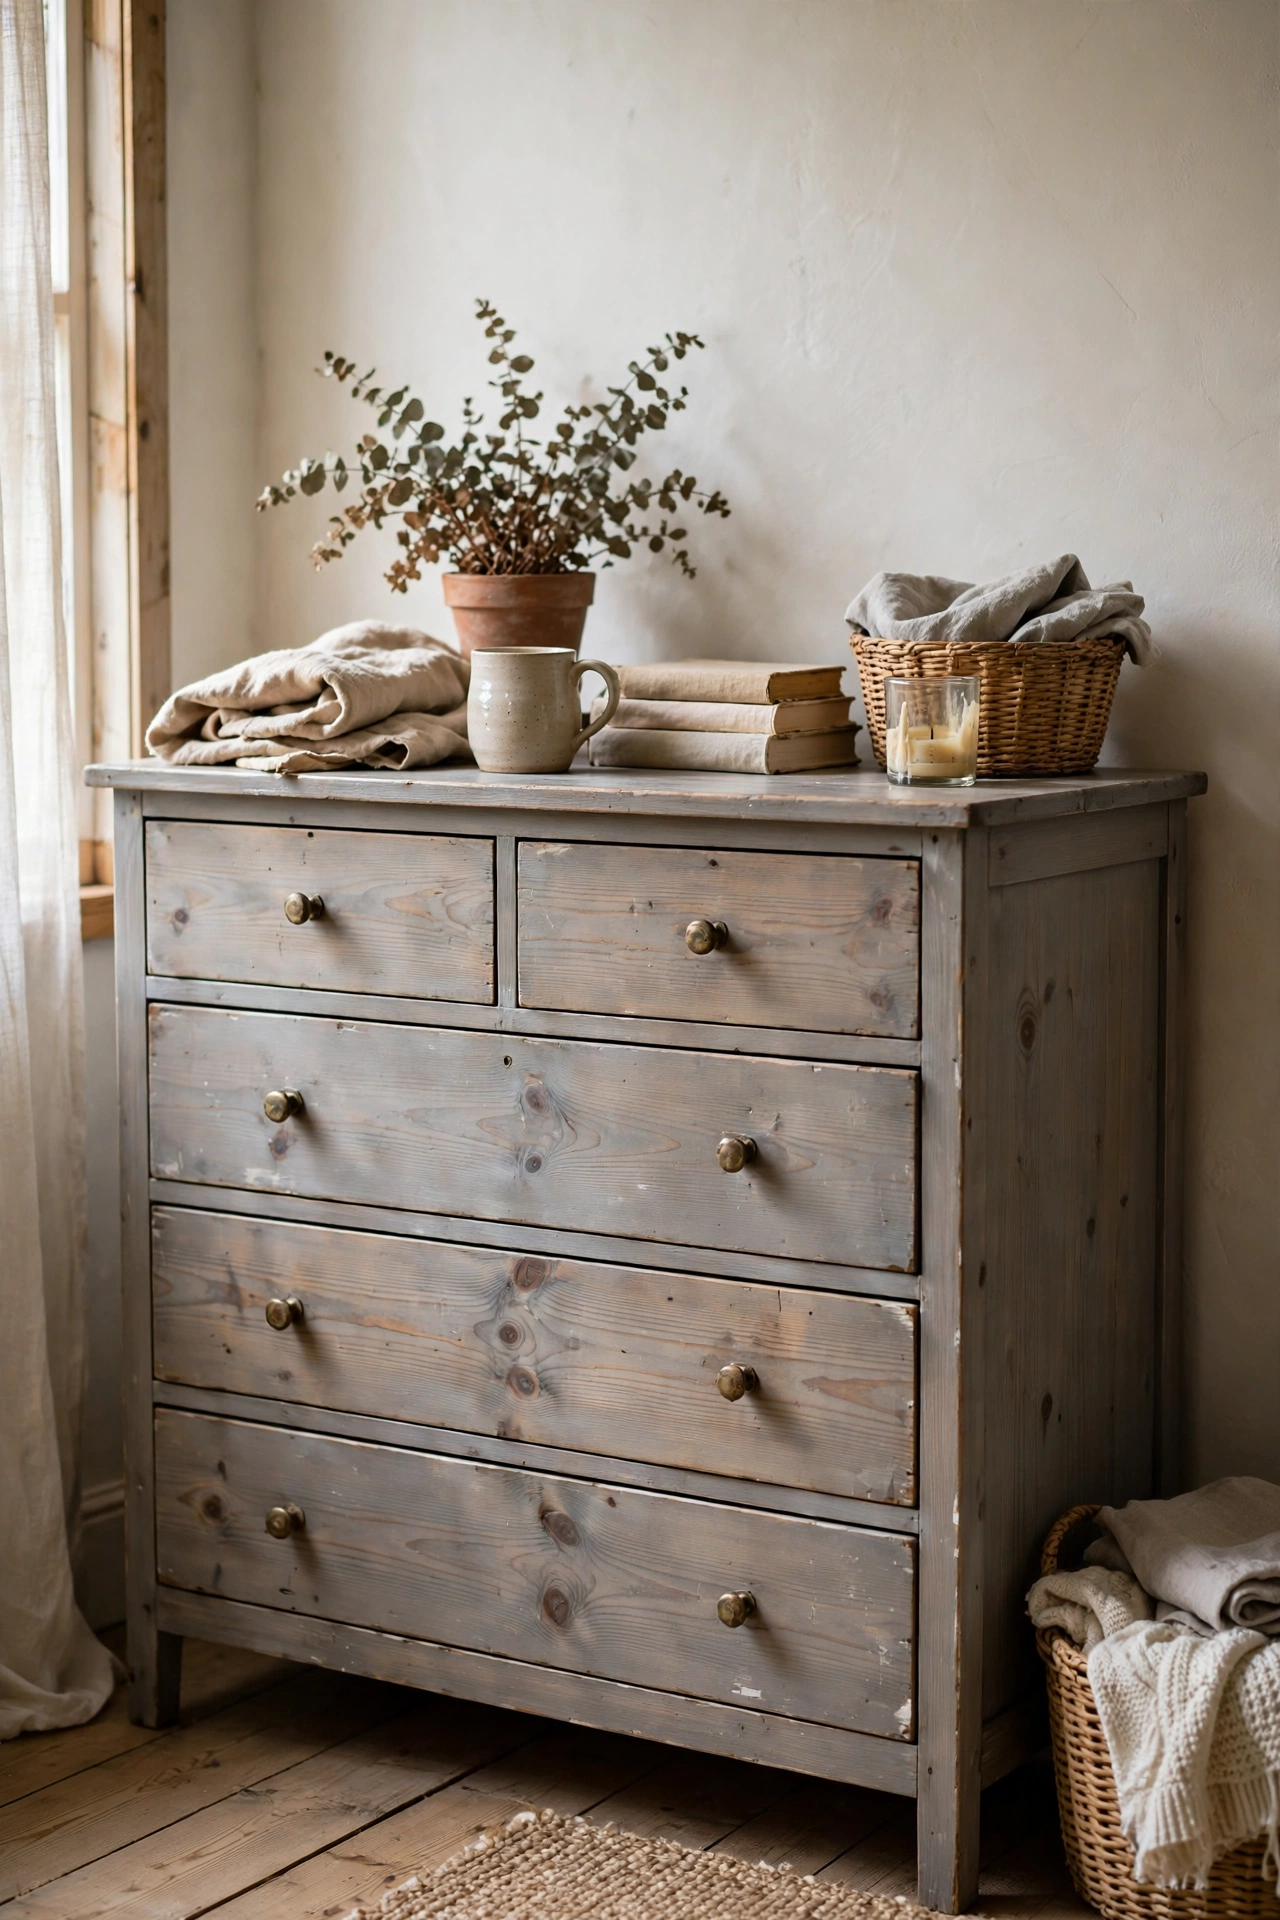
A colour wash is thinned paint wiped back so the wood grain shows through. Mix paint with water, brush it on, and wipe with a rag. I colour-washed a pine dresser in soft grey and the grain became the star. Work in small sections because the wash dries fast. This technique forgives uneven wood beautifully. It is my favourite finish for pine, which can look orange under solid paint. Seal with matte topcoat. My partner noticed the change immediately, which never happens.
Cost: ~$6-10 | Time: 2 hours
23. Stencilled Drawer Fronts
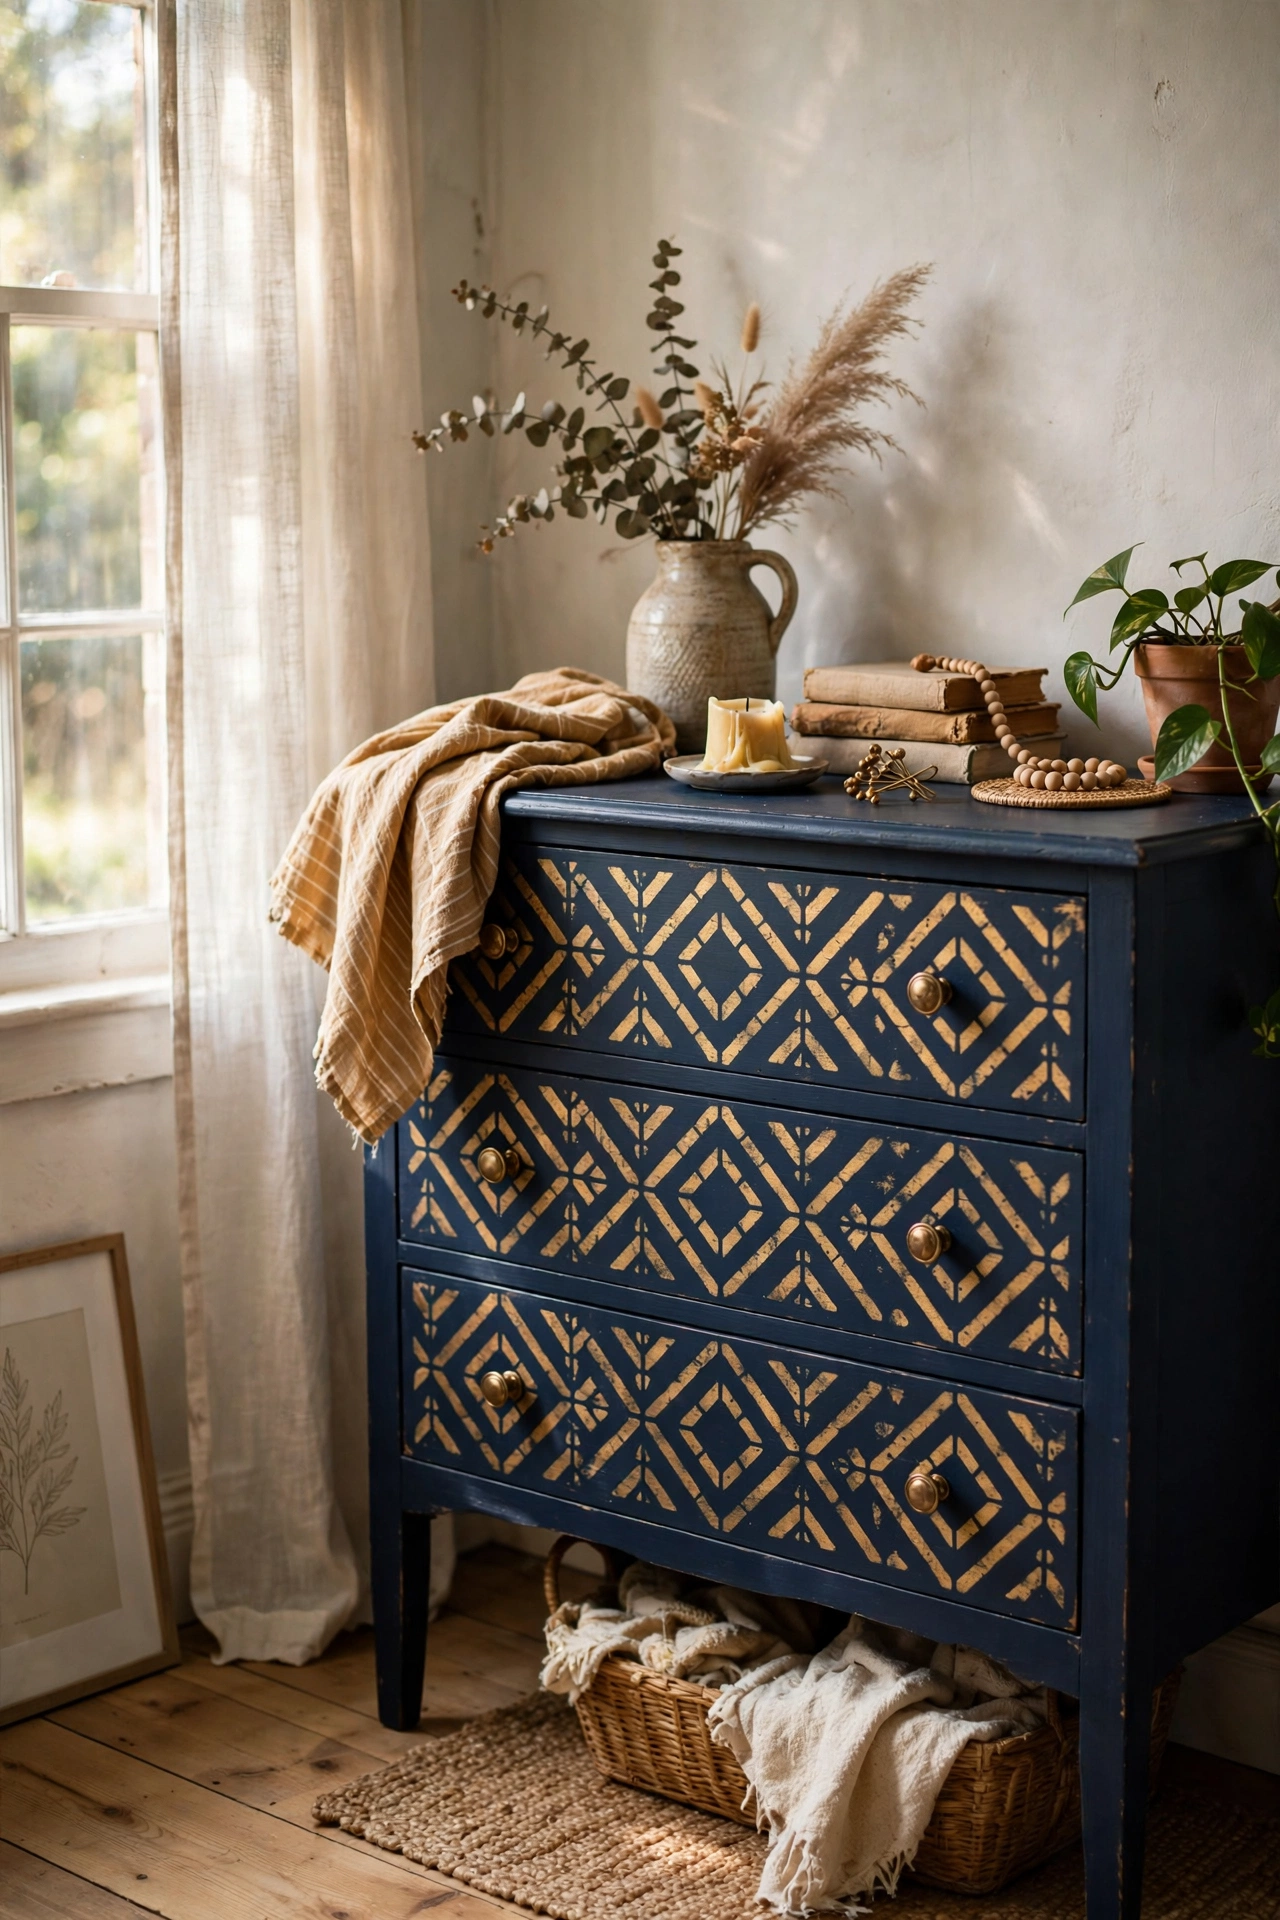
A stencil on drawer fronts turns a plain dresser into a statement. I stencilled a simple geometric pattern in gold on navy drawers. Tape the stencil down firmly and use almost no paint on the brush; dab, do not brush, or paint bleeds under the edges. My first stencil bled badly because the brush was too wet. Two light dabs beat one heavy one. Remove the stencil while the paint is wet for clean lines. I find myself smiling every time I walk past it.
Cost: ~$8-12 | Time: 2 hours
24. Wax Topcoat for a Silky Finish
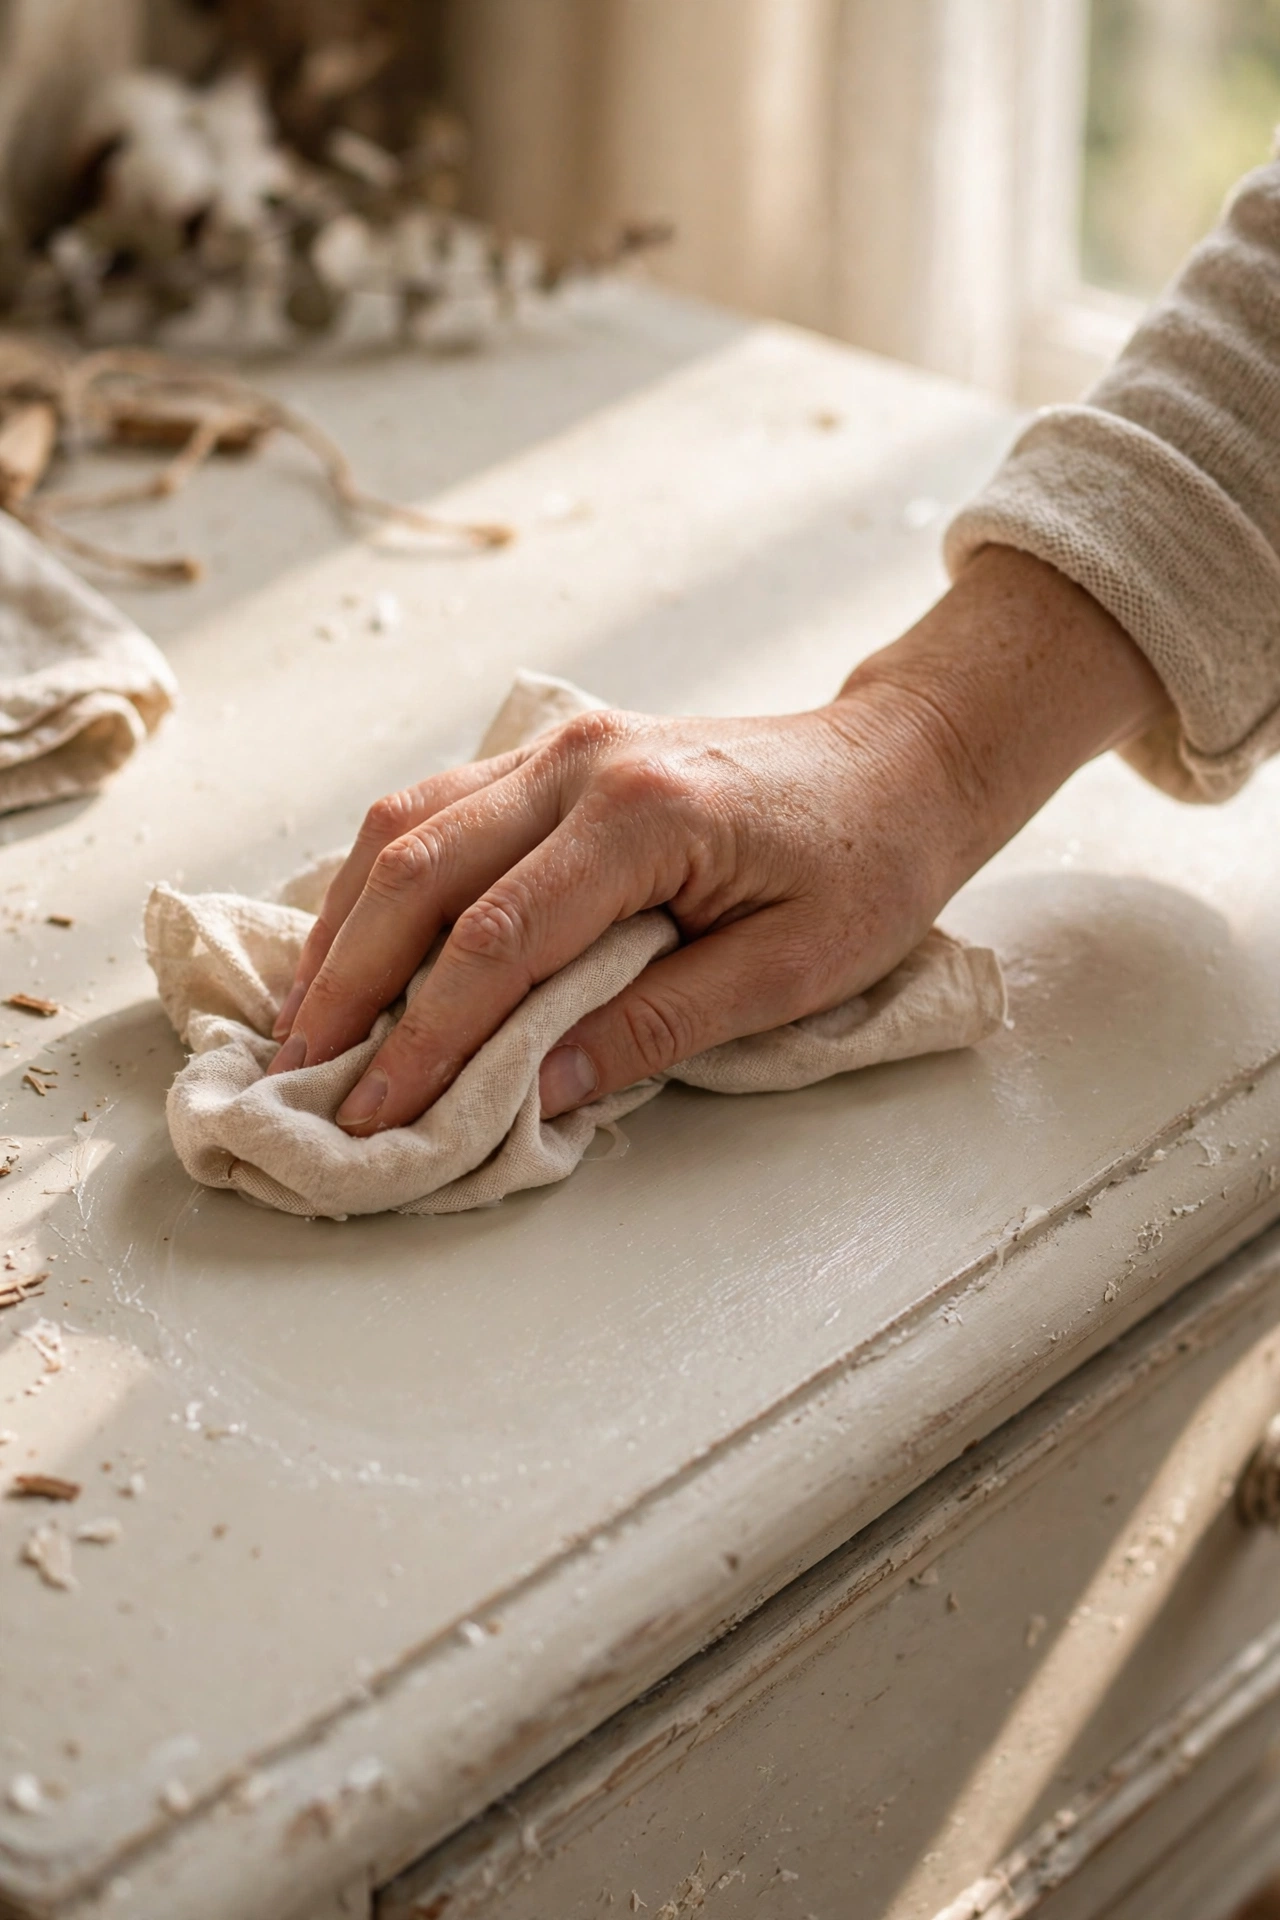
Clear wax gives chalk paint a silky, hand-rubbed finish. Apply a thin layer with a wax brush, wait fifteen minutes, then buff with a clean cloth. I waxed my first painted dresser and the difference was remarkable: it felt like quality furniture. Thin layers are everything; thick wax stays sticky. I had to strip one drawer and redo it because I globbed the wax on. Buff until the cloth glides smoothly. This has become one of my favourite corners of the house.
Cost: ~$10-14 | Time: 1 hour plus curing
25. Ombre-Painted Tall Dresser
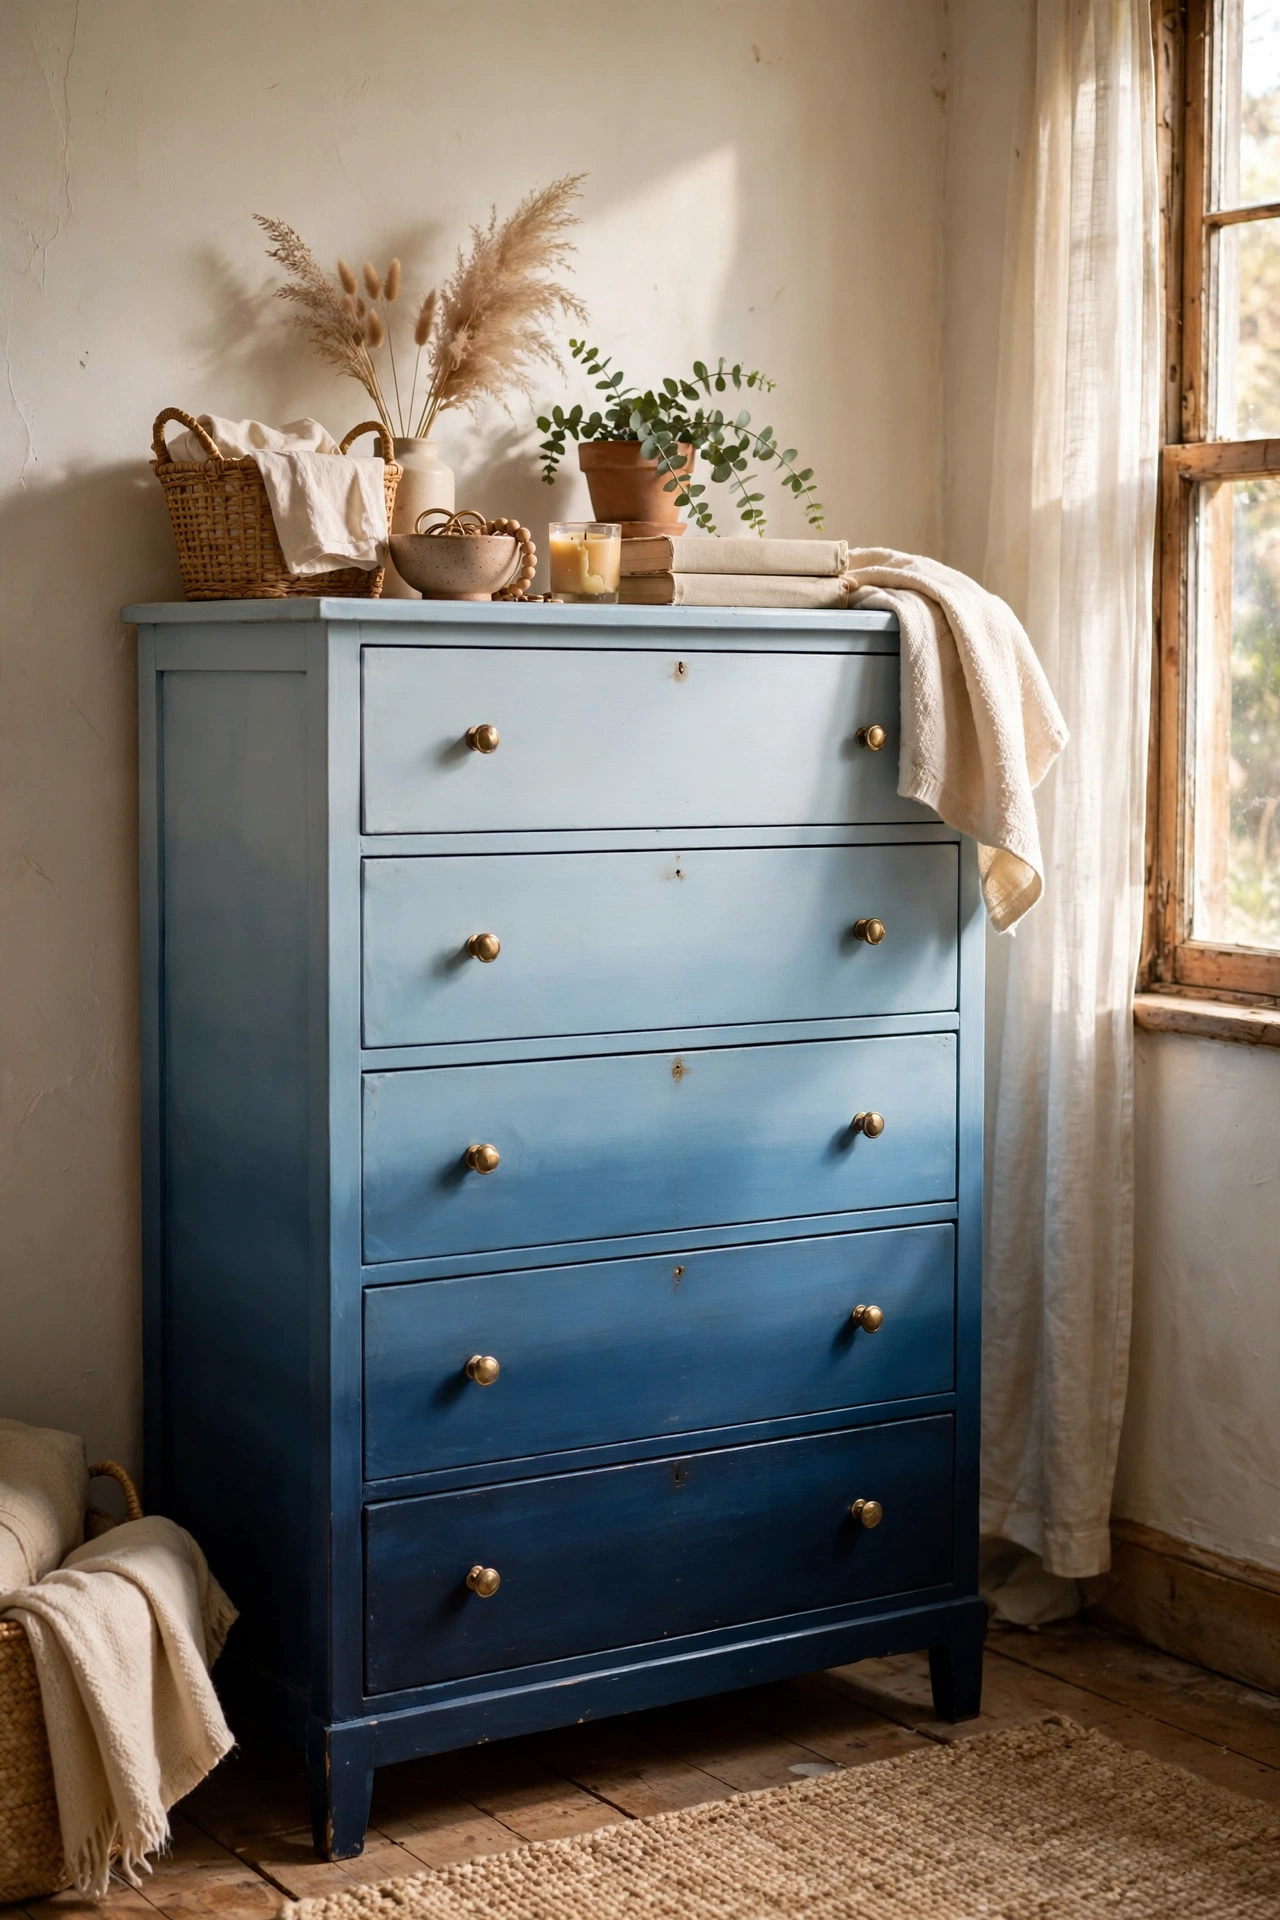
Ombre means blending one colour into another across the drawers, dark at the bottom to light at the top. Mix five shades from dark to light, paint each drawer a shade, and blend the edges where drawers meet. I did this in blues on a tall dresser and it is the piece everyone asks about. The blending is easier than it looks because the drawer gaps hide the transitions. Take a photo from across the room to check the gradient reads smoothly.
Cost: ~$14-20 | Time: 4 hours plus drying
Pro tip: Let paint cure for a full week before heavy use. I scratched my favourite dresser on day three by sliding a lamp across it. Paint feels dry in hours but stays soft for days.
Save this one for your weekend project list, and keep the painting momentum going: (see also: 19-thrift-store-diy-ideas-for-beginners/) (see also: 19-modern-style-diy-decor-projects-on-a-budget/) (see also: budget-bedroom-decor-ideas/)
