25 Dollar Store Patio Finds That Look Expensive
A patio that looks high end does not need a high end budget. Most of my favourite dollar store patio finds cost less than a takeaway coffee, yet nobody who has sat on my patio has guessed where half of it came from. The trick is knowing which cheap pieces to buy and the small upgrades — spray paint, better grouping, the right light — that make them look triple the price.
I have rounded up twenty-five of the best outdoor buys below, grouped by zone so you can shop with a plan. Each one takes under an hour and a weekend afternoon covers most of the list.
The Table Zone
Woven-Look Placemats as Outdoor Chargers

Those woven-look plastic placemats are sold for the dining room, but outside they read as proper rattan chargers. Step one: buy one per place setting and rinse them in the sink first so they sit flat. Step two: layer each over a dark tablecloth or bare wood table so the weave pattern pops. Step three: finish with a plain dinner plate on top — keep the plate simple so the texture does the work. I tried this in my own garden last summer and my sister asked if they were from a homeware store that charges ten times more. One mistake to avoid: skip the shiny metallic ones; they catch the sun and look plastic instead of pricey. The matte tan and dark brown weaves are the ones that fool people.
Cost: ~$6 for six · Time: 15 minutes
Mercury Glass Candle Holders for a Table Centrepiece
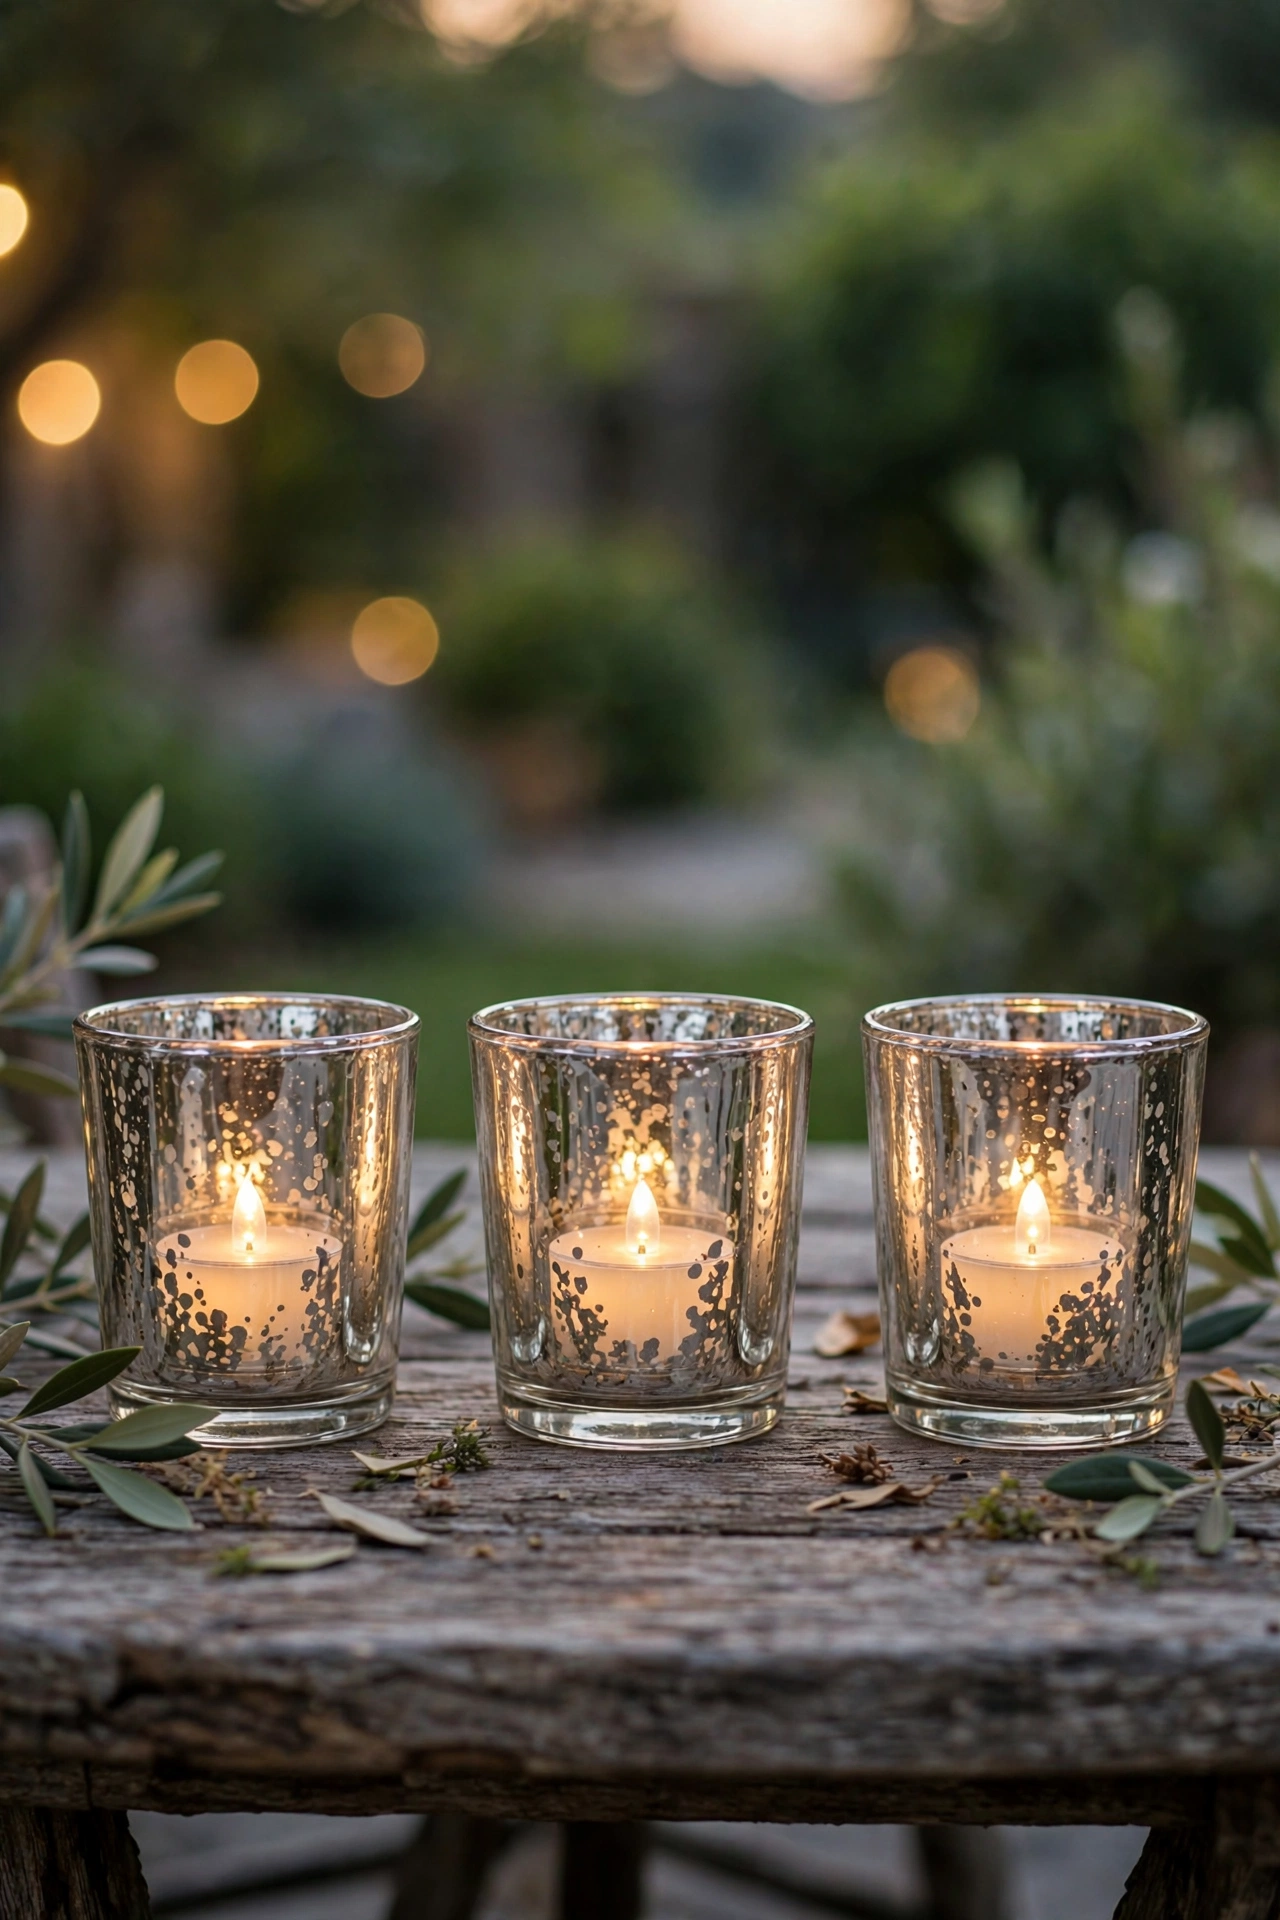
Dollar stores regularly stock mercury glass look candle holders, and they are the fastest way to make a patio table feel like a restaurant terrace. Step one: pick up three in the same size and colour — odd numbers group better than pairs. Step two: wipe them with a dry cloth and check for chips before you leave the store. Step three: place them down the middle of the table with flameless tea lights inside so the glass catches the flicker. I tried this in my own patio setup and at dusk the reflections on the glass genuinely look like real mercury glass, which sells for real money elsewhere. One mistake to avoid: don’t mix gold and silver in the same cluster; it reads messy rather than curated. Pick one finish and commit.
Cost: ~$6 for three · Time: 10 minutes
Faux Succulents in Terracotta Pots
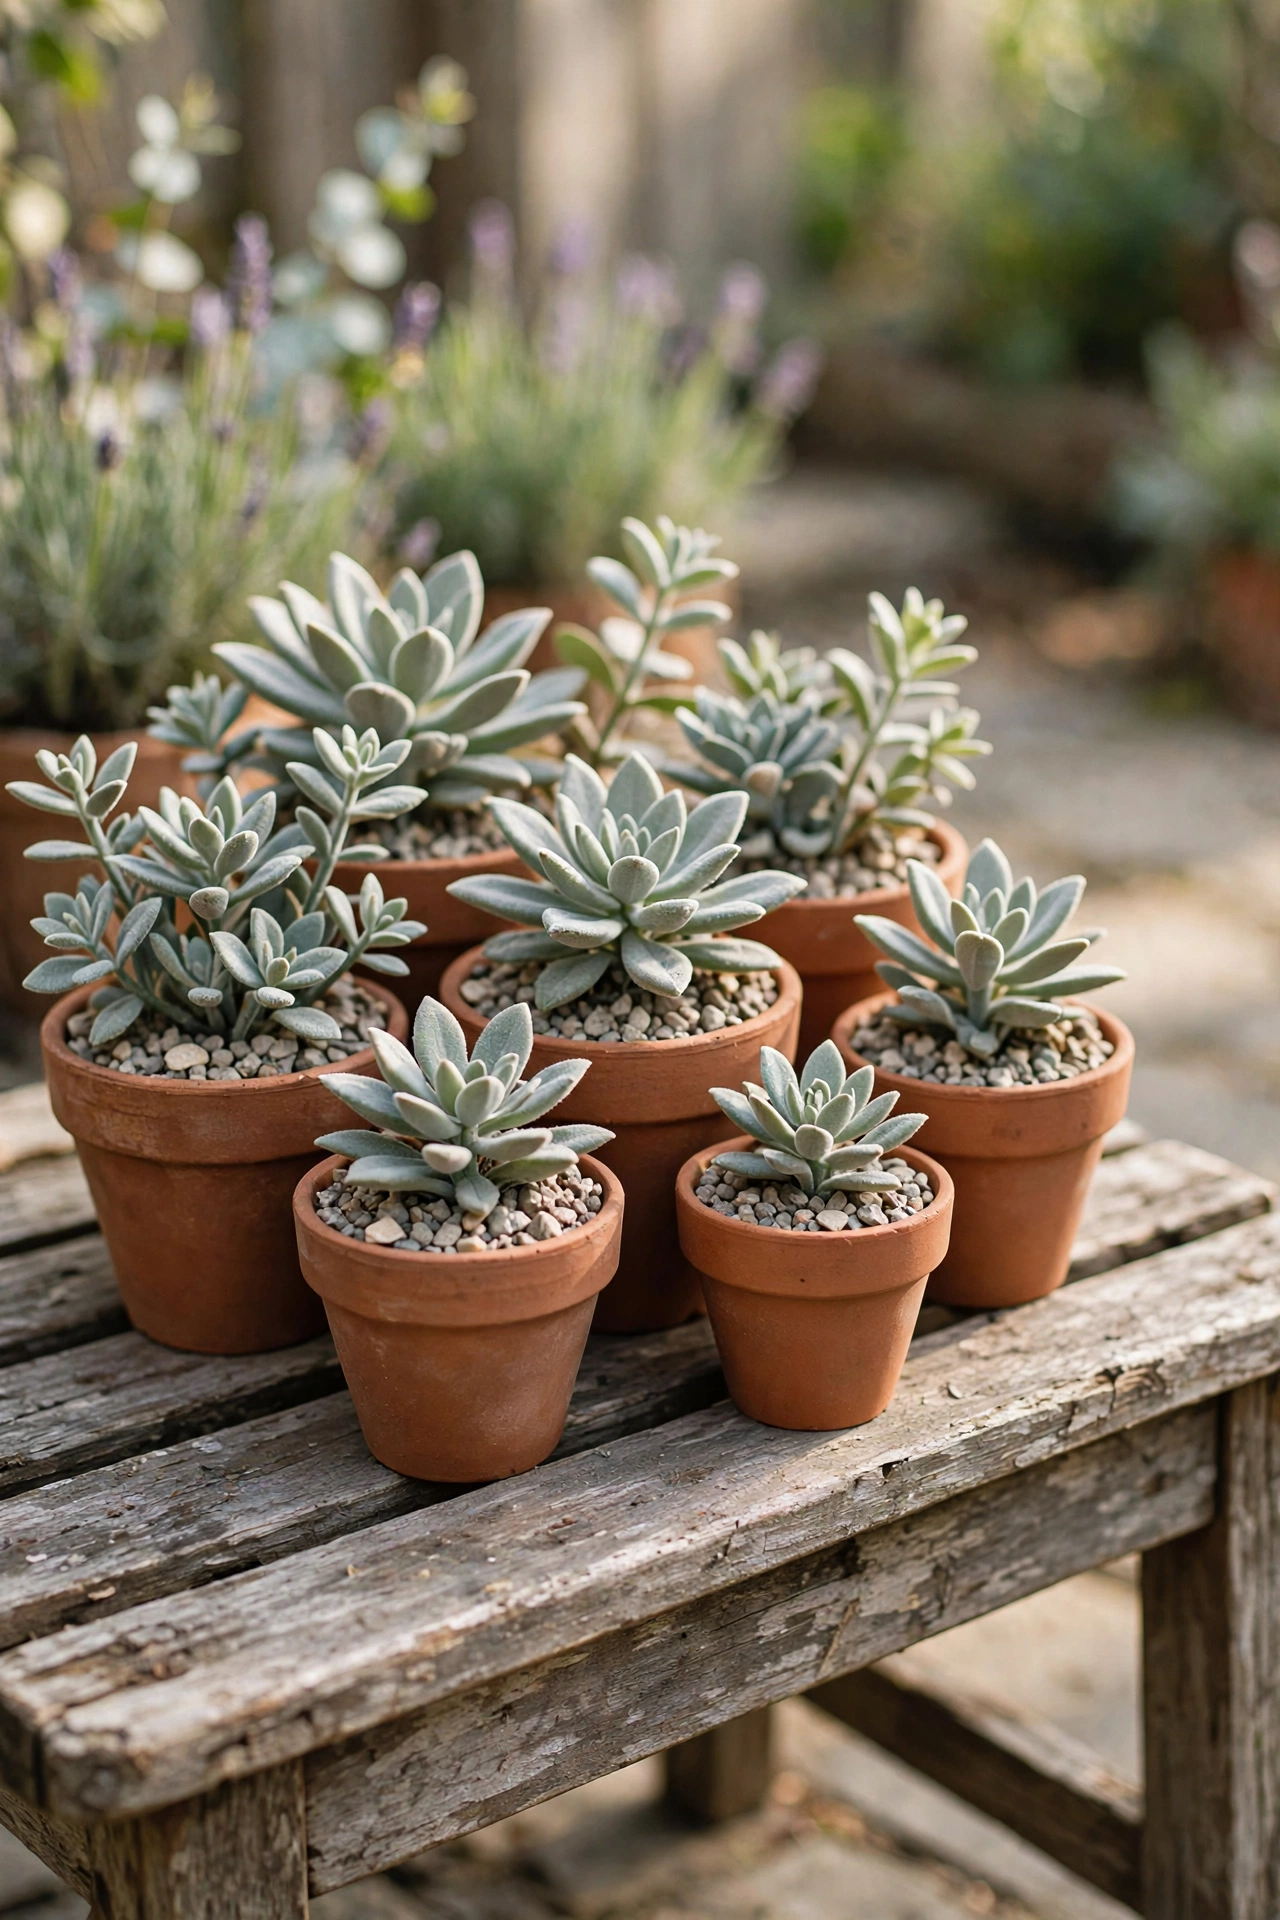
Tiny terracotta pots and faux succulents are two of the most convincing dollar store patio finds when they are put together properly. Step one: buy plain terracotta pots in two or three sizes and fill the tops with faux succulents. Step two: sprinkle a layer of real gravel or small stones over the foam base so nothing fake shows through. Step three: cluster them in groups of three on the table or along a window ledge. I tried this in my own garden and the trick that sells it is the gravel — without it, the foam base is the giveaway. One mistake to avoid: don’t buy the bright-green plastic ones that look dipped in paint; go for the dusty, sage-toned succulents with a bit of colour variation. Those pass the two-metre test easily.
Cost: ~$9 for a cluster of six · Time: 20 minutes
Melamine Tray Turned Patio Bar Station

A large melamine serving tray with a decent pattern can become your whole patio drinks station. Step one: choose a tray with a marble look or dark wood grain print — those two patterns hide the plastic best. Step two: set it on a side table with two or three glasses, a bottle, and a small bowl of citrus slices. Step three: keep the tray stocked and tidy so it always looks staged rather than left out. I tried this in my own patio corner and guests kept topping up their own drinks, which is the whole point — it looks intentional, not makeshift. One mistake to avoid: never leave it out in full midday sun all season; melamine warps and fades, so bring the tray in when the day is done. A thirty-second habit that doubles its life.
Cost: ~$8 · Time: 10 minutes
Linen-Look Napkins with Wooden Bead Rings

Cloth-look napkins in neutral colours and a bag of wooden beads are all you need for table settings that look styled rather than set. Step one: thread eight to ten wooden beads onto a loop of elastic cord for each napkin ring. Step two: knot the elastic and trim the tail so the ring sits snug. Step three: fold each napkin into a simple rectangle and slide the bead ring on a third of the way up. I tried this in my own garden for a birthday lunch and one guest tucked her napkin ring into her handbag as a keepsake — she thought it was a favour. One mistake to avoid: keep the beads plain wood or stained dark; the brightly painted ones clash with the calm linen look. Neutrals all the way.
Cost: ~$7 for eight settings · Time: 30 minutes
Glass Jars as Table Lanterns
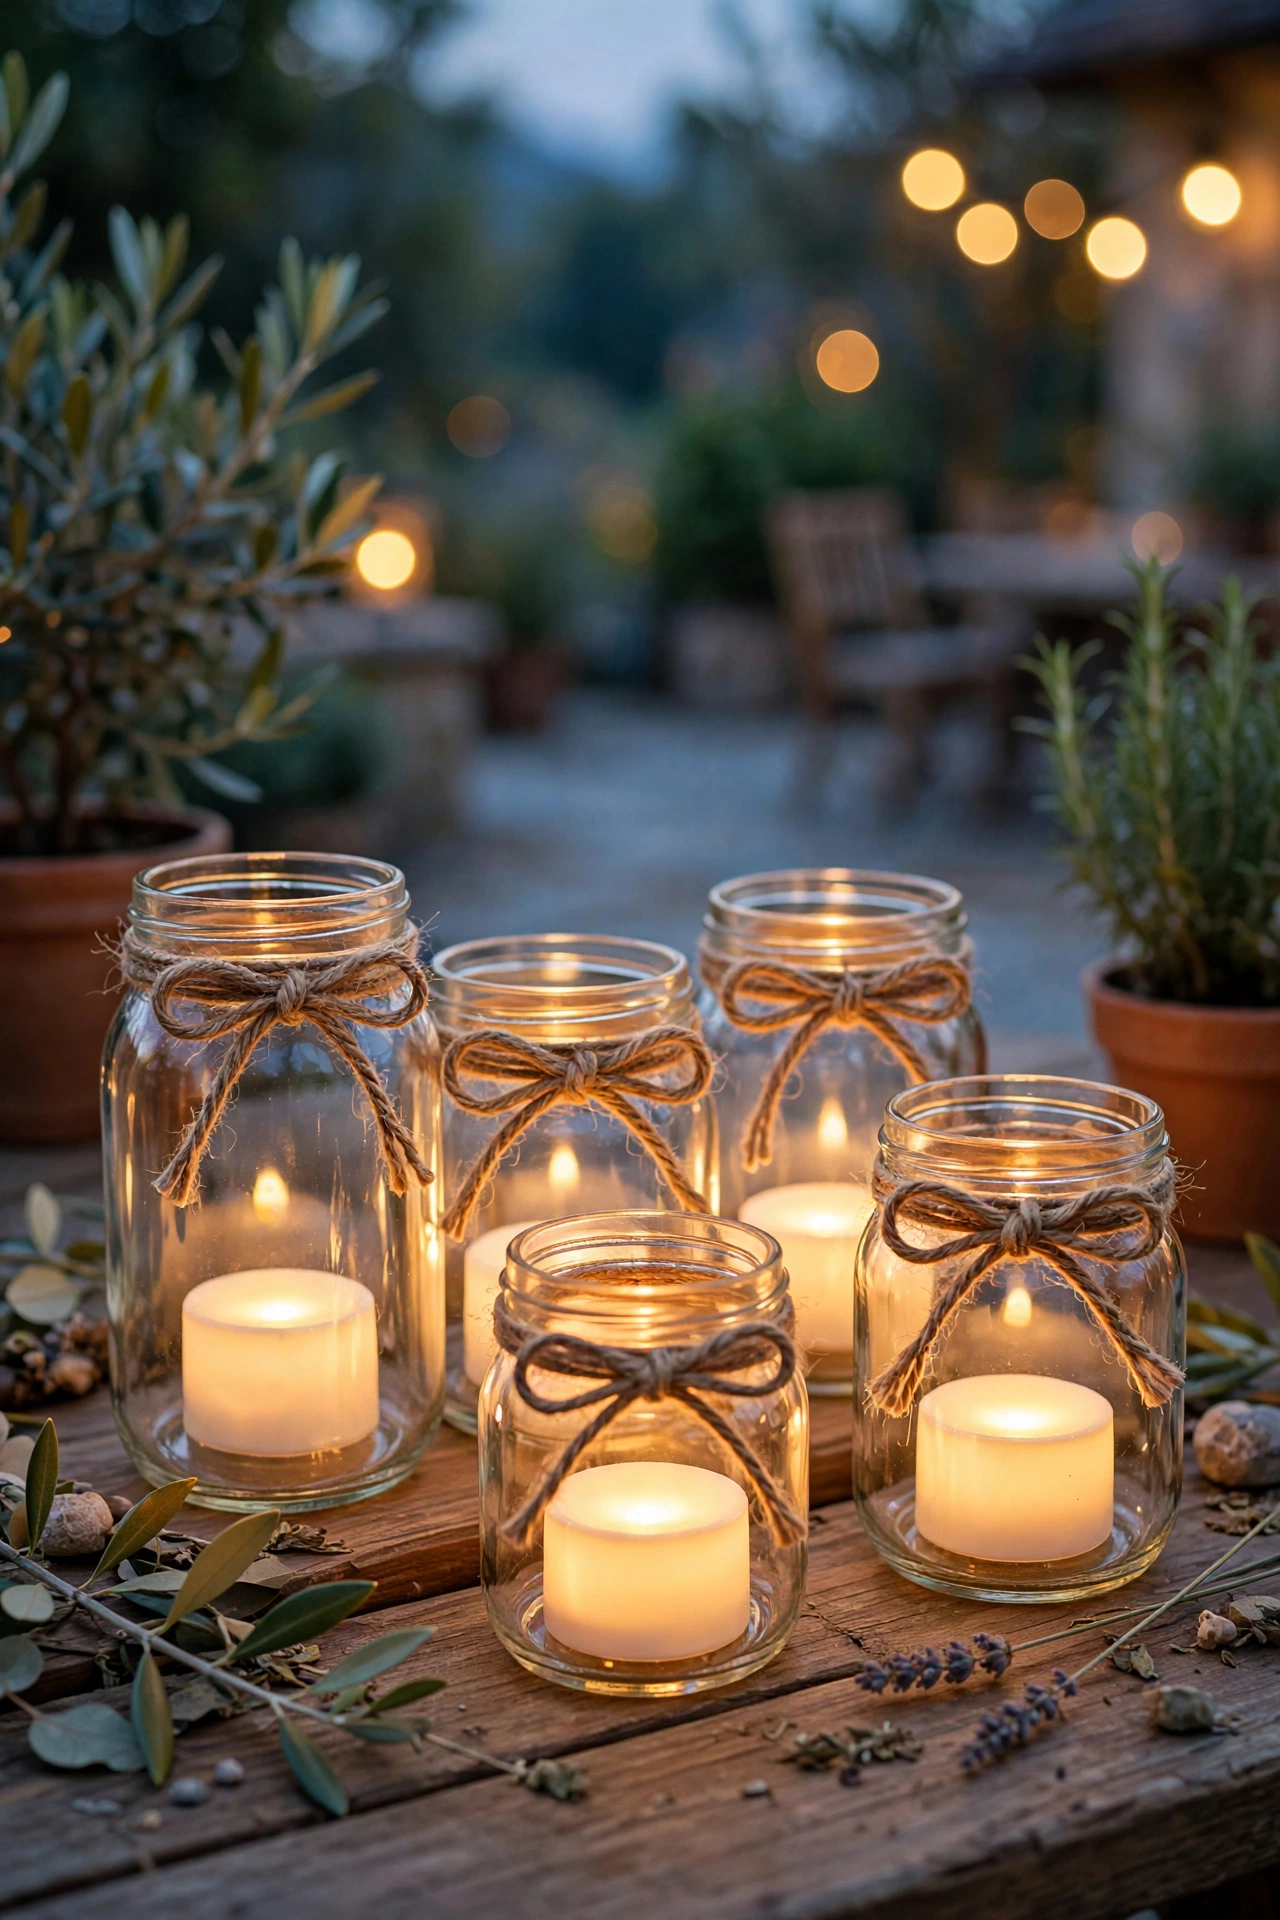
Plain glass jars plus flameless tea lights make the kind of table lanterns that sell for twenty dollars each in catalogues. Step one: grab a mix of tall and short jars — pickle and mason styles both work. Step two: tie a length of jute twine around each neck in a simple bow for texture. Step three: drop a flameless tea light in each and scatter them down the table in a loose zigzag. I tried this in my own patio and the warm glow through the glass at night is honestly the prettiest lighting I own outside. One mistake to avoid: don’t use real tea lights in the jars; the heat cracks thin glass and the soot stains the inside in one evening. Flameless every time.
Cost: ~$9 for six lanterns · Time: 20 minutes
Deck & Floor Finds
Interlocking Foam Tiles to Cover Plain Concrete
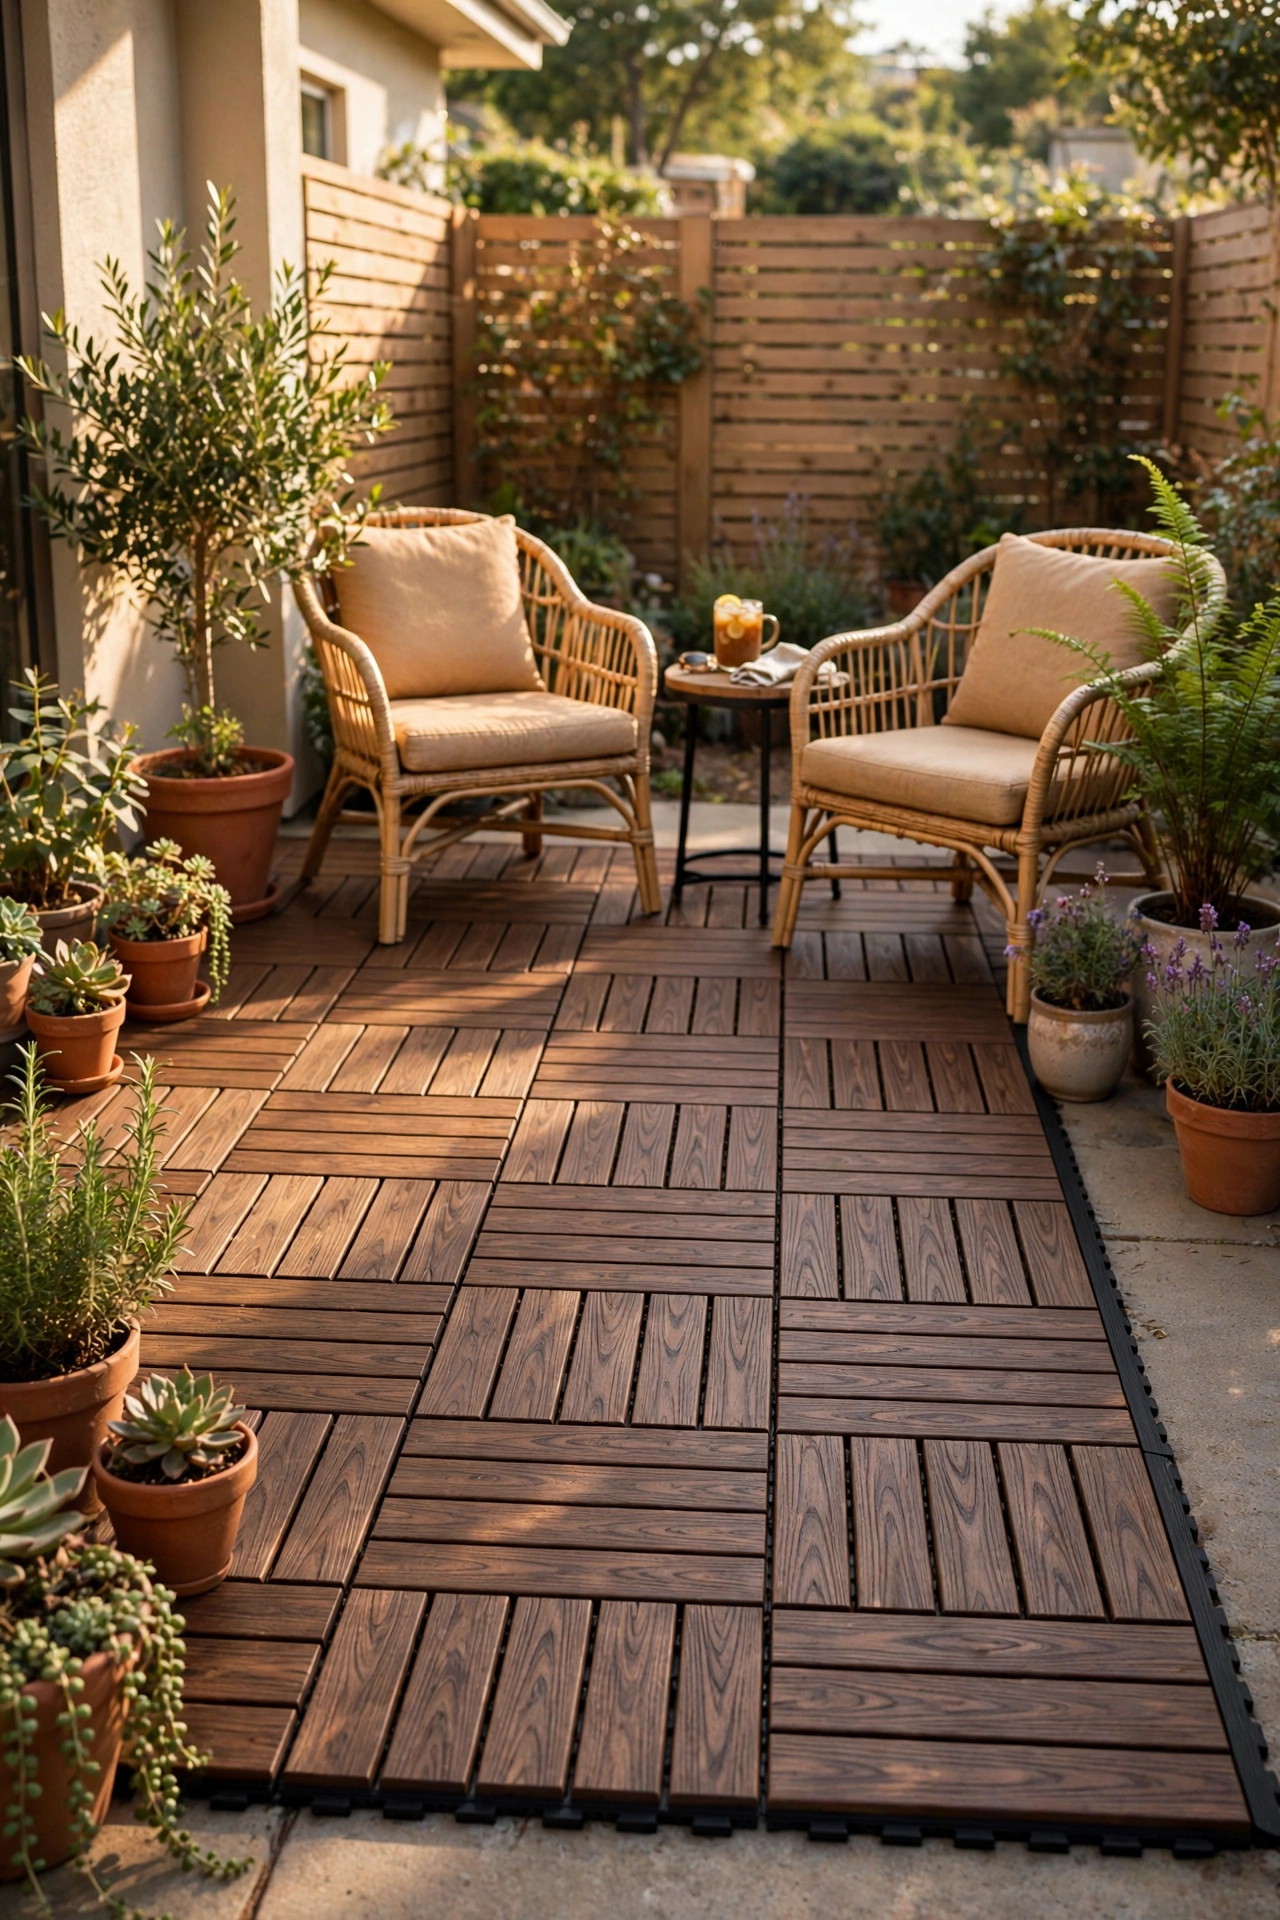
Those interlocking foam mats — the ones sold for kids’ playrooms — come in wood-grain prints that genuinely pass as deck tiles from a few steps back. Step one: measure your concrete area and buy enough tiles to cover it with a few spares. Step two: start from the centre and work outward, pressing the interlocks tight so there are no gaps. Step three: trim the edge tiles with a craft knife and a straight edge for a fitted finish. I tried this in my own patio and the transformation was the single biggest change per pound I have ever made outdoors. One mistake to avoid: buy the grey or brown wood tones, never the bright primary colours — colour is what gives the game away. Darker prints read as composite decking.
Cost: ~$18 for a small area · Time: 1 hour
Spray-Painted Plastic Planters in Matte Charcoal
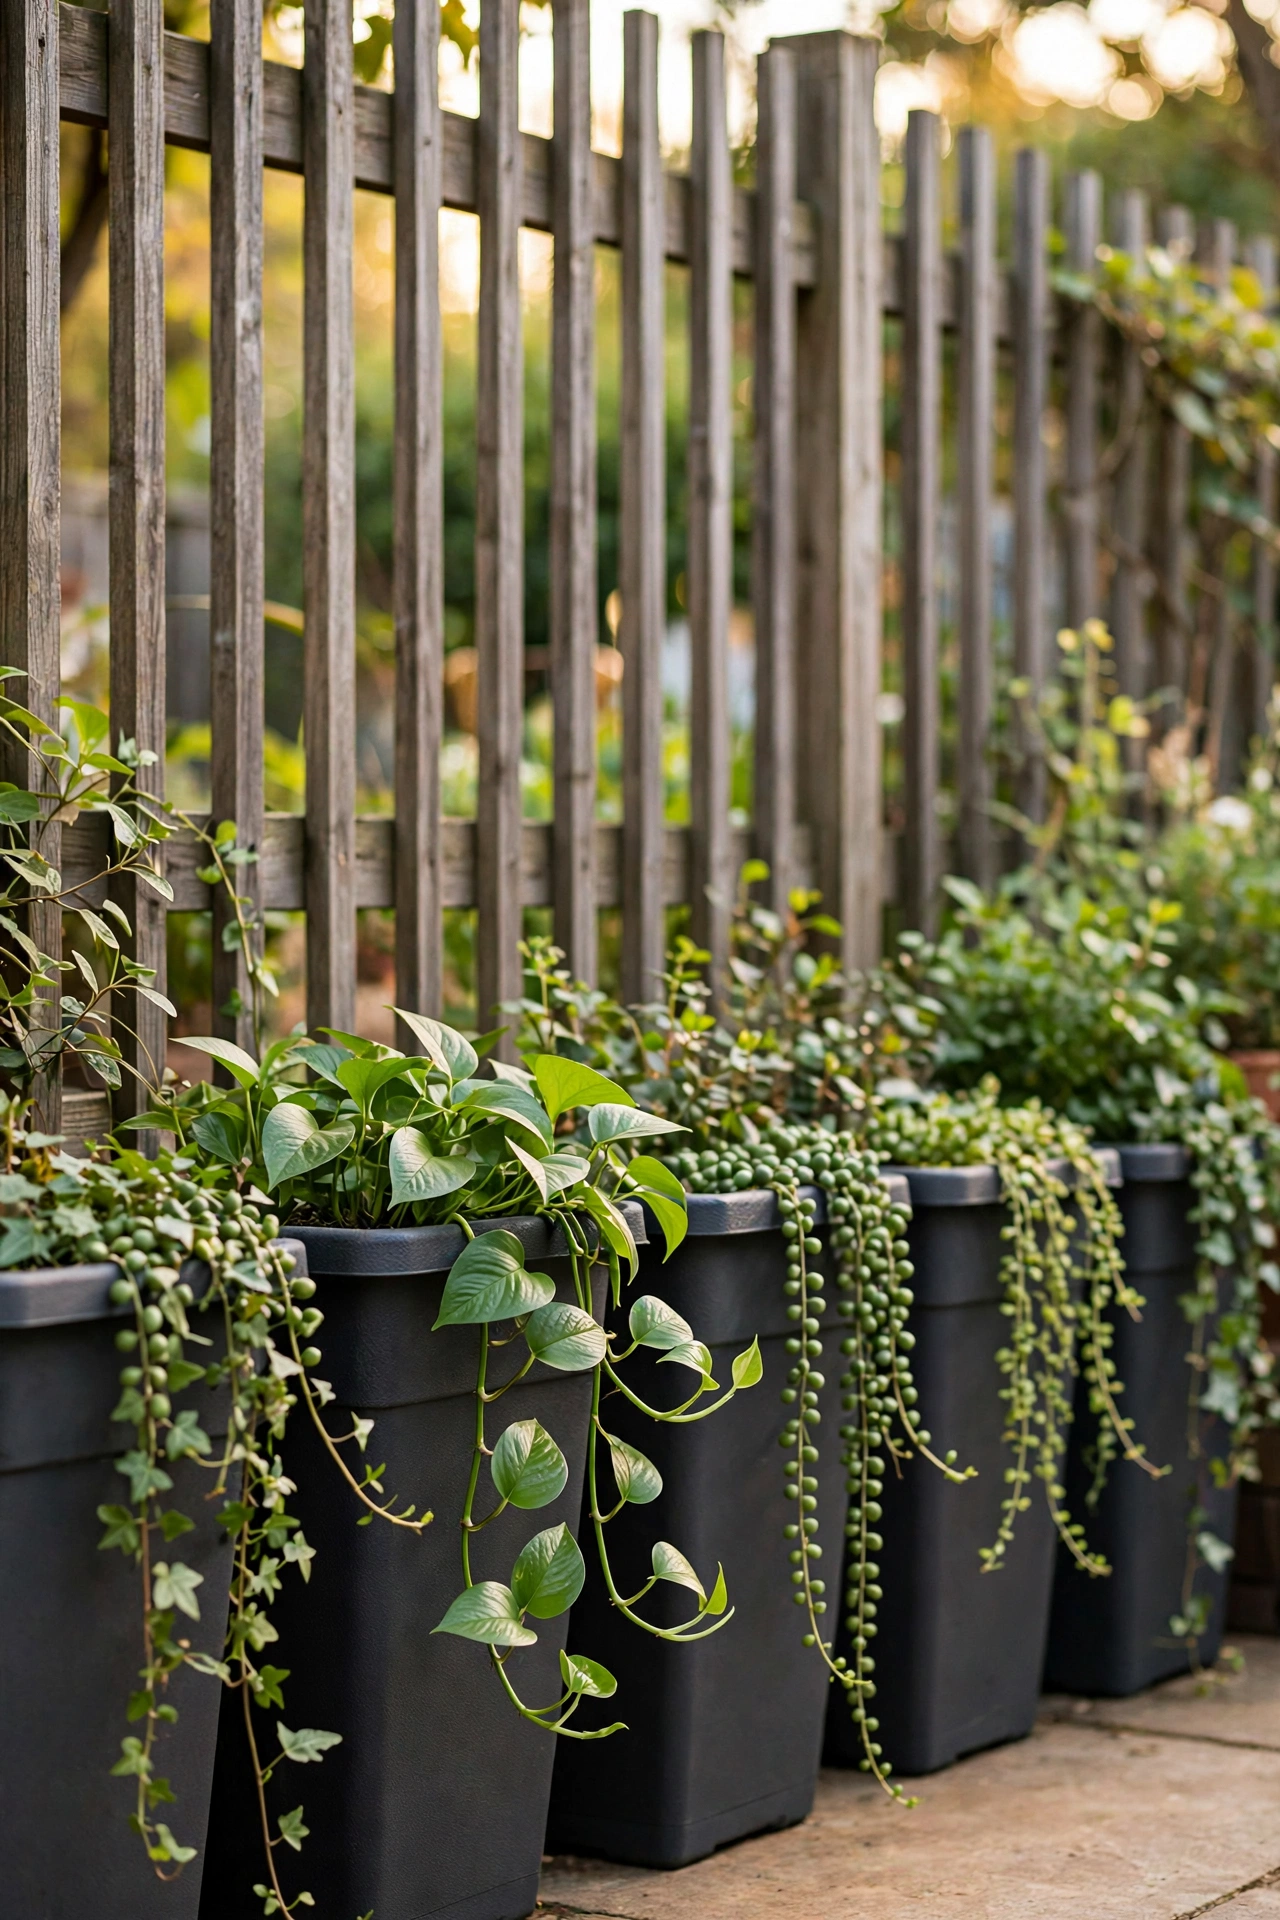
The plainest plastic planters become designer pots with one can of matte spray paint. Step one: choose planters with clean, straight lines — simple shapes take paint best. Step two: wash them, let them dry fully, then spray two thin coats of matte charcoal or stone grey, letting each coat dry. Step three: drill a drainage hole in the base with a thick nail and plant them up with something trailing. I tried this in my own garden and after one season nobody could tell the pots started life at a dollar each. One mistake to avoid: don’t skip the drying time between coats; thick wet paint peels off plastic in sheets within a month. Two thin coats is the whole secret.
Cost: ~$12 for five planters and paint · Time: 45 minutes
Galvanised-Look Buckets as Outdoor Planters
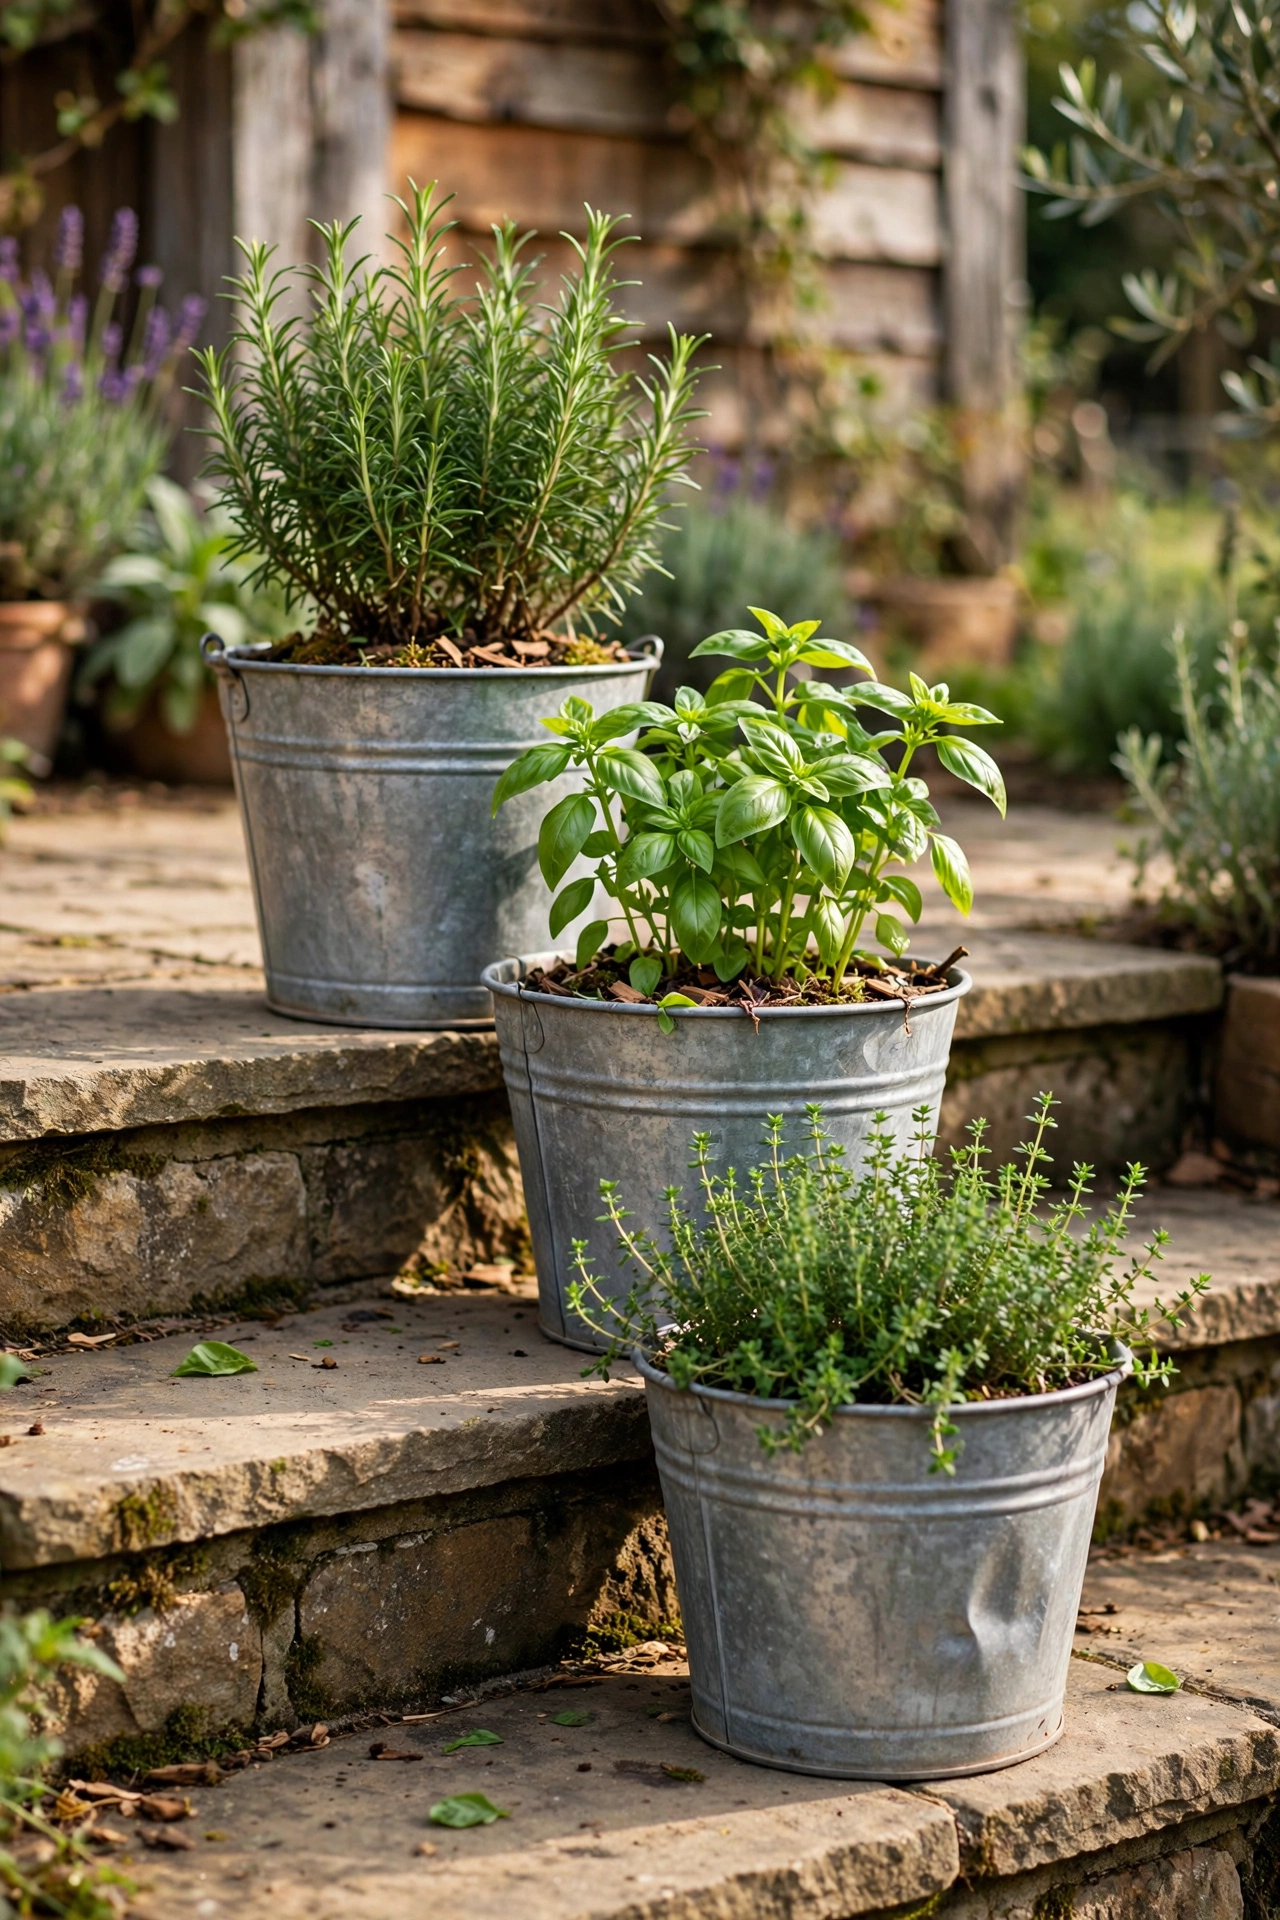
Small metal-look buckets give that farmhouse garden feel for almost nothing. Step one: pick buckets in matching sizes — three of one size looks better than a mixed collection. Step two: drill or punch drainage holes in the bottom. Step three: fill with herbs or bedding plants and set them on the steps or along the fence line. I tried this in my own patio with mint and basil, which meant the pretty display doubled as a cooking supply. One mistake to avoid: the painted coating on the cheapest buckets rusts fast, so give them a coat of clear spray sealant before planting. Ten minutes now saves you replacing them in July.
Cost: ~$8 for three · Time: 25 minutes
Tiered Plant Stand from Stacked Wire Baskets
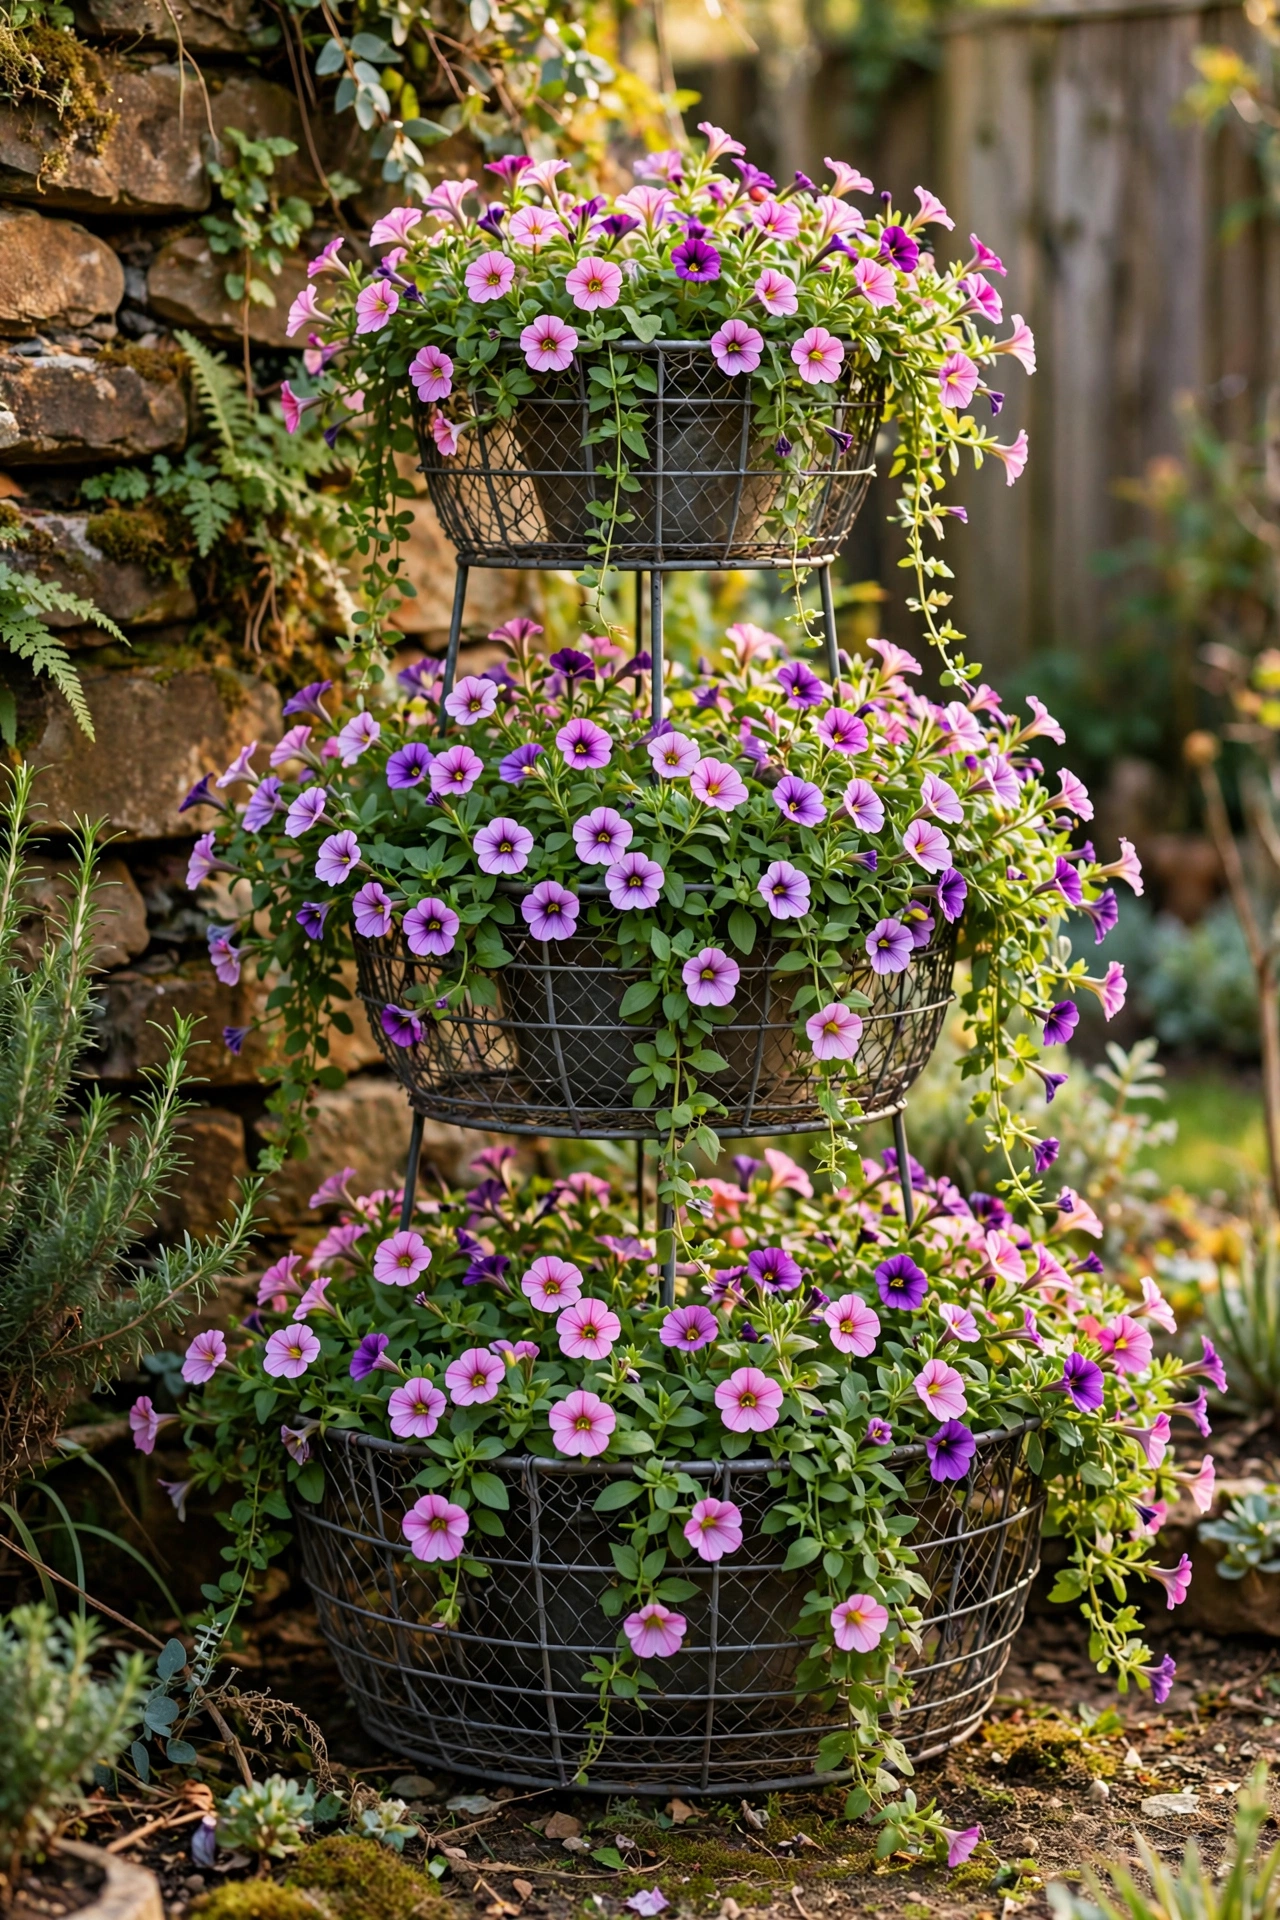
Three round wire baskets, stacked largest to smallest with short bolts or zip ties through the rims, make a tiered plant stand that looks shop-bought. Step one: buy three baskets in graduating sizes. Step two: stack them and fix them together through the rims with small bolts or heavy-duty zip ties. Step three: line each tier with a coir liner or moss and plant with trailing flowers so they spill over the edges. I tried this in my own garden corner and the cascading effect hid the structure so well that a neighbour asked which nursery sold the stand. One mistake to avoid: don’t overwater the top tier; the drip soaks the plants below and rots the liners. Water each level lightly instead.
Cost: ~$6 · Time: 30 minutes
Outdoor Throw Pillows from Cushion Covers
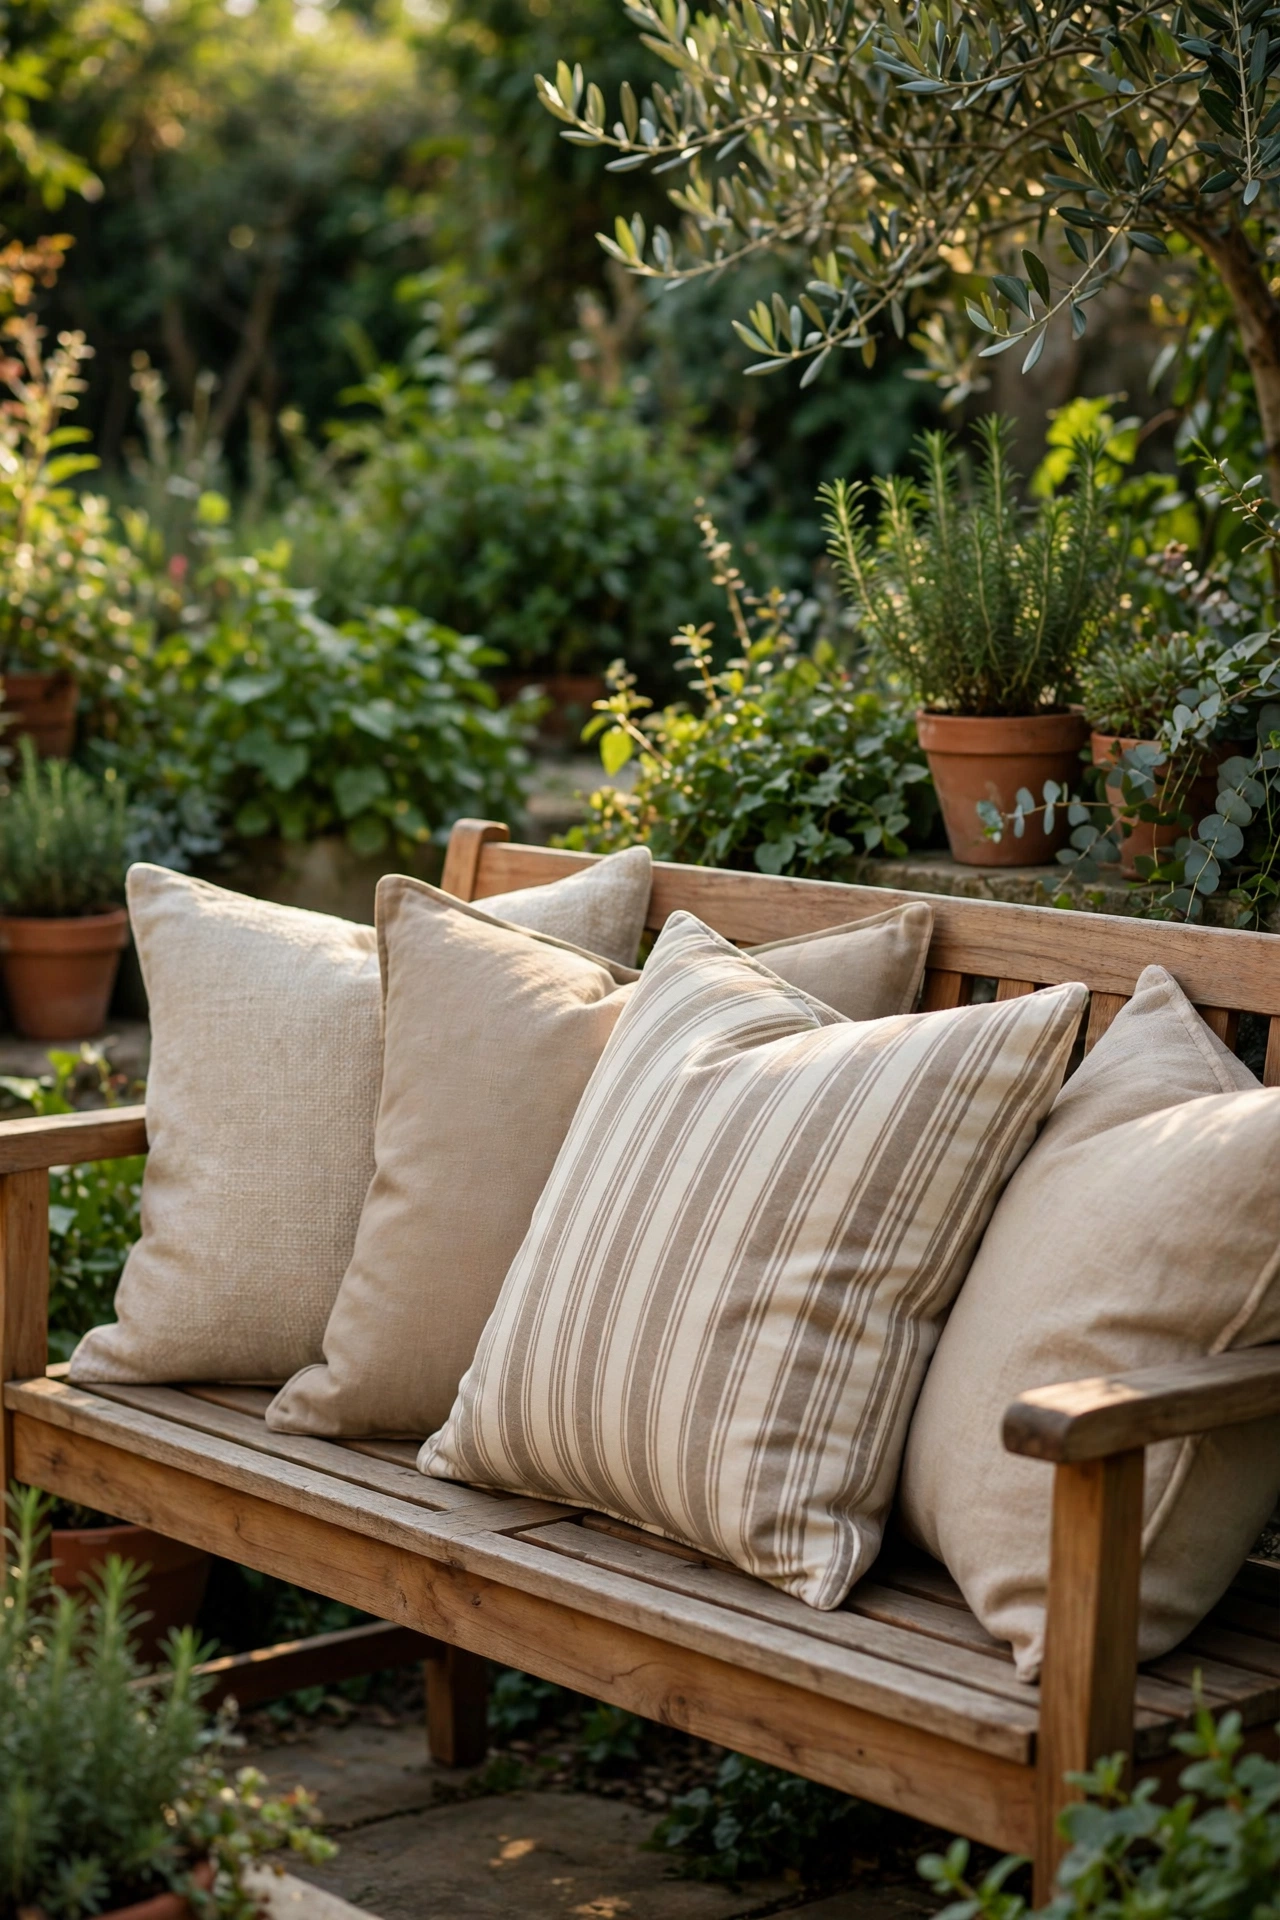
Cushion covers in outdoor-friendly polyester plus cheap inserts give you designer-look patio pillows for a fraction of the price. Step one: buy covers in two solid colours and one stripe or geometric print — odd patterns in threes look curated. Step two: match each with an insert one size up so the corners stay plump. Step three: arrange them on your chairs or bench in layers, big at the back and small in front. I tried this in my own garden and the covers have survived two summers because I bring them inside in rain. One mistake to avoid: don’t buy the inserts at the same store in the small flat sizes; a flat pillow always looks cheap. Go one size larger and stuff it in.
Cost: ~$14 for four pillows · Time: 20 minutes
Rubber Doormats Layered as a Patio Runner
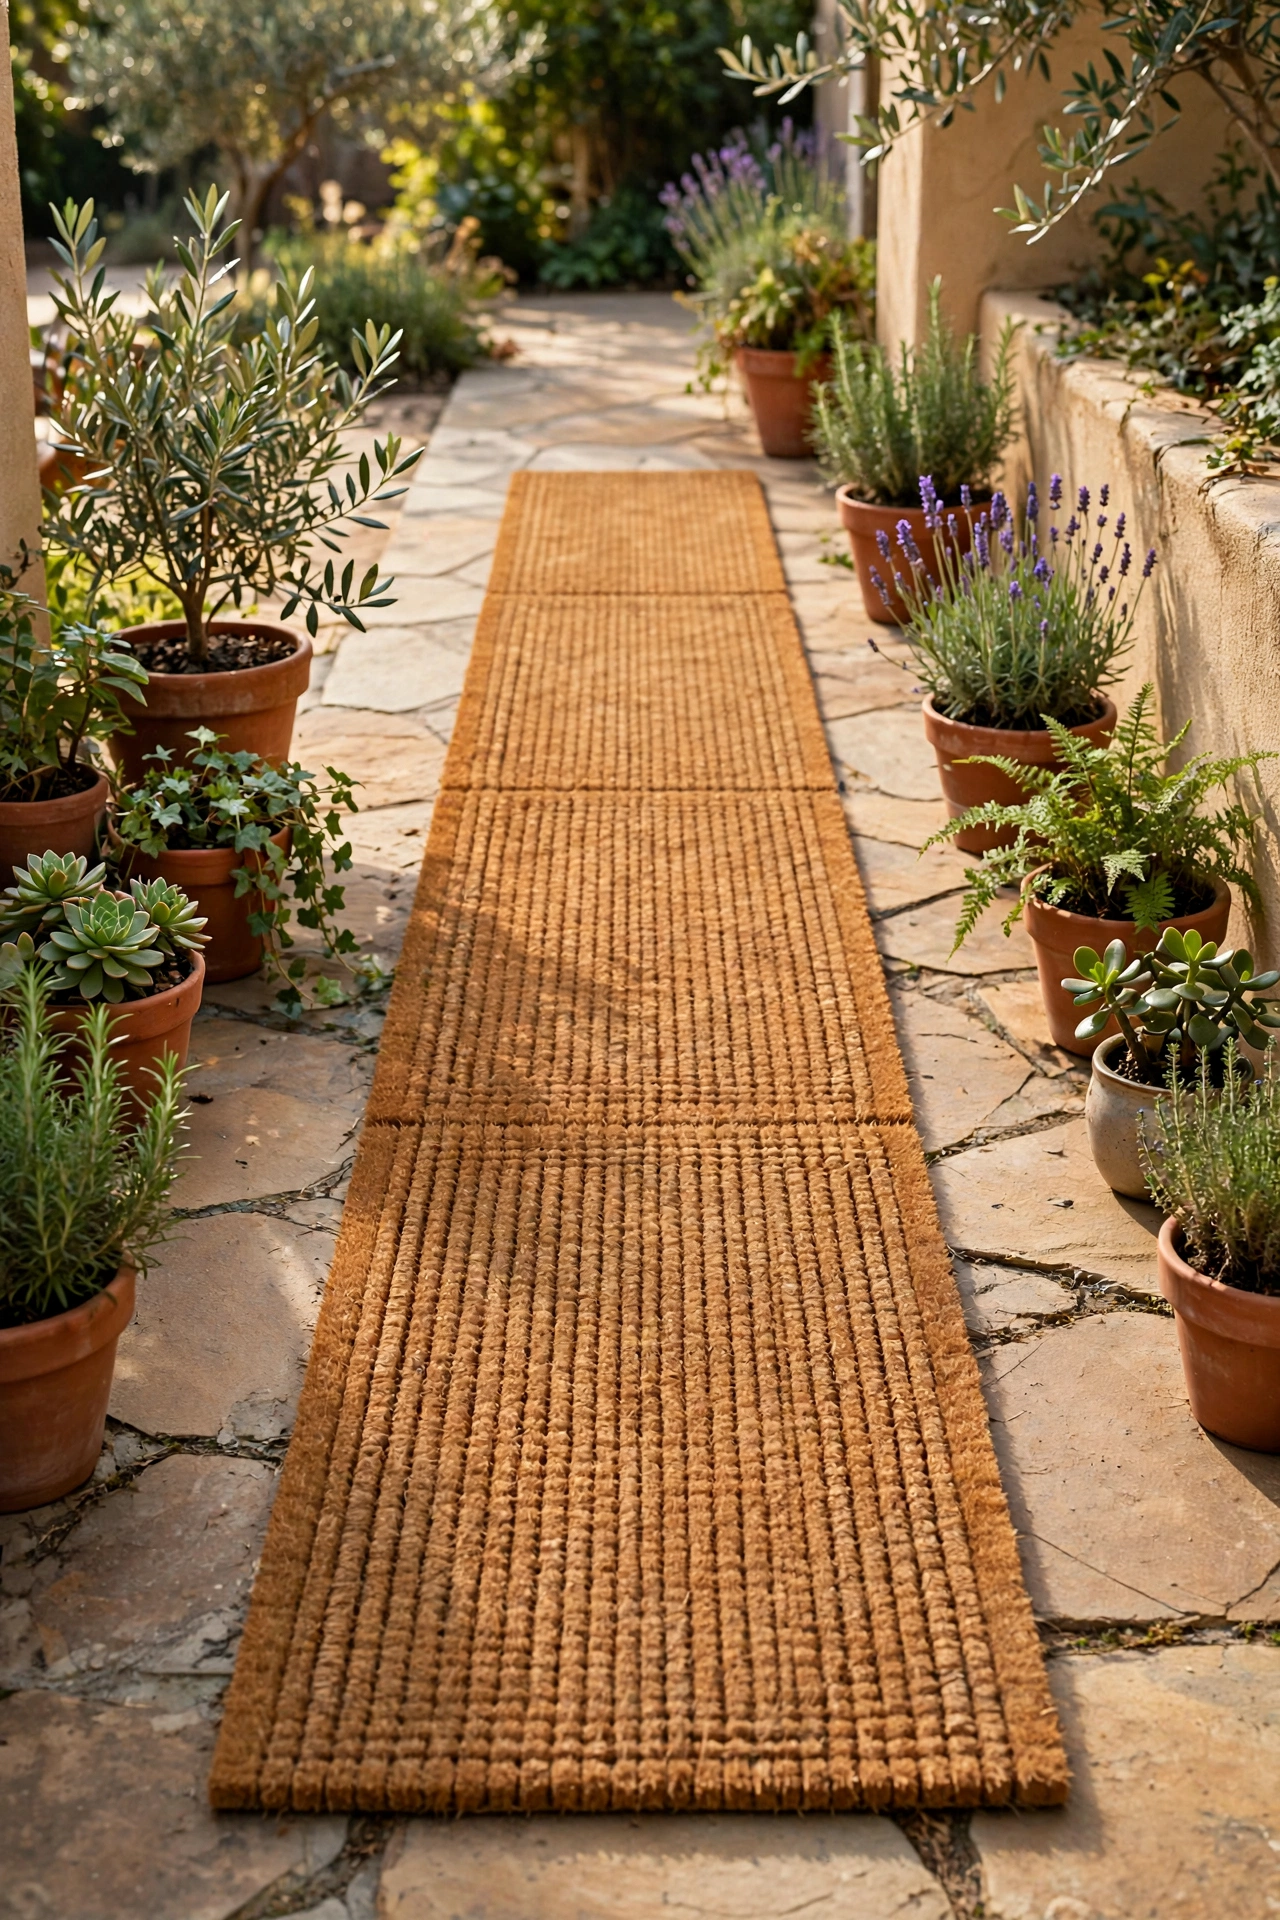
Rubber-backed coir doormats in matching designs, lined up end to end, read as one long runner down a patio or balcony. Step one: buy three or four identical mats with a simple pattern — coir, border stripes, or plain. Step two: butt them tightly together along your walkway. Step three: brush them all in the same direction so the texture lines up. I tried this in my own garden along the path to the back door and visitors assumed it was a single expensive outdoor rug. One mistake to avoid: mixing different patterns kills the illusion instantly — the whole trick is that identical mats read as one piece. Buy one extra as a spare for swapping out.
Cost: ~$16 for four mats · Time: 15 minutes
Solar Stake Lights for the Garden Path
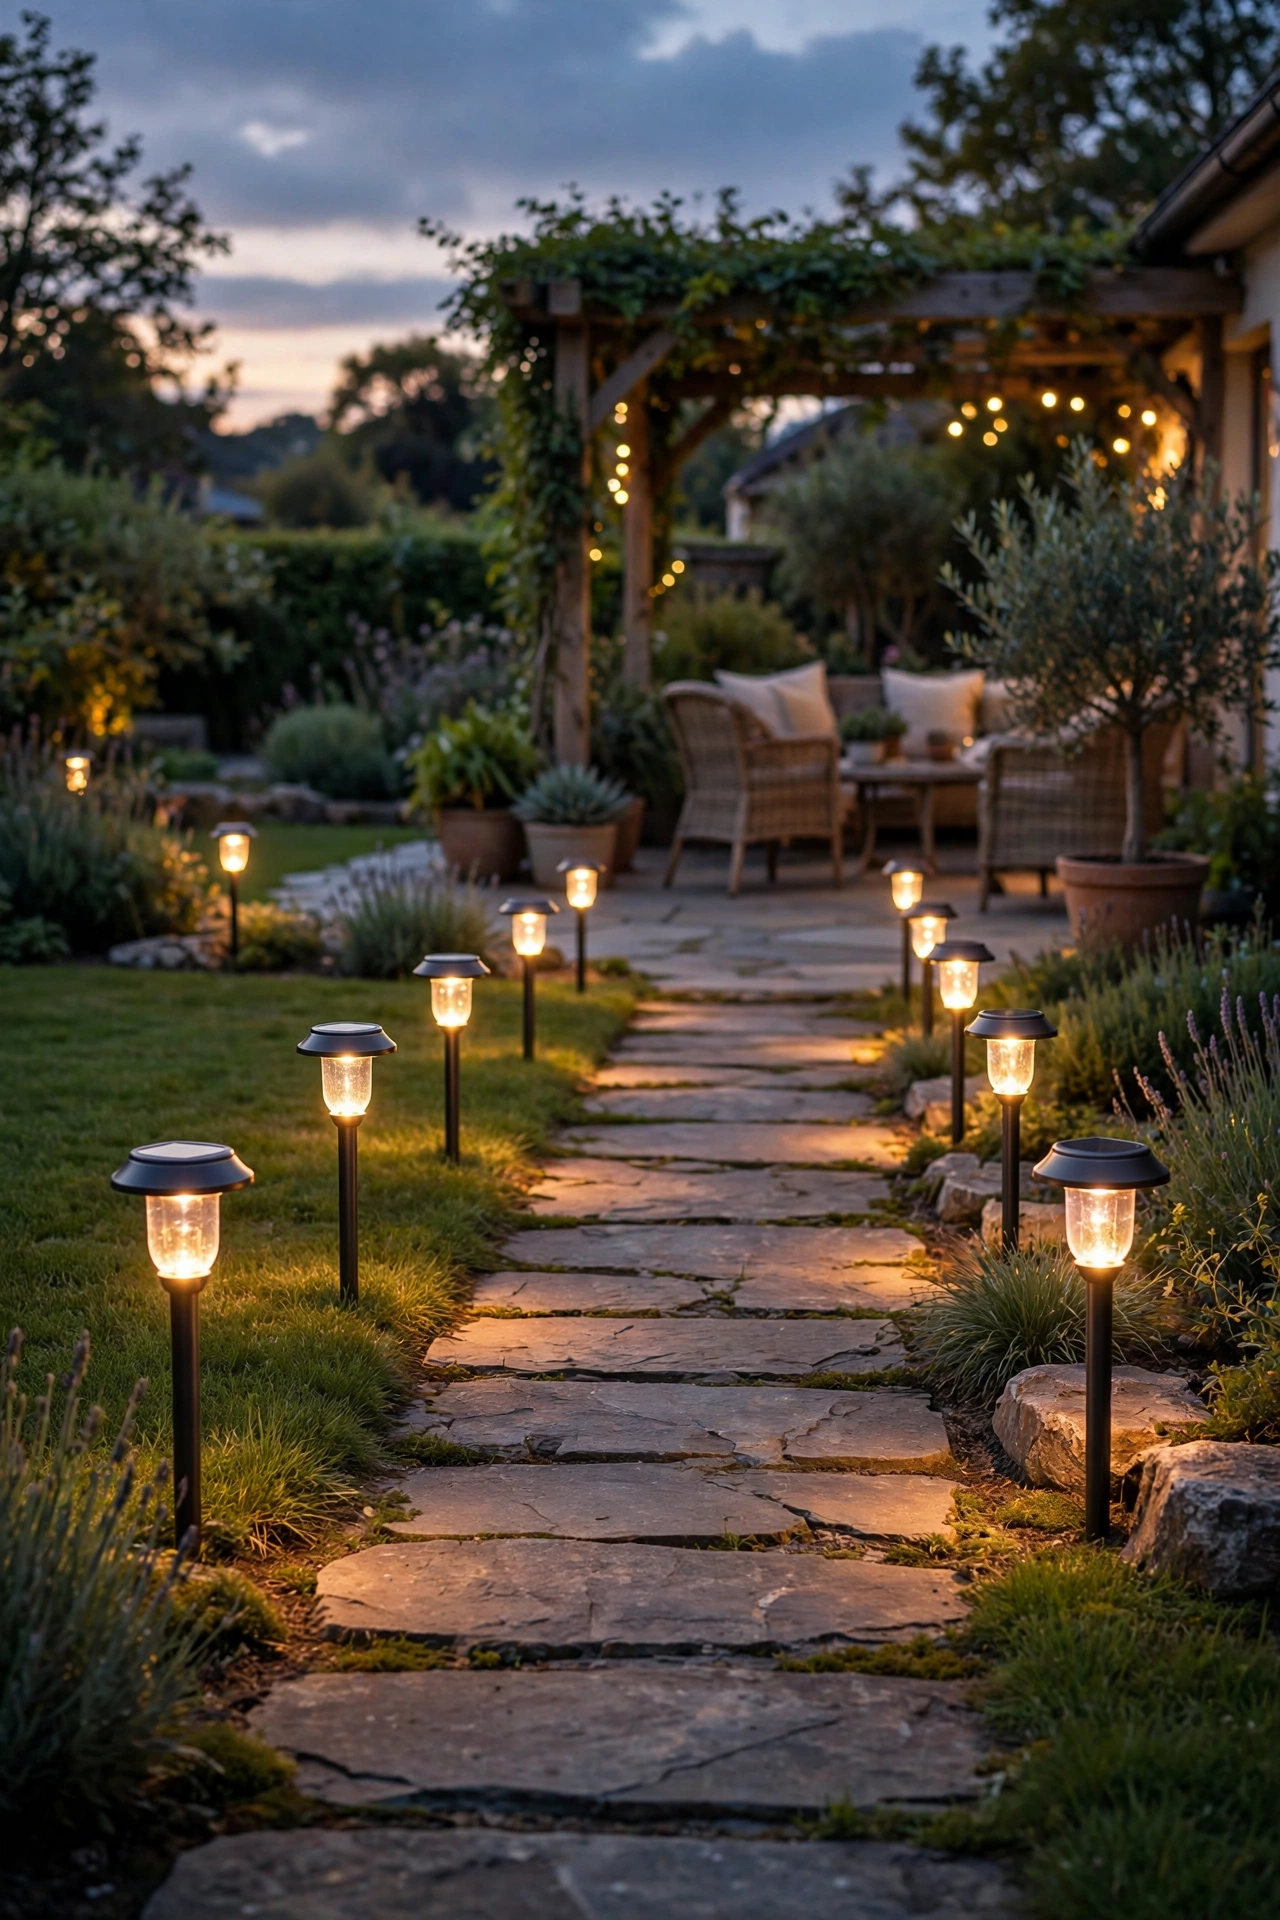
Solar stake lights are the classic cheap buy that genuinely looks expensive after dark. Step one: buy one multi-pack so all the lights match — mismatched tops look cluttered. Step two: push them into the soil at even intervals along the path, about two metres apart. Step three: wipe the little solar panels with a damp cloth once a month so they charge properly. I tried this in my own garden and the path lighting made the whole patio feel like a hotel courtyard after sunset. One mistake to avoid: placing them under a porch overhang or thick tree shade starves the panel — they need at least half a day of direct sun to glow all evening. Position before you plant.
Cost: ~$10 for a pack of six · Time: 20 minutes
Garden Statue Accents in Stone Finish
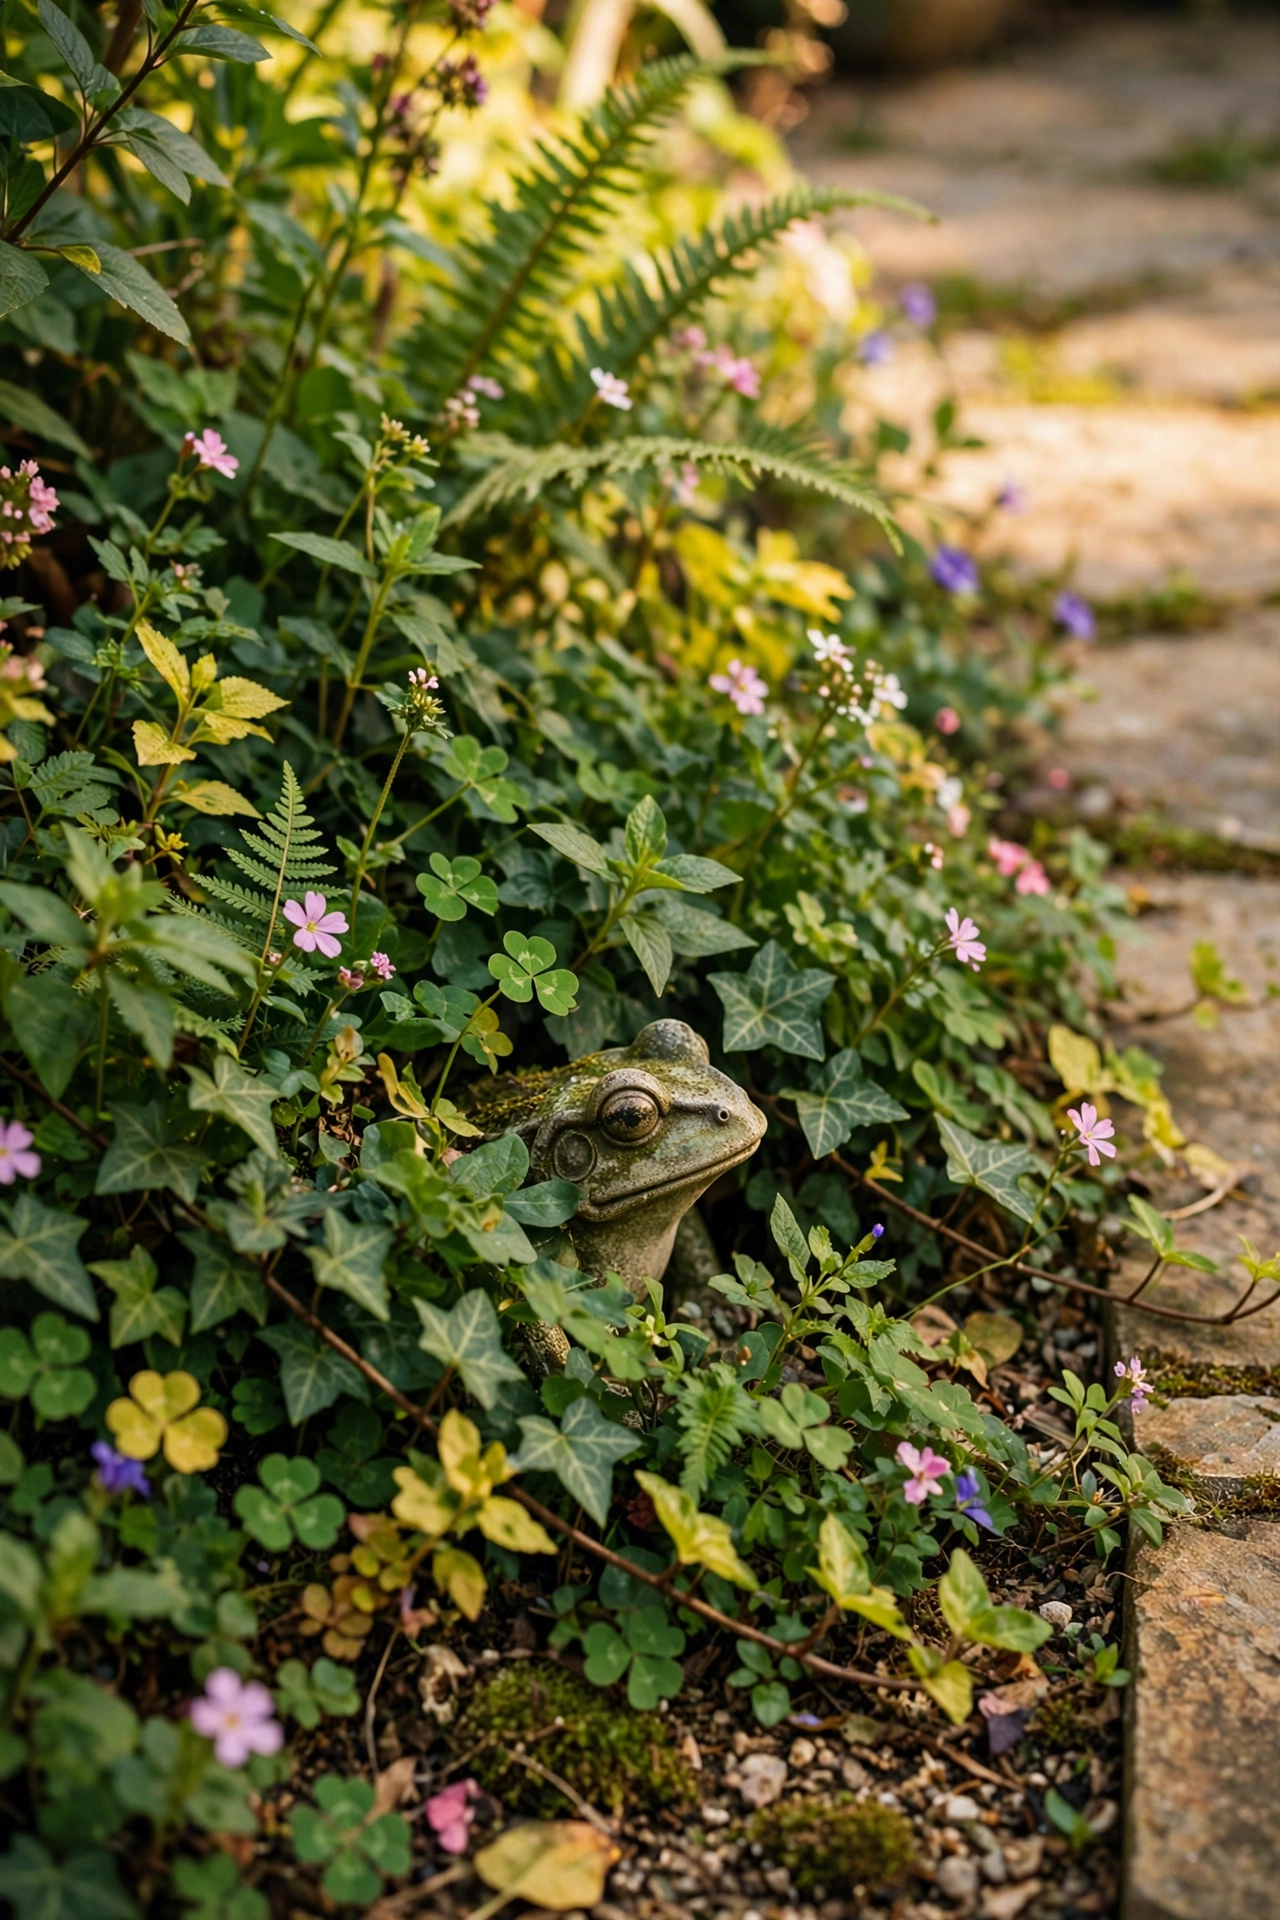
Small resin statues with a stone-look finish add that collected-over-time feel to beds and borders. Step one: choose one or two pieces with a weathered grey or sandstone finish — avoid bright paint. Step two: nestle them into the planting so they peek through the foliage rather than sitting on bare soil. Step three: let them weather naturally; a bit of moss and rain makes them look more expensive, not less. I tried this in my own garden with a small hedgehog and a frog, and the weathered finish after one season is what sells them. One mistake to avoid: don’t cluster five statues together like a gift shop display — one or two, half-hidden among the plants, is the designer move.
Cost: ~$6 for two · Time: 10 minutes
Fence, Walls & Railings
String Light Clips Along the Fence Top
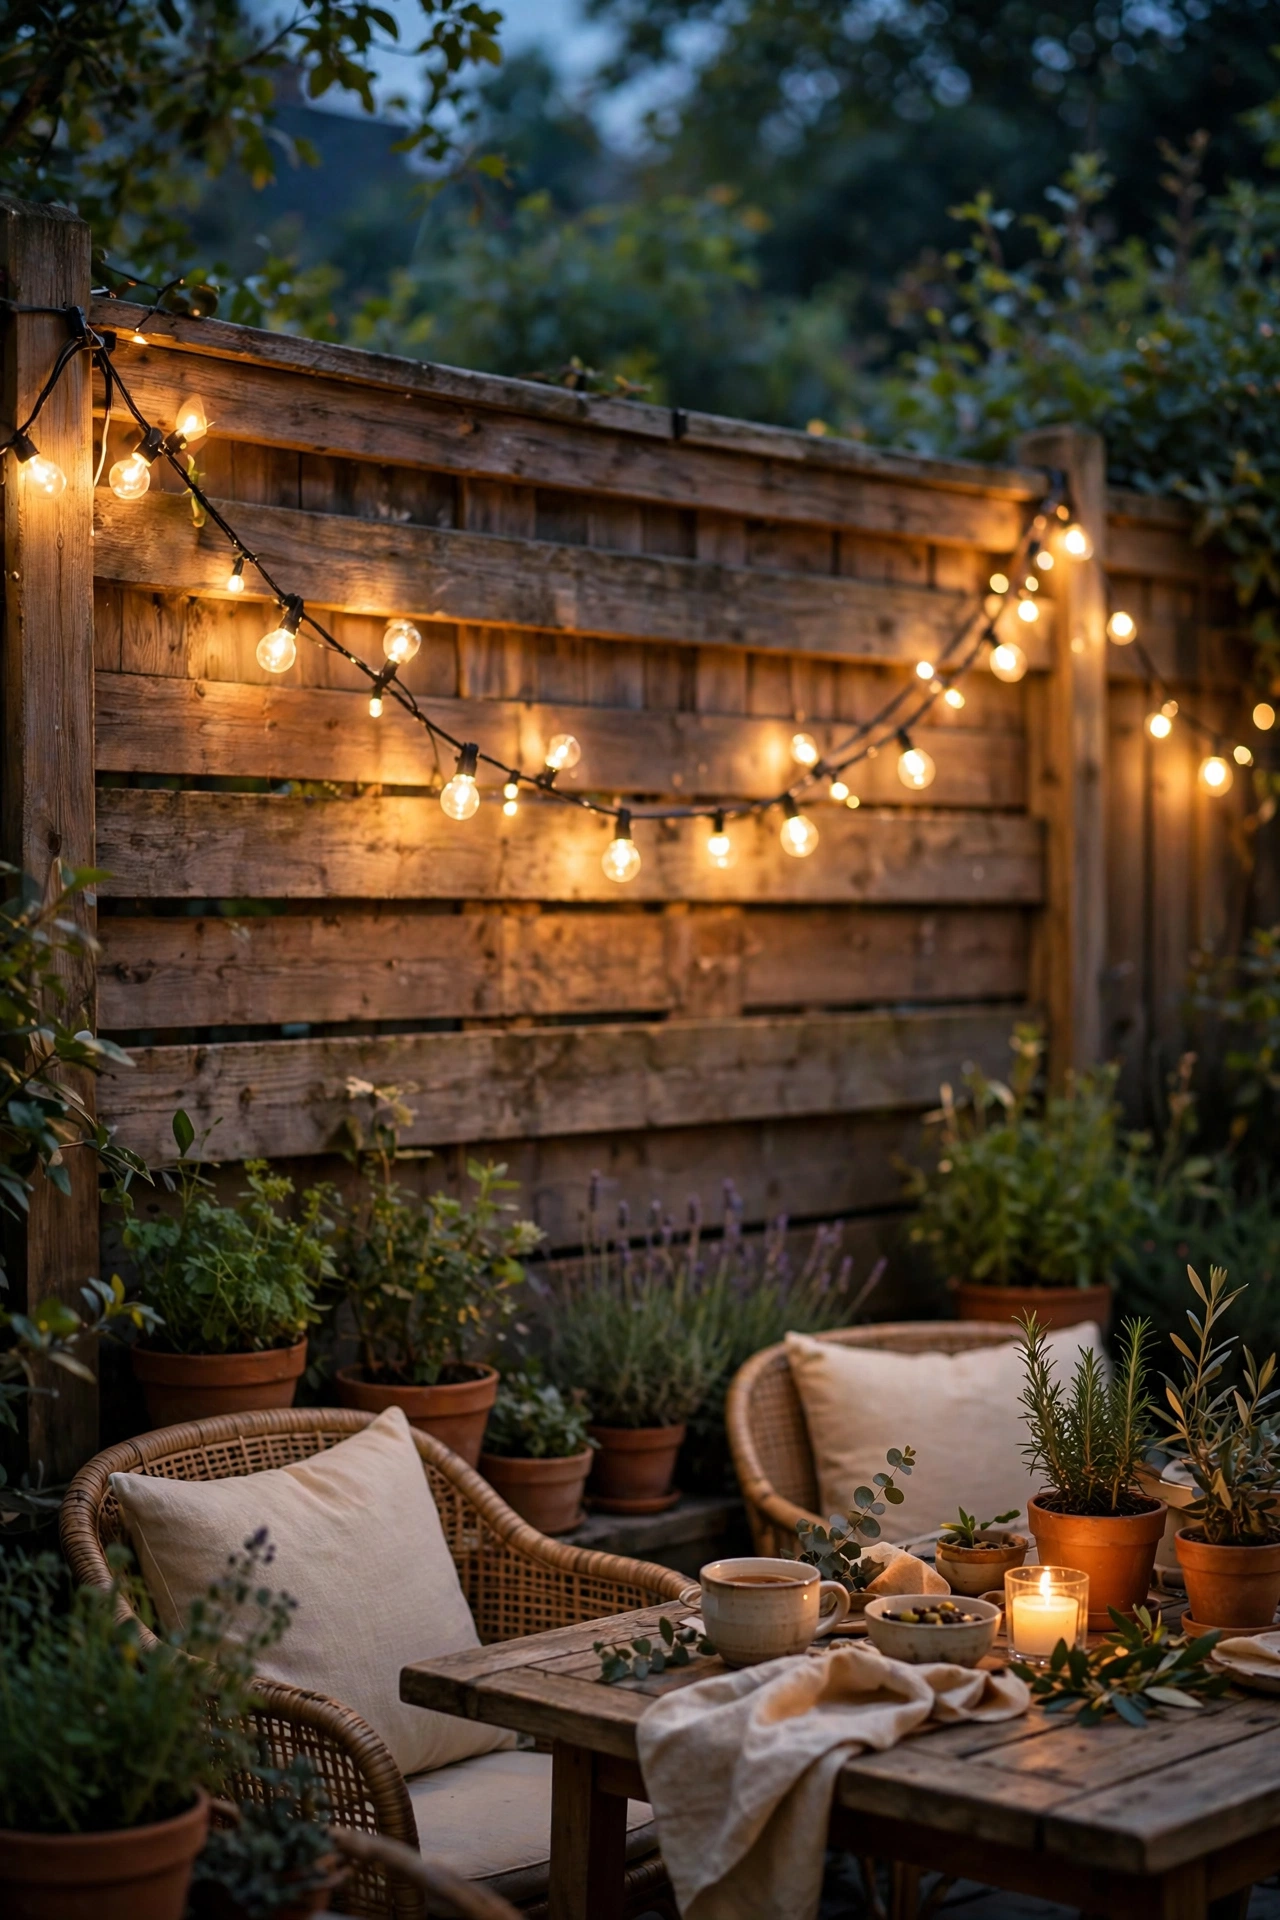
A set of adhesive or screw-in light clips turns any fence into the backdrop for festoon lighting. Step one: fix the clips along the top rail of the fence at even spacing. Step two: drape a warm-white string light through them with a gentle swag between clips. Step three: run the cable neatly down one end to a weatherproof outdoor socket. I tried this in my own garden and the fence went from plain boundary to evening feature in one afternoon. One mistake to avoid: cool-white bulbs look like a car park — warm white at 2700K is the colour that makes patios feel expensive. Check the box before you buy.
Cost: ~$12 for clips and lights · Time: 40 minutes
Faux Boxwood Mats as a Privacy Hedge
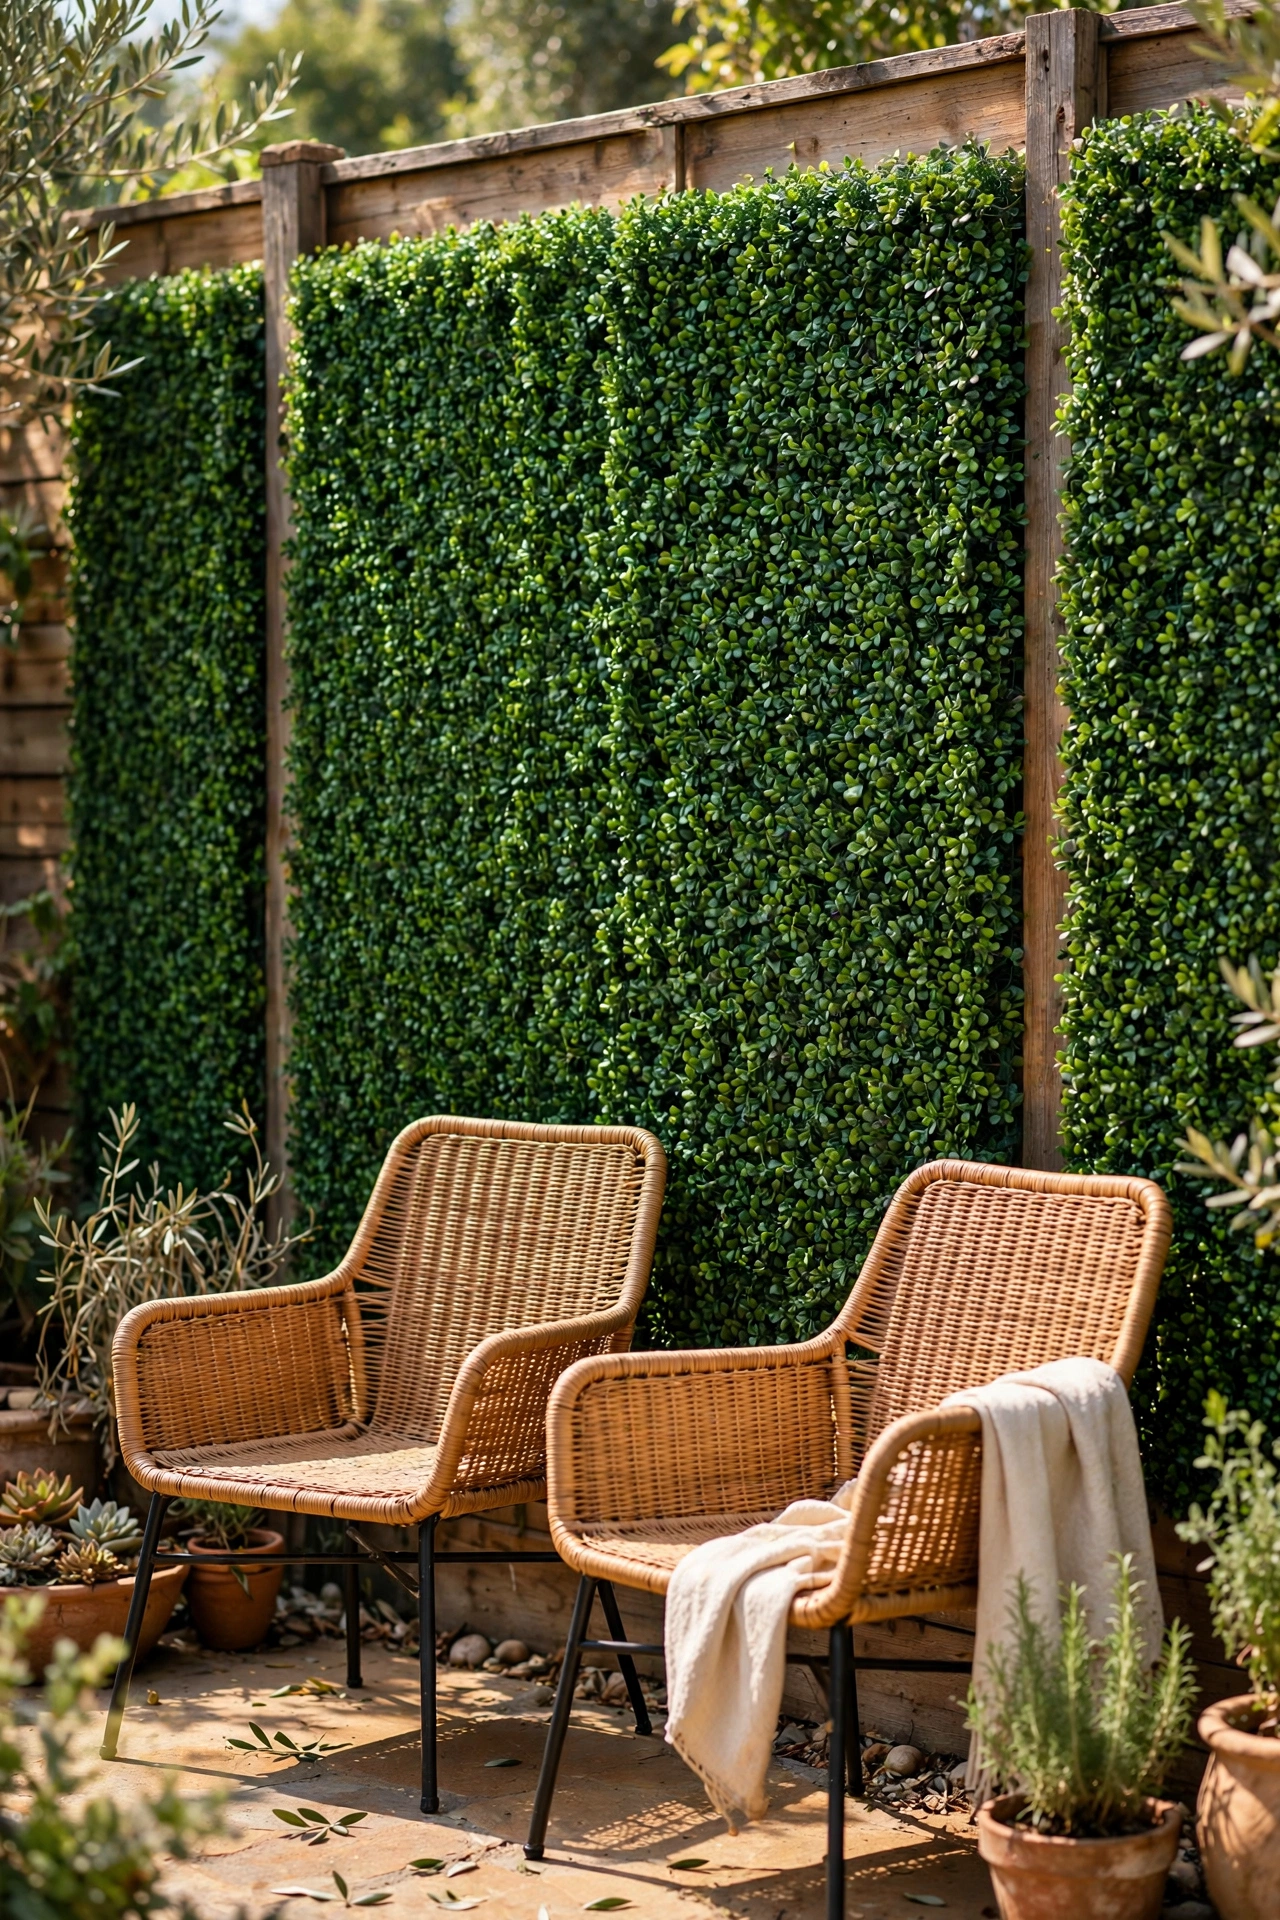
Square faux boxwood mats zip-tied to a fence or trellis read as a planted hedge from any normal distance. Step one: count how many squares your fence section needs and buy matching mats. Step two: fasten them with dark zip ties through the mesh backing, pulling tight so there are no gaps. Step three: trim the ties flush and brush the leaves in one direction for an even look. I tried this in my own garden on the one fence panel facing the neighbours and it instantly gave that panel a finished, private feel. One mistake to avoid: leaving gaps between mats lets the fence show through, which breaks the illusion — overlap the edges slightly so the coverage is solid.
Cost: ~$18 for a panel · Time: 45 minutes
Hanging Wall Planters on Fence Slats
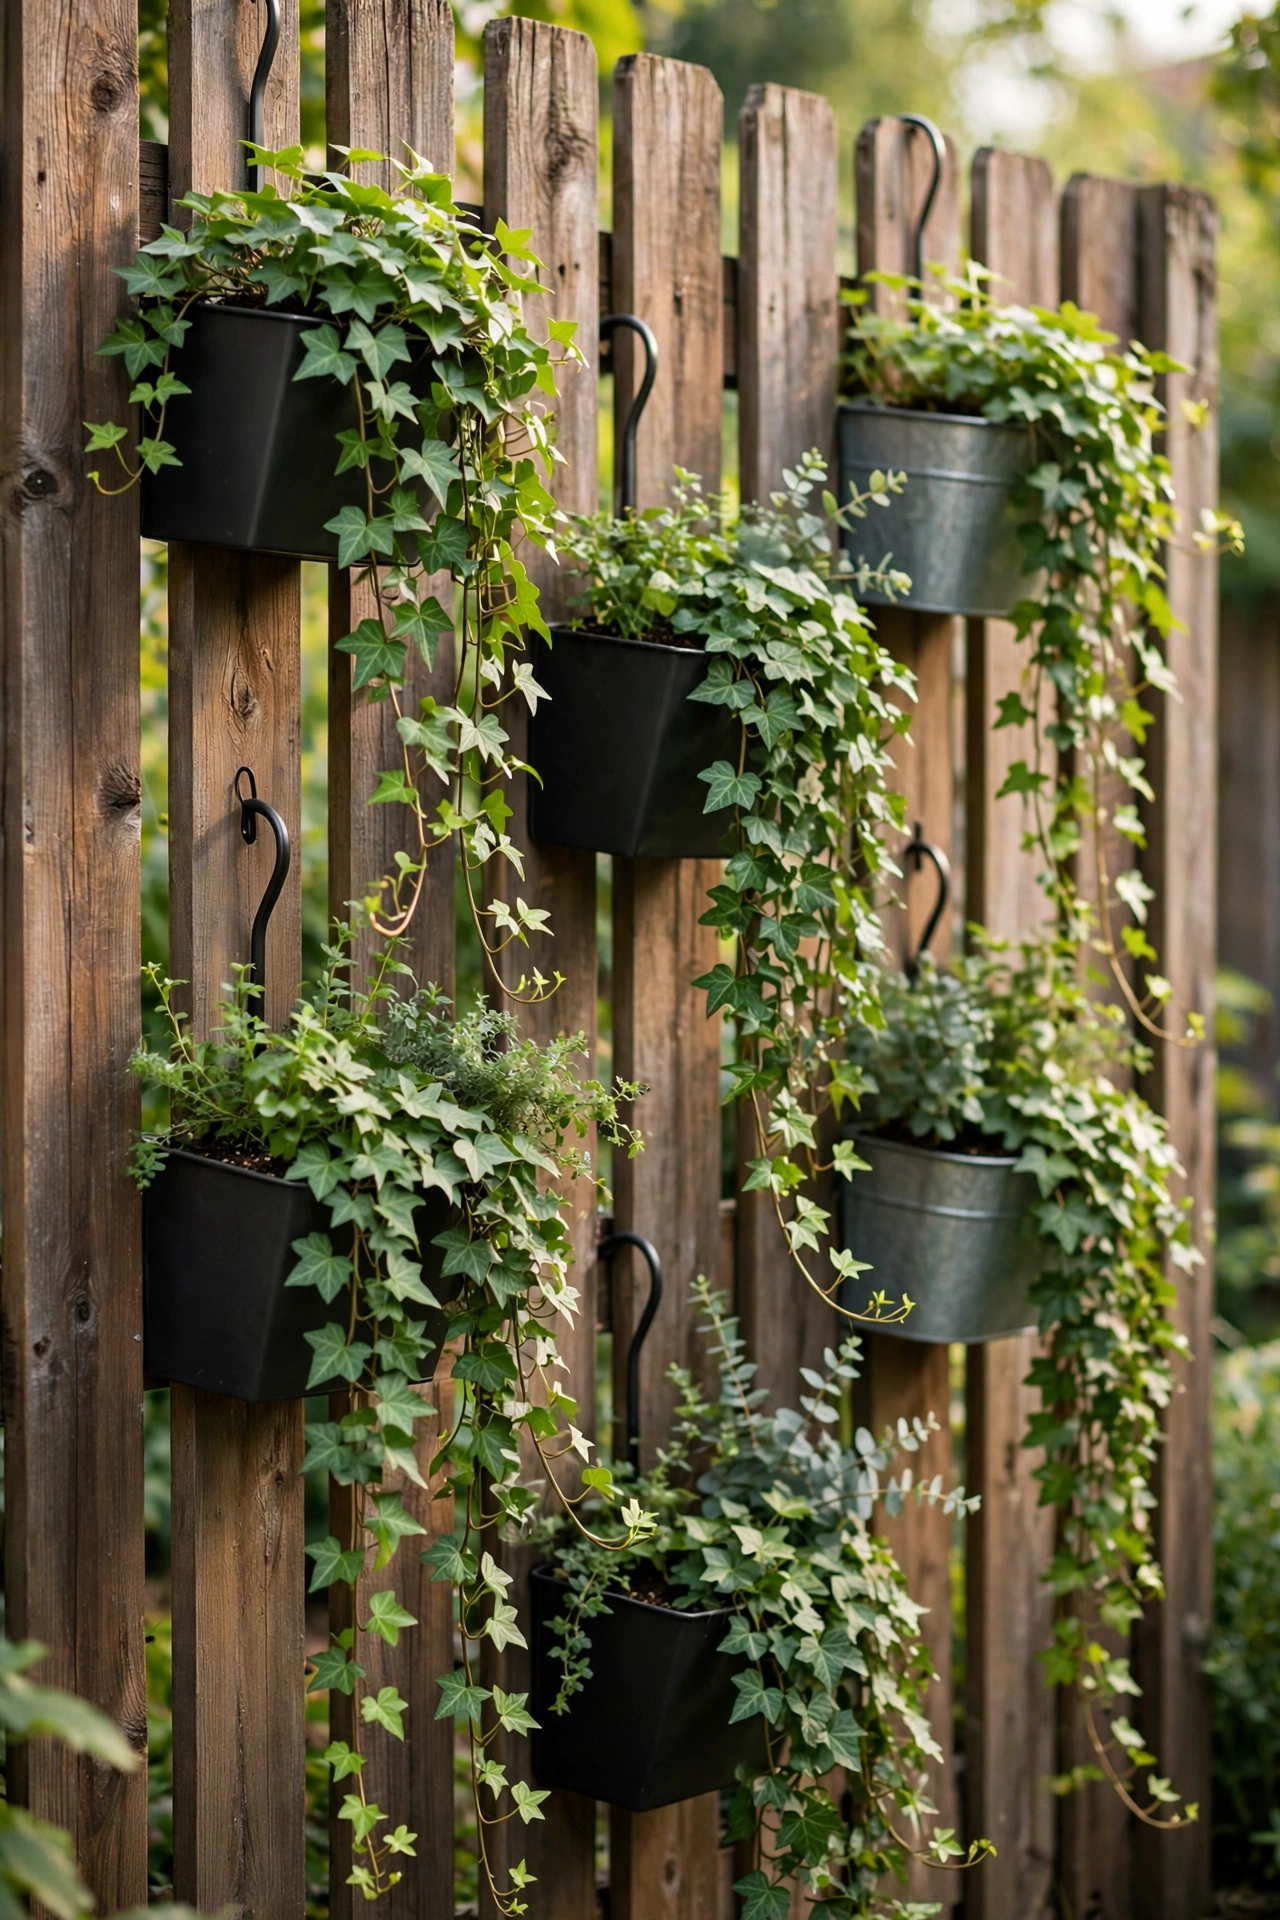
Small hook-over wall planters turn a boring fence into a vertical garden. Step one: buy planters with sturdy hooks that fit your fence slat width — test one before you buy six. Step two: hang them in a staggered pattern rather than a straight line for a natural look. Step three: plant with trailing varieties like ivy or string-of-pearls so the greenery softens the fence. I tried this in my own garden and within a month the trailing plants had knitted together into a living wall effect. One mistake to avoid: overloading them with soil and water makes the hooks slip off in wind — use lightweight potting mix and a liner so they stay put.
Cost: ~$10 for five · Time: 30 minutes
Wreath on the Garden Gate
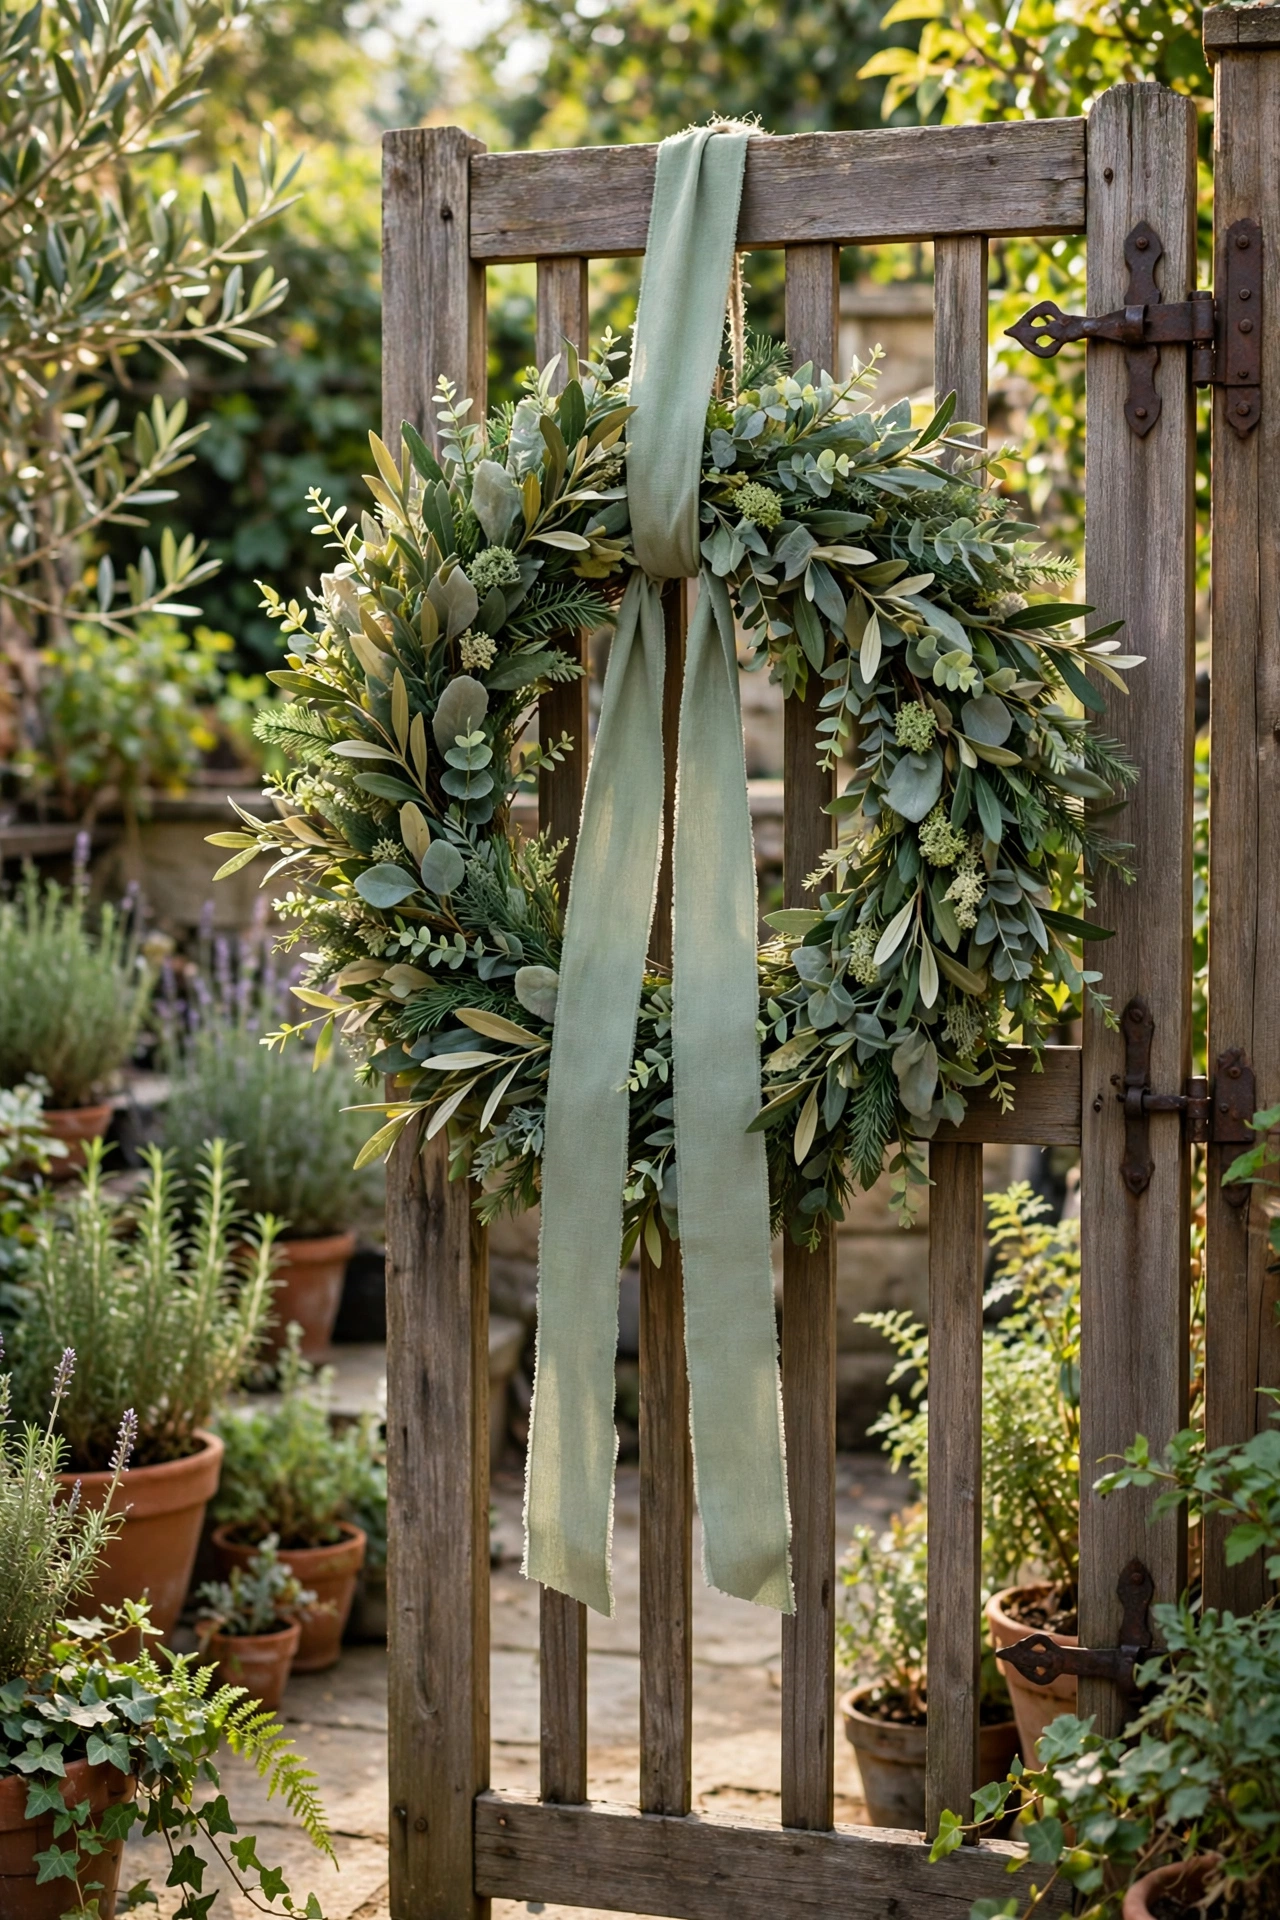
A wreath is not just for the front door — one on the garden gate makes the whole patio feel like an entrance. Step one: choose a grapevine or faux-greenery wreath in a size that suits the gate, not dinky. Step two: hang it with a wide ribbon in a colour that matches your patio cushions. Step three: swap the ribbon seasonally so the wreath works all year. I tried this in my own garden and guests now comment on the gate before they even reach the patio. One mistake to avoid: hanging it where the gate swings open flat against a wall will crush it — mount it on the outside face or on a fence panel instead.
Cost: ~$8 · Time: 10 minutes
Mirror Mosaic Sun Catchers on a Fence Panel
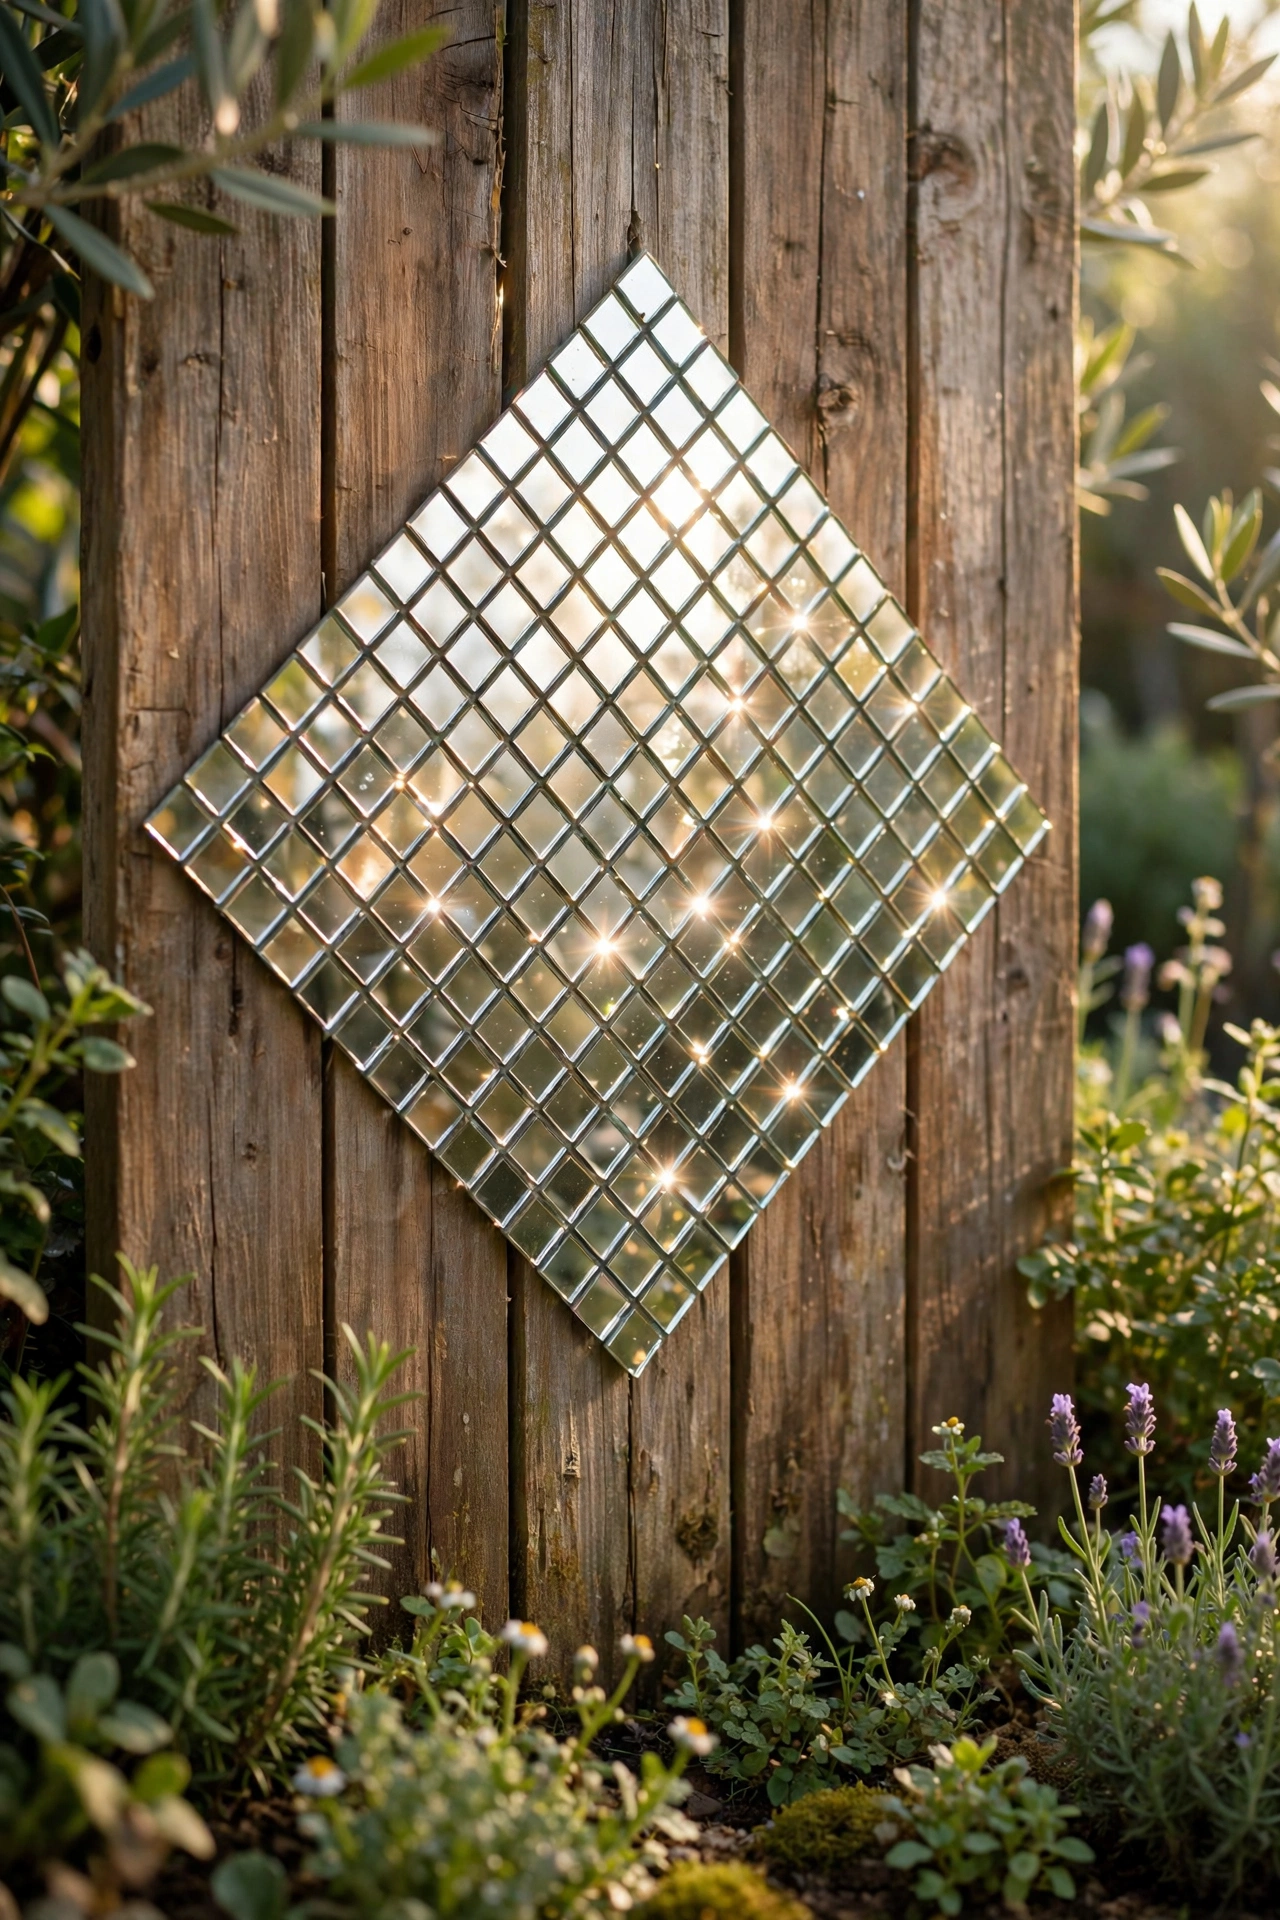
Packs of small mirror mosaic squares, glued to a board or directly onto a fence panel in a loose pattern, throw sparkling light around the patio all day. Step one: sketch a simple diamond or border pattern on paper first. Step two: fix the squares with outdoor-rated adhesive, pressing each one firmly. Step three: seal the edges with clear outdoor sealant so rain can’t creep behind the glass. I tried this in my own garden on a shady corner panel and the moving reflections genuinely made the dark spot feel alive. One mistake to avoid: placing mirrors where they catch full midday sun and bounce it at eye level — position them for morning or late light so they sparkle rather than glare.
Cost: ~$9 · Time: 40 minutes
Wooden Crate Shelves on the Railing
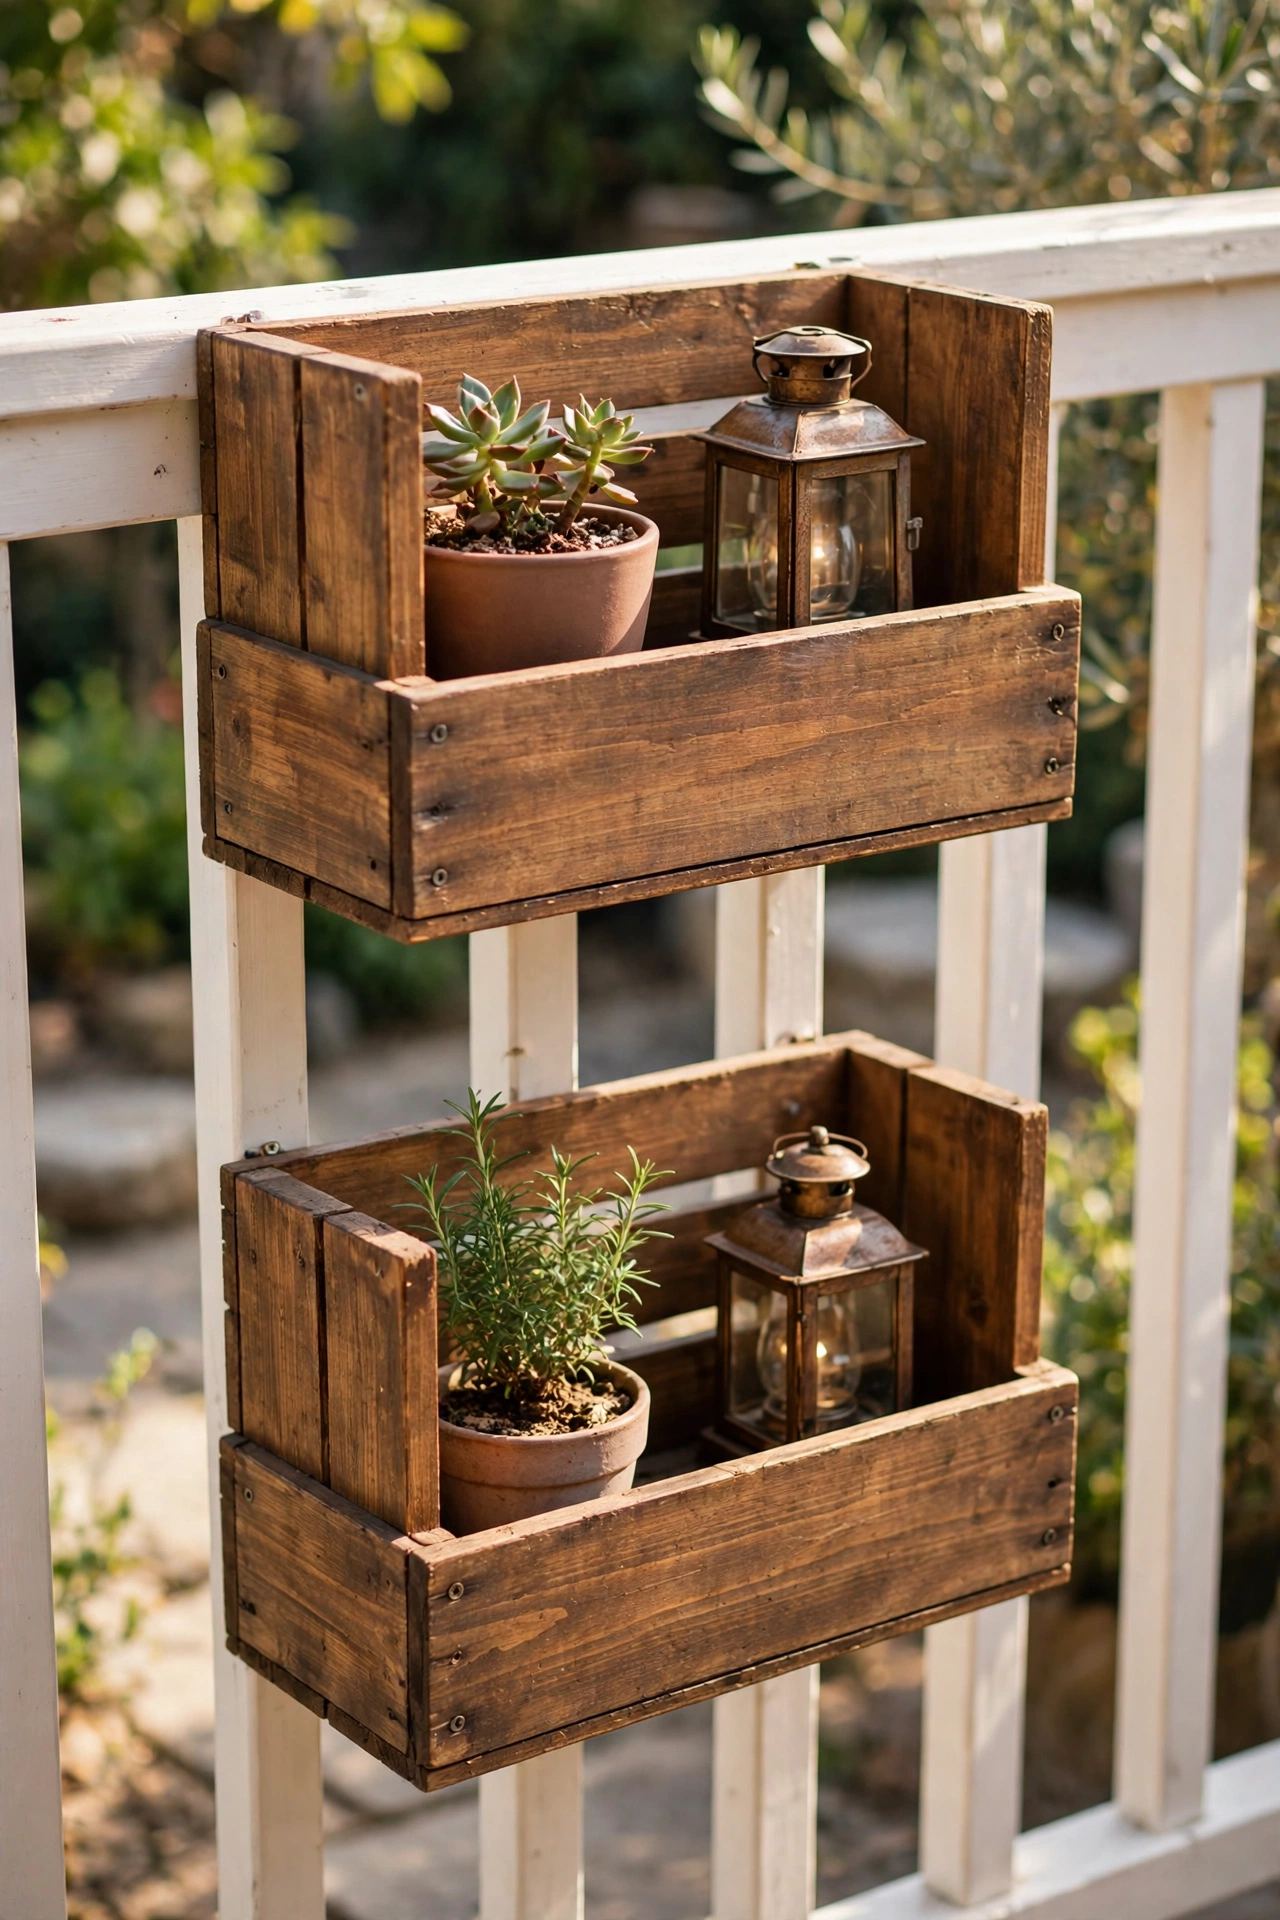
Small wooden crates screwed to a railing or fence become open shelves for plants and lanterns. Step one: sand the crates lightly and stain or paint them to match your patio scheme. Step two: fix them to the railing with L-brackets so they sit level and solid. Step three: style each crate with one plant and one lantern — resist the urge to overfill. I tried this in my own garden and the crates gave my herbs a proper home off the ground, which also kept the slugs away. One mistake to avoid: untreated wood rots fast outdoors, so seal every surface including the inside before you hang them. A forgotten inside face is where the rot starts.
Cost: ~$11 for two crates · Time: 1 hour
Evening Ambience
Solar Mason-Jar Lid Lights in Hanging Jars
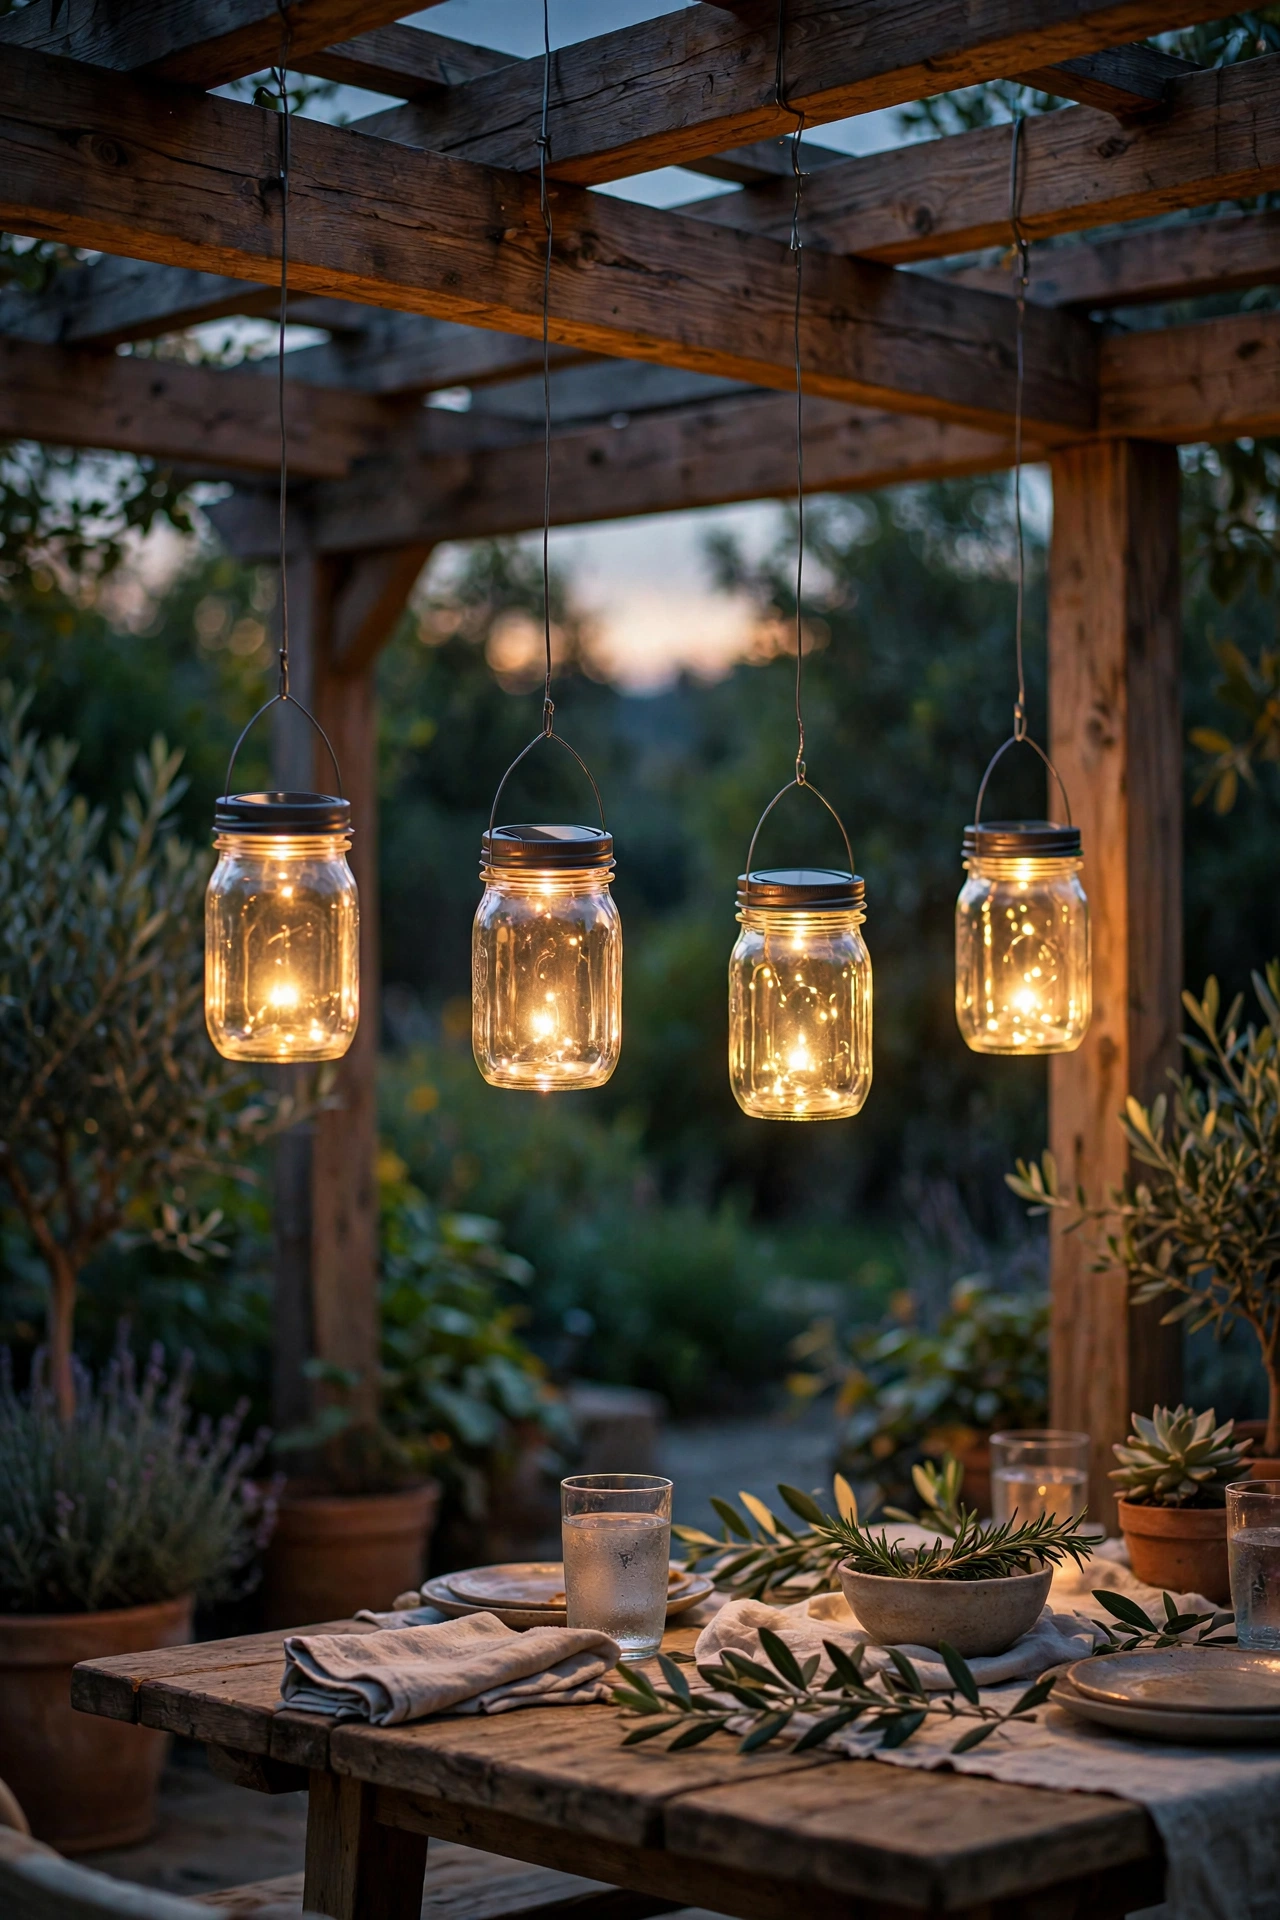
Solar lids that screw onto standard mason jars turn any tree branch or shepherd’s hook into hanging lanterns. Step one: buy the solar lid inserts and match them to jars you already own. Step two: screw the lids on and hang the jars with sturdy twine or wire from hooks. Step three: position them where they get afternoon sun so they glow at dusk. I tried this in my own garden along the pergola and the floating points of light are the prettiest thing about my evenings outside. One mistake to avoid: hanging them under dense leaves starves the solar panel — give each jar a patch of open sky above it or the lights fade by nine o’clock.
Cost: ~$10 for four · Time: 25 minutes
LED Fairy Lights Under a Glass Cloche
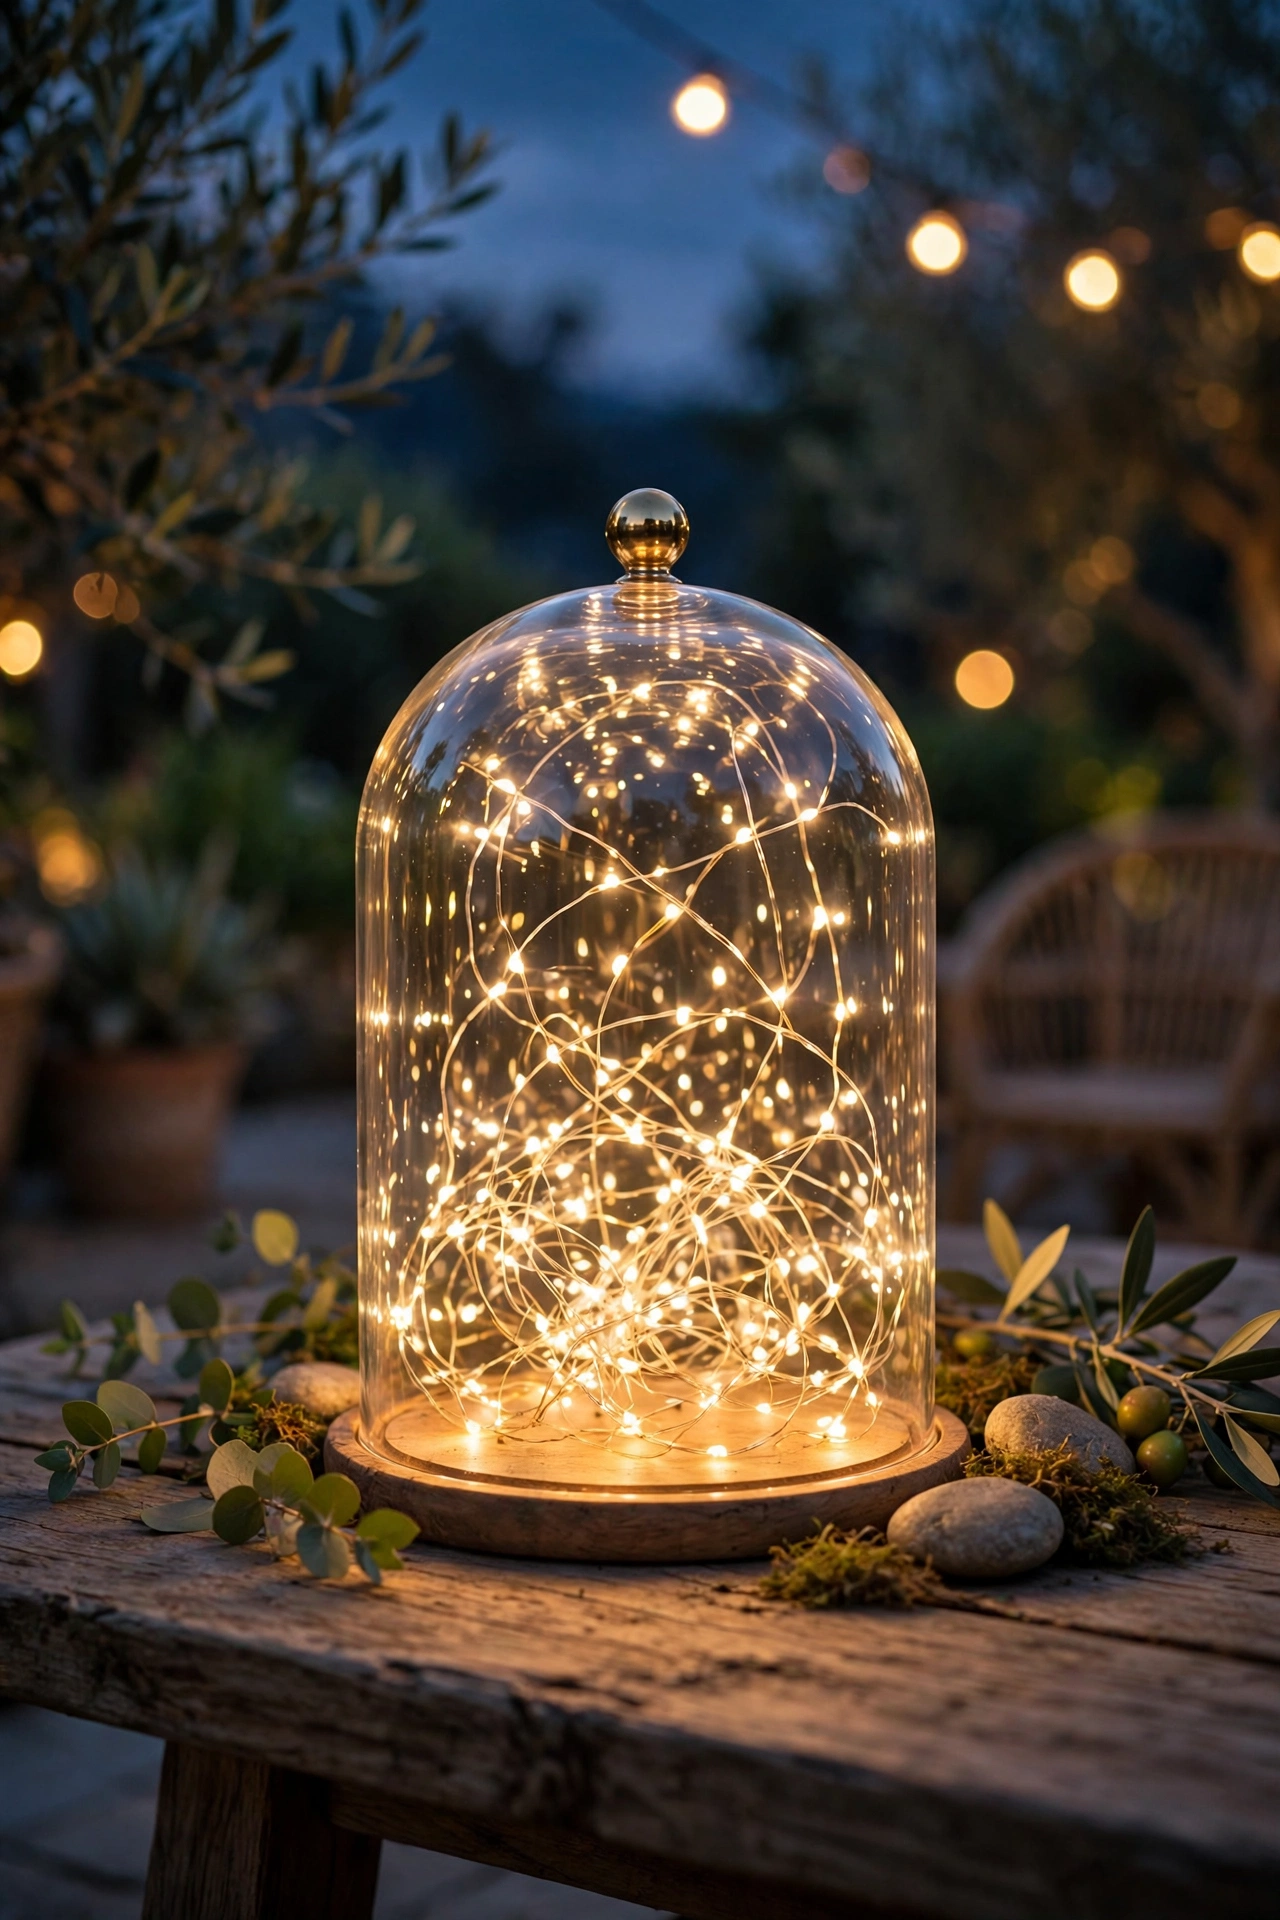
A glass cloche or large hurricane vase stuffed with fairy lights looks like a boutique lighting piece. Step one: coil a short strand of warm-white fairy lights loosely inside the cloche. Step two: tuck the battery pack underneath, hidden by the base. Step three: set it on the table or steps as a glowing centrepiece. I tried this in my own patio and it became the thing everyone photographs — it glows like a little captured galaxy. One mistake to avoid: cramming in too many lights makes it look like a tangled bulb display; one loose strand with some breathing room is far more elegant.
Cost: ~$7 · Time: 10 minutes
Bamboo Stakes with Solar Toppers as Tiki Torches

Tall bamboo stakes topped with solar flame-look lights give the resort torch effect without any fuel or fire risk. Step one: push the stakes firmly into the ground around your seating area, evenly spaced. Step two: seat a solar flame light on each top — the flickering amber ones are the most convincing. Step three: let them charge all day for the full evening flicker. I tried this in my own garden for a summer party and two guests asked where I had bought my “tiki torches”. One mistake to avoid: pushing them into loose dry soil at an angle means they lean by midnight — drive them in straight and deep, at least 25cm, or brace them with a stone at the base.
Cost: ~$14 for four · Time: 20 minutes
Glow-in-the-Dark Pebble Firefly Jars
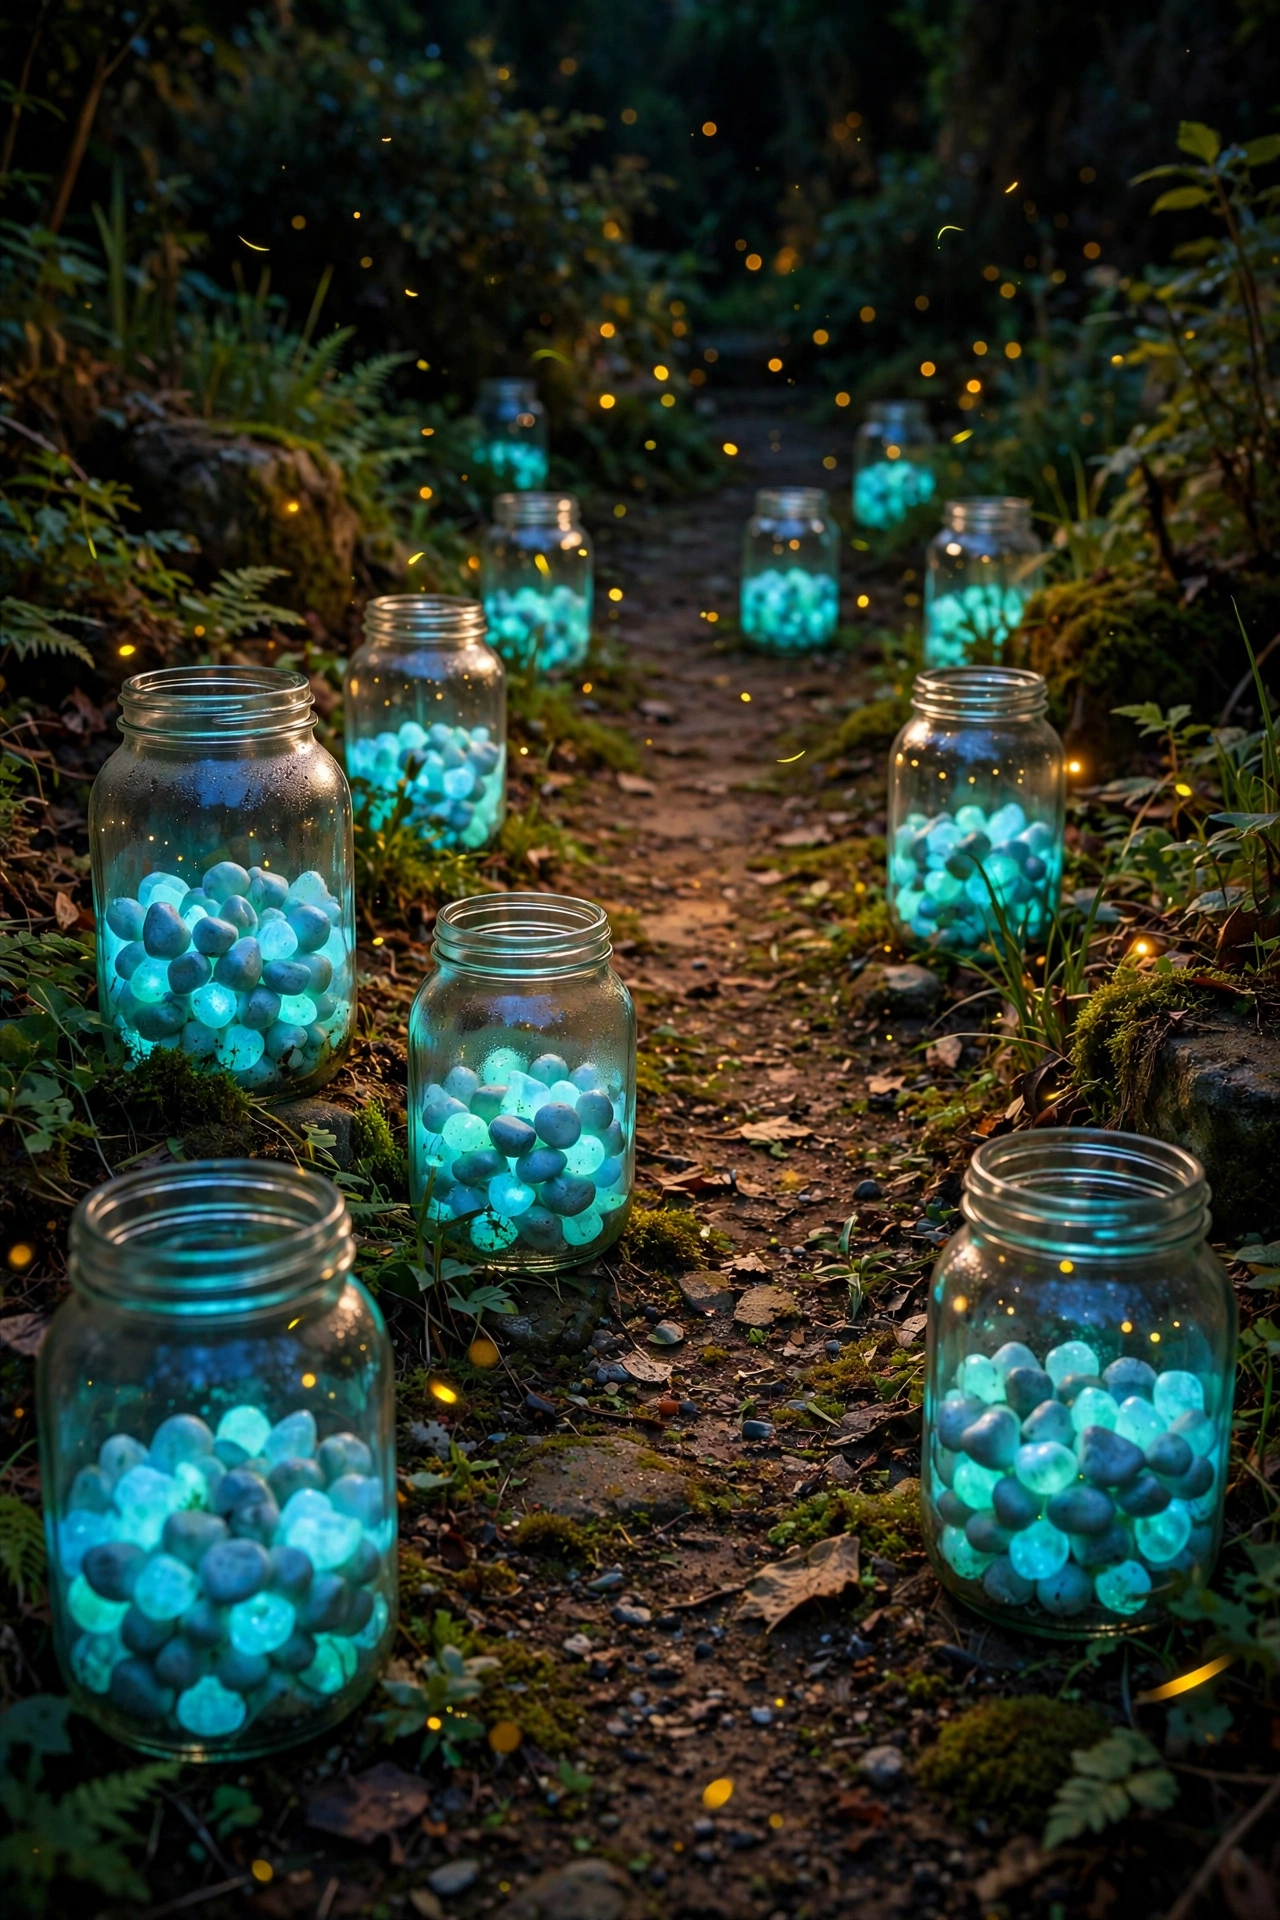
Bags of glow-in-the-dark pebbles scattered in open jars or along bed edges look like captured fireflies after sunset. Step one: “charge” the pebbles in full sunlight for a few hours. Step two: scatter them inside wide-mouth jars or along the edge of a flower bed. Step three: place the jars where you sit in the evening so you actually see the effect. I tried this in my own garden along the path to the seating area and the kids now refuse to let me move them. One mistake to avoid: the cheapest pebbles barely glow — hold a bag up to the store light and check the glow before buying, or buy one bag to test first.
Cost: ~$8 for two bags · Time: 15 minutes
Lantern Cluster at Different Heights
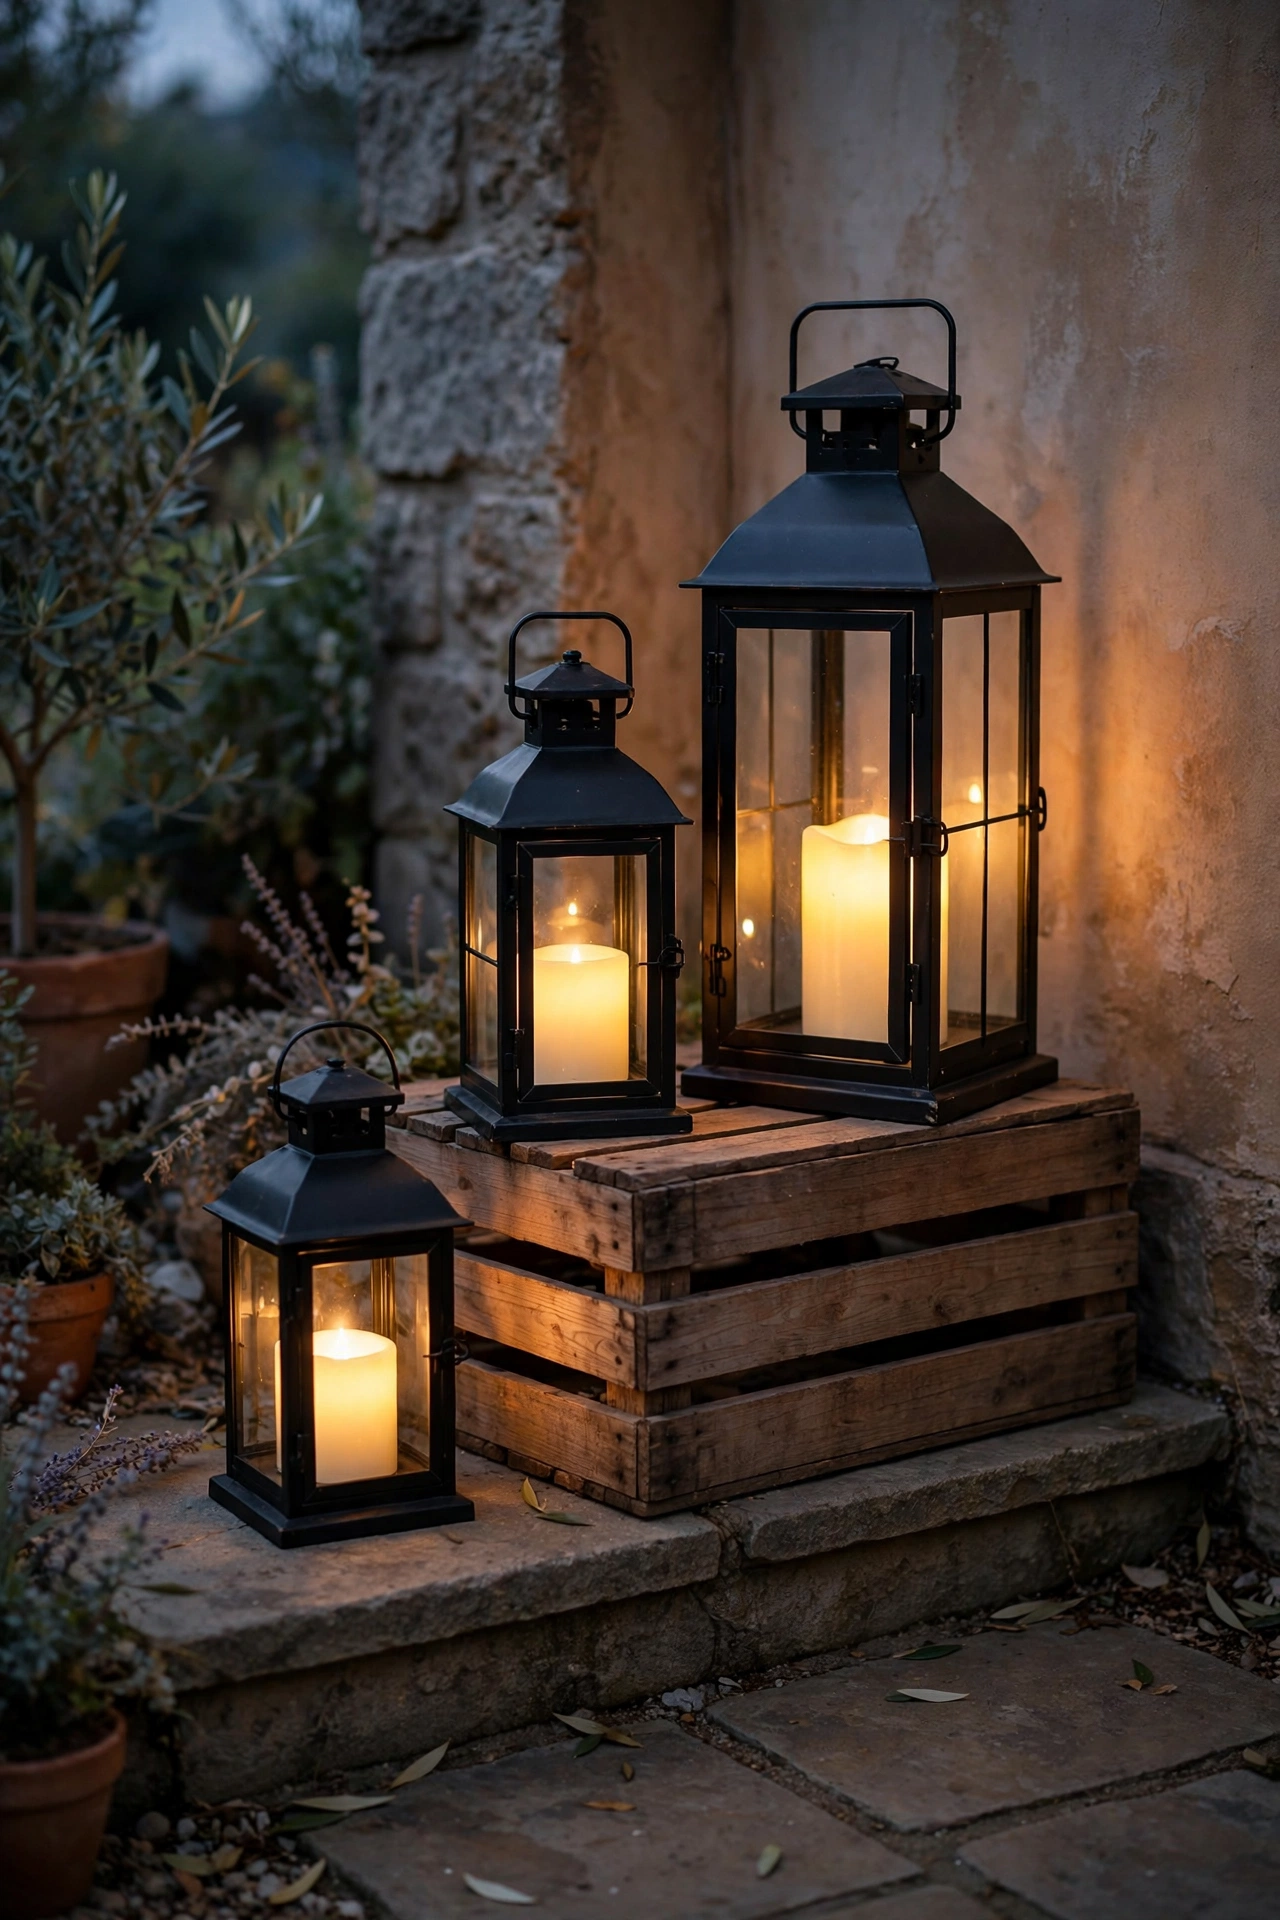
Three or four lanterns of different heights grouped together look like a styled lighting display rather than random buys. Step one: buy lanterns in one finish — black metal is the safest expensive look. Step two: set them on an upturned crate, a step, and the ground so the tops sit at three different levels. Step three: put a flameless candle in each and switch them on at dusk together. I tried this in my own patio corner and the staggered heights turned an empty corner into the cosiest spot in the garden. One mistake to avoid: spreading the lanterns evenly around the patio dilutes the effect — grouping is what makes it look designed. Keep them as one cluster.
Cost: ~$16 for four lanterns · Time: 15 minutes
If you are hunting for more budget patio inspiration, take a look at these: (see also: 23-dollar-store-patio-finds-on-a-budget), (see also: 19-best-dollar-store-finds-for-spring-decorating) and (see also: 15-dollar-store-decor-ideas-that-look-high-end).
If any of these dollar store patio finds caught your eye, save this post for later so you have the shopping list ready next time you are near the store — your future patio will thank you.
None of these ideas needs more than a free afternoon, and most cost less than a takeaway coffee. Start with the lighting — it makes the biggest difference for the smallest spend — and build your zones from there. A patio that glows at dusk always looks more expensive than it was.
