25 DIY Candle Decor Ideas on a Budget
Last winter my electricity bill arrived the same week as my heating packed up, so I started lighting candles every evening instead of switching on every lamp in the house. It was supposed to be a money-saving measure, but something unexpected happened: the flat felt cosier than it had in years. That is when I got serious about DIY Candle Decor Ideas on a Budget, because a three-pound candle in a jam jar looks sad, but the same candle in a jar you decorated yourself looks intentional. This list is every project that made my evenings nicer, all cheap and all genuinely easy.
Every idea below costs under $15, and most use candles and jars you already own. One safety note that matters: never leave a burning candle unattended, and keep decorated candles away from anything flammable. LED tea lights work beautifully in most of these projects if you have pets or small children.
1. Mason Jar Candle Lanterns
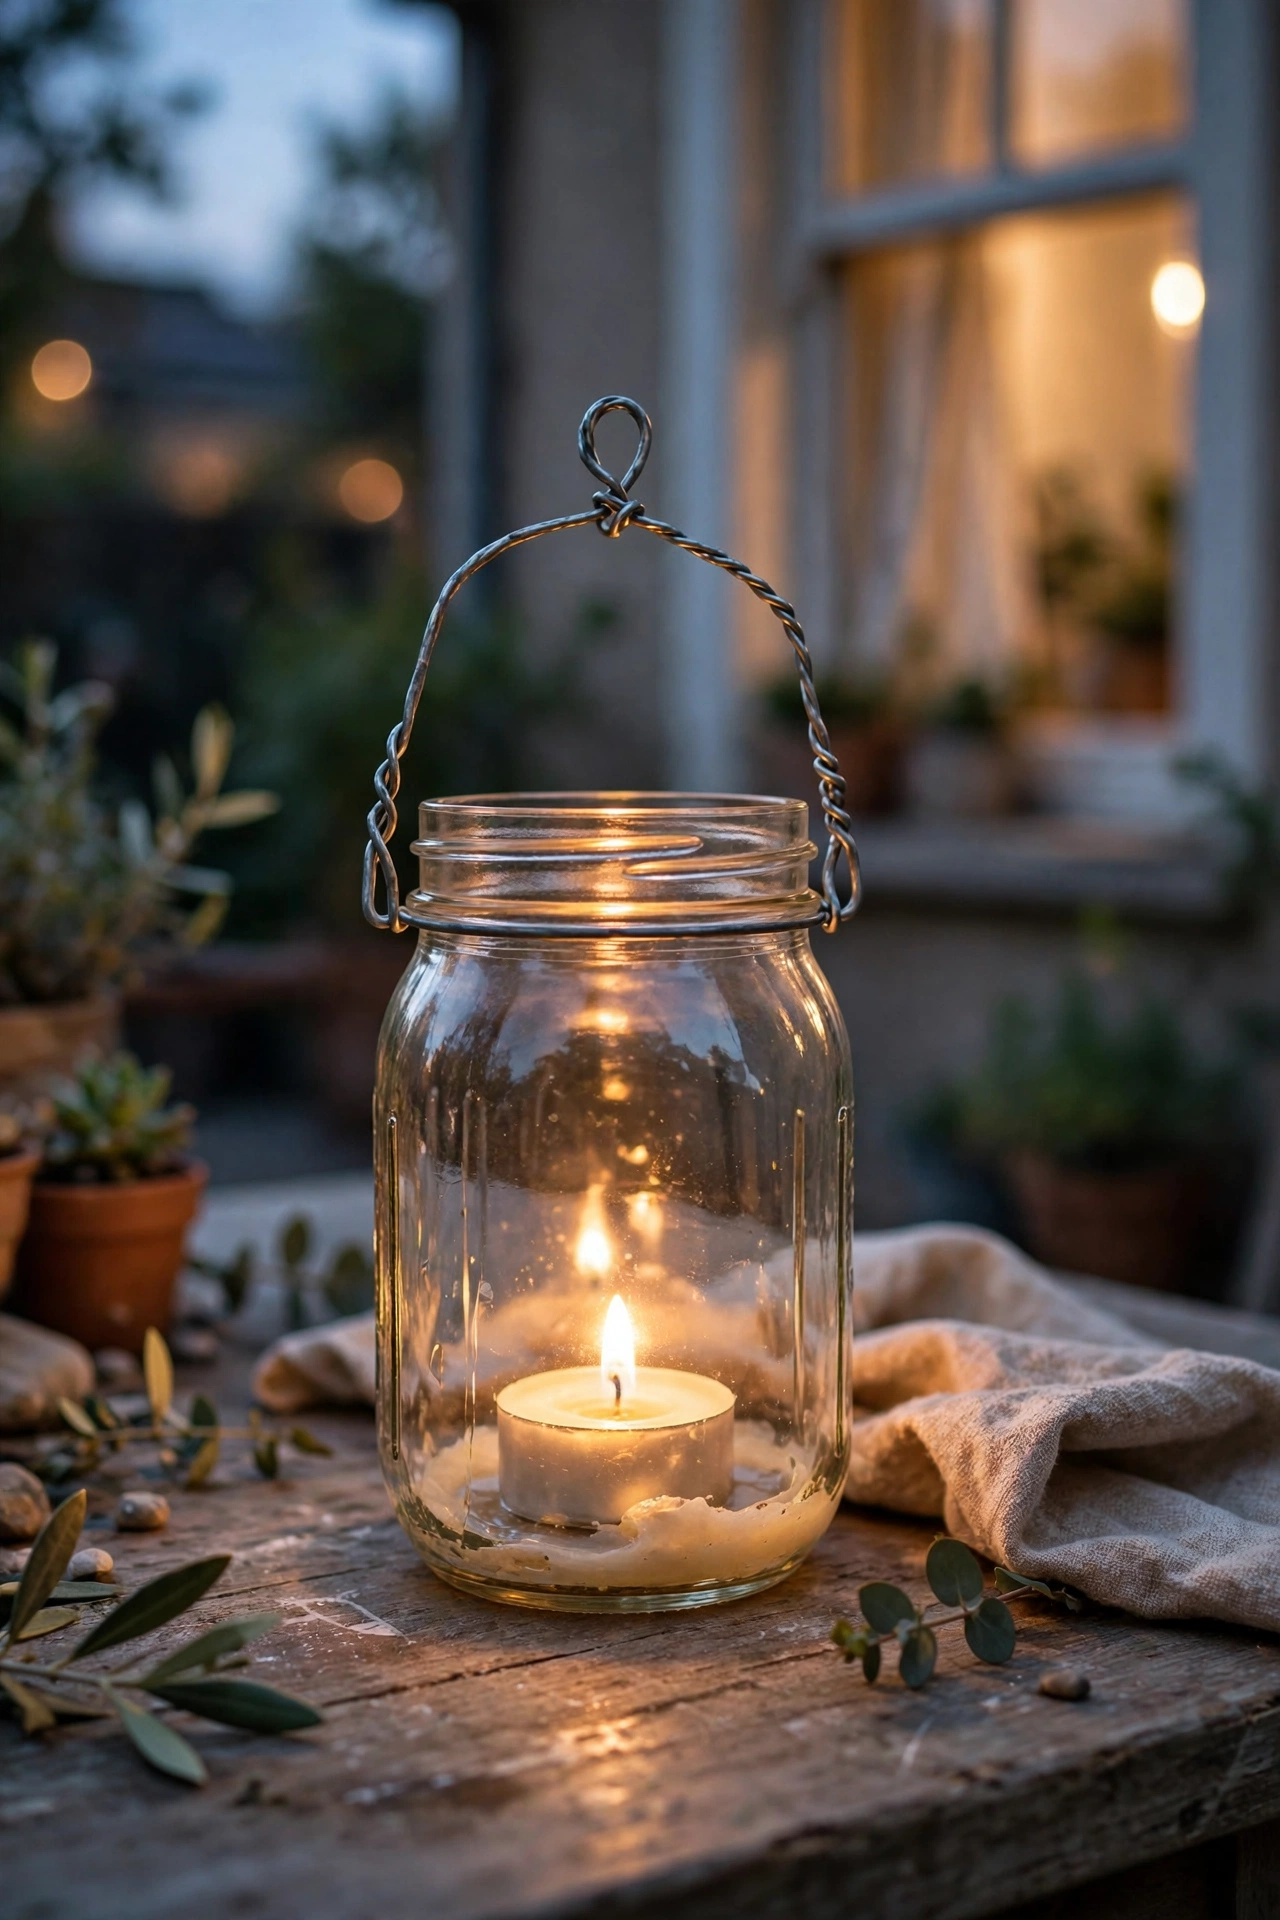
A mason jar with a wire handle becomes a lantern you can hang from a tree branch or a porch hook. I wrapped wire around the jar rim to make a handle, dropped in a tea light, and tied a bit of twine around the neck for looks. The glass protects the flame from wind, which is why these work so well outdoors. I made six for my patio and they glow beautifully on summer evenings. Use the wide-mouth jars if you can; the narrow ones are fiddly to light. A little sand in the bottom steadies the candle.
Cost: ~$3-8 | Time: 20 minutes
2. Painted Pillar Candles
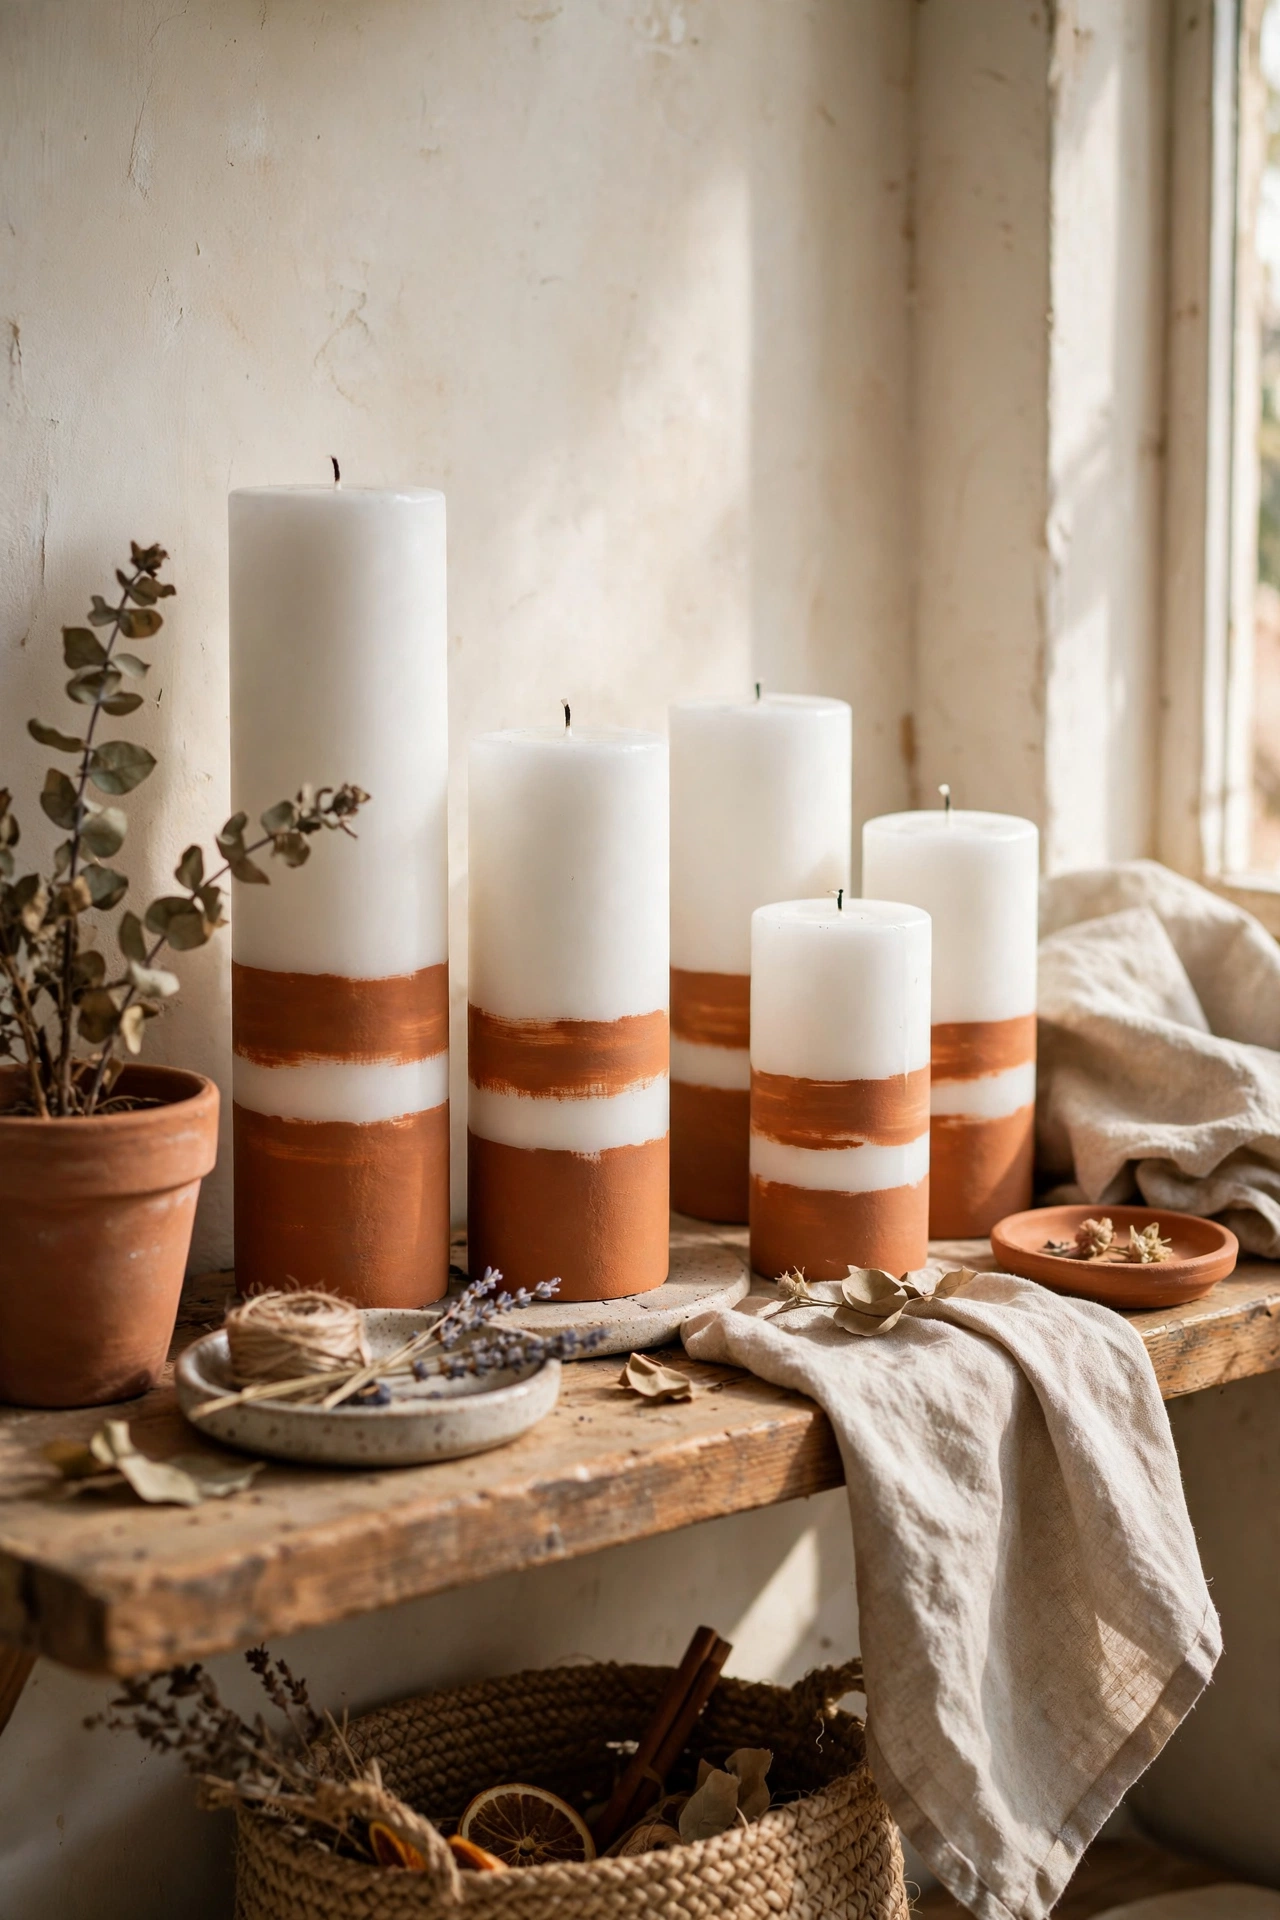
Plain white pillar candles look twice the price with a simple painted band. I wrapped painter’s tape around the middle of each candle, painted the exposed band with acrylic paint in muted terracotta, and peeled the tape off once dry. Keep the paint to the lower two-thirds so it never touches the flame area. My set of three in graduated heights cost $6 total and looks like a boutique buy. Acrylic paint is fine on the outside of a candle as long as it stays well below where the wax melts.
Cost: ~$4-8 | Time: 30 minutes plus drying
3. Wine Glass Candle Holders
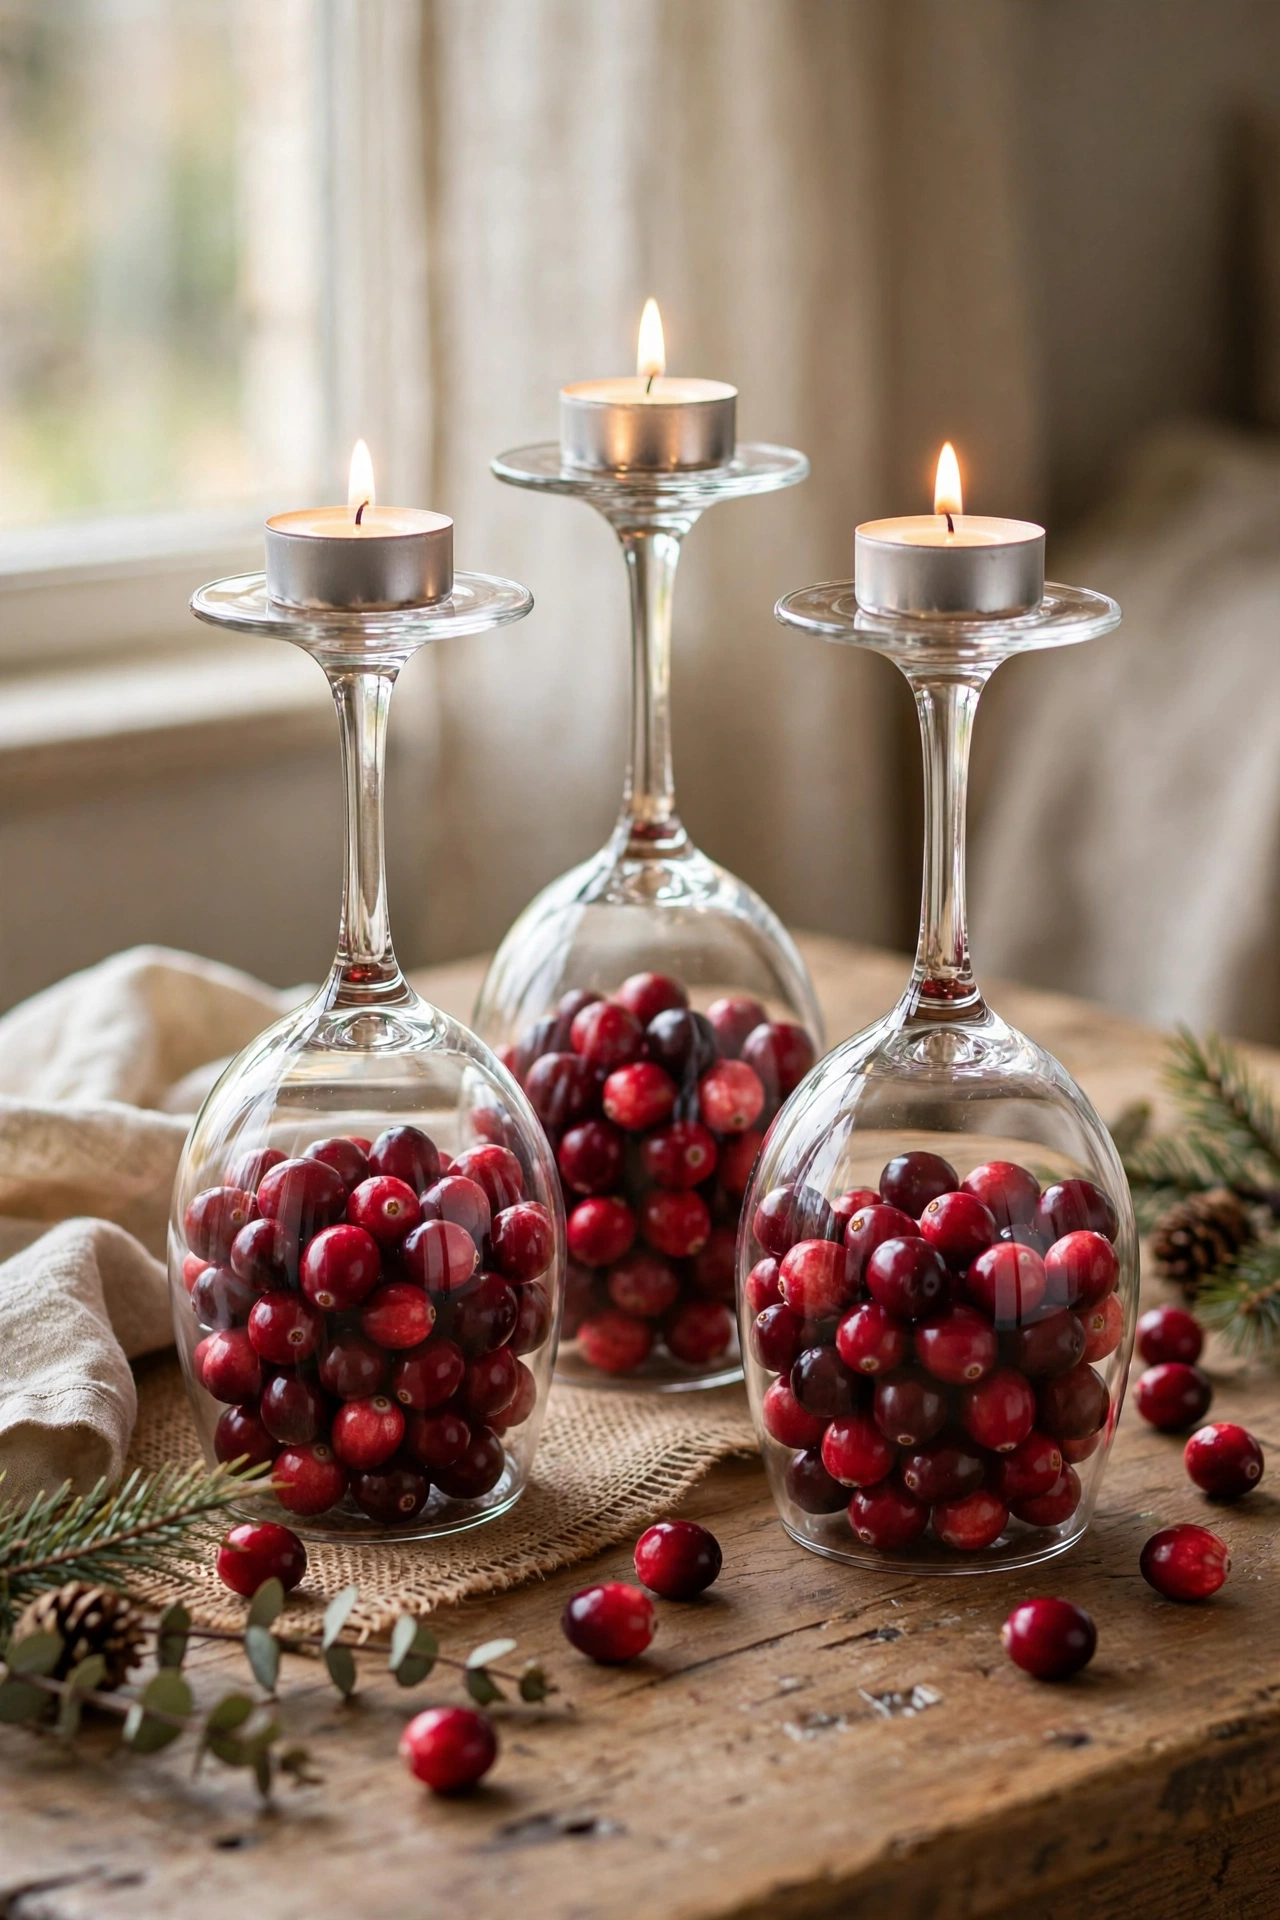
Turn a wine glass upside down and the base becomes a pedestal for a tea light while the bowl holds decorations. I fill the bowl with cranberries at Christmas, shells in summer, and pinecones in autumn, then set a tea light on the flat base on top. It is the fastest centrepiece on this list and it always looks clever. Use sturdy glasses with a wide base so they do not tip. Mine have done duty at three dinner parties and guests always ask where I bought them.
Cost: ~$2-6 | Time: 10 minutes
4. Cinnamon Stick Candle Wrap
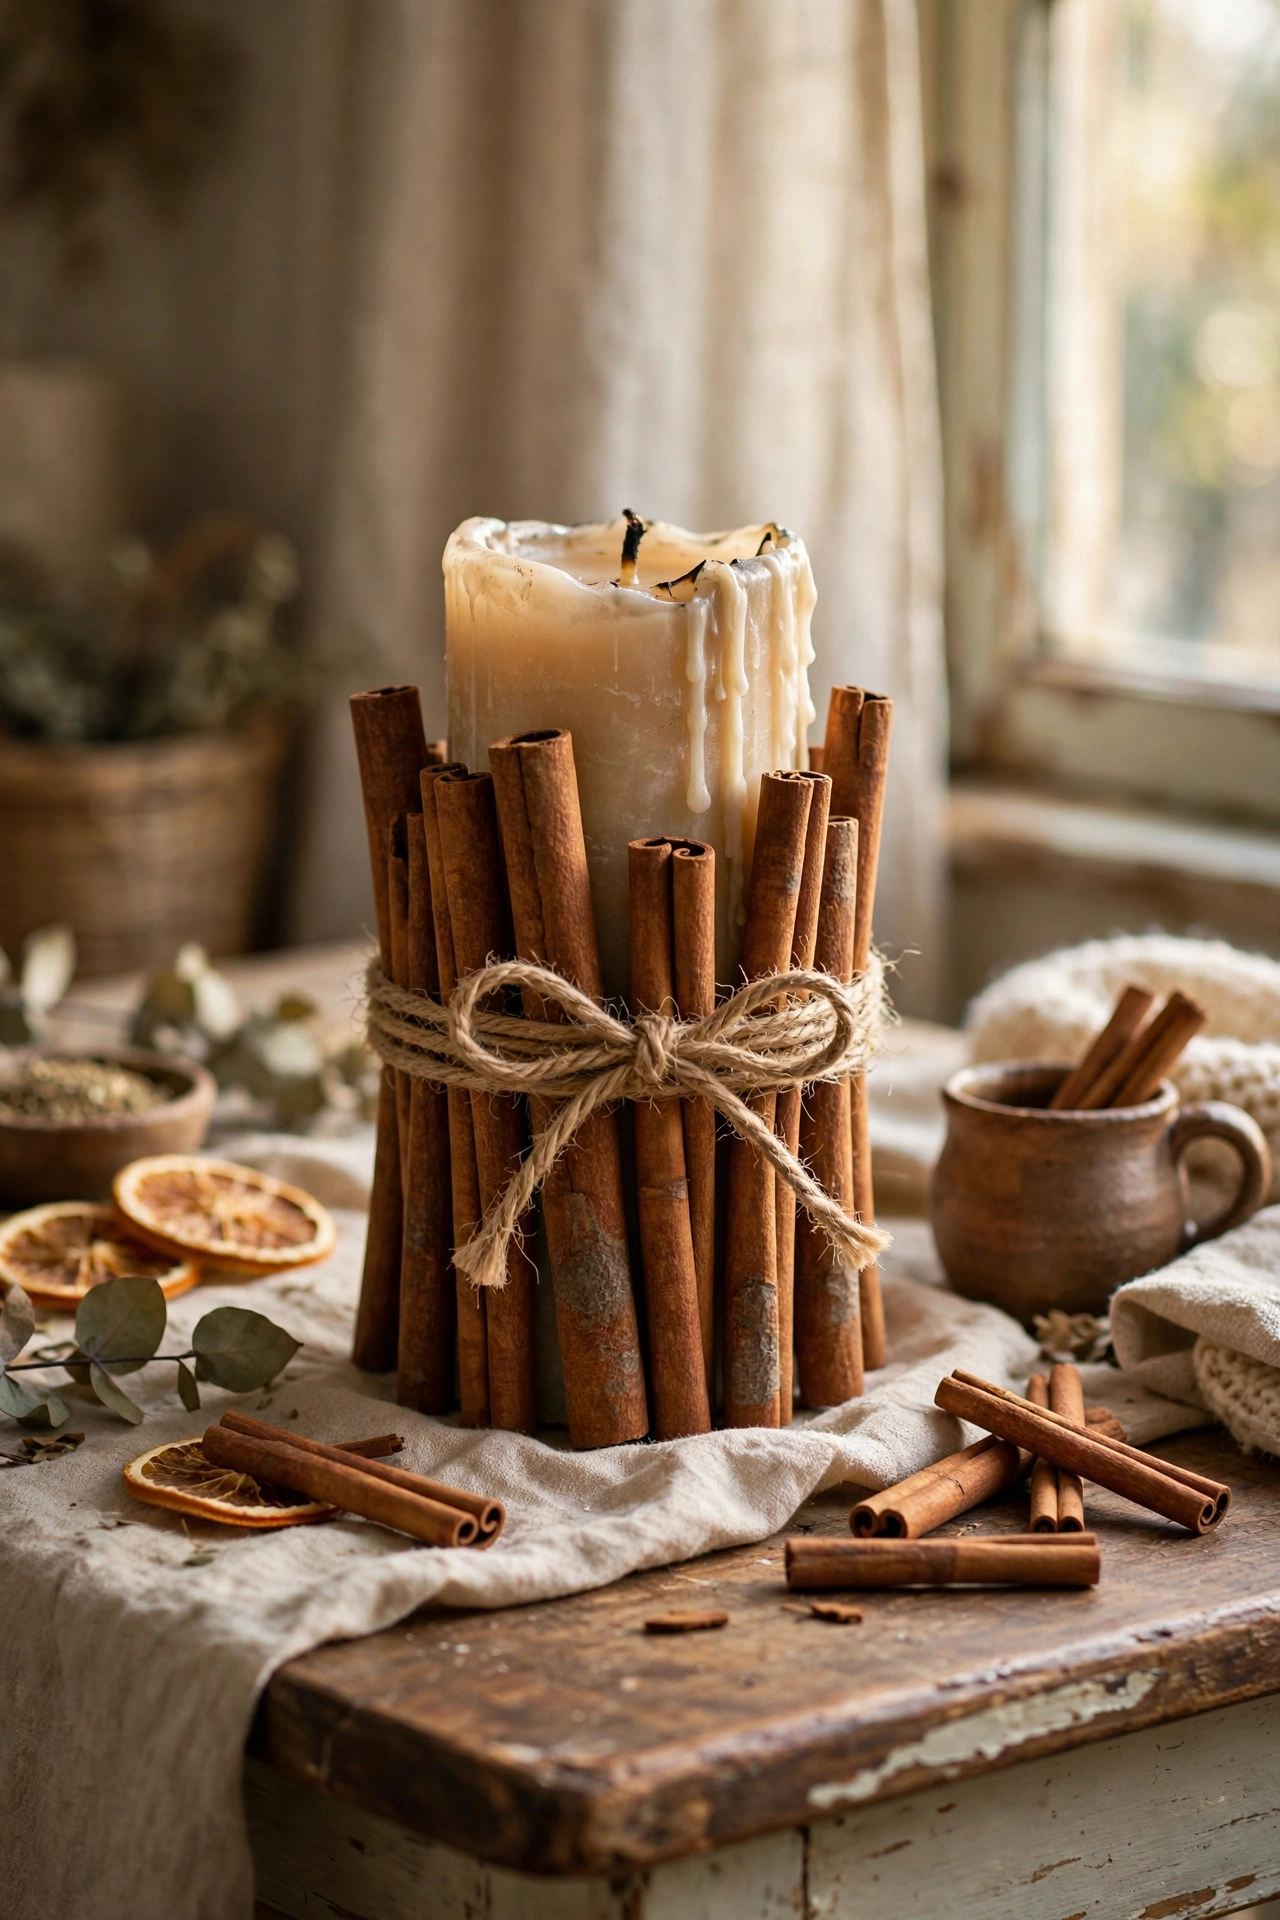
Cinnamon sticks tied around a pillar candle smell wonderful as the candle warms them. I stood sticks upright around a thick pillar, secured them with two loops of twine, and finished with a small bow. The sticks should be taller than the candle so the flame never reaches them. Mine fills my living room with the scent of Christmas every December. Buy cinnamon in bulk bags rather than little jars; the price difference is enormous. When the candle burns down, the sticks go straight into my mulled wine.
Cost: ~$5-10 | Time: 20 minutes
Budget check: four ideas in, and the wine glass trick might be the cheapest centrepiece ever invented. Most of these projects start with things already in your kitchen cupboards.
5. Floating Candle Centrepiece
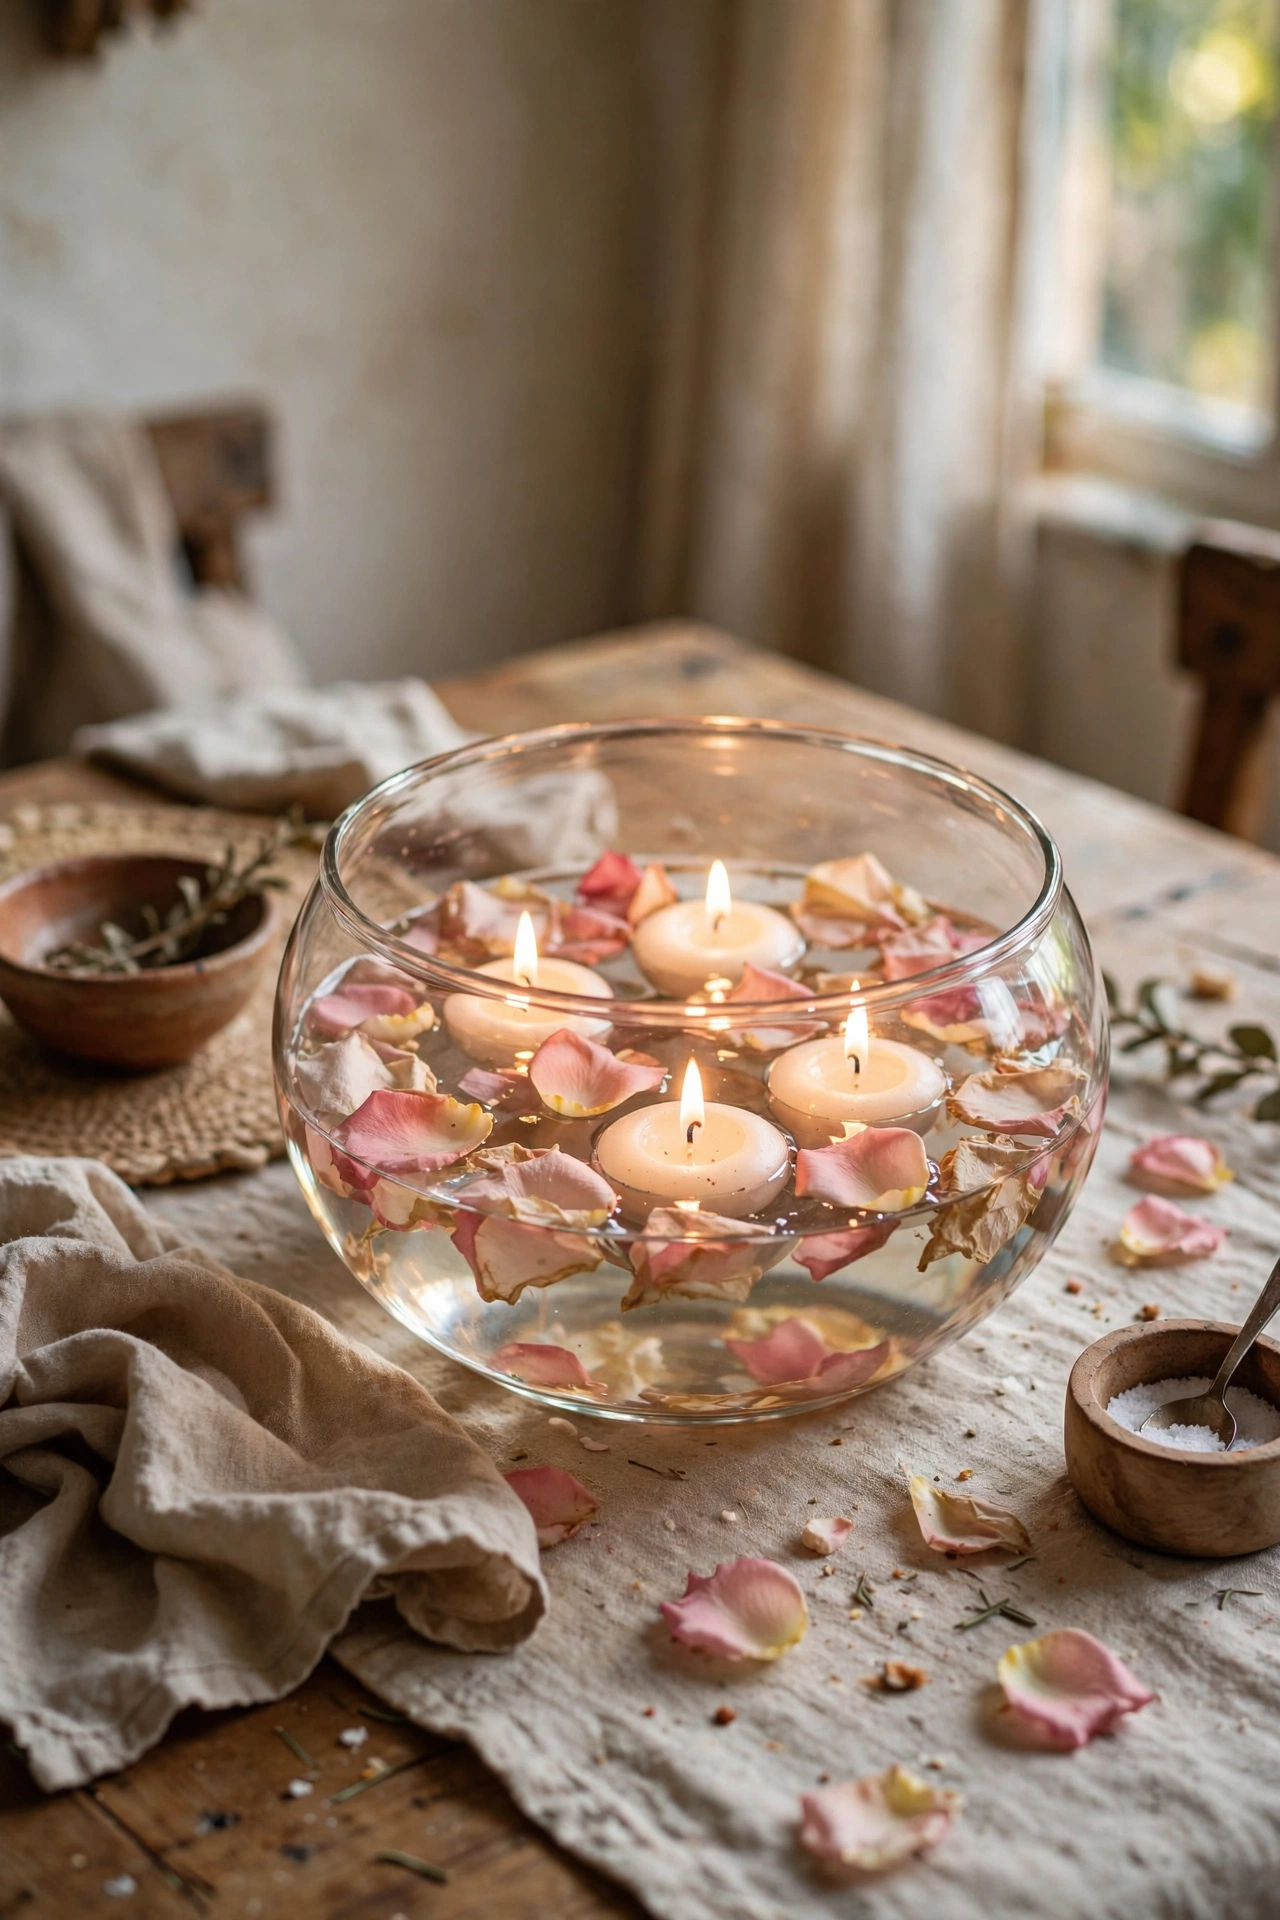
A wide shallow bowl of water with floating candles and flower heads is the easiest elegant centrepiece I know. I fill a glass trifle bowl with water, float three unscented candles, and scatter rose petals and a few flower heads on the surface. Light them just before guests arrive, because the effect is best in the first hour. Mine has graced every dinner party for two years. Keep the candles away from the bowl edge so the petals do not catch. White flowers show up best in candlelight.
Cost: ~$4-8 | Time: 15 minutes
6. Teacup Candles
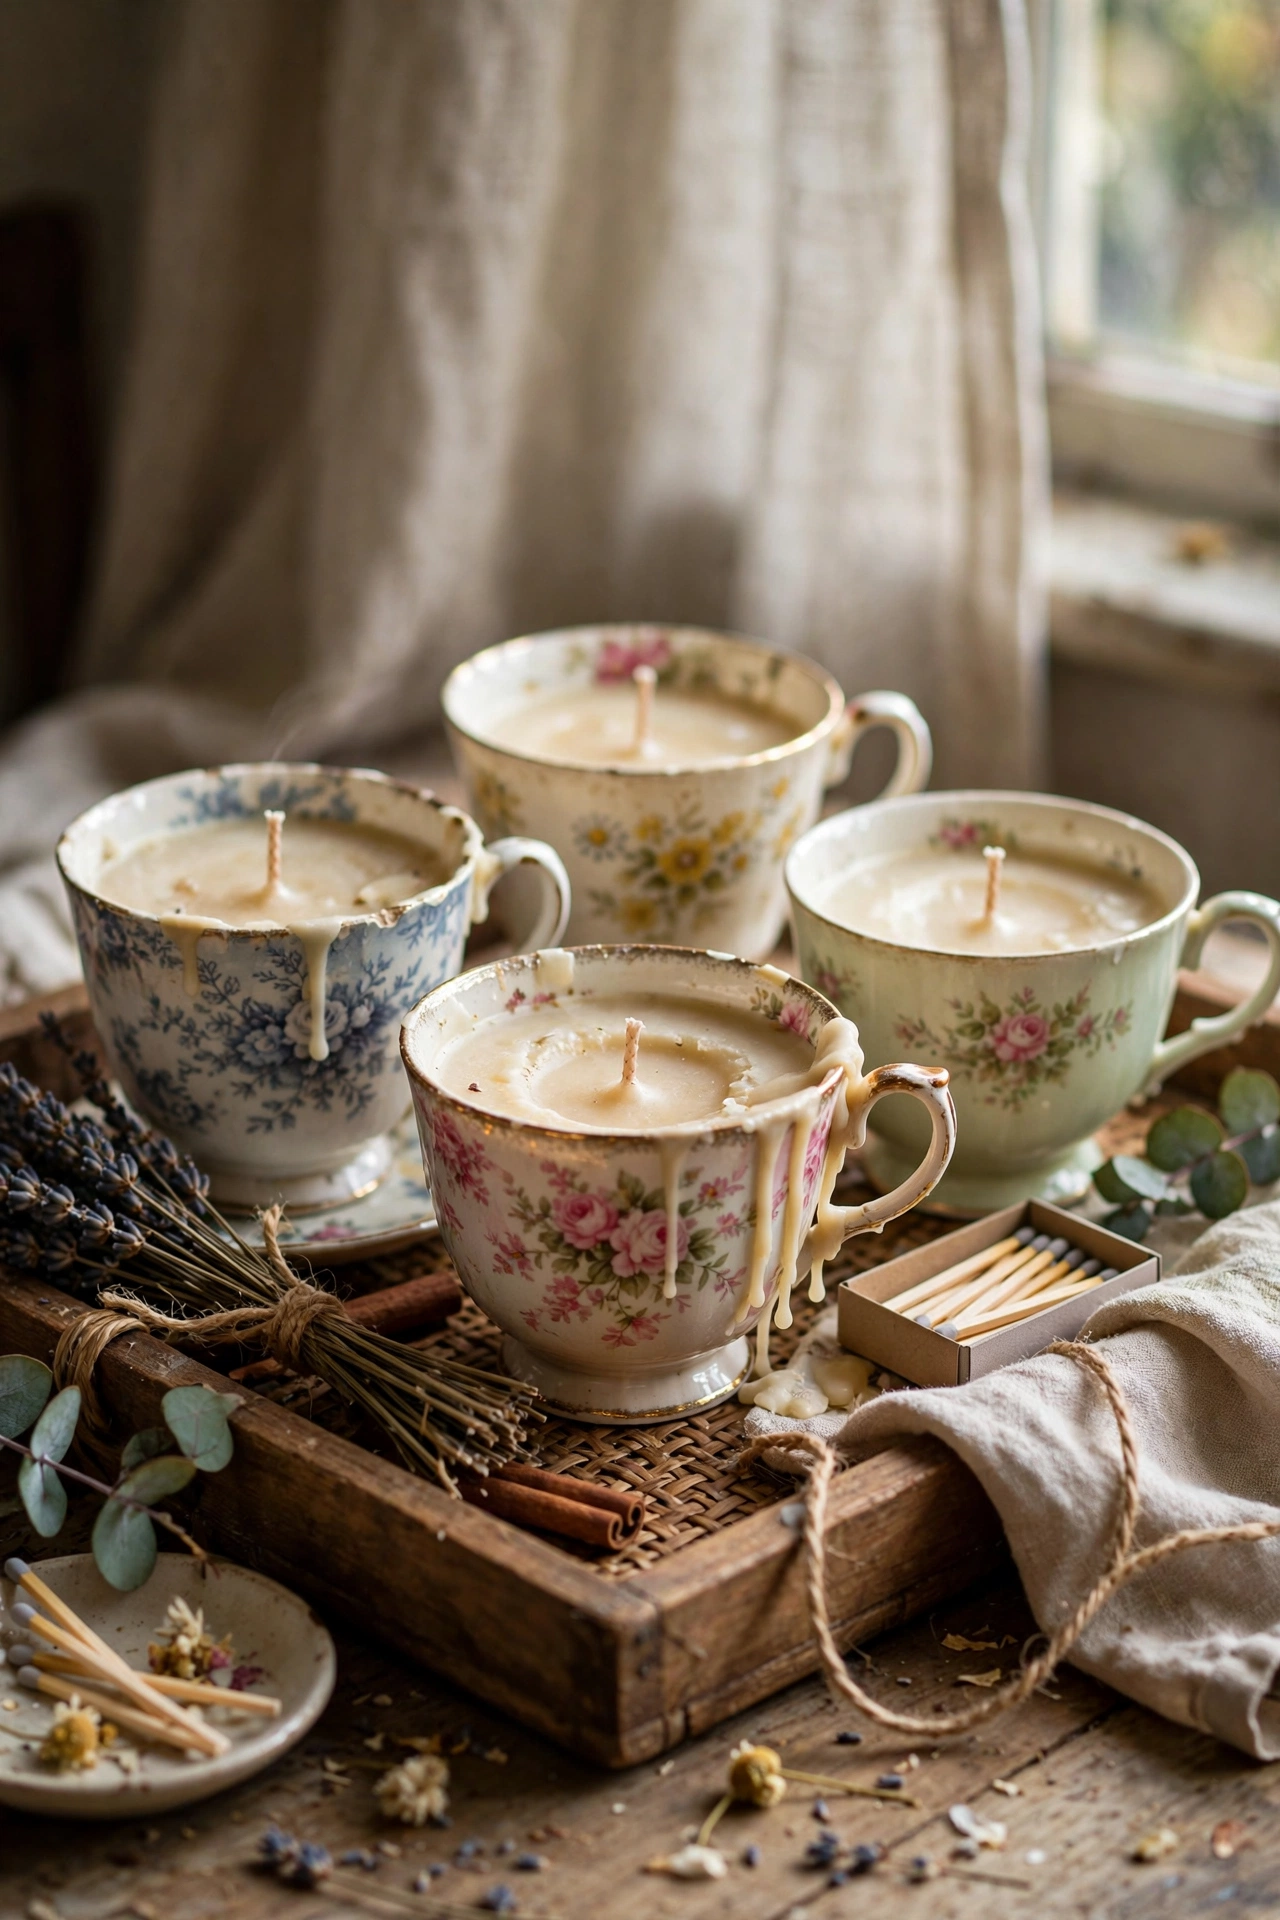
Pouring your own candles into vintage teacups is easier than it sounds and the results are gorgeous. I melt soy wax flakes in a double boiler, add a few drops of vanilla oil, place a wick in each cup with a dab of hot glue, and pour carefully. Let them set overnight before trimming the wick. My charity-shop teacups cost 50p each and the finished candles look like expensive gifts. Do not use cups with metallic gold rims near a flame; the heat can damage the finish.
Cost: ~$6-12 | Time: 1 hour plus setting
7. Paper Bag Luminaries
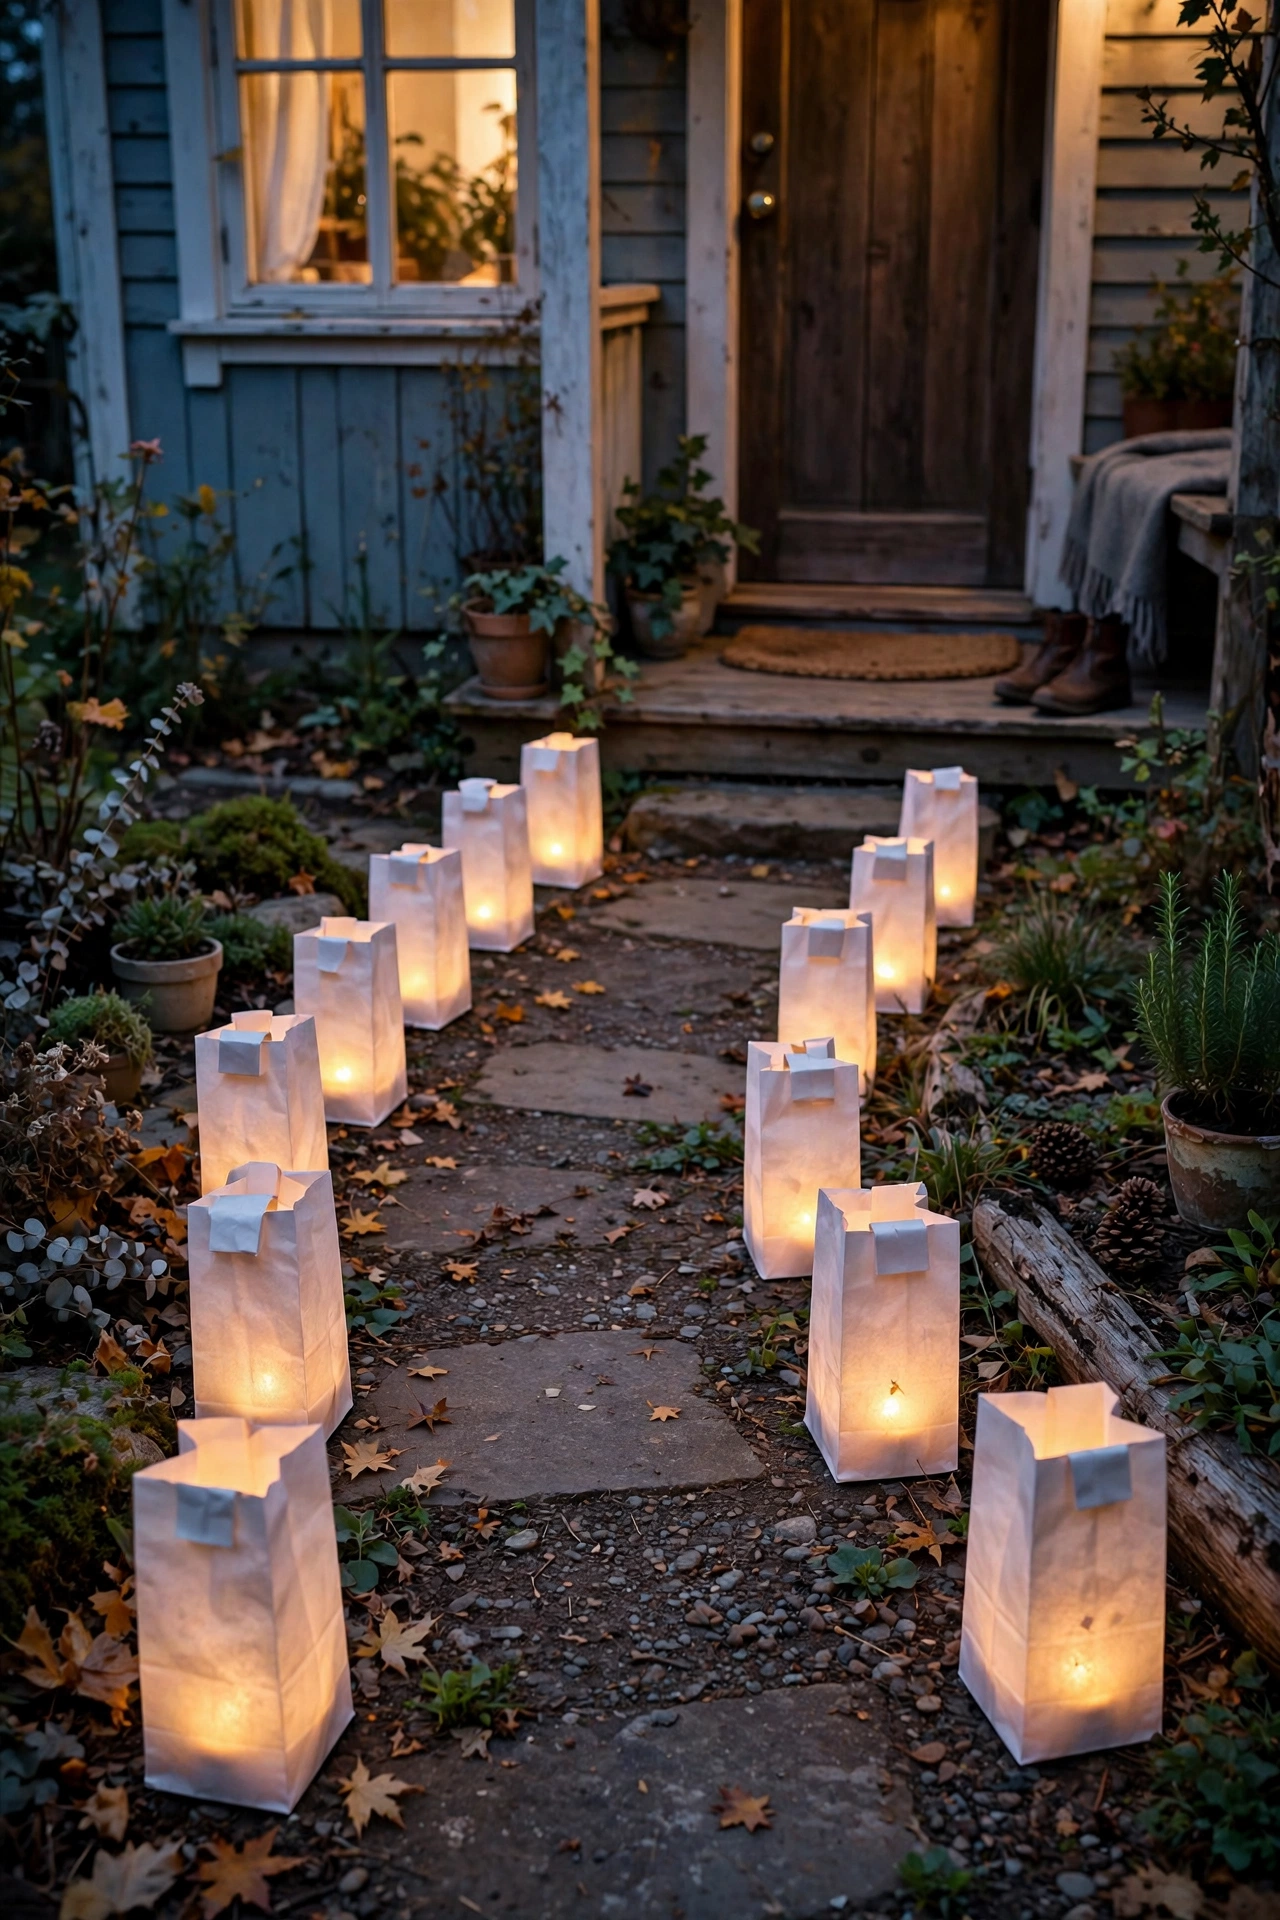
White paper bags with sand and a tea light inside line a path or patio with the prettiest glow. I fold the top of each bag down twice for stability, pour in two inches of sand, and nestle a tea light in the centre. The sand anchors the bag and catches any wax. I line my front path with twelve of them every Christmas Eve and the whole street slows down to look. Use LED tea lights if it is windy; real flames in paper need a calm night and your full attention.
Cost: ~$3-6 | Time: 30 minutes for twelve
8. Dried Flower Candle Wrap
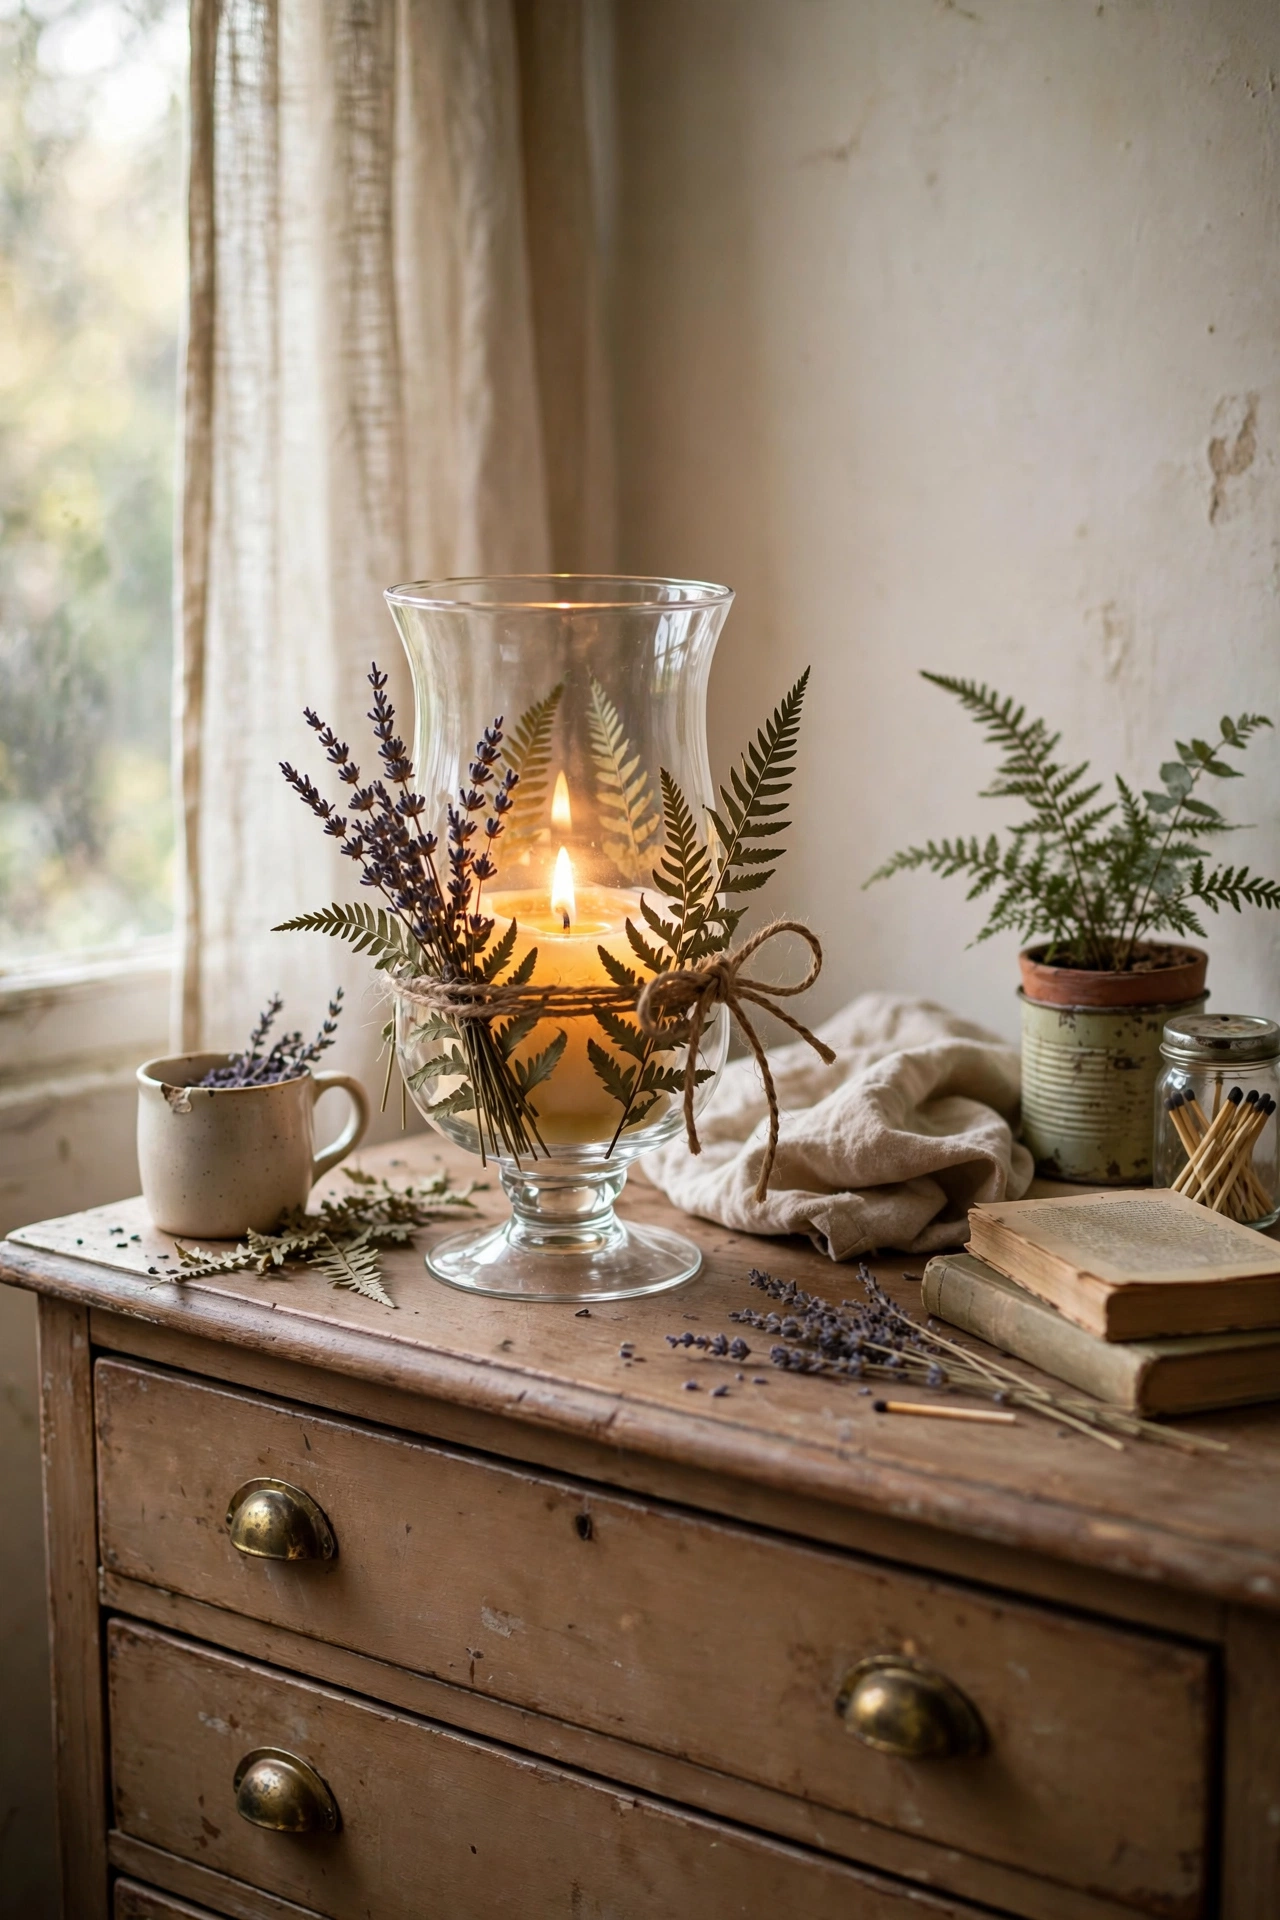
Pressed dried flowers stuck to the outside of a glass hurricane look like a botanical print when the candle glows through. I brush a thin layer of decoupage glue on the glass, press on dried lavender and fern fronds, and seal with another thin coat. Keep the flowers on the lower half, well away from the rim where heat rises. Mine sits on my bedroom dresser and the glow through the petals is lovely. Work in small sections so the glue does not dry before the flowers are placed.
Cost: ~$5-10 | Time: 45 minutes
Budget check: eight projects down, and the teacup candles are the only one needing bought wax. Everything else is decoration around candles you already own.
9. Concrete Candle Holders
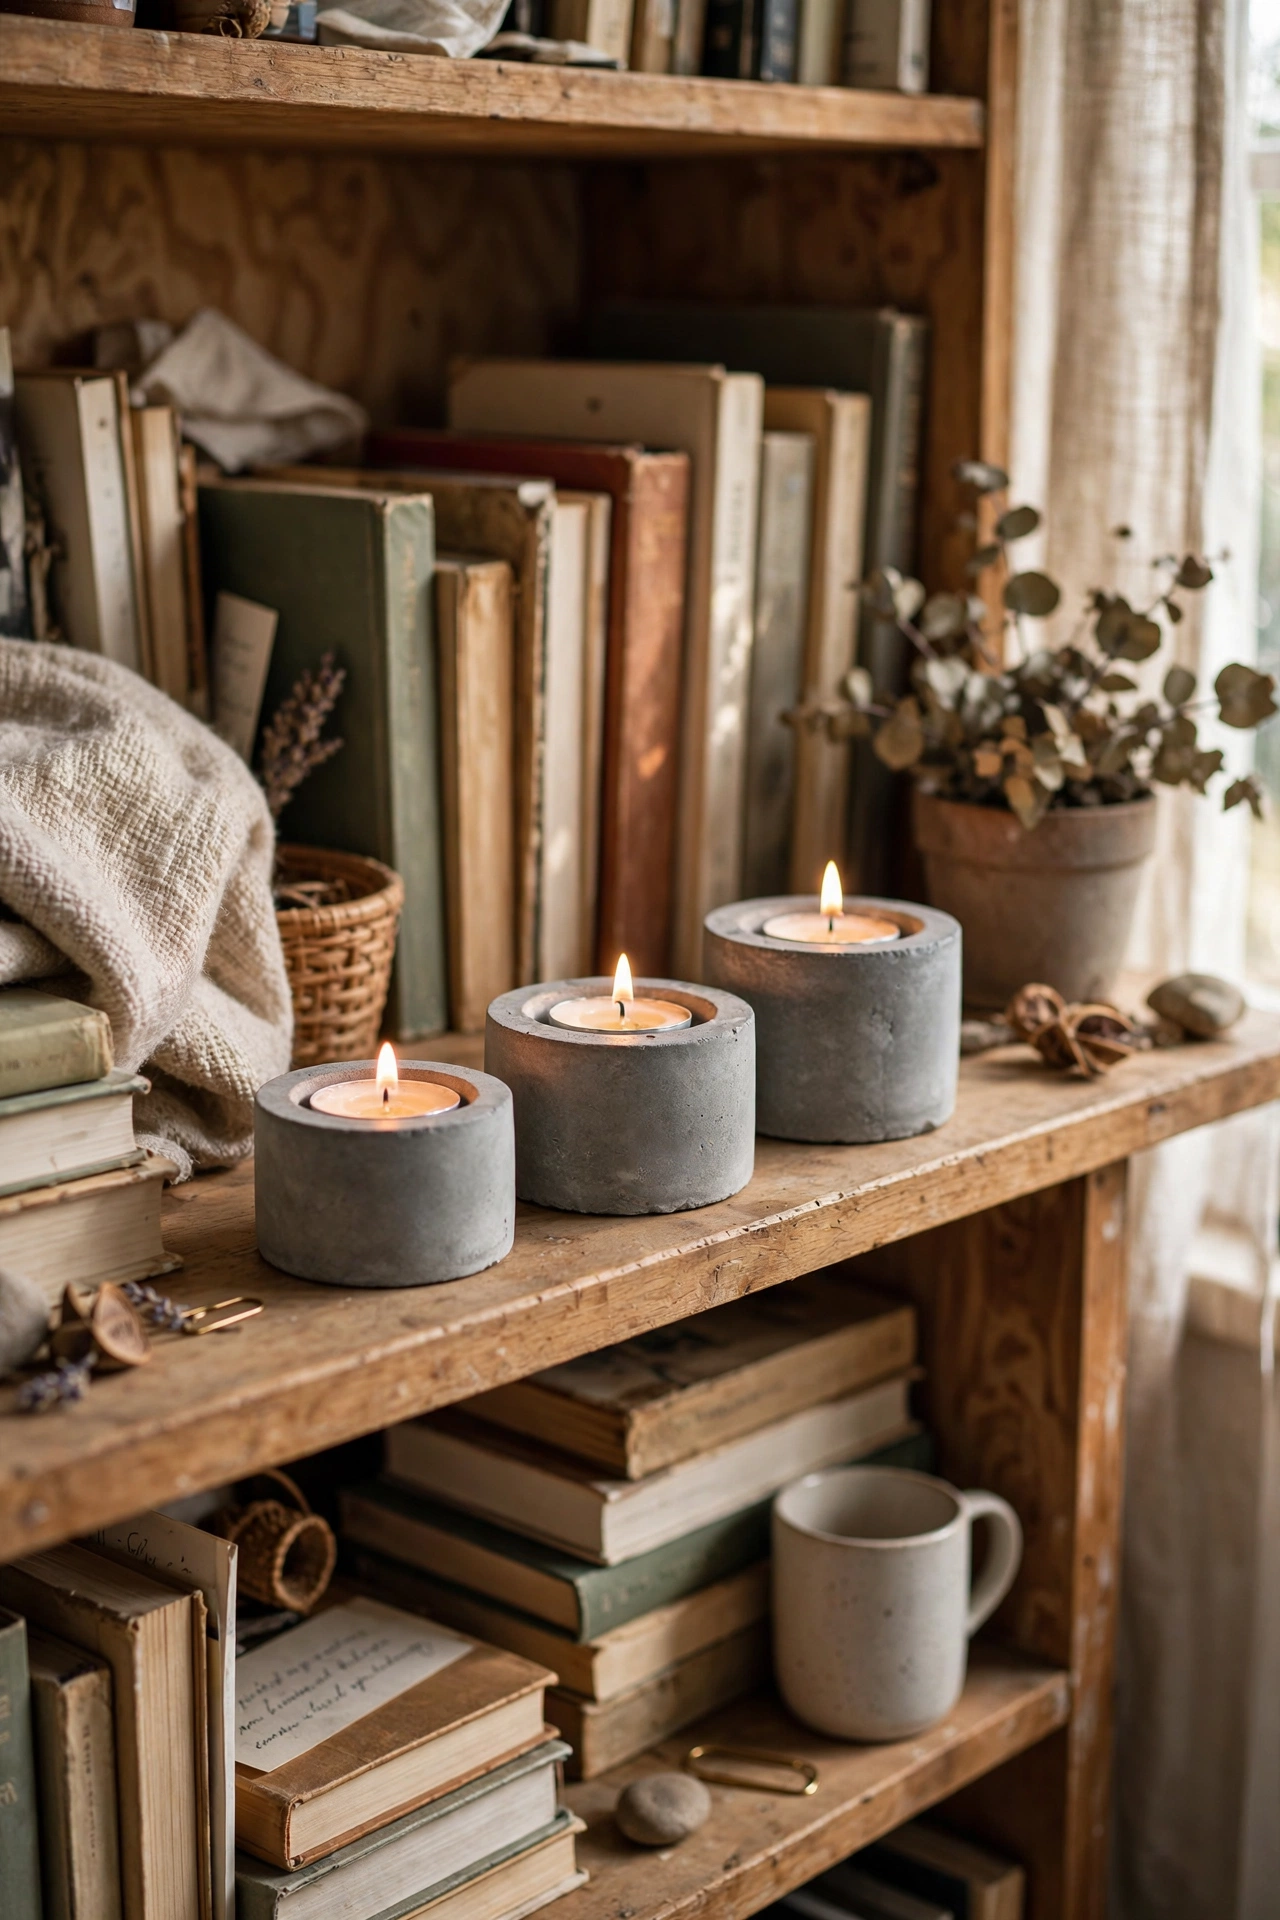
Small concrete holders cast in paper cups have a lovely brutalist look that suits modern rooms. I mix quick-set concrete, pour it into paper cups, press a tea light into the centre while it is wet, and peel the cup away once cured. Grease the cup lightly first so it releases cleanly. Mine hold tea lights on my bookshelf and the grey concrete against the books looks great. Let them cure for a full two days before use, because damp concrete and heat do not mix well.
Cost: ~$4-8 | Time: 30 minutes active, 2 days curing
10. Branch Candle Holder
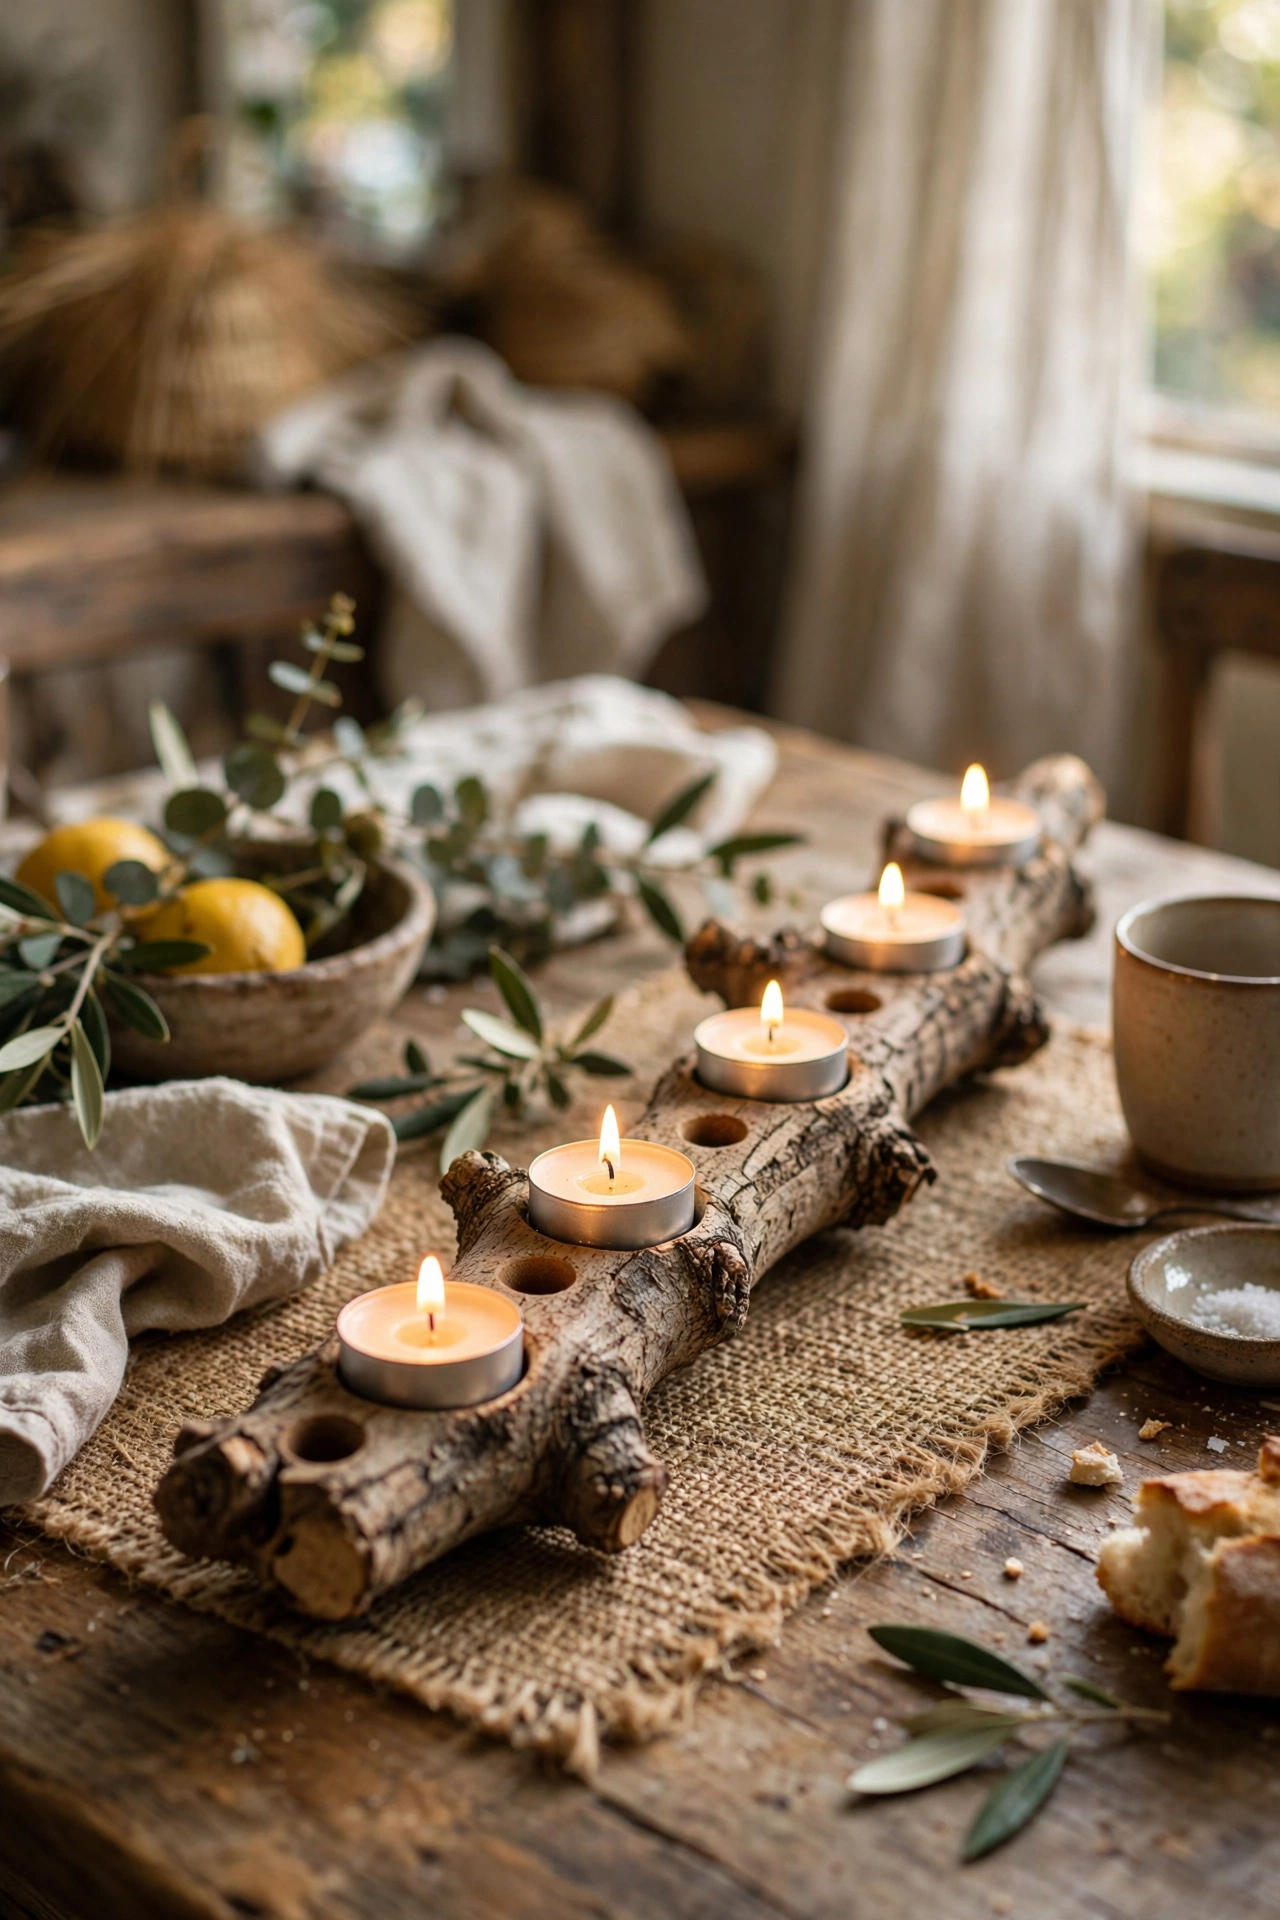
A thick branch with holes drilled for tea lights makes a rustic centrepiece with real presence. I found a sturdy fallen branch, cut it to 60cm, and drilled shallow holes along the top with a spade bit sized for tea lights. Sand it smooth and seal with matte varnish so it does not shed bark on the table. Mine runs down the centre of my dining table all autumn. Make sure the branch is completely dry before drilling, because green wood splits. Metal tea light cups in the holes protect the wood from heat.
Cost: ~$3-8 | Time: 1 hour
11. Gold-Dipped Taper Candles
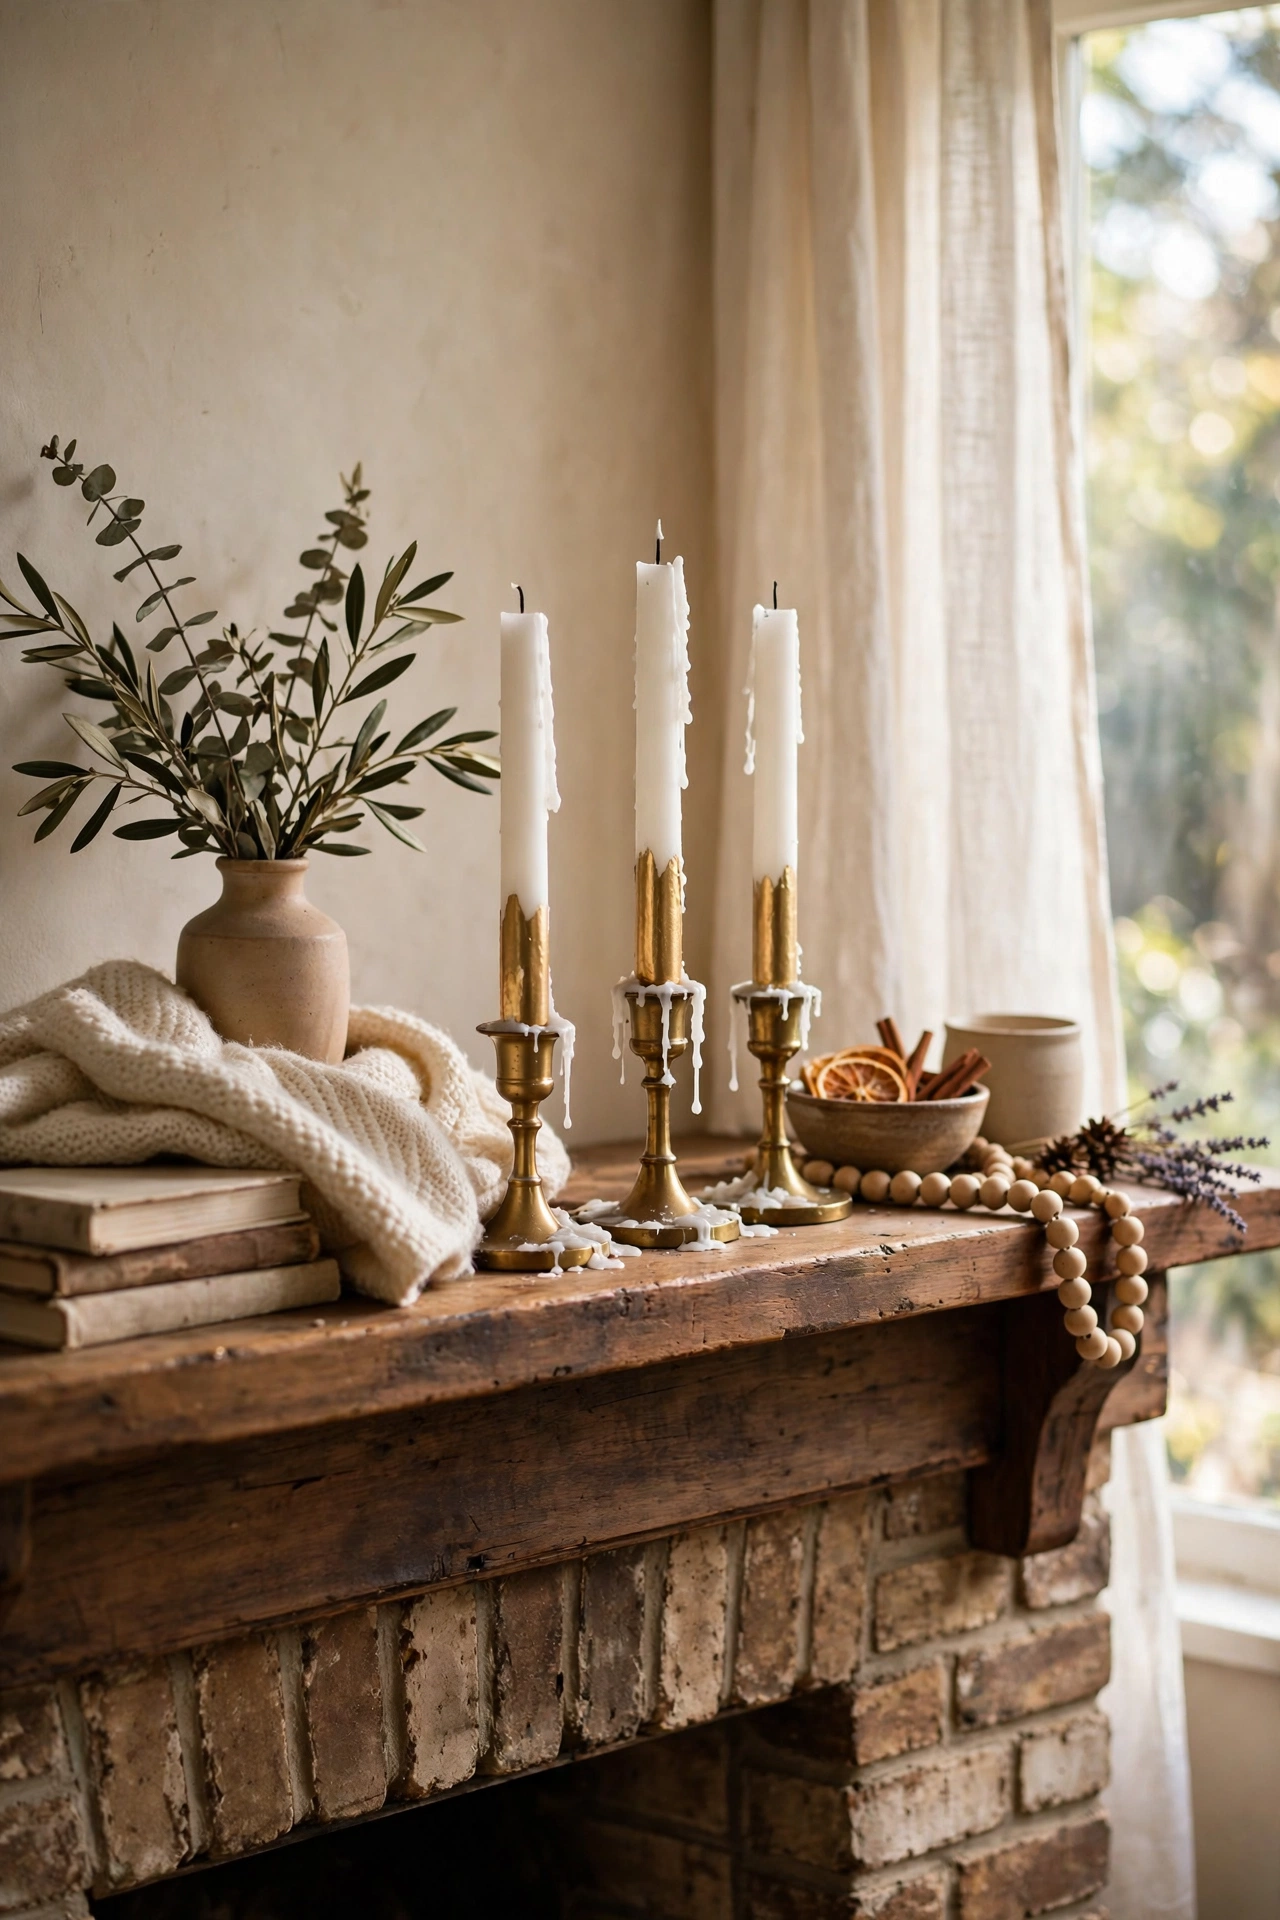
Dipping the bottom half of white taper candles in gold paint gives them a designer look for pennies. I pour gold acrylic paint into a tall jar, dip each candle to the same depth, and stand them upside down in a box to dry. Mark the dip line with a pencil first so all your candles match. Mine look like the expensive dipped candles from home stores and cost me $4 for six. Keep the painted section below the burn zone and they are perfectly safe. Ivory candles with gold dips suit every season.
Cost: ~$4-8 | Time: 30 minutes plus drying
12. Punched Tin Can Lanterns
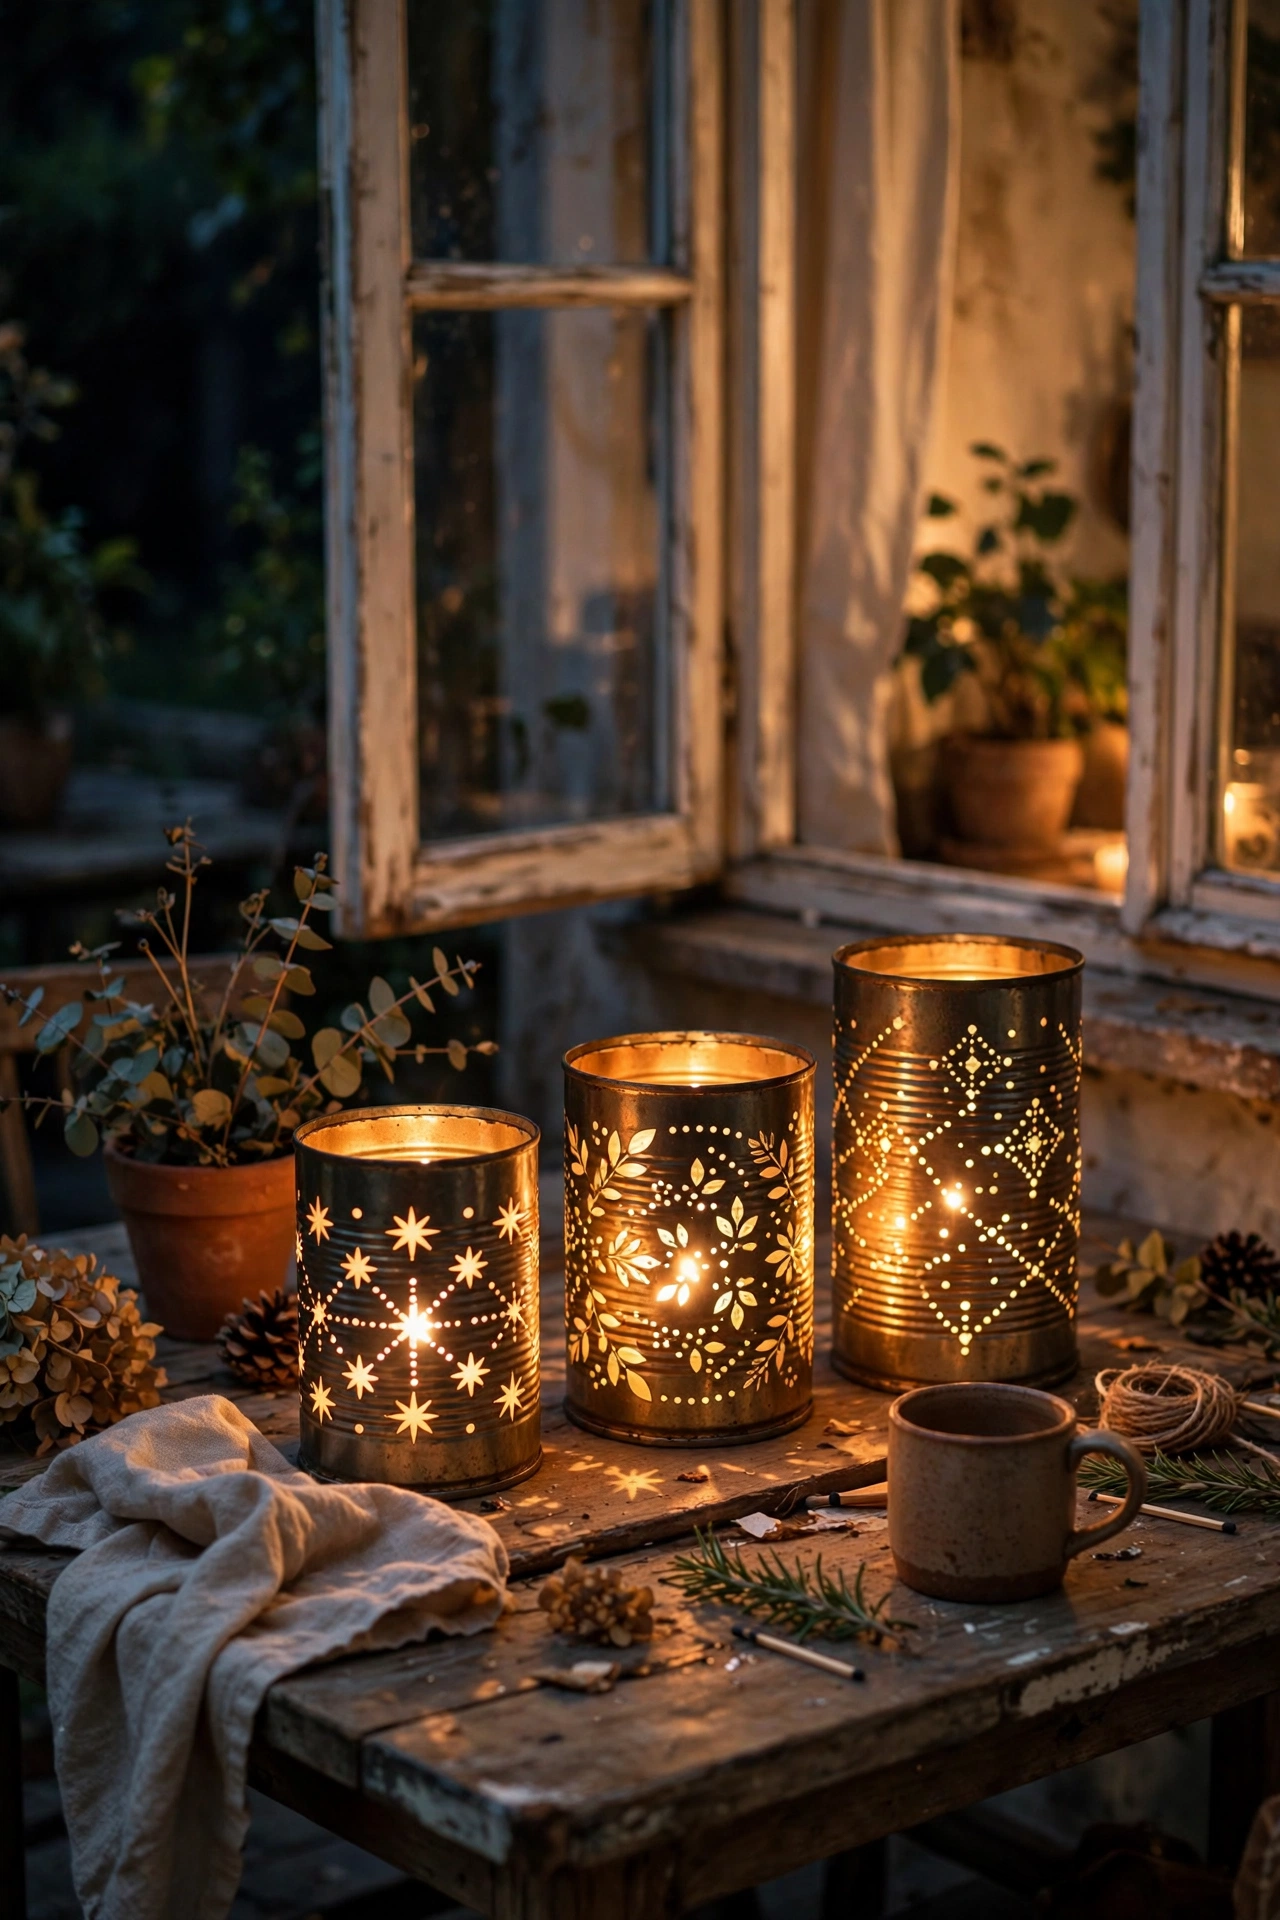
Punched tin cans glowing on a patio throw the loveliest starlight patterns. I fill each can with water and freeze it overnight, then punch a pattern with a nail and hammer; the ice stops the metal denting. Peel the labels and sand the cans first for a clean finish. I made a set of eight for my garden table and they are magical on summer nights. Use battery tea lights inside, because real flames in a painted can get too hot. Simple dot patterns look best; complicated ones blur.
Cost: ~$2-5 | Time: 1 hour for six
Budget check: halfway there, and the punched tin lanterns might be the best two dollars of atmosphere on this list. Freeze the cans the night before and the punching takes minutes.
13. Seashell Tea Light Holders
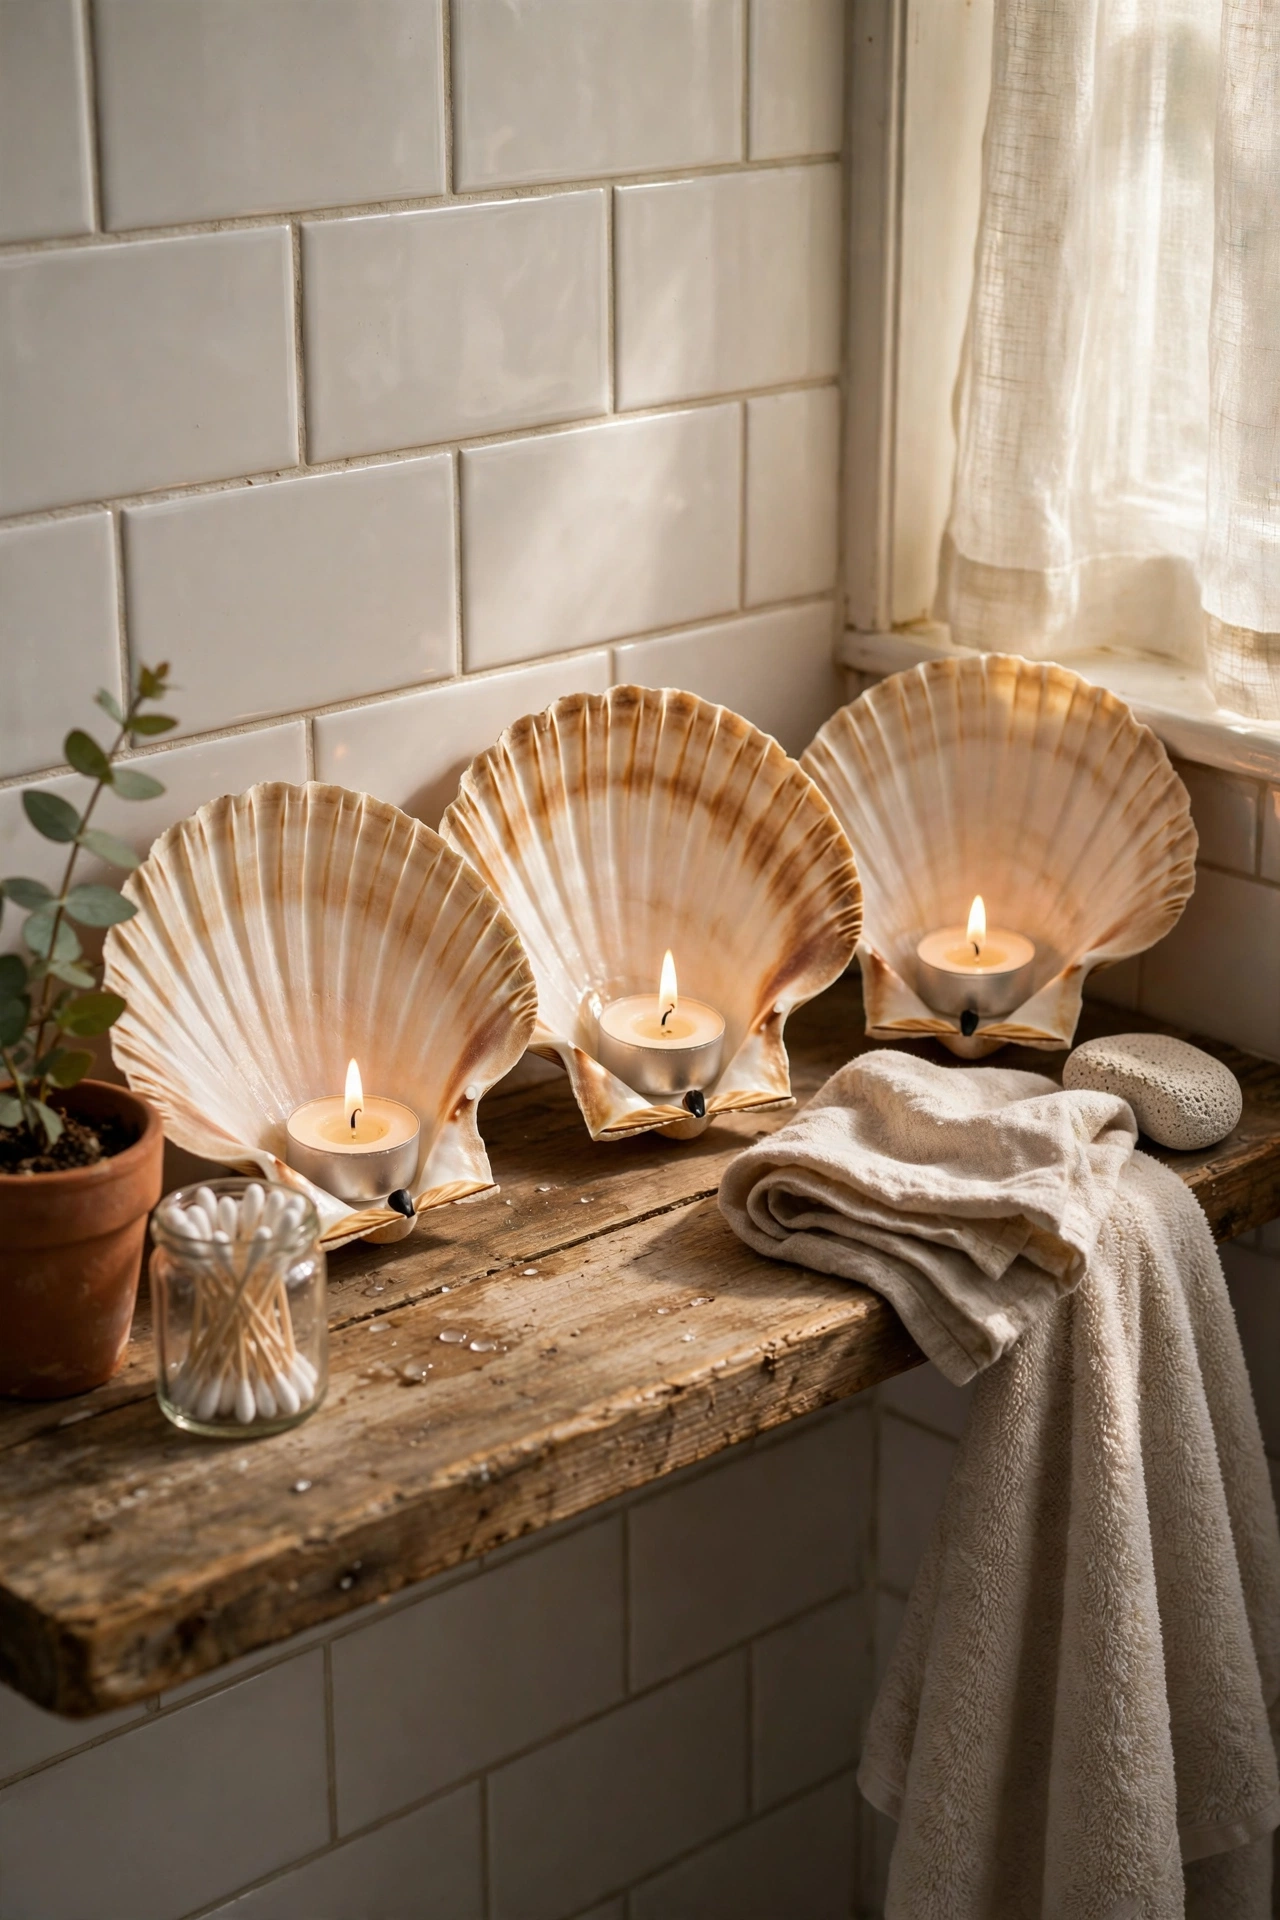
Large scallop shells hold tea lights perfectly and look like they belong in a beach house. I clean my collected shells thoroughly, dab a little melted wax in the base to seat the tea light, and arrange them in groups of three. The ridged shell throws the loveliest rippled light. Mine live on my bathroom shelf and make bath time feel luxurious. Use metal tea light cups inside the shells so the flame never touches the shell directly. Rinse shells in a bleach solution first to remove any sea smell.
Cost: ~$3-8 | Time: 20 minutes
14. Pressed Flower Candle Decoupage
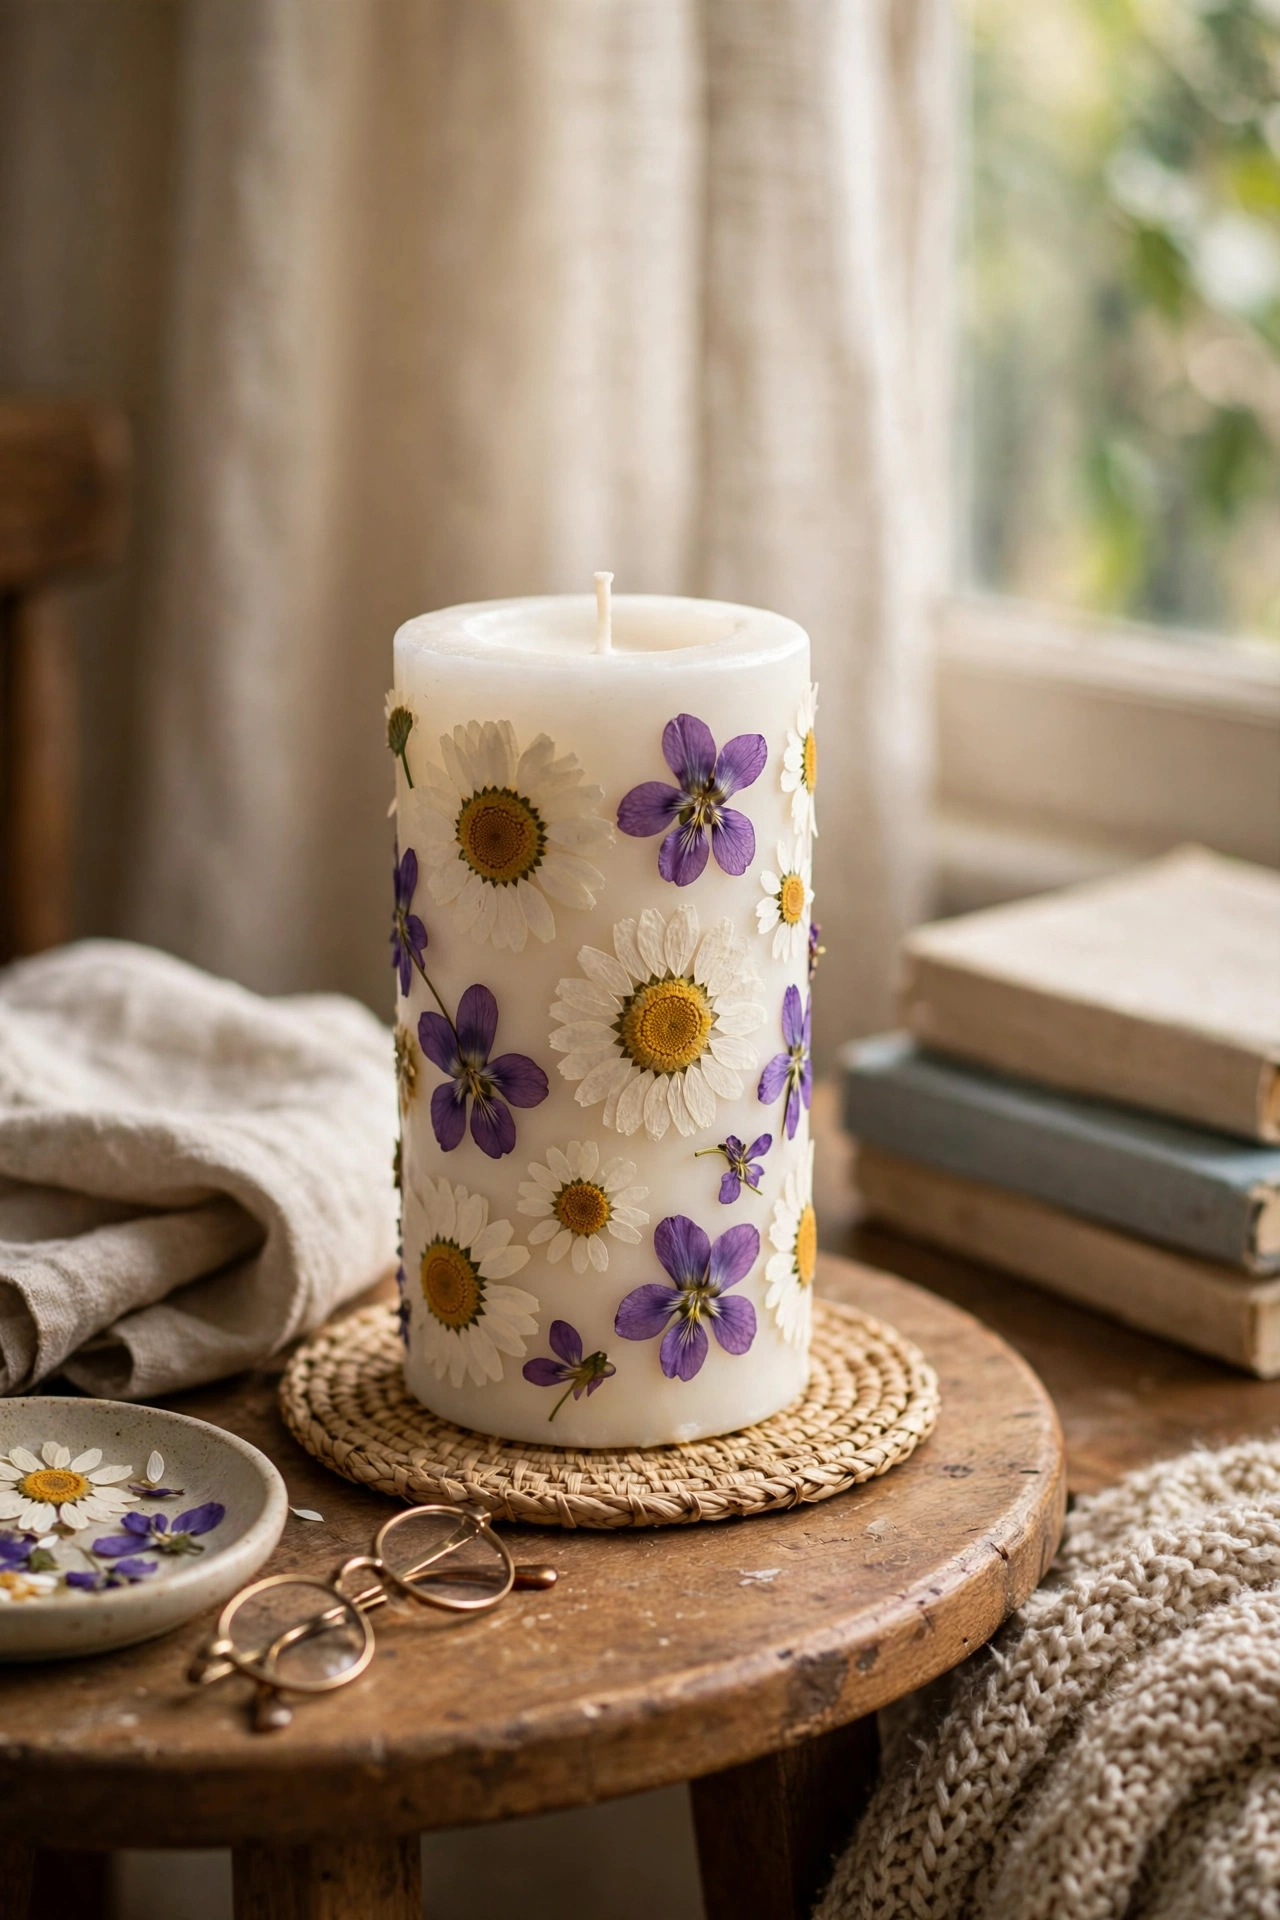
Real pressed flowers decoupaged onto a pillar candle look like hand-painted porcelain. I press small flowers for a week, then attach them to a plain pillar with tiny dots of decoupage glue, working from the bottom up. Seal with one thin coat so the flowers do not peel. Keep the flowers on the lower third of the candle, well below where it burns. Mine is almost too pretty to light, which is why I made a second one. Daisies and violets press flattest and stick best.
Cost: ~$4-9 | Time: 1 hour plus pressing
15. Lantern Tray Display
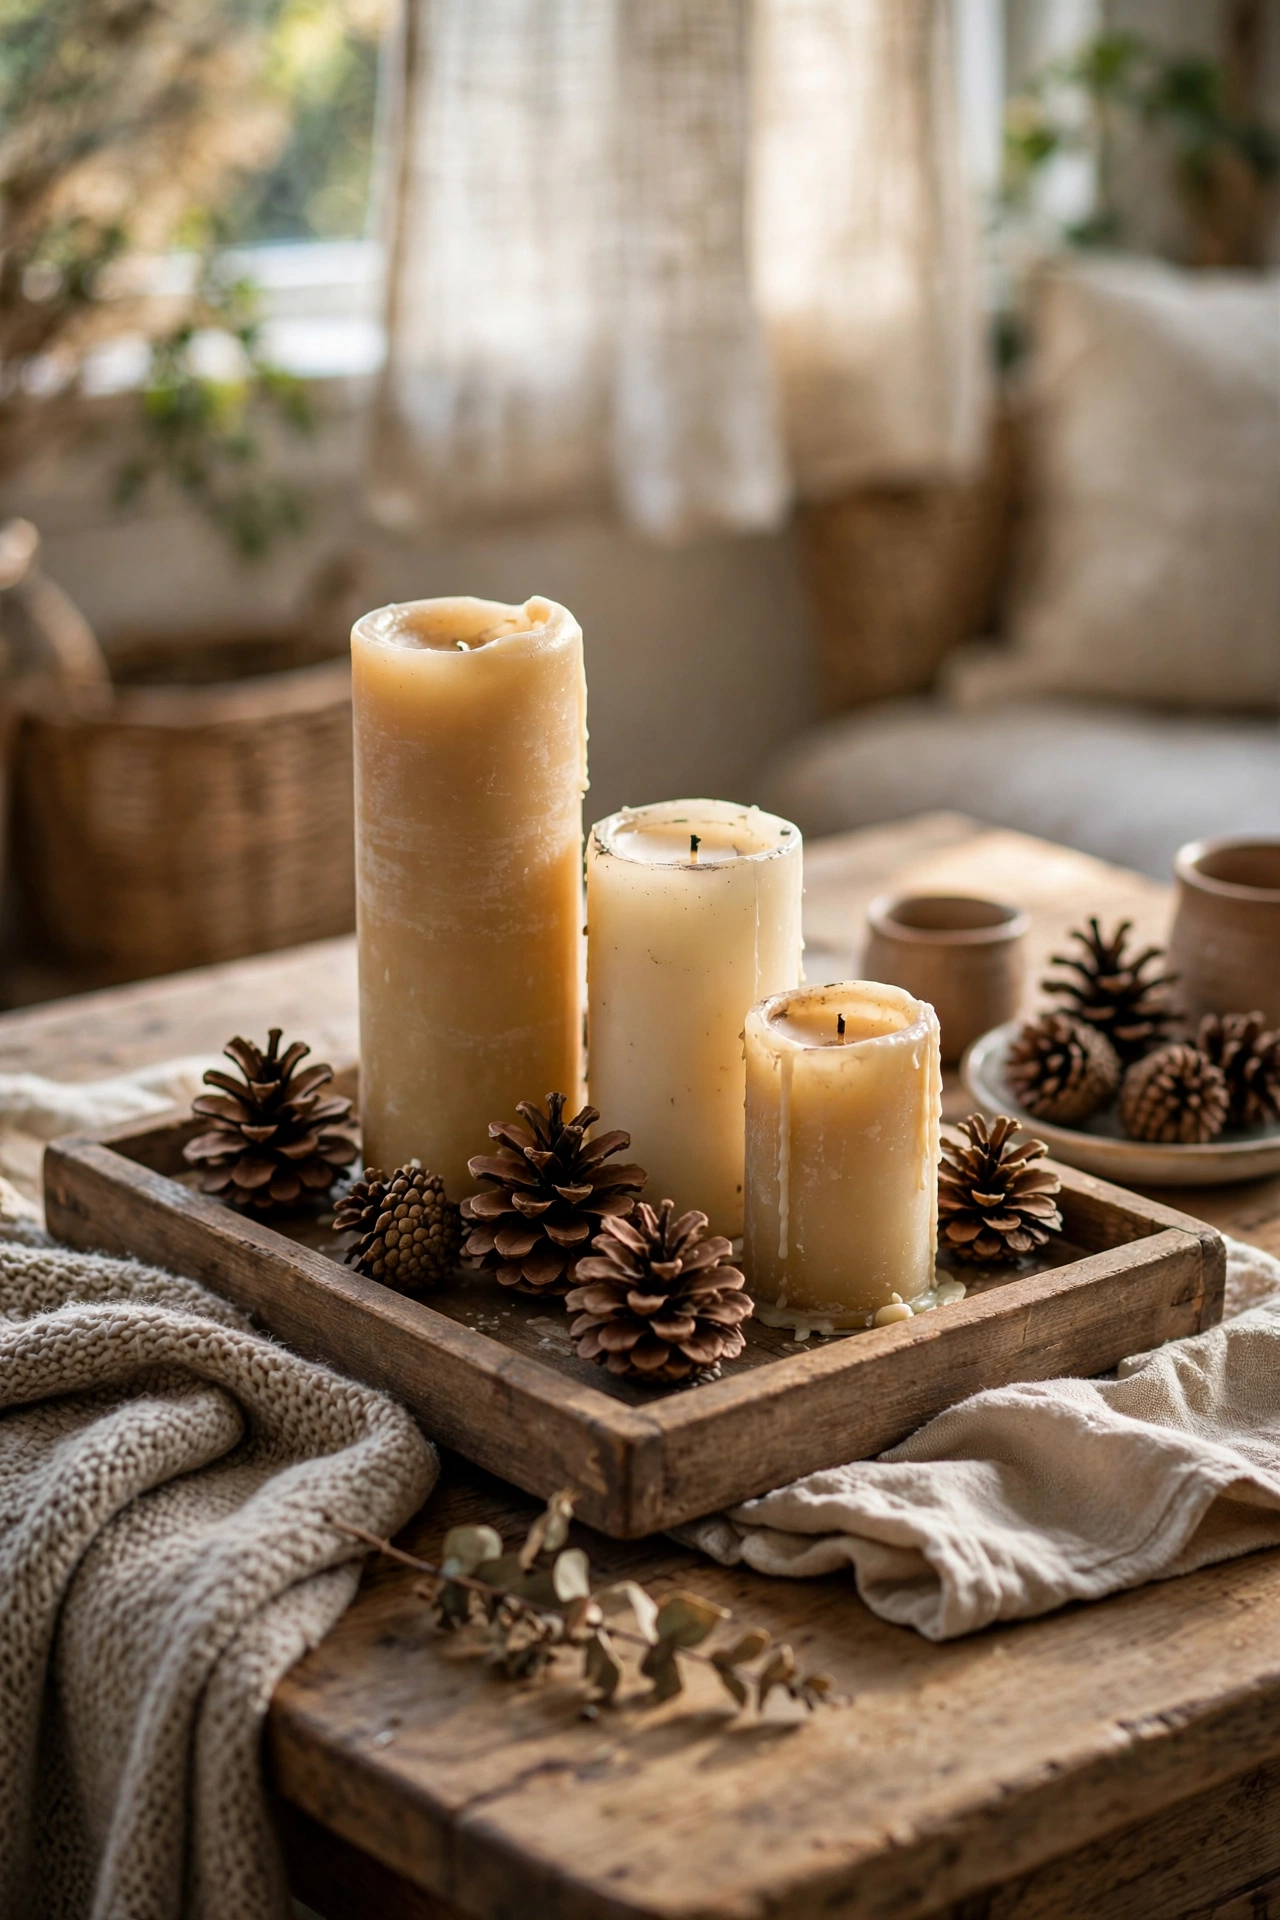
A wooden tray grouped with candles of different heights makes an instant styled vignette. I arrange a tall lantern, two pillars, and three tea lights on a charity-shop tray, then fill the gaps with pinecones or pebbles. The tray corrals everything so it looks deliberate rather than cluttered. Mine moves between my coffee table and dining table depending on the occasion. Odd numbers of candles look best; even numbers look staged. This is styling rather than crafting, which makes it the easiest project here.
Cost: ~$6-12 | Time: 15 minutes
16. Coffee Bean Candle Fill
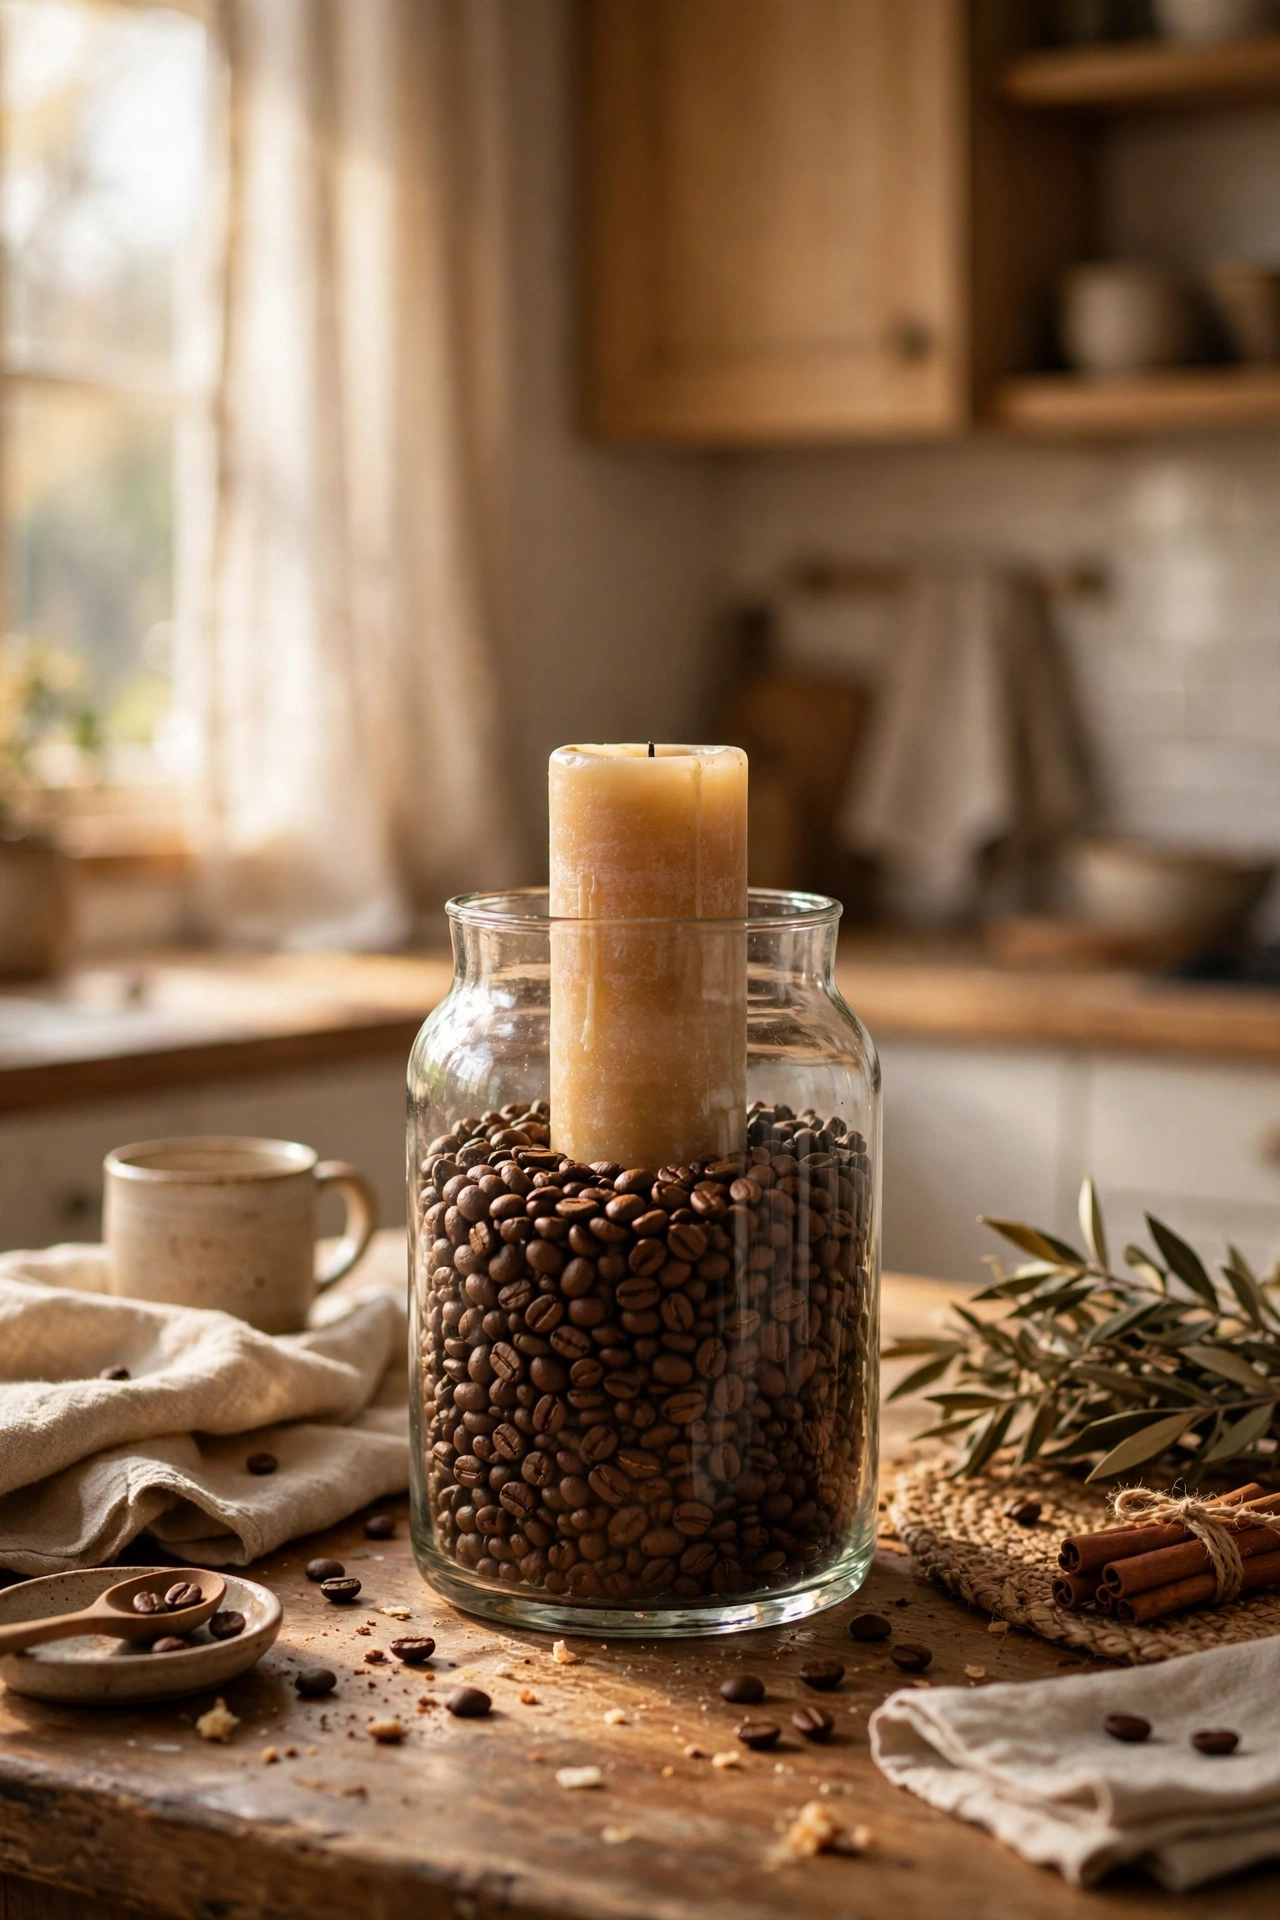
A glass vase filled with coffee beans with a candle nestled in the centre smells incredible and looks rich. I fill a wide glass cylinder a third full of cheap whole beans, press a pillar candle into the middle, and the beans hold it upright. The candle’s warmth releases the coffee scent gently. Mine sits on my kitchen counter and guests always comment on the smell. Use the cheapest beans you can find; nobody is drinking them. Top up the beans as they settle over the first week.
Cost: ~$5-10 | Time: 10 minutes
Budget check: sixteen done, and the coffee bean fill is the rare project that upgrades your sense of smell too. A bag of cheap beans fills three vases.
17. Mirror Tile Candle Base
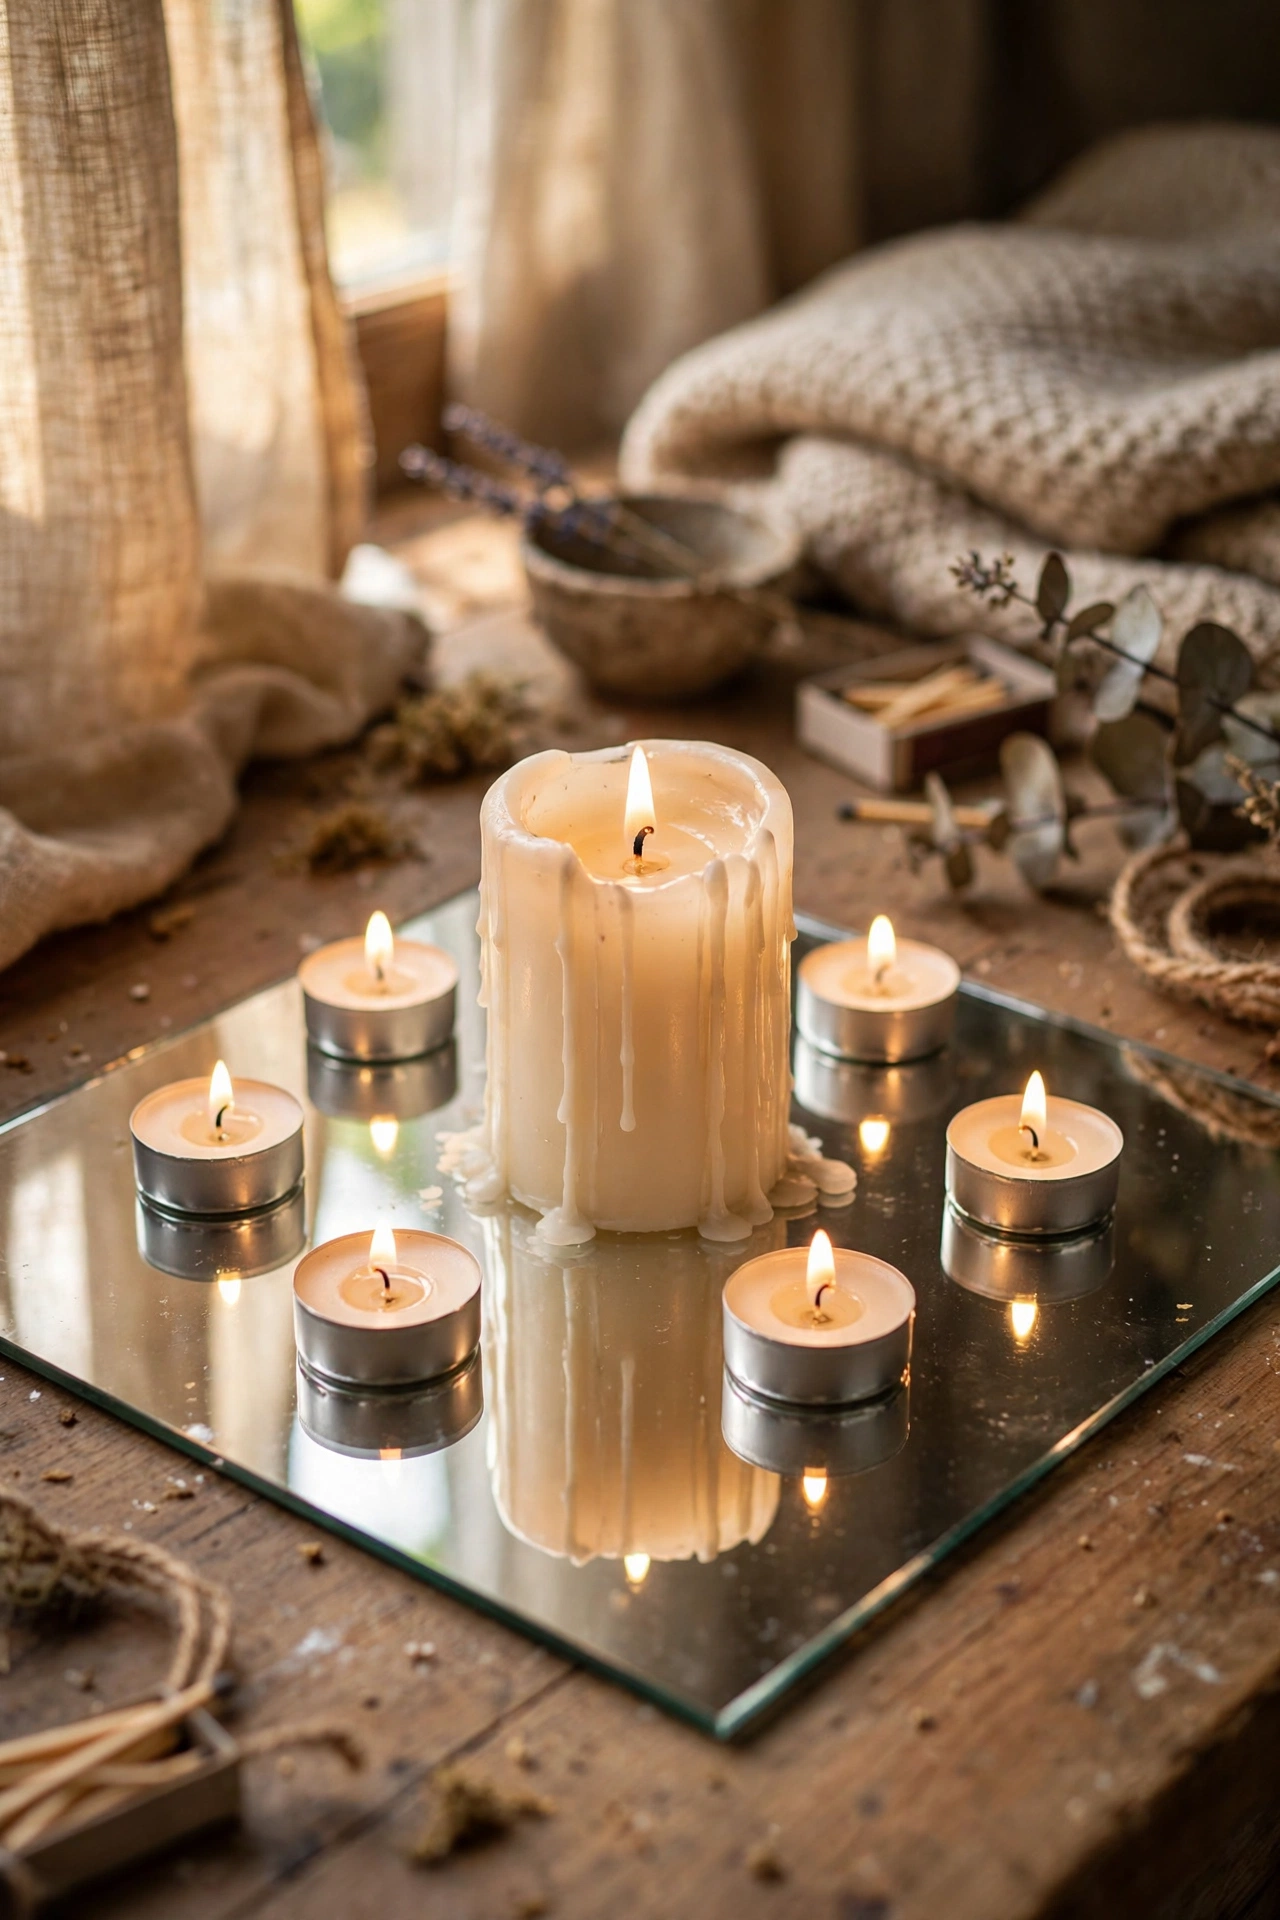
A square mirror tile under a candle doubles the light and protects your furniture. I buy packs of cheap mirror tiles from the pound shop, set a pillar candle in the centre of each, and scatter a few tea lights around it. The reflection makes one candle look like three, which is the best value trick on this list. Mine protect my wooden sideboard from wax drips while making the room glow. Wipe the mirror with glass cleaner before guests arrive; fingerprints show up in candlelight. If you love reflective decor, the wreath in (see also: 23-diy-wreath-ideas-for-every-season) number 23 has a similar glow-up effect.
Cost: ~$3-8 | Time: 5 minutes
18. Woven Basket Candle Cluster
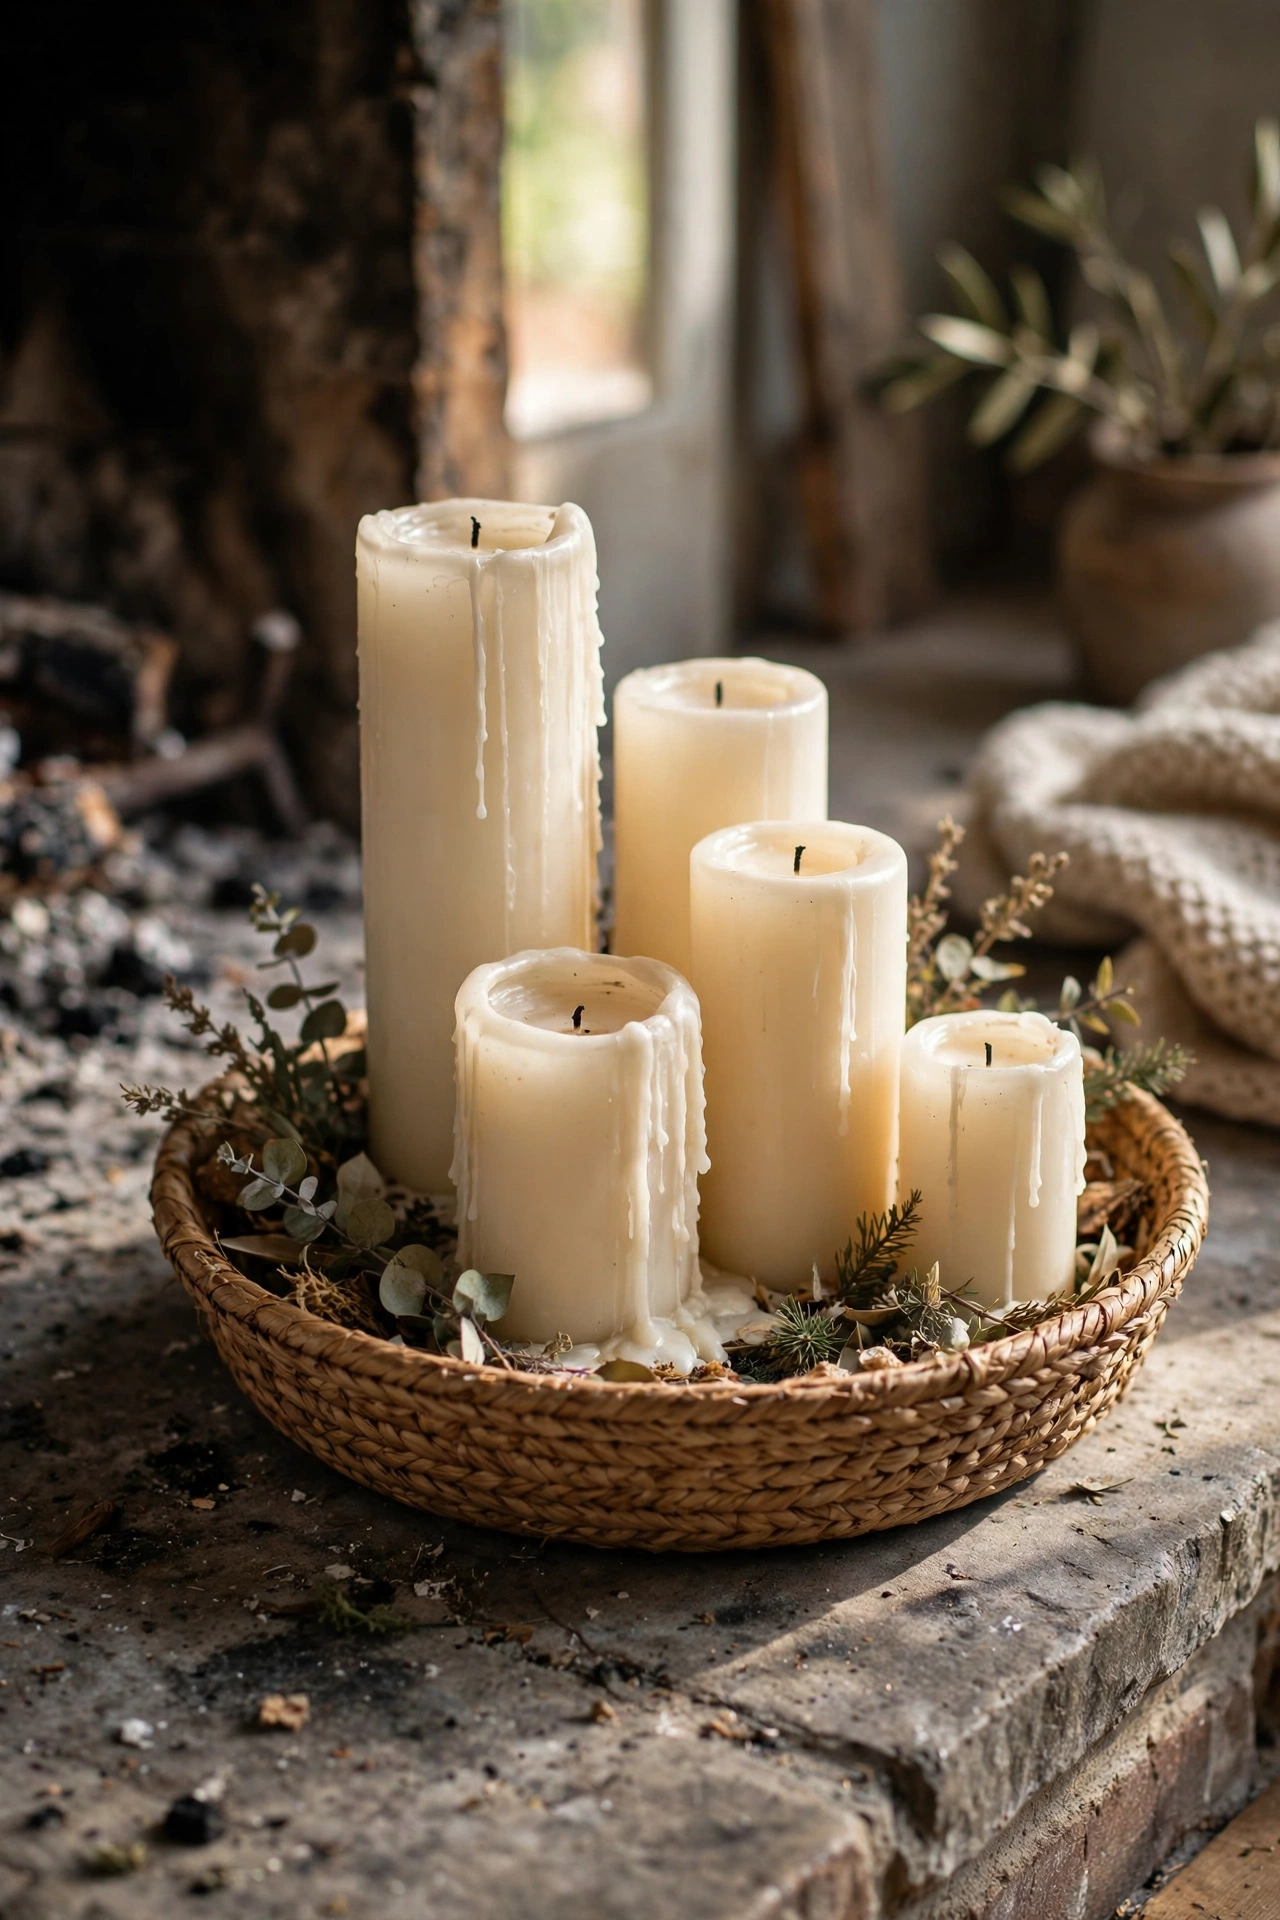
A shallow woven basket filled with pillar candles of different heights makes a warm, textural centrepiece. I line the basket with a piece of foil to catch drips, arrange five candles tallest in the middle, and tuck dried moss around the bases. The basket contains everything and moves as one piece, which I love when I need the table. Mine sits on my hearth all winter. Keep the candles well away from the basket edges, and never leave this one burning unattended. Natural baskets suit the look best.
Cost: ~$8-14 | Time: 20 minutes
19. Frosted Glass Jar Candles
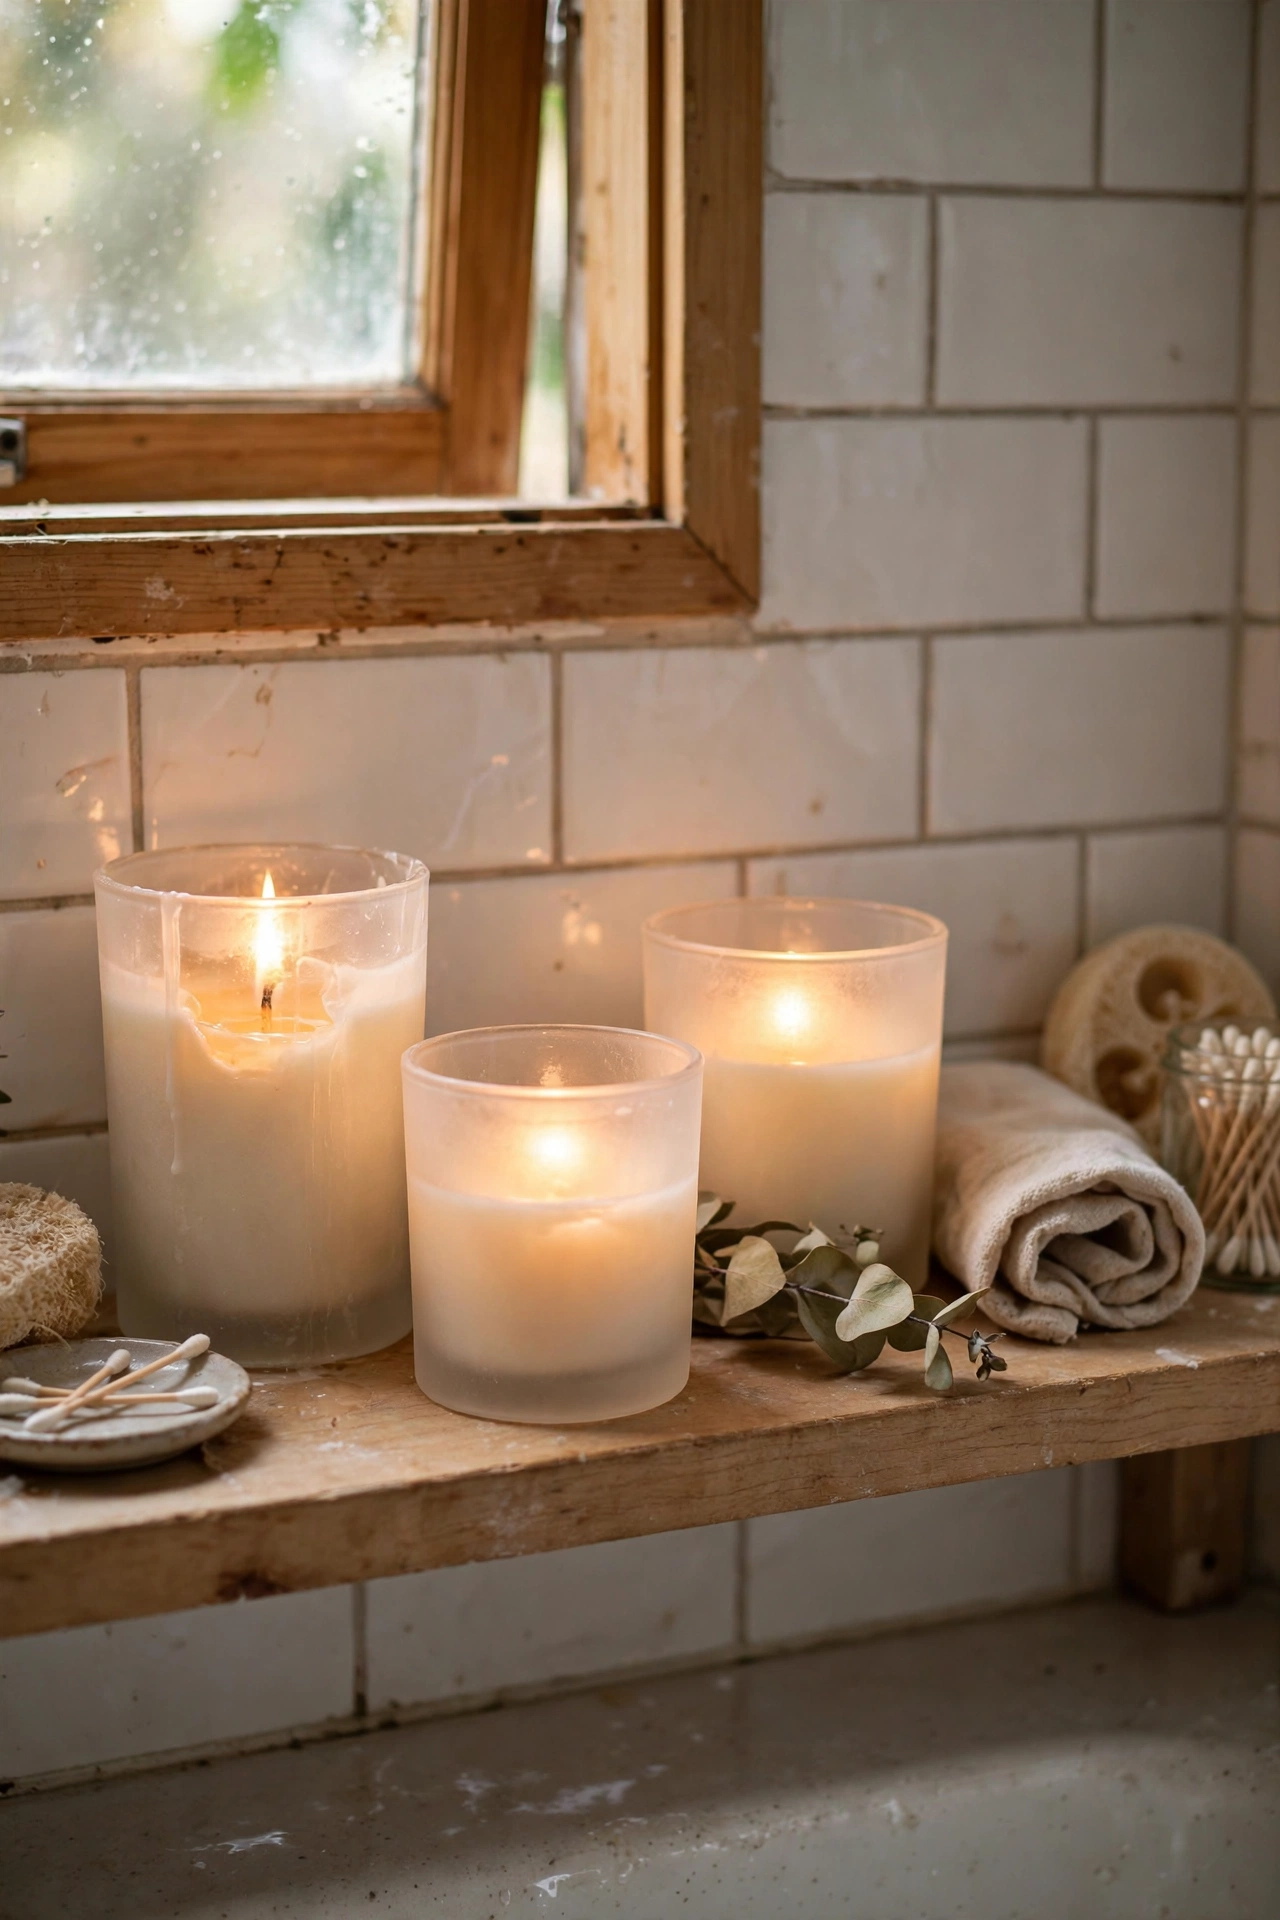
A coat of frosted glass spray paint turns any clear jar into a soft-glowing candle holder. I mask the rim with tape, spray two light coats on the outside of the jar, and let it cure for a day before use. The frosted finish diffuses the flame into a gentle glow with no harsh glare. Mine line my bathroom shelf and make the whole room feel like a spa. Do not spray the inside of the jar; the finish needs to stay on the outside away from heat. White frost suits every room.
Cost: ~$4-9 | Time: 30 minutes plus curing
20. Herb Bundle Candle Wrap
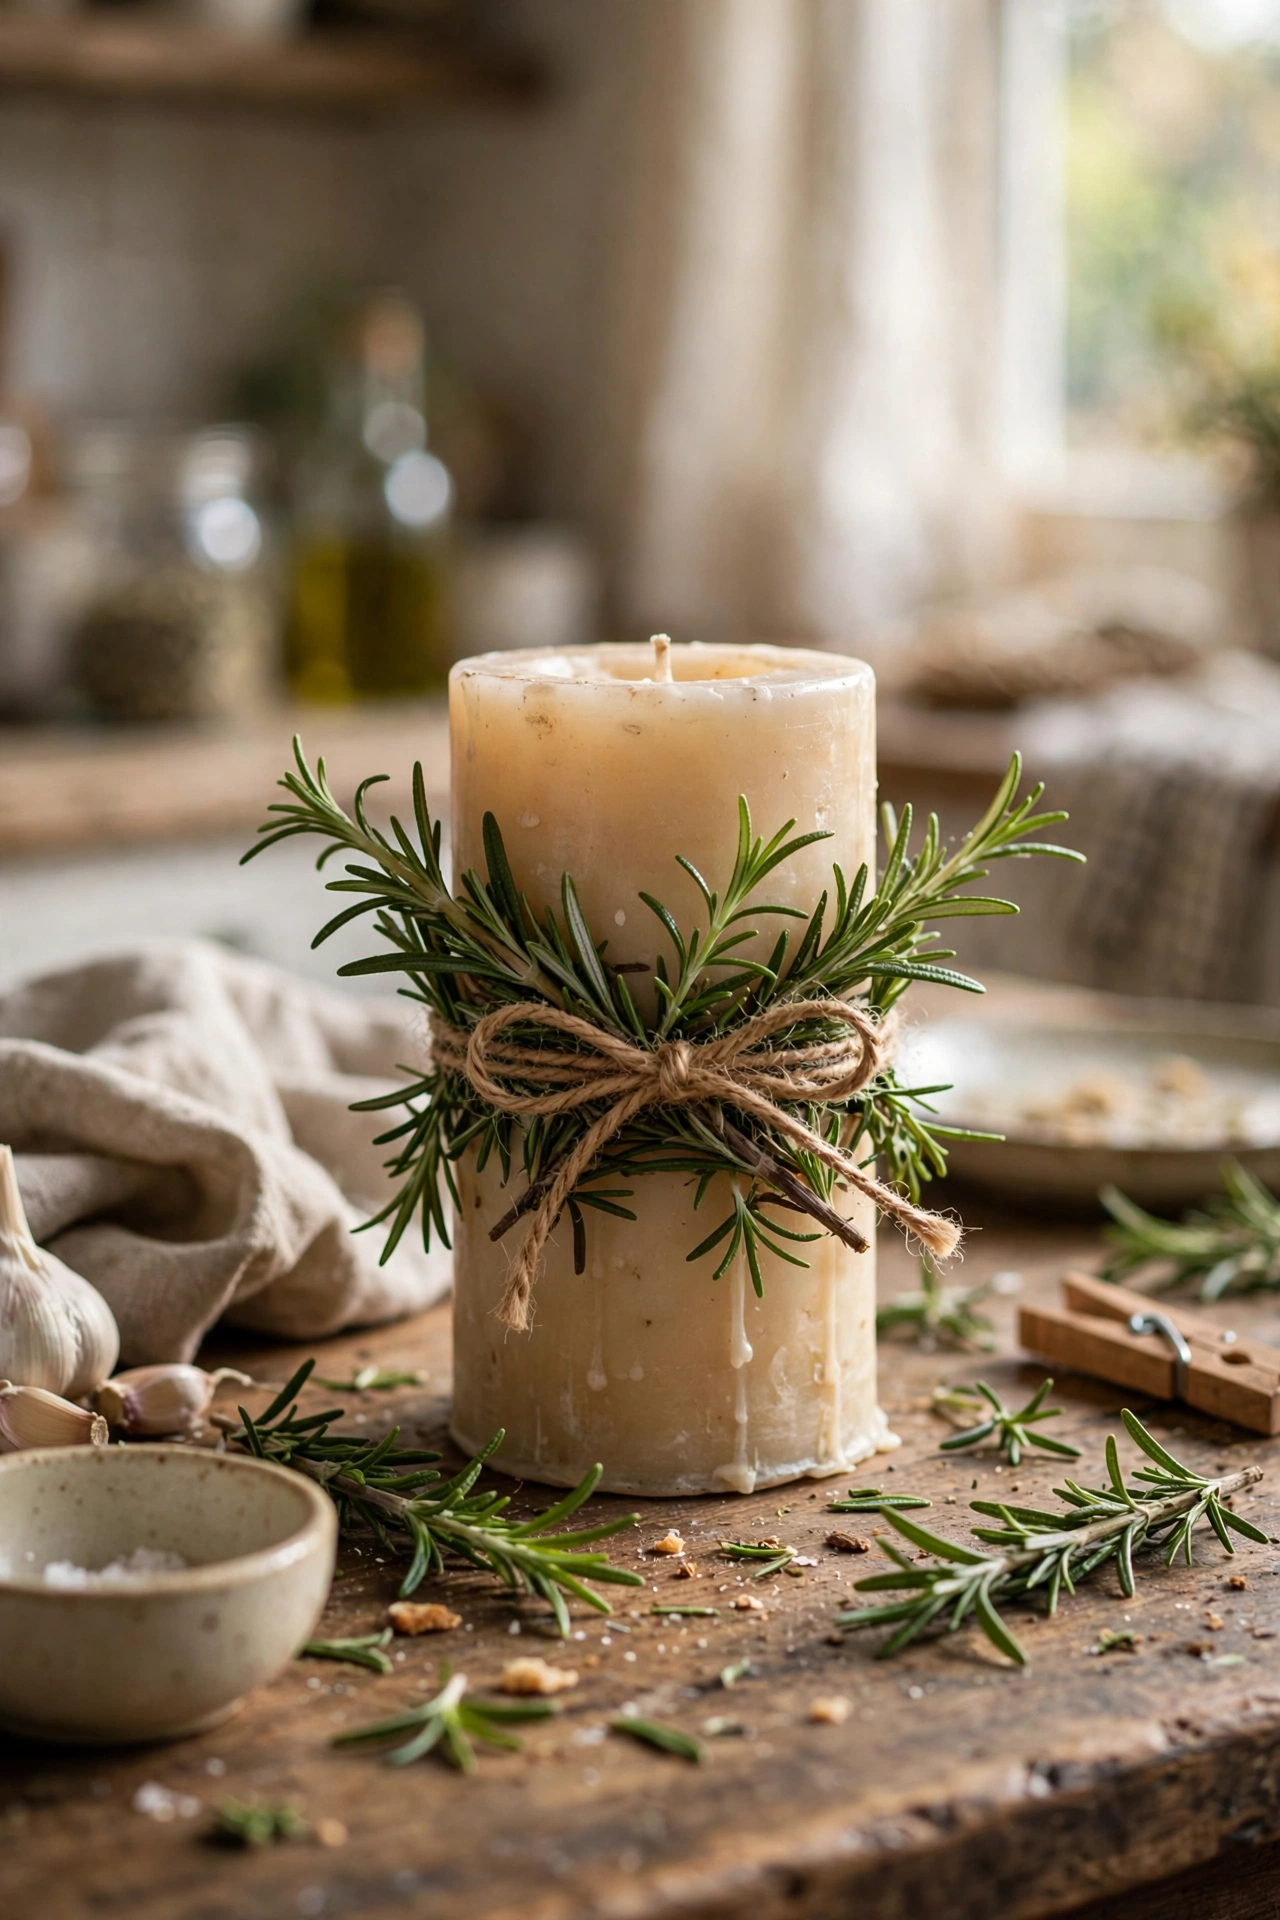
Fresh rosemary or lavender tied around a pillar candle scents the room as it warms. I wrap small herb bundles around a thick pillar, tie them with twine, and trim the tops level. The herbs should sit below the flame line and you should never leave this candle burning unattended. Mine scents my whole kitchen on winter evenings, and guests always ask what that wonderful smell is. Replace the herbs when they dry out completely; they go brown after a few weeks. Lavender looks prettiest, rosemary smells strongest.
Cost: ~$4-8 | Time: 20 minutes
Budget check: twenty ideas done, and the frosted jars are proof that one can of spray paint can upgrade a whole shelf of holders. Keep decorated candles away from draughts and they burn evenly.
21. Copper Tape Geometric Candles
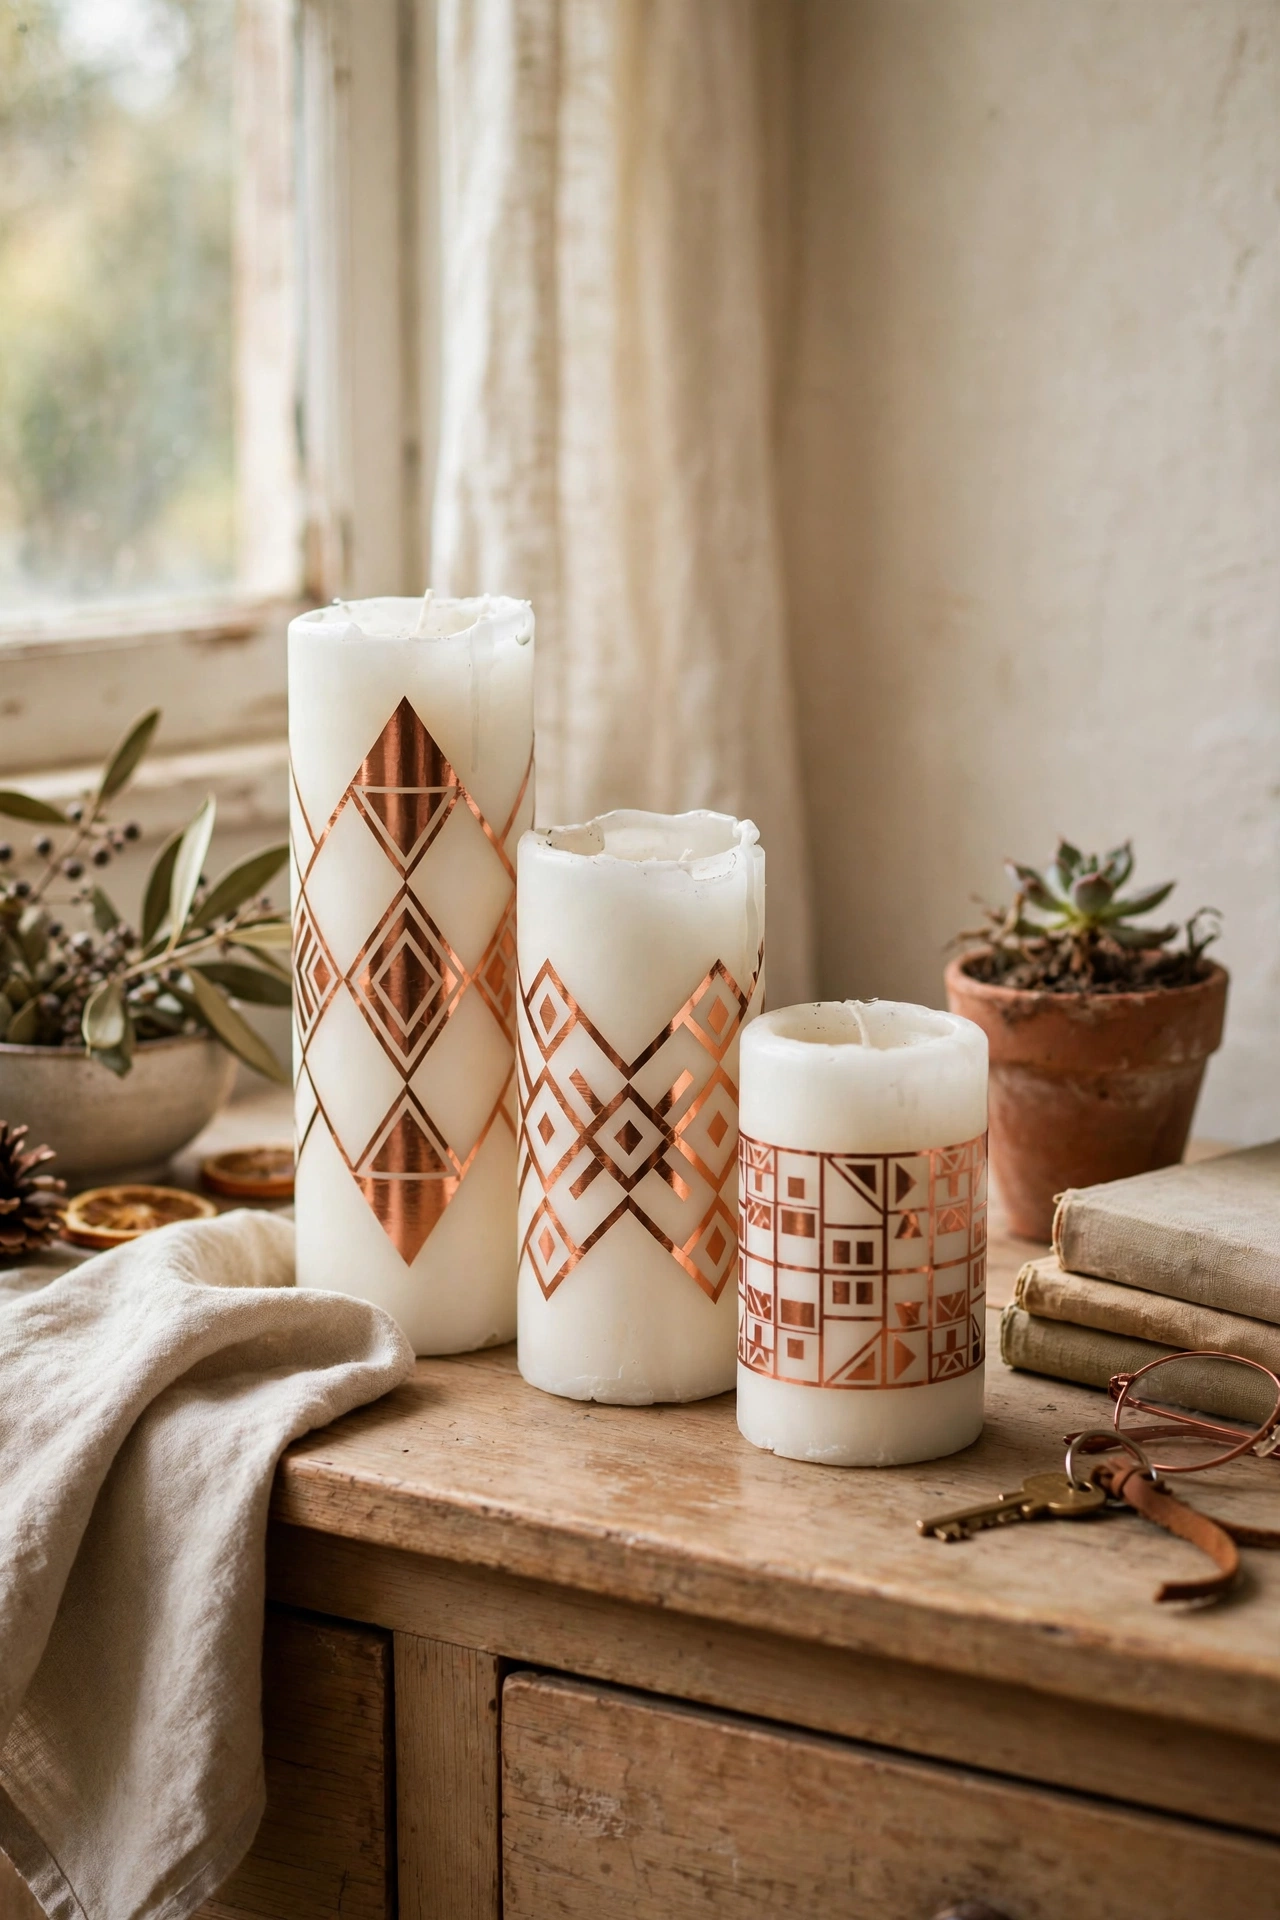
Strips of copper tape in geometric patterns turn plain pillars into modern art. I wrap thin copper tape around white pillars in triangles and chevrons, pressing it flat with a bone folder so the edges seal. Keep the tape on the lower two-thirds, well below the melt zone. Mine look like the expensive patterned candles from design shops and cost me $5 for four. The metallic tape catches candlelight beautifully. Peel and redo if a line goes crooked; the tape lifts off cleanly the first time.
Cost: ~$5-9 | Time: 30 minutes
22. Stone Candle Holders
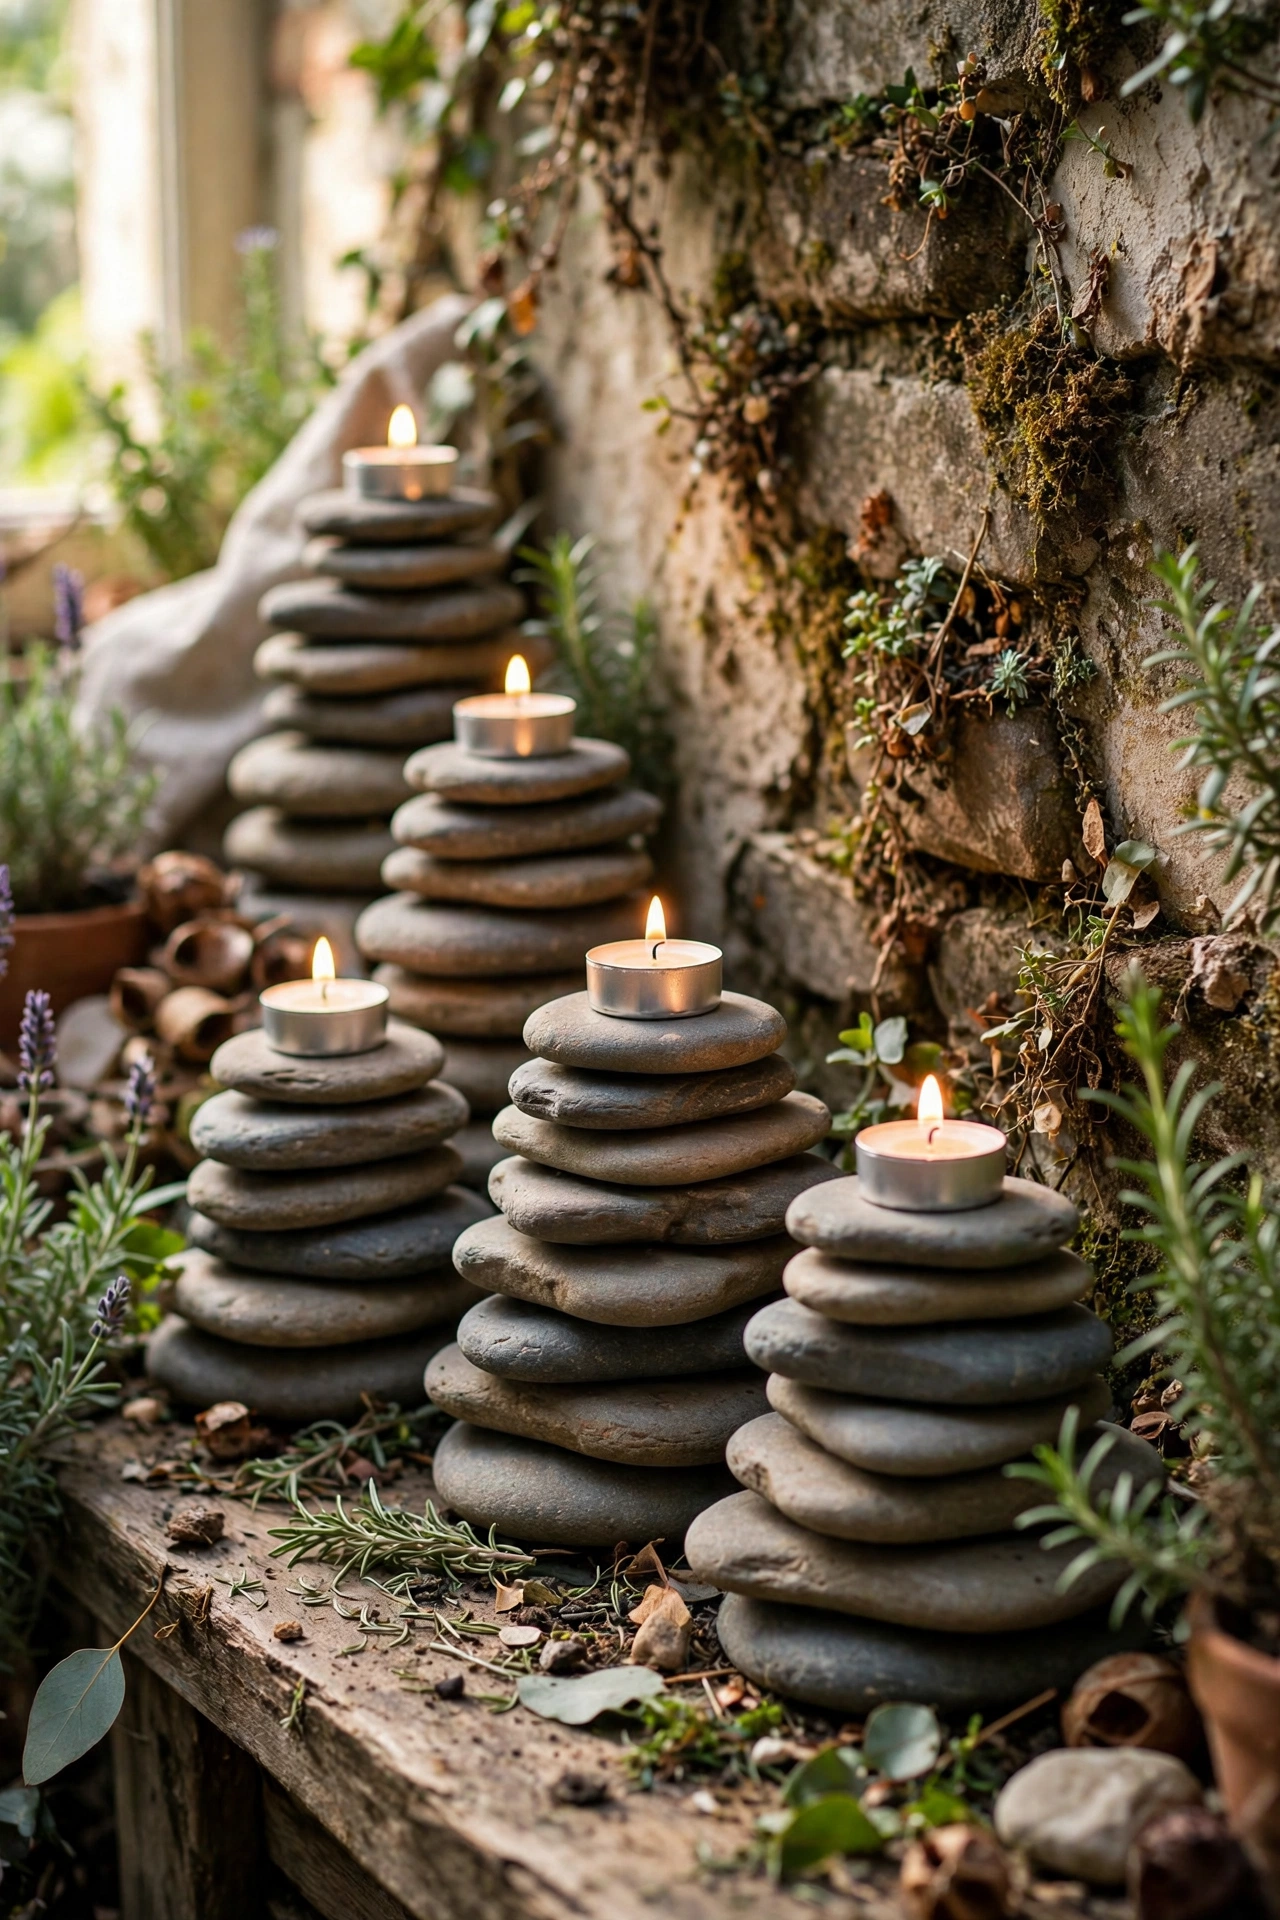
Flat river stones stacked and glued make organic candle holders with real weight. I stack three flat stones with strong adhesive, leaving the top one slightly offset, and set a tea light on top. The stone absorbs and radiates a gentle warmth. Mine hold tea lights along my garden wall all summer. Choose stones with flat faces so the stack sits stable; wobbly stacks and flames do not mix. A dab of museum putty under the tea light stops it sliding.
Cost: ~$2-6 | Time: 30 minutes plus glue curing
23. Eucalyptus Wreath Candle Ring
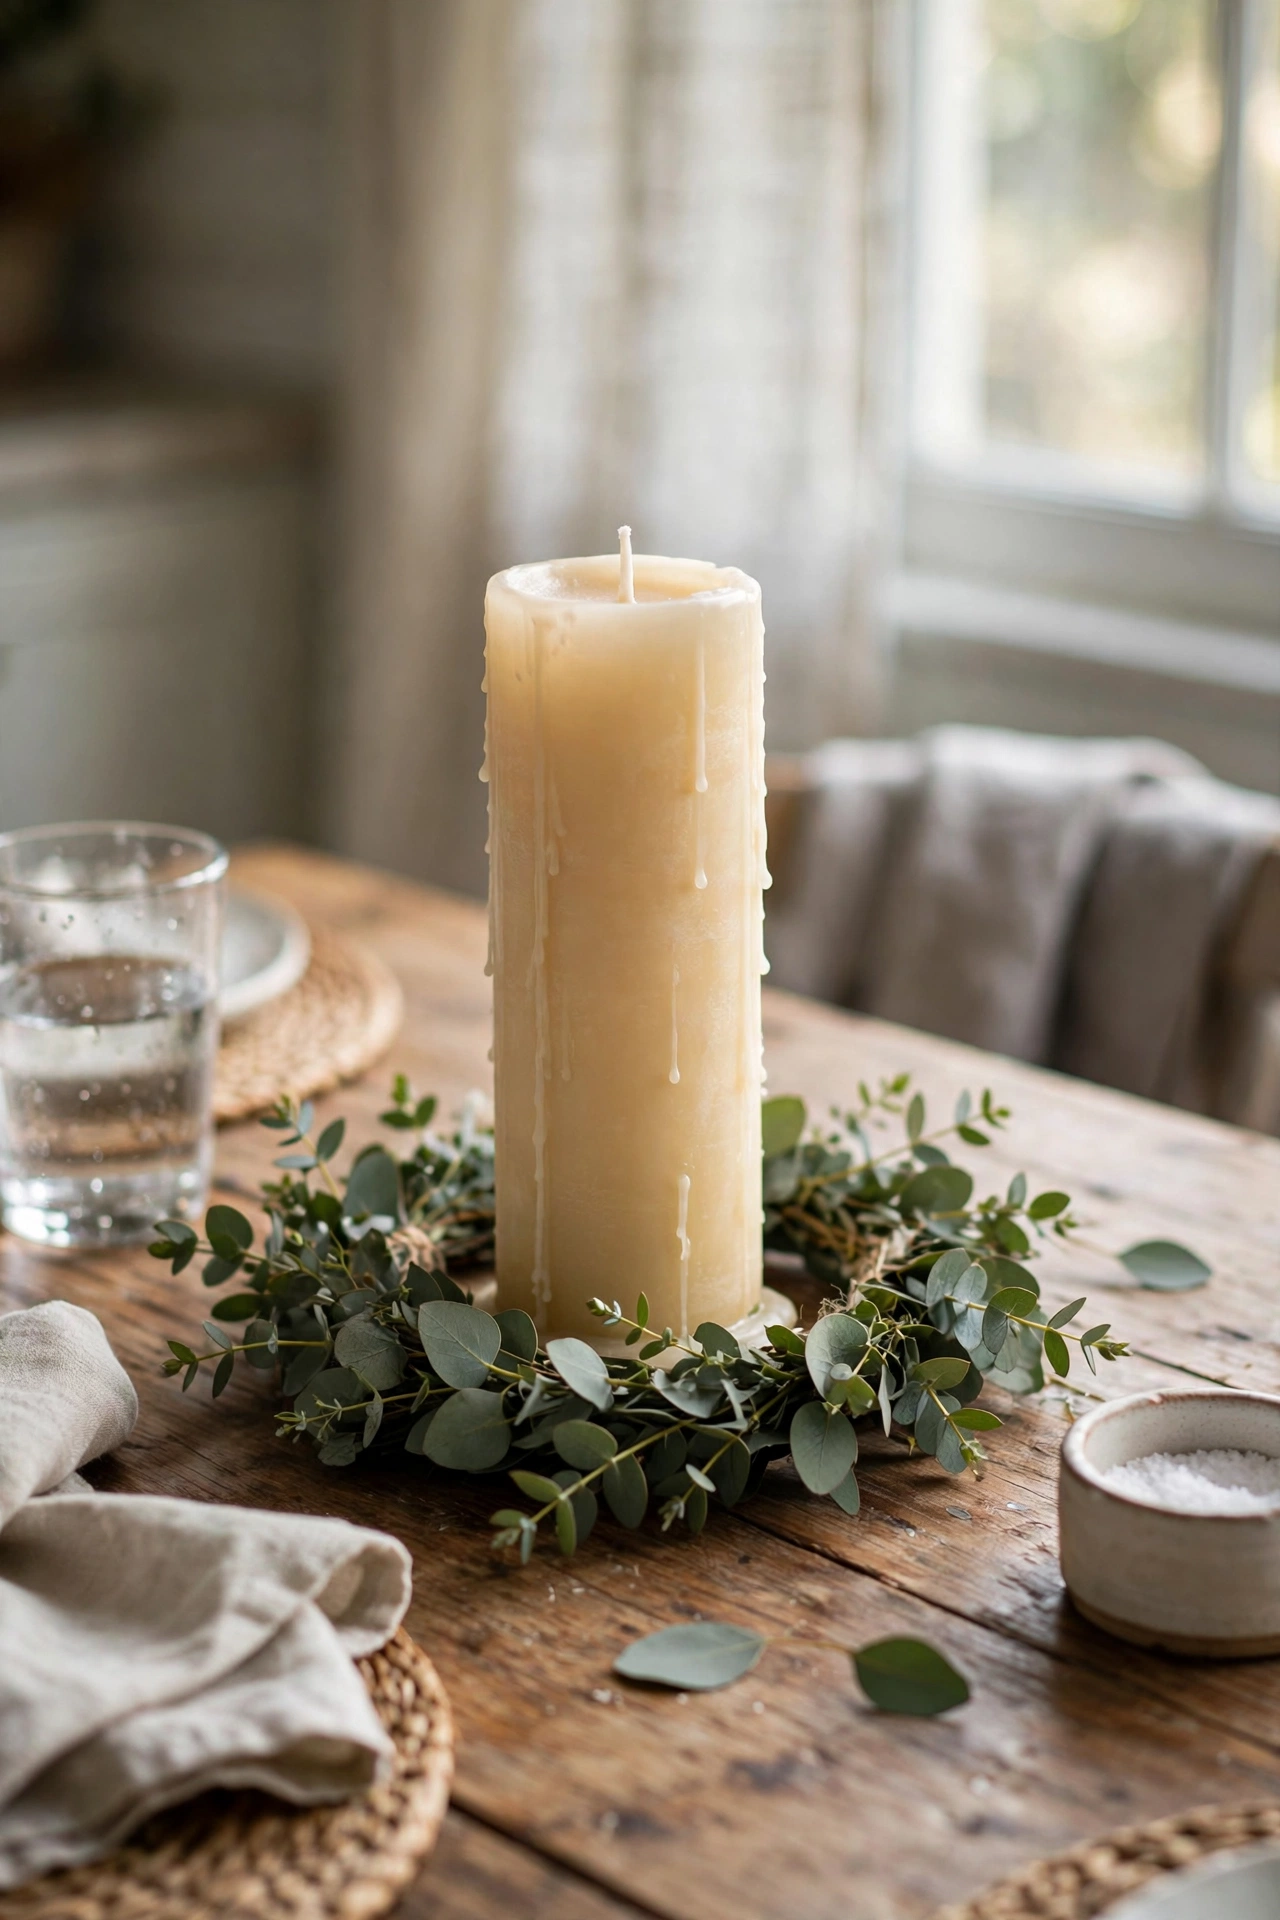
A small ring of eucalyptus around a pillar candle makes the prettiest table centrepiece. I bend fresh eucalyptus into a circle, wire it to hold its shape, and set a tall pillar candle in the centre on a heatproof plate. The candle must be tall enough that the flame sits well above the greenery. Mine scents my dining table through every autumn dinner party. Mist the eucalyptus every few days to keep it fresh, or let it dry for a silvery winter look.
Cost: ~$5-10 | Time: 30 minutes
24. Sand-Filled Hurricane Vase
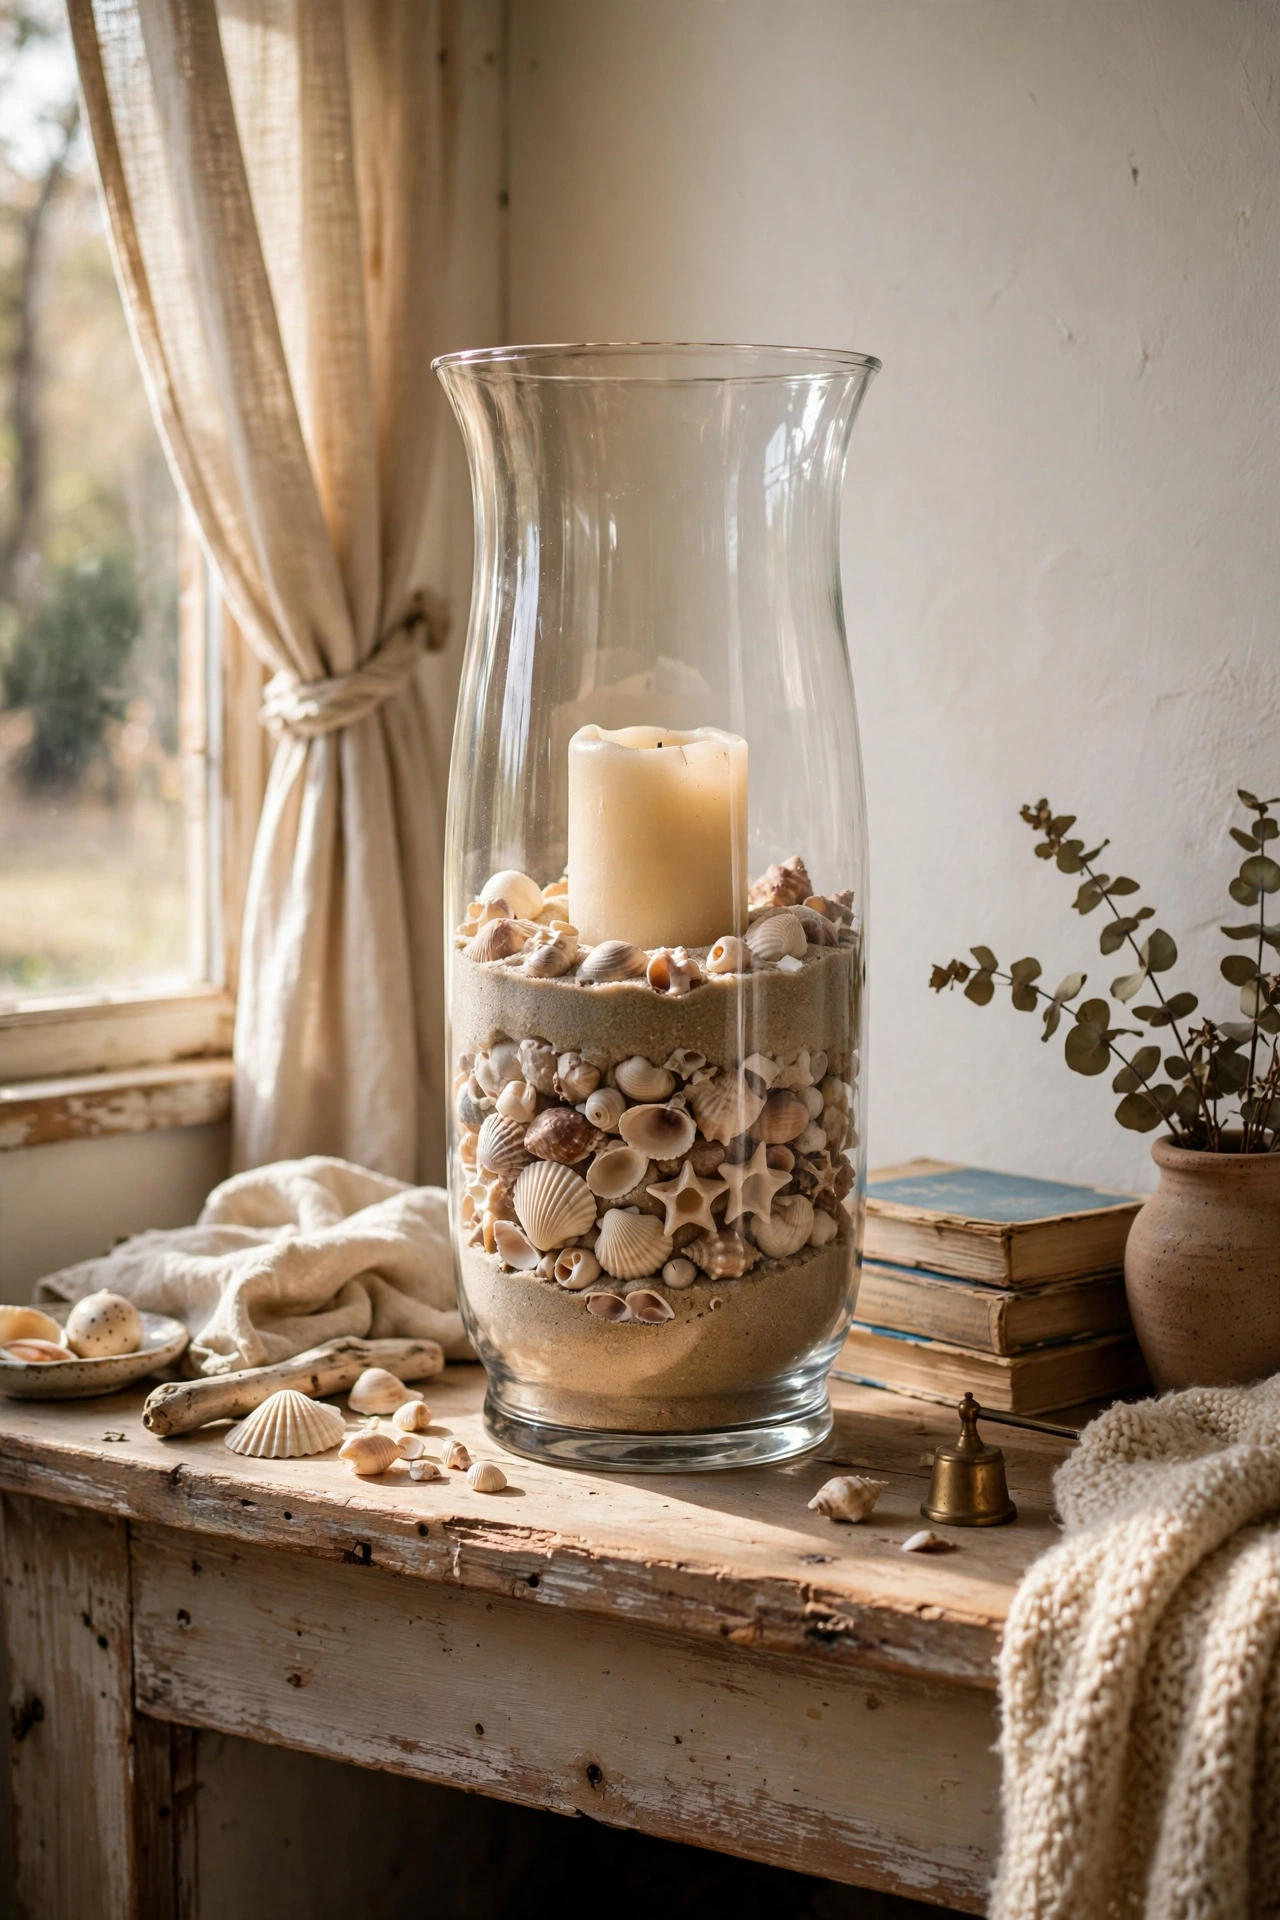
A tall glass hurricane vase a third full of sand with a pillar candle on top is beach-house elegance for almost nothing. I pour in play sand, press the candle down firmly so it stands straight, and scatter a few shells on the sand. The sand holds the candle rock steady and catches every drip. Mine has survived two years on my mantel with just a sand top-up each spring. White sand looks cleanest; coloured sand suits kids’ rooms. Keep the candle centred so it burns evenly.
Cost: ~$4-9 | Time: 15 minutes
Budget check: one project left, and the whole list averages under $7 a project. Sand, shells, and stones from outside keep doing the budget work.
25. Book Page Candle Wraps
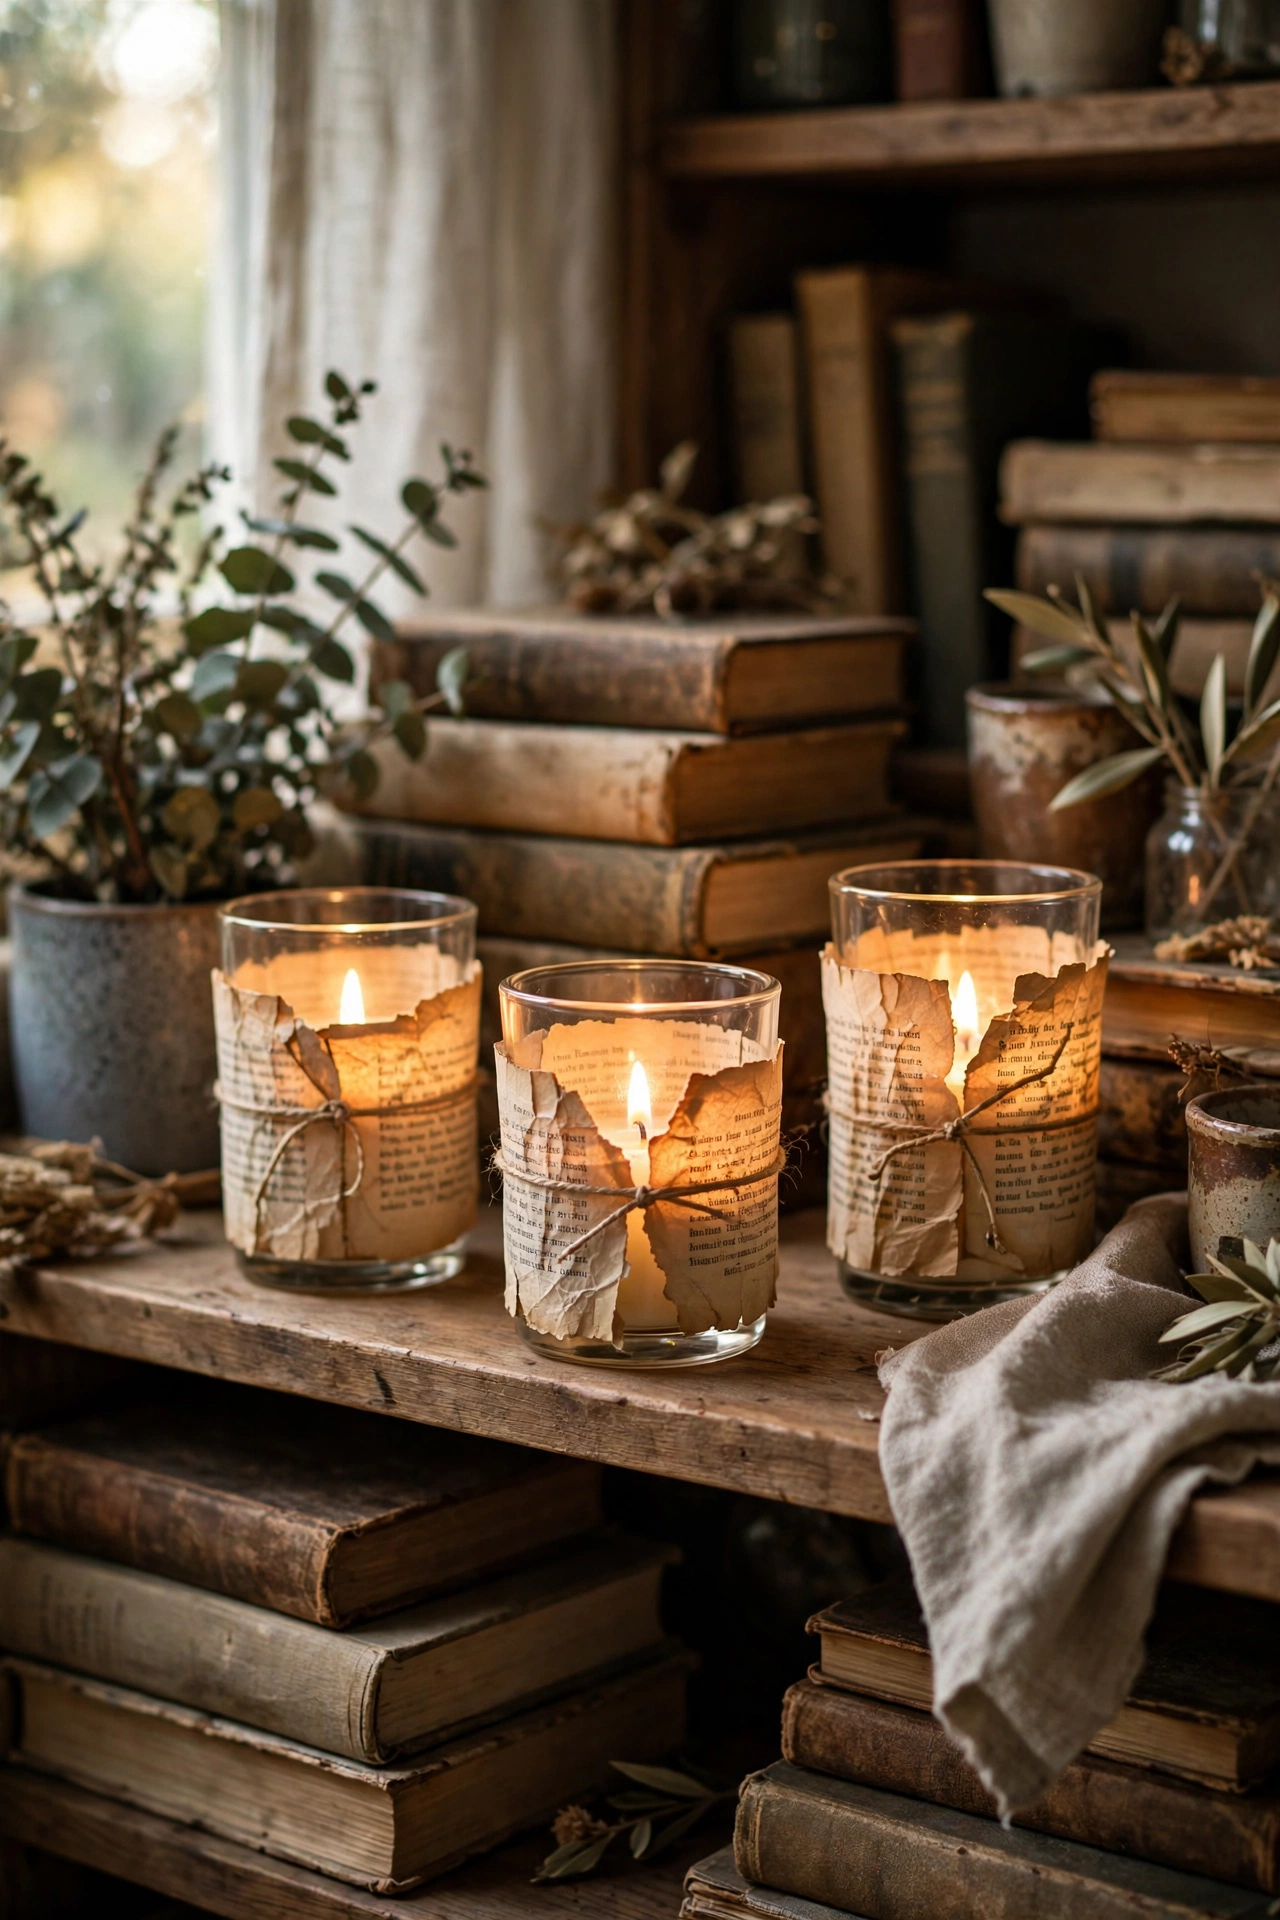
Strips of old book pages wrapped around glass holders give candles a literary, vintage glow. I cut pages into strips, wrap them around plain glass votives, and secure each with a dot of glue at the seam. The text shows through beautifully when the candle is lit. Mine hold tea lights on my bookshelf, which feels exactly right. Use pages from a damaged book you do not mind cutting up. Keep the paper on the outside of the glass only, never near an open flame. A ribbon tied around the middle finishes each one.
Cost: ~$3-7 | Time: 30 minutes
Twenty-five ways to make candlelight prettier, and not one of them cost more than a sandwich. Save this one for your next rainy-day project list, and light something lovely tonight.
Keep the DIY momentum going: (see also: 23-diy-wreath-ideas-for-every-season) (see also: 17-diy-nightstand-ideas-in-a-weekend) (see also: 17-weekend-diy-projects-you-can-finish-in-a-day)
