23 DIY Headboard Ideas That Look Expensive
Three flats ago I slept with my pillows propped against a bare wall, and every morning I woke up to a scuffed patch of paint where my head had been. A proper headboard felt like a luxury I could not justify until I priced them: $200 for anything decent. So I built my first diy Headboard from a sheet of plywood and a $12 remnant of linen, and guests have been asking where I bought it ever since.
All 23 of these diy Headboard builds cost under $80, and most land under $40. You need basic tools: a drill, a saw or a hardware-store cutting service, and a staple gun for the upholstered ones. Measure your bed width before you buy anything, and remember the headboard should sit 60 to 75 centimetres above the mattress for the right proportions.
1. Upholstered Plywood Panel Headboard
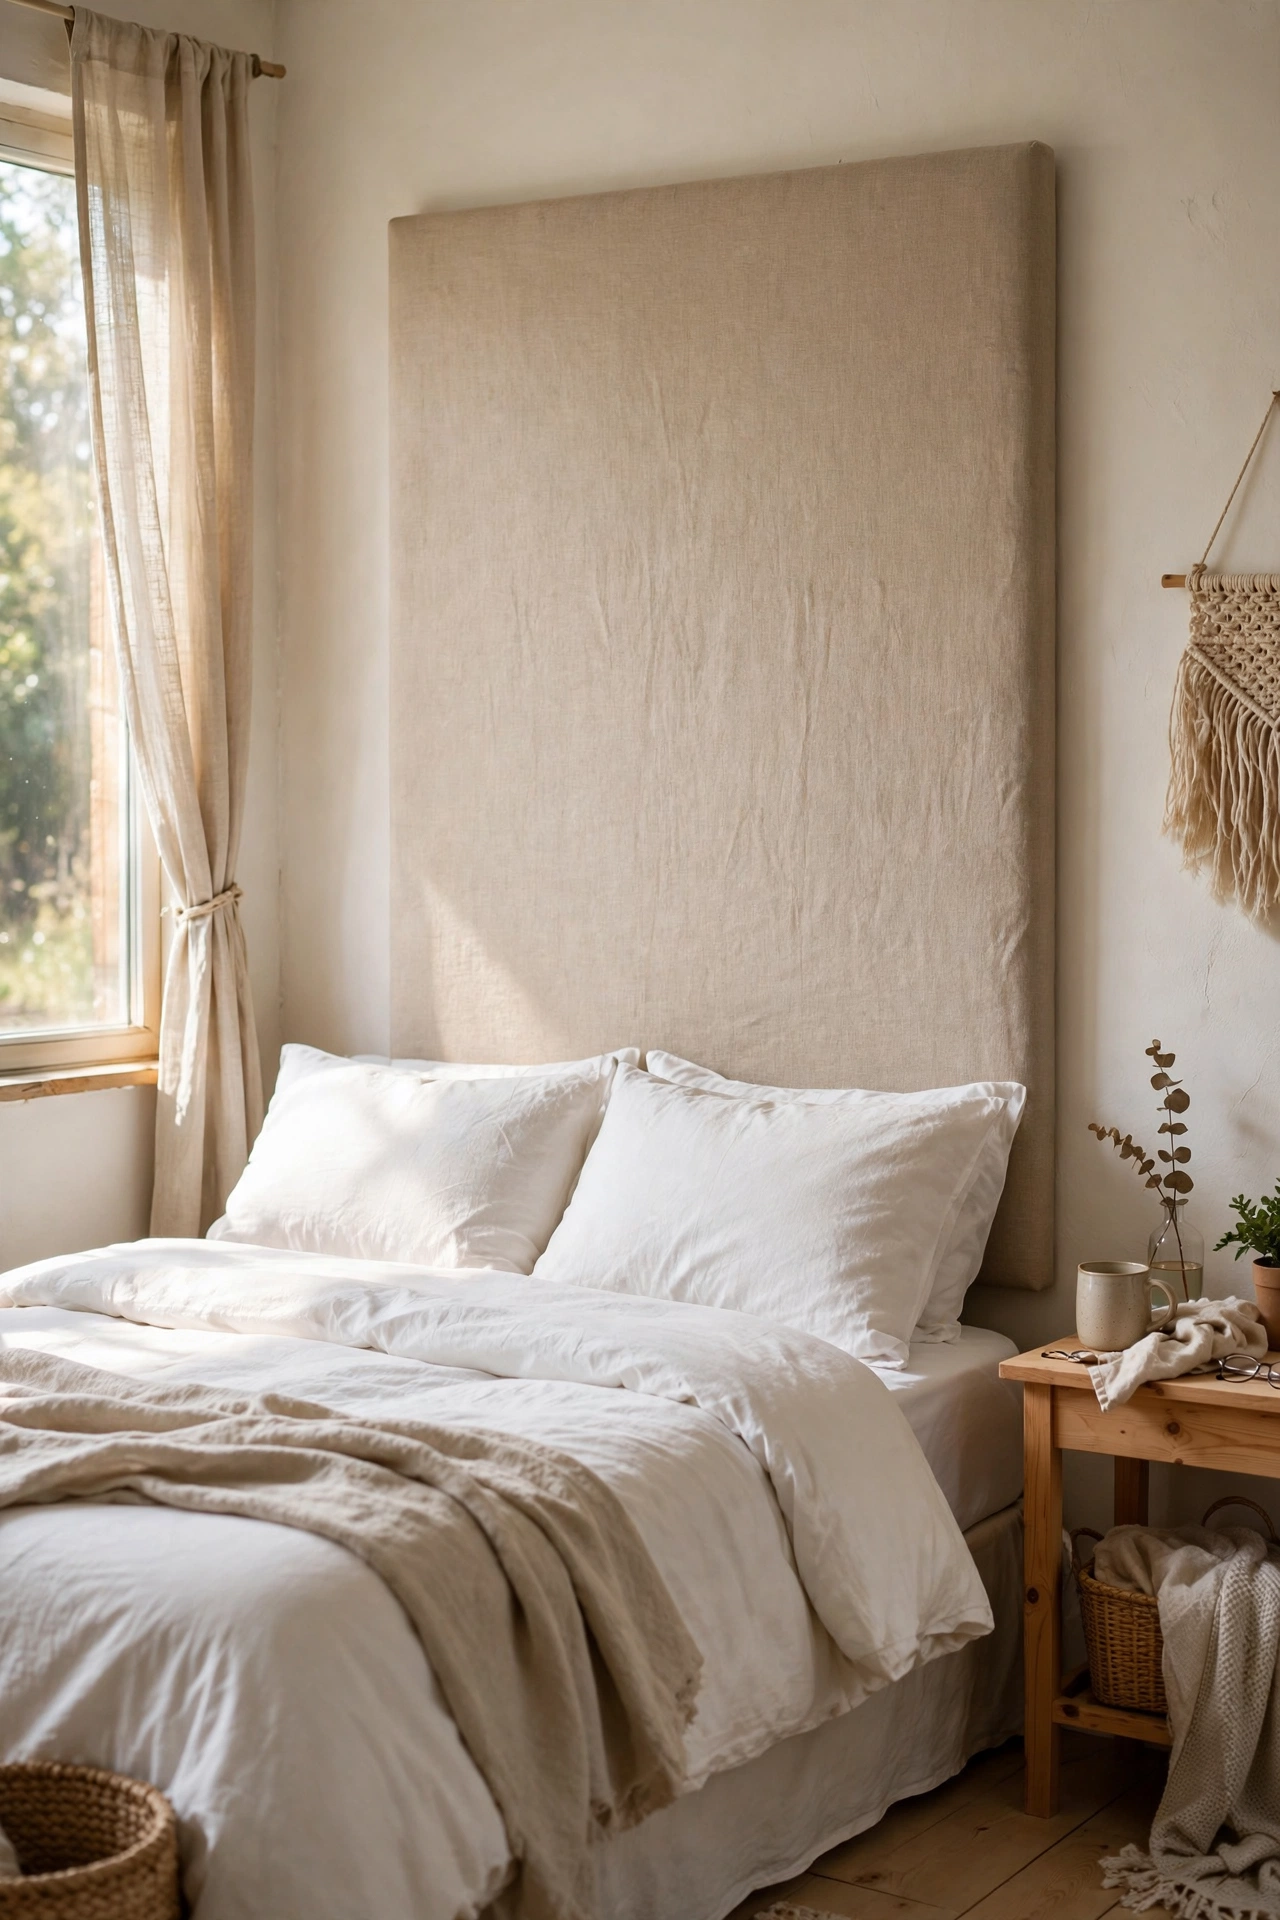
A plywood panel wrapped in foam and linen is the classic upholstered headboard, minus the markup. I had a 1.5-metre sheet of plywood cut to size, glued on 5-centimetre foam, and wrapped it tight with a linen-look curtain panel, stapling on the back. Pull the fabric drum-tight as you staple, working from the centre of each side outward, because wrinkles show through foam. Mine cost $34 all in and looks like the $300 version in the catalogue. Mount it on the wall with a French cleat so it floats just behind the bed.
Cost: ~$30-40 | Time: 2 hours
2. Reclaimed Door Headboard
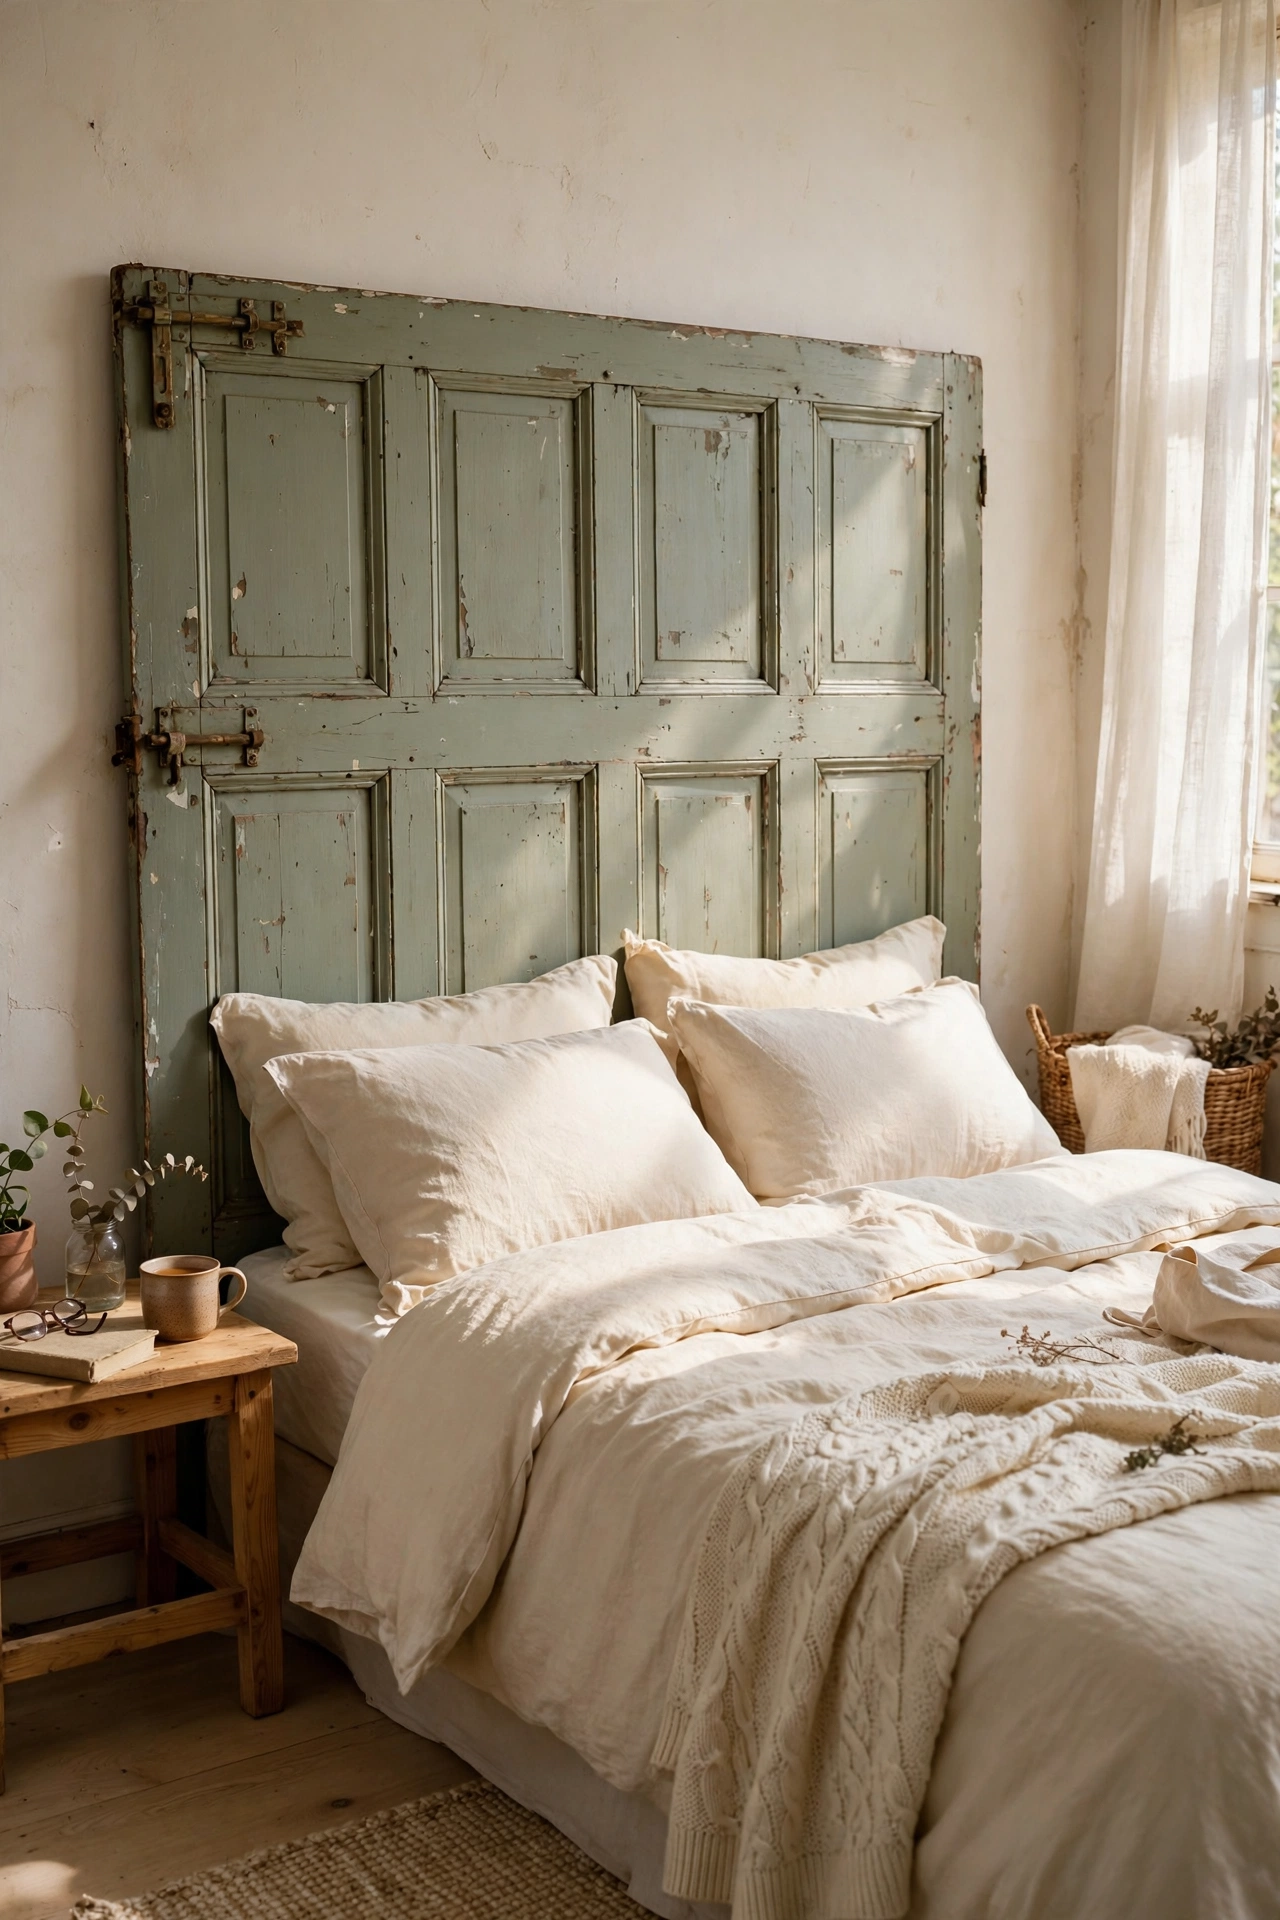
An old panelled door laid sideways makes an instant headboard with real character. I found a solid pine door for $15 at a salvage yard, sanded it back, and painted it soft sage. Two doors side by side work for a king bed. Check the door is solid wood and not hollow-core by knocking on it: hollow doors dent and feel flimsy as a headboard. I bolted mine to the bed frame with L-brackets so it cannot tip. The panel mouldings catch the light beautifully and nobody guesses it was ever a door.
Cost: ~$20-30 | Time: 3 hours
3. Floor-to-Ceiling Linen Curtain Panel
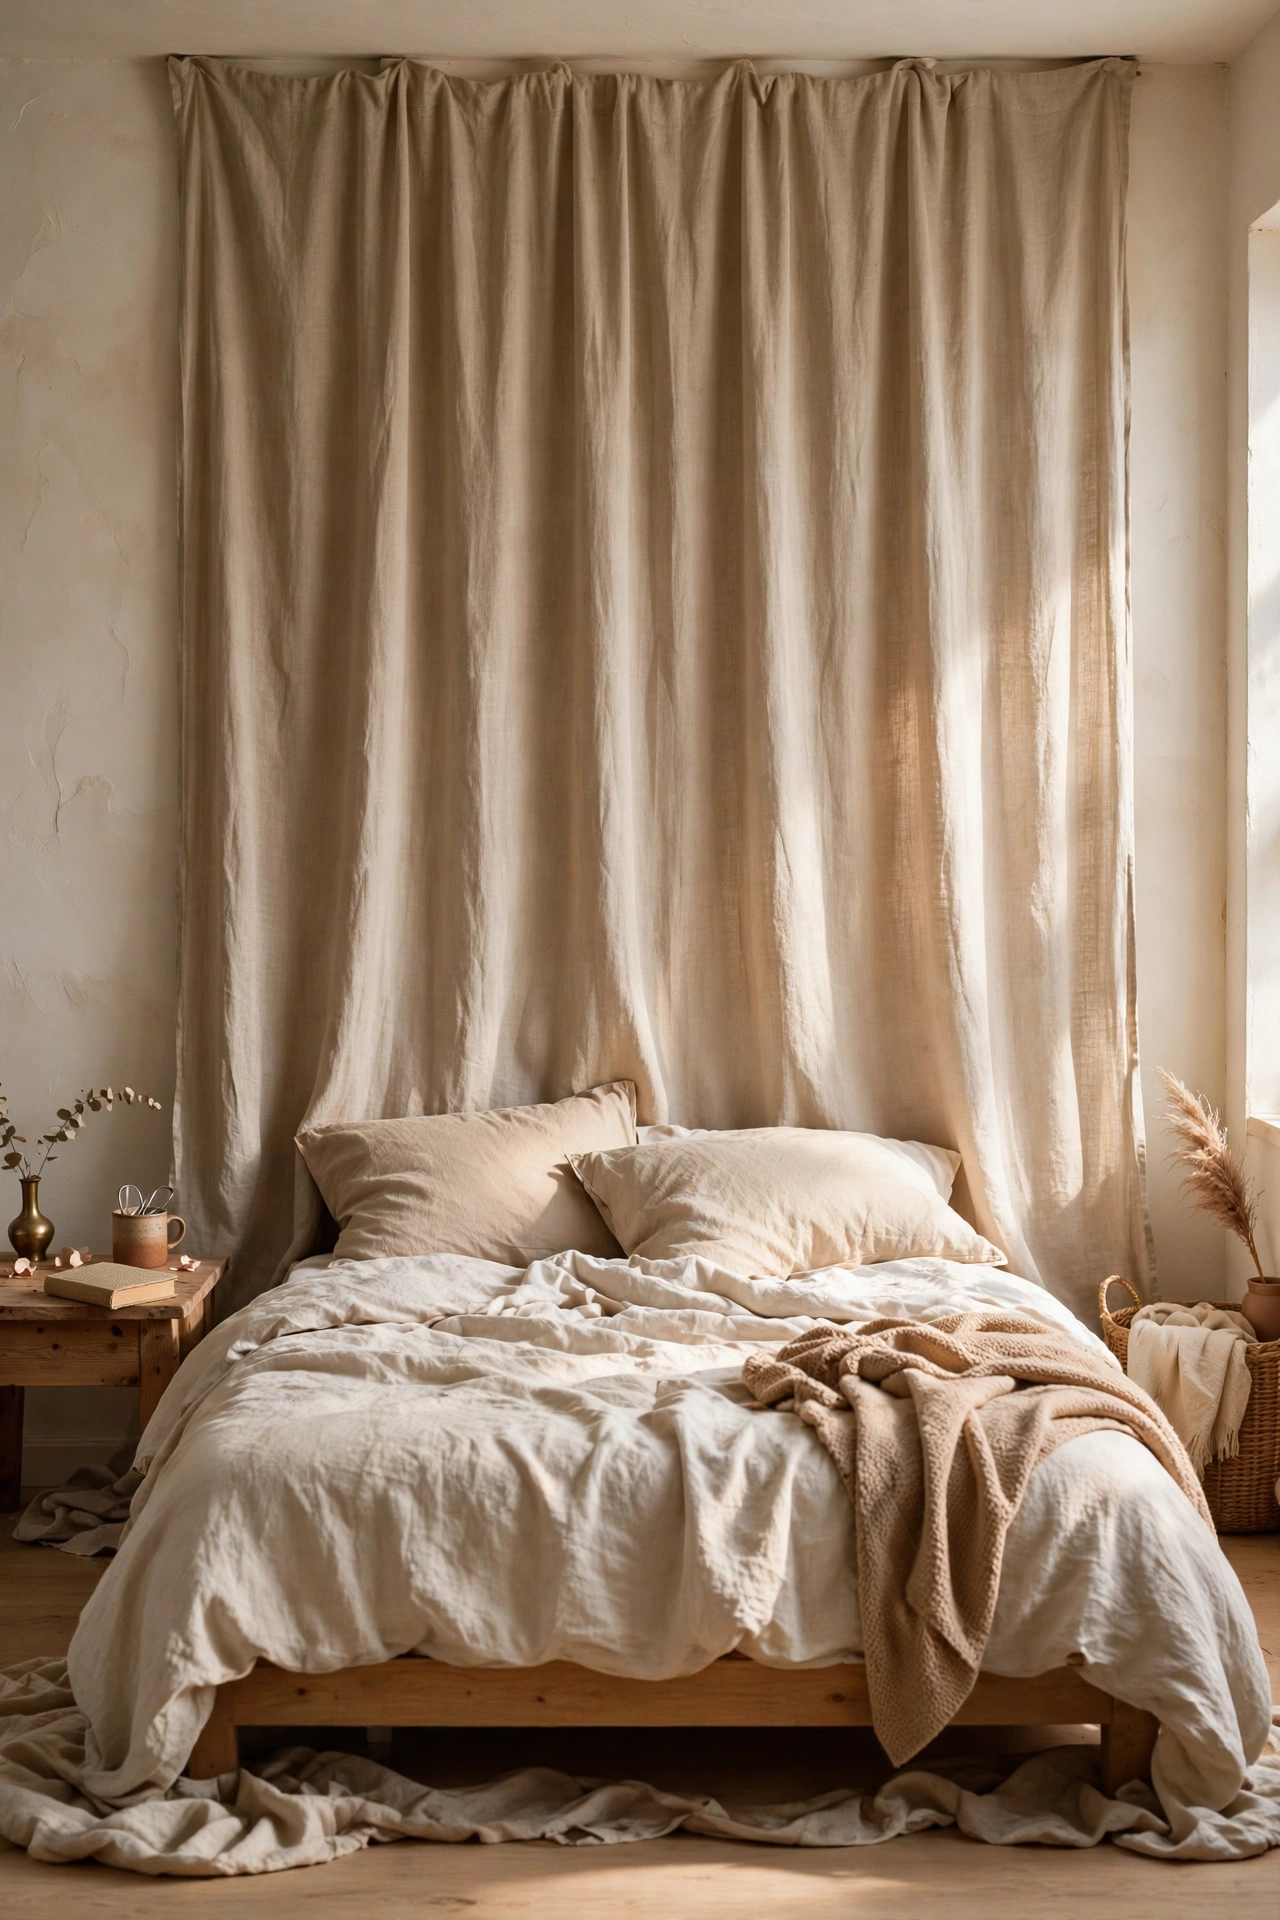
A single wide linen curtain hung from ceiling to floor behind the bed reads as a soft, expensive headboard. I mounted a $10 curtain rod 15 centimetres below the ceiling and hung one 2.5-metre linen panel, letting it pool slightly on the floor. The fabric softens the whole wall and hides uneven paint. Choose a heavyweight linen or linen-look fabric so it hangs in proper folds rather than clinging flat. I tried a cheap polyester first and it looked limp. Iron the panel once, then never again; the wrinkles are part of the charm.
Cost: ~$25-35 | Time: 45 minutes
Pro tip: Whatever style you build, make the headboard 10 to 15 centimetres wider than your mattress on each side. A headboard that ends flush with the bed edges always looks undersized, while a slightly wider one reads as custom.
4. Painted Arch Accent Headboard
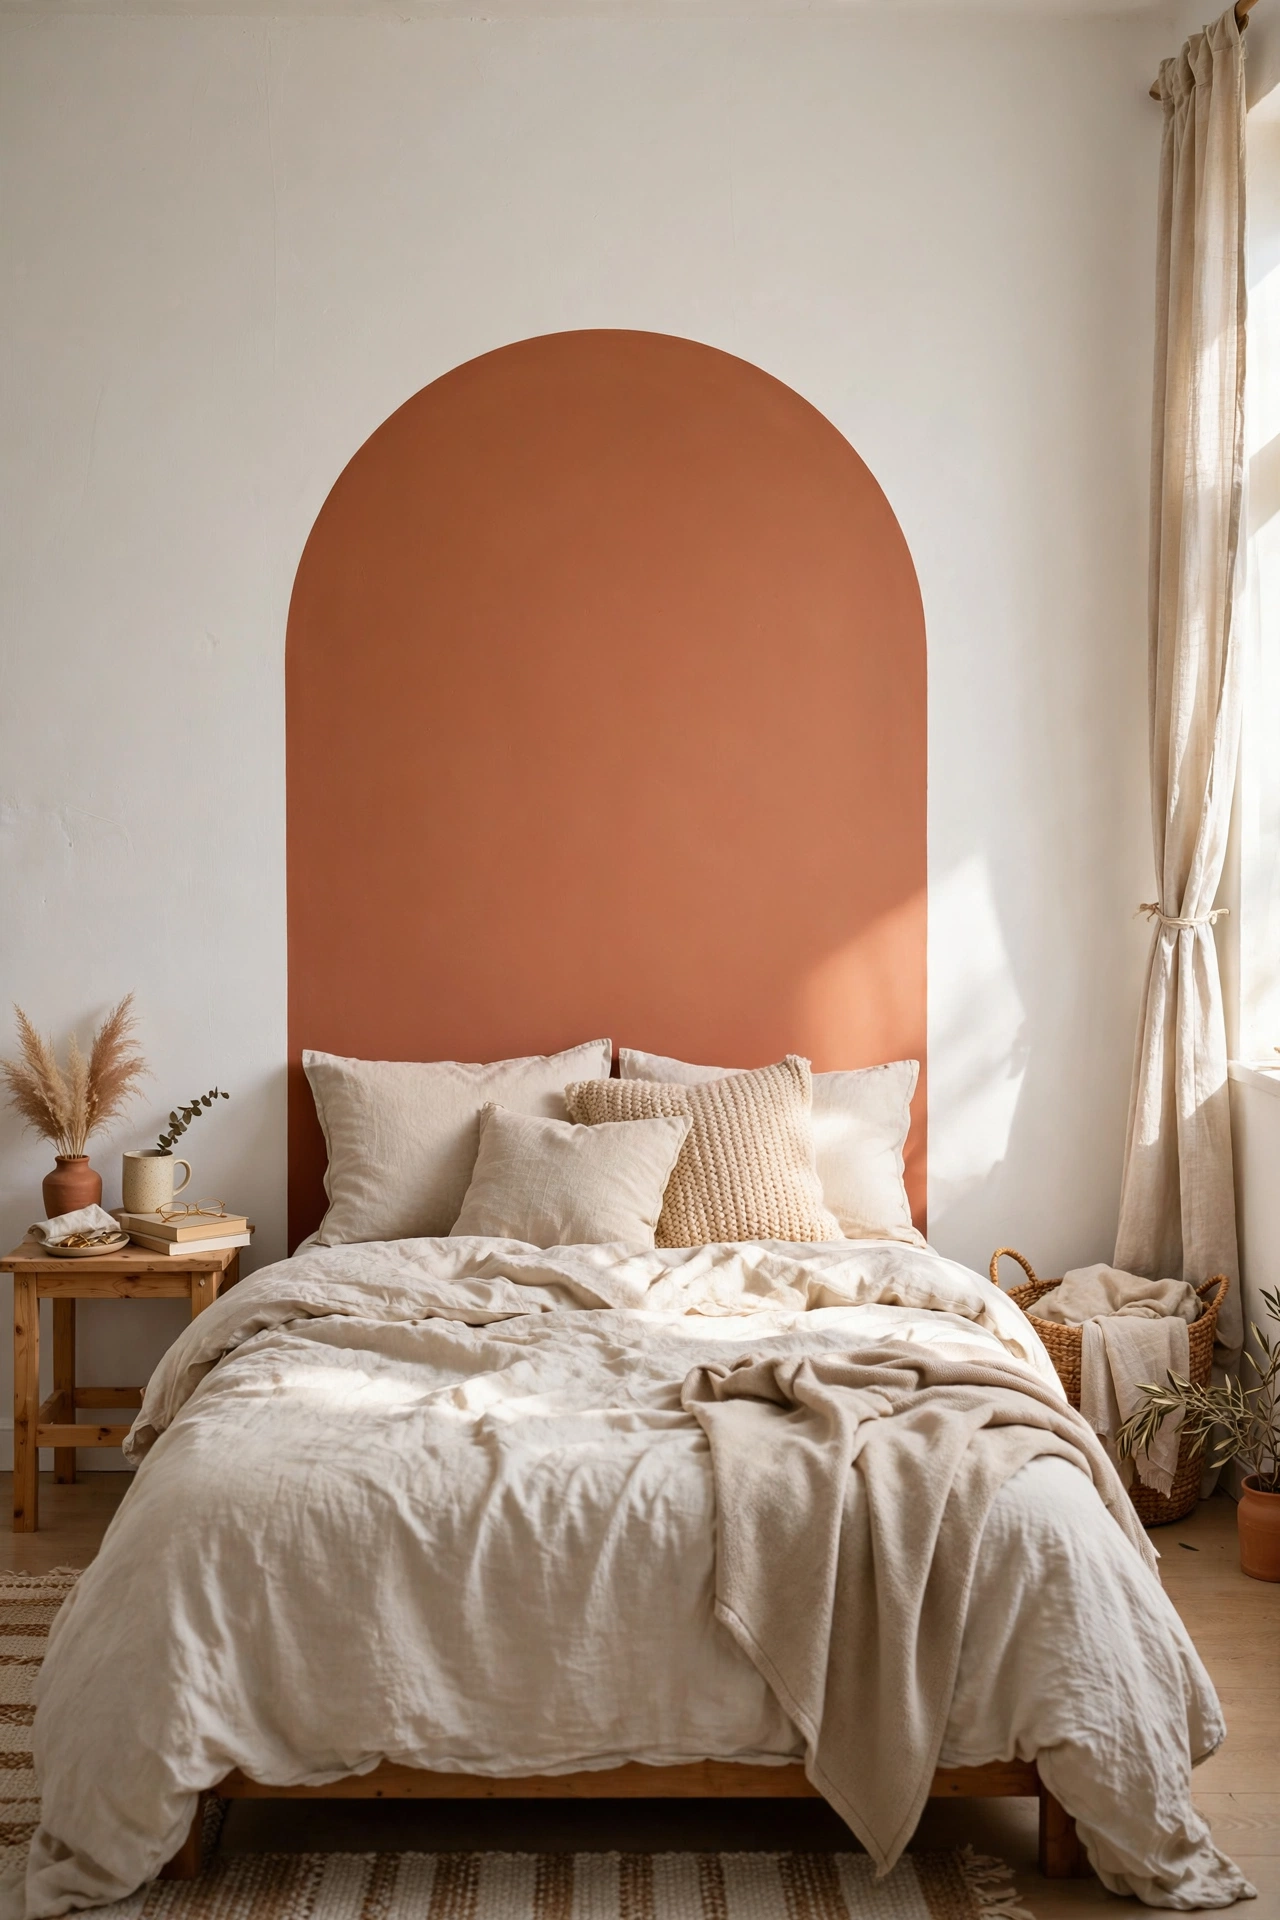
A painted arch on the wall behind the bed gives you a headboard with zero footprint. I traced a half-circle with a pencil tied to a string, then painted it in warm terracotta with a small roller. Two coats, one afternoon, and the bed suddenly had a backdrop. The trick is the string compass: pin one end at the centre point, hold the pencil taut, and sweep a perfect arc. My first freehand attempt wobbled and I had to repaint the whole wall. Extend the arch from just above the skirting to about 1.4 metres high.
Cost: ~$12-18 | Time: 3 hours
5. Herringbone Pallet Wood Headboard
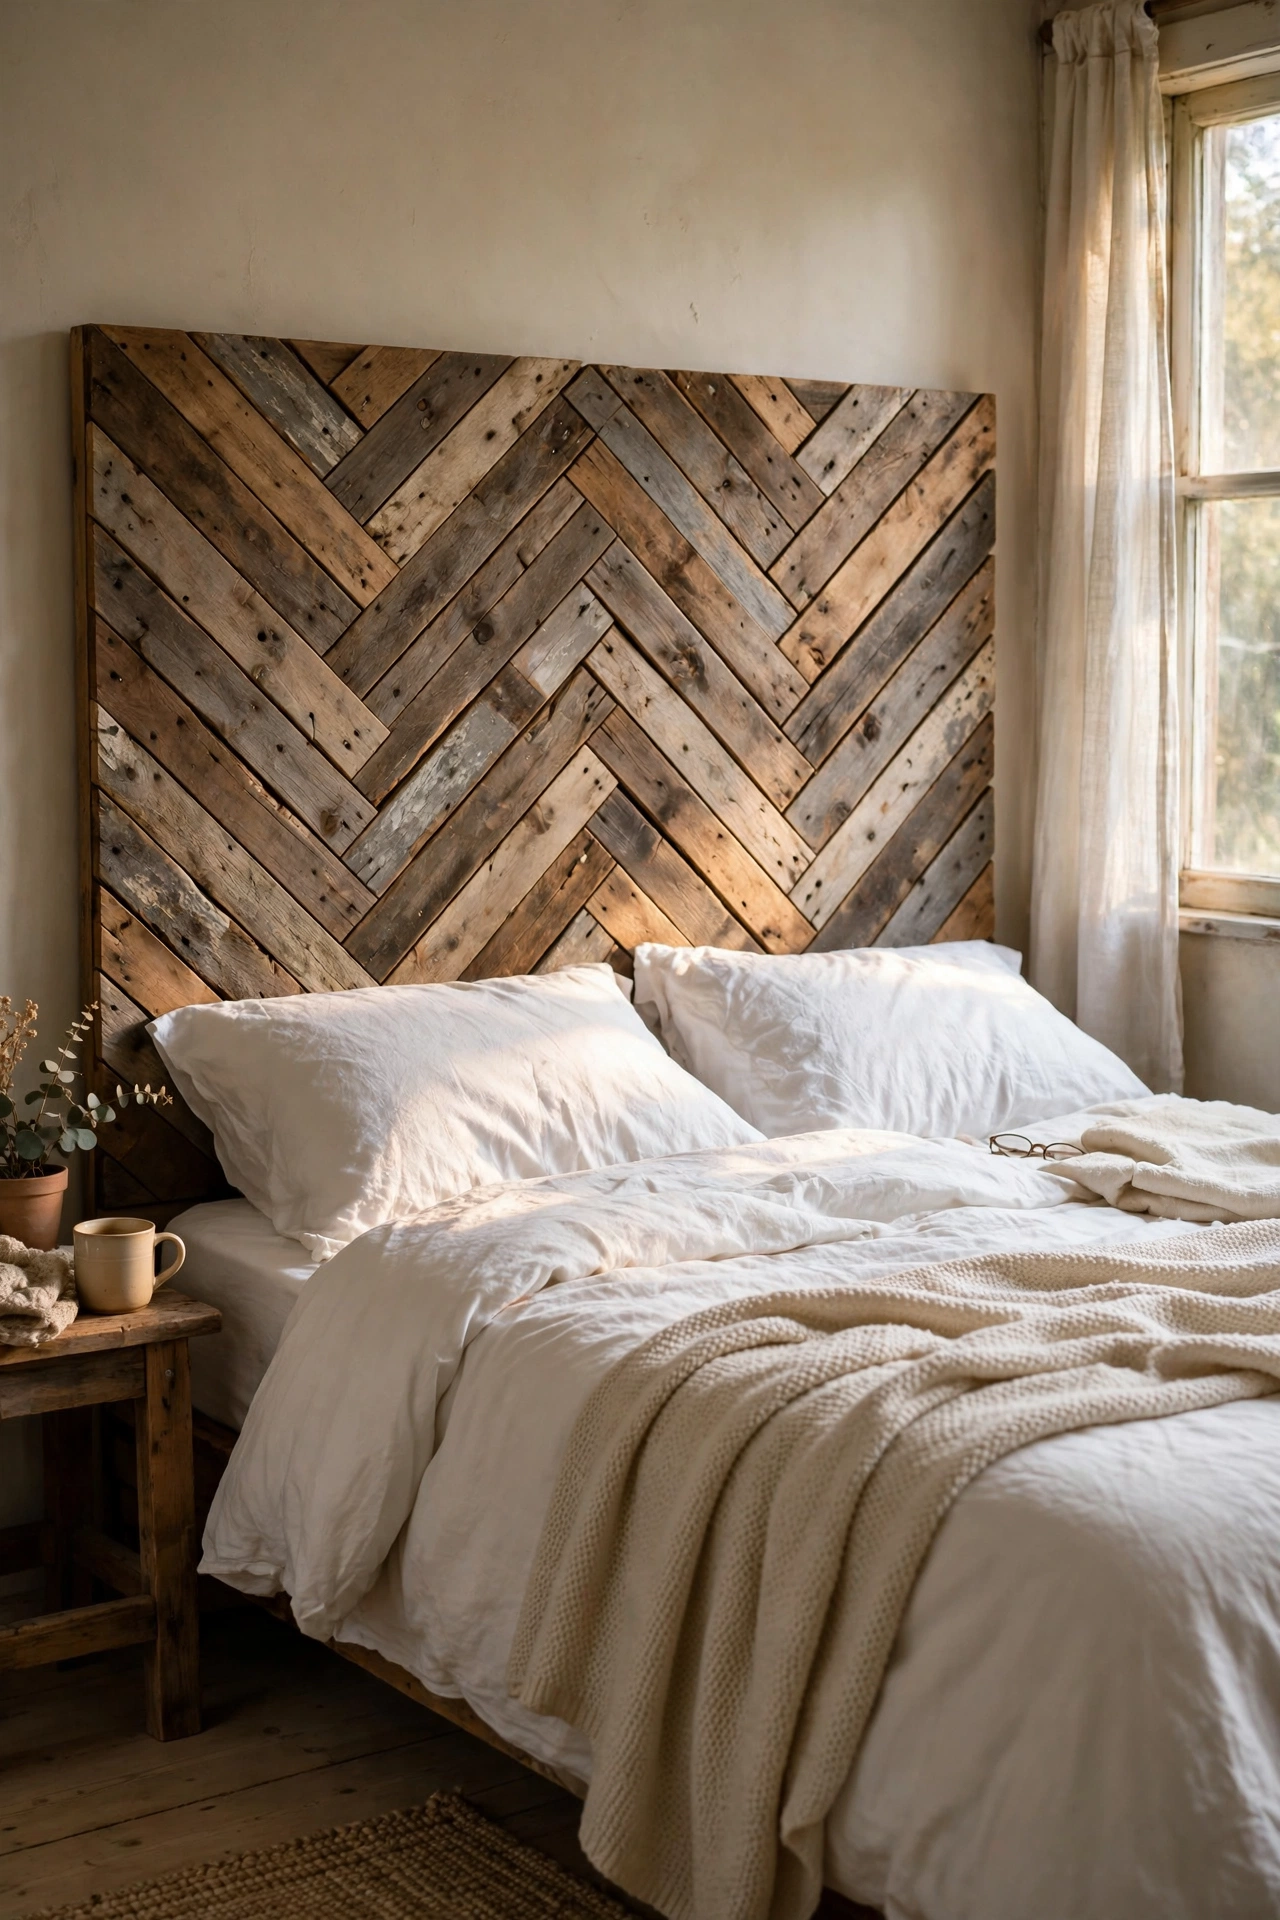
Pallet planks cut at 45 degrees and laid in herringbone look like a designer timber feature. I dismantled three free pallets, cut the boards into equal lengths, and glued them onto a plywood backing in the zigzag pattern. Sanding is the long job here: every board needs a smooth face. I spent a full afternoon with 80-grit then 120-grit. Stain alternate boards slightly darker for definition. Only use heat-treated pallets marked HT, never chemically treated ones, since this sits where you sleep.
Cost: ~$15-25 | Time: 5 hours
6. Rattan Caning Panel Headboard
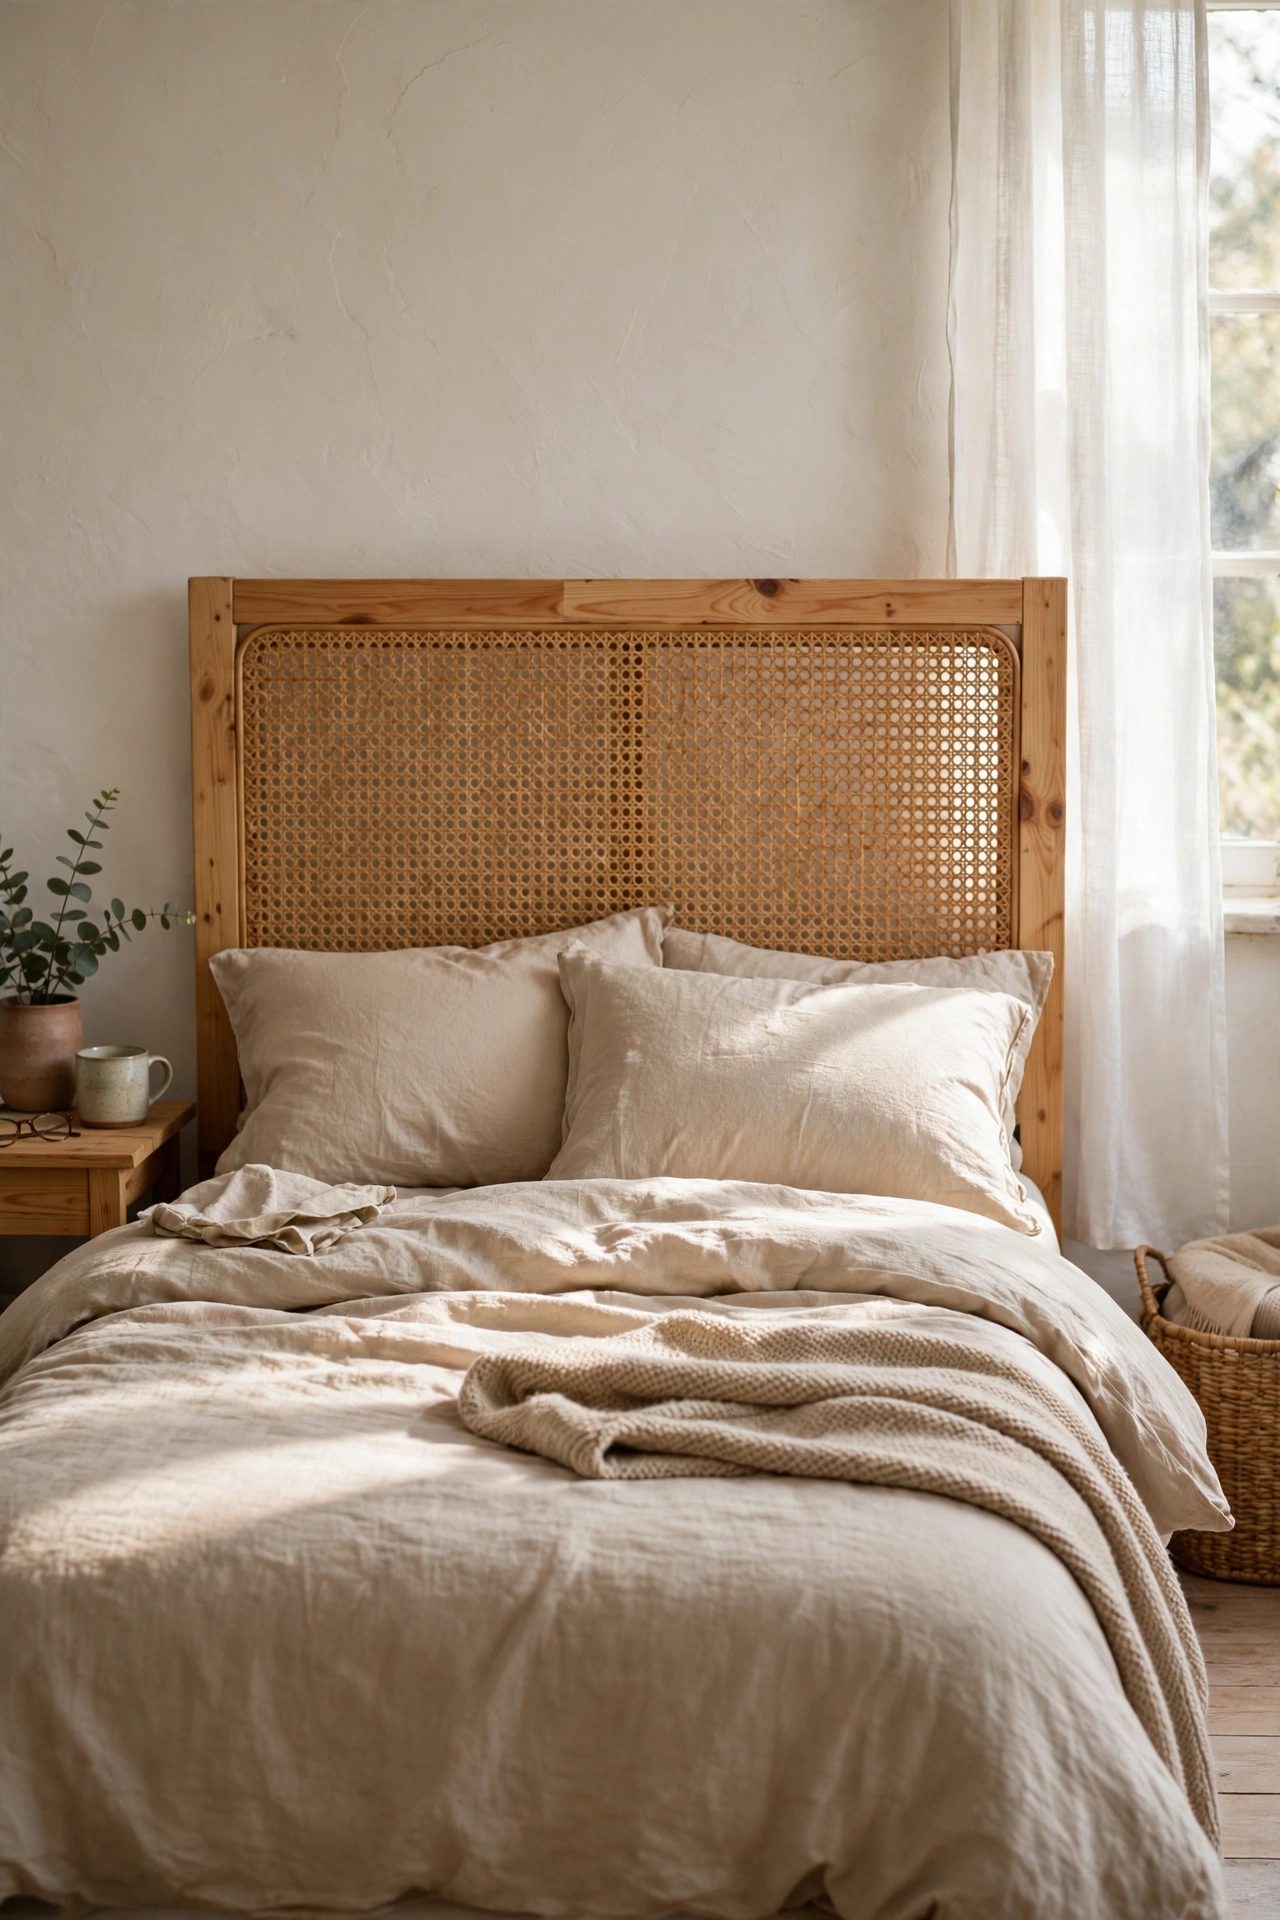
A timber frame with cane webbing stretched across it gives you the rattan look for a fraction of the price. I built a simple pine frame, soaked the cane webbing for 30 minutes to make it pliable, and stapled it drum-tight across the back. It tightens as it dries, so do not worry if it looks slack at first. The open weave keeps a small bedroom feeling airy. My webbing cost $22 for the roll and the frame was offcuts. Spray the finished frame matte black or keep it natural pine.
Cost: ~$30-40 | Time: 3 hours
Pro tip: If your headboard is a bold texture like rattan or reclaimed wood, keep your bedding quiet: plain white or cream linen lets the headboard be the star. Patterned bedding plus a busy headboard fight each other every time.
7. Tufted Foam Board No-Drill Headboard
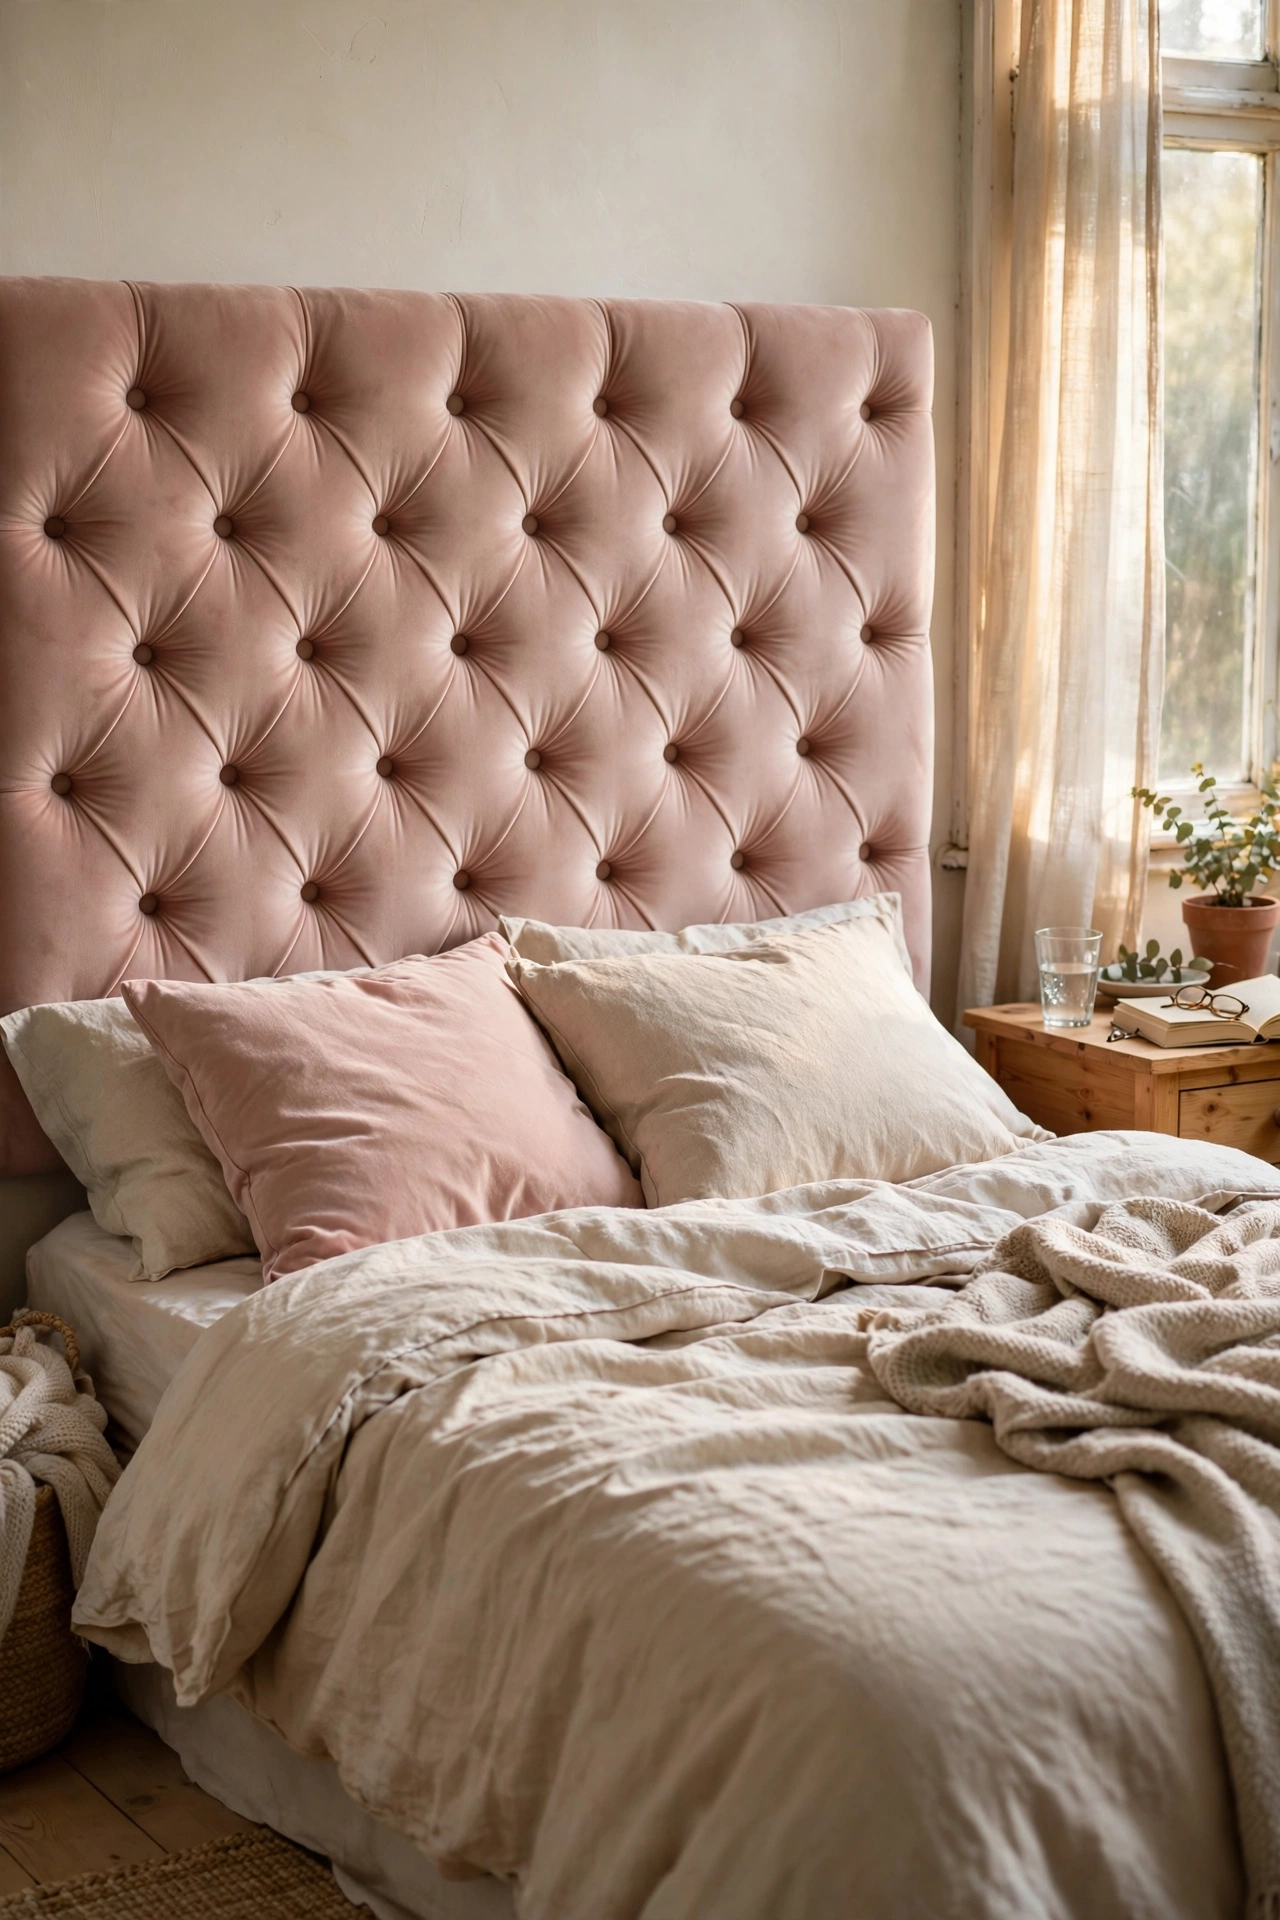
You can fake deep button tufting with foam board, batting, and covered buttons, no drilling required. I marked a diamond grid on foam board, poked holes at each intersection, pulled covered buttons through with strong thread, and wrapped the whole thing in batting and velvet. The buttons sink in and create genuine-looking tufts. Space your grid 20 centimetres apart for a classic look. My thumb ached after 30 buttons, but the result fooled my interior-designer friend completely. Hang it with heavy-duty picture strips rated for the weight.
Cost: ~$35-50 | Time: 4 hours
8. Oversized Framed Art Headboard
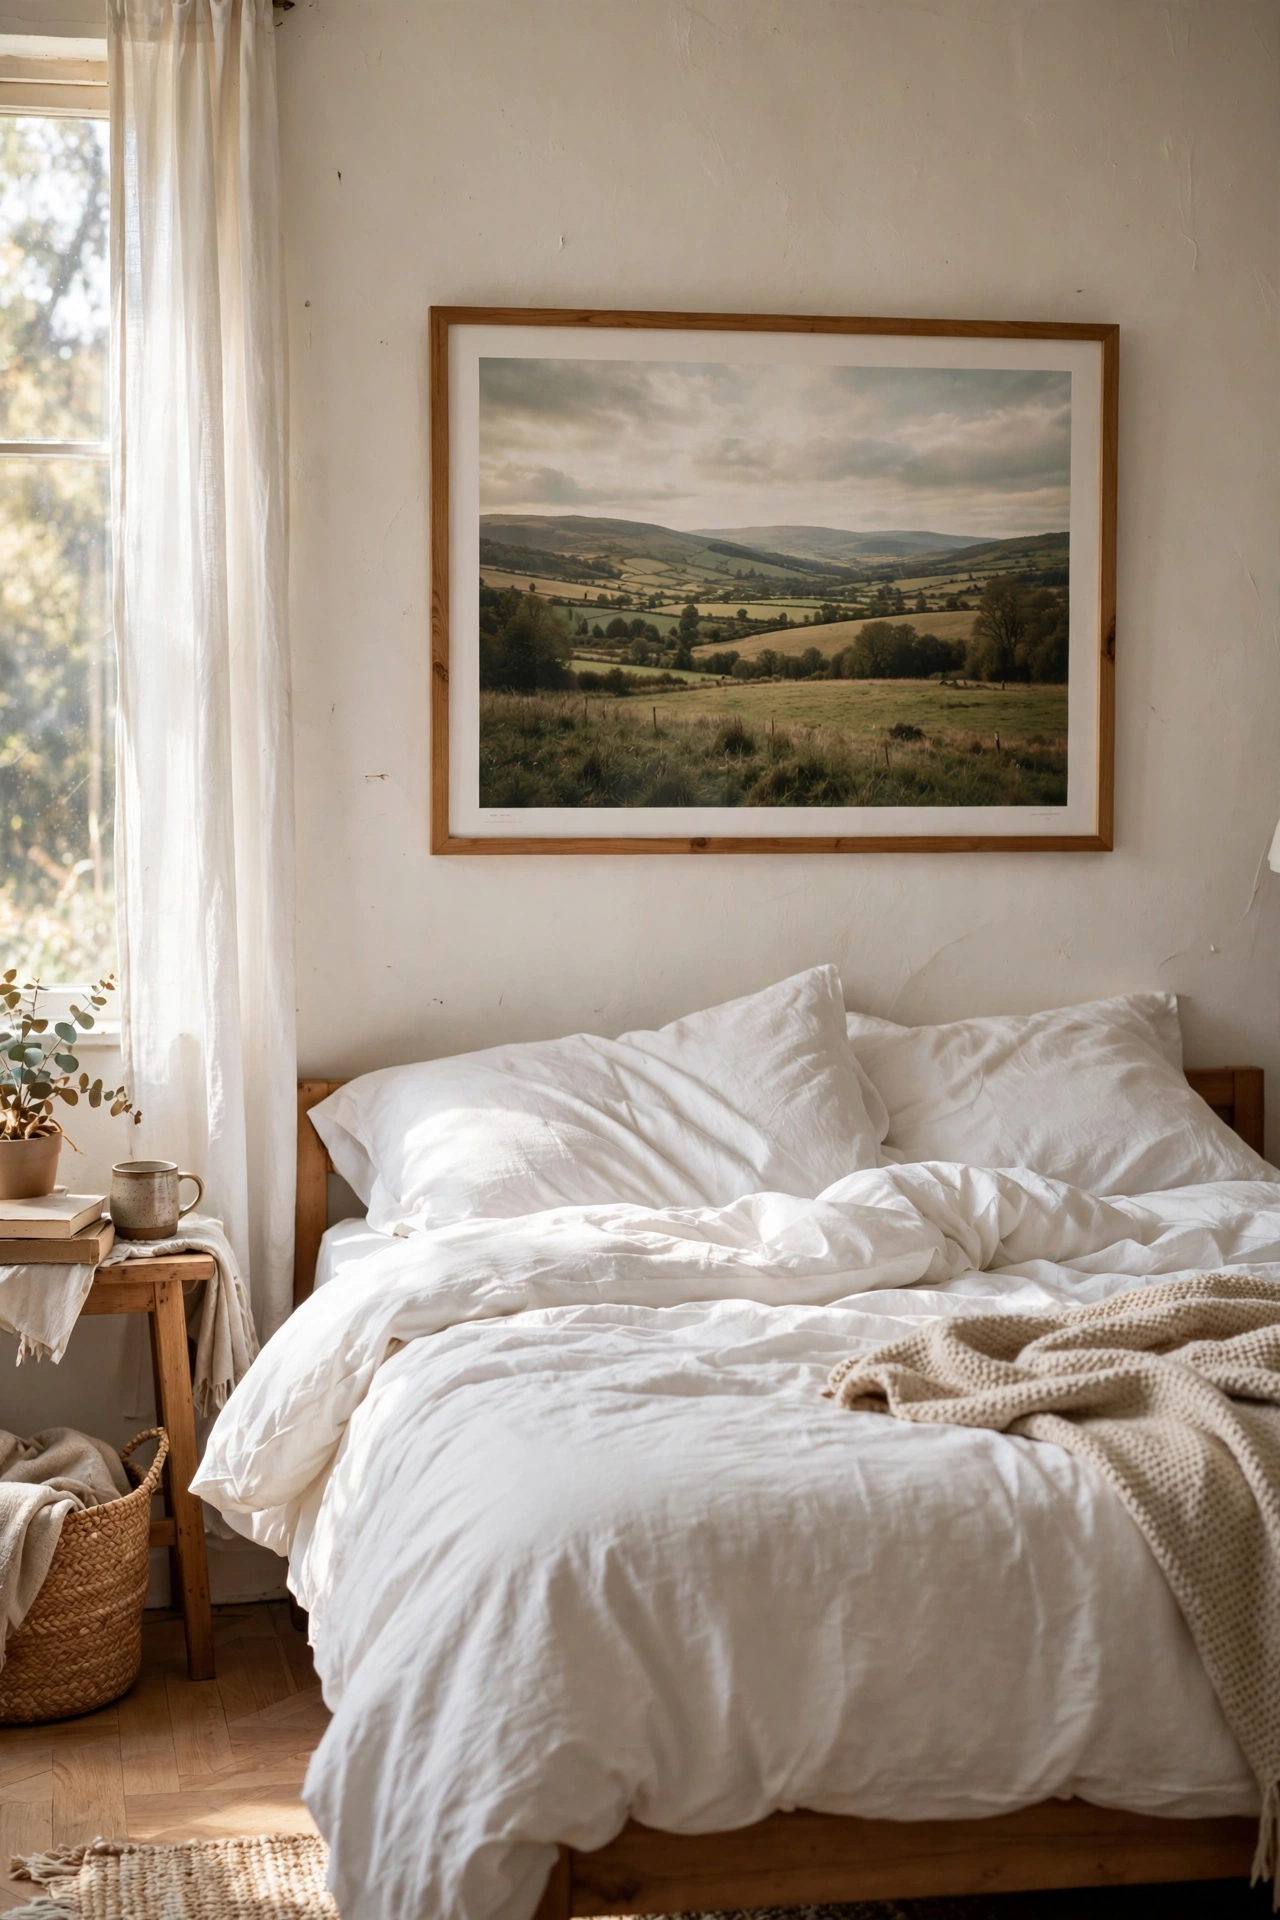
One enormous framed print hung low behind the bed does the job of a headboard with zero construction. I bought a 1.2-metre charity-shop frame for $8, had a favourite landscape photo printed to fit for $20, and hung it so the bottom edge sits just above the pillows. The scale is what makes it work: small art looks lost, but anything wider than the bed reads as intentional. I centred it carefully with a spirit level, because a crooked giant frame is very noticeable. Swap the print seasonally for a fresh look.
Cost: ~$30-40 | Time: 1 hour
9. Shaker-Style Wood Panel Headboard
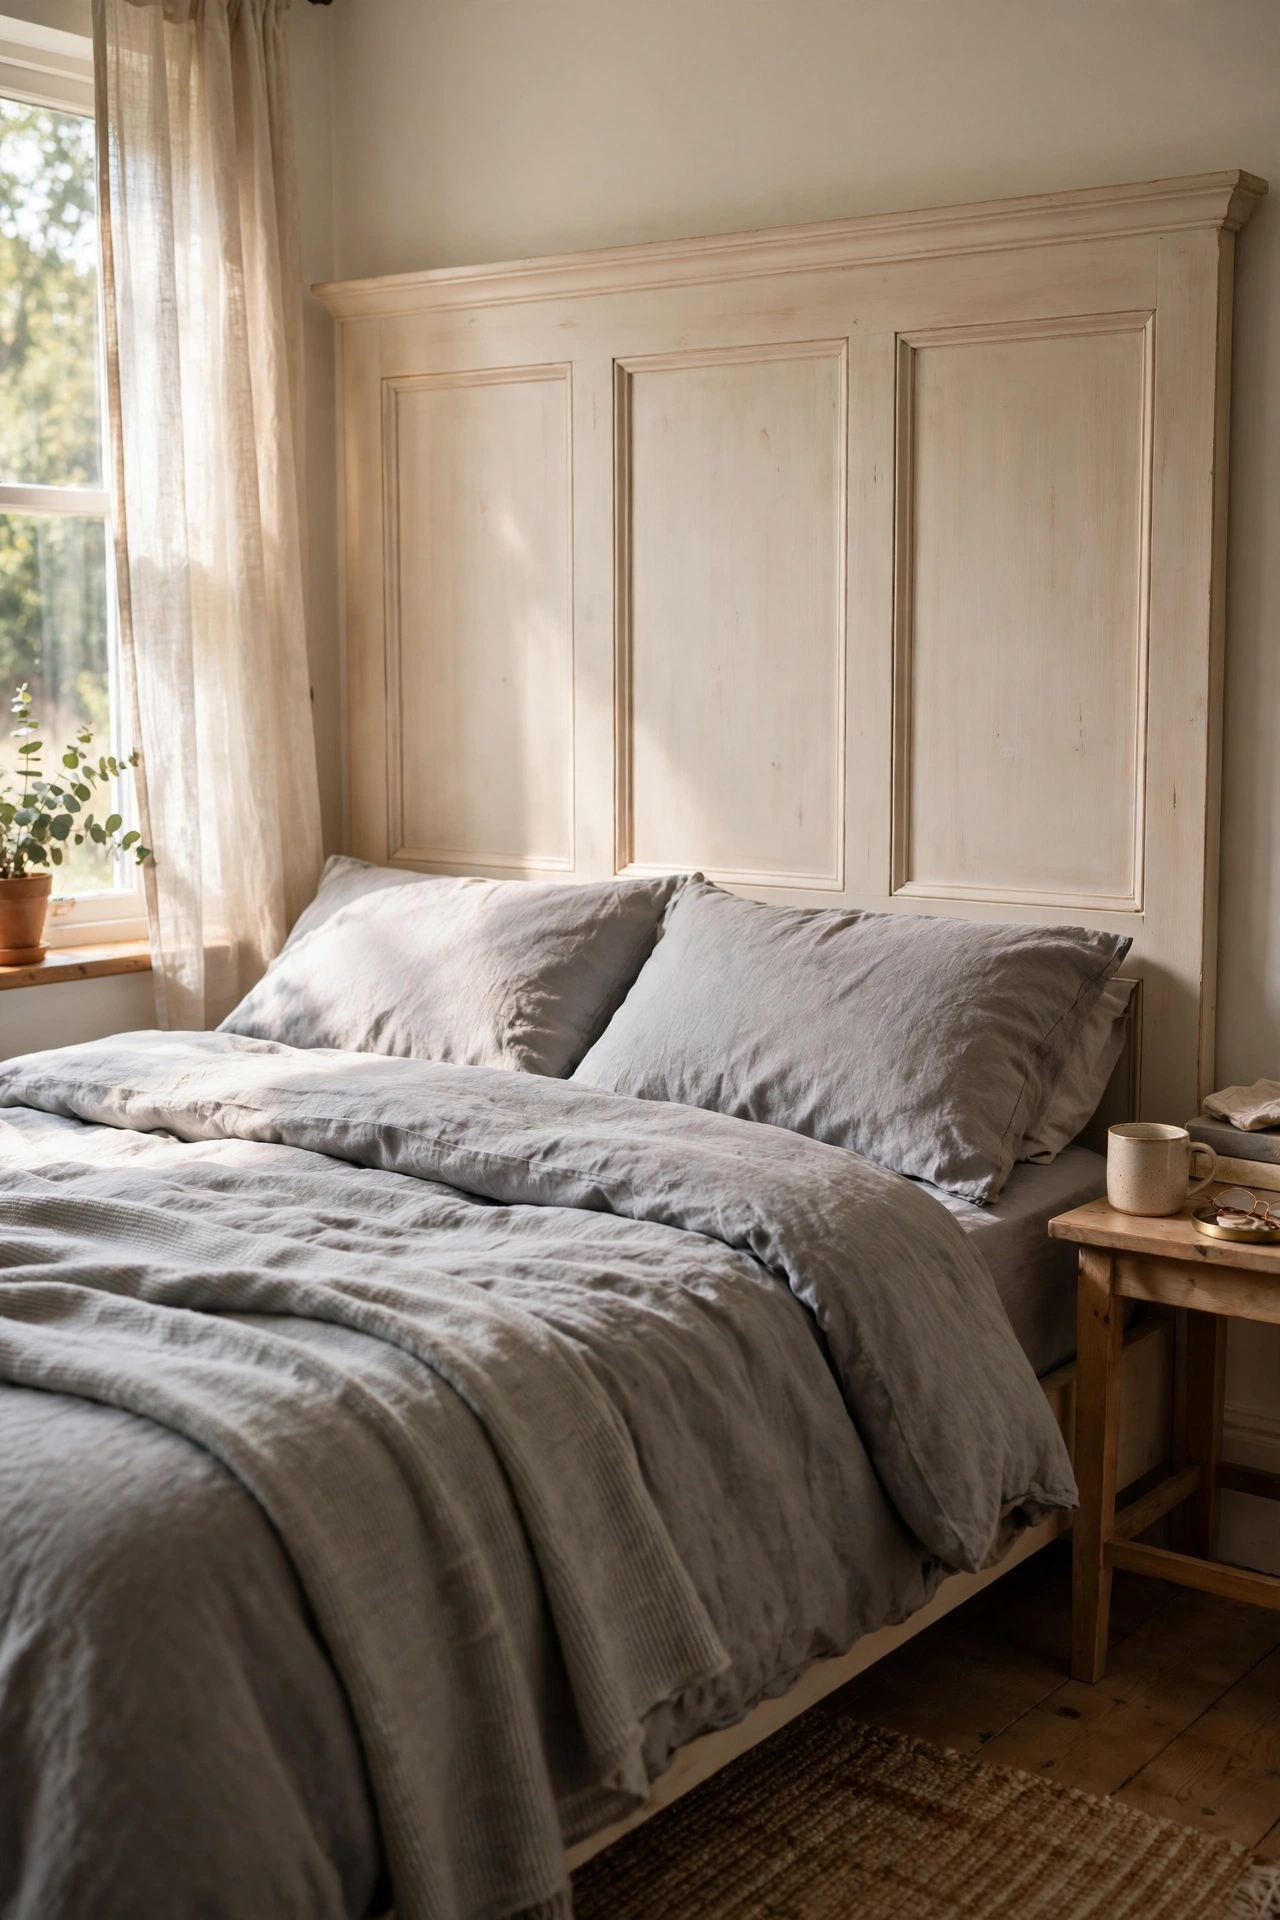
Simple shaker framing on a plywood back gives a headboard that suits any bedroom. I cut a plywood panel to size, glued and pinned thin pine battens around the edge and one vertical strip in the centre, then painted the whole thing warm white. The recessed panels catch soft shadows and look properly carpentered. Keep your batten joints tight: fill any gaps with wood filler before painting, because paint highlights gaps instead of hiding them. I caulked mine and the finish looks seamless.
Cost: ~$35-45 | Time: 4 hours
Pro tip: Paint is the cheapest luxury finish. A $15 tin of paint in a rich colour like deep green or charcoal can make a $20 plywood headboard look like it came from a boutique hotel. Always use two coats and a foam roller for a smooth finish.
10. Faux Leather Panel Headboard
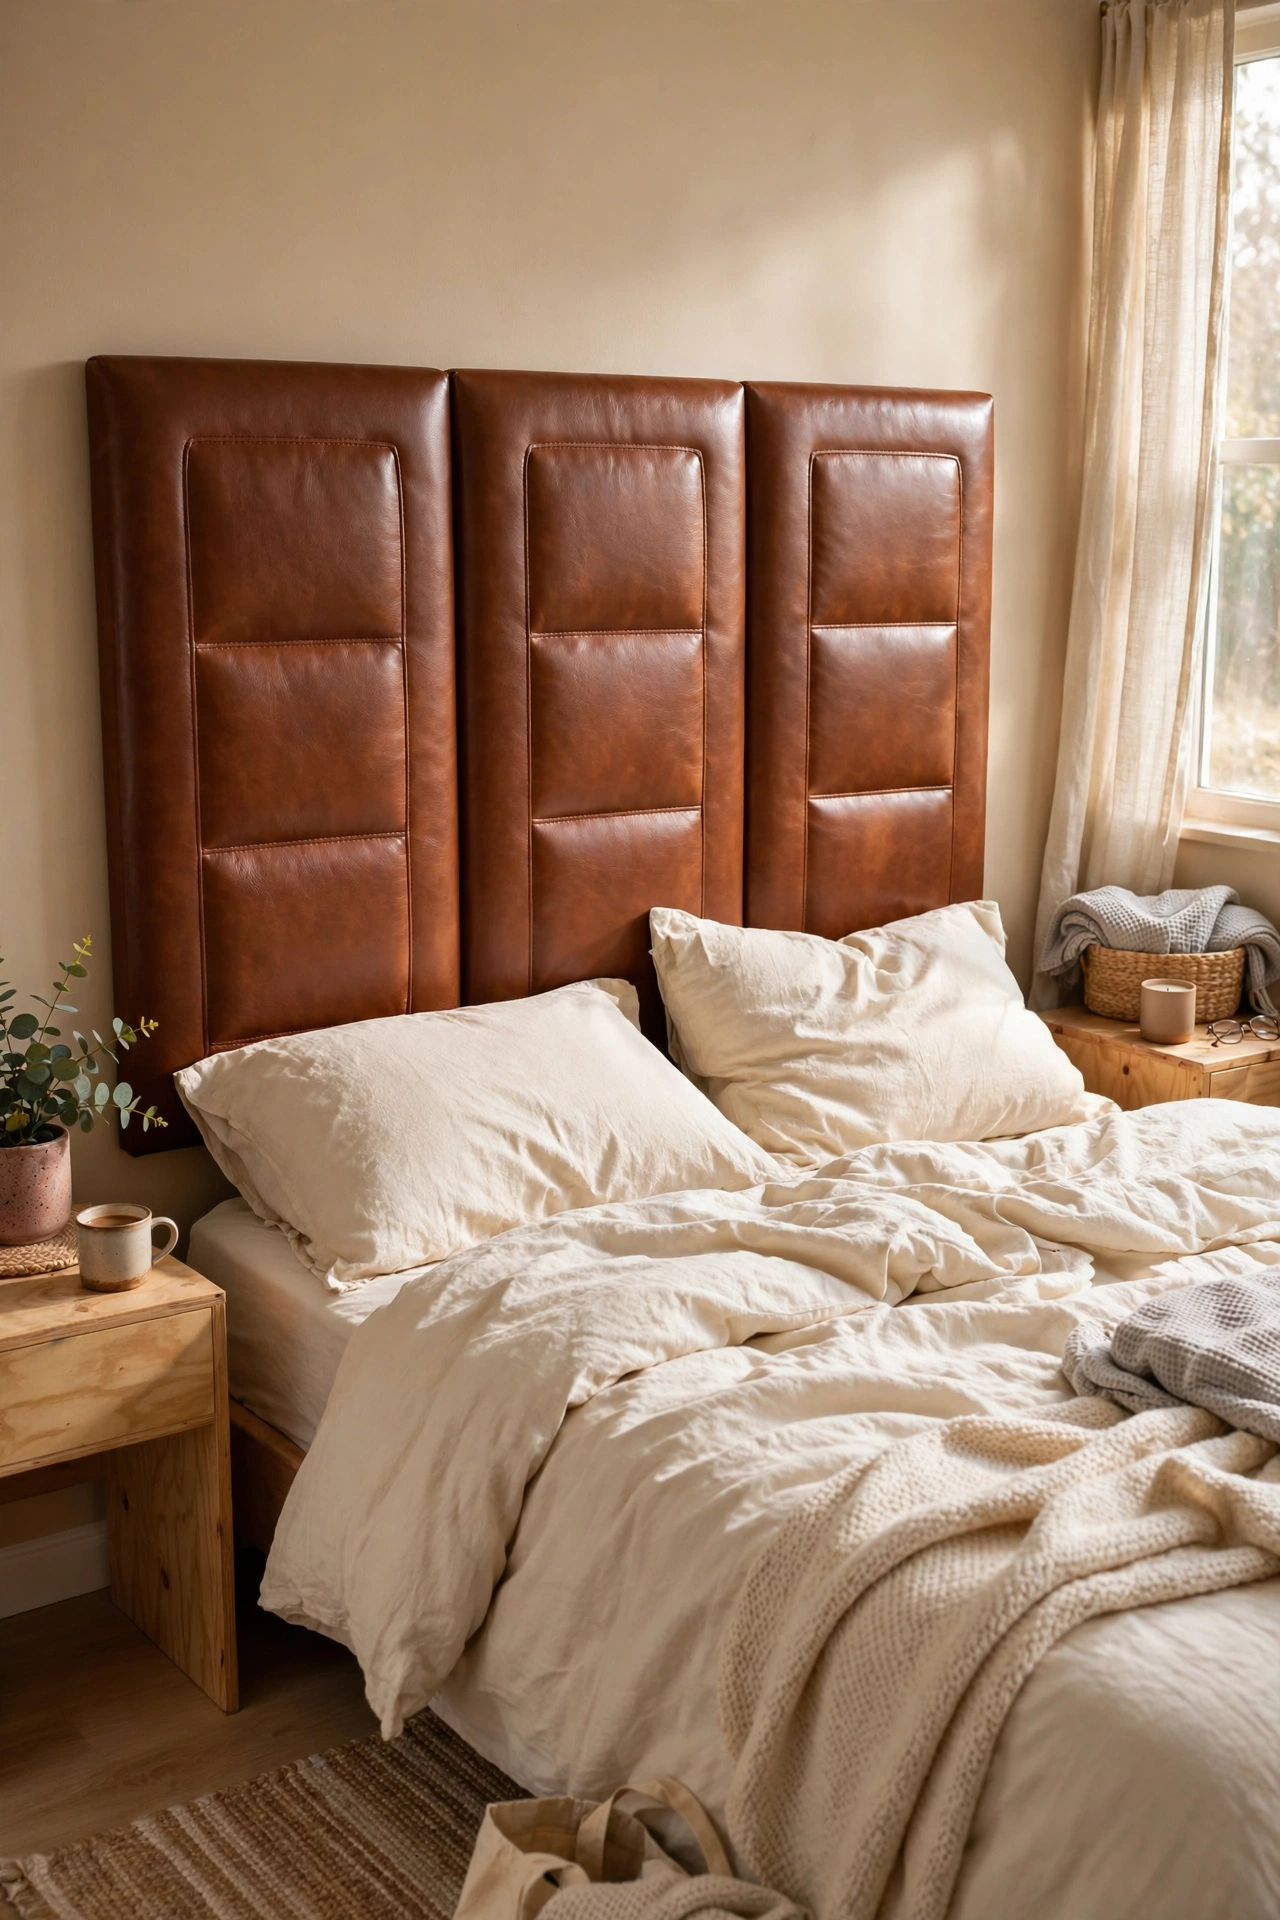
Faux leather over foam panels gives a sleek, padded headboard that wipes clean. I cut three plywood rectangles, wrapped each in 3-centimetre foam and cognac faux leather from the fabric store, and mounted them side by side with a small gap between. The panelled look is more forgiving than one huge piece: small wrinkles disappear at the seams. Pull the leather tight and staple every 5 centimetres. Mine cost $55 total and looks like the leather headboards selling for ten times that. Choose a matte faux leather, not shiny.
Cost: ~$45-60 | Time: 3 hours
11. Open Cubby Shelf Headboard
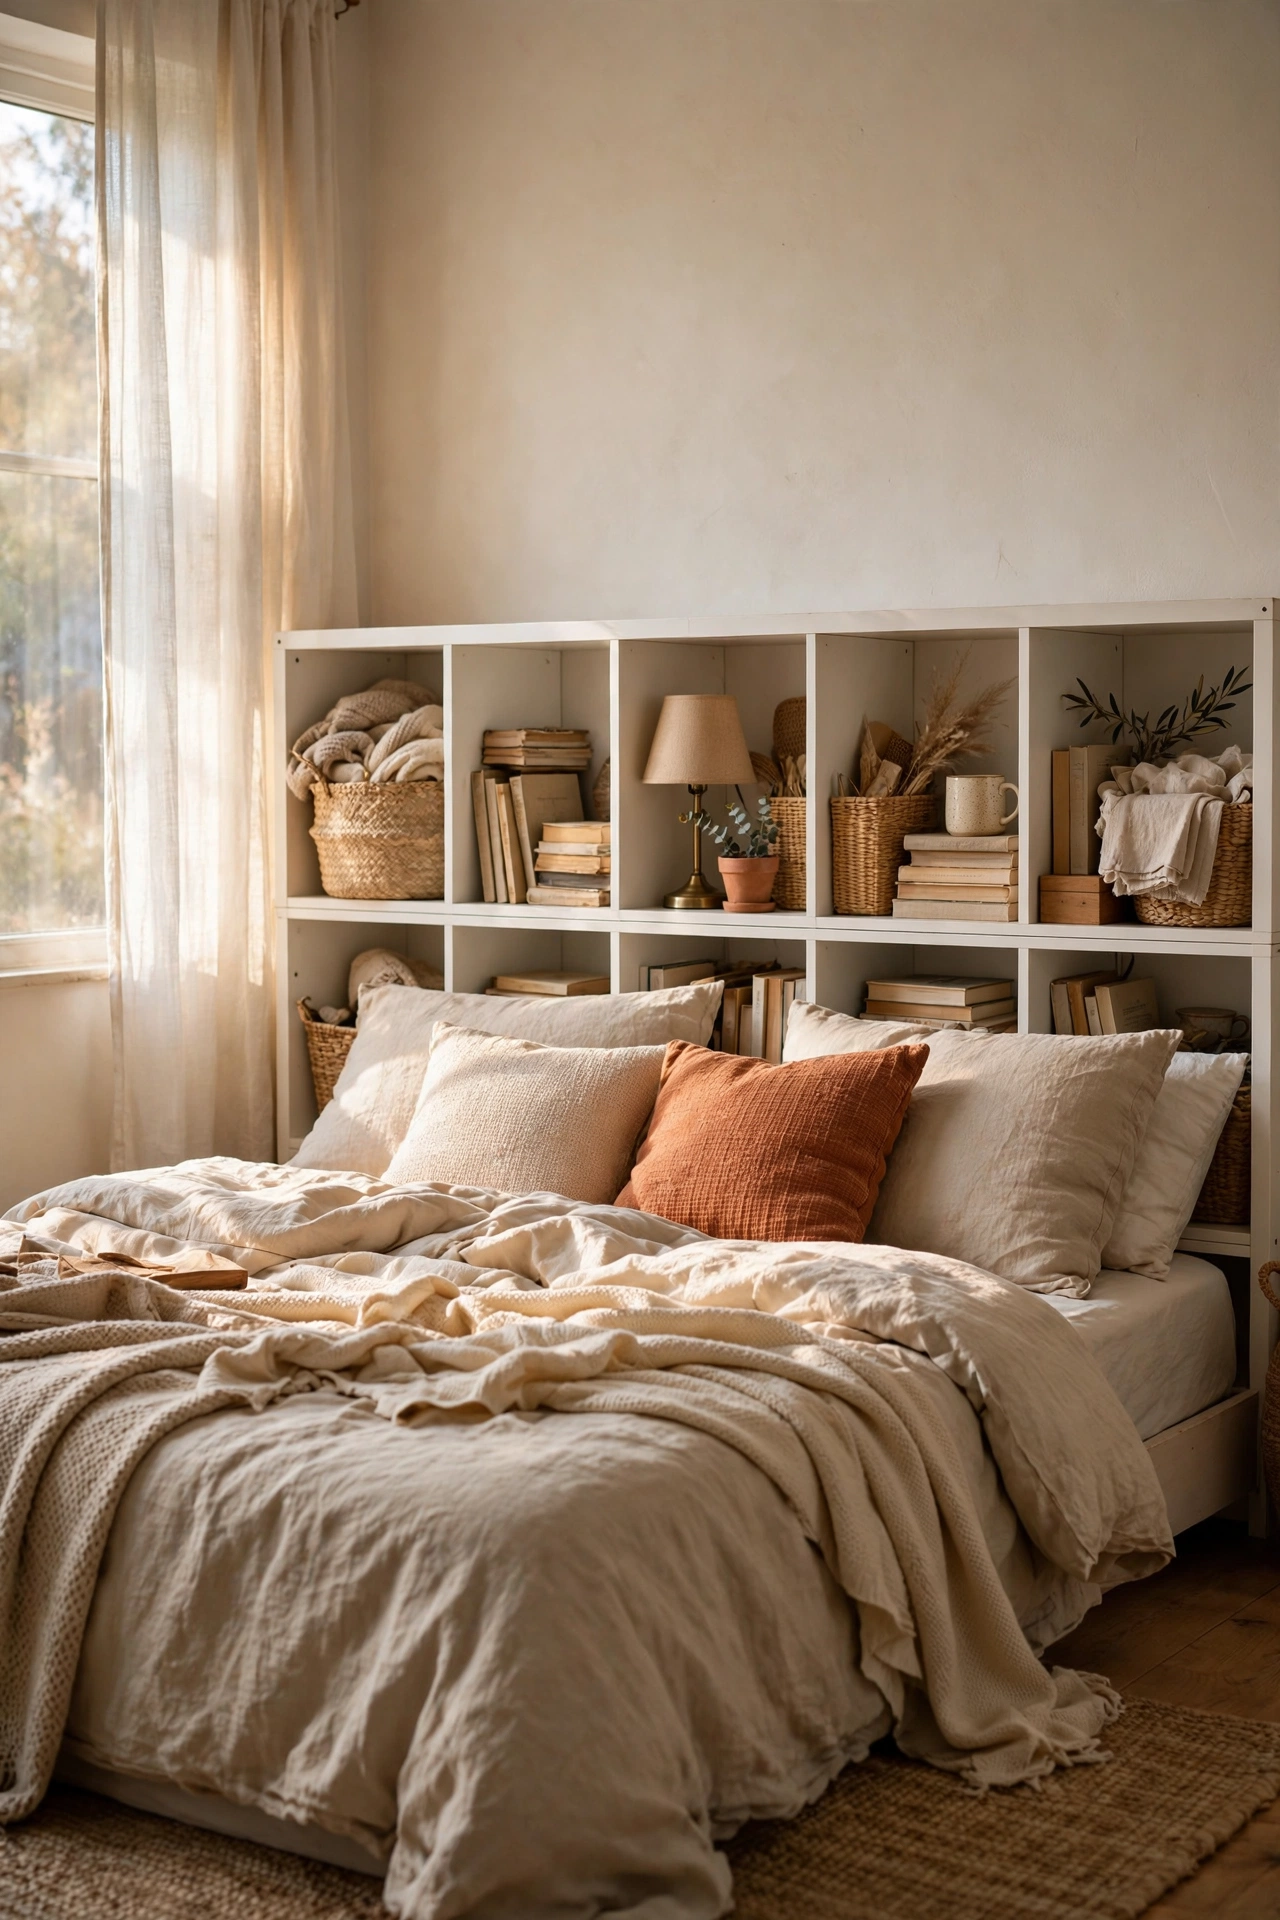
A low bookshelf behind the bed doubles as a headboard and a nightstand. I stood a $40 cube storage unit on its side behind my bed, so the cubbies face forward at pillow height. It holds my lamp, books, and glasses within arm’s reach. Anchor it to the wall with anti-tip straps, because a loaded shelf behind a bed must not move. I styled the visible cubbies with baskets to hide clutter. This is the best headboard for small bedrooms where a separate nightstand will not fit.
Cost: ~$40-55 | Time: 1 hour
12. Woven Seagrass Mat Headboard
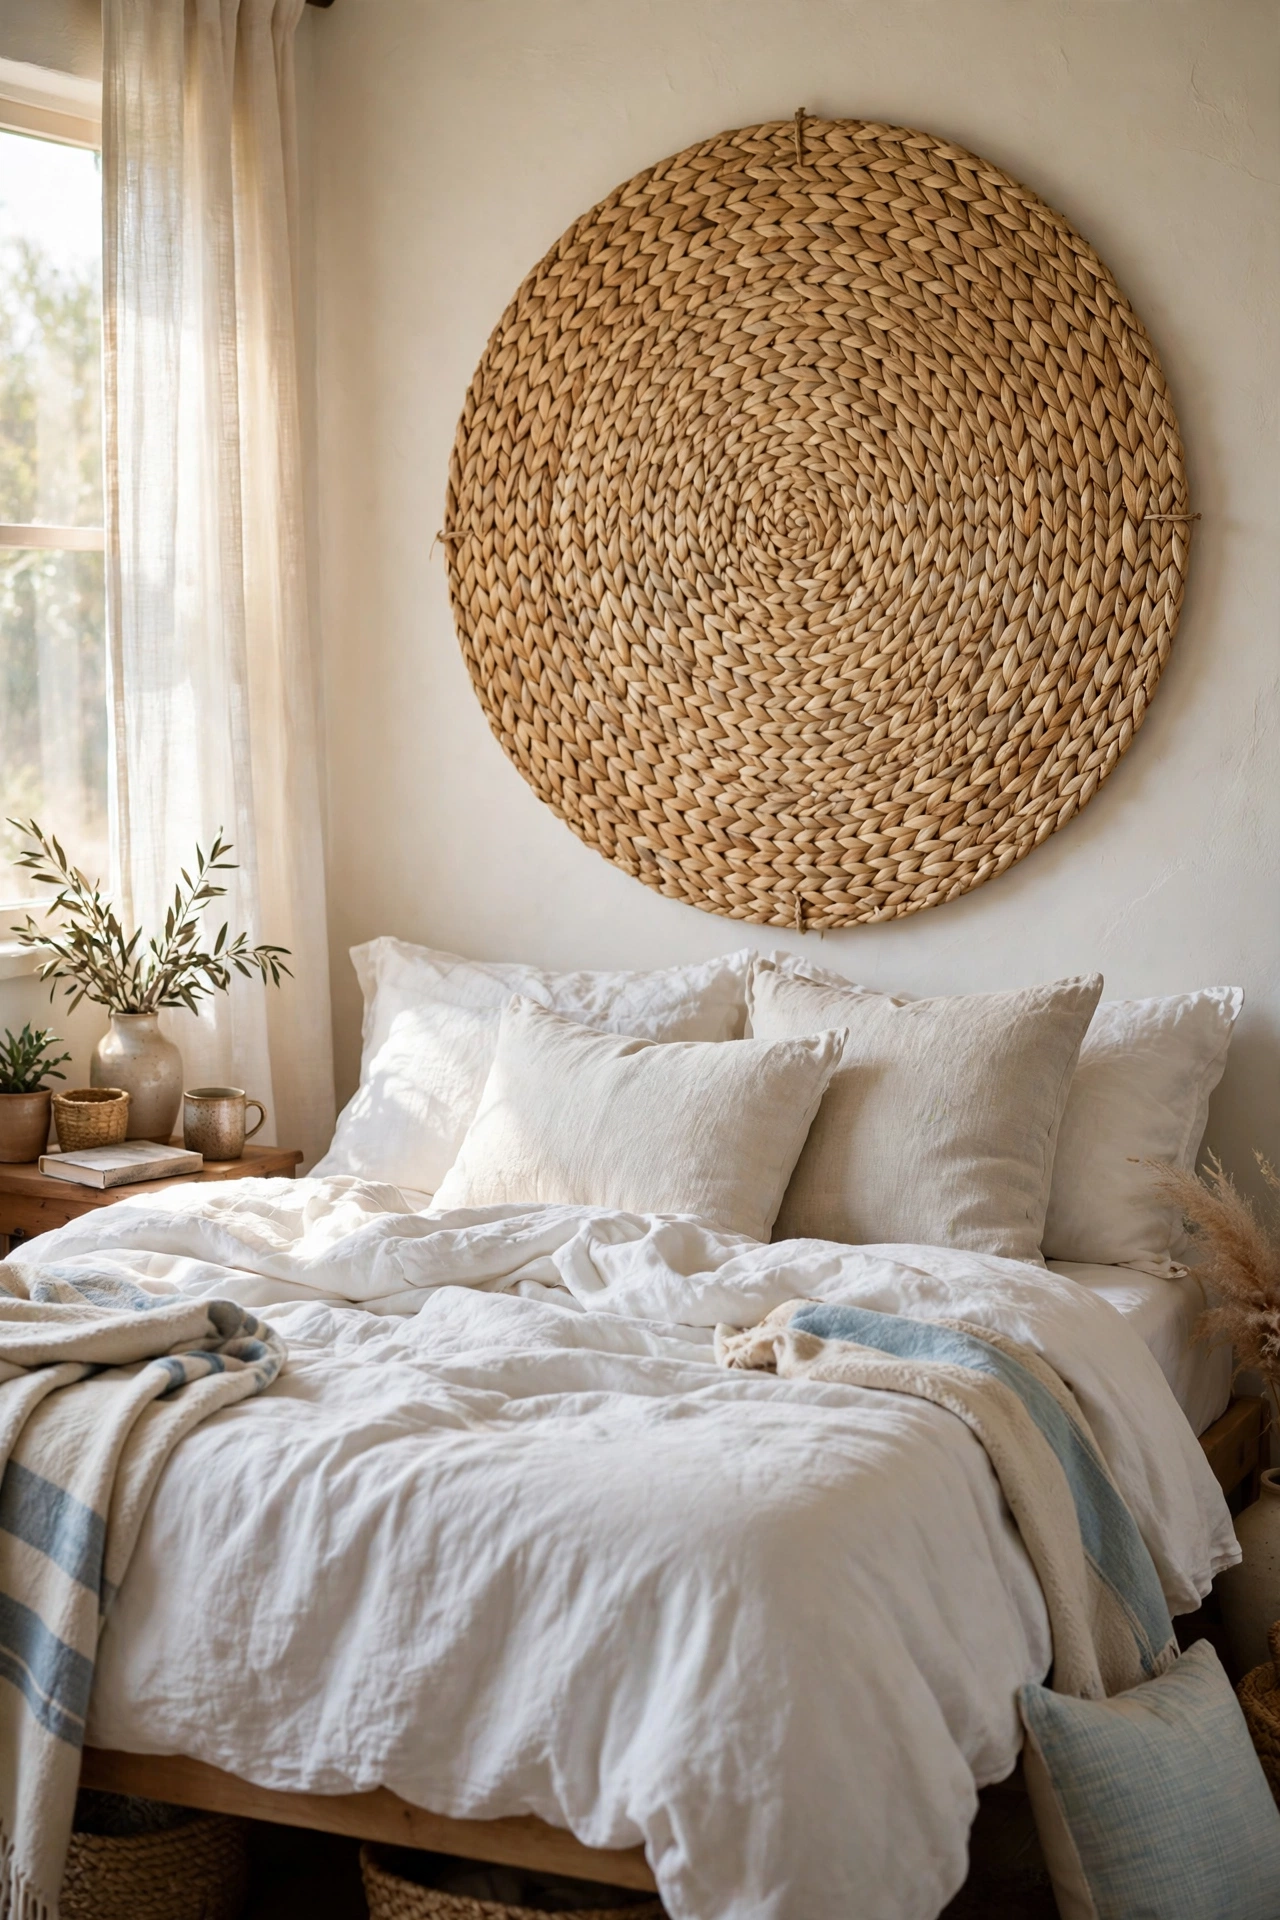
A large seagrass floor mat hung on the wall makes a textured, coastal headboard. I bought a 1.5-metre round jute rug for $28, nailed a slim timber batten to the wall, and draped the rug over it so it hangs flat. The natural fibre adds warmth that a small bedroom needs. Keep it out of direct sun or the fibres fade unevenly. I rotate mine a quarter turn every few months. Round works beautifully behind a bed; rectangular mats suit wider beds better.
Cost: ~$30-40 | Time: 30 minutes
Pro tip: Natural fibre headboards and white bedding are a perfect pair, but add one dark element nearby, a black lamp or a walnut frame, so the room does not wash out into beige nothingness.
13. Macramé Wall Hanging Headboard
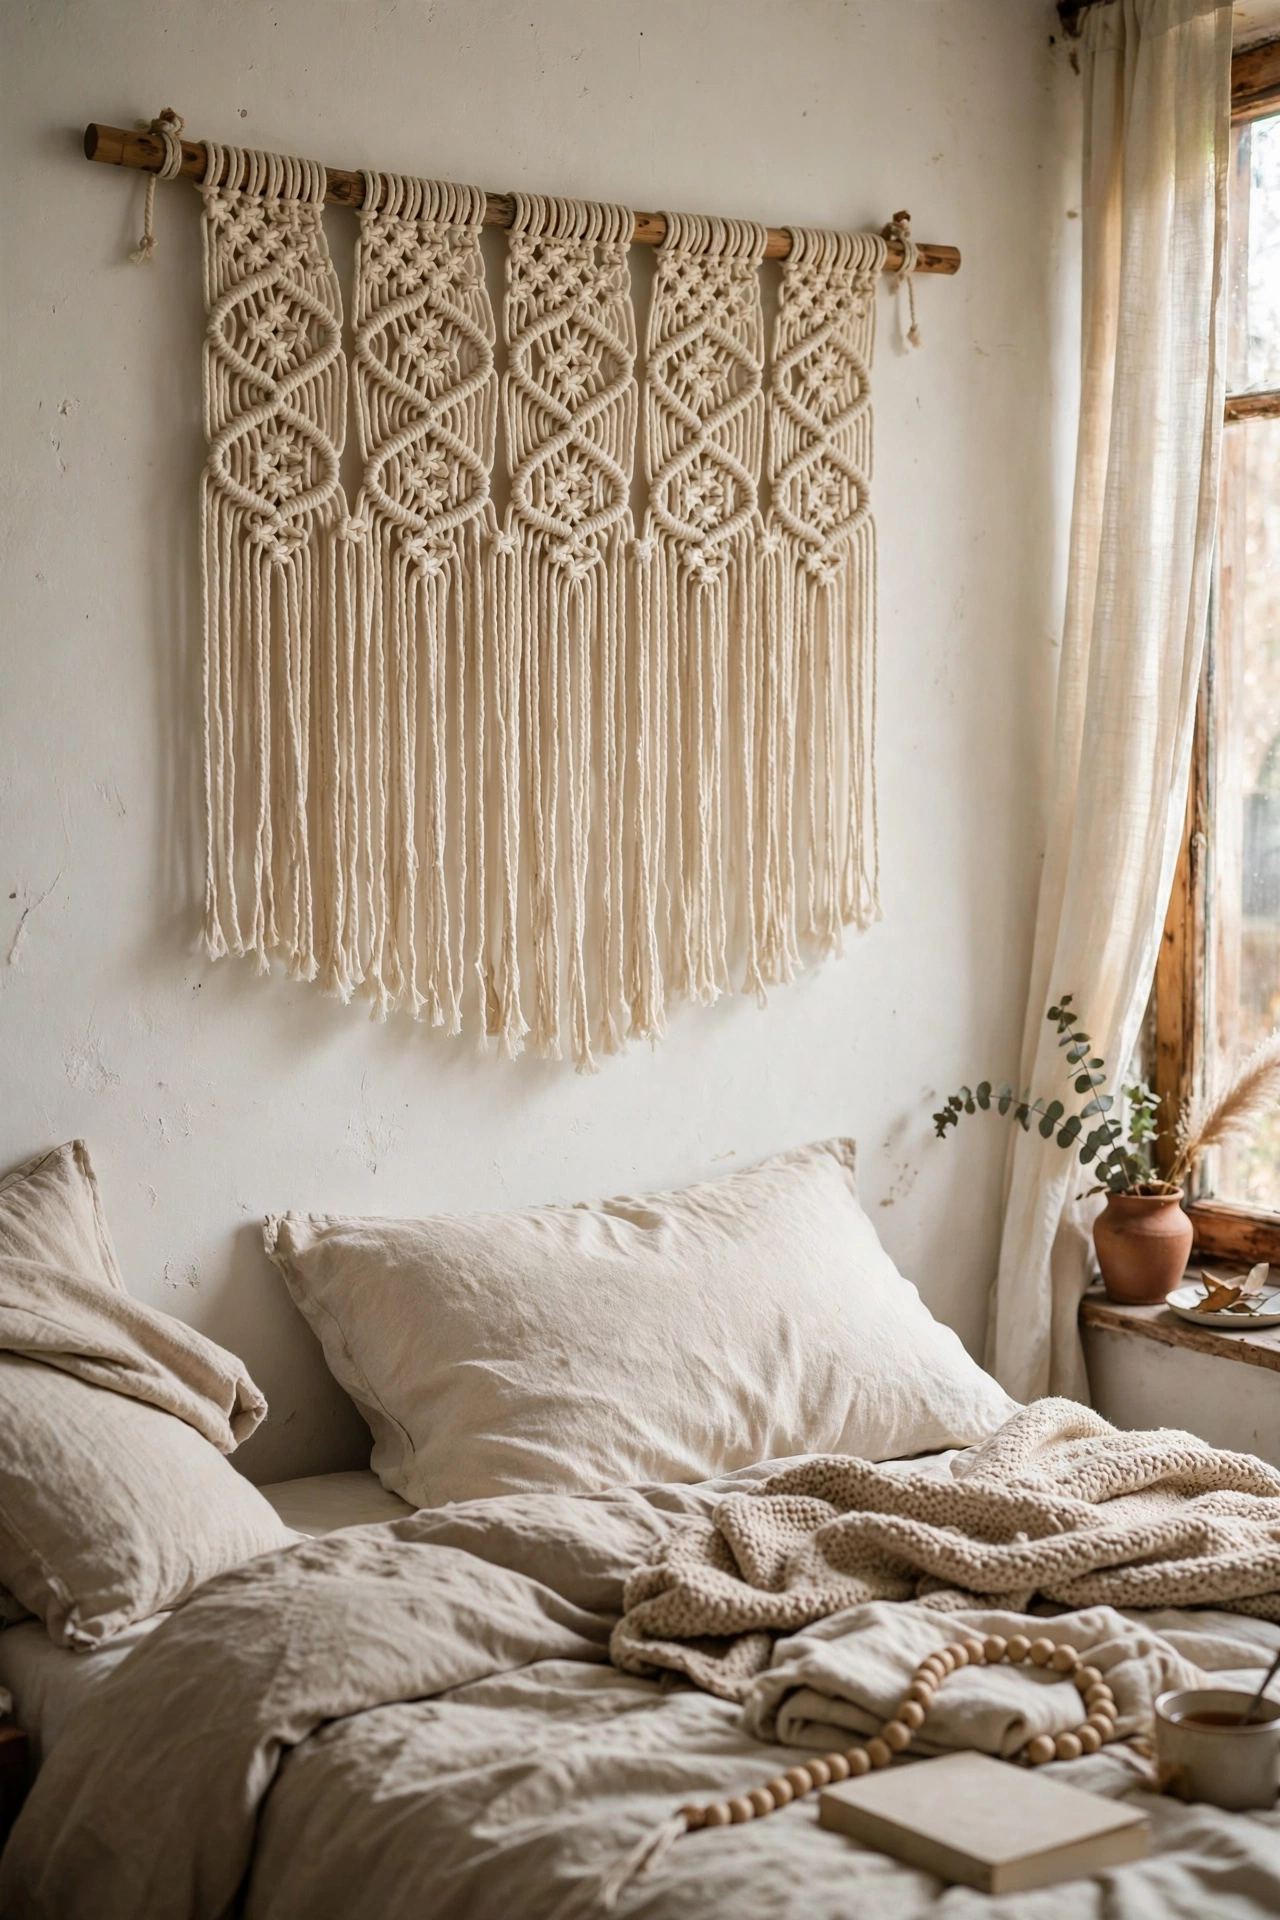
A wide macramé hanging on a wooden dowel softens the wall behind the bed like a textile headboard. I knotted a 1.2-metre piece using basic square knots over two evenings, following a free pattern. Cotton cord in natural cream keeps it calm. Hang the dowel from two hooks and let the fringe fall behind the pillows. My first attempt was too narrow and looked like a scarf, so go at least as wide as your mattress. The texture photographs beautifully and costs almost nothing but time.
Cost: ~$15-20 | Time: 6 hours
14. Vertical Shiplap Plank Headboard
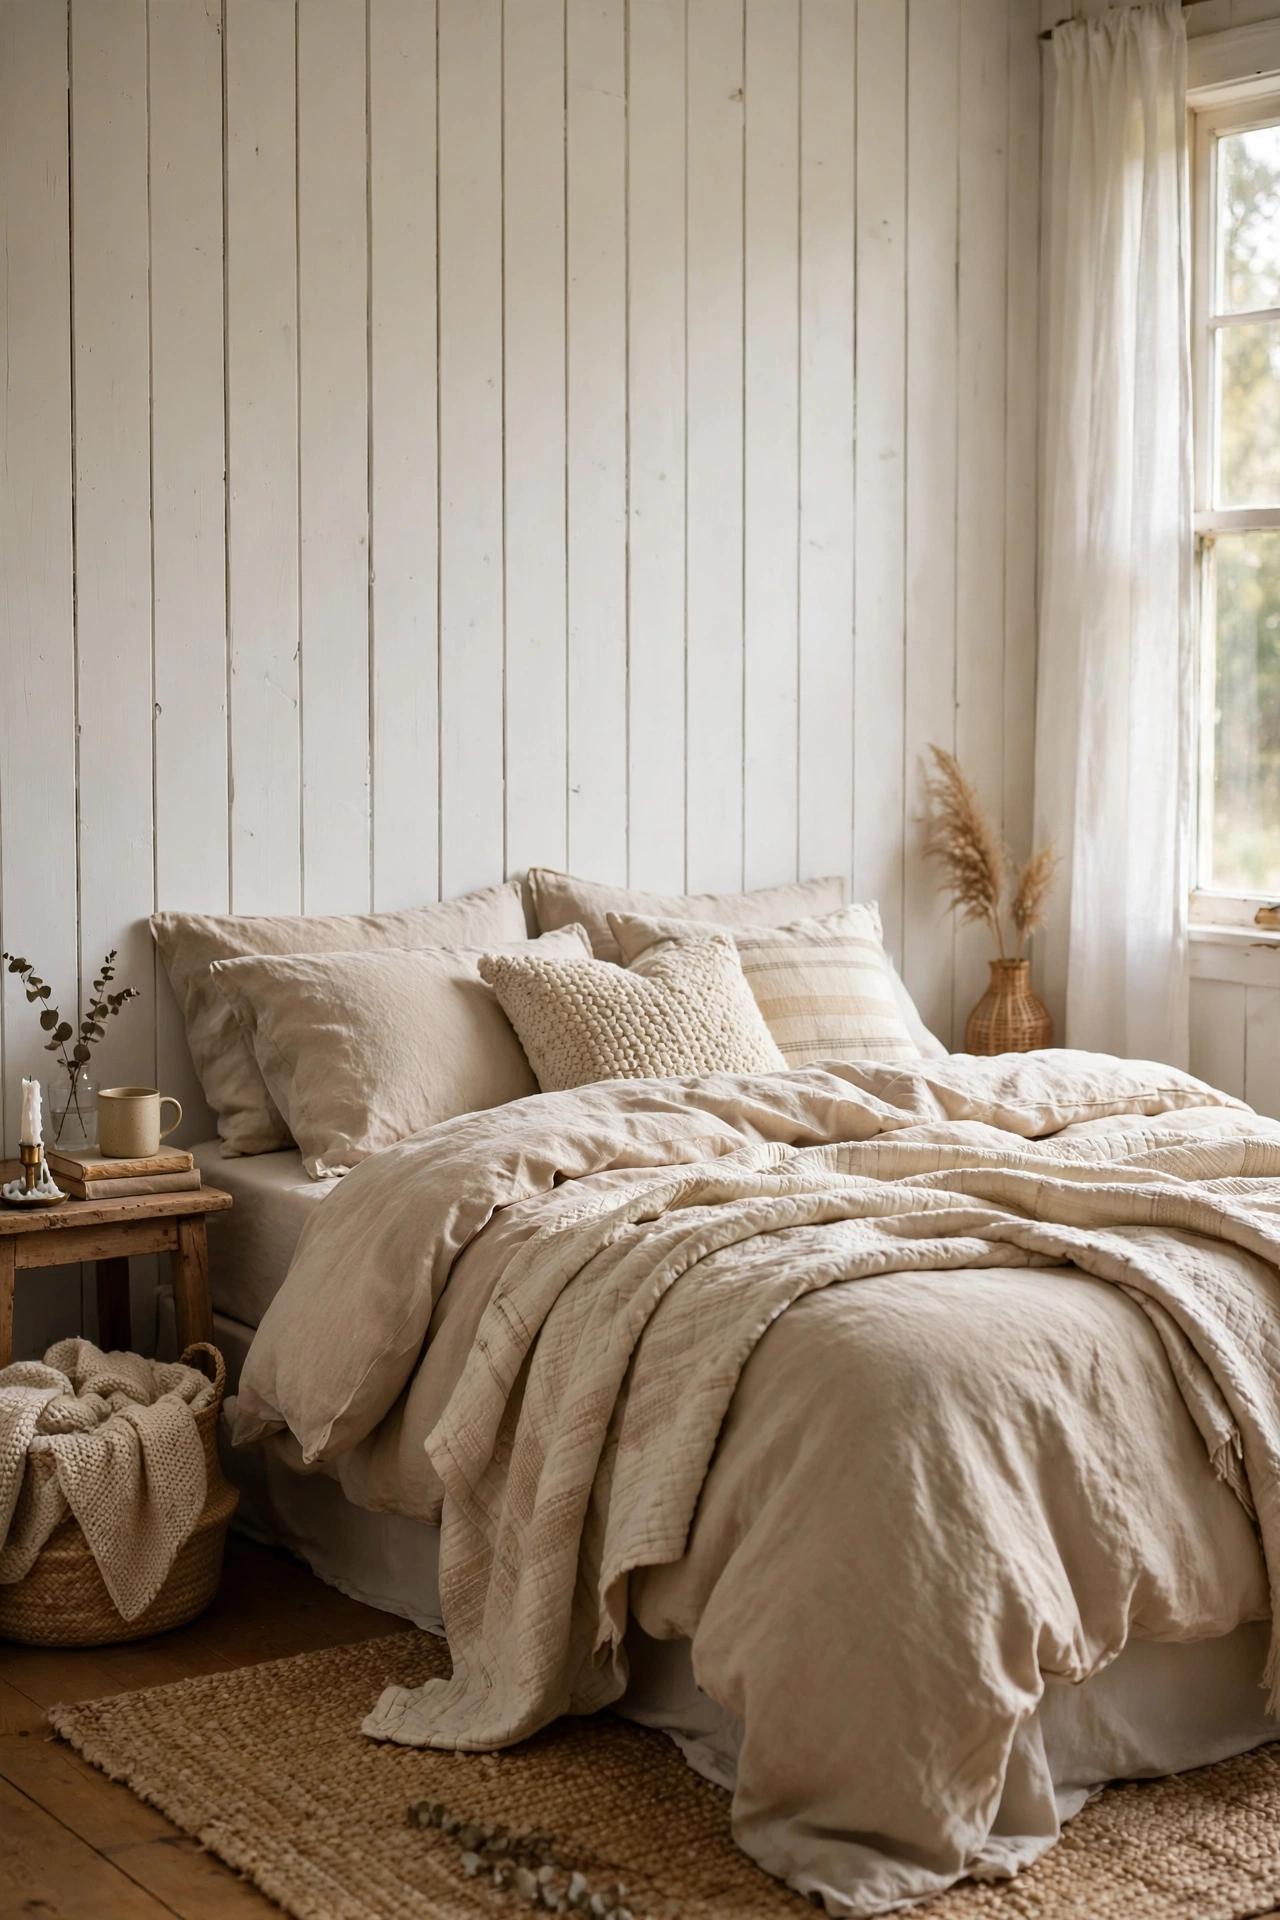
Vertical shiplap planks from floor to ceiling turn the whole wall into the headboard. I fixed 12-centimetre pine boards vertically with small gaps, painted them soft white, and let them run from the skirting to the ceiling. The vertical lines make low ceilings feel taller. Use a spacer block between boards for even gaps, because eyeballing it shows. I painted after installing and caulked the edges first, which gave a built-in look. This suits farmhouse and coastal bedrooms perfectly. I used 120-grit sandpaper to soften the board edges before painting, which stops the finish looking harsh under bedroom lighting.
Cost: ~$50-70 | Time: 6 hours
15. Velvet Channel-Tufted Headboard
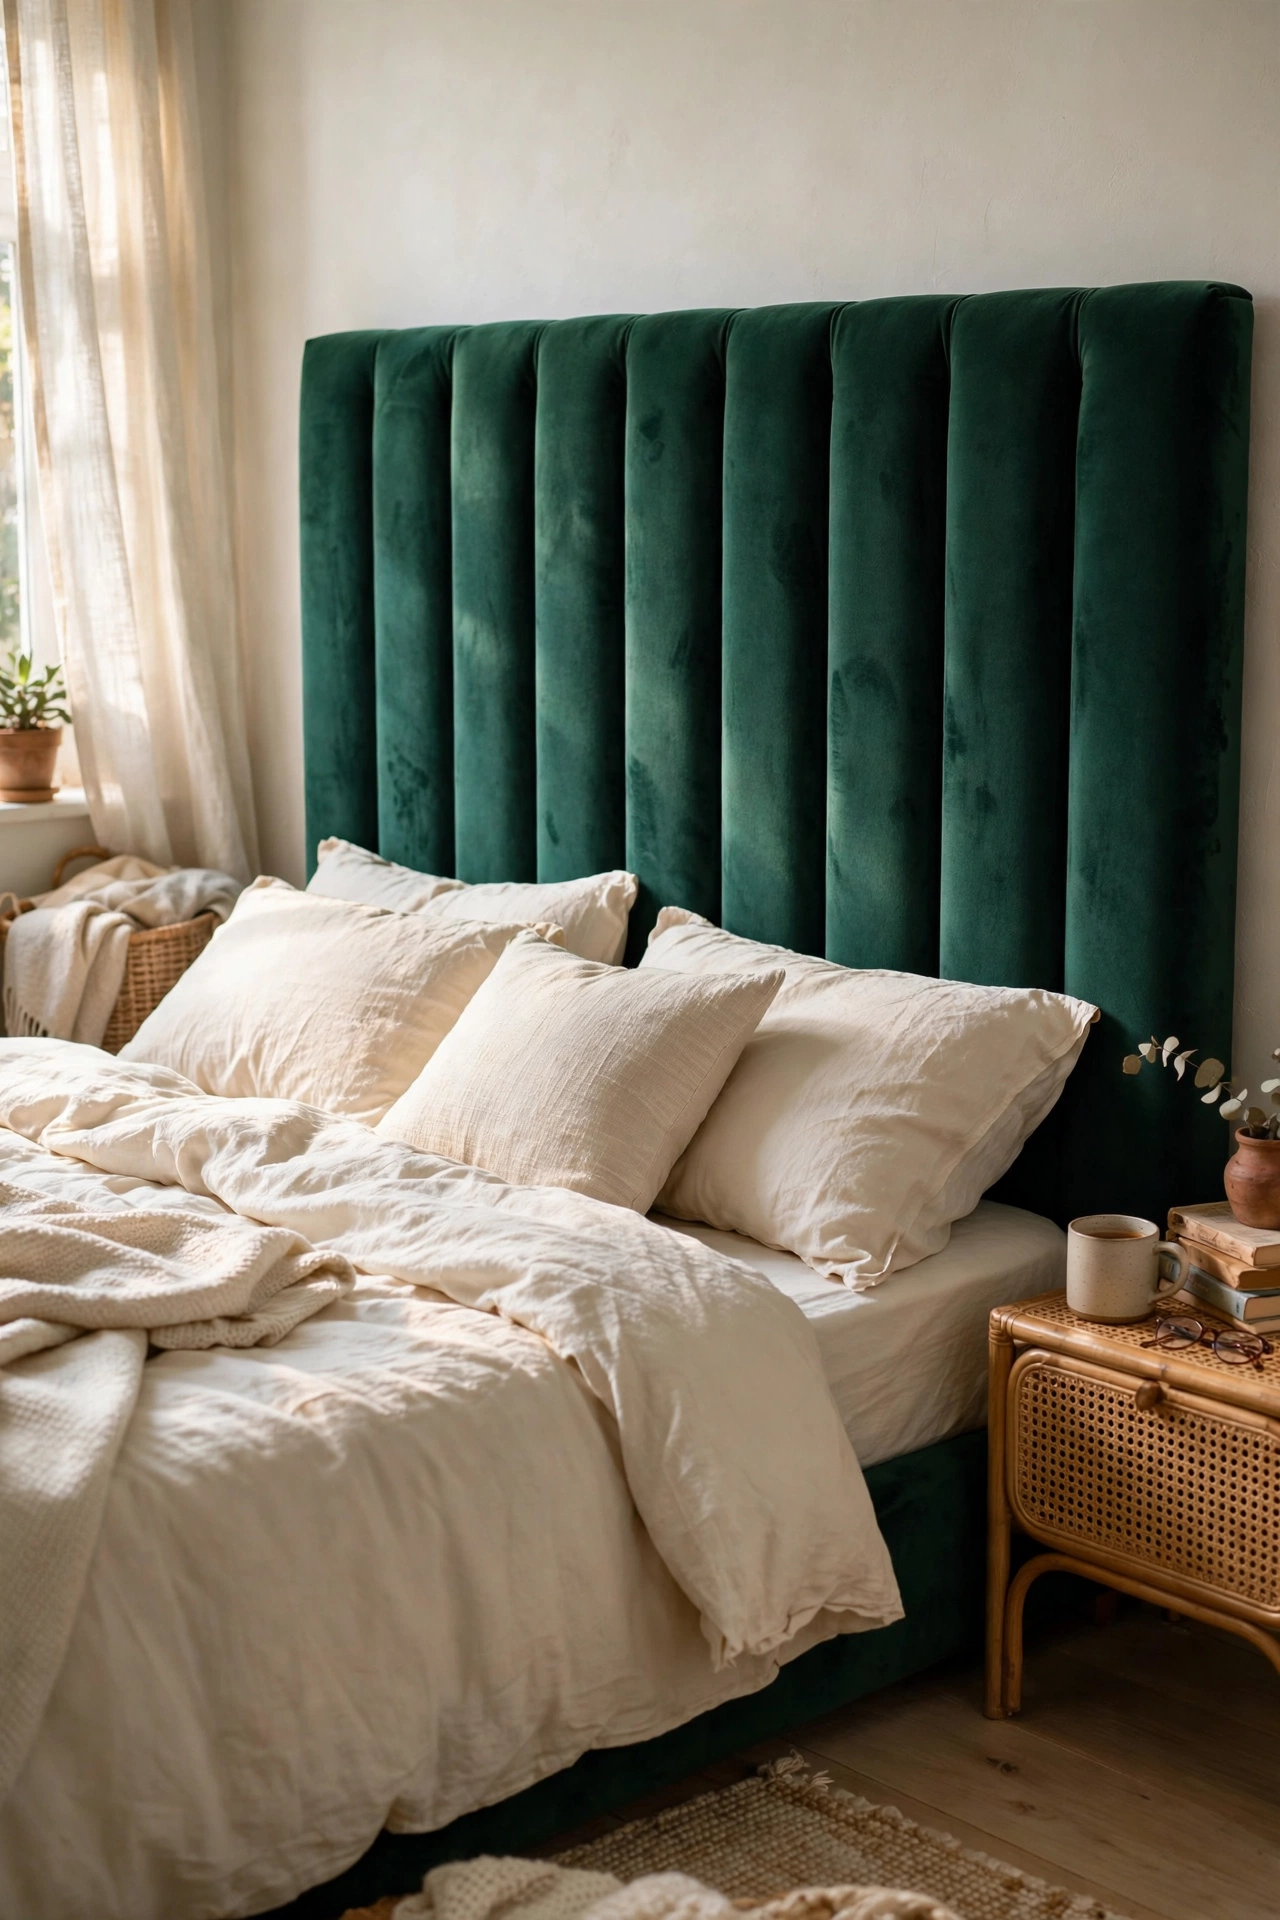
Vertical channels of velvet over foam give the fluted look you see in luxury hotels. I glued vertical foam rolls to a plywood back, 15 centimetres apart, and wrapped the whole panel in emerald velvet, tucking the fabric into each channel. The trick is wrapping each roll separately before mounting them side by side, which gives crisp grooves. My velvet was a $25 remnant and the foam was pipe insulation from the hardware store. It looks absurdly expensive for the price.
Cost: ~$35-50 | Time: 4 hours
Pro tip: For upholstered headboards, choose performance fabrics or velvet over plain cotton: they resist the head-oil marks and dust that show up on light fabric within months. A lint roller once a week keeps any fabric headboard looking new.
16. Old Window Frame Headboard
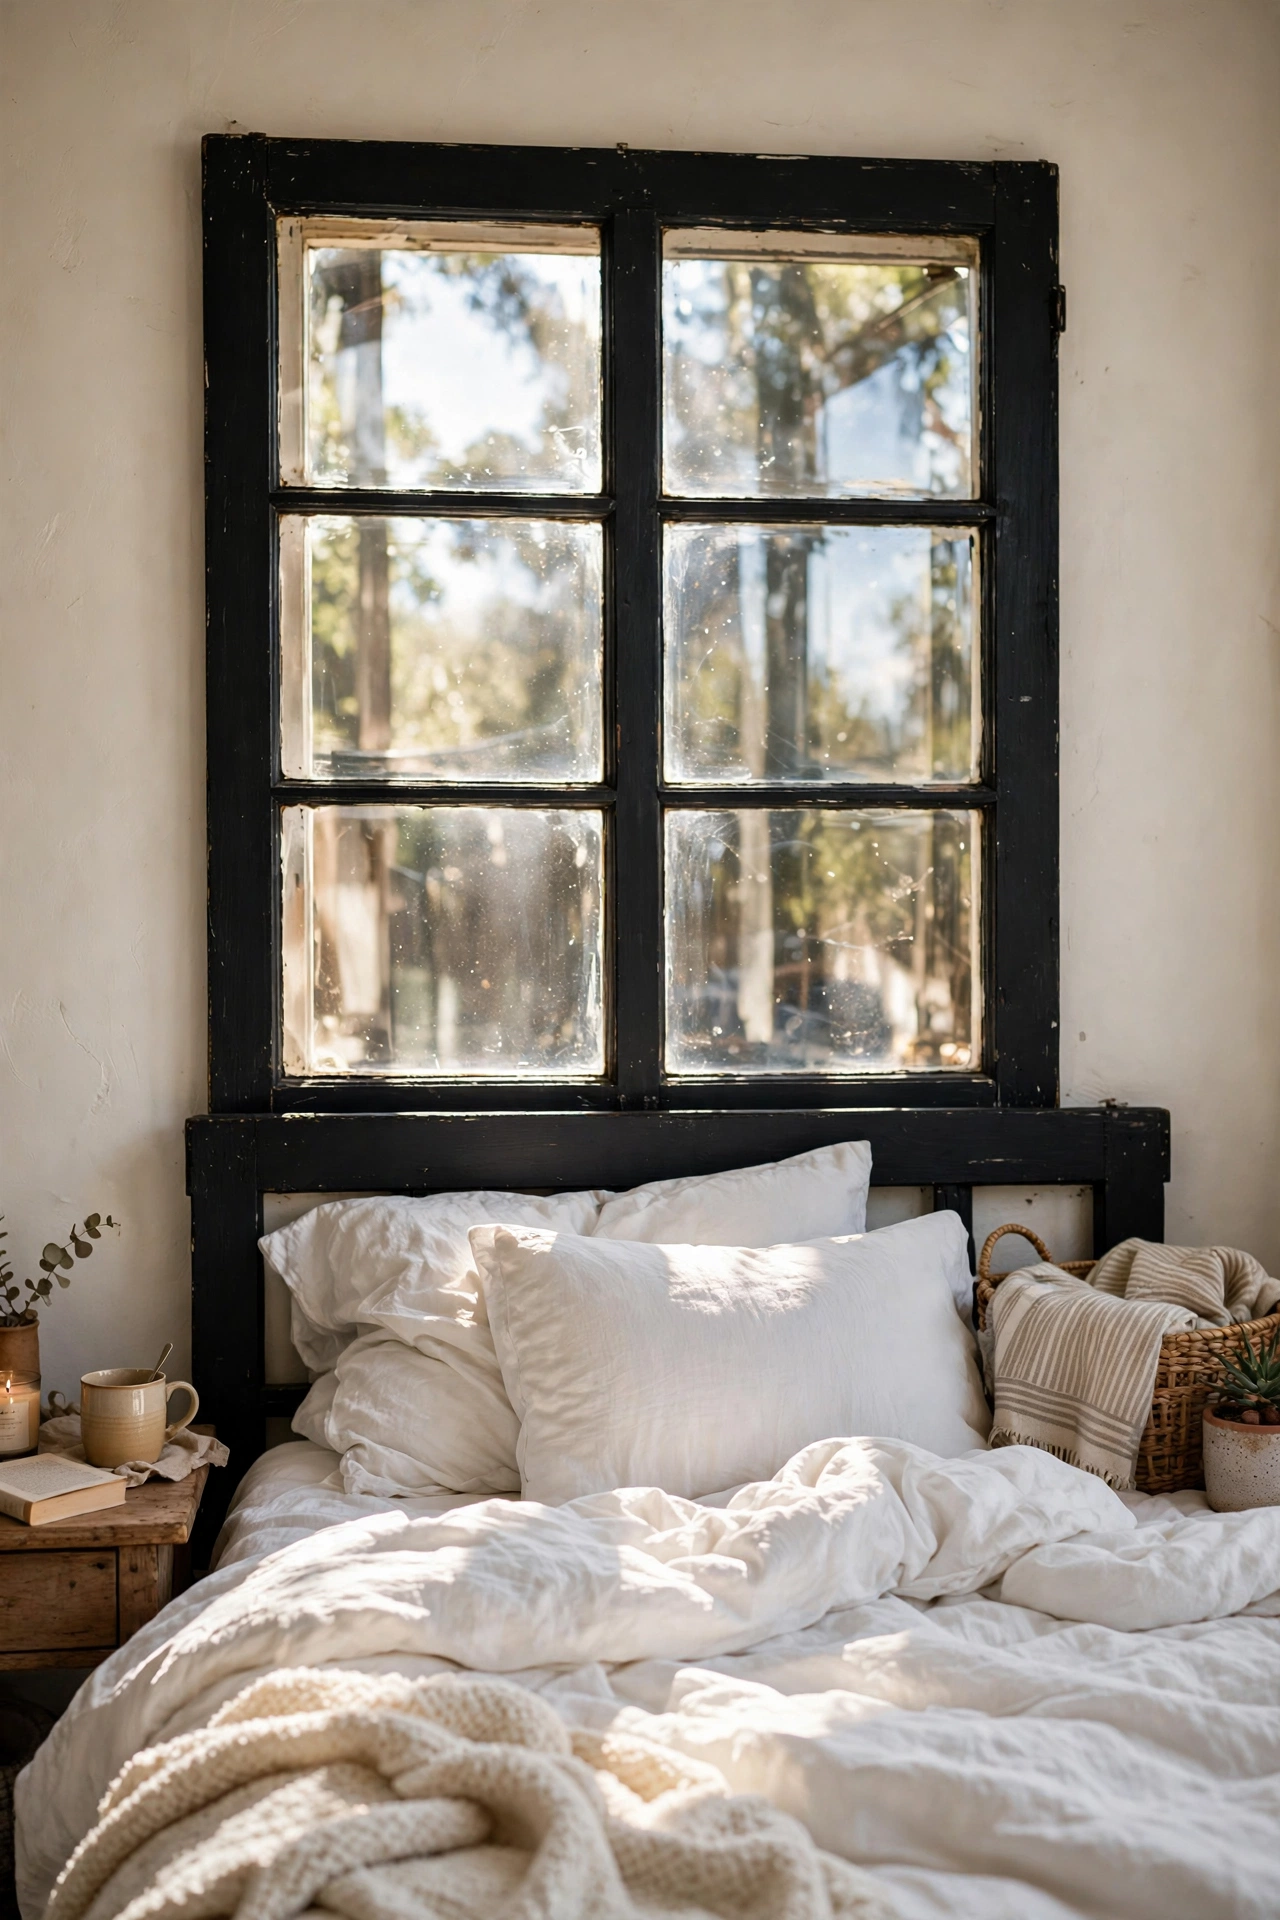
A vintage multi-pane window frame makes a charming headboard with instant history. I found a six-pane sash window for $12, stripped the flaking paint, and painted it matte black. I left the glass in for a reflective quality that bounces morning light around. Secure it firmly to the wall with two cleats, because old frames are heavier than they look. If the glass is cracked, replace it with mirror cut to size for a glamorous twist. Mine sits in my guest room and every visitor asks about it.
Cost: ~$18-28 | Time: 3 hours
17. Fluted Plywood Headboard
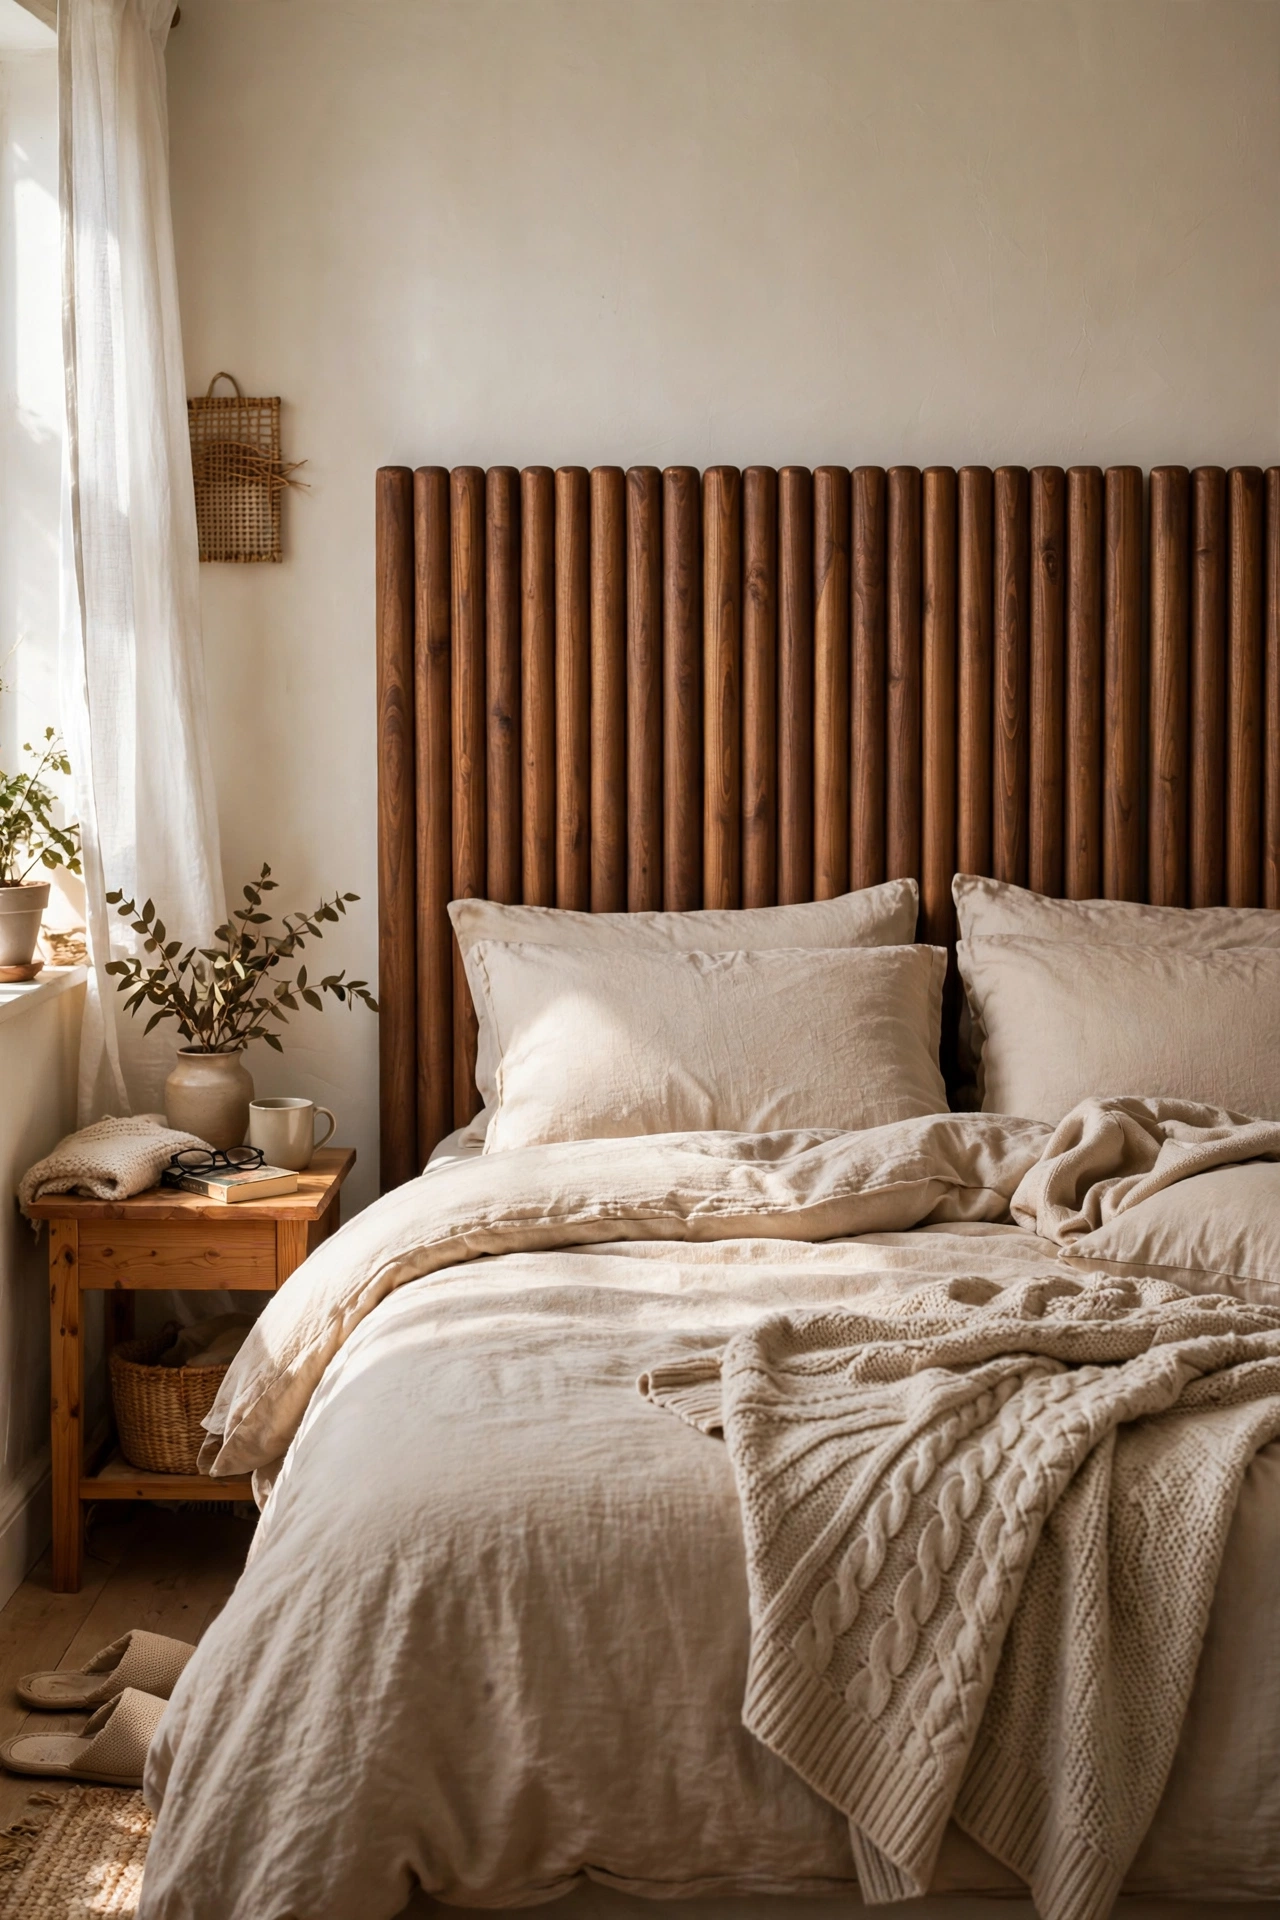
Half-round timber dowels glued in rows onto plywood create the fluted texture that is everywhere in high-end interiors. I glued 2-centimetre half-rounds side by side across a plywood panel with wood glue, clamped them overnight, and stained the whole thing warm walnut. The rhythm of the ridges catches light beautifully. This is slow, repetitive work: my queen-size panel needed 60 dowels and two evenings. Buy dowels in bulk for consistency, because different batches vary slightly in diameter and the eye notices.
Cost: ~$40-55 | Time: 6 hours
18. Tapestry Panel Headboard
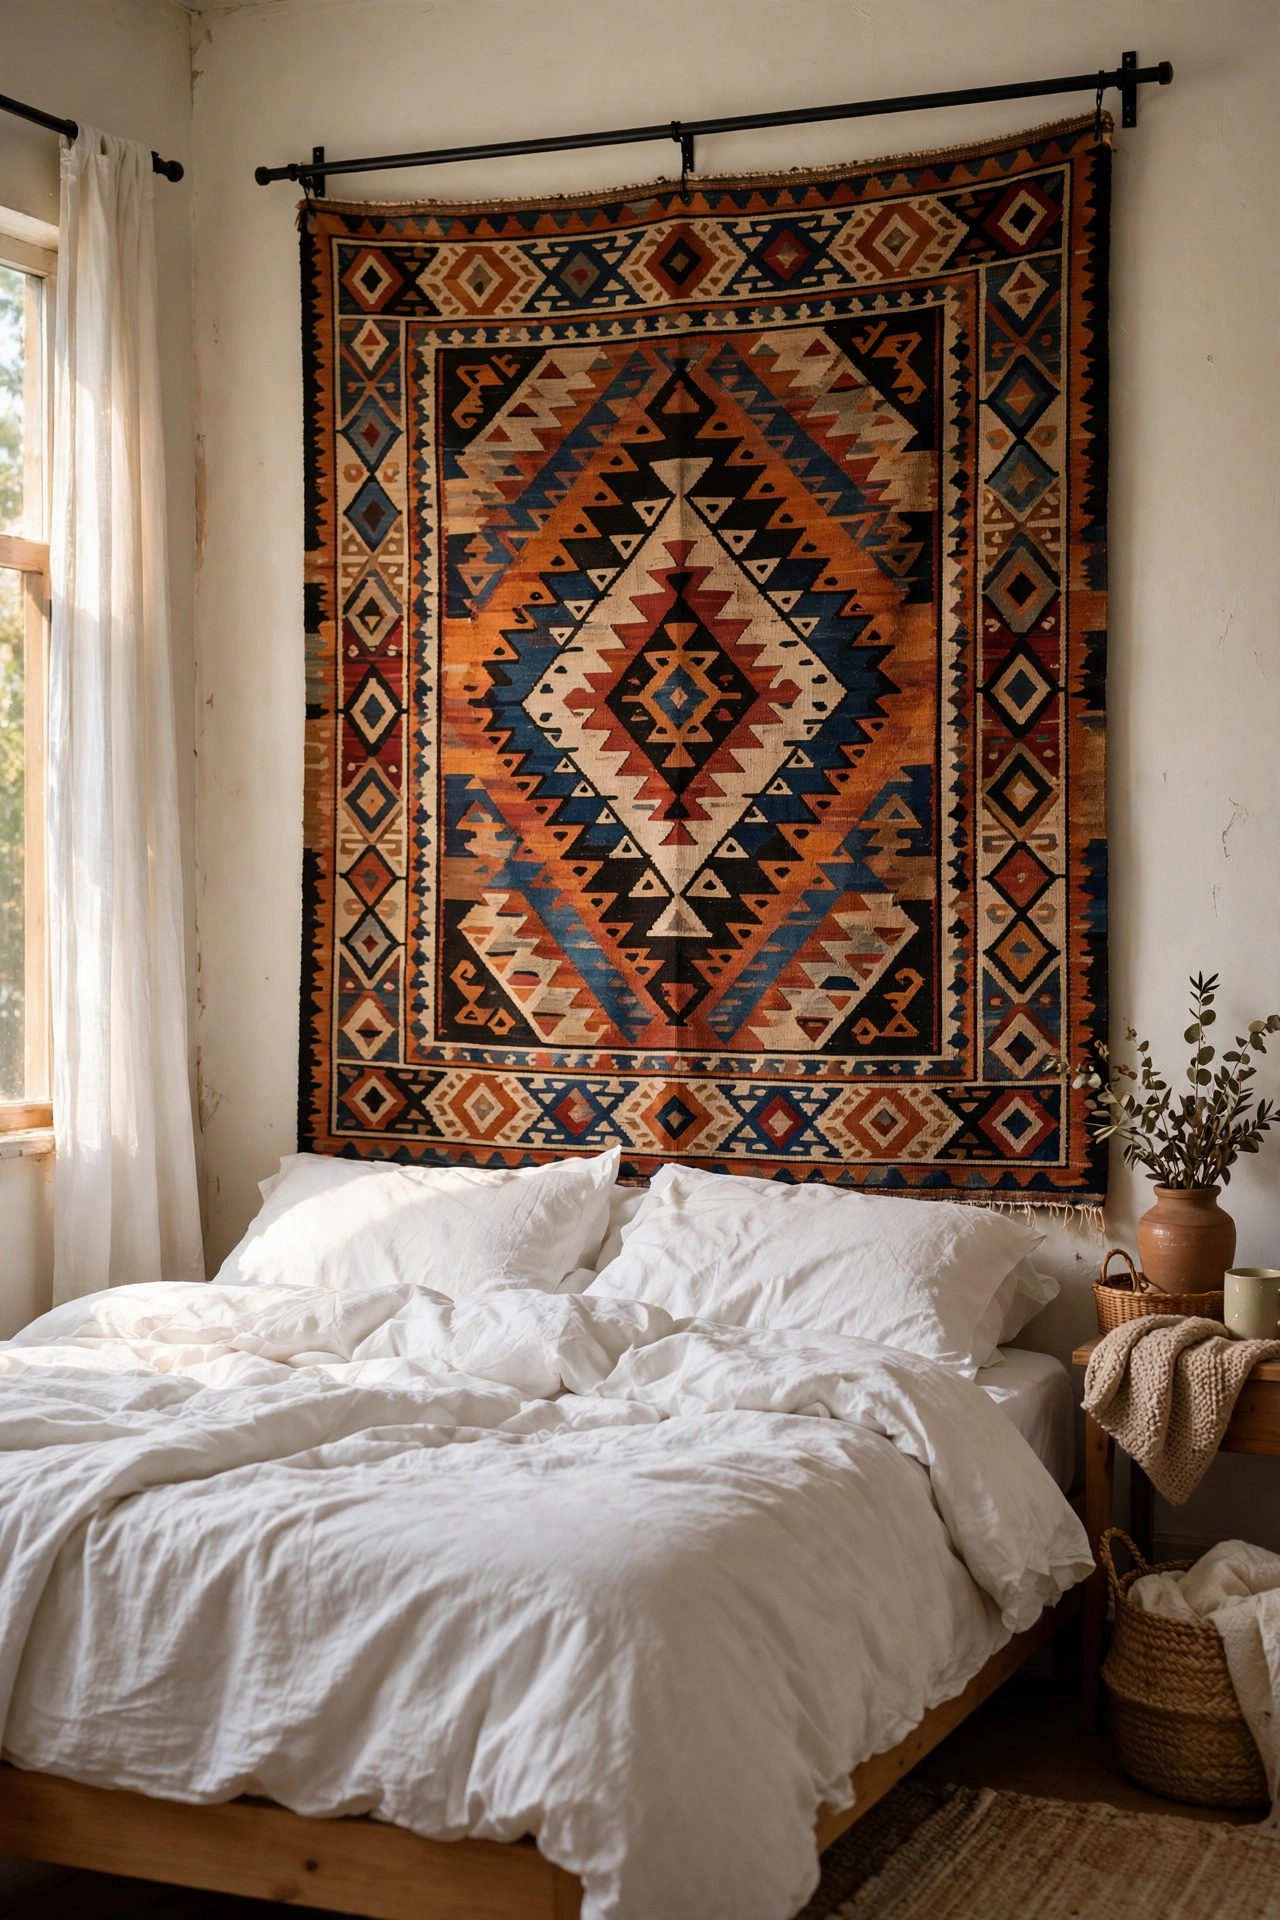
A large tapestry or woven throw hung from a curtain rod works as a soft patterned headboard. I hung a 1.5-metre kilim-style throw from a black metal rod mounted 20 centimetres above my pillows. The pattern does all the decorating, so keep everything else plain. Iron or steam the textile first so it hangs flat, because fold lines from packaging look cheap. I chose one with a border pattern, which frames the bed like a picture. Change it with the seasons if you like variety.
Cost: ~$25-40 | Time: 30 minutes
Pro tip: Textile headboards need a firm anchor: use a proper curtain rod with centre support brackets, not adhesive hooks. A sagging tapestry behind the bed ruins the effect faster than anything else on this list.
19. Behind-the-Bed Bookshelf Headboard
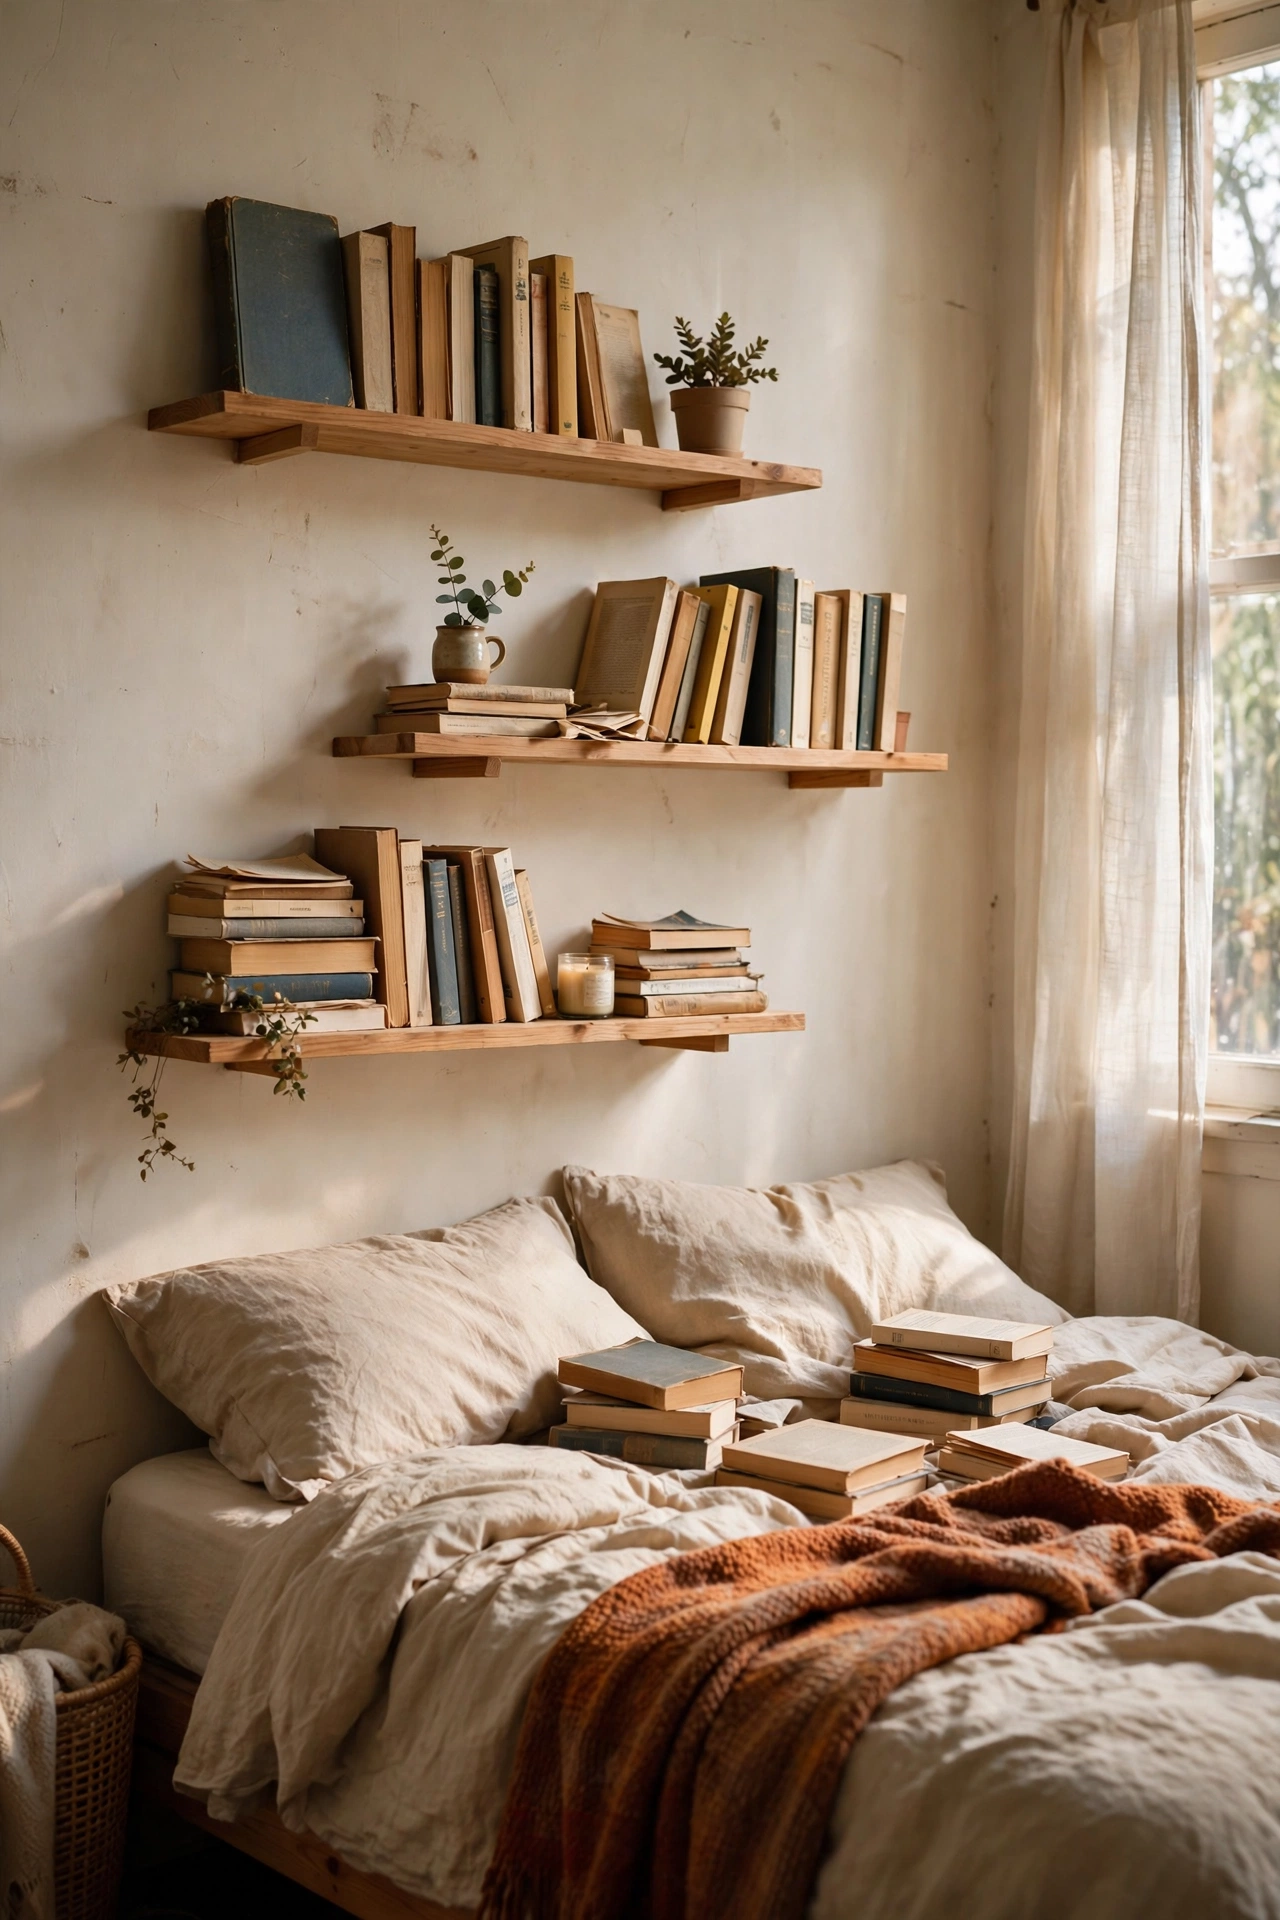
A tall, shallow bookshelf spanning the width of the bed is a headboard for readers. I mounted three 20-centimetre-deep floating shelves in a row at staggered heights behind my bed and filled them with books and one small plant. The lowest shelf sits just above pillow height so nothing topples onto the bed. I fixed each shelf into studs with long screws. Keep the styling sparse: a full shelf of books is cosy, but a crammed one feels like it might fall on you.
Cost: ~$35-50 | Time: 2 hours
20. Wicker Room Divider Headboard
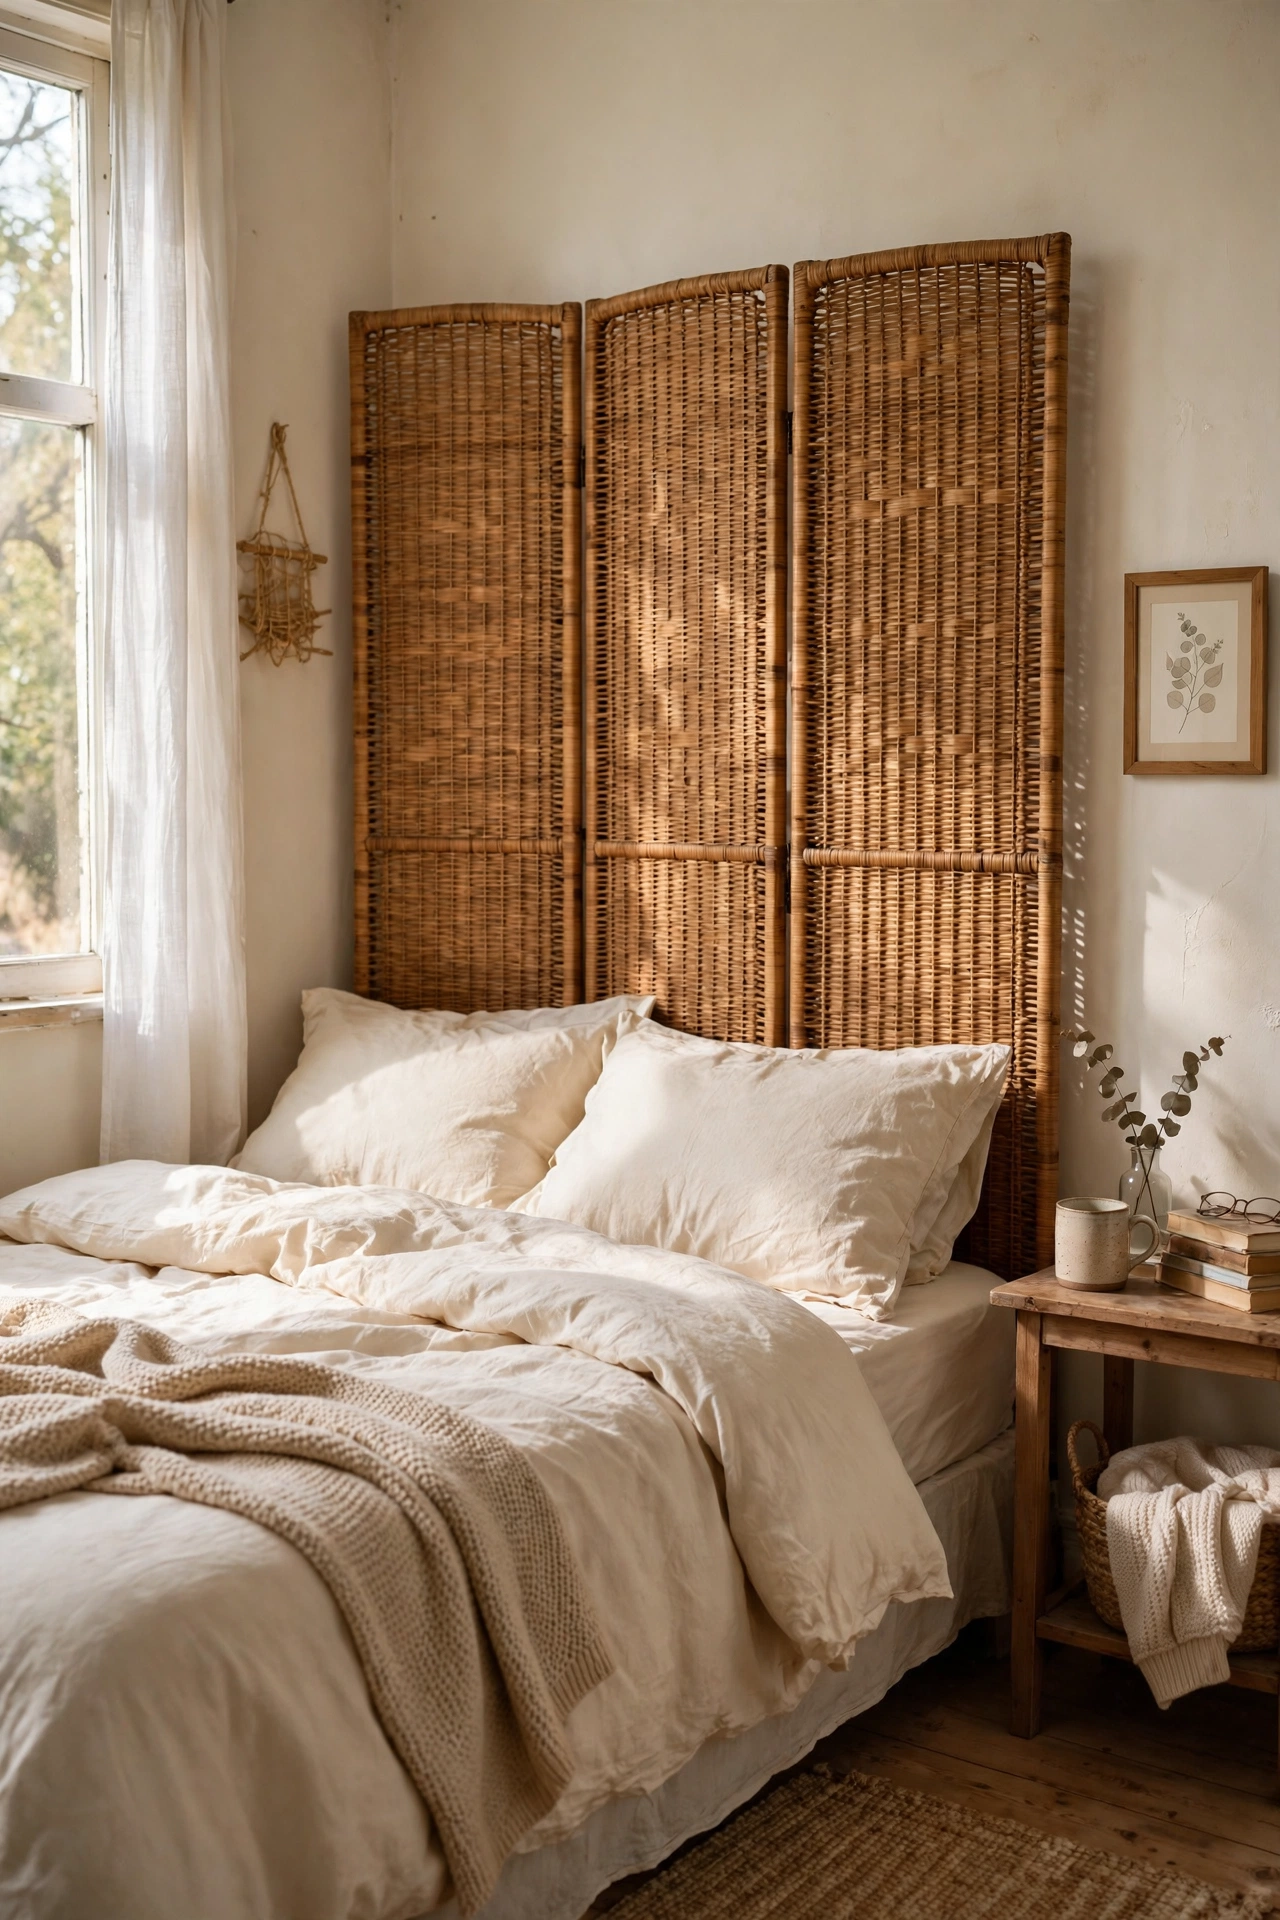
A folding wicker screen opened flat behind the bed makes a headboard with lovely texture. I found a three-panel rattan screen for $30 at a flea market, opened it fully, and secured it to the wall with small brackets. The woven panels filter light and add warmth. Make sure it stands perfectly flat against the wall, because any bowing forward looks unstable. I wedged felt pads behind the panels to keep them quiet. This is ideal for renters since it needs only two tiny brackets.
Cost: ~$30-45 | Time: 45 minutes
21. Wingback-Style Upholstered Headboard
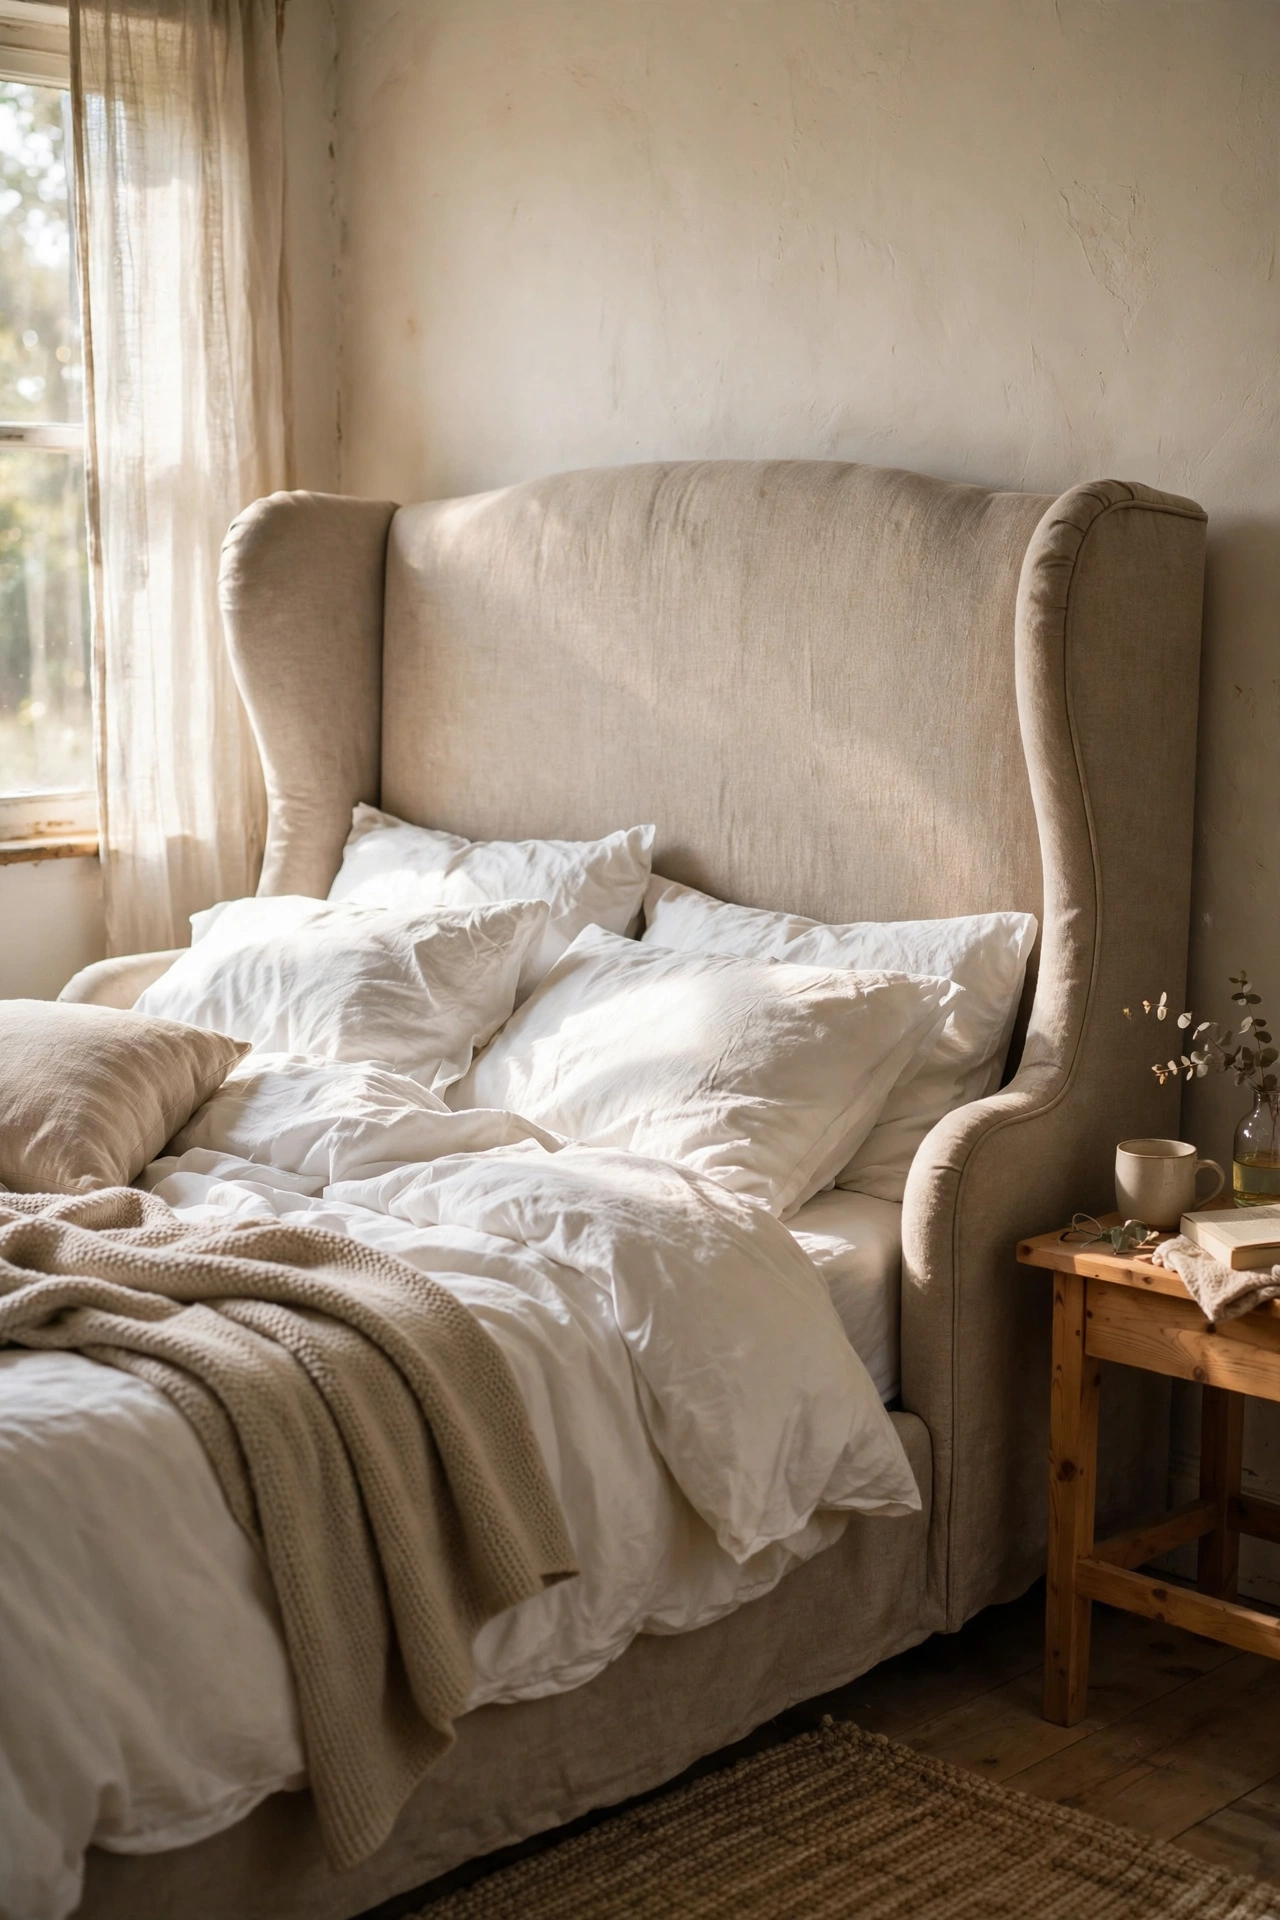
You can build the wingback silhouette with plywood side wings angled forward from the main panel. I cut the main panel plus two 30-centimetre side wings, joined them with hinges at a slight angle, then upholstered the whole thing in oatmeal linen over foam. The wings wrap the bed cozily and look genuinely bespoke. Upholster each piece separately before joining, which is far easier than wrapping the assembled shape. My total was $58, and it is the piece guests photograph.
Cost: ~$50-65 | Time: 5 hours
Save this one for your weekend project list.
Pro tip: Wingback and tall headboards suit rooms with at least 2.4-metre ceilings. In a room with low ceilings, keep the headboard under 1.2 metres high or the proportions will feel squashed.
22. Geometric Plywood Inlay Headboard
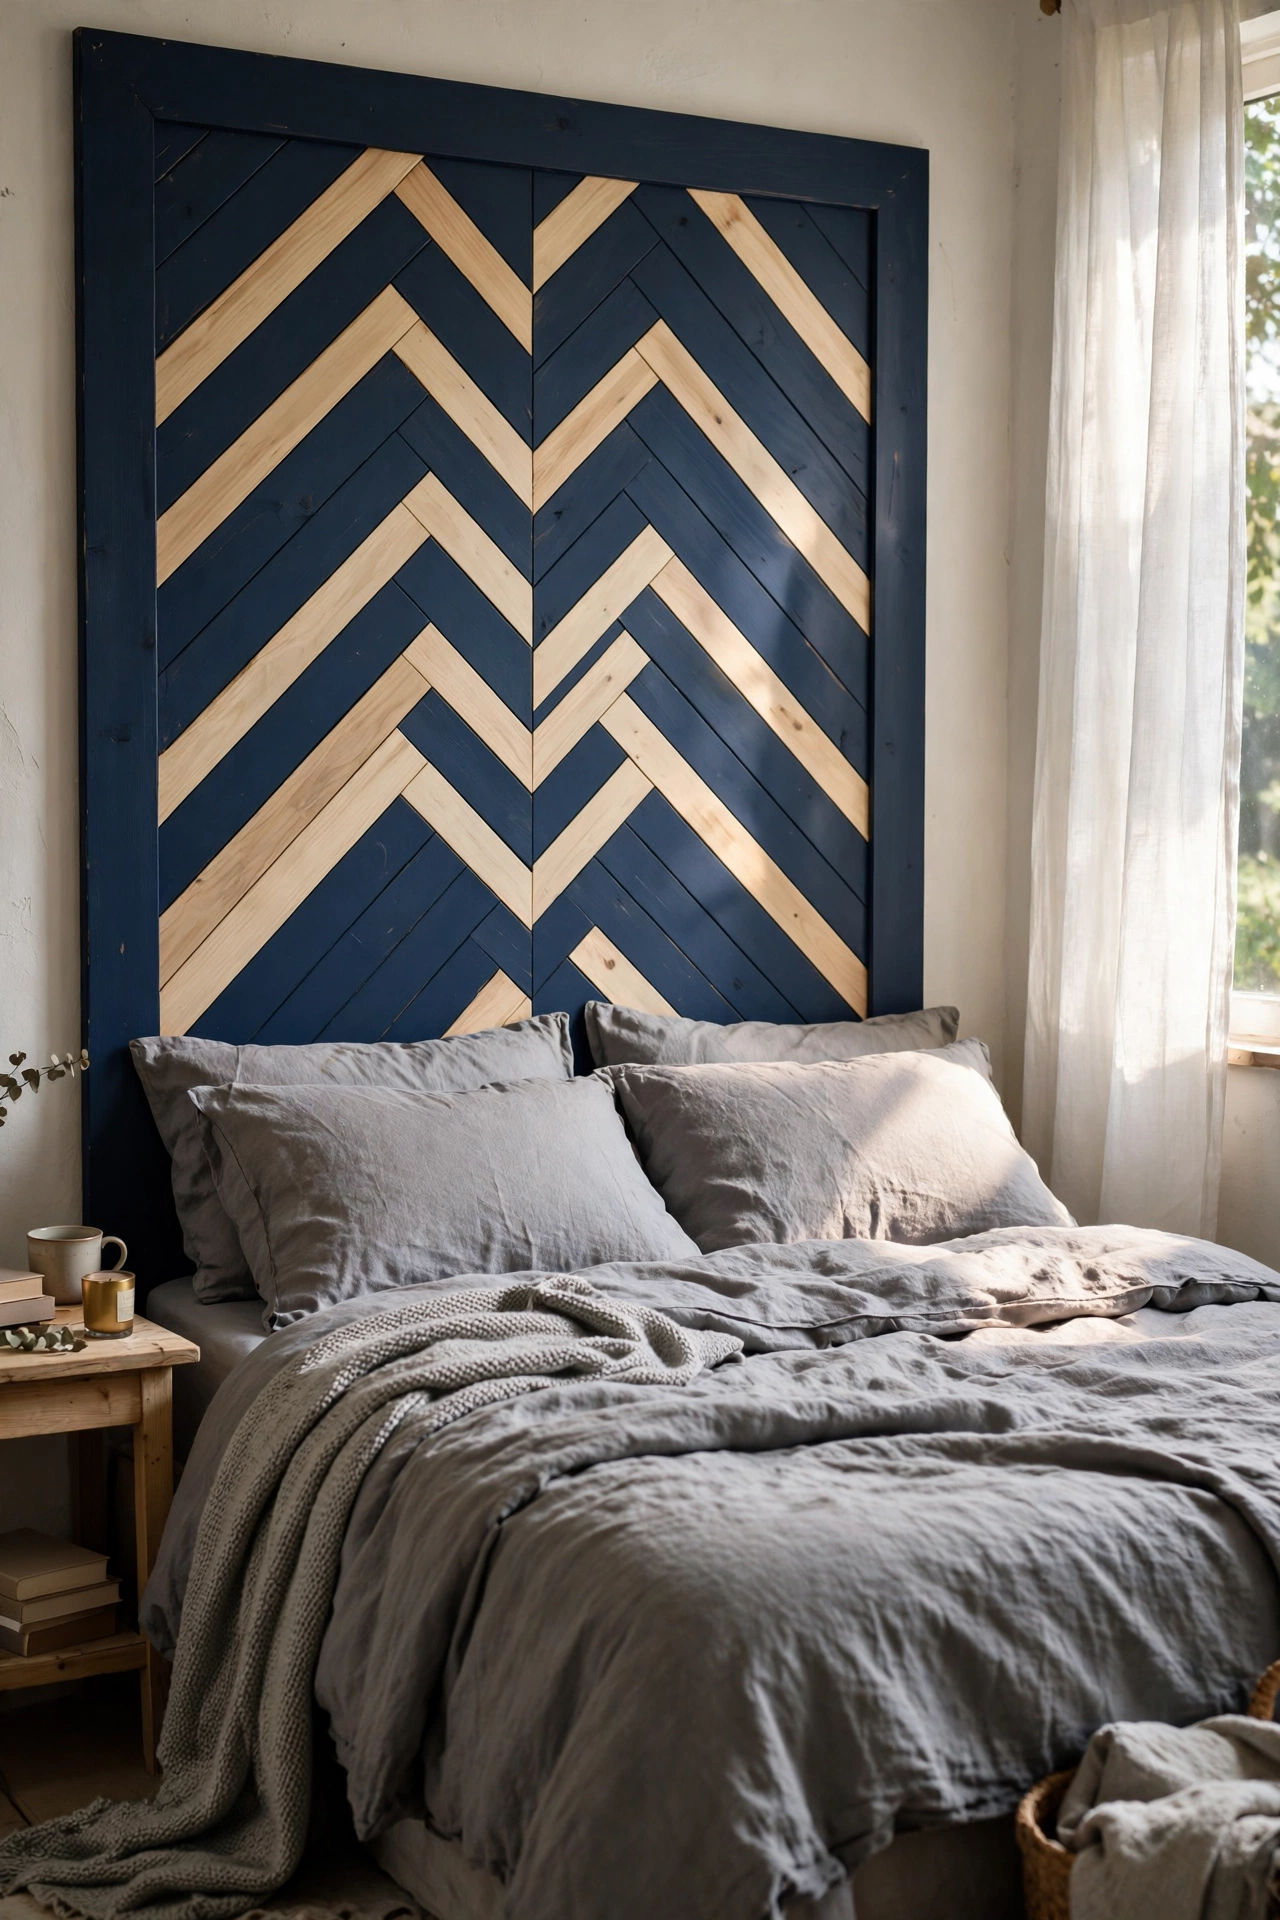
Thin plywood strips arranged in a geometric pattern on a painted back panel look like custom joinery. I painted a plywood back deep navy, then glued 1-centimetre pine strips in a chevron pattern across it and left the wood natural. The contrast between navy and pale wood is striking. Draw the pattern in pencil first and dry-lay every strip before gluing, because glue grabs fast. I used a mitre box for clean 45-degree cuts. Sand the strips before gluing, not after.
Cost: ~$30-40 | Time: 5 hours
23. Live-Edge Slab Headboard
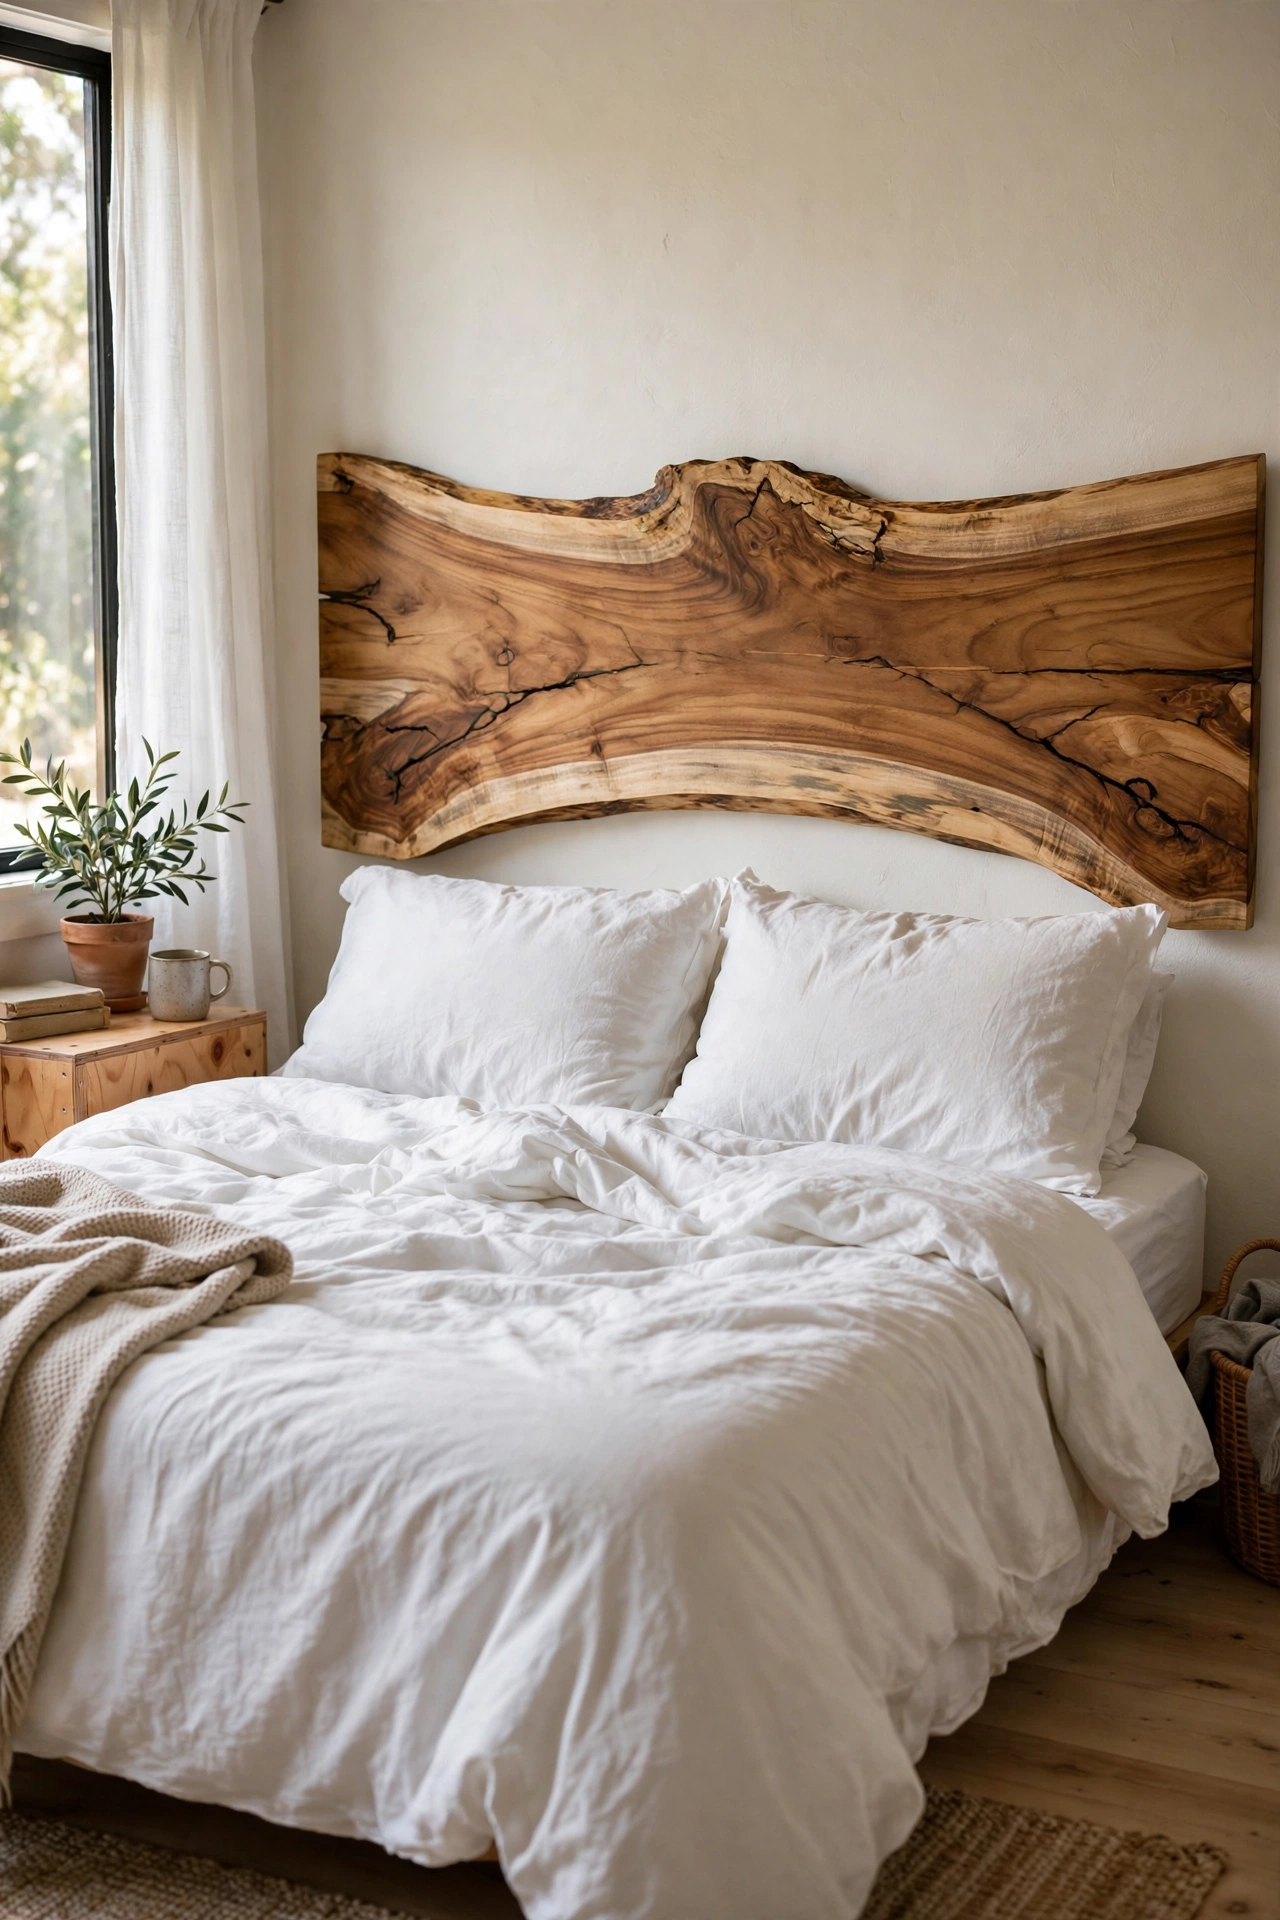
A single live-edge timber slab is the most dramatic headboard on this list. I bought a 1.6-metre acacia slab from a local sawmill for $60, sanded it to 220-grit, and finished it with hardwax oil. The natural edge is the whole design, so choose a slab with interesting grain and minimal cracks. Fill any small cracks with dark epoxy before finishing. Mount it on a French cleat rated for twice the weight. Mine is the first thing people notice in my bedroom, and it cost less than a night out.
Cost: ~$65-80 | Time: 4 hours
More bedroom ideas on a budget: (see also: 15-diy-headboard-ideas-on-a-budget/) (see also: 15-diy-bedroom-updates-under-25-dollars/) (see also: 17-minimalist-bedroom-ideas-on-a-budget/)
Measure twice, build once, and enjoy waking up to a bedroom that looks far more expensive than it was.
