21 Dollar Store Kitchen Organization Ideas That Actually Work
I’ll be honest: the state of my kitchen cupboards used to embarrass me. Tins tumbled out every time I opened a door, the spice cupboard was a graveyard of half-used jars, and finding the cling film felt like a scavenger hunt. Then I discovered dollar store kitchen organization — and no, I don’t mean flimsy bins that crack in a month. I mean the genuinely clever hacks that cost a couple of dollars and actually hold up. I spent one Saturday and about $40 reorganising every cupboard, drawer, and shelf with dollar store finds. These are the 21 ideas that survived the test of time in my kitchen — the ones I’d buy again tomorrow.
1. Stackable Pantry Bins for Dry-Good Zones
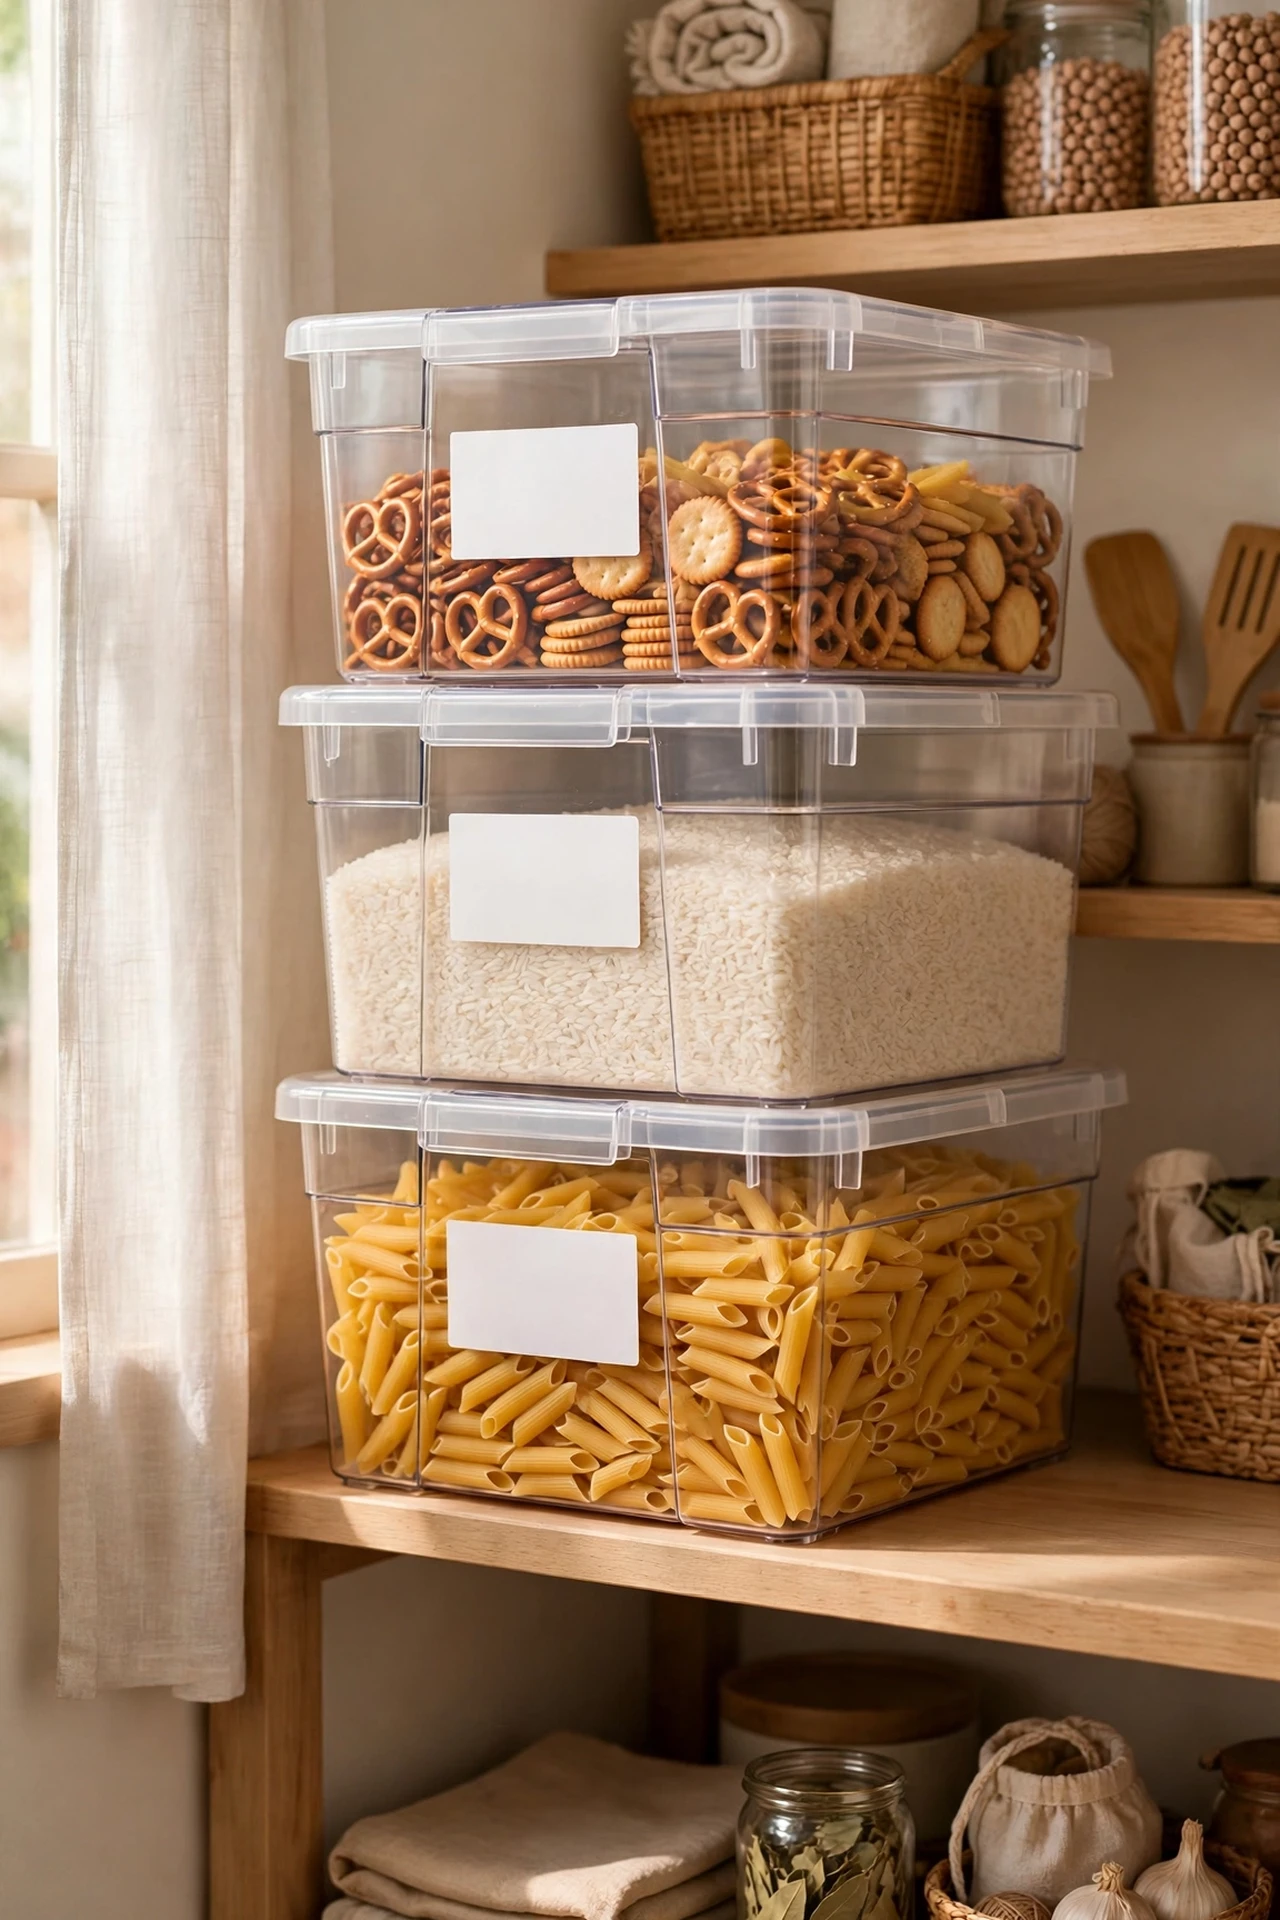
The single biggest win in my kitchen was grouping dry goods into zones with stackable dollar store bins. I bought six for the price of one fancy container set and gave each a job: pasta, rice and grains, baking supplies, snacks, tins, and breakfast bits. Here’s the method: pull everything off one shelf, toss what’s expired, group what’s left by category, then drop each group into a bin. The stacking part matters — it doubles your shelf space overnight. I tried this on a rainy Saturday and found three half-open boxes of the same crackers hiding in different spots. The mistake to avoid is buying bins before you declutter; measure first, shop second, and label everything or the zones collapse within a week. If your pantry is on the small side, pair this with (see also: pantry-organization-ideas-for-small-pantries).
Cost: ~$7.50 | Time: 45 minutes
2. Tension Rod Under the Sink for Spray Bottles
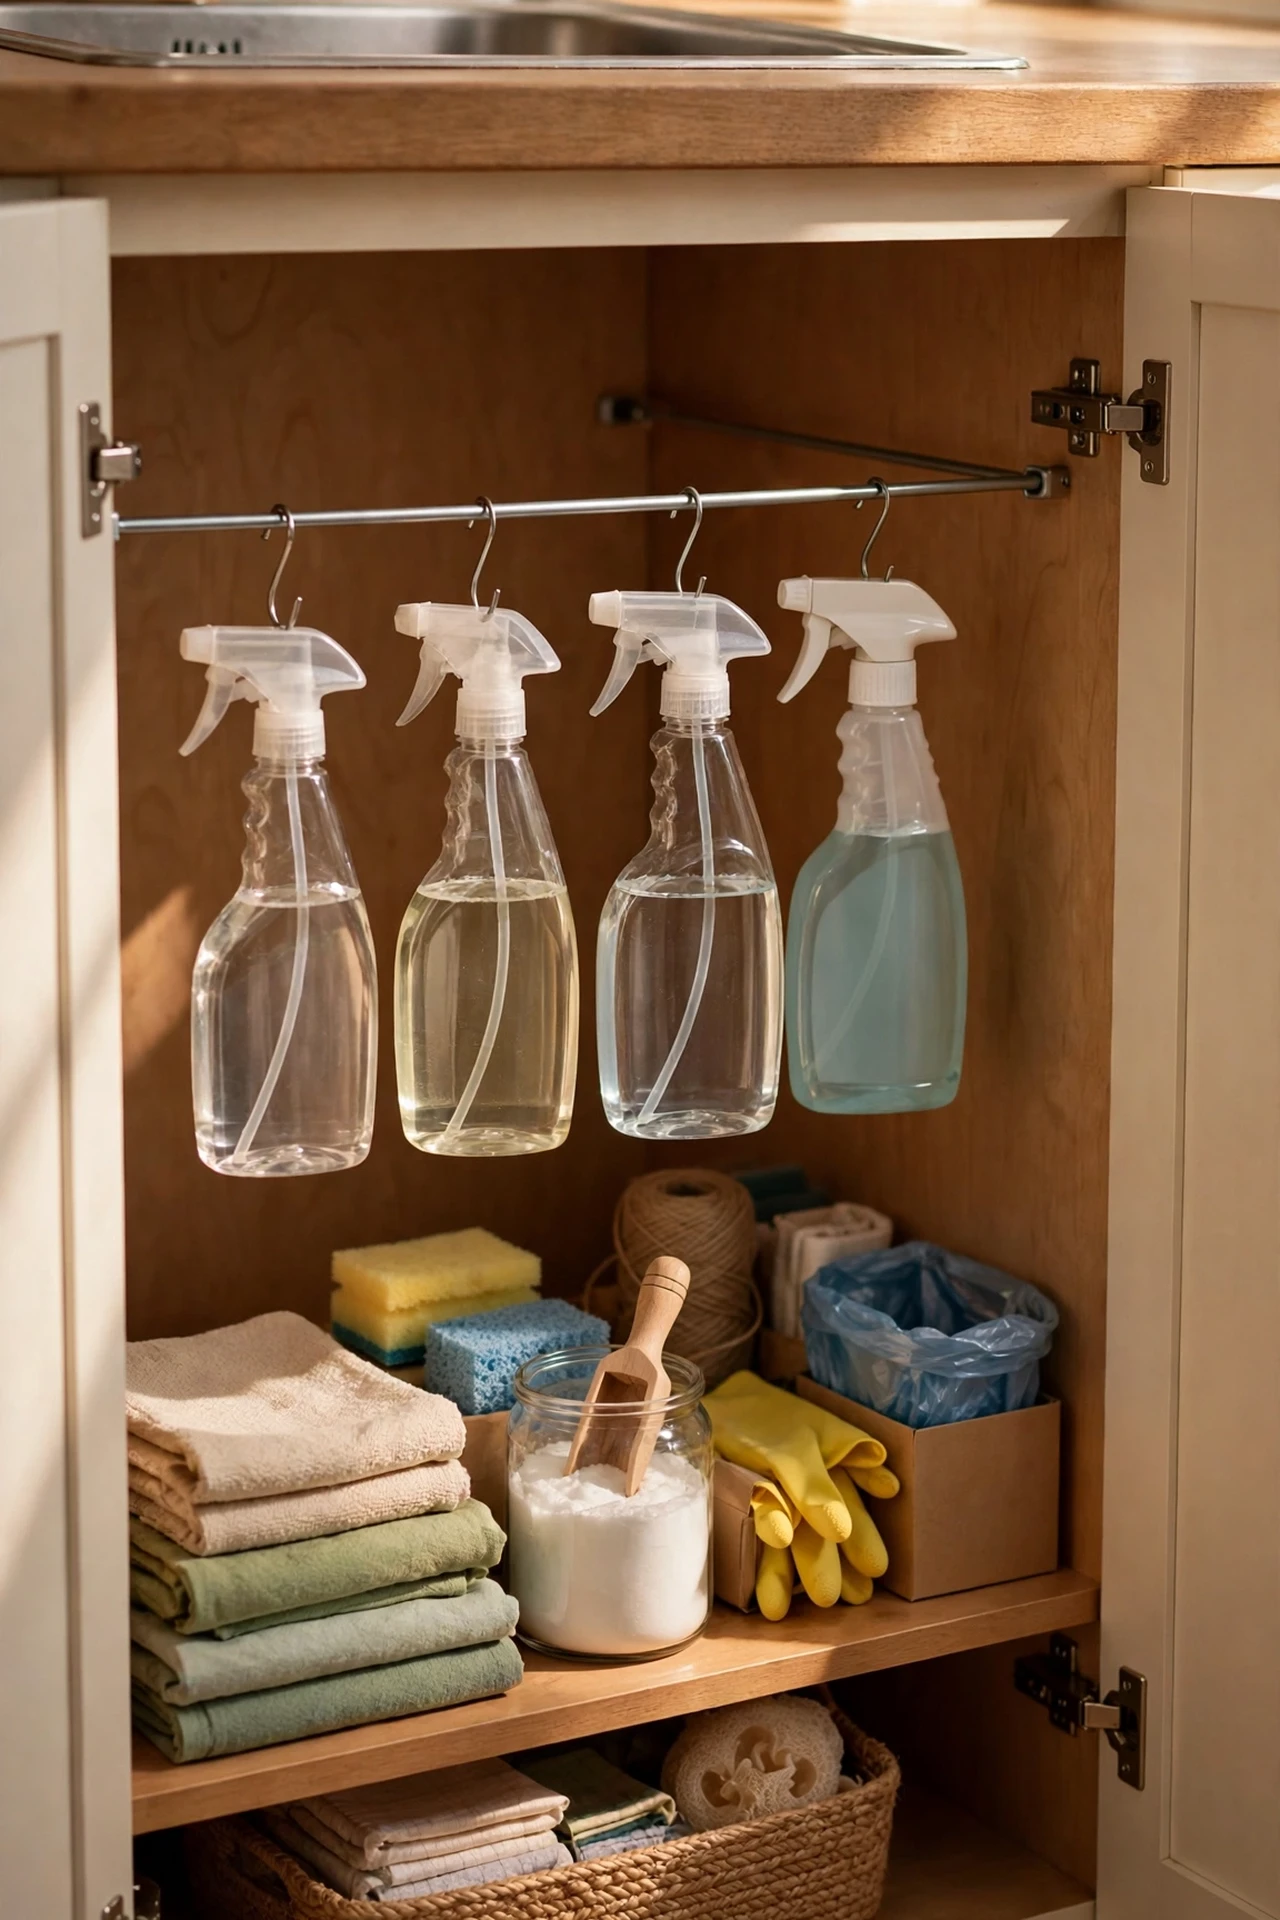
The cabinet under the sink is the Bermuda Triangle of kitchens — bottles vanish into the dark around the pipes. A cheap tension rod fixed mine completely. Twist it to fit snugly across the cabinet just below the top, then hang your spray bottles by their triggers along the rod. Suddenly every bottle is visible and grabbable, and the floor of the cabinet is free for bigger things like the dustpan or spare sponges. I tried this and went from a swampy pile to an actual system in ten minutes. The mistake to avoid is overtightening the rod — yank a bottle too hard and the whole thing pings off. Snug is enough; it just needs to hold light bottles.
Cost: ~$1.25 | Time: 10 minutes
3. Mini Bins to Tame the Junk Drawer
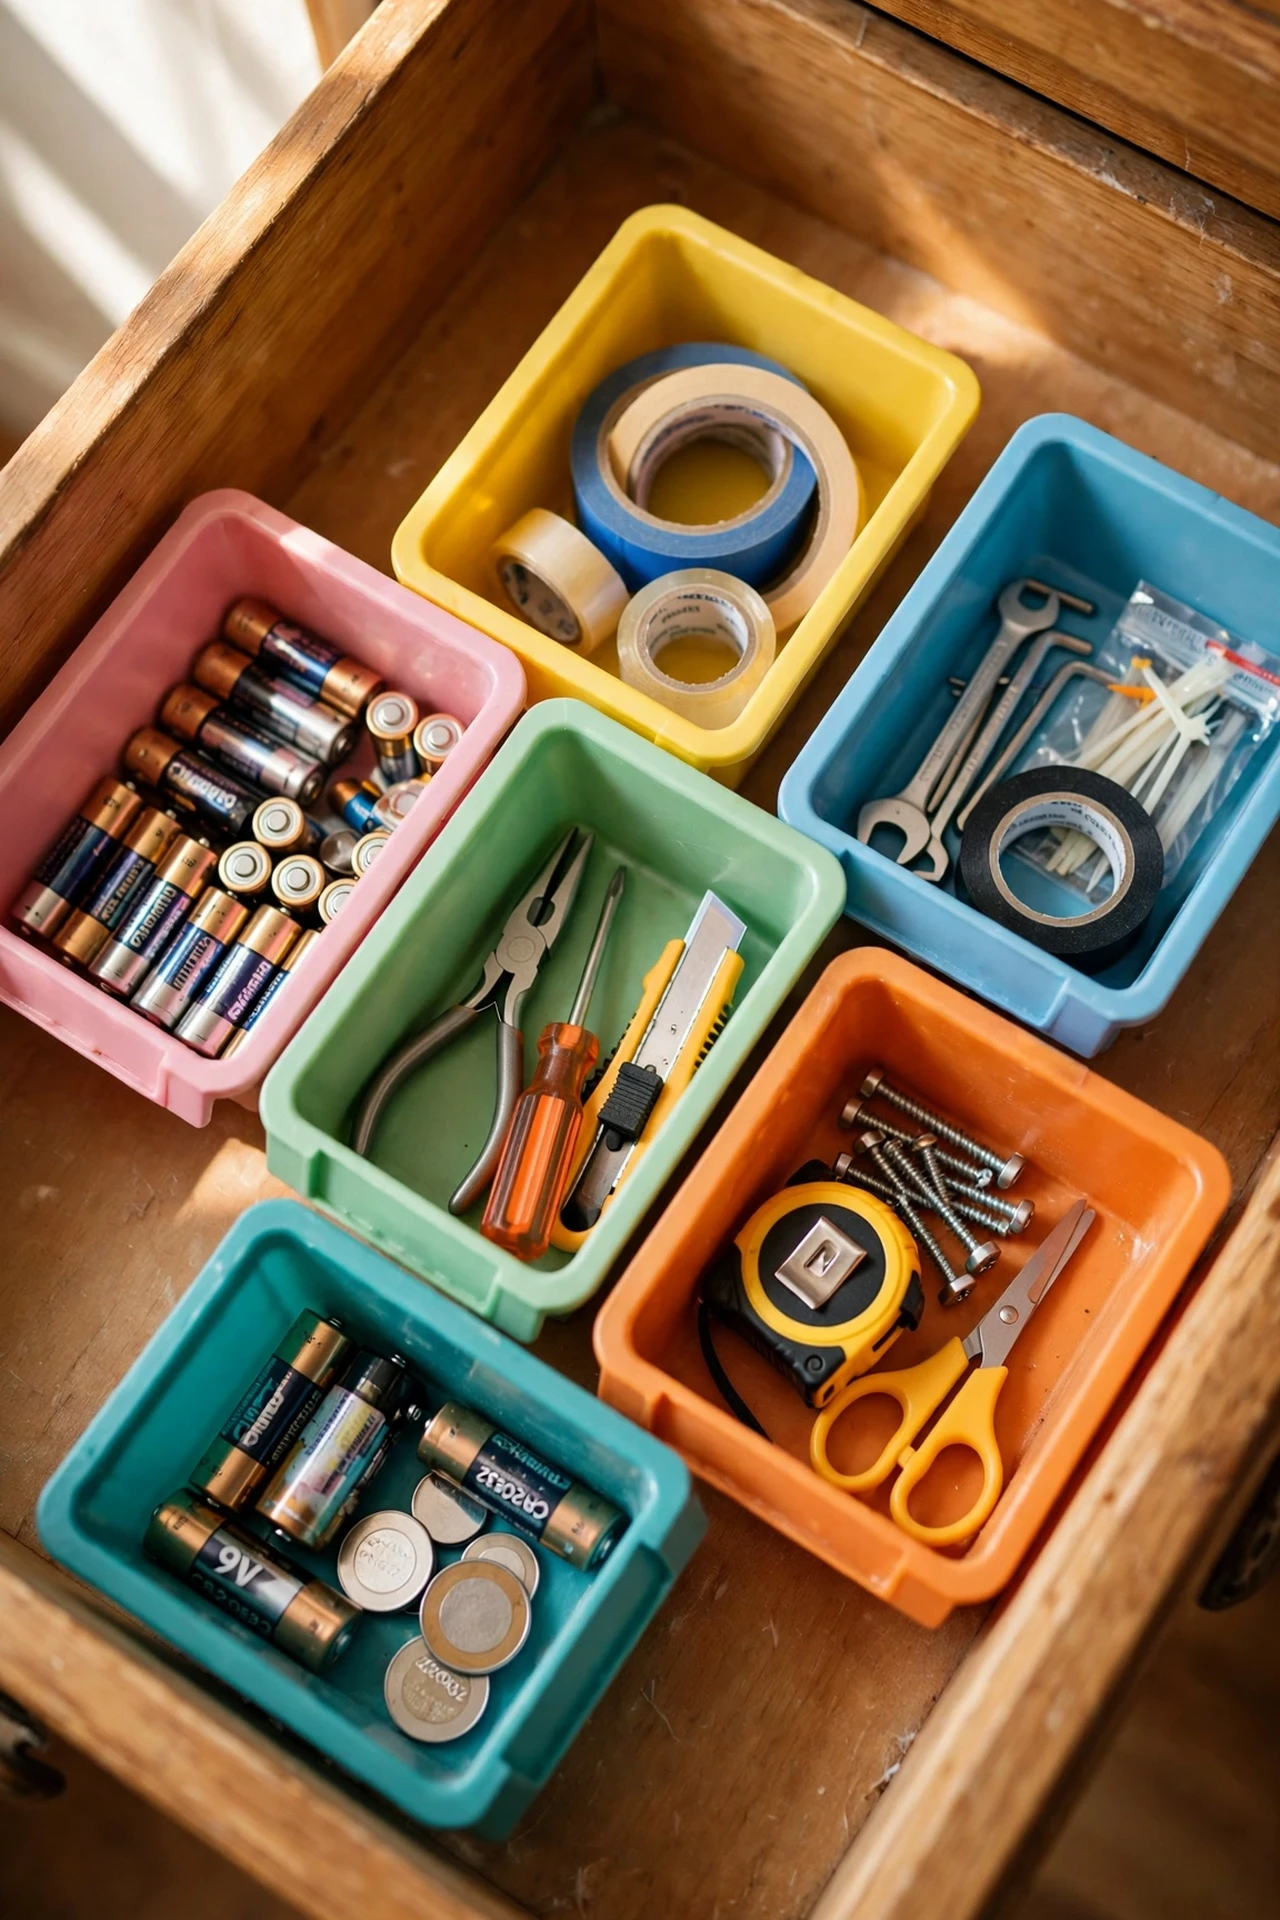
Every kitchen has one: the drawer of batteries, takeaway menus, and mystery keys. Three mini dollar store bins turned mine from chaos into something I can open without shame. The steps are simple: empty the whole drawer onto the counter, bin what belongs elsewhere, then give each category its own mini bin — tools, batteries and tape, and the actually useful odds and ends. The bins stop everything migrating into one tangled layer, which is the real junk-drawer disease. I tried this and realised half the drawer was rubbish I’d been shuffling around for years. The mistake to avoid is making the categories too cute — “miscellaneous” is where organisation goes to die, so keep it to three honest groups.
Cost: ~$3.75 | Time: 20 minutes
4. Lazy Susan Turntable in the Spice Cupboard
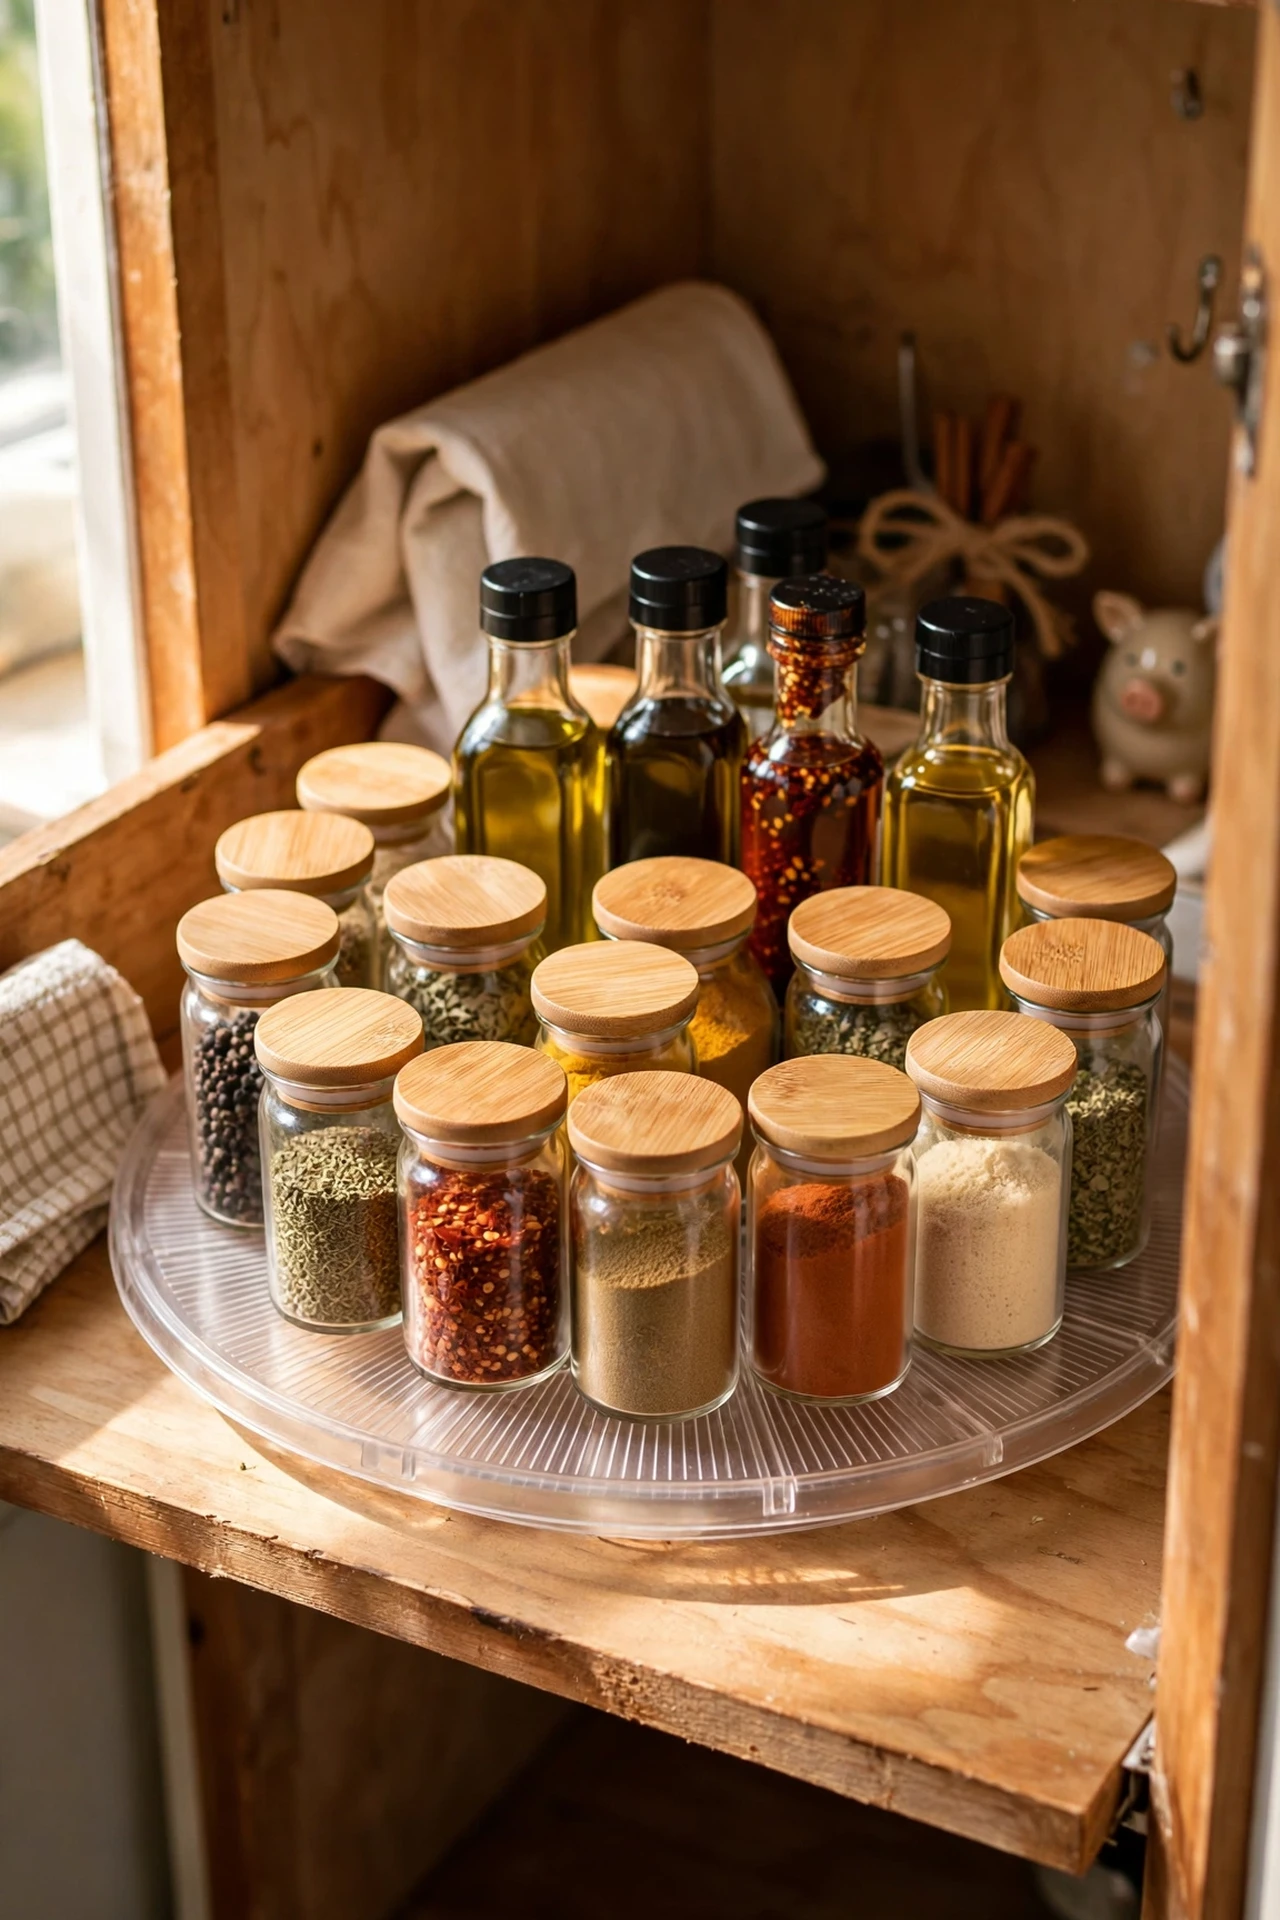
Reaching for the paprika and triggering a jar avalanche is a special kind of kitchen rage. A dollar store turntable ended mine. Pop it on the shelf, arrange your most-used spices and oils on it, and give it a spin instead of excavating. The refined version: group tall bottles in the centre, short jars around the edge so nothing topples. I keep mine in the cupboard next to the hob, and cooking genuinely feels calmer now. I tried the fancy bamboo one first and it warped in the steam; the cheap plastic one has outlasted it by two years. The mistake to avoid is overloading it — if it can’t spin freely, you’ve just built a very round shelf. Leave a finger’s width of clearance.
Cost: ~$2.50 | Time: 20 minutes
5. Over-Cabinet-Door Basket for Wraps and Foil
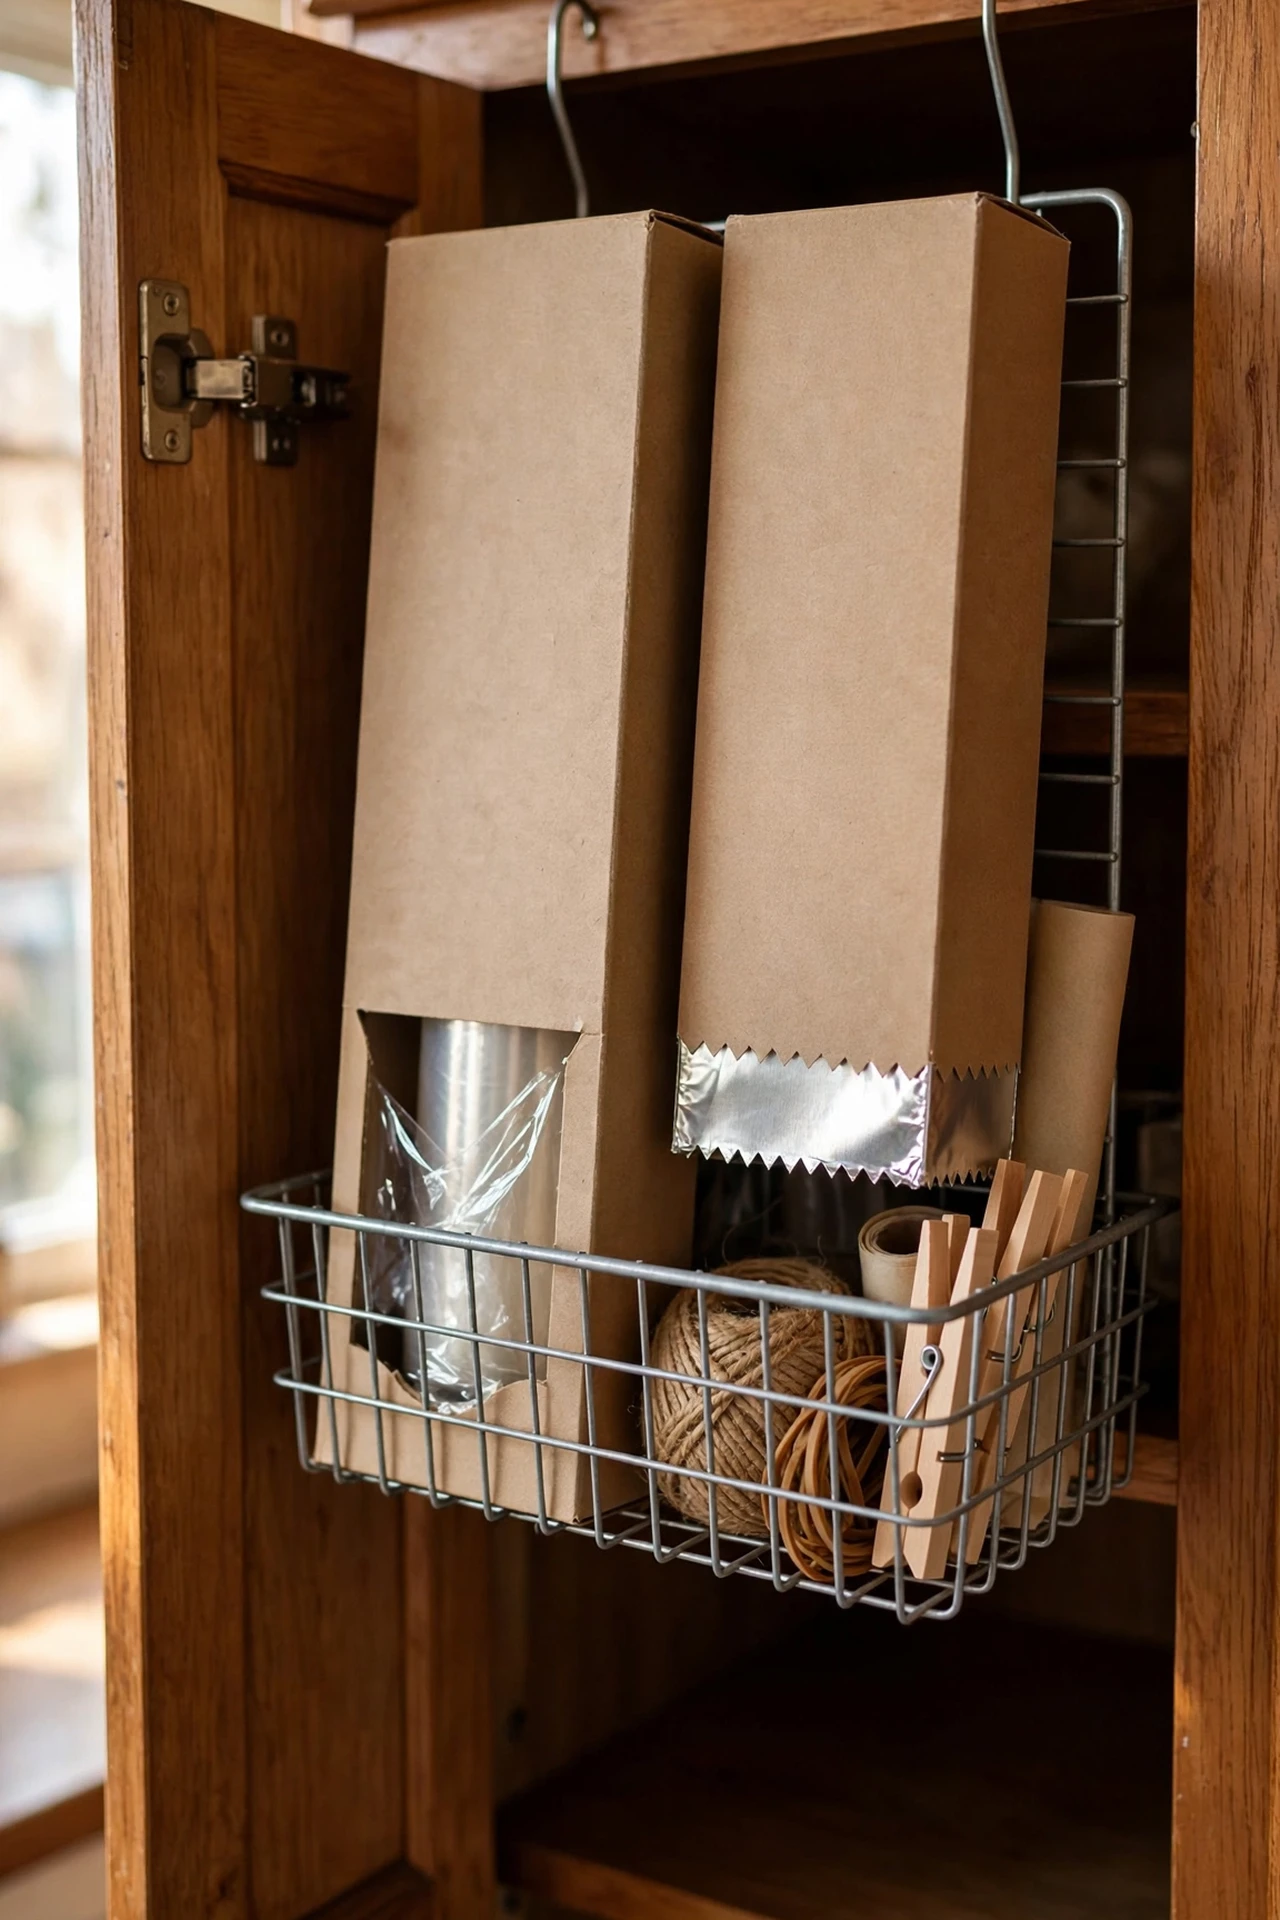
Cling film, foil, and baking paper are awkward shapes that refuse to stack, so they end up shoved wherever they fit. A wire basket that hooks over the inside of a cabinet door gives them a proper home. Measure your door first — the basket needs clearance to close — then hook it on and file the boxes upright like books. Mine lives on the door under the hob, right where I actually use the stuff. I tried this after years of the foil box launching itself at me from a high shelf, and it’s one of those fixes you wish you’d done years earlier. The mistake to avoid is hanging it on a door with a shelf directly behind it; the door won’t shut and you’ll blame the basket.
Cost: ~$5 | Time: 10 minutes
Pro tip: measure your shelves before you shop — dollar store bins come in odd sizes, and nothing stings like a bin that’s half an inch too tall for the shelf.
6. Adhesive Hooks for a Mug Rail
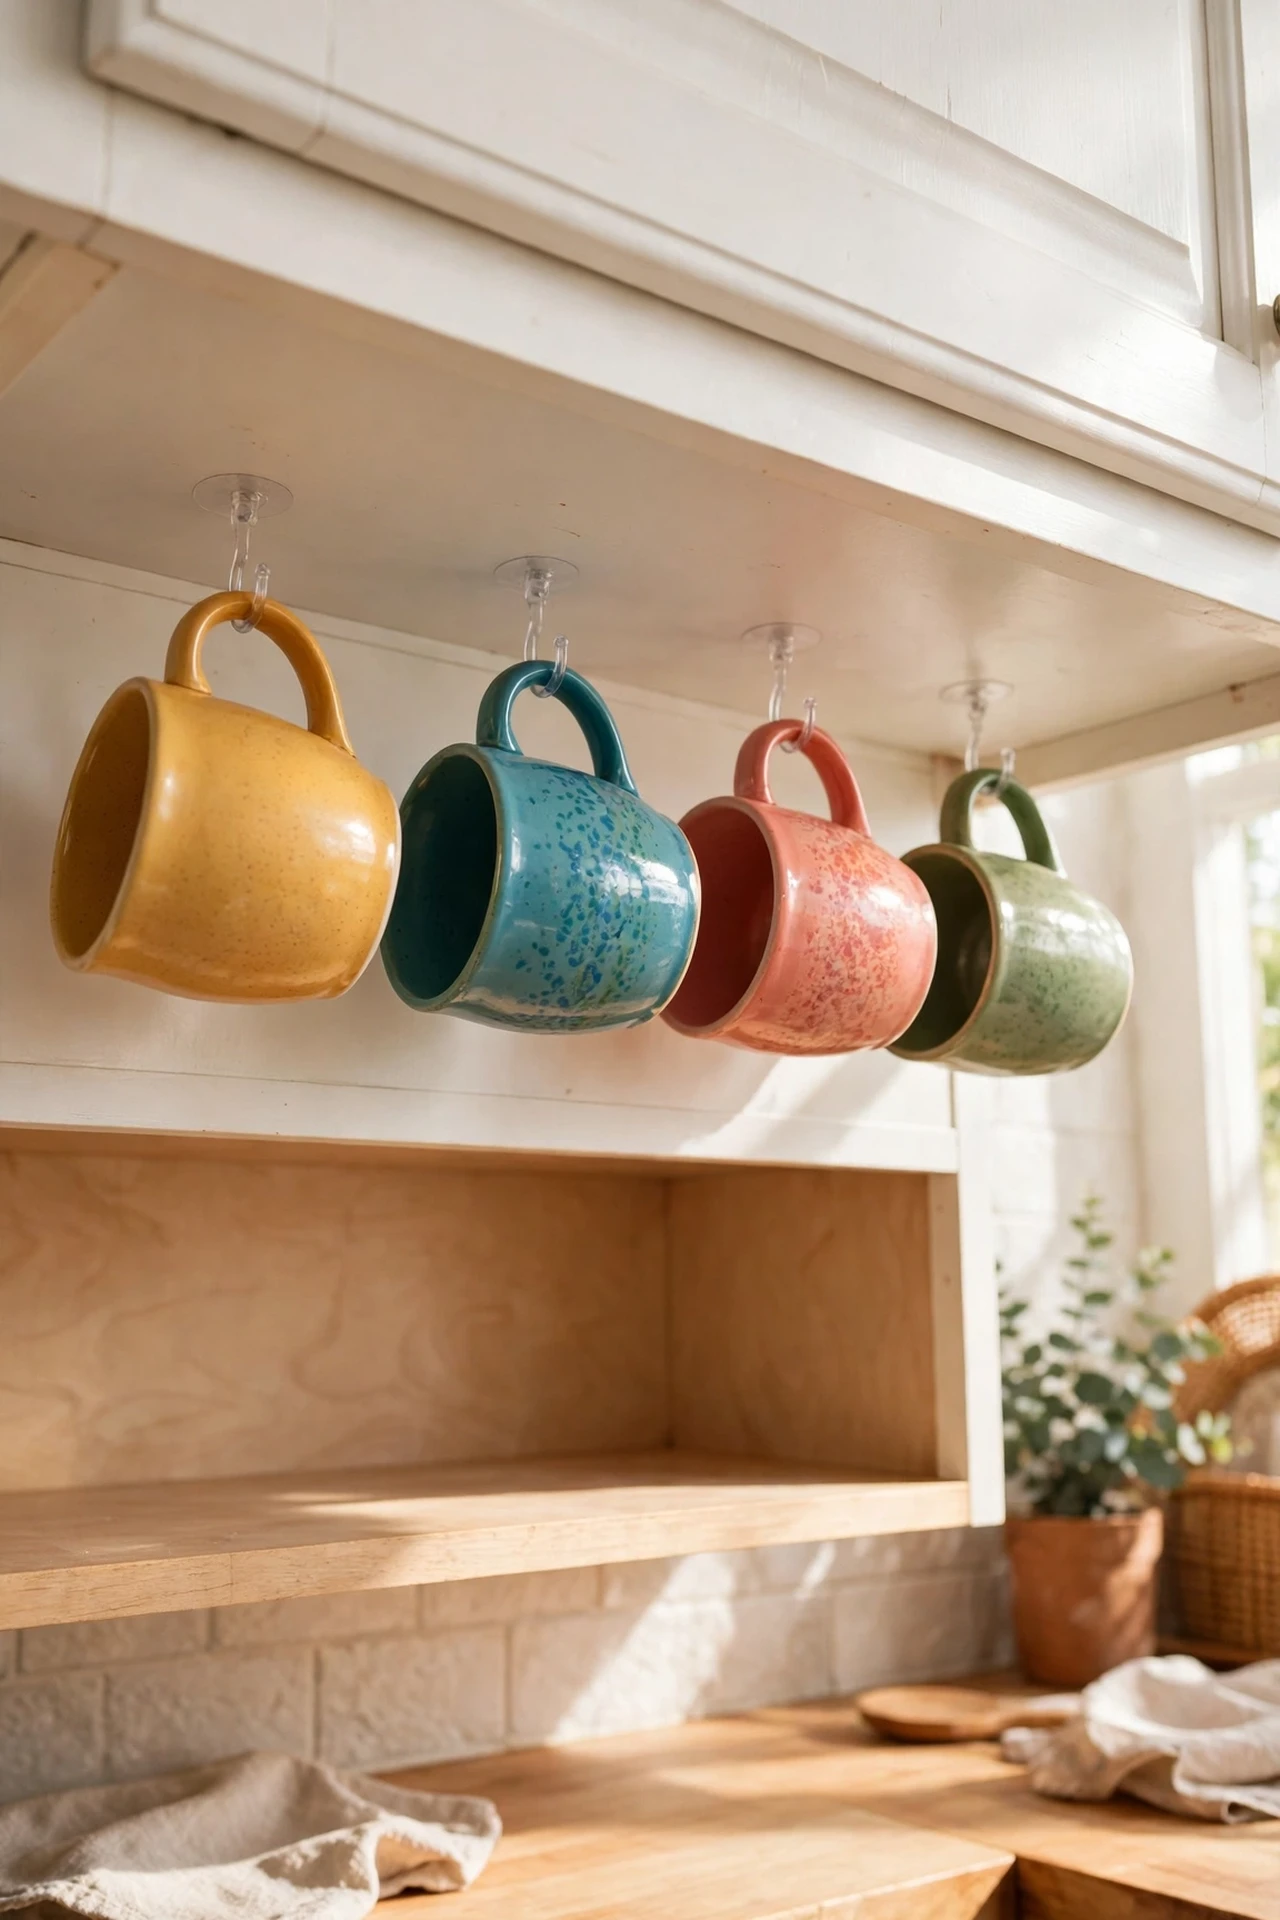
Mugs eat cupboard space for breakfast. A row of adhesive hooks stuck to the underside of a wall cabinet turned my most-used mugs into wall art and freed an entire shelf. Clean the surface with rubbing alcohol first so the hooks actually bond, press each one firmly for thirty seconds, then wait a full day before hanging anything — patience is the whole trick. Space them so the mugs don’t clink. I tried this with my four favourite mugs and the morning routine got noticeably faster; everything I reach for is right there. The mistake to avoid is hanging heavy stoneware on day one. Start with lighter mugs, and keep the chipped ones you never use in the cupboard where they belong.
Cost: ~$1.25 | Time: 15 minutes
7. File Sorter as a Pan-Lid Divider
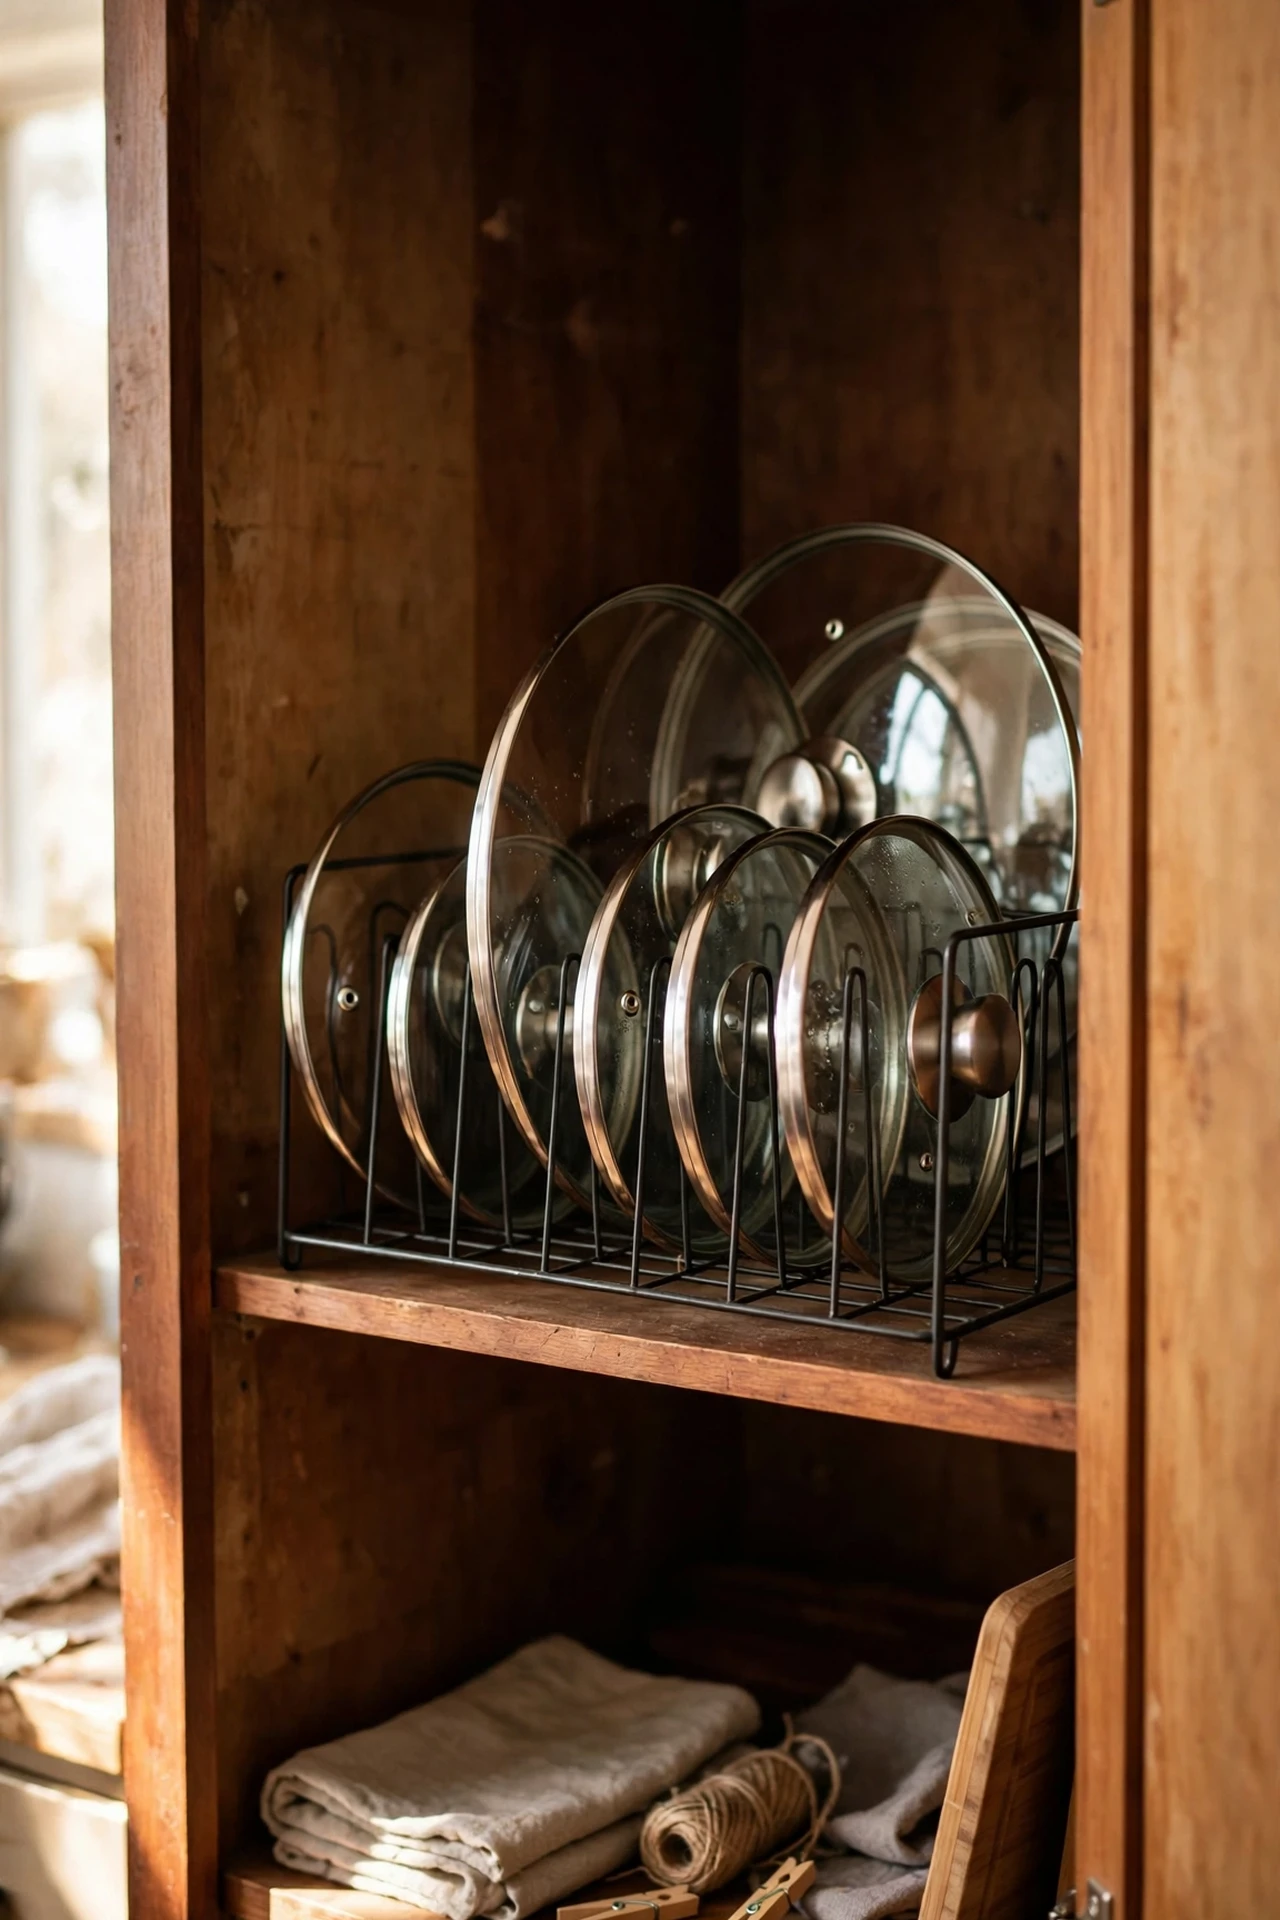
Pan lids are the worst shape in the kitchen — round, handle-y, and impossible to stack. A dollar store metal file sorter, the kind meant for desk paperwork, slots between your pans and holds every lid upright like files in a drawer. Stand it in a deep cupboard or on a low shelf, slide each lid into its own slot with the handle facing up, and the clattering pile becomes a neat little archive. I tried this after my lids staged a daily rebellion every time I opened the cupboard. The mistake to avoid is buying the flimsy wire version — go for the sturdier metal one or a heavy stockpot lid will bend it. For a dollar more, the metal sorters last years.
Cost: ~$1.25 | Time: 10 minutes
8. Shower Caddy as an Under-Sink Cleaning Station
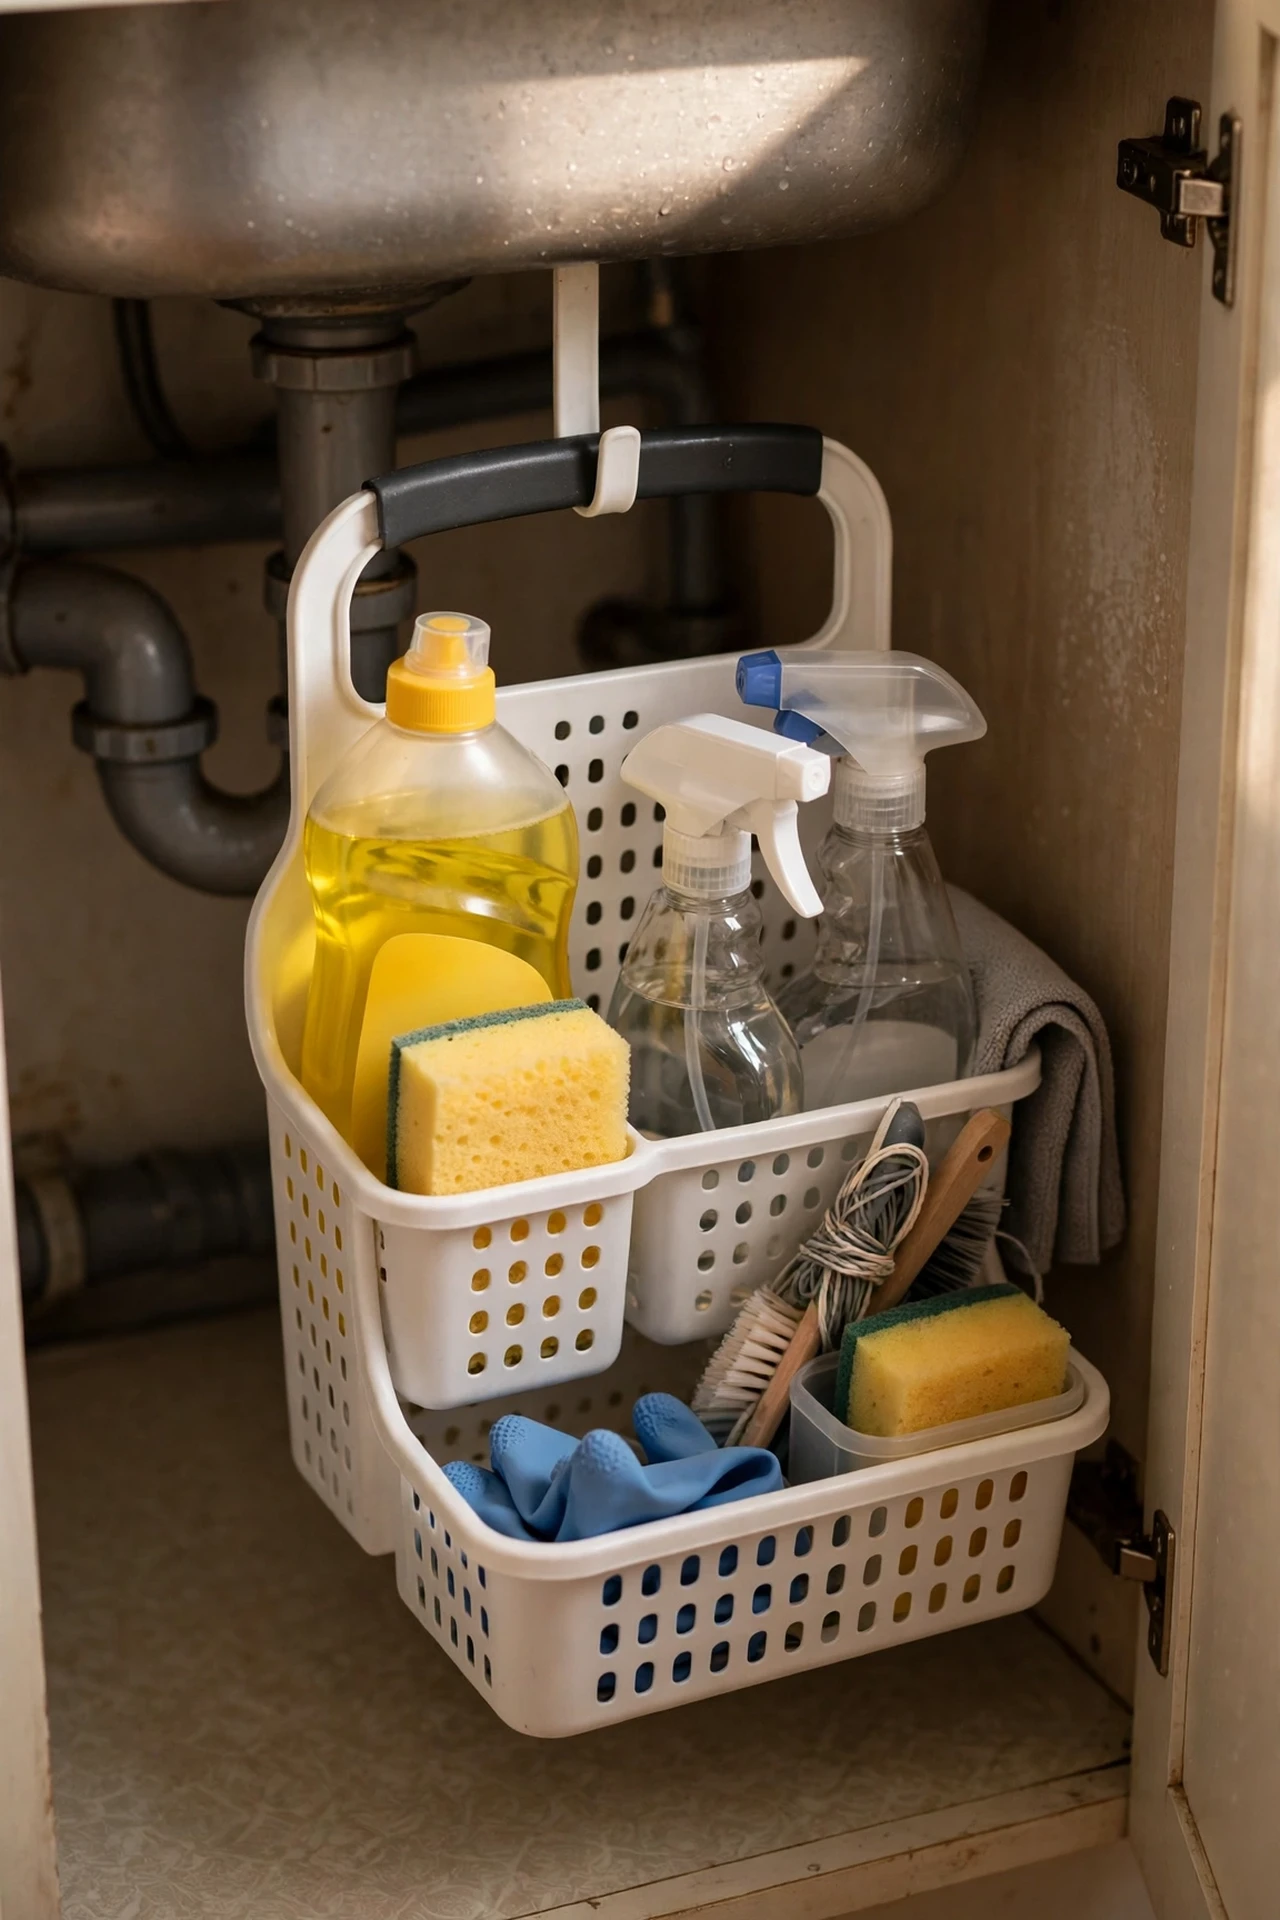
A plastic shower caddy with a handle is secretly the perfect under-sink organiser. Mine holds the washing-up liquid, sponge, descaler, and rubber gloves, and the handle means I can lift the whole station out with one hand when I need to reach the pipes. The steps: decant nothing, just group your daily-use cleaning bits into the caddy and park the rarely used stuff behind it. I tried this after one too many sessions lying on the kitchen floor fishing for the bleach. The mistake to avoid is letting the caddy become a second junk drawer — if a bottle hasn’t been touched in a month, it doesn’t earn handle privileges. Keep it lean and it stays brilliant.
Cost: ~$1.25 | Time: 15 minutes
9. Clip-On Shelf Risers for Tinned Goods
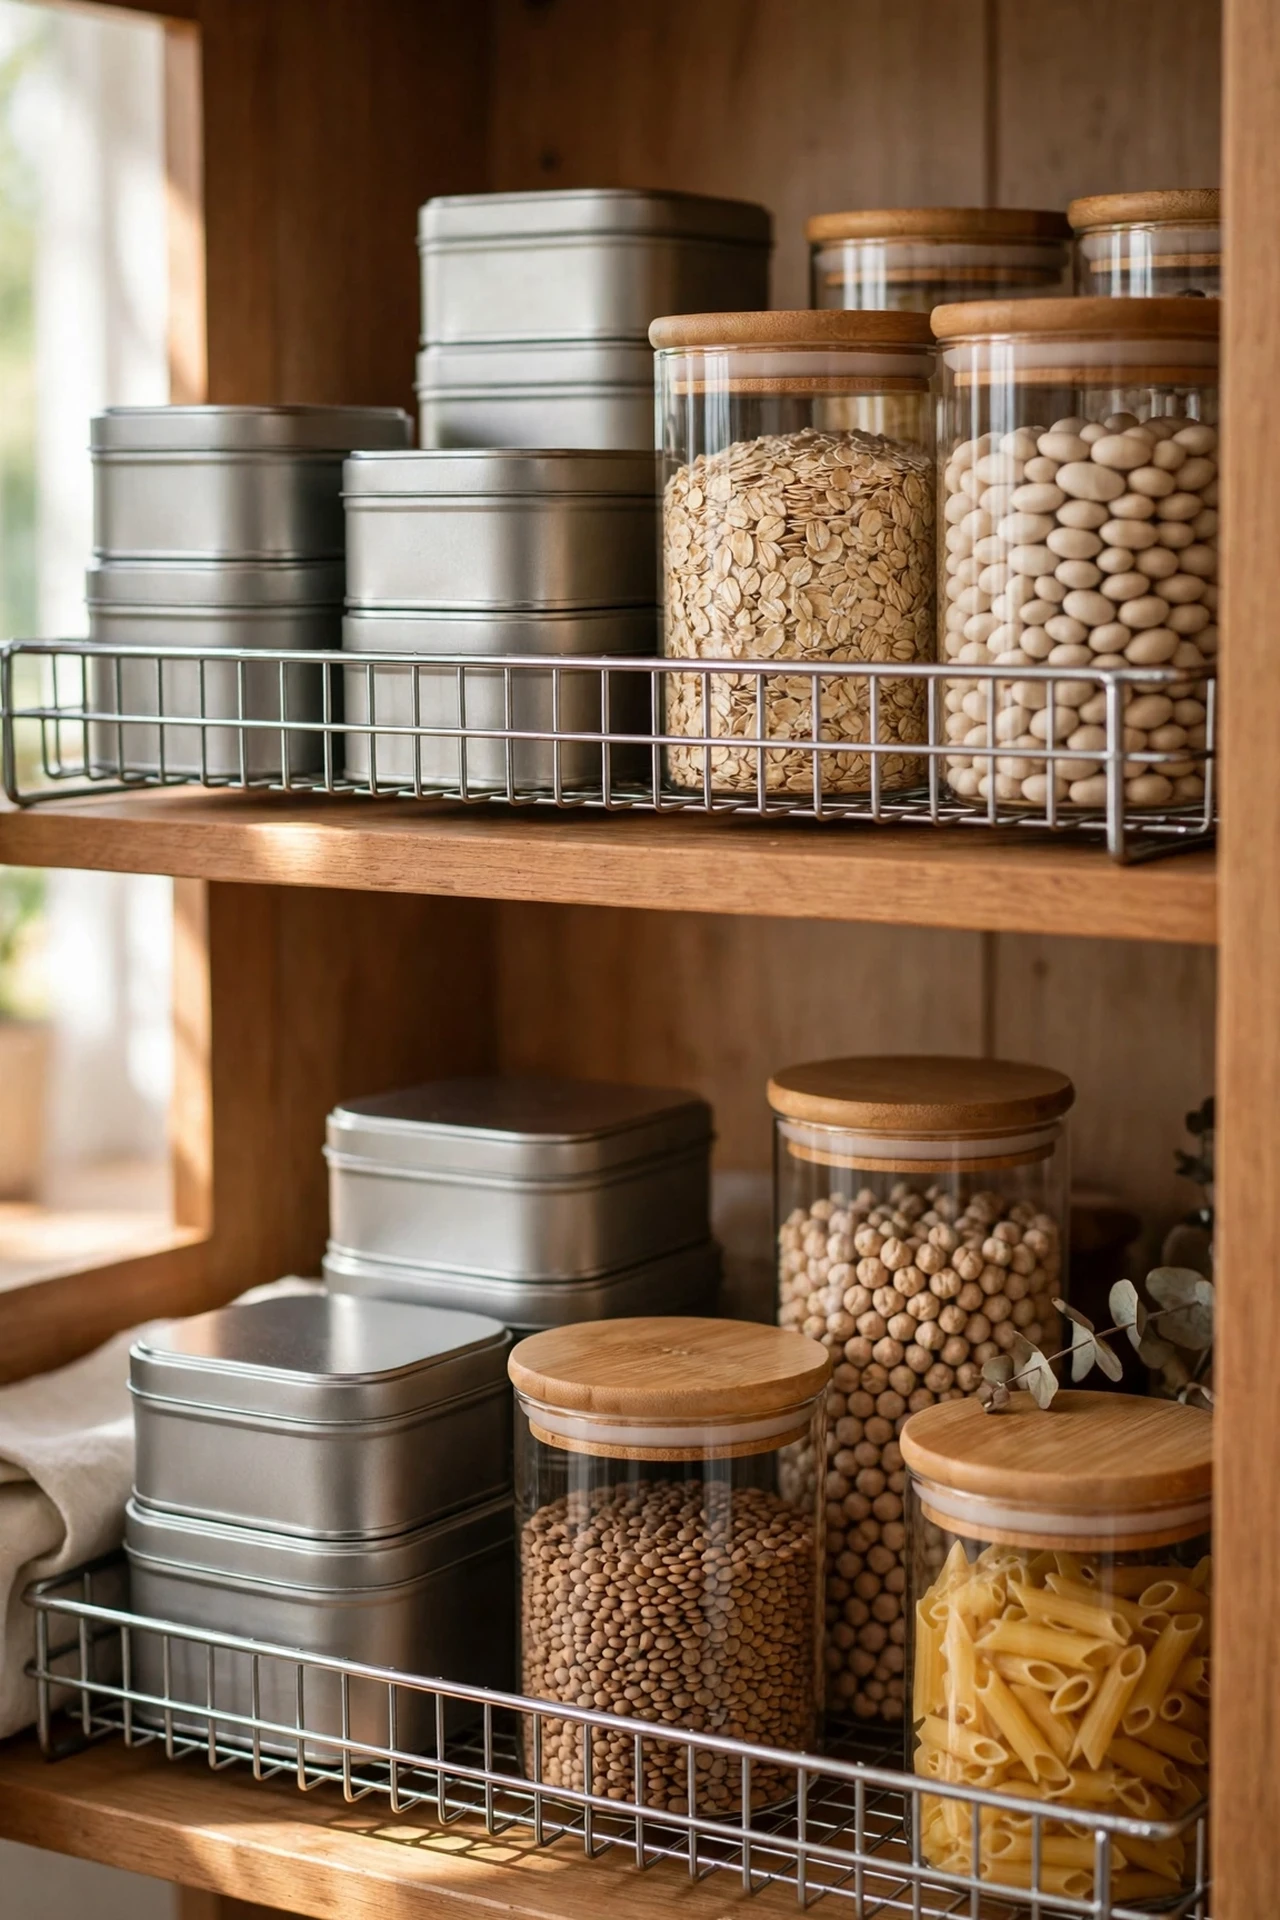
Half the height in most kitchen cupboards is dead air above short tins and jars. Clip-on shelf risers — those little wire platforms — create a second storey for a couple of dollars a pair. The method: measure your shelf height, clip the riser in, then put the tall stuff (passata, stock) on the base and the short stuff (tuna tins, small jars) up top. I doubled the capacity of my tinned-goods shelf in fifteen minutes. I tried stacking tins directly for years and paid for it every time the tower collapsed mid-reach. The mistake to avoid is placing risers where the cupboard door swings — check the clearance or you’ll be rearranging at midnight.
Cost: ~$2.50 | Time: 15 minutes
10. Magazine Holders for Cling Film and Foil Boxes
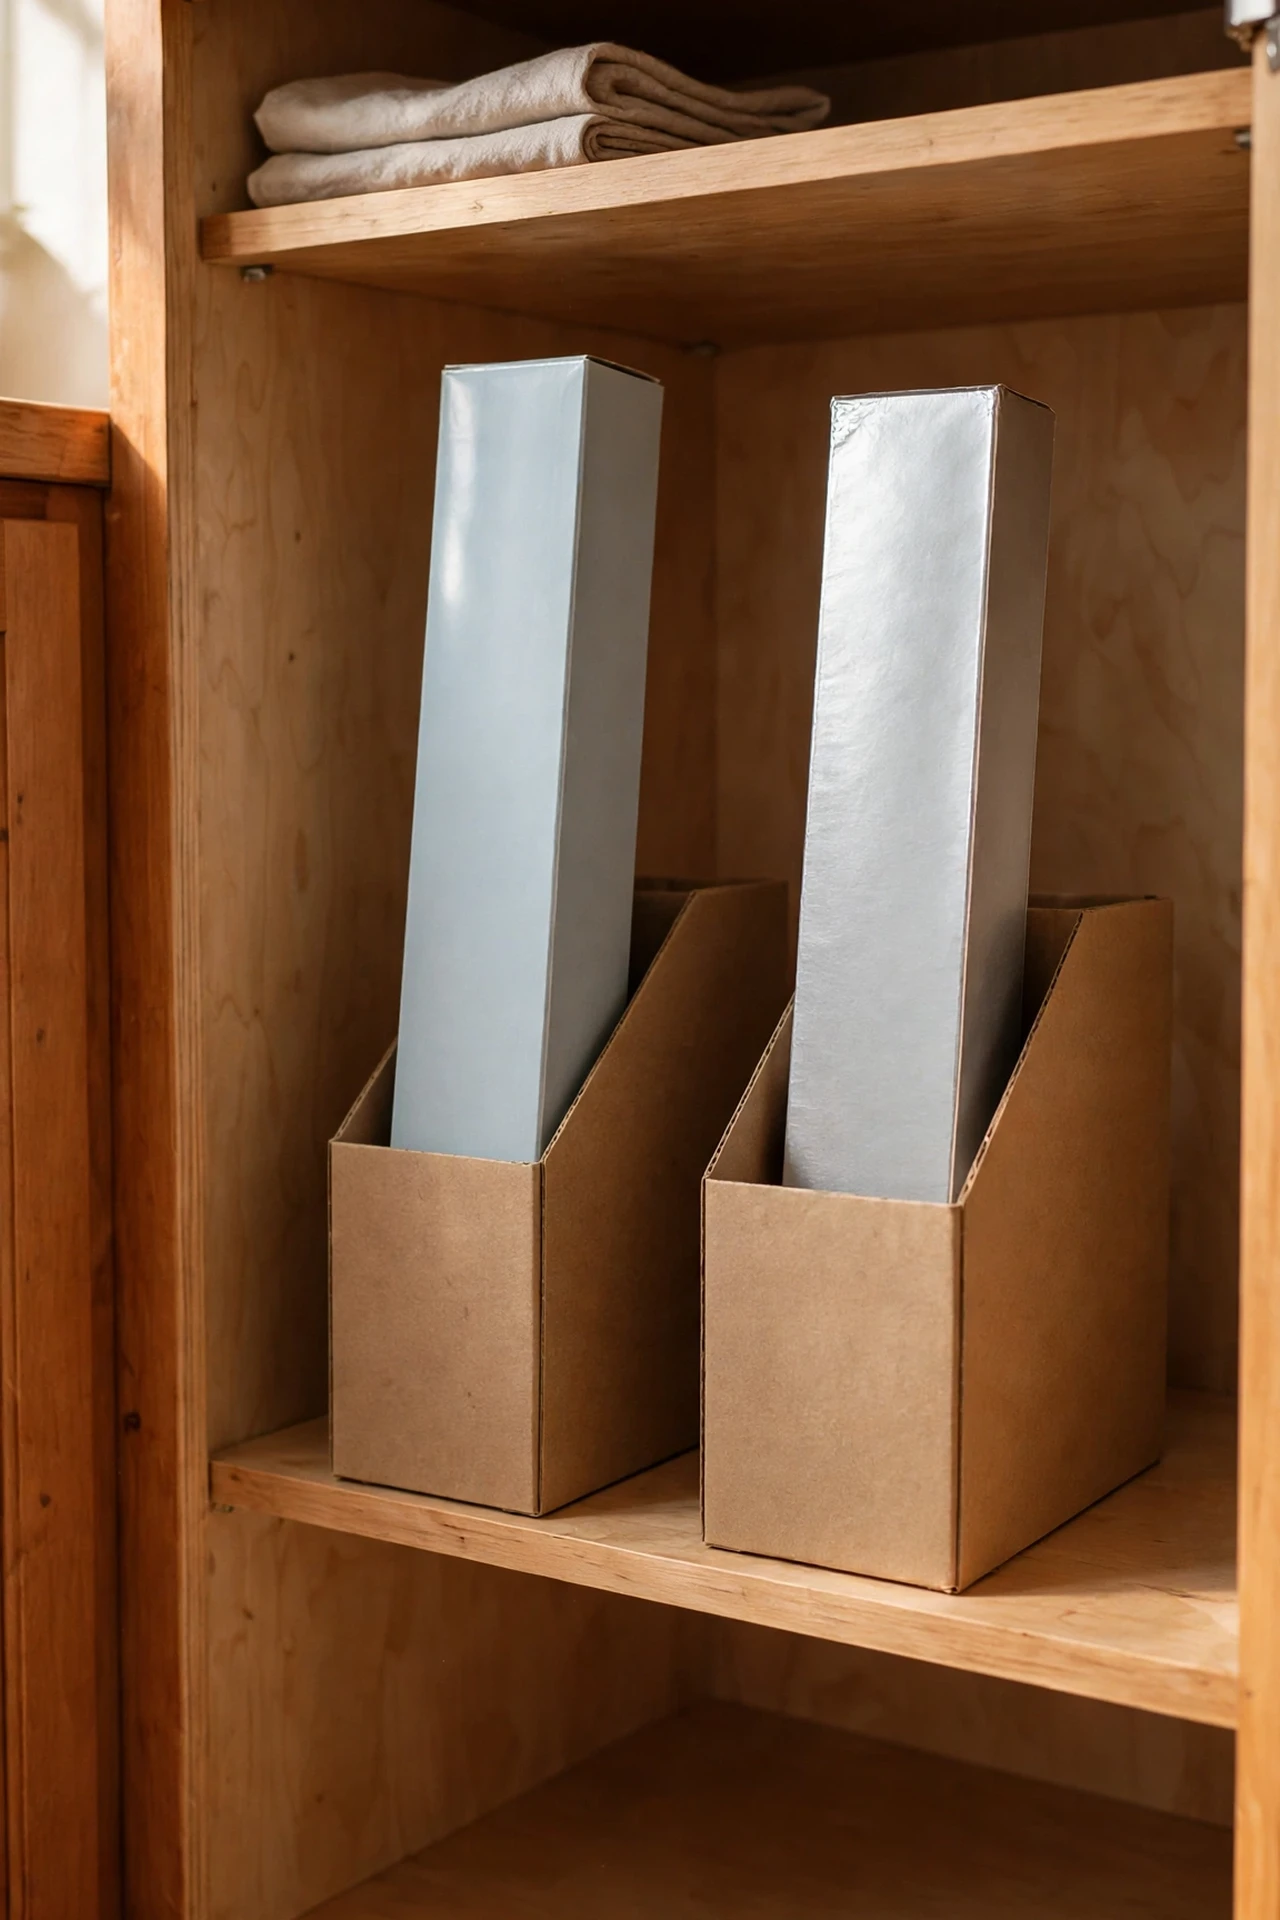
This one looks almost too clever to cost a dollar. Stand two magazine holders side by side in a deep cupboard, and the long awkward boxes of cling film, foil, and baking paper slot in perfectly, labels facing out. No more horizontal stacking, no more boxes sliding to the back. I keep mine in the cupboard beside the oven, and grabbing foil mid-cooking finally feels effortless. I tried the dedicated wrap organisers from home stores first — they cost ten times more and did the same job. The mistake to avoid is overfilling; if you have to yank, the holder tips. One box per slot, and the system polices itself.
Cost: ~$2.50 | Time: 20 minutes
Pro tip: photograph your cupboards before you go to the store — buying for real spaces instead of imagined ones saves the most common dollar store regret: bins that don’t fit.
11. Mini Turntable for Fridge Condiments
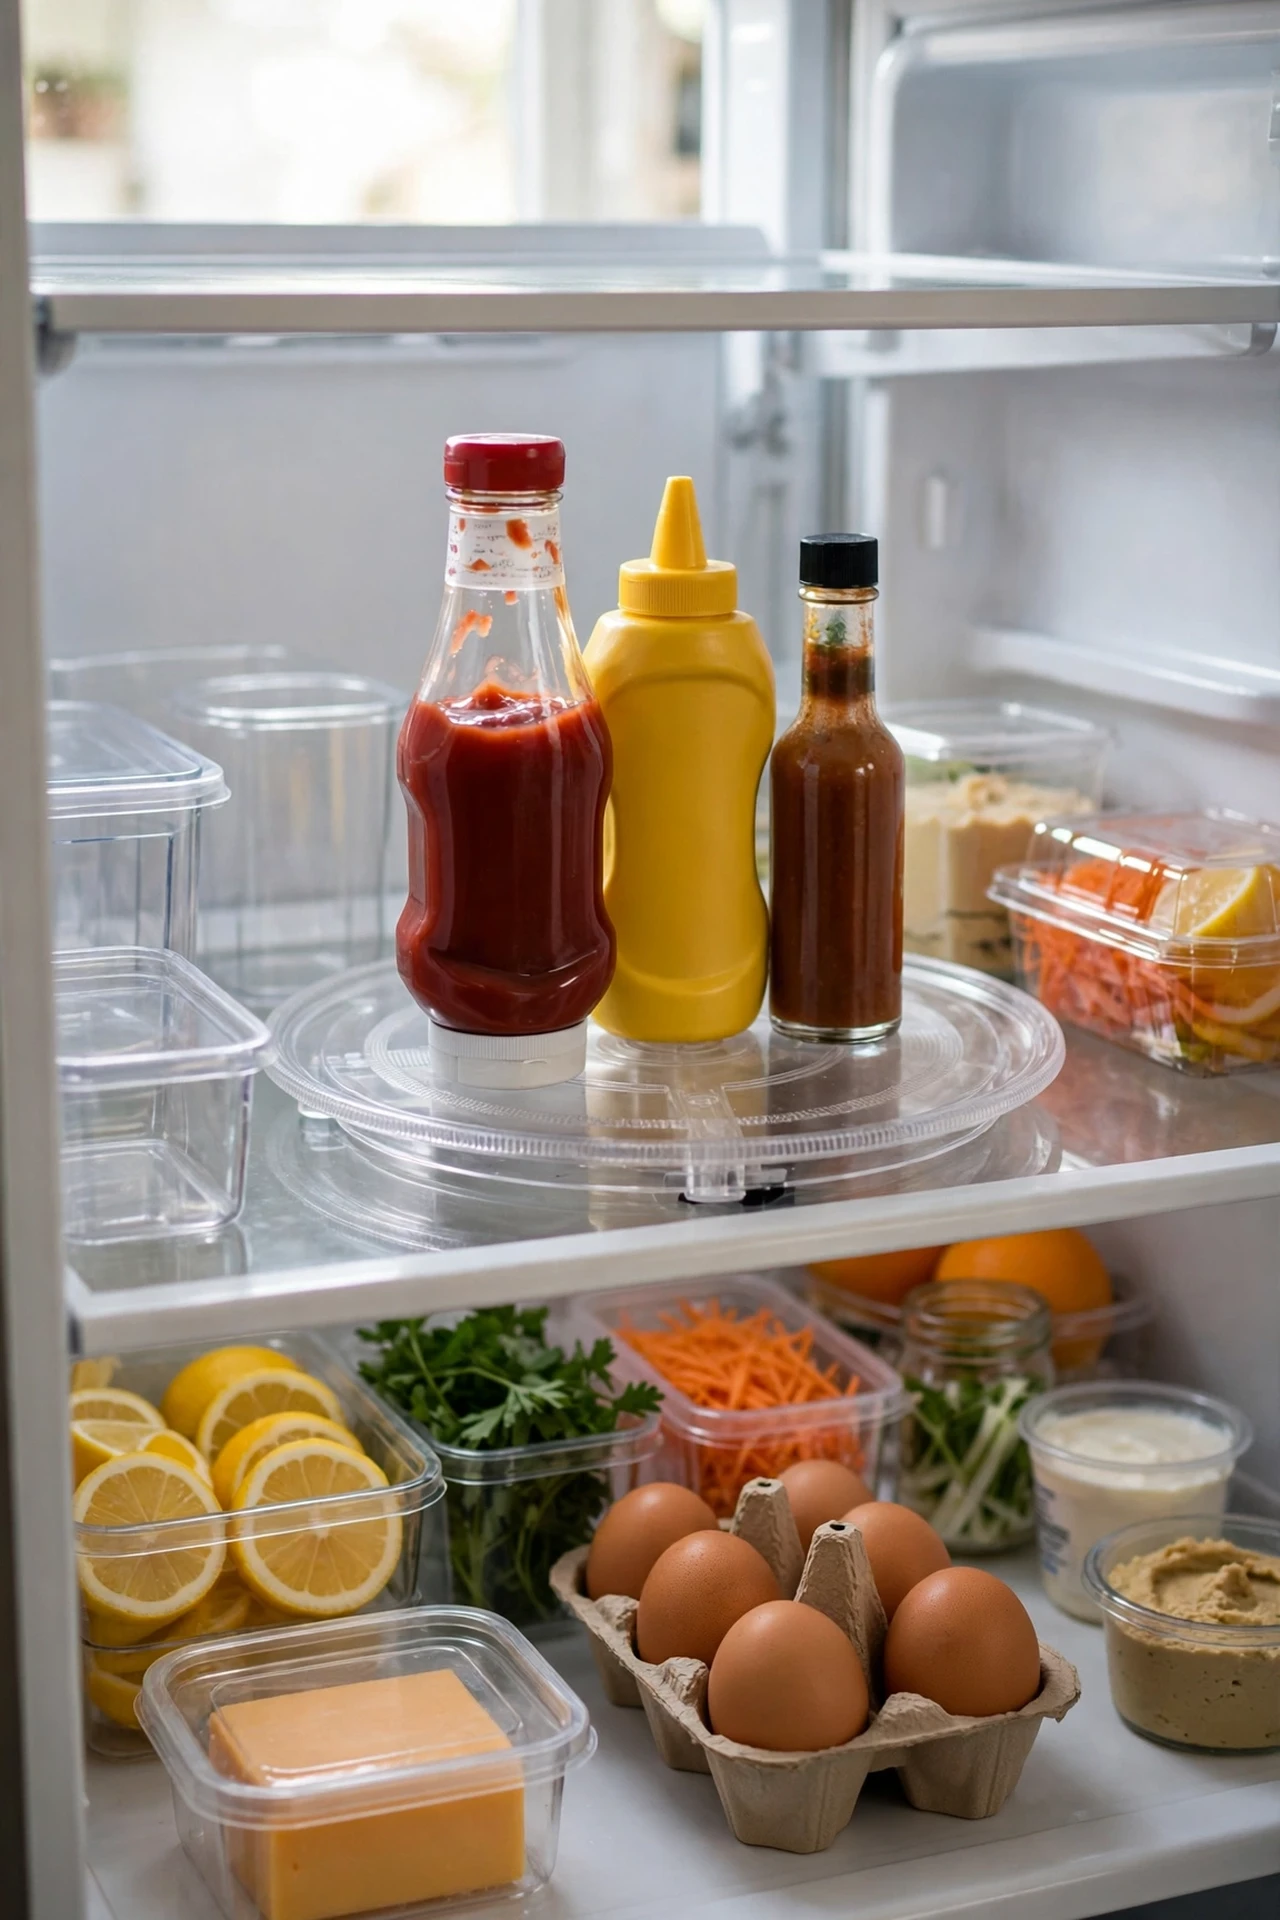
Condiments breed in the fridge door until you can’t find the mustard behind the chutney. A mini turntable on a fridge shelf corrals them into one spinning zone. Wipe the shelf first so it sits flat, group your daily drivers (ketchup, mayo, mustard) in the middle and the occasional guests (tahini, fish sauce) around the edge. I tried this after buying my third jar of Dijon because the other two were hiding. The mistake to avoid is putting it on a wire shelf without a flat base — it wobbles and everything slides. A folded tea towel underneath fixes it if your shelf is wire.
Cost: ~$1.25 | Time: 10 minutes
12. Matching Jars with Handwritten Labels
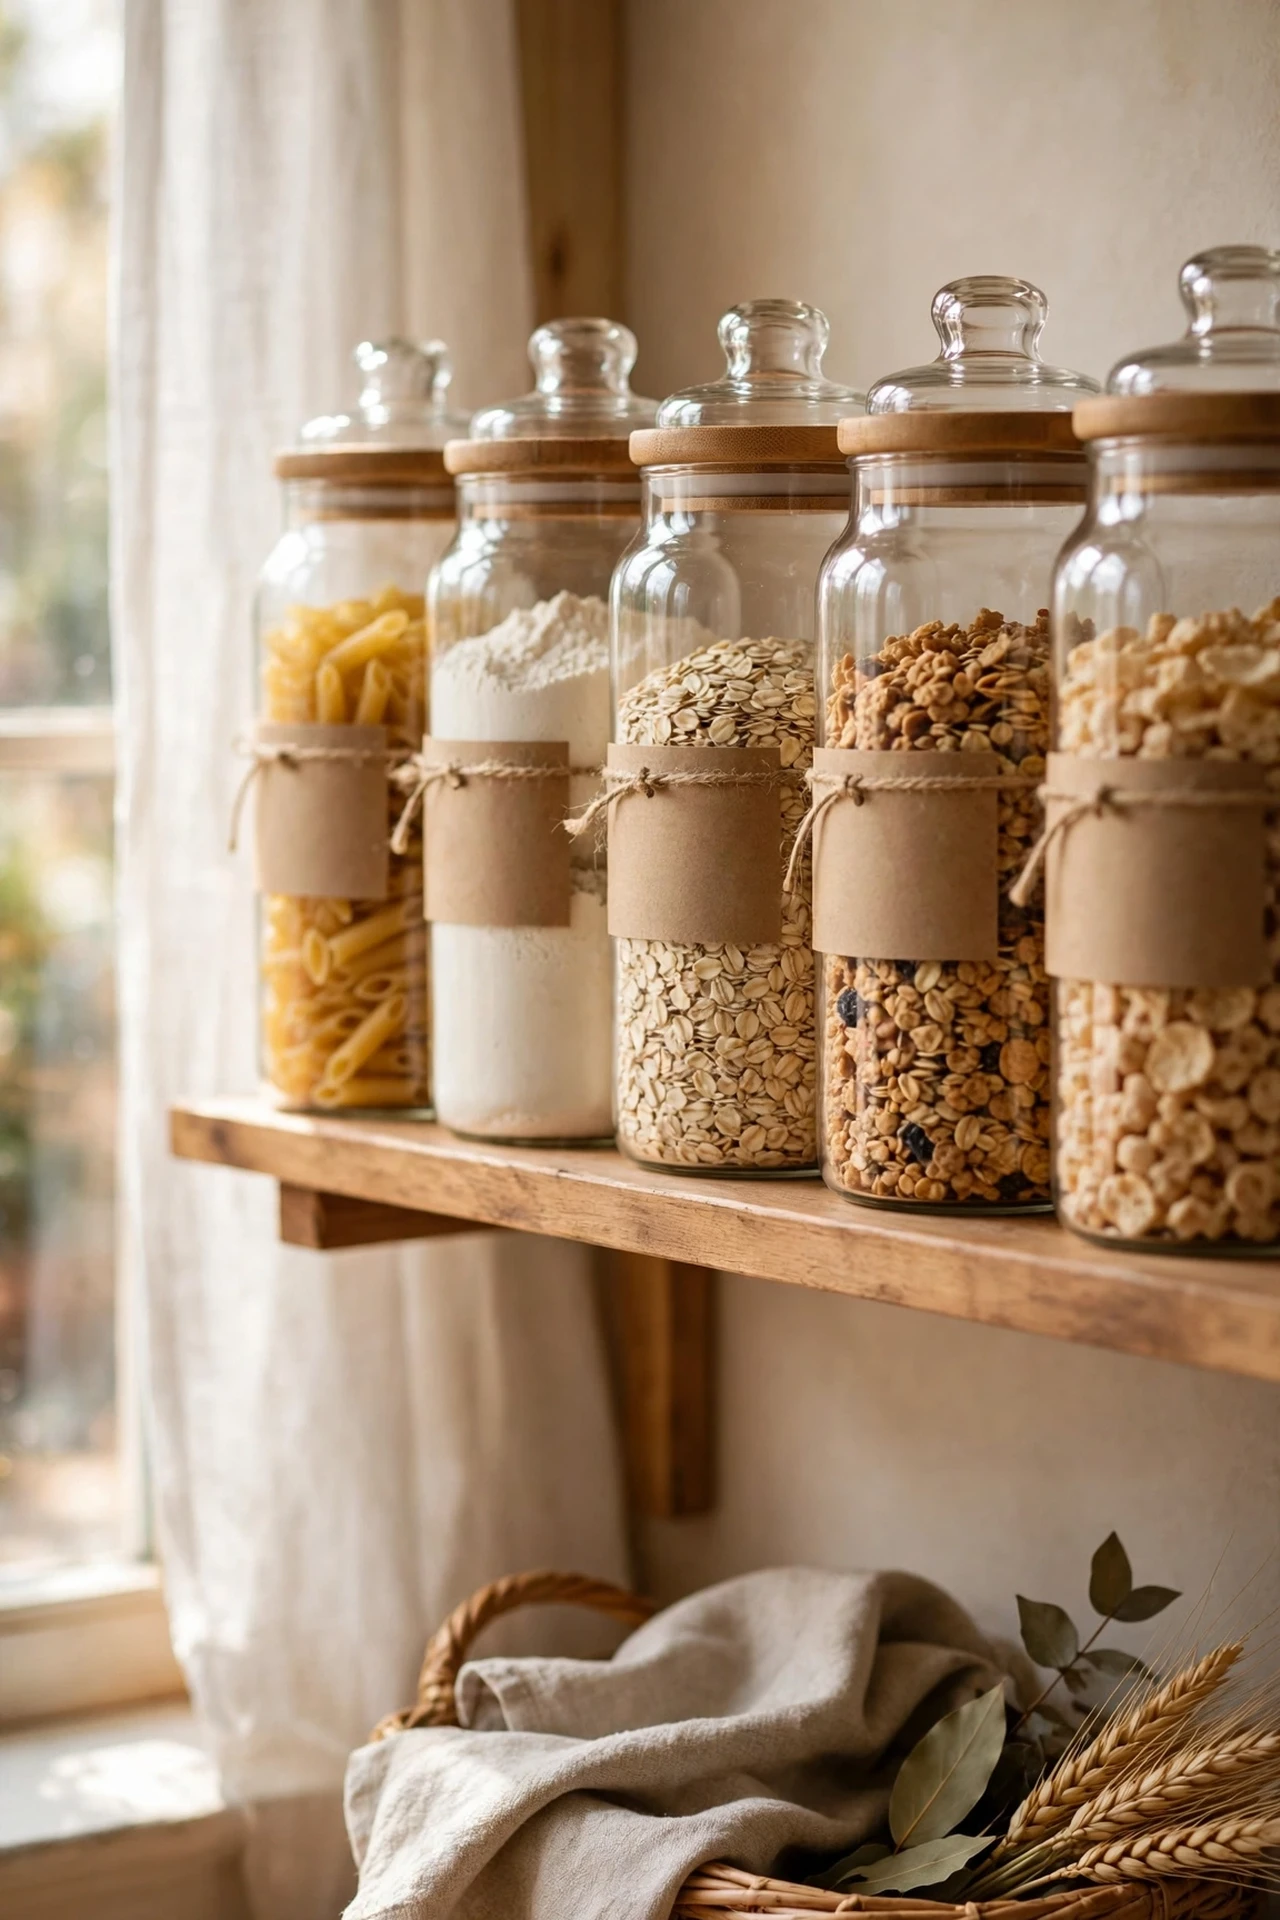
Nothing makes a pantry look expensive faster than matching jars, and the dollar store sells perfectly decent glass canisters for a fraction of home-store prices. I swapped my mismatched pasta bags and cereal boxes for a row of identical jars with simple handwritten labels — masking tape and a marker, nothing fancy. The steps: wash and dry the jars, decant one category at a time, label immediately so you don’t end up with mystery grains. I tried this with just the baking shelf first, and it looked so good I did the whole pantry the next weekend. The mistake to avoid is decanting everything at once — do it shelf by shelf or you’ll be surrounded by open bags and regret.
Cost: ~$7.50 | Time: 45 minutes
13. S-Hooks on a Tension Rod for Utensils
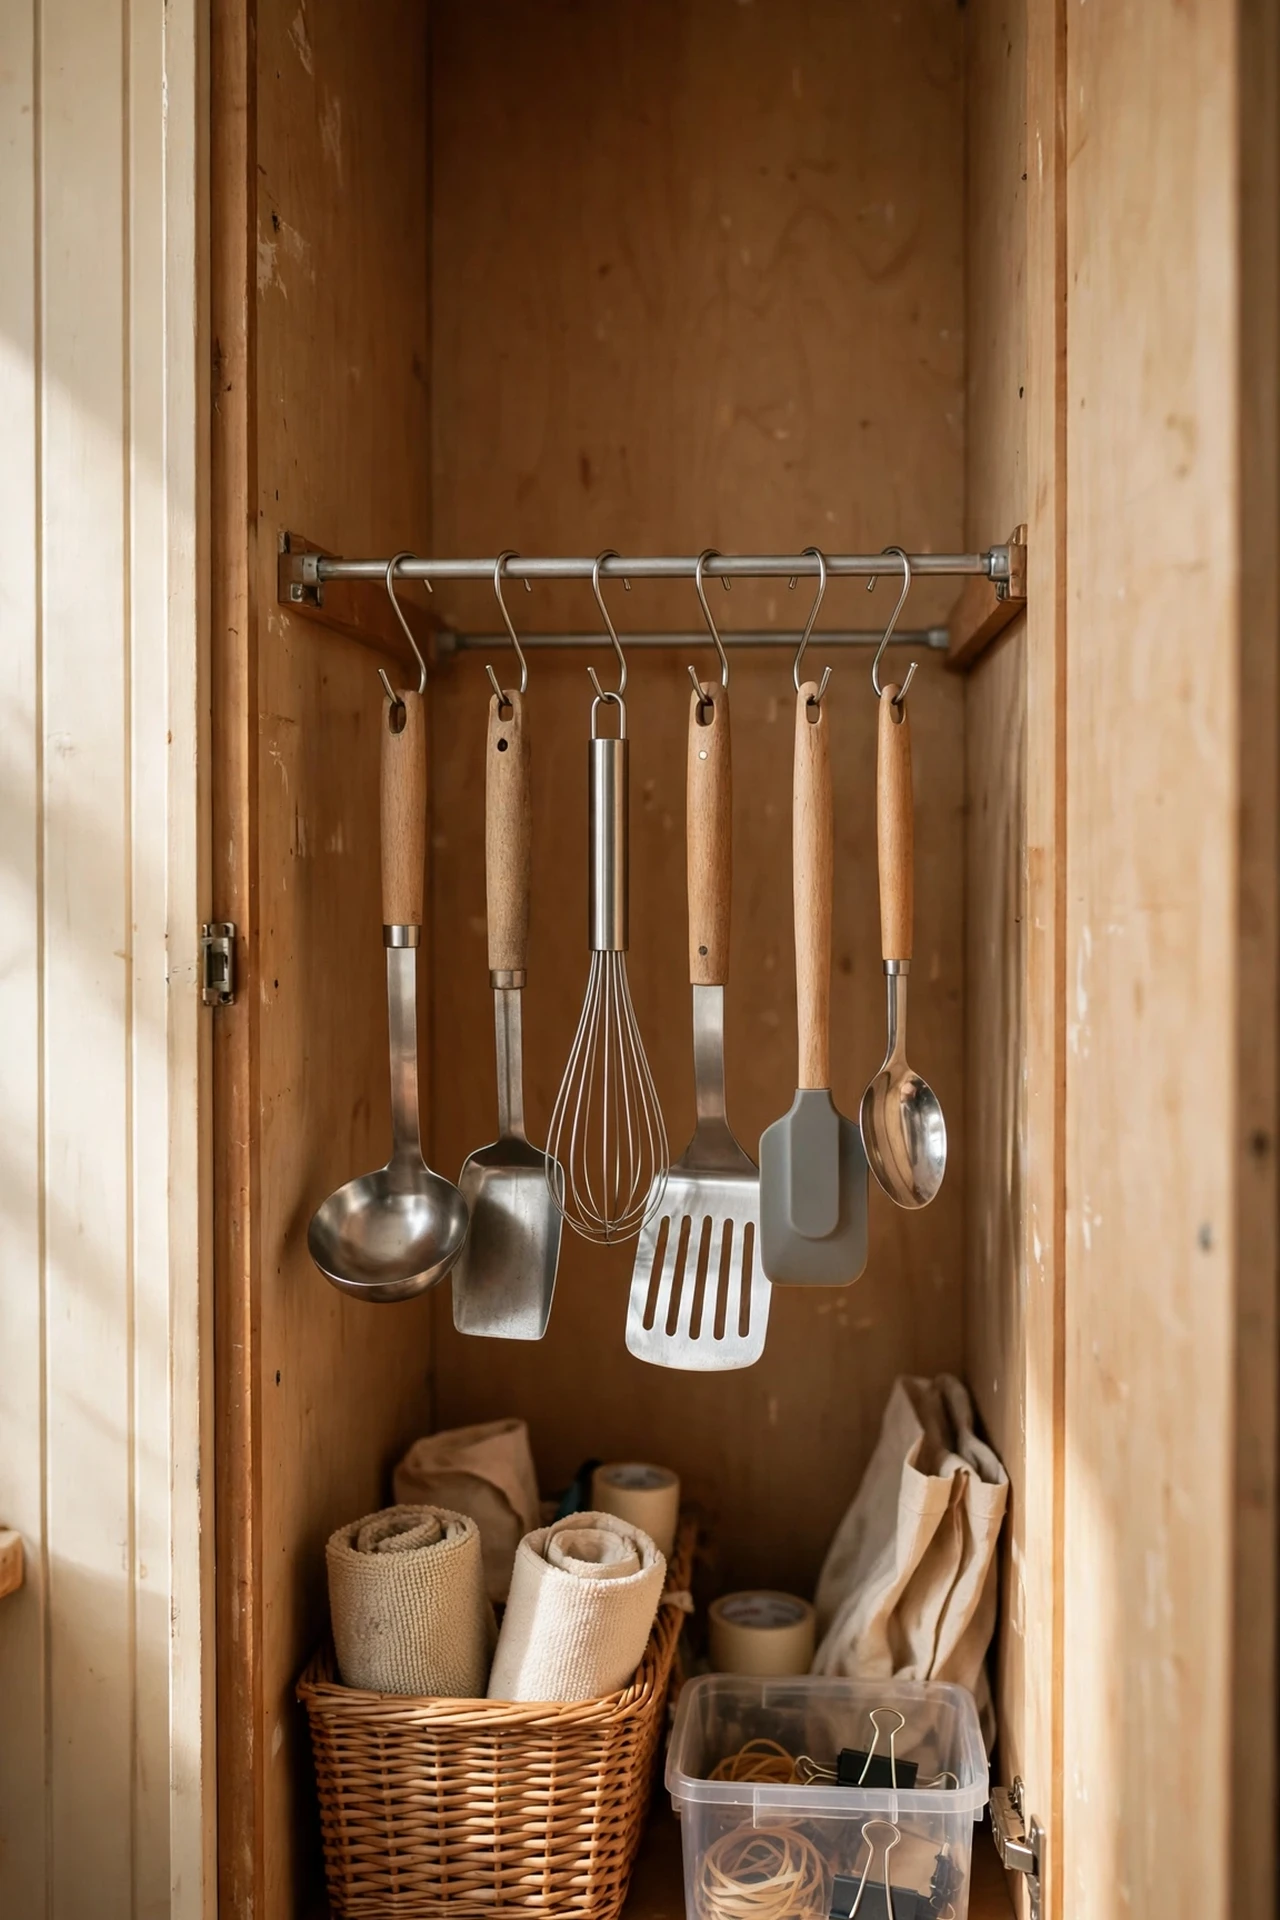
If your utensil drawer is a tangled mess of whisks and spatulas, hang the daily tools instead. A second tension rod — this time across the inside of a tall cupboard or under a shelf — plus a handful of S-hooks gives every ladle and whisk its own hook. Measure the drop so handles clear the shelf below, hang the hooks, then assign each tool a spot. I tried this with the five utensils I actually use daily, and the drawer instantly felt twice as big. The mistake to avoid is hanging everything you own — this only works for the regulars. The fondue forks can stay in the drawer.
Cost: ~$2.50 | Time: 20 minutes
14. Cutlery Tray Dividers That Actually Fit
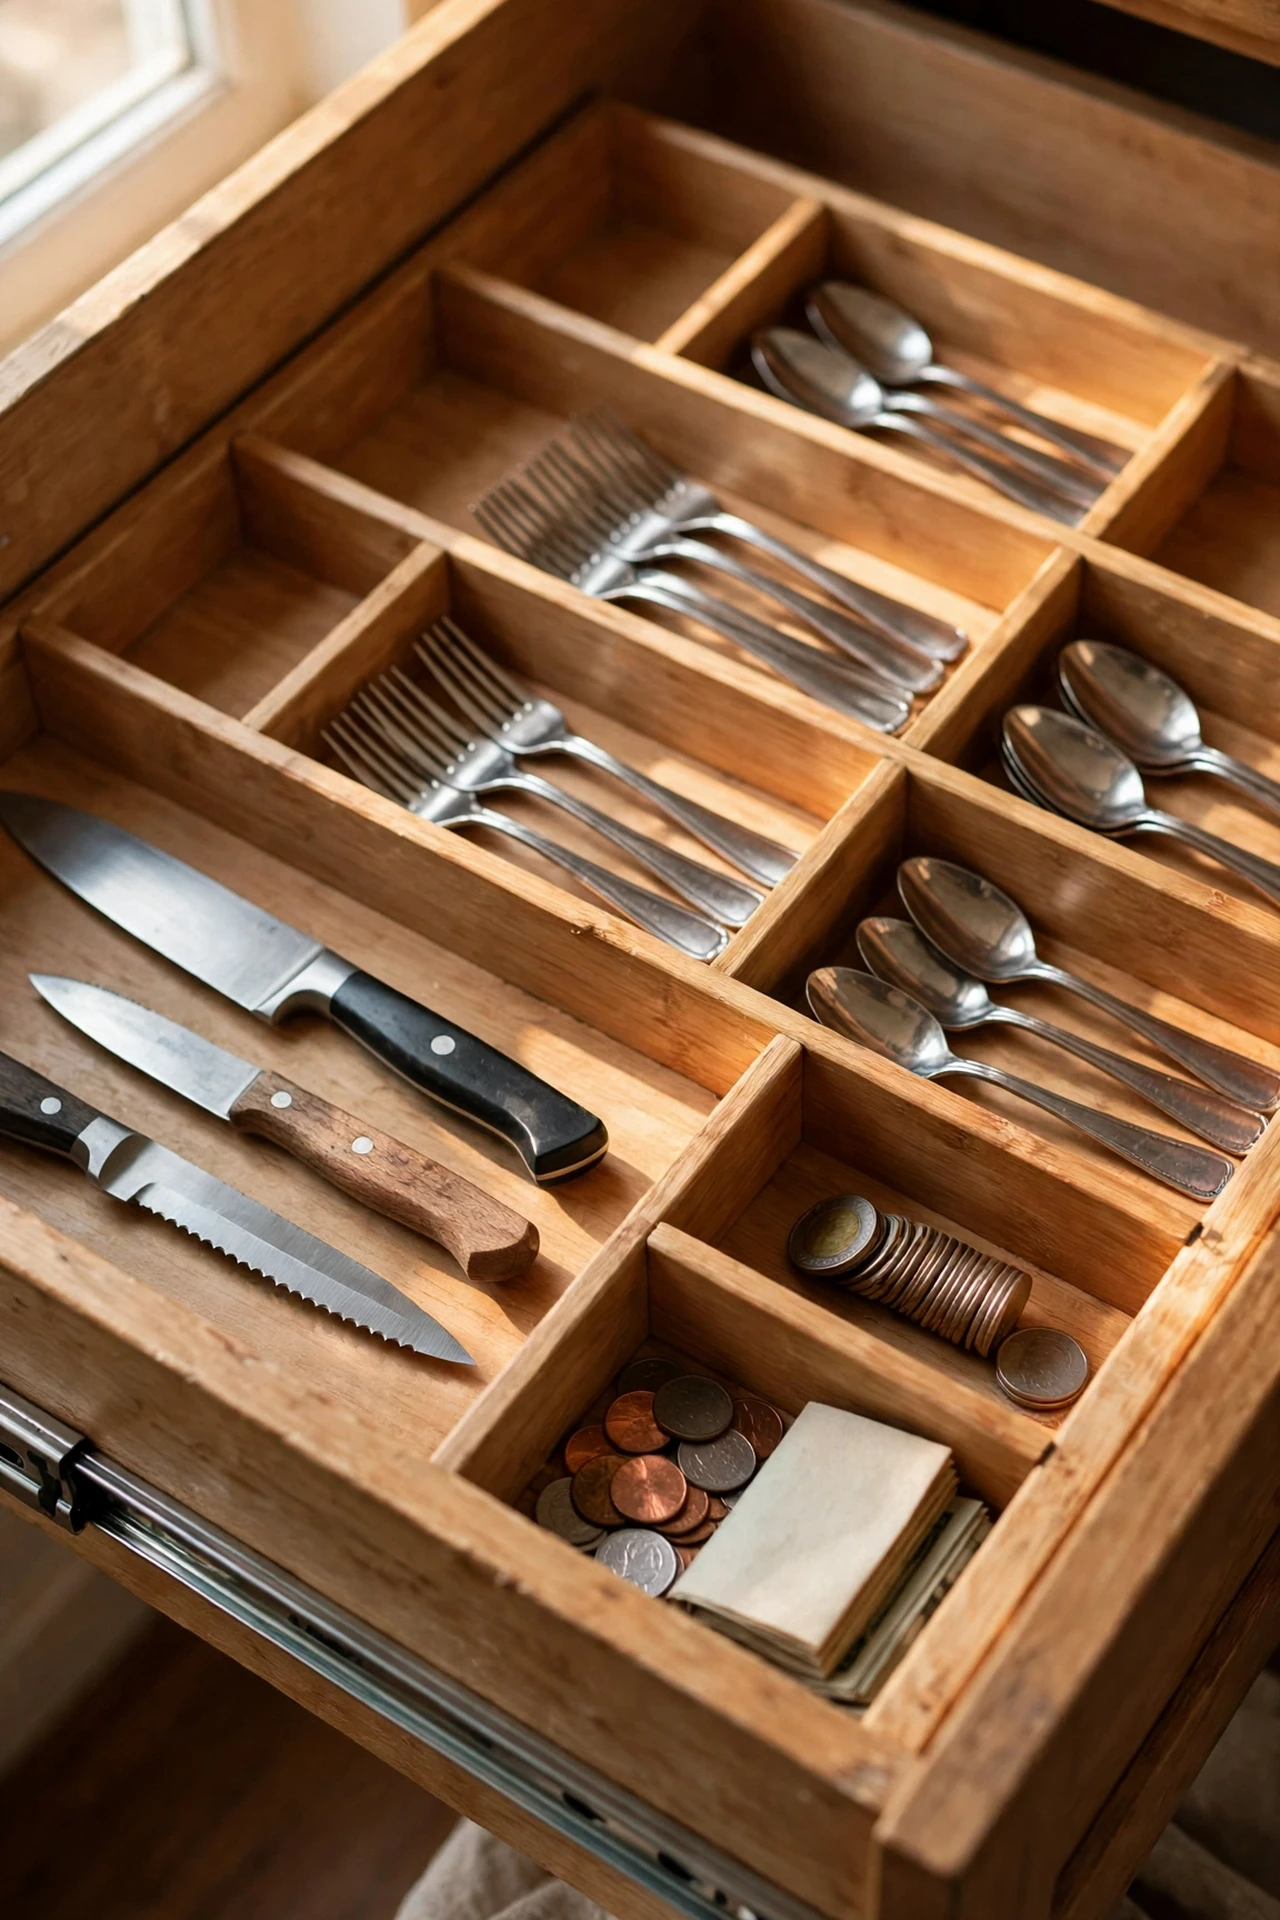
That rattling cutlery tray that slides around every time you open the drawer? Dollar store drawer dividers fix it for under four dollars. Pull the tray out, clean the drawer (crumbs, always crumbs), then arrange the dividers to make compartments that fit your actual cutlery — long slots for knives, square ones for the teaspoon mountain. I tried the one-size-fits-all tray for years and my serving spoons never fit; customising the layout took twenty minutes and felt absurdly satisfying. The mistake to avoid is eyeballing it — measure the drawer first. Dividers that are a centimetre too long will haunt you.
Cost: ~$3.75 | Time: 20 minutes
15. Over-Door Shoe Organiser on the Pantry Door
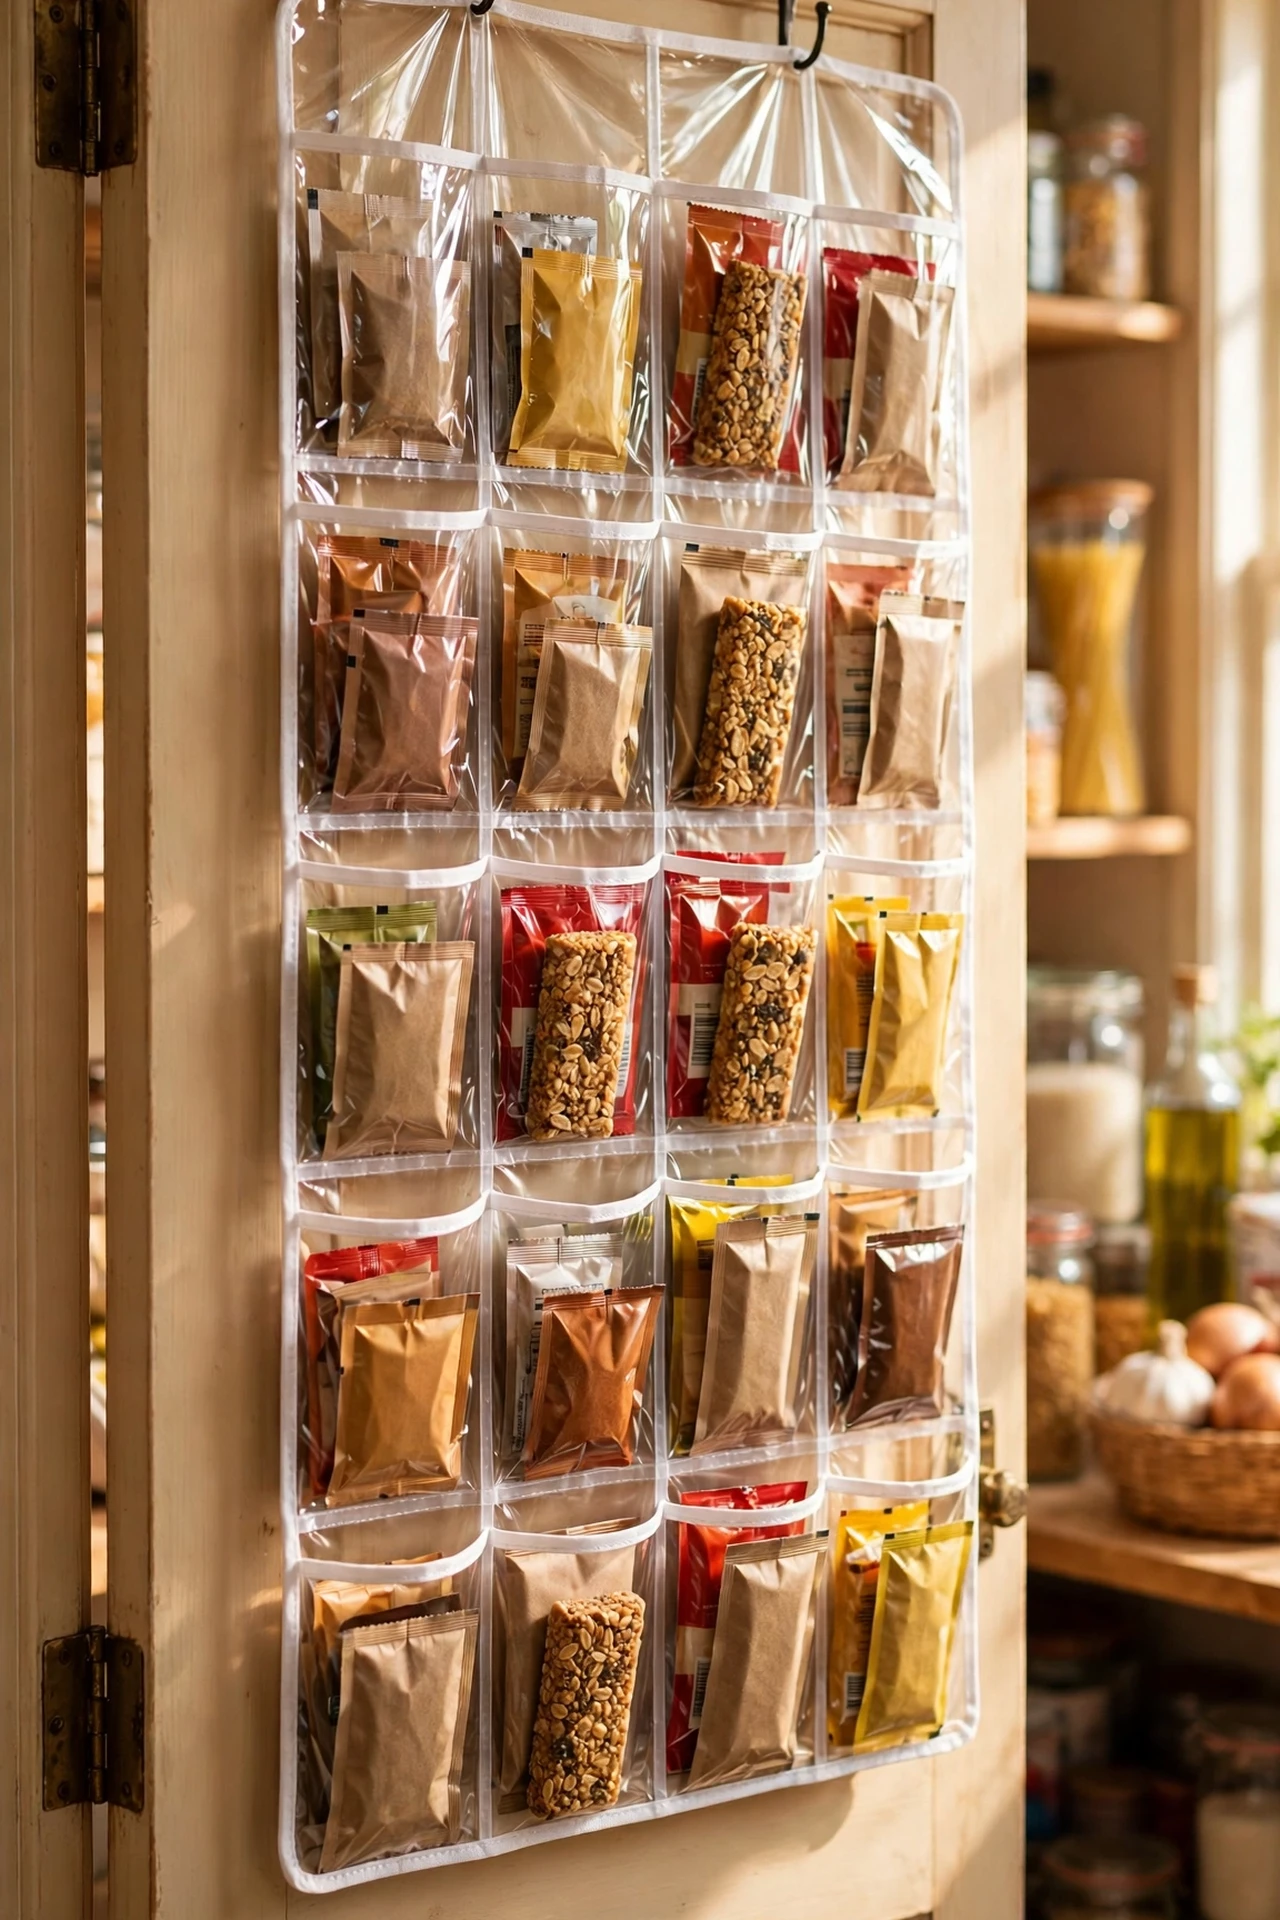
This is the highest-capacity dollar store hack on the list. A clear over-door shoe organiser hung on the inside of the pantry door gives you two dozen pockets for spice packets, snack bars, sauce sachets, and all the small things that vanish on shelves. Hook it over the door, check it clears the frame, then fill pockets by category — baking at the top, snacks at kid height if you have little ones. I tried this in my narrow pantry and it genuinely felt like gaining a whole extra shelf — one of those tricks from (see also: small-kitchen-ideas-that-feel-twice-as-big) that punches above its weight. The mistake to avoid is loading it with heavy jars; the pockets are for light bits. Tins will stretch it out of shape within a month.
Cost: ~$1.25 | Time: 15 minutes
Pro tip: buy one spare of anything adhesive — hooks lose stickiness in steamy kitchens, and a backup saves a second trip.
16. Wire Shelf for Double-Stacking Mugs
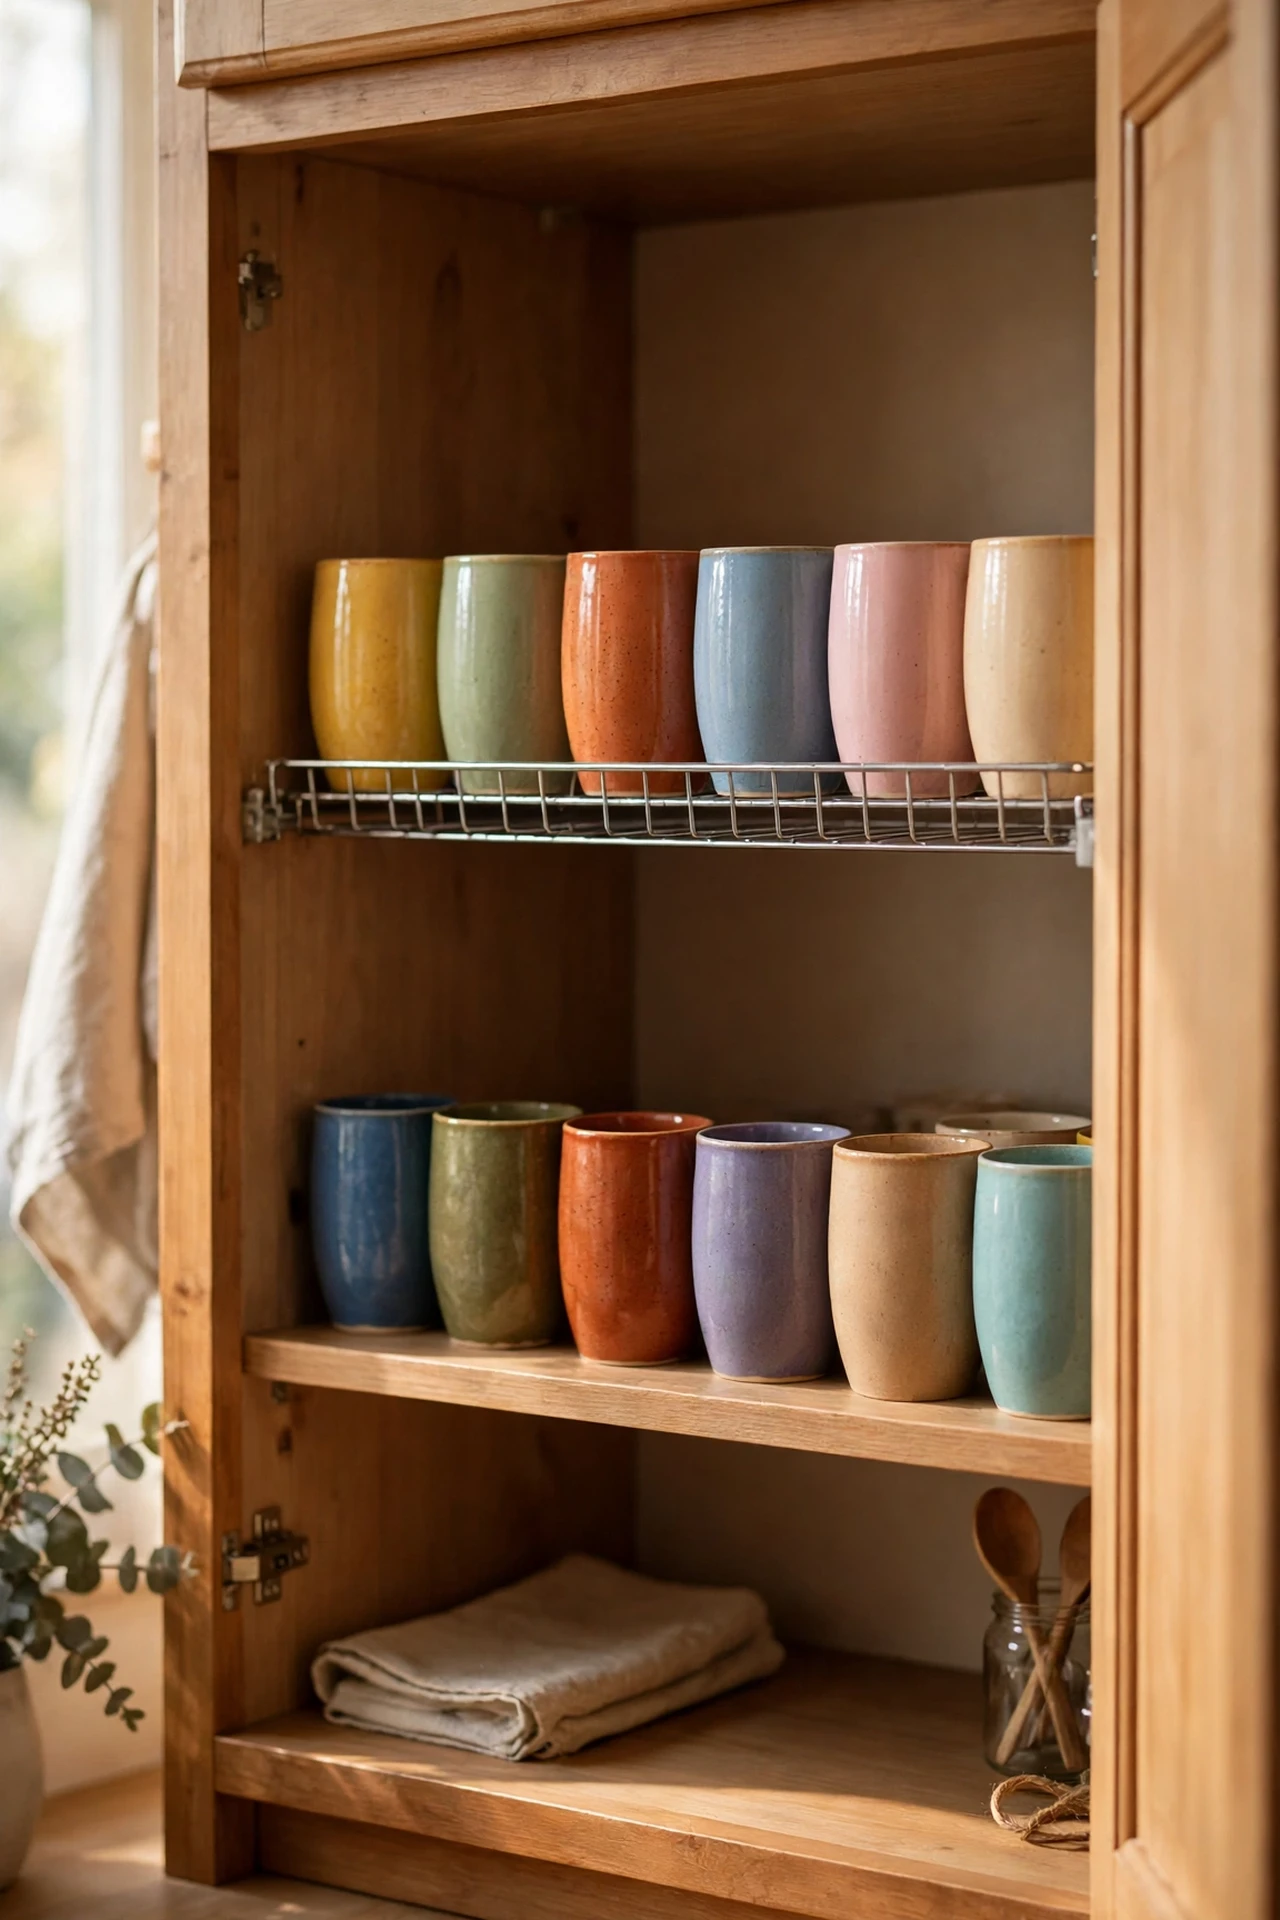
Mugs are space hogs because you can’t stack them more than two high without a wobble disaster. A small wire shelf insert lets you stack two neat rows in the same cupboard footprint. Slide it onto the shelf, put the everyday mugs below and the occasional ones up top. I tried this and reclaimed enough room to move the glasses in beside them. The mistake to avoid is the top-heavy trap — heaviest mugs on the bottom row, always. And measure your shelf height first; some cupboards are too short for the insert plus two mug rows.
Cost: ~$1.25 | Time: 10 minutes
17. Bread Box as a Coffee and Tea Station
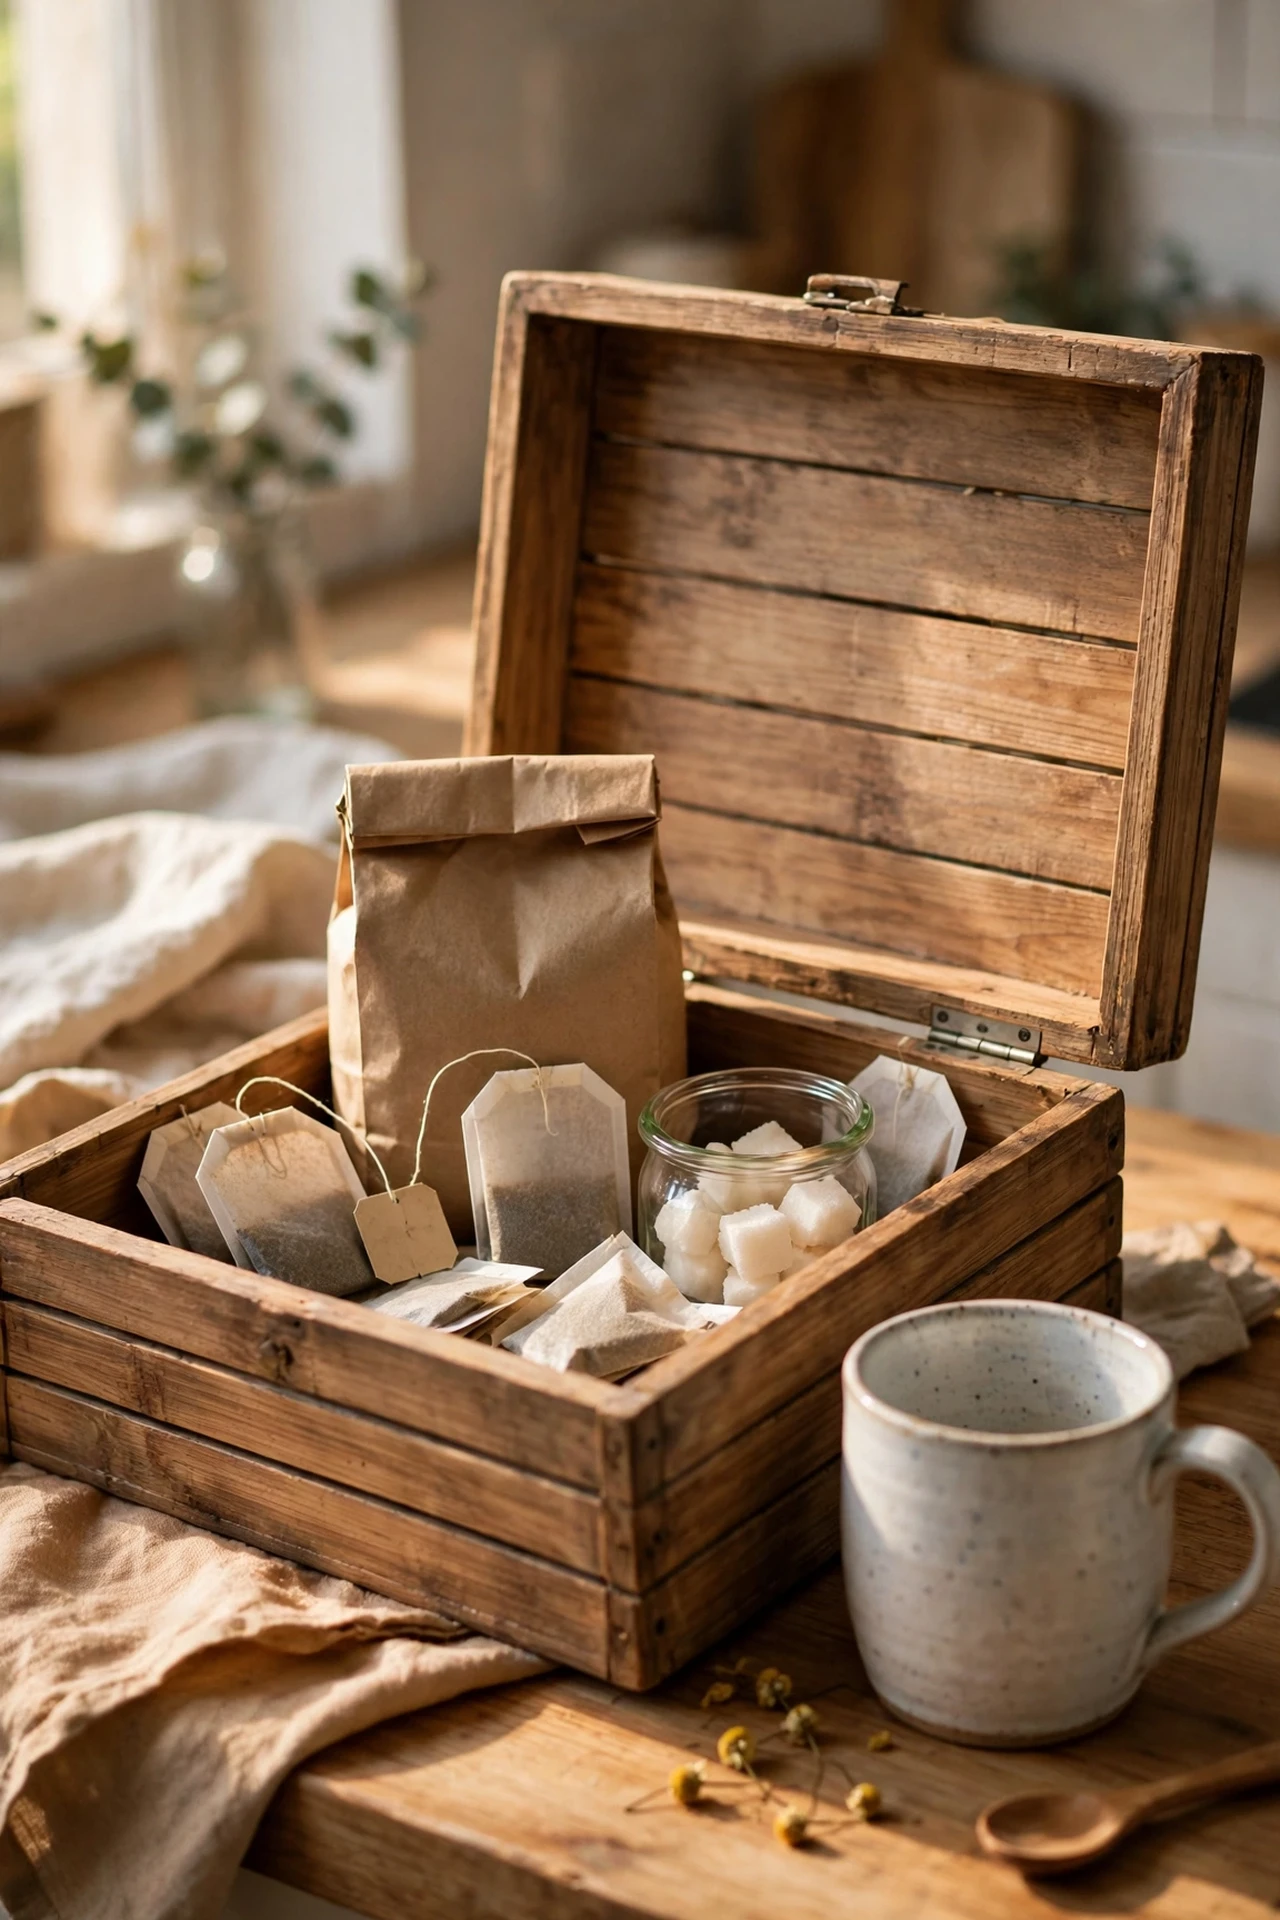
Coffee and tea paraphernalia spreads across counters like it pays rent. A dollar store bread box with a roll-top or lift lid corrals it all into one tidy station — and the lid hides the clutter when you’re done. Park it near the kettle, load it with the coffee, tea bags, sugar, and your favourite mug, and the morning routine happens in one square foot. I tried this and my counter went from chaotic to calm overnight; guests now think I have a “coffee bar”. The mistake to avoid is buying the tiny decorative one — measure your tallest coffee bag first. If the lid won’t close, it’s just an expensive tray.
Cost: ~$10 | Time: 20 minutes
18. Baskets on Top of Wall Cabinets
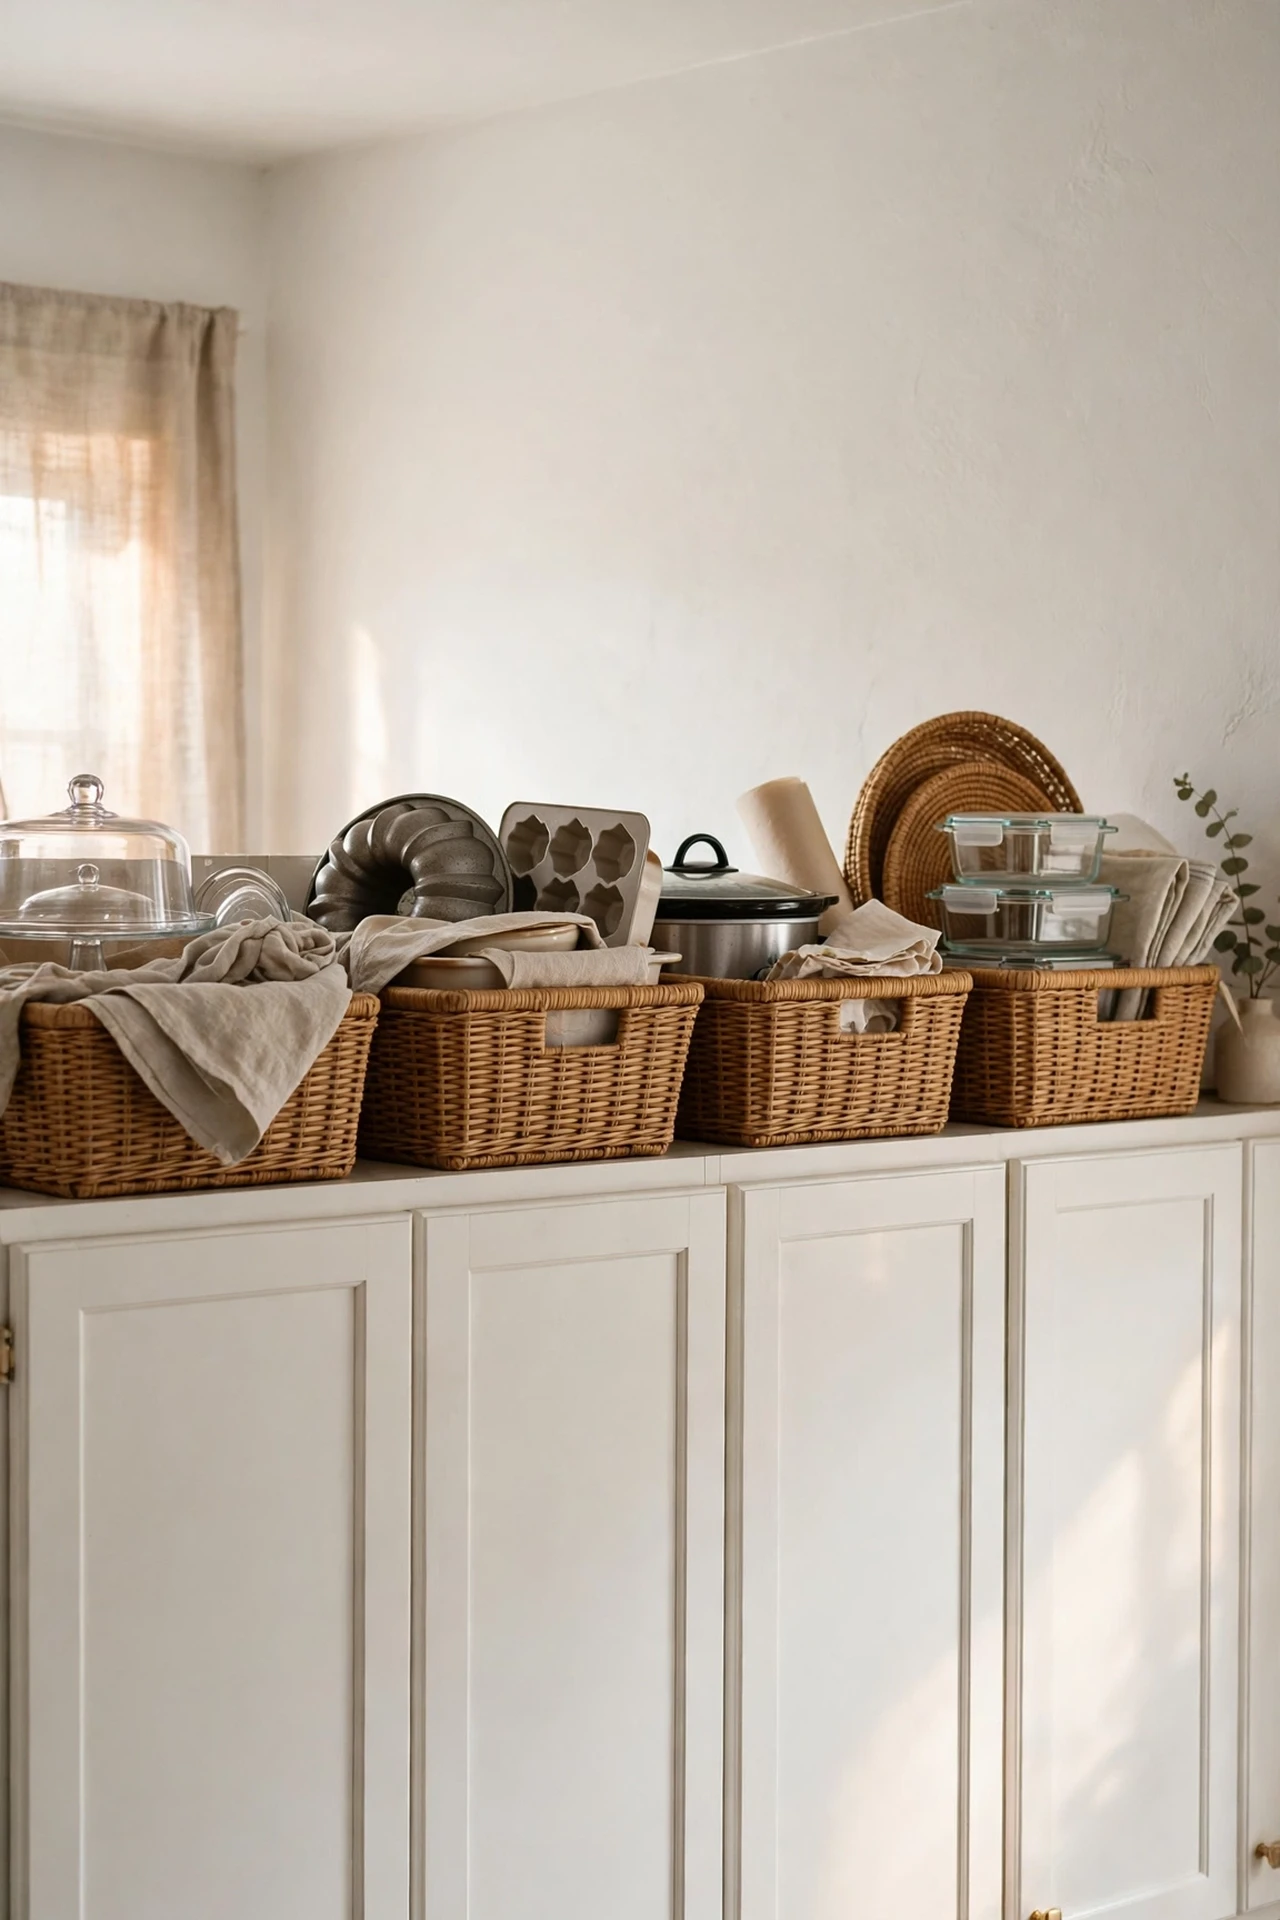
The dusty dead zone above your wall cabinets is free storage if you stop ignoring it. Line it with dollar store baskets and stash the rarely used stuff up there: the Christmas baking tins, the spare paper towels, the picnic set. The steps: dust first (it’ll be grim), place one basket per category, and keep a small step stool nearby so “up there” doesn’t mean “forgotten”. I tried this and finally found a home for the fondue set that lived on my dining table for a year. The mistake to avoid is storing anything heavy or heat-sensitive up there — it’s warm near the ceiling and a pain to reach, so light and occasional only.
Cost: ~$3.75 | Time: 15 minutes
19. Can Dispenser Rack for the Pantry
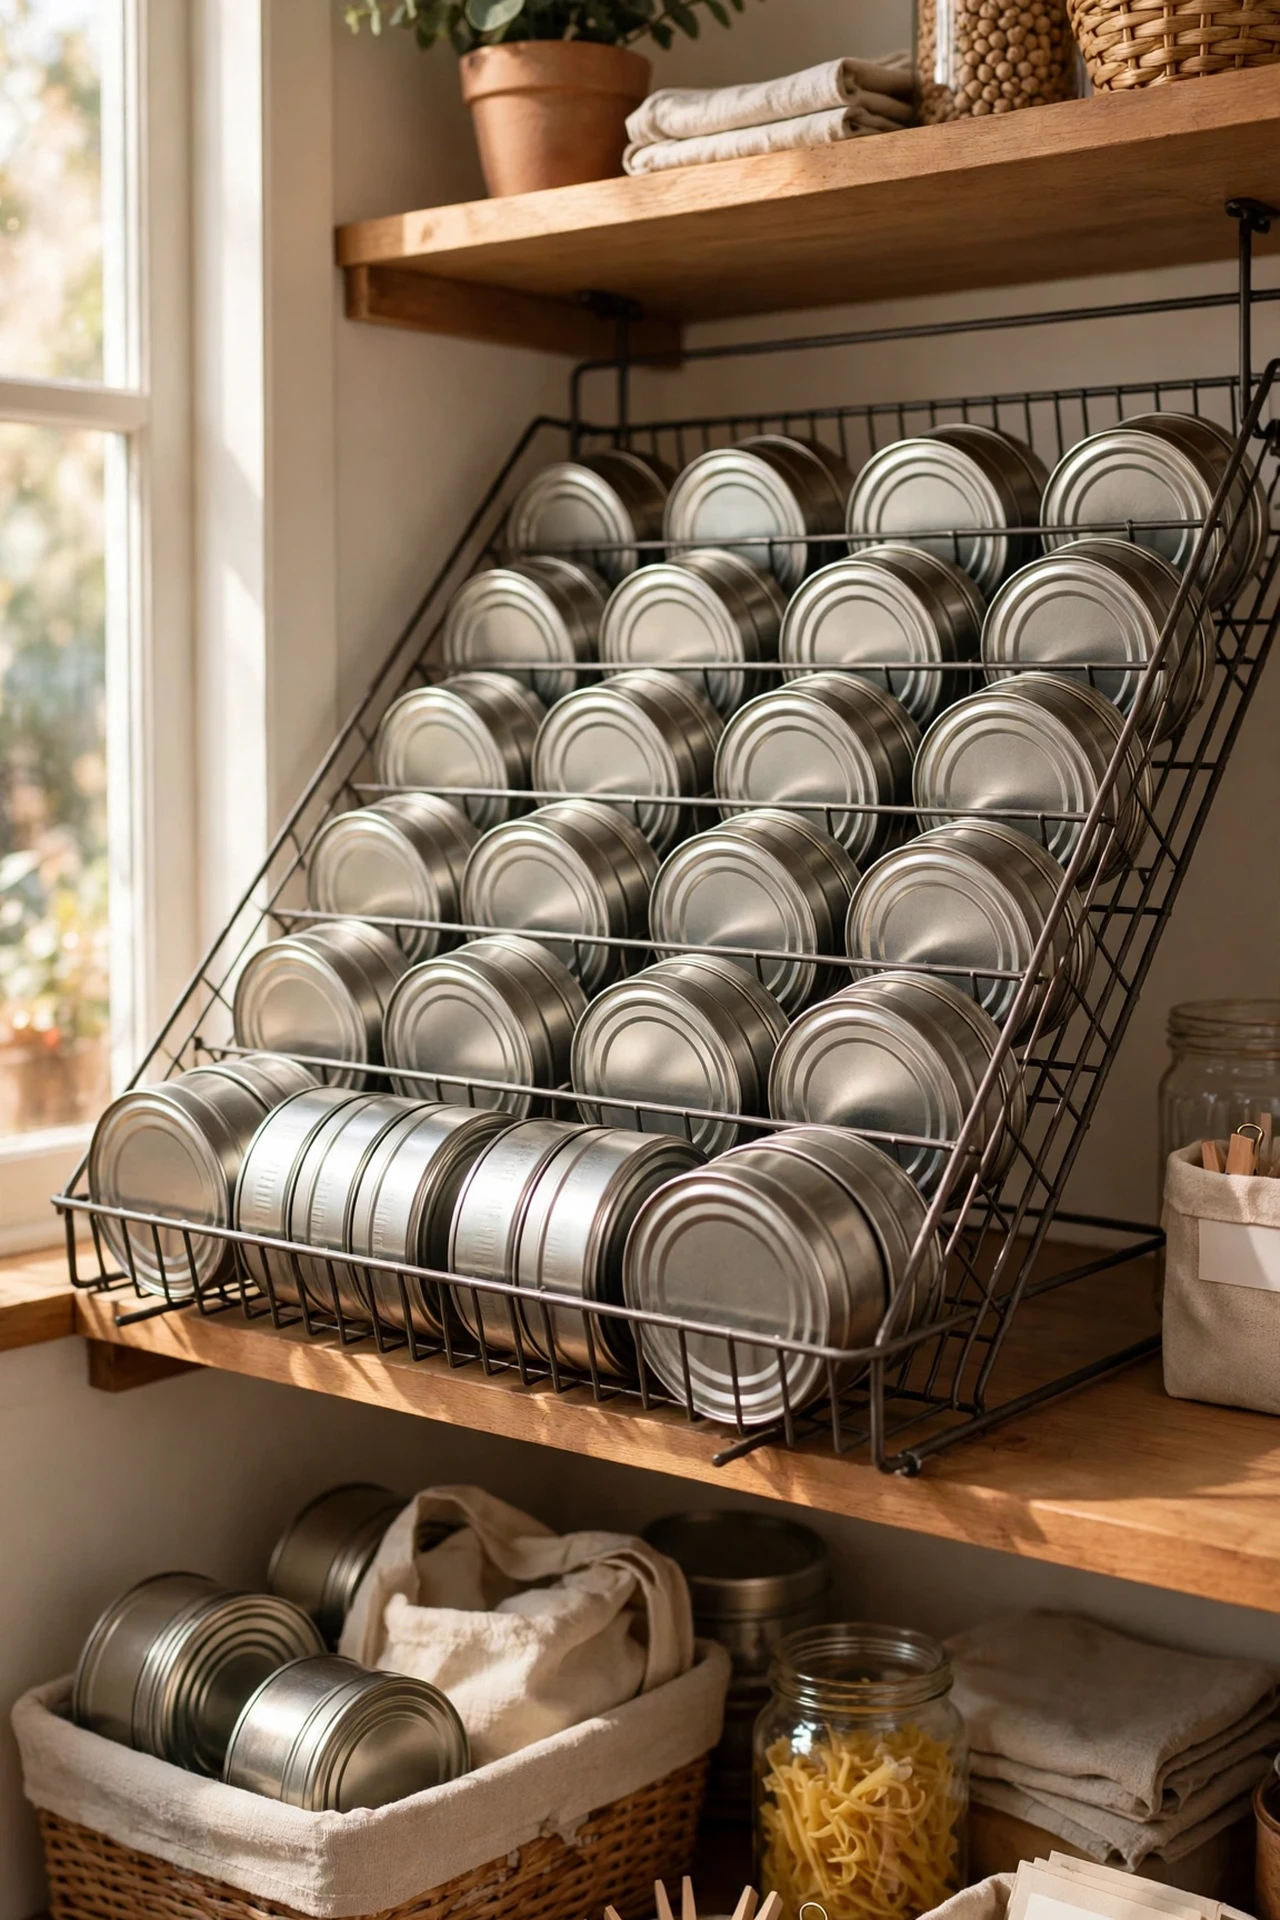
Tins are the cockroaches of pantry organisation — they survive every system. A wire can dispenser rack, the kind that rolls tins forward as you take one, finally tamed mine. Load tins at the back so the oldest rolls to the front, and you’ll actually use things before they expire. I tried the neat-rows approach for years and always ended up with ancient chickpeas at the back. The mistake to avoid is mixing tin sizes in one rack — it jams. One rack for standard tins, and keep the odd sizes (coconut milk, I’m looking at you) on a normal shelf.
Cost: ~$5 | Time: 20 minutes
20. Broom Clips Inside a Cupboard Door
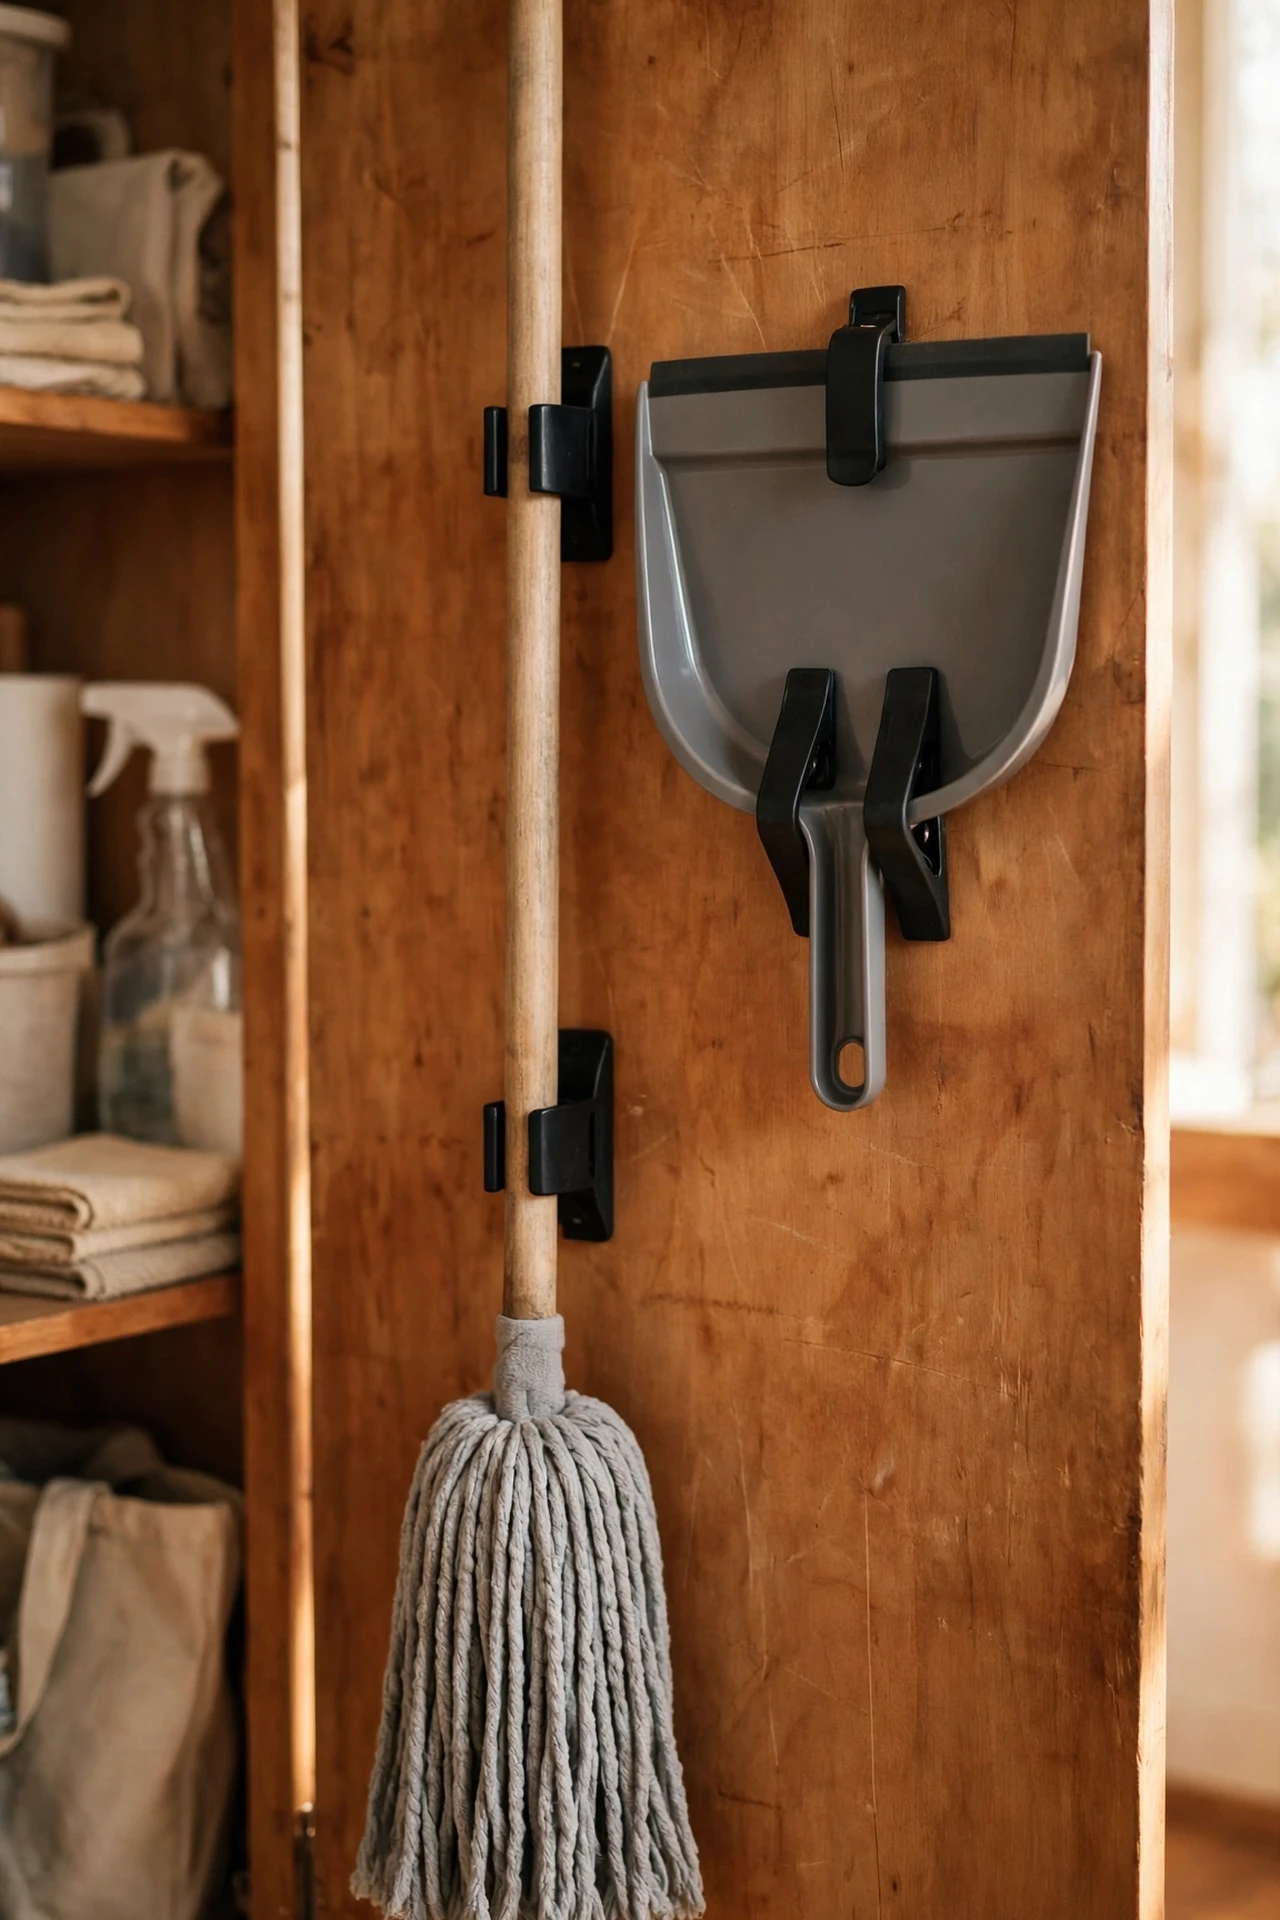
The mop and dustpan leaning in the corner of the kitchen drive me mad, so I fixed two dollar store broom clips inside the tall cupboard door and hung them there. Mark the height with the mop in hand so it clears the shelf below, fix the clips with the included screws, and snap the handles in. Everything stands upright, off the floor, and invisible when the door’s shut. I tried the adhesive versions first and they slid down the door within a week — the screw-in clips haven’t budged in a year. The mistake to avoid is hanging them on a door that already holds the bin; the weight adds up and the hinges will complain.
Cost: ~$1.25 | Time: 10 minutes
Pro tip: declutter first, organise second. No bin on earth fixes a cupboard stuffed with three broken toasters and expired soup.
21. Drawer Liners That Stop Everything Sliding
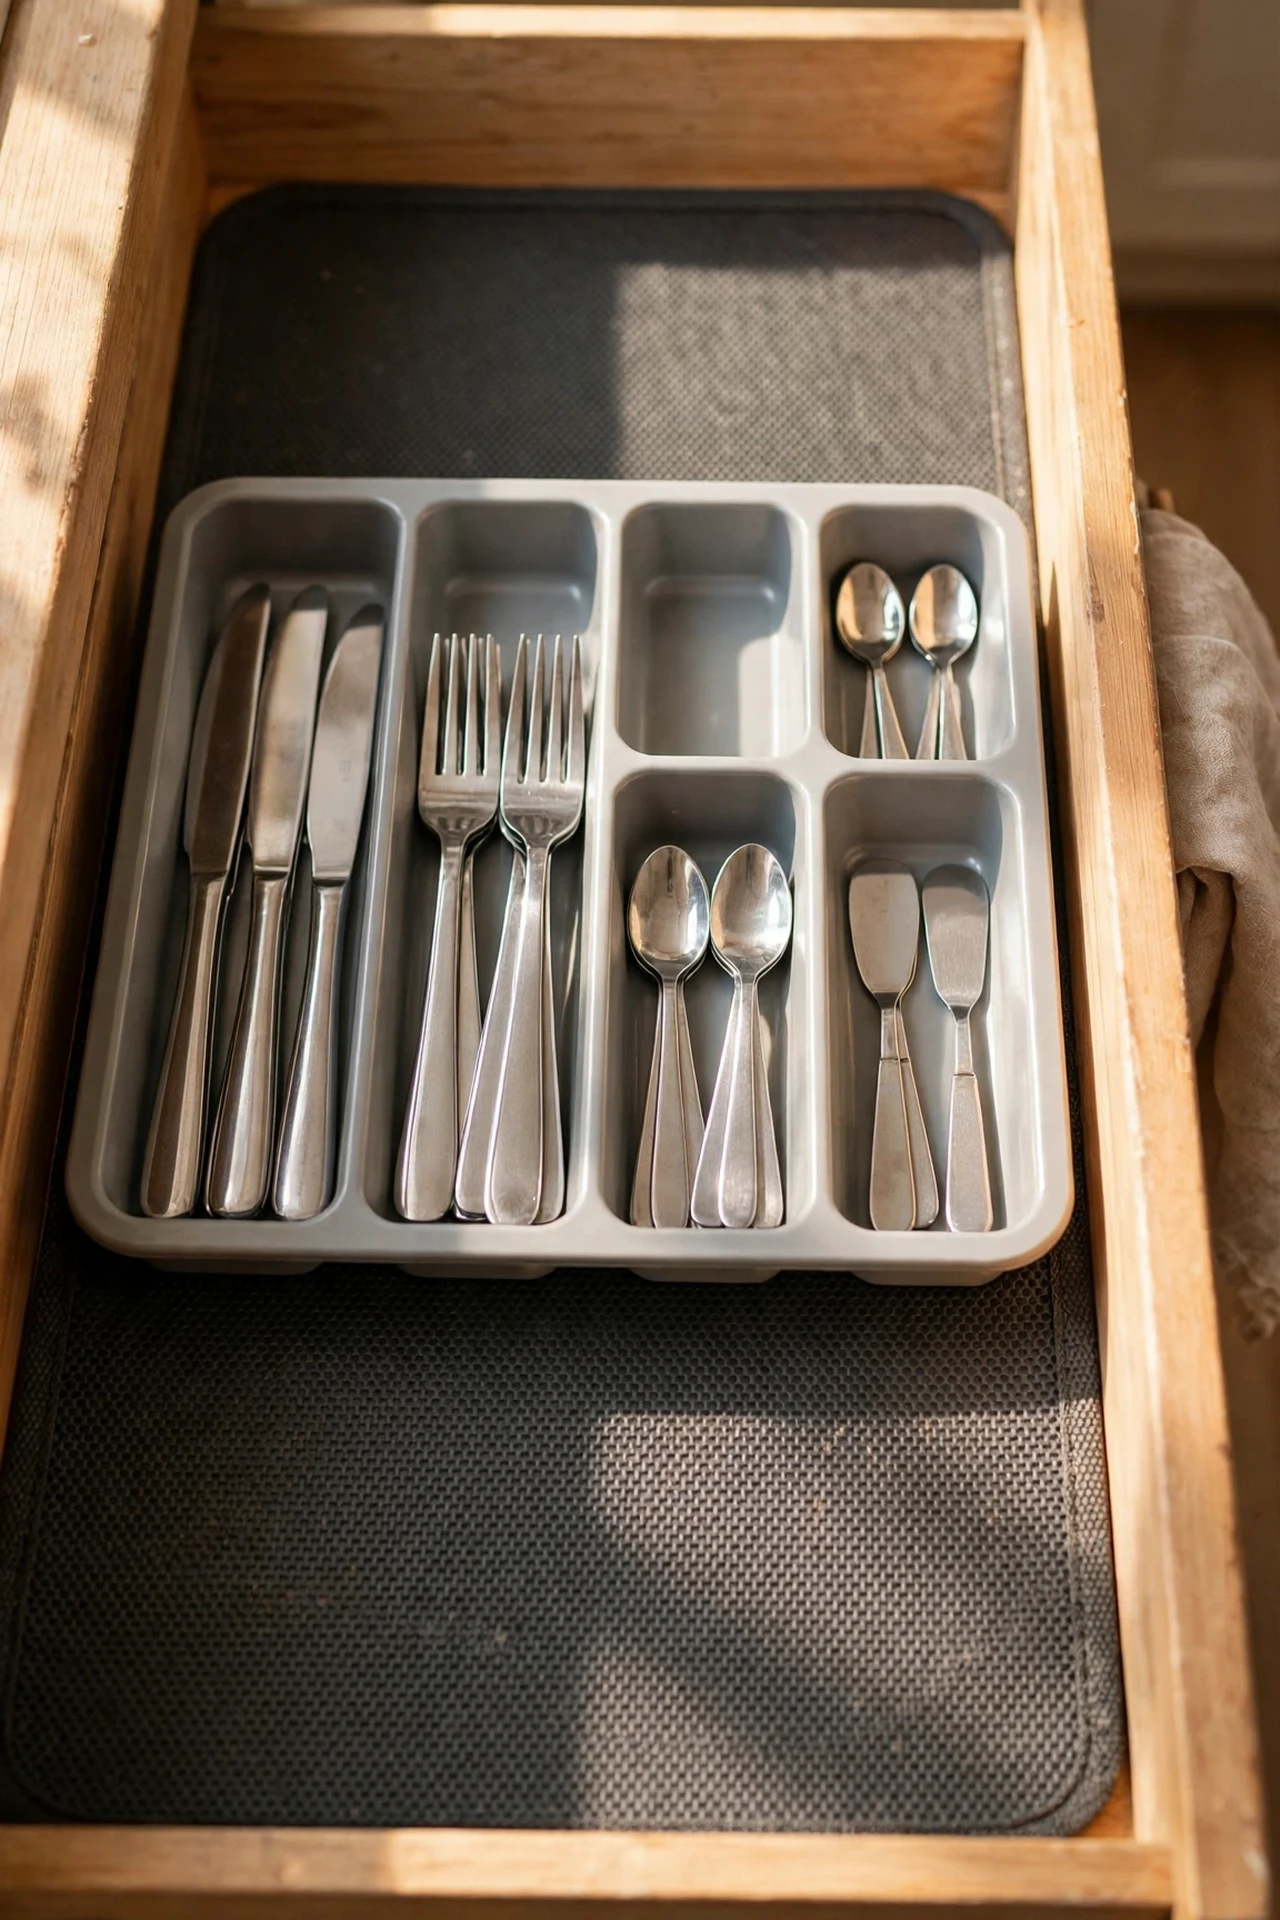
This is the least glamorous idea on the list and quietly one of the best. A roll of dollar store non-slip drawer liner, cut to fit, stops cutlery trays migrating, keeps spice jars from sliding, and makes every drawer feel oddly luxurious. The steps: measure each drawer, cut the liner slightly generous, lay it flat and press out the bubbles. I lined every kitchen drawer in half an hour and the cutlery tray hasn’t moved since — I didn’t realise how much the daily rattle was annoying me until it stopped. The mistake to avoid is the paper-thin liner; double it up in heavy-use drawers or it’ll tear within months. Two layers, done once, lasts years.
Cost: ~$2.50 | Time: 30 minutes
If any of these made you think “I need to do that this weekend” — save this post now. Future-you, wandering the dollar store aisles with a basket, will be very glad past-you was organised about it.
That’s all twenty-one: a full kitchen reset for less than the cost of one fancy organiser from a home store. Start with the cupboard that annoys you most — by Sunday evening, opening it will make you smile instead of sigh.
