19 DIY Halloween Decor Ideas on a Budget
Two Octobers ago I decided to host a Halloween get-together and nearly talked myself out of decorating when I priced up the shop-bought stuff. One bag of plastic skeletons cost more than my whole food budget. So I set myself a rule: every bit of diy Halloween decor had to come from the pound shop, the recycling bin, or things I already owned. By party night my front step looked properly haunted, and I had spent less than a takeaway.
All 19 ideas below are the ones that survived: cheap, quick, and genuinely spooky rather than sad. Most cost under $8 and take an evening or less. Start with the porch, because that is what the trick-or-treaters see first. For more autumn styling, see (see also: fall-porch-decor-on-a-budget).
1. Milk Jug Ghost Lanterns
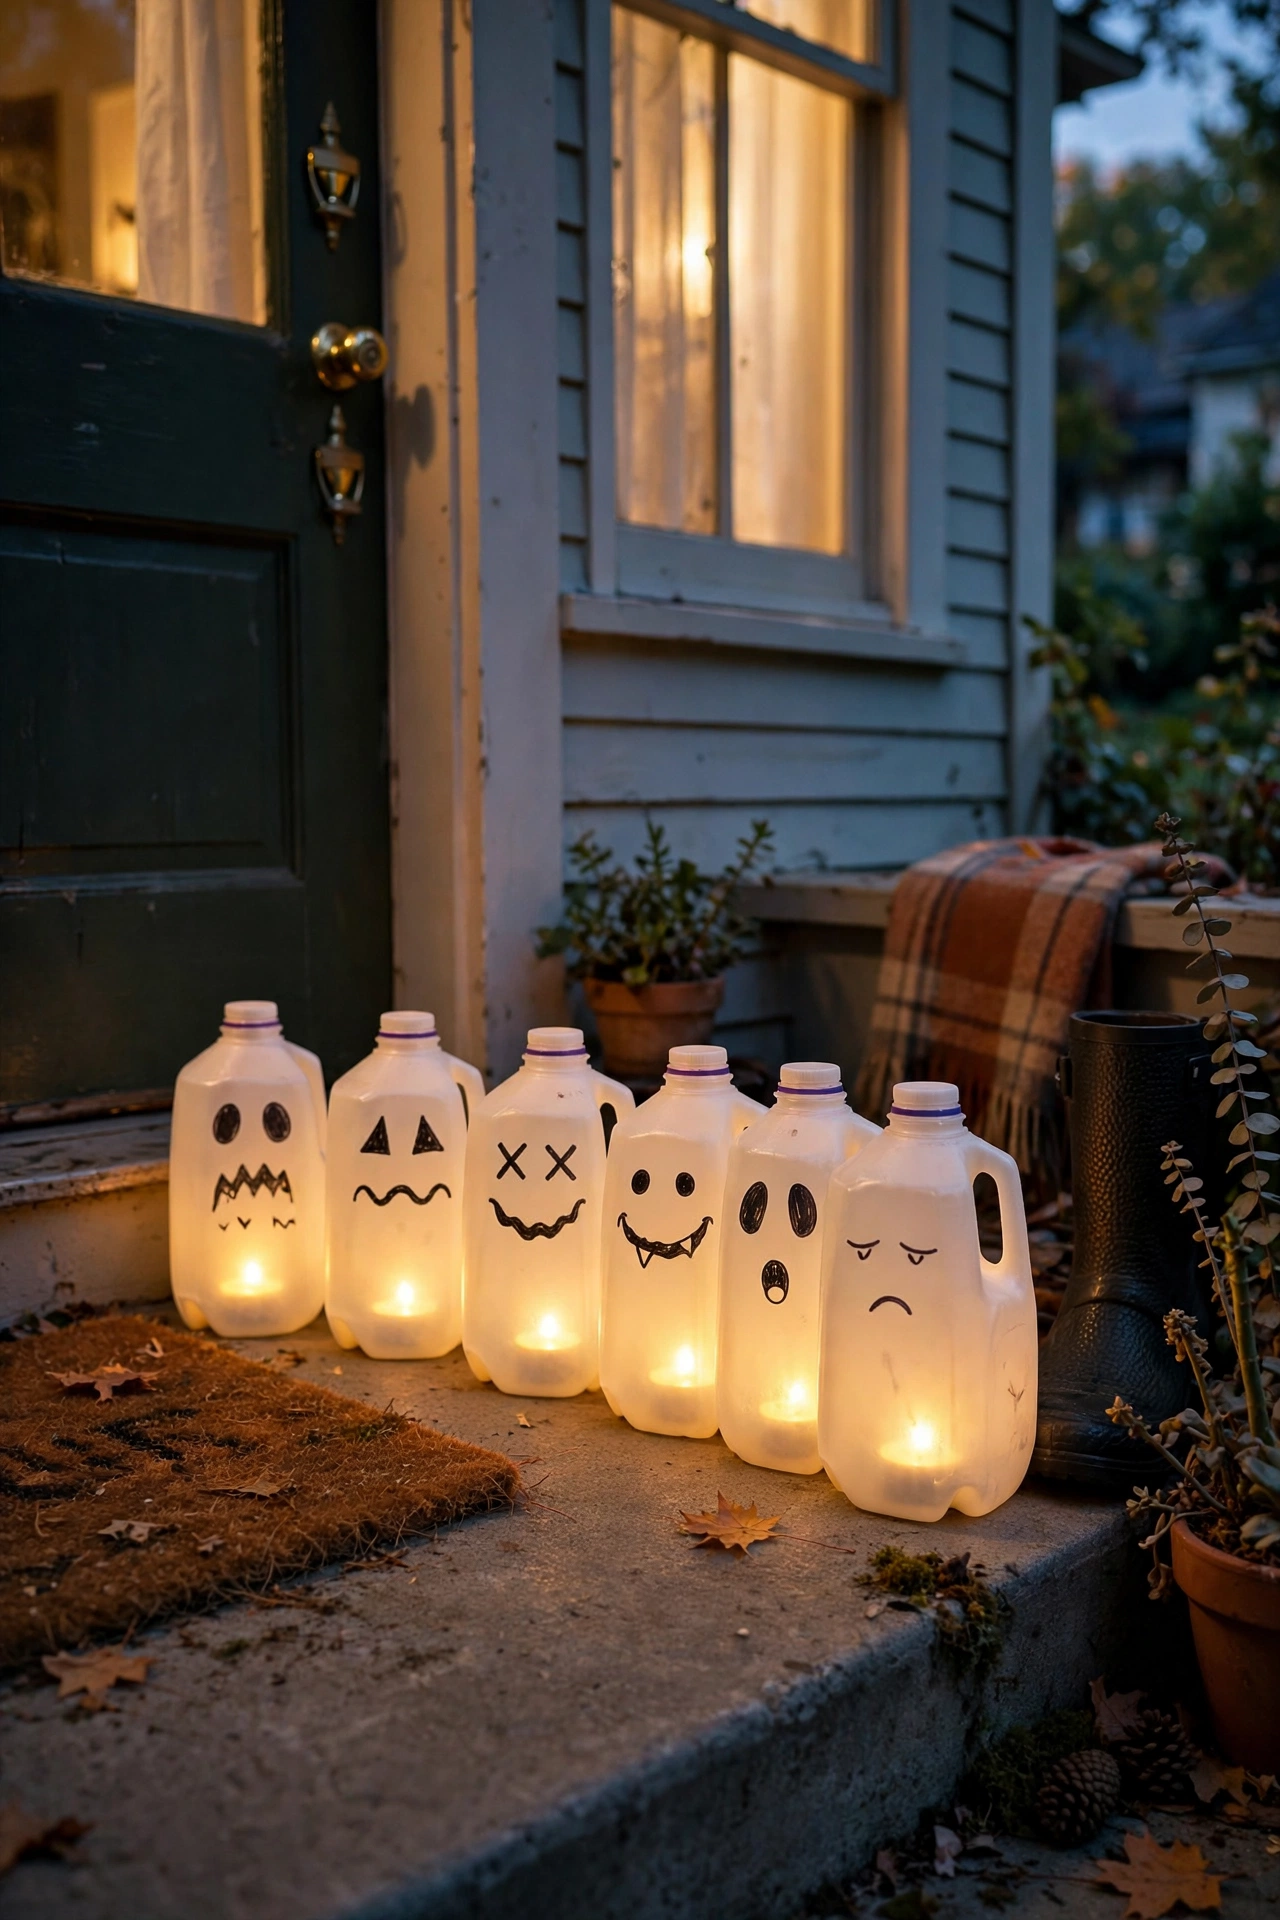
Save your empty milk jugs for a week and you have a whole ghost family waiting to happen. Draw simple spooky faces on each jug with a black marker, drop a battery tea light inside, and line them along your front step or hallway floor. I made eight of these the first year and the neighbours thought I had bought them. My mistake was using real candles the first time, which warped the plastic and smelled awful. Battery lights only. Frosted jugs glow best, so give clear ones a light mist of white spray paint first.
Cost: ~$4-6 | Time: 1 hour
2. Cheesecloth Hanging Ghosts
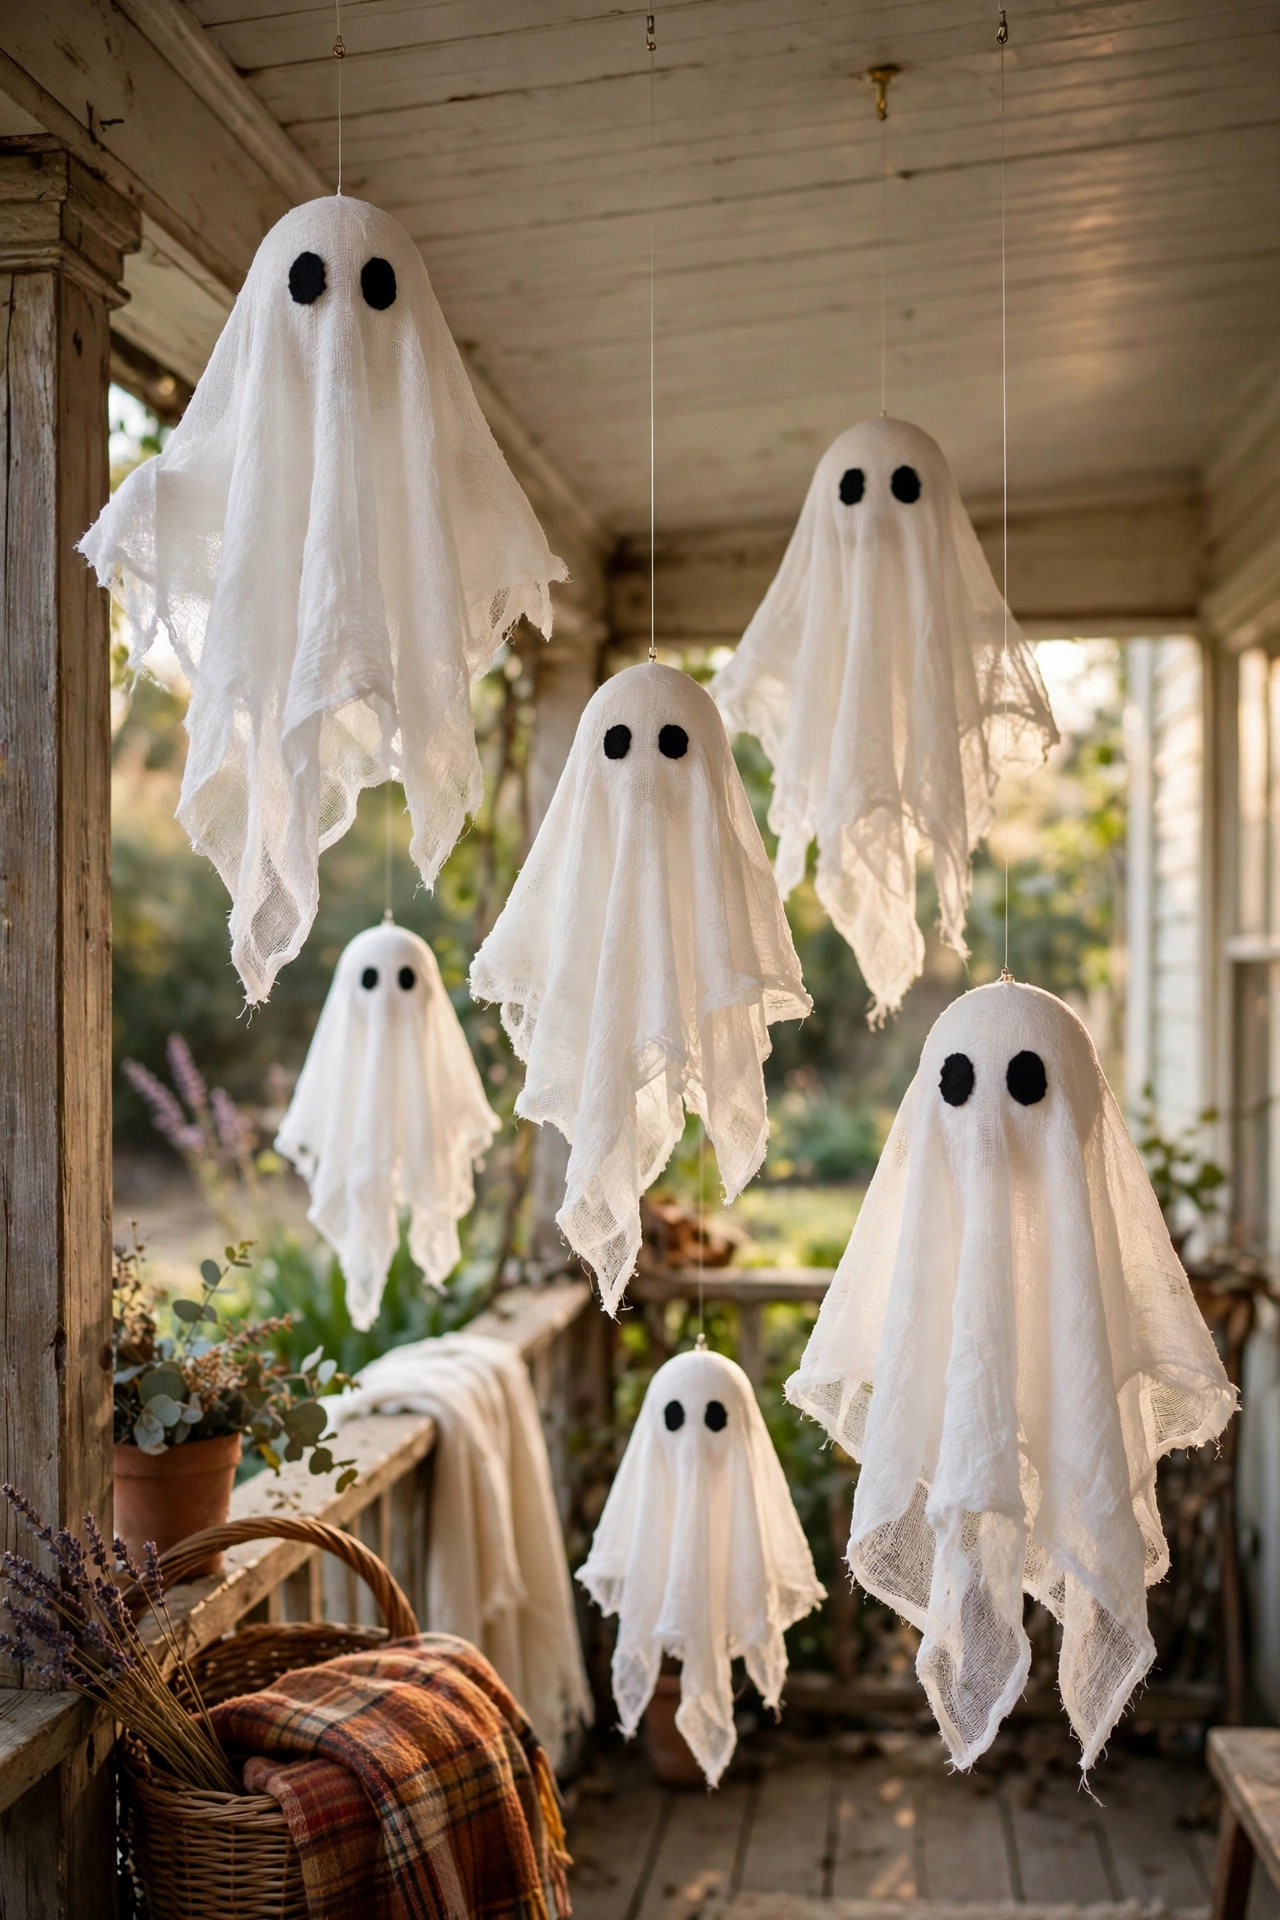
Cheesecloth ghosts floating from the porch ceiling are the single most effective cheap scare I know. Drape damp cheesecloth over a balloon taped to a stick frame, brush the whole thing with watered-down white glue, and let it dry overnight. Pop the balloon and you have a stiff little ghost. I hang mine at different heights with fishing line so they drift in the breeze. The first batch collapsed because I skipped the glue step, so do not skip it. A dab of black felt makes the eyes.
Cost: ~$5-8 | Time: 2 hours plus drying
3. Black Paper Bat Swarm Wall
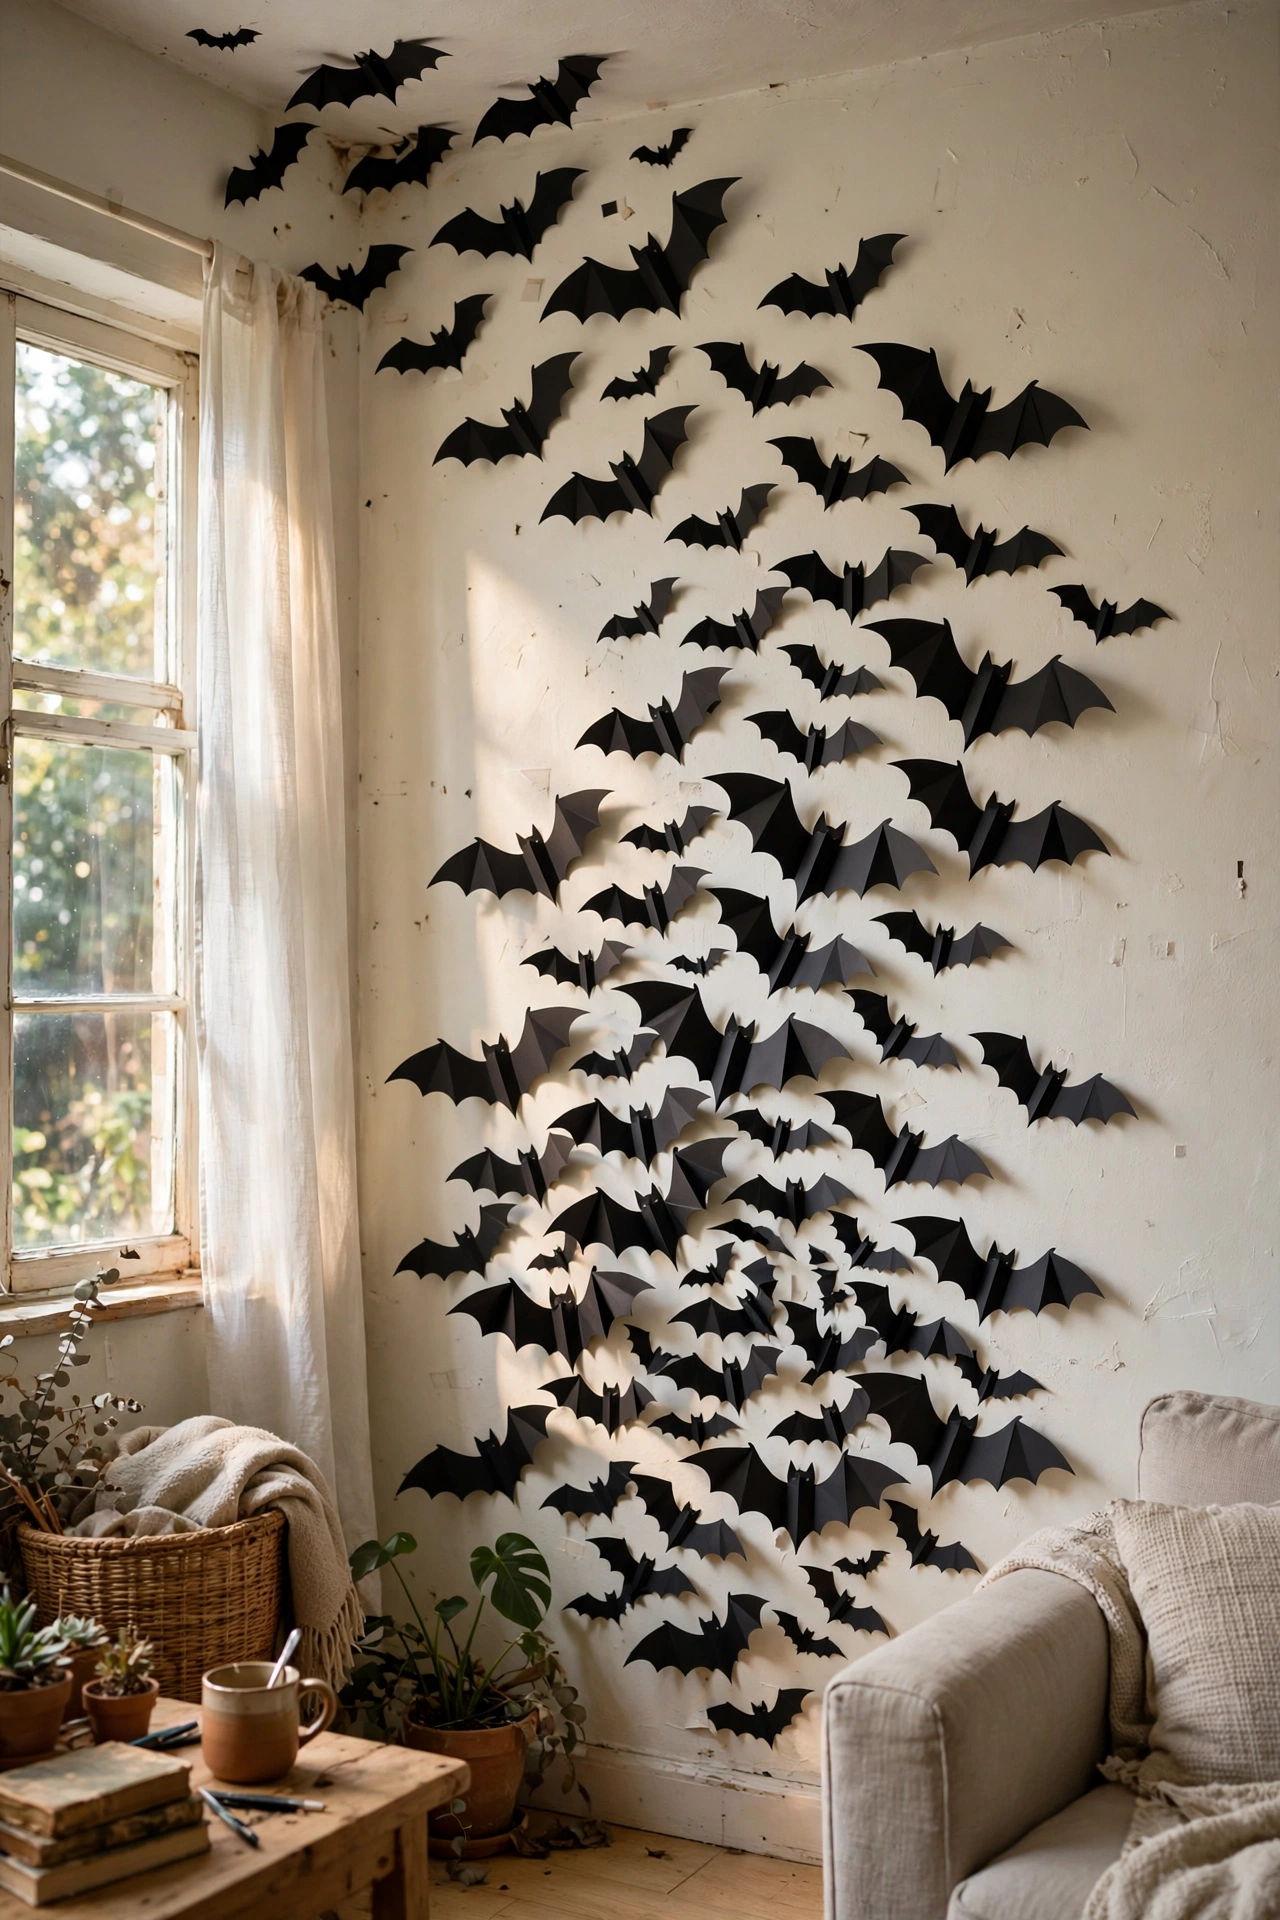
A swarm of paper bats across one wall looks dramatic and costs almost nothing. Fold black card in half, cut a simple bat shape, and stick them to the wall with removable adhesive dots, wings slightly bent so they cast shadows. I covered the wall behind my sofa with about forty bats in an evening, flying up toward the ceiling like they were escaping the fireplace. Print a template if freehand drawing worries you. Keep them away from lamps, because paper and heat are a bad mix.
Cost: ~$3-5 | Time: 1 hour
Pro tip: Buy your black card and glue dots in one trip, because nothing kills a Halloween crafting evening like a mid-project shop run.
4. Pound Shop Pumpkin Stack Topiary
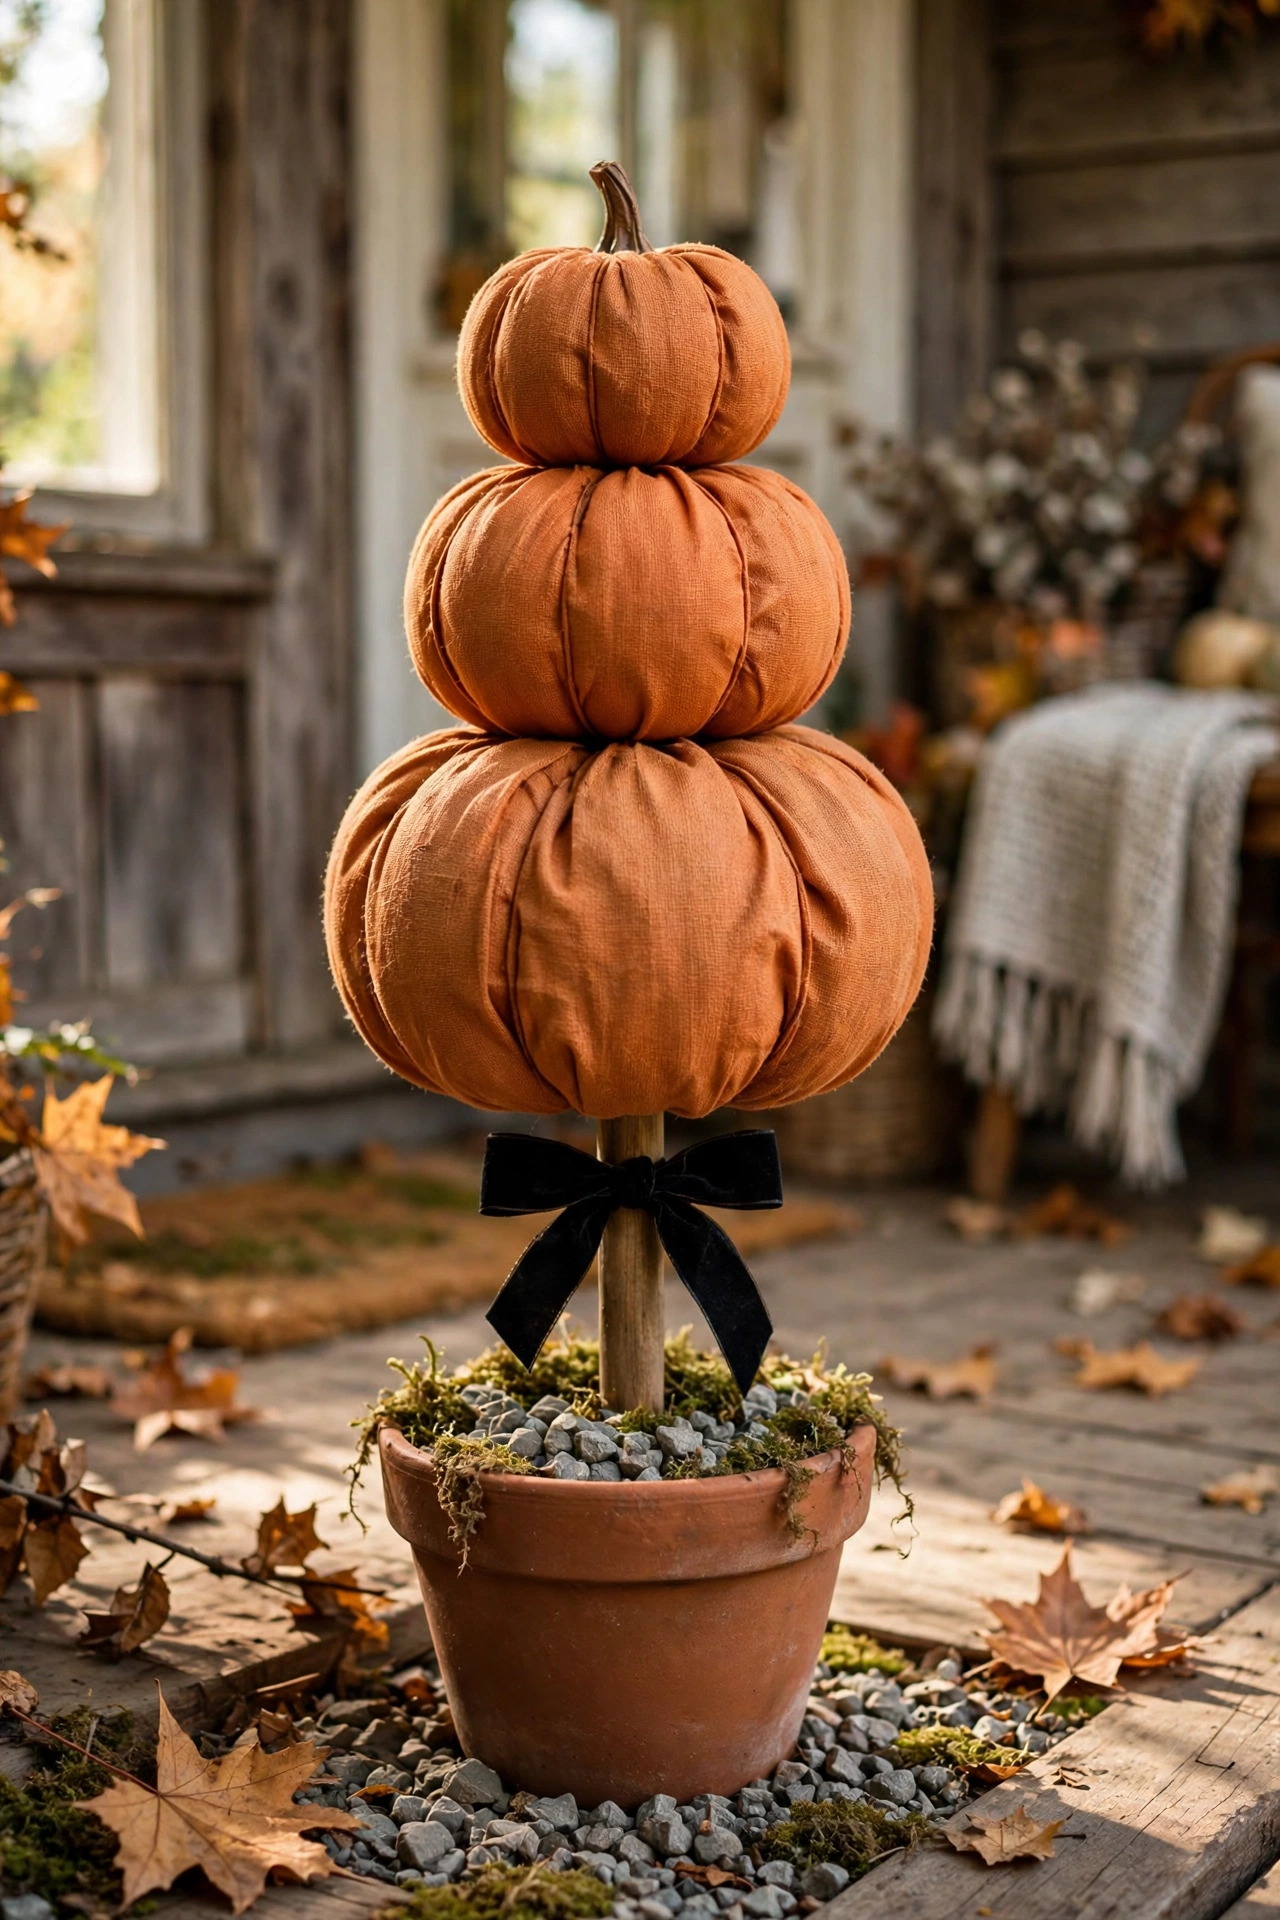
Three fake pumpkins stacked on a dowel in a heavy pot reads as a proper porch topiary. I push a wooden dowel into a plant pot filled with gravel, slide the pumpkins down over it largest to smallest, and wedge a bit of moss around the bases to hide the joins. Mine has survived three Octobers now. Spray the pumpkins with a matte sealer if they live outside, because cheap foam fades fast in sun. A black ribbon bow at the top finishes it.
Cost: ~$8-12 | Time: 30 minutes
5. Spray-Painted Foam Pumpkin Mantel
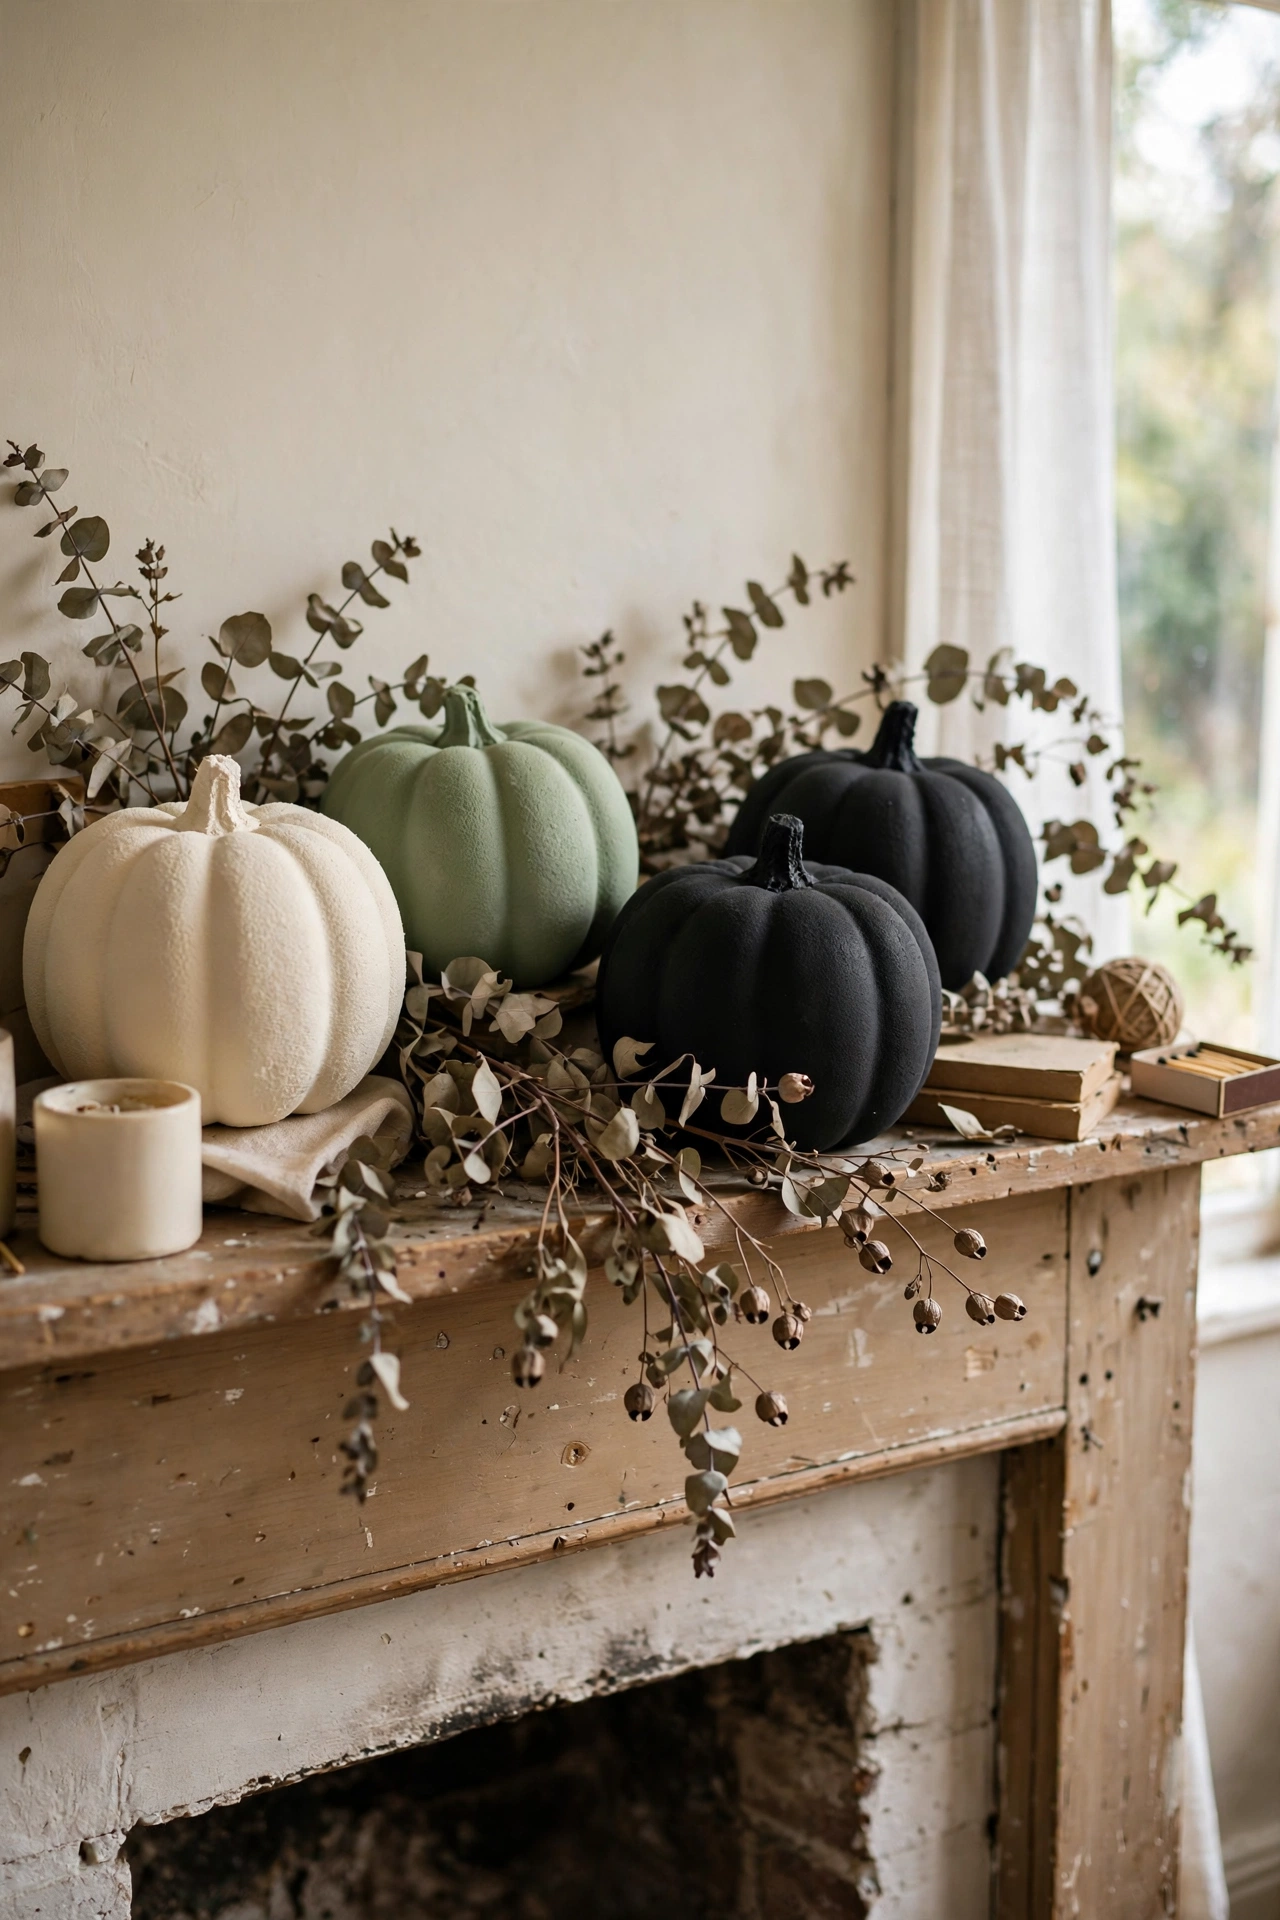
Orange foam pumpkins look plasticky until you paint them. I spray mine in cream, sage, and matte black, then cluster them along the mantel with dried eucalyptus tucked between. The whole display cost me less than one realistic faux pumpkin from a home store. Sand the pumpkins very lightly first so the paint grips. I tried skipping that step once and the paint flaked off in sheets by November. Two light coats beat one heavy coat every time. I buy the cheap foam pumpkins in October when the craft shops discount them, and one can of paint covers about six.
Cost: ~$6-10 | Time: 1 hour plus drying
6. Black Cat Silhouette Window Clings
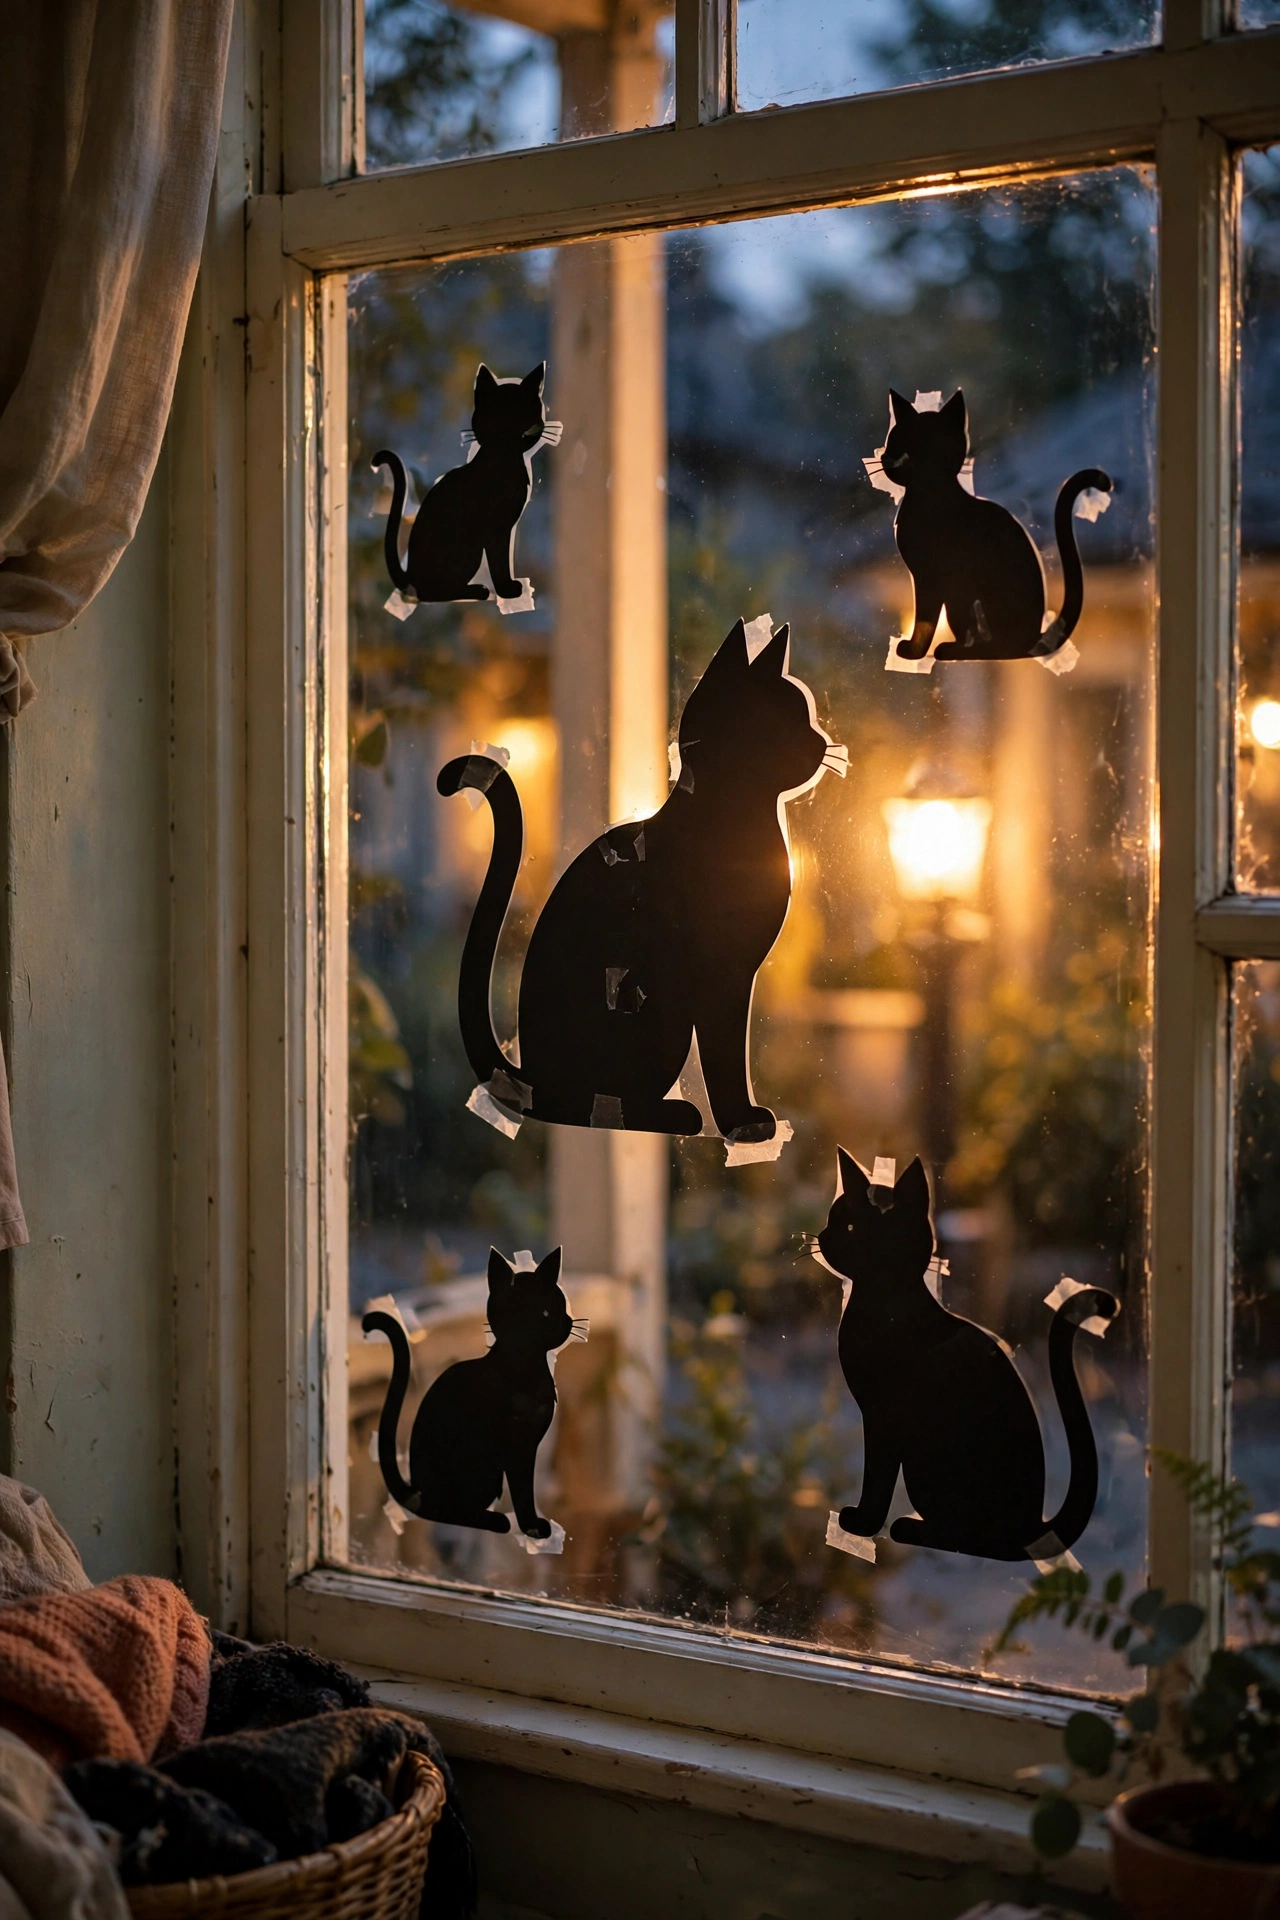
Black cat silhouettes in the windows tell the whole street you are celebrating. I draw simple cat shapes on black paper, cut them out, and stick them inside the glass with a dab of reusable adhesive so they read as silhouettes from outside. Backlight them with a warm lamp in the evening and they look genuinely eerie. My first cat looked more like a rabbit, so I switched to a printed template and traced it. Three cats of different sizes look better than one big one.
Cost: ~$2-4 | Time: 45 minutes
Pro tip: Black paper silhouettes work best in windows that face the street at dusk, when the inside light turns them into proper shadows.
7. Corner Spider Web from Yarn
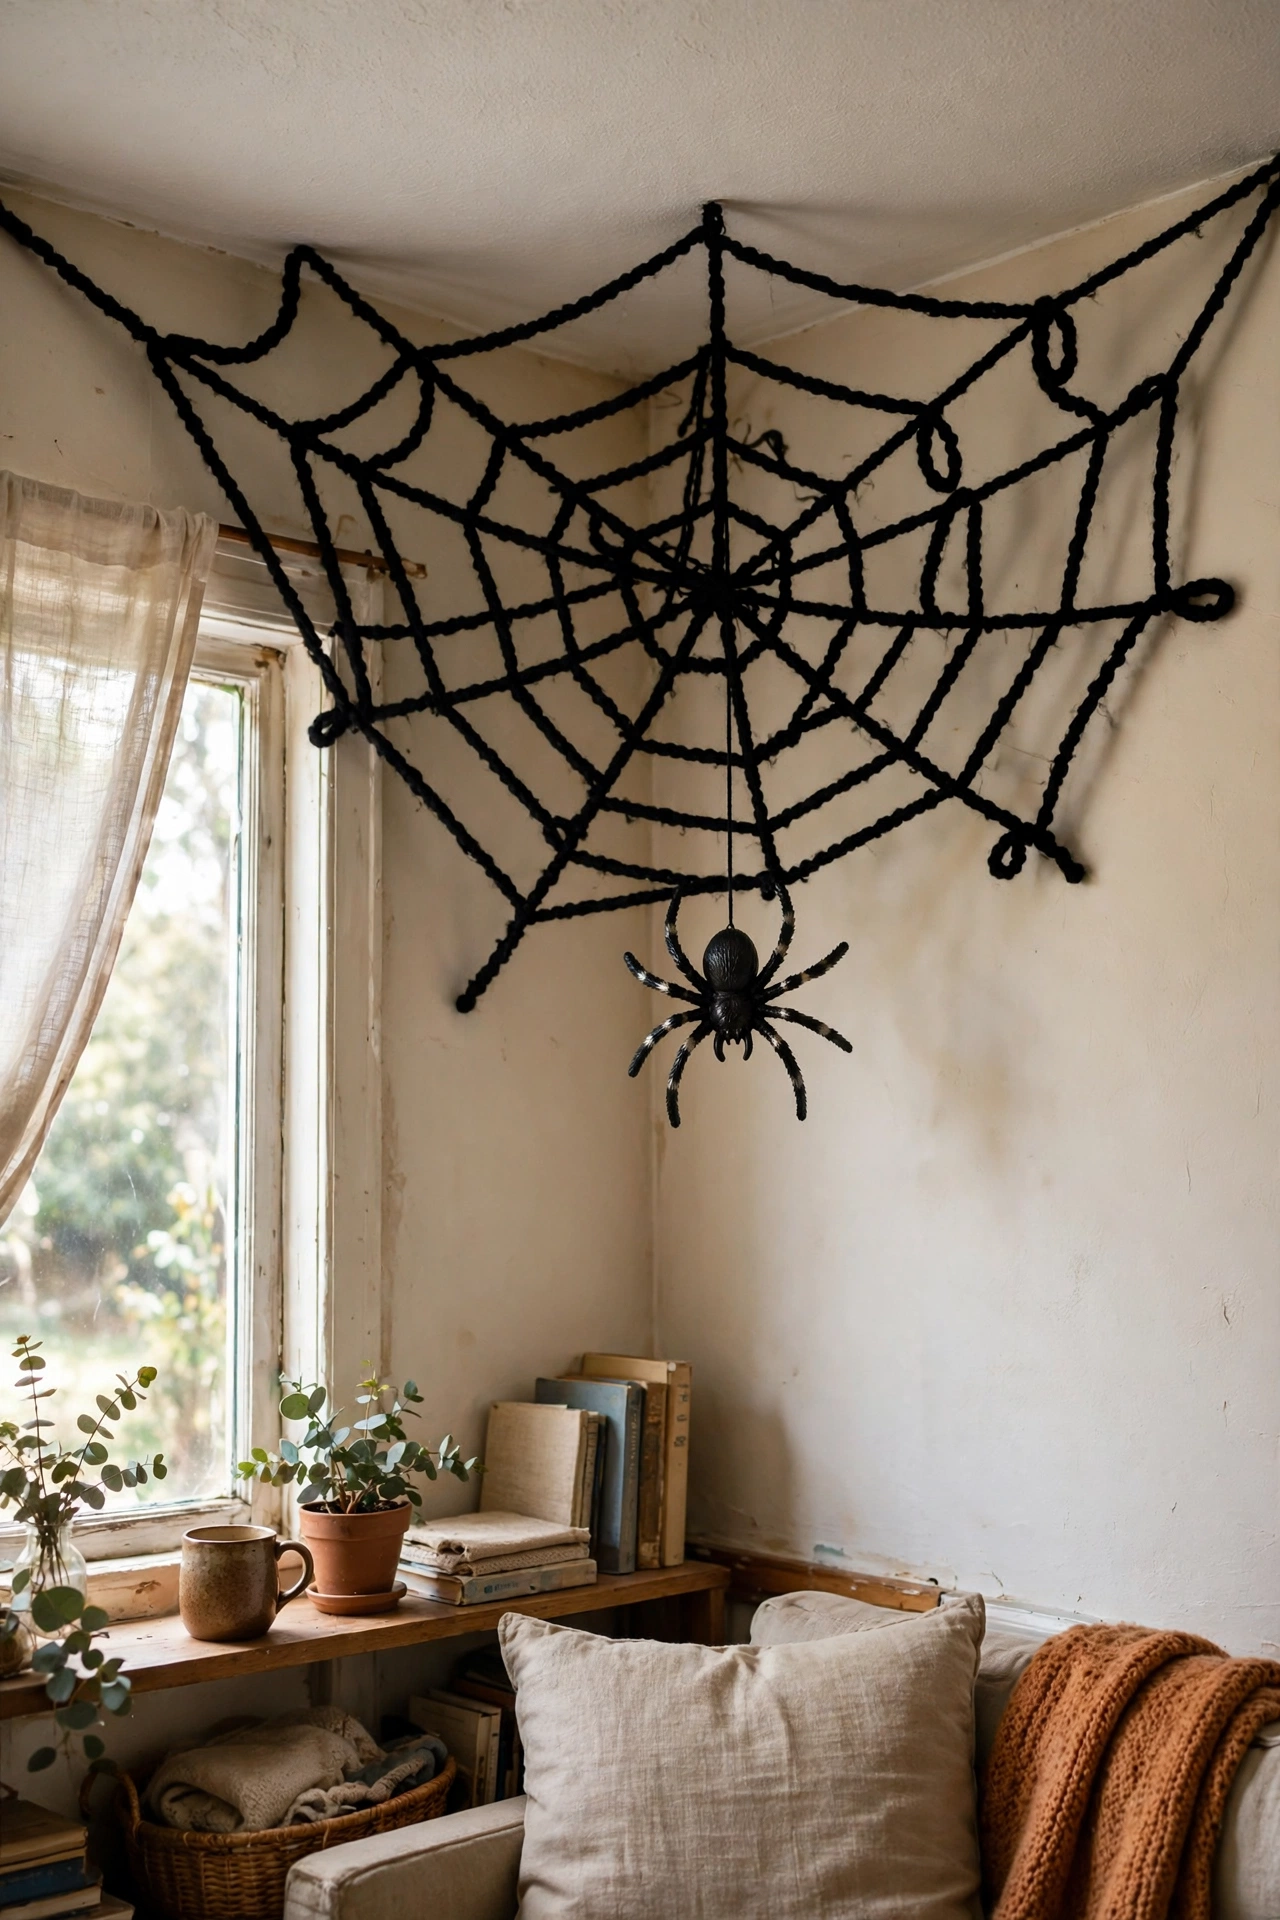
A giant yarn web across a ceiling corner is the fastest way to make a room feel haunted. I tape anchor strands of thick black yarn from the corner point outward like spokes, then weave a spiral of thinner yarn around them, tying loosely as I go. Add a big plastic spider and you are done. The first web I made sagged because my anchor points were too far apart, so keep spokes within a foot of each other. White yarn shows up better in dark rooms if black feels too flat.
Cost: ~$3-5 | Time: 45 minutes
8. Monster-Face Mason Jar Sweet Holders
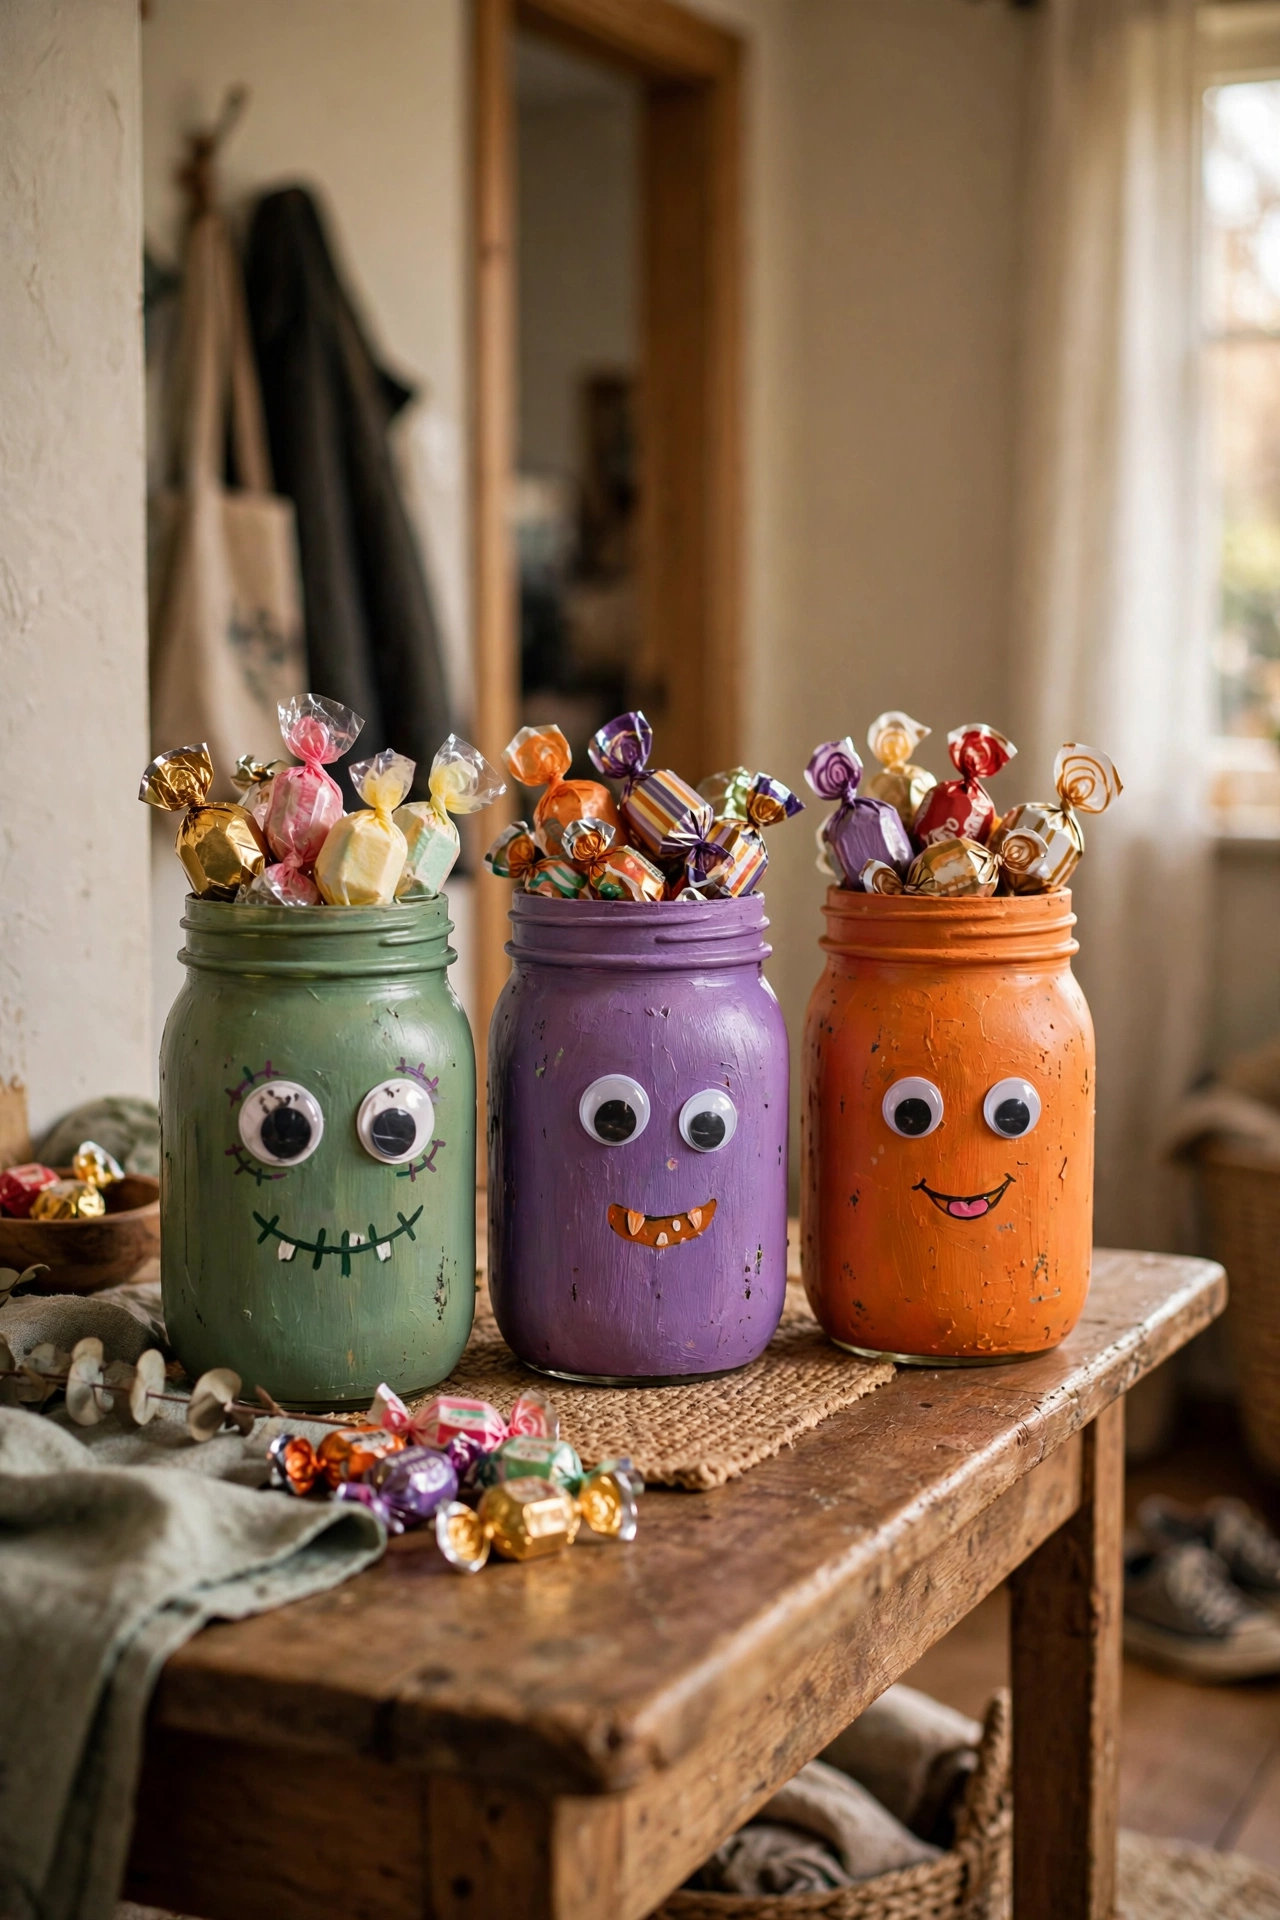
Mason jars painted as monsters do double duty as decor and sweet bowls. I paint the jars green, purple, and orange with craft paint, add googly eyes and stitched mouths with a marker, and fill them with wrapped sweets for visitors. They sit on my hallway table every October and the kids love choosing which monster to take from. Paint the outside only, and let each coat dry fully or the faces smear. A strip of raffia tied round the neck hides the jar rim.
Cost: ~$6-9 | Time: 1 hour
9. Floating Witch Hat Luminaries
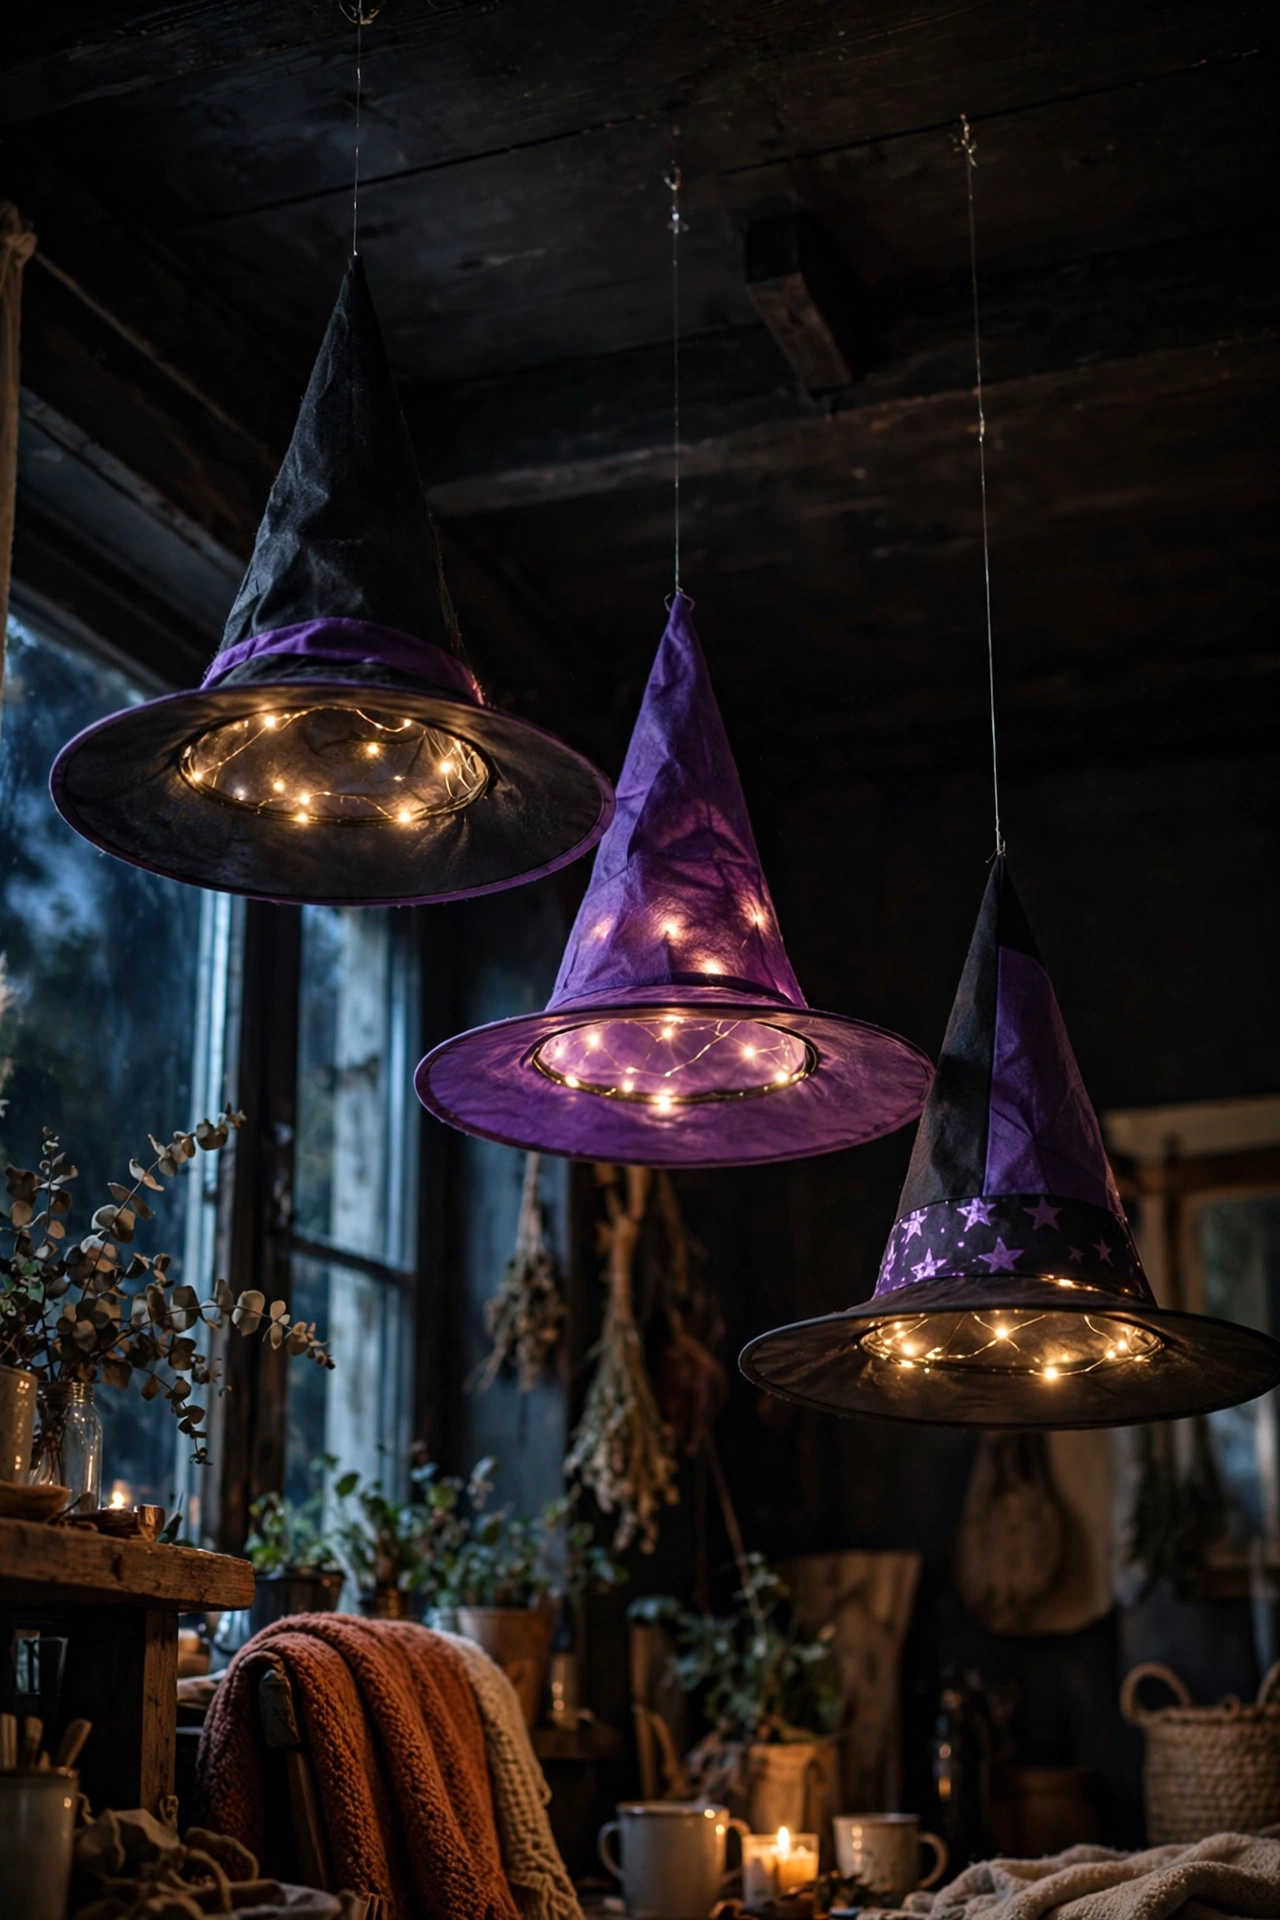
Witch hats hung from the ceiling with glowing lights inside look like they are hovering mid-spell. I buy cheap conical party hats, poke a string of fairy lights up inside each one, and hang them at staggered heights from the ceiling with clear thread. The effect at night is genuinely magical. My mistake the first year was hanging them too high to enjoy; keep the lowest at about head height. Purple and black hats glow best. I use battery fairy lights with a timer so they switch on at dusk by themselves and I never forget. Tie the thread through a small hole at the hat tip so they hang straight.
Cost: ~$7-11 | Time: 1 hour
Pro tip: Fairy lights with a timer function save you climbing on a chair every night to switch your hanging decorations on and off.
10. Washable Bloody Handprint Windows
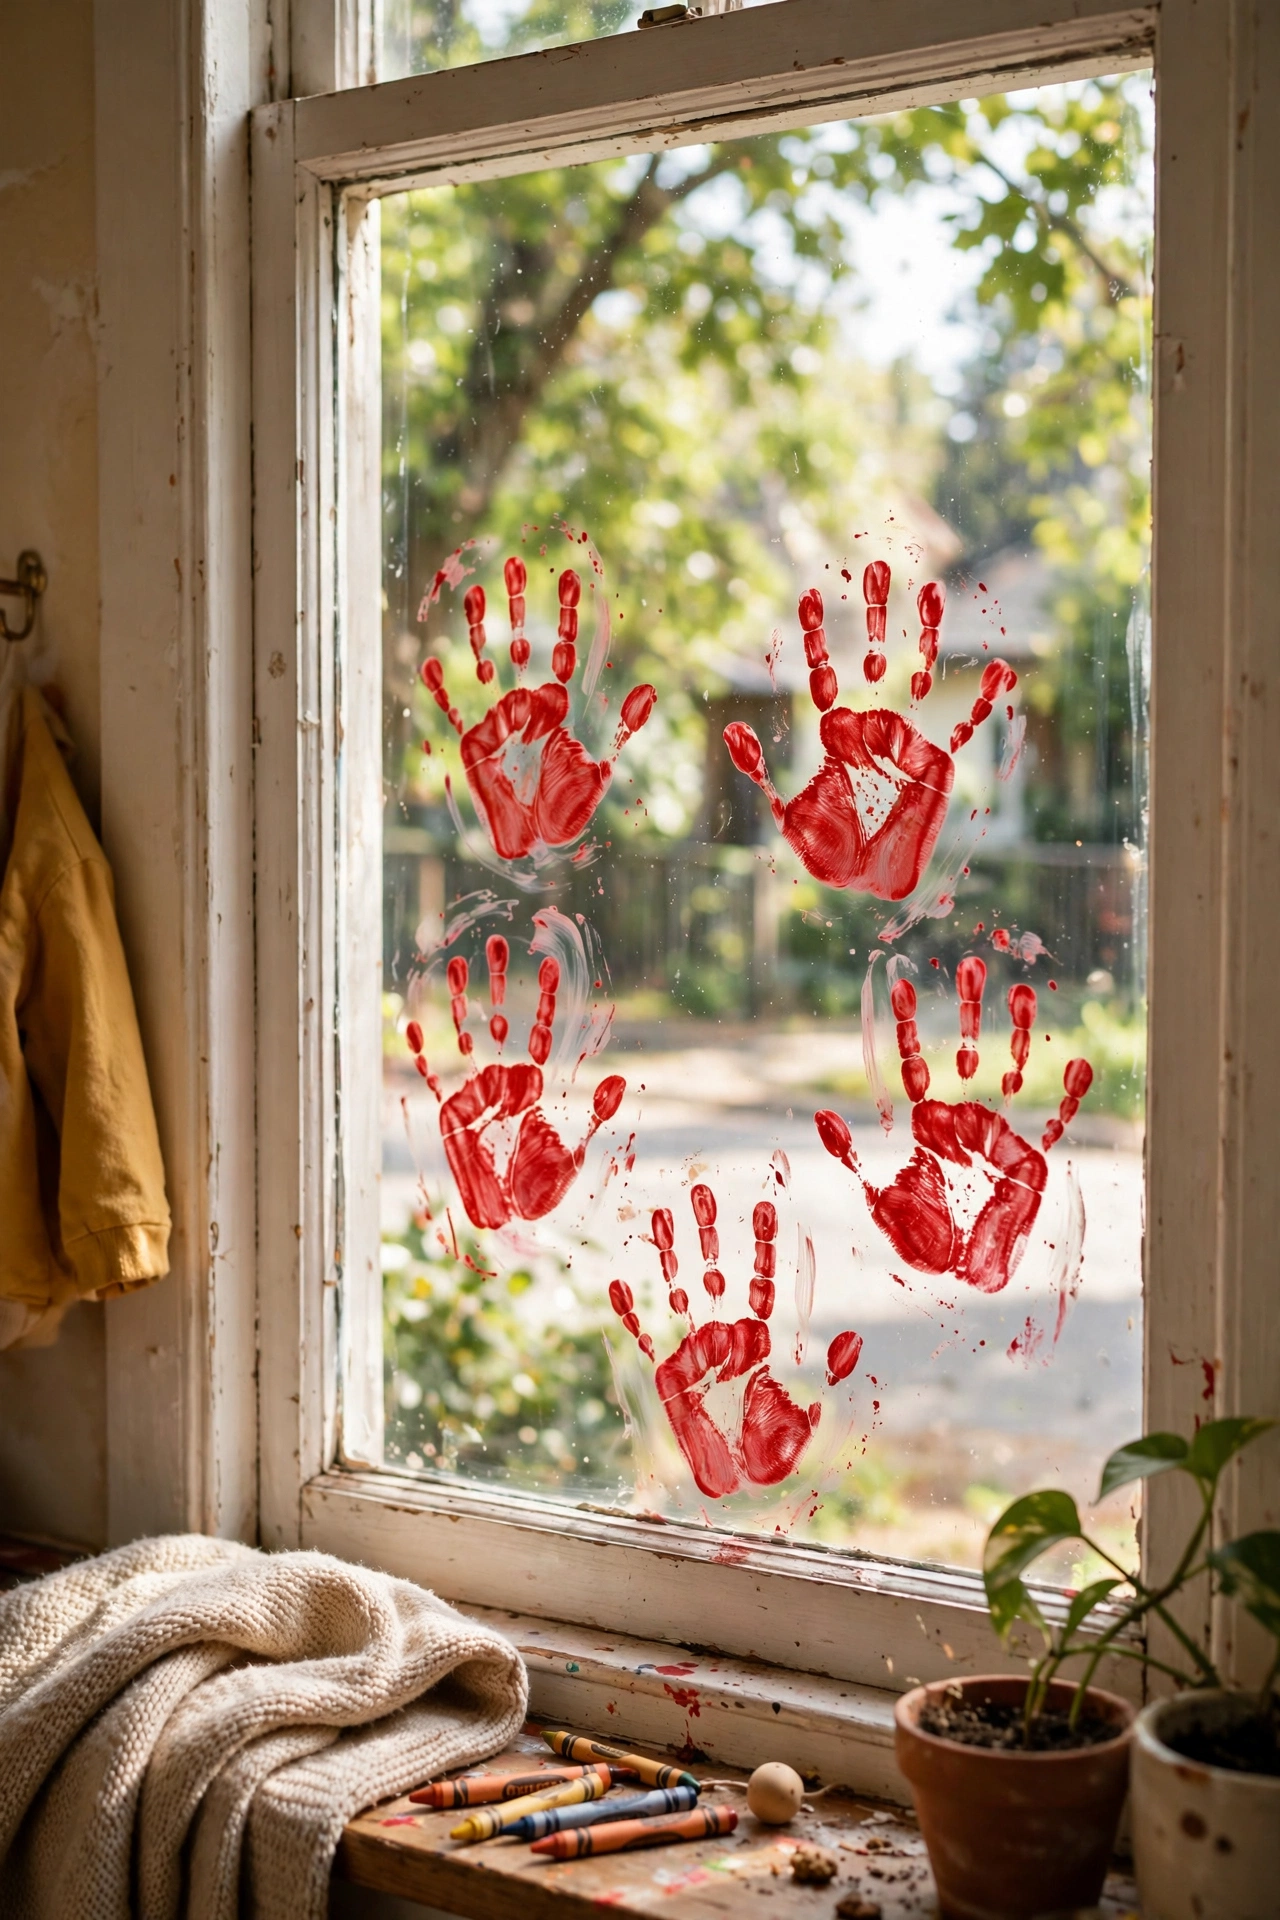
Bloody handprints on the front window are gloriously gross and wash straight off. I mix washable red poster paint with a squirt of washing-up liquid, press my hand in it, and stamp the inside of the glass. The washing-up liquid is the secret: it stops the paint bonding and makes January cleanup a five-minute job. I learned that after scrubbing one window for an hour the first year. Keep prints to the lower panes so they read at child eye level.
Cost: ~$2-3 | Time: 30 minutes
11. Haunted Mirror Message
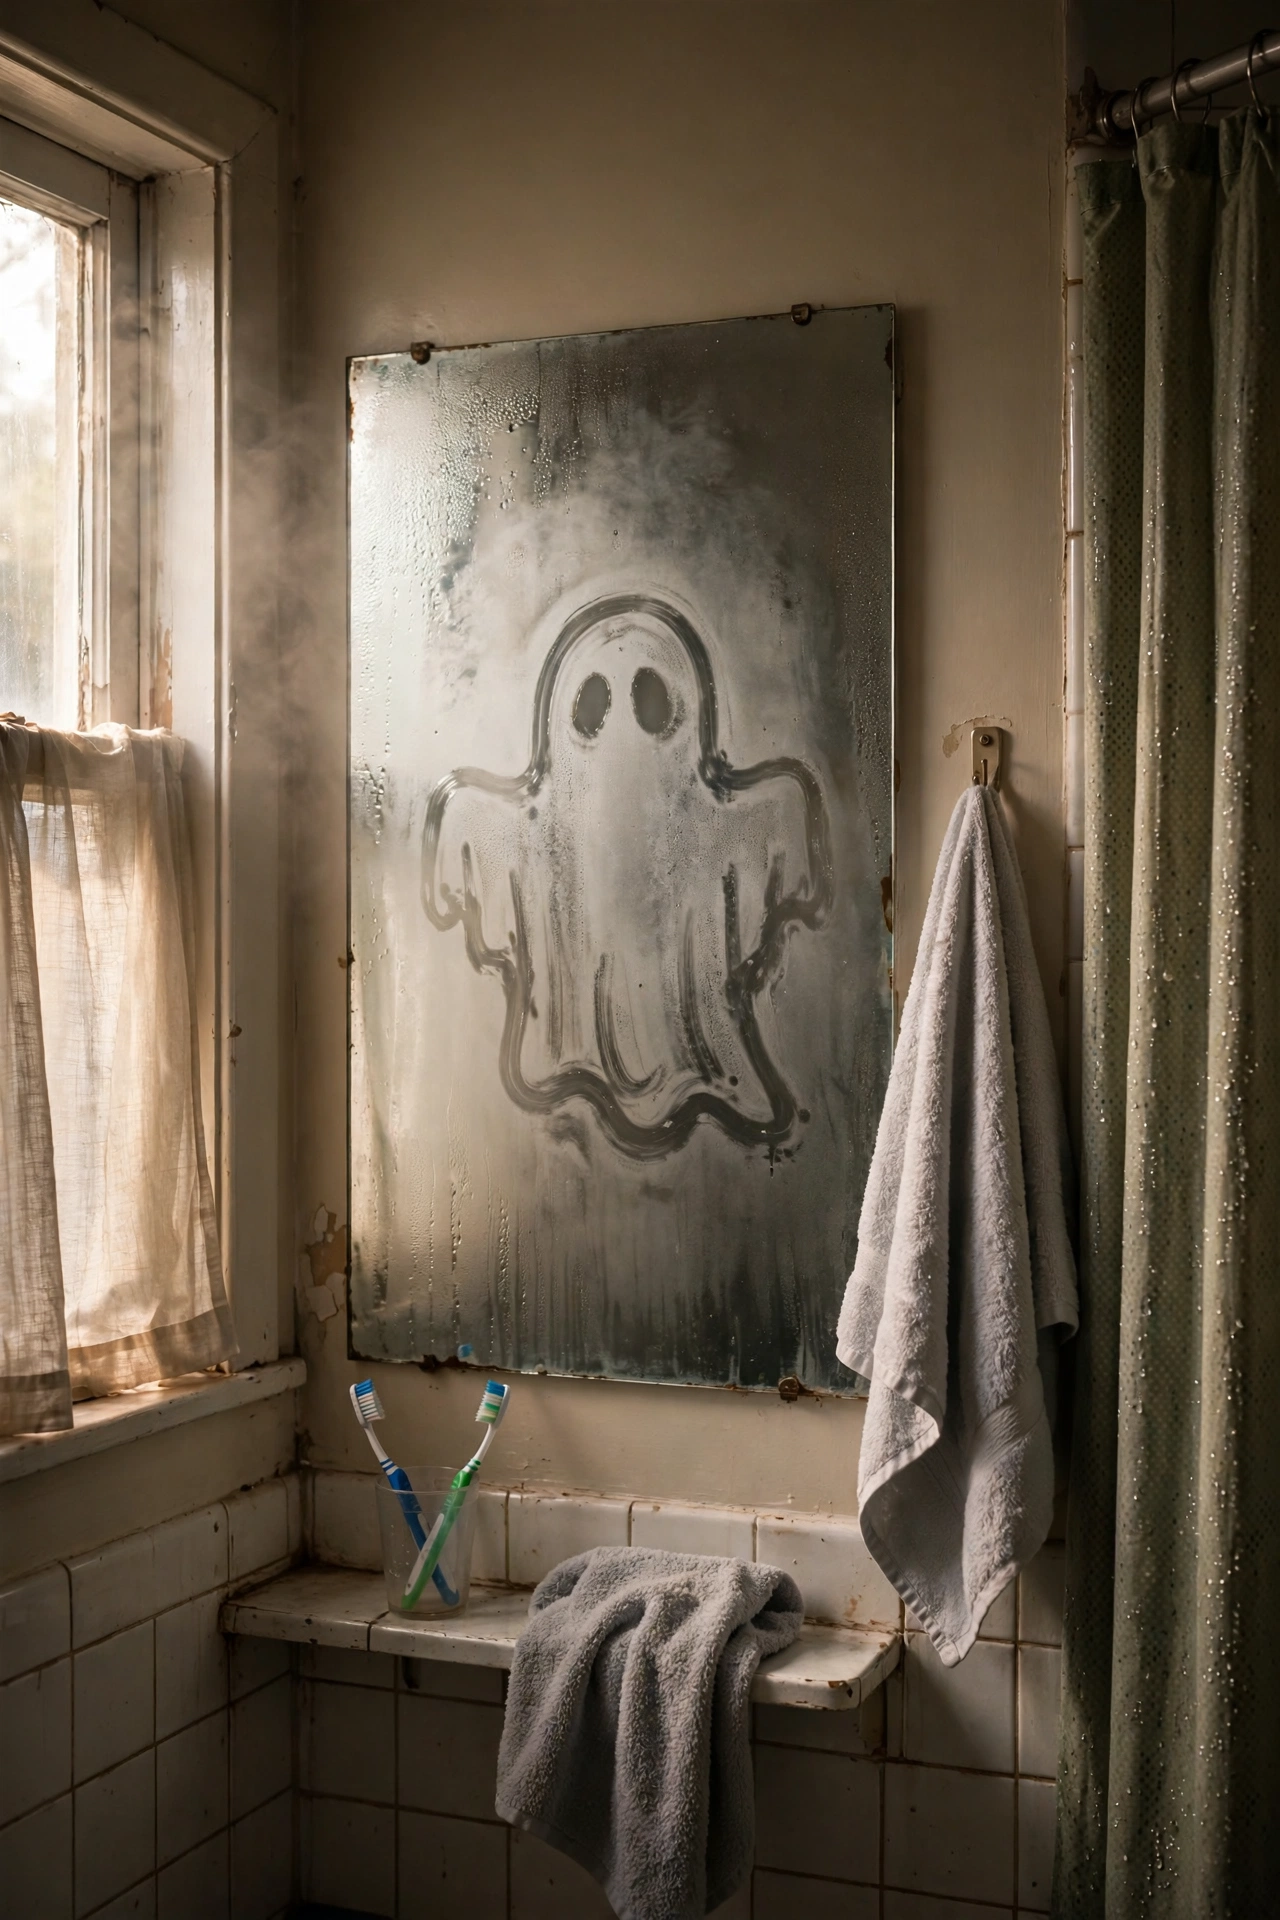
A message that appears on the bathroom mirror when it steams up is my favourite quiet scare. Write on the mirror with a bar of soap or a smear of petroleum jelly, then buff it until invisible. When the shower runs, your words fog into view. I wrote a spooky warning on the guest bathroom mirror before a party and heard the scream from the kitchen. Test it on a small corner first, because some soaps leave a residue that shows in daylight. More party tricks: (see also: diy-halloween-party-ideas).
Cost: ~$1-2 | Time: 15 minutes
12. Cardboard Tombstone Graveyard
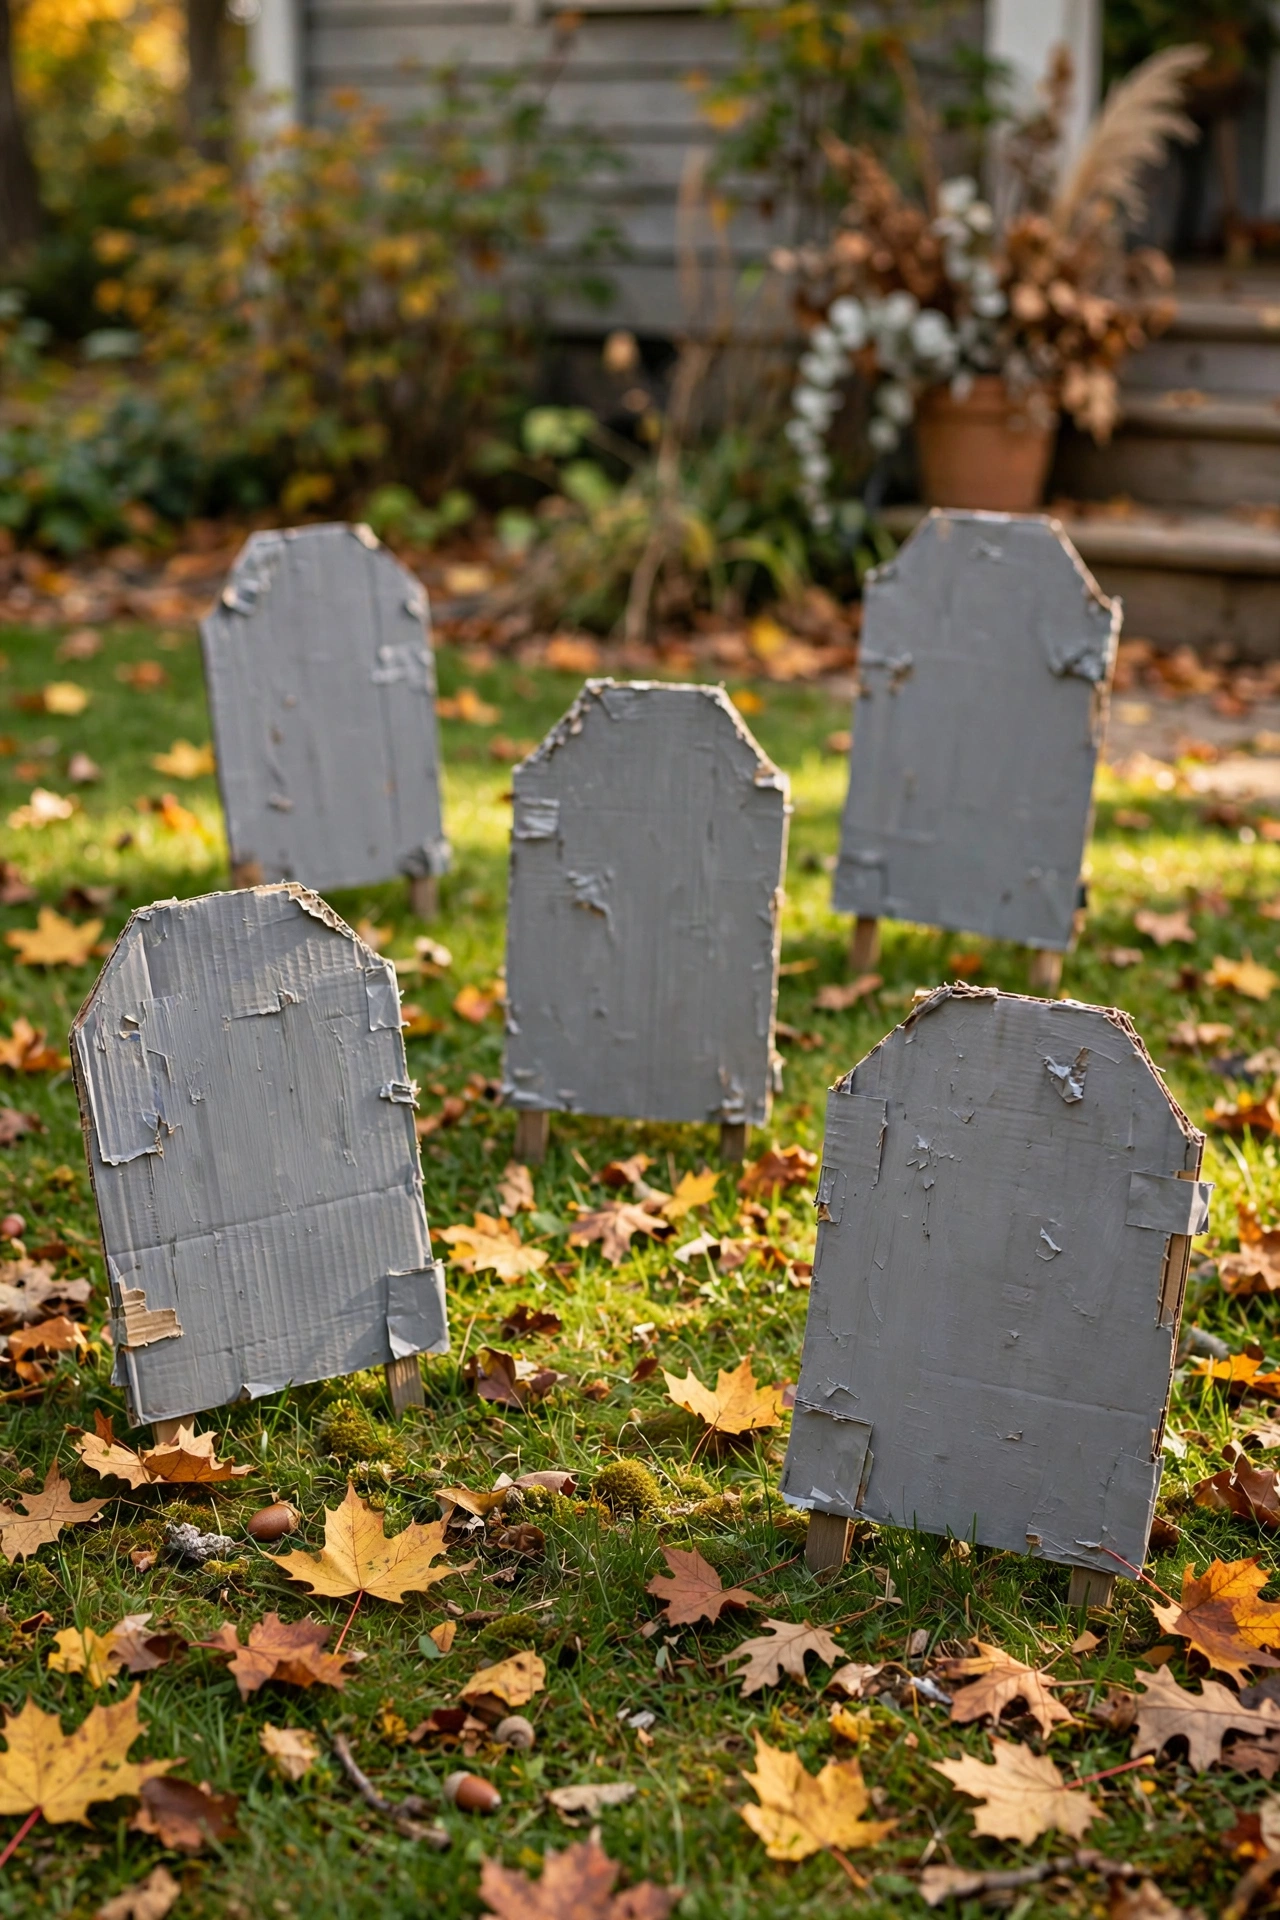
A front-garden graveyard made from cardboard is the classic for a reason. I cut tombstone shapes from thick cardboard boxes, paint them grey with darker shading around the edges, and write silly epitaphs in black marker. Slide each onto a garden cane pushed into the lawn. They survive about two weeks of October weather, which is exactly as long as you need. My first batch blew over, so now I stake every single one. I save the tombstones between seasons stacked flat in the garage, and most years I only need to repaint the edges.
Cost: ~$5-8 | Time: 2 hours
Pro tip: Write your tombstone epitaphs in pencil first. Marker on cardboard is forever, and a spelling slip on a gravestone is a special kind of embarrassment.
13. Spooky Gauze Table Runner
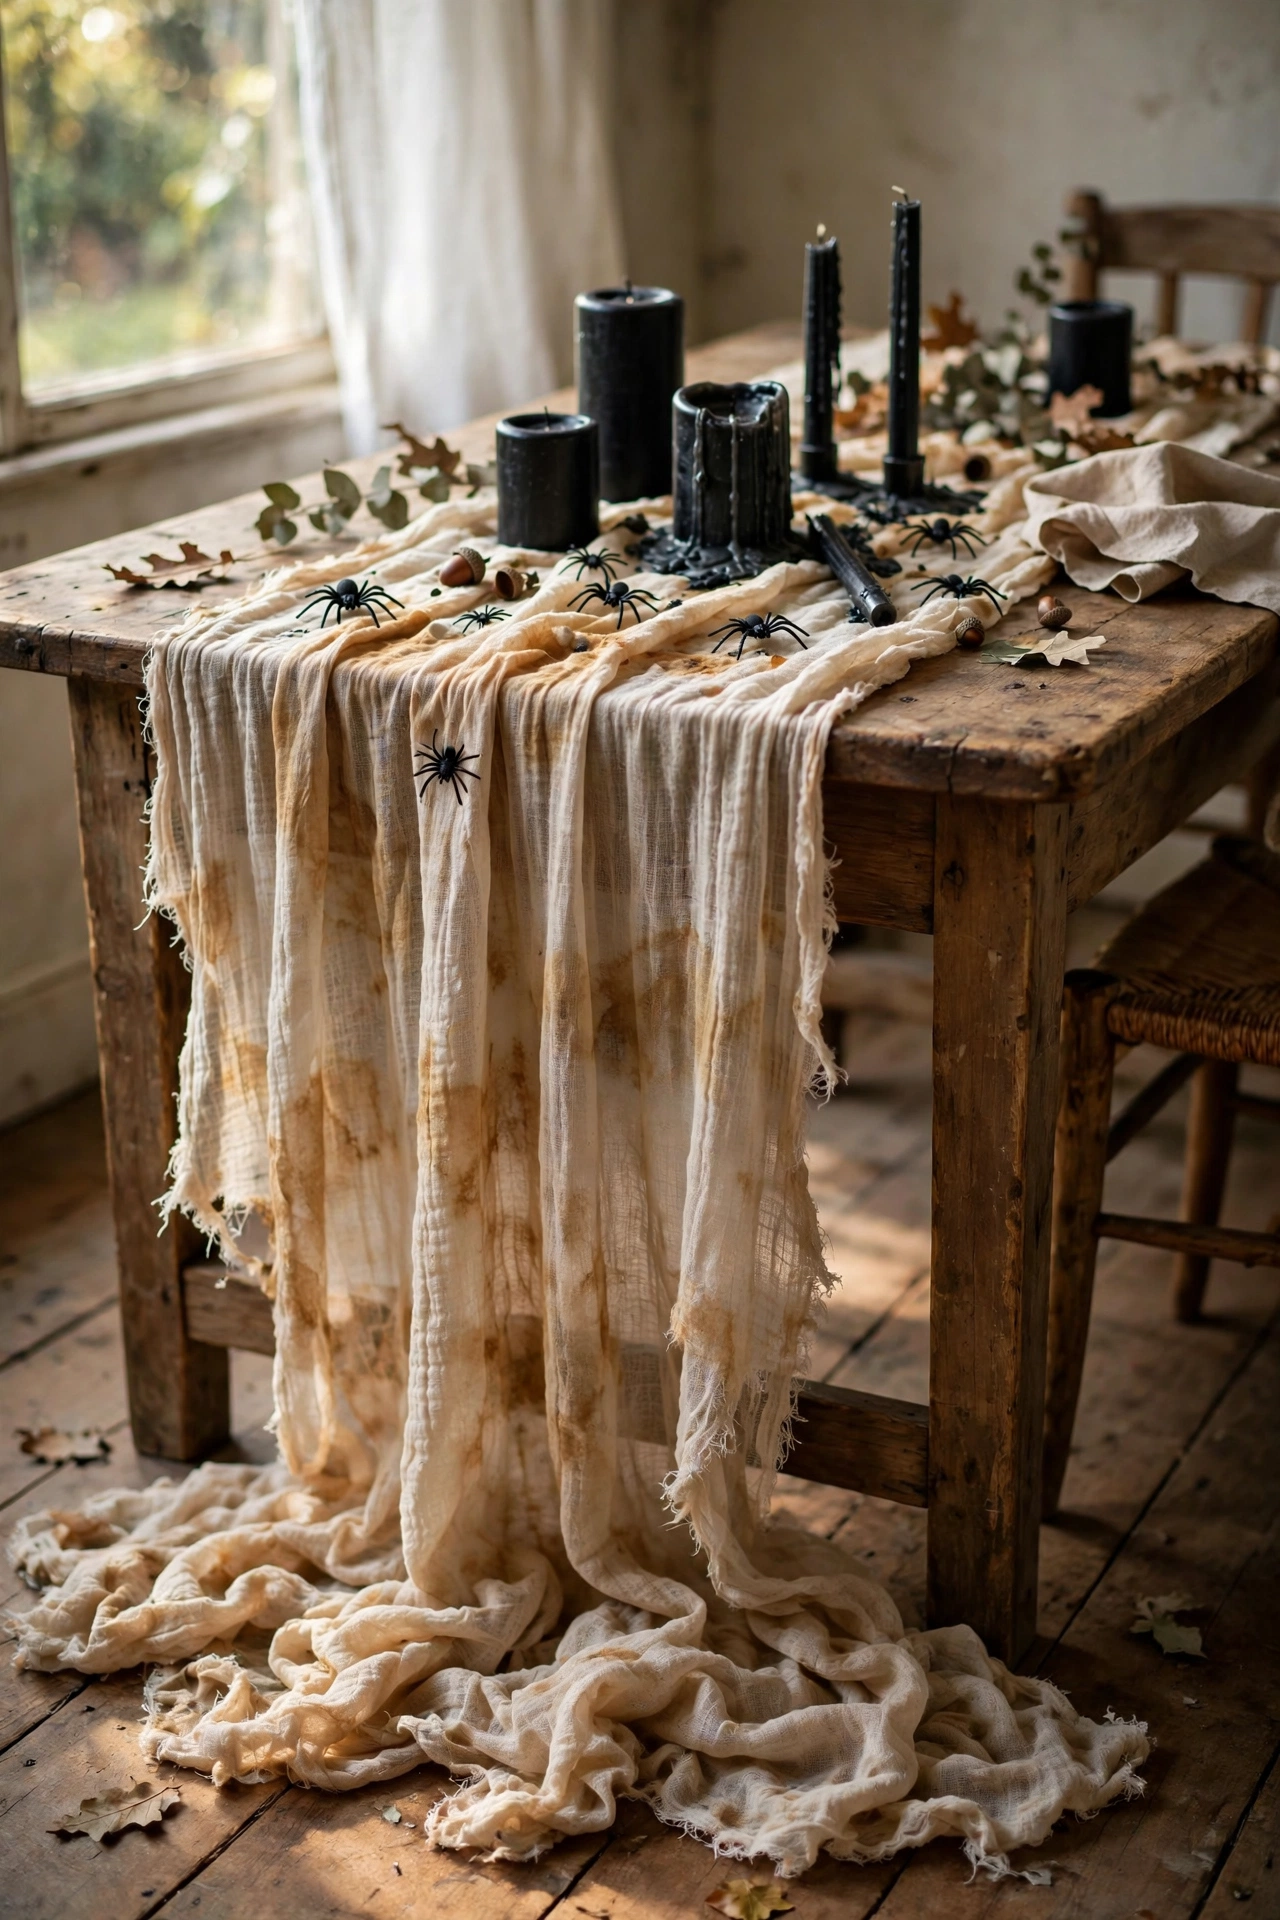
A length of torn gauze down the middle of the table instantly sets a haunted dinner mood. I buy cheap white cheesecloth, tear it into a long strip, stain it with cold tea for an aged look, and drape it over the table so the ends pool on the floor. Scatter plastic spiders and a few black candles on top. The tea-staining step takes it from craft-shop to creepy, so do not skip it. It washes fine afterwards if you want to reuse it.
Cost: ~$4-7 | Time: 30 minutes
14. Glowing Eyes in the Bushes
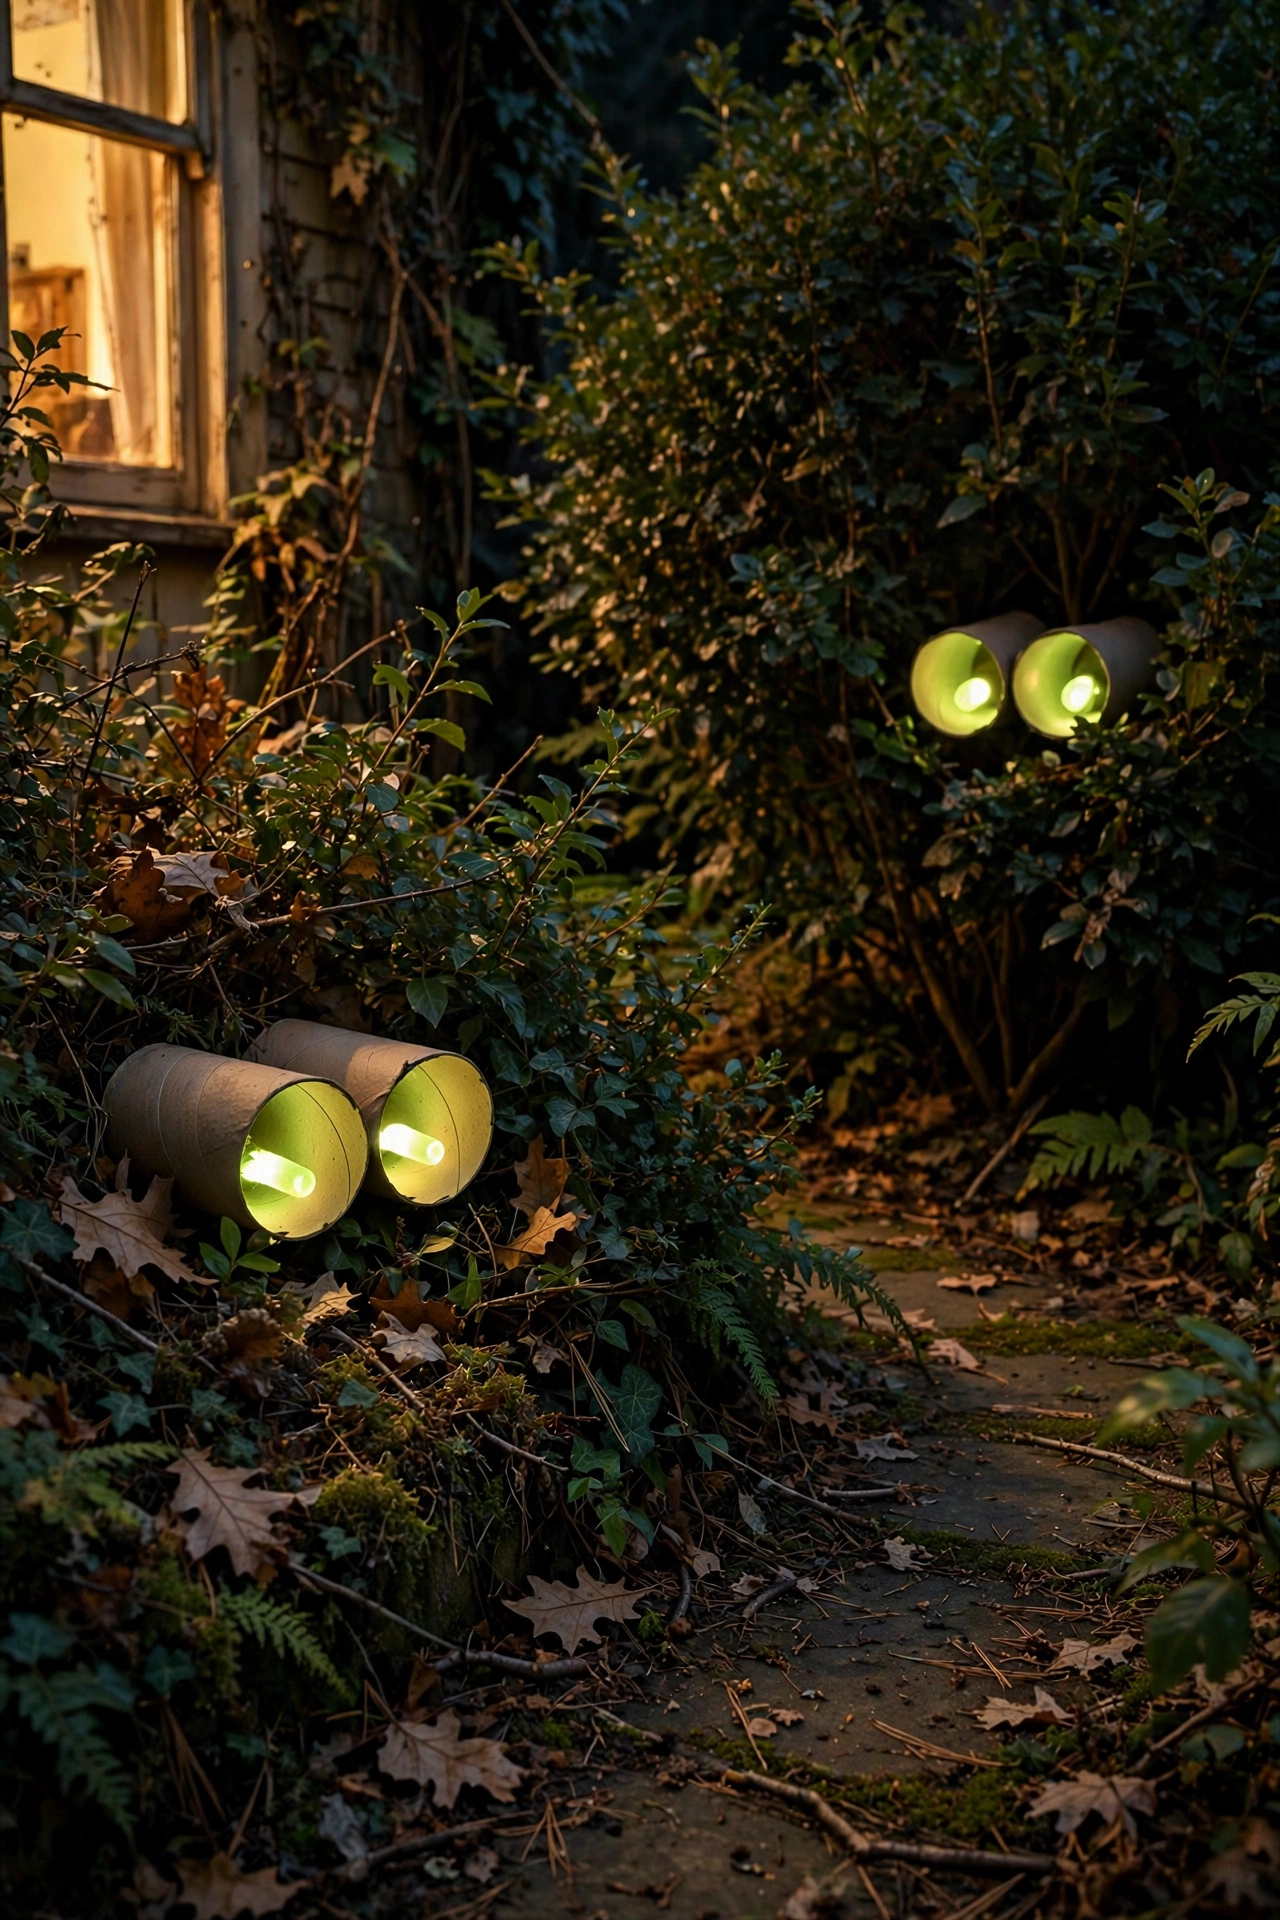
Pairs of glowing eyes hidden in the front bushes startle every visitor in the best way. Cut eye shapes from cardboard toilet rolls, tape a glow stick inside each one, and tuck them deep in the shrubbery after dark. From the path you just see floating eyes. I hide six pairs and move them around through October so returning visitors get surprised twice. The glow sticks last one night, so time this one for party night or Halloween itself. I buy the bulk packs of glow sticks after summer, when camping shops clear them out for pennies.
Cost: ~$4-6 | Time: 30 minutes
15. Apothecary Poison Sweet Jars

Old jars labelled as potions make a brilliant Halloween sideboard display. I peel the labels off jam jars and bottles, fill them with sweets, dried beans, and coloured water, then add handwritten tags reading Bat Wings, Witch Hazel, and Eye of Newt. A bit of twine round each neck sells the apothecary look. Mine live on the sideboard all October and guests always pick them up to read. Use food colouring in the water jars for that murky potion glow.
Cost: ~$5-8 | Time: 45 minutes
Pro tip: Handwrite your potion labels with a fountain pen or calligraphy marker. Printed labels look fine, but wobbly handwriting looks authentically ancient.
16. Cotton Spider Egg Sacs
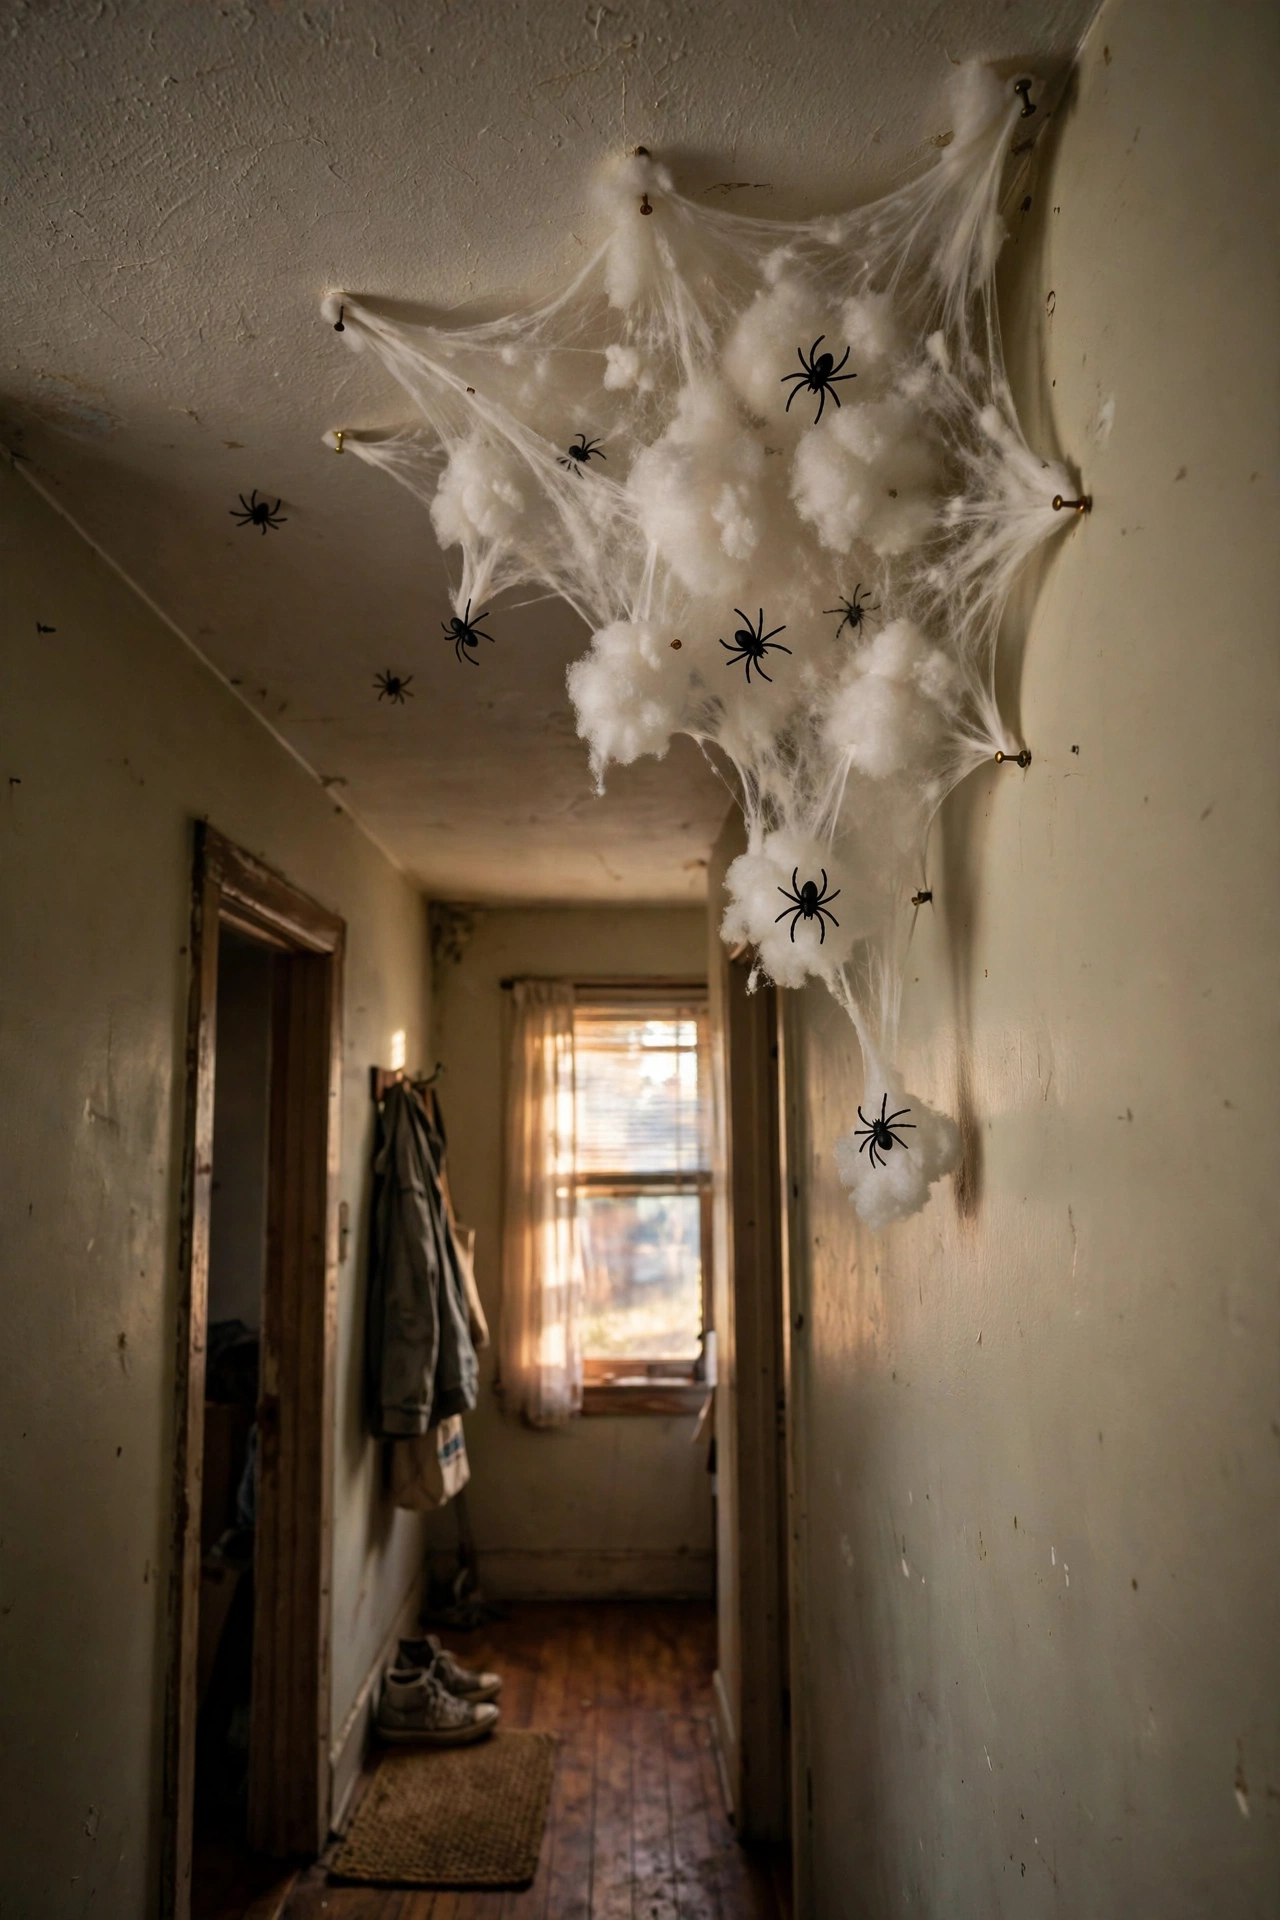
Clumps of cotton batting stretched into egg sacs and tucked into corners are deeply unsettling in the best way. I pull cotton balls into thin sheets, drape them over small white balloons or bunched tissue, and pin them into ceiling corners with a few plastic spiders crawling out. Guests notice them on the second look, which makes them better. Do not overdo it: three sacs in a room is creepy, ten is just messy. I pull the cotton over a small balloon so the sacs hold a rounded shape instead of going flat against the corner.
Cost: ~$3-5 | Time: 40 minutes
17. Paper Chain Ghost Garland
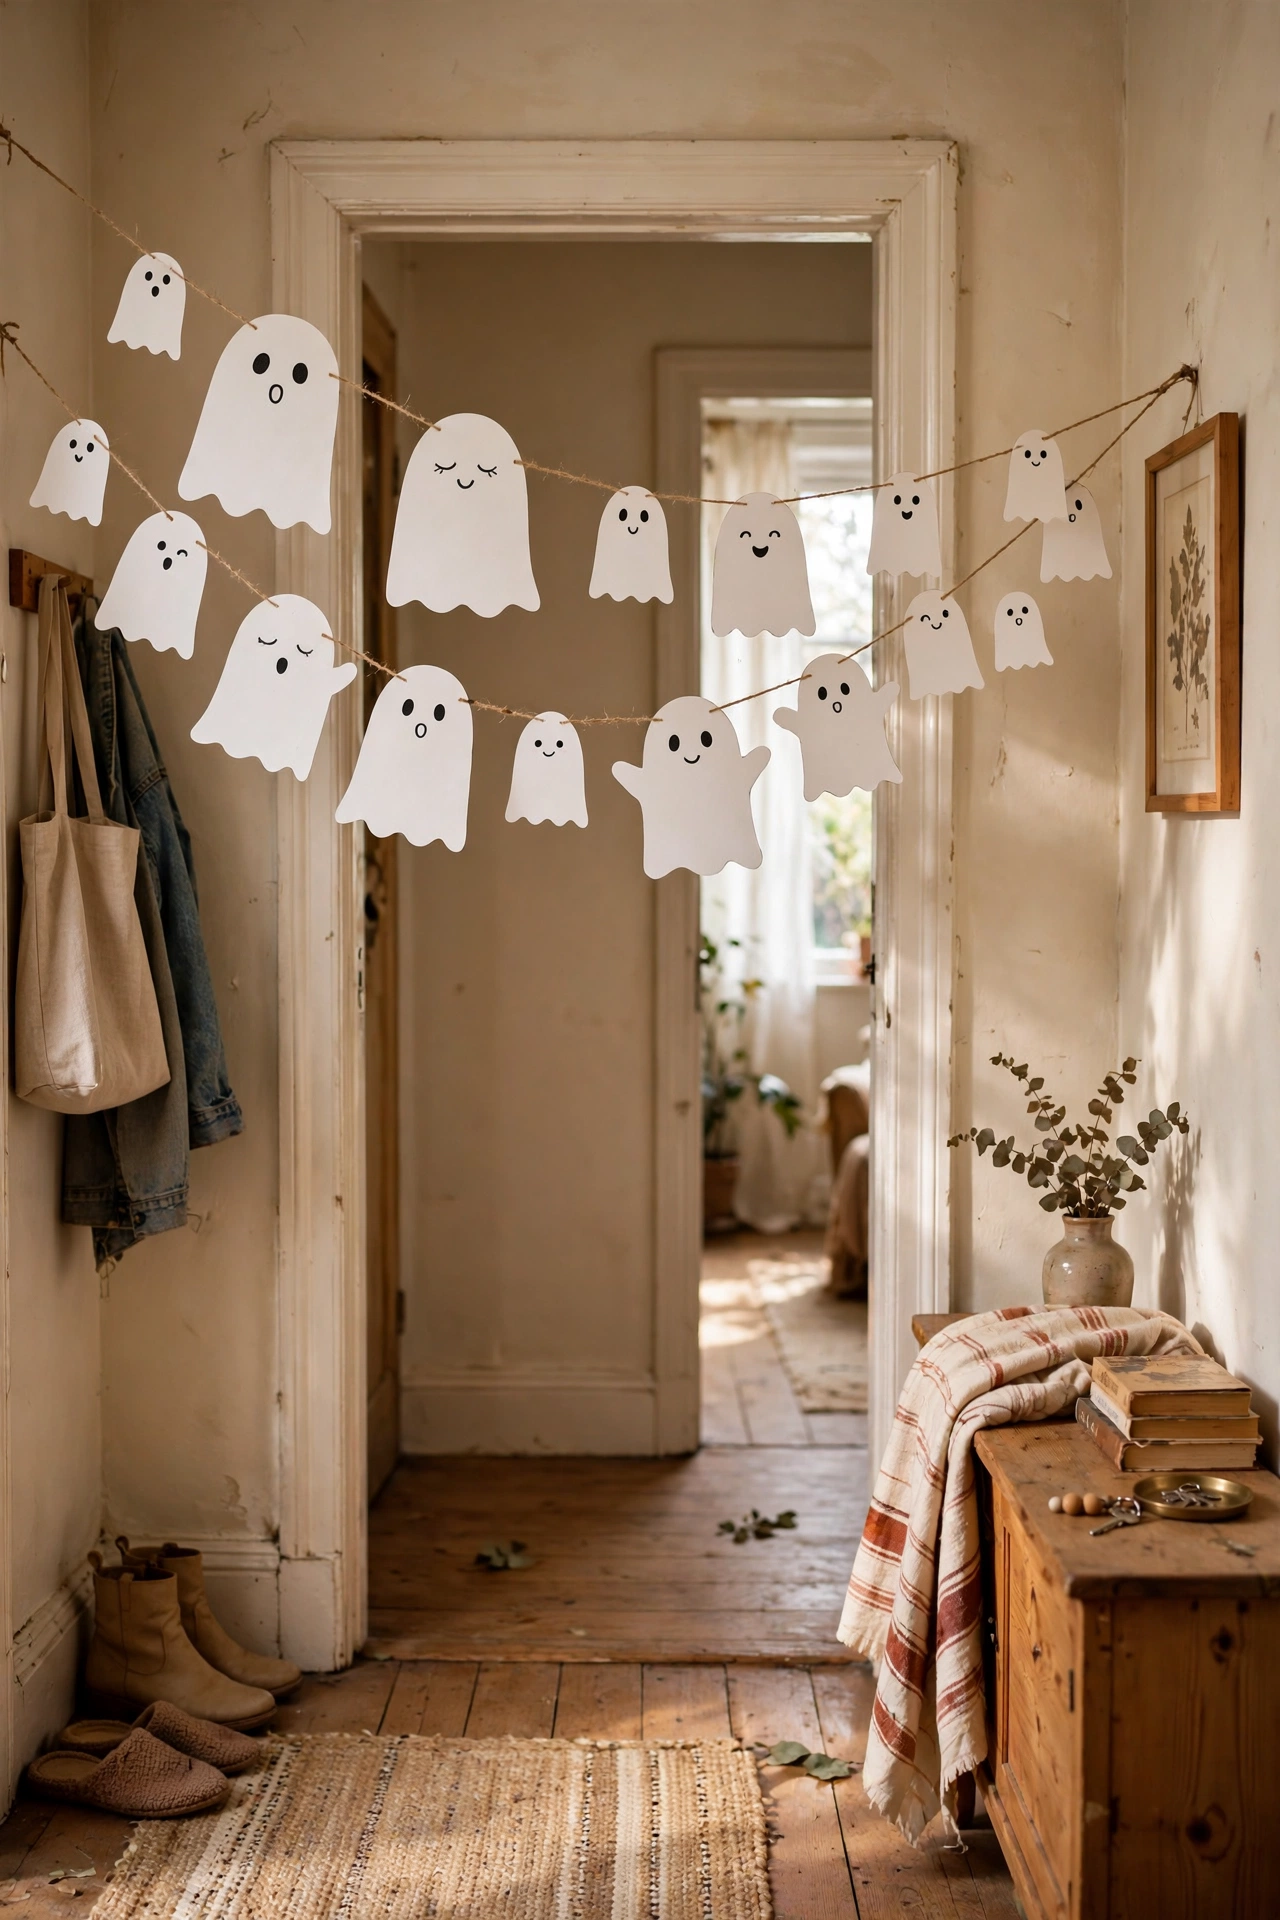
A garland of white paper ghosts strung across a doorway is the gentlest decoration on this list and the kids’ favourite. Cut ghost shapes from white paper, draw faces, and tape them along a length of string. I made one with my niece last year and it is still the decoration she asks about. Alternate big and small ghosts for a better rhythm. Laminate them if you want the garland to survive more than one October. I punch a small hole at the top of each ghost and thread the string through, which hangs much neater than tape.
Cost: ~$2-4 | Time: 1 hour
18. Witch Broom Porch Decoration
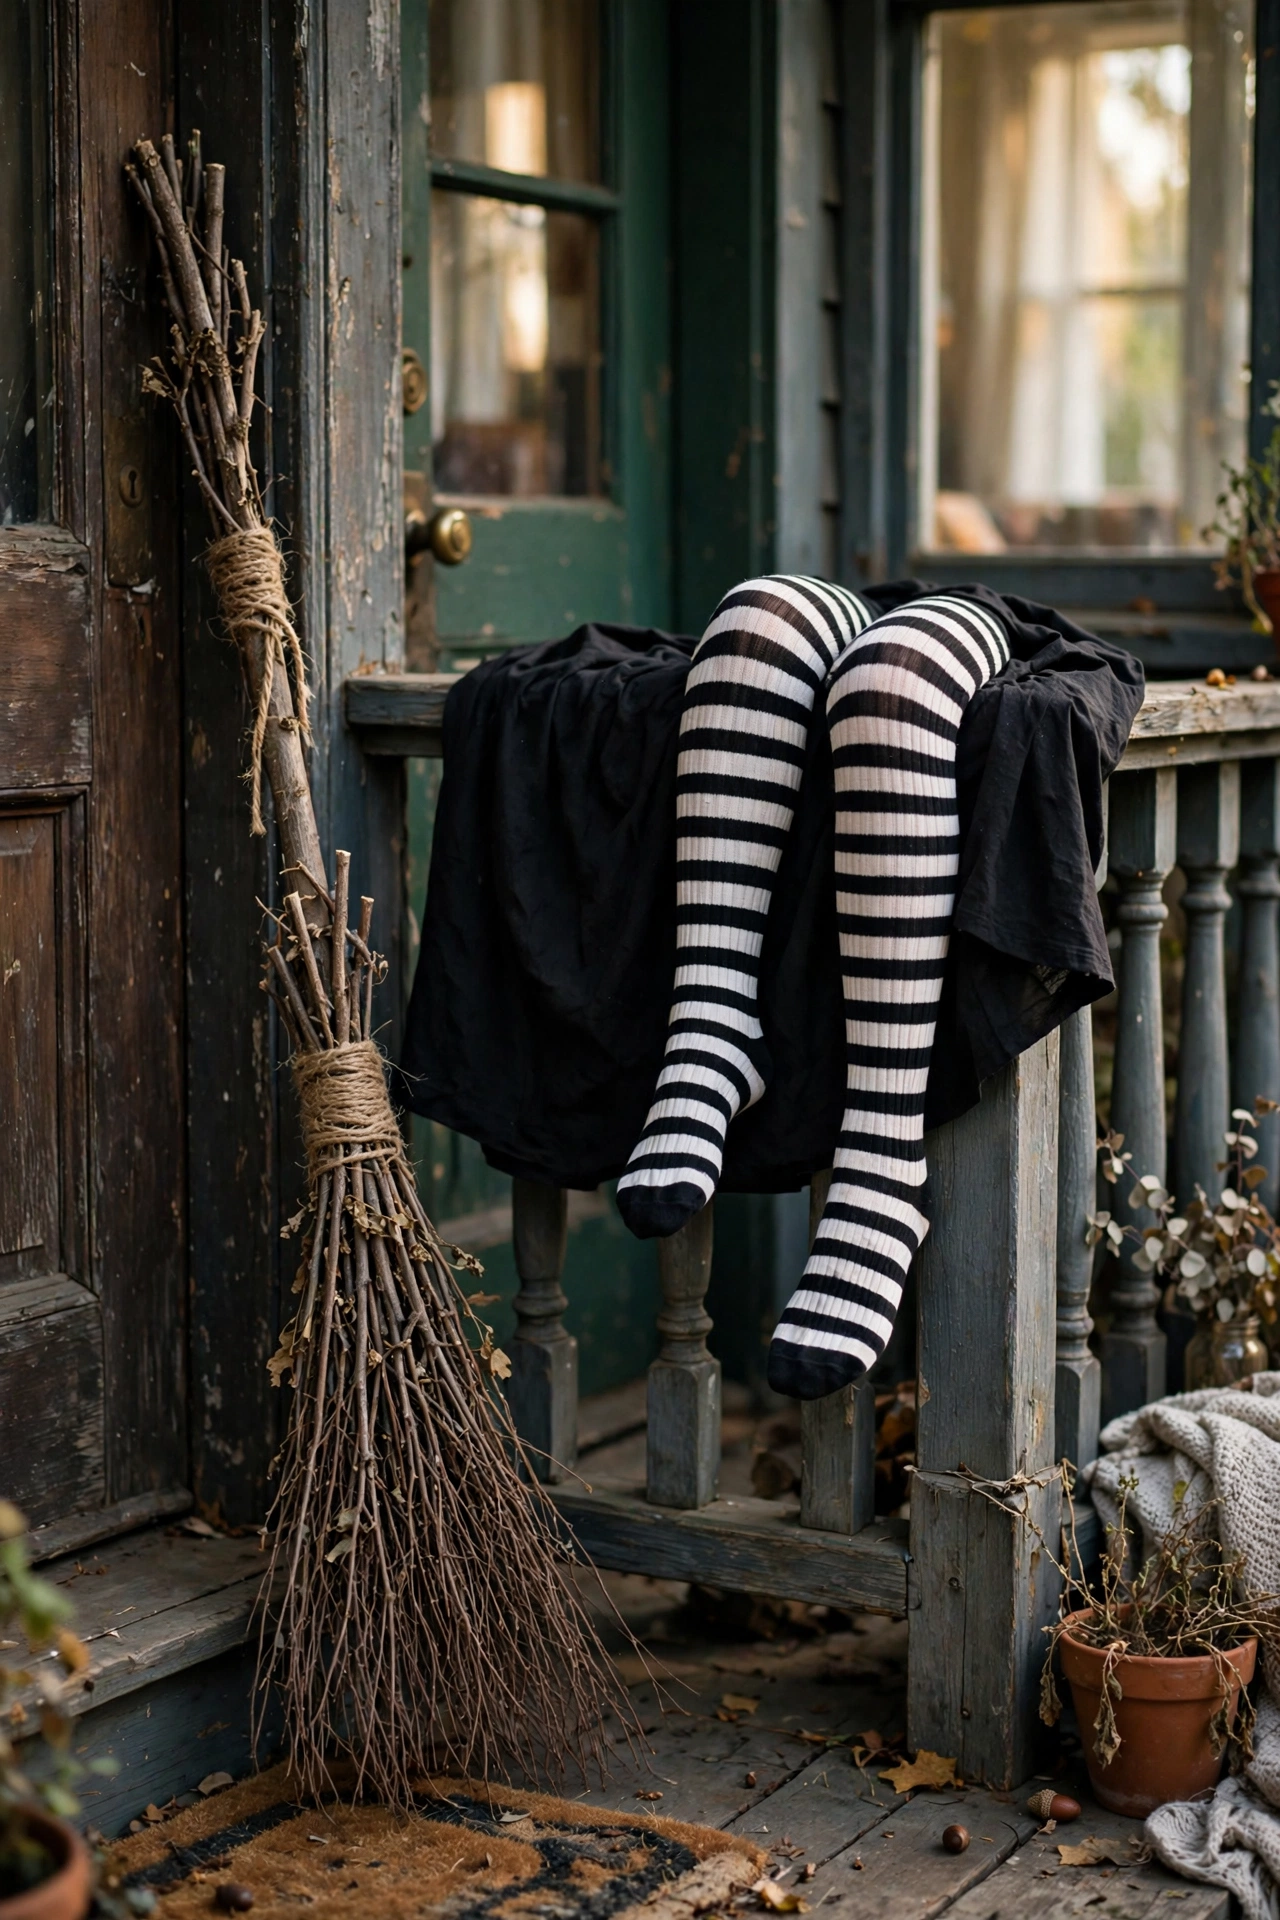
A witch broom leaning by the front door with a striped stocking leg dangling from it is pure storybook Halloween. I bind garden twigs to a long stick with twine for the broom, then stuff one leg of stripy tights with newspaper and poke it out from under a black skirt draped over the porch rail, as if a witch crash-landed. It gets more comments than anything else I make. I weight the broom base with a brick so it does not topple when the October wind picks up. Save this one for your weekend project list.
Cost: ~$6-10 | Time: 1 hour
Pro tip: Lean the broom where it is sheltered from rain. Wet twigs go limp and your jaunty witch broom turns into a sad stick by November.
19. Black Lace Candle Wraps
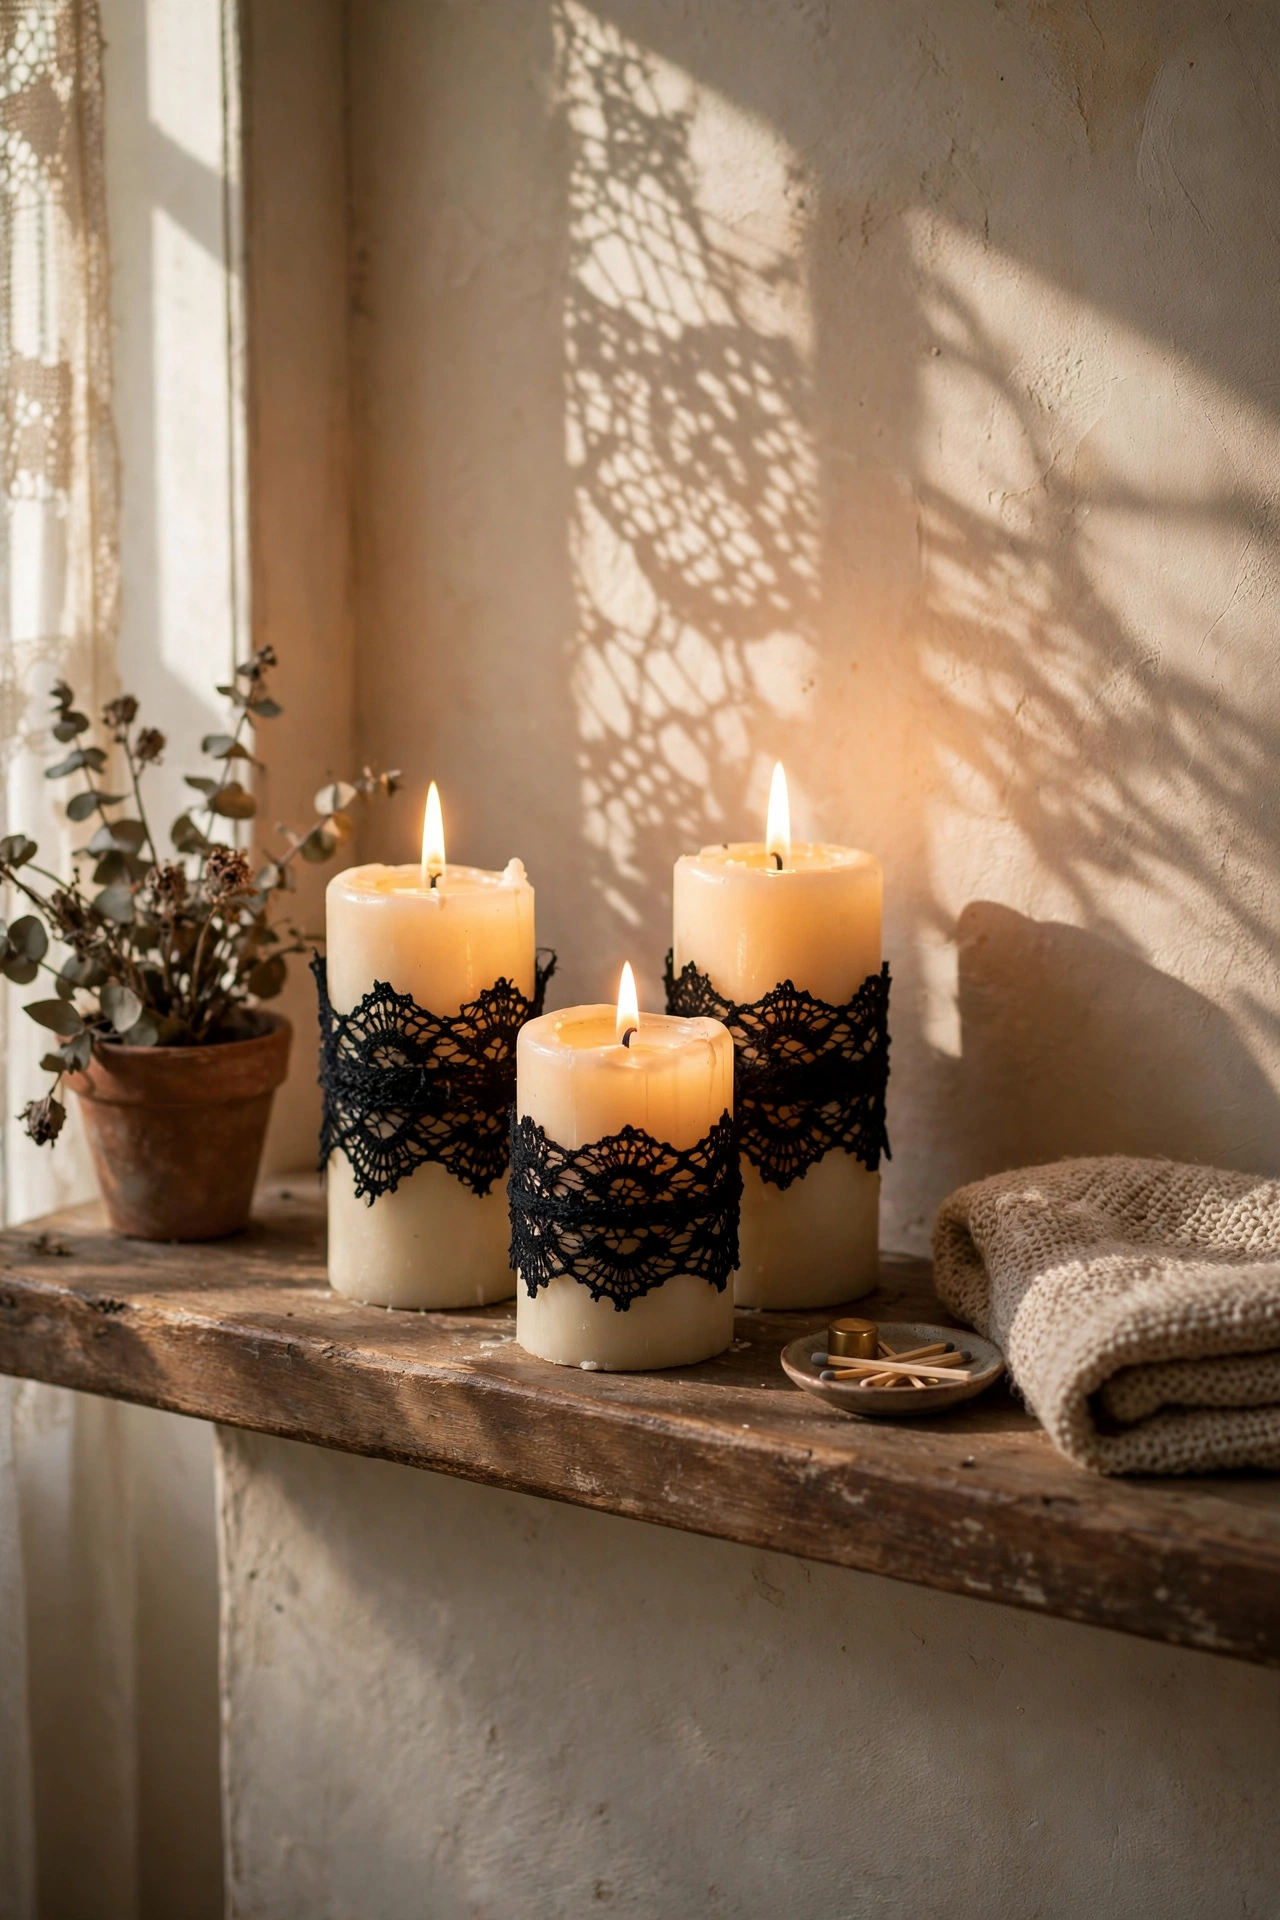
Plain pillar candles get a Halloween makeover with a wrap of black lace. I cut lace to size, wrap it round the candle, and secure it with a dot of hot glue at the back. Lit from within, the lace throws the loveliest patterned shadows. Use LED candles rather than real flames, because lace and fire are an obvious no. I keep a set of these out from October through New Year, swapping the lace for cream after Halloween.
Cost: ~$4-7 | Time: 30 minutes
That is the full haunted house, all for less than a night out. Have a properly spooky October, and send me a photo of your porch if you try the graveyard.
