17 Genius Dollar Store Storage Hacks for Every Room
Every organised home I have ever admired had one thing in common: simple systems, not expensive furniture. These dollar store storage hacks are proof you can sort every room for a few dollars a project. I have spent months testing budget organisers in my own home — bins that buckle, hooks that fall, turntables that genuinely work — and these 17 are the ones that earned their shelf space. No customising marathons, no weekend-long builds: just clever little fixes, organised room by room, so you can start with your worst drawer and go from there.
Kitchen & Pantry Storage Hacks
Stackable Storage Bins for Deep Cupboards
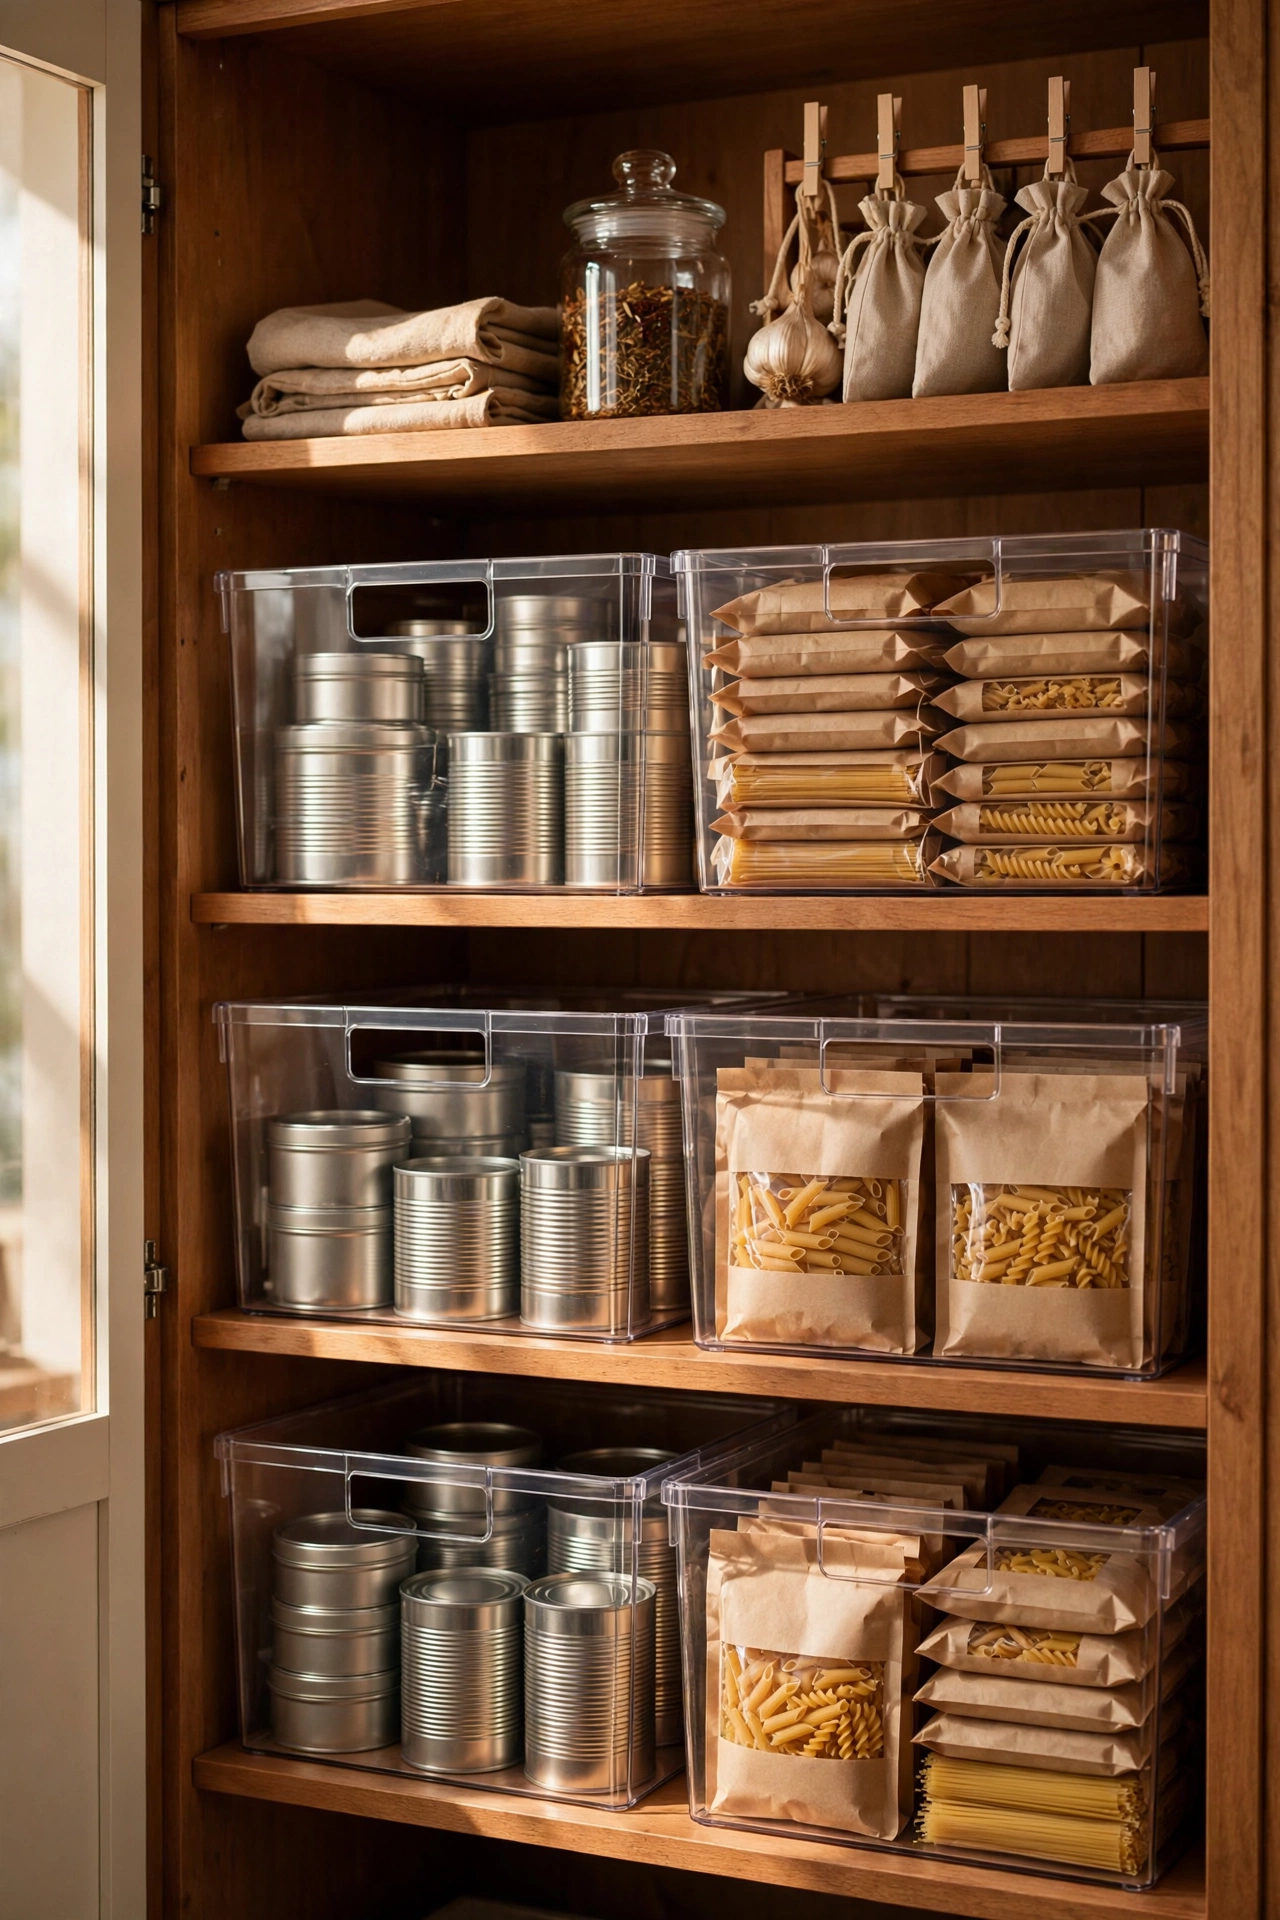
Cost: ~$2 each · Time: 20 minutes
Those deep kitchen cupboards are where tins and packets go to disappear. Stackable storage bins turn that dead space into proper pull-forward sections you can see into. Measure the shelf height first so two or three stack without wedging, then group by category — tins in one, pasta and grains in another, snacks in a third. The angled bins with an open front are worth a few pence more; they save you lifting the top bin off every time. I tried this in my own kitchen after a year of losing baking powder in the void. One mistake to avoid: buying mismatched sizes across two trips. They never stack properly, and it annoyed me for months until I finally re-bought a matching set.
Tension-Rod Cabinet Dividers for Baking Trays
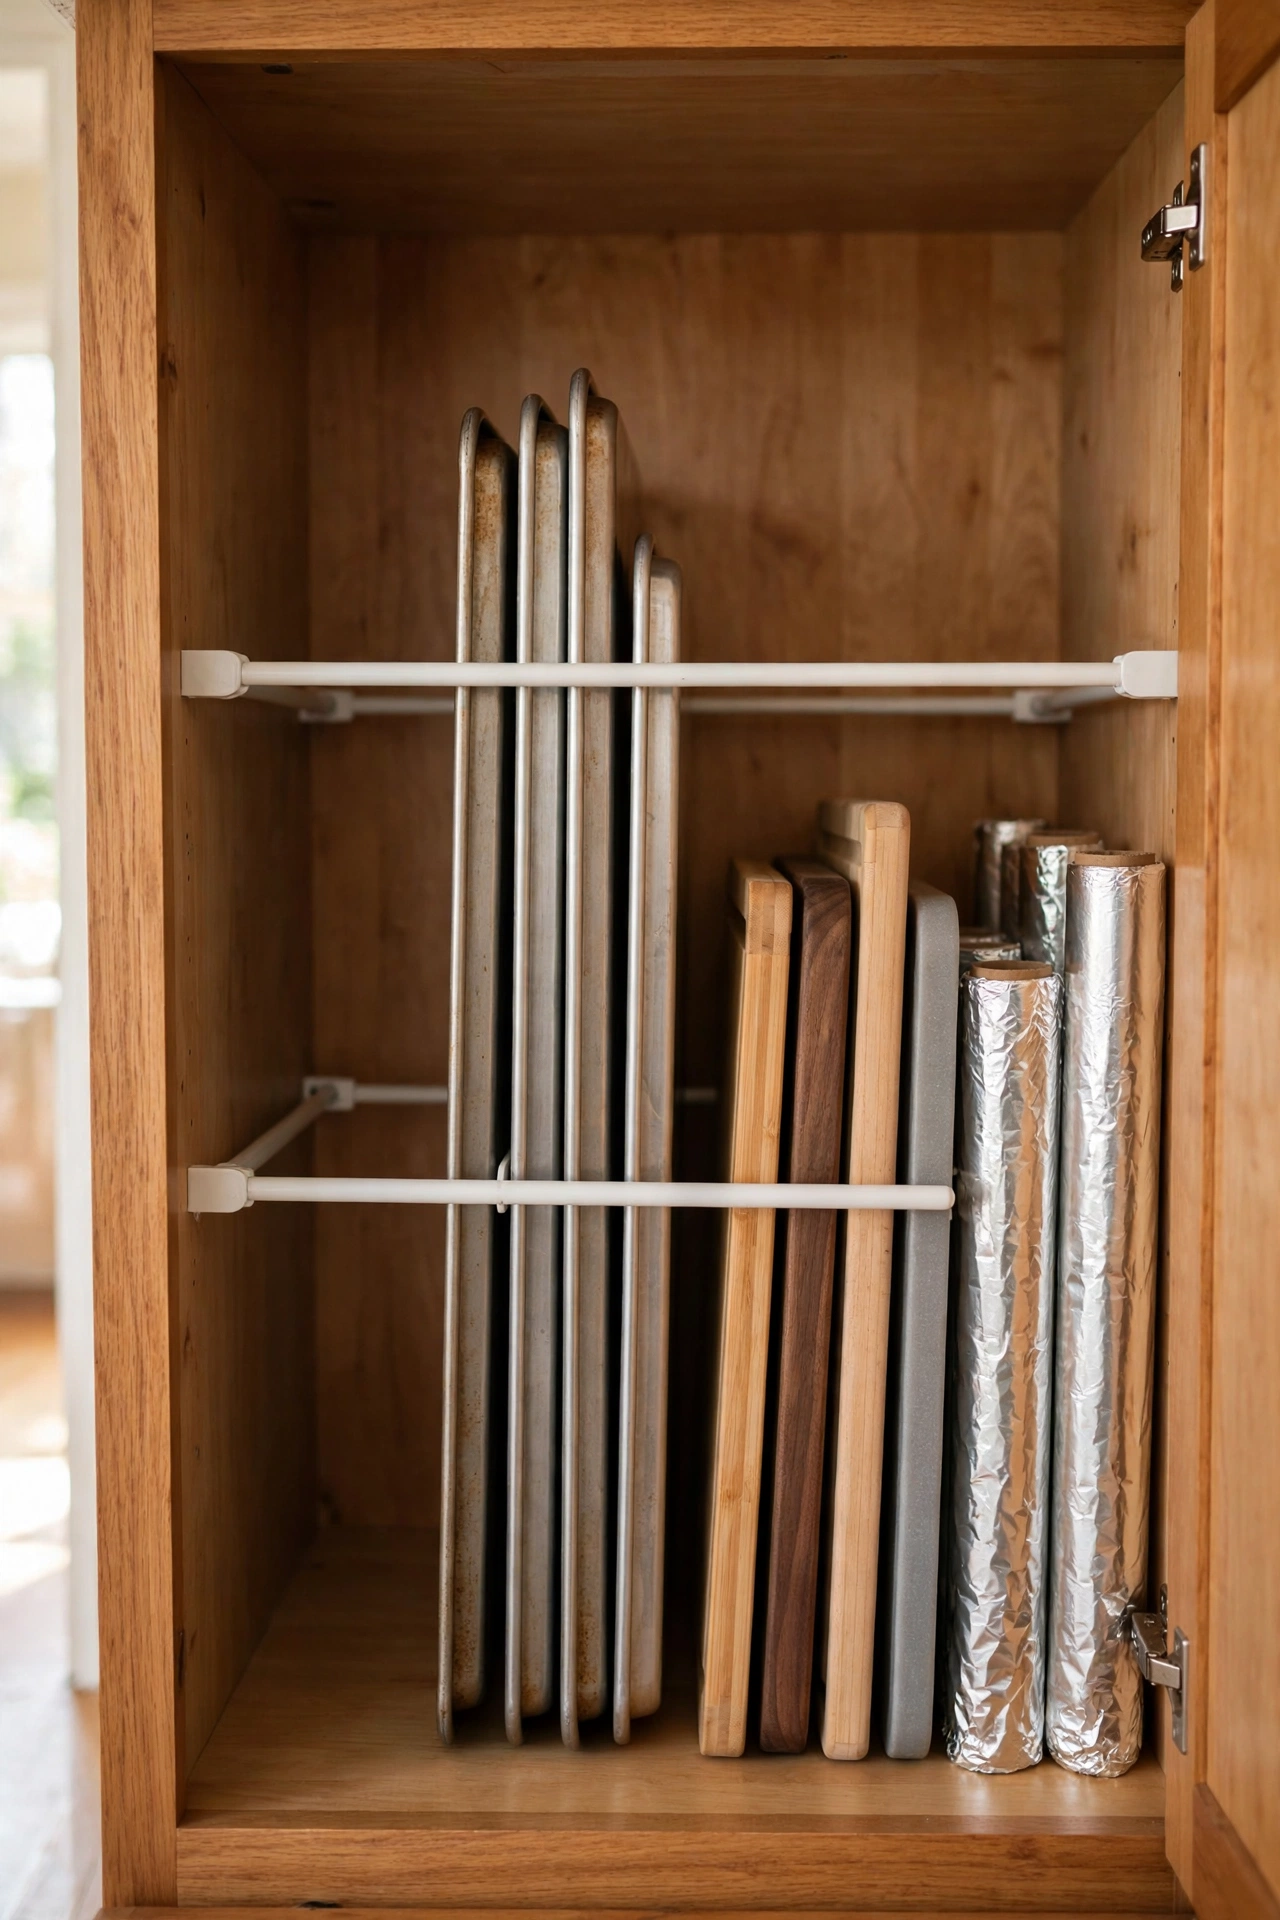
Cost: ~$1.25 · Time: 10 minutes
Baking trays and chopping boards live best standing upright, and tension rods are the cheapest way to make that happen inside a cupboard. Measure the cupboard depth, twist the rod to fit snugly, and slot your trays in vertically between the rods like files in a drawer. Place one rod low and one midway if you have a tall stack. It works just as well for cling film, foil and baking paper, which always seem to jam at the back. I fitted these in my own under-sink cupboard and stopped the daily avalanche that used to greet me every morning. One mistake to avoid: do not skip checking the rod is fully twisted tight before loading it. Mine sagged within a day the first time, and a slow drip of trays slid out at ankle height.
Lazy Susan Turntables for Blind Corner Cupboards
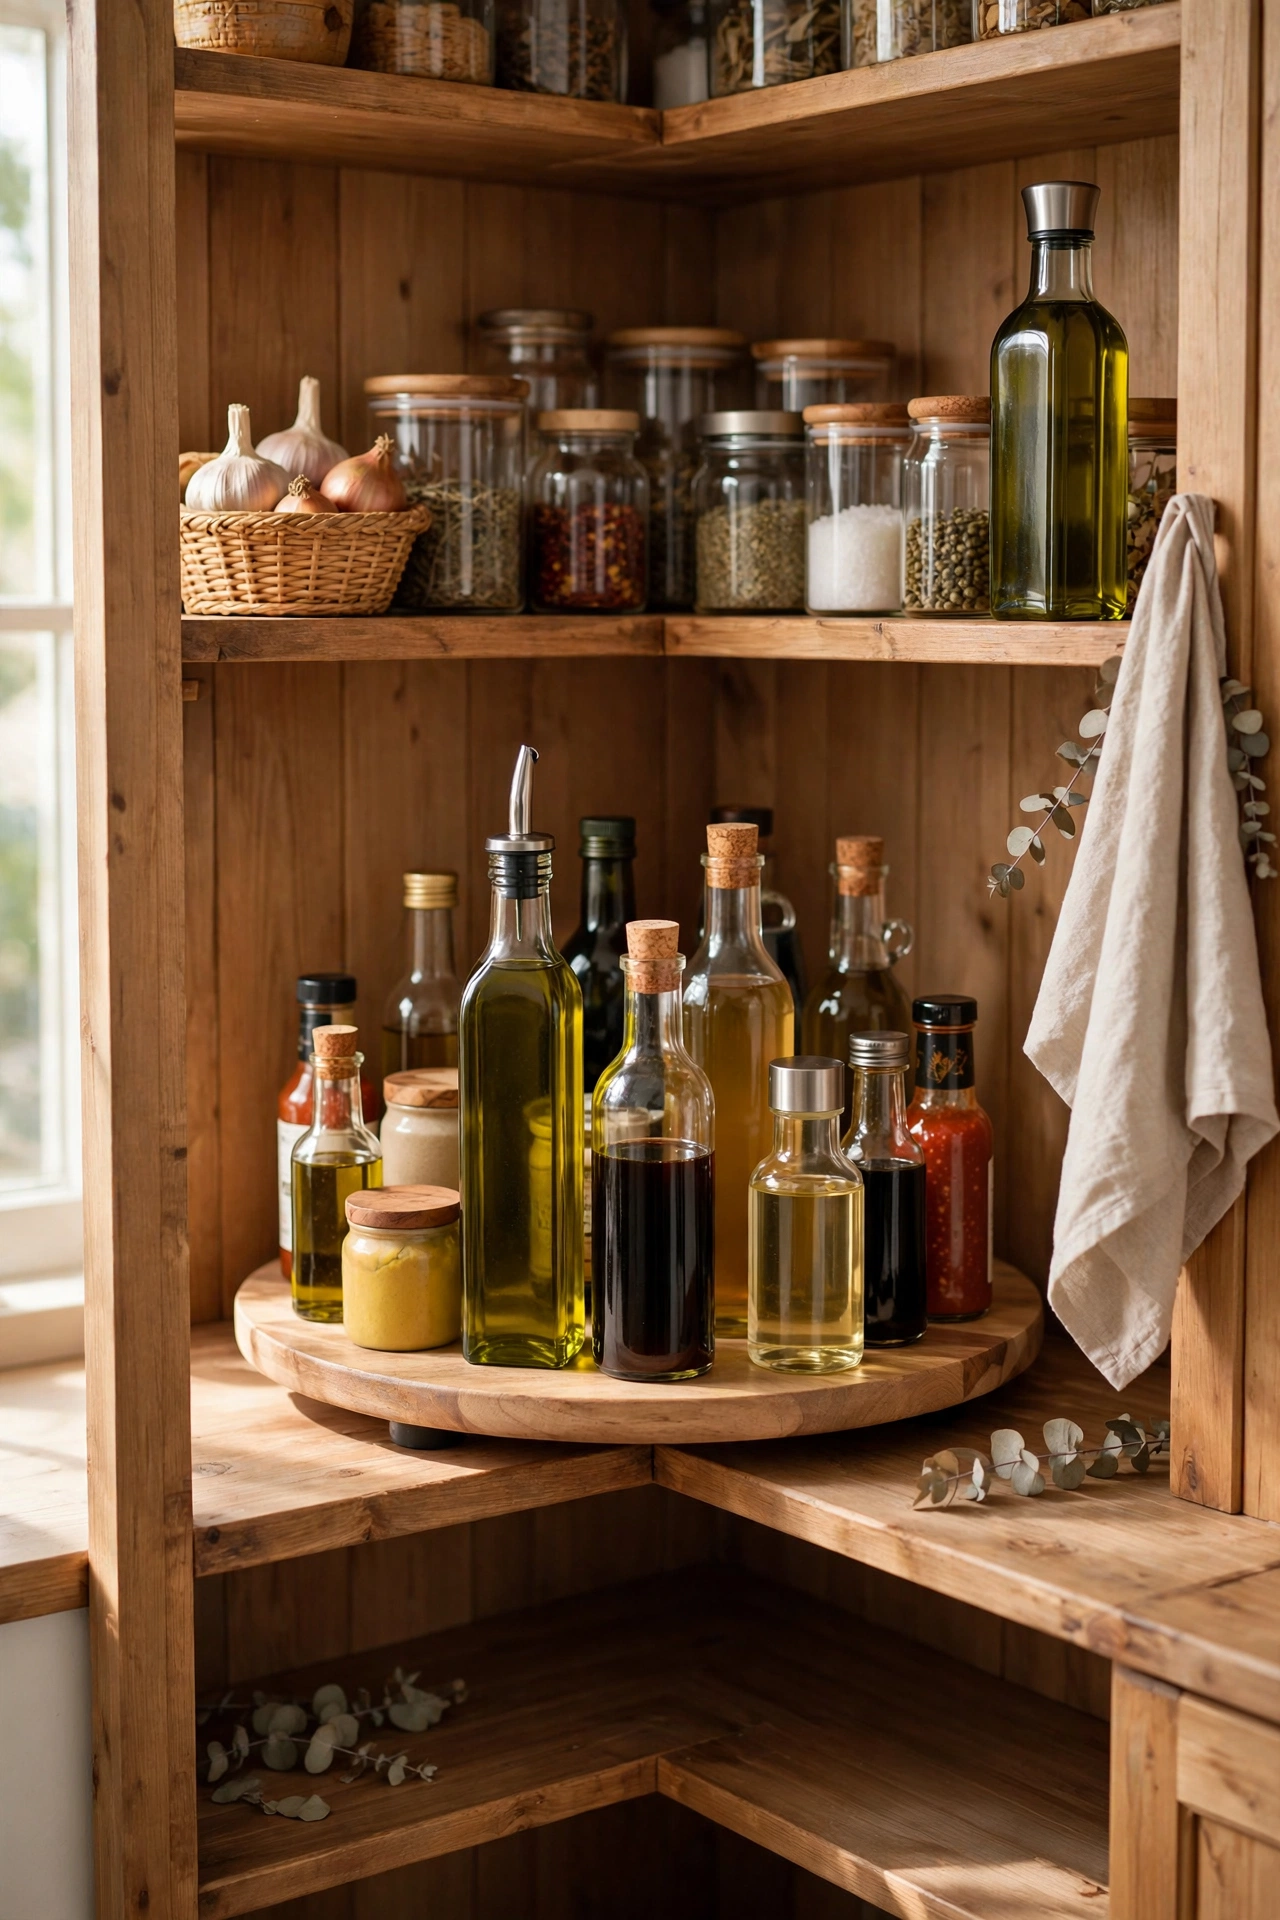
Cost: ~$3 · Time: 10 minutes
The corner of a deep pantry cupboard is a black hole for oils, vinegars and sauces. A lazy susan turntable ends the ritual of pulling out six bottles to reach the one hiding at the back. Wipe the shelf down, set the turntable in place, and group by use — everyday cooking oils and vinegars on one, baking and speciality bottles on another. Give it a spin to check nothing catches the shelf above. I put one in my most annoying corner cupboard and it genuinely felt like gaining a new shelf. One mistake to avoid is overloading it; a crowded turntable will not spin freely and you will be back to shoving. Leave breathing room around the edge and wipe it monthly, because drips collect underneath. (see also: 25-dollar-store-organization-ideas-for-every-room)
Pantry Shelf Risers for Double-Layer Storage
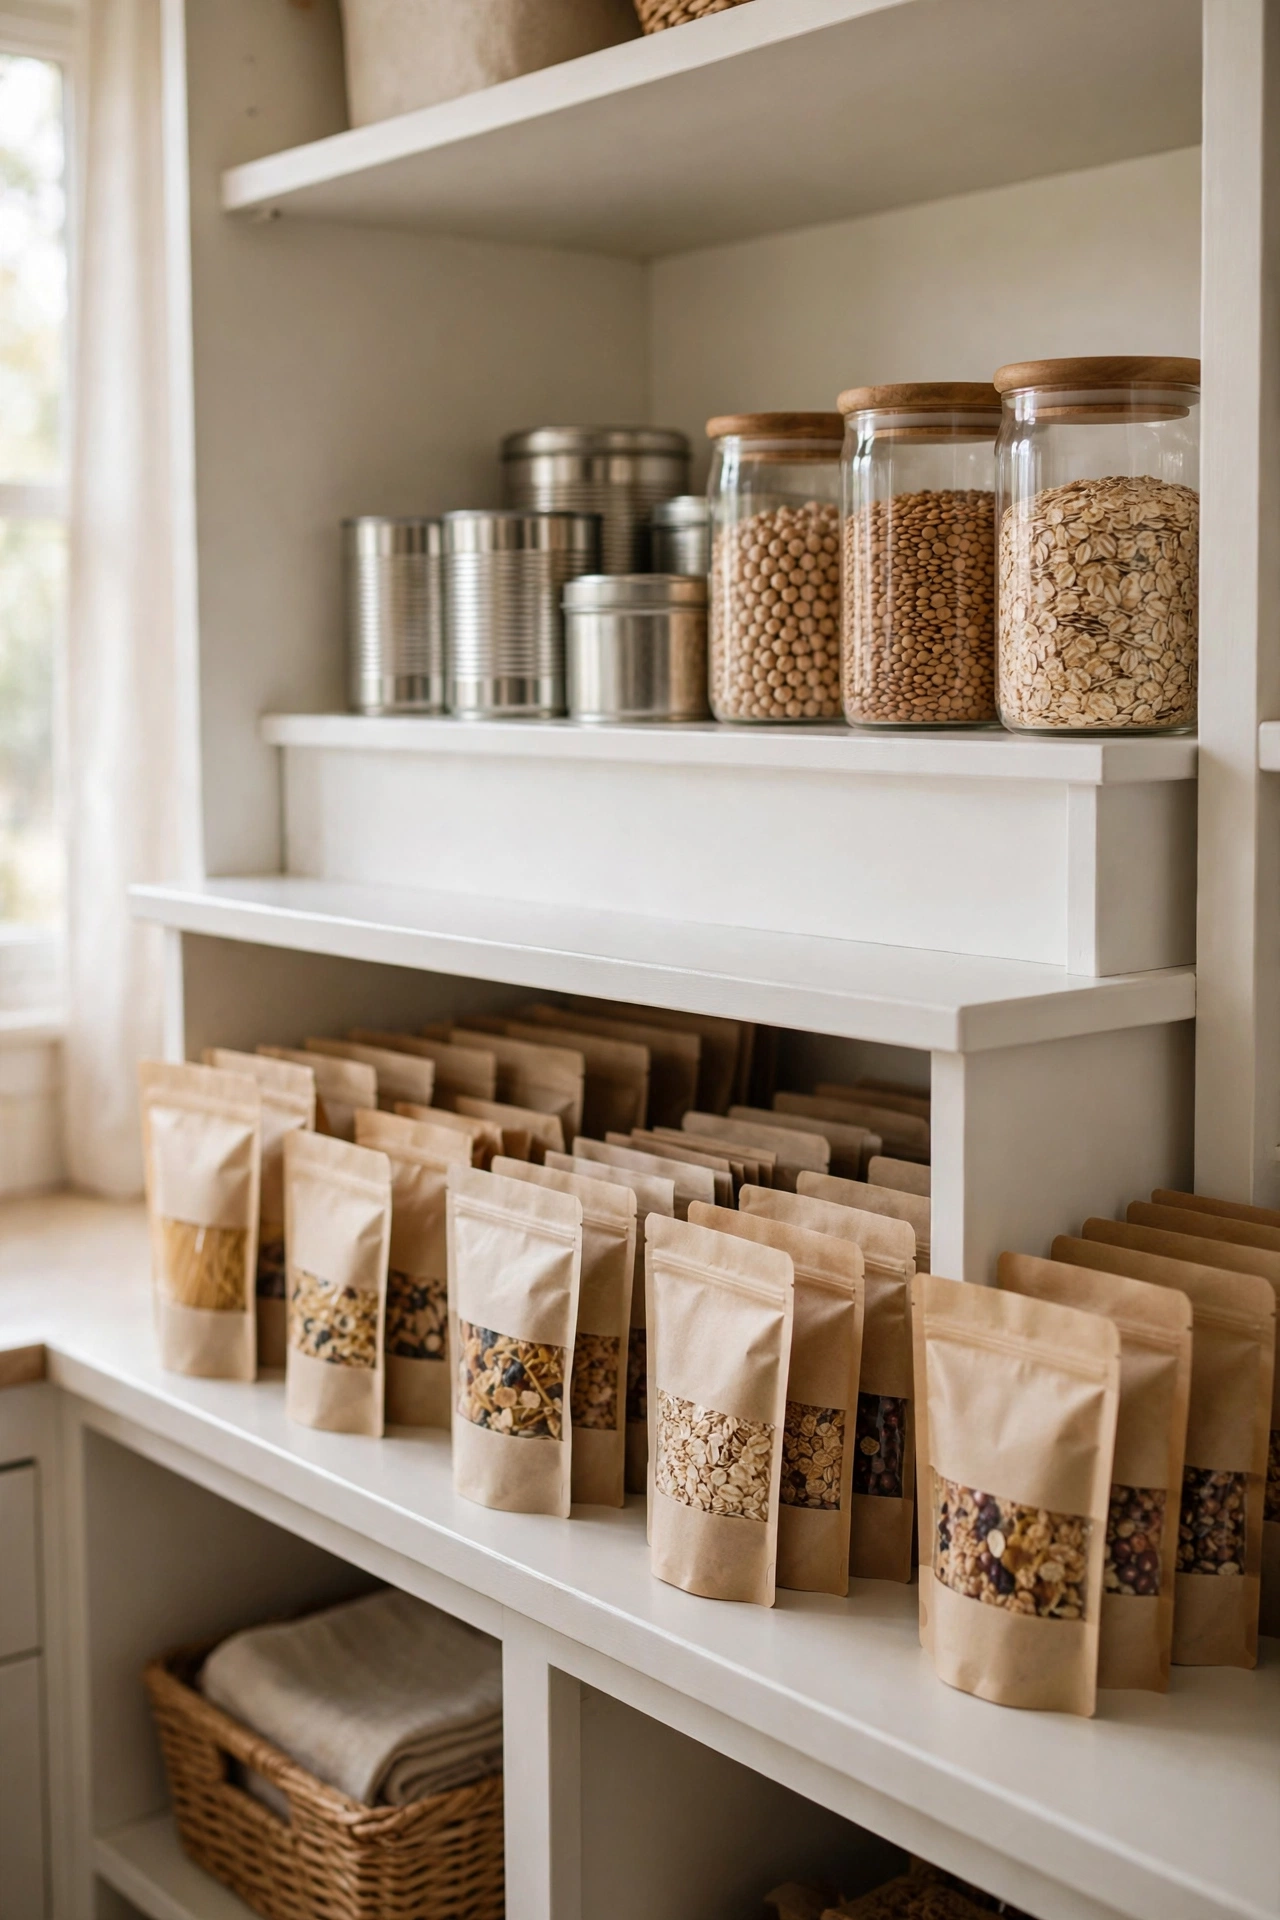
Cost: ~$2 · Time: 15 minutes
Shelf risers double the usable space in a pantry by giving tins and jars a second level to sit on. Measure your shelf clearance first — they come in two heights and the taller one will not fit everywhere. Pop them in, put the everyday things on top and the bulky packets below, and that wasted vertical air suddenly works for you. Keep the heavy tins on the bottom shelf and the lighter packets up top so the whole arrangement stays stable. I added two to my pantry and finally stopped the nightly game of tin Tetris. One mistake to avoid: lining up the risers without checking the shelf is level first. Mine rocked slightly until I shifted it a centimetre, and it never sat right until I fixed it.
Bedroom & Closet Storage Hacks
Bamboo-Look Drawer Dividers for Dresser Chaos
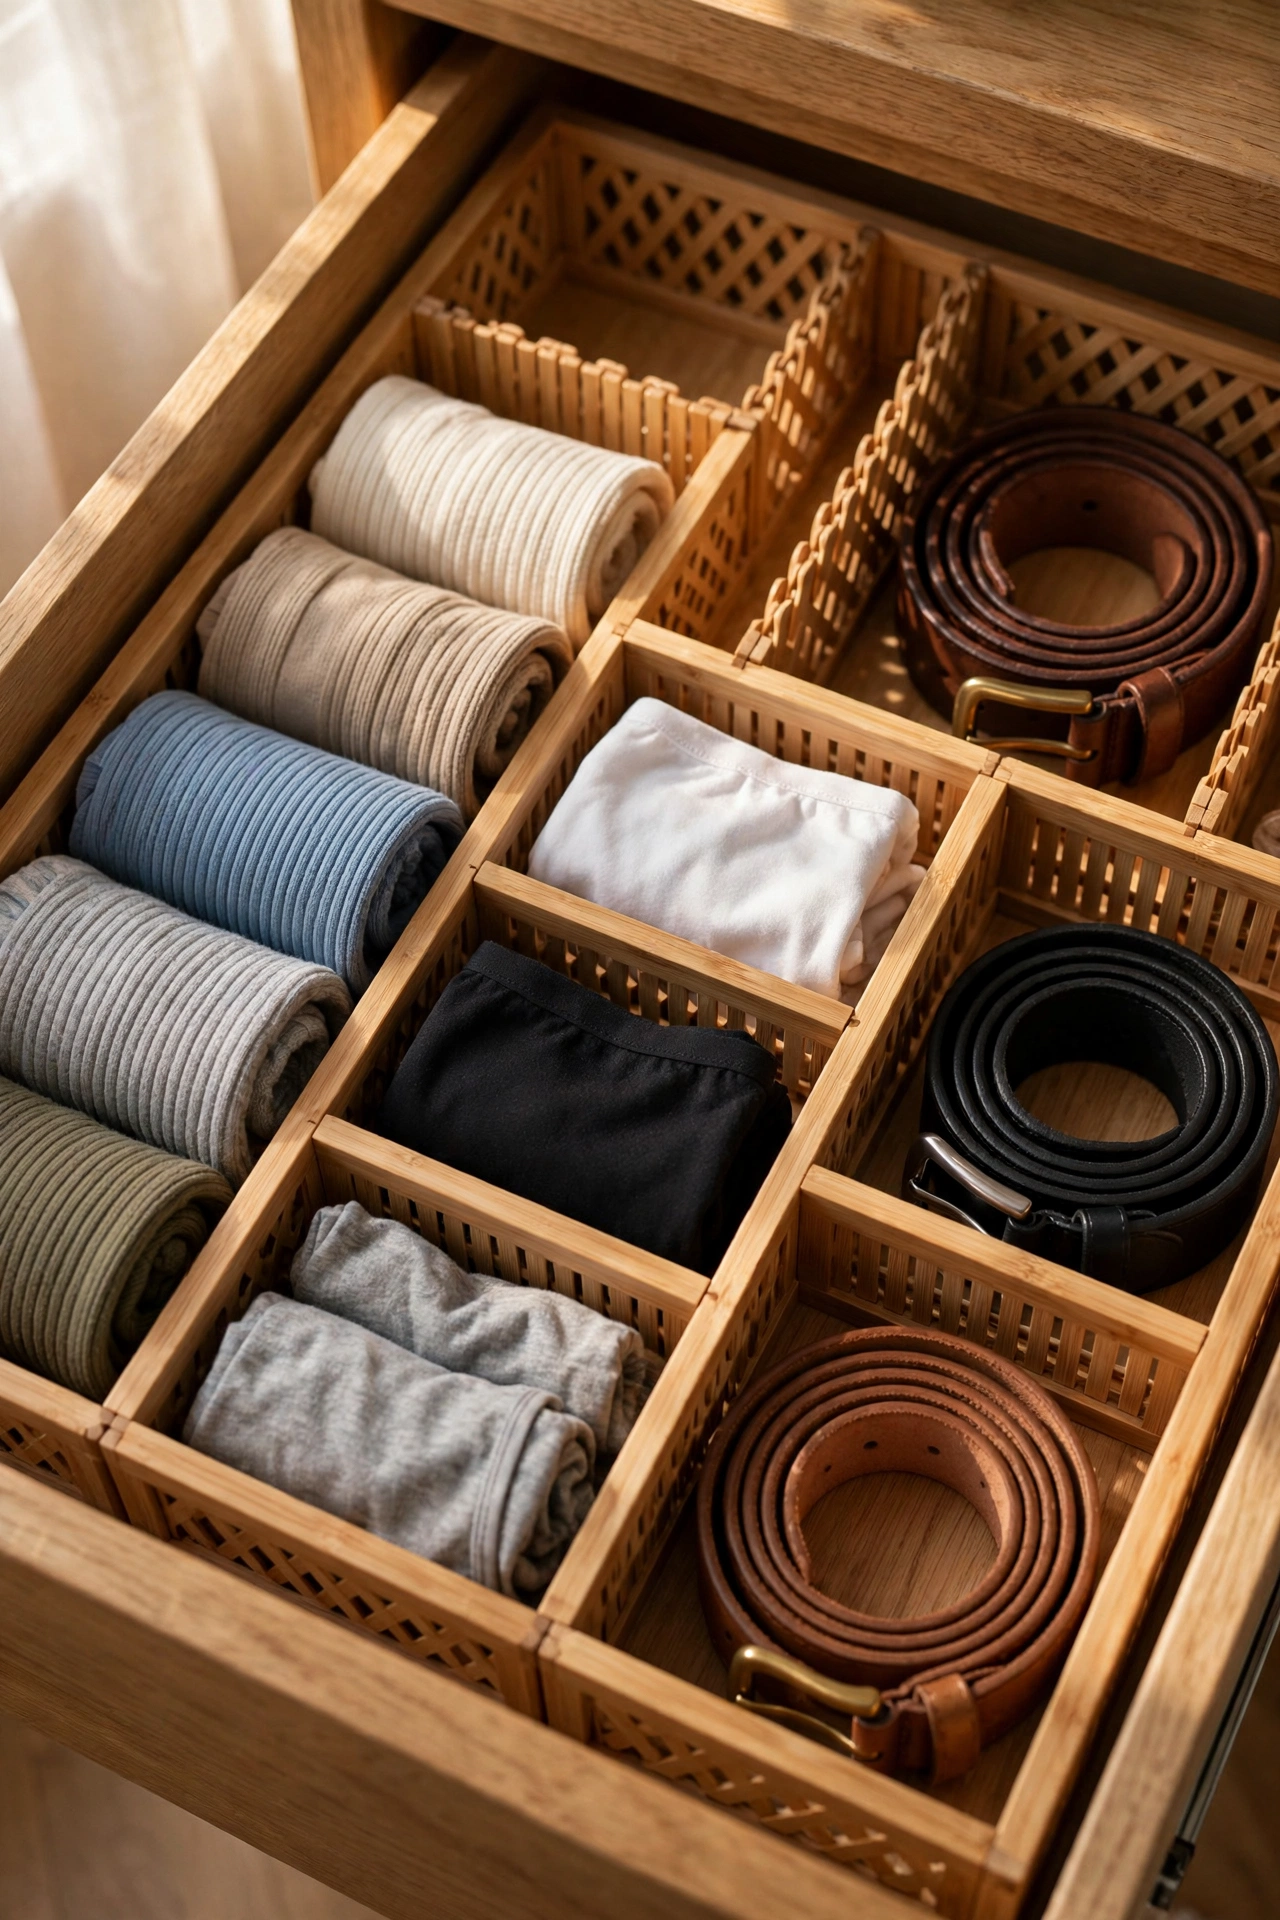
Cost: ~$3 · Time: 15 minutes
A sock drawer without dividers is a swamp. Expandable bamboo-look dividers turn a chaotic dresser drawer into neat compartments where everything has its own lane. Empty the drawer completely first — it is always worse than you think — wipe it down, slot the dividers in, and only put back what you actually wear. The spring-loaded ones adjust to fit, so measure roughly without stressing over precision. I found three identical belts in mine, which tells you everything about how it got out of hand. One mistake to avoid: forcing a divider into a drawer that is slightly too narrow. It bows, pops out of place, and never sits right again. Size down rather than squeeze.
Over-the-Door Shoe Organiser Repurposed for Accessories
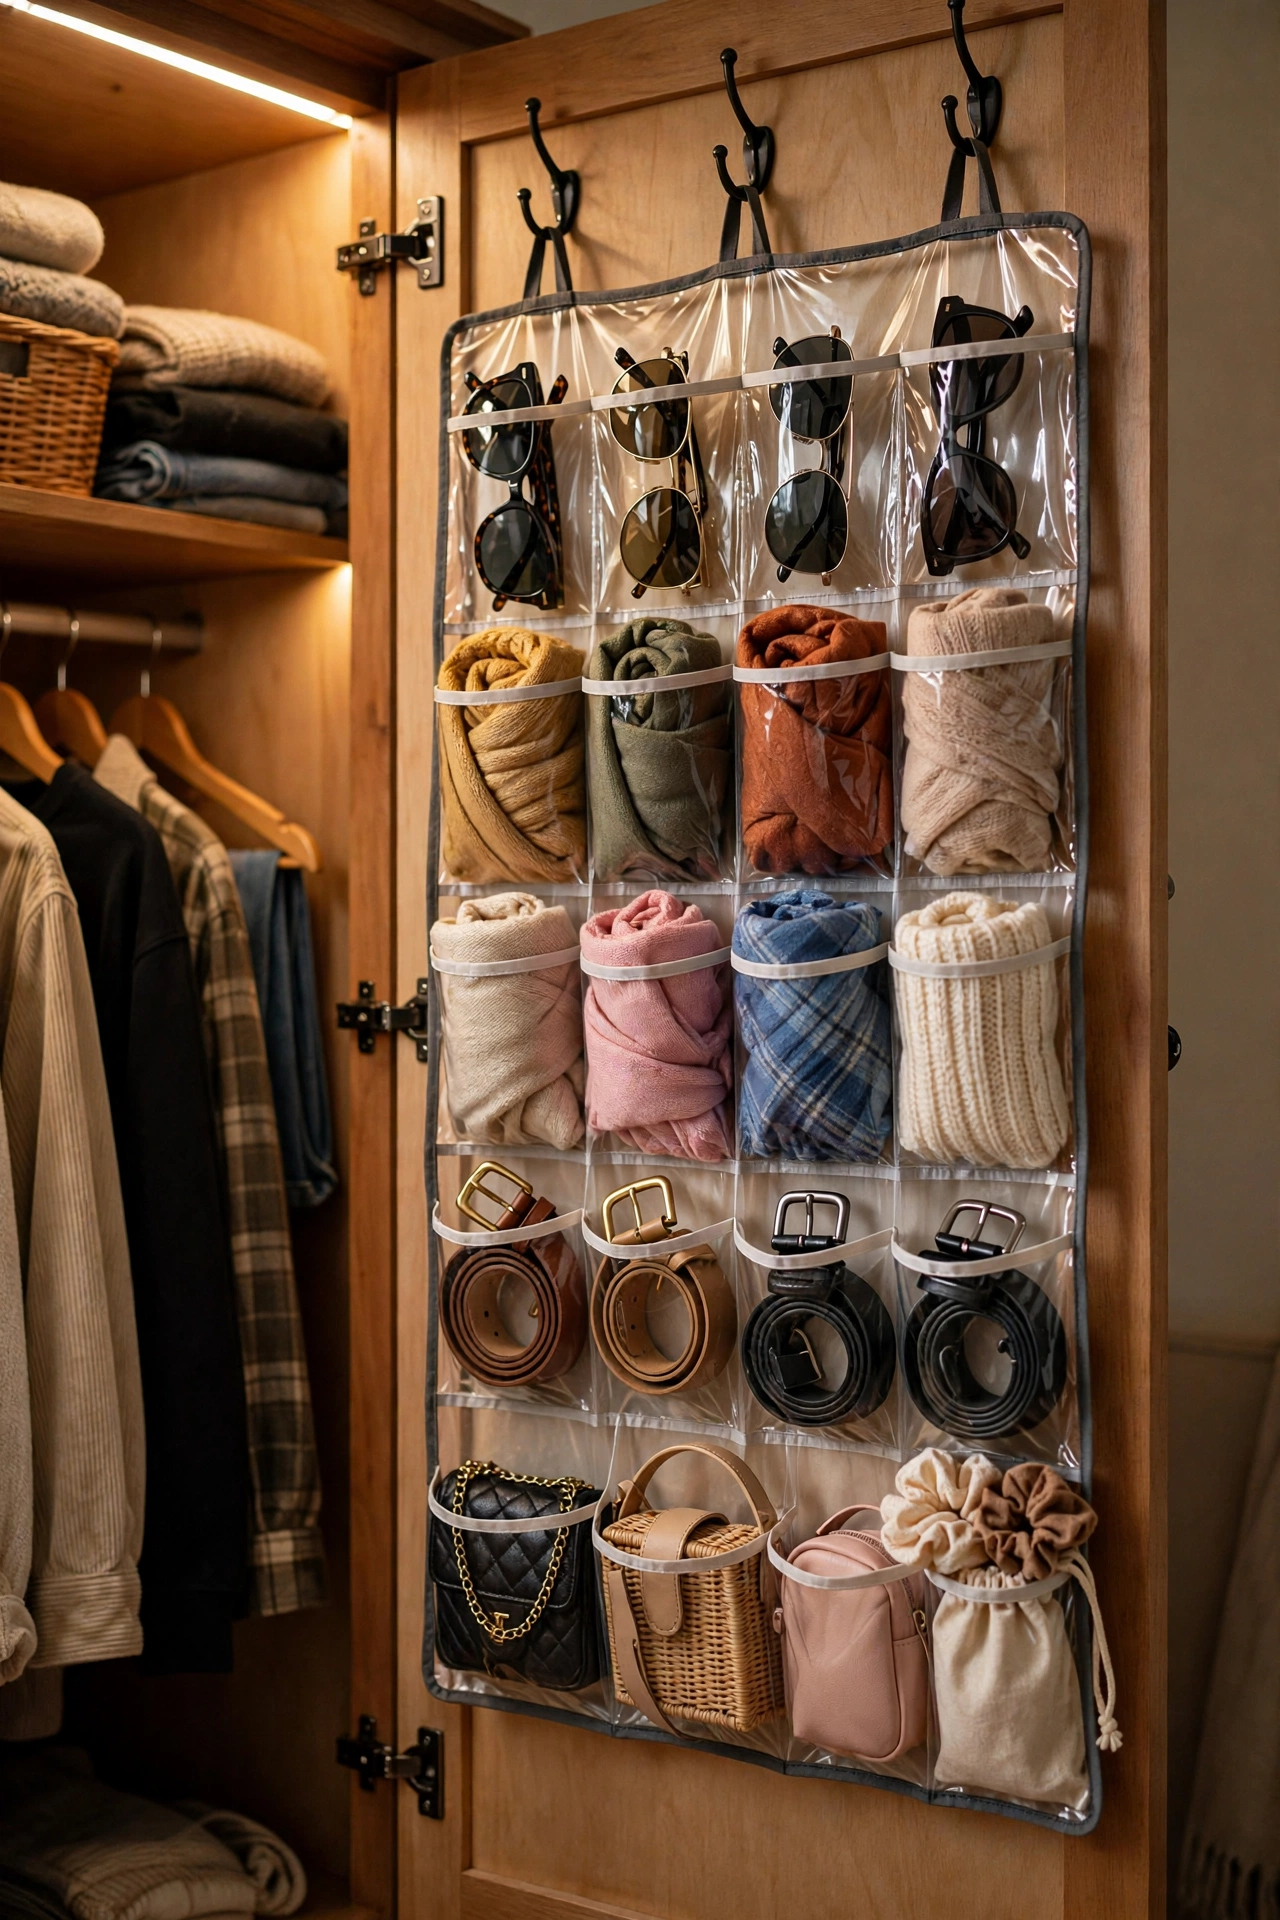
Cost: ~$4 · Time: 15 minutes
An over-the-door shoe organiser with clear pockets is secretly one of the most versatile storage buys in the whole store — for everything except shoes. Hang it inside a wardrobe door and it swallows scarves, belts, handbags, sunglasses and all the small things that never have a proper home. Keep the most-used rows at eye level and the rarely-worn things down low. Because the pockets are clear, you can actually see what you own instead of forgetting it exists. I tried this in my own wardrobe for accessories and stopped losing my favourite scarf three times a week. One mistake to avoid: overloading the bottom pockets with heavy bags. They drag the whole organiser down and the top hooks slip. Light items only down there.
Slim Under-Bed Storage Boxes for Seasonal Clothes
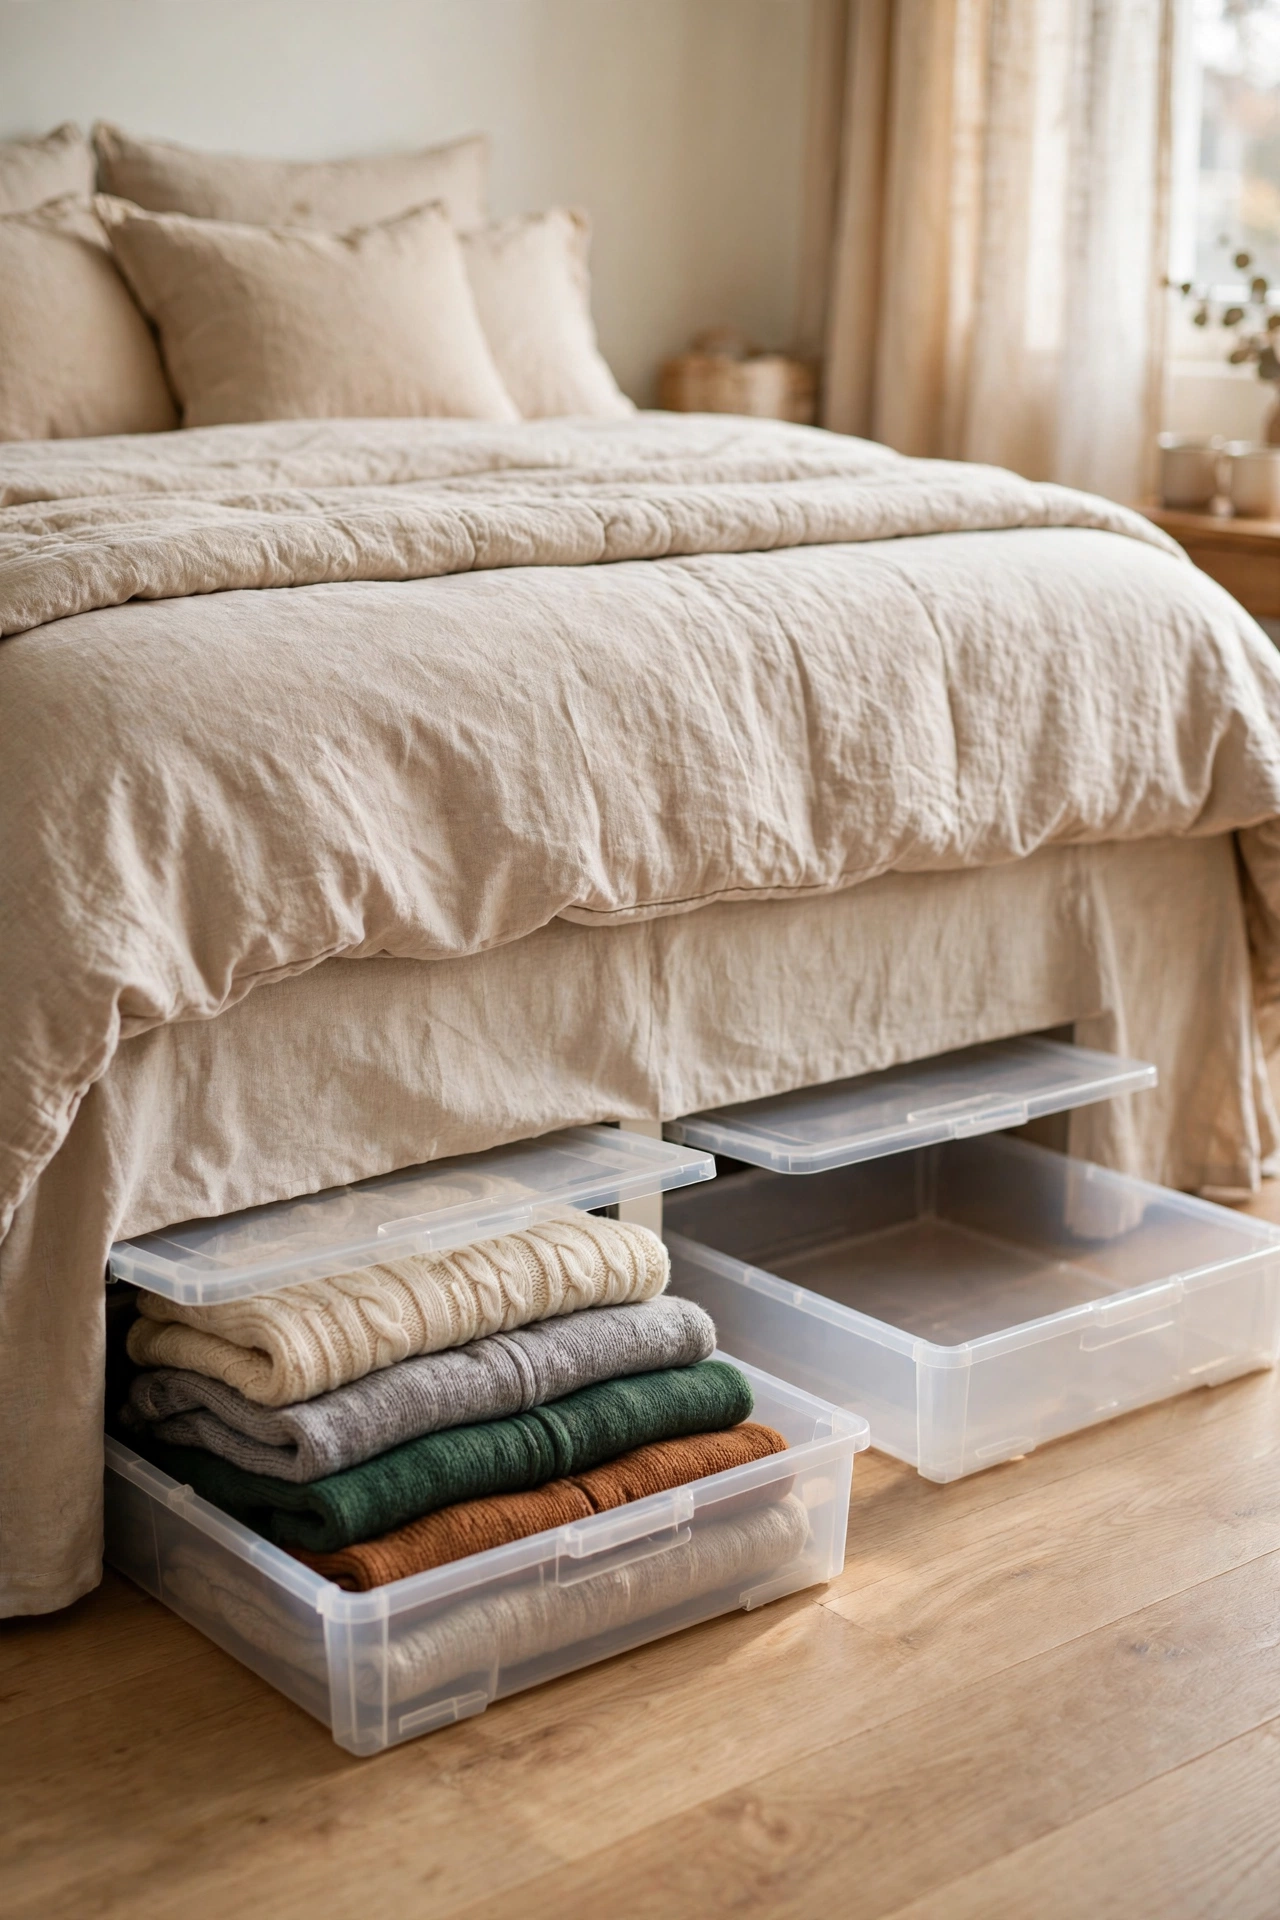
Cost: ~$3 each · Time: 30 minutes
The space under the bed is the biggest storage zone most bedrooms waste. Slim under-bed boxes slide in there and hold the seasonal stuff — heavy winter jumpers in summer, swimwear and sandals in winter — plus spare bedding and anything you only need a few times a year. Measure your bed clearance before you buy; beds vary more than you would expect. Sort by category, slide the boxes in with the label end facing out, and note the contents on the side in chalk pen. I boxed up my winter coats last spring and the wardrobe finally breathed again. One mistake to avoid: skipping the lid. Dust collects fast under a bed, and a lidded box keeps everything fresh between seasons.
Velvet-Look Jewellery Tray Organisers for Drawers
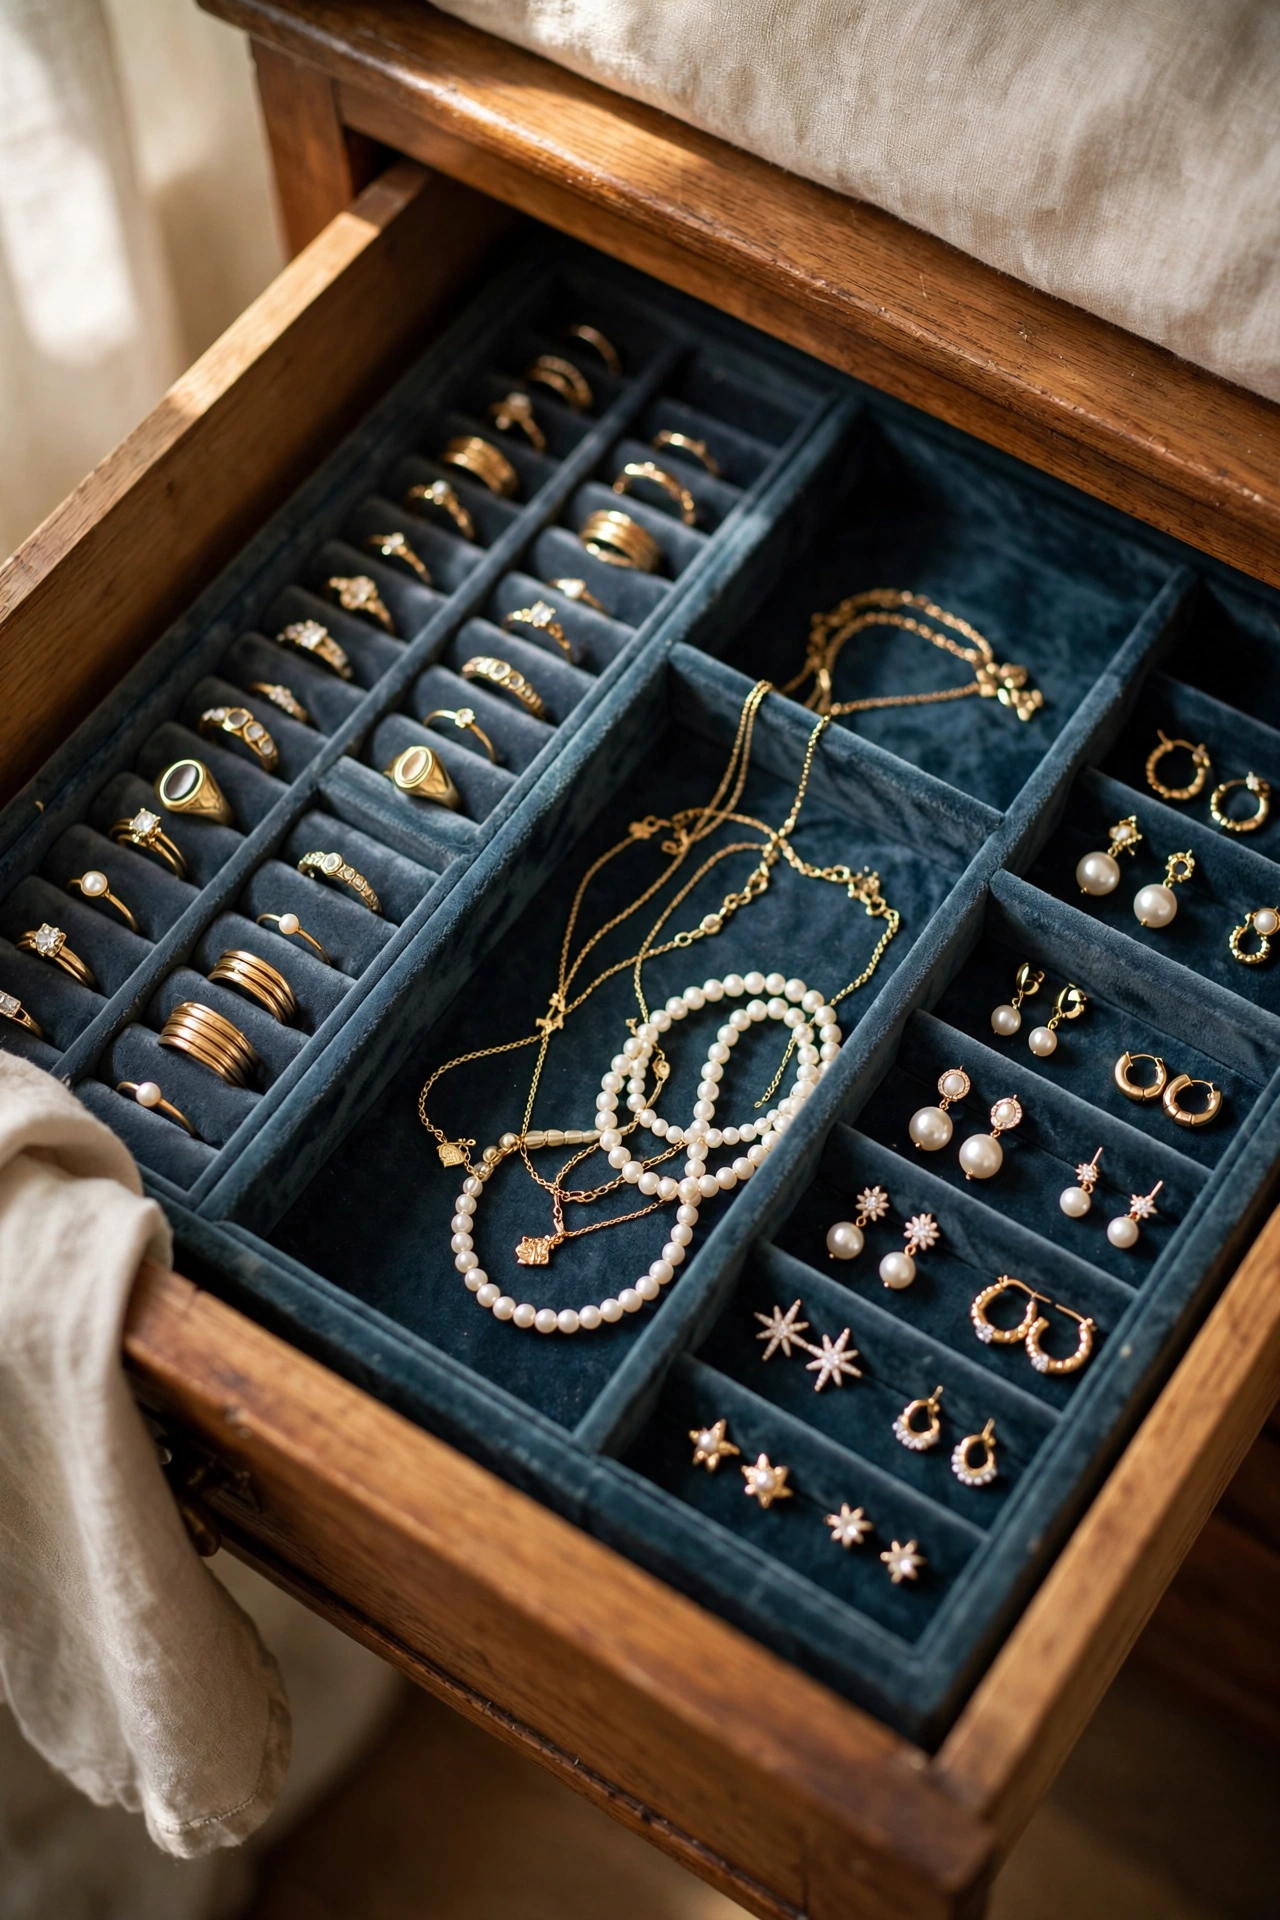
Cost: ~$2 each · Time: 20 minutes
A tangled jewellery box is the reason necklaces snap and earrings vanish. Velvet-look tray organisers with divided compartments sit inside a drawer and give every piece its own slot. Line the drawer first so the trays do not slide, stack two trays if you have the depth, and sort by type — rings in the little squares, necklaces in the long slots. The soft surface stops the scratching that bare plastic trays cause. I moved my tangled mess into these trays and my favourite chain survived its first month without knotting. One mistake to avoid: stacking three or more trays without testing that the drawer still closes. I had to unstack the lot and start again.
Cord and Cable Organiser Clips for the Nightstand
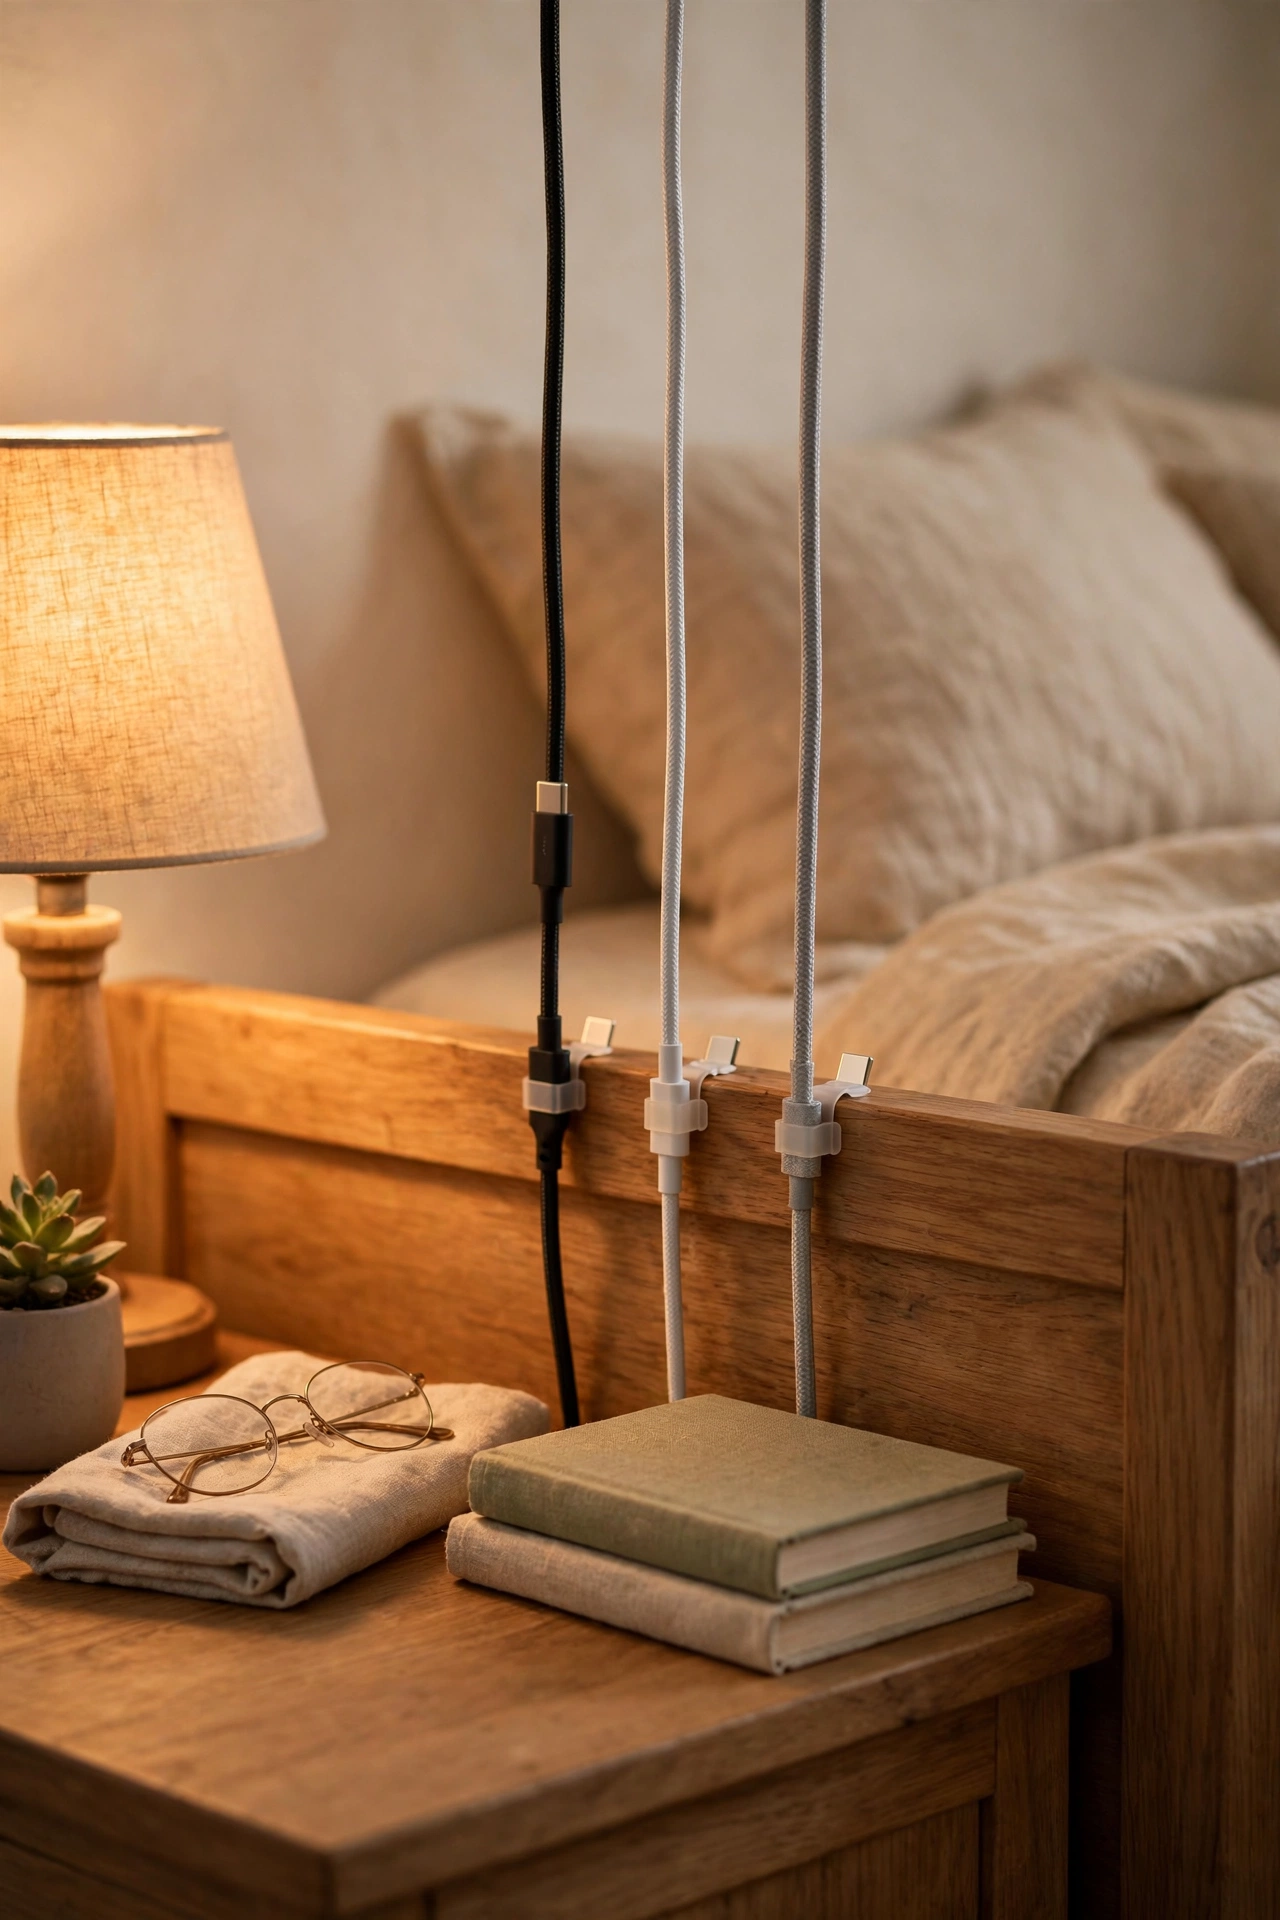
Cost: ~$1.25 · Time: 10 minutes
The nightstand cable situation is small but mighty in its power to annoy. Self-adhesive cord and cable clips stick to the back of a bedside table and hold each charging cable exactly where your hand expects it. Wipe the surface with a damp cloth first and let it dry — adhesive sticks far better to a clean surface. Press each clip firmly and leave it an hour before threading the cable through. I clipped three cables along the back edge of my nightstand and stopped losing my phone charger down the gap every single night. One mistake to avoid: sticking them where your phone actually rests. The cable needs slack, or it will pop the clip clean off when you pick the phone up.
Bathroom & Laundry Storage Hacks
Lidded Woven-Look Baskets for Bathroom Clutter
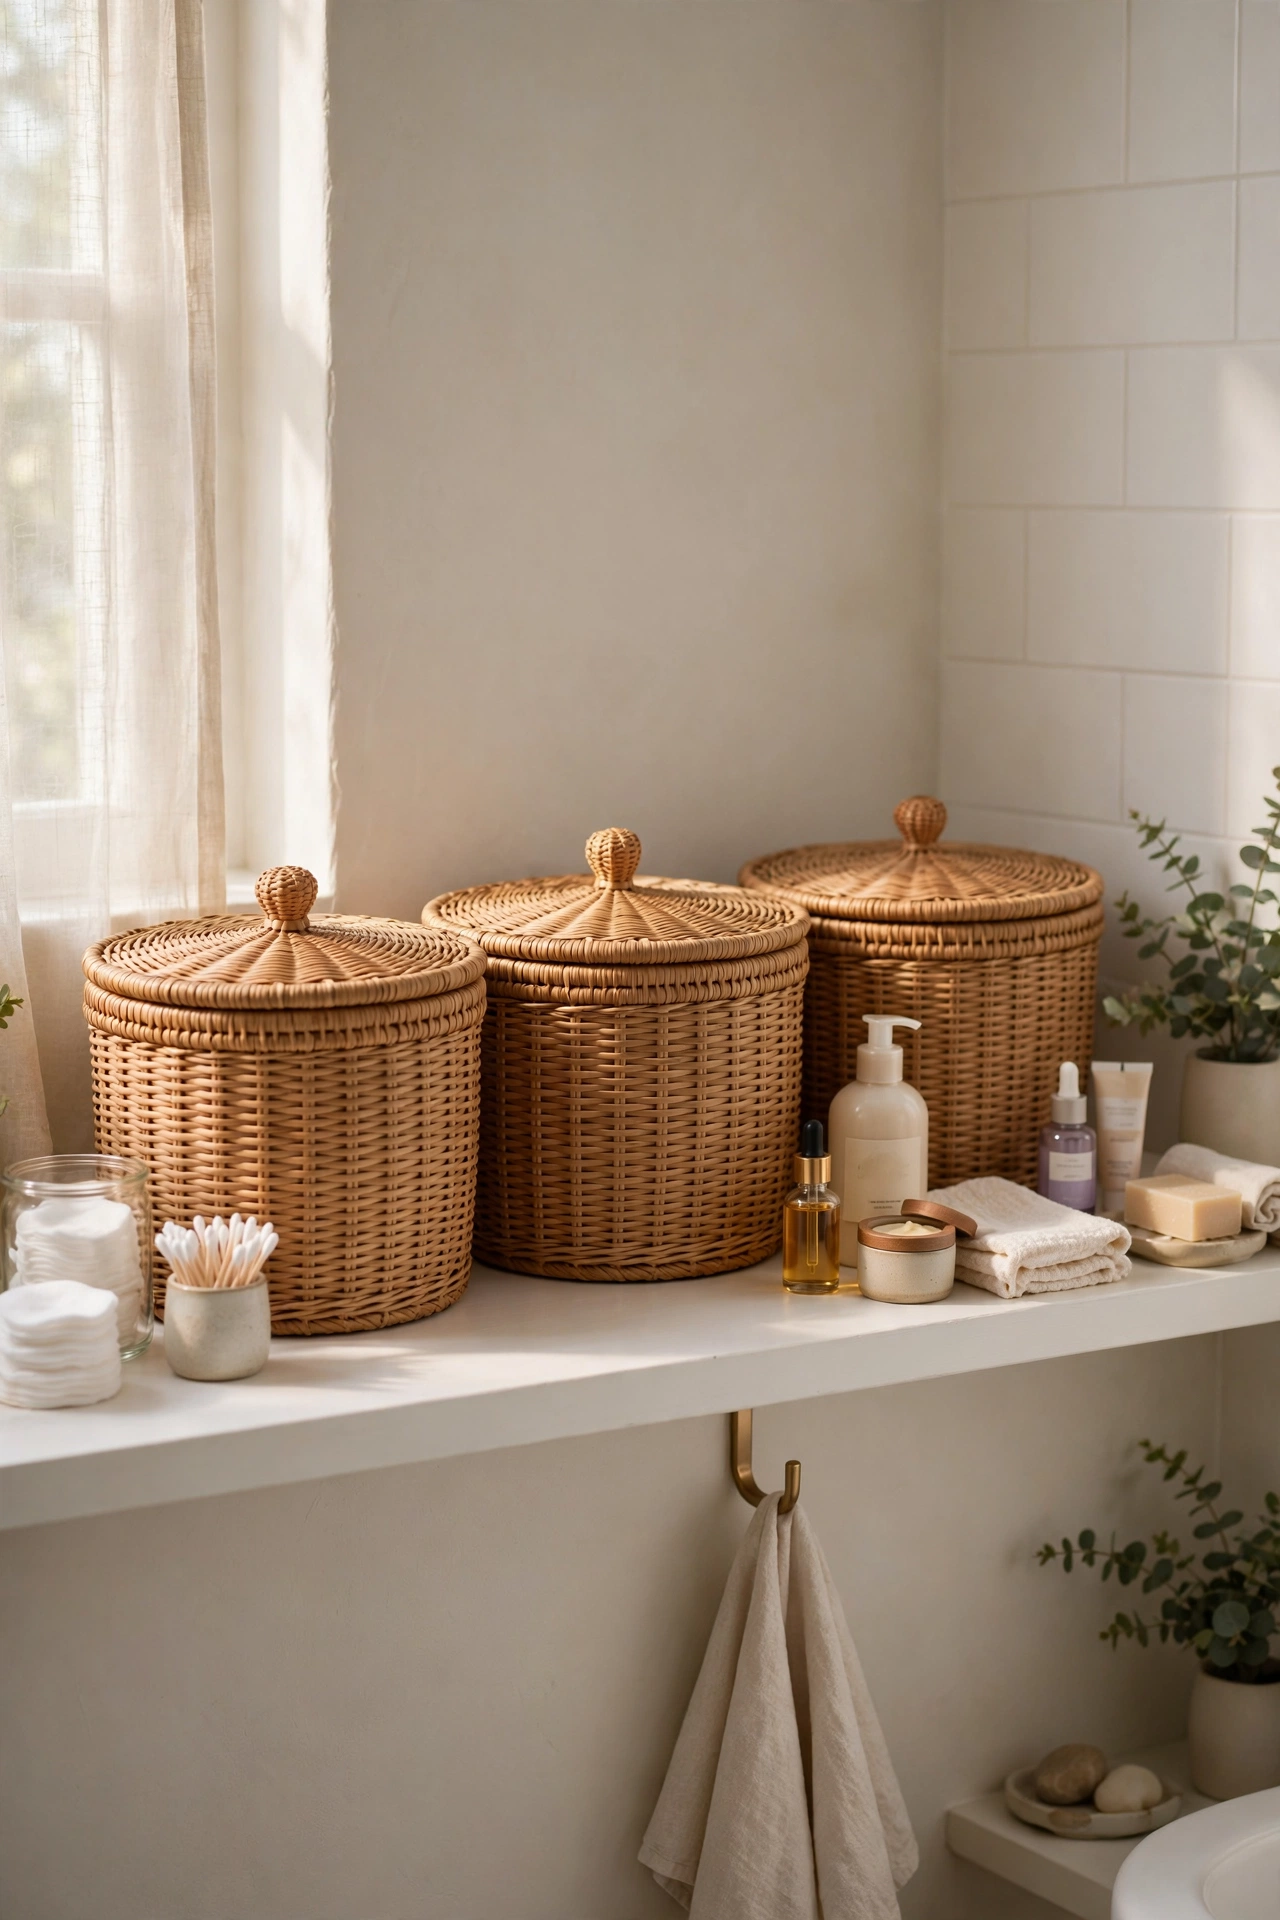
Cost: ~$3 each · Time: 15 minutes
Bathroom shelves look instantly calmer when the clutter lives inside lidded baskets instead of scattered across them. Woven-look baskets with lids group the lotions, spare toiletries and first-aid bits into tidy units you can pull down as one. Choose a size that fits your shelf depth, keep the daily-use items in the lower baskets and the rarely-needed things up high, and leave the lids on — they keep the dust out and hide the visual noise. I corralled my bathroom shelf chaos into three baskets and the room suddenly looked twice as big. One mistake to avoid: buying before measuring the shelf. I ended up with one basket that stuck out half an inch and caught my elbow for a week.
Mason Jar Wall Storage for Small Bathroom Bits
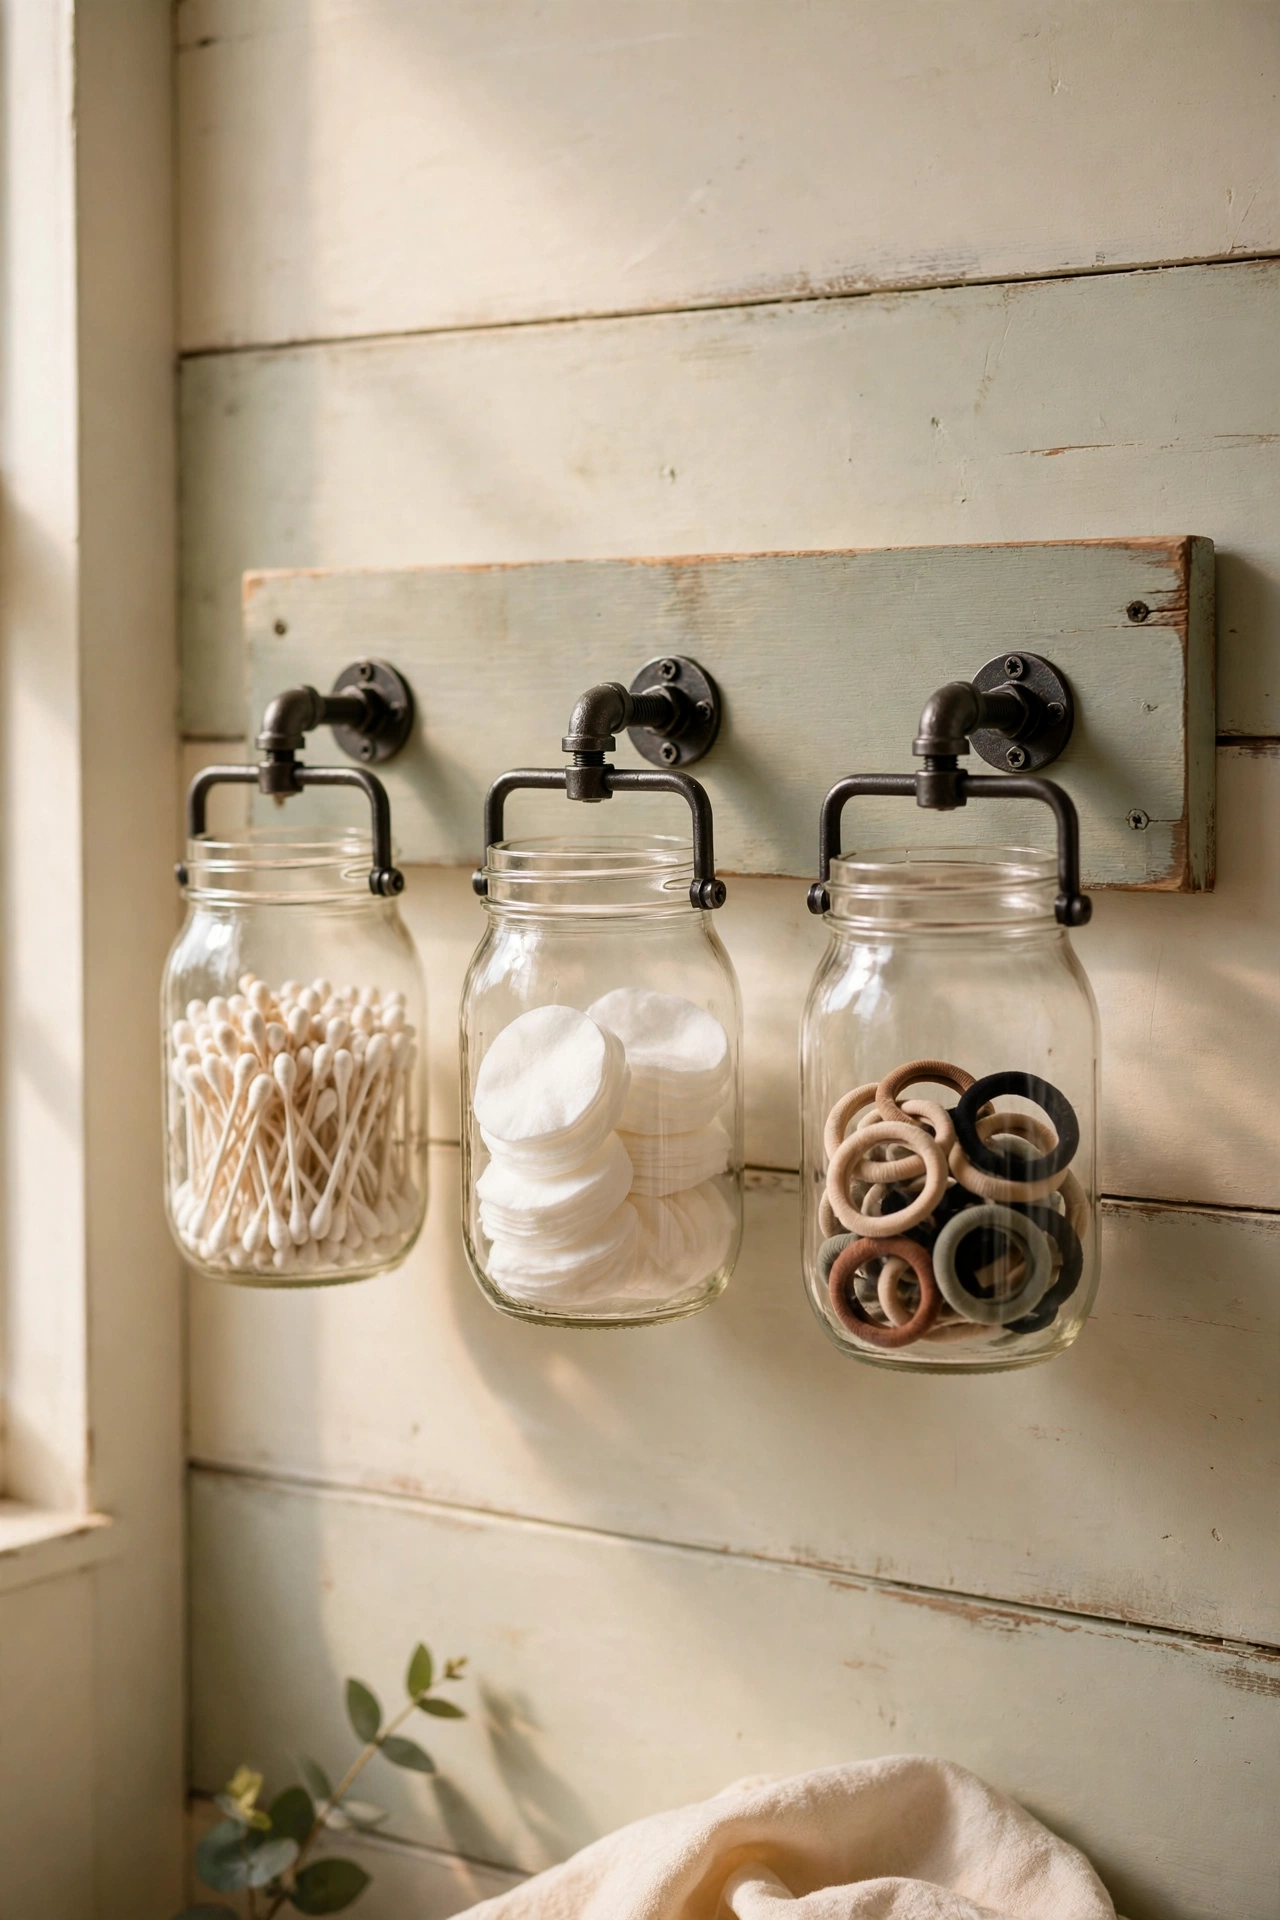
Cost: ~$5 · Time: 40 minutes
Counter space in a small bathroom is precious, and mason jars mounted on a painted board move cotton buds, cotton pads and hair ties up onto the wall where they are visible and reachable. Screw cup hooks or metal clamps onto a wooden board, hang the board securely, and drop the jars in. Keep the everyday things in the largest jars and the tiny fiddly bits in the small ones. A quick coat of paint on the board makes it look deliberate rather than improvised. I tried this in my own guest bathroom and the counter finally stayed clear. One mistake to avoid: using glue instead of screws to fix the board. Mine sagged within a week until I fastened it properly. (see also: 15-dollar-store-entryway-finds-on-a-budget)
Chalkboard Label Tags for Baskets, Jars and Bottles
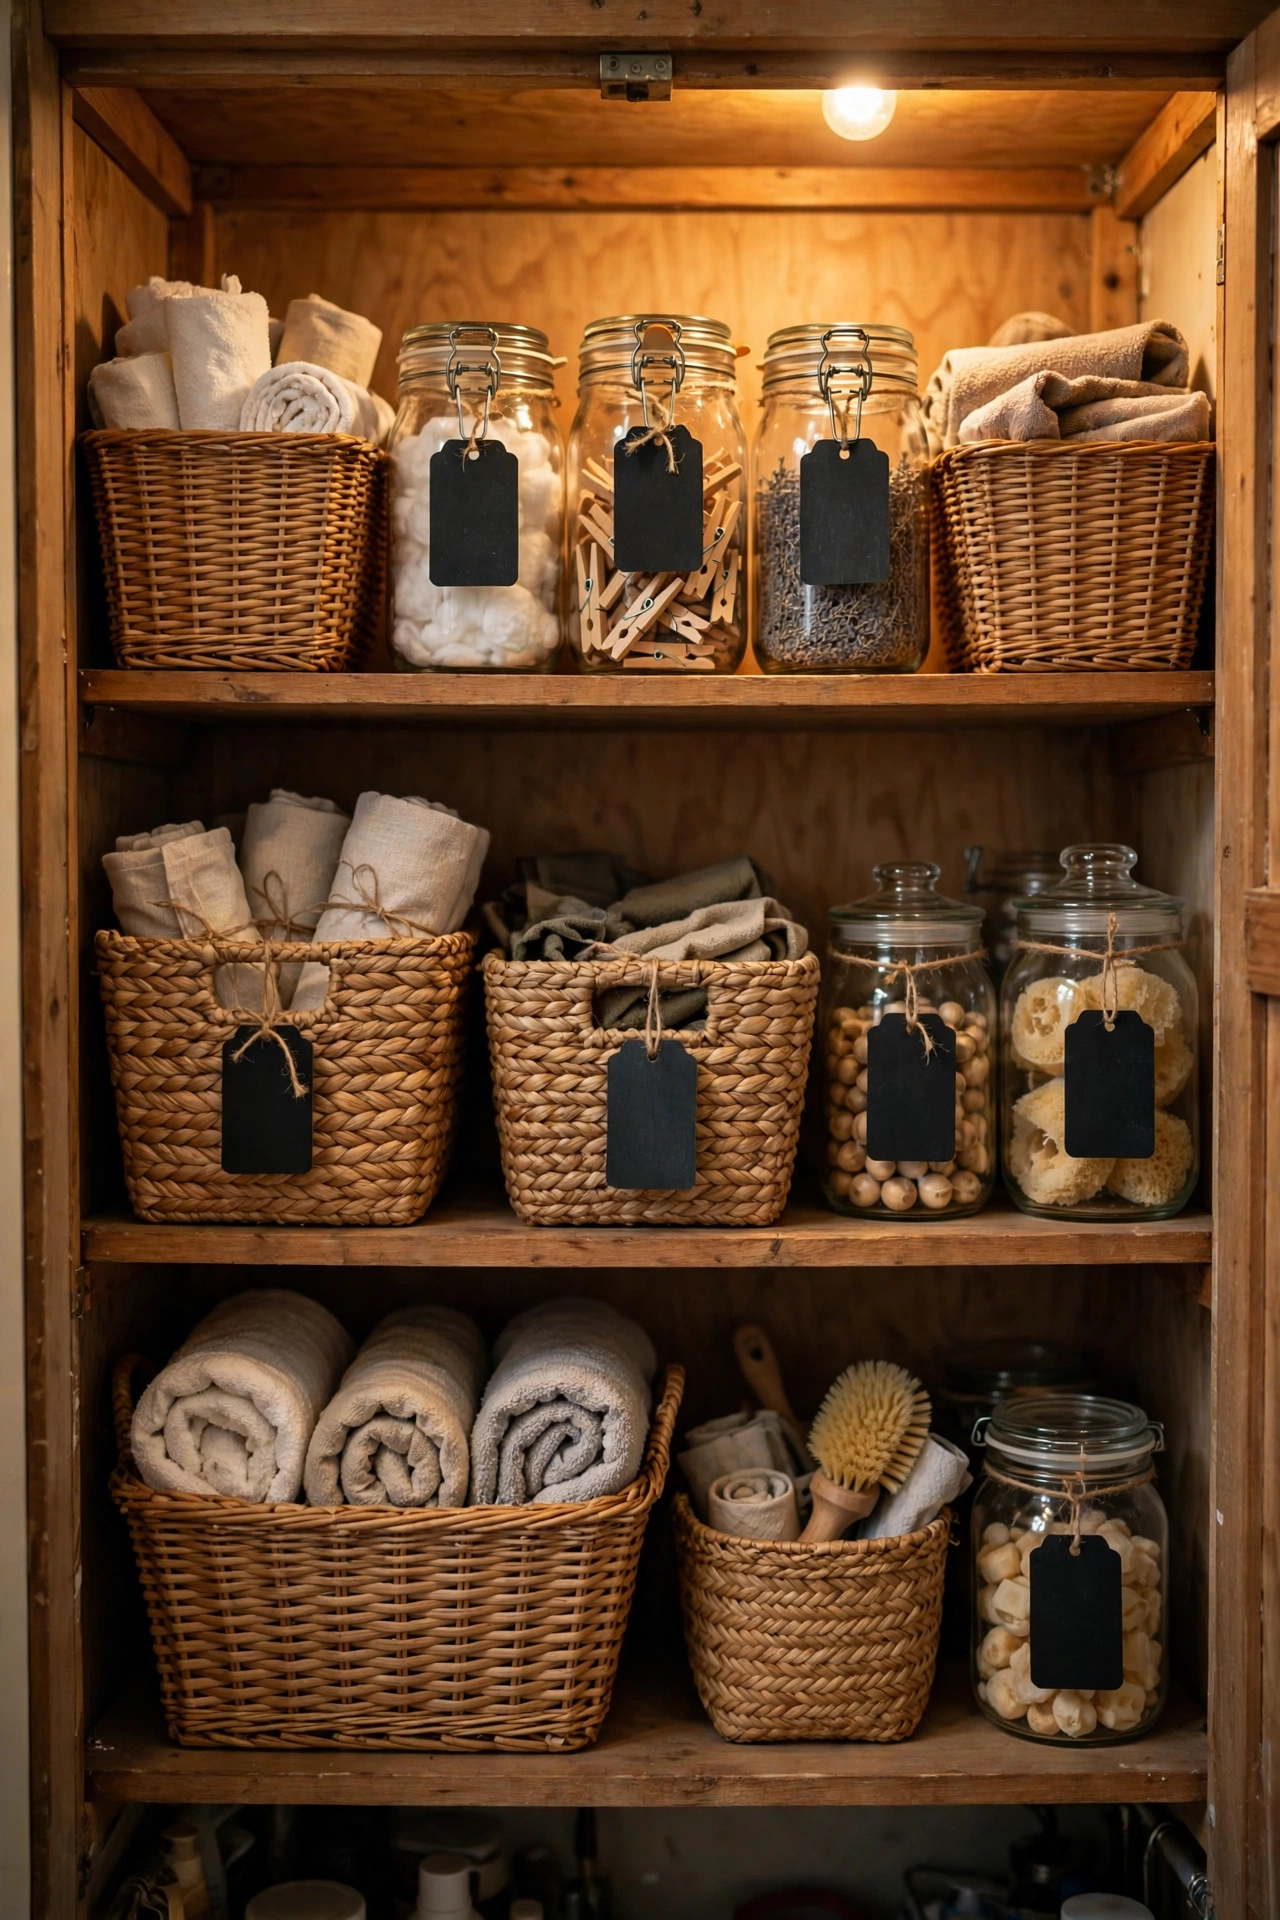
Cost: ~$1.25 · Time: 20 minutes
Labels are what separate a tidy shelf from one that stays tidy. Chalkboard tags tied onto baskets, jars and bottles tell the whole household where things belong, which is half the battle won. Write the contents in chalk pen, loop the tag through a handle or around a neck, and add the date you filled it if it is food. The pen wipes off with a damp cloth, so the tags evolve as the contents change. I labelled every basket in my laundry cupboard and my partner finally stopped putting the cleaning cloths in with the tea towels. One mistake to avoid: writing with actual chalk. It smudges the moment anything brushes it — use a chalk marker and it stays legible for months.
Linen Closet Shelf Dividers for Towel Stacks
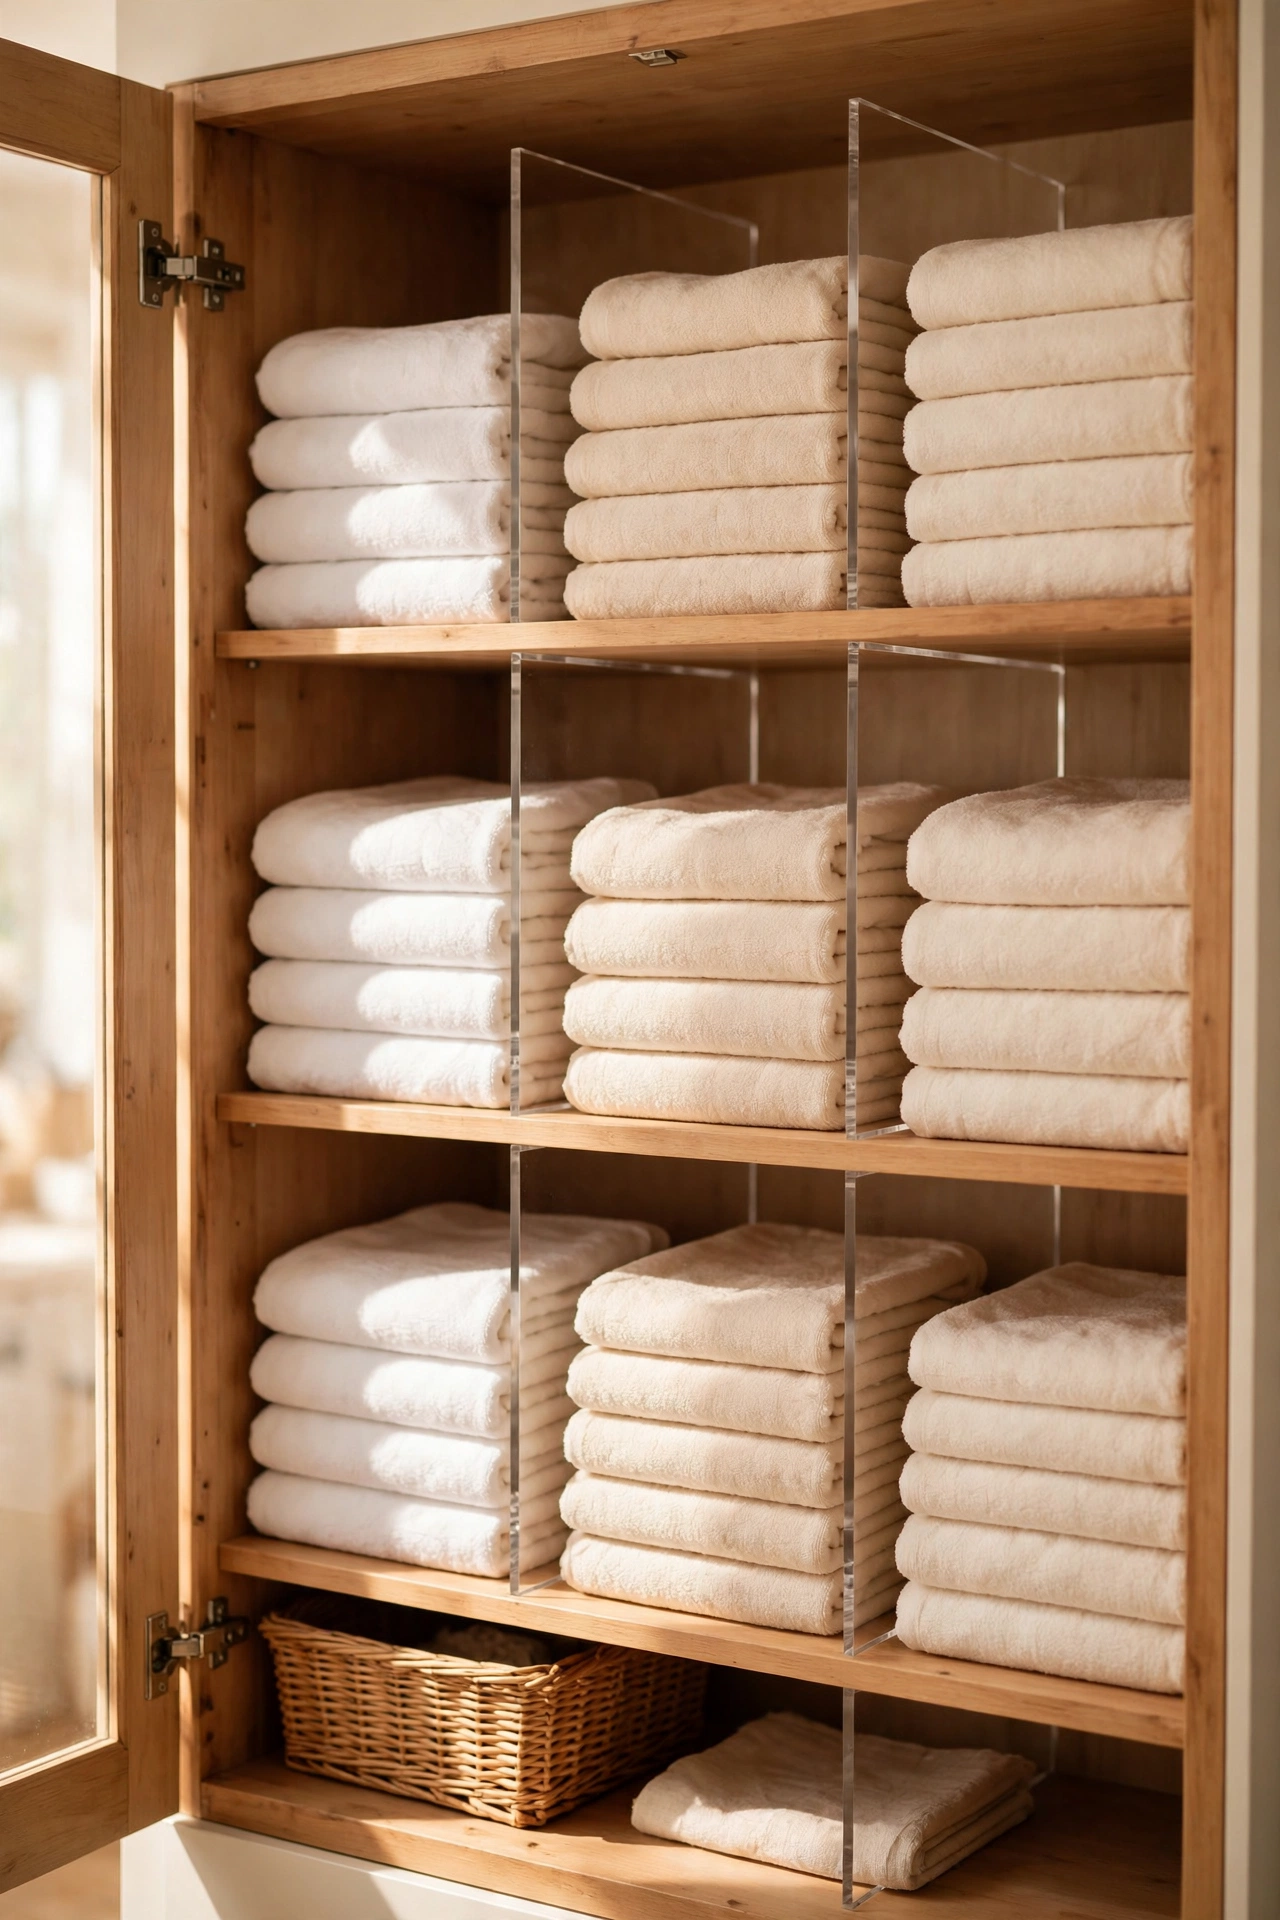
Cost: ~$2 each · Time: 15 minutes
Towel stacks that topple every time you pull one out are a small daily irritation. Shelf dividers slide between the stacks and keep each pile standing on its own, like bookends for linen. No tools are needed — just slot them between the stacks and adjust the spacing to your pile widths. They work just as well for folded sheets and duvet covers, which are the worst offenders for the slow sideways slide. I added dividers to my airing cupboard and the neatness actually survived contact with the rest of the house. One mistake to avoid: spacing them too wide. A divider with a wobbly gap is just decoration; snug spacing is what holds the pile upright.
Living Areas & Everyday Storage Hacks
Adhesive Hooks for Keys, Bags and Light Decor
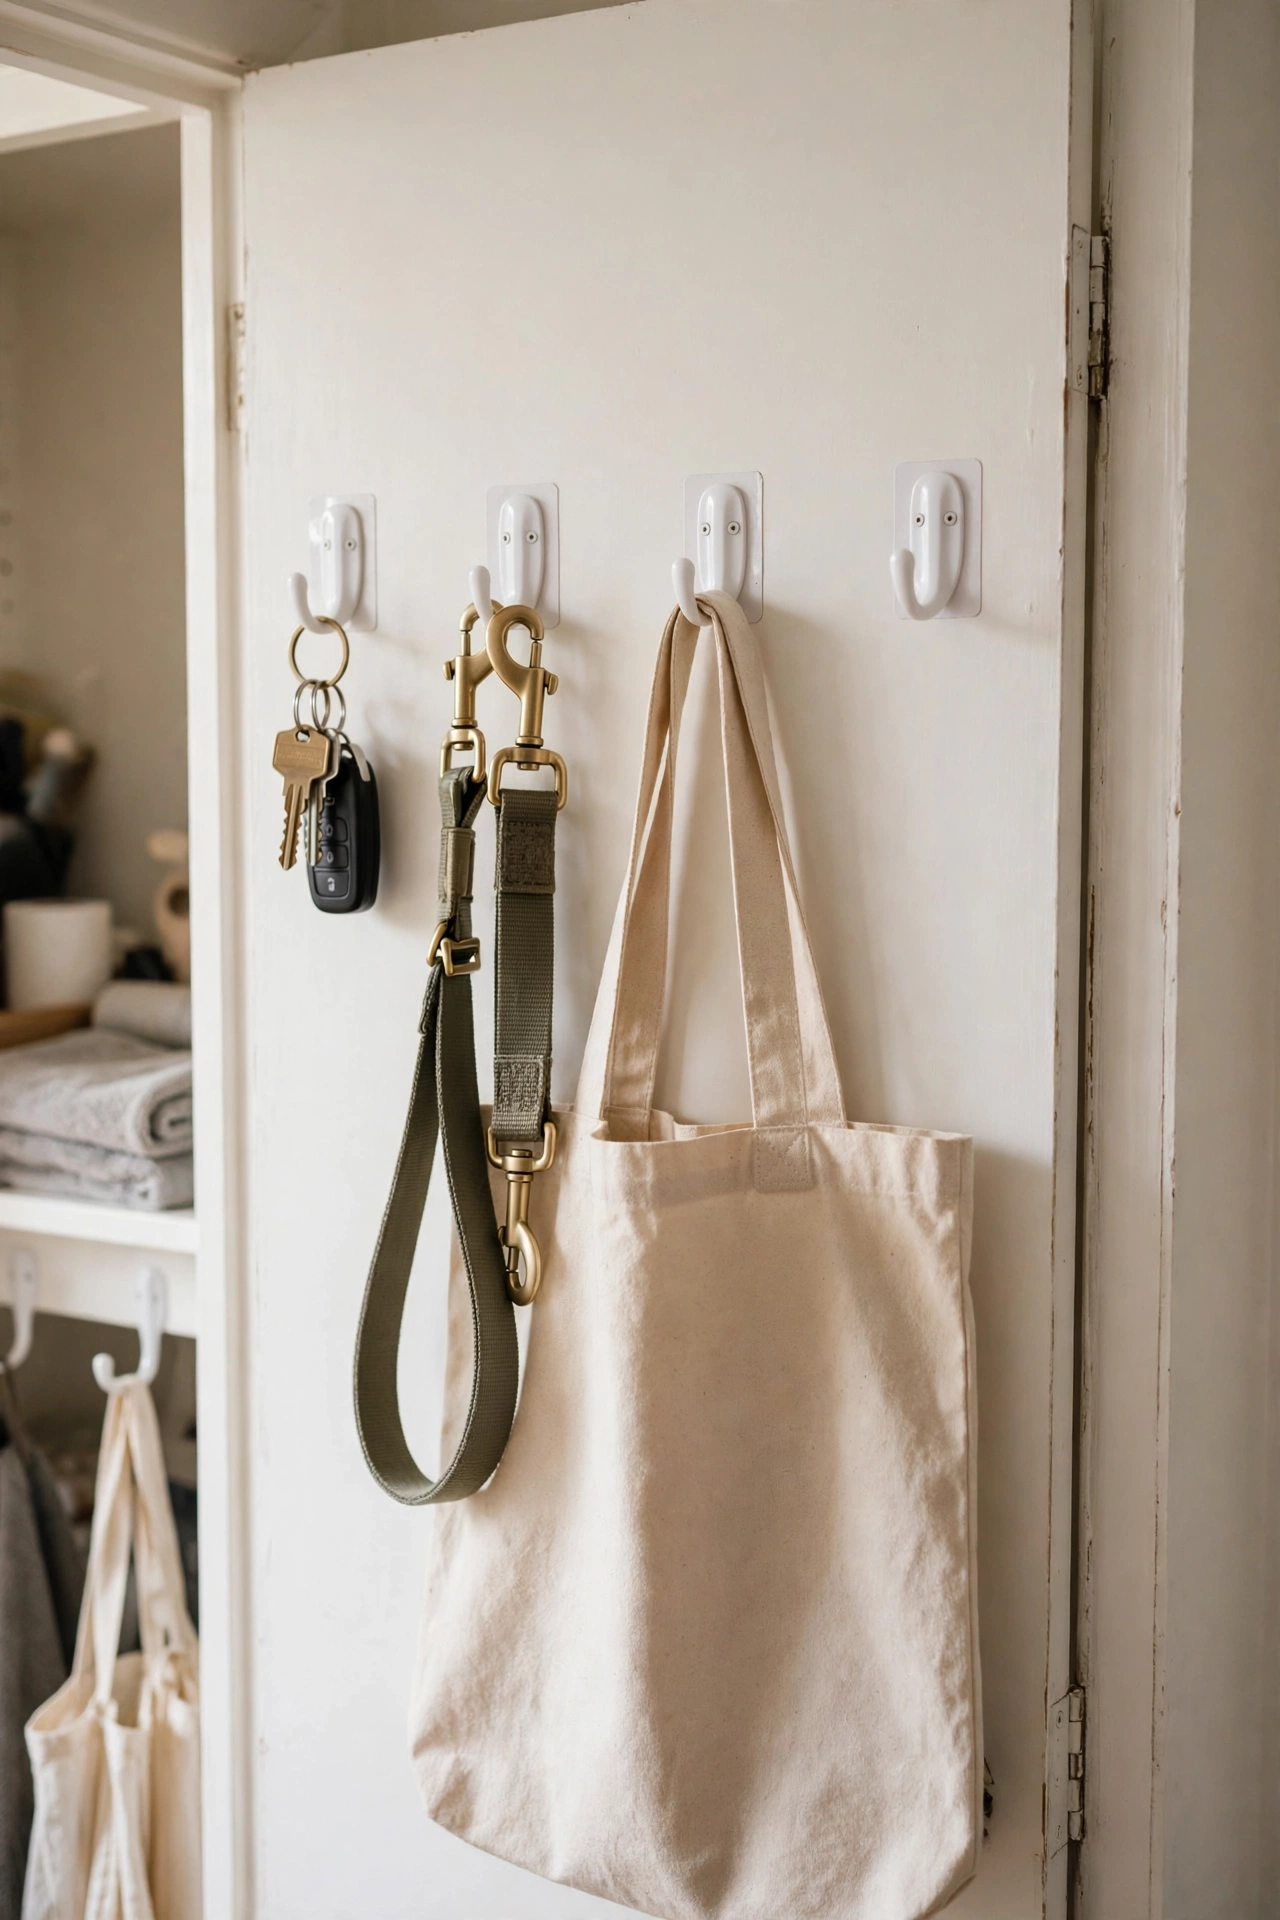
Cost: ~$1.25 · Time: 10 minutes
Adhesive command-style hooks are the renter’s best friend: no drilling, no damage, and they hold keys, bags, tea towels and light seasonal wreaths without complaint. Clean the surface with the wipe provided, press the strip firmly for thirty seconds, and — this is the important bit — wait a full hour before hanging anything on it. The adhesive needs that time to bond. I hung a row inside my front cupboard for keys and the dog lead, and it cleared the hallway table completely. One mistake to avoid: the one I made, which was skipping the wait. My favourite hook slid down the wall at three in the morning with a crash, and the adhesive never recovered afterwards.
Three-Tier Rolling Cart as a Mobile Command Centre
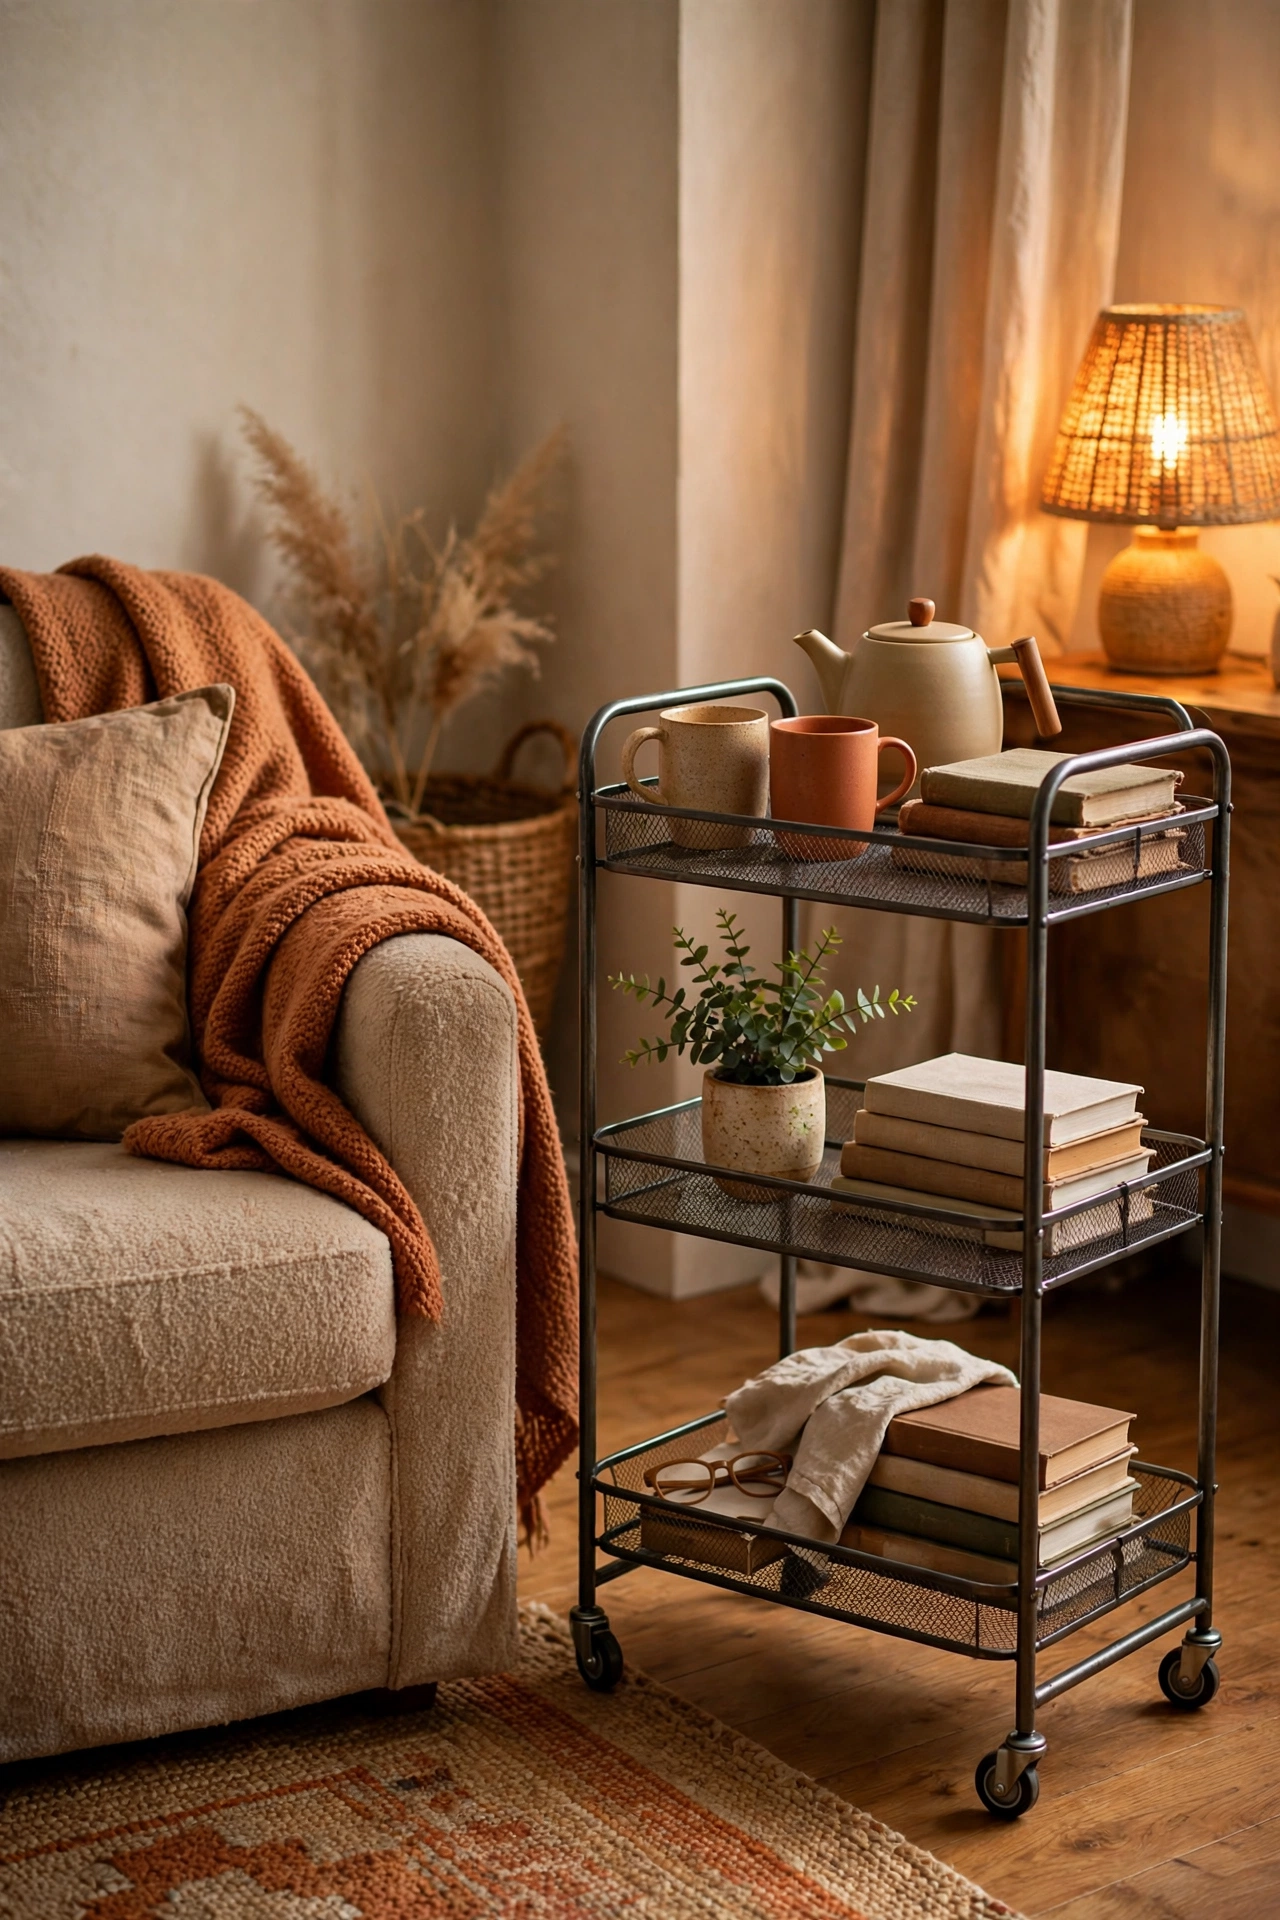
Cost: ~$8 · Time: 25 minutes
A three-tier rolling cart is a whole extra set of shelves that follows you around the house. Assemble it, give each tier a job — craft supplies, gift-wrapping station, homework kit — and wheel it to wherever it is needed, then tuck it into a corner. The castors mean it never becomes a dumping ground in the wrong room, because you move the cart instead of the clutter. I set one up as a tea-and-reading station beside my favourite chair and it gets more use than half my furniture. One mistake to avoid: loading the top tier heavy. A top-heavy cart tips when you wheel it, so keep the weight low and the light bits up top. (see also: 23-dollar-store-living-room-finds-worth-grabbing)
Wooden Crate Wall Shelves for Display Storage
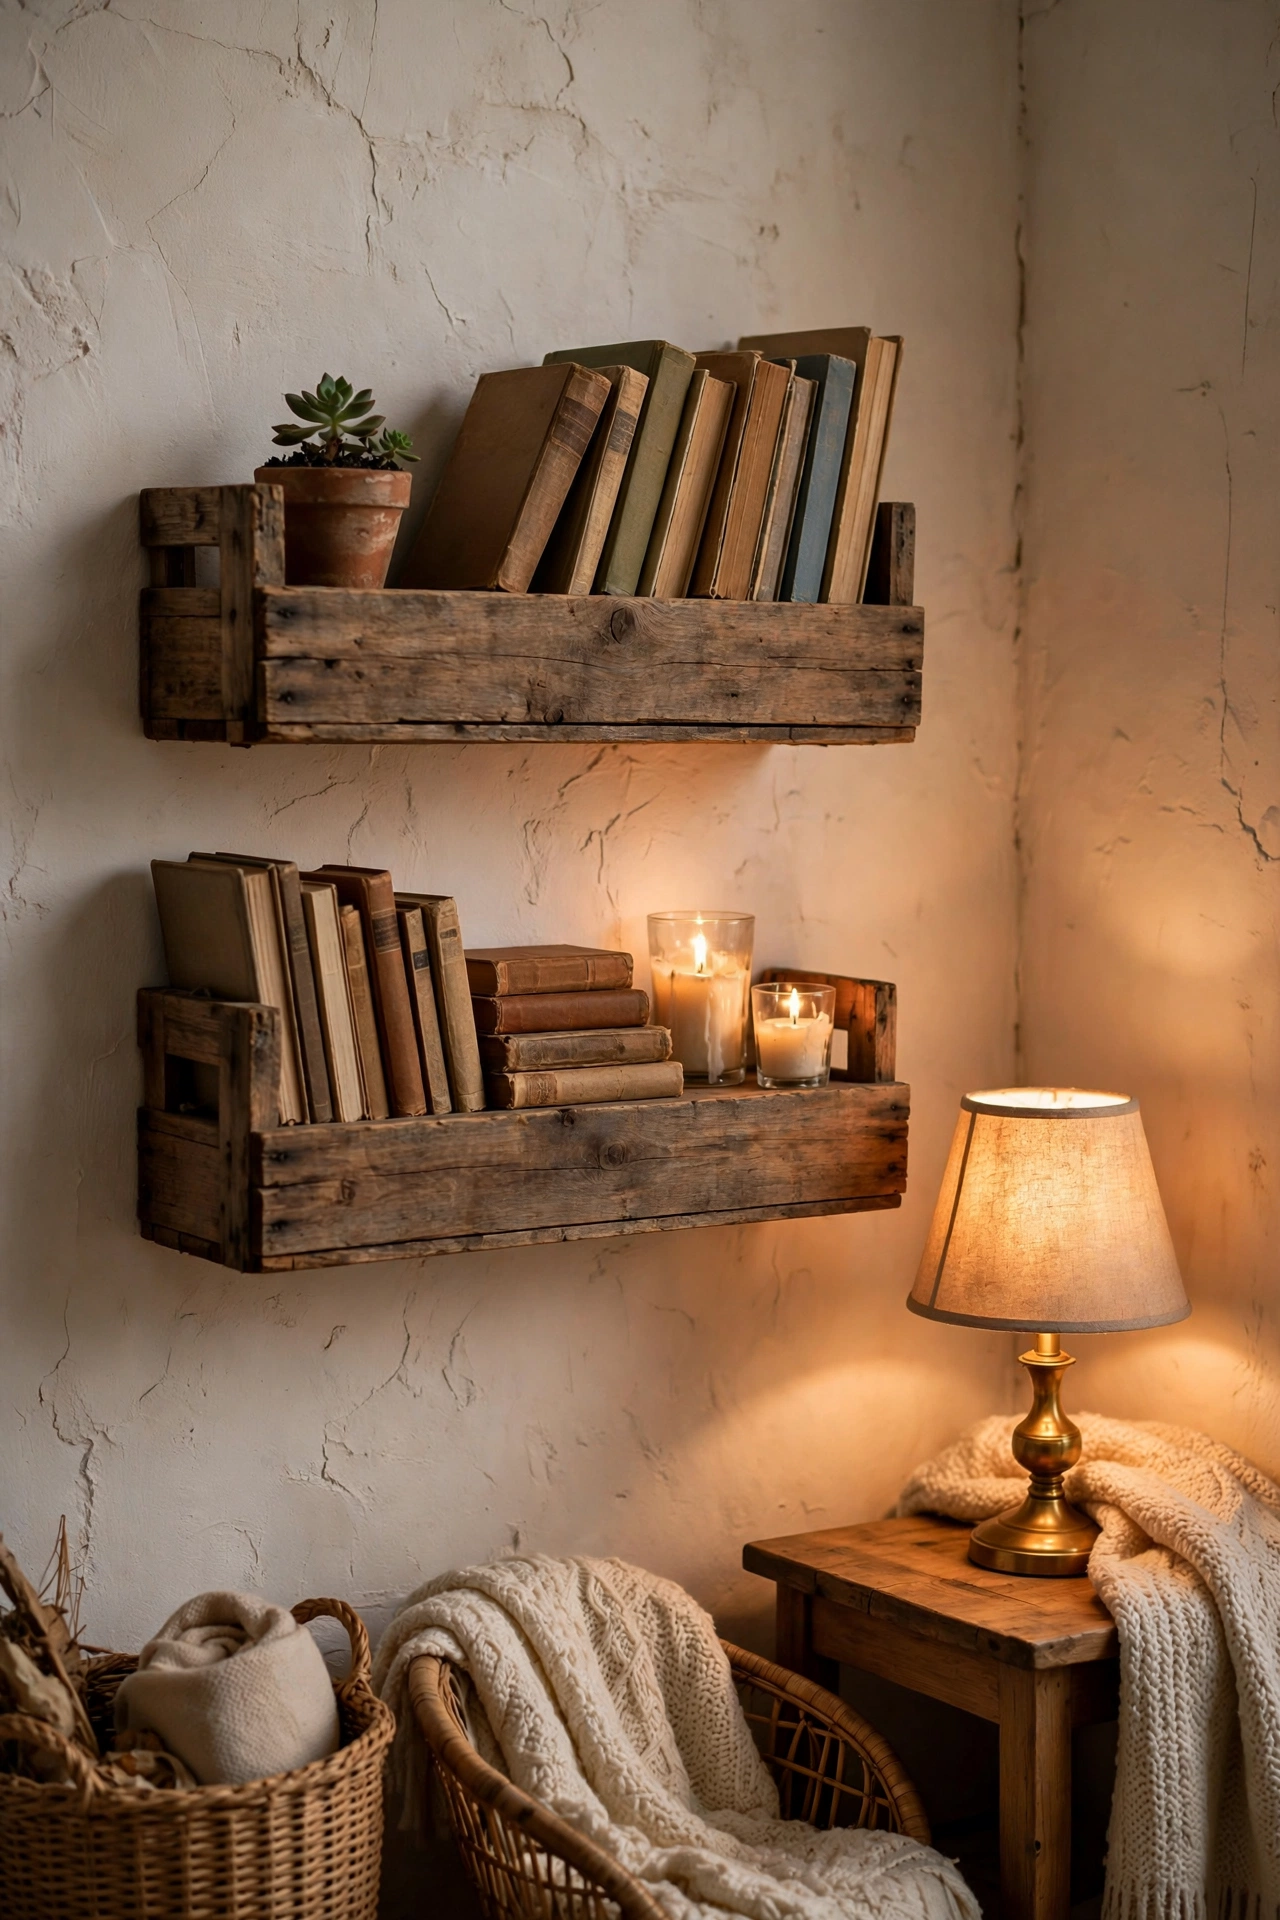
Cost: ~$3 each · Time: 45 minutes
Wooden crates stacked sideways make wall shelves that look far more considered than their price suggests. Sand any rough edges with a quick rub, stack two or three in a pleasing arrangement, and secure the whole thing to the wall with brackets — never rely on stacking alone. Use them for books, small plants and the bits you like to look at. A light stain or whitewash lifts them from packing-crate to intentional styling. I built a two-crate shelf in my reading corner and visitors assumed it was a vintage find. One mistake to avoid: skipping the wall fixing. Gravity and cats both conspire against unsecured stacks, and neither gives a warning first.
Pegboard Wall Organiser for Home Office Bits
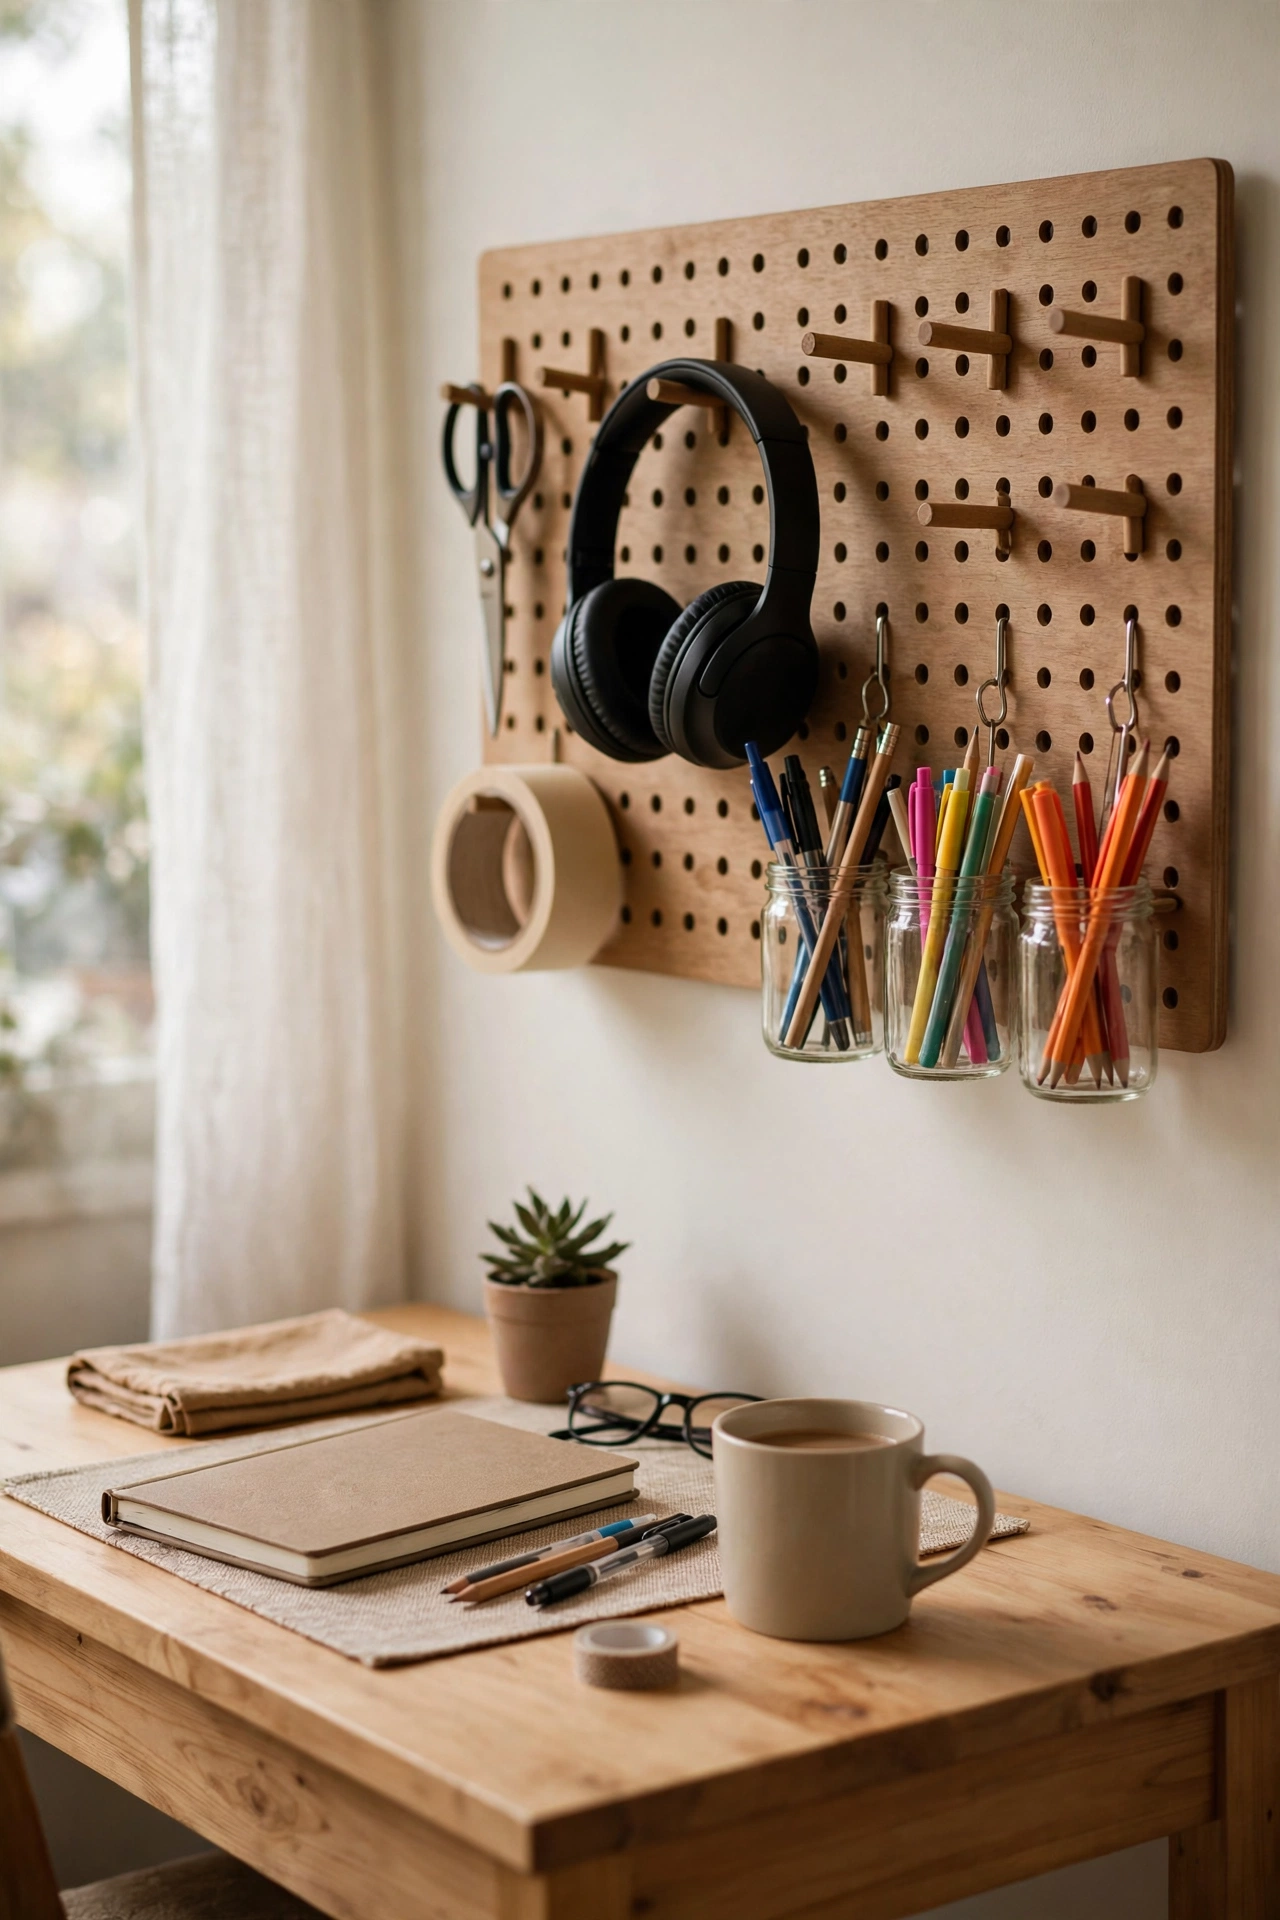
Cost: ~$5 · Time: 30 minutes
A pegboard turns a blank bit of wall into fully customisable storage for the home office or craft corner. Hang the board with proper fixings, then arrange the hooks and small shelves to suit — scissors and tape within reach, notebooks and jars slotted where they fit. The beauty of it is that it changes as your needs do; nothing is permanent. Keep a mix of hook sizes so everything from headphones to rolls of ribbon has a home. I mounted one above my desk and my drawers finally closed properly again. One mistake to avoid: hanging it with weak adhesive pads. A loaded pegboard is heavier than it looks — screws into the wall, or nothing at all.
If one of these hacks is about to sort your worst drawer, save this idea for later — pin it or bookmark the page so it is waiting when the tidying mood strikes.
Start with the room that bugs you most, grab three or four of these fixes, and give it one Saturday. None of them costs more than a few dollars, and the before-and-after is always more satisfying than it has any right to be. (see also: 21-dollar-store-home-office-finds-on-a-budget)
