23 Peel and Stick Kitchen Backsplash Ideas Renters Swear By
My landlord had exactly one rule: no drilling, no painting, no “improvements” I could not undo in an afternoon. Fair enough — but staring at the same tired cream tiles for two years was slowly driving me mad. Then a friend showed me her kitchen, where she had covered the whole backsplash with peel and stick backsplash ideas she found online, and I could not tell they were not real tiles until she told me. That weekend I did my own, and I have been a convert ever since. Below are 23 renter-approved styles, grouped by look, with the real-world tips I wish someone had told me first.
Subway Tile Looks
1. Classic White Subway Tiles for a Timeless Finish
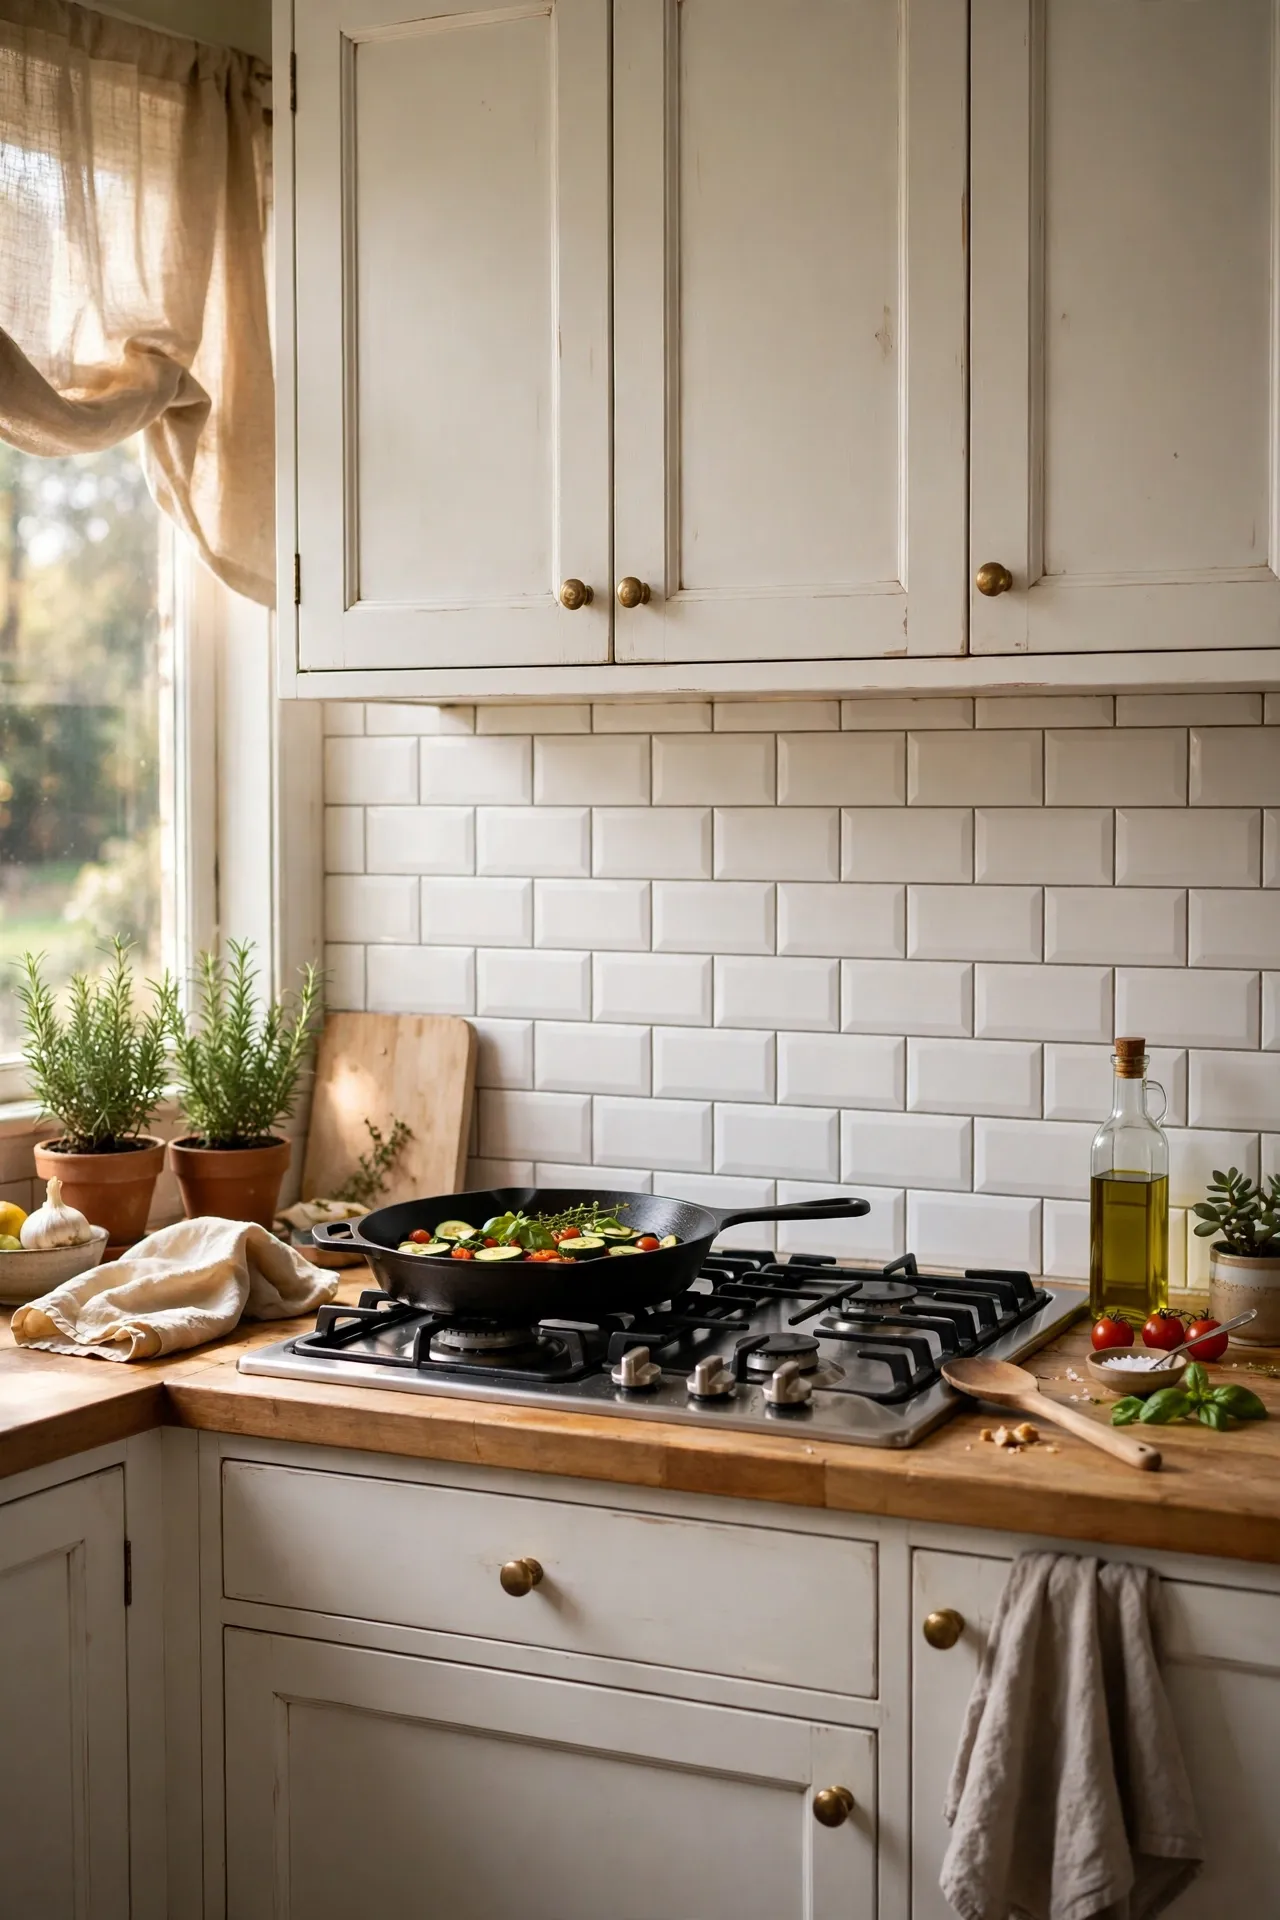
The classic white subway tile is popular for a reason: it goes with everything, makes small kitchens look bigger, and never dates. The peel-and-stick versions come as individual tiles or sheets of six — sheets are faster, singles look more convincing up close. Start from the centre of the hob and work outward so the cut tiles land at the edges. I did my whole backsplash with sheets in one Saturday afternoon. My mistake was eyeballing the first row instead of using a spirit level; by the third row everything had drifted. Level the first row, press each tile firmly from the centre out to push out air bubbles, and it will look like a proper tiler did it.
Cost: ~$25 for the wall | Time: 2 hours
2. Herringbone Subway Layout That Looks Custom
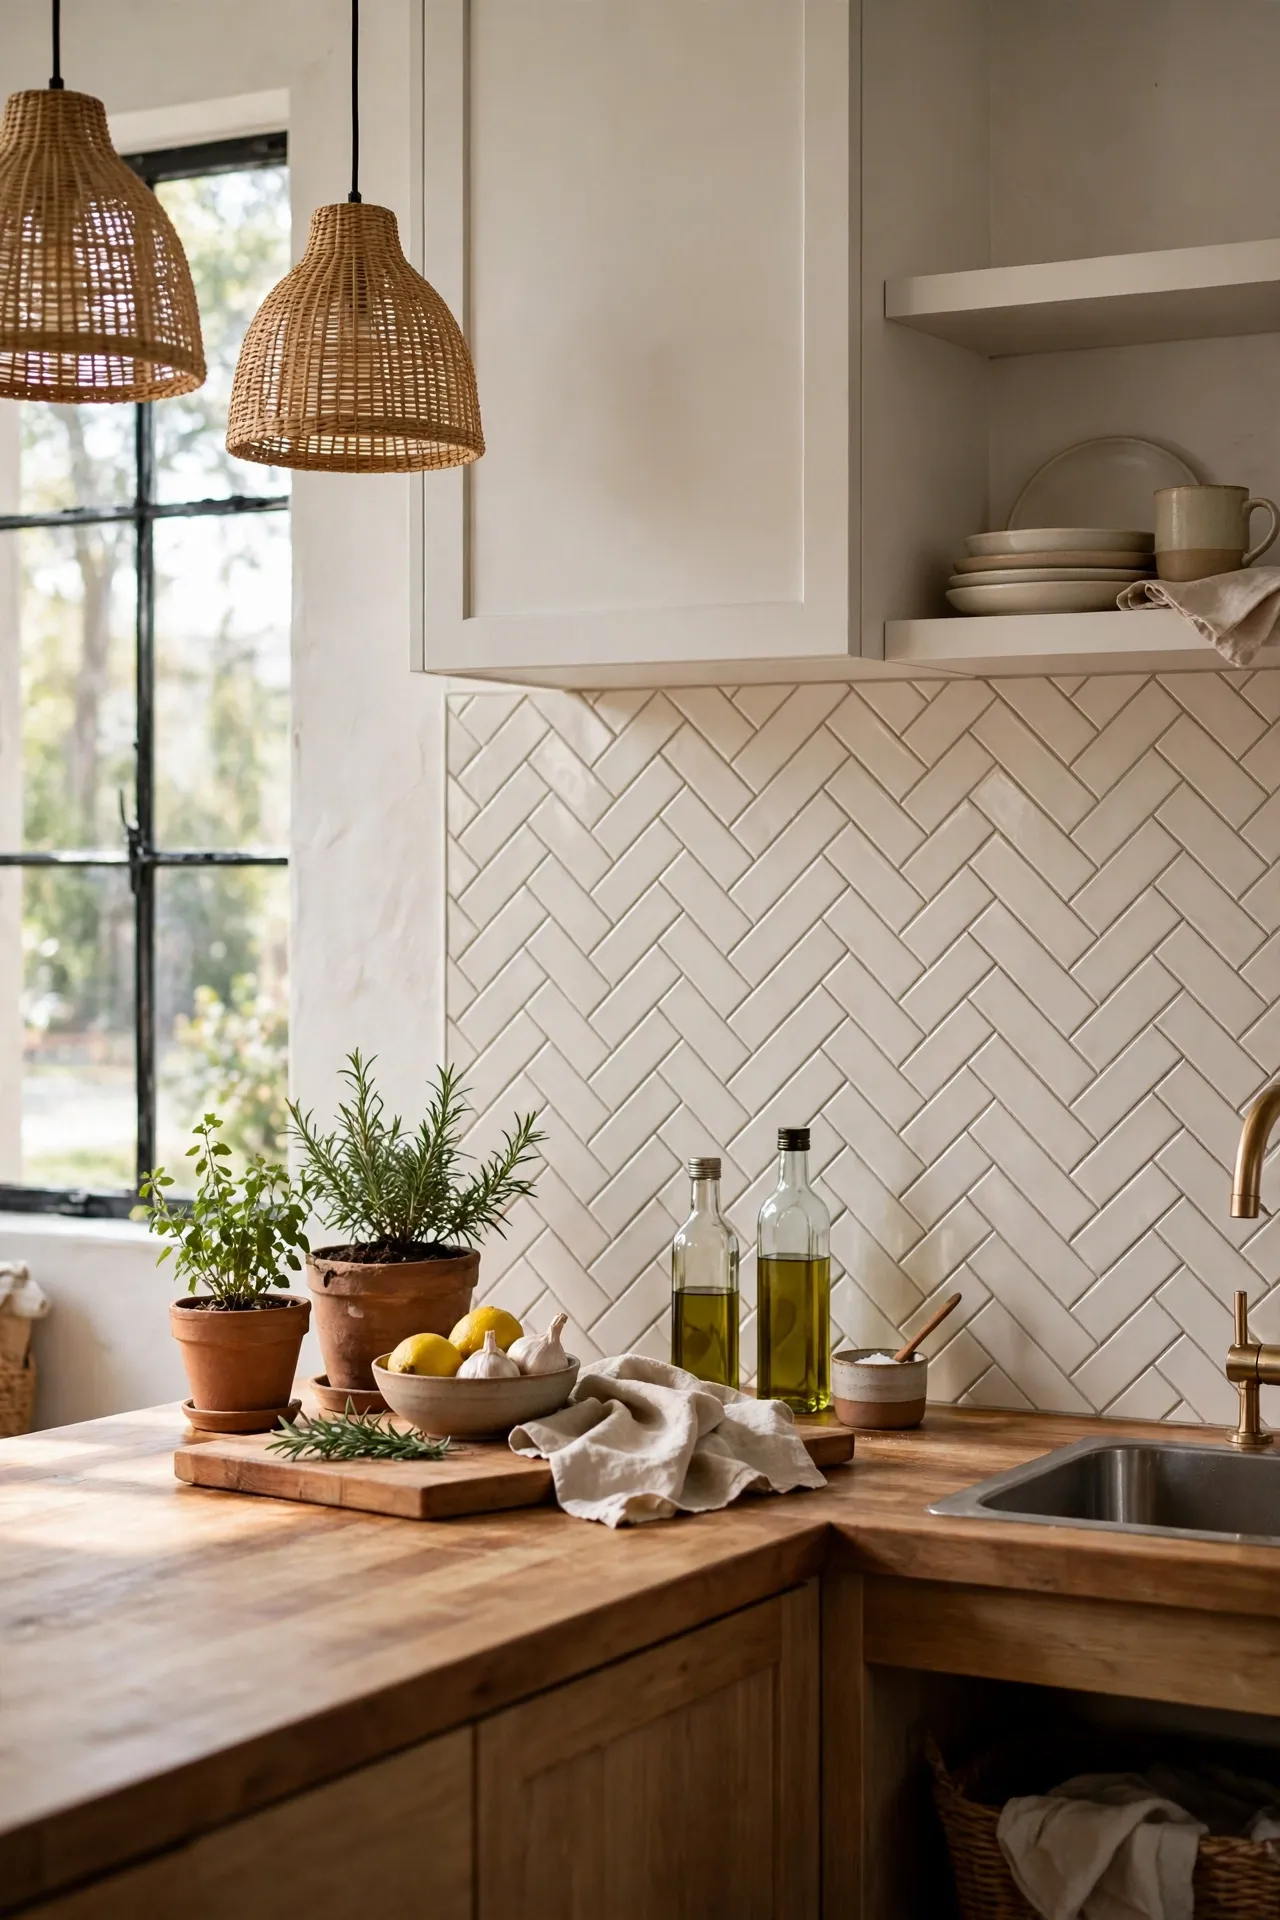
Herringbone is the pattern that makes people assume you hired a professional. Buy the long thin subway tiles and lay them in a zigzag at 45 degrees — it uses about fifteen percent more tiles than a straight layout, so order extra. Mark your centre line with a pencil first, because herringbone shows every wobble. I tried this behind my hob and the compliments have not stopped. My mistake was starting at the edge instead of the centre, which left me with slivers of tile at the far end. Centre first, work outward, and keep a sharp craft knife and a metal ruler handy for the angled cuts at the borders.
Cost: ~$35 for the wall | Time: 3 hours
3. Dark Grey Subway Tiles for a Moody Kitchen
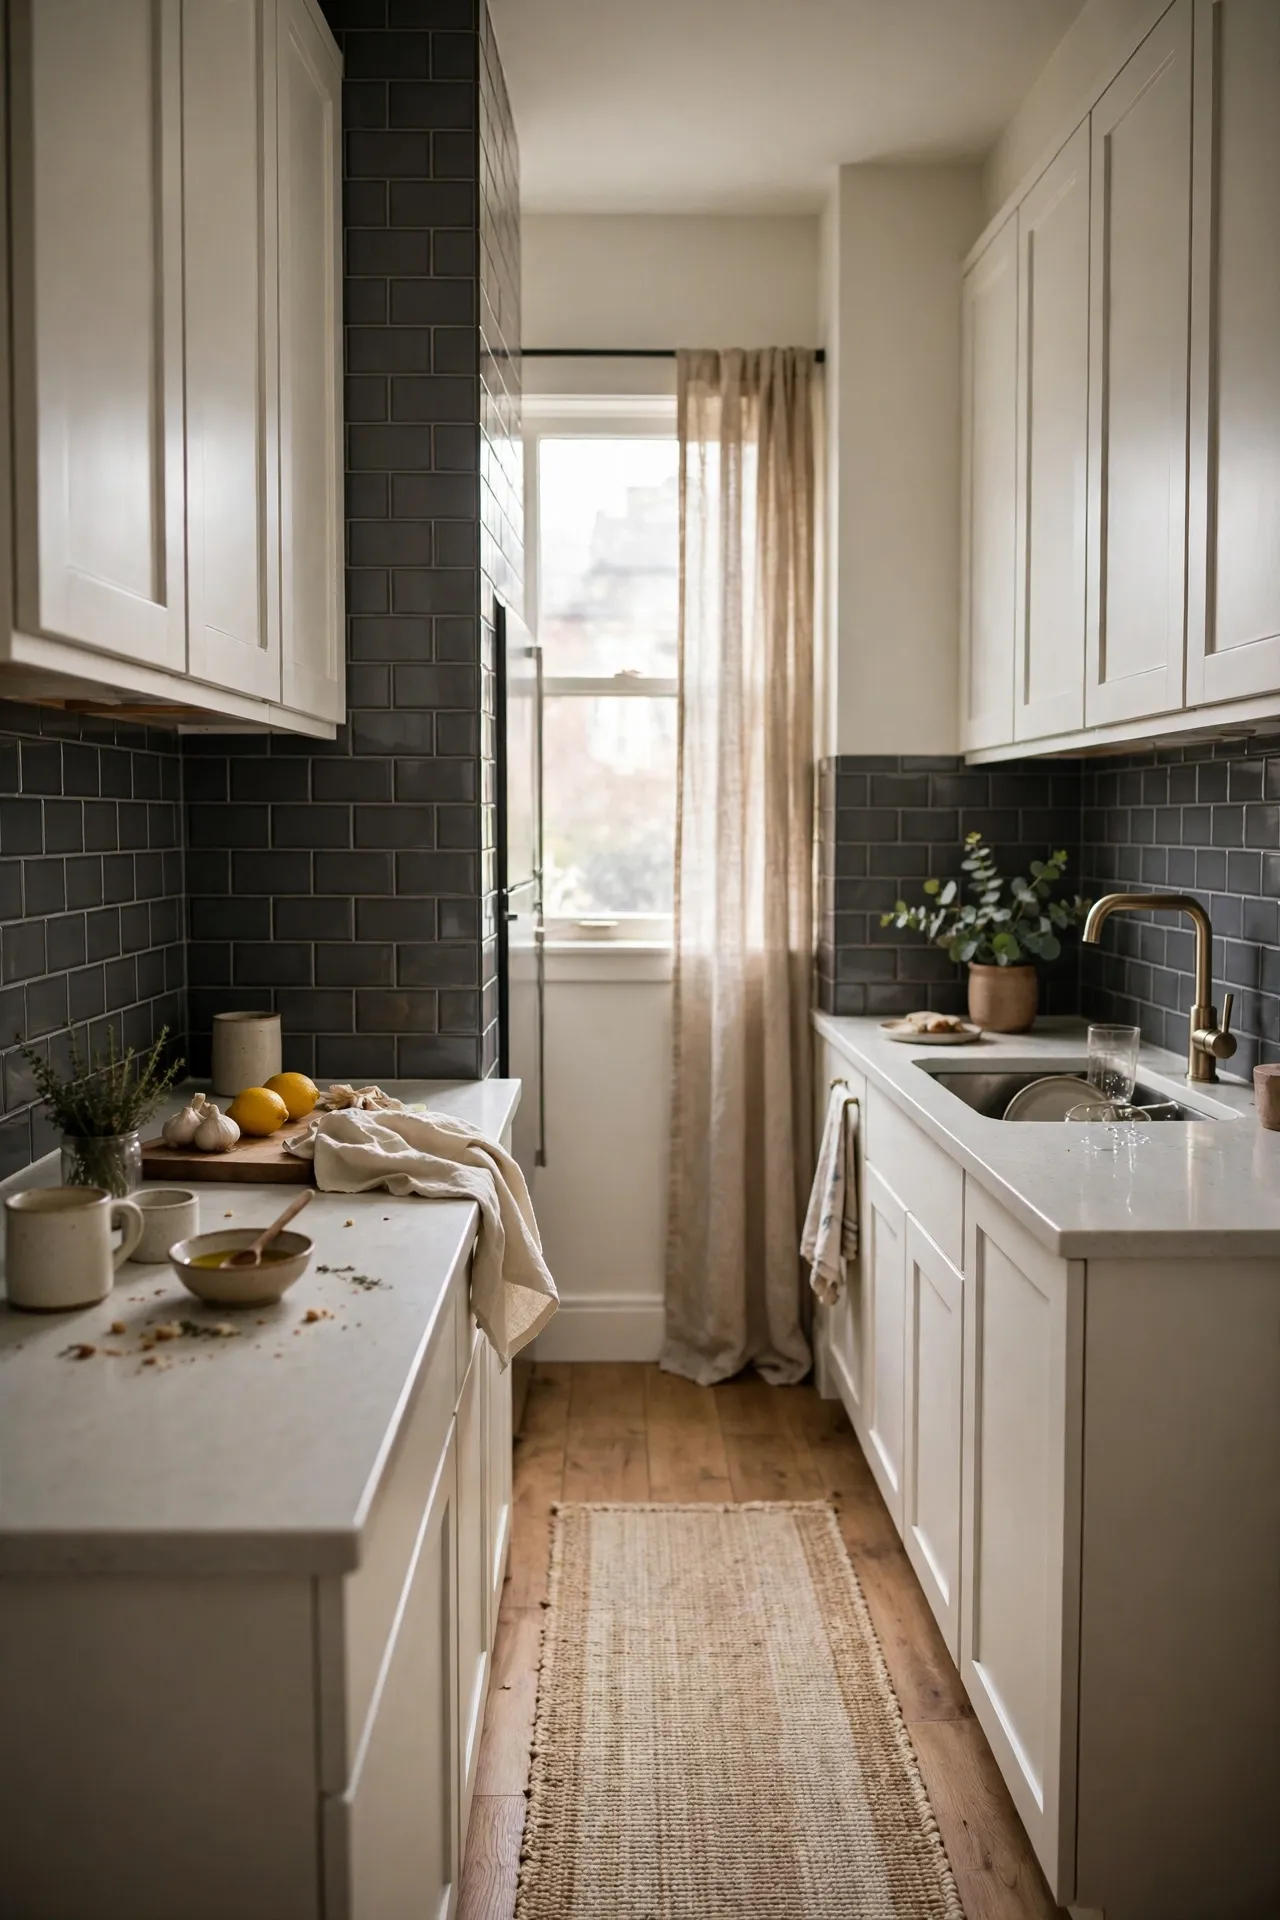
Dark grey subway tiles give a kitchen instant drama without going full black, and they hide cooking splashes better than anything white. Pair them with light worktops so the room does not feel cave-like. The darker the tile, the more the grout lines show — go for a slightly lighter grout-line colour in the design. I put these in a galley kitchen with white cabinets and it completely changed the mood. My mistake was choosing a matt finish that showed every fingerprint during installation. Gloss or satin finishes wipe clean and forgive clumsy fingers, so pick those for the area behind the hob.
Cost: ~$28 for the wall | Time: 2 hours
4. Bevelled-Edge Subway Tiles With Extra Dimension
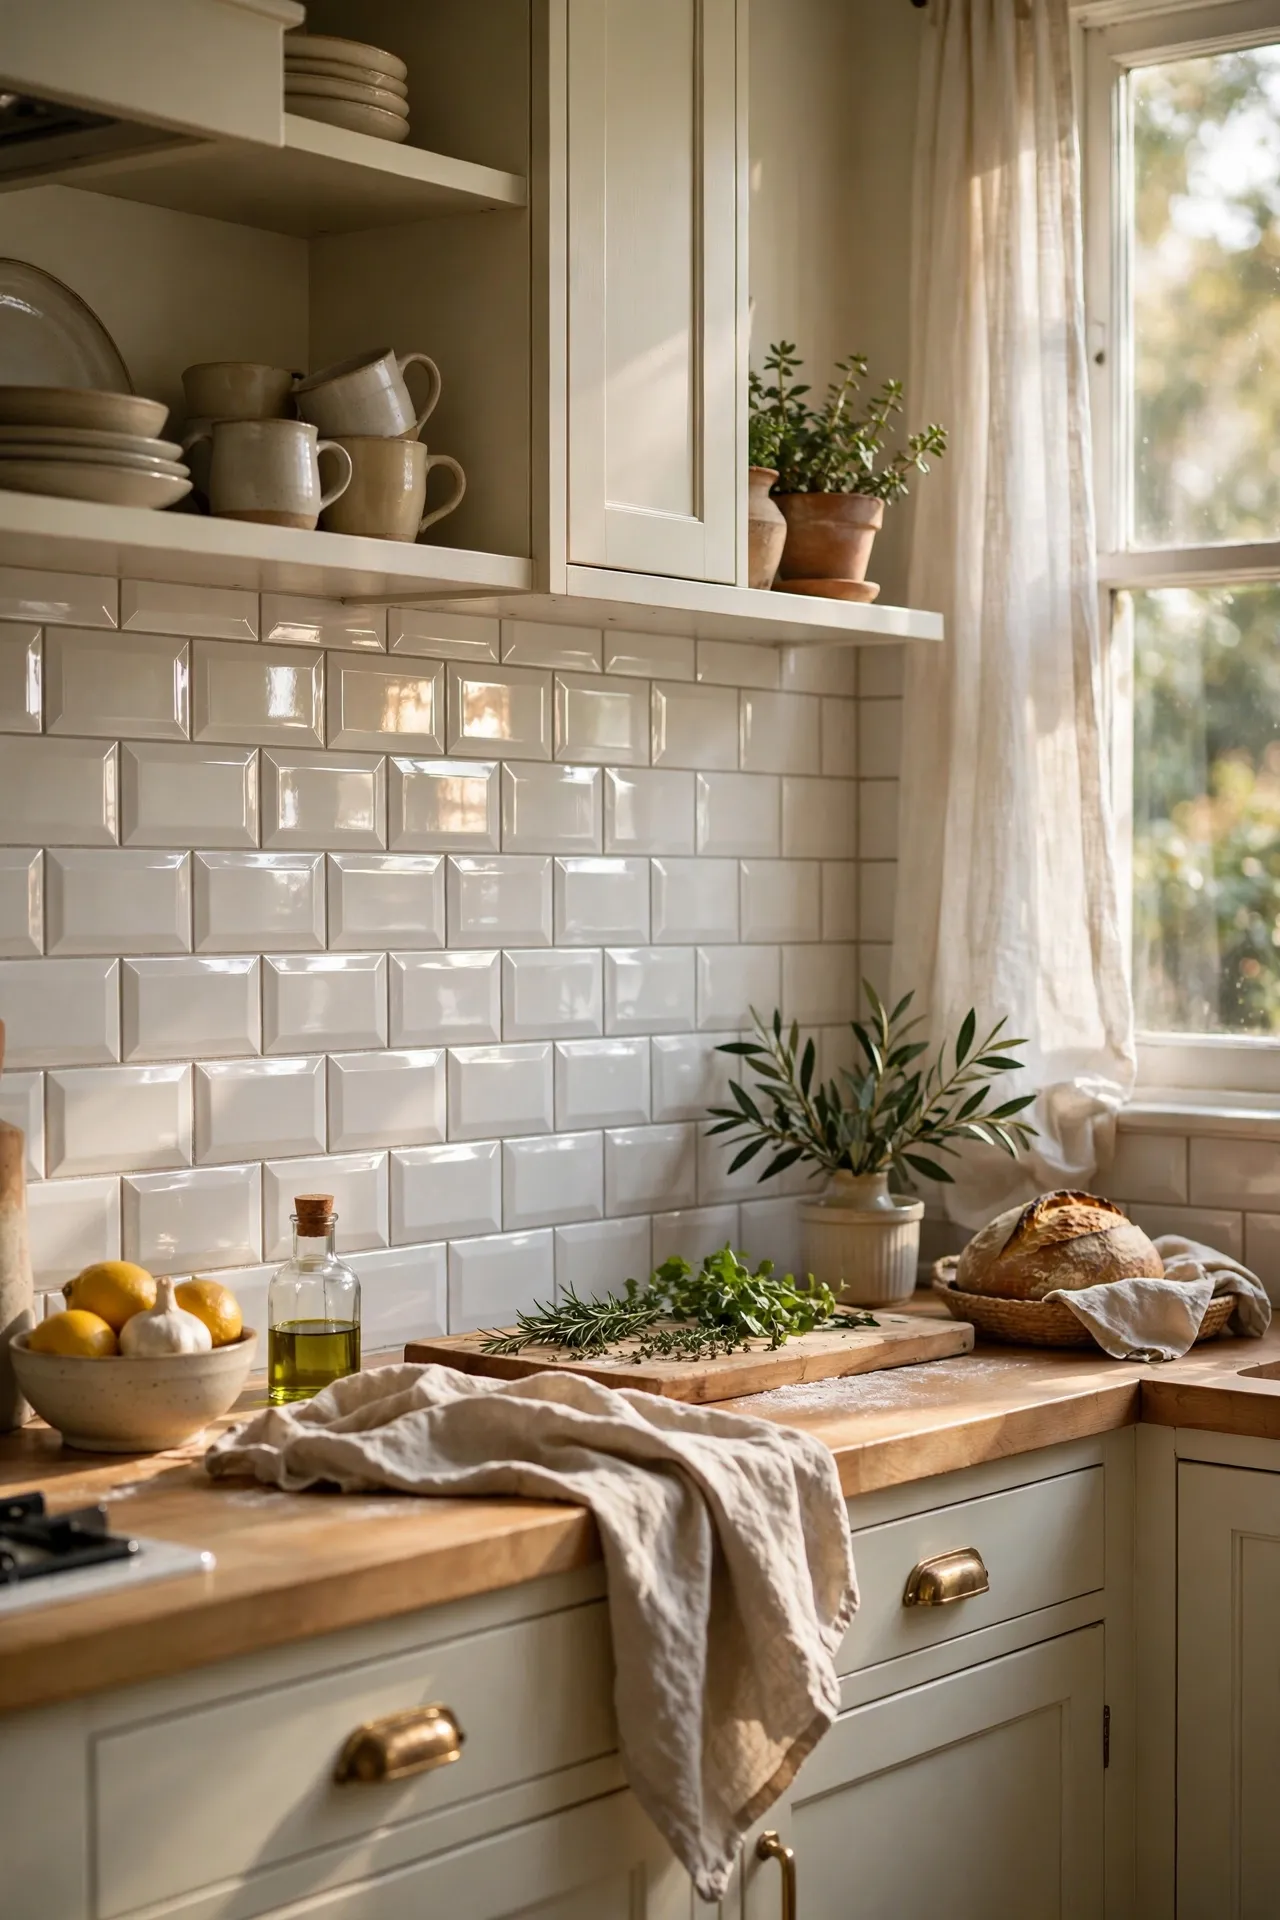
Bevelled-edge tiles have that little angled rim that catches the light and makes a flat wall look three-dimensional. They cost a touch more than flat stickers but the difference is enormous in person. Press them on one at a time rather than in sheets, because the bevels need to line up to catch the light evenly. I used these in my sister’s kitchen and she thought I had hired a tiler. My mistake was mixing two different brands — the bevel depths did not match and the wall looked lumpy. Buy all your tiles from one batch, one brand, and check they line up before you peel anything.
Cost: ~$32 for the wall | Time: 2.5 hours
5. Matte Black Subway Tiles for Modern Drama
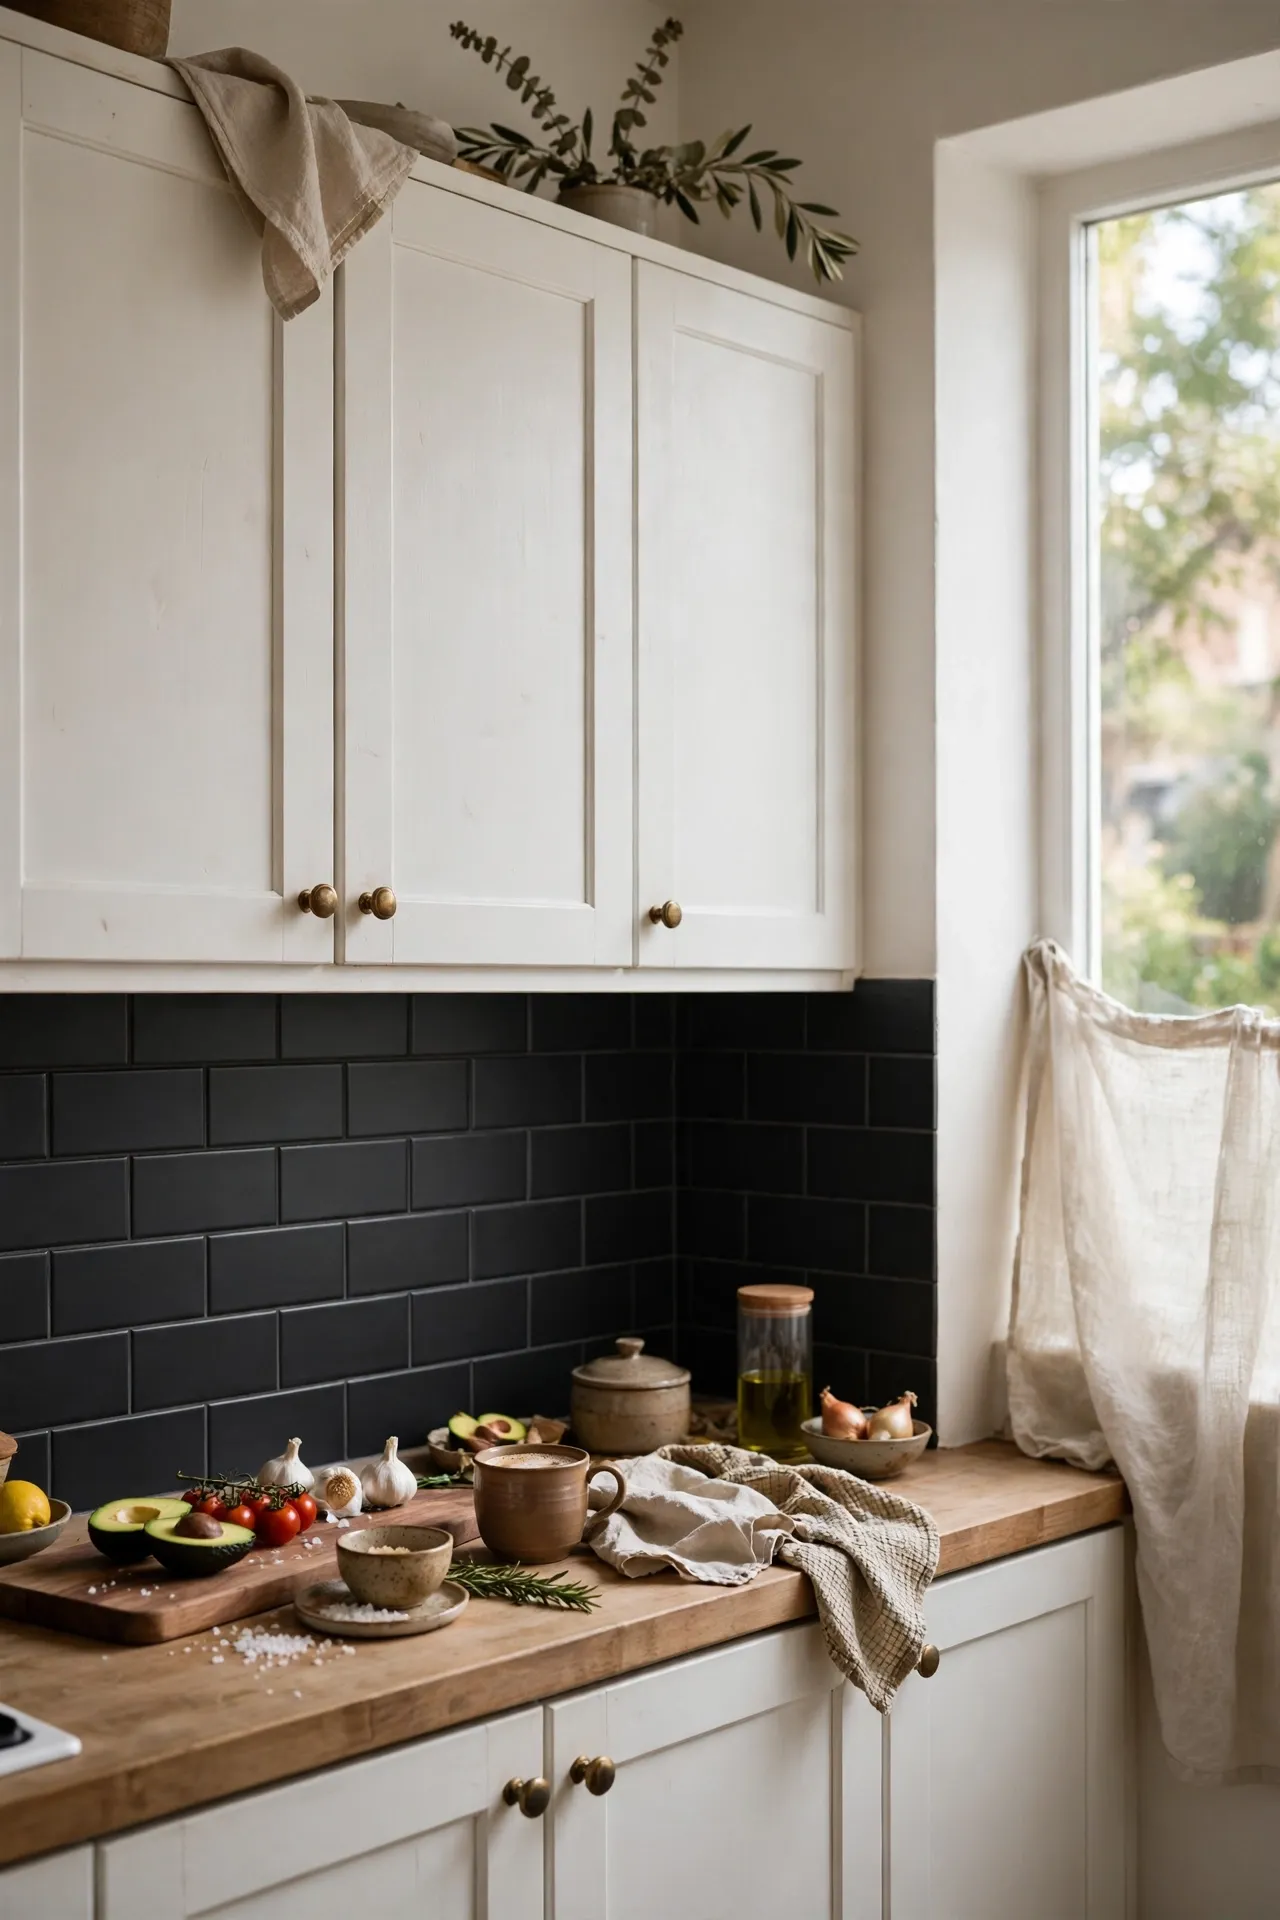
Matte black subway tiles are bold, but in the right kitchen they are stunning — especially against pale wood or white cabinets. Keep the rest of the kitchen light and let the backsplash be the statement. Black shows dust, so pick a design with a subtle sheen rather than dead matt, which marks if you look at it. I did a single strip of these between two white cabinets as an accent. My mistake was doing the whole wall in my first attempt; it swallowed all the light. Use black as an accent behind the hob or in a small galley, not floor-to-ceiling in a dark kitchen.
Cost: ~$20 for an accent strip | Time: 1.5 hours
6. Sage Green Subway Tiles for Soft Colour
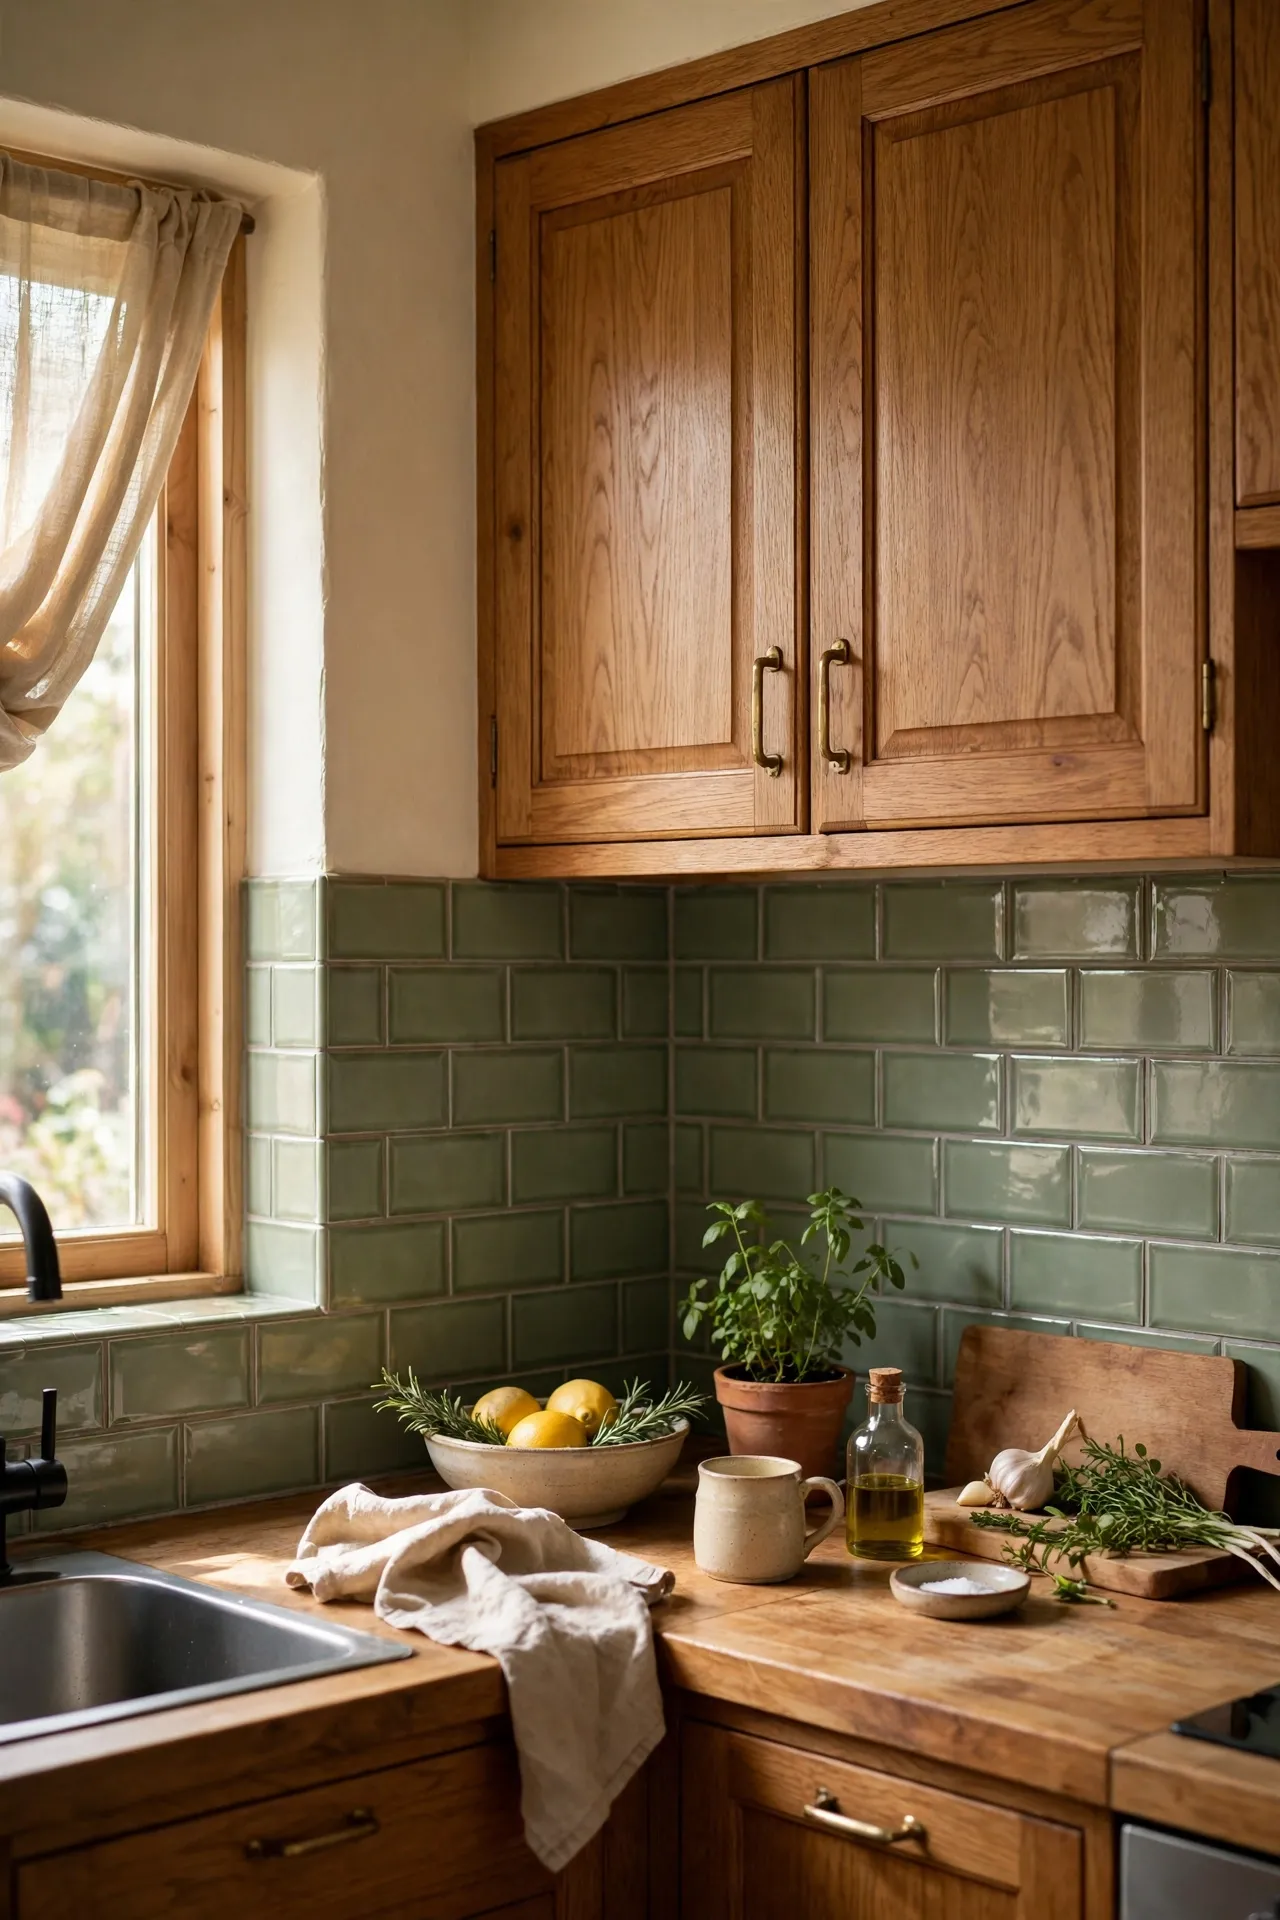
Sage green is the colour that works in every kitchen — calm, a bit vintage, and kind to both oak and white cabinets. The peel-and-stick versions in this shade photograph beautifully too, which matters if you are pinning your kitchen. Lay them in a classic brick pattern and let the colour do the talking. I chose sage for a rental refresh and the landlord asked where I had the tiling done. My mistake was not ordering a spare sheet; one miscut tile left me a square short and the shade had sold out. Order ten percent extra in coloured tiles, because dye lots vary between batches.
Cost: ~$30 for the wall | Time: 2 hours
Patterned & Moroccan Styles
7. Moroccan Zellige-Look Tiles in Glossy White
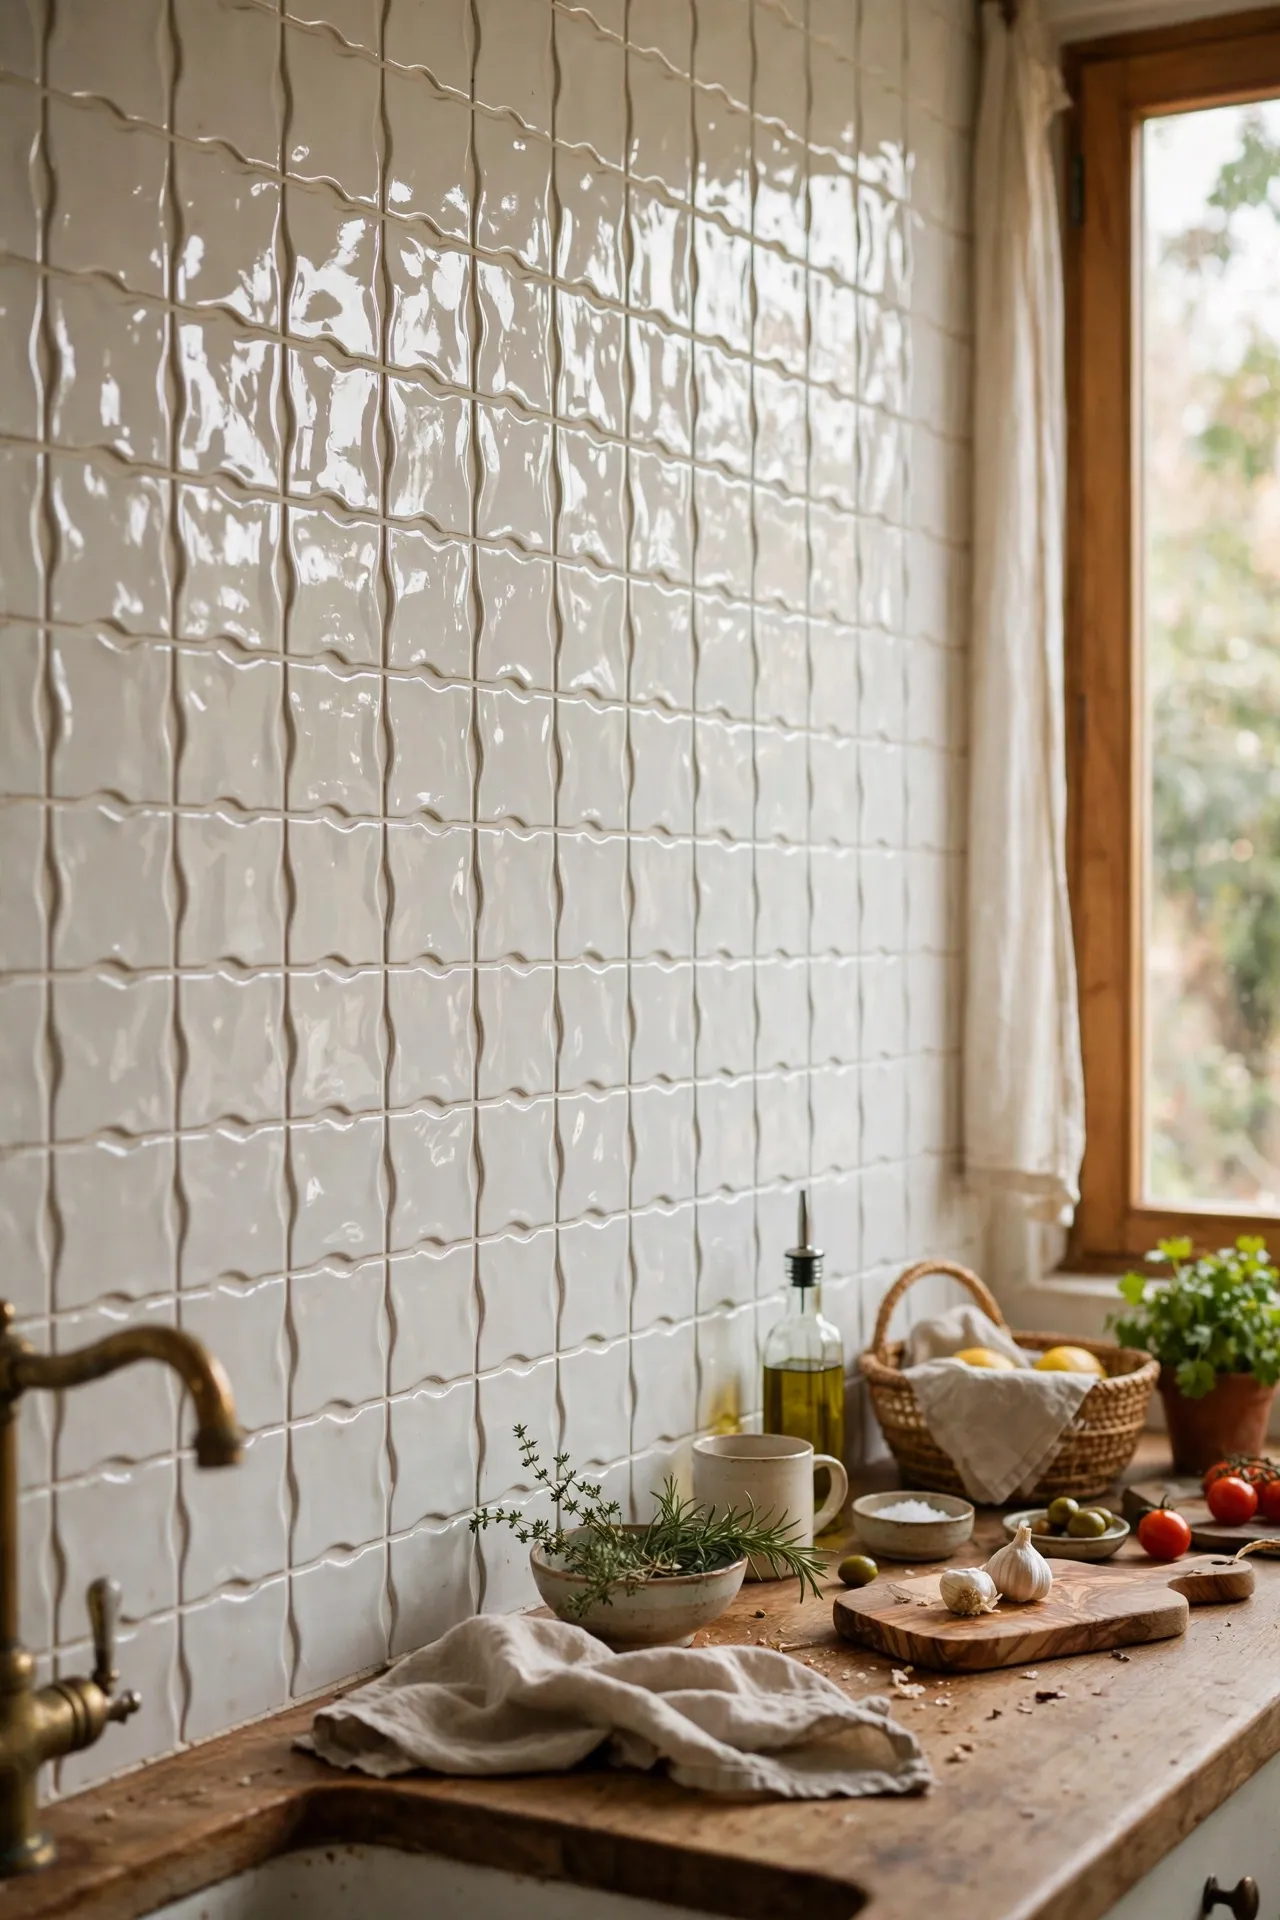
Real zellige tiles cost a fortune and need a specialist tiler; the peel-and-stick lookalikes give you that handmade wavy gloss for a fraction of the price. The charm is in the slight unevenness, so do not stress about perfect alignment — it is supposed to look hand-cut. Mix a few shades of white and cream across the wall for the authentic look. I did a full wall of these and guests touch them to check. My mistake was pressing too hard and stretching one tile, which left a visible wrinkle. Smooth them on gently from the centre outward, and never pull a tile back up and re-stick it stretched.
Cost: ~$30 for the wall | Time: 2 hours
8. Art Deco Fan Tiles in Black and Gold
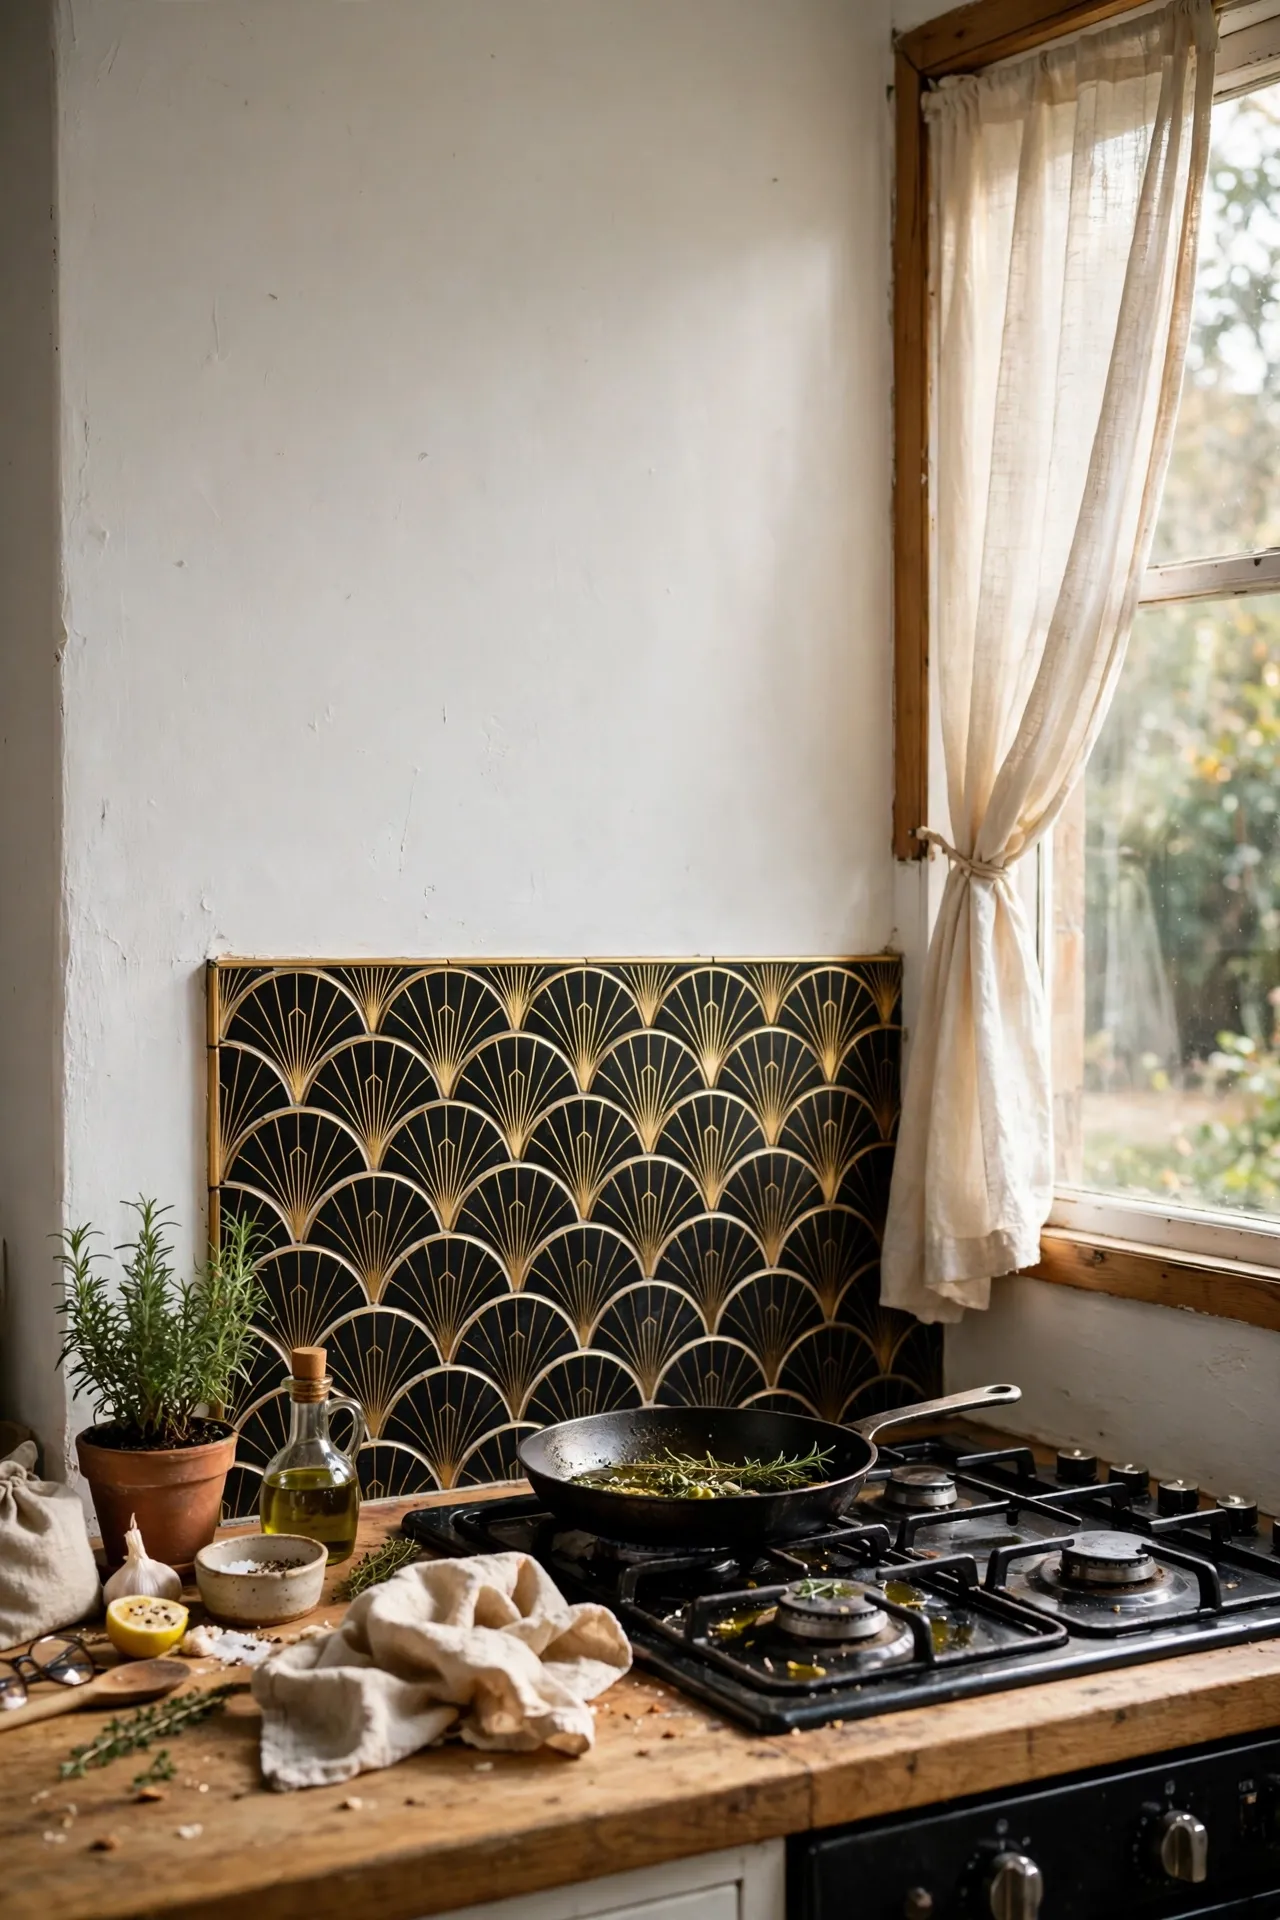
Art deco fan or scallop tiles in black and gold are pure glamour — they turn a plain rental kitchen into something that looks designed. This pattern is busy, so keep everything else calm: plain worktops, simple handles, no competing prints. The gold in the design picks up warm light beautifully in the evening. I used these as a single feature strip behind the hob rather than the whole wall. My mistake was covering the entire backsplash with them first; it was too much and I had to peel half of it off. Bold patterns work best as an accent — one statement area, not every wall.
Cost: ~$18 for a feature strip | Time: 1.5 hours
9. Encaustic Cement-Look Patterned Squares
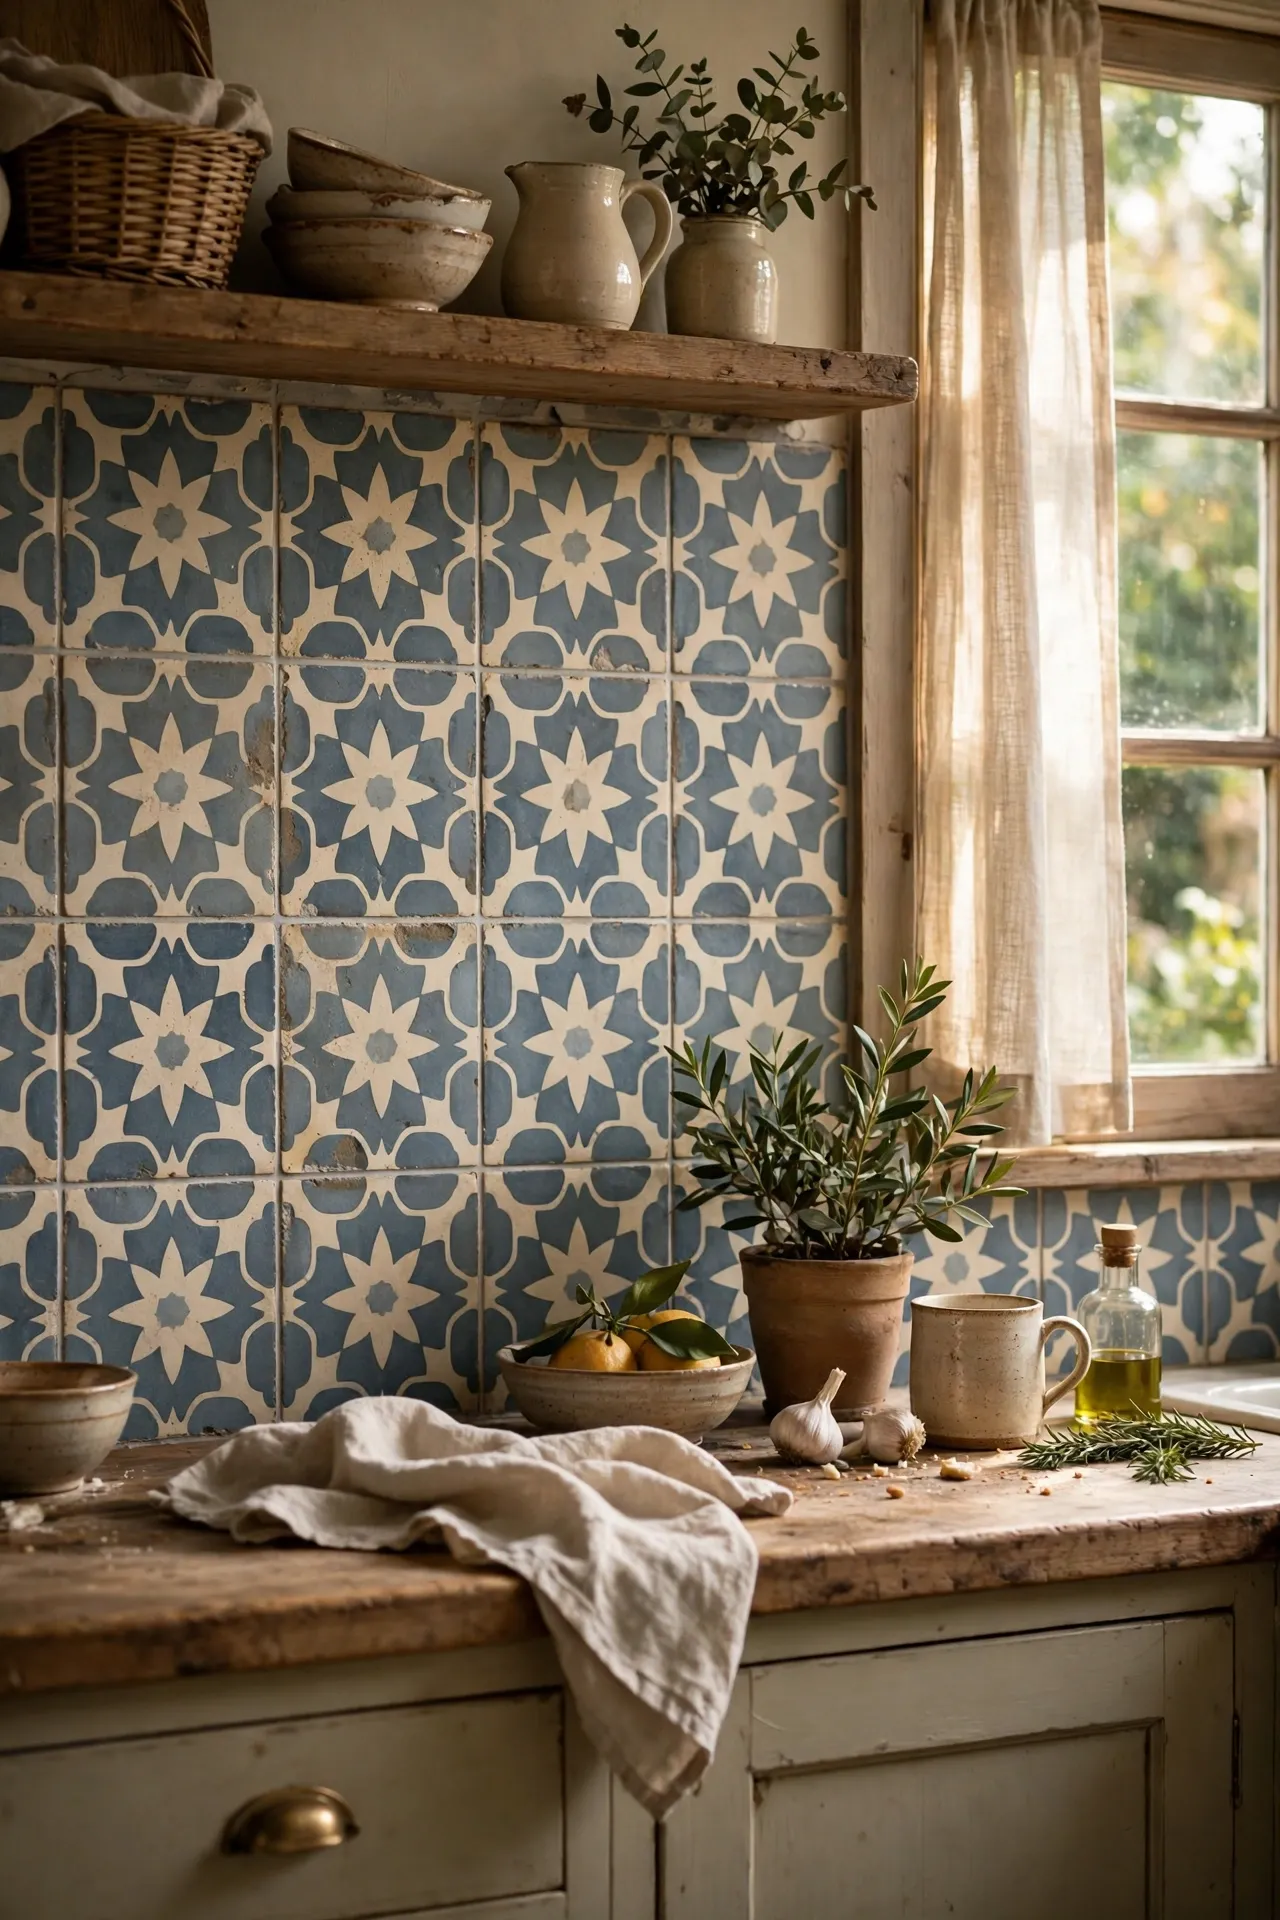
Encaustic-look tiles give you that gorgeous old European cement tile feel — intricate patterns in muted blues, greys, and creams — without the sealing and the weight. Each tile is usually a different pattern in the set, so lay them all out on the floor first and arrange the mix before you stick anything. I did these in a cottage kitchen and they stole the show. My mistake was sticking them straight from the box, which left three identical tiles clustered together like an error. Dry-lay first, photograph the layout, then stick to your plan. It takes an extra twenty minutes and saves the whole look.
Cost: ~$32 for the wall | Time: 2.5 hours
10. Bold Blue and White Portuguese Tiles
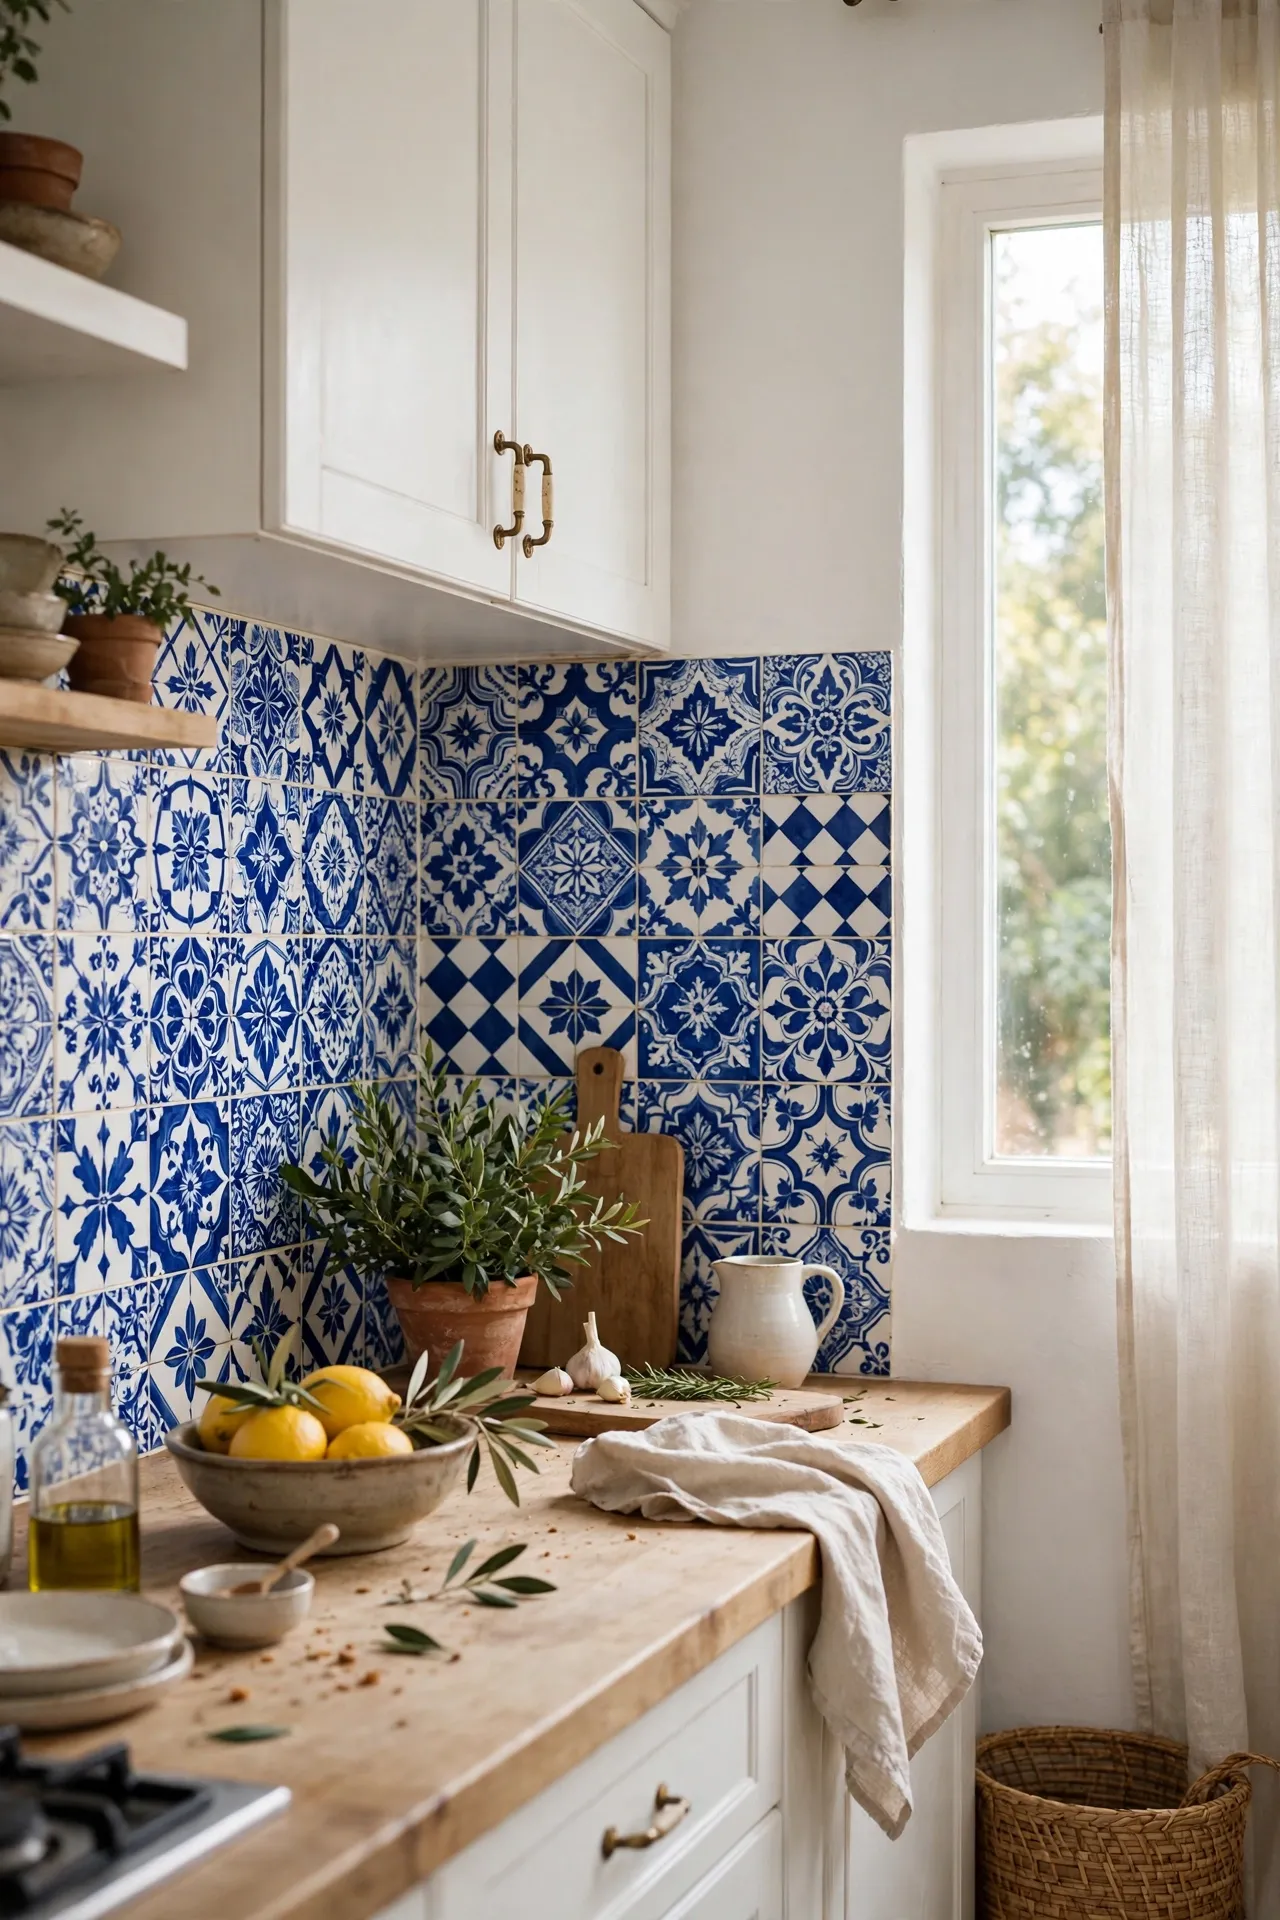
Blue and white Portuguese-style tiles bring instant holiday feeling to a kitchen — think Lisbon cafes and sunny courtyards. They are a strong pattern, so pair them with plain white walls and keep the worktop clear. The classic designs mix beautifully, so do not worry about repeating motifs. I put these in a north-facing kitchen that always felt gloomy, and the blue lifted the whole room. My mistake was choosing a design with very dark navy that read almost black in low light. Hold a sample up in your actual kitchen light before ordering — colours shift dramatically between daylight and evening bulbs.
Cost: ~$28 for the wall | Time: 2 hours
11. Fish Scale Tiles for a Mermaid Glow
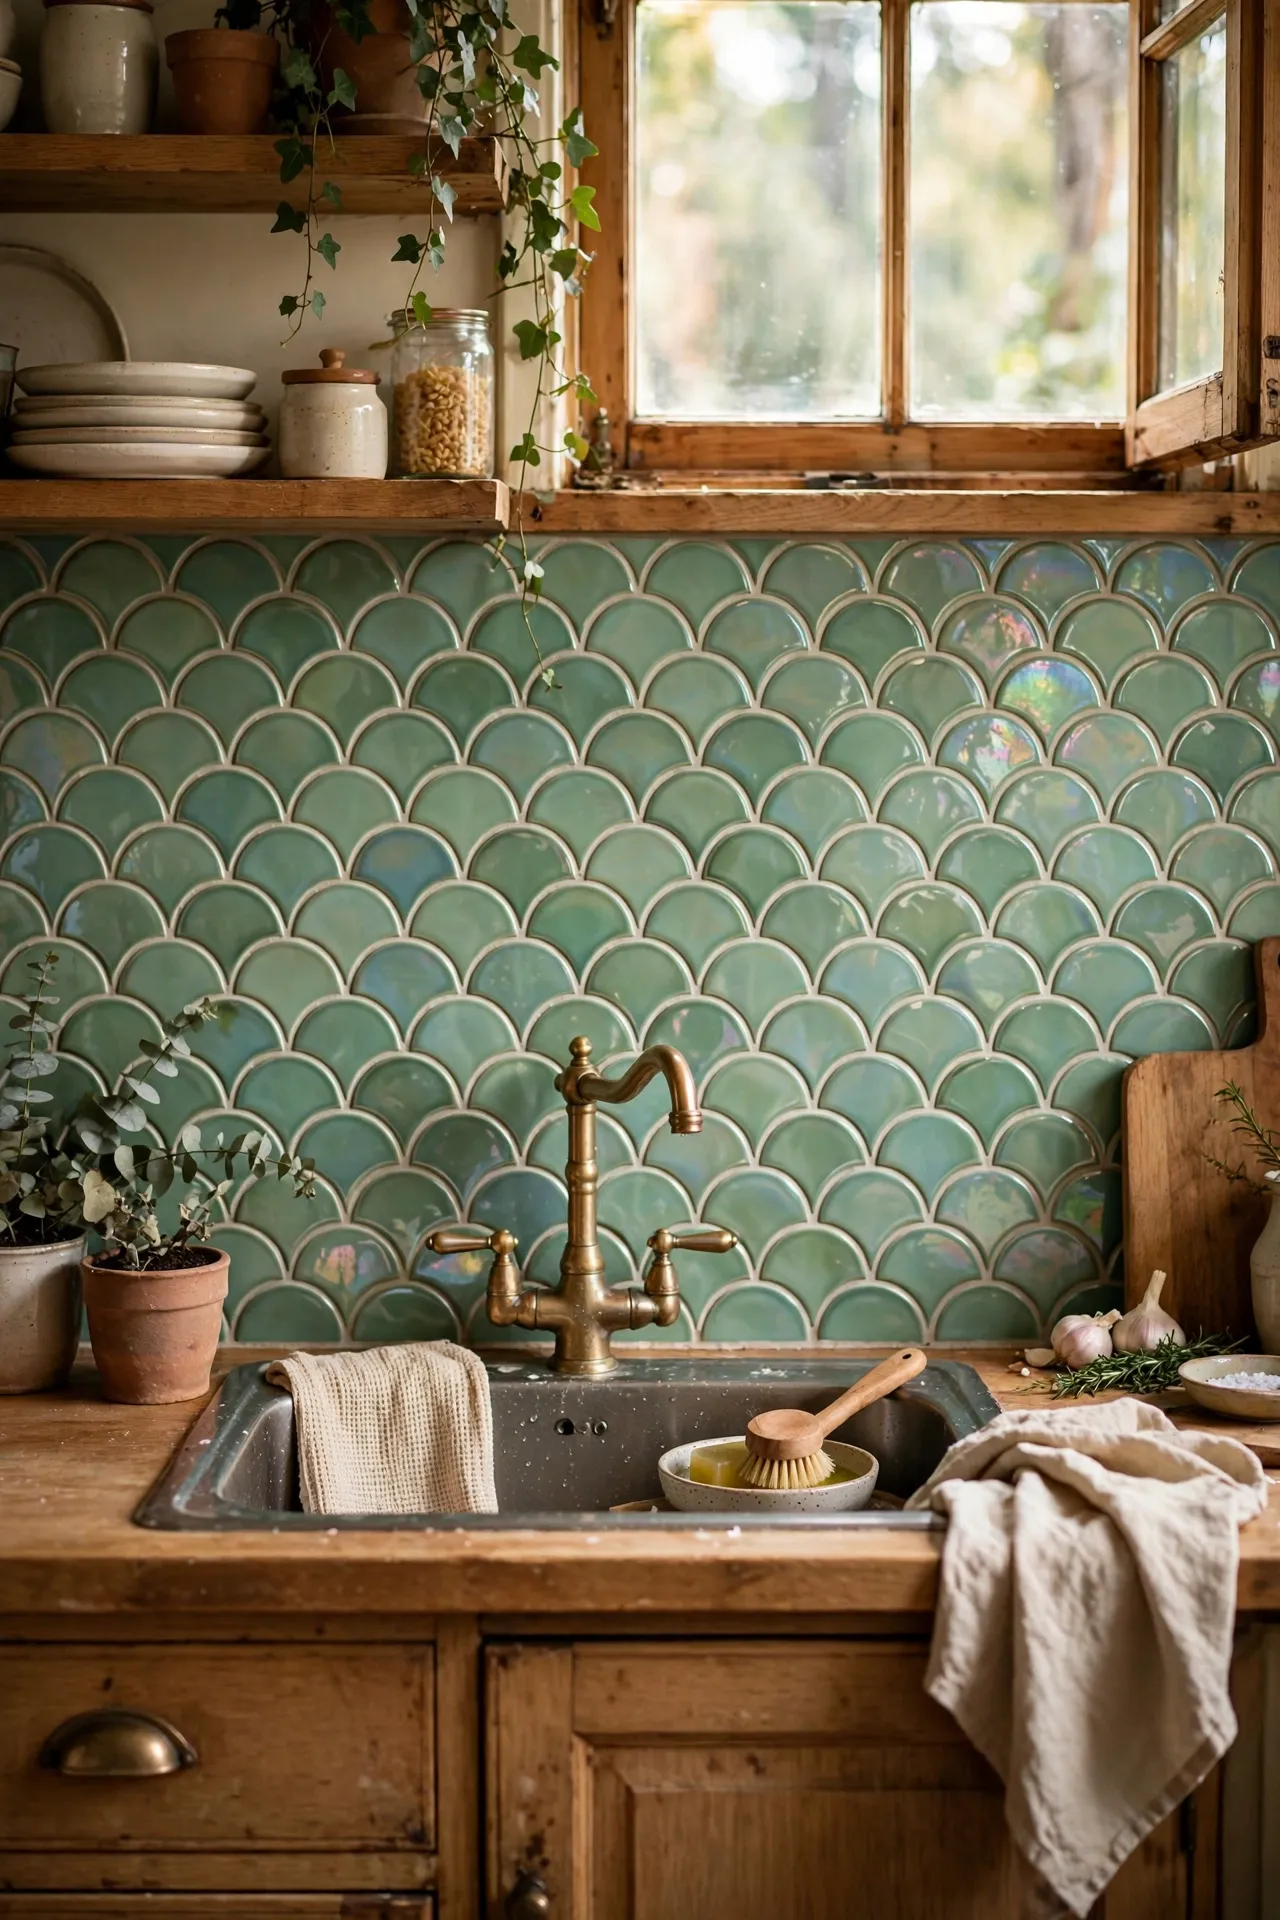
Fish scale or mermaid tiles are the playful choice — overlapping scallops in pearly greens and blues that shimmer when the light moves. They are gorgeous behind a sink or as a small feature panel. The scales need to overlap in neat rows, so take your time with the first row; everything hangs off it. I did a small panel of these in a utility area and it is my favourite thing in the house. My mistake was rushing the curves around a socket and cutting them jagged. For sockets and edges, make a paper template first, trace it onto the tile, then cut slowly. Neat cuts make or break this pattern.
Cost: ~$22 for a feature panel | Time: 2 hours
Faux Marble & Stone
12. Carrara Marble-Look Panels Behind the Hob
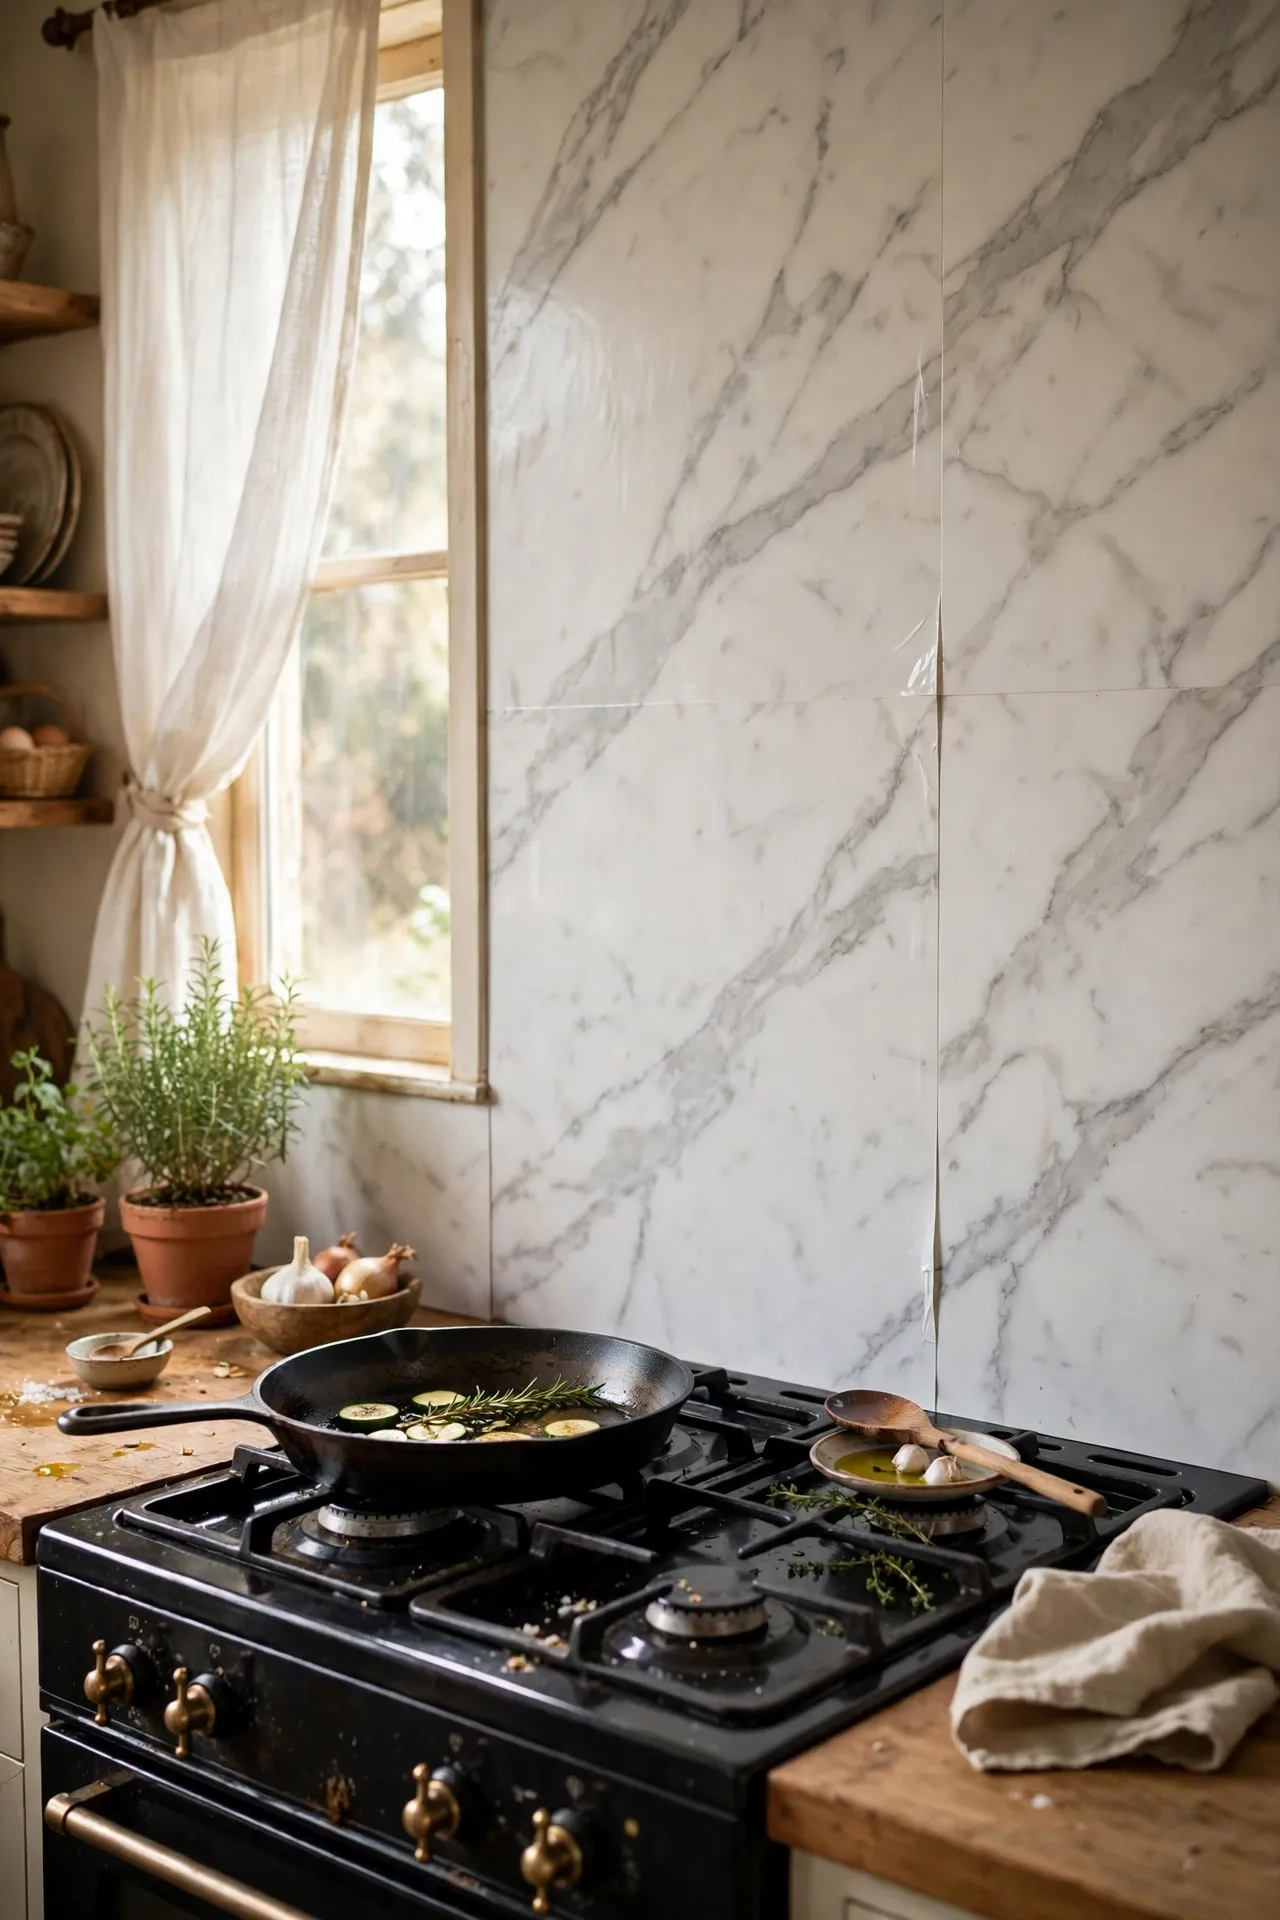
Carrara marble — white with soft grey veining — is the classic luxury look, and the large peel-and-stick panels mimic it convincingly from a normal viewing distance. Use the big panels rather than small tiles for marble; fewer seams means fewer giveaways. Line up the veining across panels so it flows like one slab. I covered the wall behind my hob with two panels and visitors assume it is real stone. My mistake was butting the panels too tightly, which made the seam pucker. Leave a hairline gap and press the edges down last, and the join virtually disappears.
Cost: ~$24 for two panels | Time: 1 hour
13. Dramatic Calacatta Gold Marble Slabs
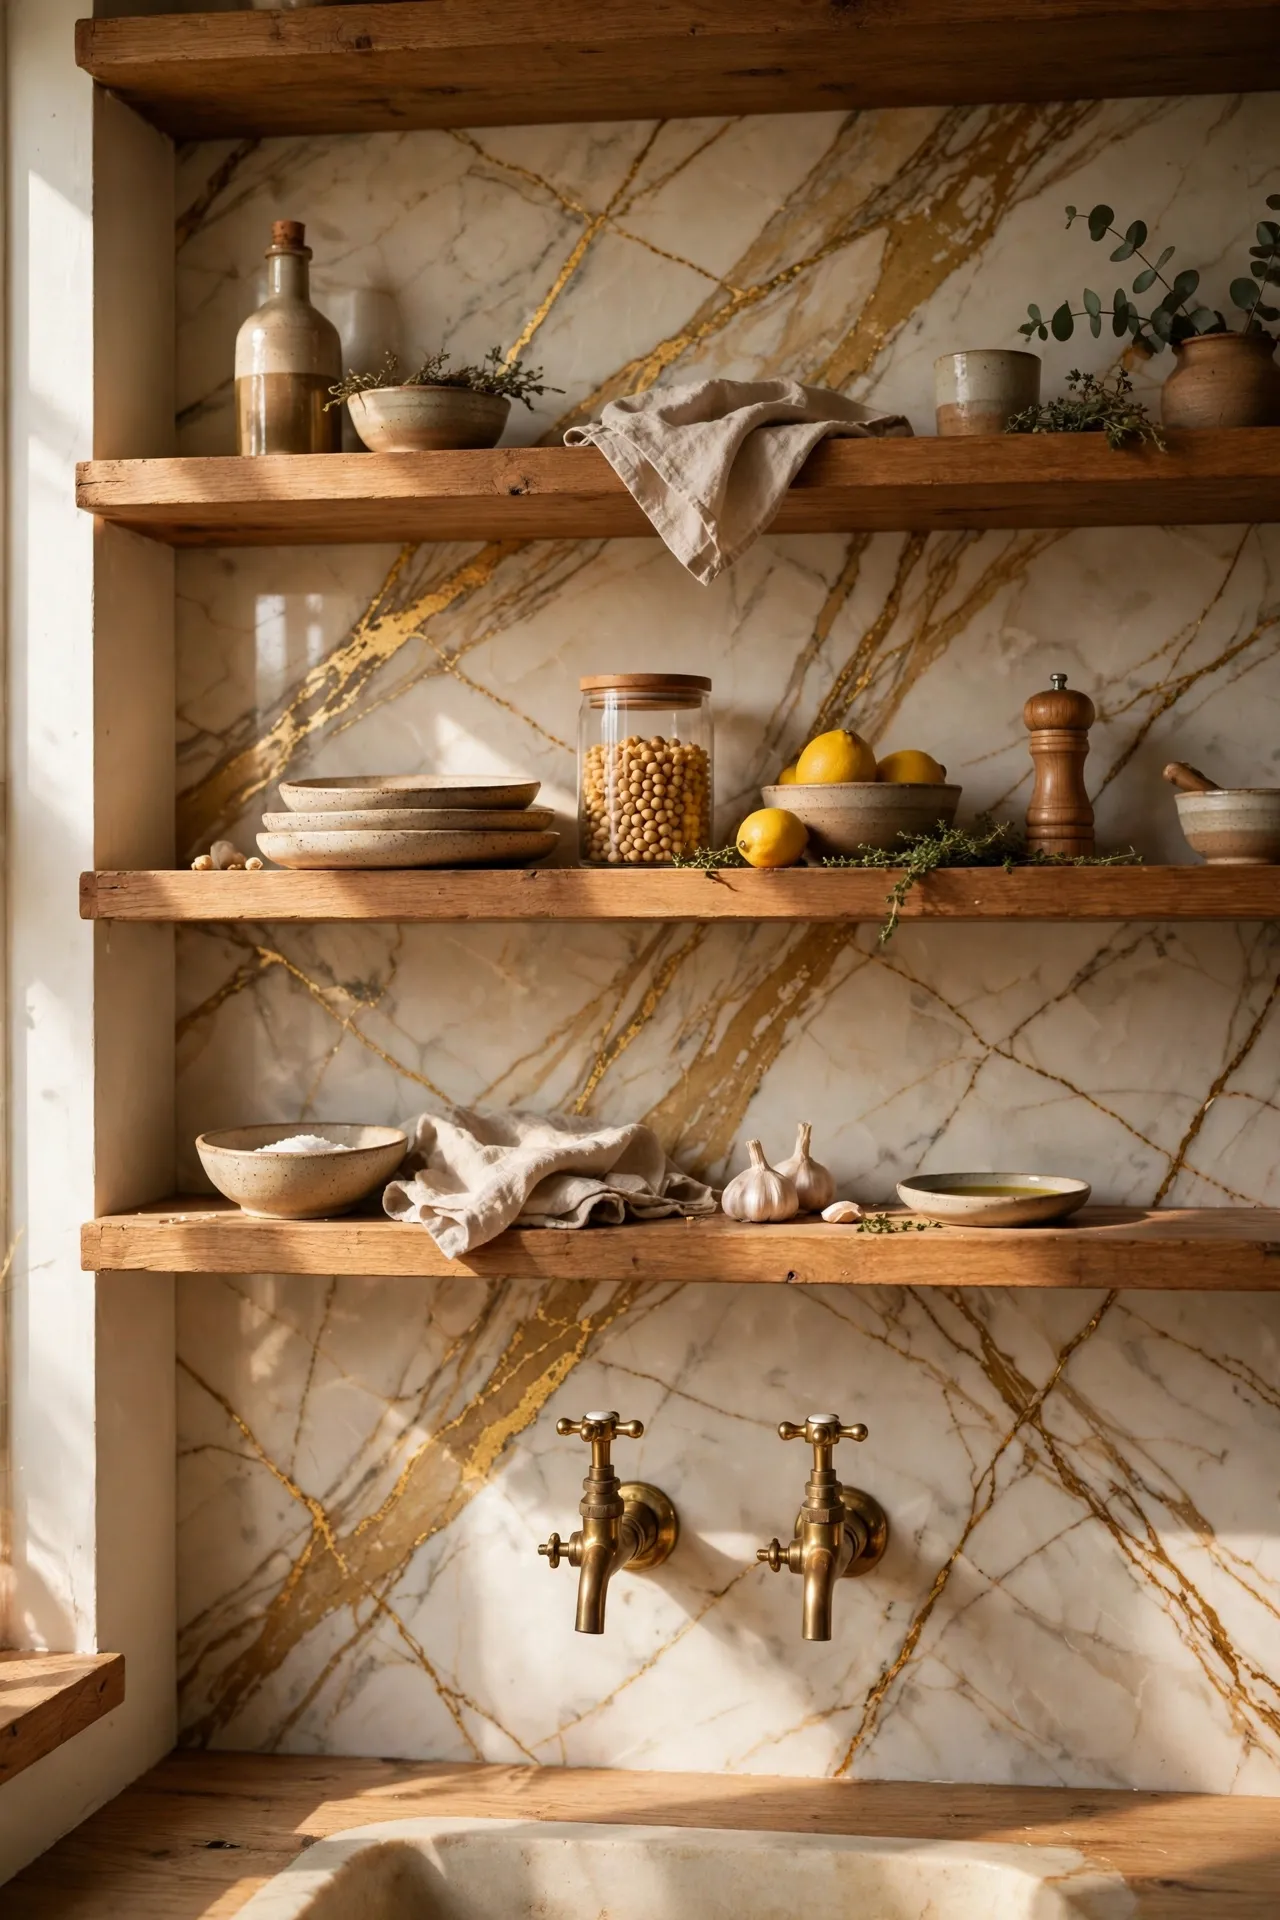
Calacatta gold is Carrara’s bolder cousin — brighter white with thick gold and grey veins that make a real statement. It suits kitchens with brass taps and warm wood, where the gold in the stone ties everything together. Because the veining is dramatic, keep the rest of the kitchen quiet. I used this as a full-height panel behind open shelving and it looks like a designer kitchen. My mistake was choosing a print where the gold veining repeated obviously every two feet. Check the product photos for repeat patterns before you buy — good marble prints have long repeats that do not obviously tile.
Cost: ~$26 for the panels | Time: 1 hour
14. Rough-Cut Slate Stone for Texture
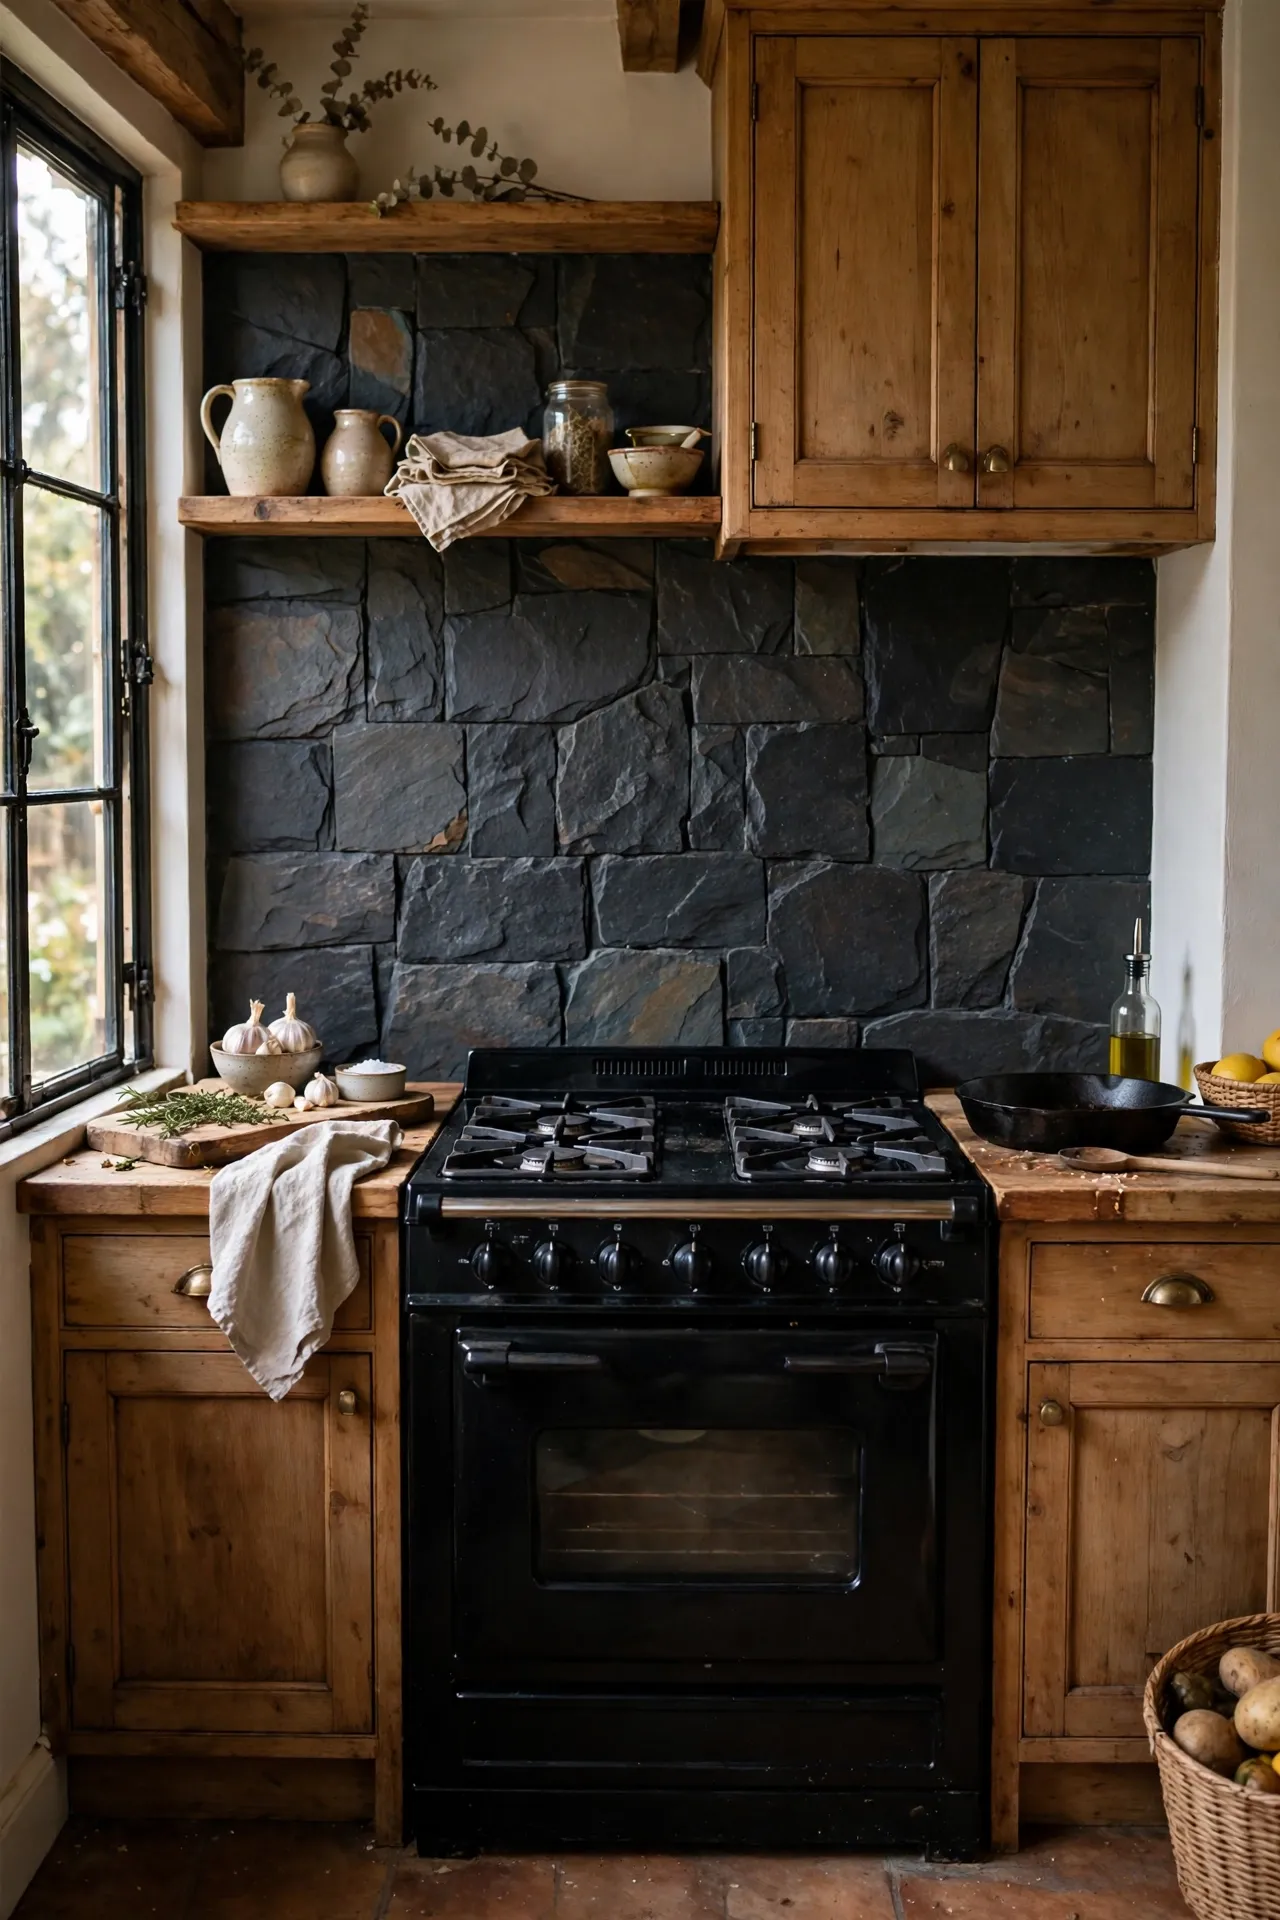
Slate-look stickers bring real texture to a kitchen — dark, craggy, and brilliant at hiding the chaos of a busy cooking zone. They suit rustic and industrial kitchens especially well. The rough finish means alignment matters less, which makes these one of the easiest styles for a first-timer. I put slate behind a range cooker in a farmhouse-style kitchen and it grounded the whole room. My mistake was using them right behind a gas hob without checking the heat rating. Most peel-and-stick tiles handle normal cooking heat, but check the specs if yours sits very close to open flames.
Cost: ~$28 for the wall | Time: 1.5 hours
15. Honed Travertine for Warm Neutral Kitchens
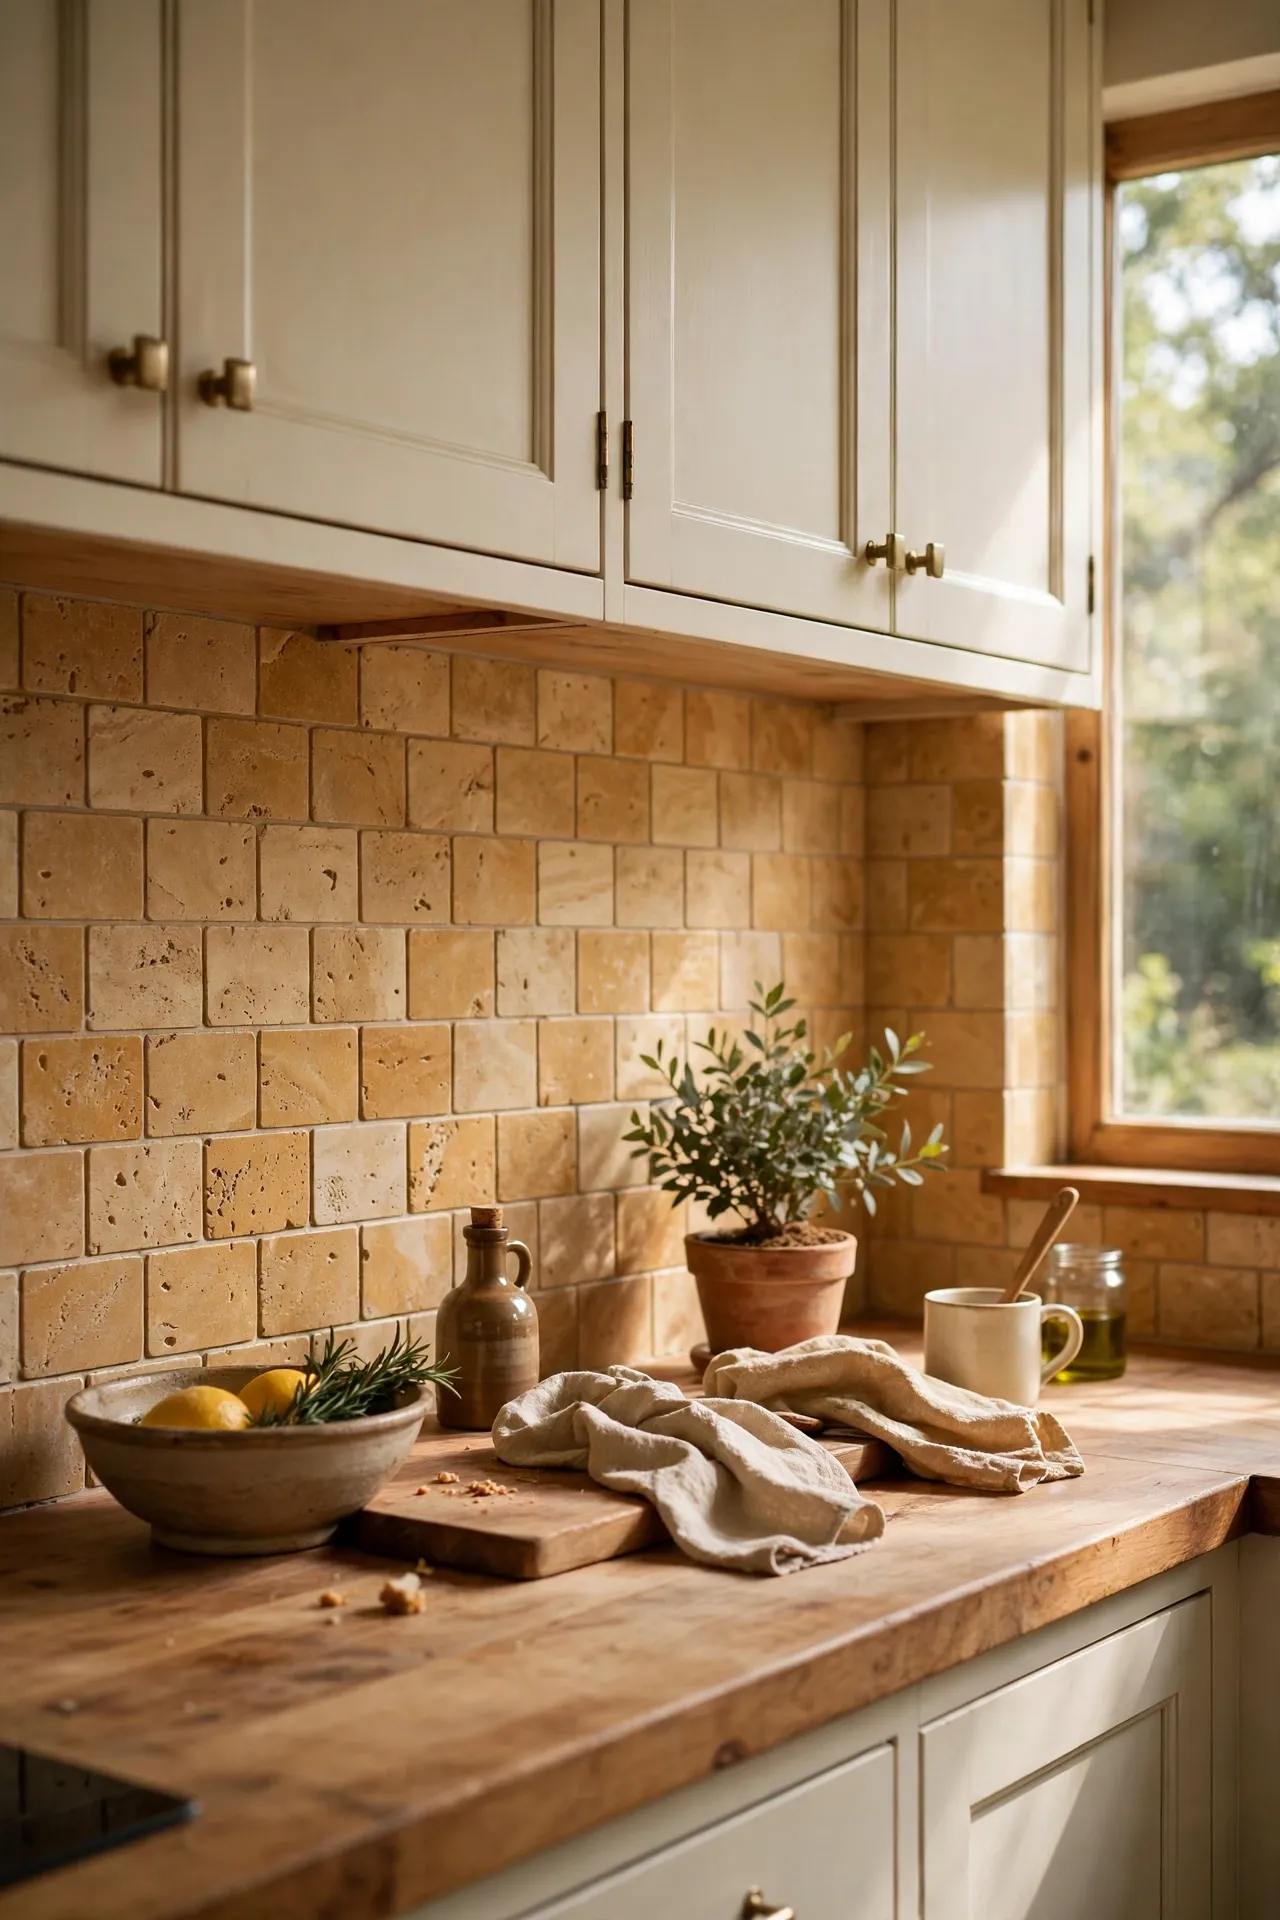
Travertine — that warm, pitted, honey-coloured stone — is perfect if white marble feels too cold for your kitchen. The peel-and-stick versions capture the soft mottled look beautifully. It pairs gorgeously with cream cabinets and wooden worktops for a Mediterranean feel. I used travertine-look tiles in a rental with beige everything, and instead of fighting the beige I leaned into it. My mistake was picking a design with very deep fake pitting that collected dust in the grooves. Choose a smoother print for the area behind the hob, where grease and dust settle, and save the heavy texture for lower-splash zones.
Cost: ~$30 for the wall | Time: 2 hours
16. Rustic Terracotta Stone Squares
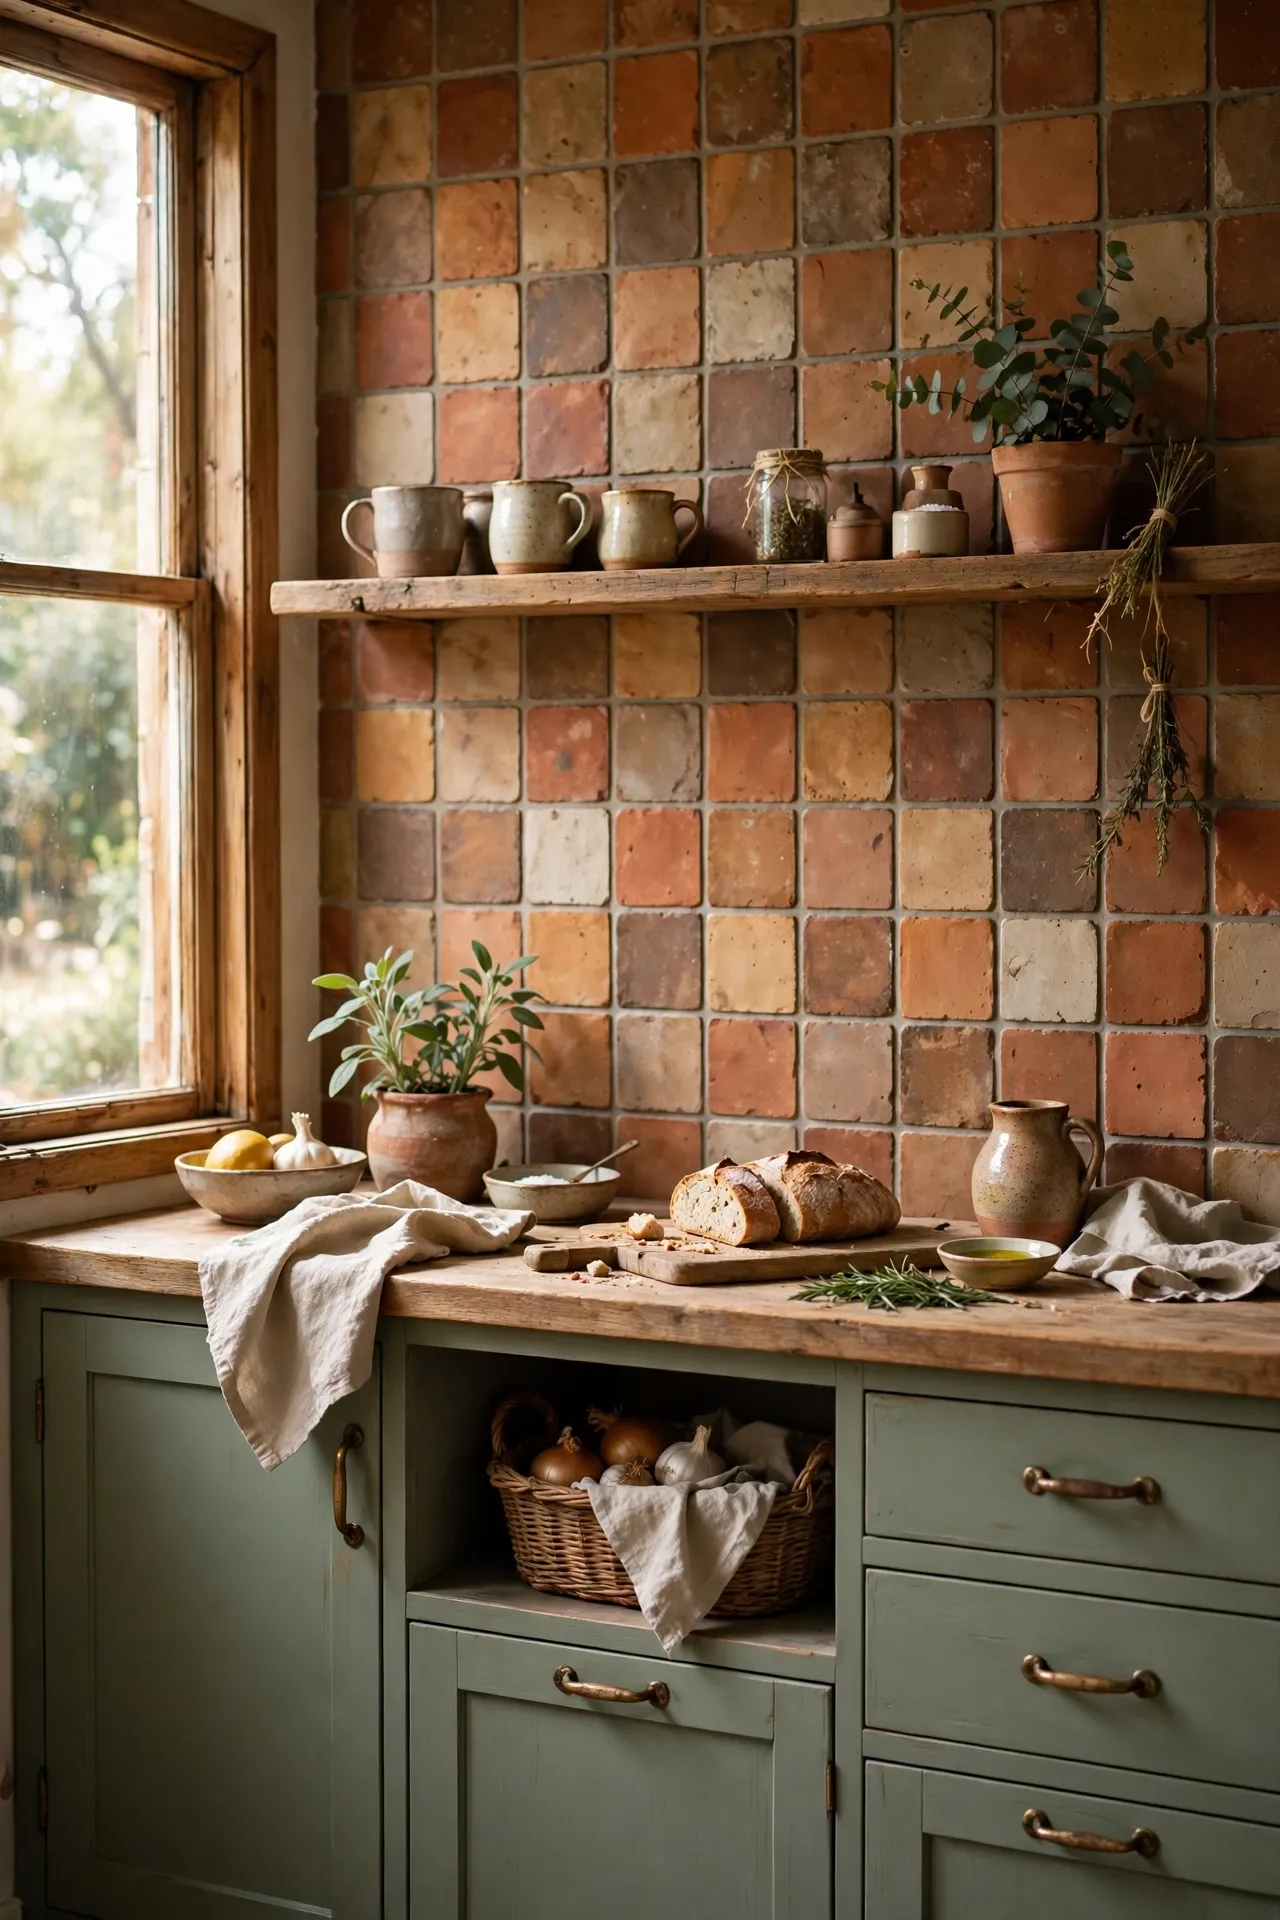
Terracotta squares bring warmth and a sun-baked Mediterranean feel that works beautifully with green cabinets or natural wood. The colour varies from tile to tile in good designs, which is exactly what you want — real terracotta is never uniform. Lay them in a simple grid and let the colour variation do the work. I did these in a kitchen with sage green units and the combination is my favourite I have ever done. My mistake was not sealing the edges near the sink; water got behind one tile and it curled. Run a thin bead of clear silicone along edges near water, and they will stay put for years.
Cost: ~$28 for the wall | Time: 2 hours
Brick, Wood & Rustic Textures
17. Whitewashed Brick Panels With a Cottage Feel
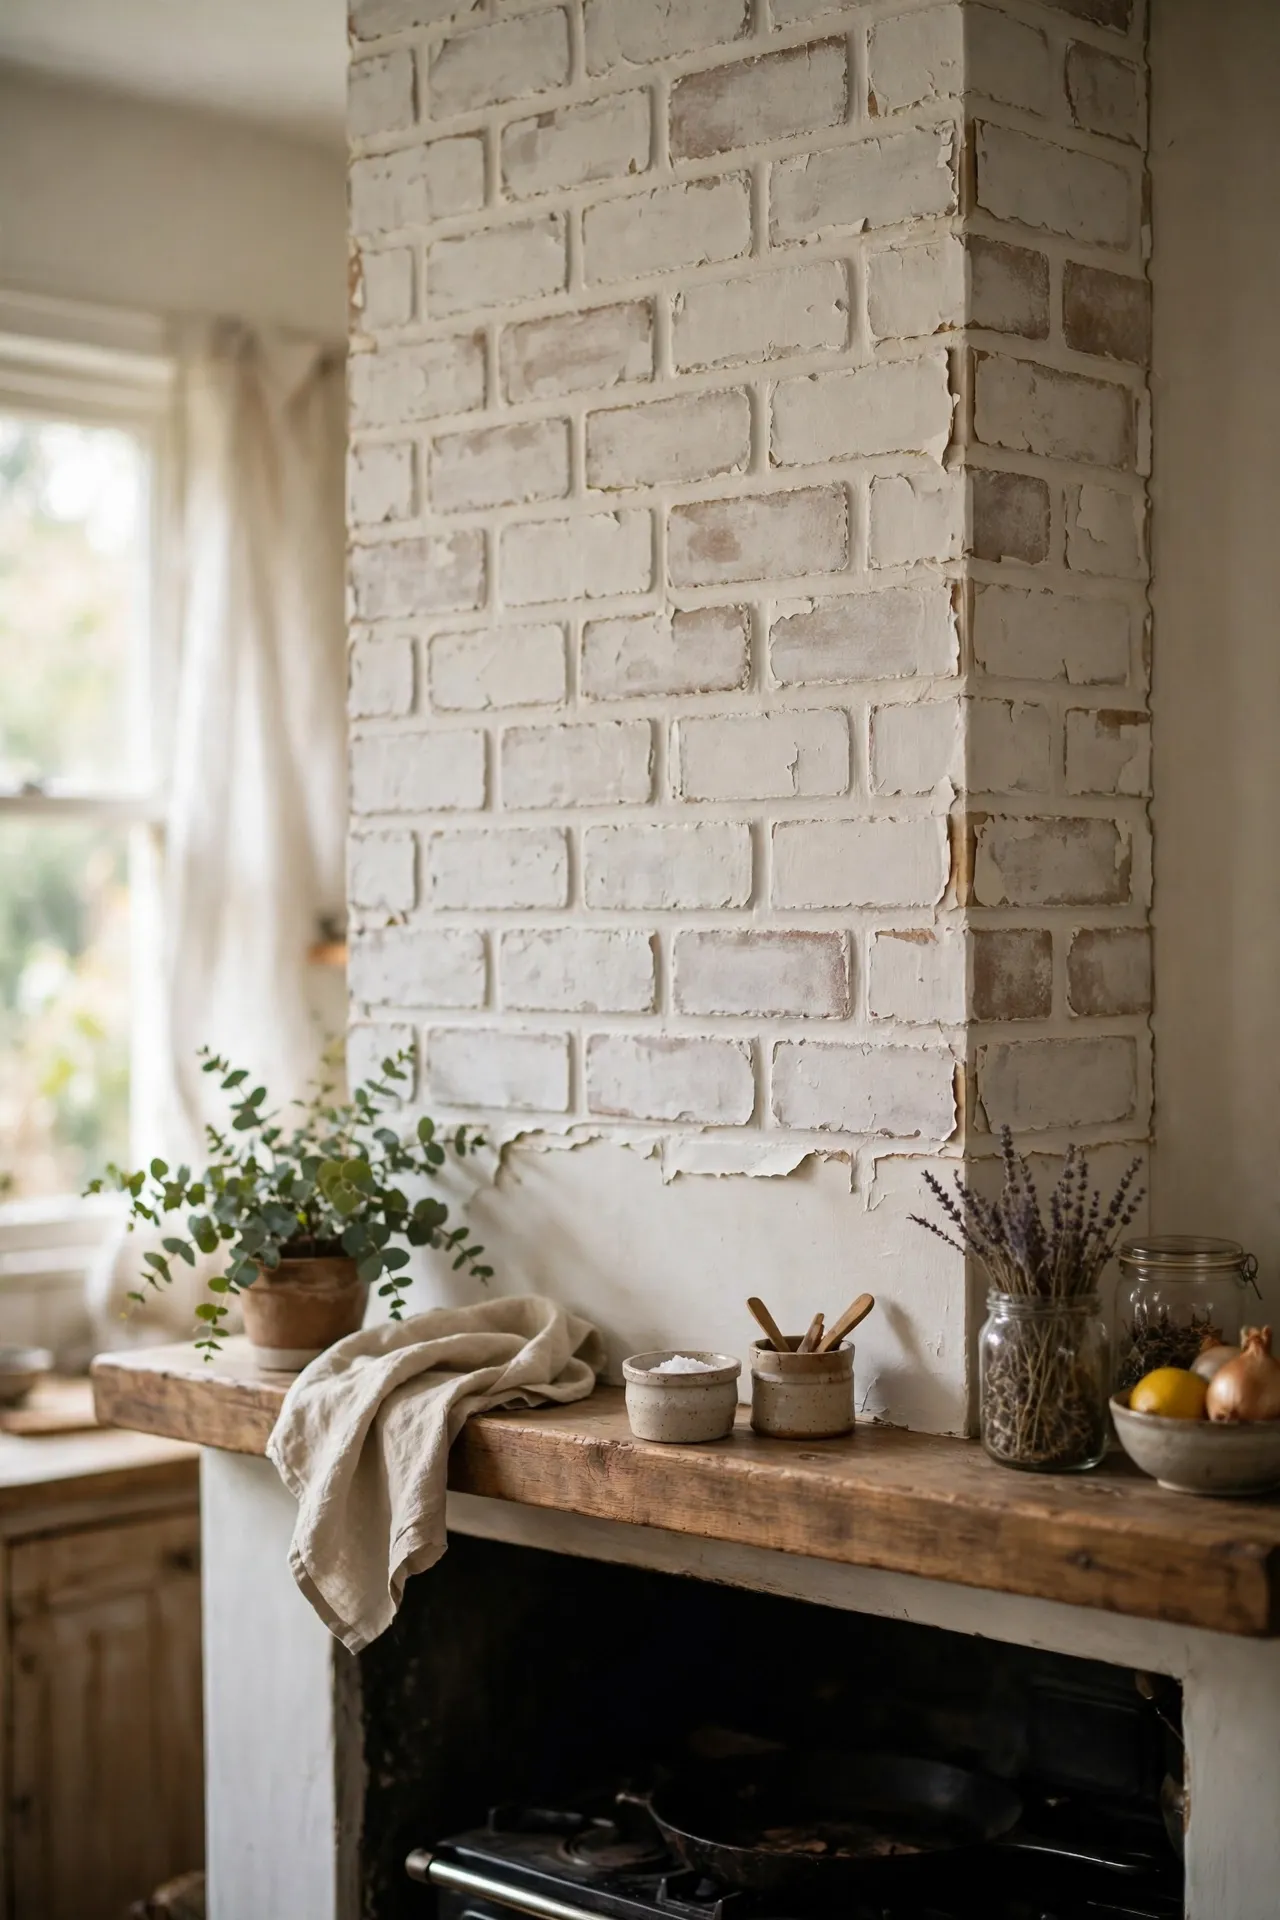
Whitewashed brick gives you that cosy cottage or farmhouse look without any actual masonry. The large panels go up fast — one panel covers what would be dozens of individual tiles. The whitewash effect brightens the brick so it works even in small kitchens. I covered an entire chimney breast with these and it became the focal point of the room. My mistake was starting at one end and discovering the last panel needed a sliver cut that looked terrible. Measure the wall, divide by the panel width, and adjust your starting point so the cut pieces at each end are roughly equal.
Cost: ~$30 for the wall | Time: 1.5 hours
18. Reclaimed Wood Plank Stickers for Warmth
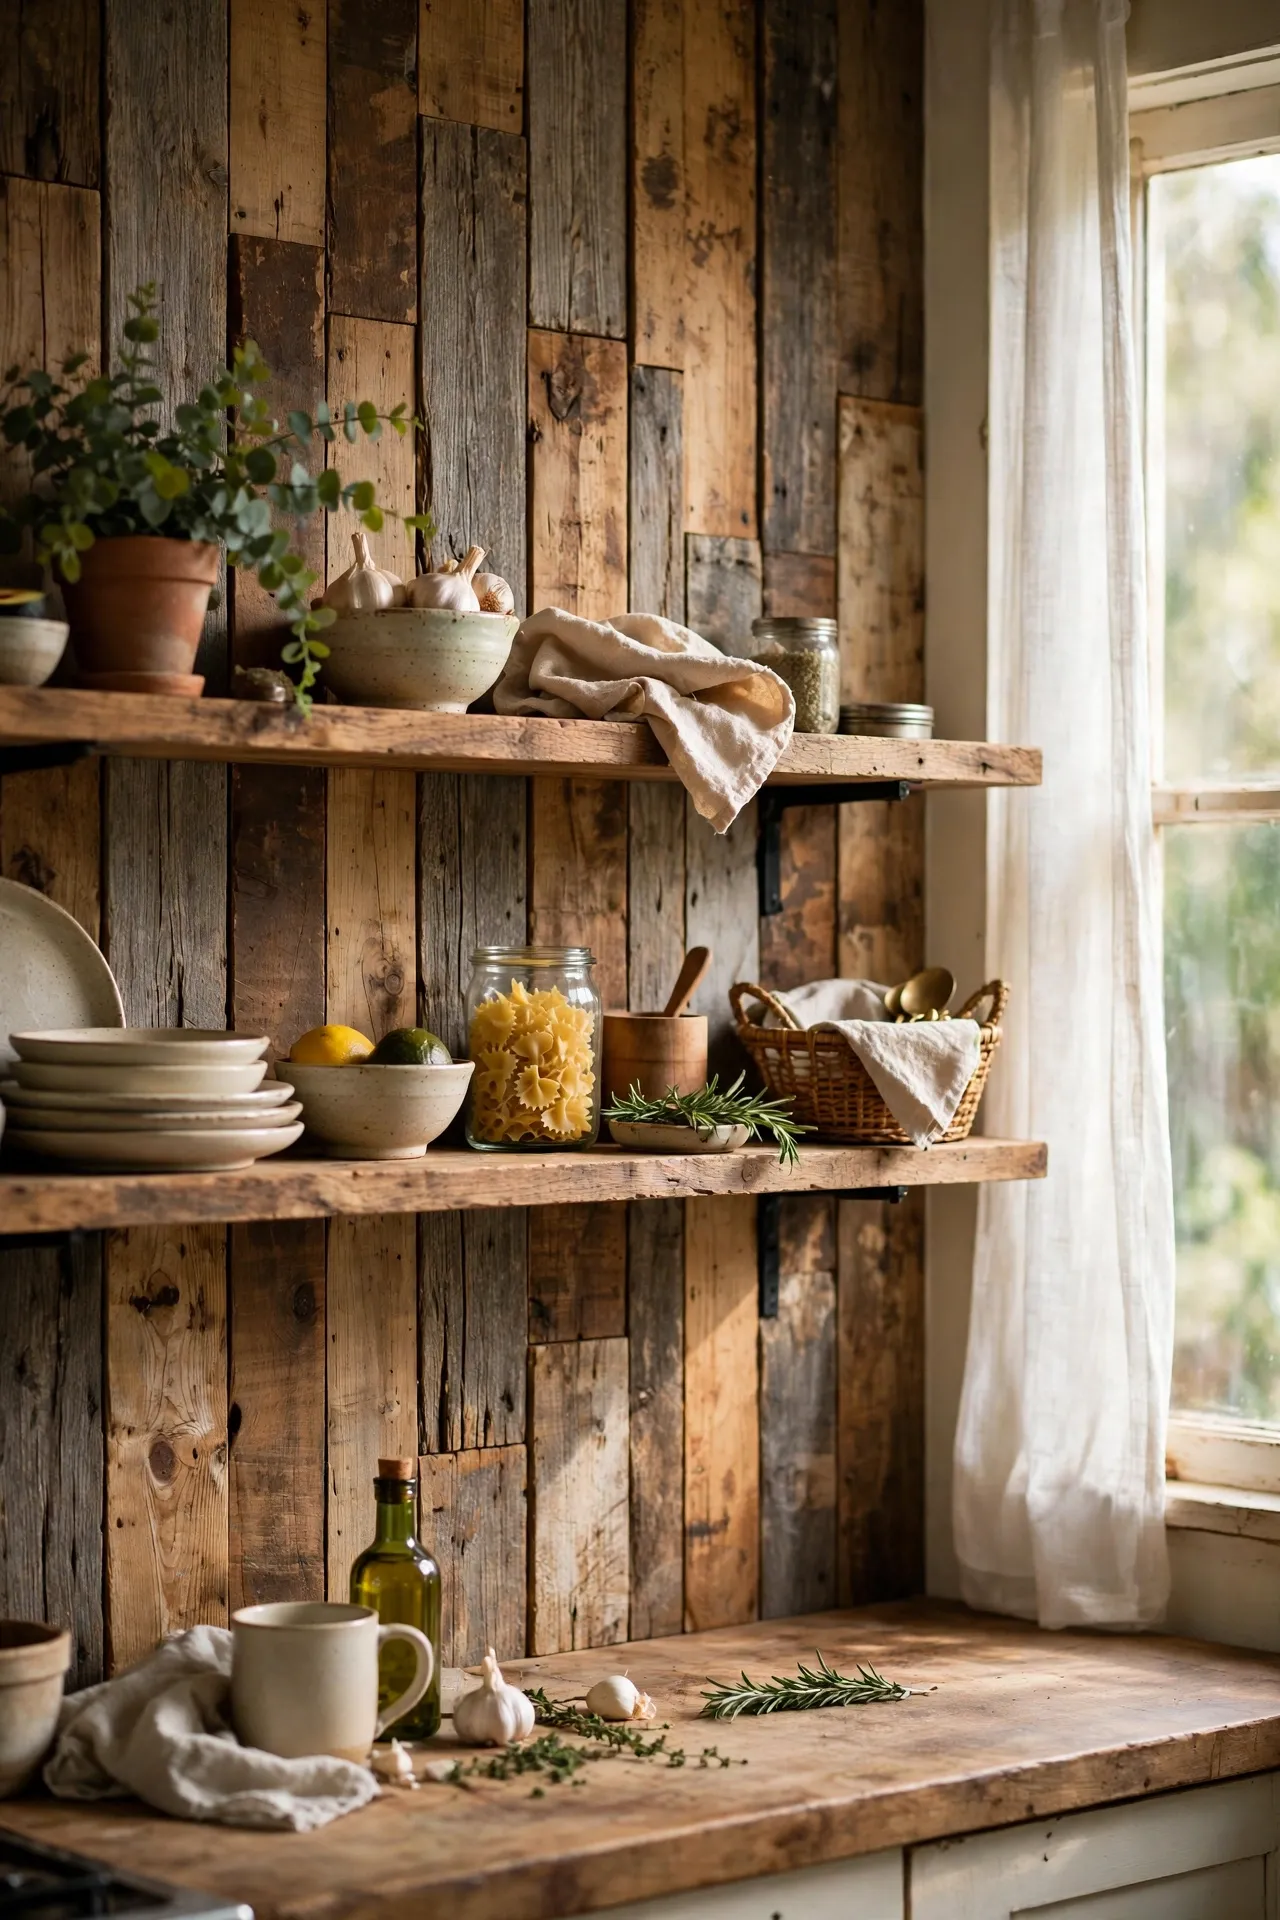
Wood-look peel-and-stick planks warm up a kitchen instantly — perfect for modern white kitchens that feel a bit clinical. Choose a design with varied grain and a few knots; uniform wood-look prints scream fake. Lay them horizontally to widen the room or vertically to add height. I did a horizontal run behind open shelving and it looks like a proper timber splashback. My mistake was using them directly behind the hob where steam softened the adhesive over time. Keep wood-look stickers to lower-heat areas, or add a clear heat-resistant panel behind the hob itself.
Cost: ~$26 for the wall | Time: 2 hours
19. Horizontal Shiplap Strips in Soft White
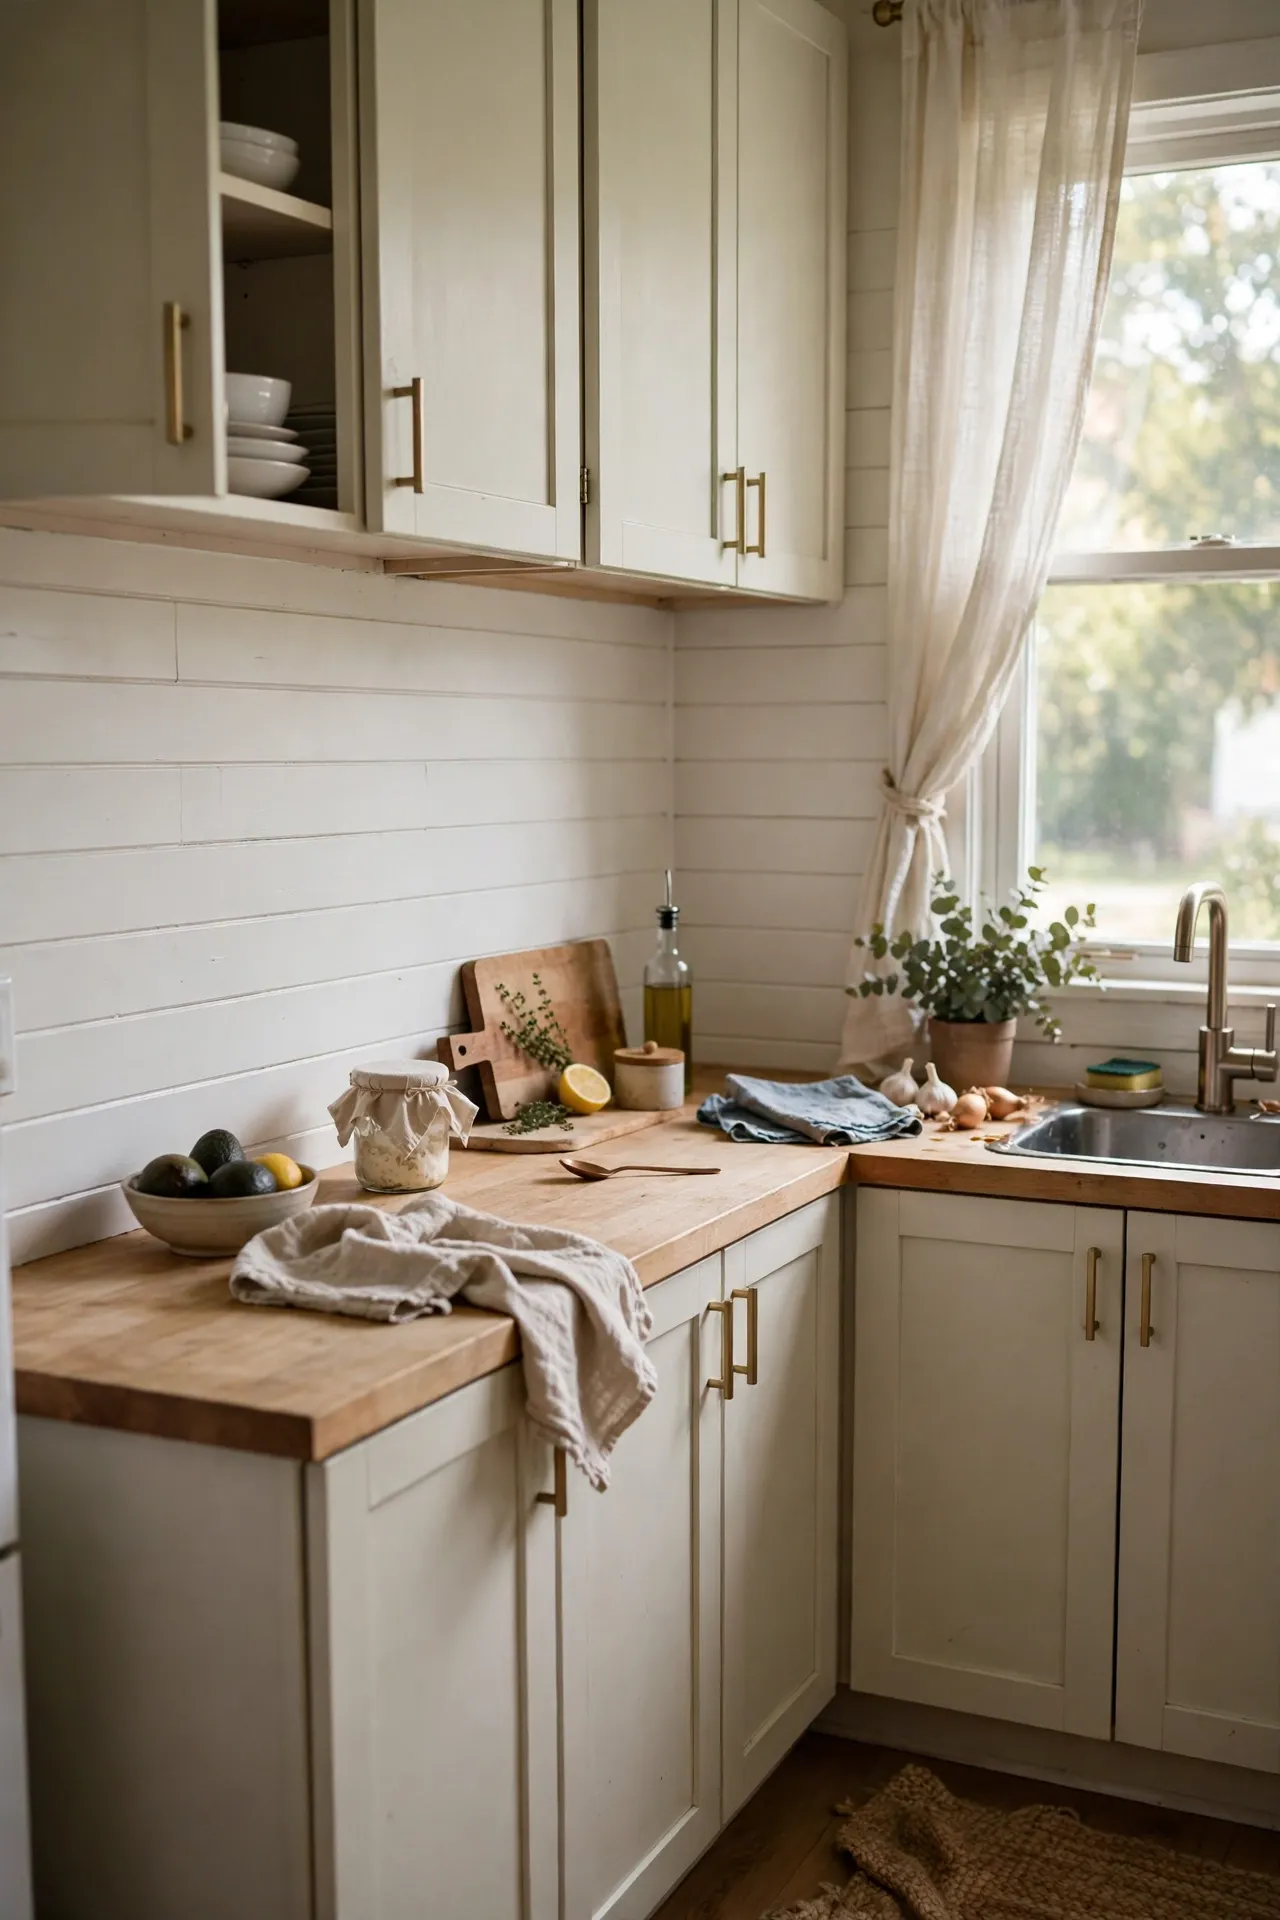
Shiplap strips in soft white give you that clean coastal or farmhouse look that never goes out of style. They are subtle — more texture than pattern — so they work when you want interest without a statement. Butt the strips tightly so the shadow lines read as real tongue-and-groove. I used these in a tiny rental kitchen and the horizontal lines made the wall feel twice as wide. My mistake was leaving tiny gaps that caught grease and went yellow within months. Tight joints, and wipe them down with the regular kitchen clean — white shows everything, but it also cleans up beautifully.
Cost: ~$24 for the wall | Time: 2 hours
20. Charcoal Brick for an Industrial Edge
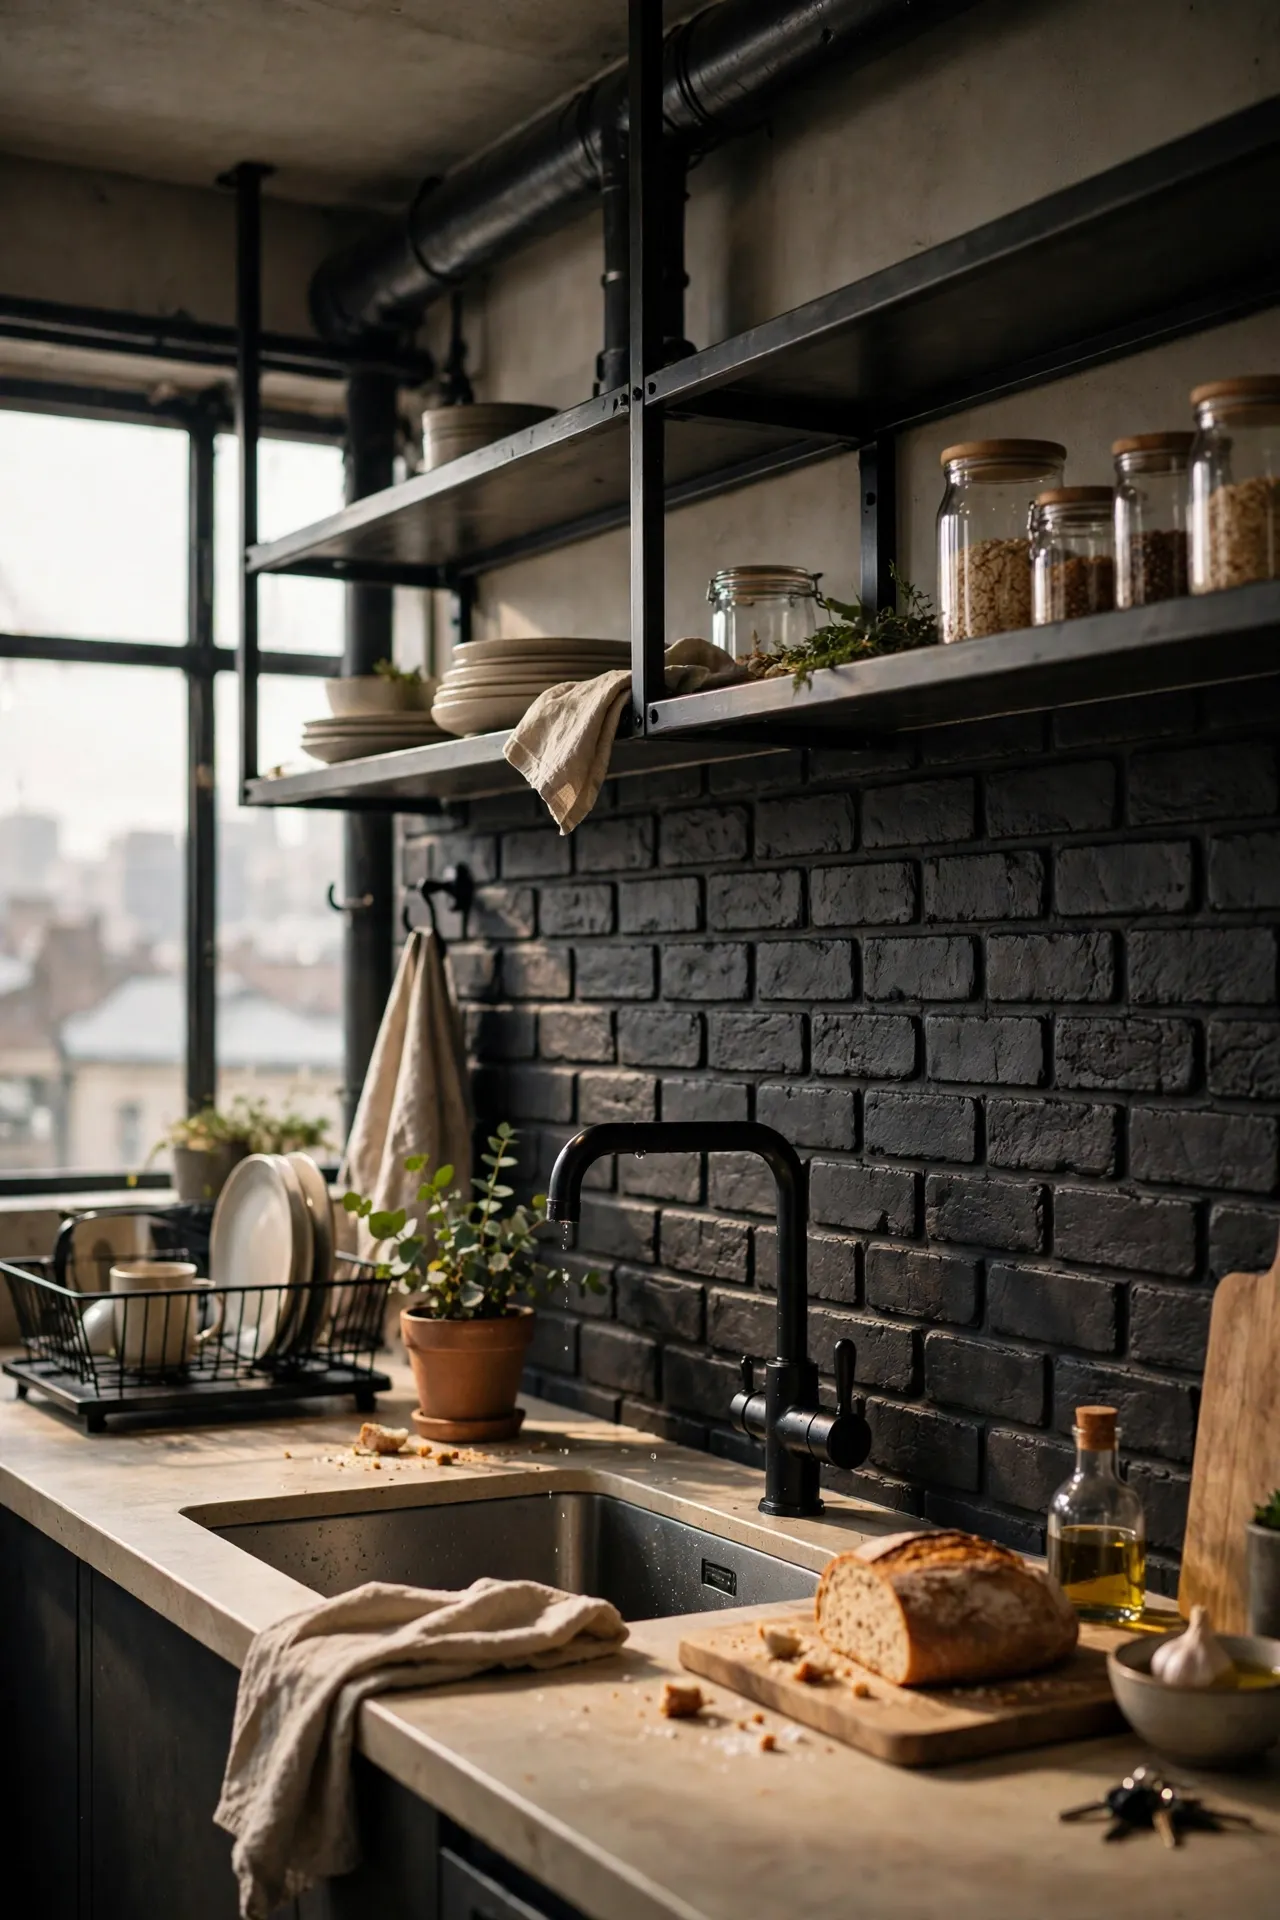
Charcoal or dark grey brick is the industrial-loft look — moody, modern, and brilliant with black taps and open shelving. It is a strong look, so balance it with light worktops and plenty of warm lighting. The dark colour hides every splash and mark, which makes it secretly the most practical choice here. I did a charcoal brick panel in a city flat kitchen and it looked like a warehouse conversion. My mistake was pairing it with dark worktops too, which made the whole corner feel like a cave. Dark backsplash needs light above and below it — pale counters, under-cabinet lighting, done.
Cost: ~$28 for the wall | Time: 1.5 hours
Bold Colour & Statement Patterns
21. Deep Navy Tiles for a Statement Wall
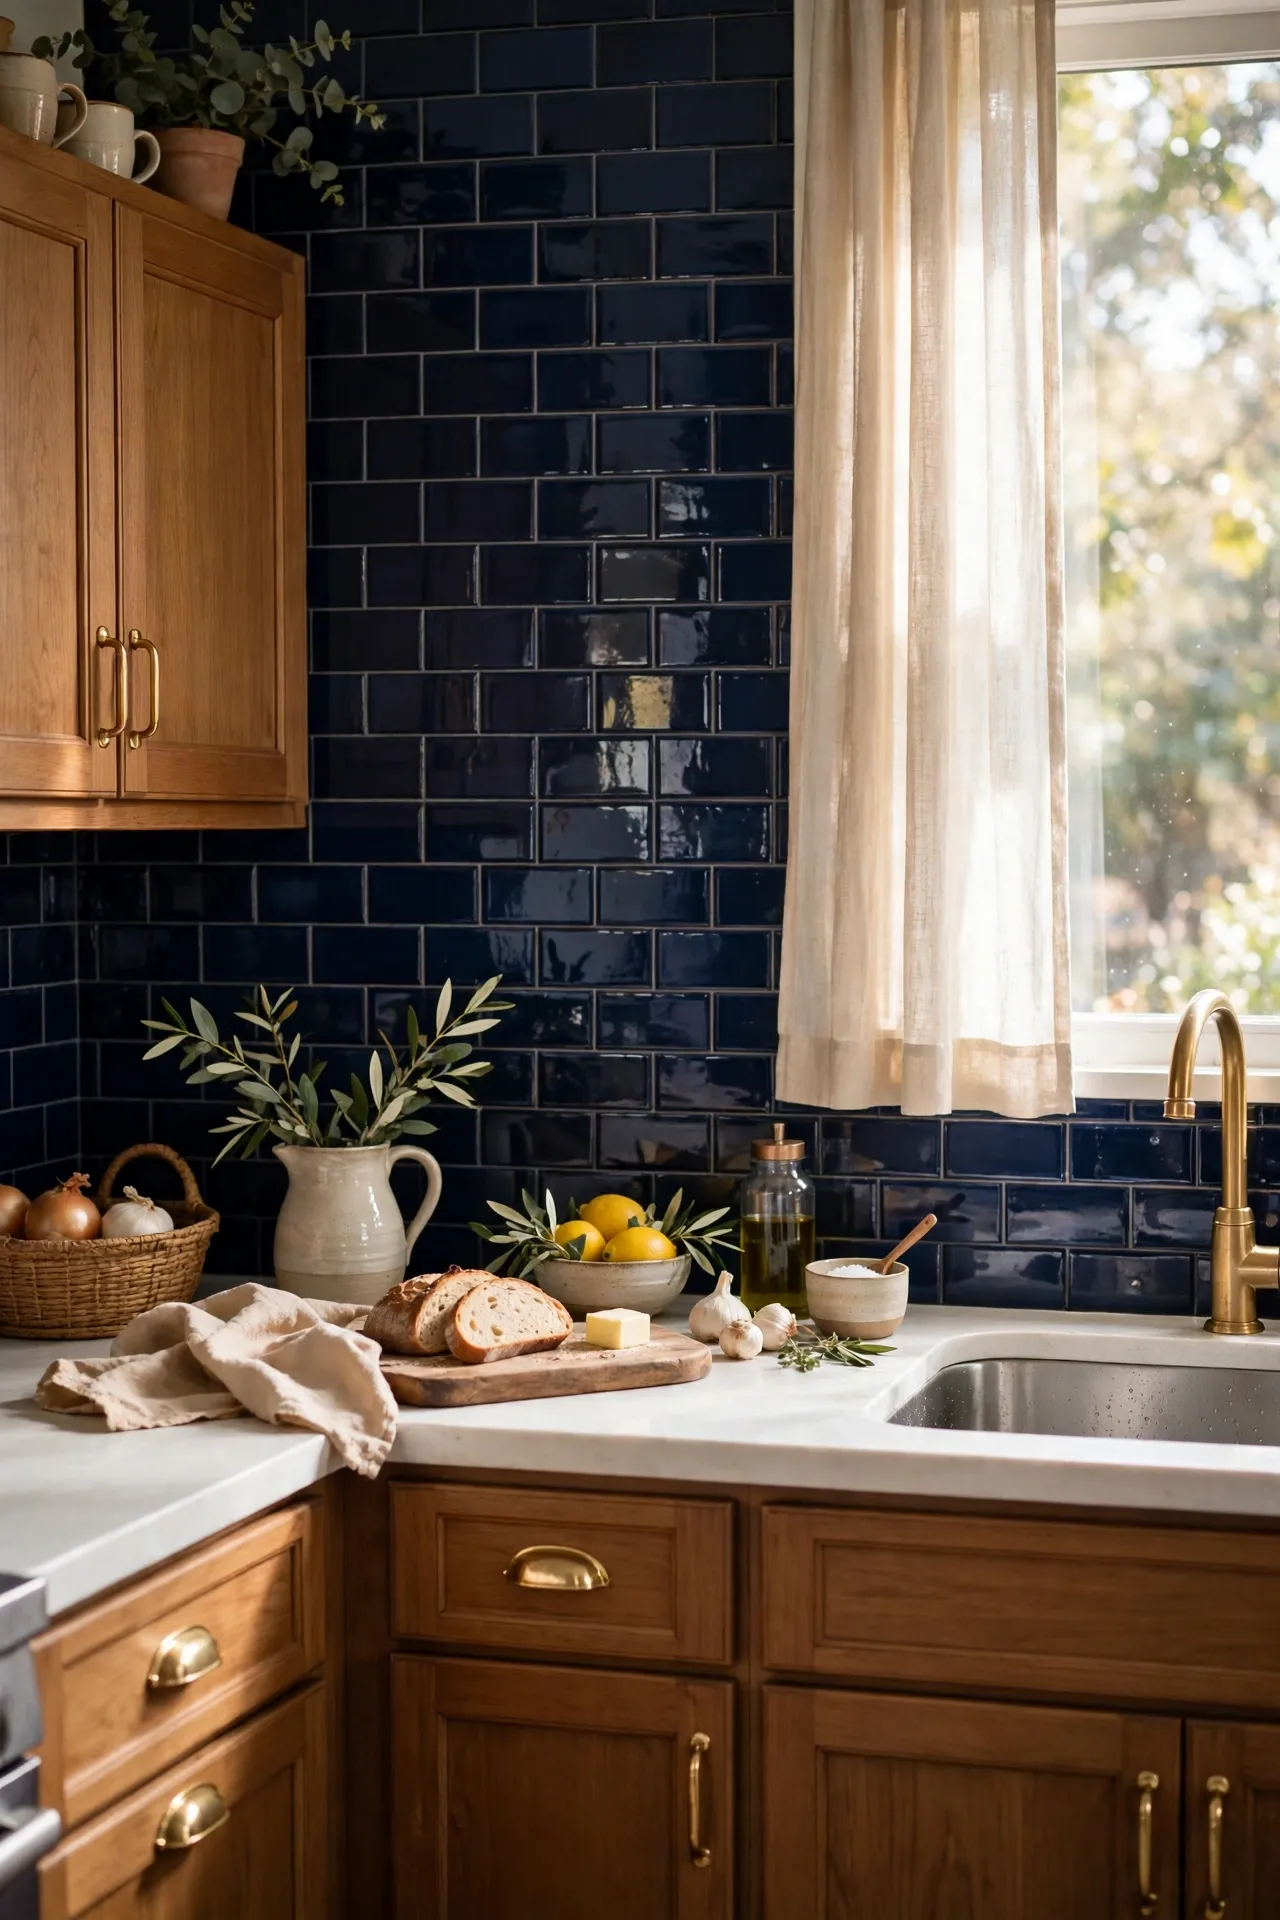
Deep navy is the colour that makes a kitchen feel designed — rich, classic, and surprisingly easy to live with. It pairs beautifully with brass or gold handles and white worktops. Navy shows every crumb of dust during installation, so wipe each tile before you stick it. I did a navy backsplash in a rental and the letting agent photographed it for the listing. My mistake was choosing a flat matt navy that looked chalky in daylight. A gloss or satin finish gives navy its depth — flat finishes drain the richness right out of dark colours.
Cost: ~$28 for the wall | Time: 2 hours
22. Emerald Green Gloss Tiles With Brass Taps
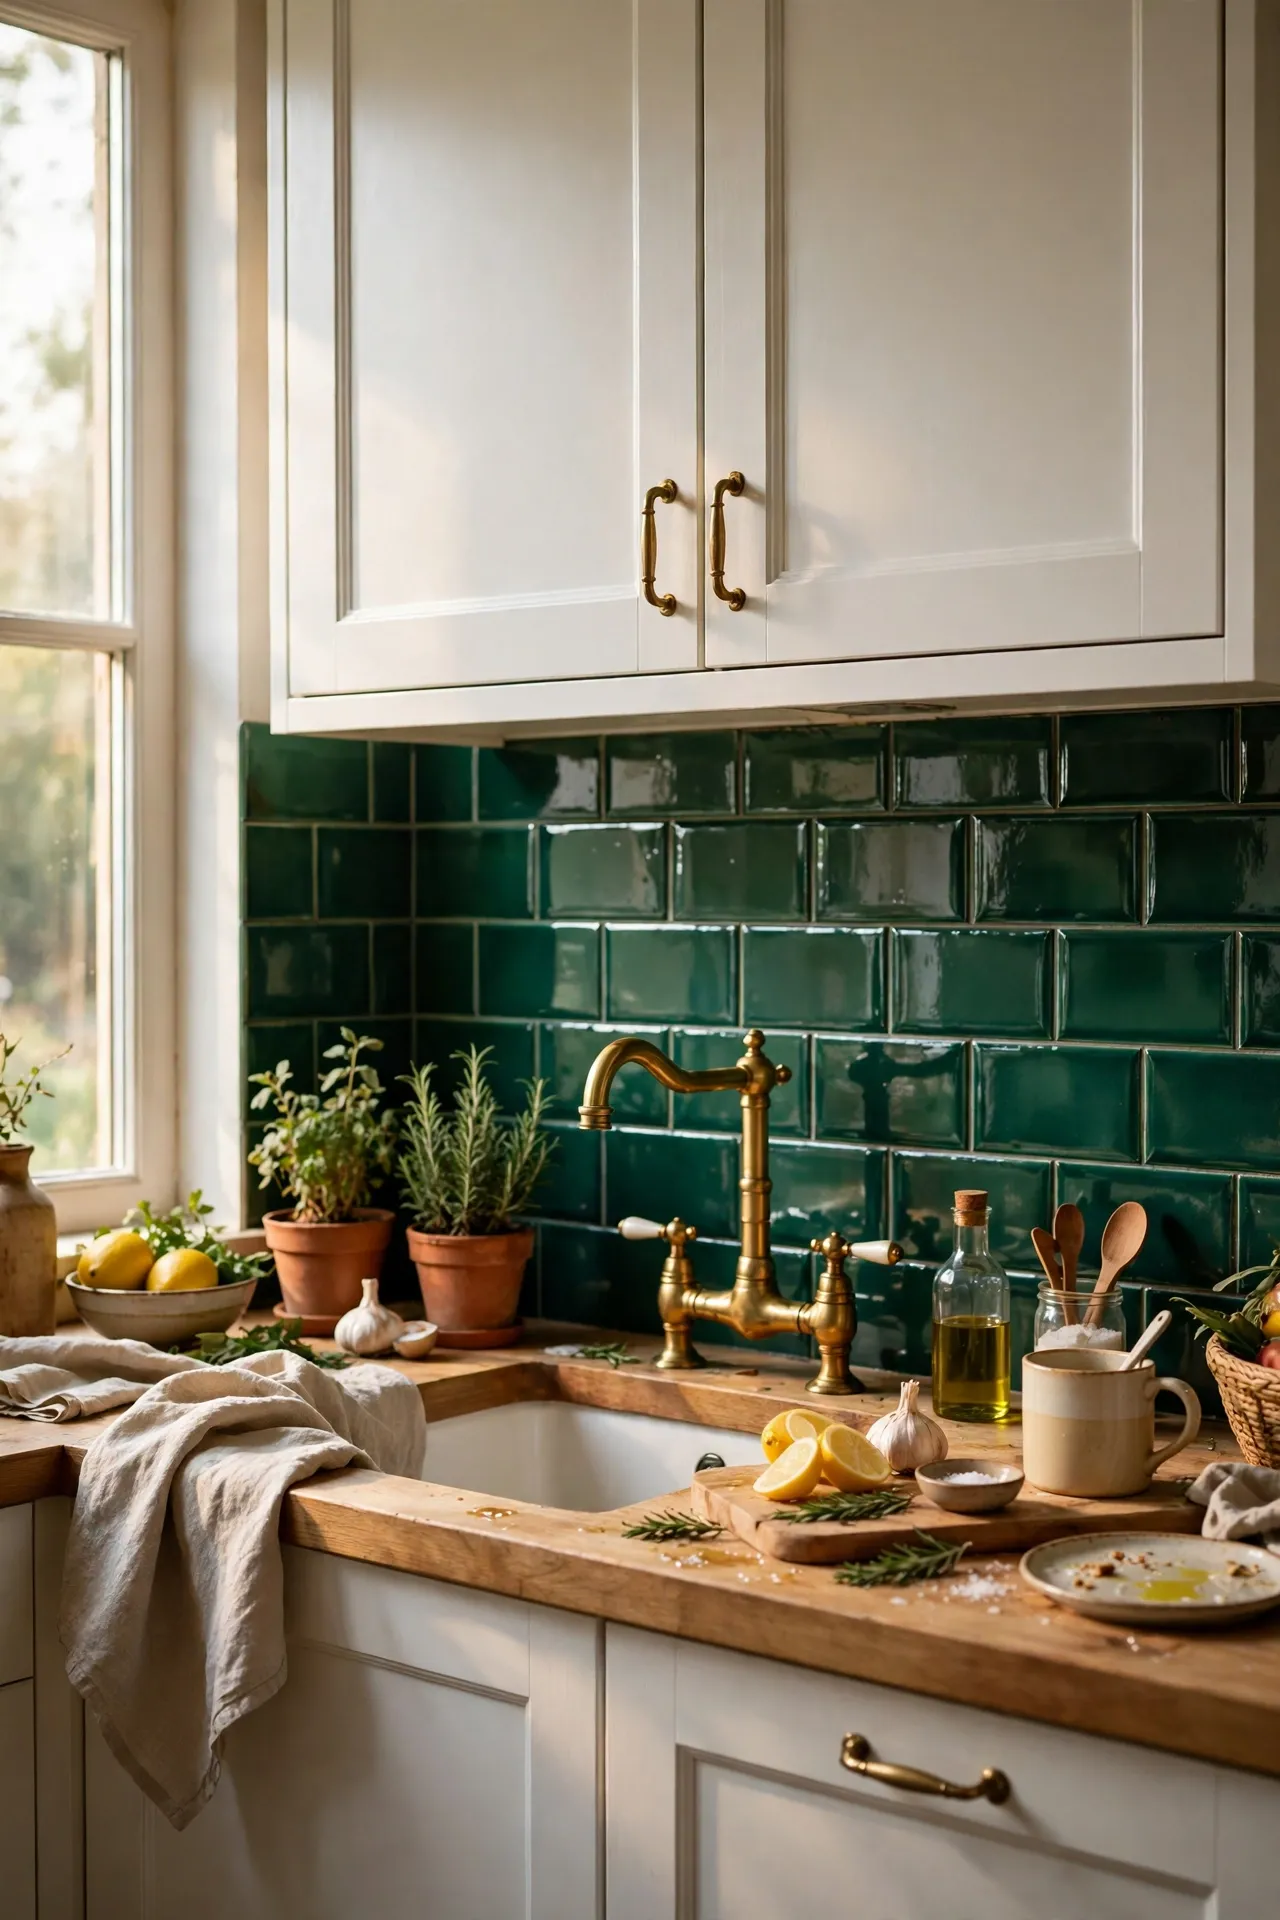
Emerald green gloss tiles with brass taps is the combination all over interiors magazines right now, and peel-and-stick makes it renter-friendly. The gloss bounces light around, so it works even in darker kitchens. Keep cabinets neutral — white, cream, or pale wood — and let the green be the star. I did this in my own kitchen last spring and I still smile every time I walk in. My mistake was not checking the green in evening light before committing; my first choice went almost black under warm bulbs. Test a sample at night as well as in daylight — greens shift more than any other colour.
Cost: ~$32 for the wall | Time: 2 hours
23. A Metallic Gold Accent Strip Above the Hob
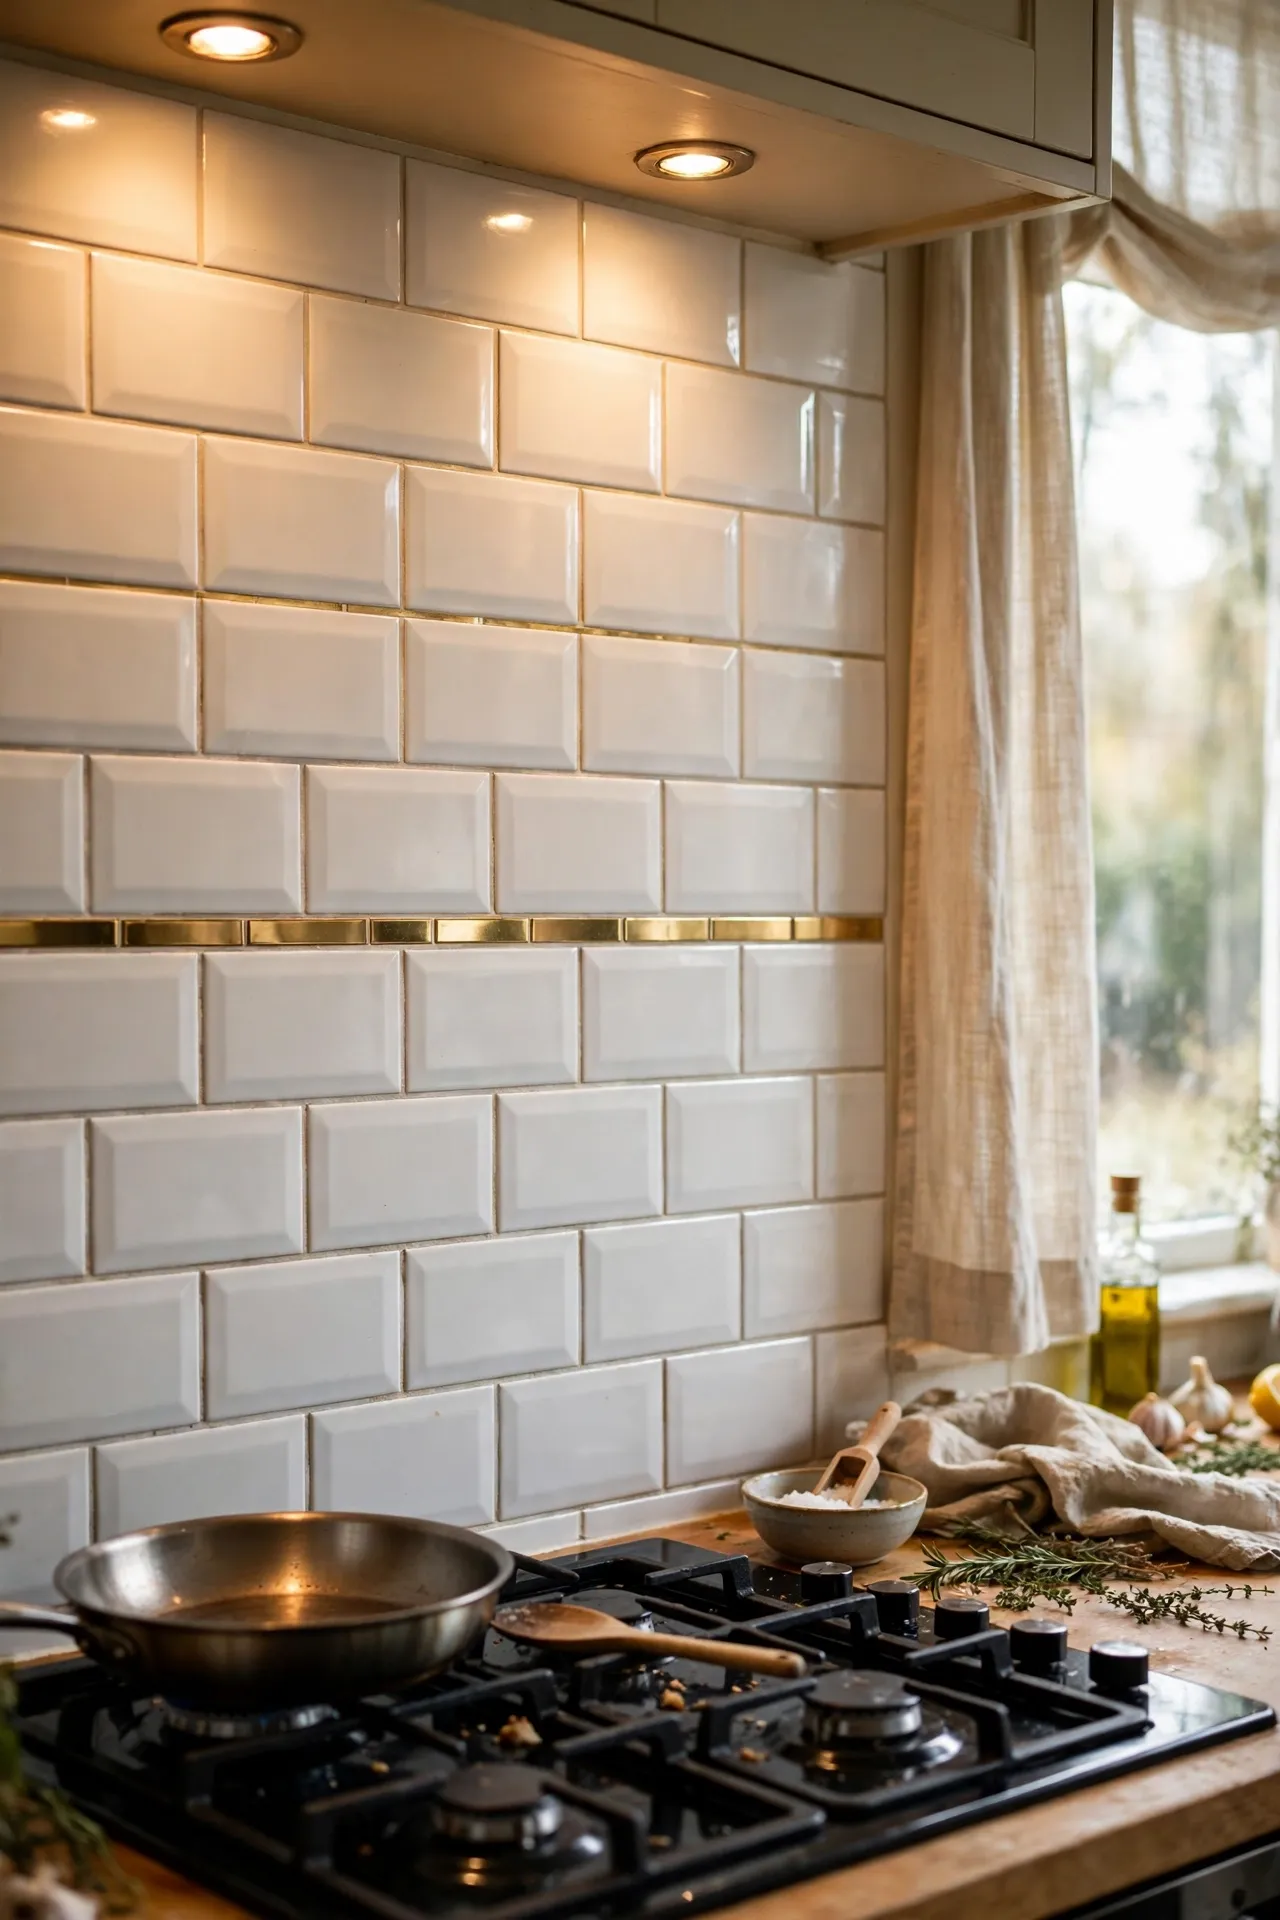
A slim strip of metallic gold tiles above the hob is the jewellery of the kitchen — a little flash of glamour that costs almost nothing. Use it as a border between plainer tiles, or as a single feature row. Metallic finishes catch the light beautifully, especially under spotlights. I added a gold strip between white subway tiles and it lifted the whole backsplash from plain to polished. My mistake was using a cheap metallic print that looked plasticky up close. Spend a little more on metallics and choose ones with real texture — the difference between convincing gold and sticky-back plastic is about three pounds a sheet.
Cost: ~$14 for the strip | Time: 45 minutes
📌 Like this one? Save it to your kitchen board before you forget.
Planning a full kitchen refresh? See 25 Renter-Friendly Kitchen Upgrades With Zero Damage for the complete damage-free playbook, 15 Kitchen Decor Ideas Under $50 Without Renovating for more budget-friendly wins, and 19 Kitchen Cabinet Hardware Ideas That Upgrade Everything for the one-hour swap that changes everything.
That is all 23 — whichever style you pick, measure twice, order ten percent extra, and start in the middle. Your landlord will never know, but your kitchen will feel like a different room by Sunday night.
