21 Nightstand Decor Ideas That Look Expensive
Nightstand decor ideas are the highest-impact, lowest-cost styling project in the whole bedroom. That little square of surface beside your bed is the first thing you see in the morning and the last thing you see at night, yet most of us leave it as a dumping ground for chargers, half-read books, and a glass with yesterday’s water in it. I know, because mine looked like that for years.
This list is everything I tried on my own two nightstands, grouped into four sections: under-$10 wins first, then lamp and light upgrades, then storage and organisation tricks, and finally the bigger statement moves for when you want to rethink the nightstand itself. Every idea costs $40 or less, most sit under $15, and I have noted real prices and real times. Start with the cheap wins and work your way up.
Under $10 wins: start with these if your budget is truly tight.
1. Single Stem in a Bud Vase
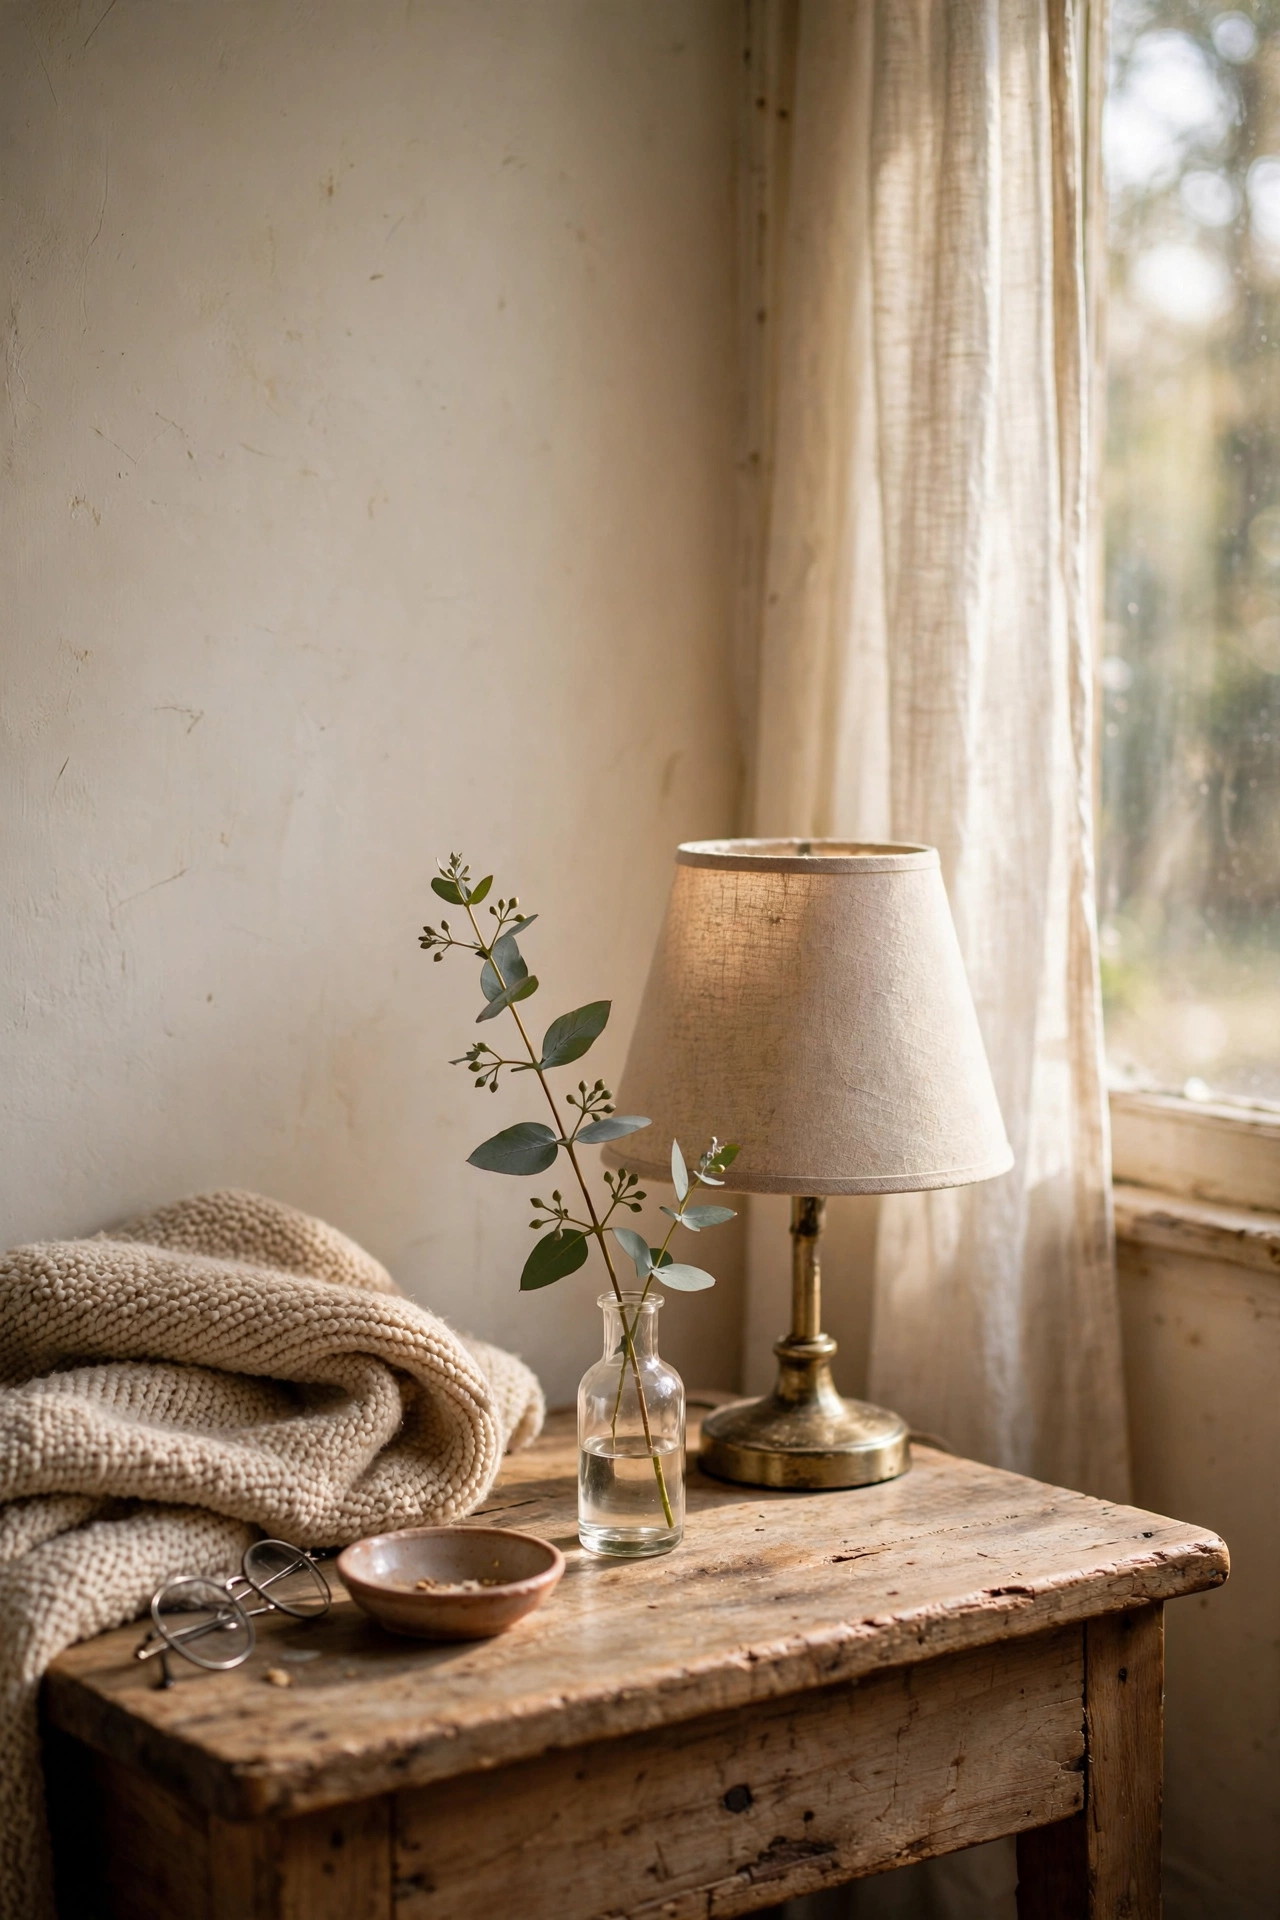
One stem in a tiny bud vase looks more expensive than a big bouquet, and it costs almost nothing. I bought three glass bud vases for $2 each and keep one on each nightstand with a single eucalyptus sprig or a stem from the garden. Change the water every few days and trim the stem at an angle so it lasts. My first attempt used a tall stem in a short vase and it toppled over nightly. Keeping the stem roughly twice the vase height looks balanced and stays upright. A $4 grocery bunch split across vases lasts me two weeks.
Cost: ~$4-8 | Time: 5 minutes
2. Stack of Three Books as a Riser
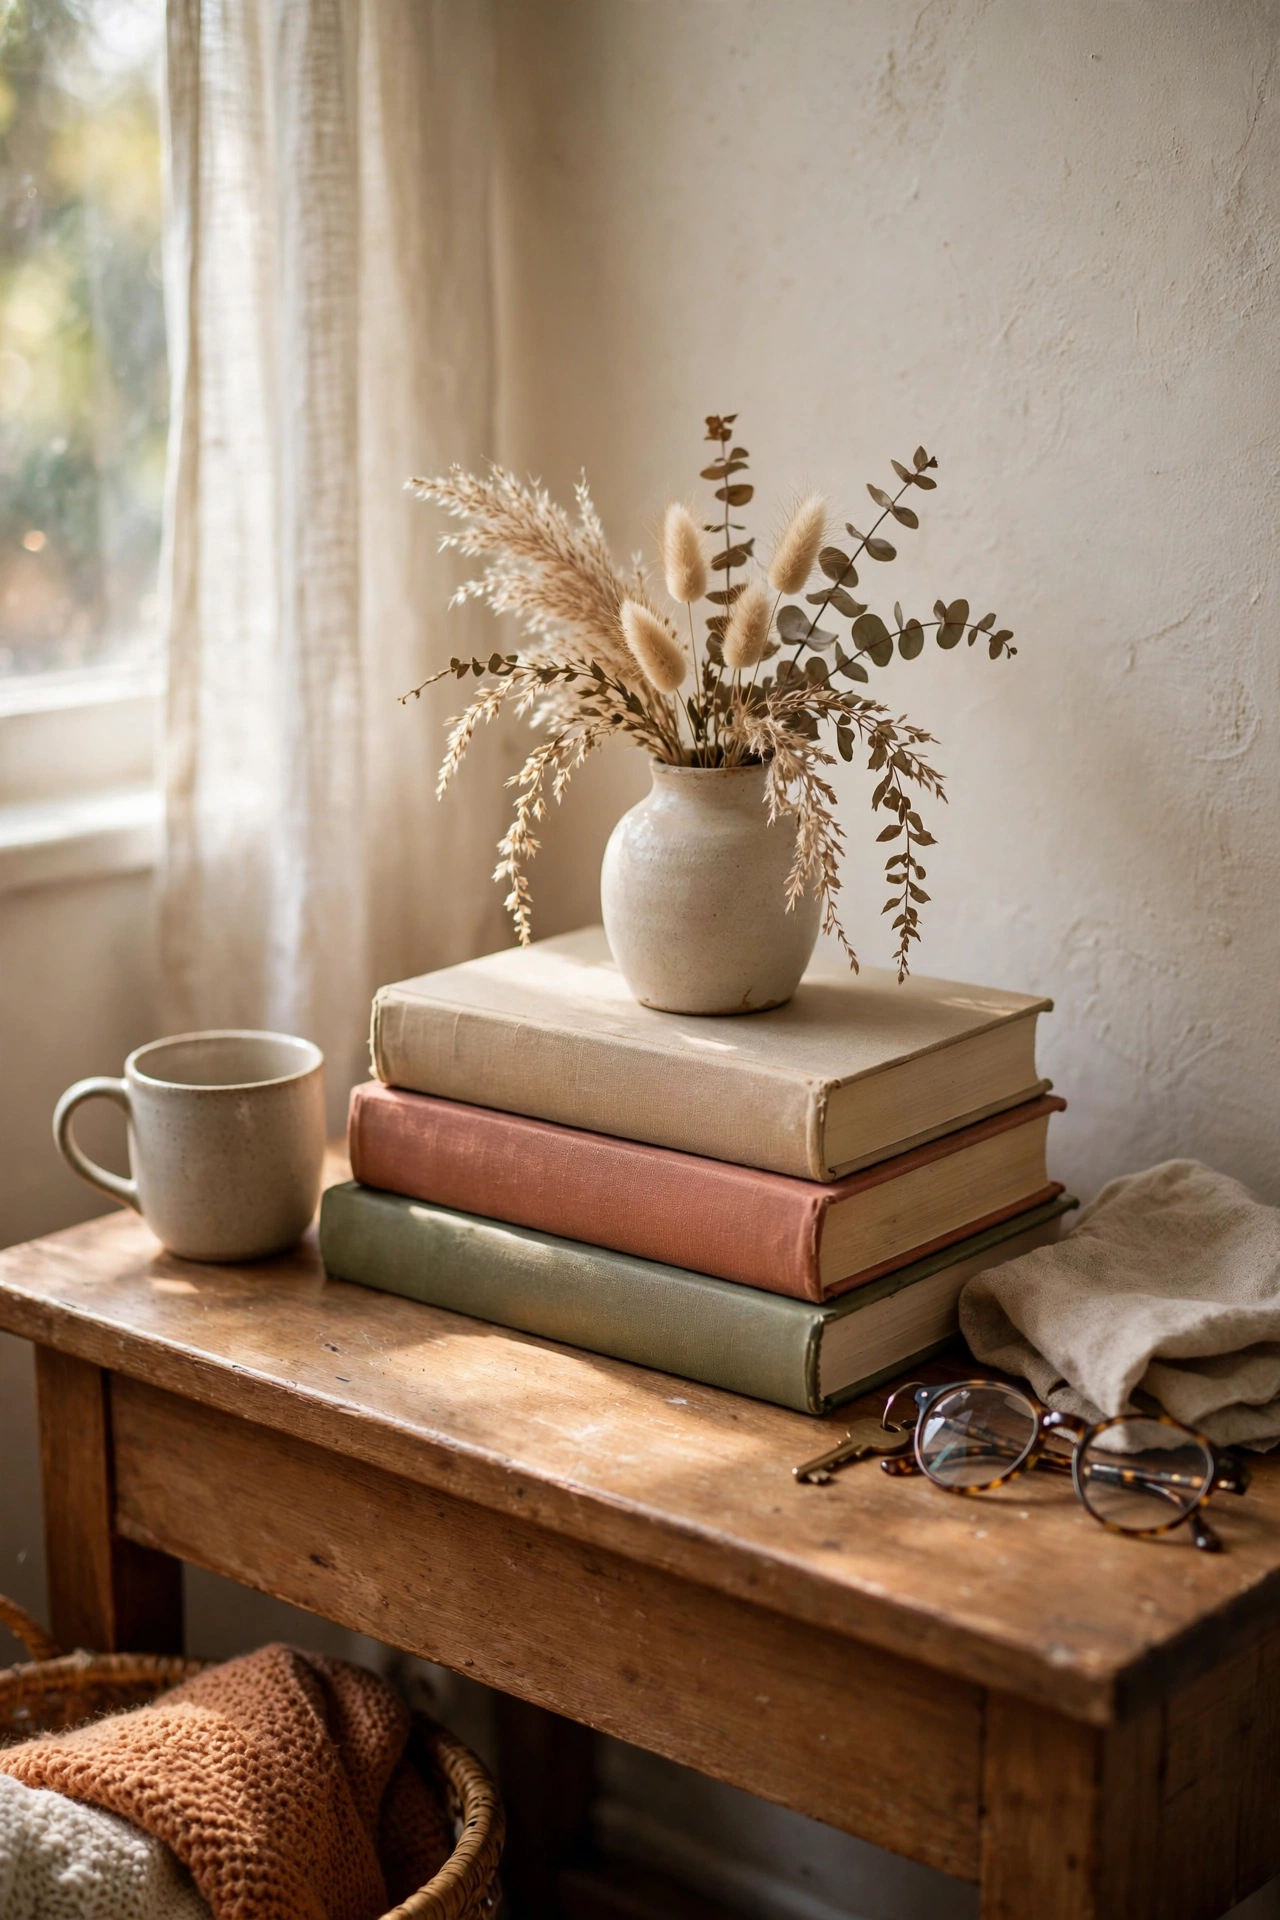
A stack of two or three books makes an instant pedestal for a small vase or candle, adding height without buying anything. I pulled three hardbacks with handsome spines from my shelf, stacked largest to smallest, and set my bud vase on top. The trick is choosing books you have actually read, because guests will pick them up. Mine sat wobbly at first because the middle book was smaller than the one above it. Restacking in true descending size fixed the wobble. Free, five minutes, and it looks like deliberate styling.
Cost: ~$0 | Time: 5 minutes
3. Cluster of LED Tea Lights in Glass Holders
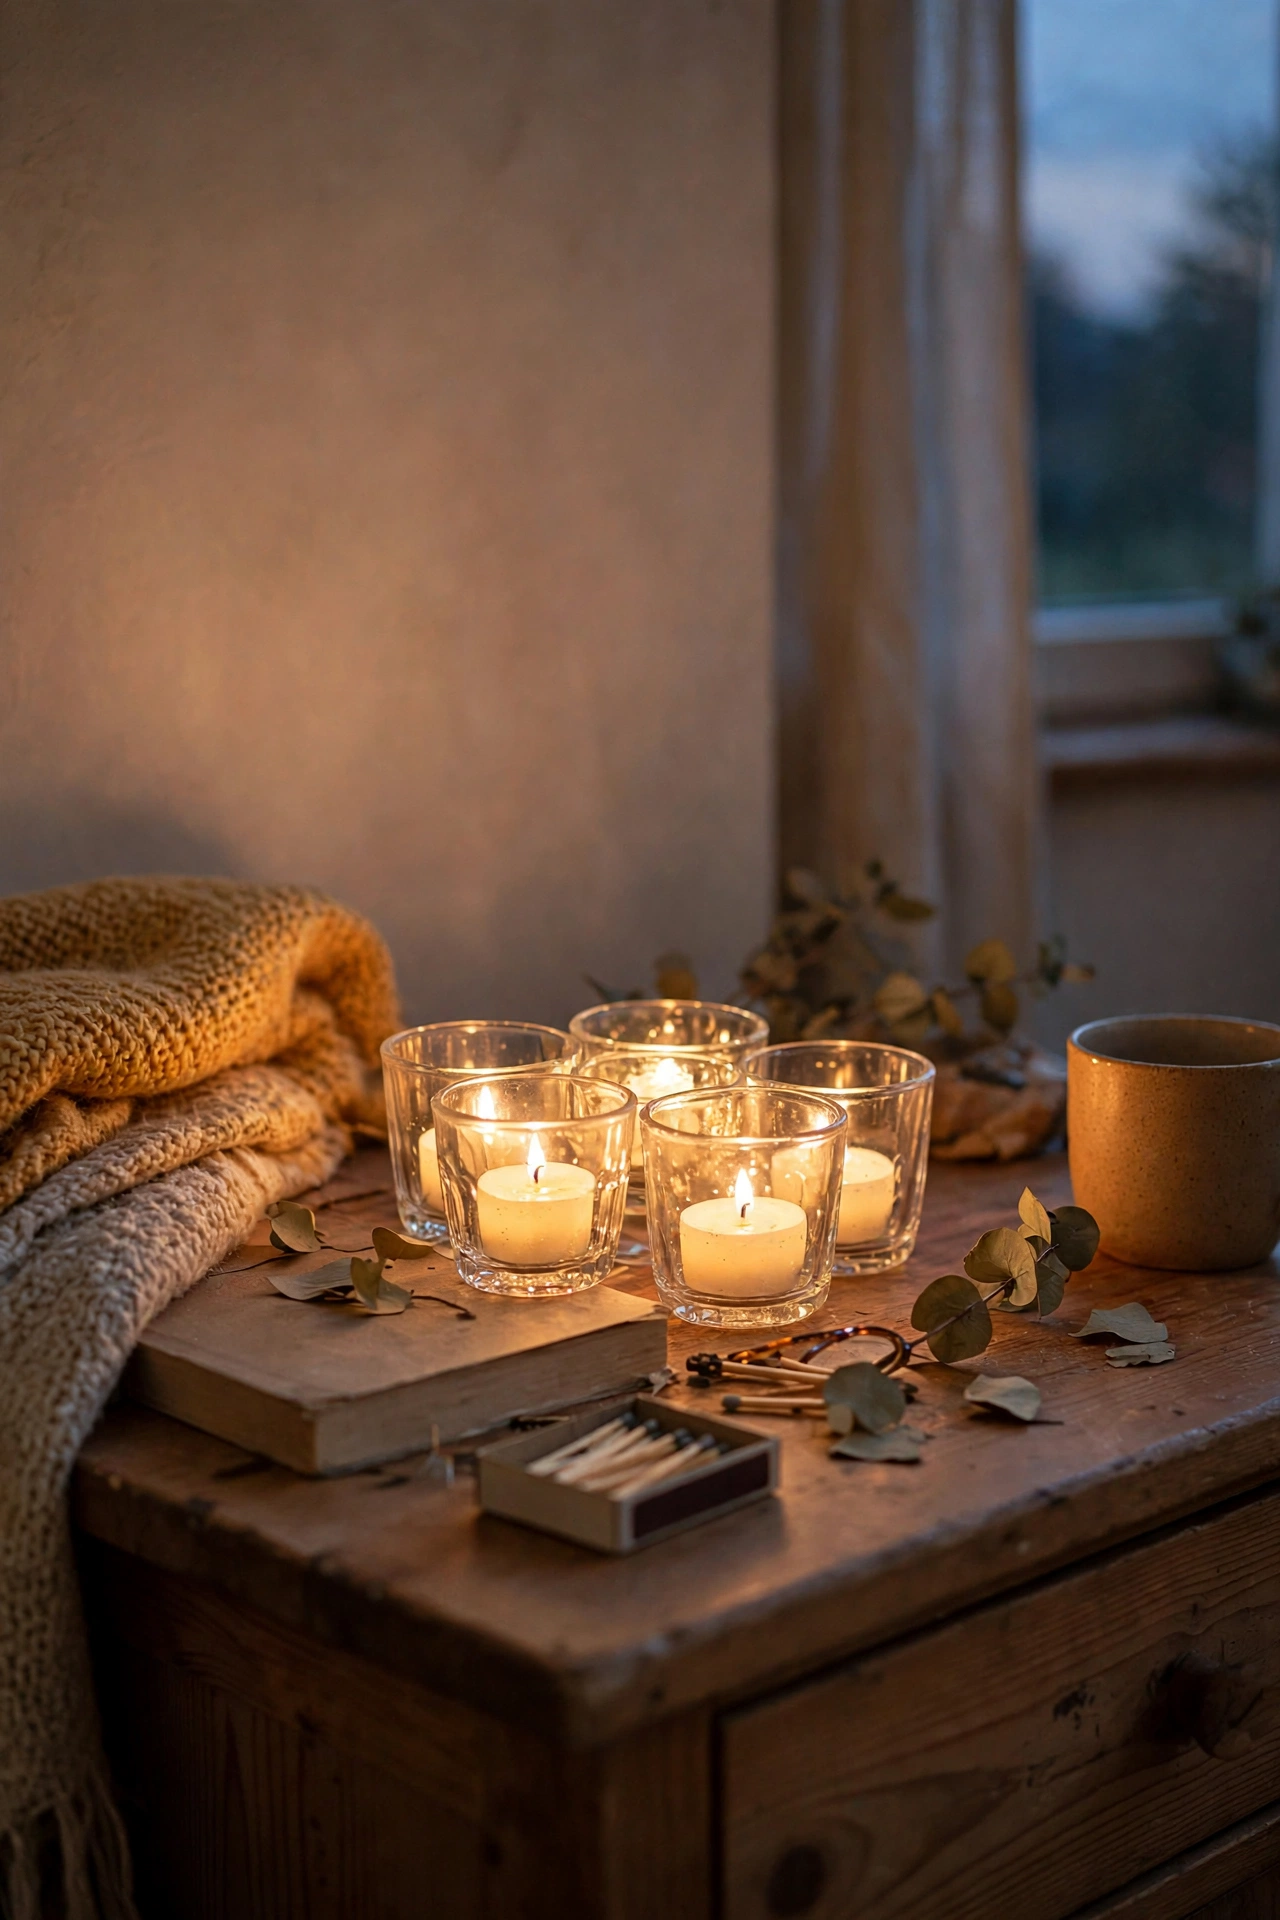
A tight cluster of tea lights in little glass holders turns your nightstand into a glow zone every evening. I bought a bag of six glass holders for $5 and a pack of LED tea lights, grouping three on each nightstand. Cluster them tight so they read as one arrangement, and vary the glass heights slightly. Real tea lights are lovely, but I doze off reading, so LED is non-negotiable for me. My first setup spread them across the whole nightstand and they looked lost. Pulling them into one trio fixed it instantly.
Cost: ~$6-10 | Time: 5 minutes
4. Thrifted Brass Tray as a Styling Base
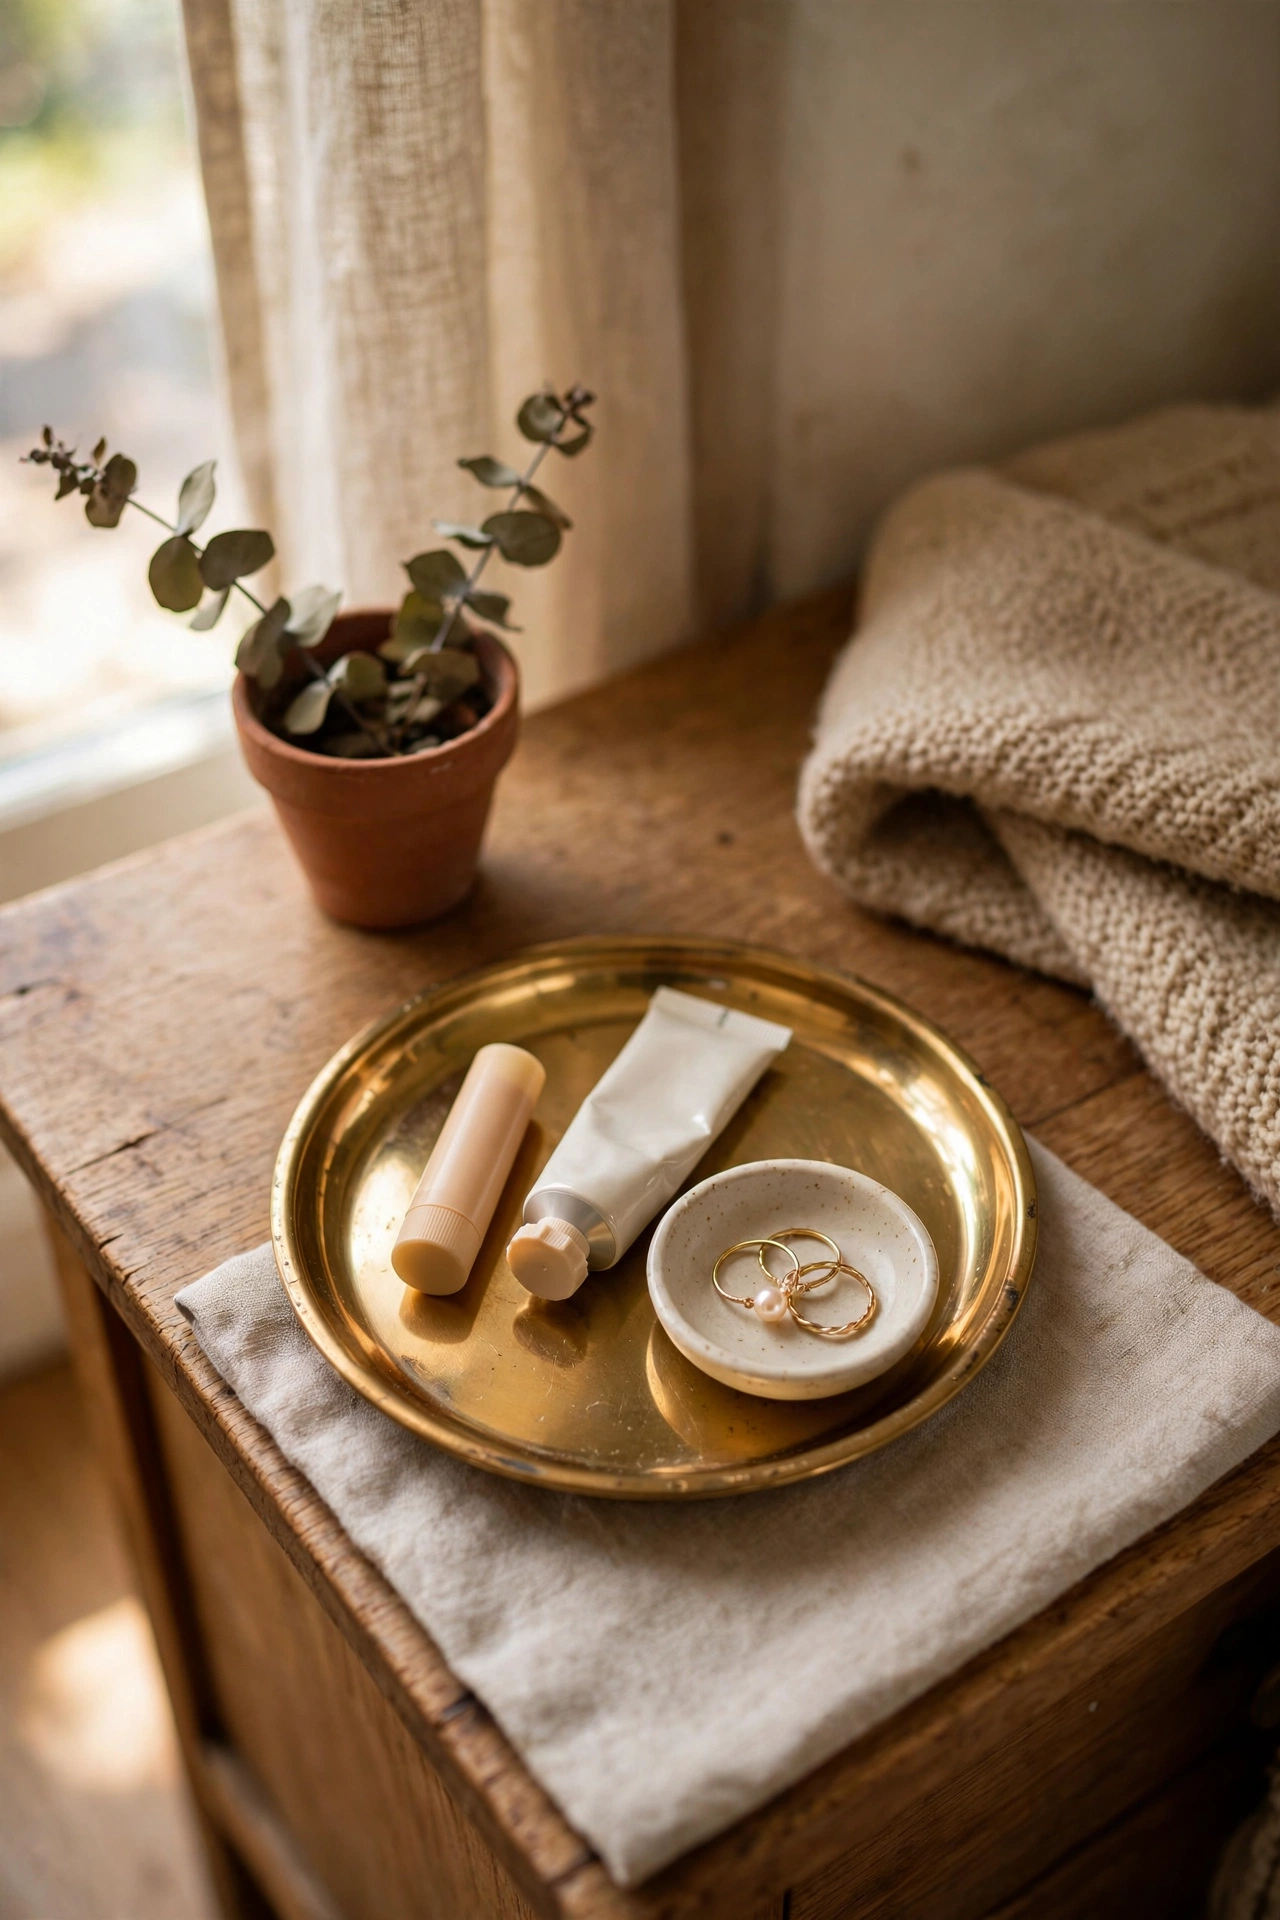
A small brass or gold tray corals your nightstand clutter into one intentional-looking arrangement. I found a tarnished brass tray at a charity shop for $3, polished it with ketchup of all things, and now it holds my lip balm, hand cream, and ring dish. The tray is the trick: random items look like clutter, but the same items on a tray look styled. Rubbing with ketchup and a soft cloth brought the shine back in ten minutes. Check the tray size first, because an oversized tray eats the whole nightstand surface.
Cost: ~$3-8 | Time: 15 minutes
5. DIY Tile Coasters with Felt Backs
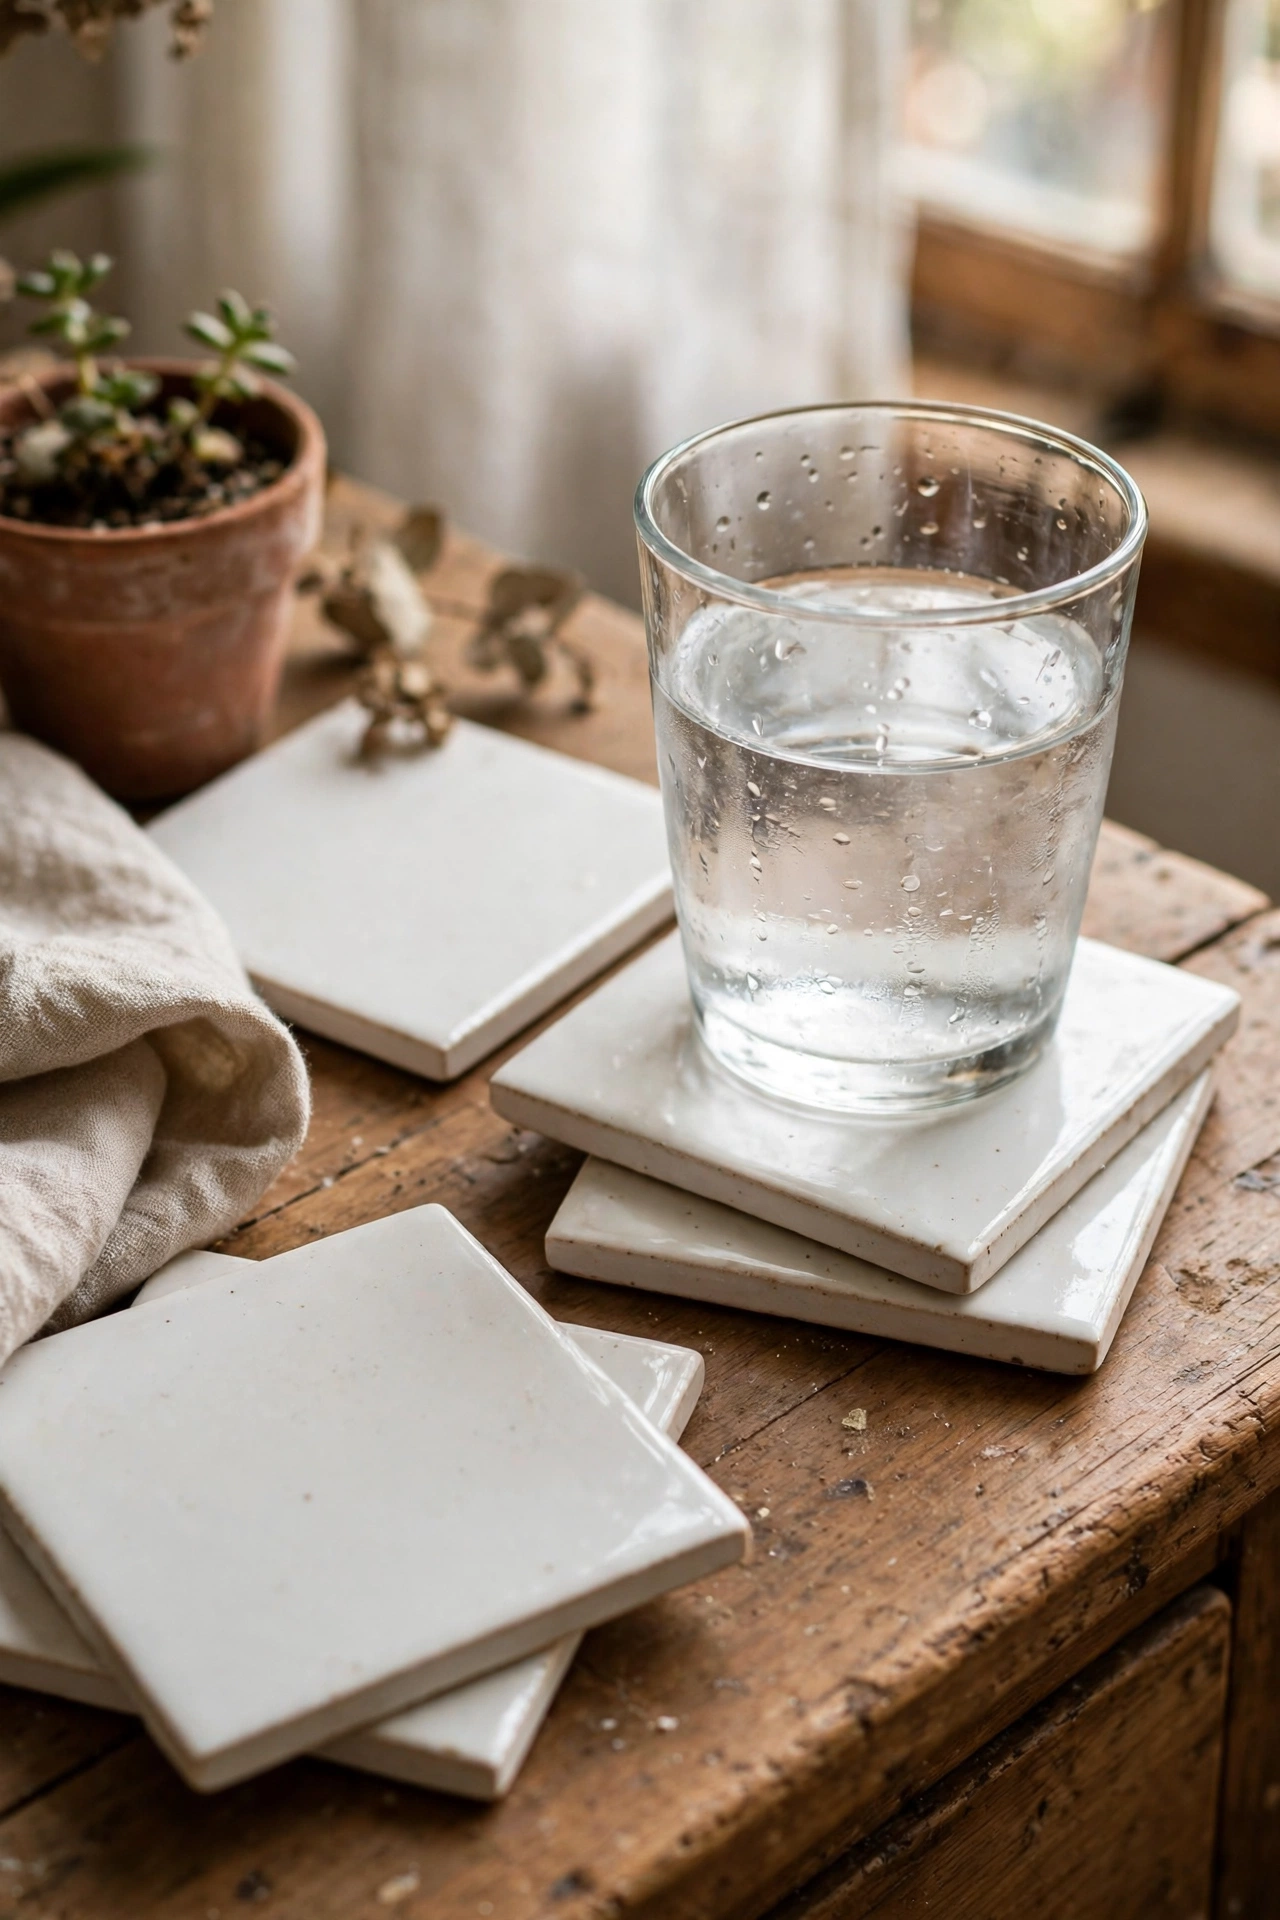
Handmade-look coasters from plain ceramic tiles cost pennies and protect the nightstand. I bought four white 10cm tiles for 80p each, stuck felt pads on the backs, and sealed the tops with clear matte spray. They look like minimalist stone coasters and they stop the dreaded water rings. My first batch slid around because I skipped the felt pads. The pads grip the surface and protect it at the same time. Ten minutes of work, and my nightstand finally has a proper home for the water glass.
Cost: ~$4-8 | Time: 20 minutes
Lamp and light upgrades: the fastest way to make the whole corner feel expensive.
6. Lampshade Swap in Linen or Pleated Fabric
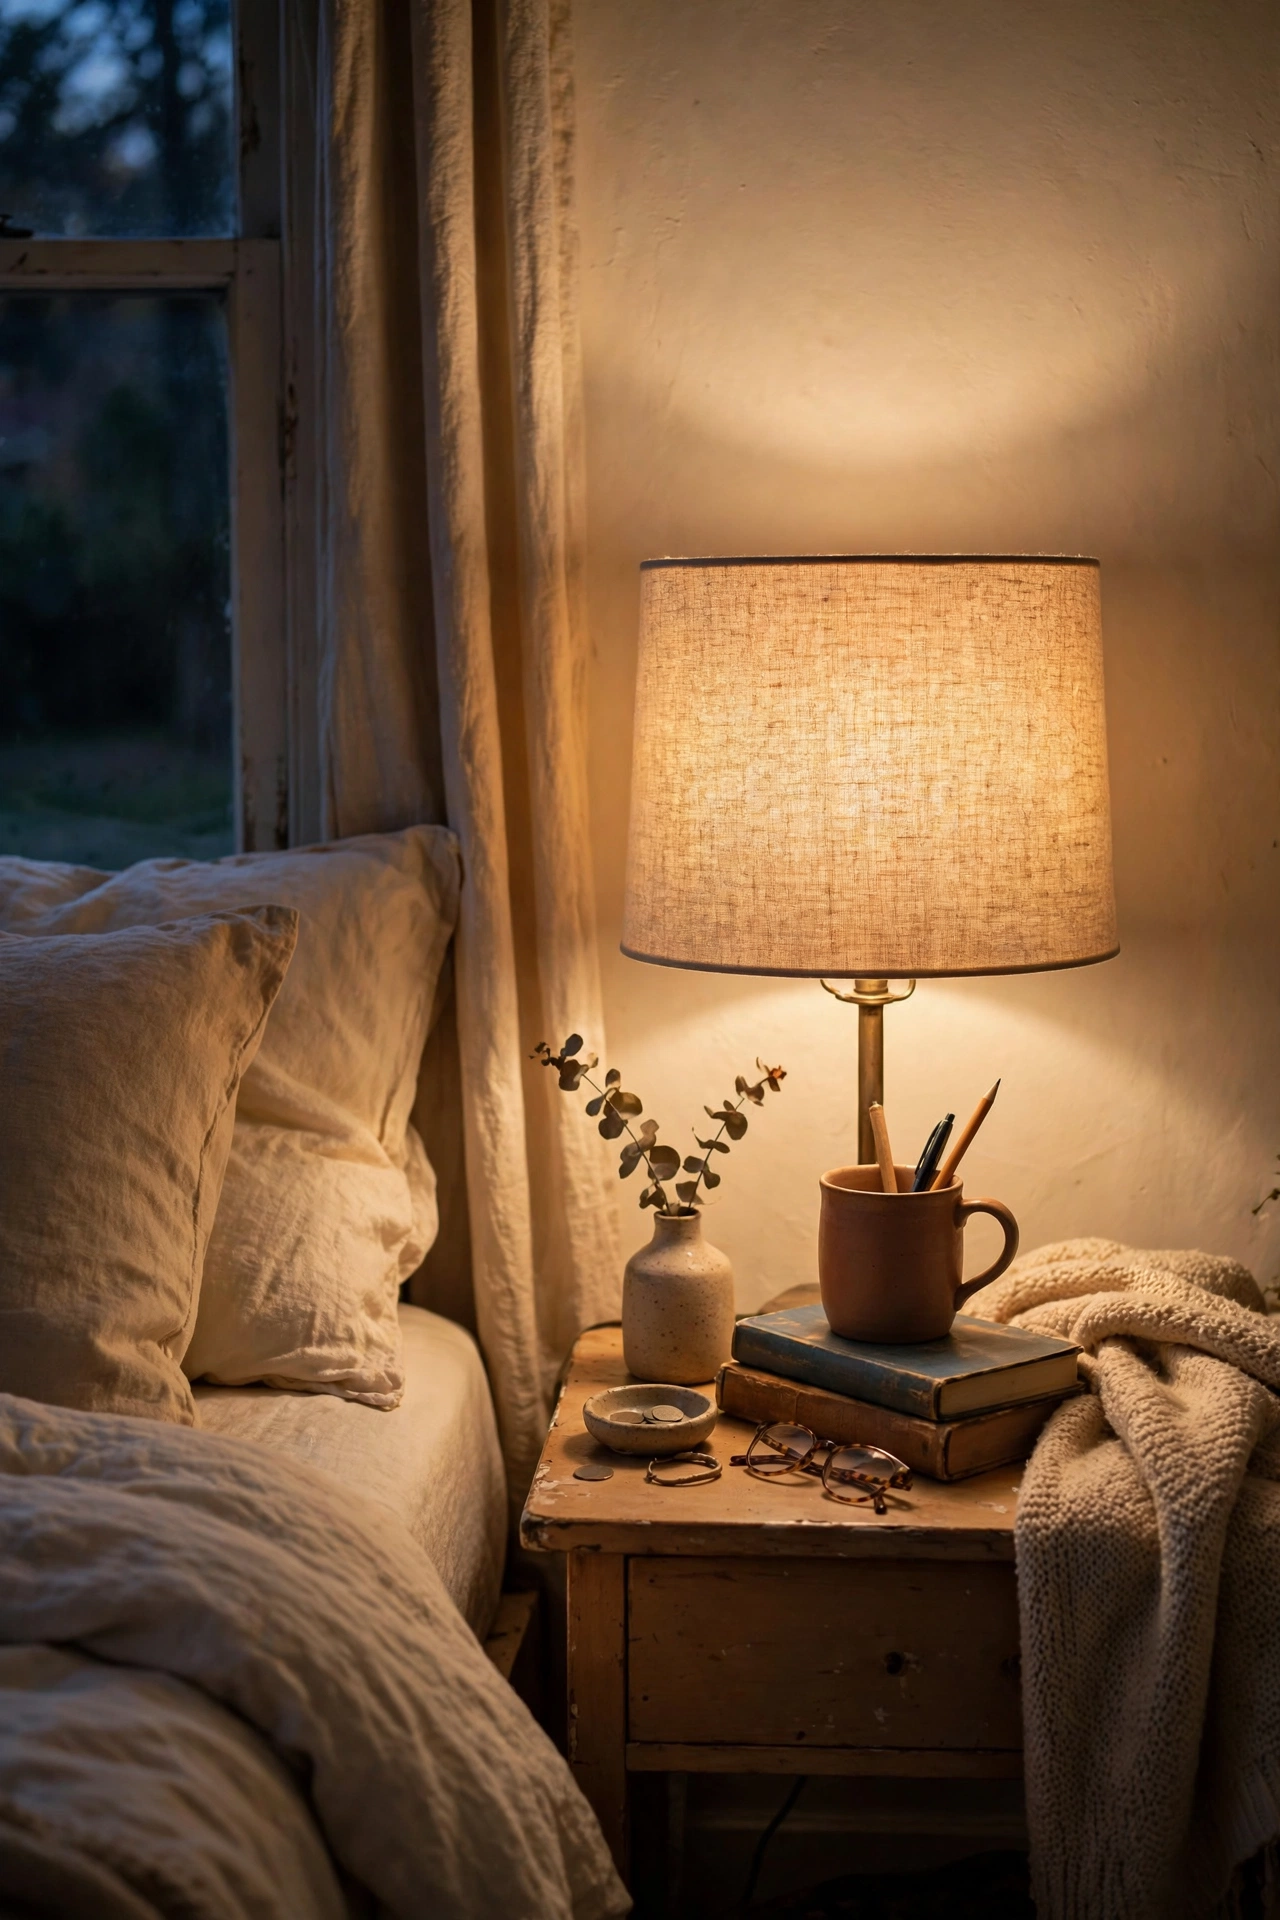
Swapping just the shade transforms a boring lamp without touching the wiring. I replaced my dated white shades with natural linen drums for $16 each, and the warm texture made my $10 lamp bases look boutique. Check the fitter type before buying: harp, spider, and clip-on fittings are not interchangeable, and I learned that the annoying way with a return trip. Measure top and bottom diameters so the proportions stay right. Ten minutes per lamp, and the evening light in my bedroom completely changed.
Cost: ~$14-20 | Time: 15 minutes
7. Plug-In Wall Sconce Instead of a Table Lamp
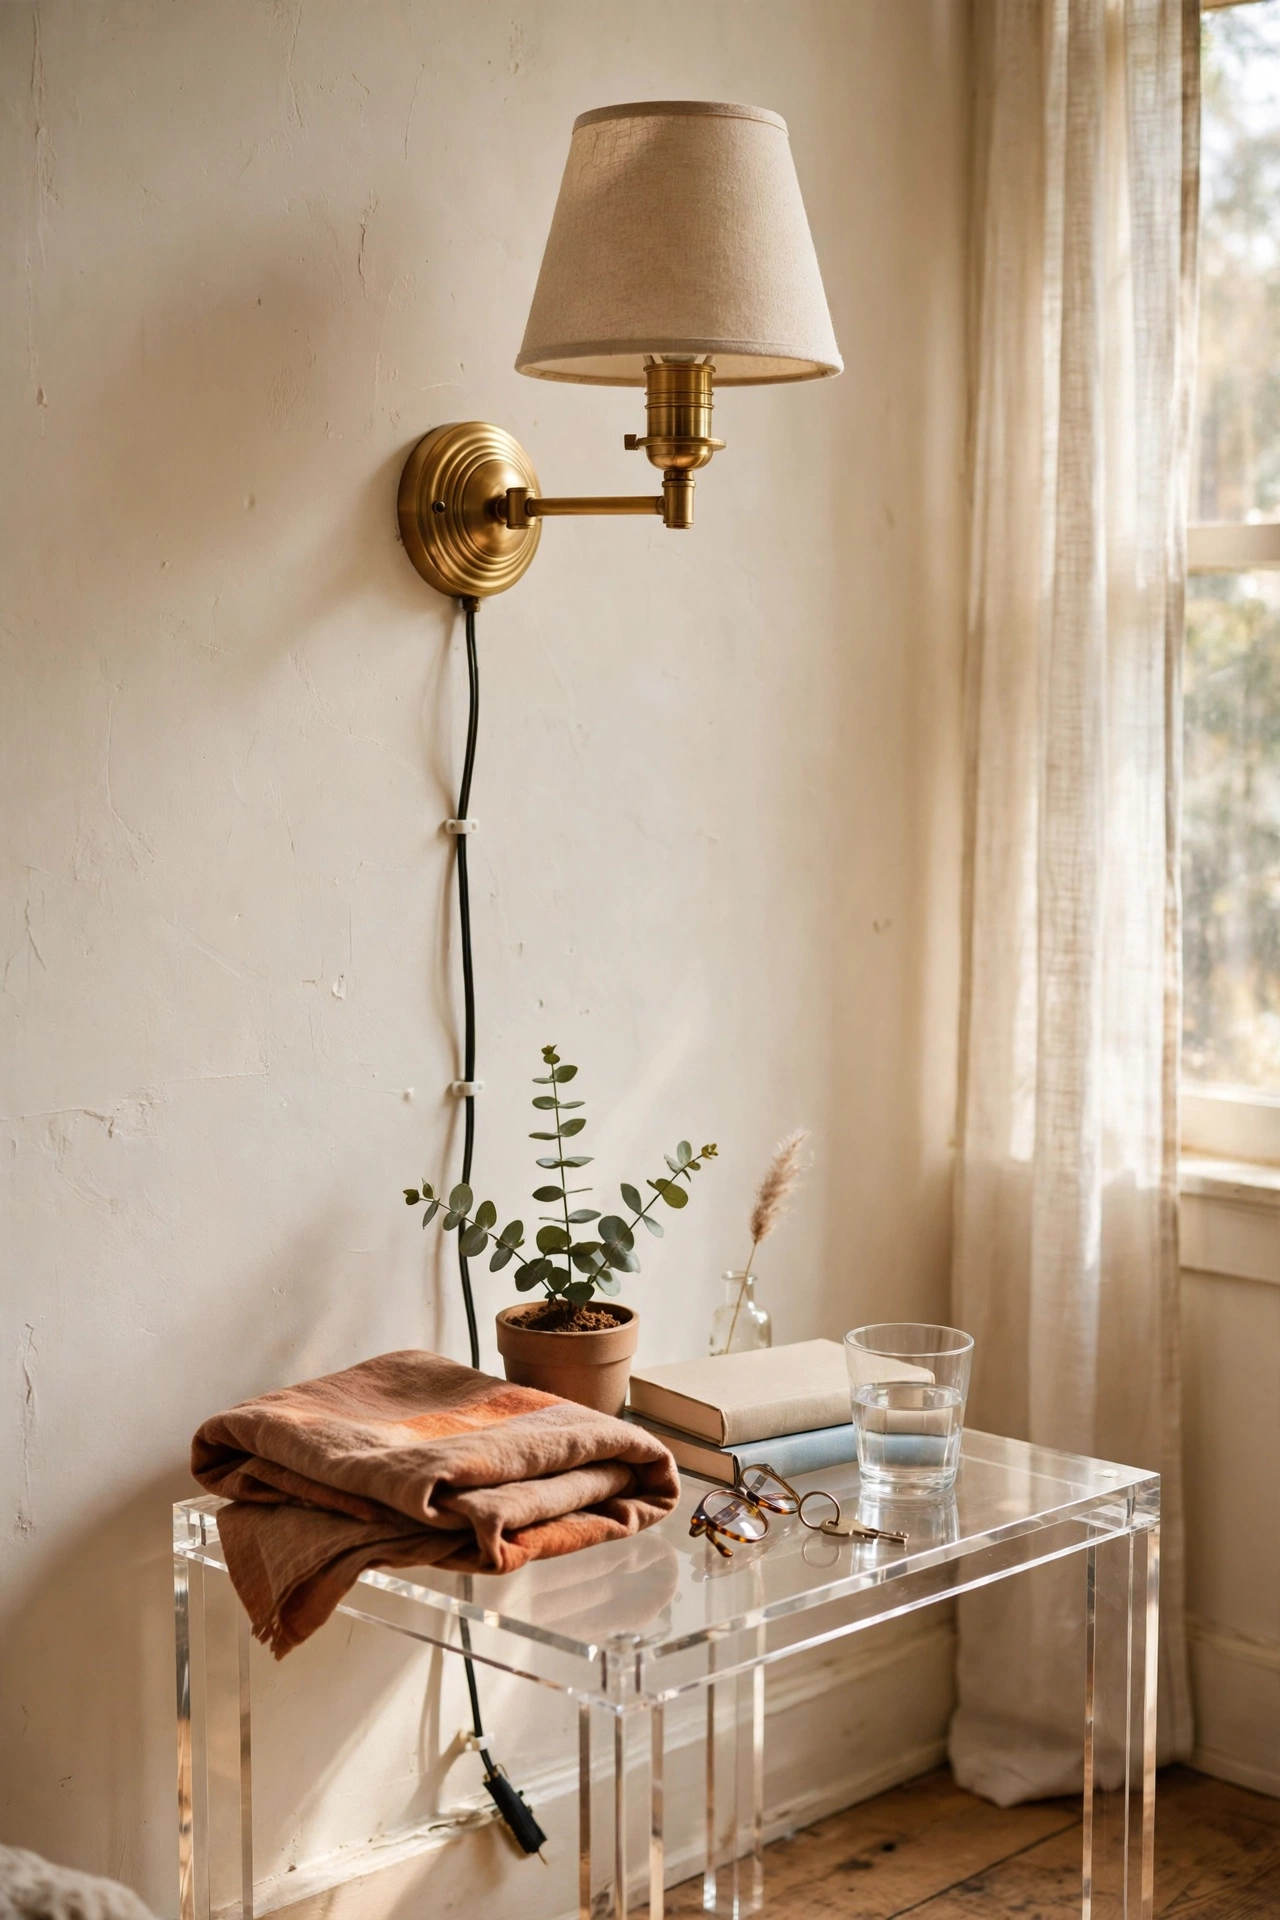
A plug-in wall sconce frees up the entire nightstand surface and looks incredibly high-end. I mounted a $24 brass plug-in sconce above each nightstand using the adhesive hooks rated for the weight, running the cord down behind the furniture with cord clips. No electrician, no holes that matter. Hang it about 140cm from the floor so the light pools over your reading spot. My first sconce hung too high and lit the ceiling instead of the bed. Dropping it 15cm made all the difference.
Cost: ~$20-30 | Time: 30 minutes
8. Clip-On Reading Light for Small Nightstands
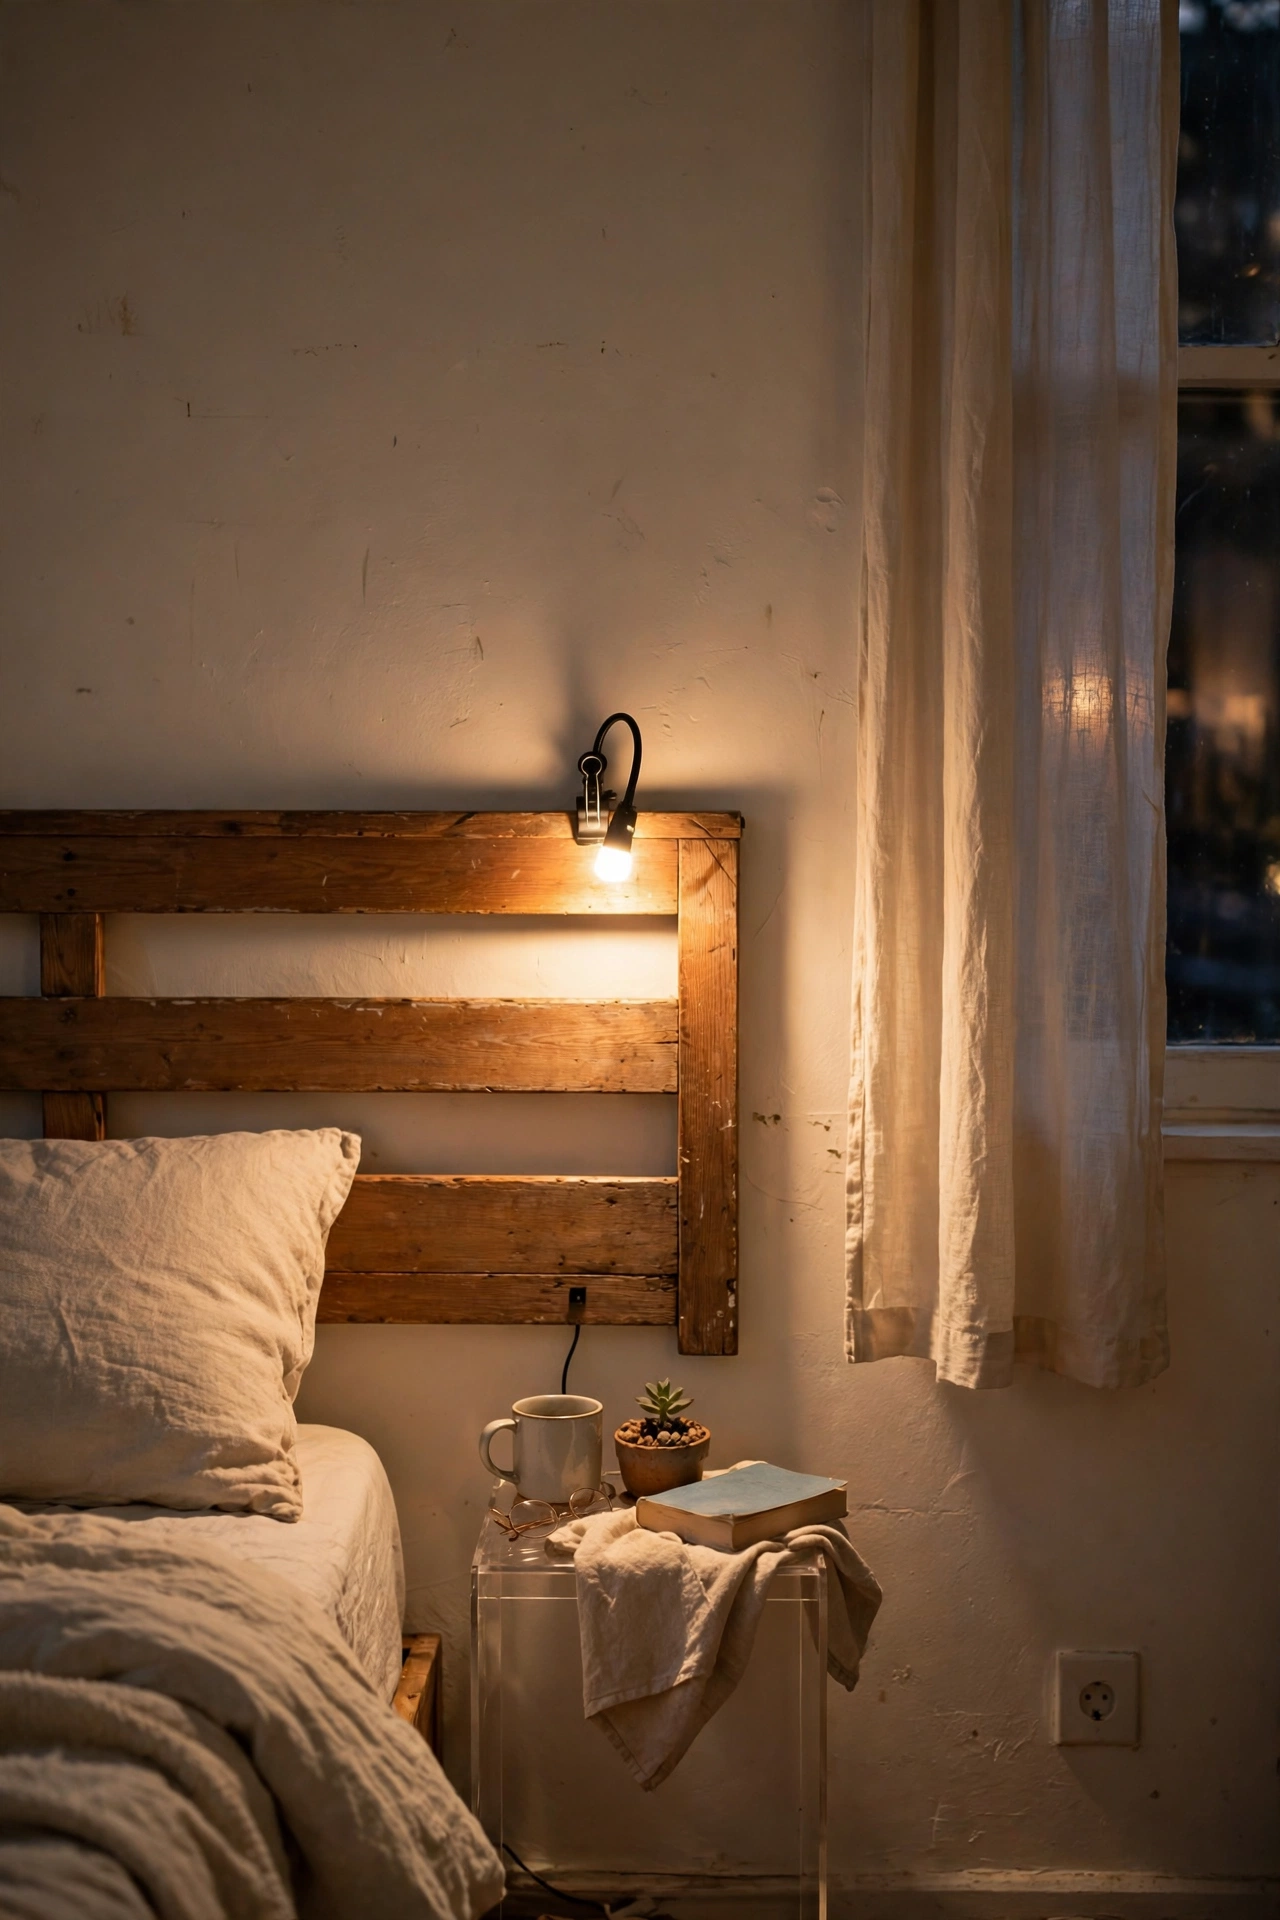
If your nightstand is tiny, skip the lamp entirely and clip a reading light to the headboard. I bought a $12 warm-white clip light with a flexible neck, and it gives perfect reading light while leaving the whole surface free. Choose warm white (2700K), because the cool-white ones make the bedroom feel like a hospital ward at night. Mine has three brightness levels, and the lowest is ideal for winding down. It recharges by USB, so there is no cord trailing across the nightstand.
Cost: ~$10-16 | Time: 5 minutes
9. Himalayan Salt Lamp for Warm Glow
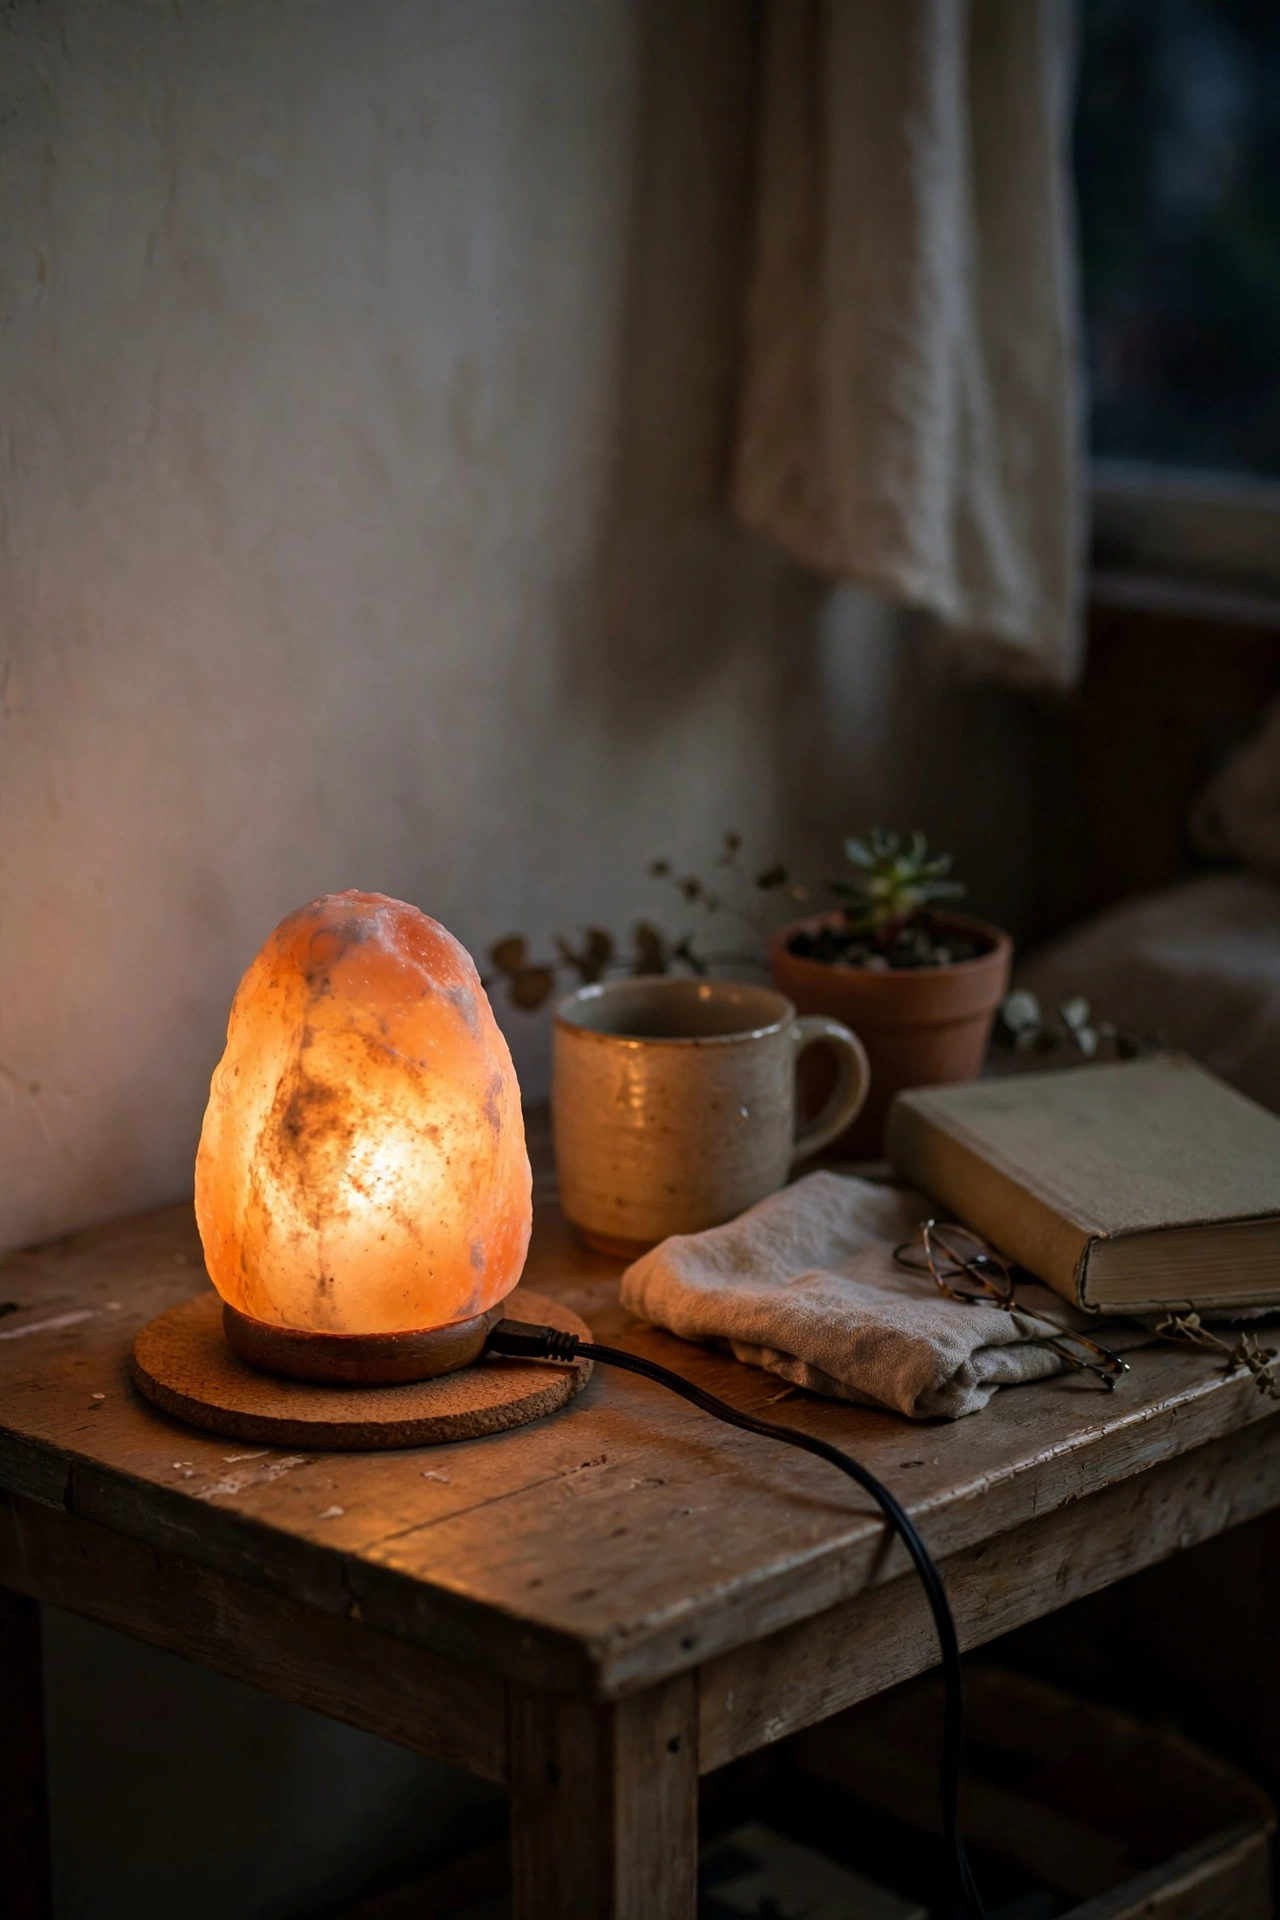
A small salt lamp gives the cosiest amber glow of anything on this list. I put a $14 mini salt lamp on my nightstand, and on its dimmest setting it is the perfect nightlight that does not wreck your sleep. Keep it on a coaster or tray, because salt lamps weep slightly in humid weather and can mark wood. I learned that from a pale ring on my old nightstand. A $2 cork coaster underneath solved it permanently. It doubles as decor by day and gentle light by night.
Cost: ~$12-18 | Time: 5 minutes
10. Thrifted Lamp Base with a New Shade
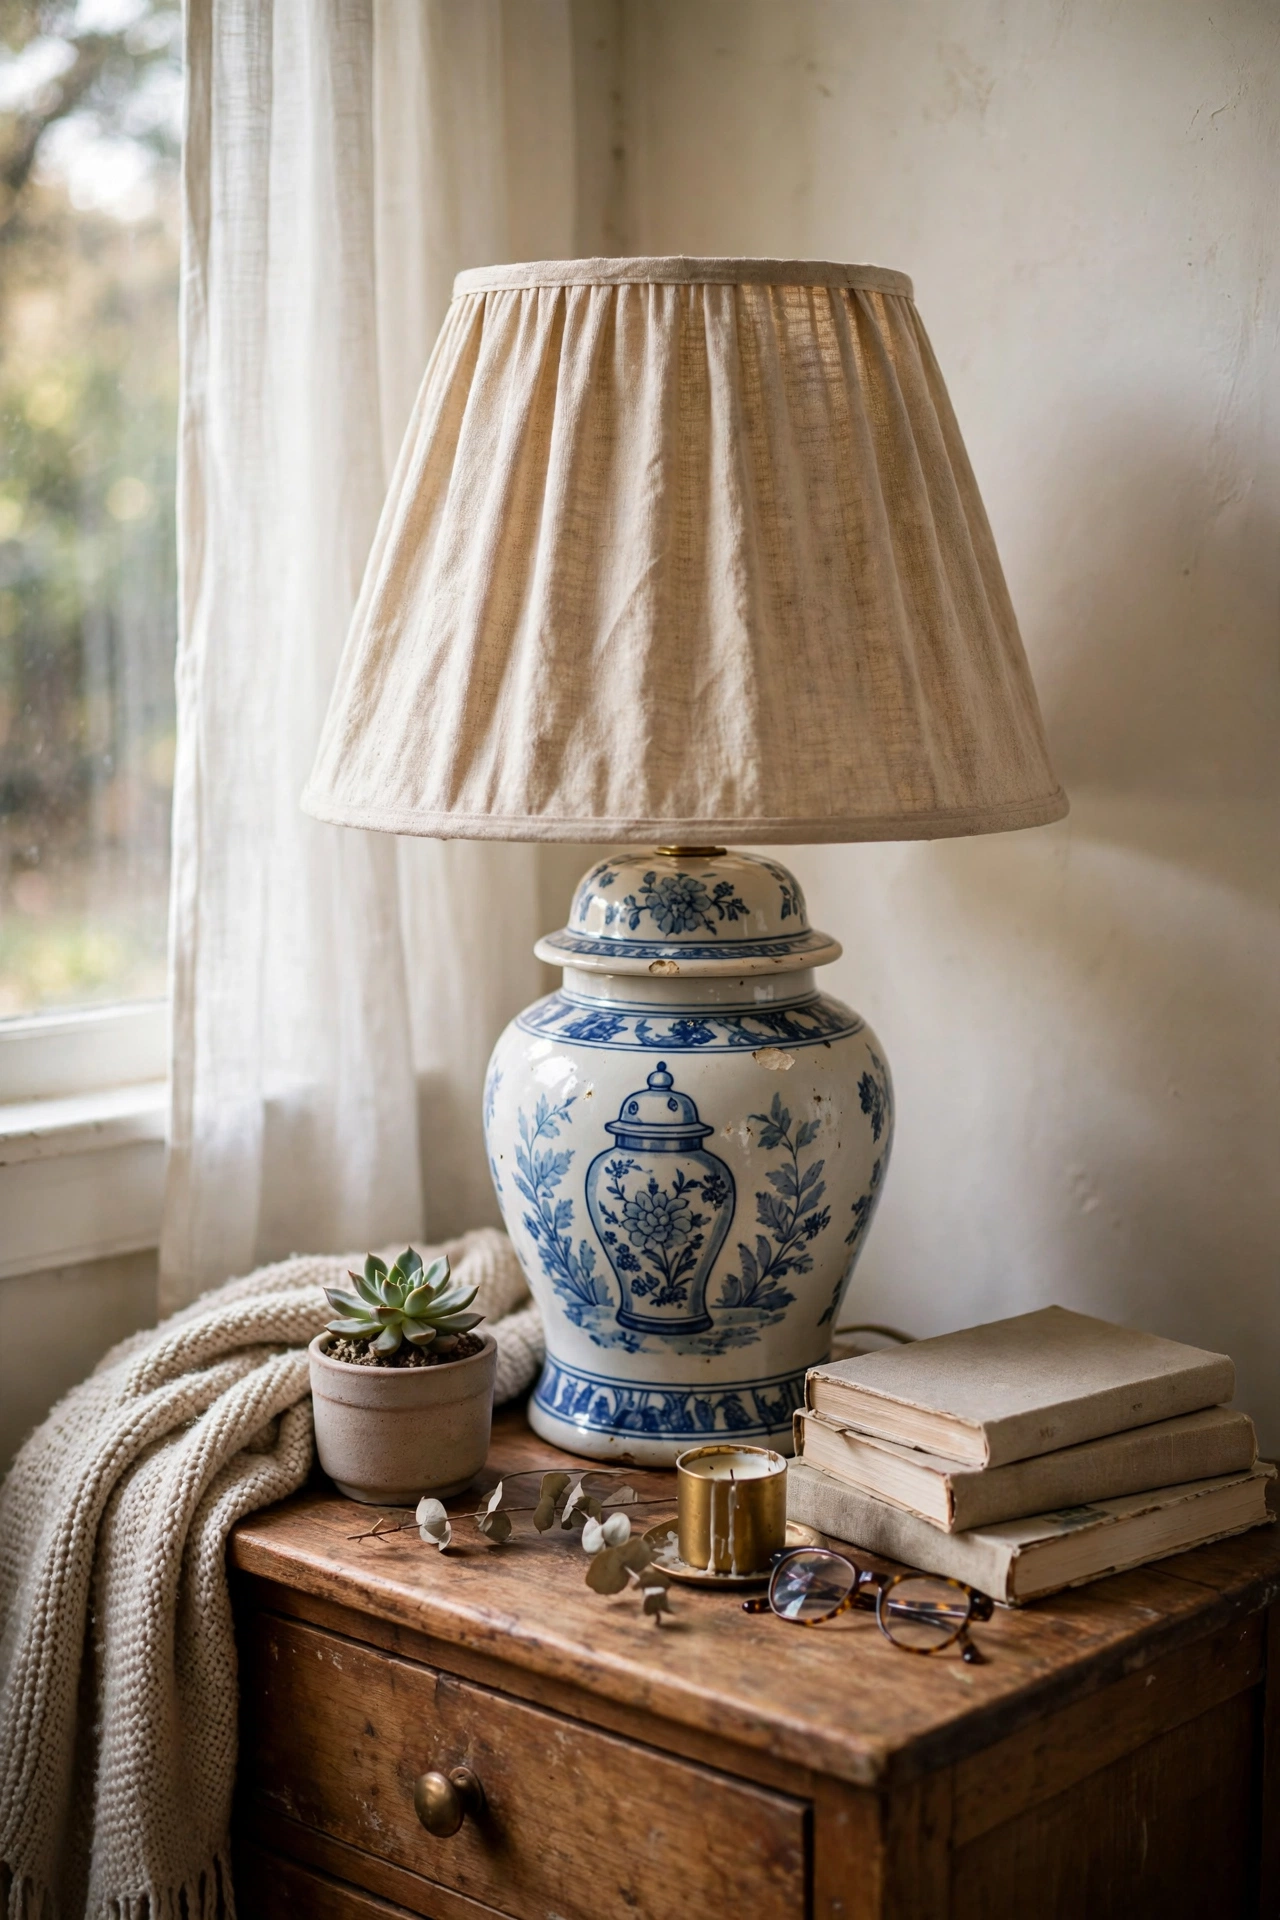
The thrift-store lamp formula never fails: interesting old base plus brand-new shade equals expensive-looking lamp. I found a ceramic ginger-jar base for $6, rewired nothing because the cord was sound, and topped it with a $16 linen shade. Always test a thrifted lamp in the shop if they will let you, and check the cord for cracks. My first find had a frayed cord I did not spot until home. A $4 replacement cord and twenty minutes fixed it, but inspecting first is smarter.
Cost: ~$18-28 | Time: 30 minutes
Storage and organisation: hide the clutter so the styling can shine.
11. Drawer Dividers for the Nightstand Drawer
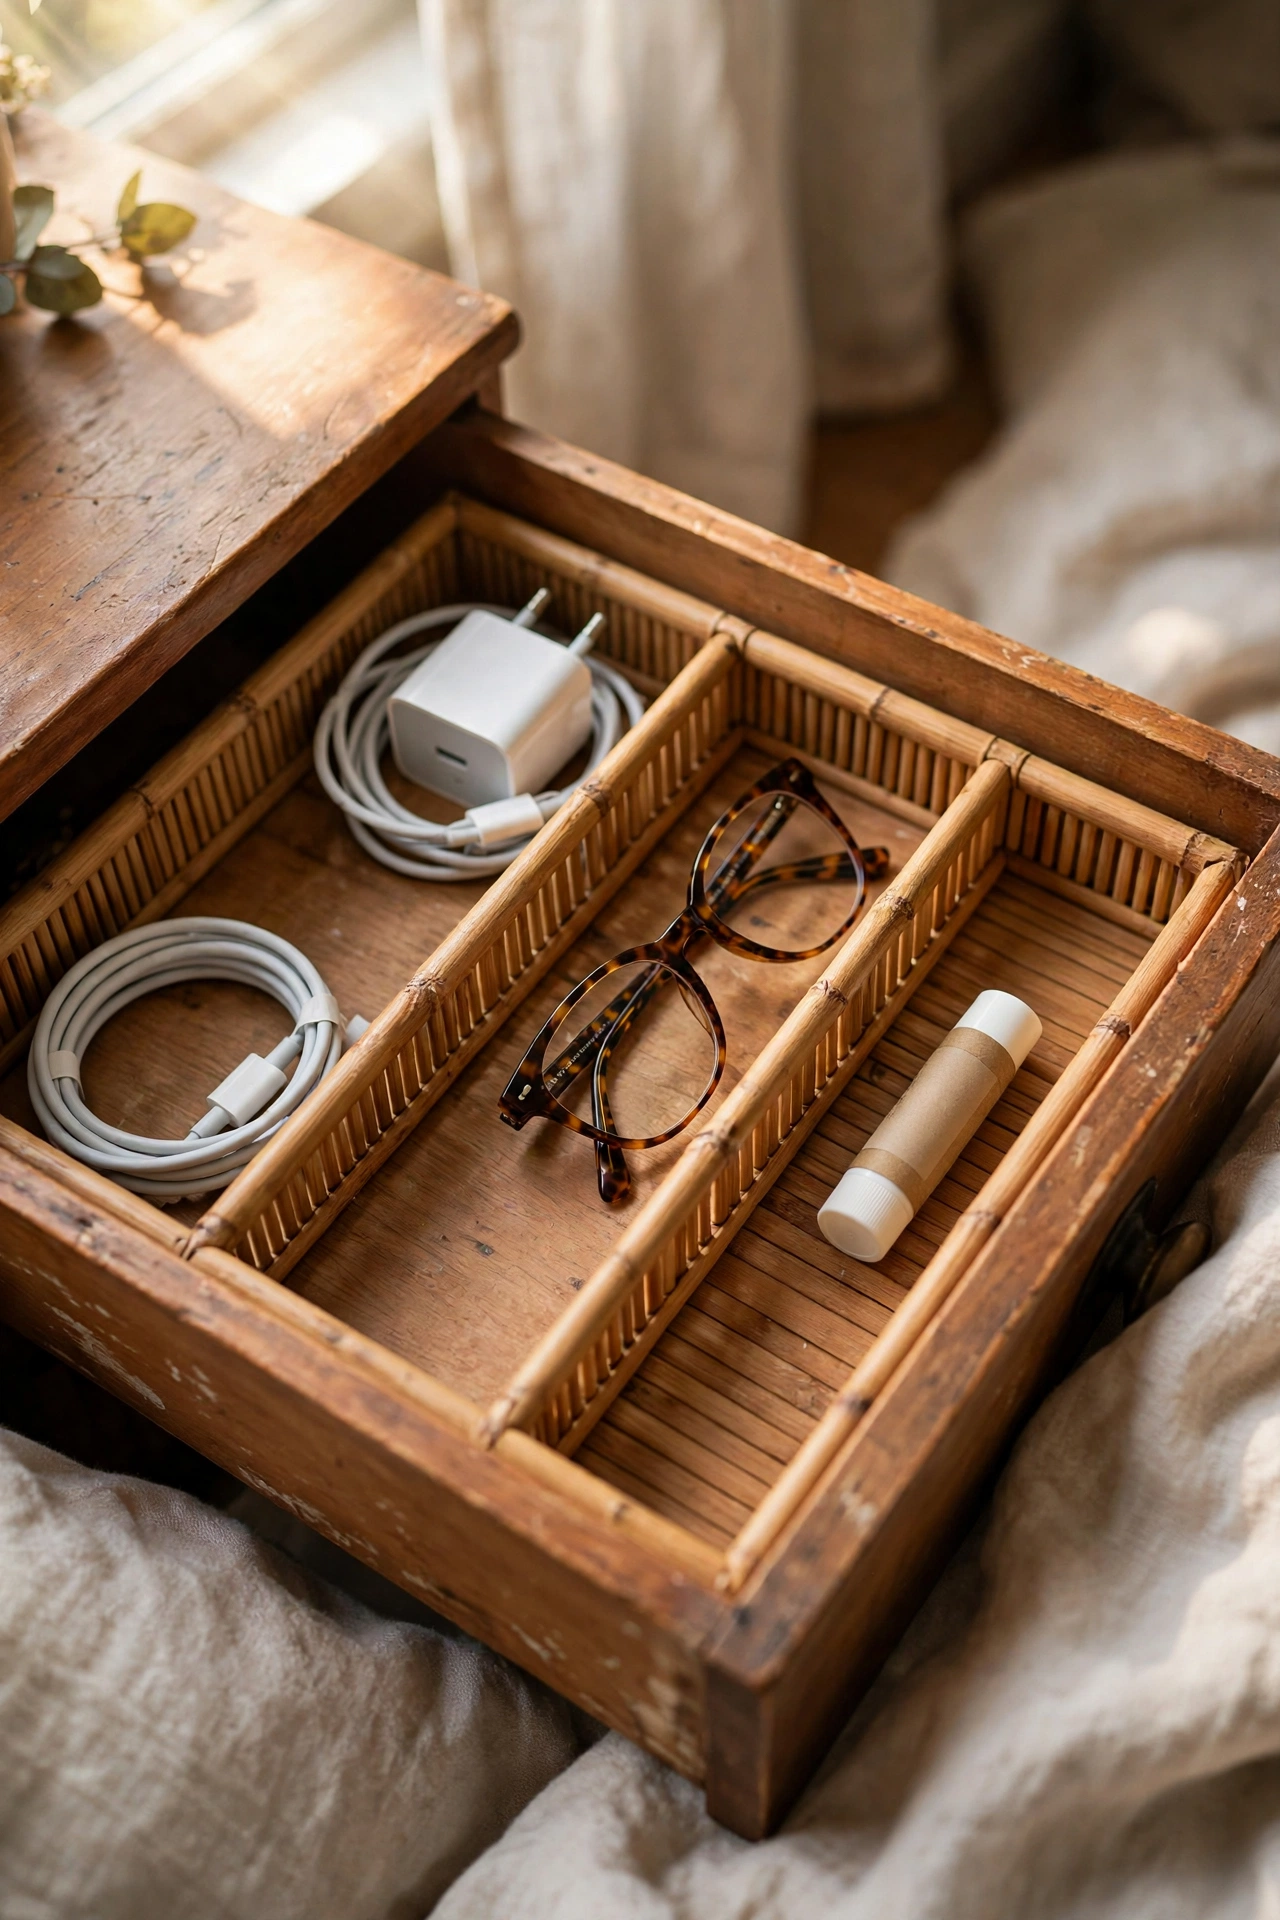
Drawer dividers turn the nightstand drawer from a junk pit into actual storage. I bought a $9 set of adjustable bamboo dividers and gave everything a zone: chargers, lip balm, reading glasses, journal. Measure your drawer depth before buying, because standard dividers are too tall for shallow nightstand drawers. Mine stuck up and stopped the drawer closing until I swapped to the low-profile set. Ten minutes of sorting, and I can find my glasses in the dark now without the 2am drawer rummage.
Cost: ~$8-14 | Time: 20 minutes
12. Catch-All Dish for Jewellery and Keys
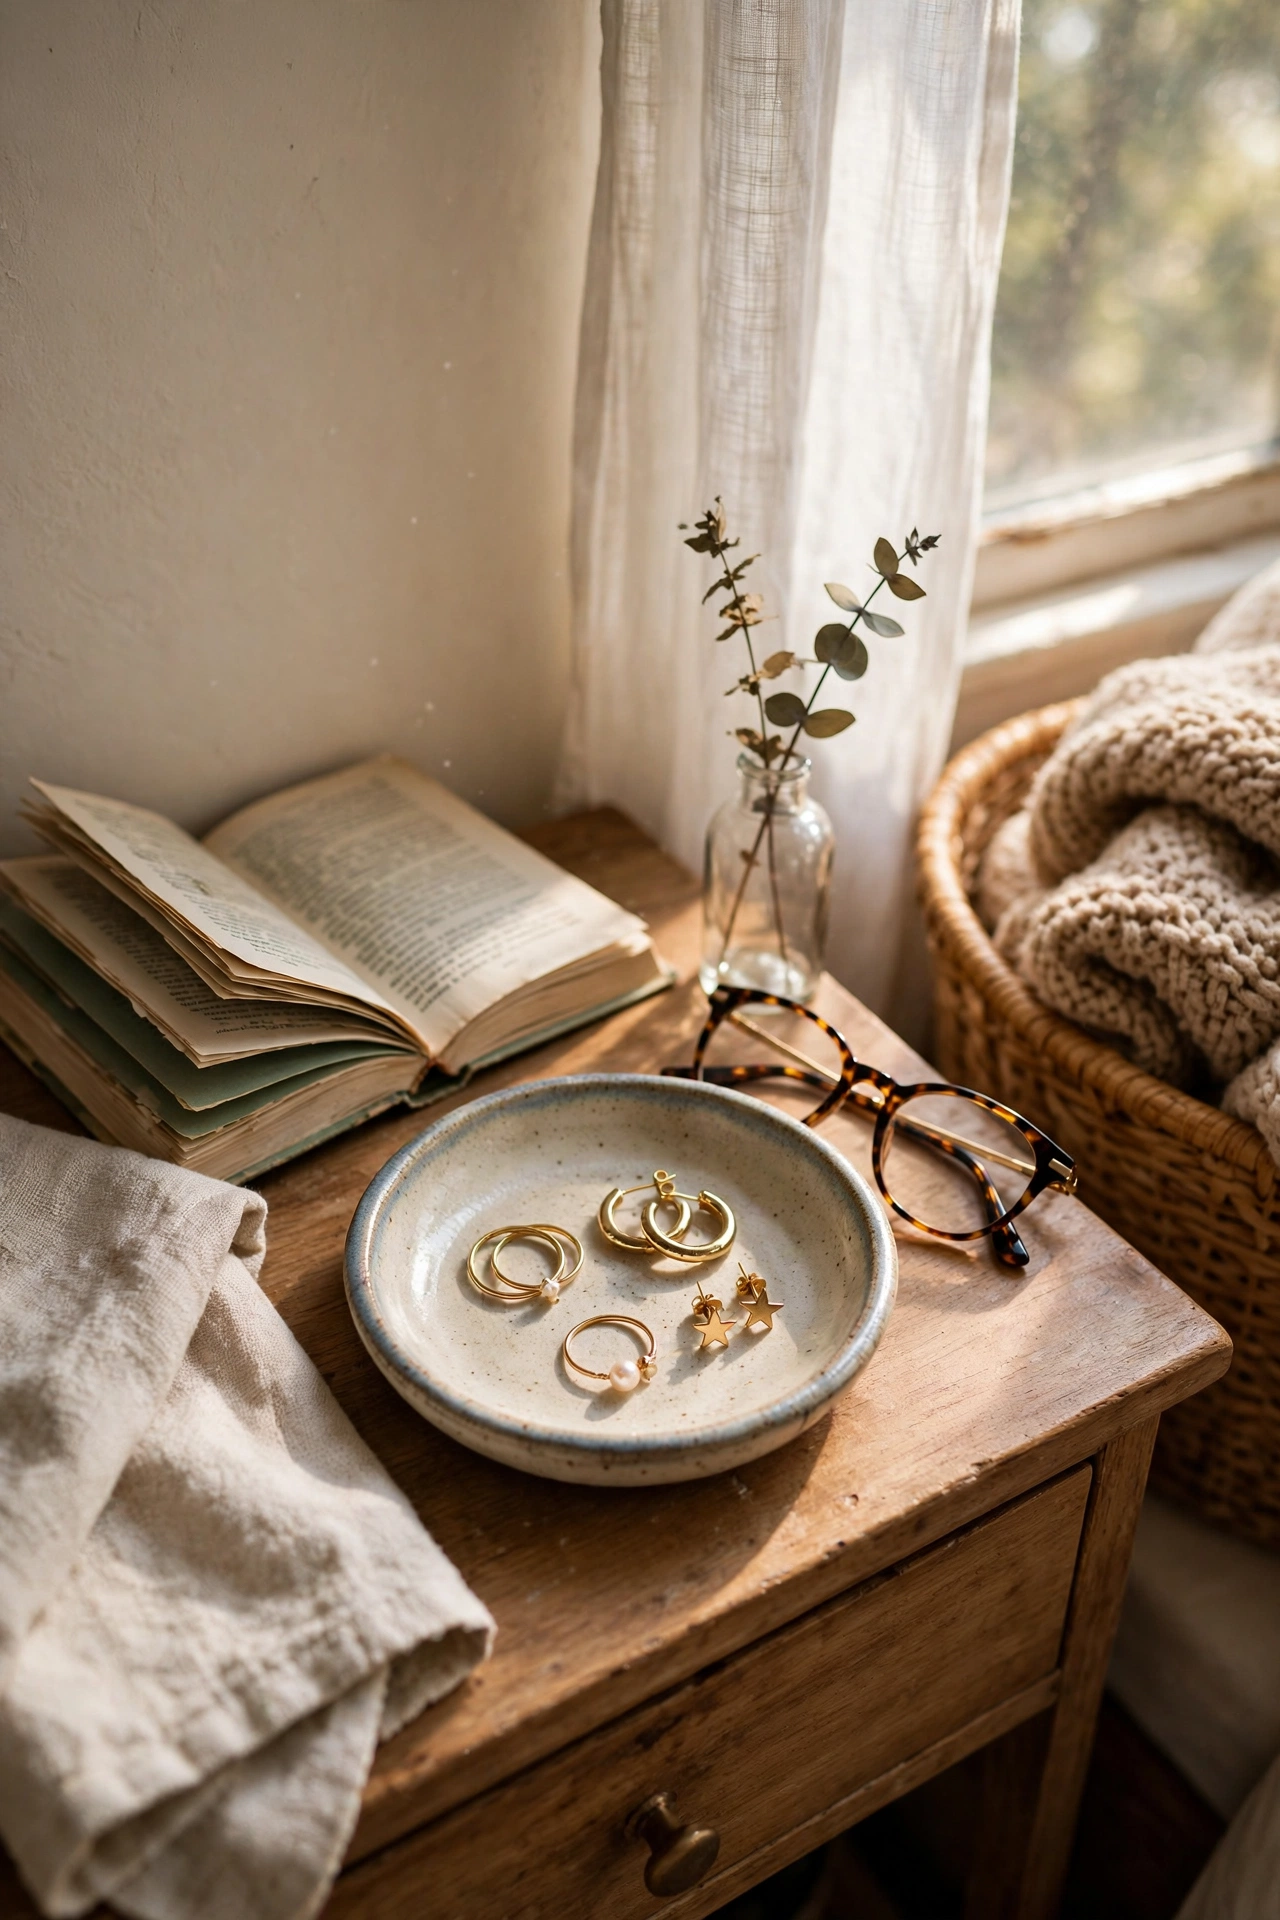
A little catch-all dish stops rings, earrings, and hair ties migrating across the nightstand. I found a small ceramic dish at a flea market for $4, and everything I take off at night now lands in one spot. Place it on the side nearest your dominant hand so using it becomes automatic. Mine sat on the far side for a month and I never used it. Moving it six inches closer changed the habit overnight. It looks like decor and works like an organiser.
Cost: ~$3-8 | Time: 5 minutes
13. Hidden Charging Drawer with a Cable Hole
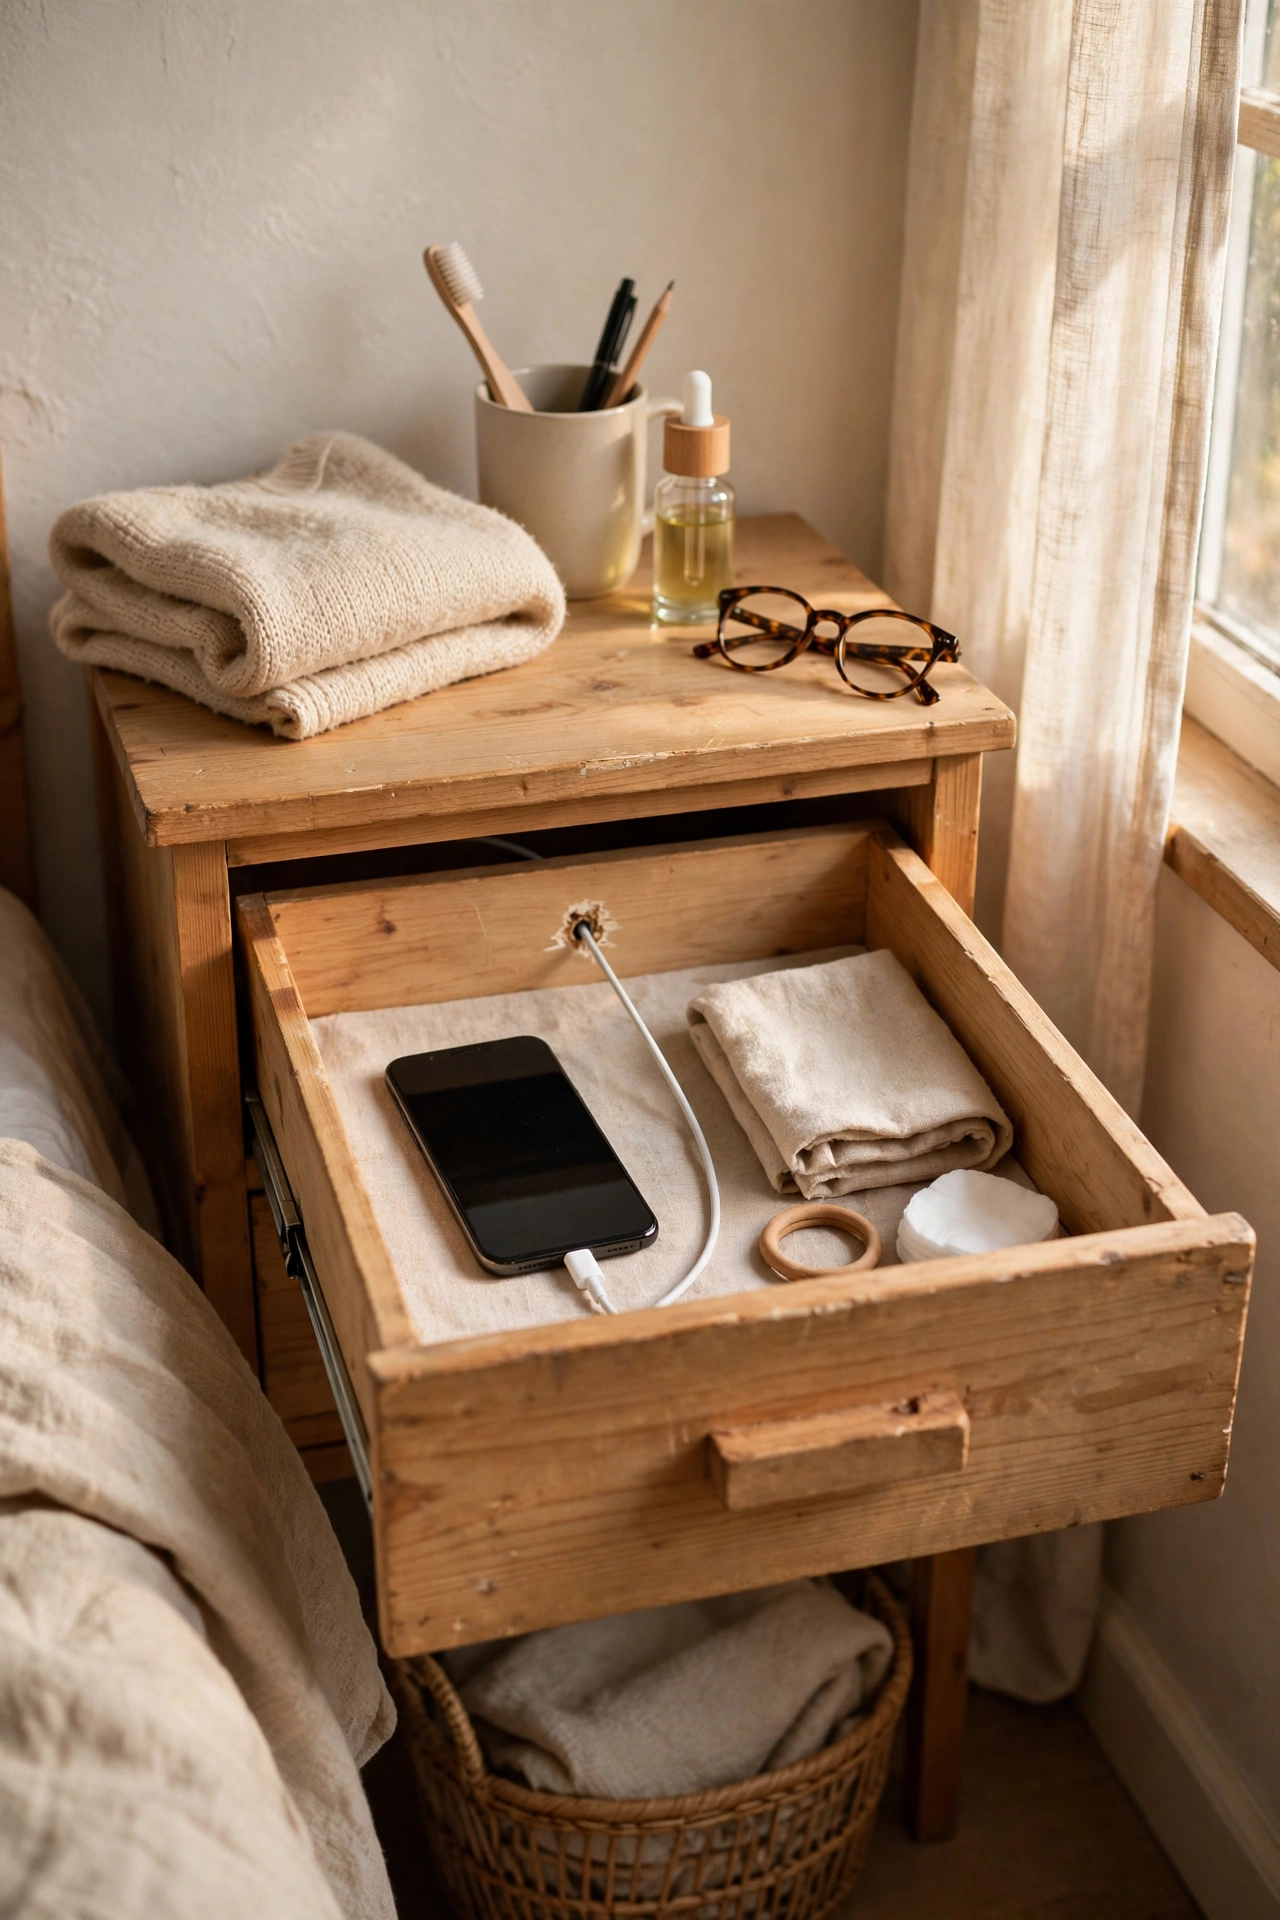
Drilling one small hole in the back of the nightstand drawer hides every charger. I drilled a 4cm hole, fed a short extension lead through it, and now my phone charges inside the closed drawer with zero cable spaghetti on top. Unplug the lamp first and check nothing is behind the drilling spot, obviously. My first hole was too close to the drawer runner and the cable caught. Moving it 5cm sideways fixed it. The nightstand surface is finally, blissfully cable-free.
Cost: ~$8-14 | Time: 30 minutes
Pro tip: Pro tip from my own nightstands: style in odd numbers and leave one-third of the surface empty. Three items grouped tight plus breathing room always looks more expensive than five items spread edge to edge. I photograph my nightstand after every restyle, and the empty-space versions win every single time.
14. Stacked Vintage Suitcases as a Nightstand
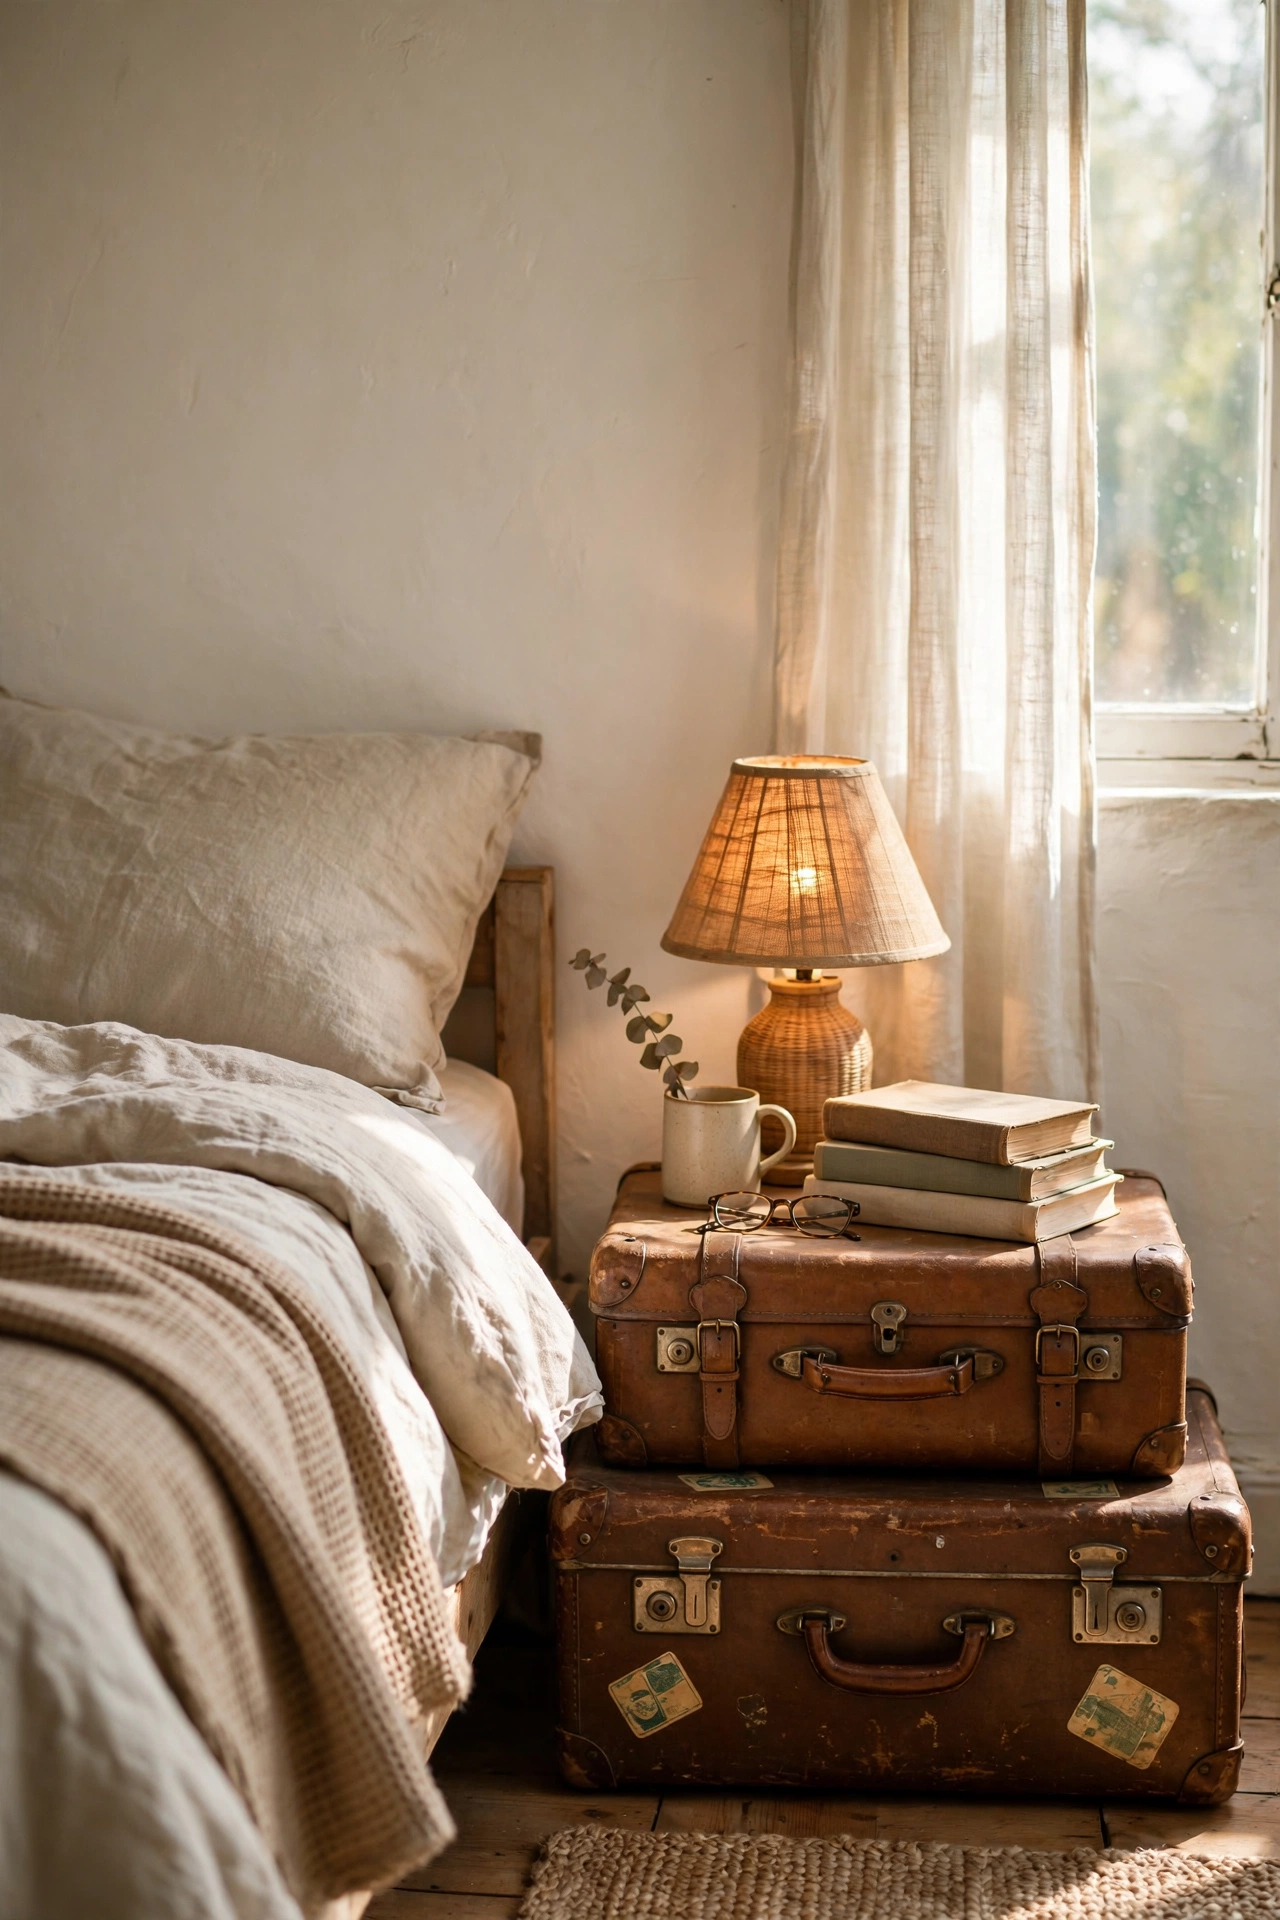
Two stacked vintage suitcases work as a nightstand with secret storage inside. I found two for $10 each at a car boot sale, stacked them beside the bed, and topped them with my lamp. The top case holds out-of-season scarves, the bottom one spare bedding. Check the stack is stable before loading it up, because domed lids wobble. Mine needed a non-slip mat between the cases. Wipe them down and air them out first, because old cases can smell musty. It looks like a styling choice and hides a shocking amount of stuff.
Cost: ~$18-28 | Time: 15 minutes
15. Woven Basket Under the Nightstand
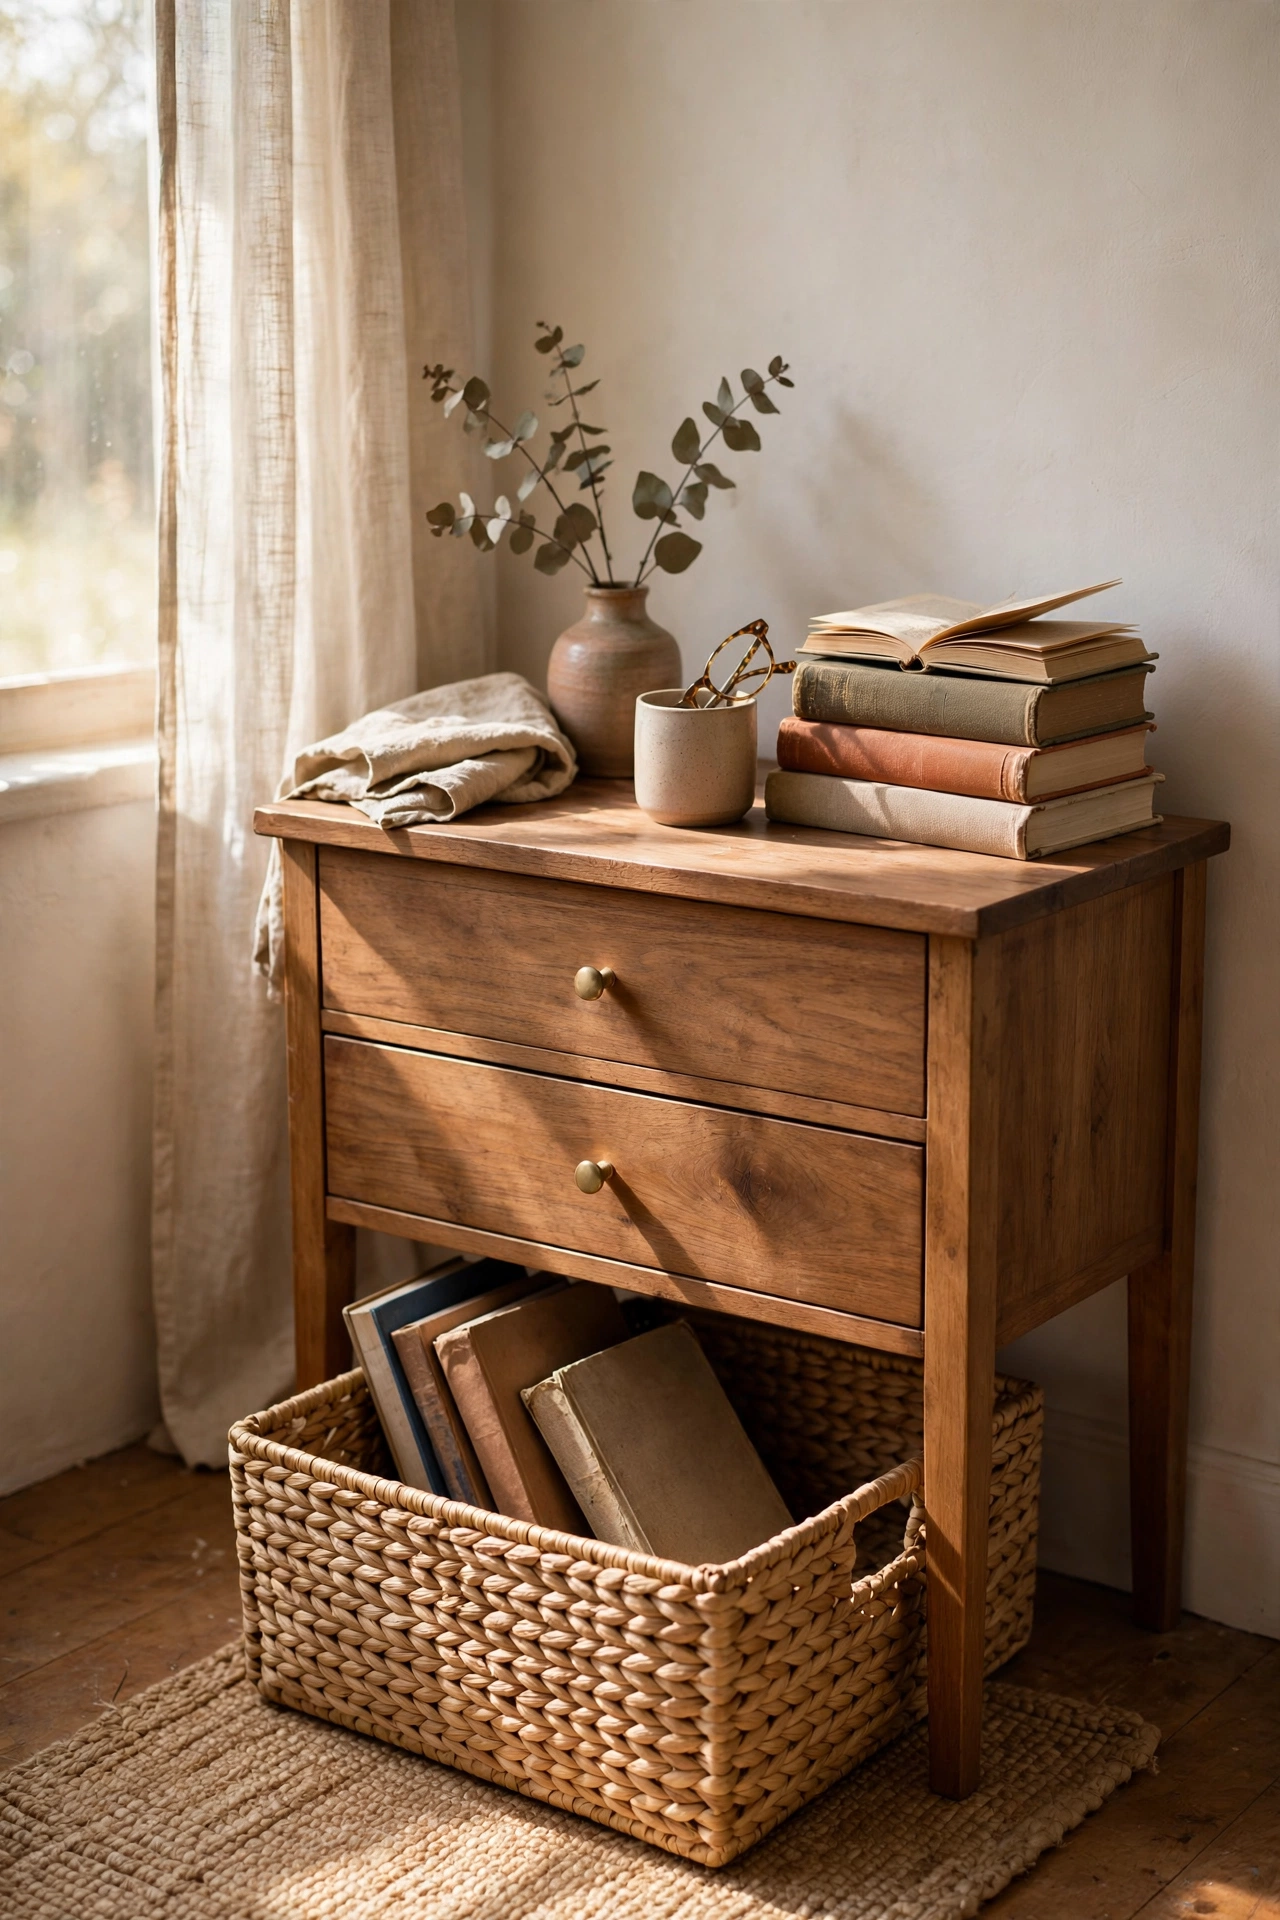
A flat woven basket slid under the nightstand swallows the overflow: chargers, notebooks, the book you are actually reading. I bought a seagrass basket for $12 that fits exactly in the leg gap of my nightstand. Measure the gap before you buy, because baskets come in maddeningly similar-but-wrong sizes. My first one was 3cm too tall and would not slide in. The right size disappears under there and keeps the floor around the bed clear. Function you cannot see is the best kind.
Cost: ~$10-16 | Time: 5 minutes
Bigger statement moves: rethink the nightstand itself.
16. Wall-Mounted Shelf as a Floating Nightstand
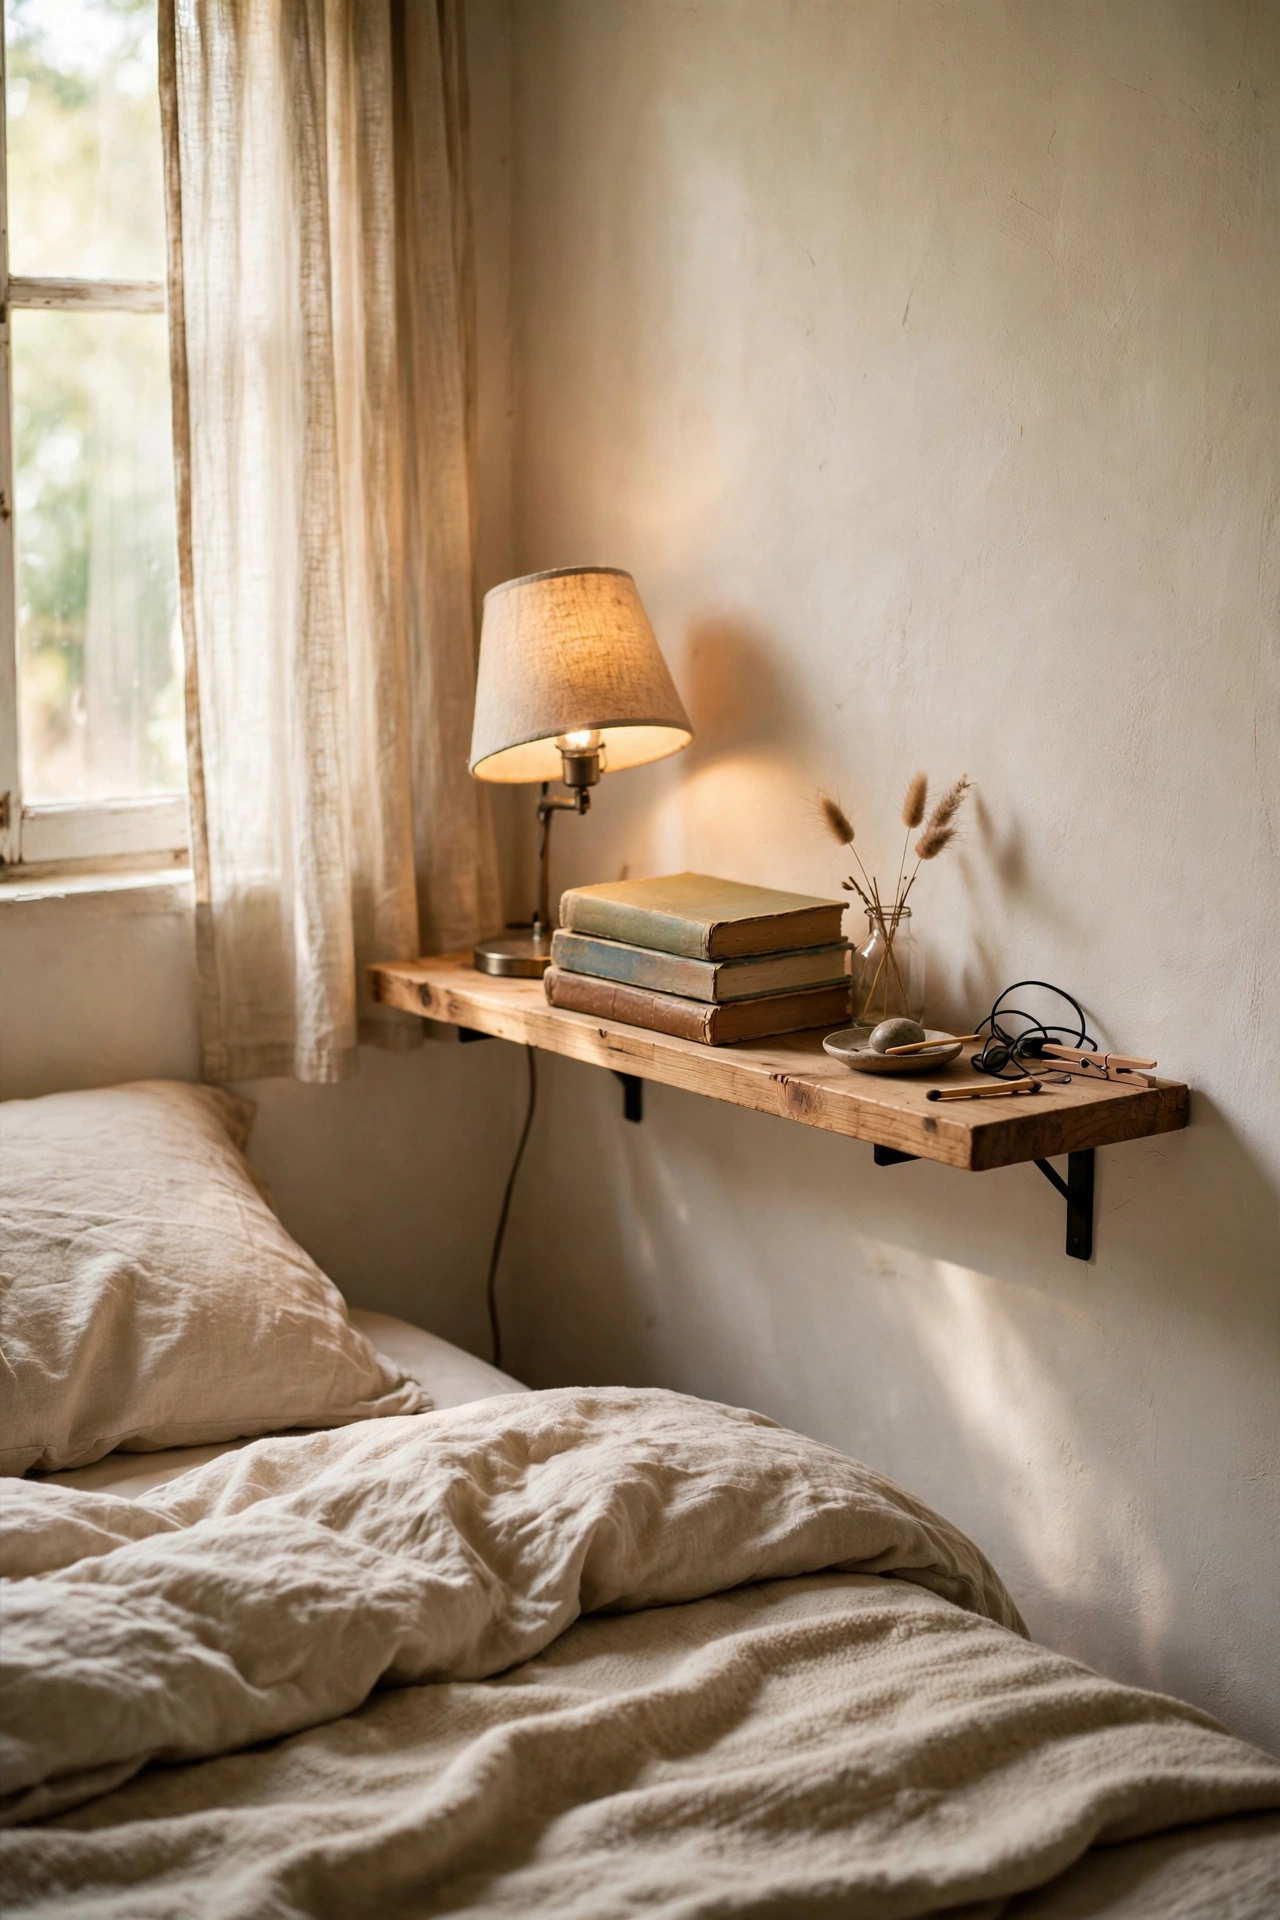
A wall-mounted shelf as a nightstand looks custom and frees up floor space, which makes small bedrooms feel bigger. I mounted a $14 solid oak-look shelf at mattress height beside the bed, using proper wall anchors into a stud. The styling rule: lamp on one side, small stack of books on the other, nothing in the middle. My first attempt overloaded it and the shelf sagged within a week. Two items plus a bud vase is the maximum. Use a level, because a sloping shelf ruins the whole floating effect.
Cost: ~$12-20 | Time: 45 minutes
17. Vintage Wooden Stool as a Nightstand
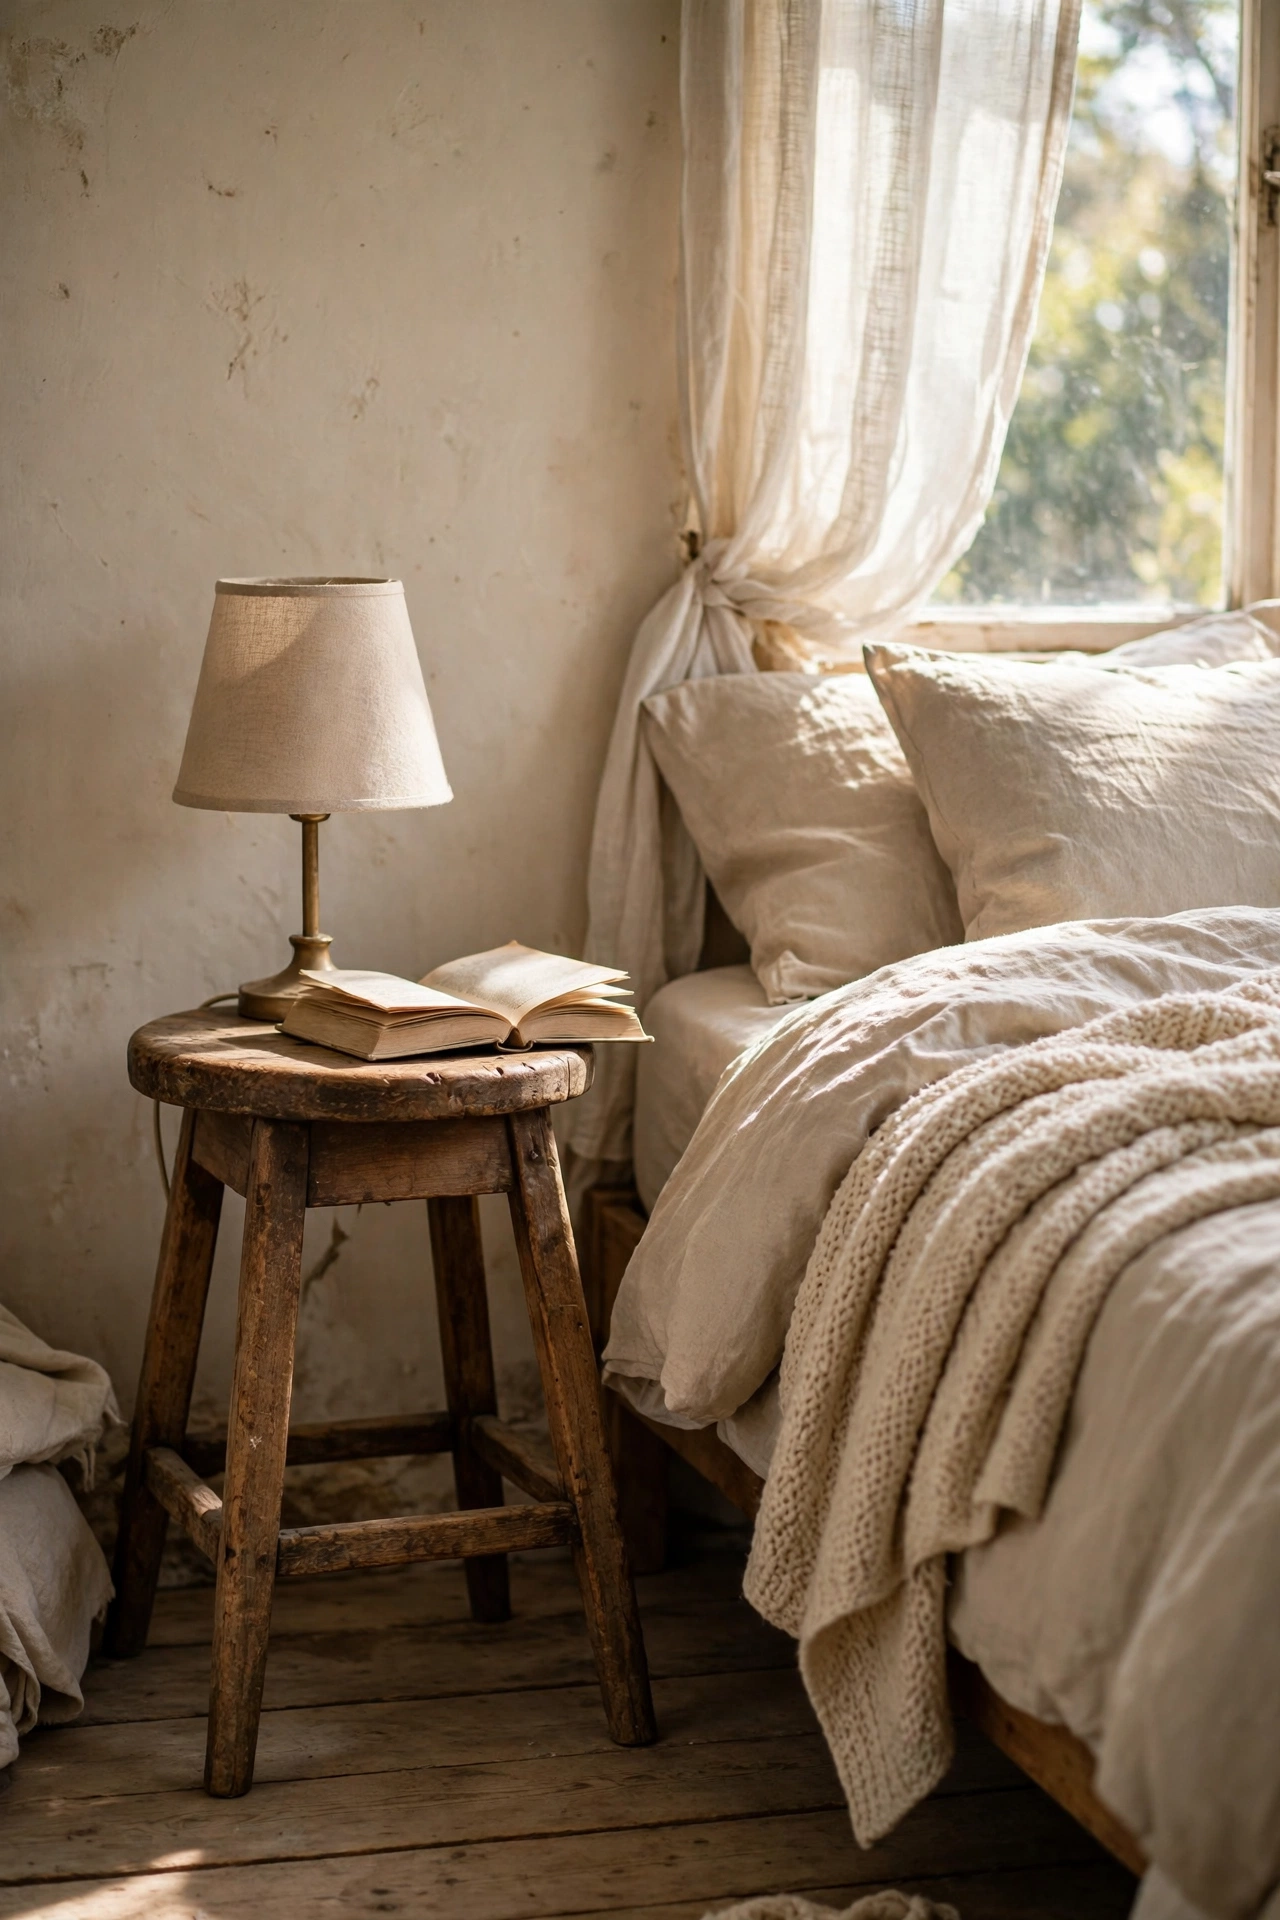
A sturdy wooden stool makes a characterful nightstand for less than any furniture-shop option. I bought a $12 milking-style stool at a flea market, sanded it smooth, and sealed it with clear wax. Check it is roughly mattress height, within 10cm either way, or reaching for your water gets annoying. Mine was too low at first and I kept knocking things reaching down. A thicker cushion-free seat swap was not needed, I just found a taller stool. The round top forces you to keep styling minimal, which is a feature.
Cost: ~$10-18 | Time: 1 hour
18. DIY Wooden Crate Nightstand
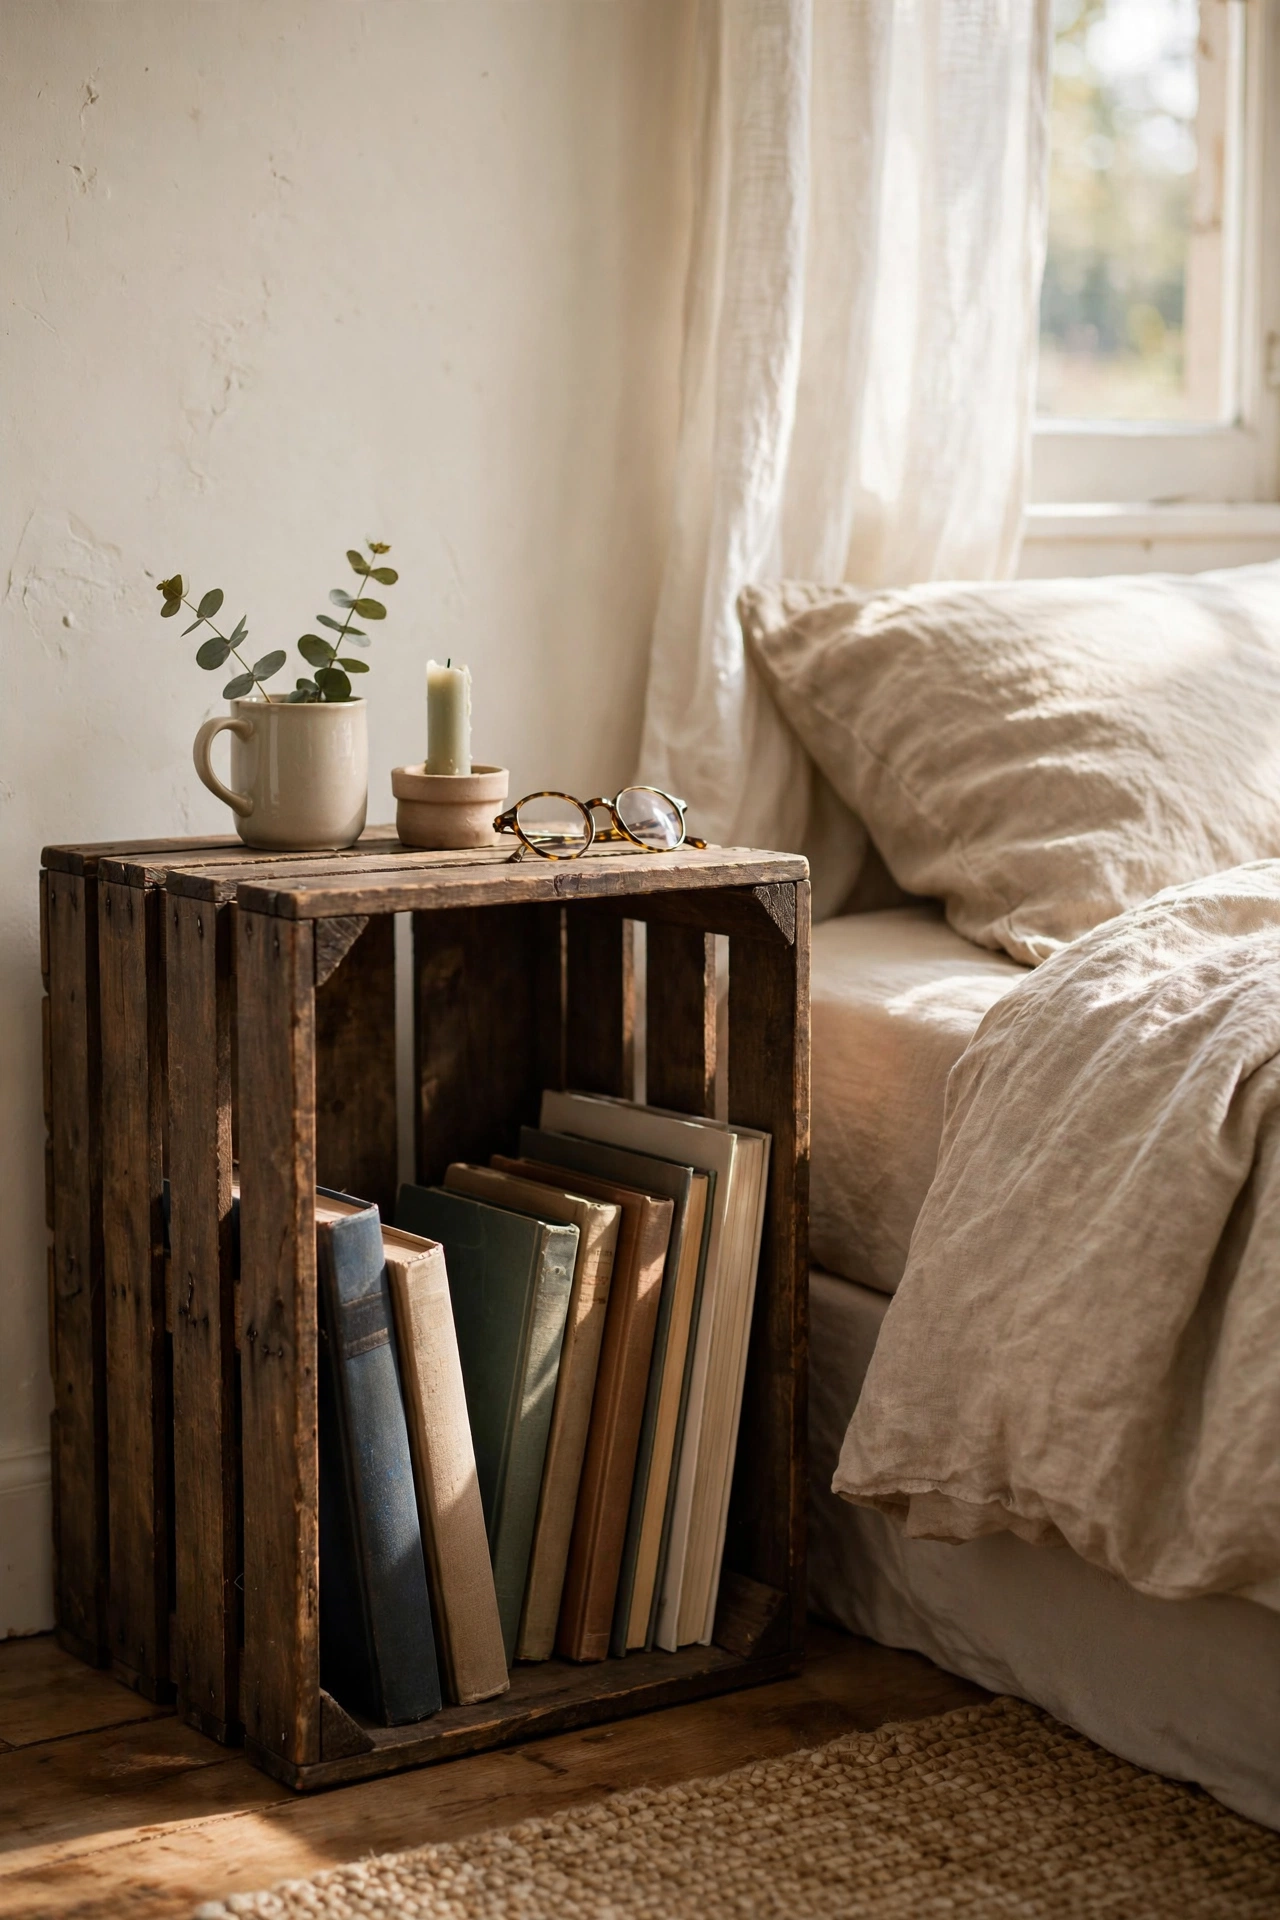
A wooden crate on its side is a $15 nightstand with built-in cubby storage. I bought an unfinished pine crate, sanded it, stained it walnut, and set it on its side beside the bed. The opening faces out and holds books upright like a mini shelf. Sand thoroughly, because crate wood is rough and will snag bedding. I skipped proper sanding once and caught my duvet on a splinter for a month. An hour with 120-grit paper made it silky. Stack two for a taller nightstand.
Cost: ~$12-20 | Time: 2 hours plus drying
19. Narrow Ladder Shelf Beside the Bed
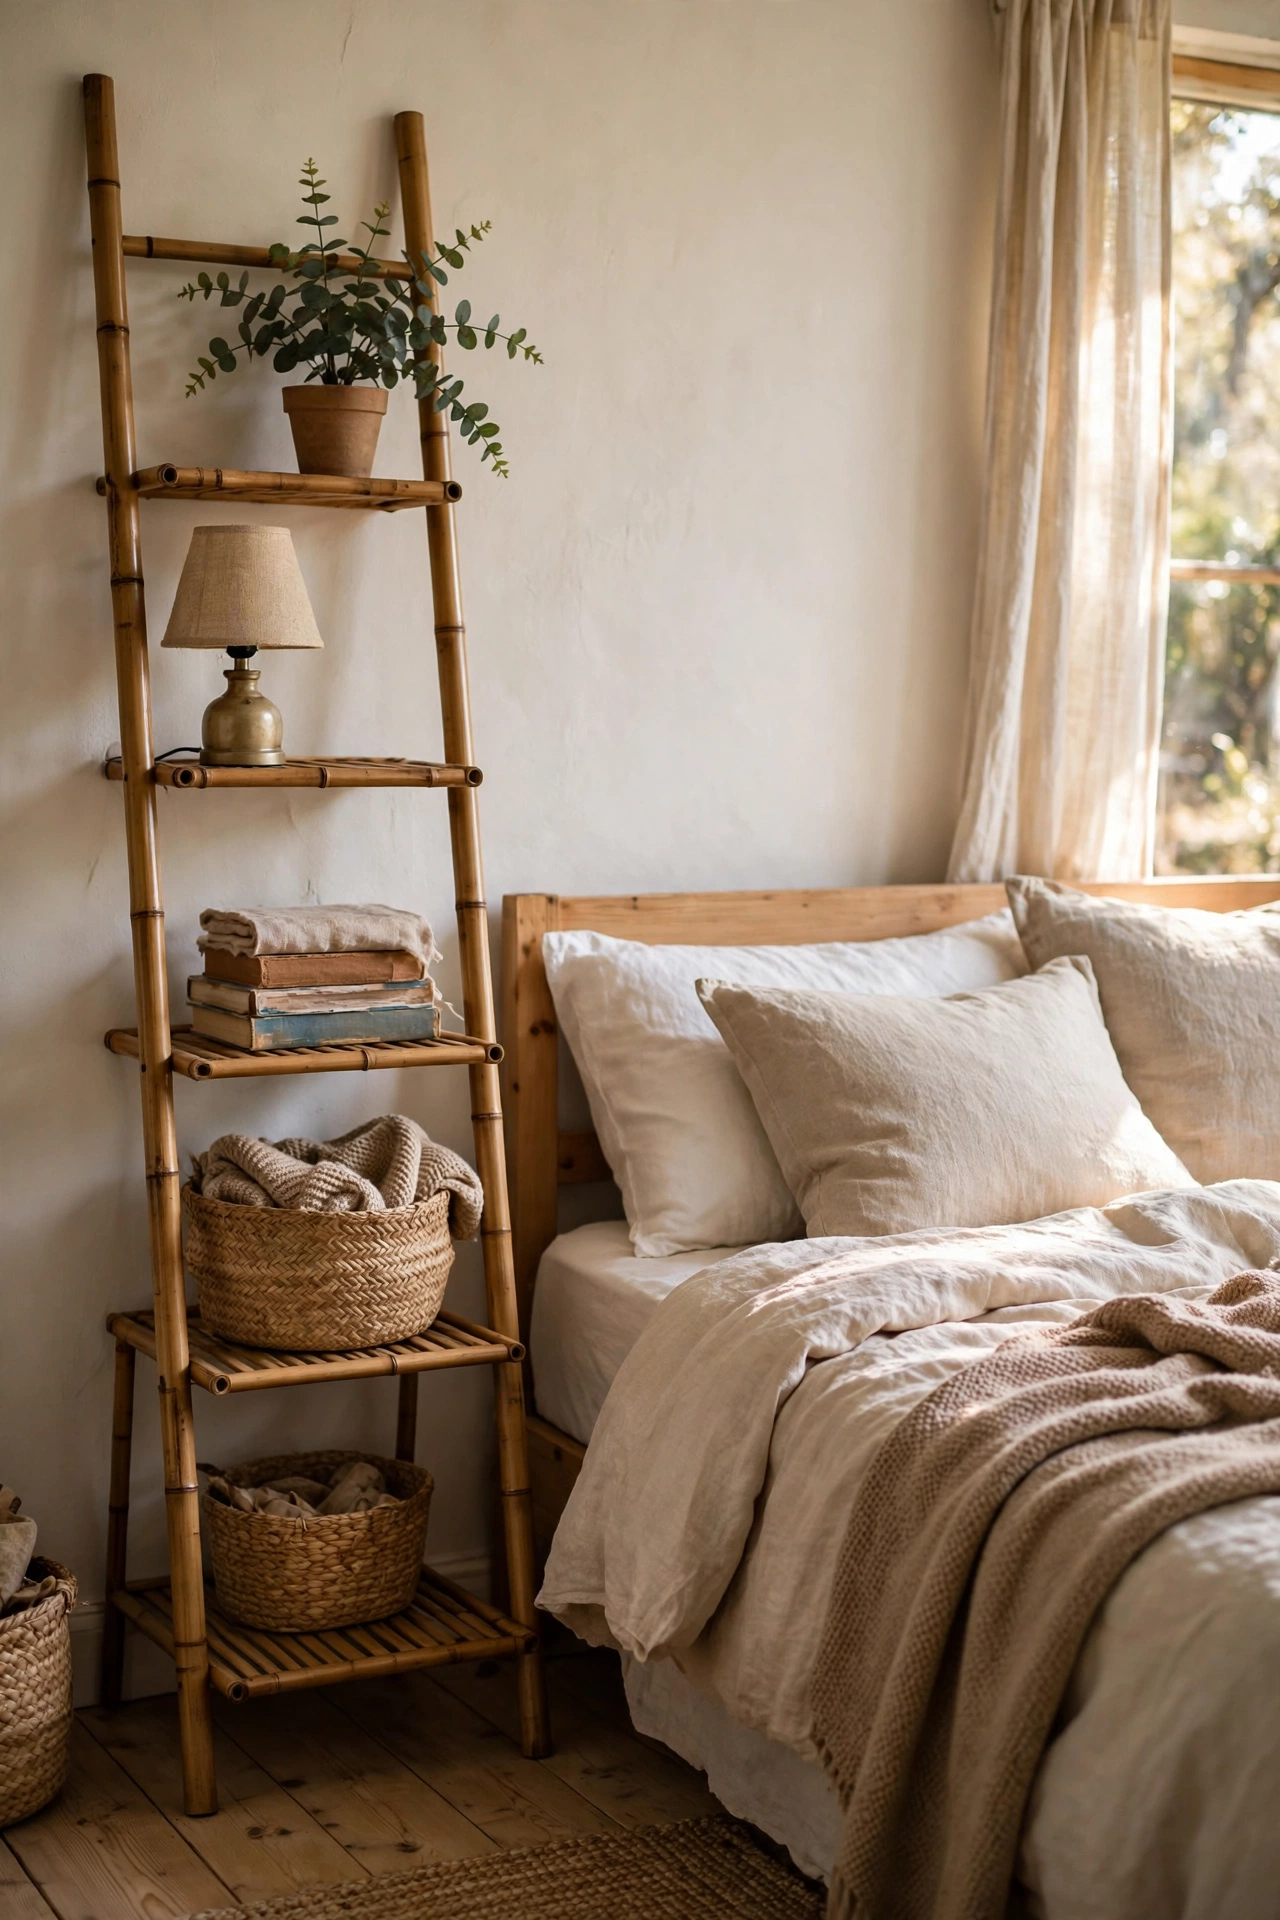
A narrow ladder shelf gives you four nightstand surfaces in one footprint. I bought a $28 bamboo ladder shelf and styled it bottom to top: basket, books, lamp, plant. Anchor it to the wall with the included strap, because a top-heavy ladder beside a bed is a tipping hazard. I skipped the anchor initially and it wobbled every time I grabbed my book. Two screws into a stud fixed it in ten minutes. It holds more than any nightstand I have owned and takes up less floor space.
Cost: ~$25-35 | Time: 45 minutes
20. Floating Cube Nightstand with Hidden Storage
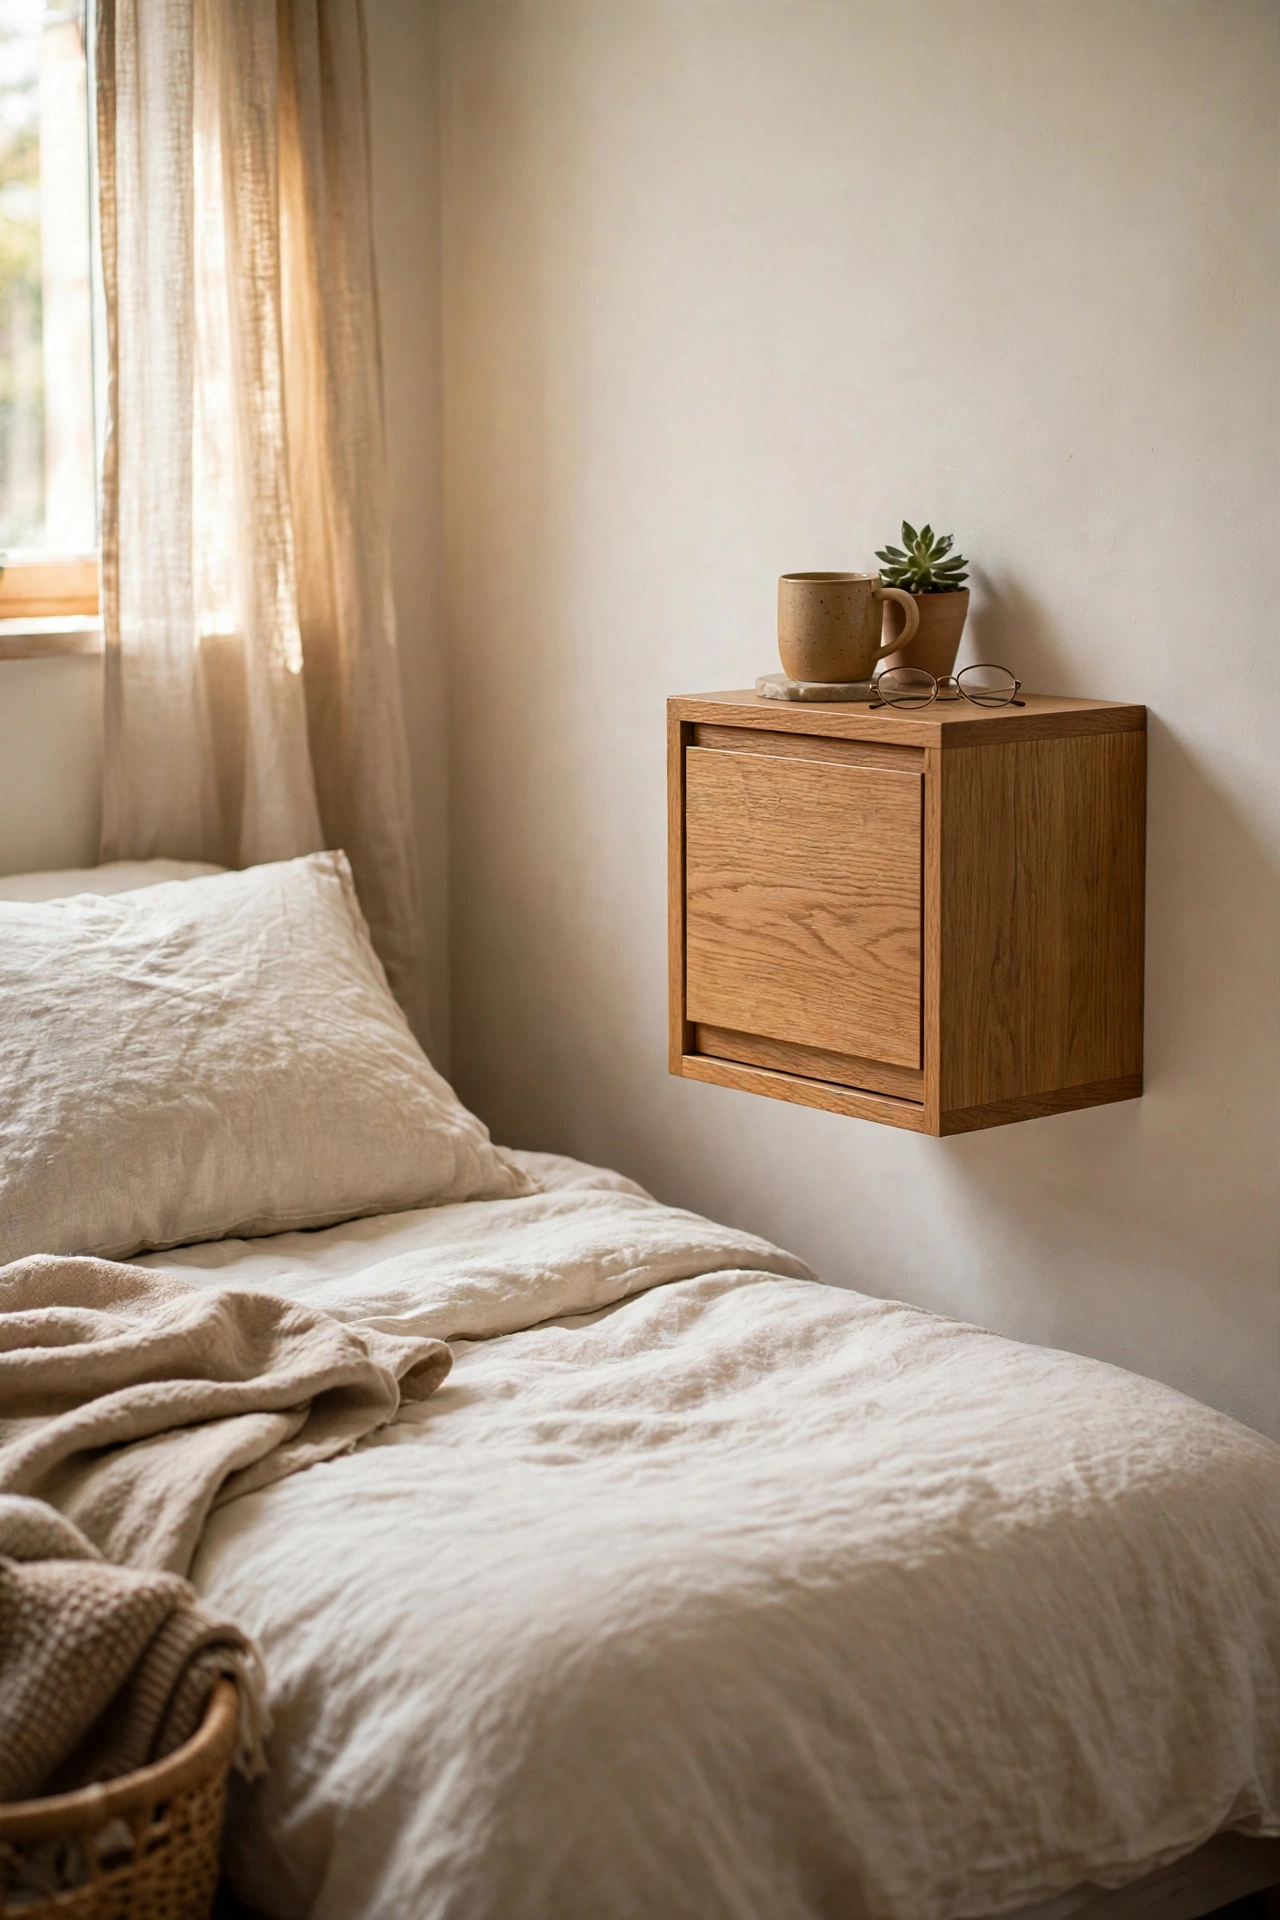
A wall-mounted cube with a flip-down front looks like a design piece and hides everything. I installed a $32 floating cube at mattress height, and the drop-down door conceals chargers, medication, and the remote. Mount into a stud or use heavy-duty toggle bolts, because a loaded cube pulls hard on the wall. My first fixings were standard plasterboard plugs and the cube tilted within days. Toggling into the stud made it rock solid. Closed, it is a clean oak square; open, it is command central.
Cost: ~$28-40 | Time: 1 hour
21. Mini Gallery Wall Above the Nightstand
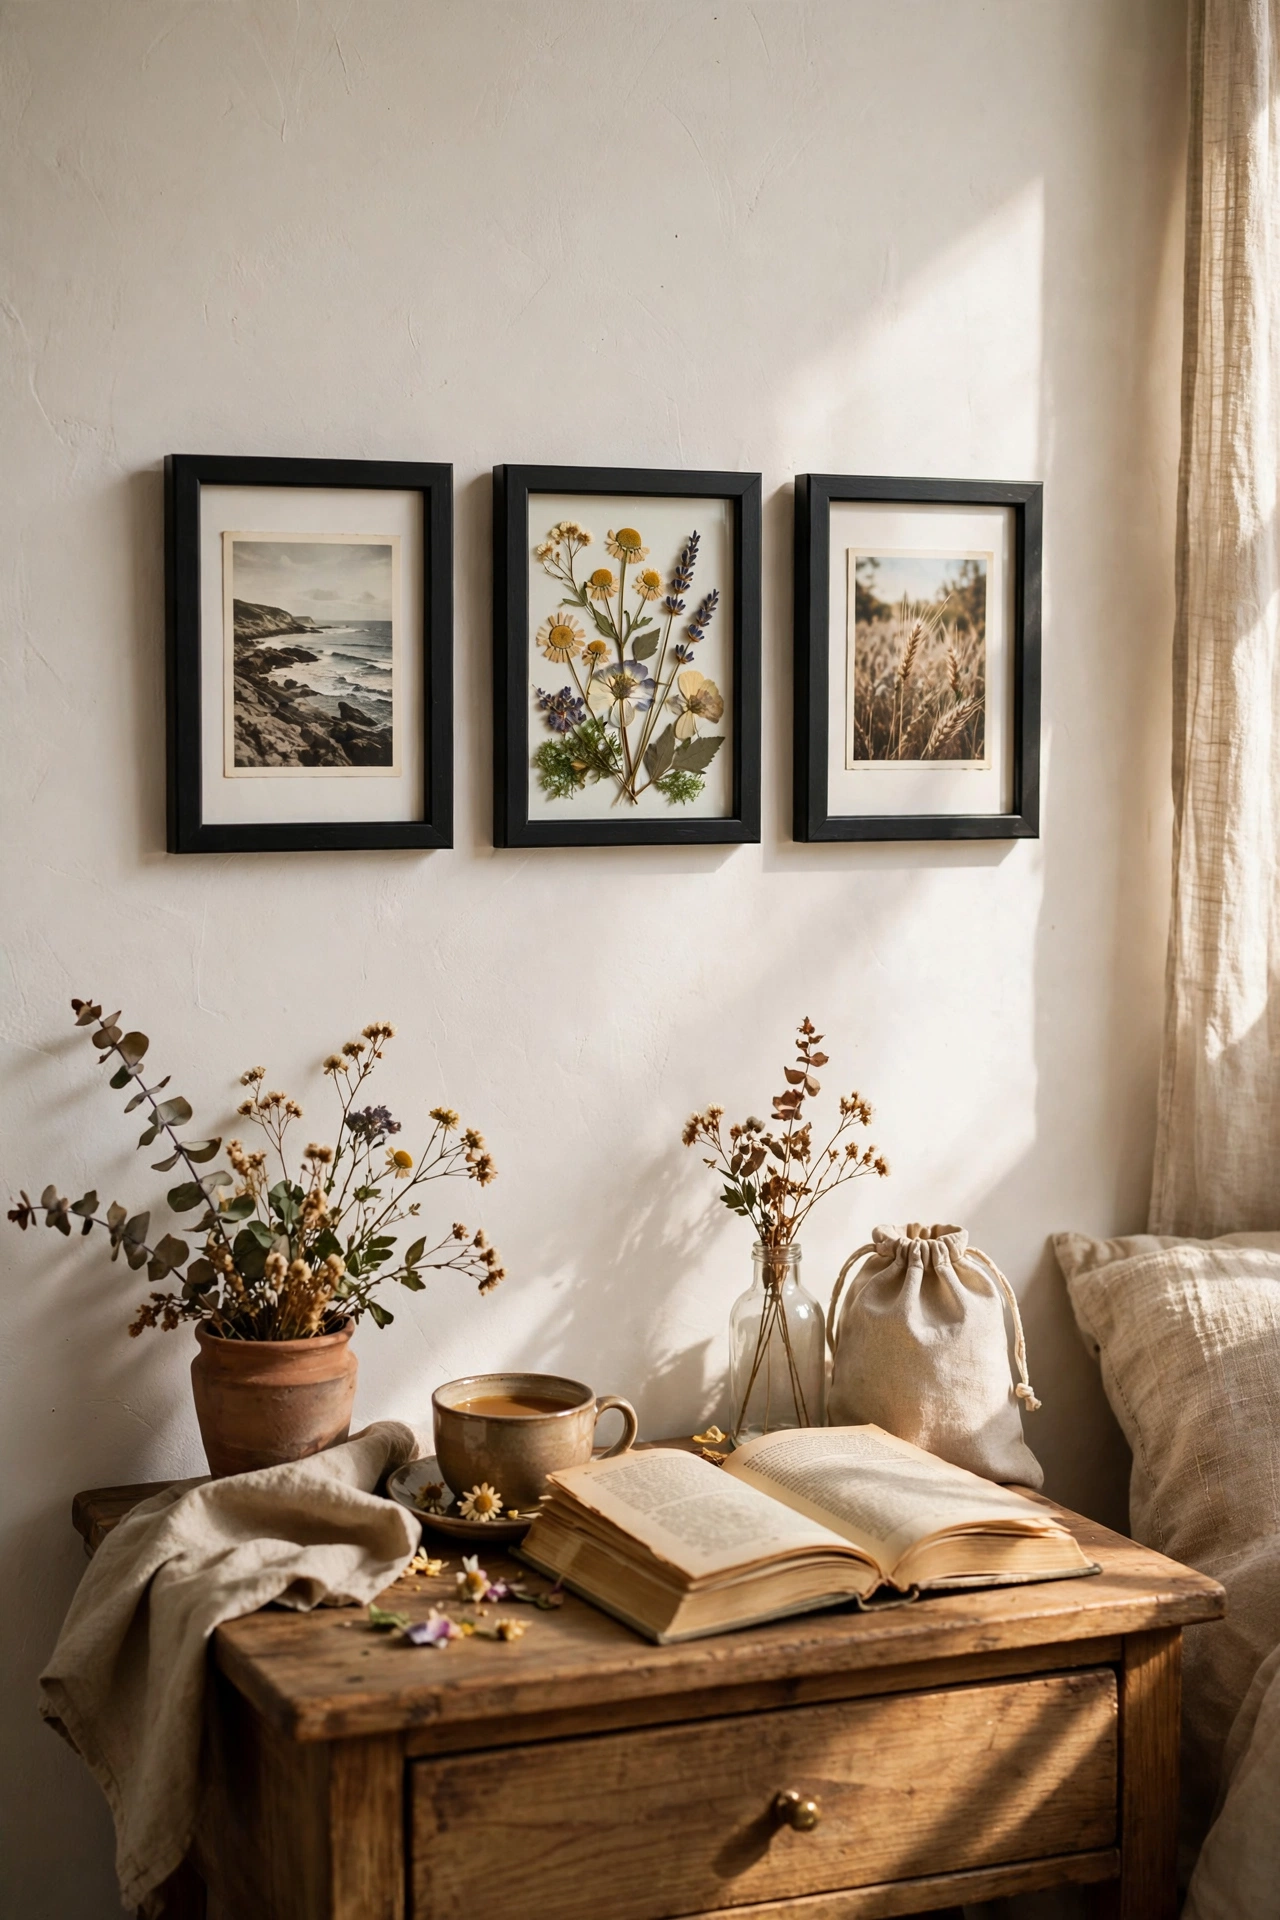
A tight cluster of three small frames above the nightstand draws the eye up and makes the whole corner feel designed. I hung three 15cm frames in a row, mixing a print, a photo, and a pressed flower, all in matching thin black frames. Lay the arrangement on the floor first and photograph it before committing to nails. My first attempt went straight on the wall and the spacing was chaos. The floor rehearsal took five minutes and the final hang took twenty. Matching frames are what make mixed art look intentional.
Cost: ~$12-20 | Time: 45 minutes
Quick questions, answered
What should I actually keep on my nightstand?
A lamp, water, your current book, and one decorative item is the sweet spot. Everything else, chargers, glasses, hand cream, earns its place only if you use it nightly. If you have not touched it in a week, it belongs in the drawer or elsewhere.
How do I style a nightstand without it looking cluttered?
Group items in odd numbers, vary their heights, and leave a third of the surface empty. A tray corrals small items into one visual unit. Step back and squint: if you cannot pick out three distinct shapes, remove something.
What is the cheapest nightstand upgrade that looks expensive?
A new lampshade plus a bud vase with a single stem, under $25 total, transforms the whole corner. Lighting and one living thing beat any amount of knick-knacks. Do those two first, then decide if you need anything else.
📌 Loving these ideas? Pin this post now so you can save this idea for your own nightstand refresh!
Keep styling your bedroom with these next: (see also: 25-terracotta-bedroom-ideas-on-a-budget/) (see also: 21-thrifted-bedroom-decor-that-look-designer/) (see also: 15-small-bedroom-storage-ideas-on-a-budget/)
