15 Coffee Bar Ideas on a Budget
I got hooked on the idea of a home coffee bar the first time I saw one on a friend’s Instagram story — hers was all marble and brass, and my rental kitchen at the time was neither. So I built my own version from a charity-shop trolley and a chipped wooden tray, and honestly, making my morning cup in a corner I’d styled on purpose felt like a small luxury every single day. These coffee bar ideas on a budget are everything I figured out since: no renovations, no expensive machines, just clever setups that look like you planned them. Most come together in an afternoon for the price of a few takeaway coffees.
Corner Coffee Stations
Dead corners are wasted money in a kitchen — a coffee bar is one of the easiest ways to put one to work. These four setups all live in a corner, out of the way of your main prep space, but styled so they look like the kitchen’s best feature.
1. Thrifted Bar Cart Coffee Station
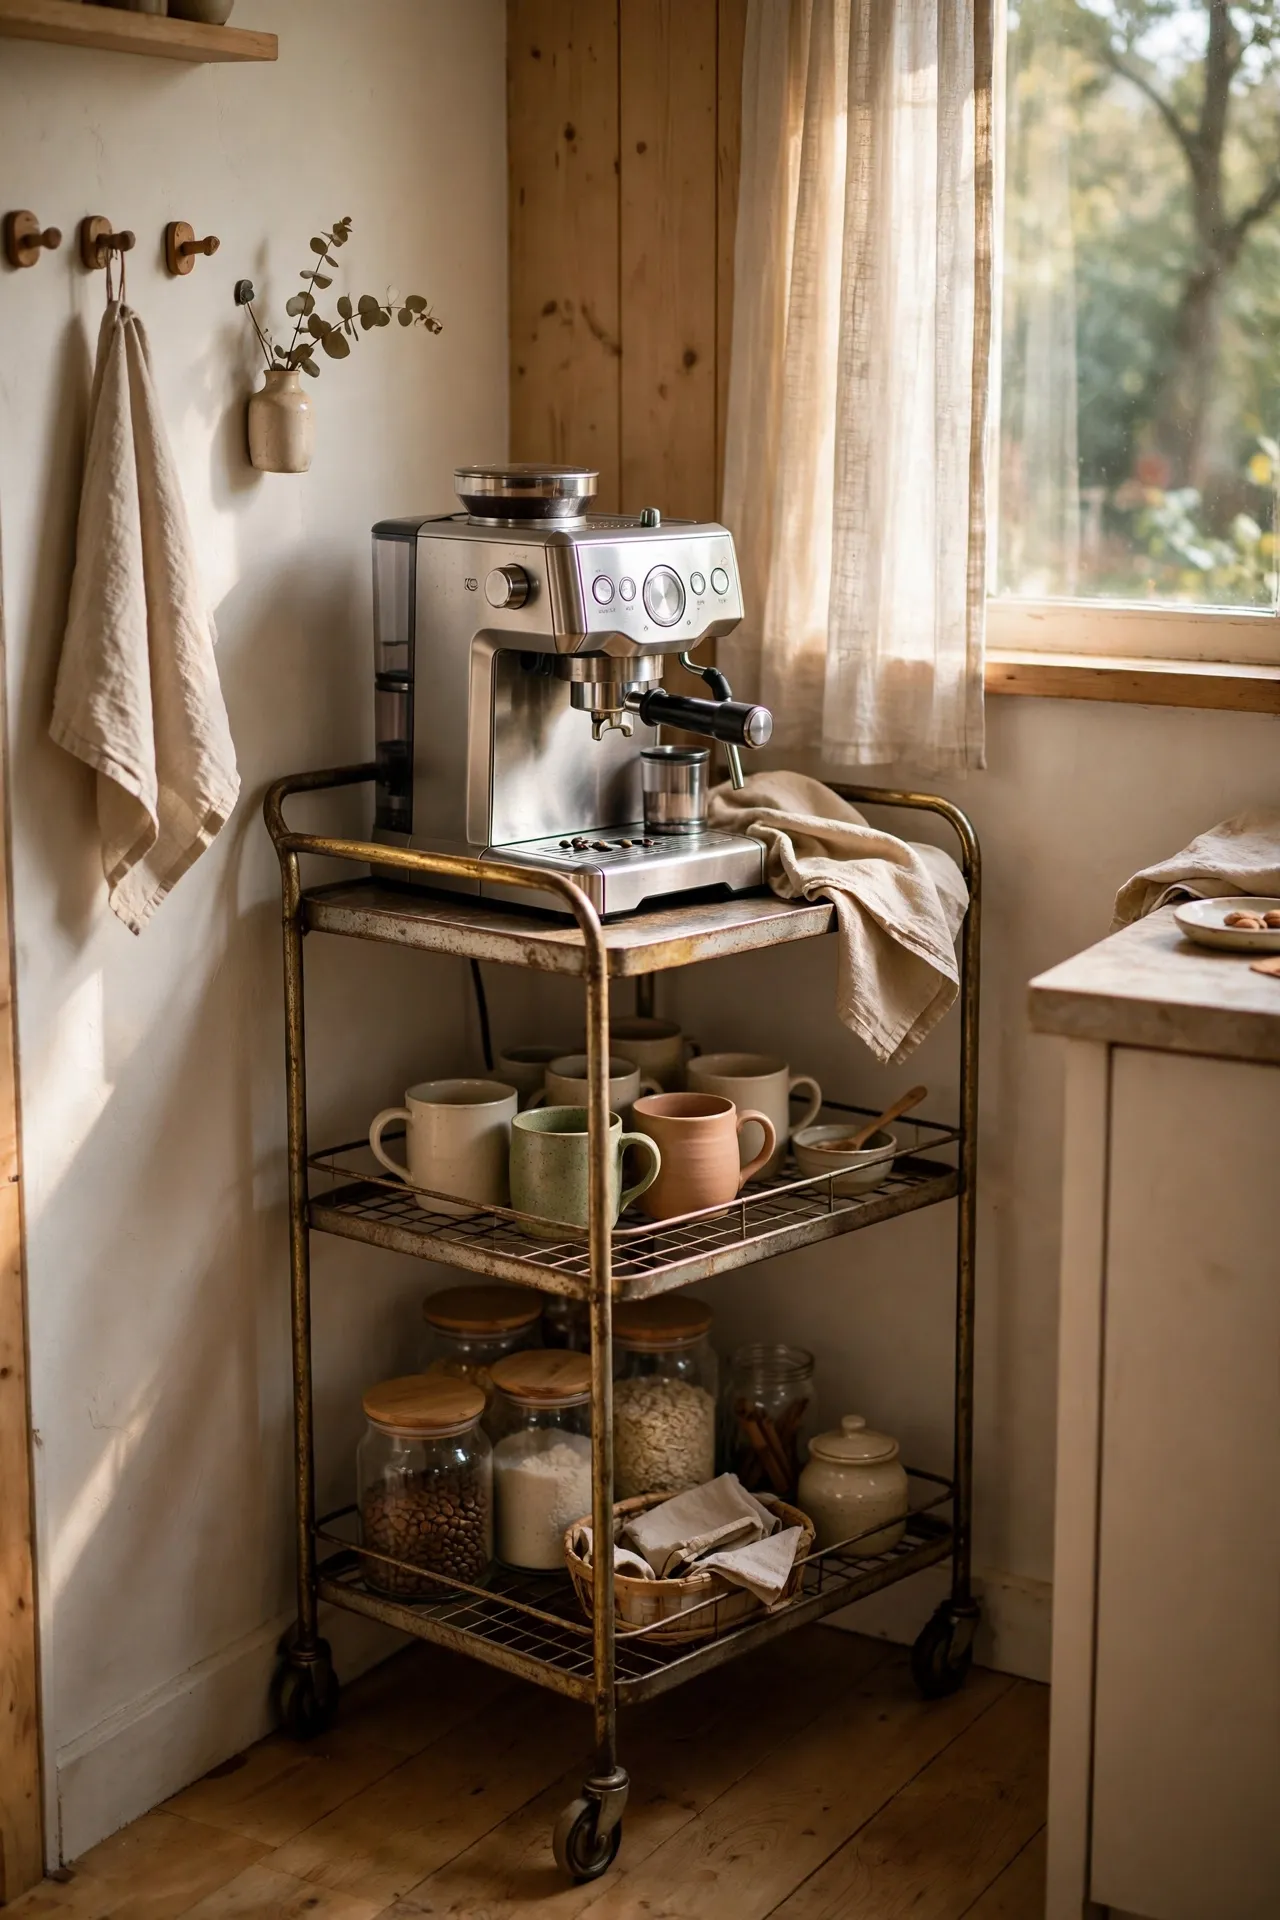
A second-hand bar cart is the classic coffee bar for a reason — it rolls wherever you need it and holds everything in one tidy footprint. Hunt charity shops and marketplace listings for a metal or wooden cart, give it a wipe-down and a fresh coat of spray paint if the finish is tired, then style the top shelf with your machine or brewer, mugs on the middle shelf, and beans, syrups and filters below. Keep the heaviest items low so it doesn’t wobble when you wheel it. I tried overloading the top shelf first time round and the whole thing rattled every time I rolled it across the tiles — the mistake to avoid is top-heavy styling; weight goes on the bottom. For more rental-friendly kitchen upgrades, these (see also: 15-kitchen-decor-ideas-under-50-without-renovating) ideas are worth a look.
Cost: ~$15 for a second-hand cart | Time: 1 hour
2. Unused Corner Cabinet Coffee Nook
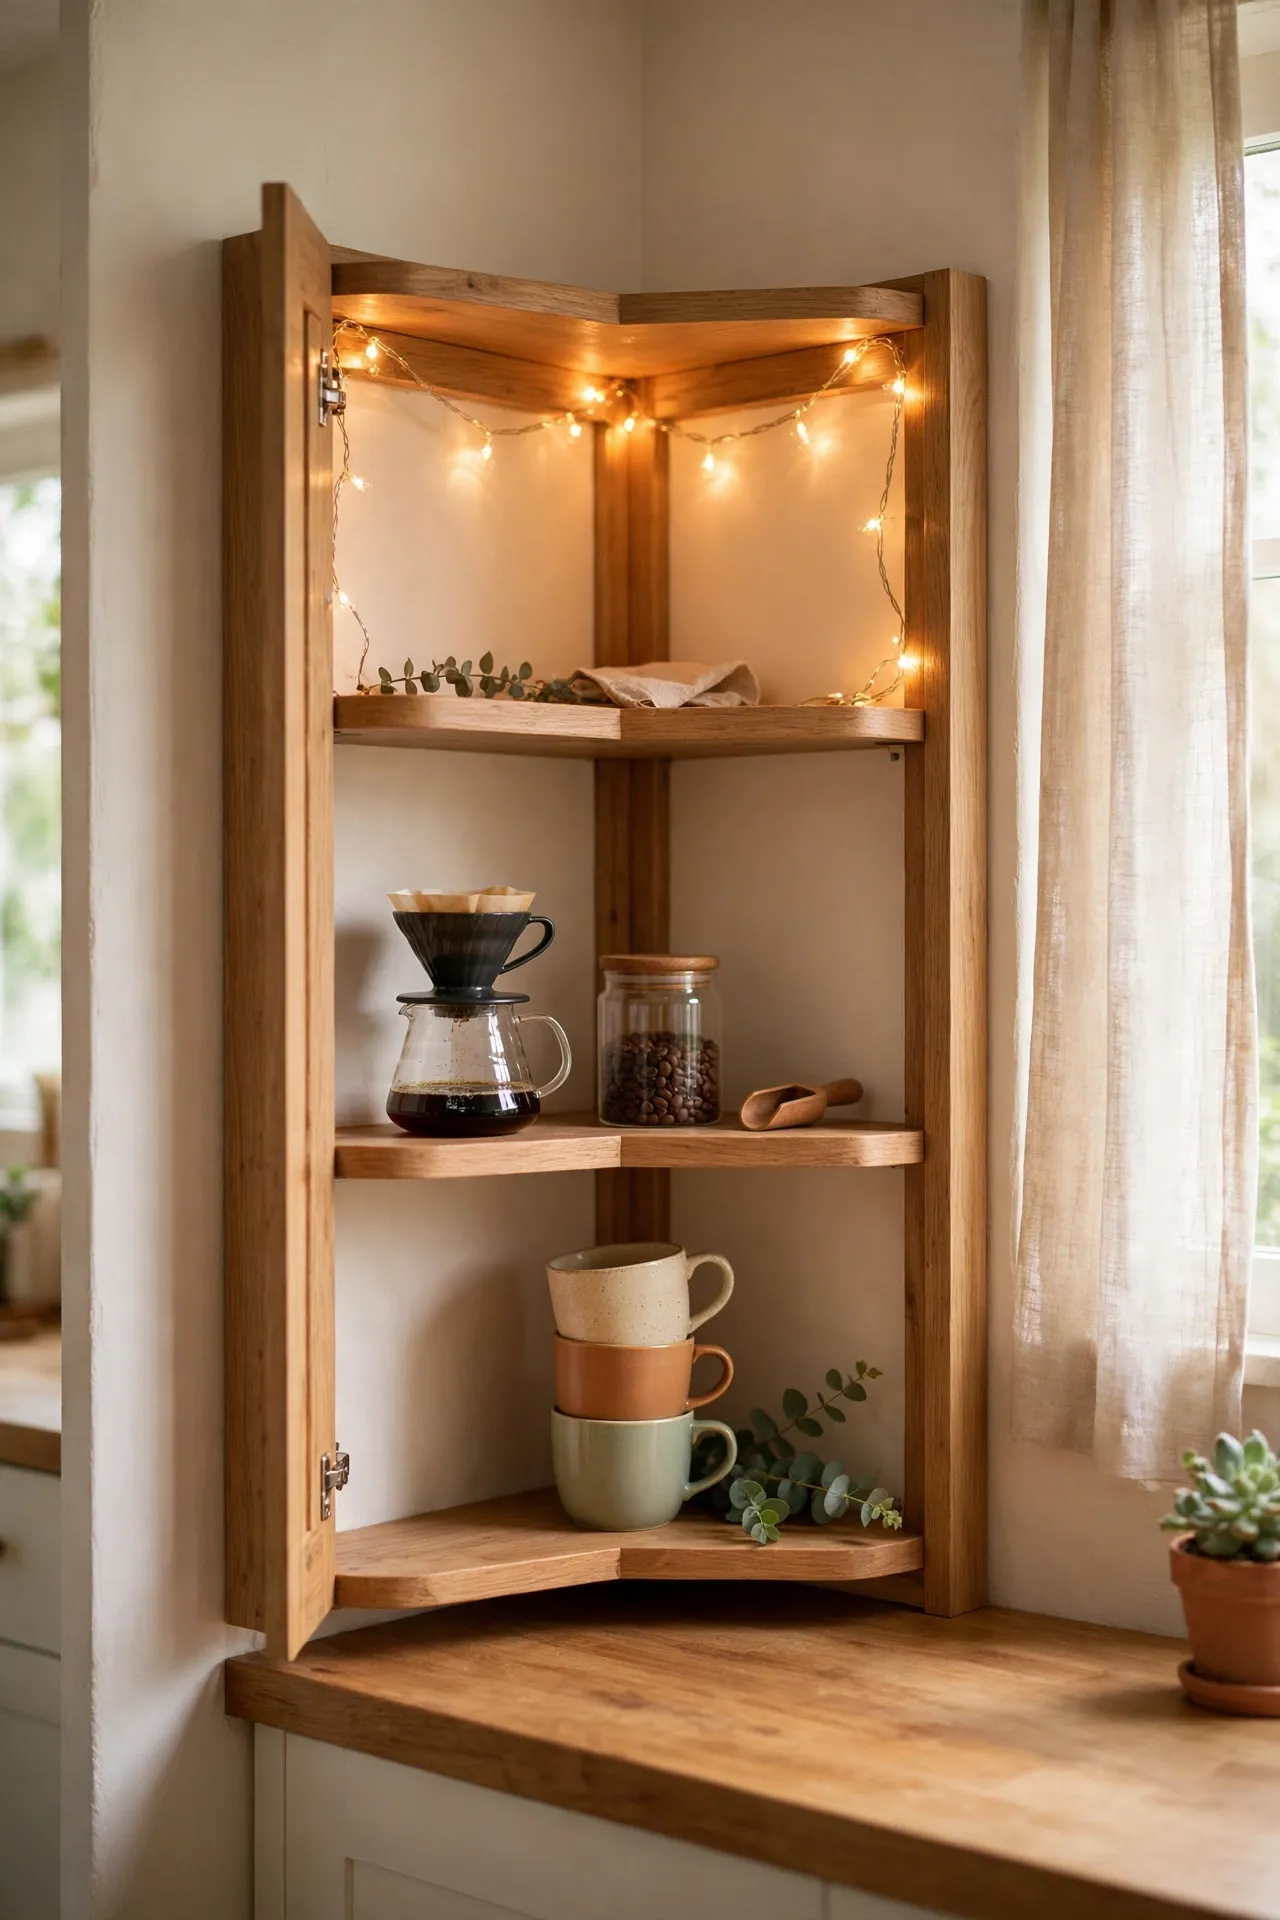
That awkward corner cabinet where the blender goes to die can become a proper little coffee nook with barely any effort. Clear it out completely, line the shelf with a wipeable mat, and treat the inside like a miniature room: your brewer at the back, a small stack of mugs, and a tiny dish for spoons and sugar packets. Keep the door open during the day so it feels like a display, and close it when you want the clutter gone. If the cabinet is dark inside, a battery stick-on light makes a ridiculous difference for almost nothing. I tried cramming my machine in without measuring and the door wouldn’t close — the mistake to avoid is skipping the tape measure; check the height with the lid or lever open before you commit.
Cost: ~$8 for mat and light | Time: 45 minutes
3. Tiny Kitchen Corner Shelf Bar
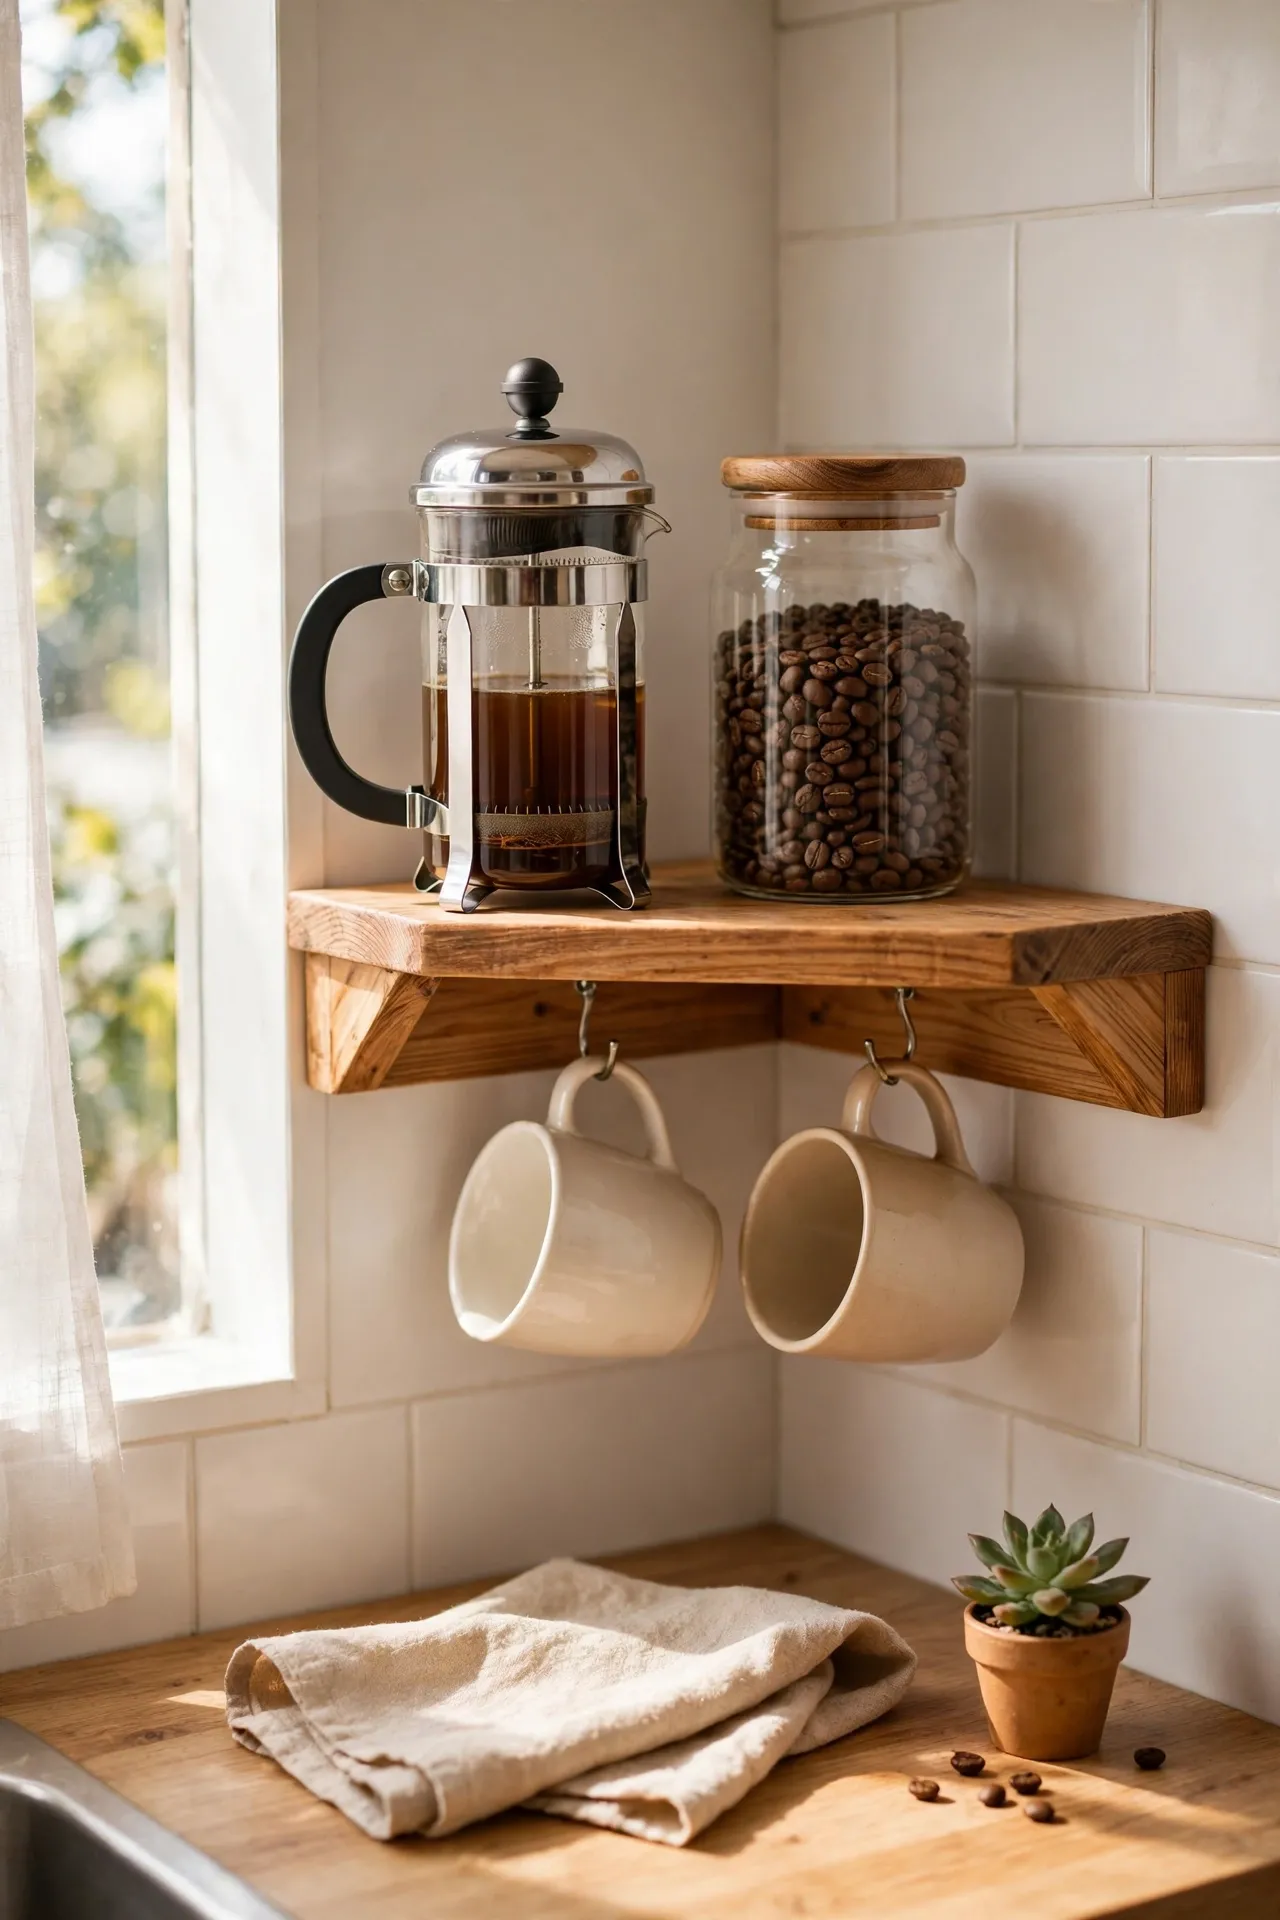
If your kitchen has no counter to spare, a single corner shelf creates a coffee bar out of thin air. Fix one sturdy L-bracket shelf into a bare corner at just below shoulder height, then keep everything you need in a tight group: a French press, two mugs on hooks underneath, and a small jar of beans. The trick is ruthlessness — this setup only works if nothing else creeps onto the shelf. Add a small tray to corral the bits so it reads as one styled unit rather than scattered clutter. I tried putting my kettle up there too and the shelf bowed within a week — the mistake to avoid is overloading it; one shelf means one purpose, and the kettle can live elsewhere.
Cost: ~$10 for shelf and brackets | Time: 30 minutes
4. Espresso Corner with a Storage Drawer
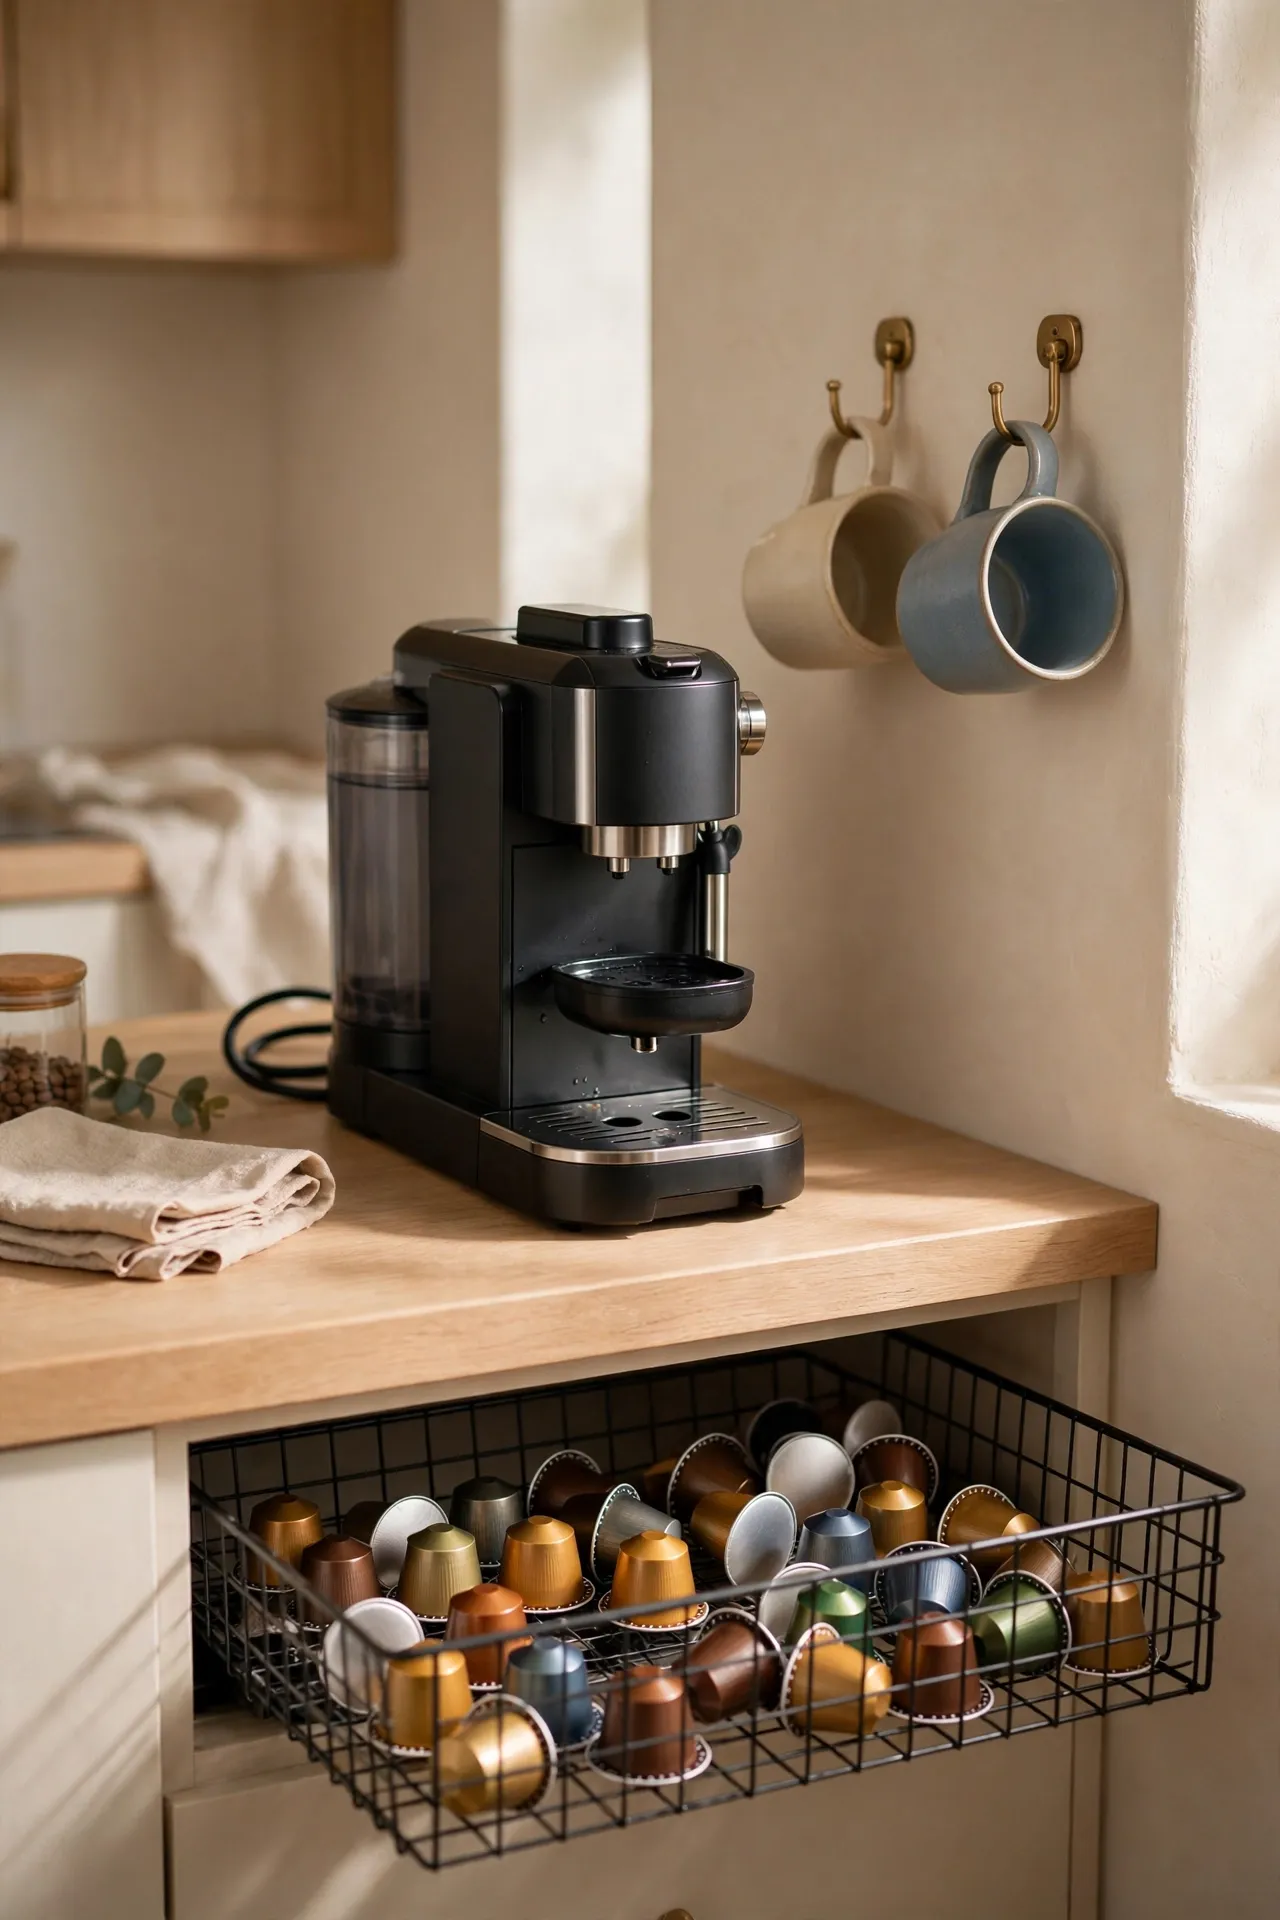
Pod machines are compact enough for the smallest corner, but the pods themselves are what turn the setup messy. The fix is a shallow storage drawer — the kind with wire compartments — that sits under or beside the machine and swallows every pod. Pick a corner near a plug, slide the drawer in, and decant your pods by flavour so grabbing your morning cup takes five seconds. Top the drawer with a small mat to catch drips, and hang two mugs on adhesive hooks on the adjacent wall. I tried keeping pods in their original boxes stacked beside the machine and it looked like a stockroom — the mistake to avoid is visible packaging; decanted pods in a drawer look instantly tidier and last the same.
Cost: ~$12 for the drawer | Time: 20 minutes
Countertop Coffee Setups
If you’ve got a stretch of counter to spare — even a small one — these setups treat the coffee bar like a permanent little station. The golden rule here is containment: everything sits on or within a defined zone, so the rest of the counter stays clear.
5. Breakfast Counter Coffee Station
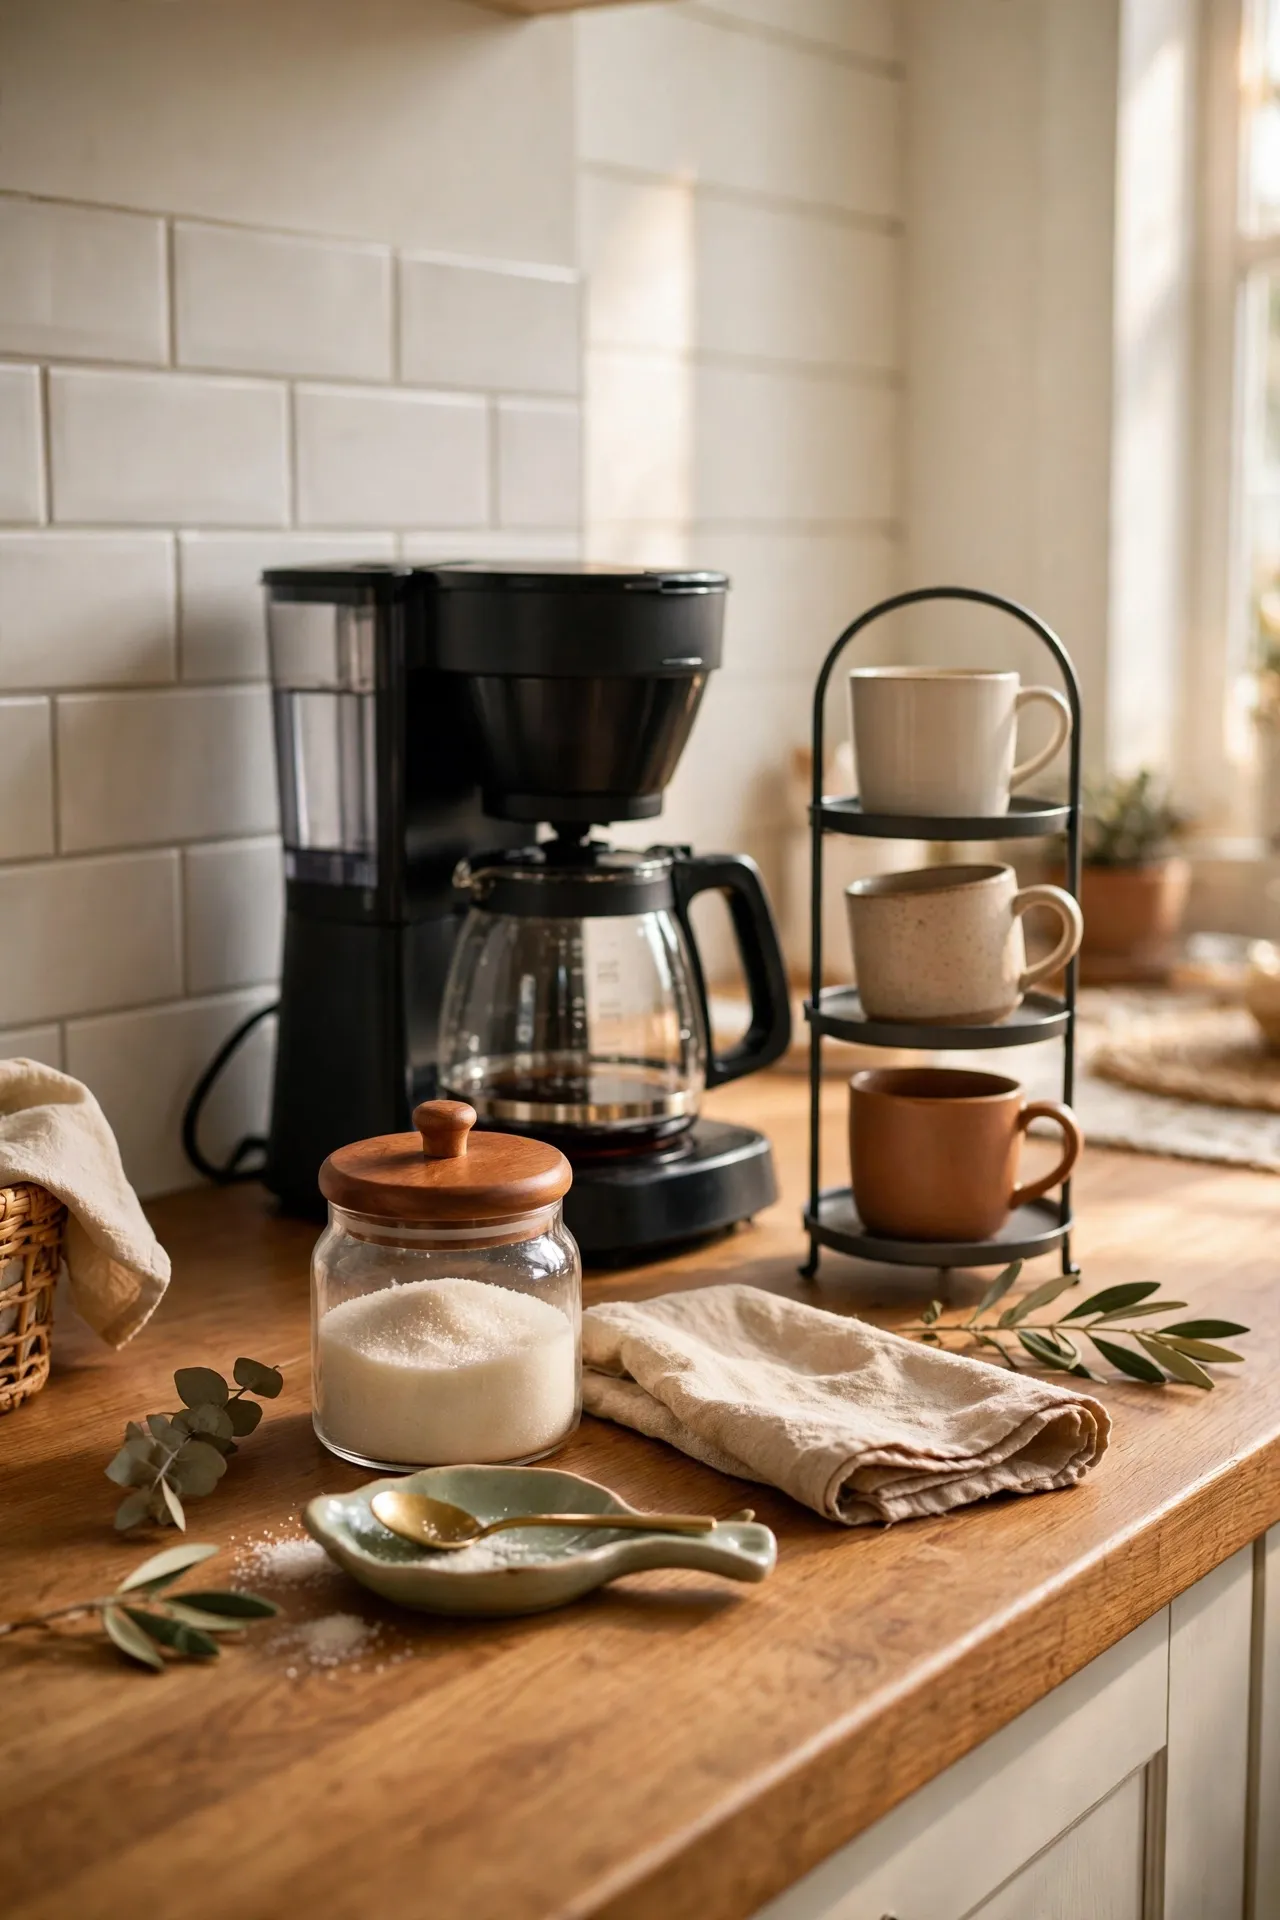
Carving a coffee zone out of your breakfast counter keeps the whole routine in one spot. Choose the least-used stretch — usually the end nearest the wall — and build backwards: machine or brewer against the wall, mugs hung on a small stand or hooks in front, and a little jar of sugar and a spoon rest to finish. Leave a clear landing strip of counter in front so you can actually make the coffee without shoving things aside. I tried styling mine right in the middle of the counter and it drove me mad during breakfast — the mistake to avoid is placing it where toast and cereal happen; tuck it at one end and the workflow finally makes sense.
Cost: ~$10 for stand and jars | Time: 30 minutes
6. Tiered Tray Coffee Bar
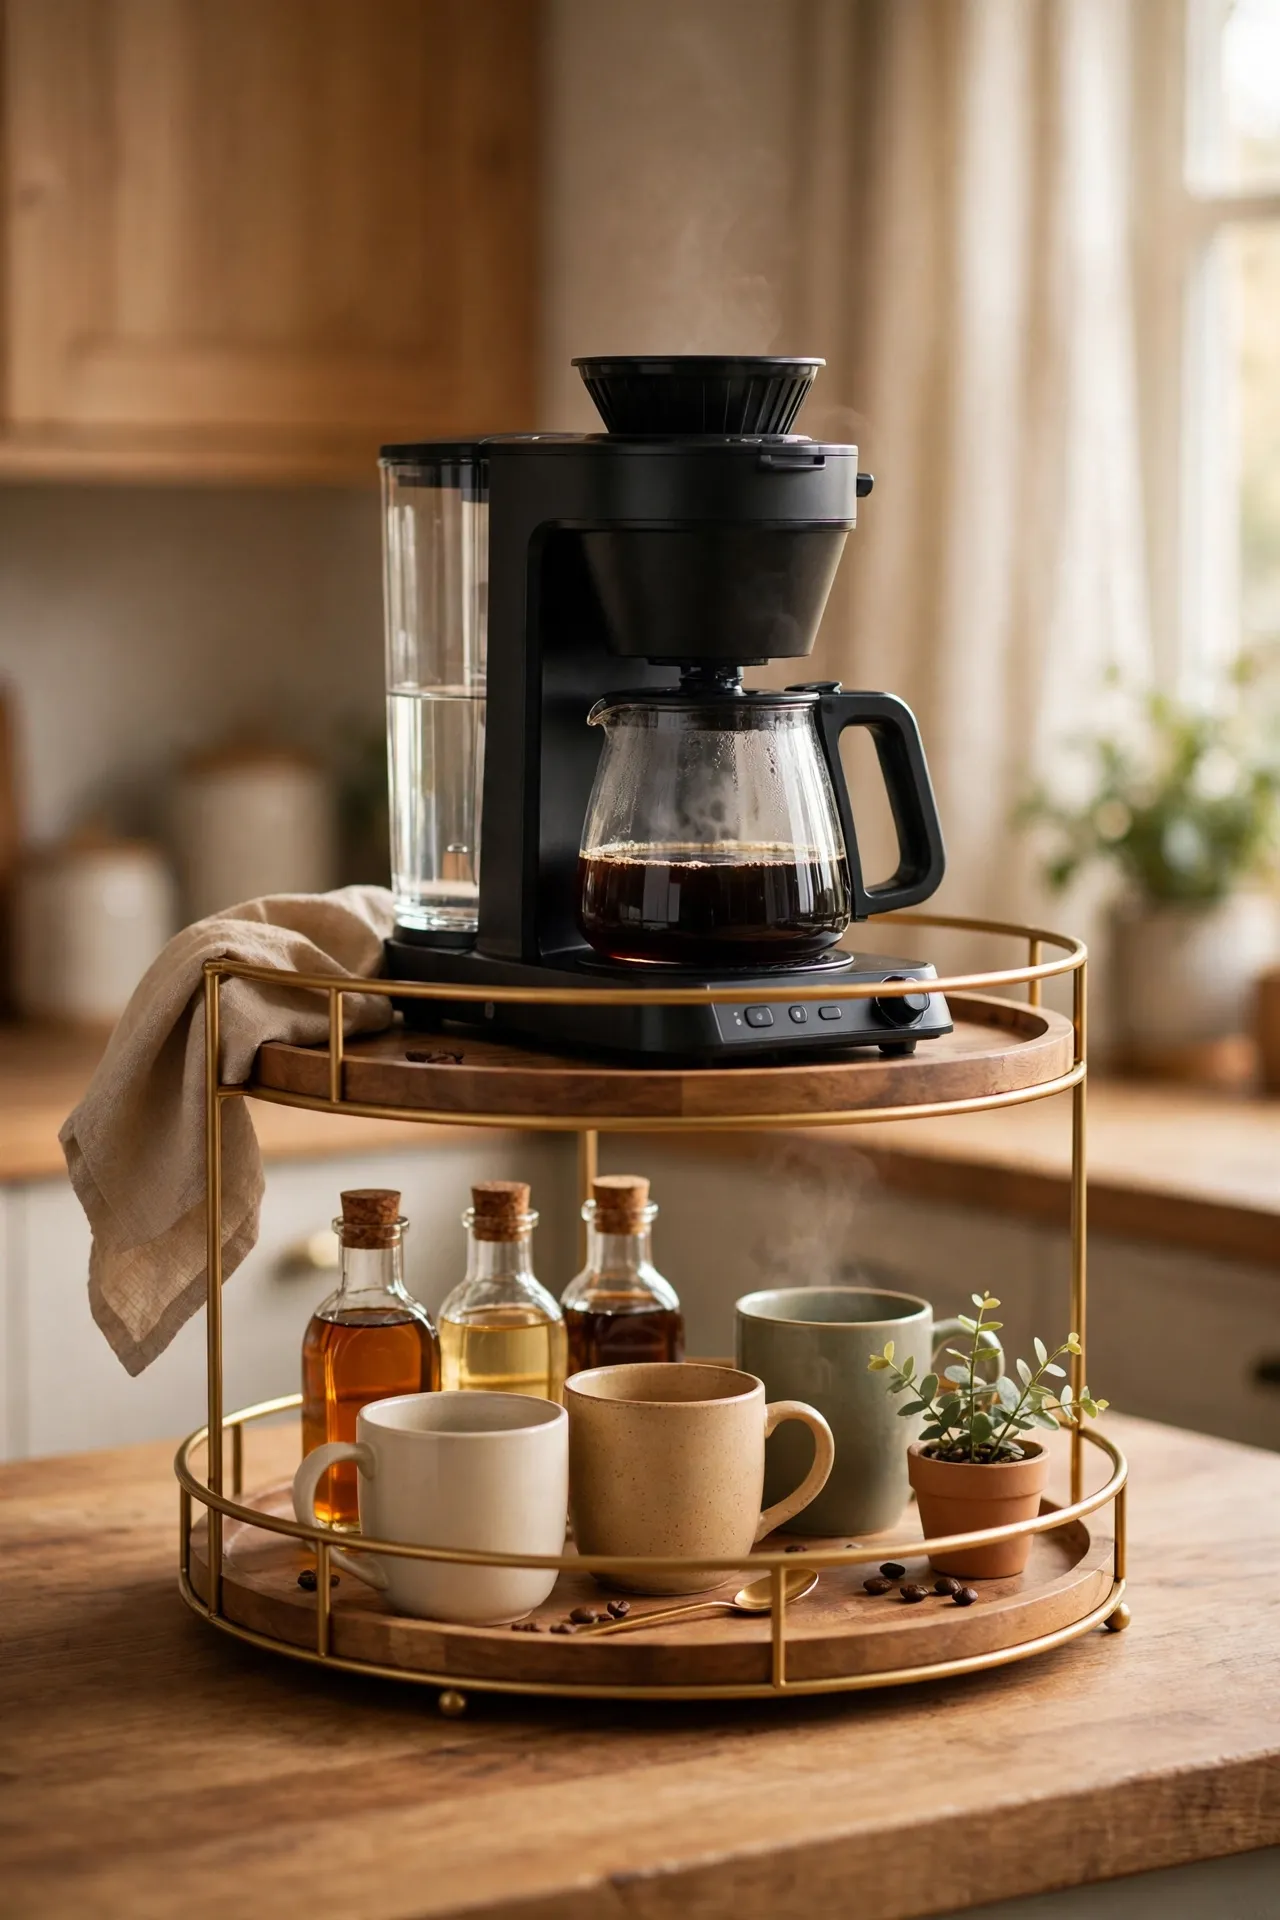
A two or three-tiered tray turns any counter into an instant coffee bar with zero DIY. Put the tray down, arrange the tallest items at the back of the top tier — your brewer or a jar of beans — then fill downwards with mugs, sugar cubes, syrups and a tiny plant or candle. The vertical styling gives you three times the surface in the same footprint, and the whole thing lifts away in one go when you need the counter back. I tried a single flat tray first and it just looked like stuff on a board — the mistake to avoid is a one-level tray for a full coffee setup; the tiers are what make it look like a proper bar instead of a pile.
Cost: ~$14 for a tiered tray | Time: 20 minutes
📌 Like this one? Save it to your kitchen board before you forget.
7. Wicker Basket Coffee Caddy
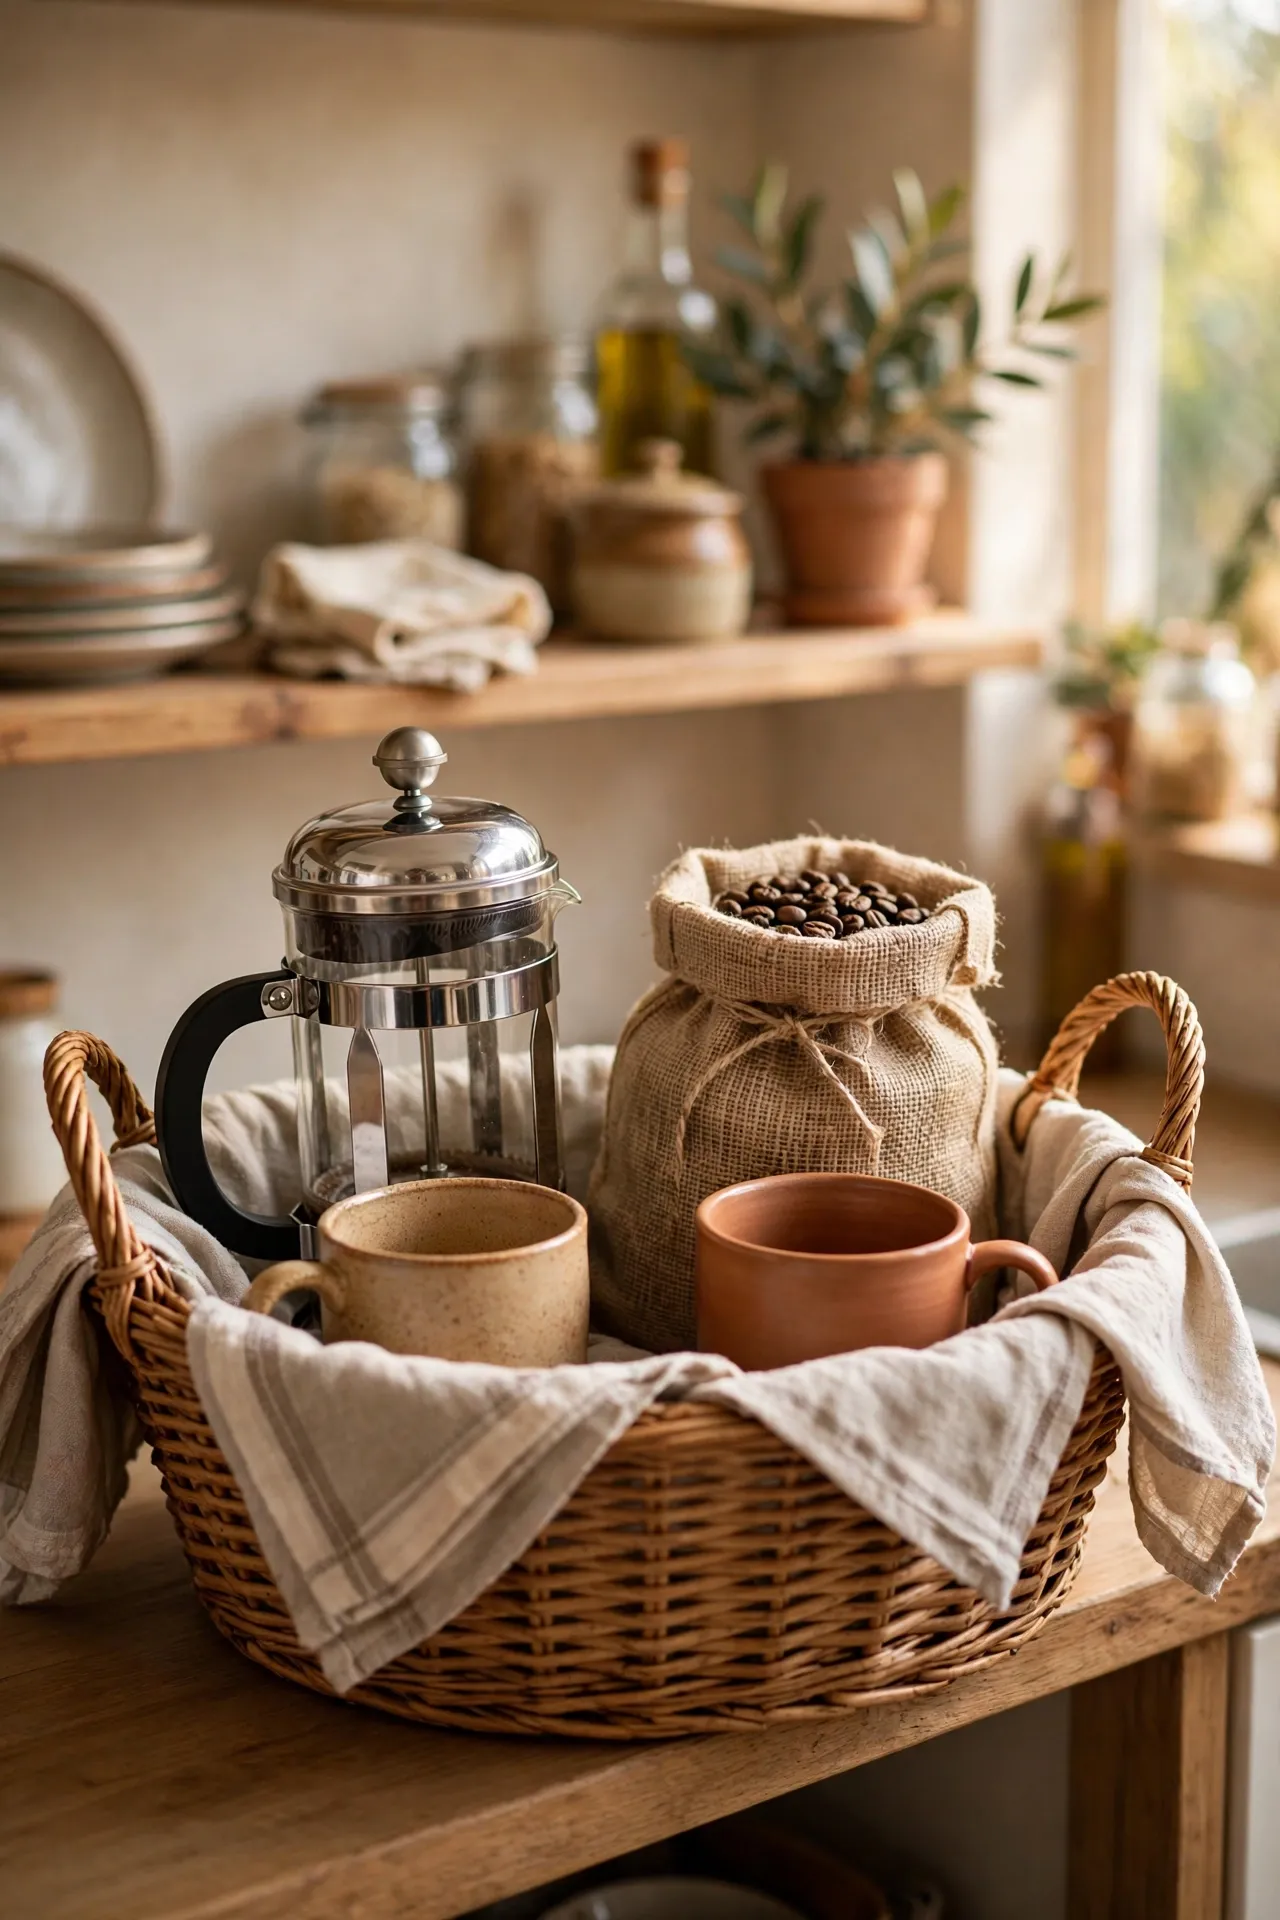
For tiny kitchens, a coffee bar that packs away is better than one that hogs the counter — and a wicker basket caddy does exactly that. Choose a basket with sturdy handles, line it with a folded tea towel, and stand your daily kit inside: a French press or pour-over cone, a bag of coffee, two mugs and a spoon. When it’s coffee time, carry the whole thing out; when it’s over, the basket slides onto a shelf or into a cupboard. The basket hides the clutter and looks like decor when it’s sitting out, too. I tried a rigid plastic box version and it looked like a toolbox on my counter — the mistake to avoid is anything too utilitarian; a natural-textured basket doubles as styling.
Cost: ~$9 for a basket | Time: 15 minutes
8. Wooden Tray Coffee Kit
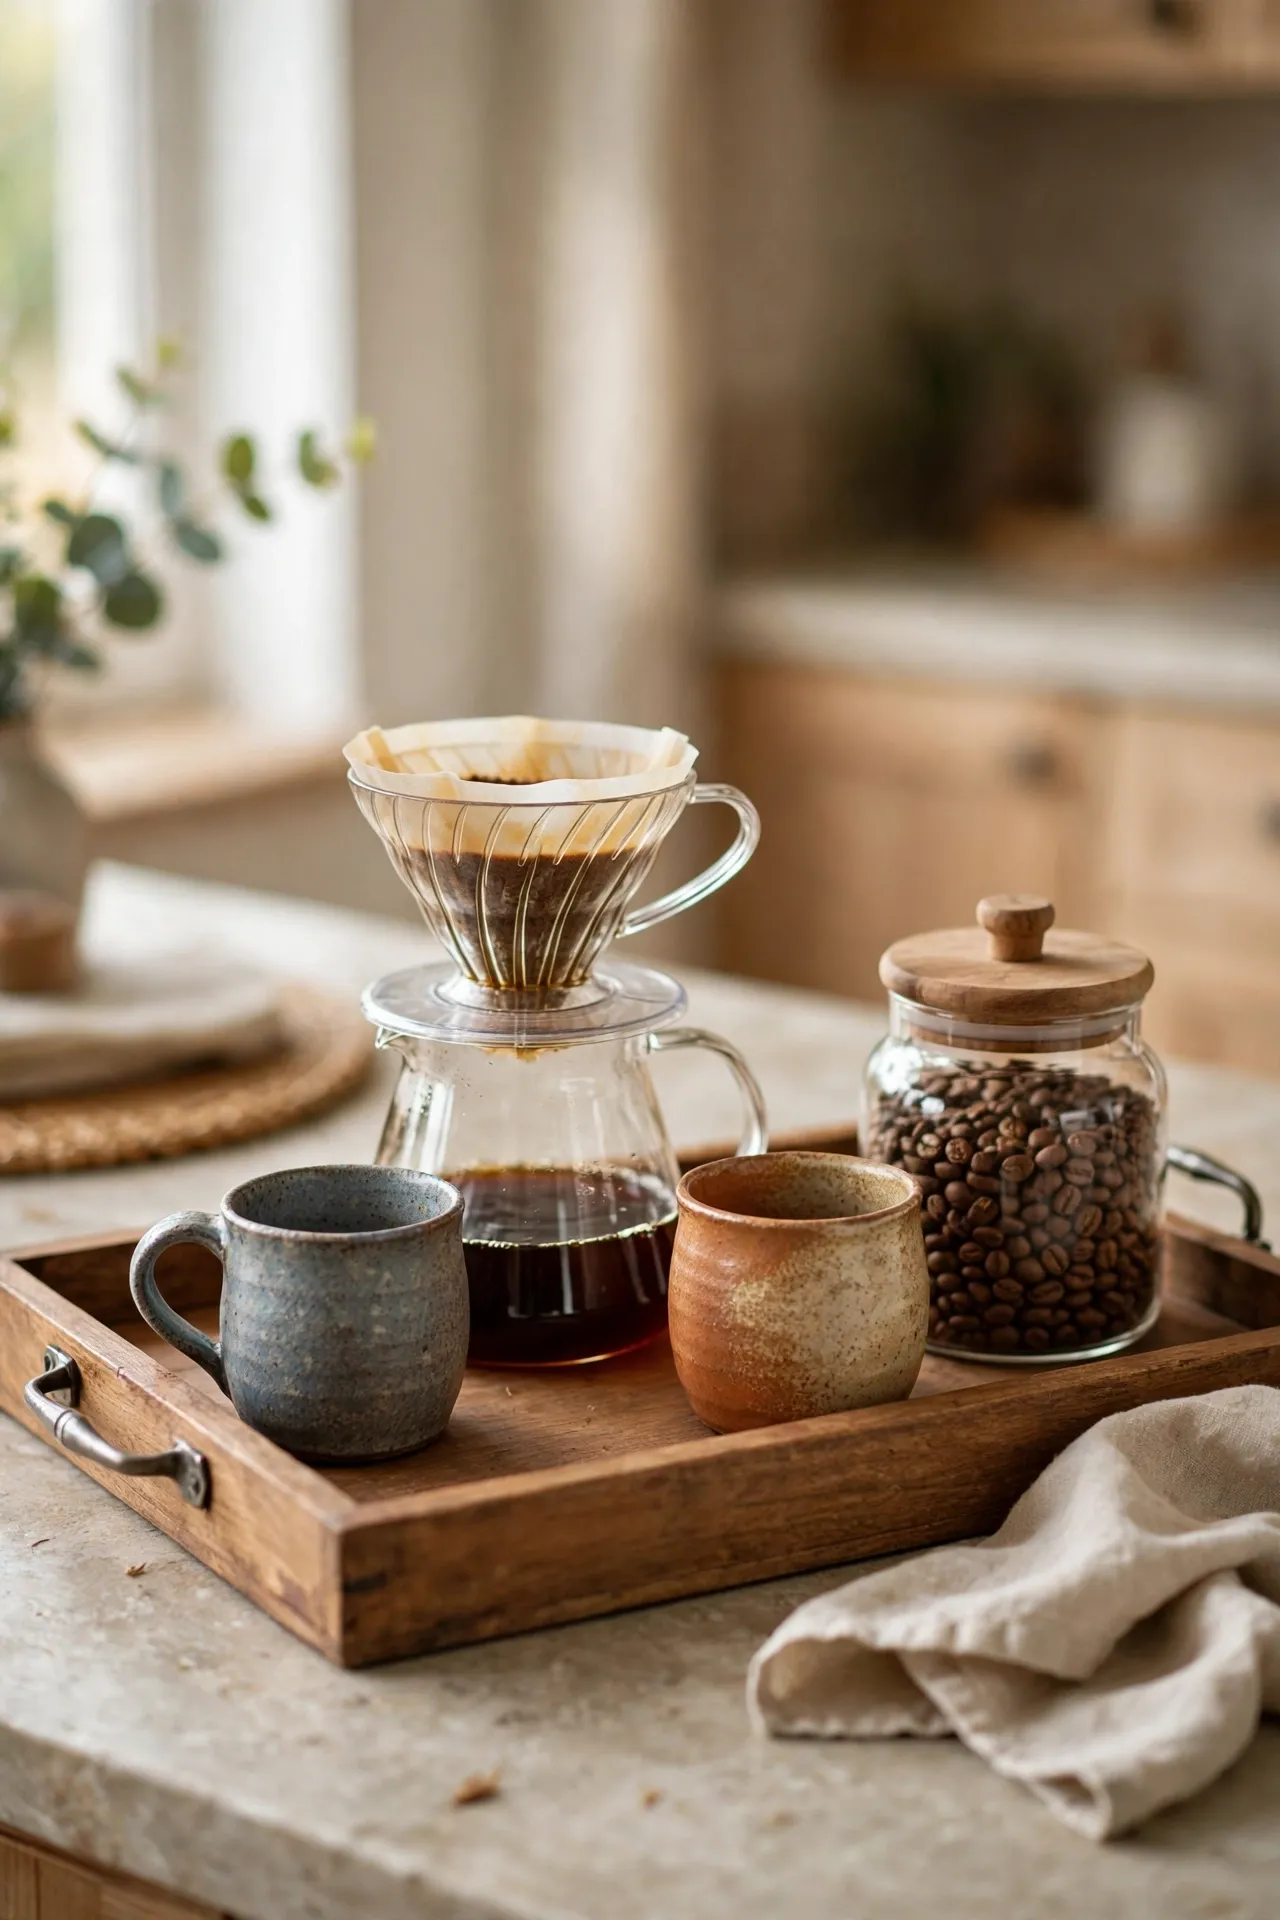
A simple wooden tray with raised edges is the easiest coffee bar you’ll ever make — and it moves with you from kitchen to sofa. Find a tray with handles, then build your kit: a small brewer, one or two mugs, a lidded jar of beans, and a folded napkin or cloth. The edges keep everything from sliding, and the tray itself makes a plain setup look deliberate. If your tray is pale wood and your mugs are mismatched, don’t fight it — mixed crockery on a plain tray has a cosy, collected feel that matching sets can’t copy. I tried cramming a full kettle onto mine and it dominated everything — the mistake to avoid is oversizing the kit; the tray should carry the ritual, not the whole kitchen.
Cost: ~$8 for a tray | Time: 15 minutes
Floating Shelf & Wall Displays
Going vertical is how small kitchens get a coffee bar without losing a single inch of counter. These four ideas use shelves, pegboards and walls to display your mugs and kit like a little café.
9. Floating Shelf Coffee Display
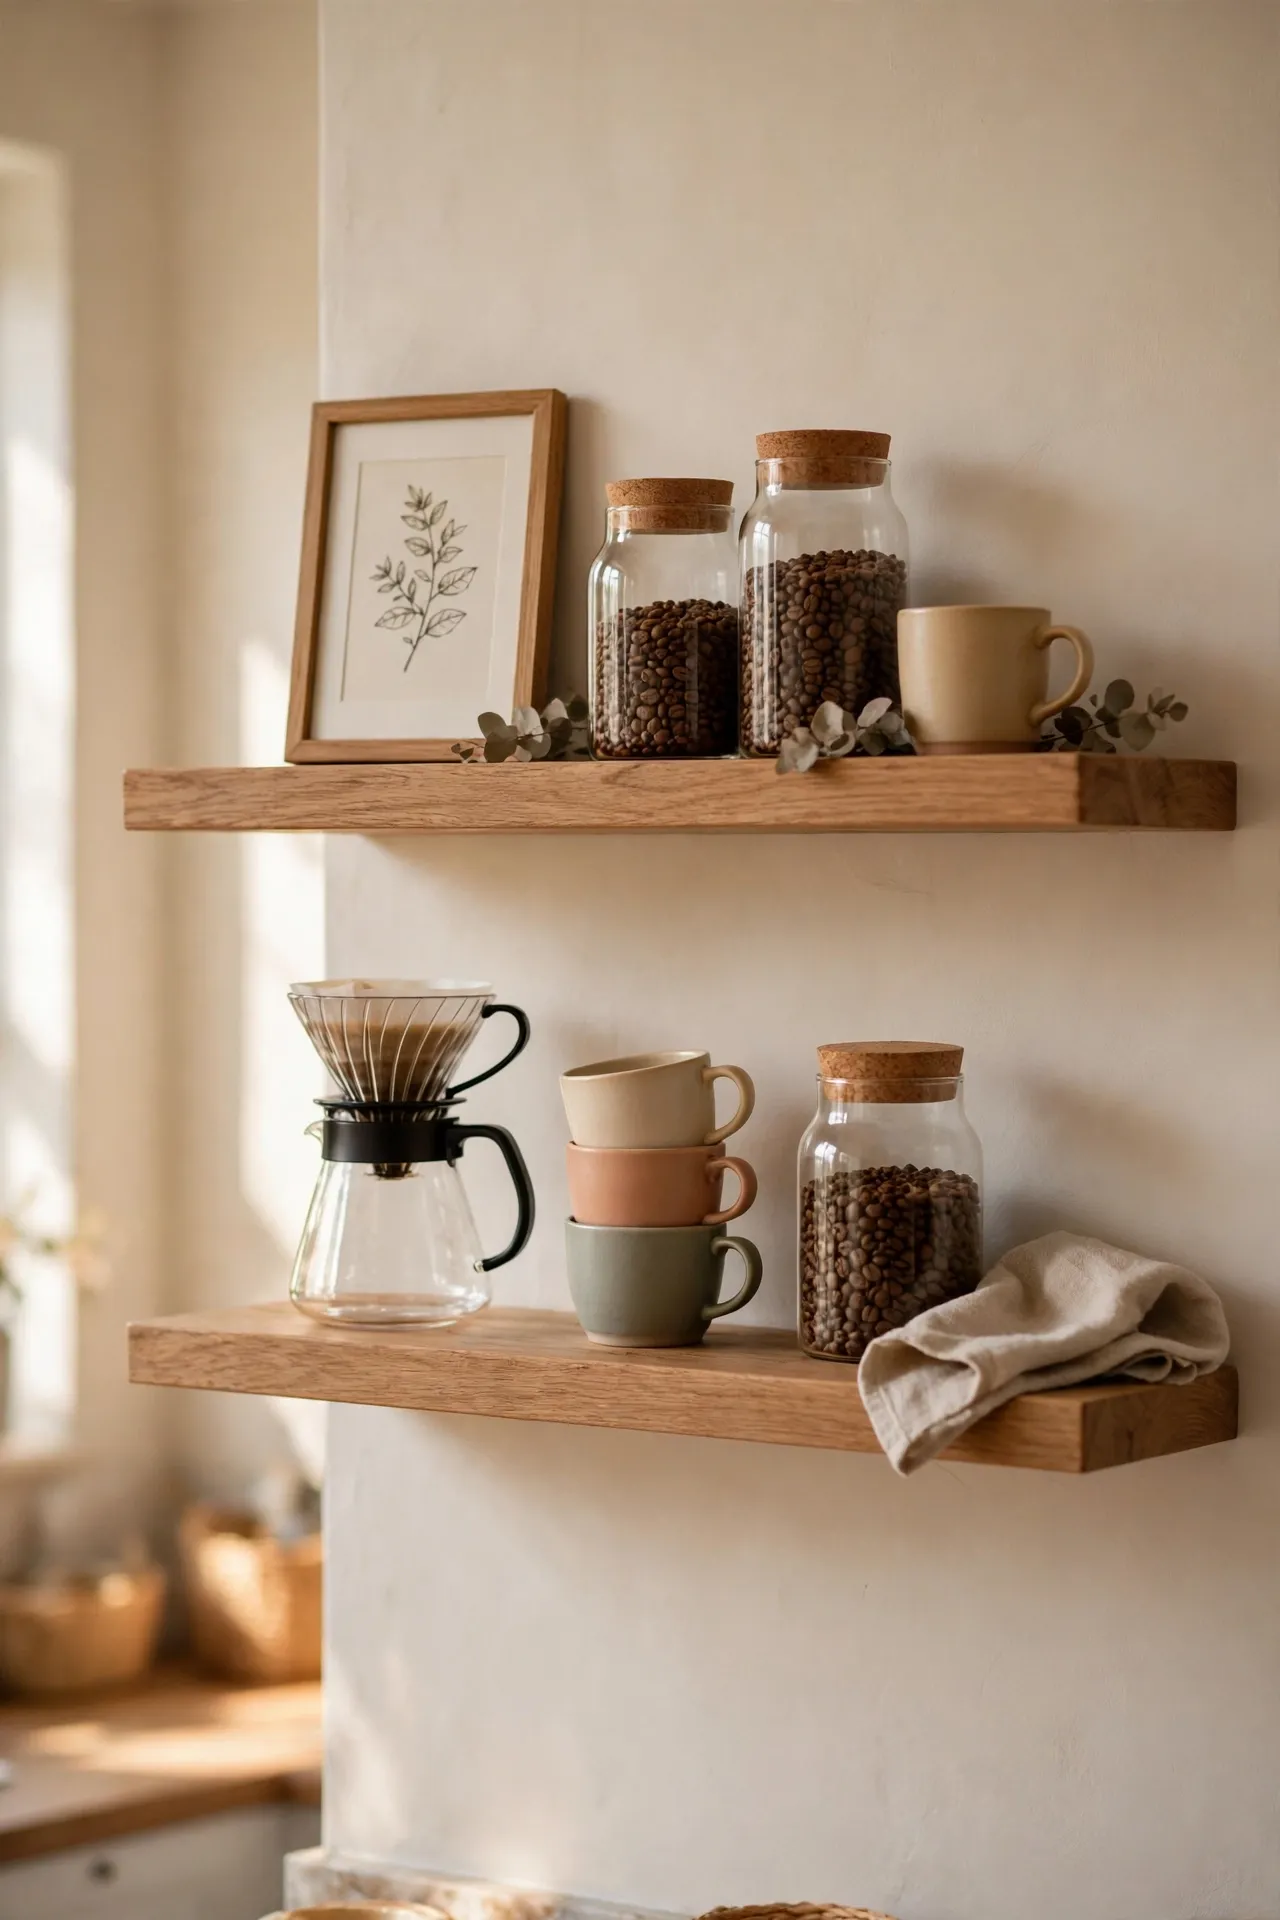
Two floating shelves on an empty wall are all it takes to fake a built-in coffee station. Mount them about 30cm apart above a small counter or side table, then style the lower shelf with your brewer and daily mugs and the upper one with jars of beans, sugar and a small framed print. Stagger heights so it doesn’t look like a grid — a tall jar next to a short stack of cups reads as styled, not stored. Keep the shelves close to where you brew so it’s functional, not just pretty. I tried spacing mine a full metre apart and they looked like two unrelated shelves — the mistake to avoid is floating them too far from each other; tight spacing is what makes them read as one unit. If your counters feel cluttered overall, these (see also: 19-kitchen-counter-decor-ideas-that-look-styled-not-cluttered) tricks will help.
Cost: ~$16 for two shelves | Time: 45 minutes
10. Pegboard Coffee Wall
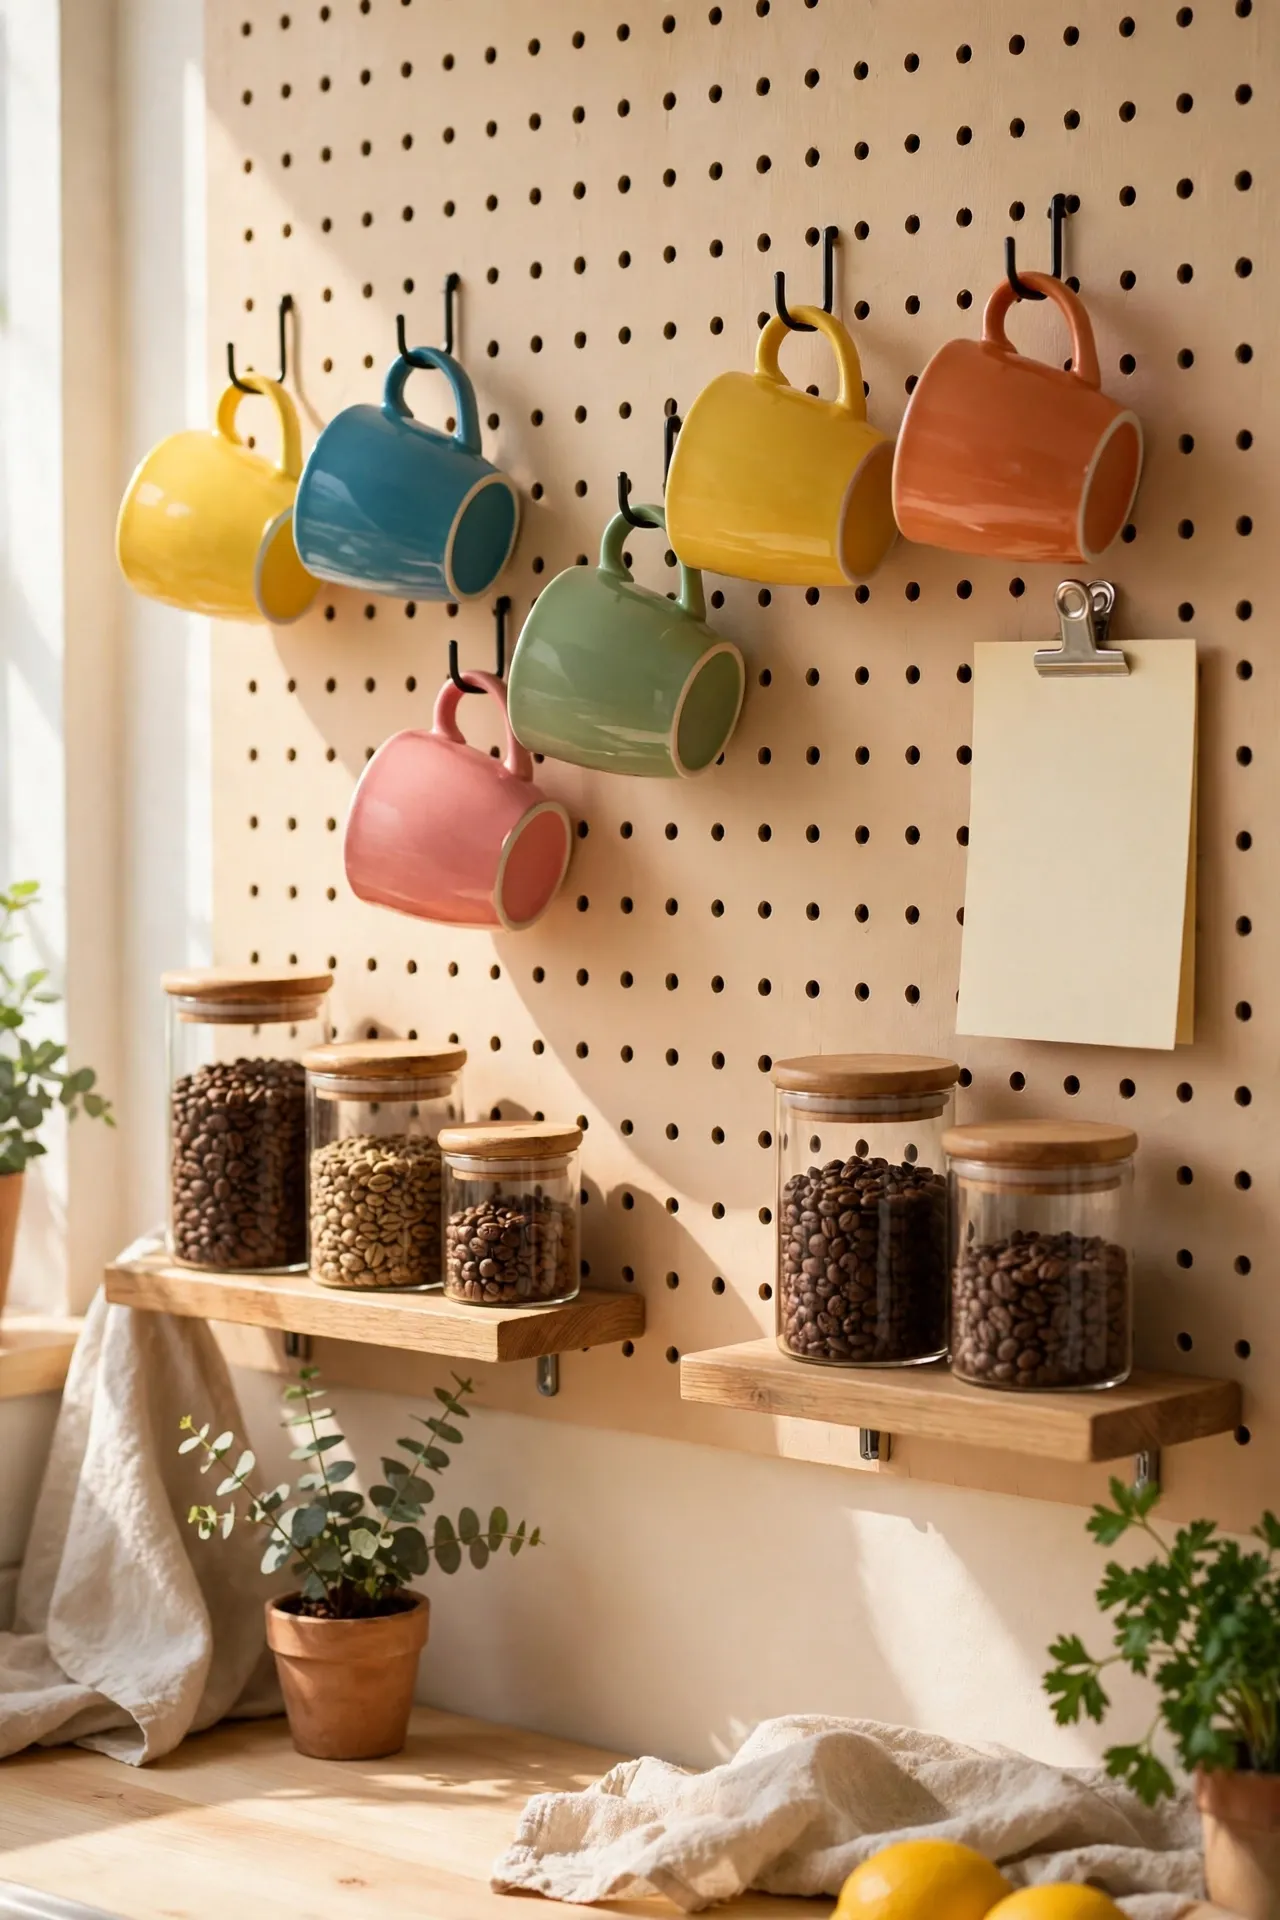
A pegboard turns a blank wall into a fully customisable coffee display that you can rearrange whenever the mood changes. Mount a board — painted in a colour you love or left natural — then add hooks for mugs, small shelves for jars, and a clip for a printed menu or a favourite quote. The best part is flexibility: move hooks around in seconds when you add a new mug or gadget. Paint the board the same colour as the wall behind it for a calm look, or go bold with a dark shade to make white mugs pop. I tried hanging every mug I owned and it looked like a shop clearance — the mistake to avoid is overfilling; four to six mugs on display looks curated, the rest can live in the cupboard.
Cost: ~$12 for board and hooks | Time: 1 hour
11. Chalkboard Menu Sign Wall
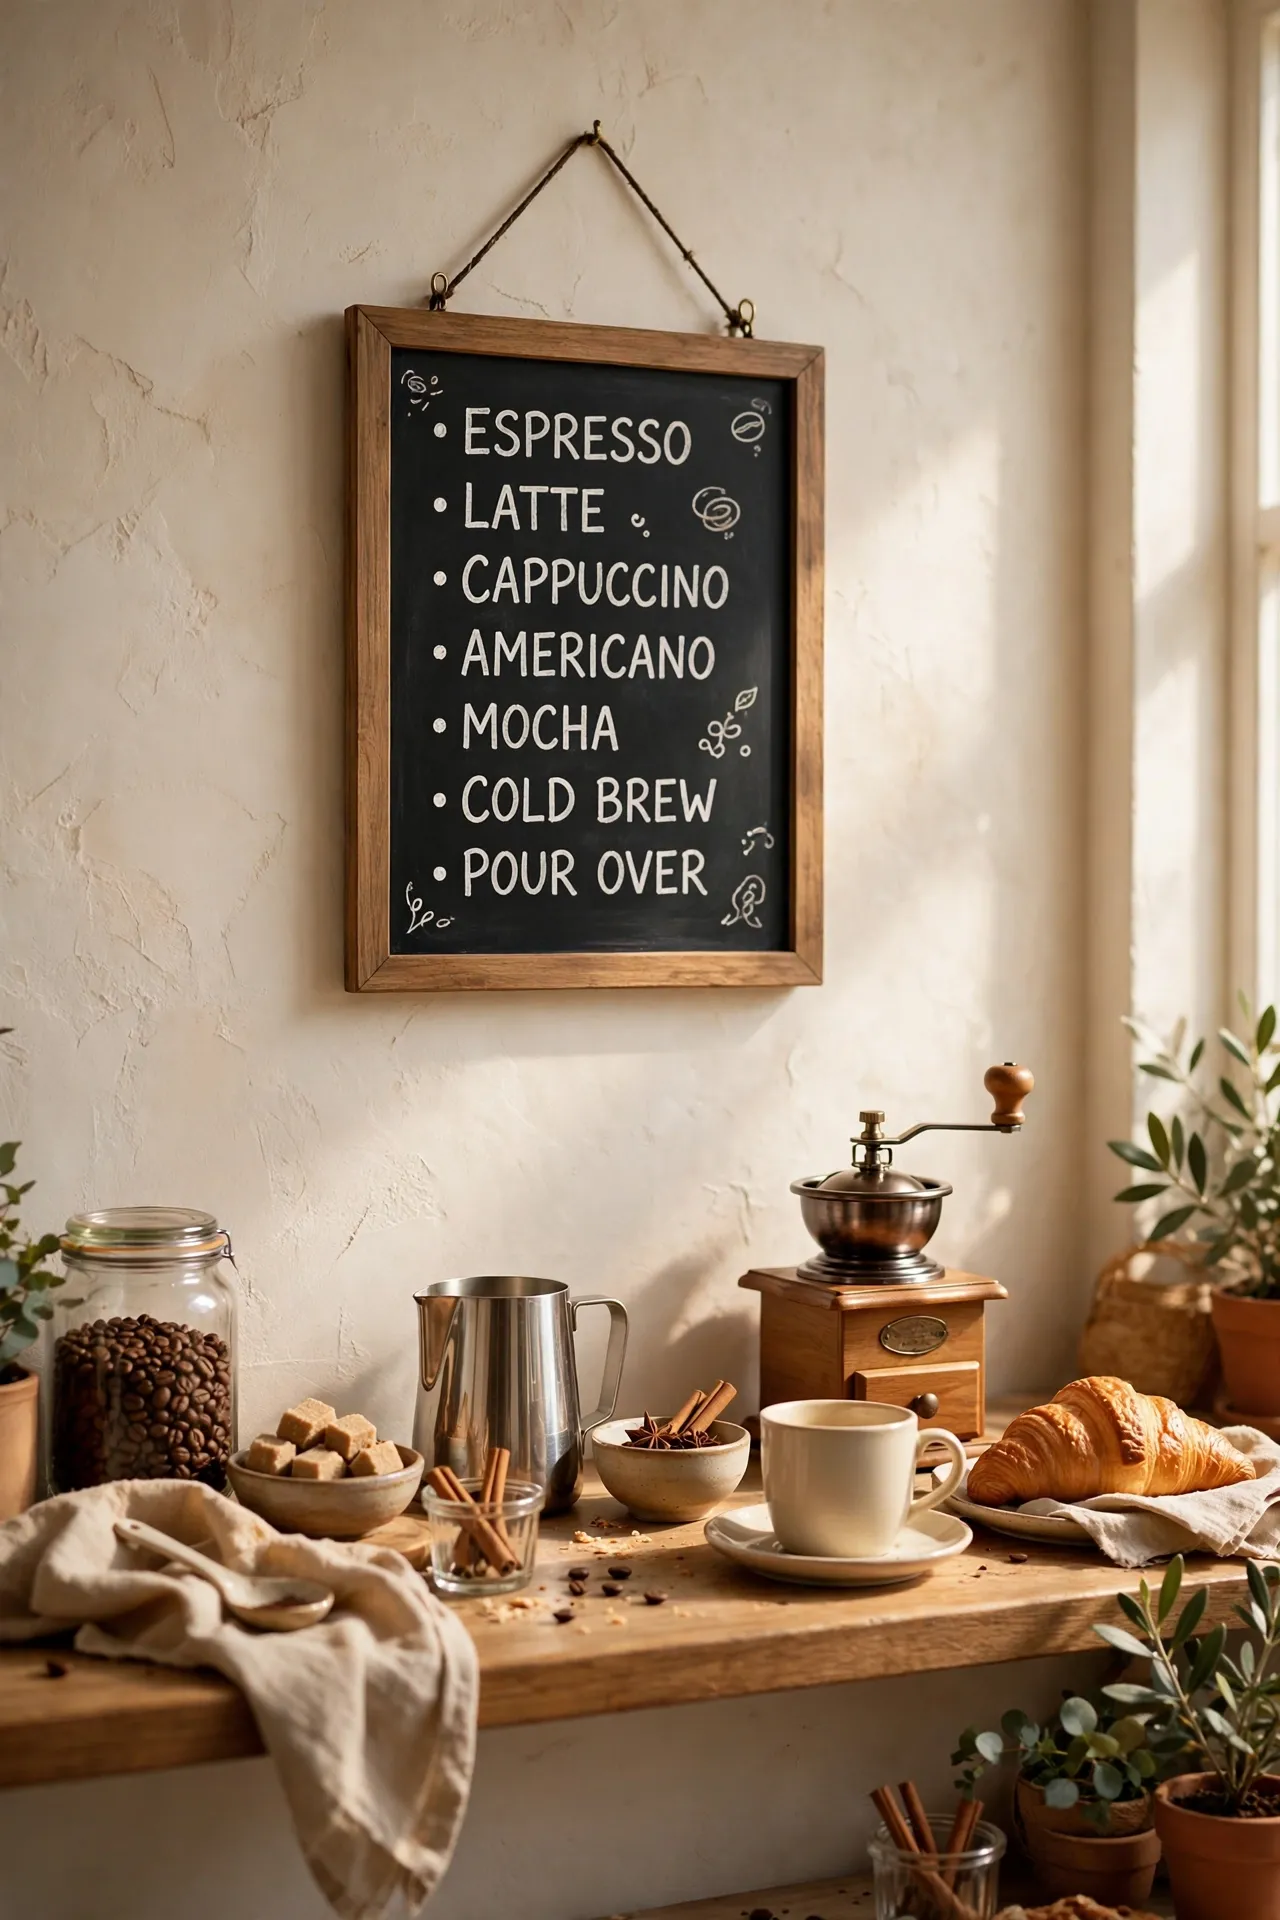
Nothing says coffee bar like a little chalkboard menu — and you don’t need lettering skills to pull it off. Pick up a small framed chalkboard (or paint a frame’s glass with chalkboard paint), write your house “menu” in chalk markers — flat white, oat latte, the works — and hang it above your setup. Chalk markers are more forgiving than real chalk and won’t smudge when someone brushes past. Update it seasonally for fun: pumpkin spice in autumn, peppermint in December. I tried freehand calligraphy with a cheap marker and it bled everywhere — the mistake to avoid is fancy pens on a rough board; a fine-tip chalk marker on a smooth surface keeps lines crisp.
Cost: ~$7 for board and markers | Time: 25 minutes
12. Mug Rail Wall Display
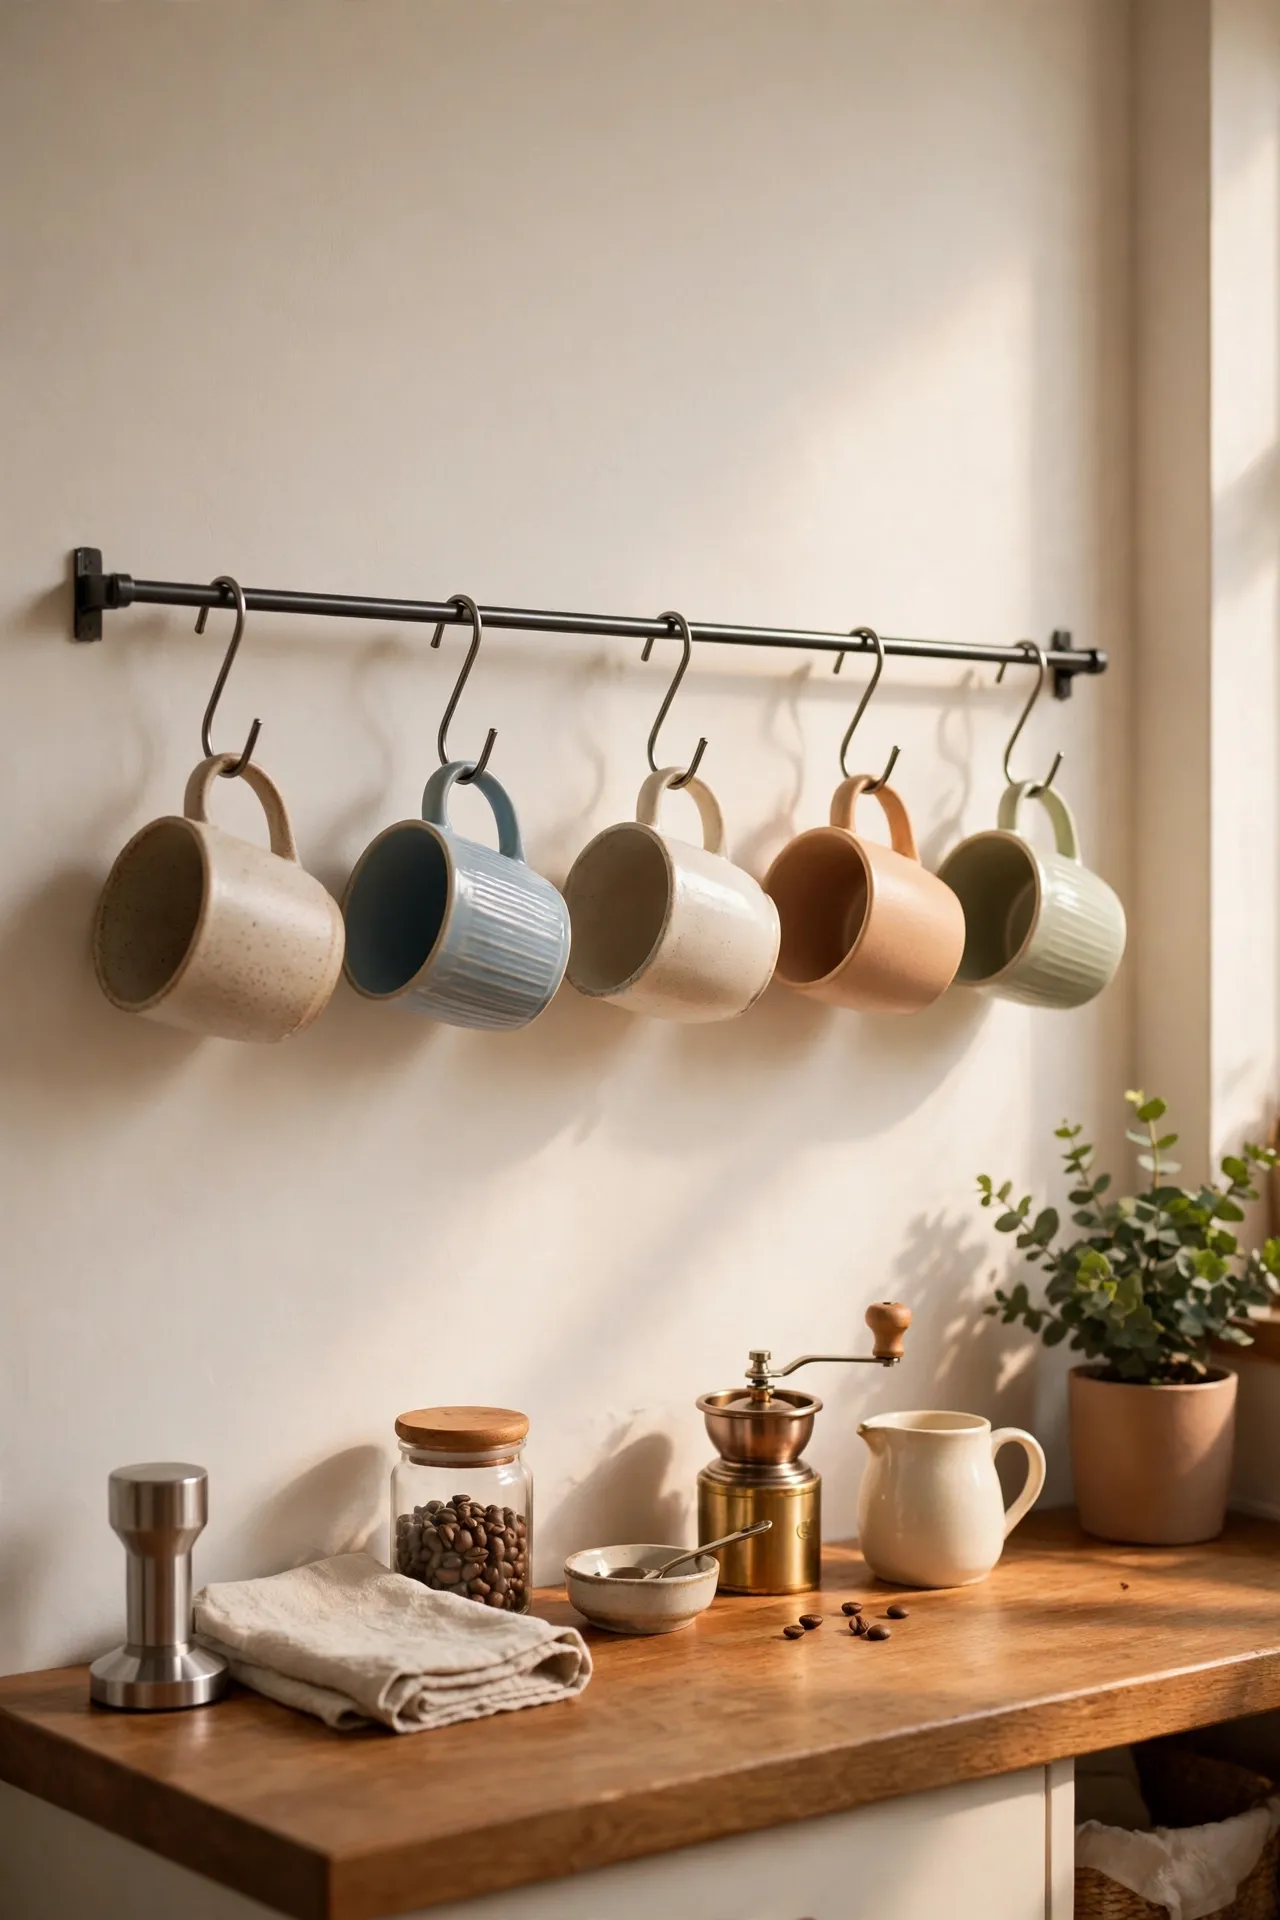
A single rail with S-hooks turns a mug collection into wall art and frees up a whole cupboard. Screw a slim rail or curtain rod under your shelf or on a bare wall, hang your prettiest mugs on S-hooks, and leave a little breathing room between each one. Mugs at slightly different heights look natural and collected — perfect symmetry reads as a shop display. This also forces a useful edit: only mugs worth looking at earn a hook. I tried hanging all twelve of my chipped freebies and the wall looked tired — the mistake to avoid is displaying the duds; the rail is for the favourites, and the rest can stay in the cupboard.
Cost: ~$9 for rail and hooks | Time: 30 minutes
Brew-Style Corners & Finishing Touches
The last three ideas are about the finishing layer — the brewing method, the lighting and the seasonal swaps that take a coffee setup from functional to favourite-corner-of-the-kitchen.
13. French Press & Pour-Over Minimal Bar
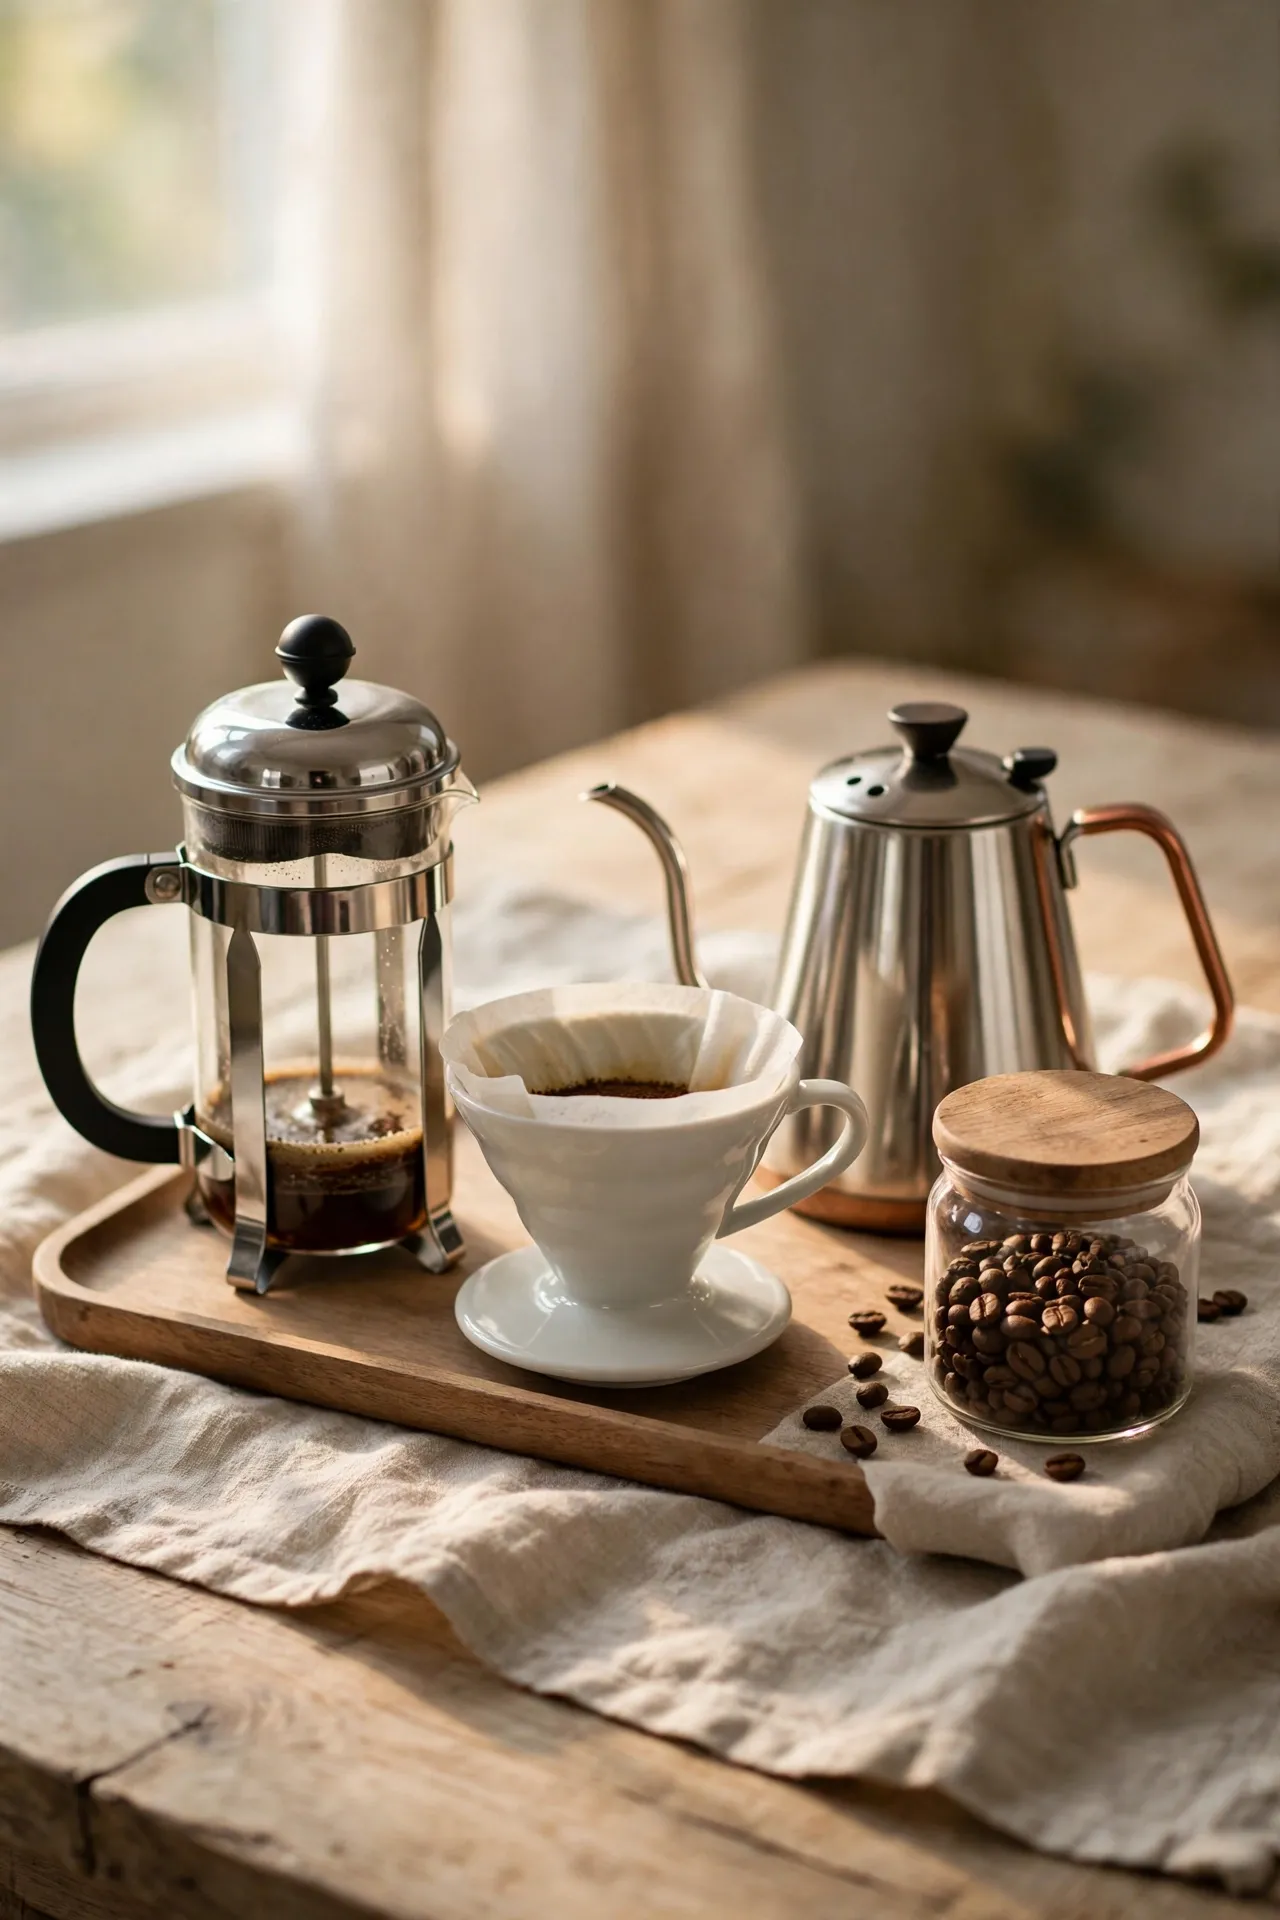
You don’t need a machine at all — a manual brewer setup is the cheapest coffee bar there is, and it looks effortlessly chic. Group a French press or pour-over cone, a gooseneck kettle and a small grinder on a tray or shelf, add a linen cloth and a jar of whole beans, and you’ve got a bar that costs less than a week’s worth of café coffees. The manual ritual is the whole point: slow mornings, good beans, no buttons. Keep a folded tea towel under the dripper to catch drips and add texture. I tried hiding my kettle in the cupboard between uses and the faff killed the habit — the mistake to avoid is storing the kit away; this setup only works if it’s always ready to go. For more open-shelf styling that won’t break the bank, these (see also: 21-open-shelving-kitchen-ideas-styled-for-less) ideas pair perfectly.
Cost: ~$20 for brewer and kettle | Time: 20 minutes
14. Fairy Light Coffee Corner
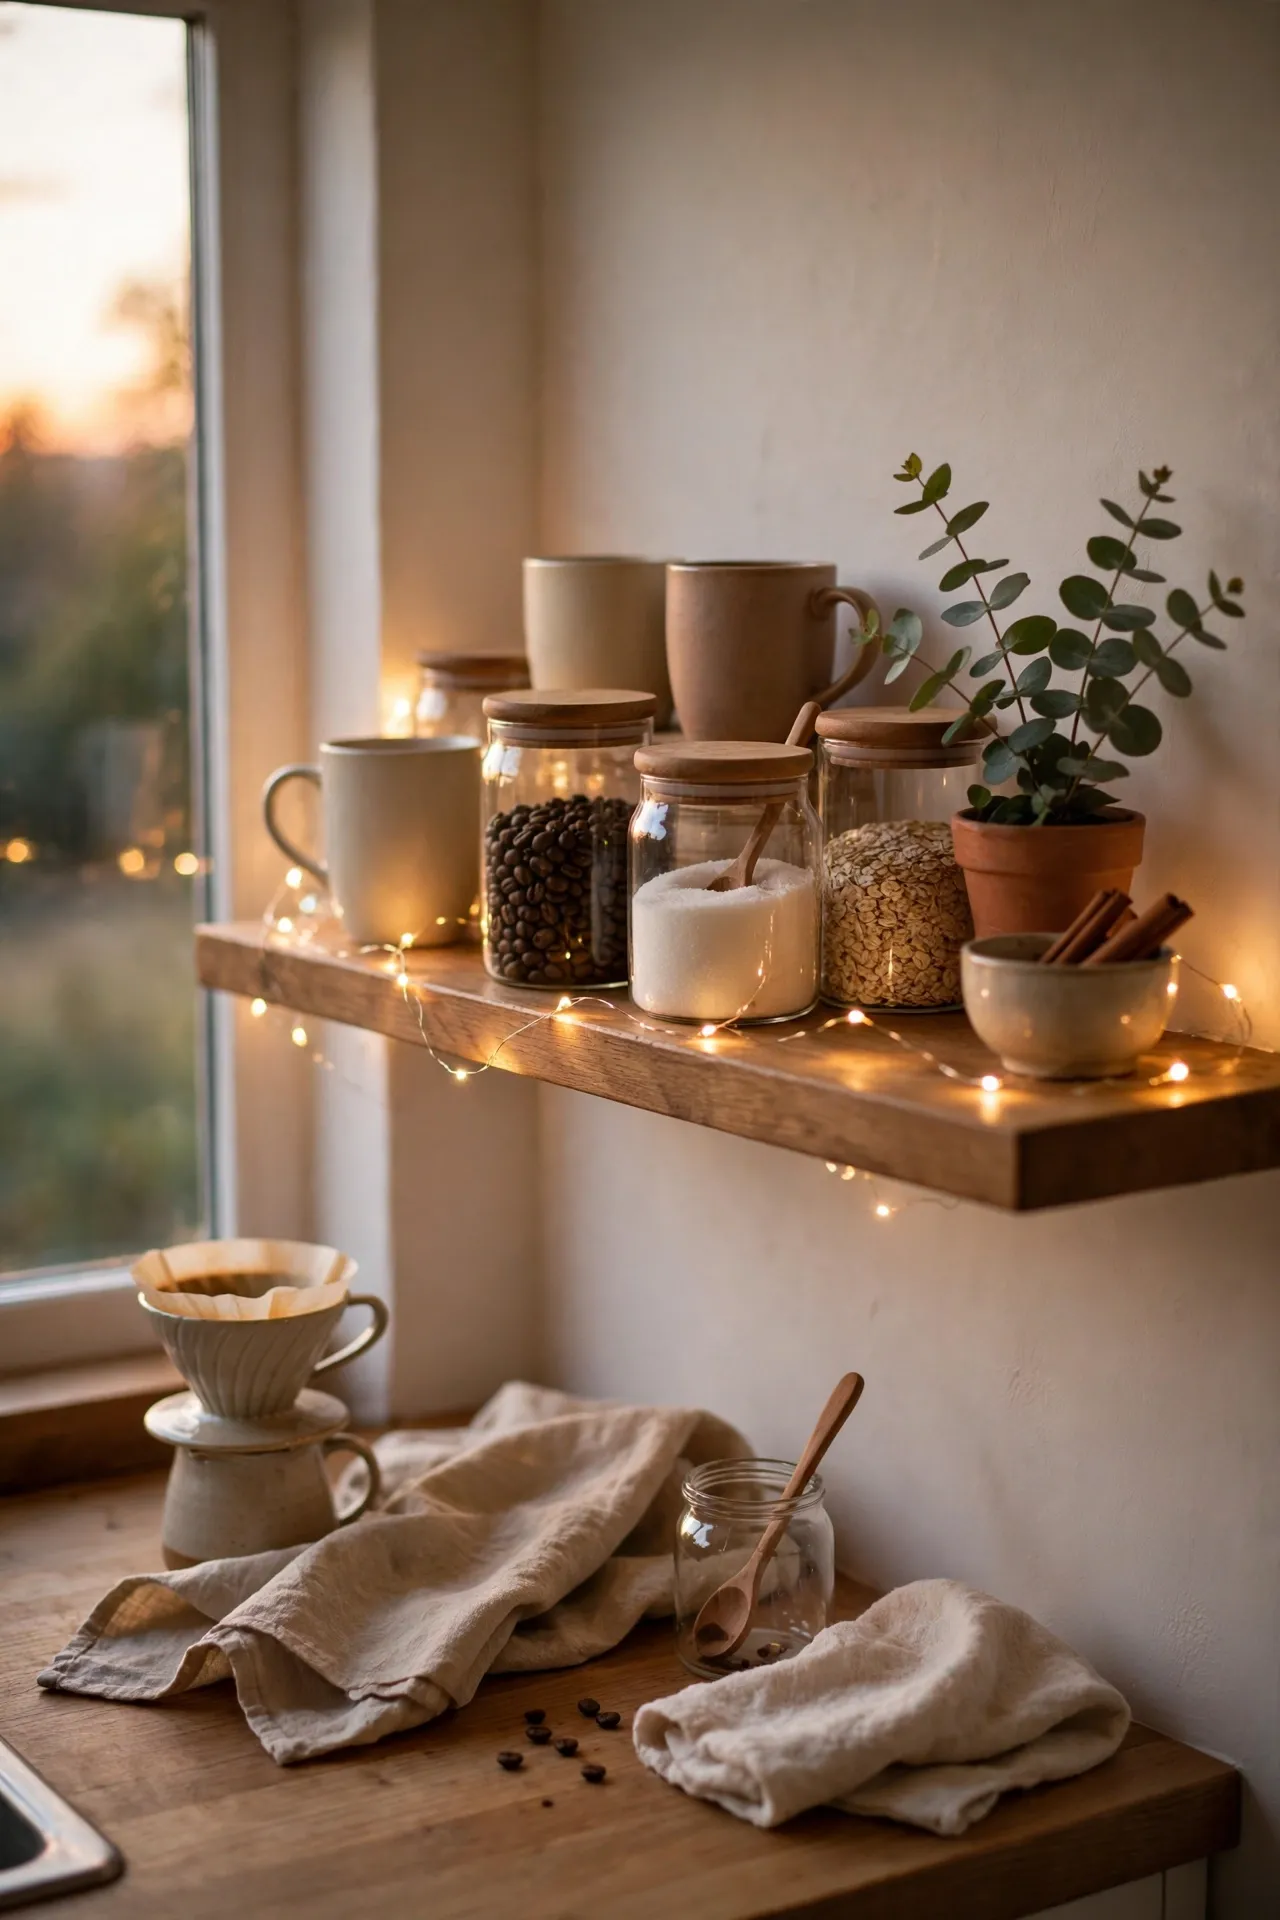
A string of warm fairy lights is the cheapest way to make a coffee corner feel like an evening café. Drape a battery-operated set along your shelf, around a framed print or behind your jars — the warm glow against mugs and glass looks ten times more expensive than it is. Use a timer function so they switch on by themselves in the evening; no one remembers to do it manually. Stick to warm white, not multicolour, unless you want Christmas all year. I tried cool-white lights first and my corner looked like a hospital corridor — the mistake to avoid is the wrong colour temperature; warm white is the whole trick.
Cost: ~$6 for fairy lights | Time: 10 minutes
15. Seasonal Coffee Bar Swaps

The cheapest way to keep a coffee bar feeling fresh is swapping a few small things with the seasons instead of rebuilding it. Keep your base — machine, mugs, tray — and change the easy layers: a sprig of eucalyptus in spring, a small pumpkin beside the sugar jar in autumn, a candy-cane stirrer in winter. A different syrup bottle or a new tea towel counts too; nobody notices the constants, only the changes. Store the seasonal bits in one small box so the swap takes five minutes. I tried redecorating the whole thing every season and burned out by February — the mistake to avoid is a full overhaul; three small swaps is all you need for the “new bar” feeling.
Cost: ~$5 per season | Time: 10 minutes
A proper coffee bar isn’t about the machine or the marble — it’s a corner of your kitchen that says your mornings matter. Pick the setup that fits your space, start with what you already own, and let it grow one small swap at a time.
