25 Renter-Friendly Bathroom Upgrades That Need No Drilling
When I moved into my first rental, the bathroom was the room I gave up on first. Beige tiles, a wobbly towel bar I was not allowed to touch, and a landlord rule that said no holes in the walls. It took me a year to realise how many renter friendly bathroom ideas need zero drilling at all. Every upgrade on this list is damage-free, removable, and cheap enough to take with you when you move. No power tools, no patching, no awkward deposit conversation at the end of the lease — just small swaps that make a tired rental bathroom feel like yours.
Part 1 — Shower and walls: quick wins that change the whole room.
1. Upgrade to a Rainfall Showerhead Without Tools
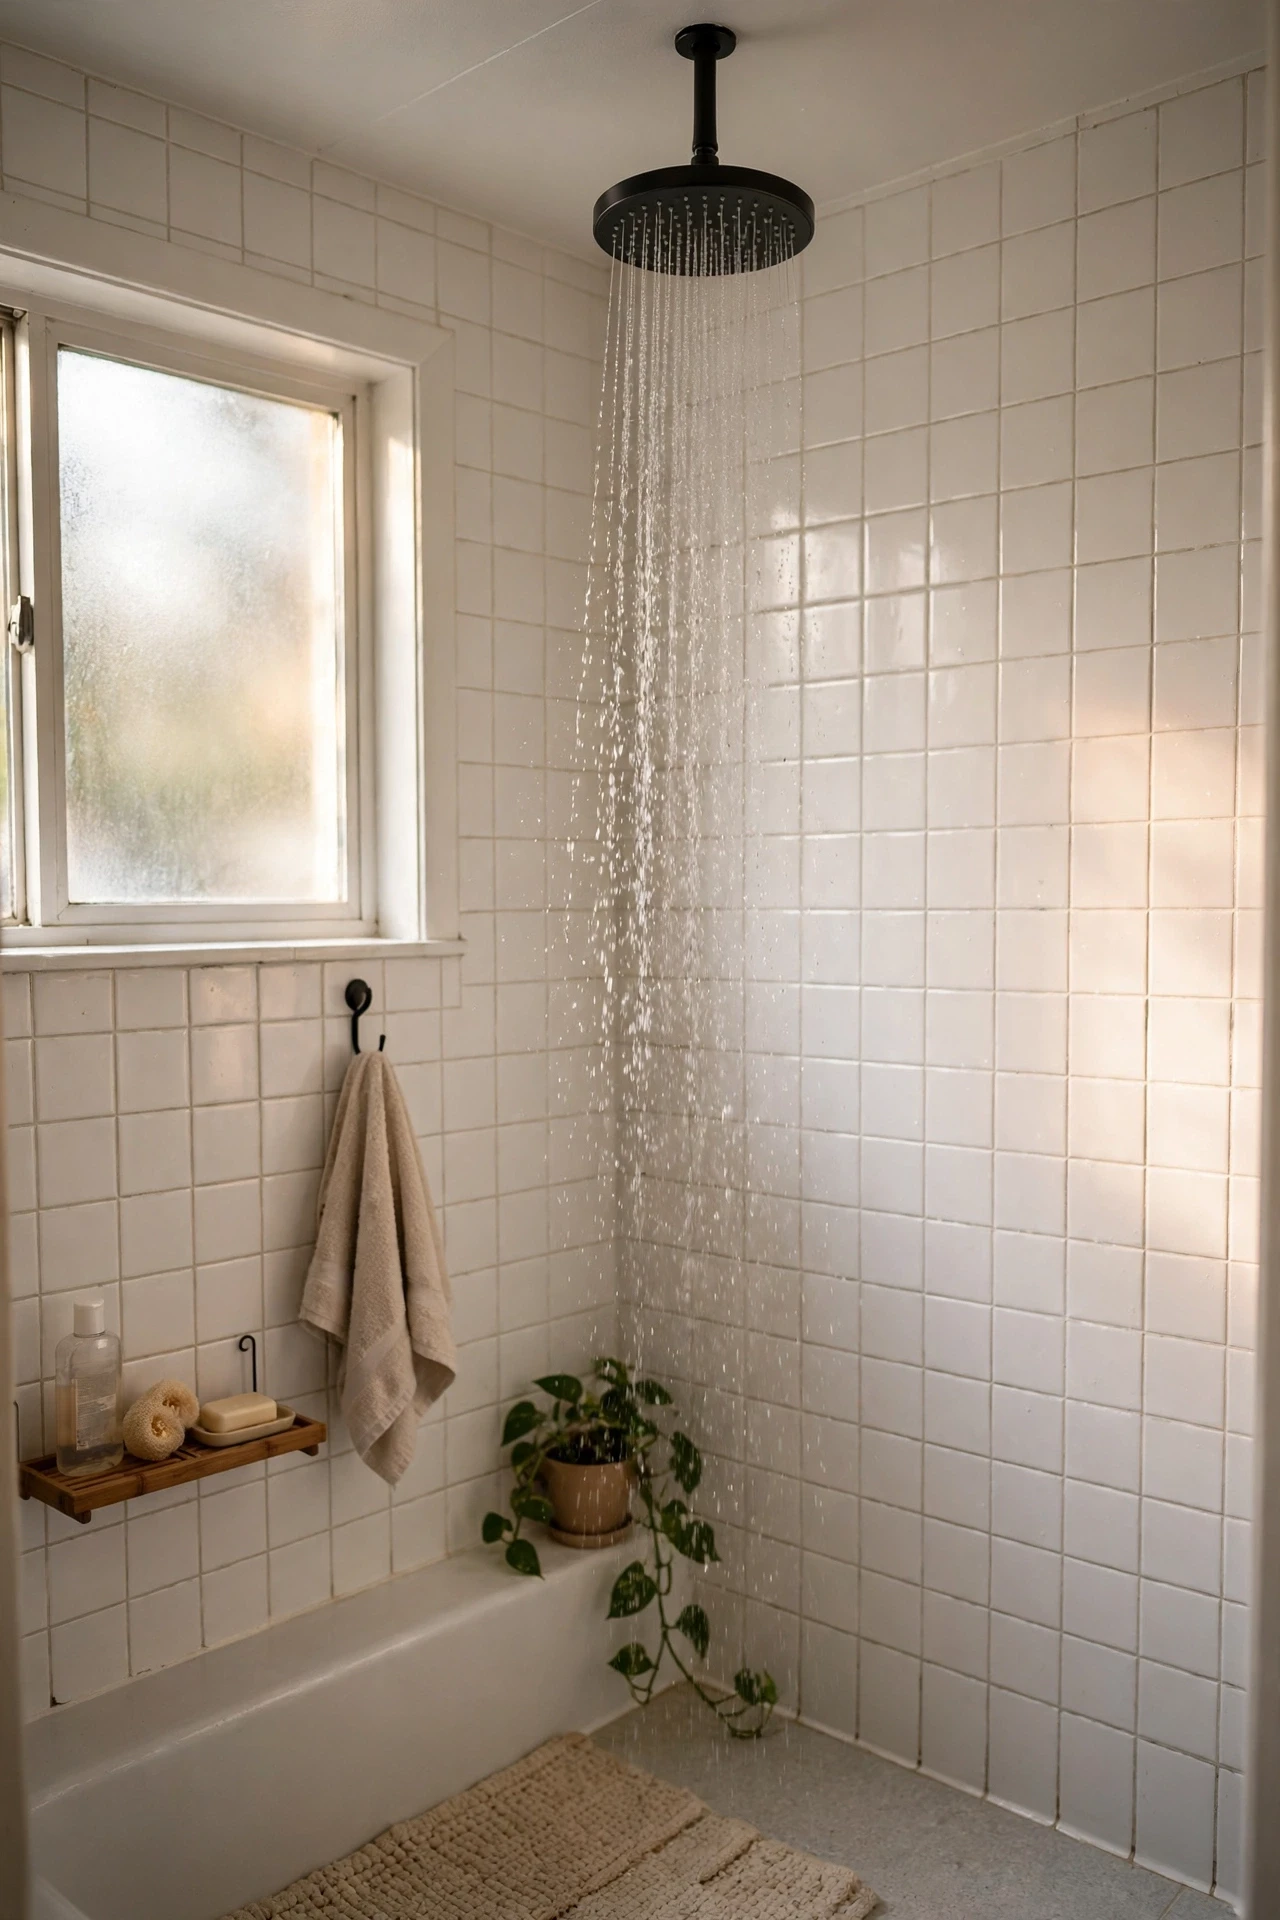
Swapping a showerhead is the single best rental upgrade I know, because you unscrew the old one by hand and screw the new one on in about five minutes. Look for a rainfall head with a few spray settings, and wrap the thread with plumber’s tape so it seals properly on the first try. Keep the original showerhead in a labelled bag under the sink so move-out day is painless. The difference in water pressure and coverage is honestly startling — my morning shower went from a thin drizzle to something that actually woke me up. I tried this and the mistake to avoid is overtightening, which can crack the fitting. Hand-tight plus a quarter turn is plenty.
Cost: ~$25 | Time: 10 minutes
💰 Budget win: A good rainfall head costs less than one takeaway dinner for two, and you take it to your next flat.
2. Hang an Over-the-Door Towel Rack
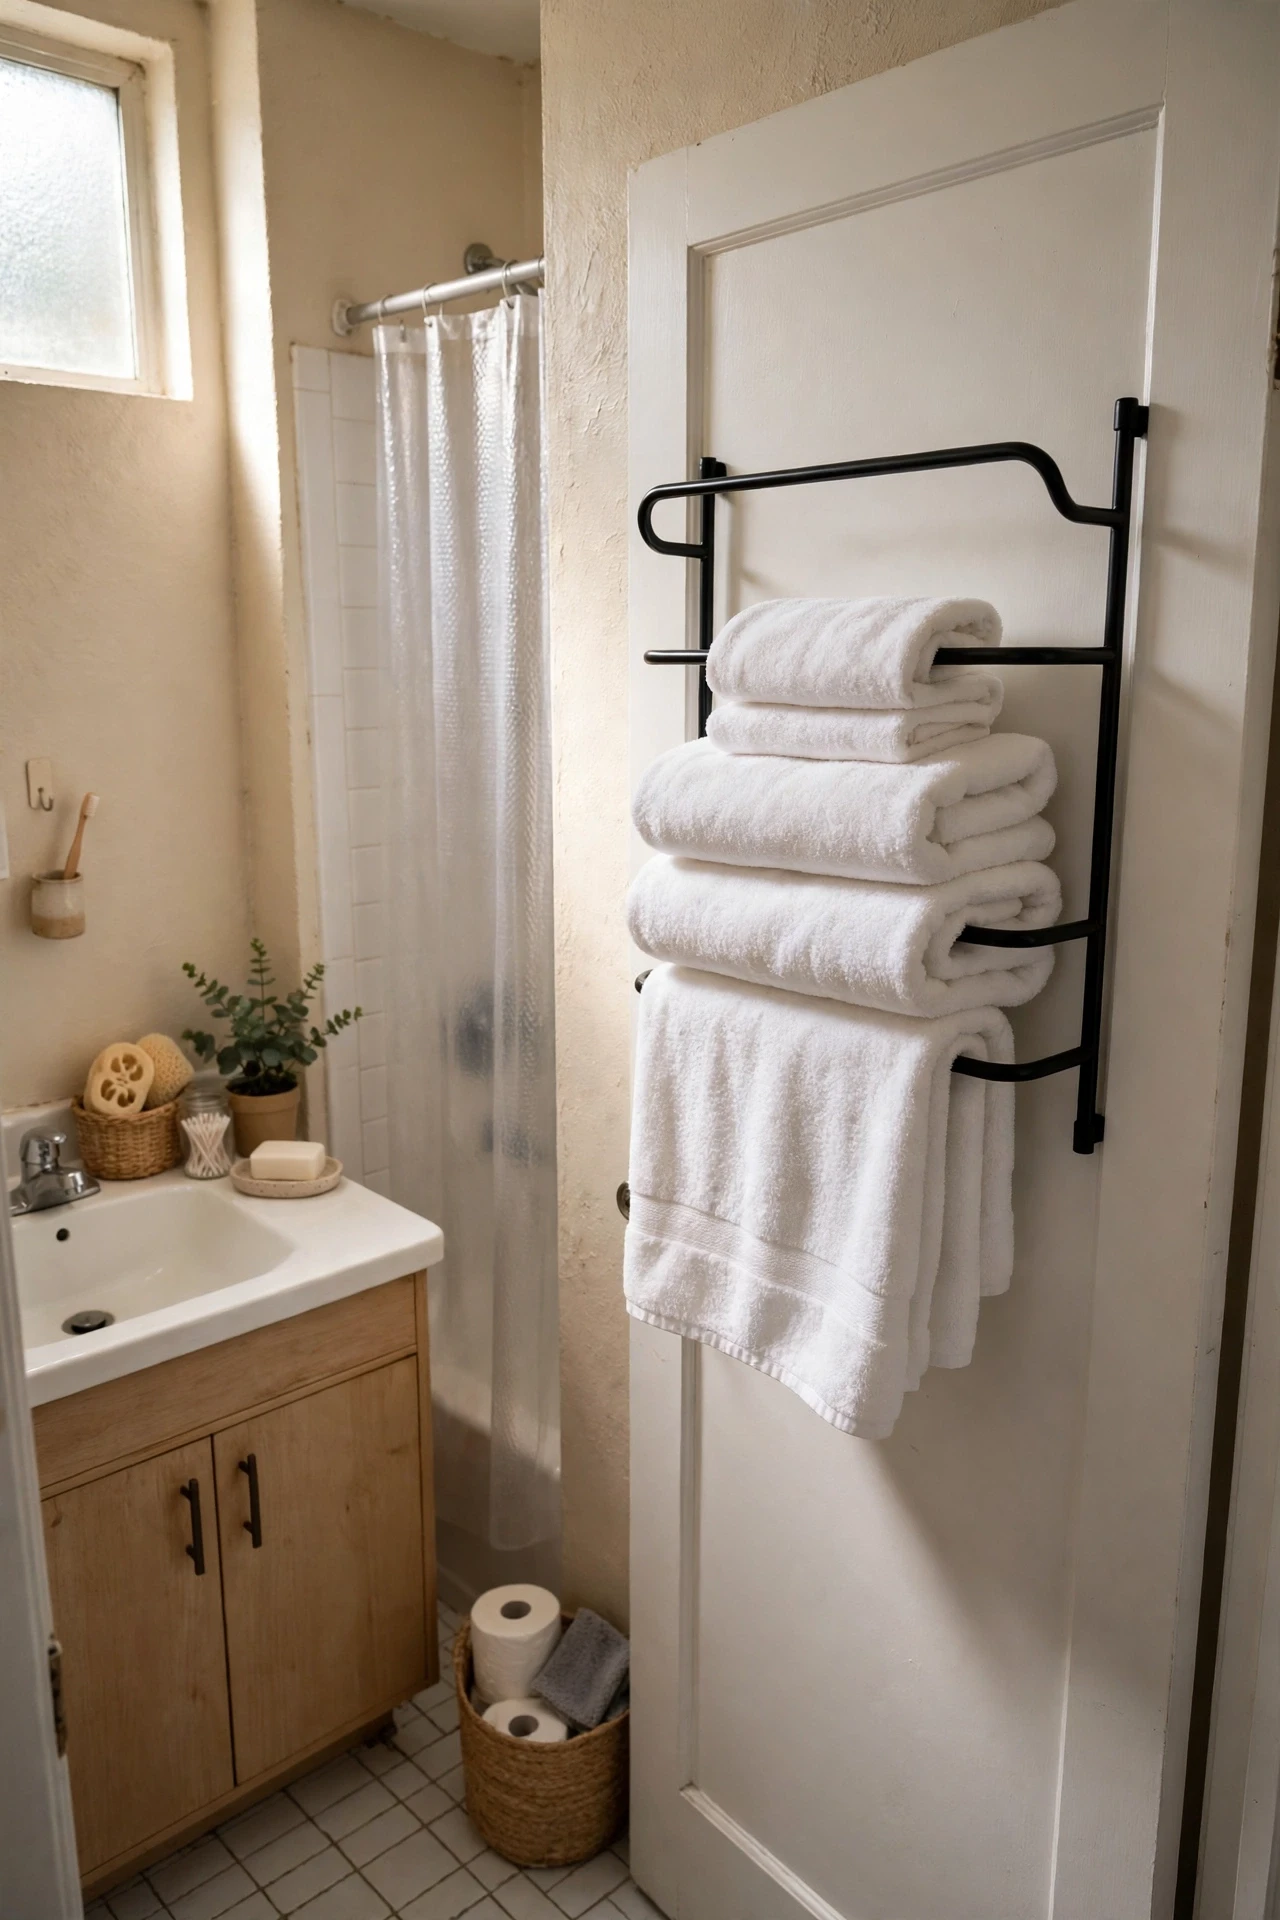
An over-the-door rack solves the classic rental problem of one towel bar for two people, and it needs no screws at all. Hook it over the bathroom door, check that the door still closes cleanly, and add the foam pads that usually come in the box so it does not rattle or mark the paint. Choose a rack with at least three bars so towels actually dry instead of bunching up damp. I hung mine in the first week of my last tenancy and it never moved, even with two heavy bath sheets on it every day. For more small-bathroom storage tricks, see my (see also: small-bathroom-storage-ideas) roundup.
Cost: ~$15 | Time: 5 minutes
💰 Budget win: One rack replaces three wall hooks you were never allowed to install, for the price of a coffee and a pastry.
3. Stick Removable Hooks Behind the Door
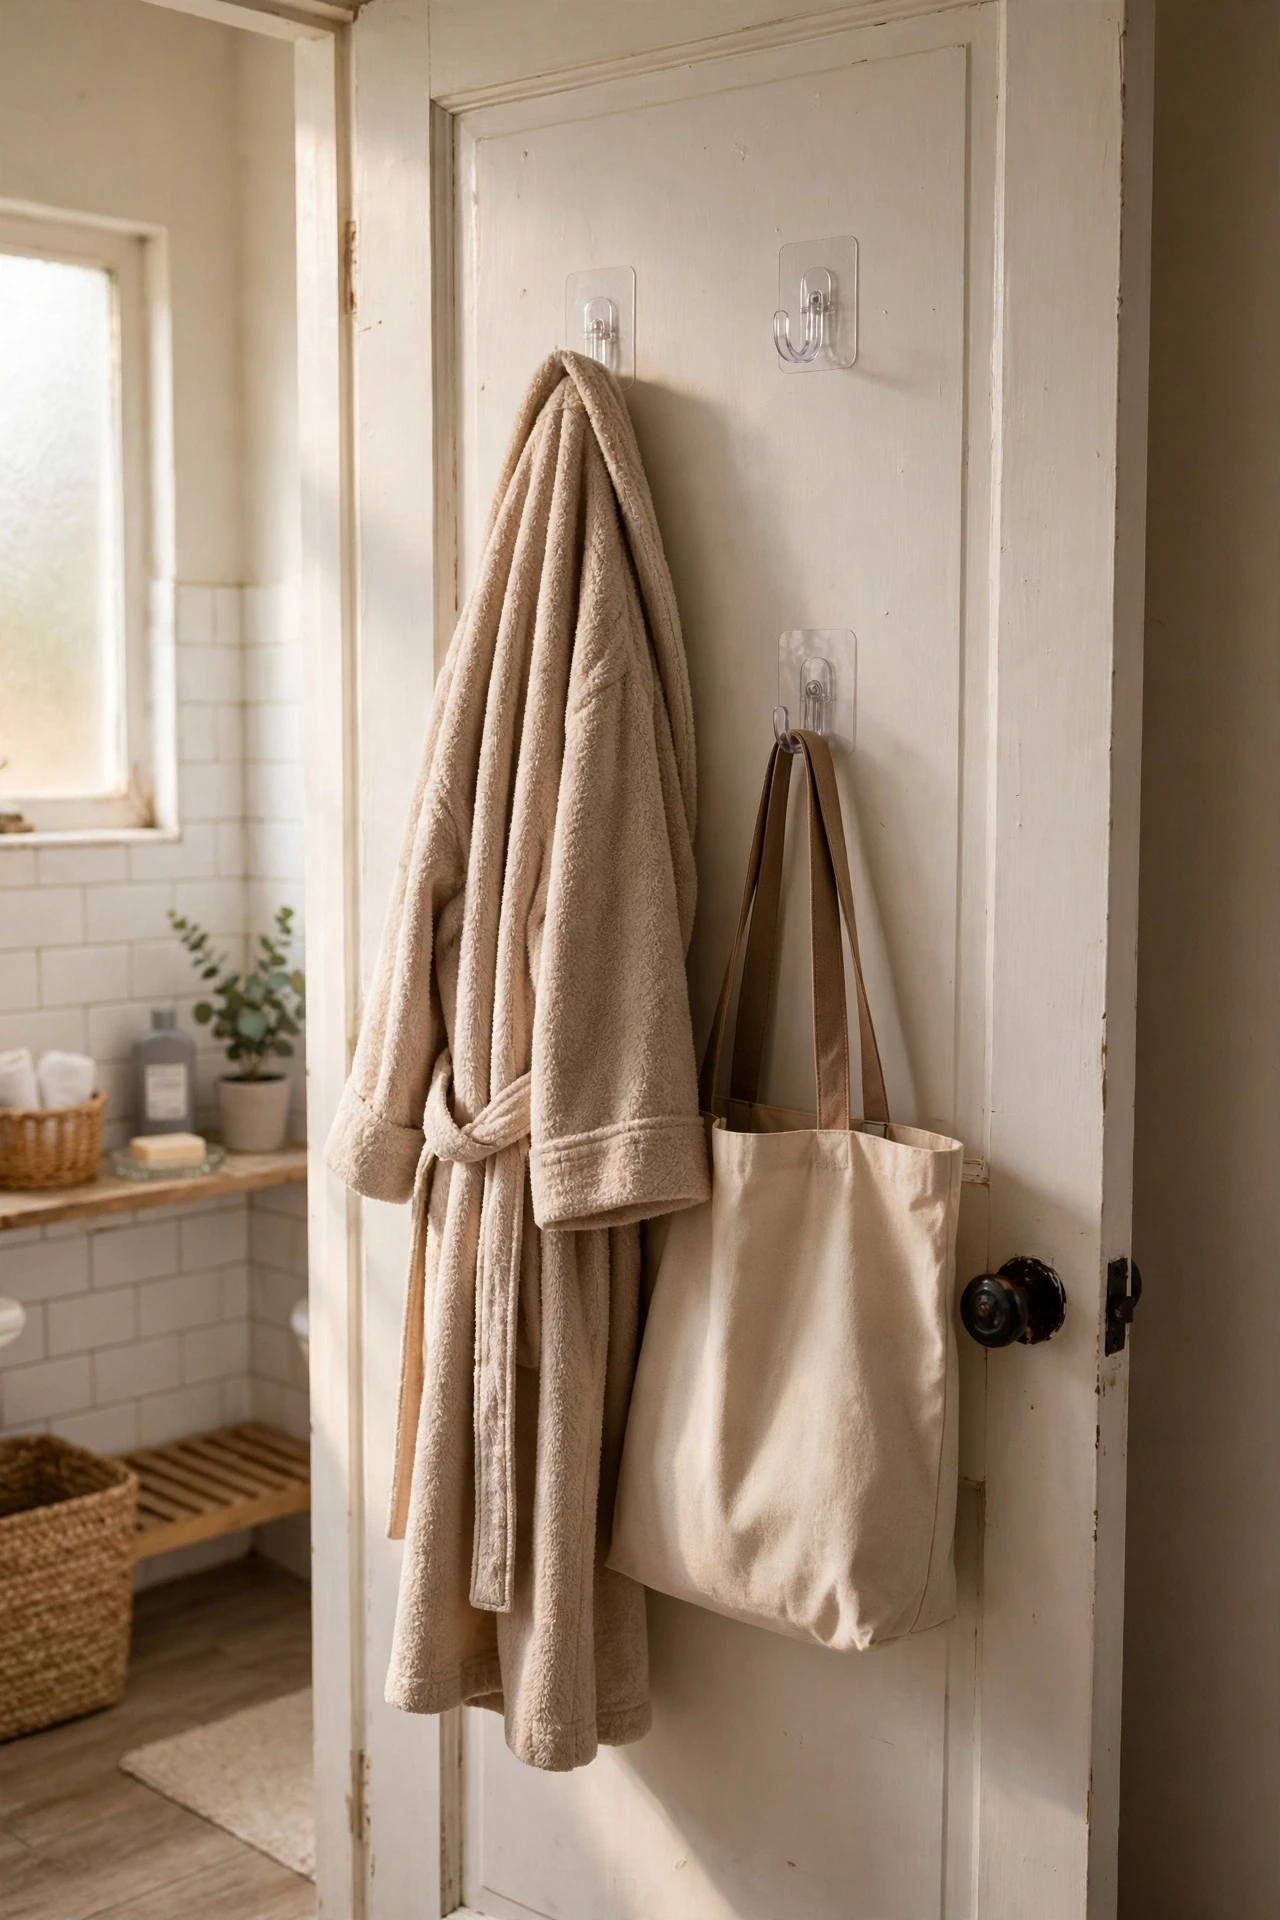
Removable adhesive hooks are the renter’s best friend, but only if you prep the surface first. Wipe the spot with rubbing alcohol, let it dry completely, then press the strip firmly for thirty seconds and wait an hour before hanging anything heavy. That one hour of patience is the difference between a hook that holds for a year and one that drops your robe at midnight. Use them behind the door for robes, bags, and a hanging toiletry pouch. When you move out, pull the tab slowly straight down and the paint stays intact. I learned this the hard way after ripping a strip off too fast in my first flat.
Cost: ~$8 | Time: 15 minutes
💰 Budget win: A multipack of strips costs a few dollars and covers the whole bathroom, door, and inside of the cabinet.
4. Lay Down a Thick Washable Bath Mat
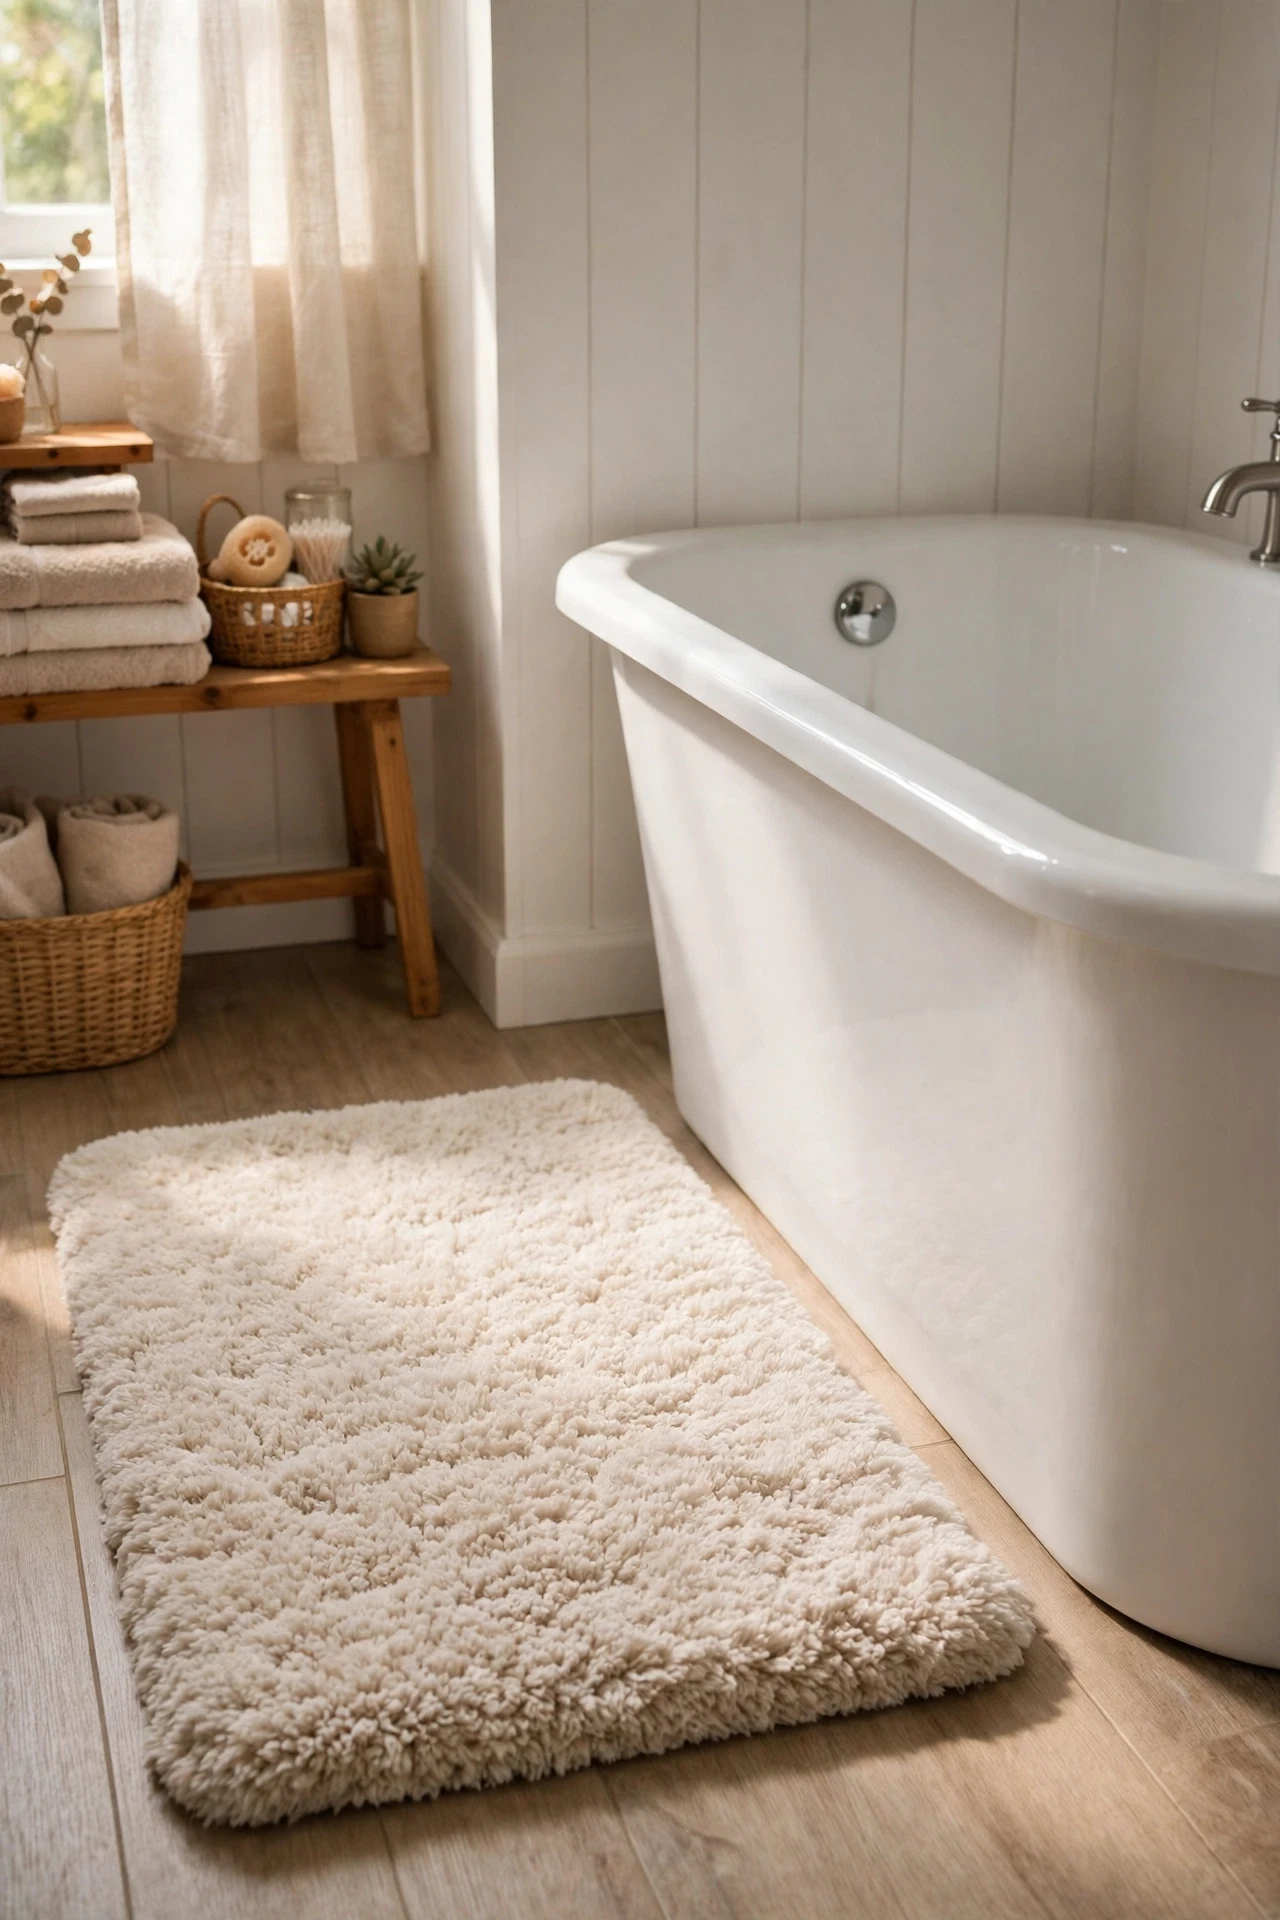
A thick bath mat does more than keep your feet warm — it hides tired tiles and sets the colour scheme for the whole room. Pick a washable cotton or chenille mat with a non-slip backing, and buy one big enough to actually step onto when you get out of the shower. Light colours brighten a windowless bathroom, while a darker mat hides stains between washes. Shake it out weekly and machine-wash it monthly so it never gets that musty smell. Mine transformed a grey rental bathroom instantly, and it was the first thing guests commented on. Save this idea if your tiles are the part you hate most — it is the fastest cover-up on this list.
Cost: ~$20 | Time: 5 minutes
💰 Budget win: A quality washable mat outlasts three cheap ones and survives the washing machine dozens of times.
5. Add a Tension Rod Over the Toilet for Extra Shelves
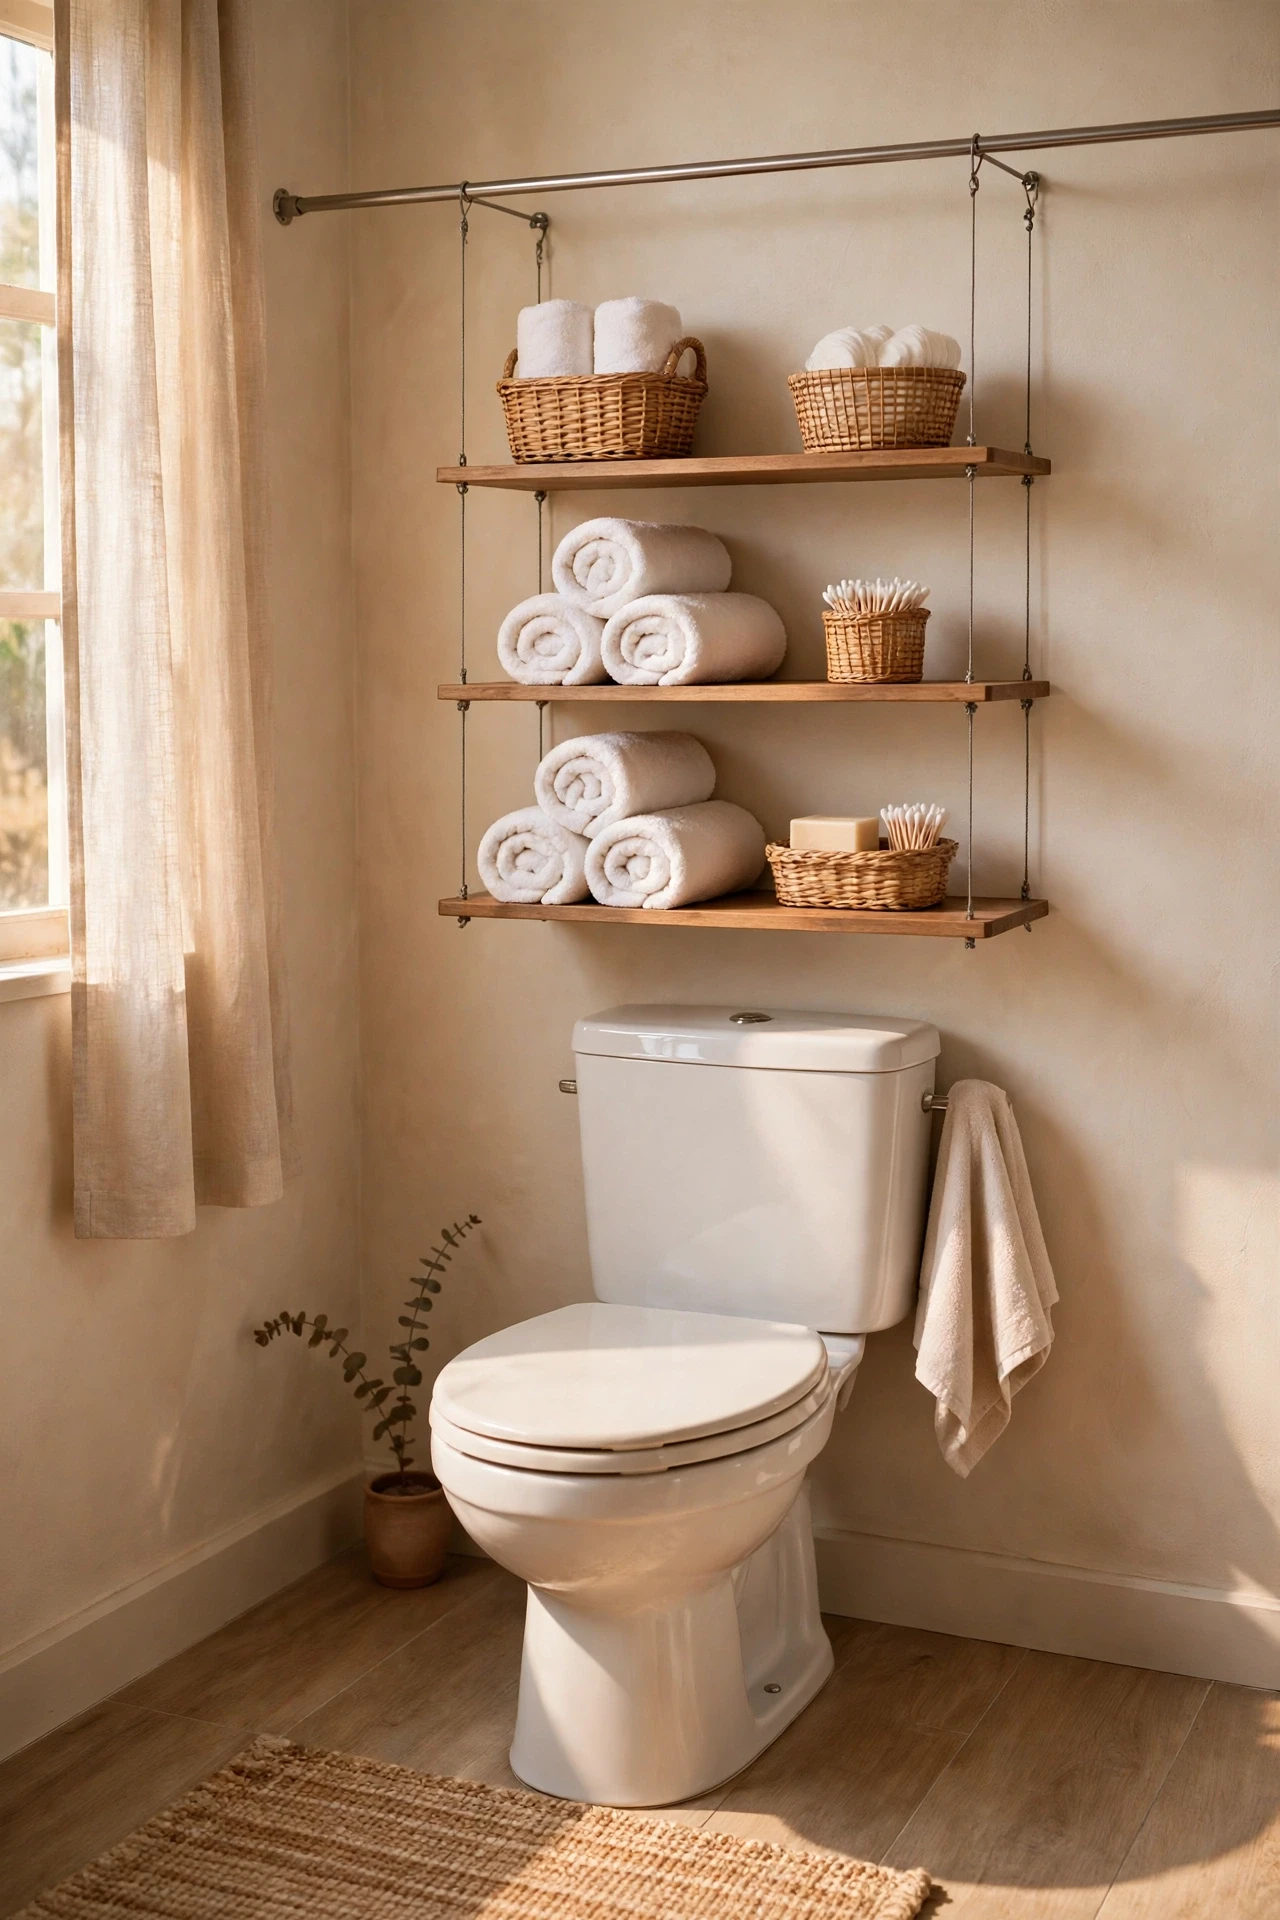
The wall above the toilet is wasted space in most rentals, and a tension rod shelf unit turns it into storage without a single hole. Twist the rod to fit snugly between two walls, or use a freestanding over-toilet frame that leans against the wall instead. Either way, keep heavy items low and light decor up high so nothing topples when you flush. I stacked spare towels, a basket of toiletries, and a small plant on mine, and the bathroom suddenly felt organised instead of cramped. Measure the width before you buy, because a rod that is even slightly too short will slip at the worst moment.
Cost: ~$18 | Time: 20 minutes
💰 Budget win: A tension rod and two small baskets cost less than one wall-mounted cabinet, and you keep both when you move.
6. Roll a Slim Cart Into the Vanity Gap
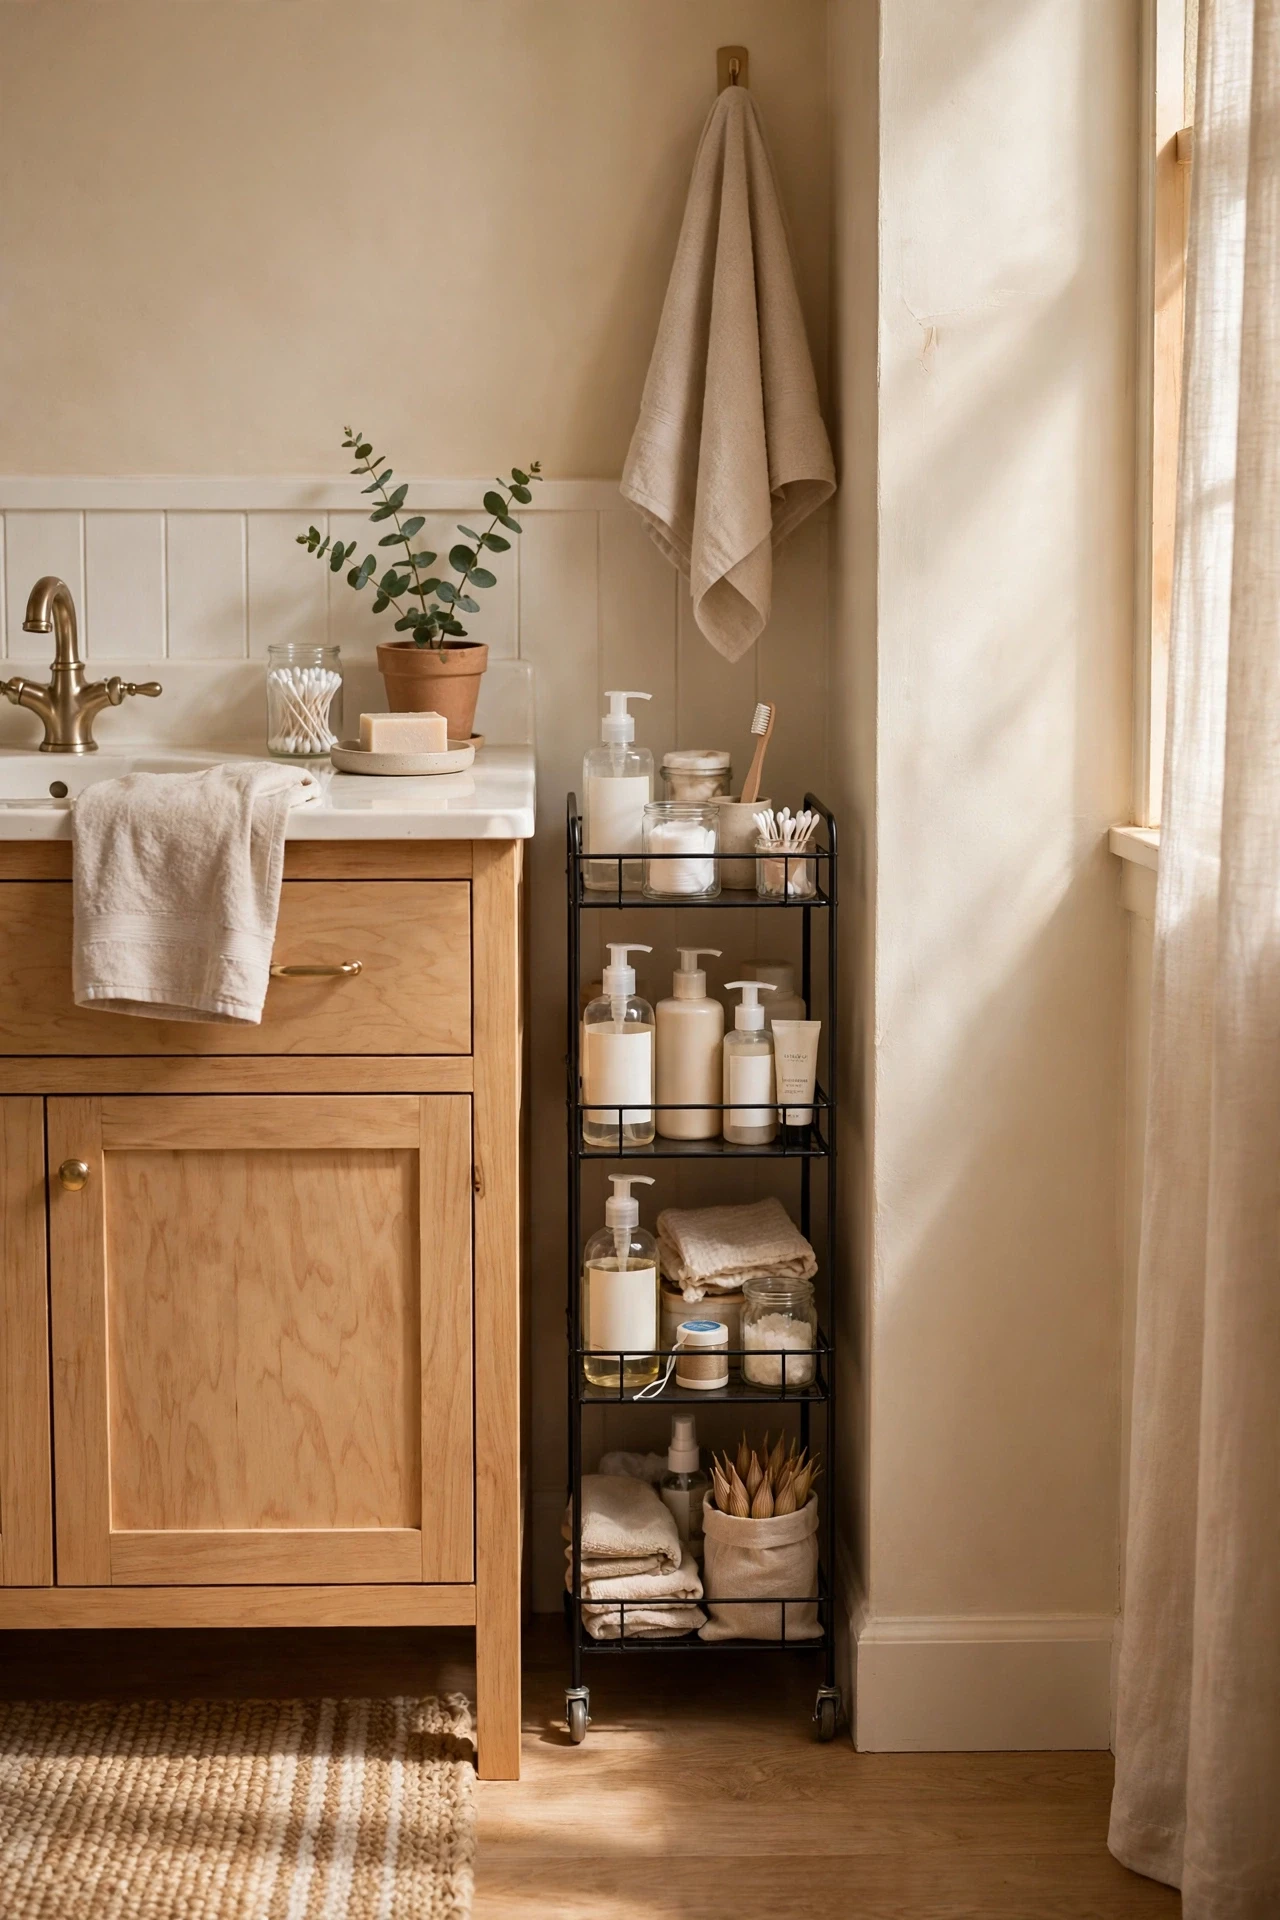
Almost every bathroom has a dead gap beside the vanity or toilet, usually just wide enough for a slim rolling cart. Measure the gap first — most carts are around six inches wide — then load it with cleaning supplies at the bottom, daily toiletries in the middle, and spare rolls on top. The wheels mean you can pull it out to clean behind it, which matters in a rental where dust builds up fast. I tried this and the mistake to avoid is overloading the top shelf, because a top-heavy cart tips when you roll it. Keep the heavy bottles low and the cart glides perfectly every time.
Cost: ~$22 | Time: 15 minutes
💰 Budget win: A slim cart uses space that was earning nothing and costs less than a single vanity organiser tray set.
Part 2 — Surfaces and style: cover what you cannot change.
7. Cover Dated Tiles With Peel-and-Stick Tile Decals
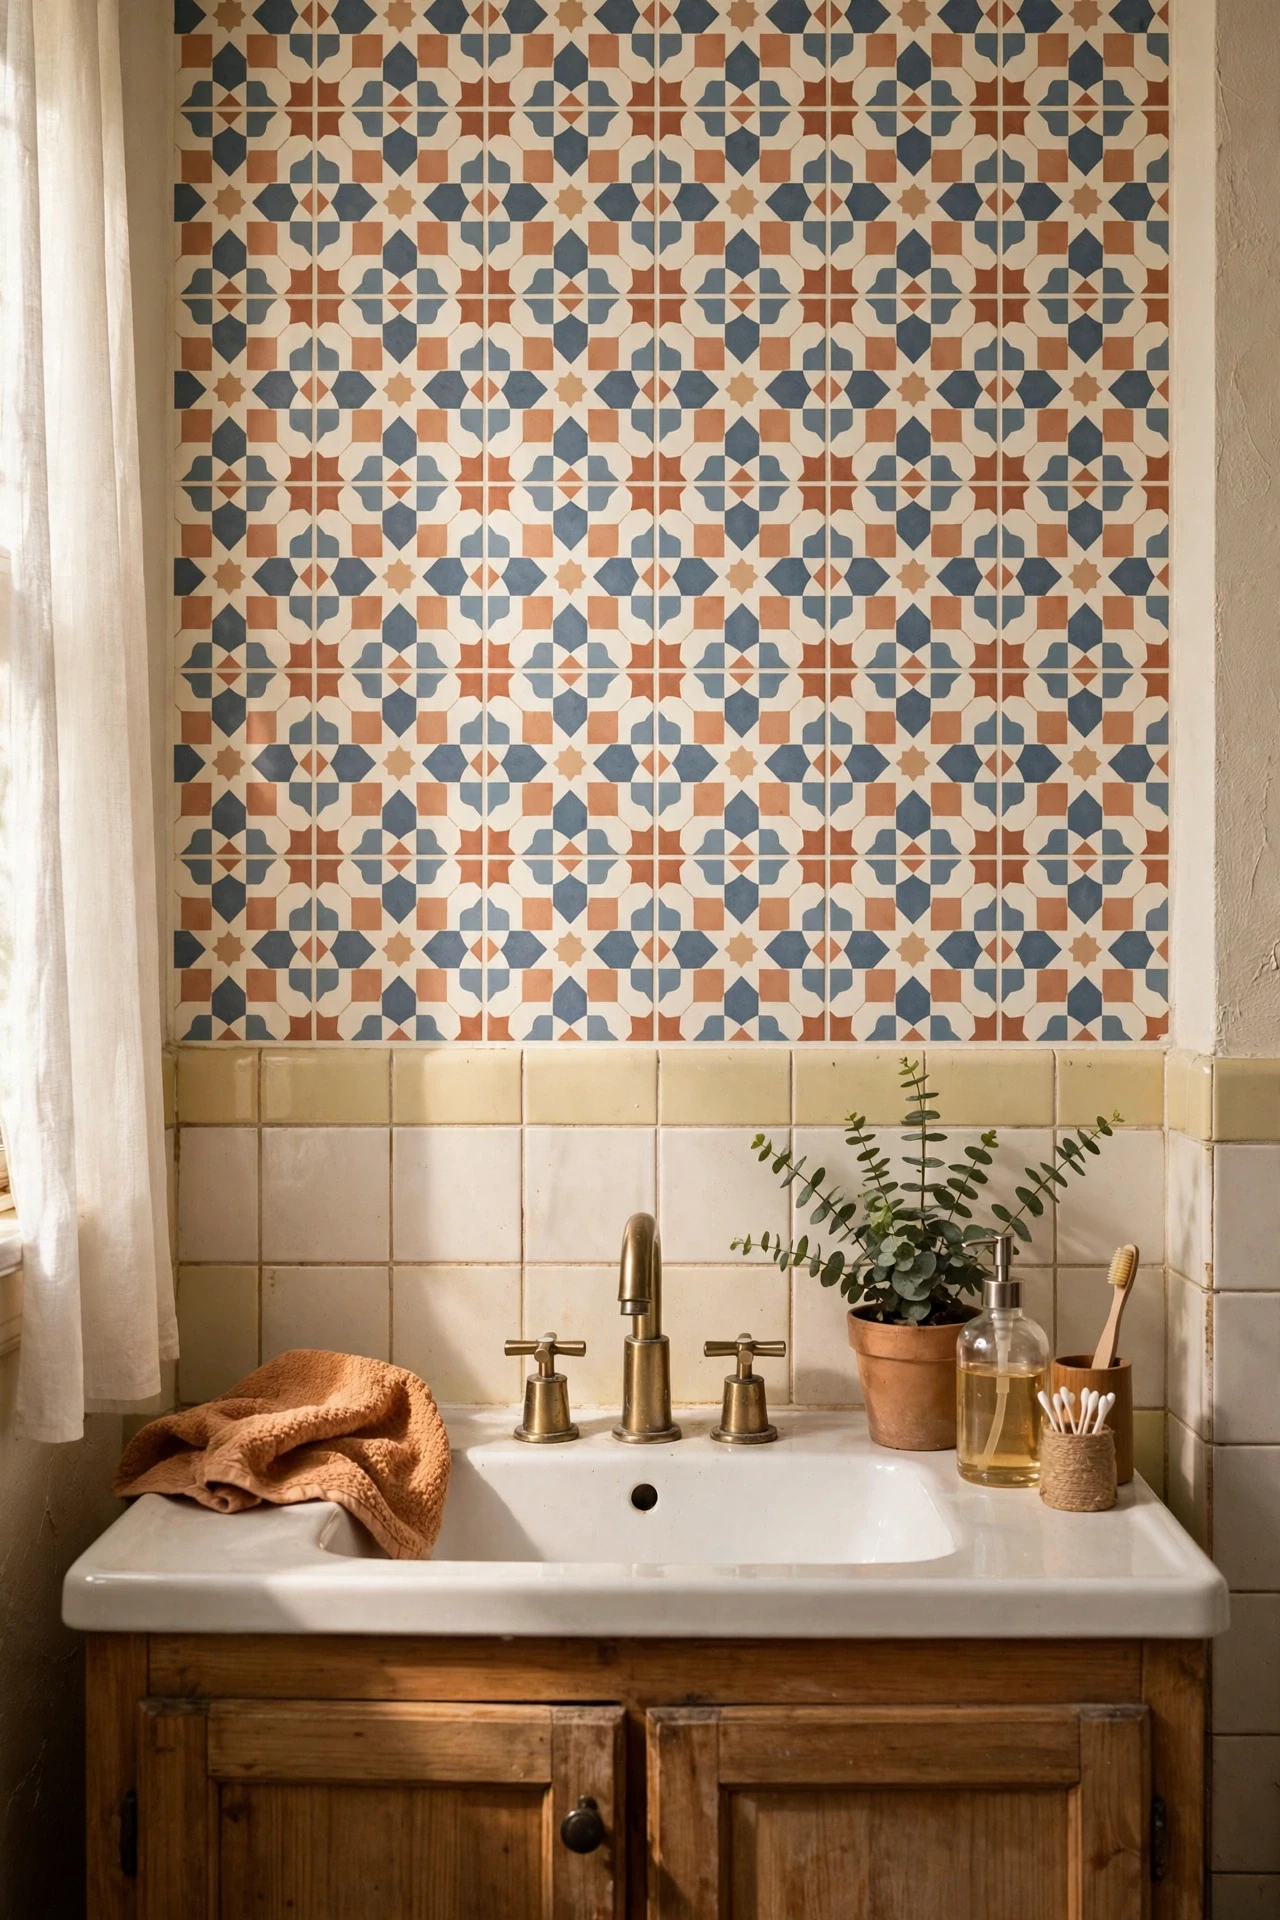
Peel-and-stick tile decals are the closest thing to a bathroom renovation without touching a wall. Clean the tiles well, let them dry, then press each decal on from one edge to push out air bubbles as you go. Start with a small section — maybe one row above the sink — before committing to a whole wall, so you can check the look in daylight. They peel off cleanly when your lease ends, as long as you warm them slightly with a hairdryer first. My pink-beige rental tiles disappeared under a white-and-navy pattern in one afternoon, and my landlord never knew. For more budget surface ideas, see my (see also: budget-bathroom-decor-ideas) roundup.
Cost: ~$20 | Time: 2 hours
💰 Budget win: One pack covers a full splashback area for a fraction of retiling, and it comes off without a trace.
8. Swap in a Statement Shower Curtain
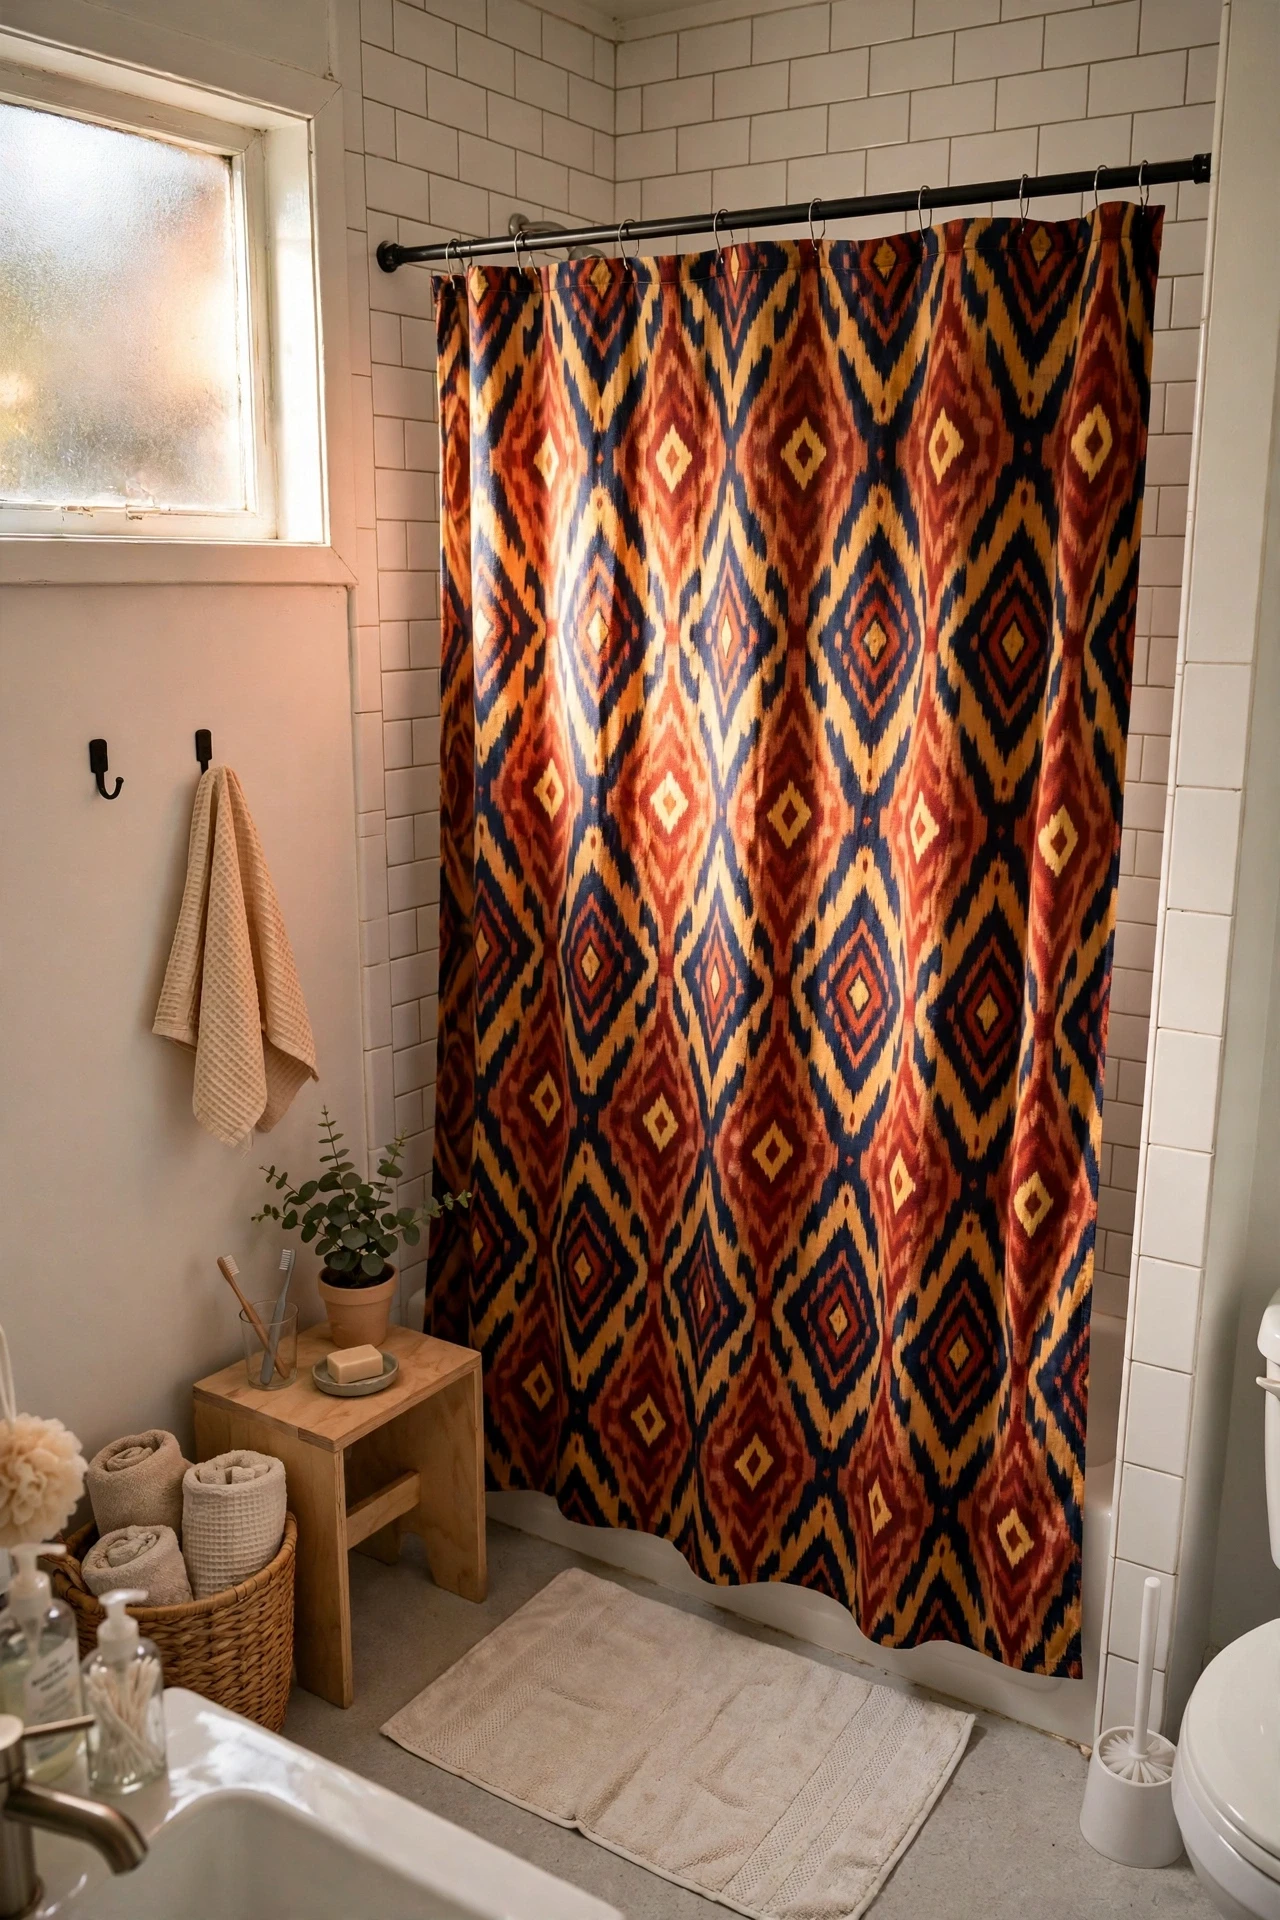
The shower curtain is the biggest single block of colour in most bathrooms, so changing it changes everything. Pick a bold pattern — stripes, botanical print, or a warm terracotta — and hang it on the existing rod with fresh rings. Add a fabric outer curtain over a cheap plastic liner so the pretty part stays dry and lasts for years. Make sure the curtain is long enough to sit inside the tub, not outside it, or water will end up on the floor. I swapped a sad clear liner for a waffle-weave curtain and the room felt like a hotel overnight. It is the easiest style upgrade a renter can make.
Cost: ~$18 | Time: 10 minutes
💰 Budget win: A curtain plus liner costs less than a new mirror and has a bigger visual impact than both combined.
9. Place a Freestanding Towel Ladder in the Corner
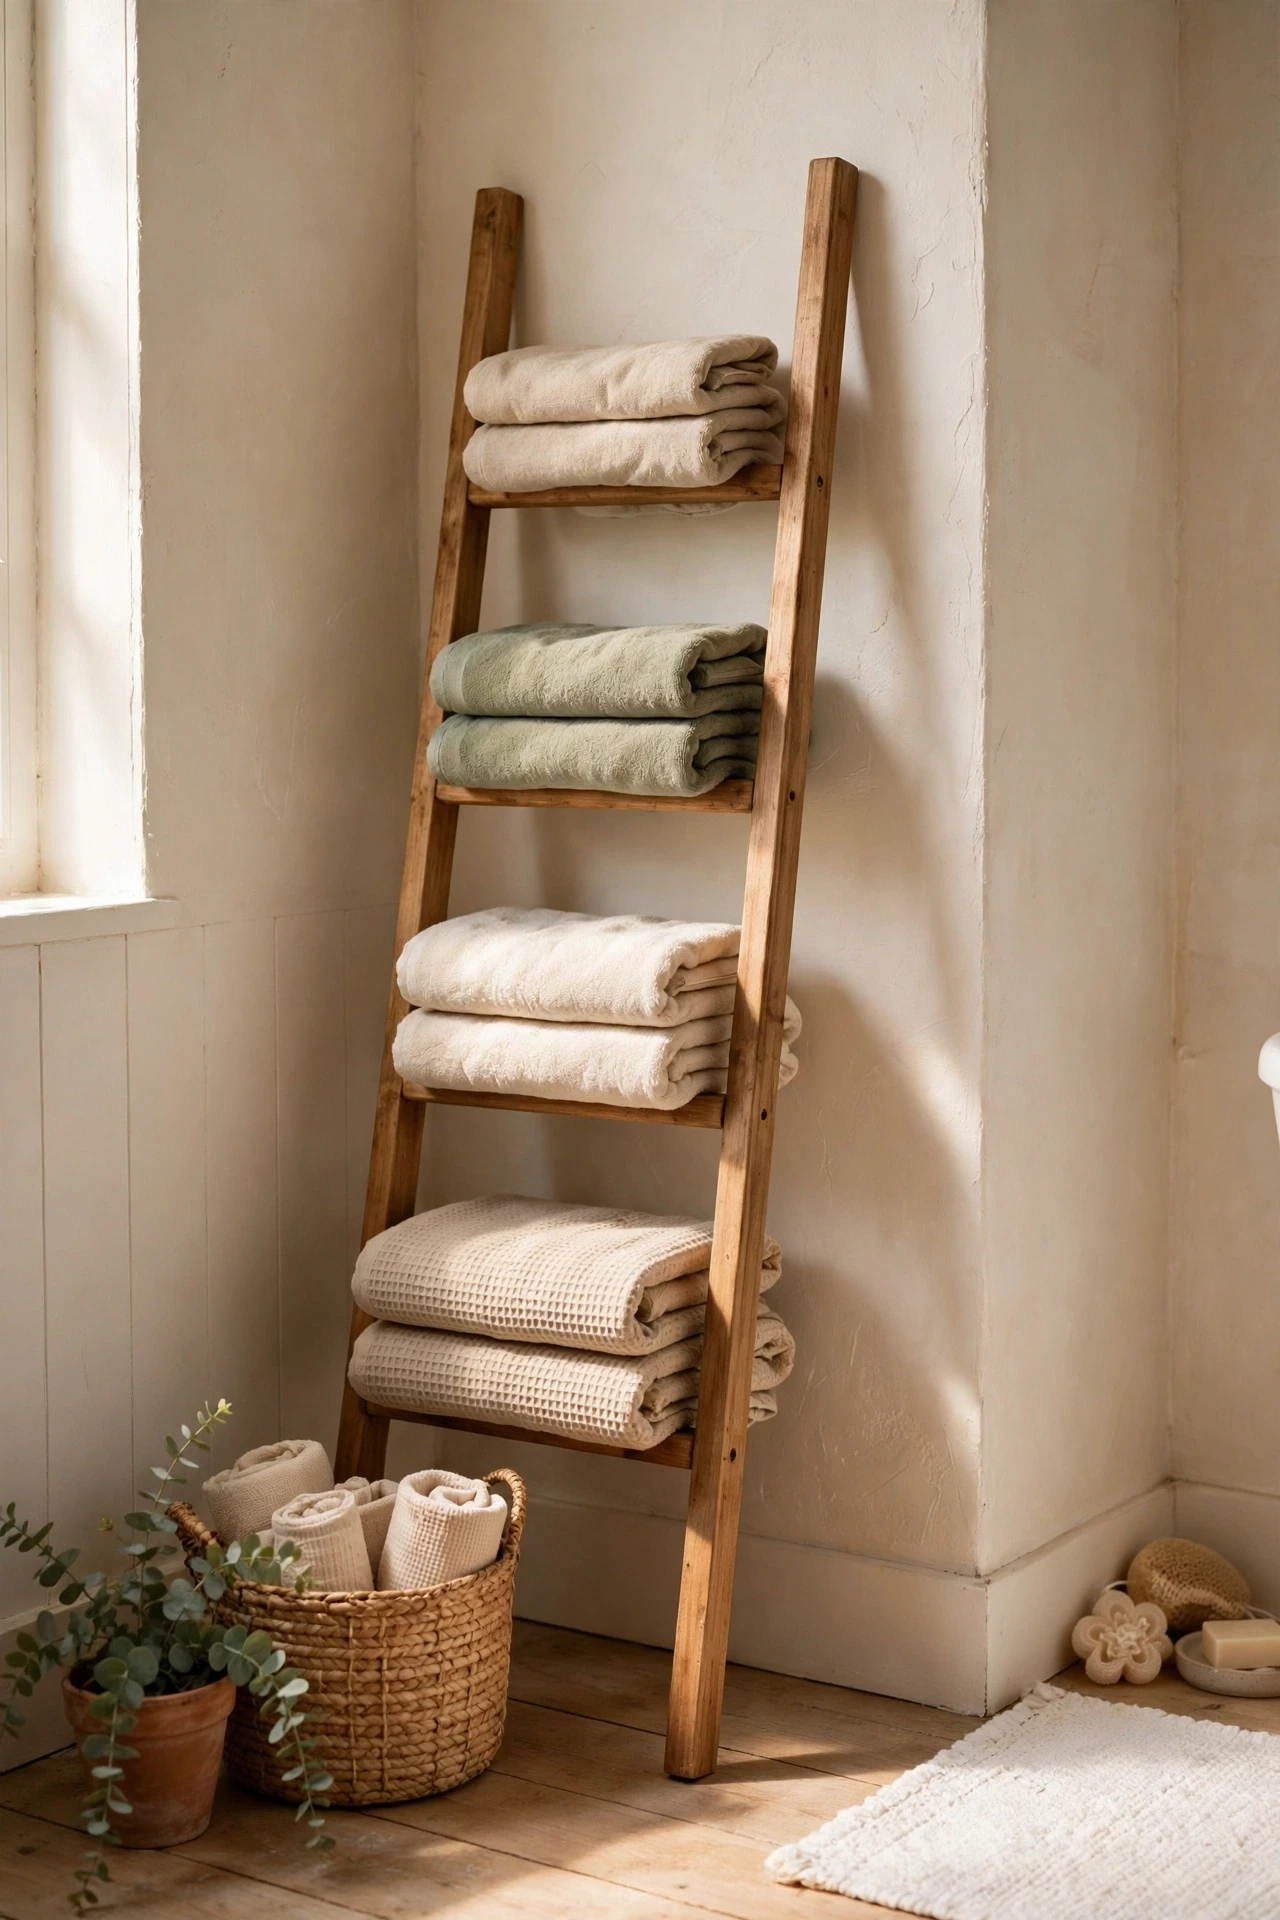
A towel ladder leans against the wall, needs no fixings, and instantly makes a bathroom look styled rather than stuffed. Lean it at a slight angle so it cannot slide, drape two or three towels over the rungs, and use the top rung for a small hanging plant or a scented sachet. Bamboo ladders suit warm, relaxed bathrooms, while black metal ones feel more modern. Keep it in a corner that does not block the door swing, and never lean it on a freshly painted wall before the paint has fully cured. Mine holds towels, a robe, and my favourite candle, and it cost less than a wall-mounted rail I was not allowed to fit anyway.
Cost: ~$30 | Time: 5 minutes
💰 Budget win: A ladder gives you four towel rails for the price of one, and it moves to your next home in one piece.
10. Use Suction-Cup Shelves Inside the Shower
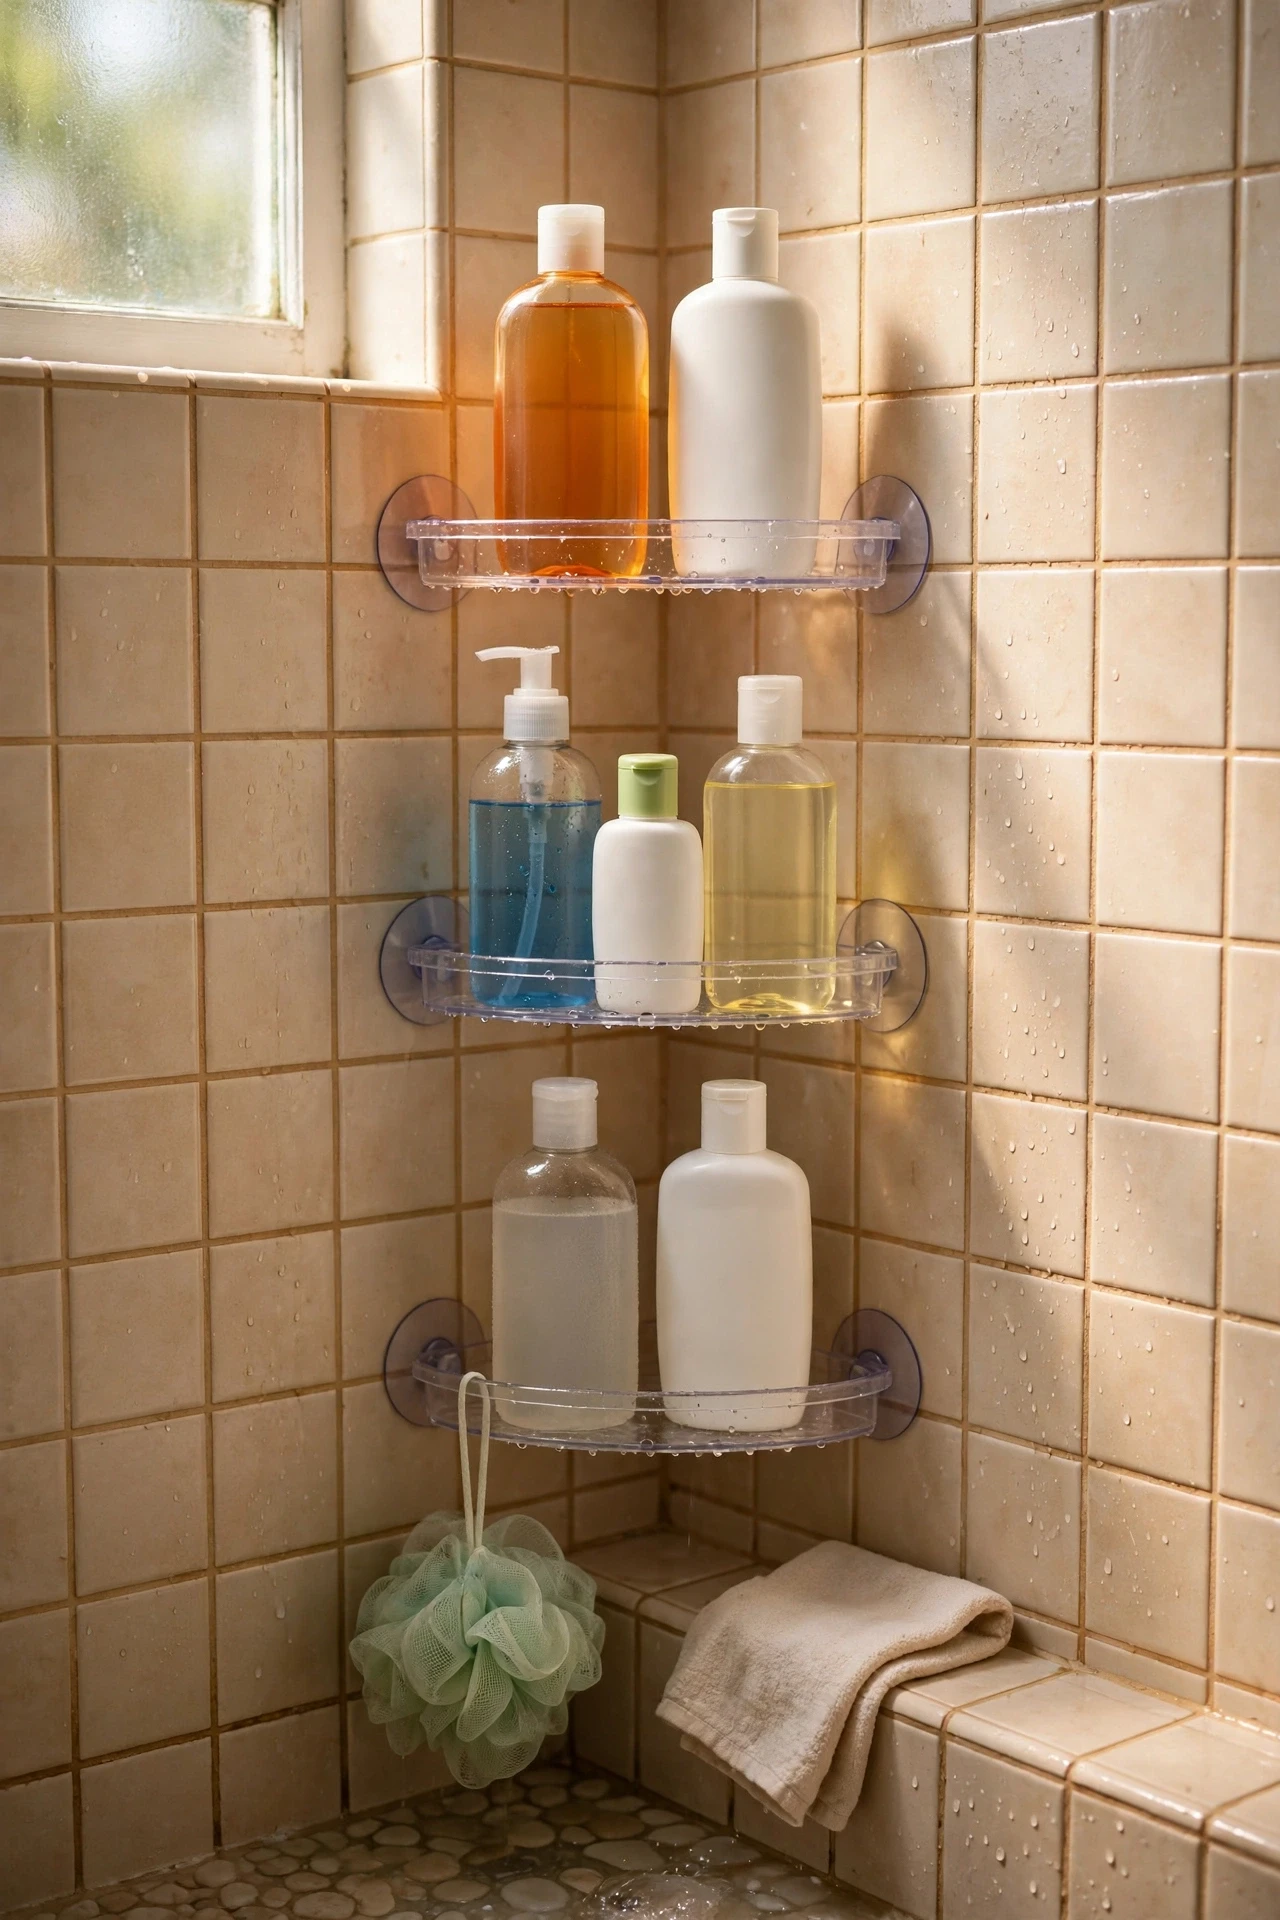
Suction-cup shelves only work if the surface is smooth, so test one on your shower wall before buying a full set. Press the cup firmly, lock the lever if it has one, and leave it empty for a few hours so the seal sets properly. Then load it with shampoo, conditioner, and a bar of soap — but keep the total weight modest, because an overloaded shelf is the one that falls at 6am. Smooth tiles and glass are perfect; textured tiles will not hold a seal no matter how good the cup is. I use two corner shelves in my shower and they have stayed put for over a year, which still surprises me.
Cost: ~$12 | Time: 15 minutes
💰 Budget win: Two suction shelves cost less than a shower caddy that rusts, and they leave no marks behind.
11. Switch to a No-Drill Toilet Paper Stand
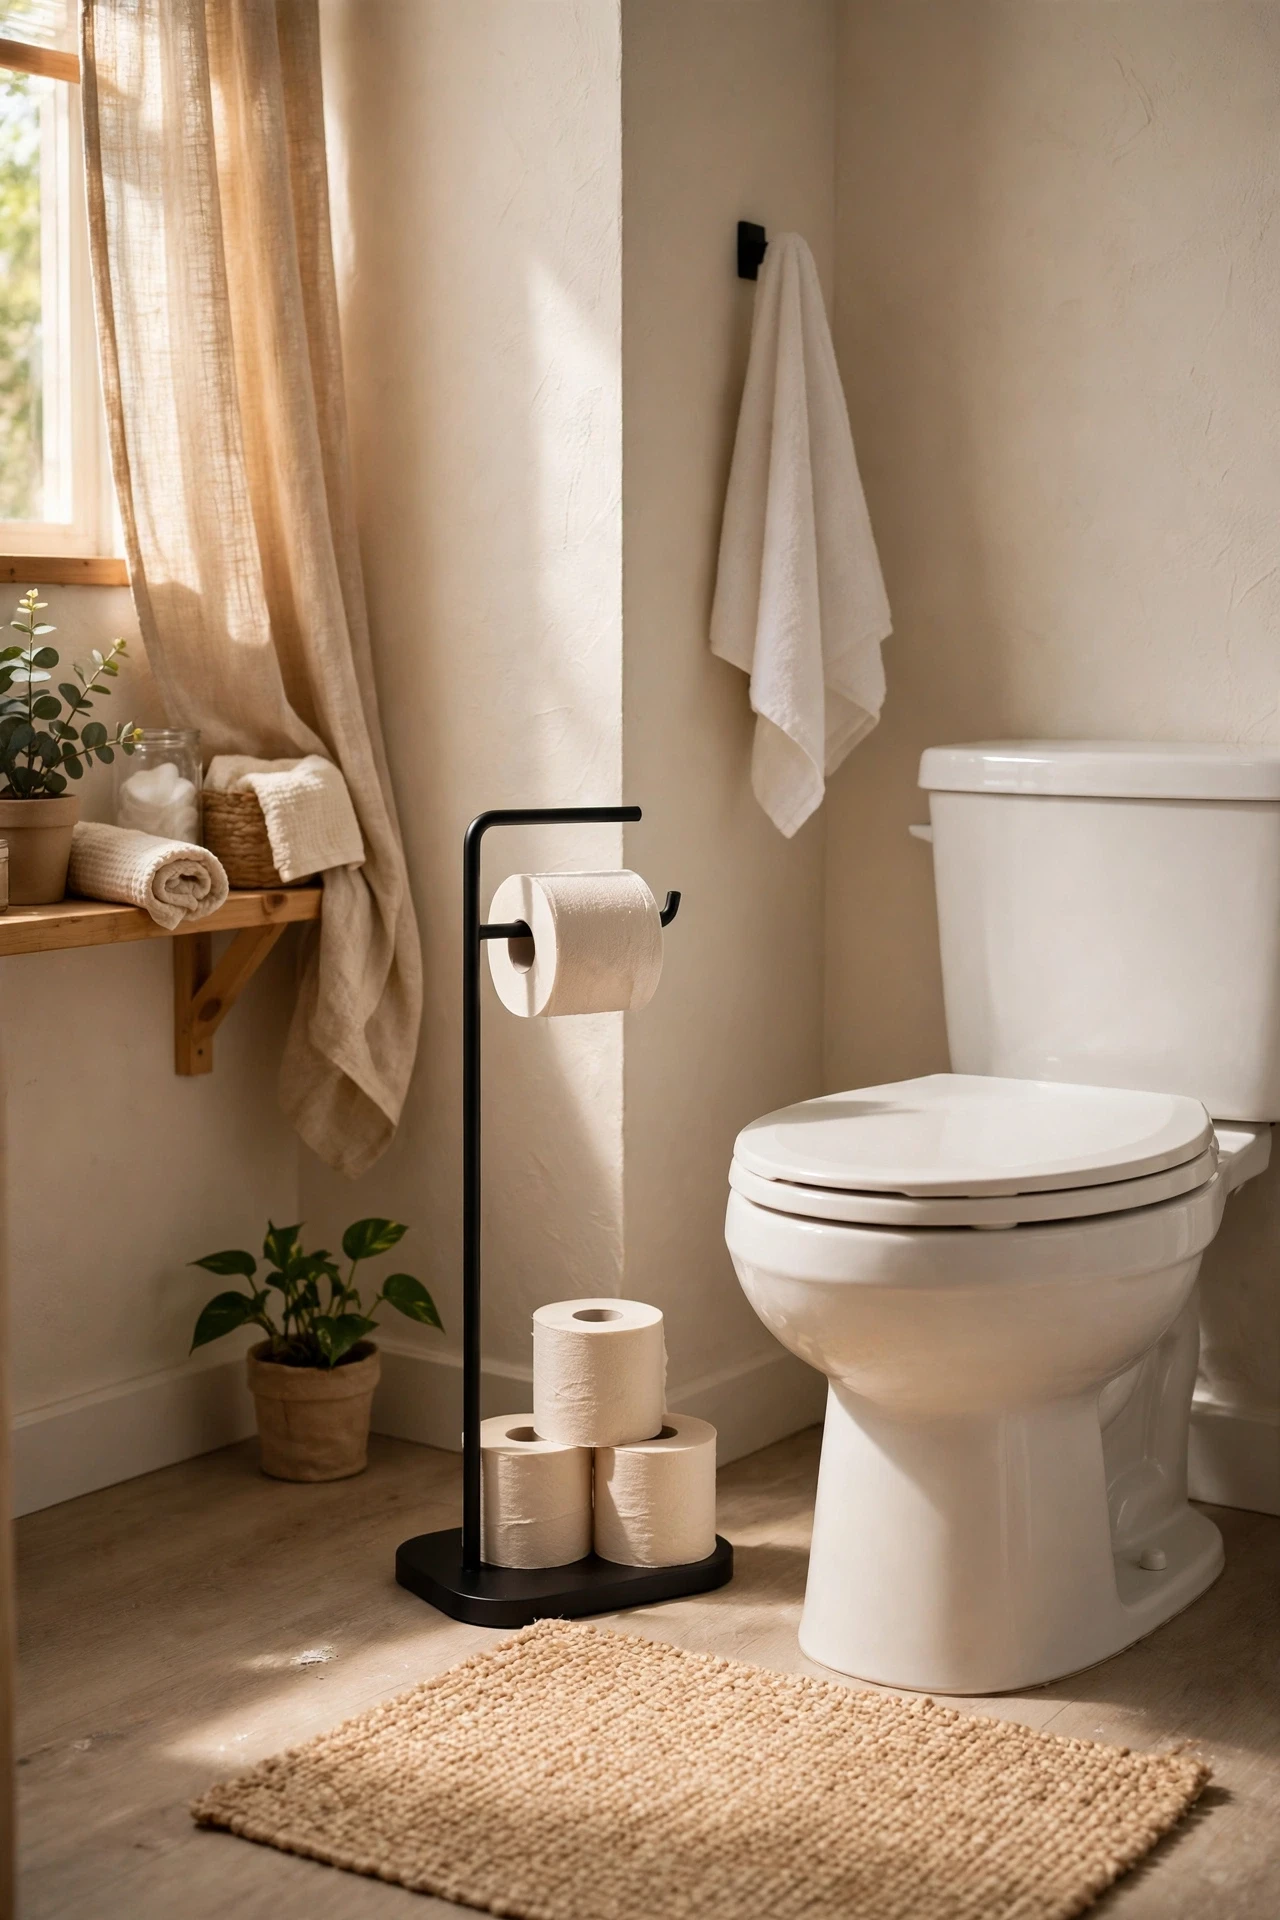
Most rentals come with a toilet paper holder in the worst possible spot, or none at all. A freestanding stand fixes that in seconds: place it beside the toilet, load three or four spare rolls on the base, and you never have to reach behind the door mid-emergency again. Choose a weighted base so it does not tip when you pull a roll, and pick a finish that matches your other accessories so it looks intentional. Mine is matte black, matches the towel ladder, and quietly solved a daily annoyance I had tolerated for months. Small fix, big daily relief.
Cost: ~$16 | Time: 5 minutes
💰 Budget win: A stand with built-in spare storage replaces a wall holder and a separate basket in one purchase.
12. Add a Countertop Tray to Corral Daily Essentials
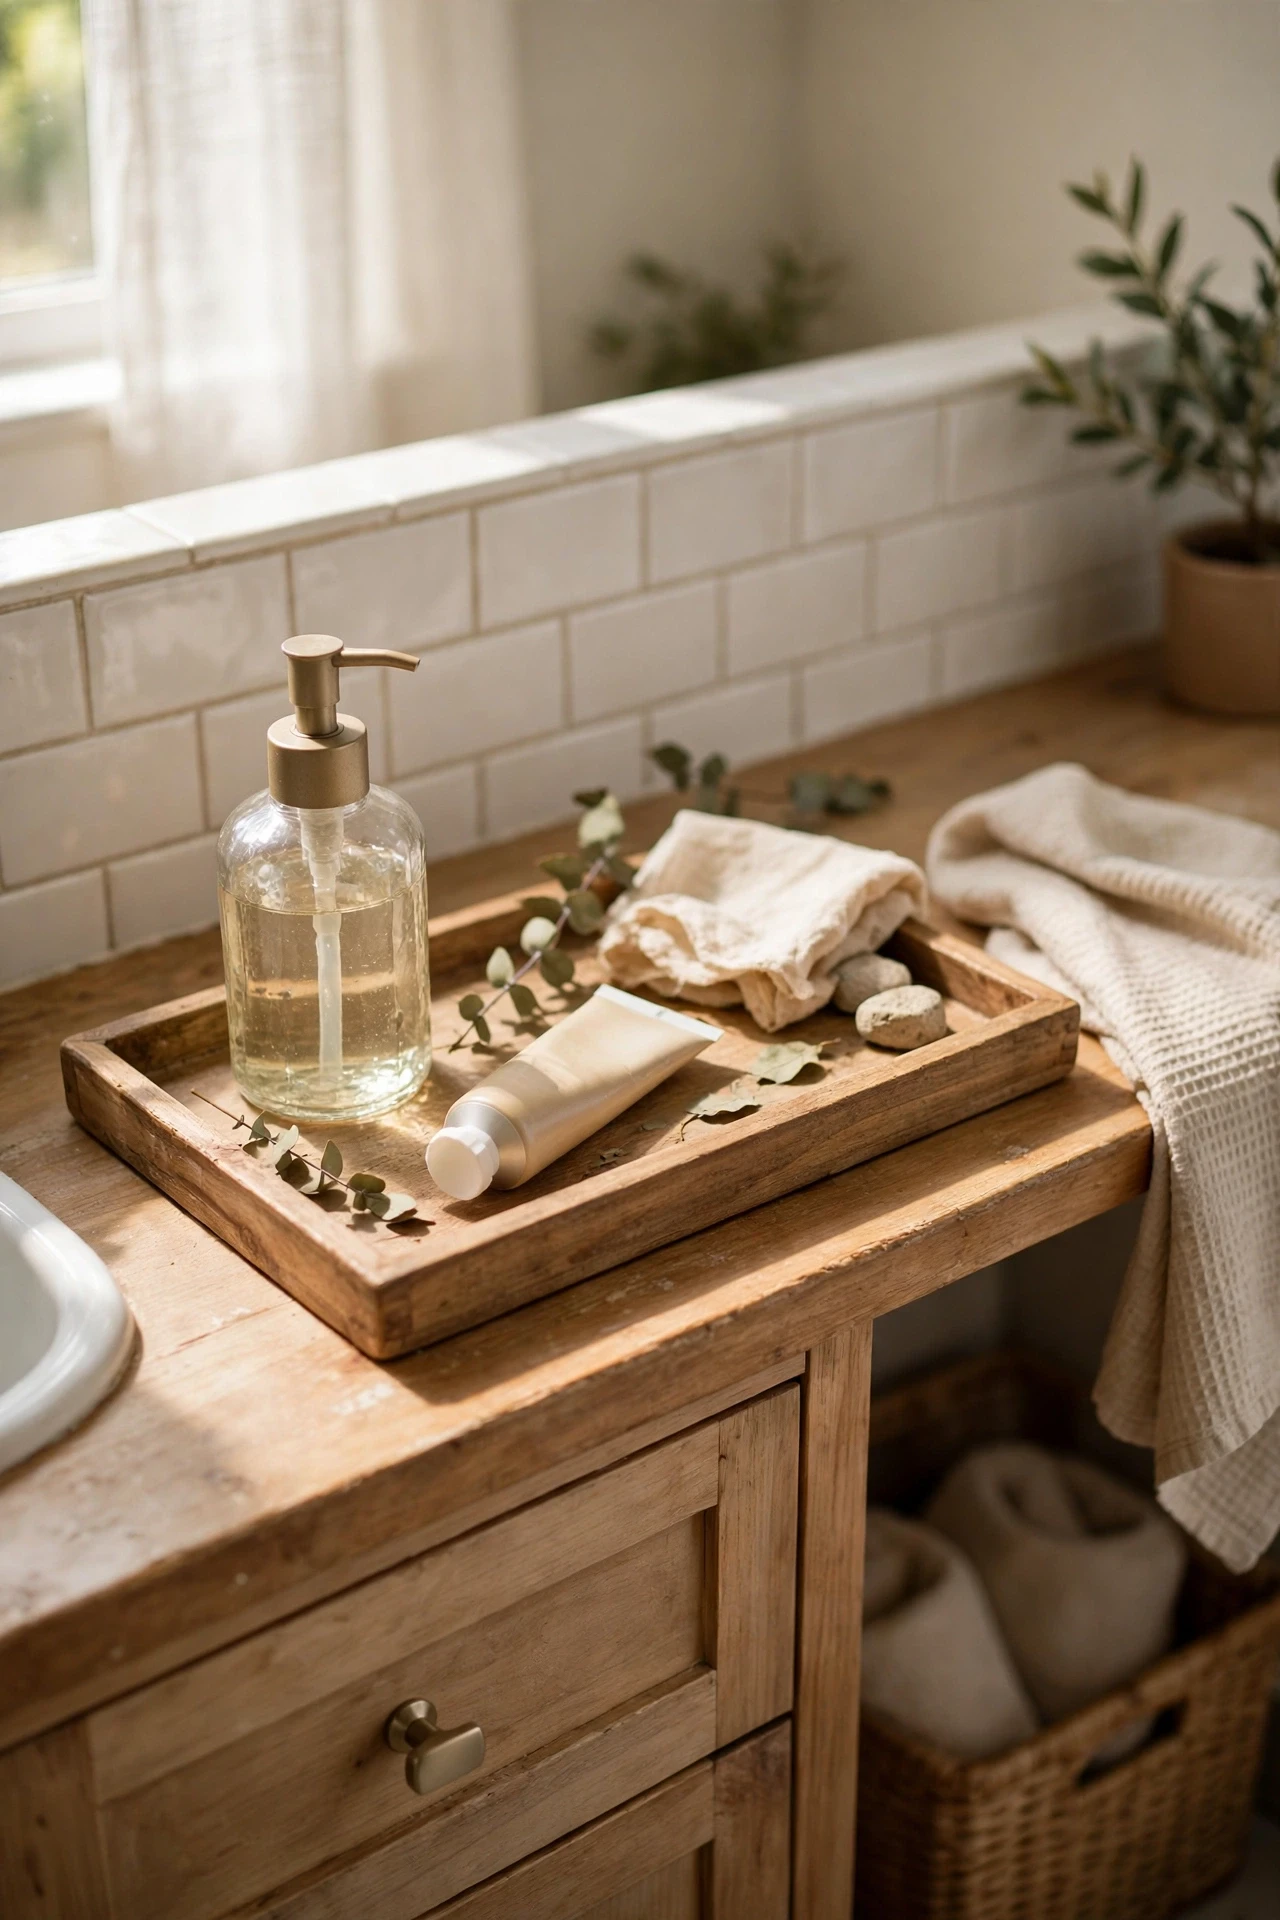
A cluttered vanity makes even a clean bathroom look messy, and a simple tray fixes it by giving everything a boundary. Set a wooden or marble-look tray beside the sink, then group your soap dispenser, hand cream, and a small vase on it. The rule is simple: if it does not fit on the tray, it lives in the cabinet. Wipe the tray weekly so water rings do not build up underneath, and choose one with a raised edge so bottles do not slide off. My vanity went from chaotic to calm the day I added a tray, and guests always assume the bathroom is bigger than it is.
Cost: ~$14 | Time: 5 minutes
💰 Budget win: A thrifted tray works just as well as a new one, and a coat of sealant makes wood trays waterproof.
Part 3 — Small details: the touches that make it feel like home.
13. Drape a Eucalyptus Bundle From the Showerhead
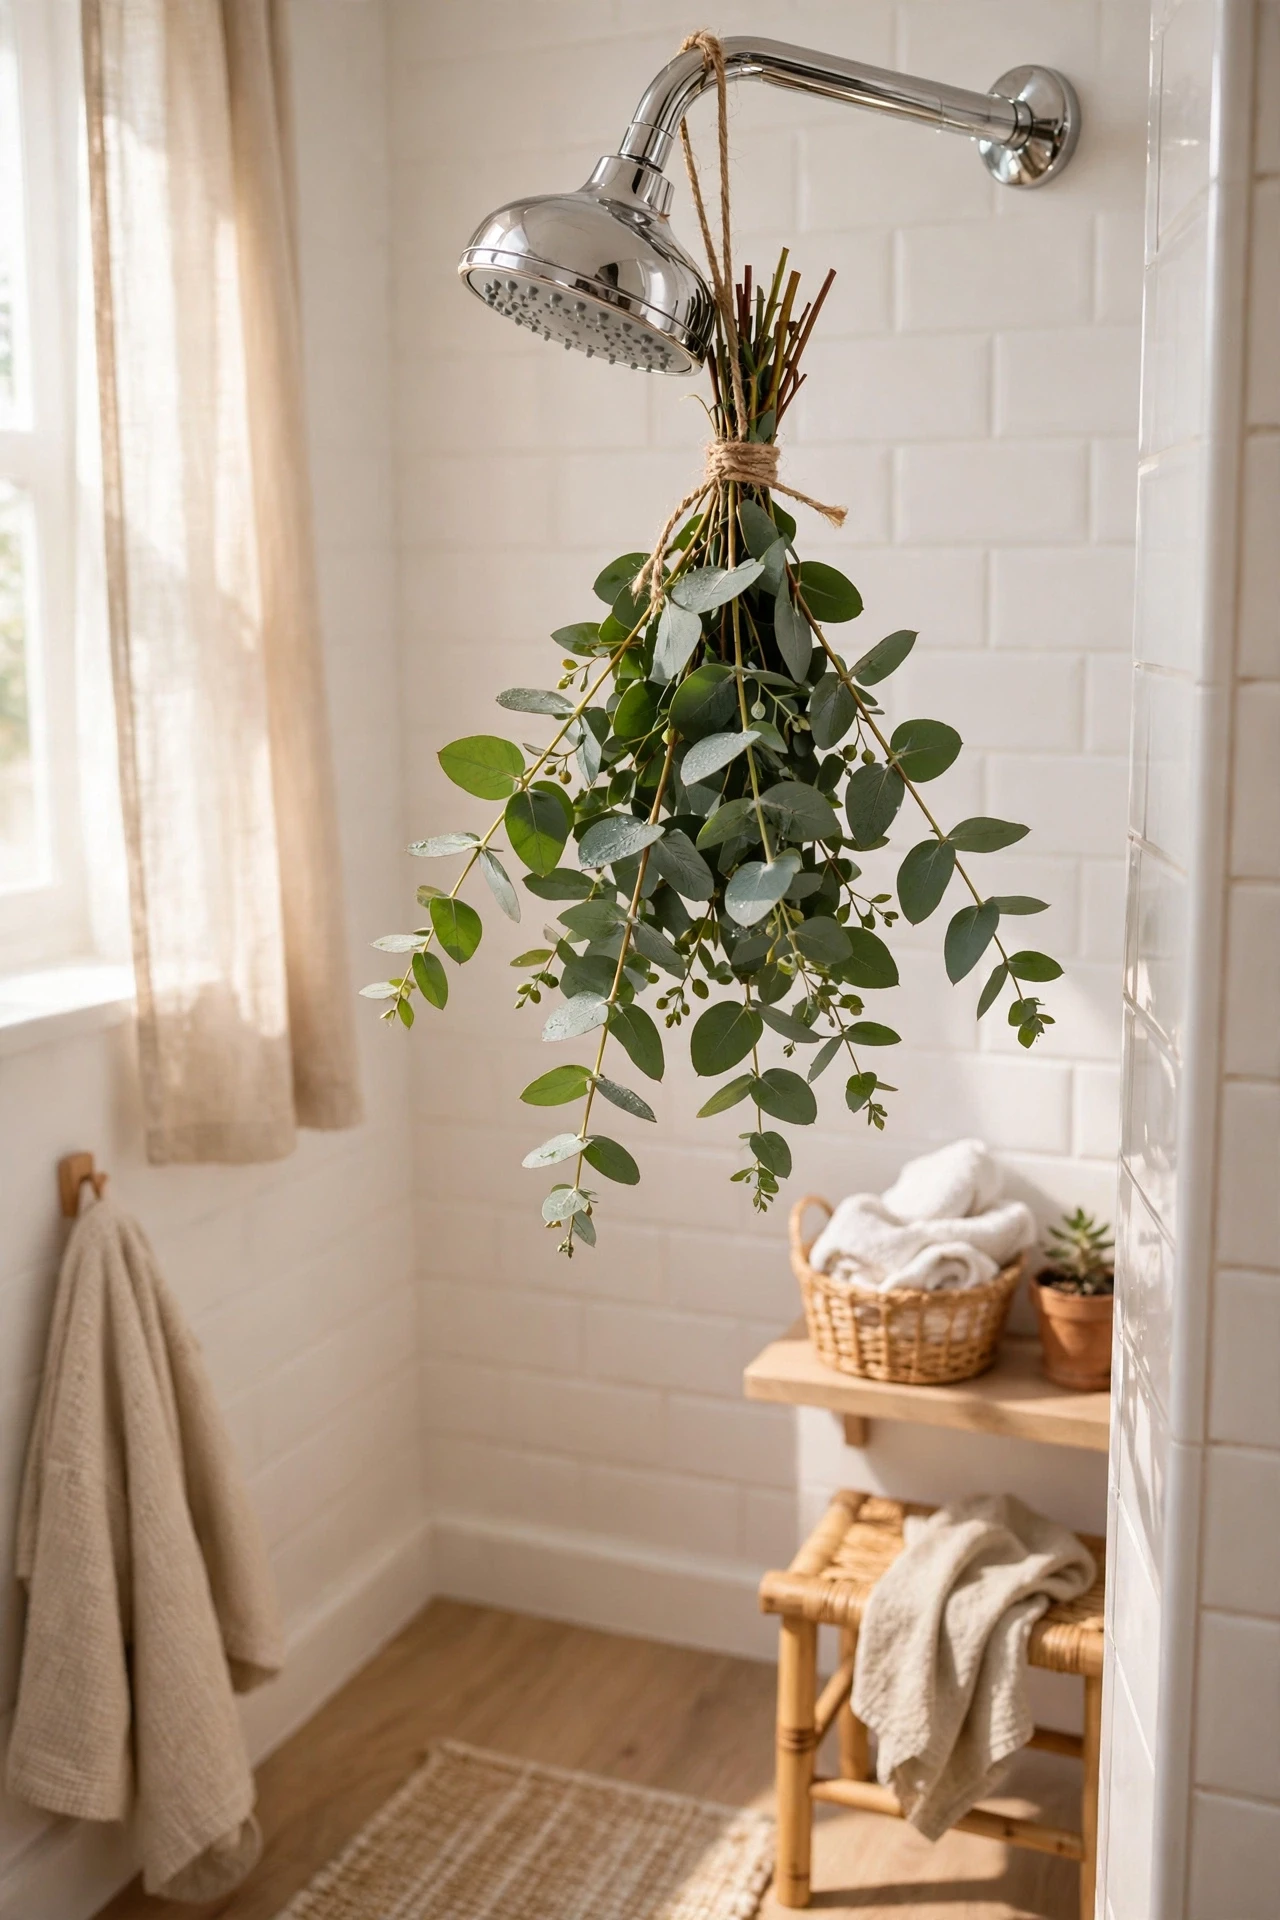
Tie a small bunch of fresh eucalyptus to your showerhead with twine, just behind the water stream, and the steam releases a gentle spa scent every time you shower. Buy a bunch from a florist or grocery store, trim the stems, and replace it every two or three weeks when the scent fades. Keep it out of the direct spray so it dries between showers and does not go mouldy. This costs almost nothing and makes a plain rental bathroom smell like a boutique hotel. I tried this and the mistake to avoid is tying it too loosely — a soggy bunch slipping into the drain is not the spa moment you wanted.
Cost: ~$5 | Time: 5 minutes
💰 Budget win: One bunch scents your shower for weeks and costs less than a single scented candle.
14. Swap the Mirror Frame With Adhesive Trim
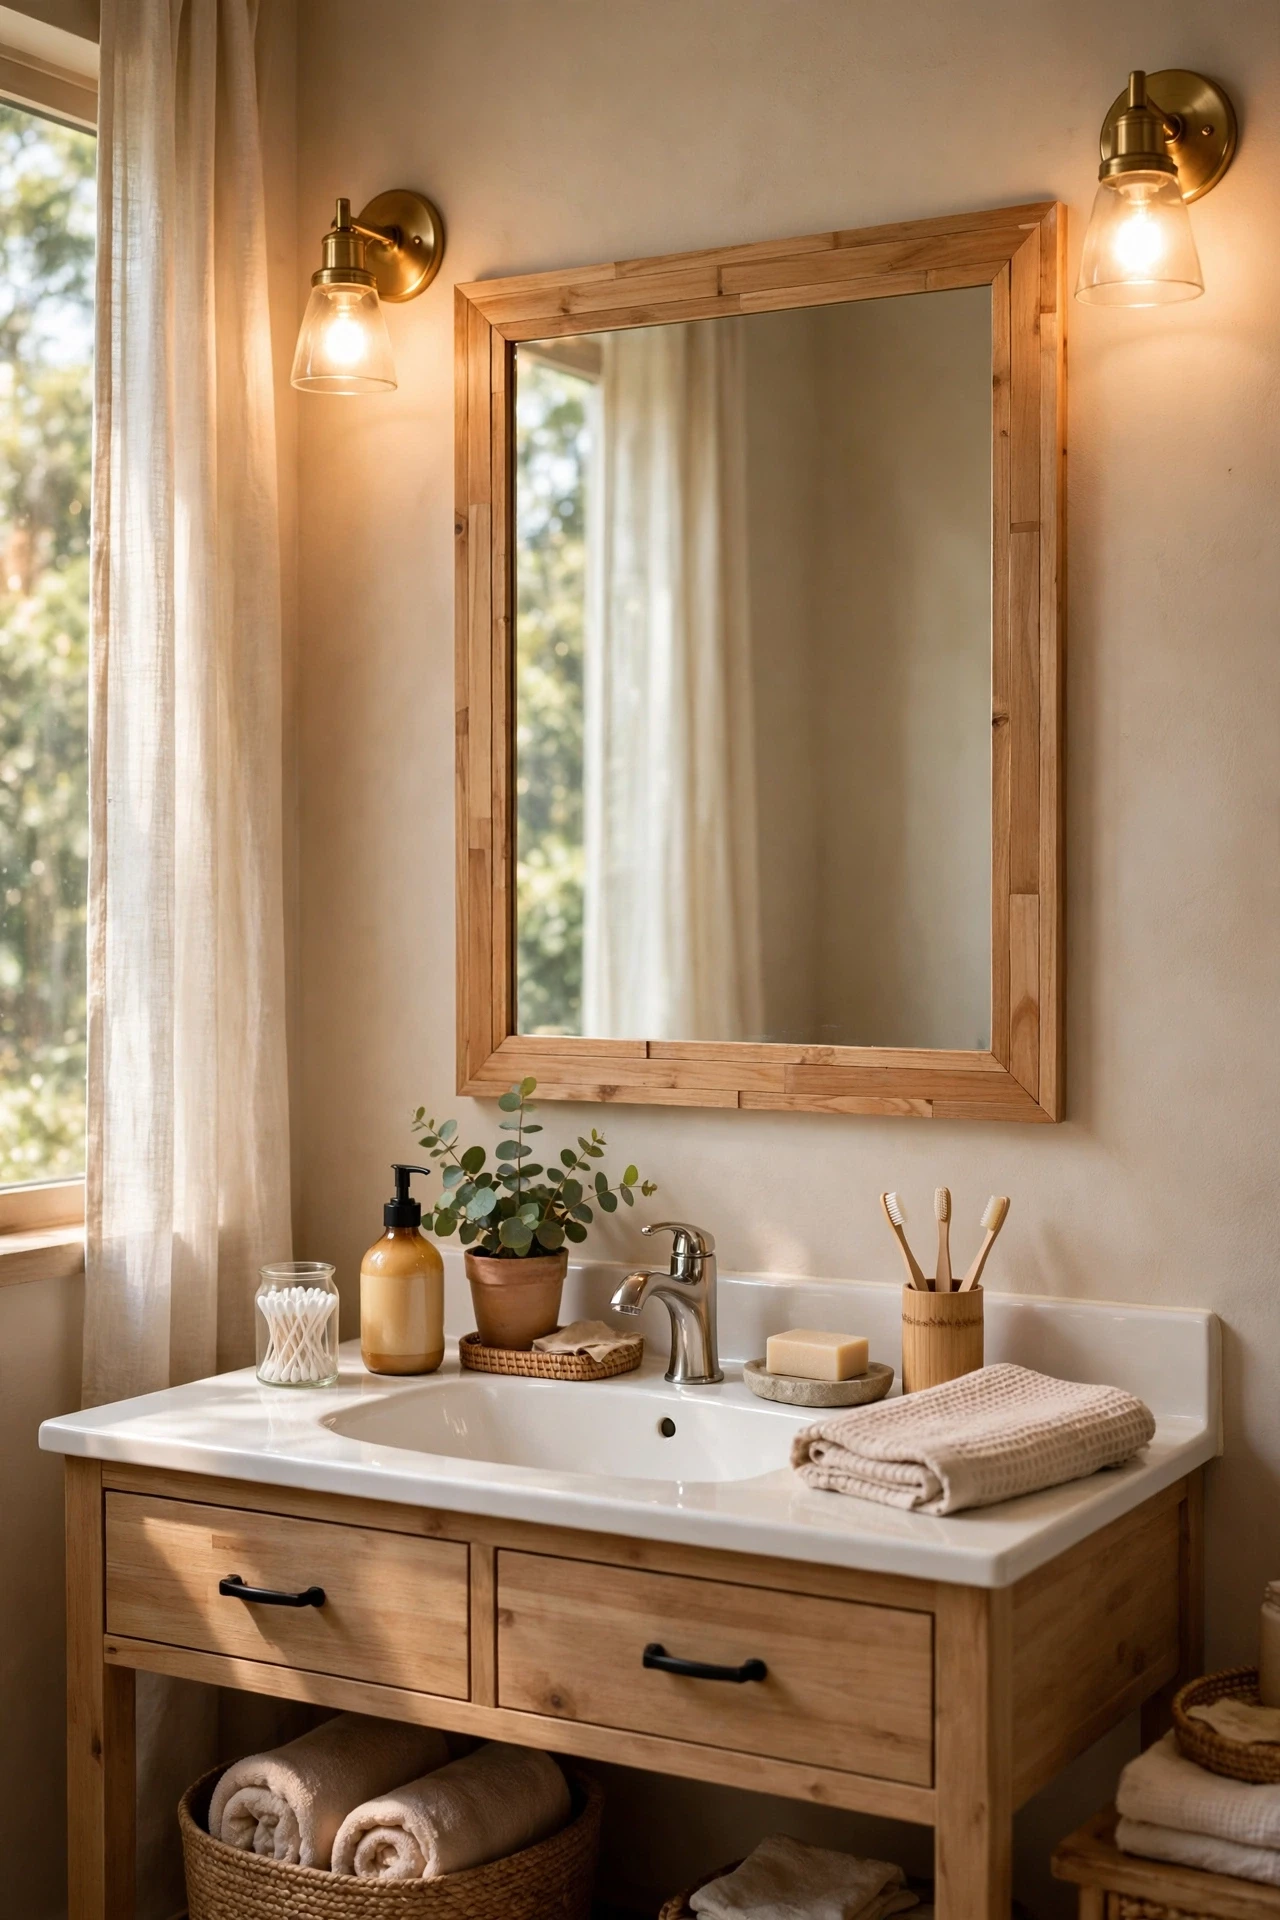
Builder-grade mirrors in rentals are usually just a flat sheet of glass with no frame, and adhesive trim changes that without tools. Measure the mirror edges, cut the trim to size with scissors or a craft knife, and press it on firmly, starting at the top edge. Wood-look trim warms up a cold bathroom, while gold or black trim adds a modern edge. Clean the mirror edge first so the adhesive bonds properly, and press each piece for a full minute. My mirror looked custom-framed for under fifteen dollars, and the trim peeled off cleanly when I moved out. Just avoid covering any part of the glass you actually use daily.
Cost: ~$14 | Time: 30 minutes
💰 Budget win: Adhesive trim costs a tenth of a new framed mirror and gives the same finished look.
15. Use a Tension Rod Under the Sink for Spray Bottles
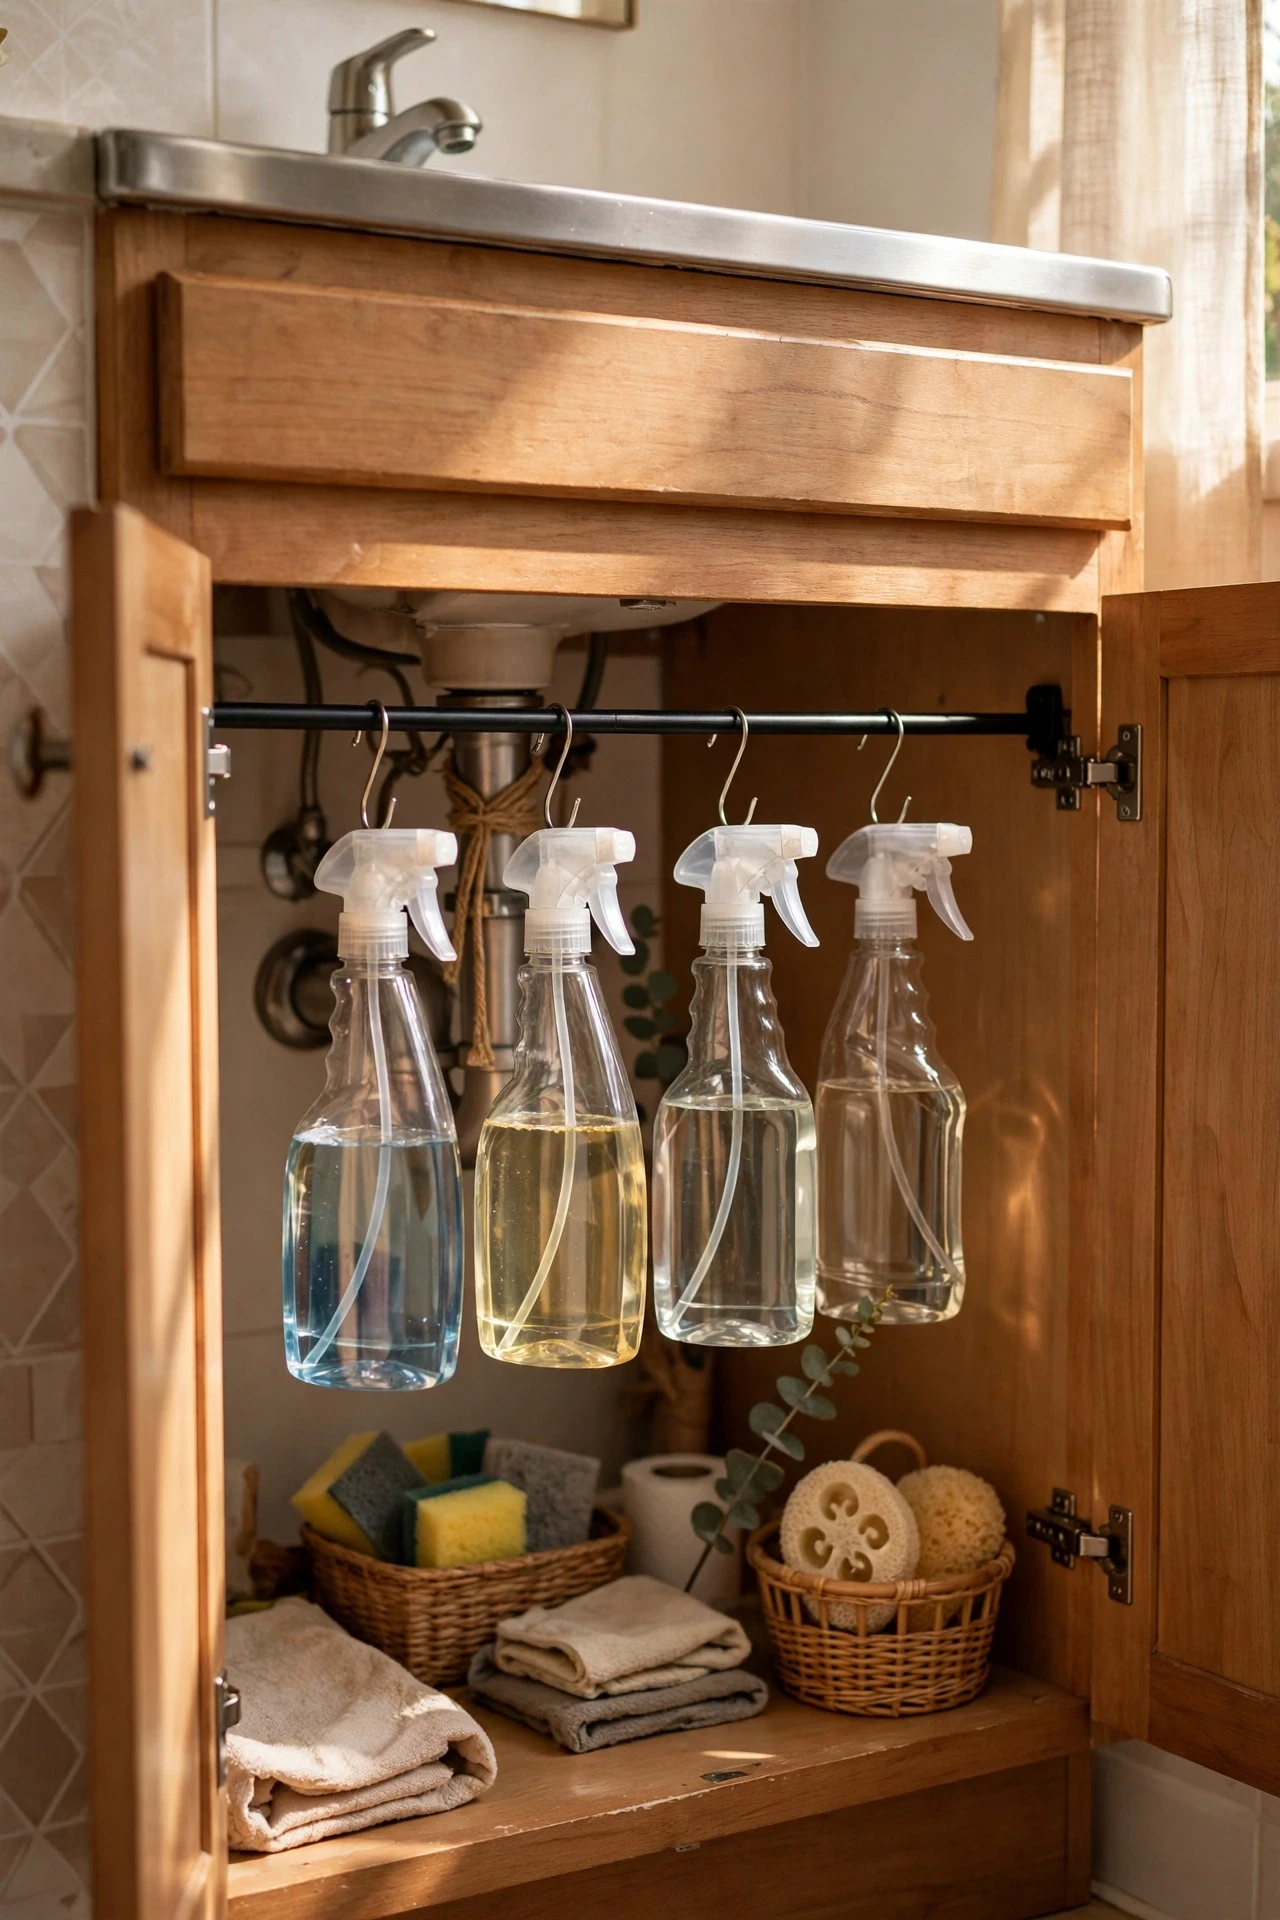
The cabinet under the sink is usually a jumble of bottles that fall over every time you reach for one. A short tension rod fitted across the cabinet, a few inches below the top, gives spray bottles a handle to hang from. Hook each trigger sprayer over the rod and suddenly the whole cabinet is visible and reachable. Measure the inside width before buying, and fit the rod high enough that bottles hang clear of the cabinet floor. I did this in ten minutes and stopped knocking over the bleach bottle every week. It is a tiny fix that makes cleaning day noticeably less annoying.
Cost: ~$6 | Time: 10 minutes
💰 Budget win: One rod organises the entire under-sink cabinet for less than the price of a single organiser bin.
16. Add Battery Puck Lights Under the Vanity Cabinet
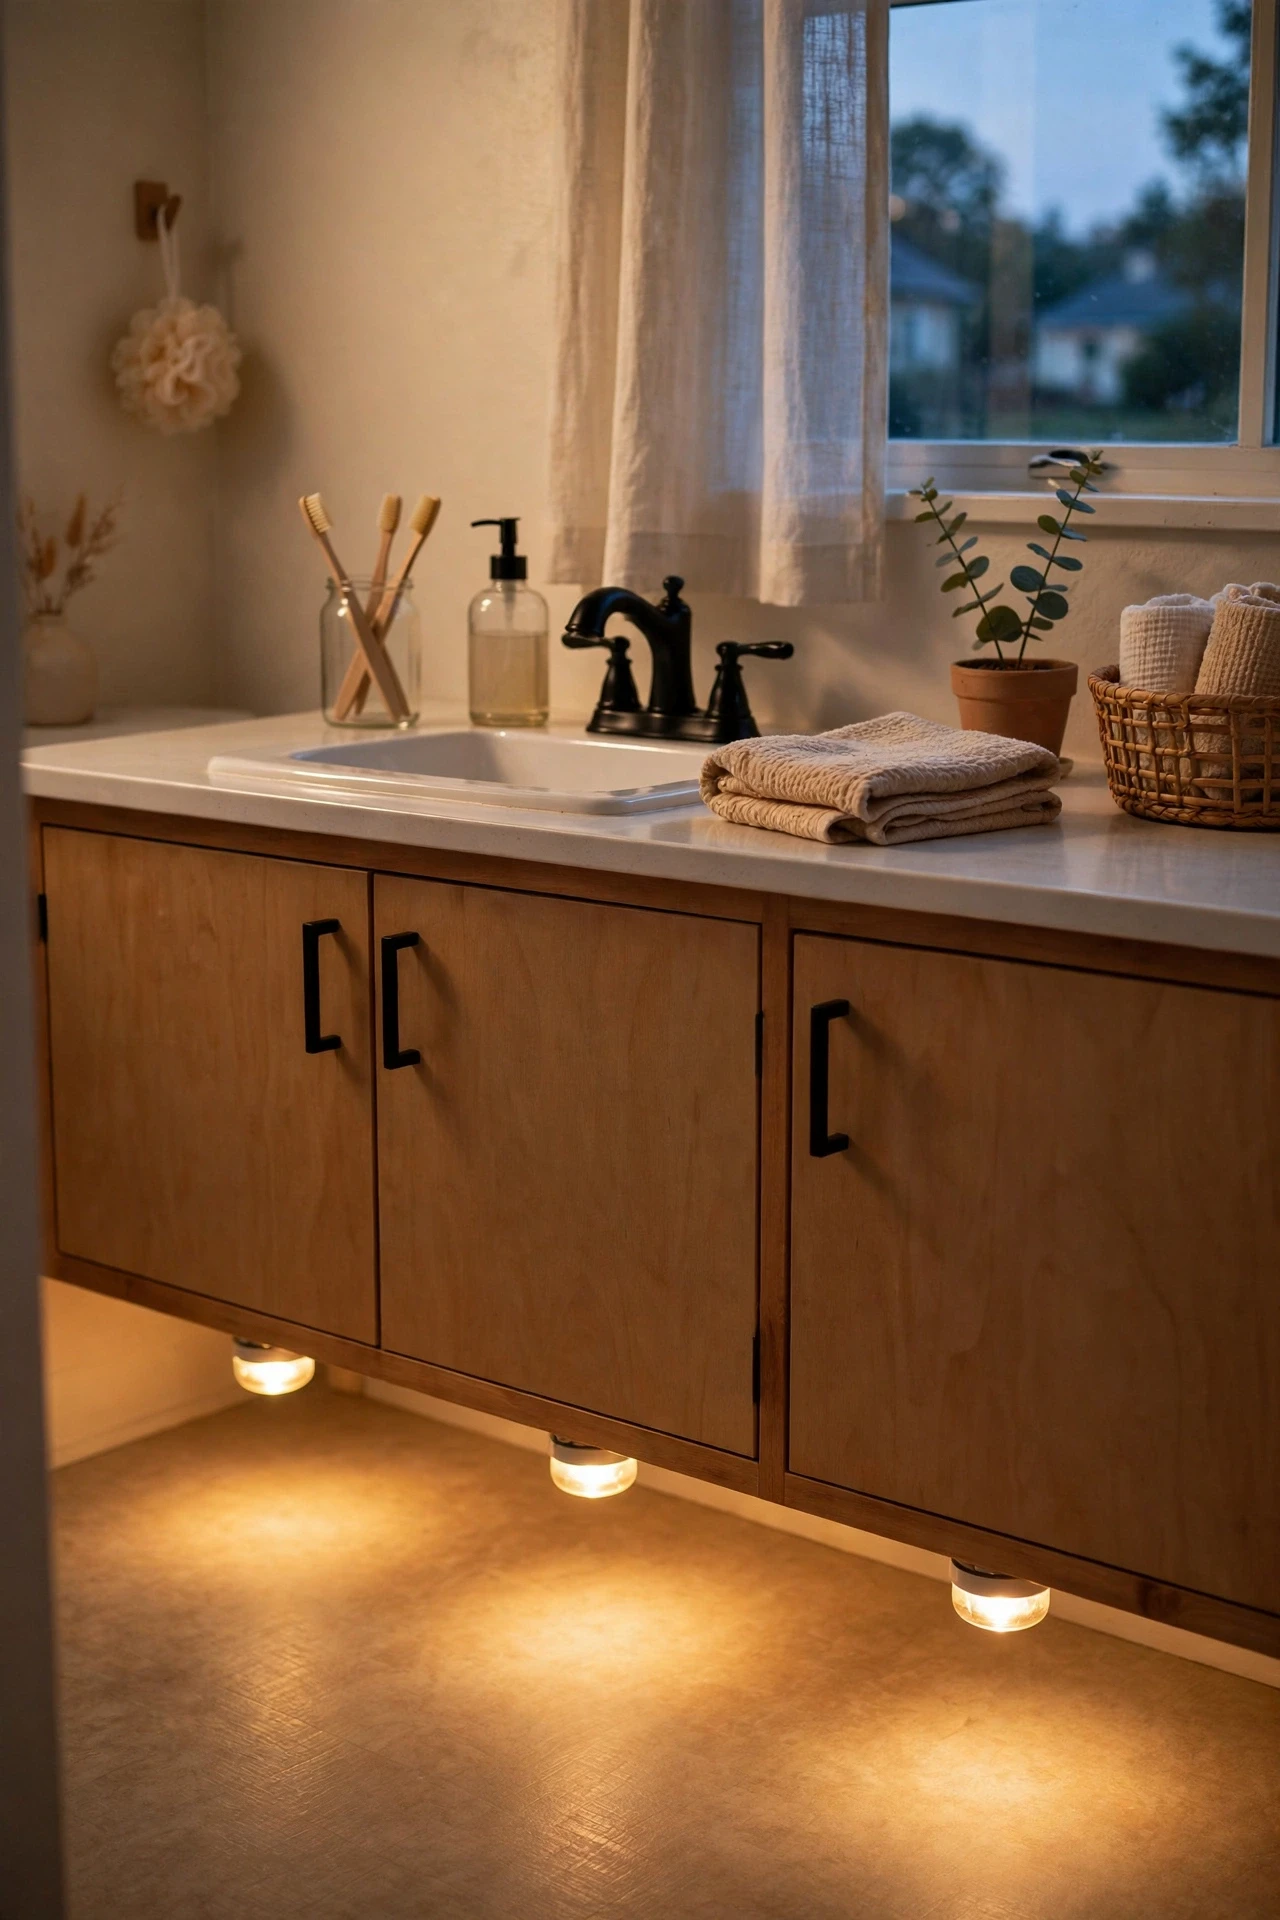
Rental bathrooms often have one harsh overhead light and nothing else, which makes the room feel flat and unflattering. Battery puck lights stuck under the vanity cabinet or along a shelf cast a soft downward glow that makes the whole room feel warmer. Use the adhesive pads they come with, press firmly, and choose warm white rather than cool white for a cosy effect. Most pucks have a tap-on switch and last months on one set of batteries. I stuck three under my cabinet and the evening bathroom routine felt calmer instantly. When you move, peel them off and the cabinet is untouched.
Cost: ~$10 | Time: 10 minutes
💰 Budget win: A pack of three pucks costs less than a single plug-in light and needs no electrician at all.
17. Hang a Fabric Laundry Hamper From the Door
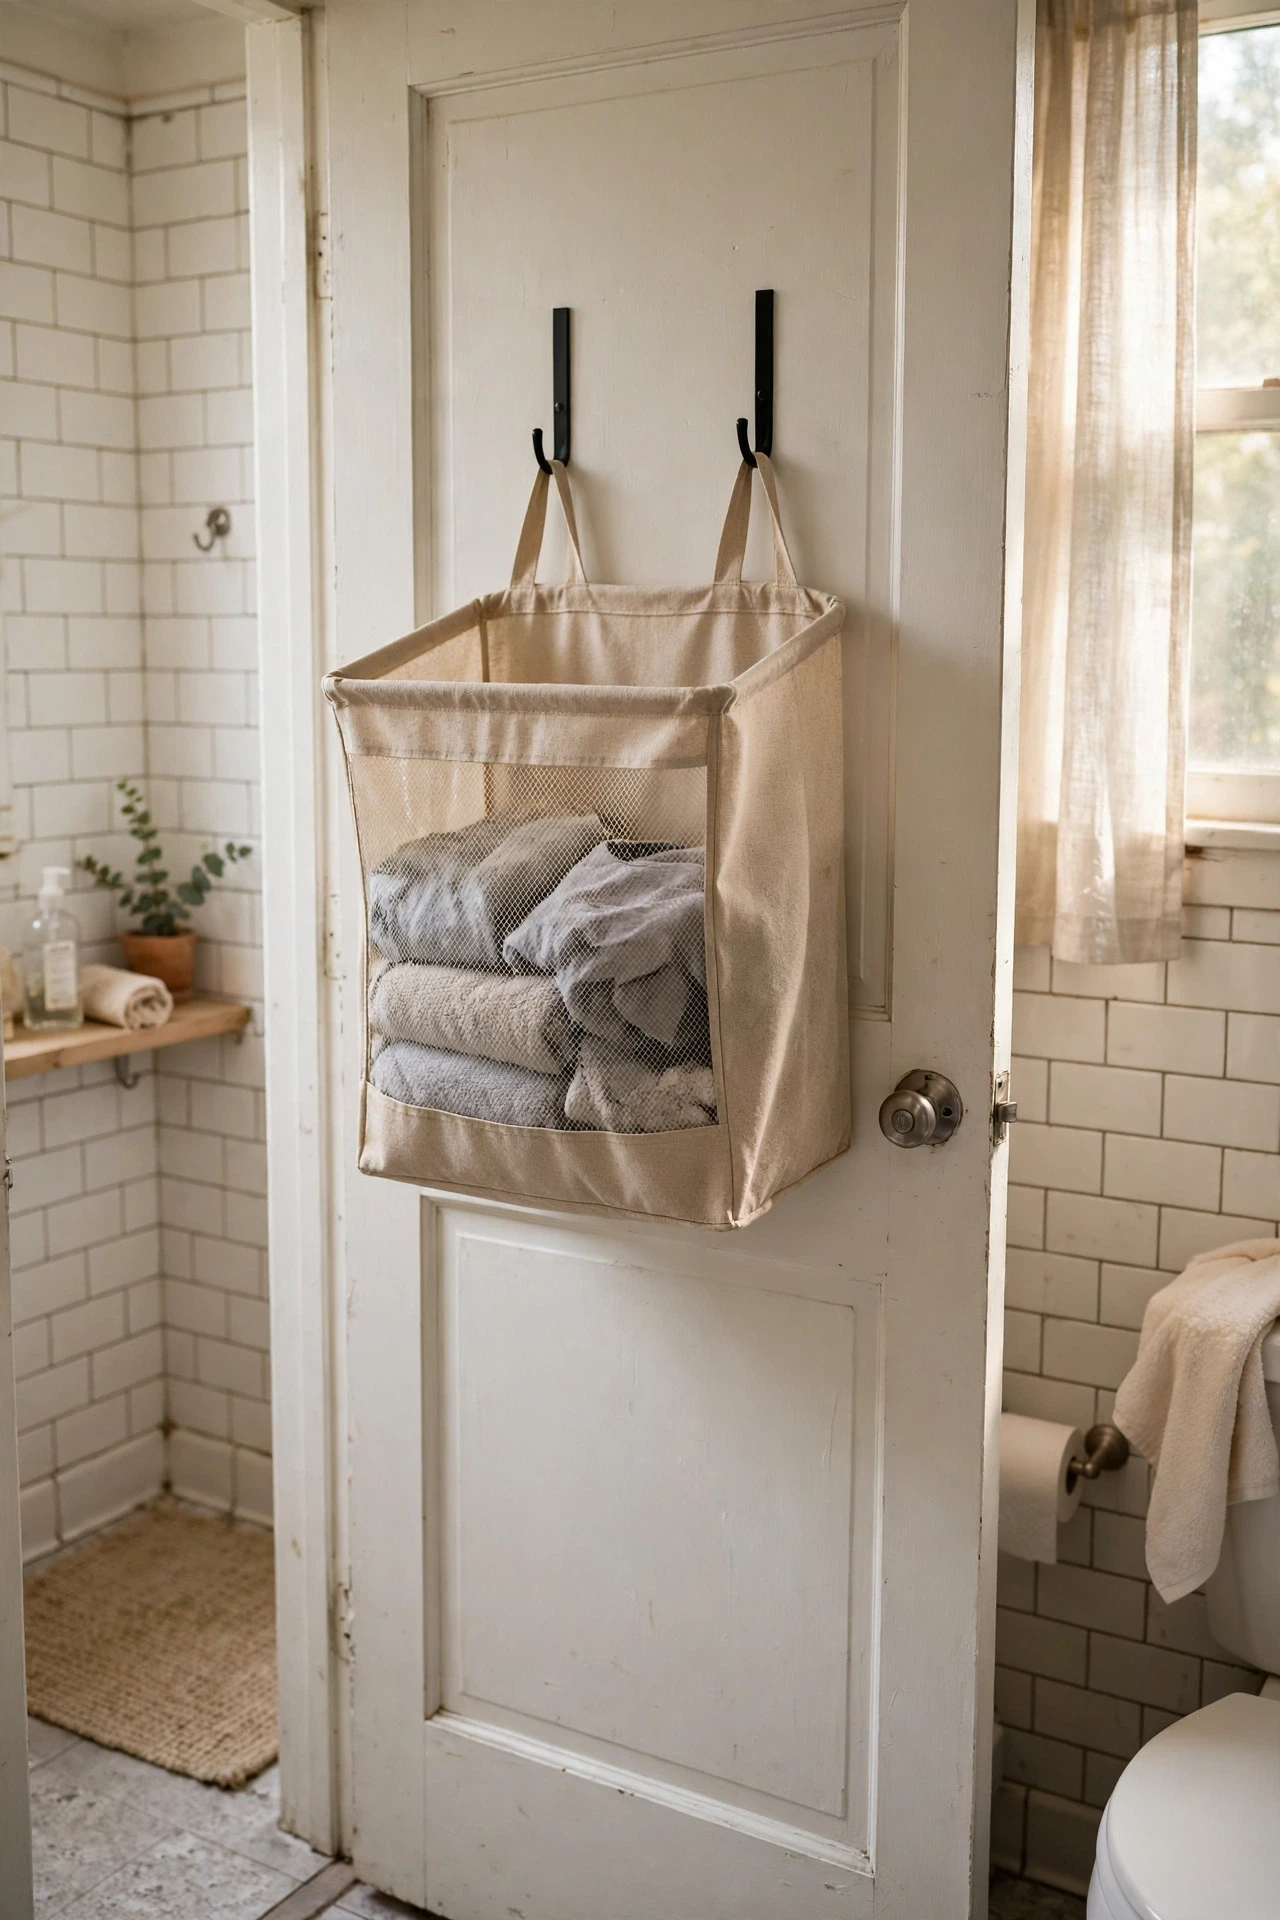
A bulky laundry basket eats floor space in a small bathroom, but an over-the-door fabric hamper uses space that was doing nothing. Hook it over the door or on a removable hook, toss in towels and clothes as you go, and unhook the whole bag on laundry day. Choose a washable fabric so the hamper itself can go through the machine now and then. Keep it on the inside of the door so it does not swing into the hallway, and do not overload it past the seam or the hooks will strain. Mine freed up a full square foot of floor, which in a tiny bathroom feels like a renovation.
Cost: ~$12 | Time: 5 minutes
💰 Budget win: A fabric hamper costs less than a lidded basket and folds flat when you move house.
18. Place a Small Stool as a Bath Caddy and Plant Stand
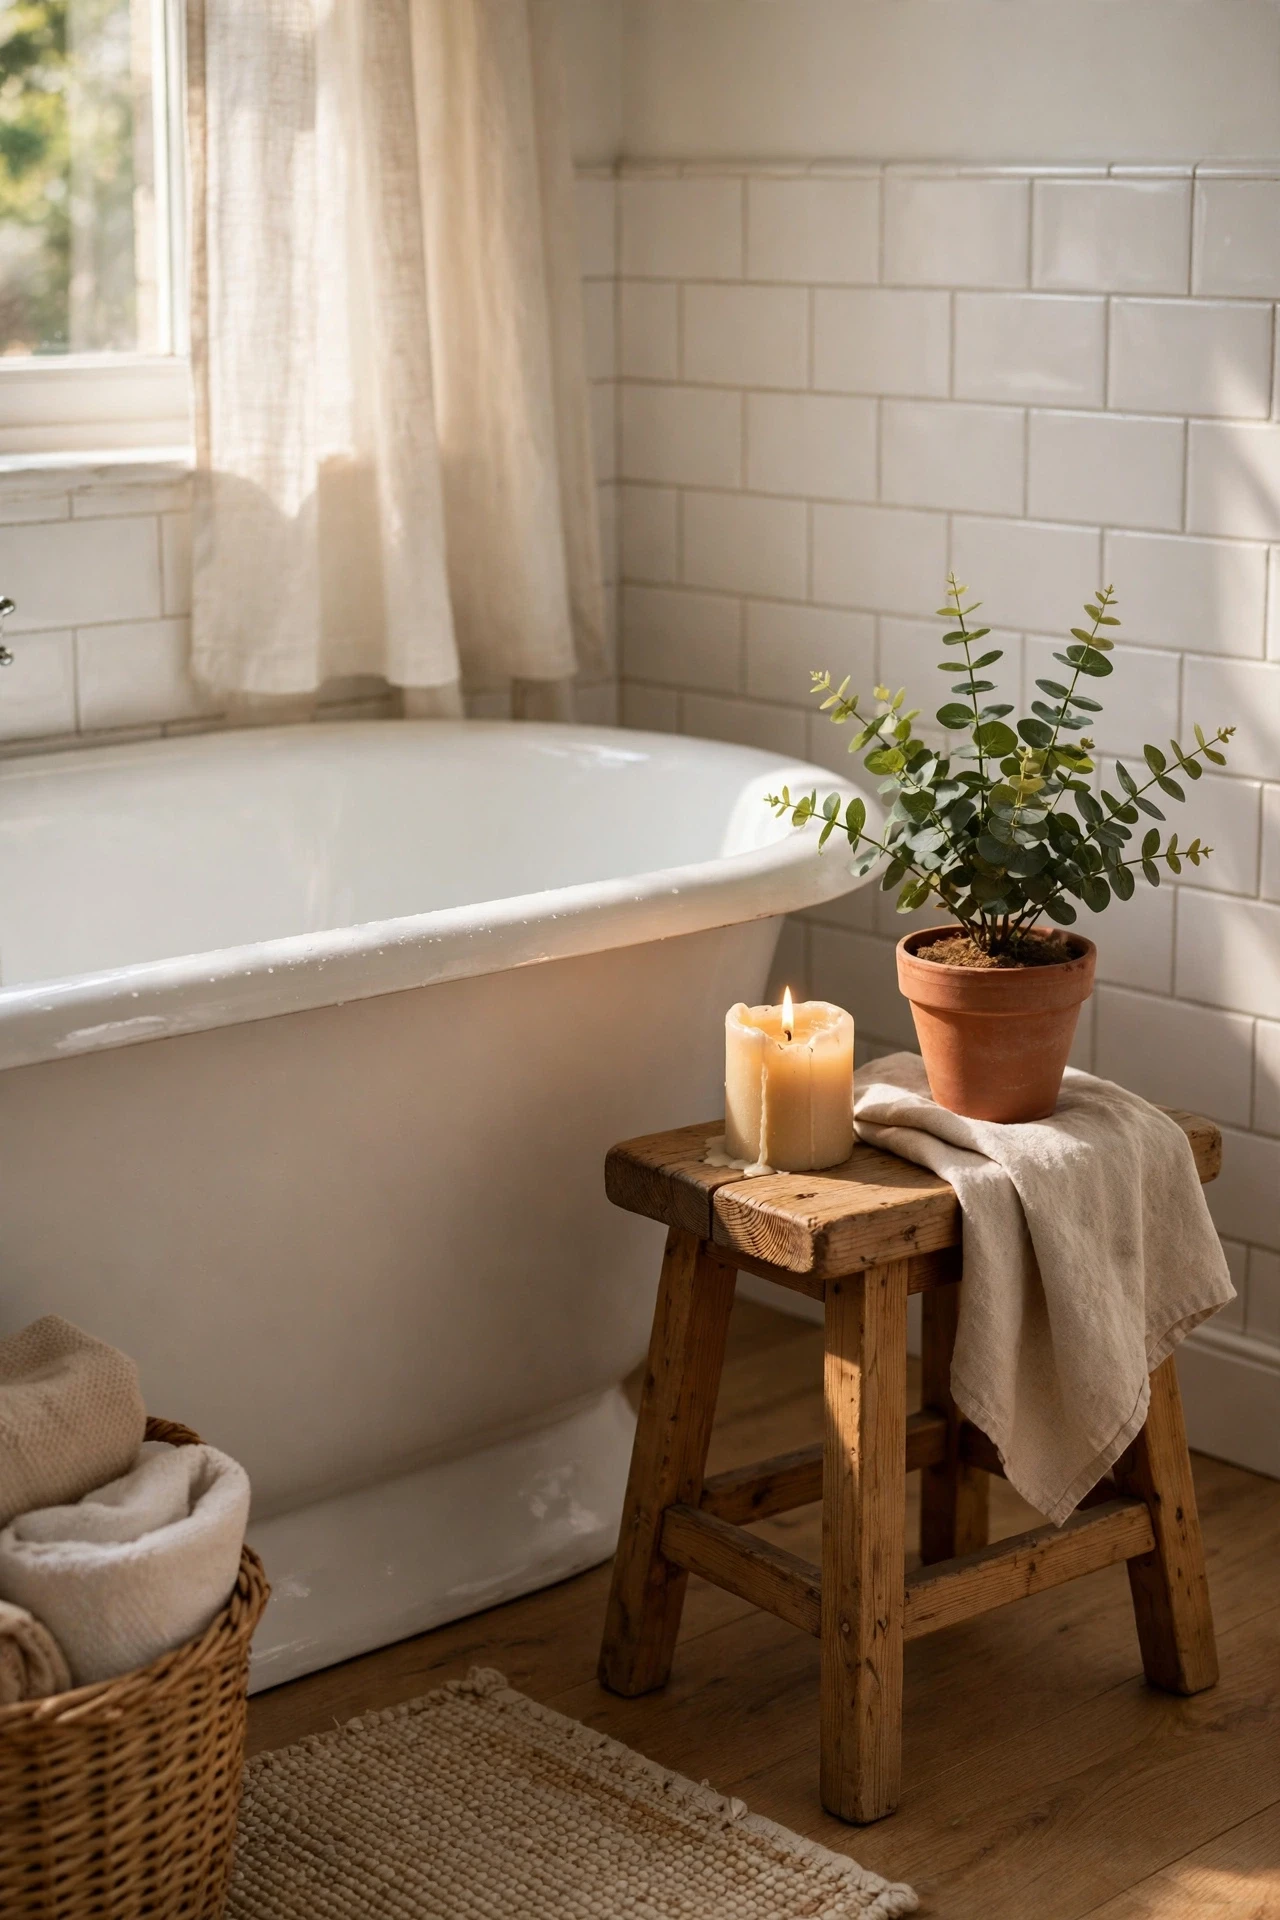
A small wooden stool beside the tub is the most versatile piece in a rental bathroom. Use it as a bath caddy for a book, a candle, and a glass of water during a soak, then move it to a corner as a plant stand the rest of the week. Choose a stool with a flat top and sturdy legs, and seal the wood with a clear waterproof finish so steam does not warp it. Keep it low enough to reach comfortably from the tub, and avoid a wobbly thrift find that could tip near water. Mine cost nine dollars secondhand, and it is the piece I reach for most in the whole room.
Cost: ~$15 | Time: 5 minutes
💰 Budget win: One stool does three jobs — caddy, plant stand, and extra seat — for less than a single-purpose bath tray.
Part 4 — Finishing touches: renter-safe swaps that stay with you.
19. Swap Faucet Aerators for Better Water Flow
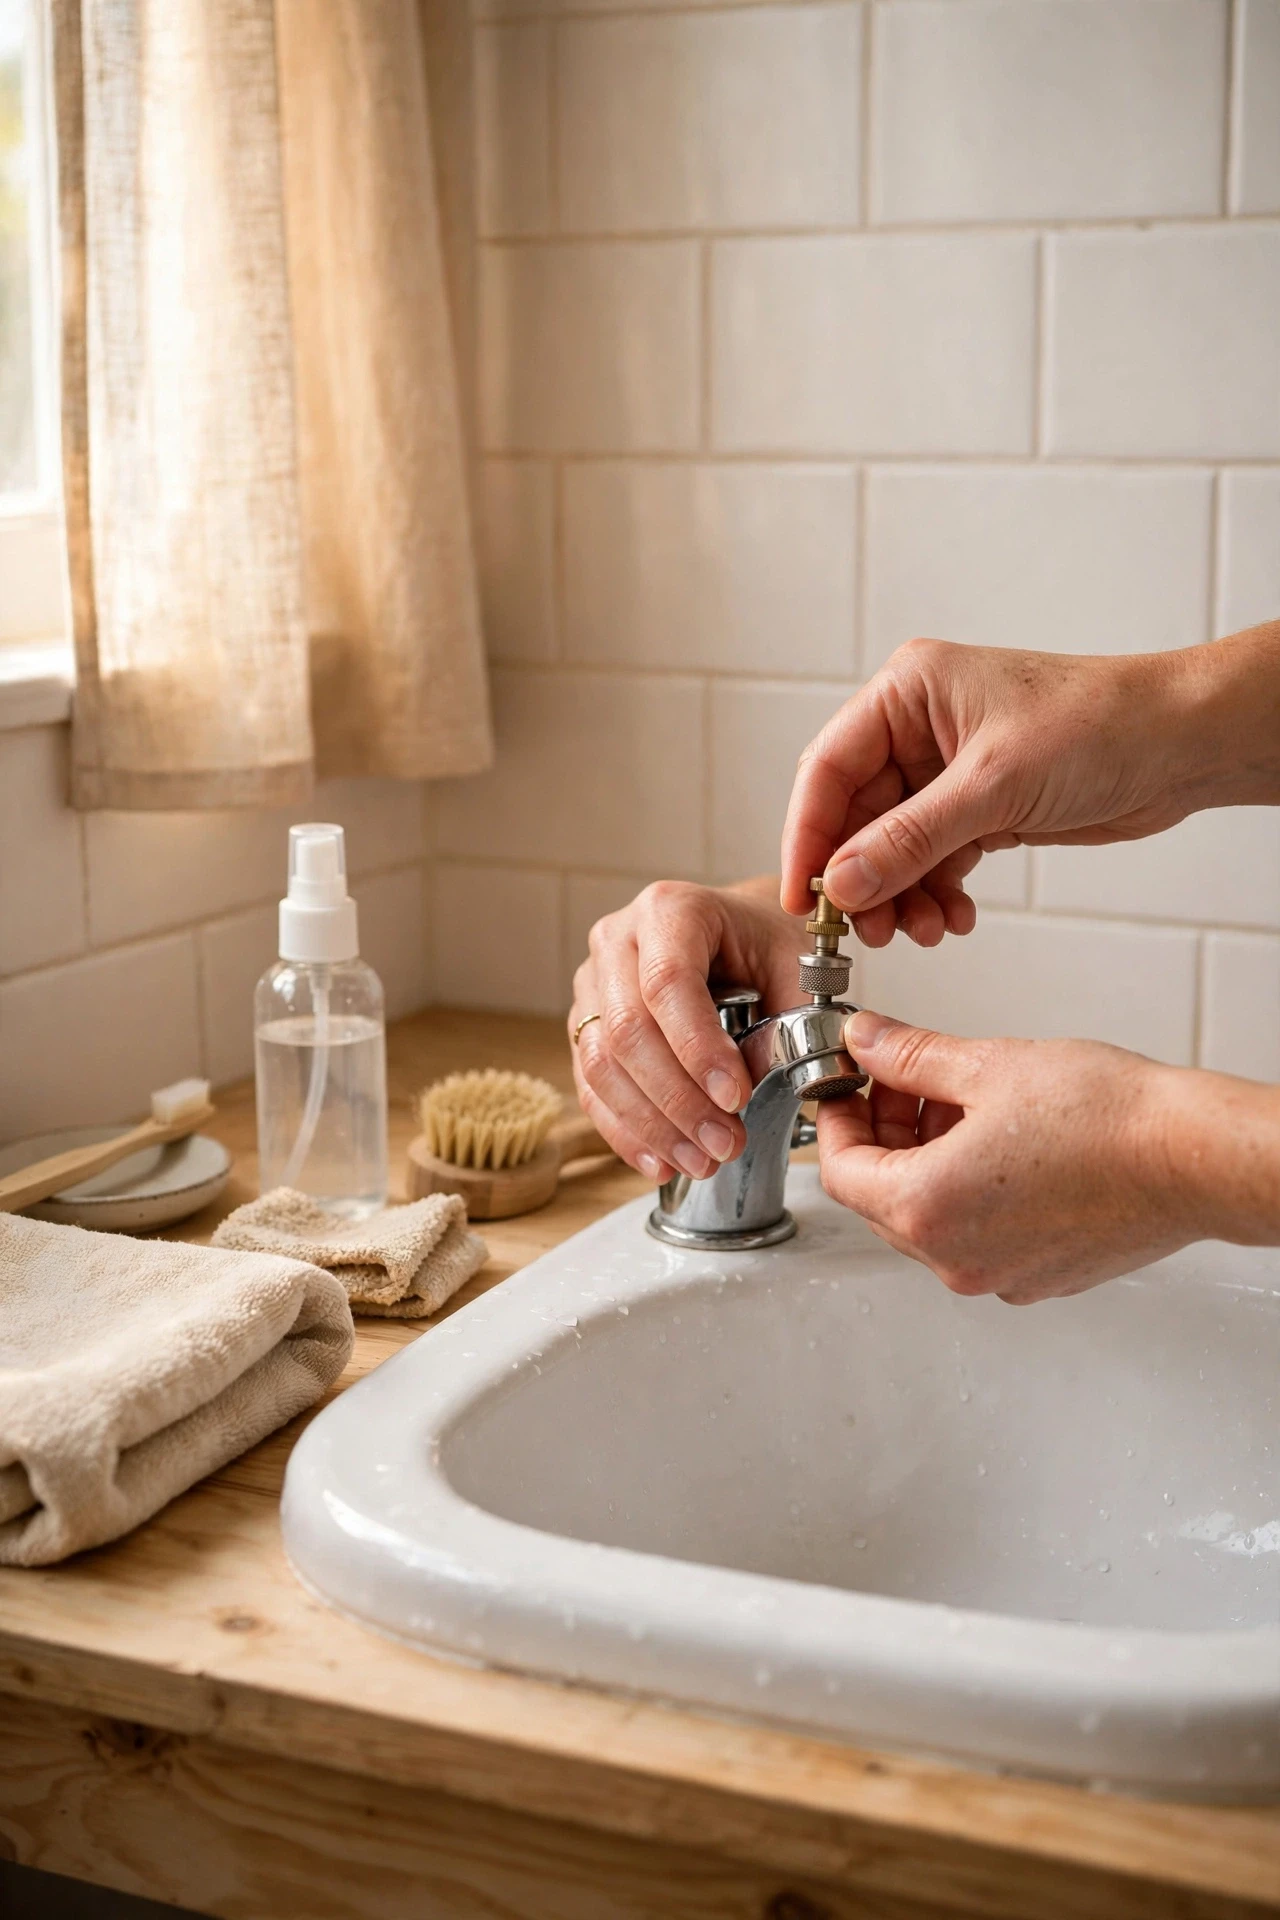
A faucet aerator is the small mesh piece at the tip of your tap, and swapping it can fix weak flow or heavy splashing in minutes. Unscrew the old one by hand or with a cloth-wrapped wrench, take it to the shop to match the thread size, and screw the new one on. Keep the original in the same bag as the old showerhead for move-out day. A low-flow aerator also saves water, which matters if you pay your own bill. I swapped mine and the sink stopped splashing all over the counter, which meant one less wipe-down every morning. For more water-saving swaps, see my (see also: rental-bathroom-upgrades) post.
Cost: ~$7 | Time: 10 minutes
💰 Budget win: An aerator costs less than a coffee and can cut your tap water use noticeably every single day.
20. Use a Magnetic Strip for Bobby Pins and Clips
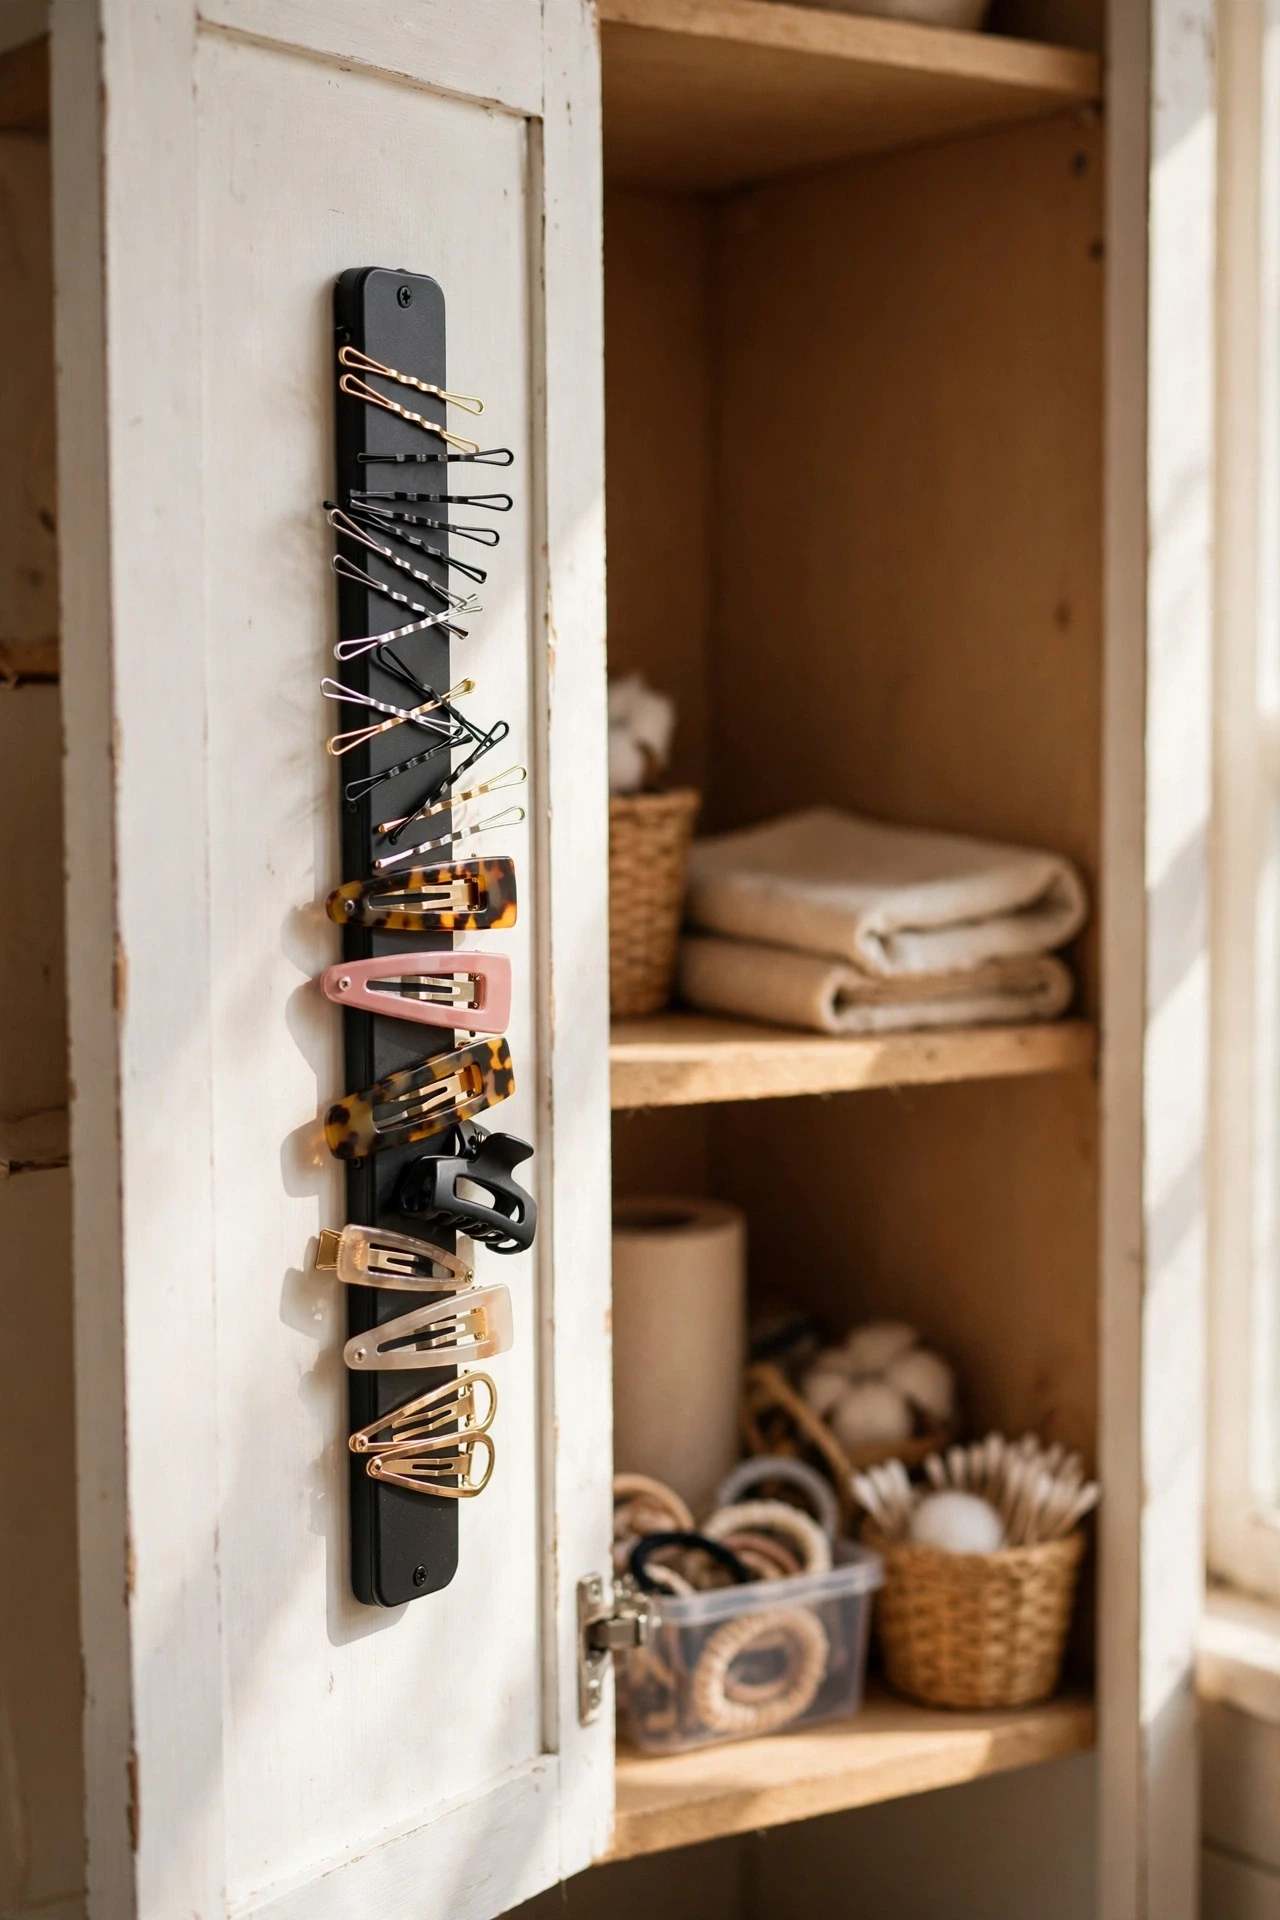
Bobby pins vanish into every drawer and drain in a bathroom, but a small magnetic strip inside a cabinet door catches them all. Stick a self-adhesive magnetic strip to the inside of the medicine cabinet or vanity door, then press pins, clips, and tweezers onto it. Everything stays visible and reachable, and you stop buying replacement packs every month. Keep the strip away from the mirror edge so it does not block the door from closing, and wipe it now and then so hair and dust do not build up. I fitted one in five minutes and have not lost a bobby pin since — a small claim, but a true one.
Cost: ~$5 | Time: 5 minutes
💰 Budget win: A five-dollar strip ends the monthly replacement-pack habit, so it pays for itself within weeks.
21. Add a Removable Wallpaper Accent on One Wall
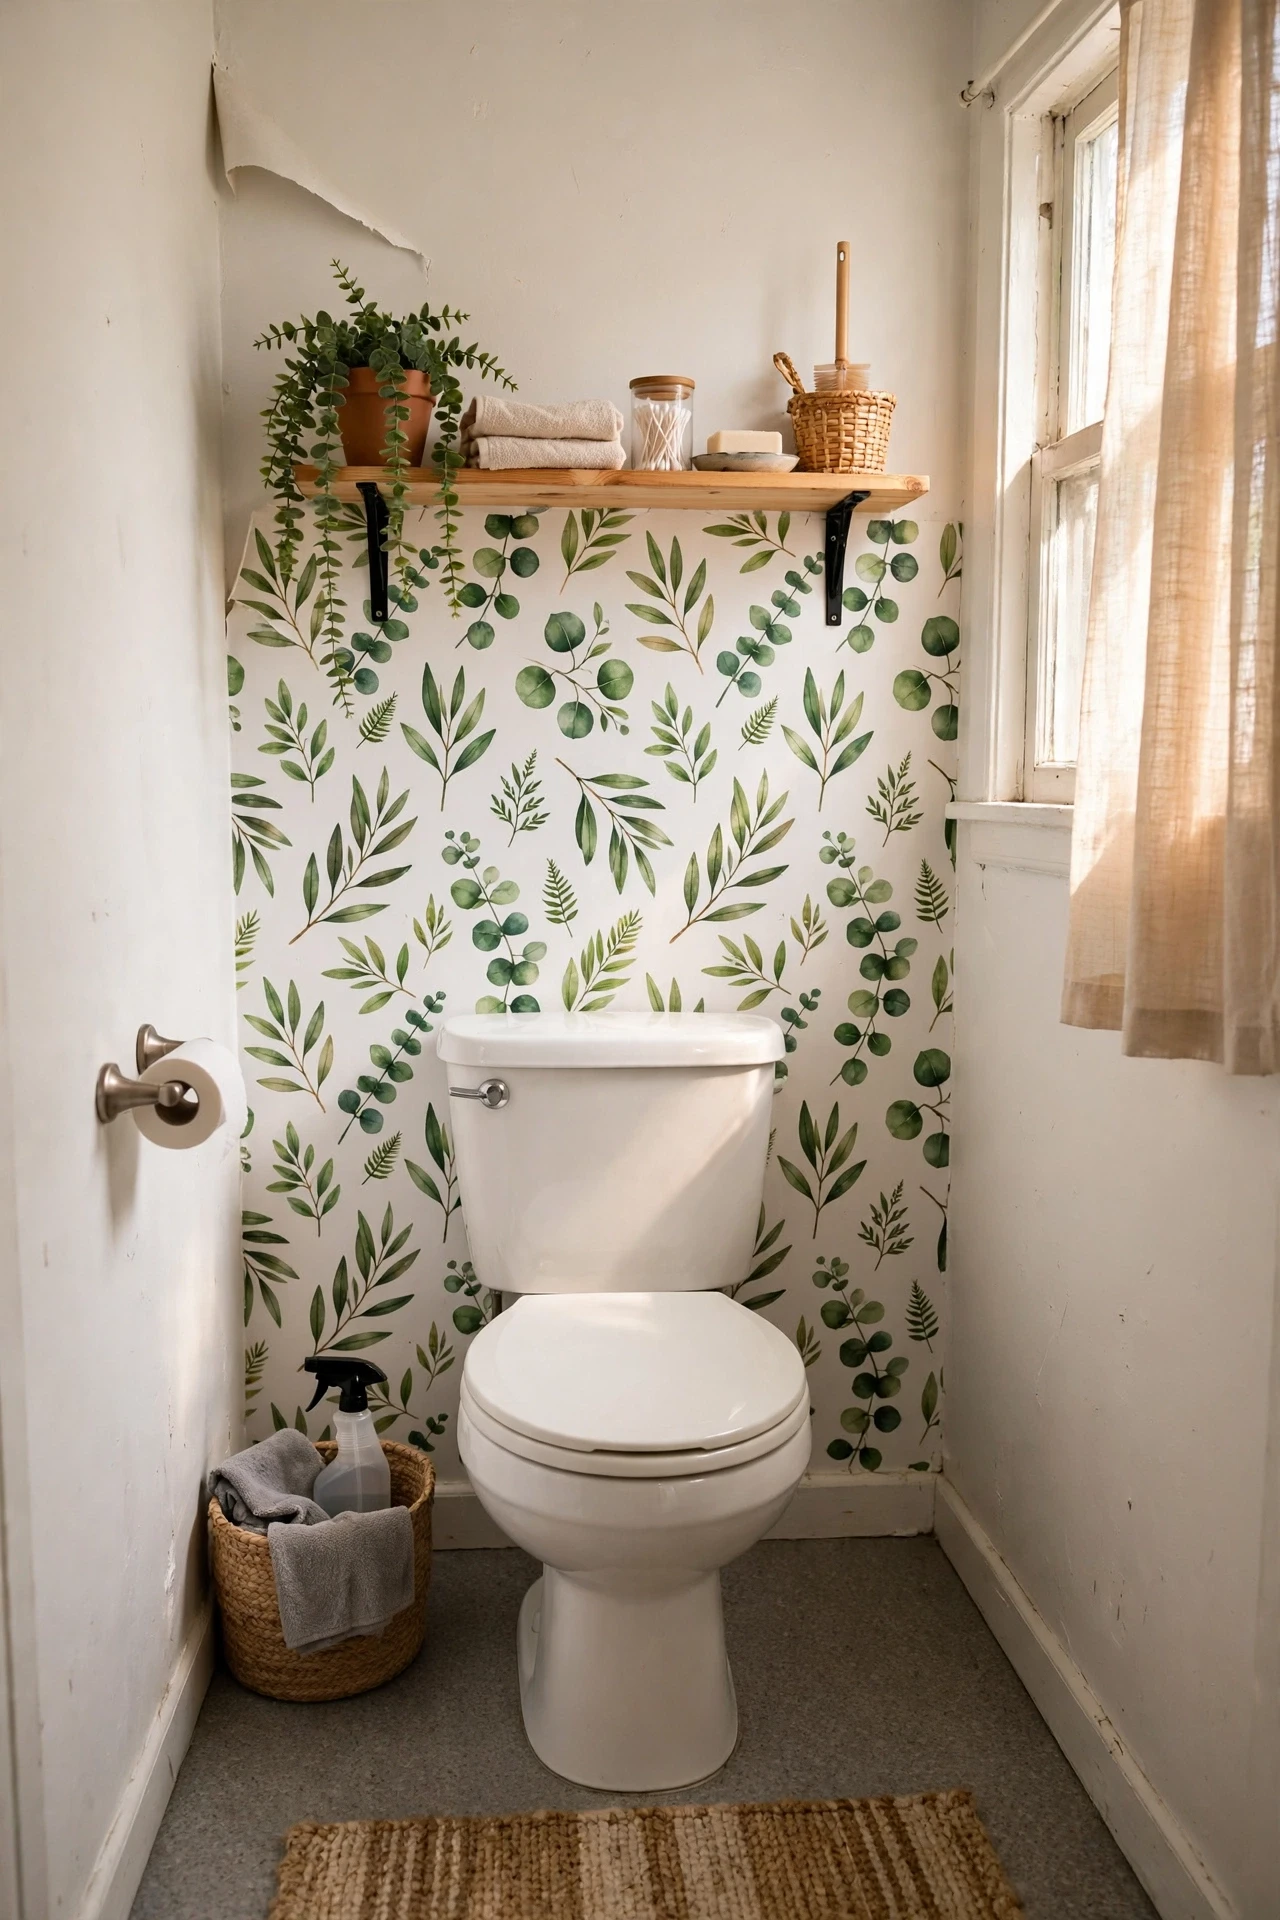
Peel-and-stick wallpaper has come a long way, and one accent wall can turn a plain rental bathroom into a room with real character. Pick a moisture-friendly vinyl pattern, measure the wall carefully, and hang it from the top down, smoothing out bubbles as you go. Do one wall only — behind the vanity or toilet — so the pattern feels intentional rather than overwhelming. When the lease ends, peel it off slowly from a corner and the paint underneath stays clean. I papered the wall behind my toilet in a soft botanical print, and it is the first thing I see every morning. It still makes me smile.
Cost: ~$25 | Time: 1 hour
💰 Budget win: One roll usually covers a small bathroom accent wall, so measure first and avoid buying a second roll.
22. Set Out Matching Dispensers for a Hotel Feel
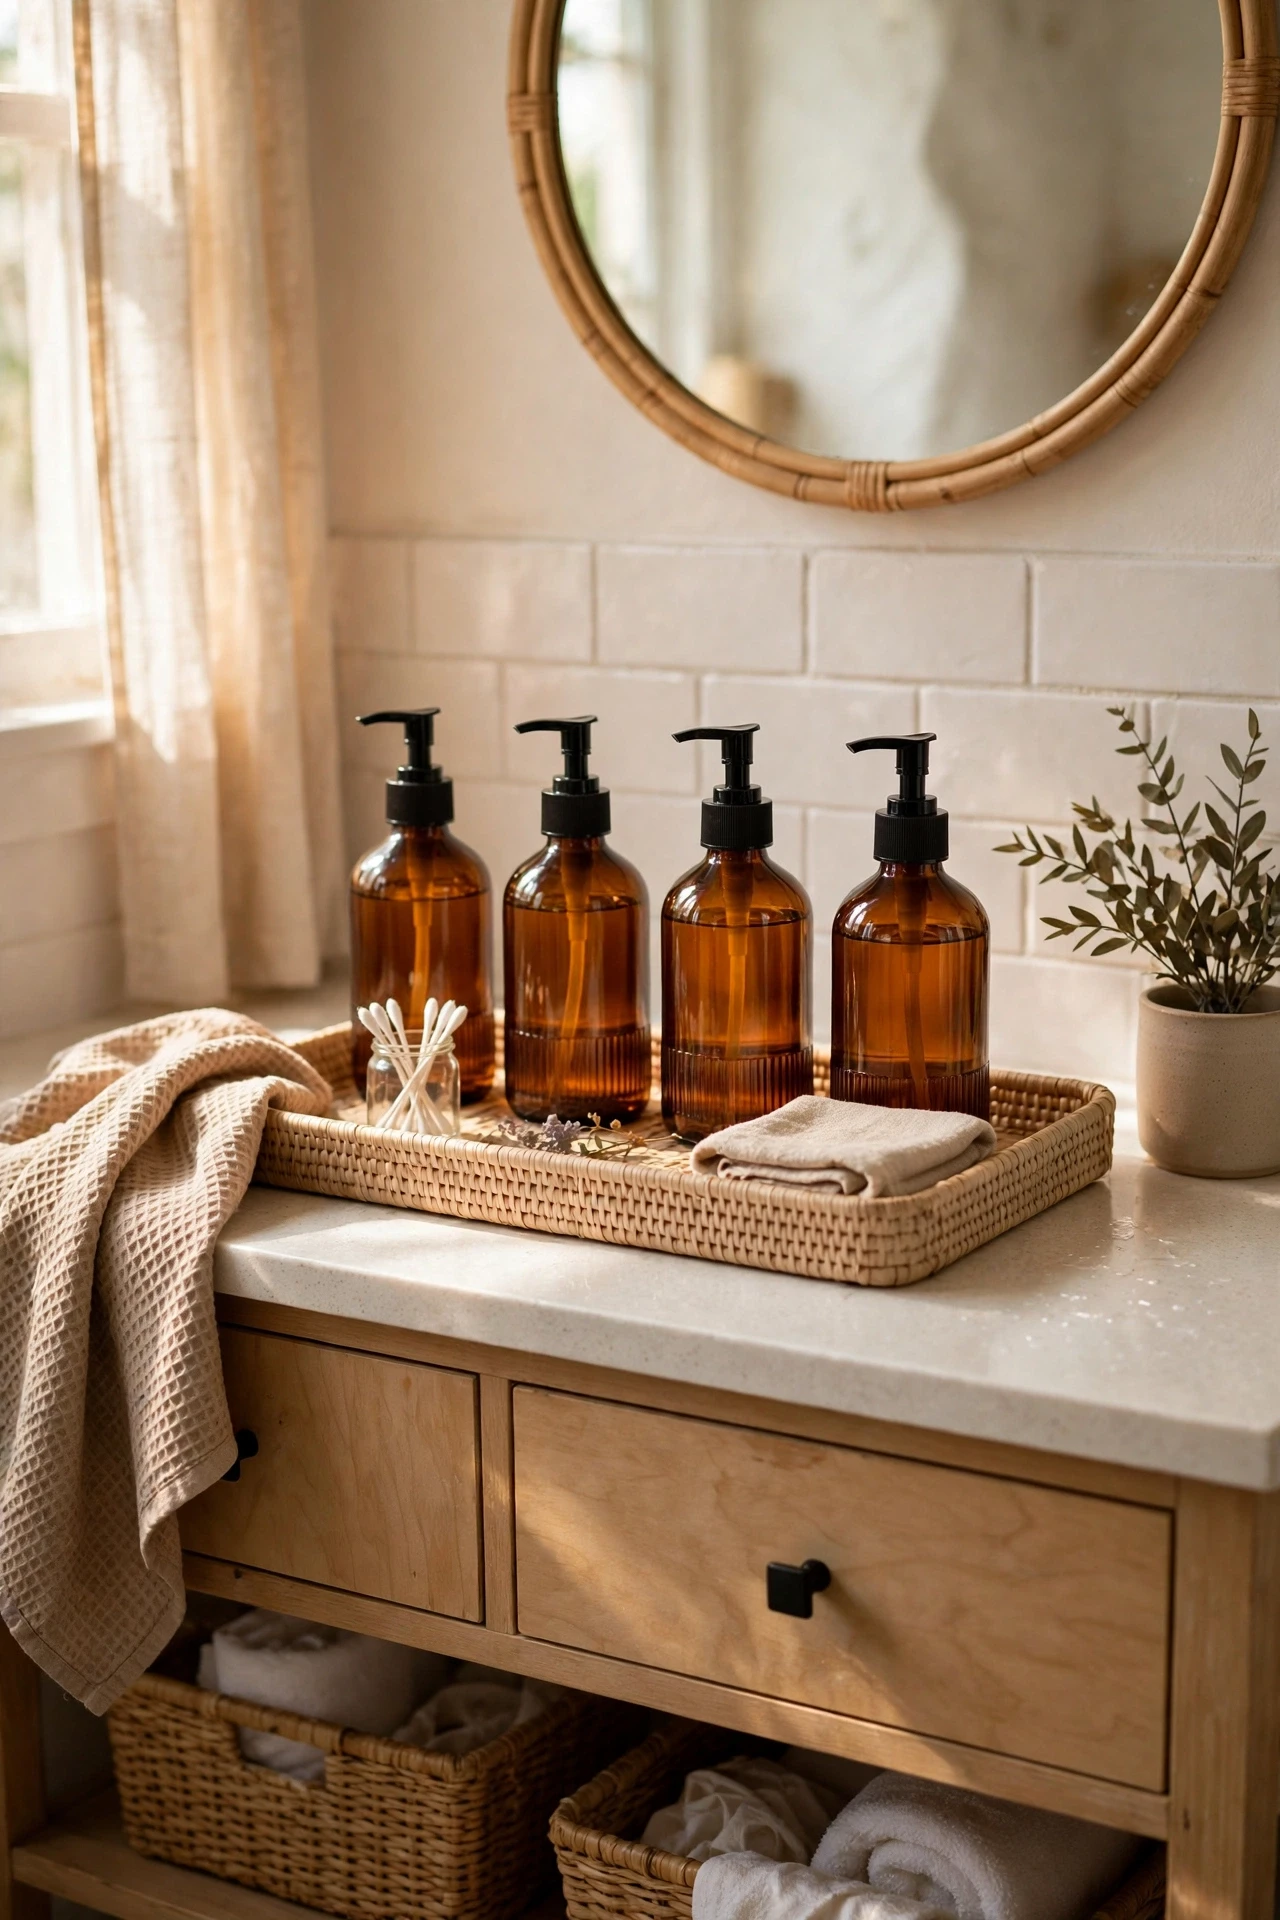
Mismatched shampoo bottles and half-torn labels make a bathroom look untidy no matter how clean it is. Decant shampoo, conditioner, hand soap, and lotion into a matching set of amber or white pump bottles, label them simply, and line them up on a tray or shelf. The room instantly reads as calmer and more grown-up, like a hotel bathroom rather than a shared flat. Refill them from bulk bottles to save money over time, and keep the originals under the sink for refills. My set cost twelve dollars and changed the whole feel of the vanity overnight. It is a tiny ritual that makes daily routines feel nicer.
Cost: ~$12 | Time: 20 minutes
💰 Budget win: Refilling matching bottles from bulk buys costs less per wash than buying small branded bottles each time.
23. Hang a Waterproof Speaker With a Suction Mount
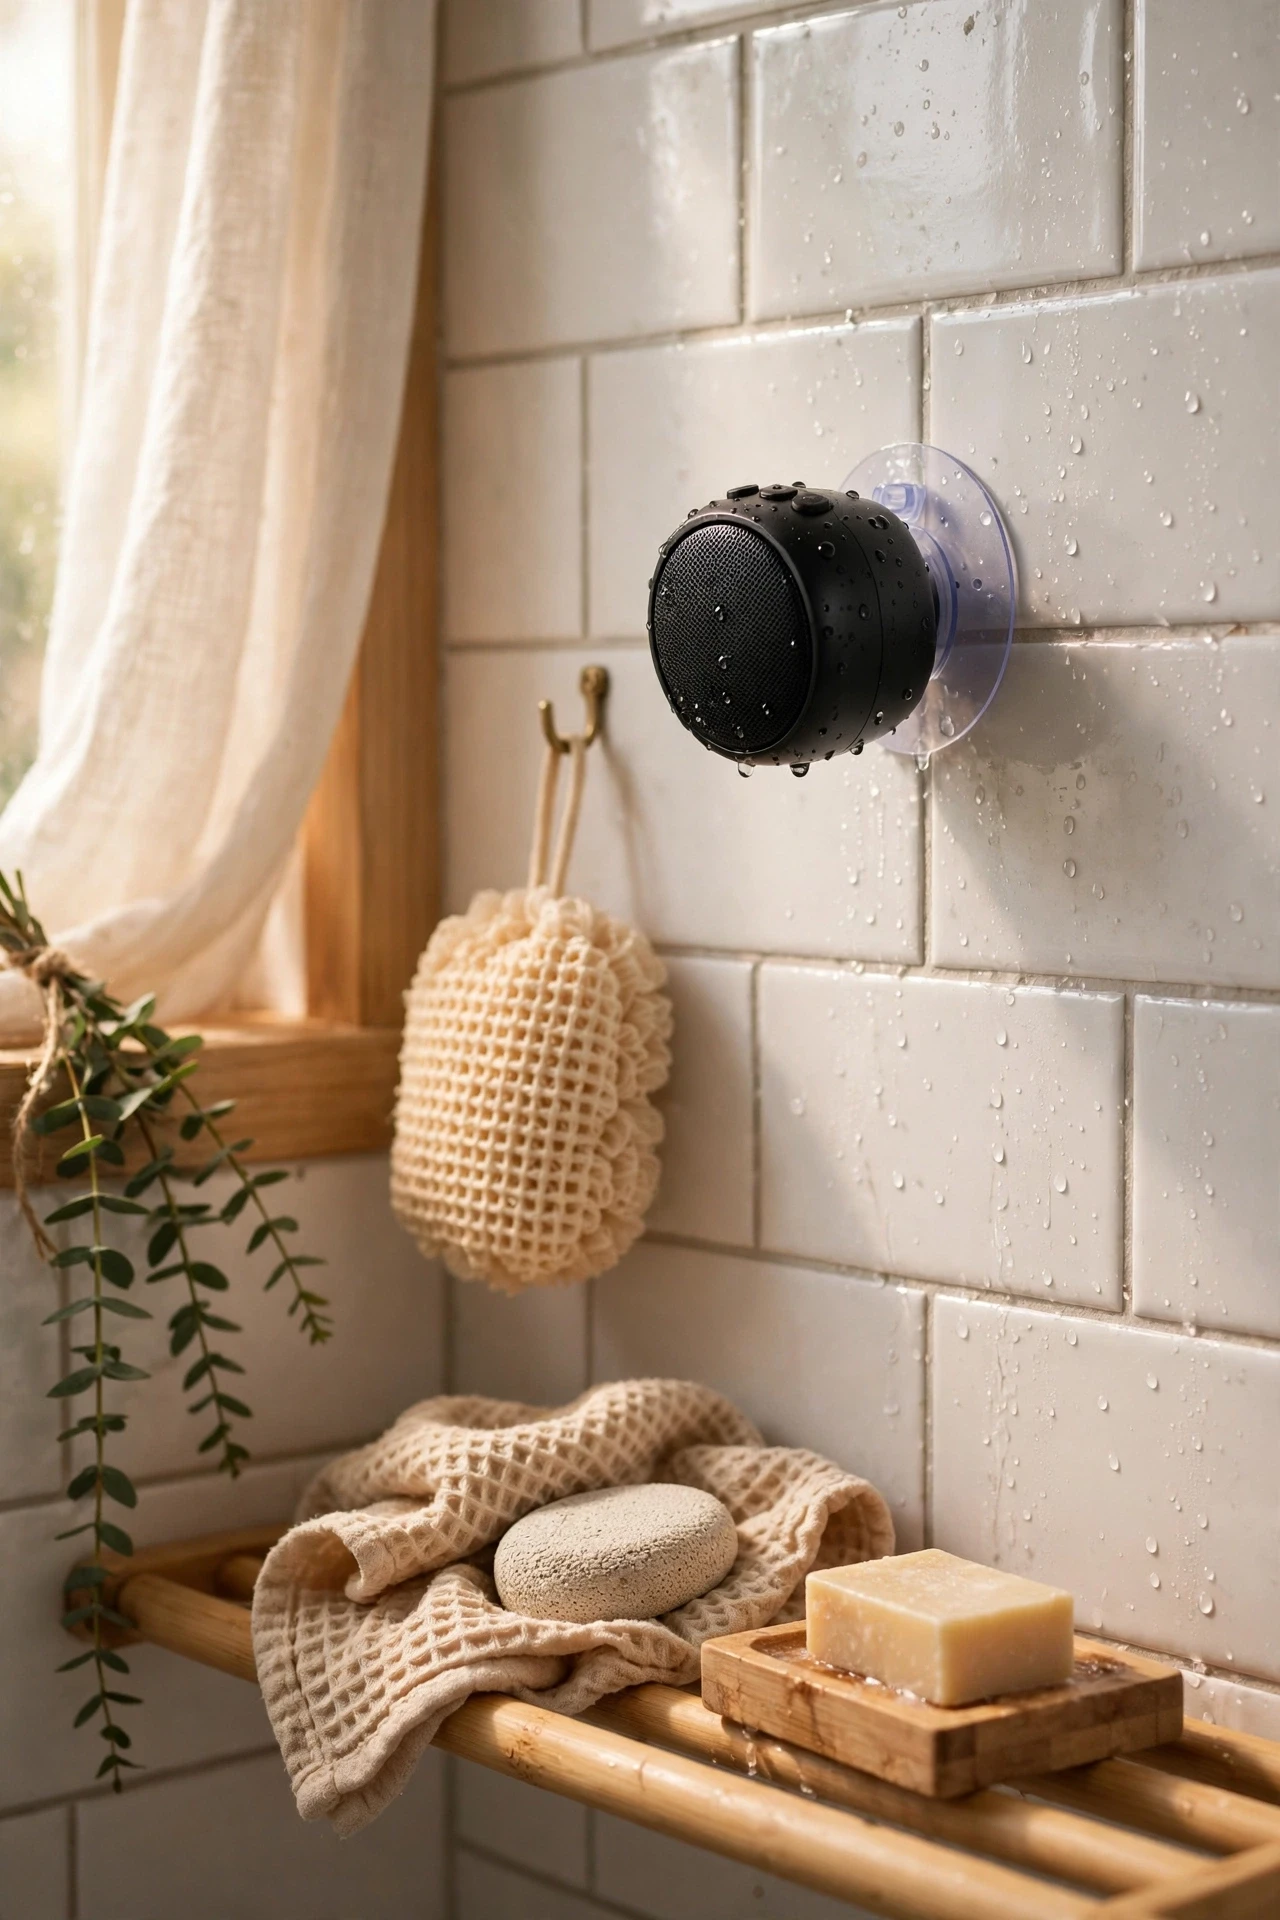
Music or a podcast turns a rushed morning routine into something you actually enjoy, and a small waterproof speaker on a suction mount brings sound into the shower safely. Stick the mount to a smooth tile or the glass door, away from the direct water stream, and pair it before you step in. Keep the volume modest — thin rental walls carry sound further than you think — and charge it weekly so it never dies mid-shower. I play a morning playlist while I get ready, and it genuinely changed how I feel about early starts. Just check the suction seal now and then so the speaker never takes a dive.
Cost: ~$20 | Time: 5 minutes
💰 Budget win: A small waterproof speaker costs less than a fancy showerhead and gets used every single day.
24. Lay Peel-and-Stick Floor Tiles Over Old Vinyl
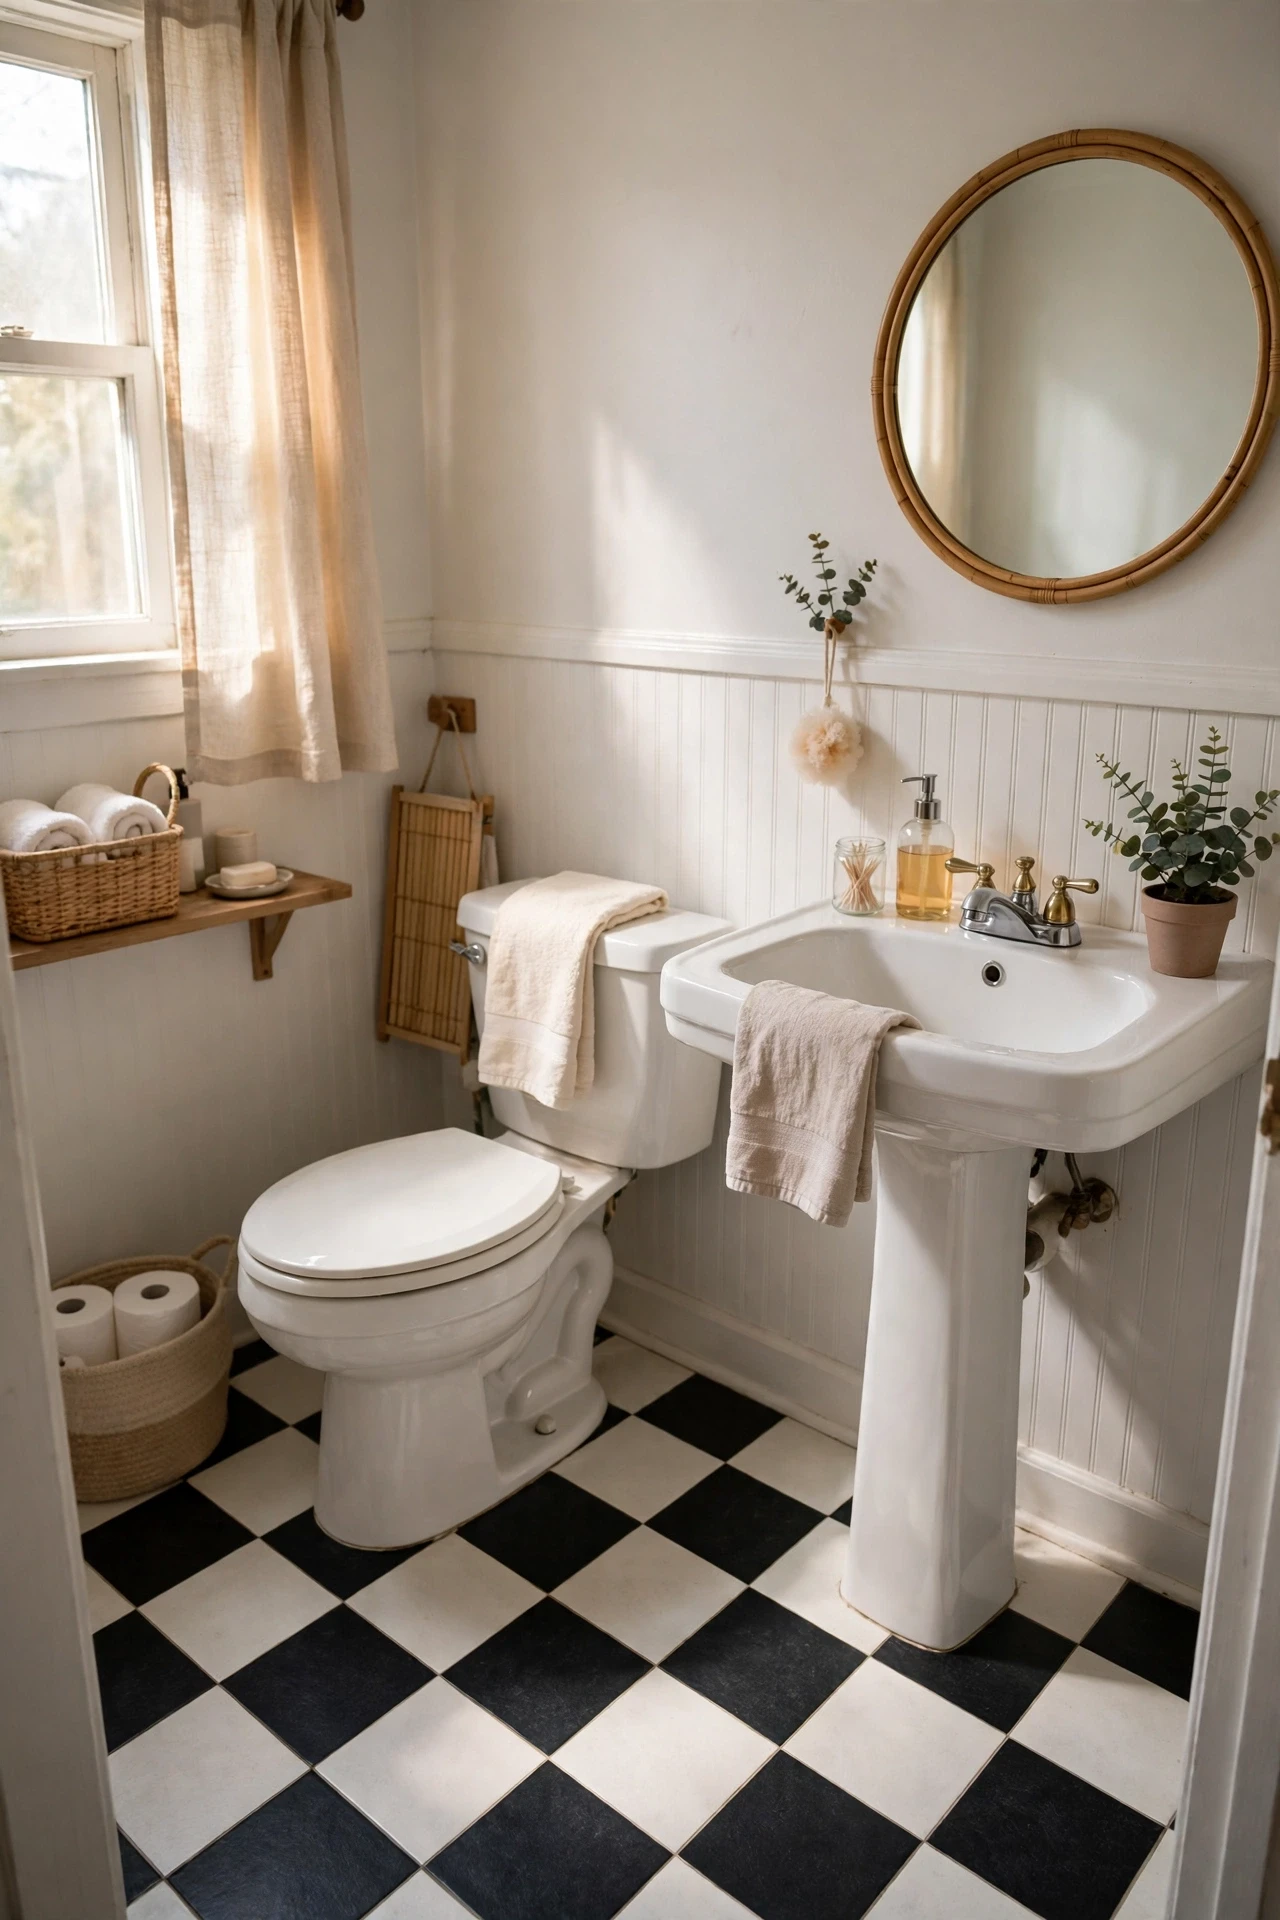
If your rental floor is stained vinyl or cracked linoleum, peel-and-stick floor tiles are a dramatic cover-up that still comes off later. Clean the floor thoroughly, let it dry, and lay the tiles from the centre outward so the pattern stays even at the edges. Press each tile firmly and roll over it with a rolling pin if you have one. Avoid the wettest area right beside the tub unless the tiles are rated for bathrooms, and seal the edges with a thin bead of clear caulk for extra protection. My floor went from yellowed vinyl to a clean checkerboard in an afternoon, and it survived two years of daily showers.
Cost: ~$30 | Time: 3 hours
💰 Budget win: A box of floor tiles covers a small bathroom for less than a tenth of professional flooring, and it peels up later.
25. Finish With a Faux Plant and a Scented Candle Duo
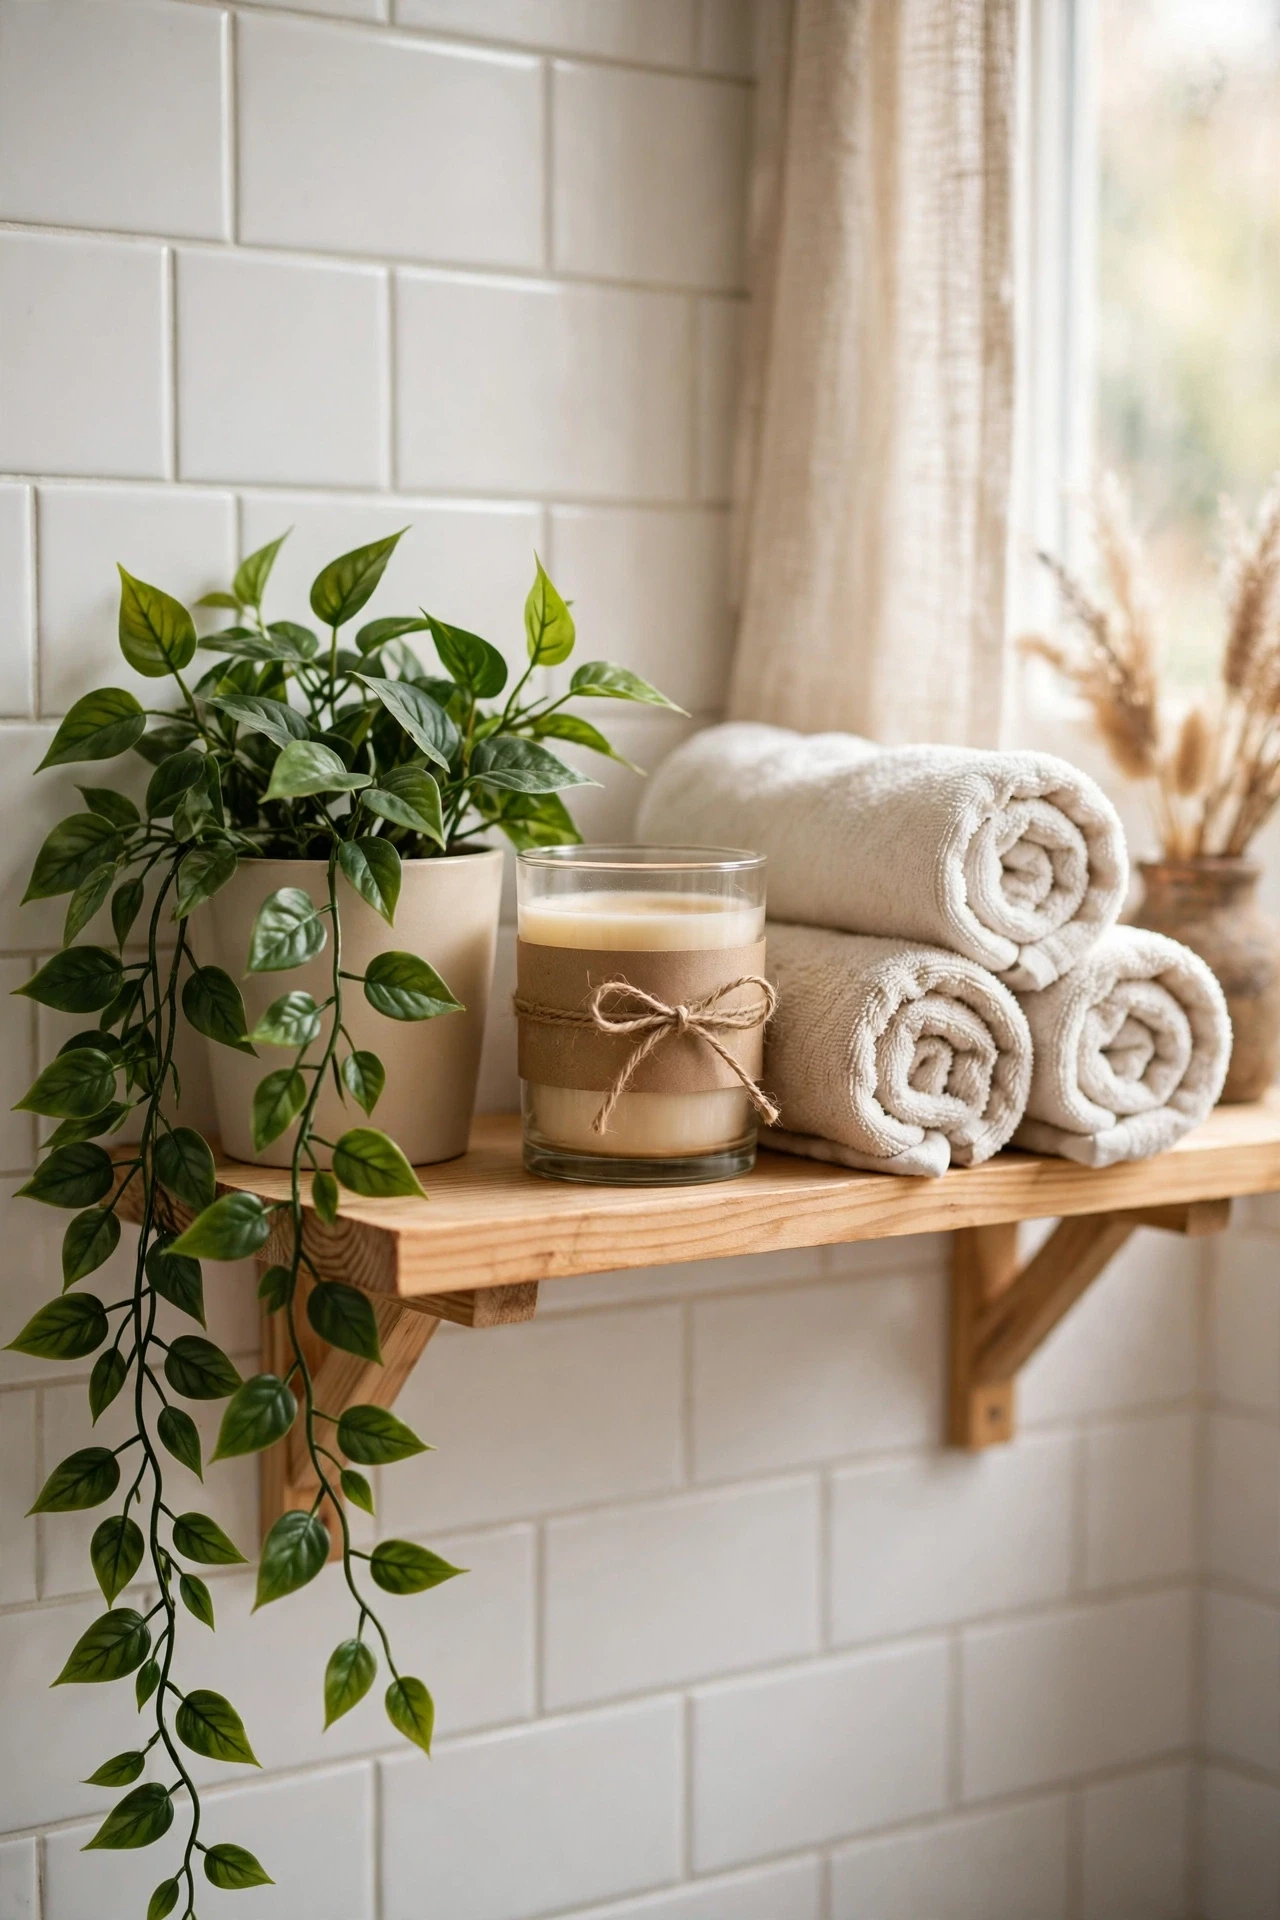
Every bathroom needs one living-looking touch and one scent, and a faux plant plus a candle delivers both with zero upkeep. Set a trailing faux pothos on a shelf or the stool from earlier, where real plants would struggle without light, and place a candle beside the sink for evening baths. Choose a plant that looks real at arm’s length — matte leaves beat shiny plastic every time — and a candle scent you actually like, not just one that was on sale. Dust the plant monthly so it stays convincing. This last touch pulls the whole room together, and it costs less than a single takeaway. A rental bathroom can feel like home; it just needs a few thoughtful layers.
Cost: ~$15 | Time: 5 minutes
💰 Budget win: Faux plants never need replacing, unlike real ones that die in windowless bathrooms within weeks.
Start with the showerhead and the curtain, then add storage and one bold surface swap. None of these upgrades need permission, tools, or patching, and all of them travel with you to the next place. Your rental bathroom does not have to look rented — it just needs a few smart, removable layers.
