23 Renter-Friendly Bedroom Ideas That Need No Drilling
I learned renter friendly bedroom ideas the hard way, staring at a £900 deposit I did not want to lose. My rental bedroom had magnolia walls, a wobbly landlord bed, and a strict no-holes clause in the tenancy agreement. So I rebuilt the whole room without a single drill hole: command strips, tension rods, and furniture that stands on its own. I gave my rented bedroom a full makeover for under $160, and when I moved out two years later, every wall was exactly as I found it.
This list is everything that survived two rental inspections with zero damage and zero deductions. No drilling, no wall plugs, no filler, no repainting. Each idea comes off cleanly when you leave, and most go up in under an hour. Work through them in any order, and your landlord will never know how different the room used to look.
1. Command Strip Gallery Wall
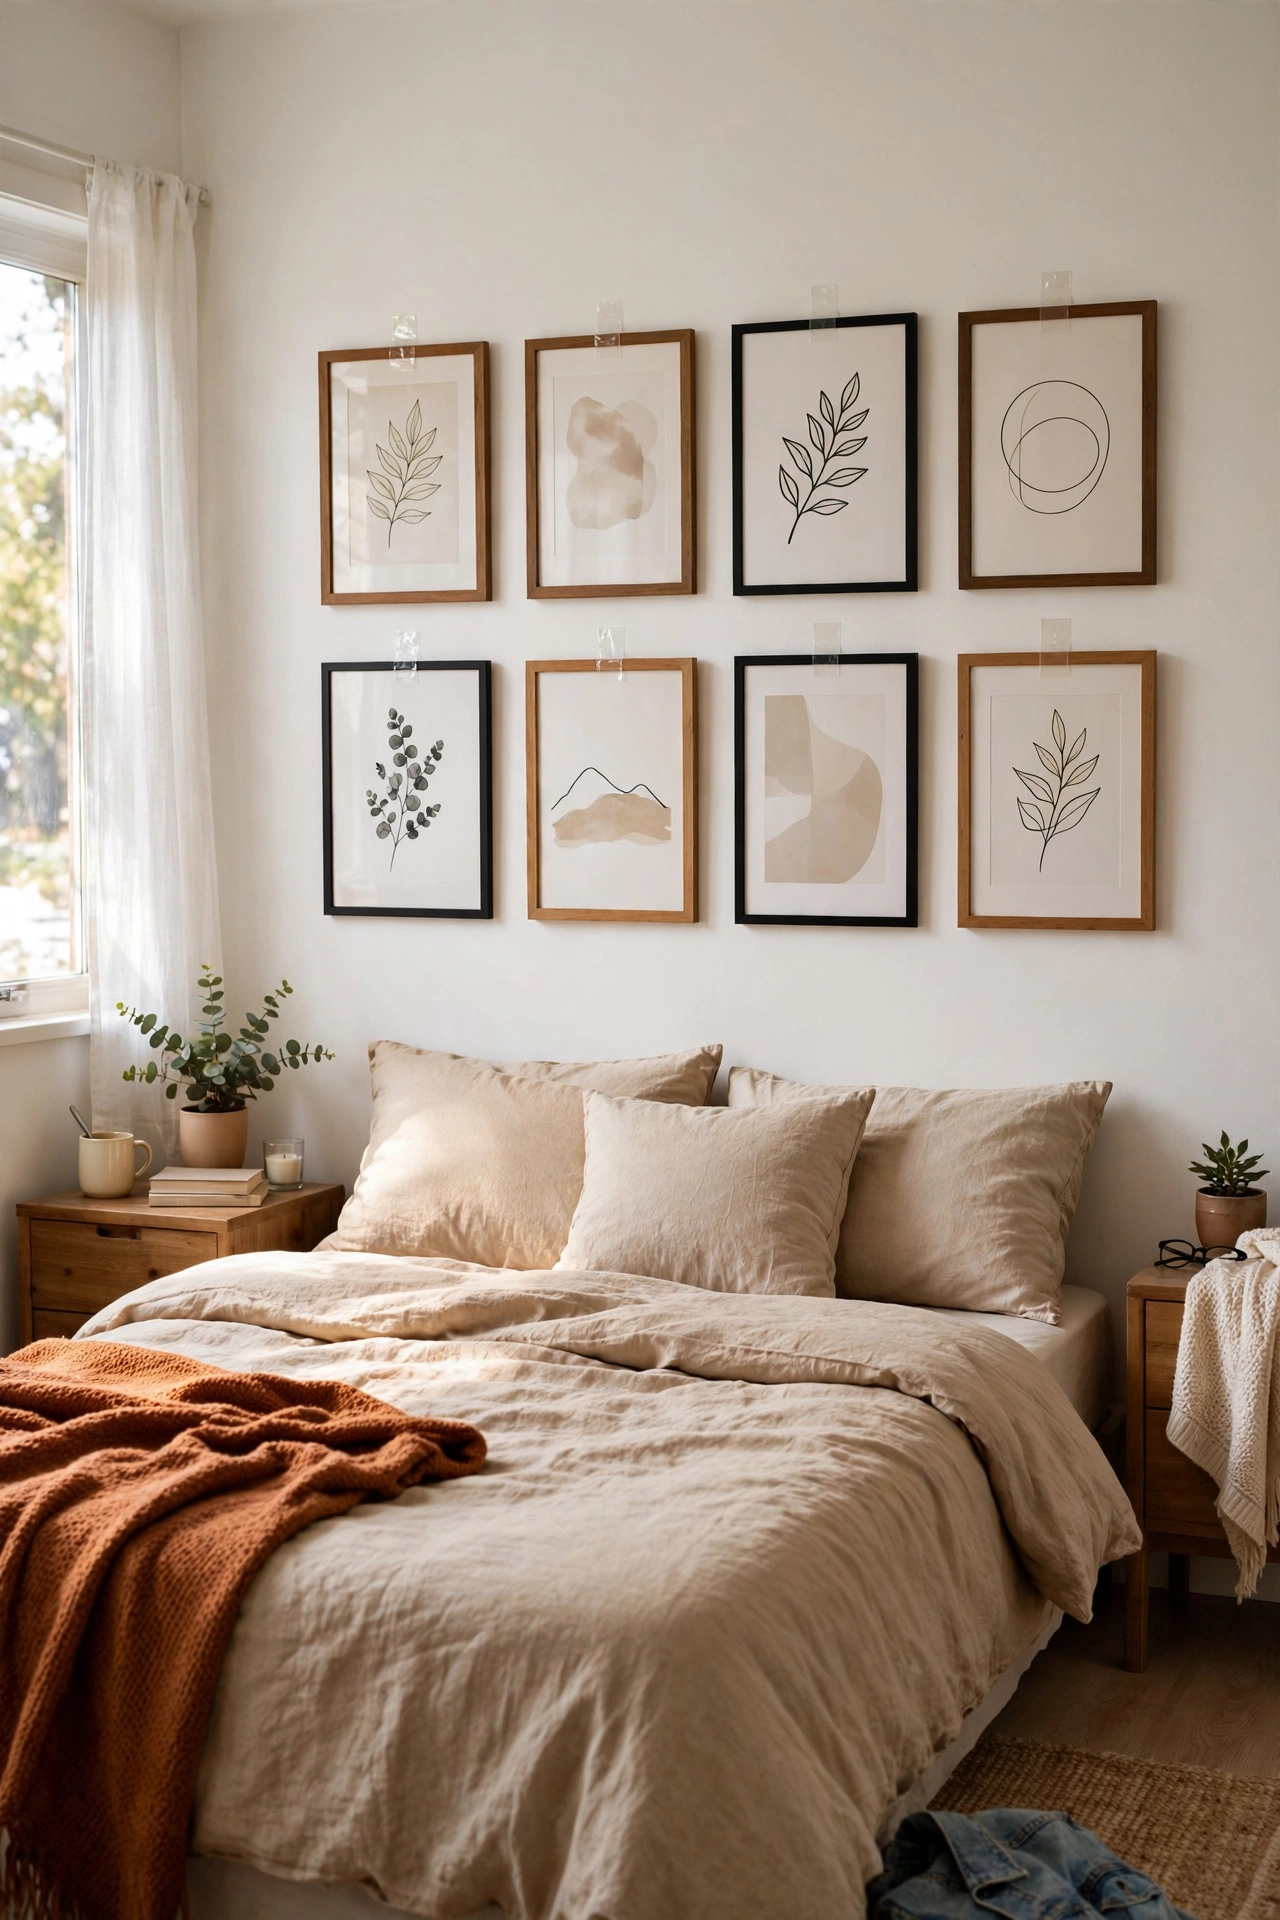
A gallery wall without a single nail is the renter’s best trick. I hung six frames above my bed using large picture-hanging command strips, planning the layout on the floor first with painter’s tape on the wall as a guide. The strips hold up to 7 pounds each, so even chunky frames stay put. Press each strip firmly for thirty seconds and wait an hour before hanging, because rushing this step is why strips fail. My first frame fell at 2am because I hung it immediately. After I followed the wait time, nothing moved for two years. Pull the tab straight down when you leave and the paint stays perfect.
Cost: ~$15-25 | Time: 1 hour
2. Tension Rod Curtain Panels
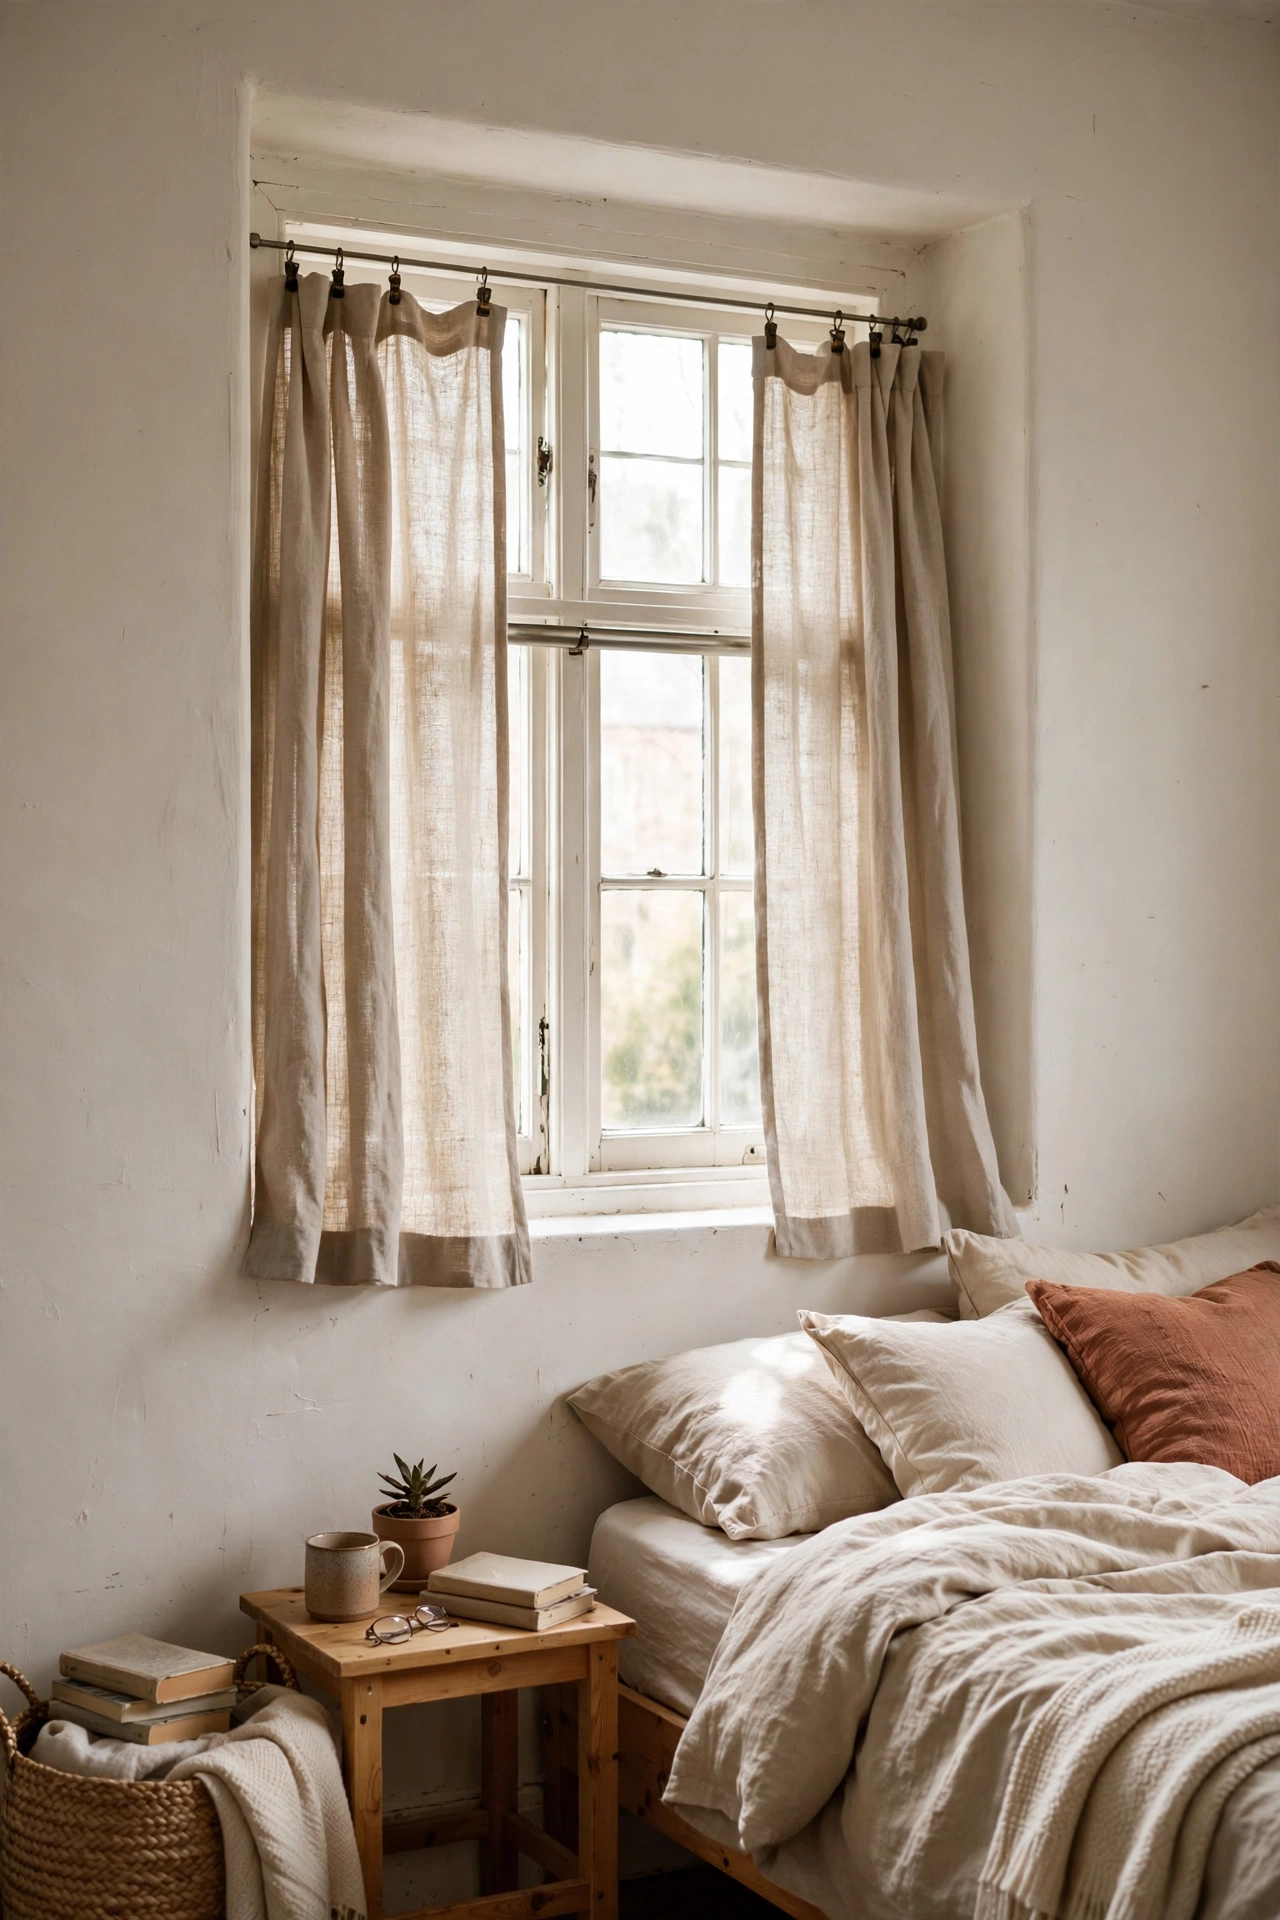
Tension rods let you hang proper curtains with zero hardware. I fitted a $10 tension rod inside my window recess and hung two linen panels on clip rings. Twist the rod until it is snug, then give it a quarter turn more so it grips firmly. Hang the panels high, with the rod near the top of the recess, so the window looks taller. My first rod slipped because I had not tightened it enough and the curtains pooled on the sill. One extra twist fixed it permanently. This works in any window with a recessed frame, and the whole thing comes down in seconds on moving day. Ten minutes of work for curtains that look fully installed.
Cost: ~$25-40 | Time: 15 minutes
3. Peel-and-Stick Accent Wall
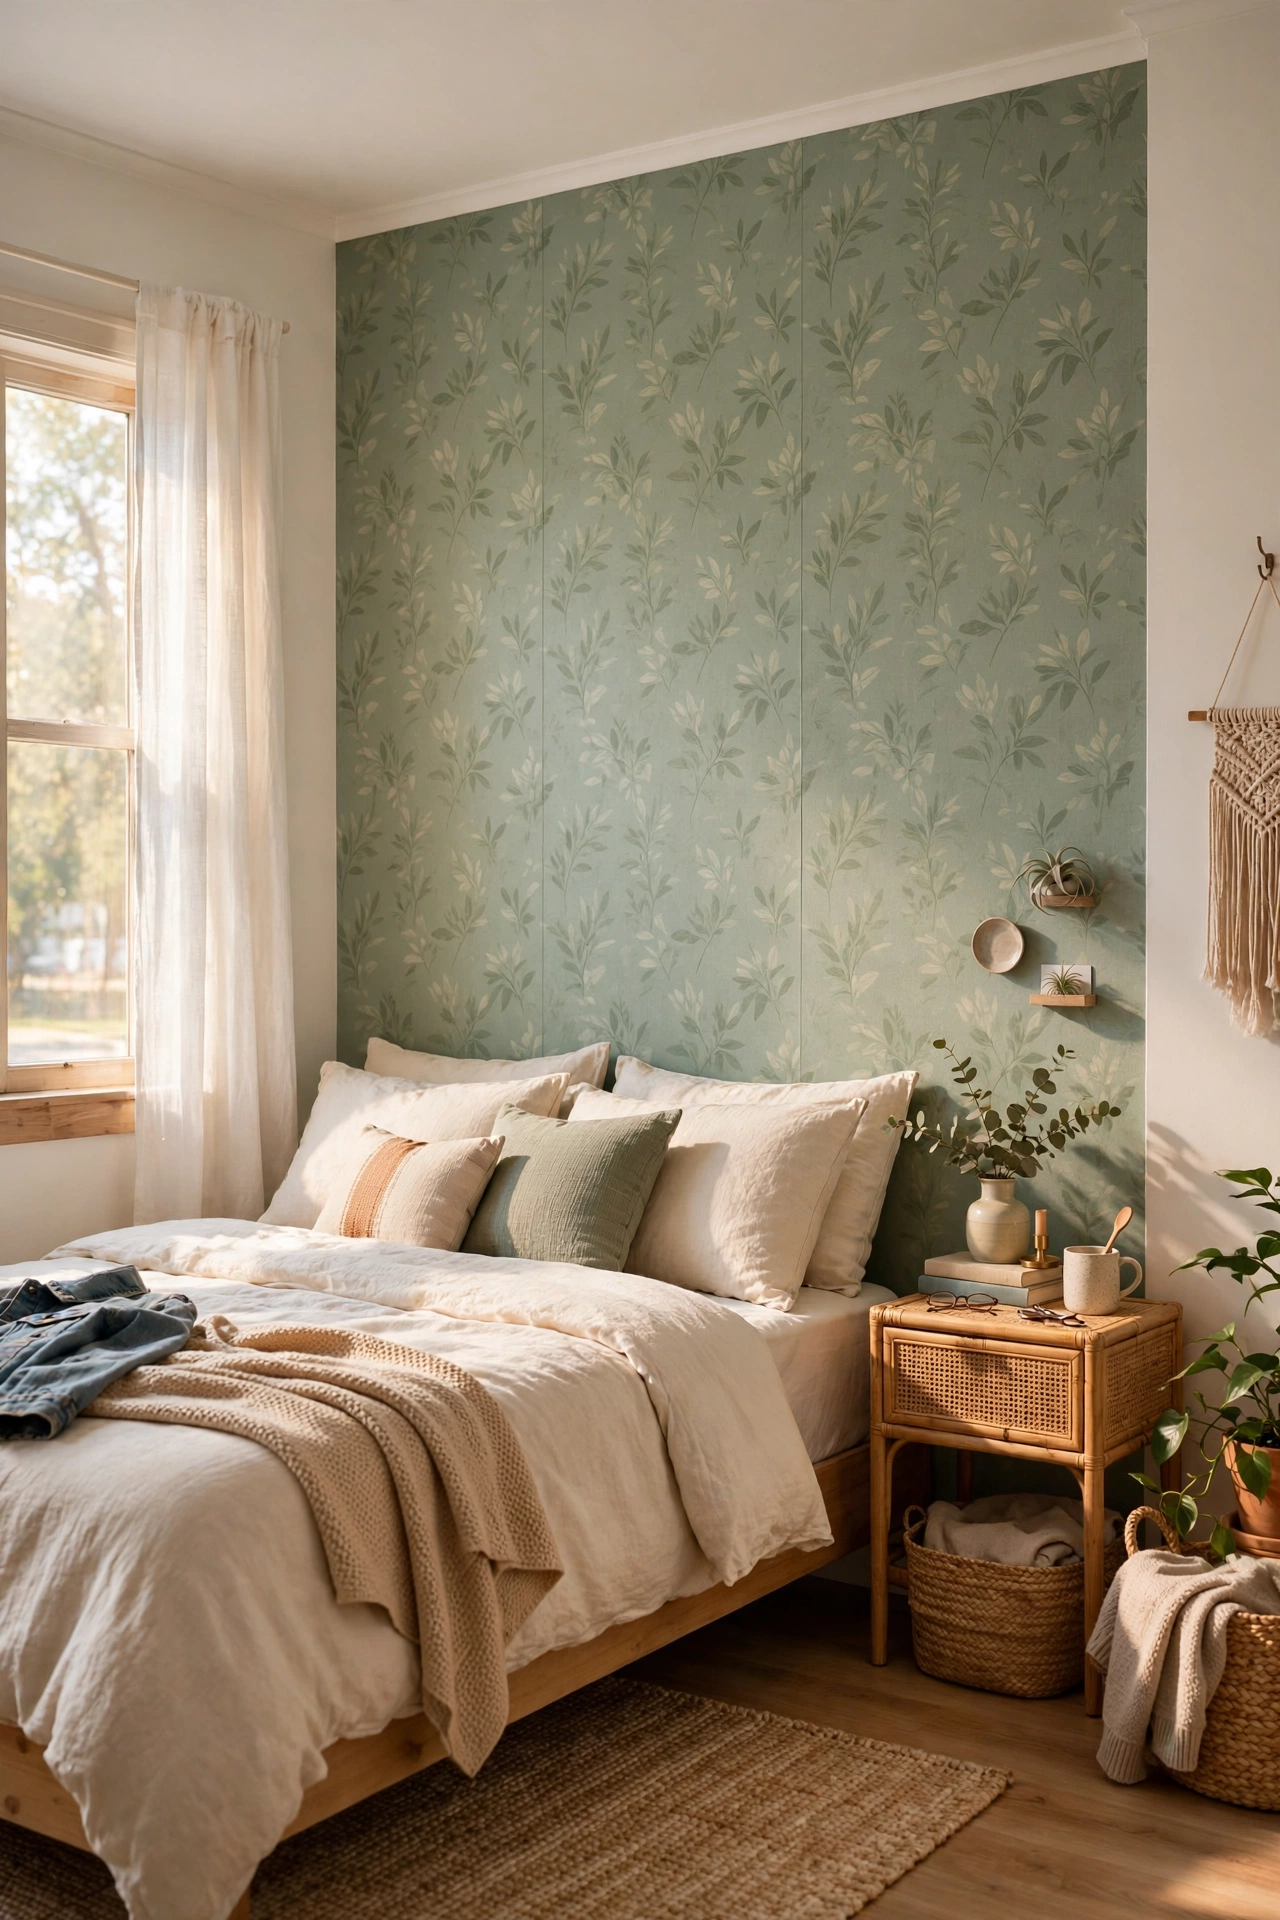
Peel-and-stick wallpaper gives renters the accent wall owners get with paint. I covered the wall behind my bed with a soft sage removable paper, working top to bottom with a plastic smoother to push out air bubbles. Order one extra roll beyond the calculator’s suggestion, because pattern matching eats more paper than you expect. I ran short on my first wall and had to wait a week for the second batch. Start in the least visible corner so your learning curve hides there. When I moved out, it peeled off in full sheets with no residue. One weekend, one wall, and the room had the depth paint would have given.
Cost: ~$30-40 | Time: 3 hours
4. Freestanding Full-Length Mirror
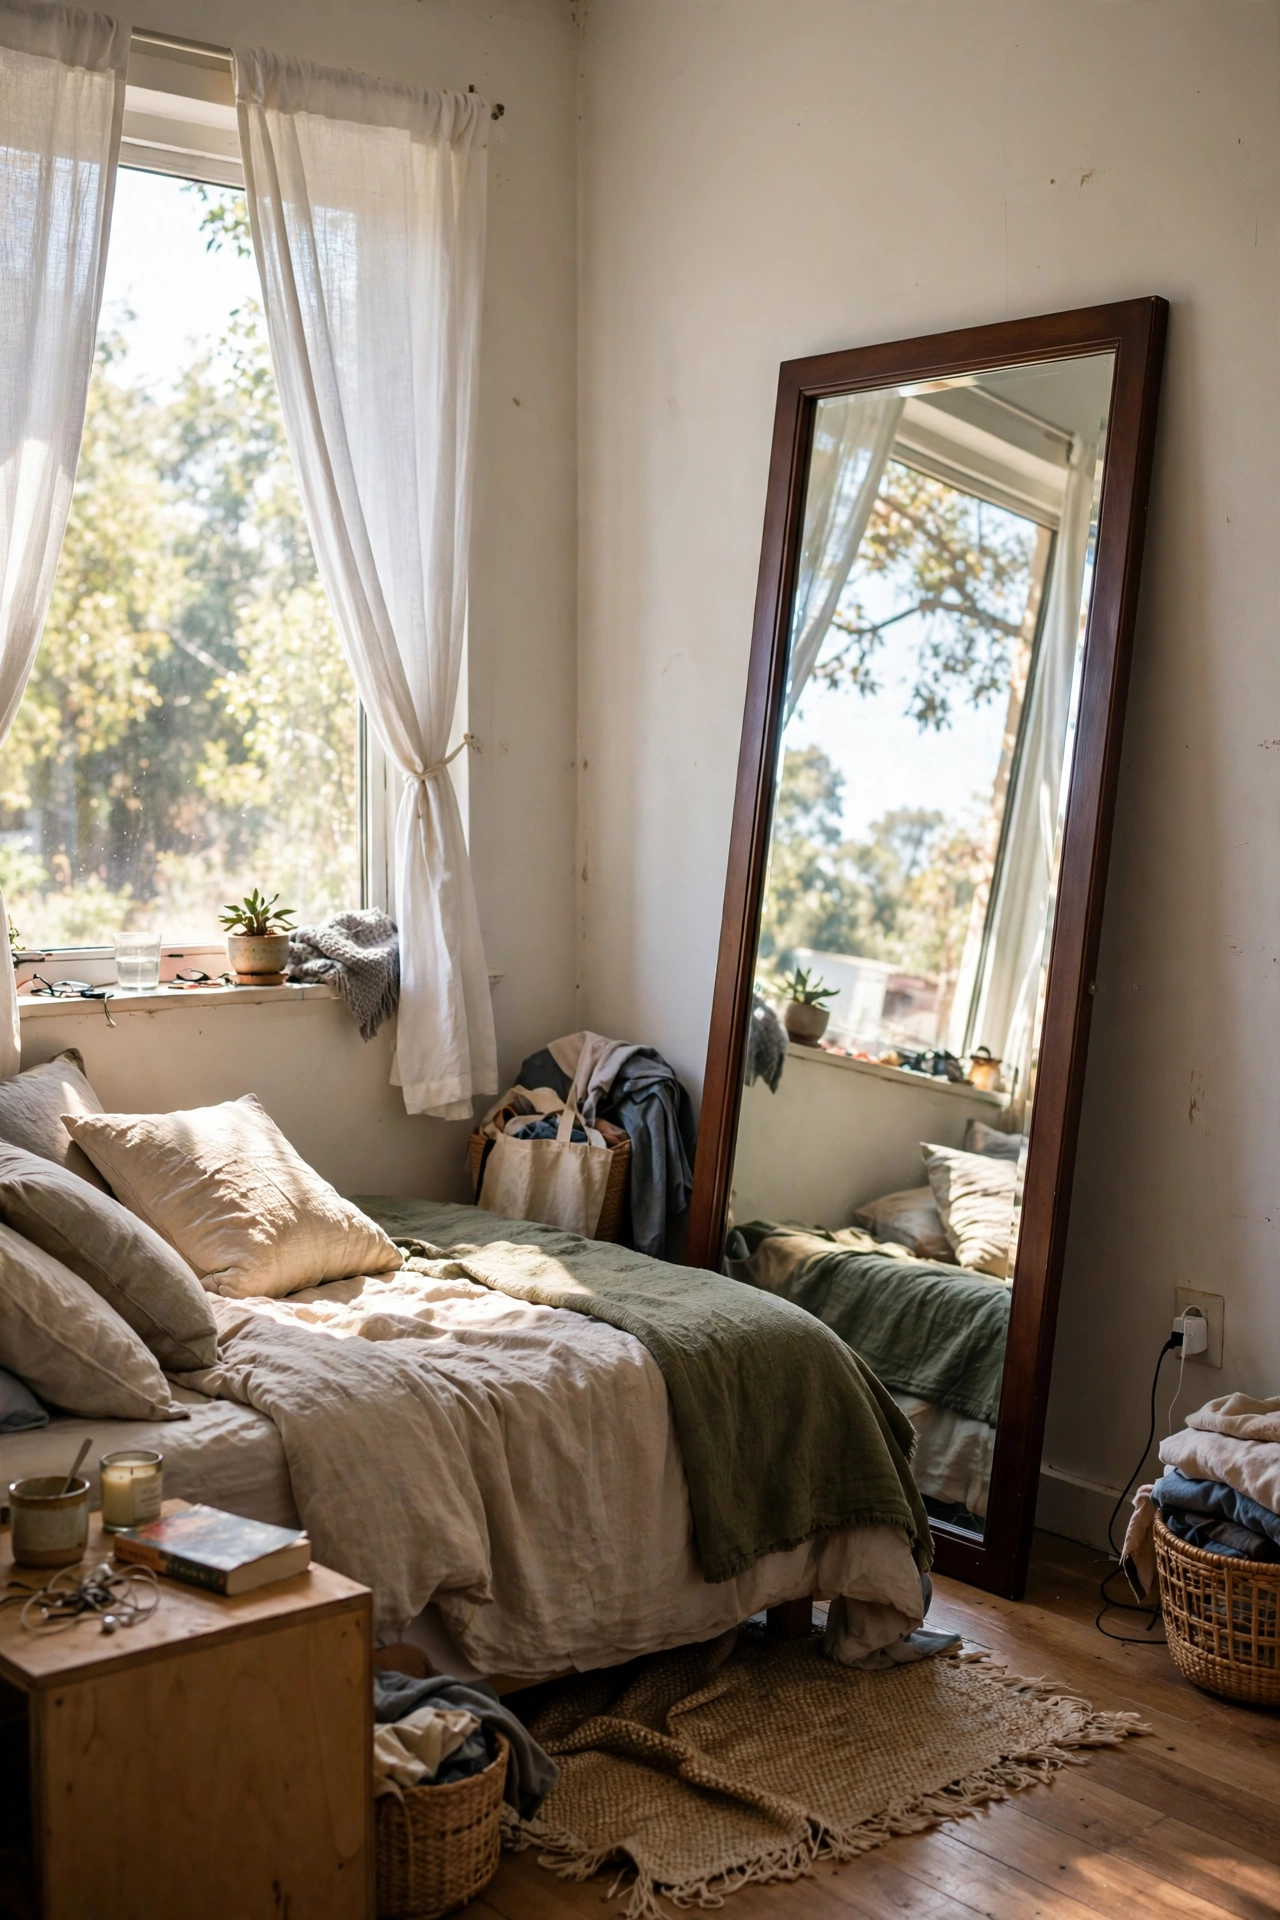
A leaning full-length mirror needs no mounting at all. I bought a $35 cheval-style mirror secondhand and leaned it against the bedroom wall at a slight angle, with the base about six inches out from the skirting. The angle is what keeps it stable, so do not stand it flat against the wall. Put felt pads behind the top corners so it never marks the paint. My mirror sits opposite the window now and doubles the daylight in the room. I check my outfit in it daily and the room looks twice as big. It moved house with me in the van, zero wall contact required. The simplest big-impact change on this list.
Cost: ~$30-40 | Time: 5 minutes
5. Over-the-Door Hook Rack
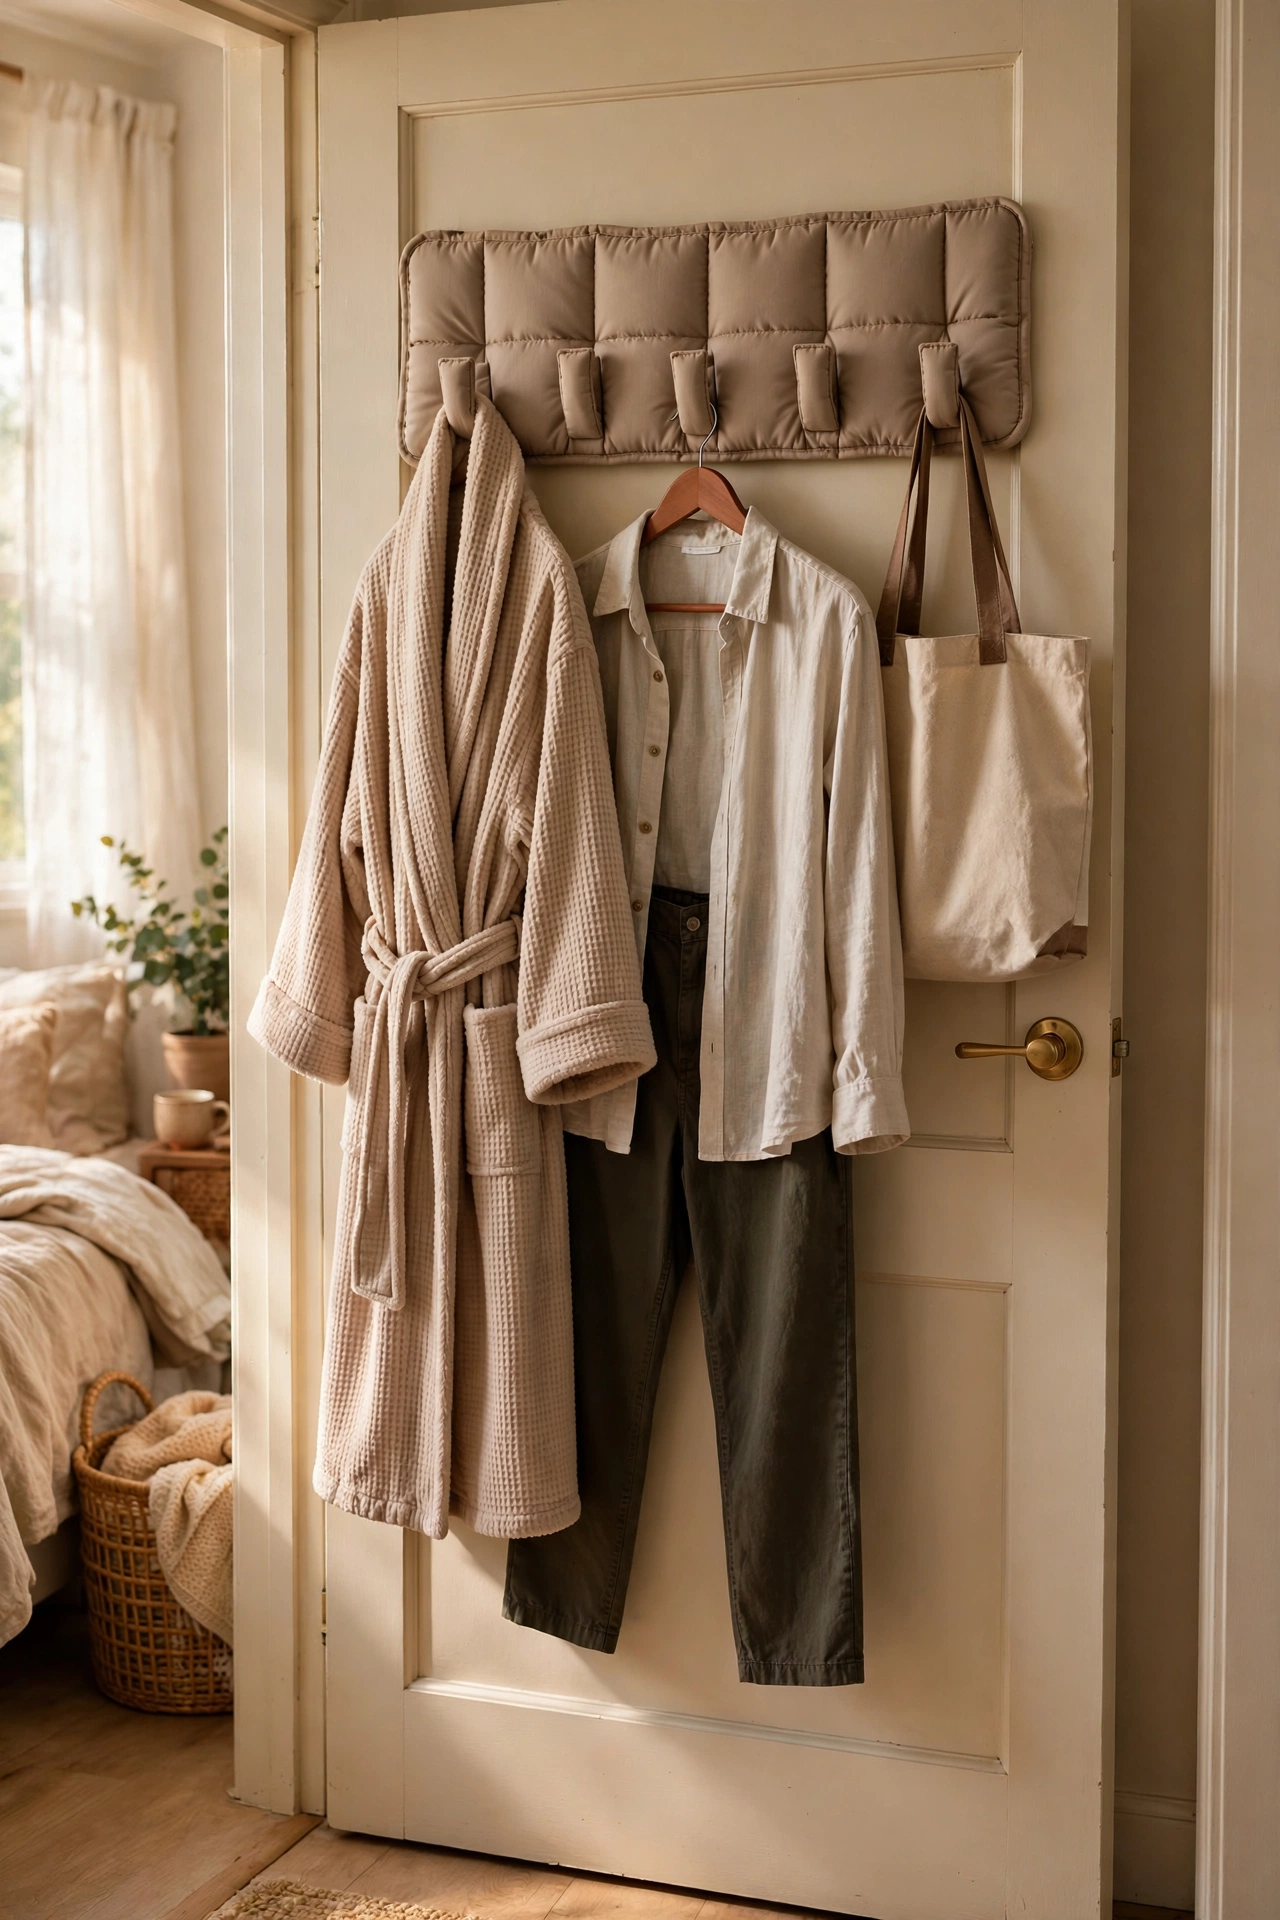
An over-the-door hook rack adds hanging space without touching the door or the wall. I hung a $12 five-hook rack over my bedroom door for my dressing gown, tomorrow’s outfit, and my tote bag. Choose one with foam padding on the brackets so it never scratches the door’s paint. My first rack had bare metal brackets and left two small marks I had to touch up. The padded version has been perfect for eighteen months. It holds a surprising amount of weight, and it lifts off in one second when you move. In a rental with one tiny wardrobe, these hooks are the difference between tidy and chaotic.
Cost: ~$10-15 | Time: 2 minutes
6. Adhesive LED Strip Behind the Headboard
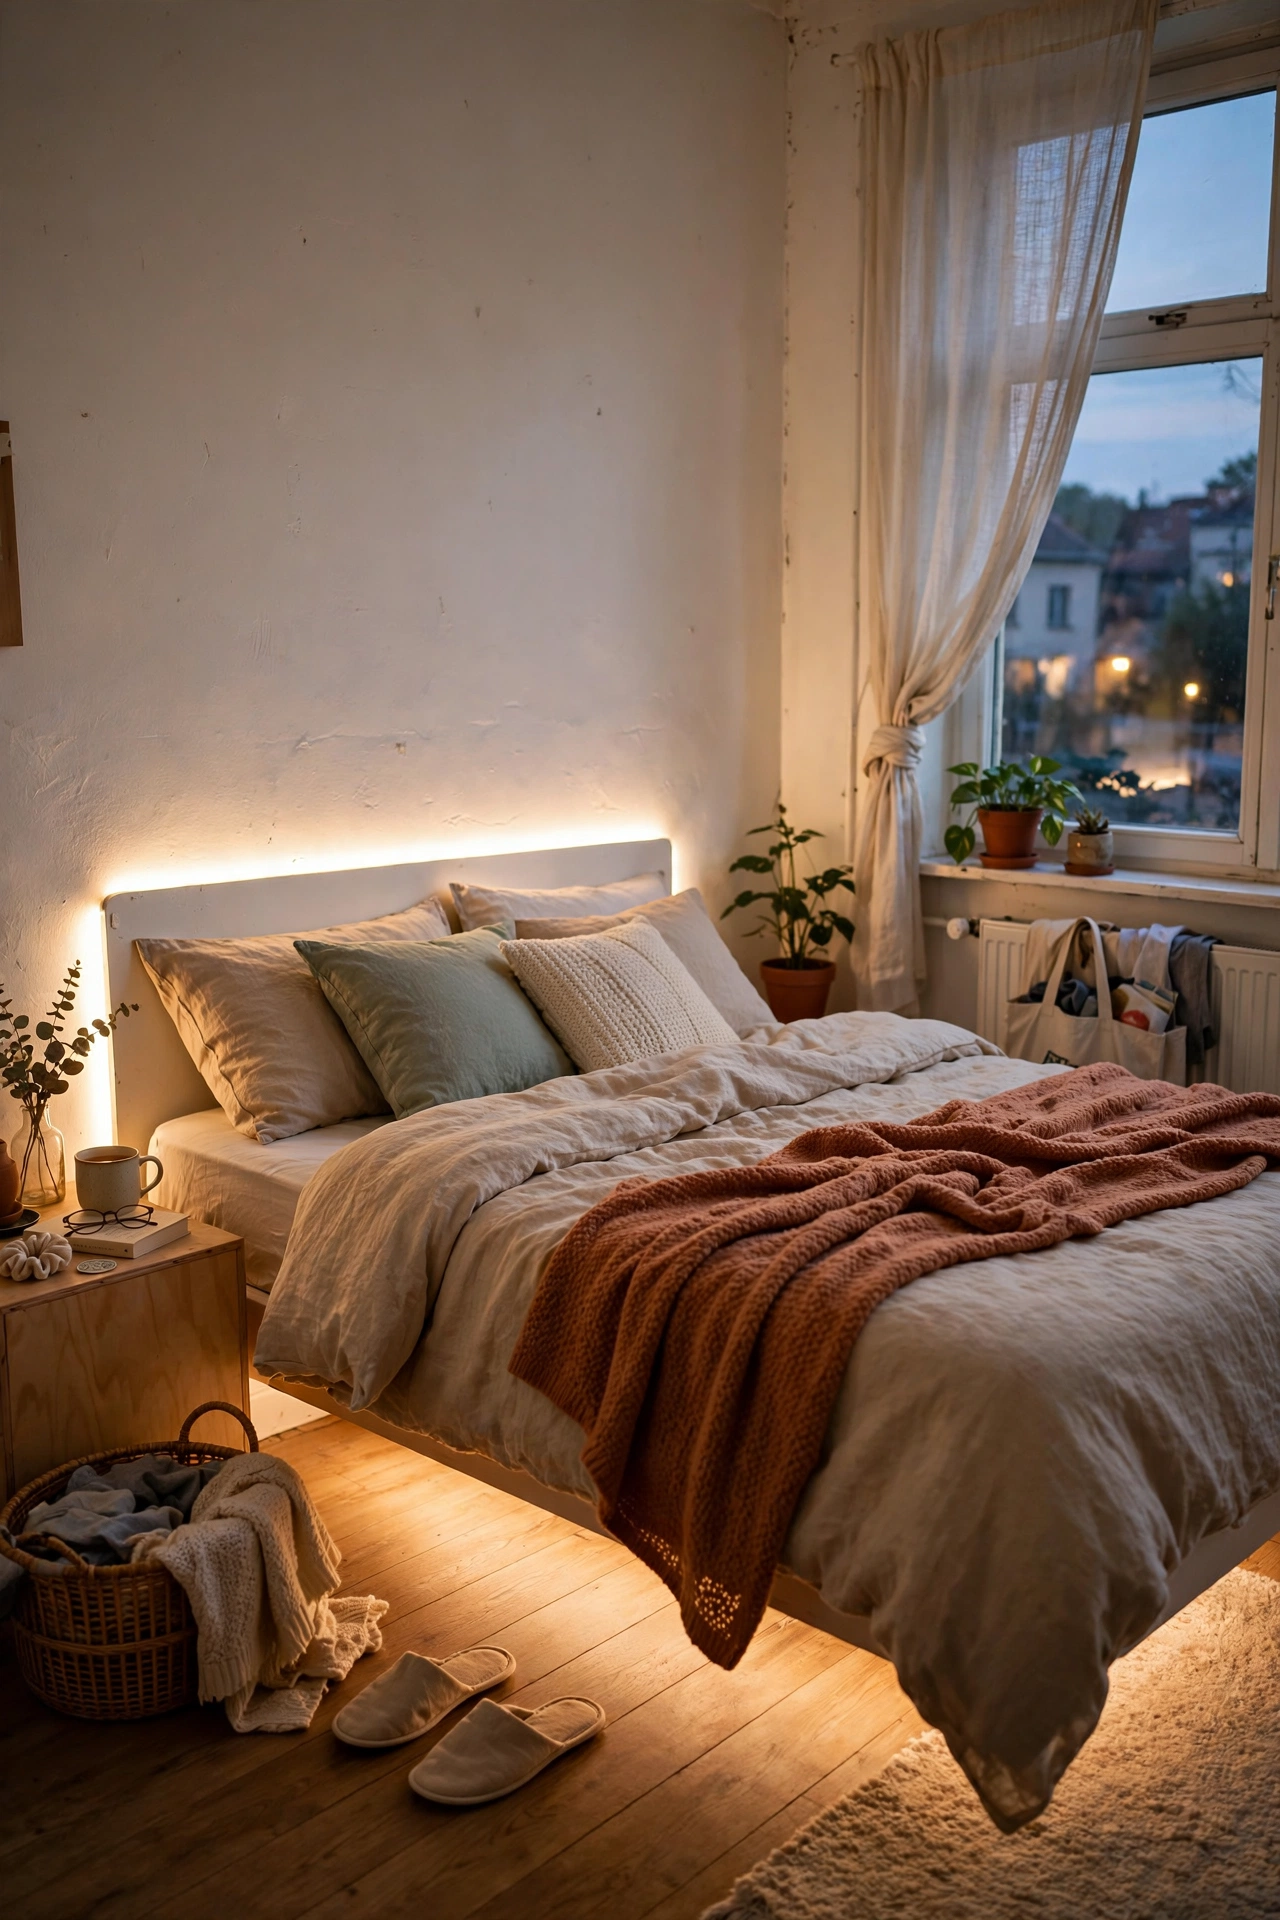
An adhesive LED strip tucked behind the headboard gives you a soft glow with no wiring and no holes. I stuck a $14 warm-white strip along the back edge of my headboard, ran the cable down behind the bed to the plug, and hid the power brick under the mattress edge. Choose a strip with a remote dimmer so you can drop the brightness for reading. My first strip was cool white and the bedroom felt like a laboratory. Swapping to 2700K warm white made it feel like a boutique hotel. The adhesive peels off the headboard cleanly, and the light makes the bed look like it floats. Fifteen minutes, one plug socket, huge evening payoff.
Cost: ~$12-18 | Time: 20 minutes
7. Arc Floor Lamp Instead of Wall Sconces
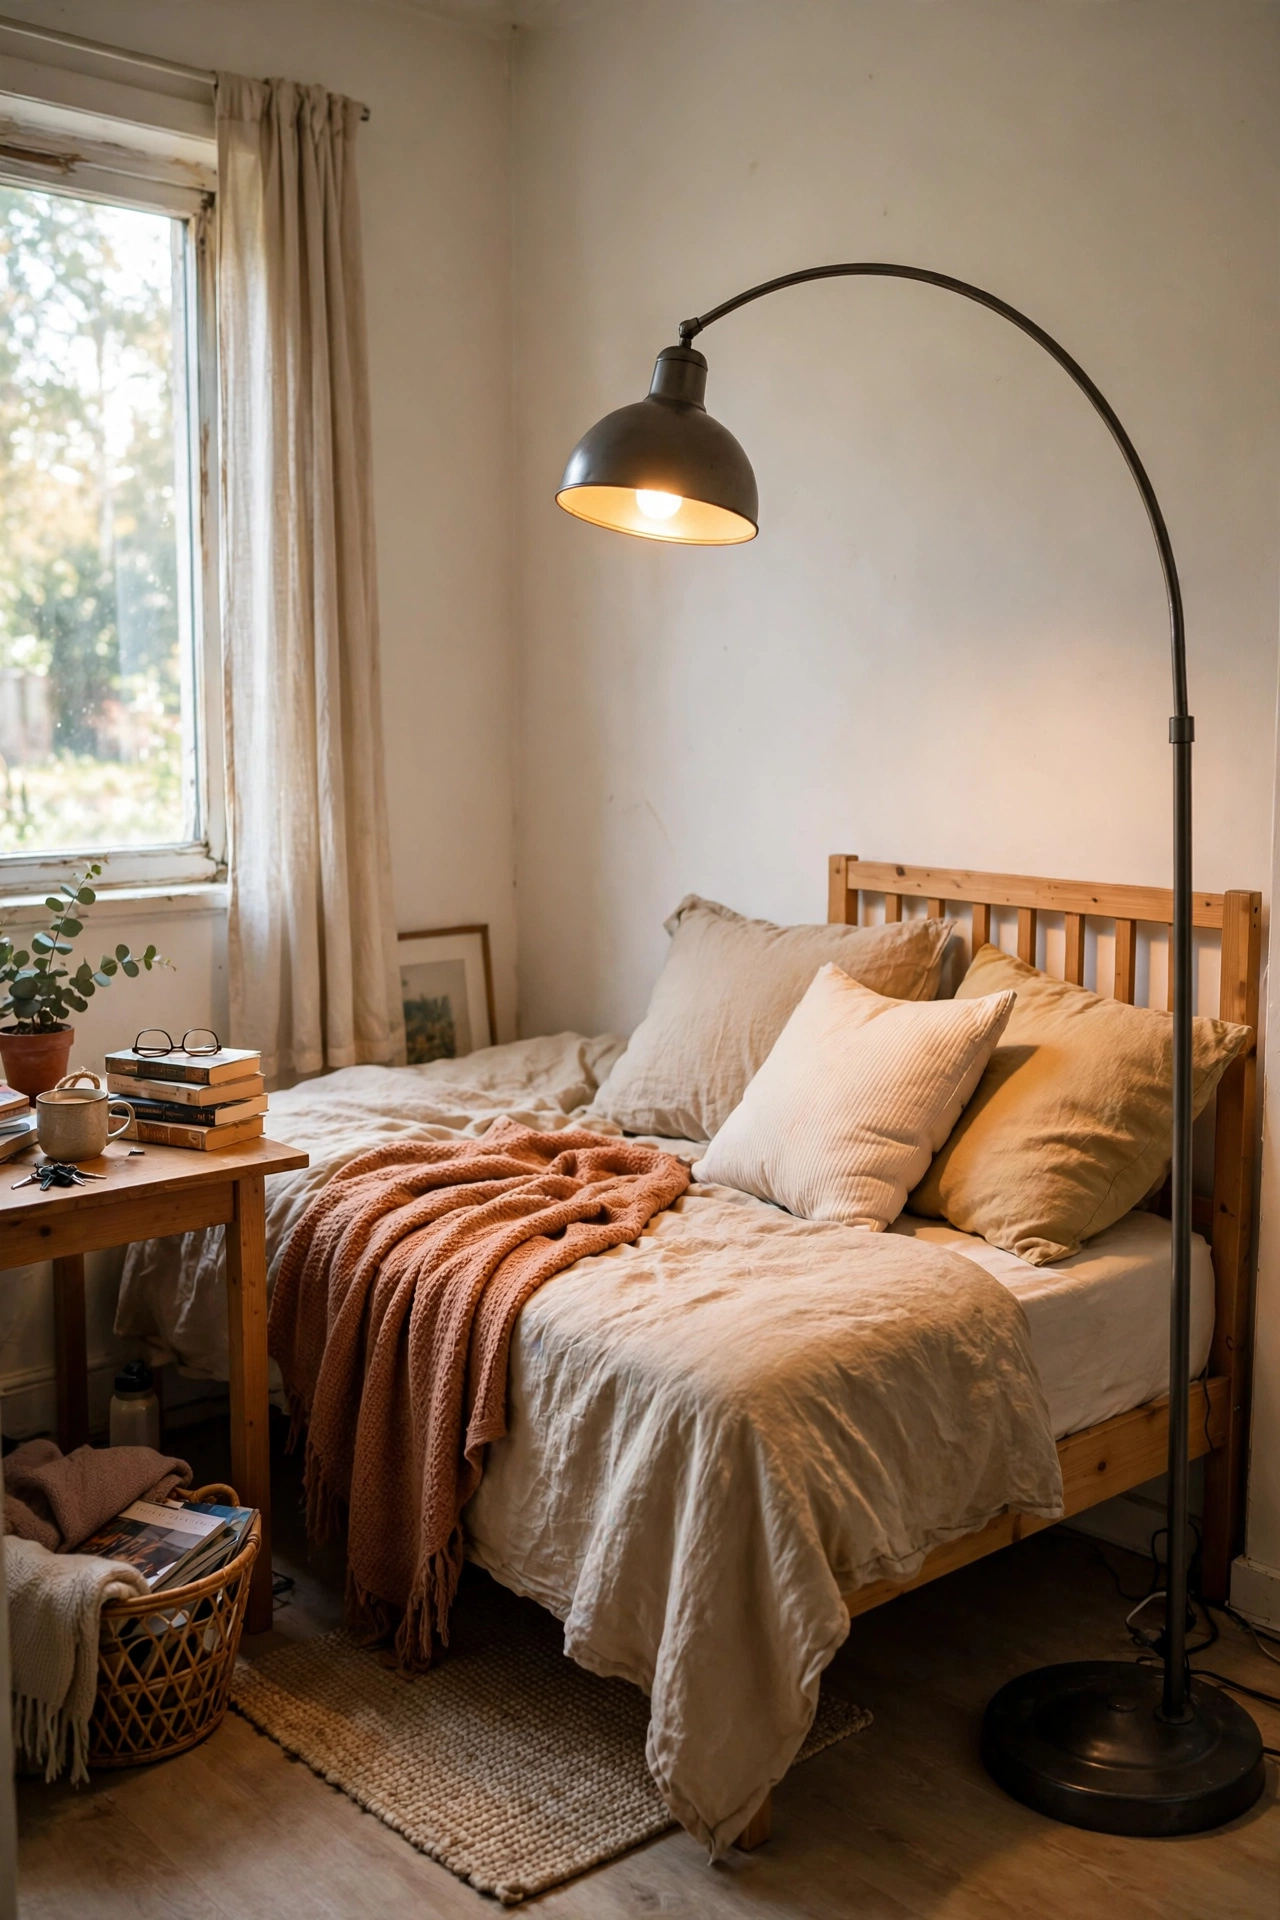
An arc floor lamp gives you the over-the-bed lighting of wall sconces with zero installation. I found a secondhand arc lamp for $28, positioned the heavy base in the corner, and curved the arm over my reading side of the bed. The weighted base means it cannot tip, and the long arm puts the light exactly where a sconce would. Check the base weight before you buy secondhand, because light-based arcs wobble. Mine is solid enough that I have never worried about it. It plugs into a normal socket and moves house in one piece. Renters get sconce-style lighting without asking the landlord for anything.
Cost: ~$25-40 | Time: 15 minutes
8. Freestanding Lean-To Headboard
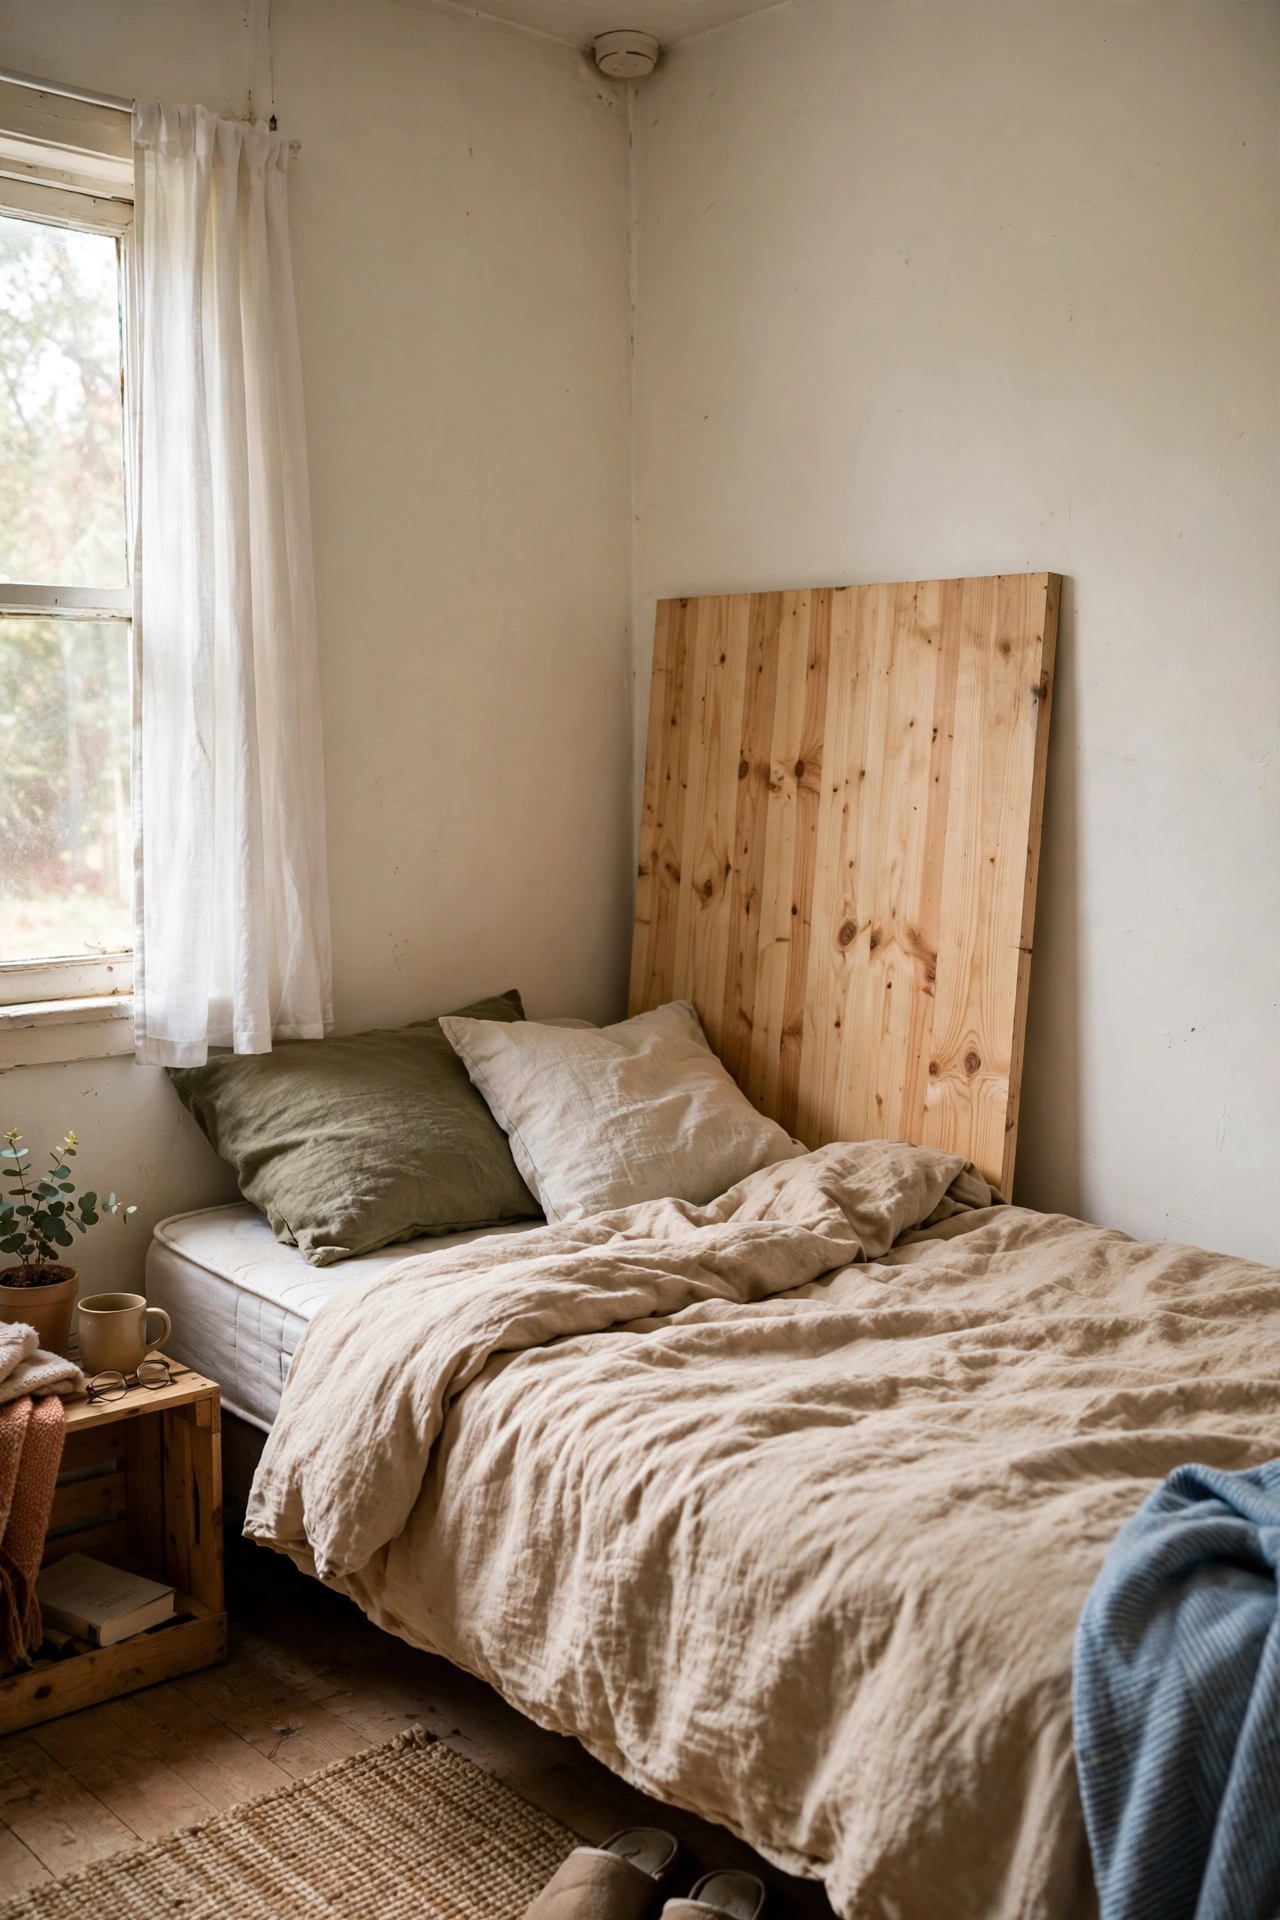
A headboard that simply leans between the bed and the wall needs no bolts at all. I made mine from a $20 pine board, sanded it smooth, and wedged it upright with the mattress pressing it firmly against the wall. The mattress weight holds it rock solid; it has not shifted in two years. Cut the board two inches narrower than the bed frame so the edges do not catch your elbows. My first board was full width and I bruised my arm twice before trimming it. Stain it, paint it, or wrap it in fabric for a custom look. It lifts straight out on moving day with nothing to unscrew or patch.
Cost: ~$18-28 | Time: 1 hour
9. Leaning Ladder Shelf
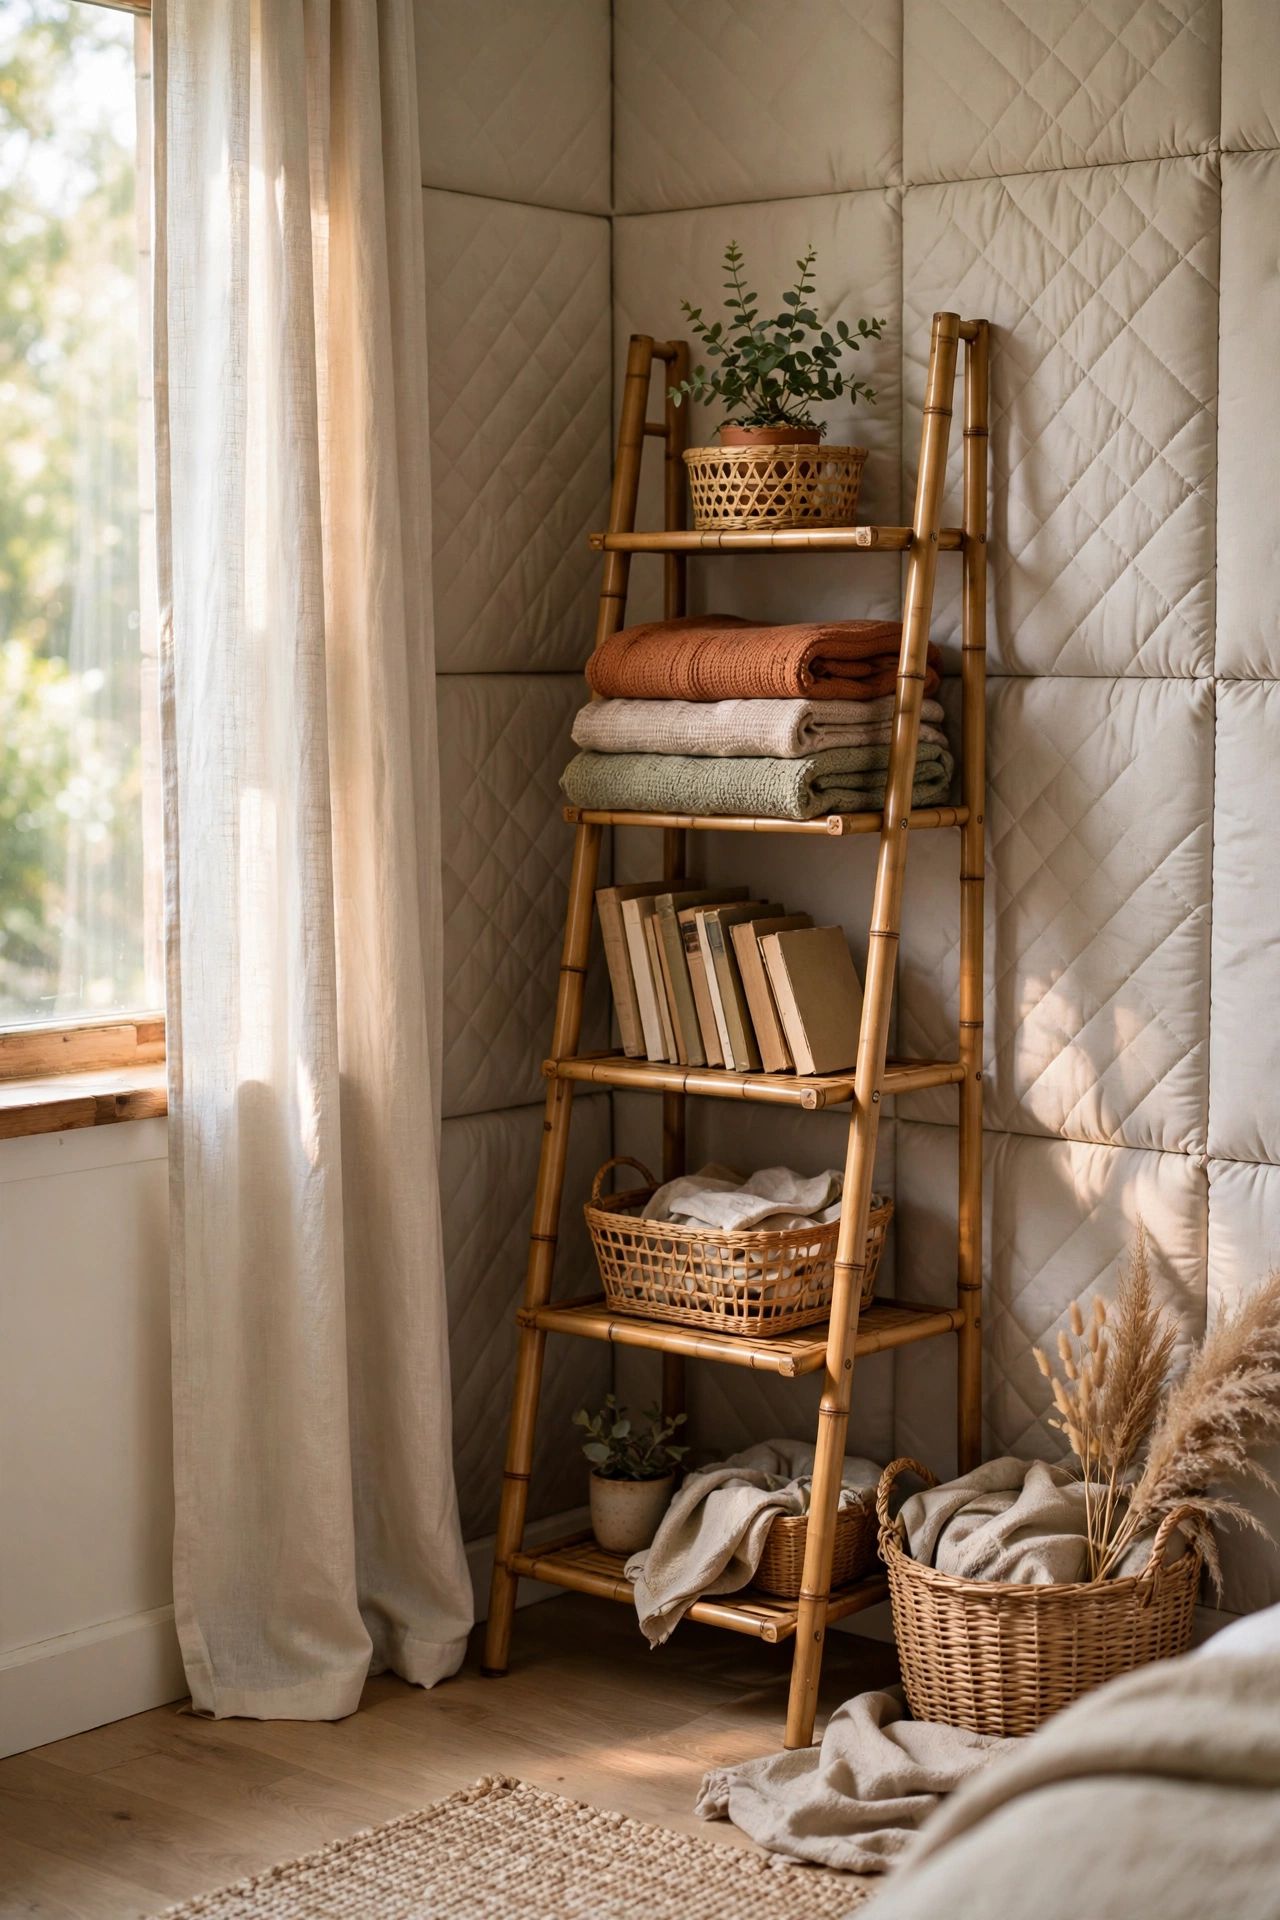
A leaning ladder shelf gives you five shelves of storage that touch the wall with only padded feet. I bought a bamboo ladder shelf for $38 and styled it with folded throws, books, and one plant per shelf. Put rubber pads on the wall-contact points so the paint never scuffs. The styling rule that works: leave one shelf half empty so it reads as decor, not storage overflow. My first attempt crammed every shelf and it looked like a stockroom. Removing a third of the items made the rest look deliberate. It holds a wardrobe’s worth of overflow and leaves the room with zero trace when it moves out with you.
Cost: ~$30-40 | Time: 30 minutes
10. Large Area Rug Over Rental Carpet
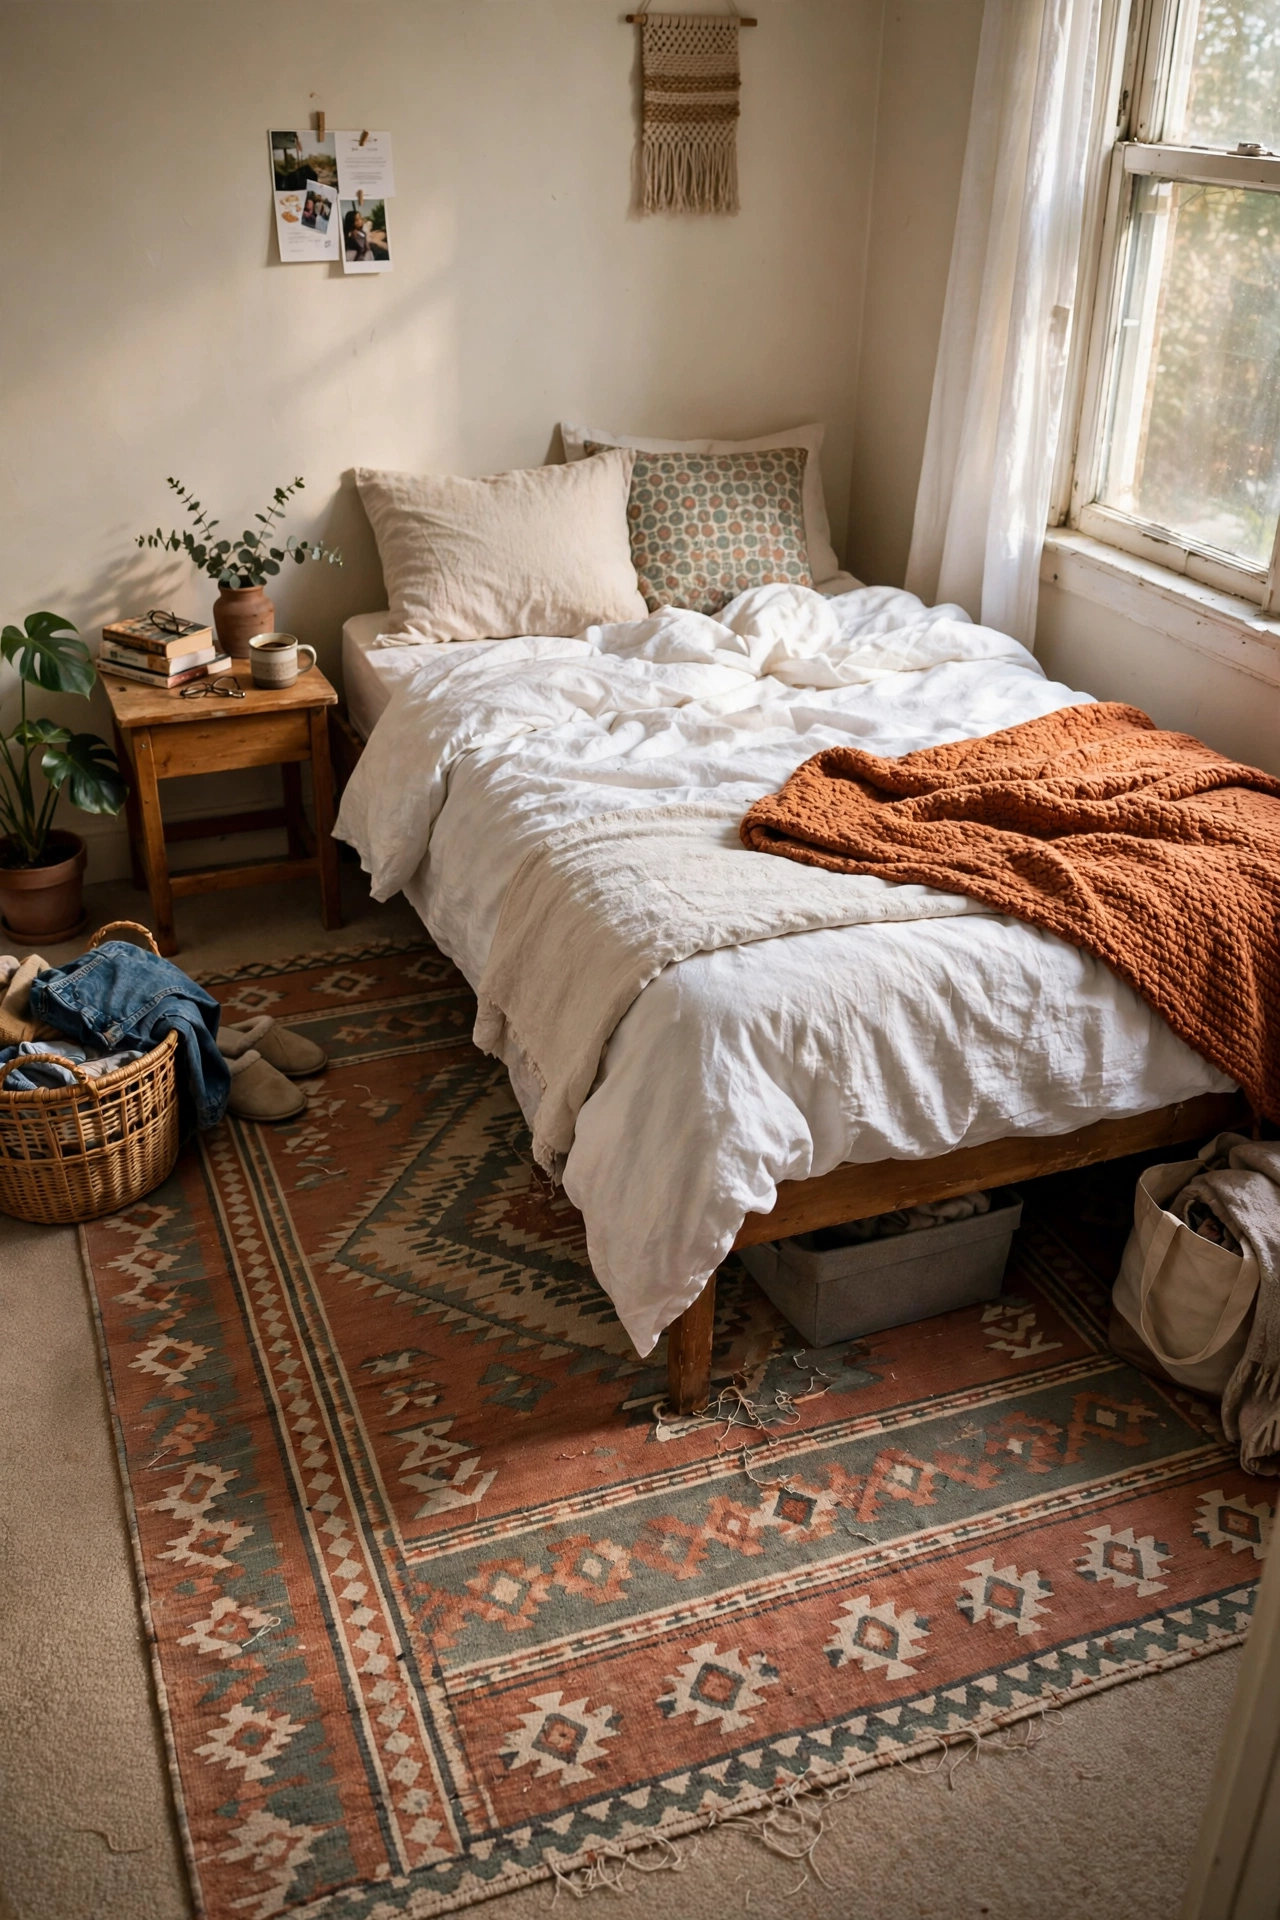
A big rug is the fastest way to hide tired rental flooring without touching it. I laid a 5×7 flat-weave rug over my landlord’s beige carpet, anchoring it under the front legs of the bed so it never creeps. Use a rug pad underneath if the pile is thick, because rugs slide on carpet without one. My first rug bunched up within a week until I added the pad. Now it stays put and the beige carpet has vanished from the room’s story. Choose a pattern you love, because this rug becomes the room’s personality. It rolls up on moving day and the original floor is untouched underneath.
Cost: ~$35-40 | Time: 20 minutes
11. Removable Wall Decals Above the Bed
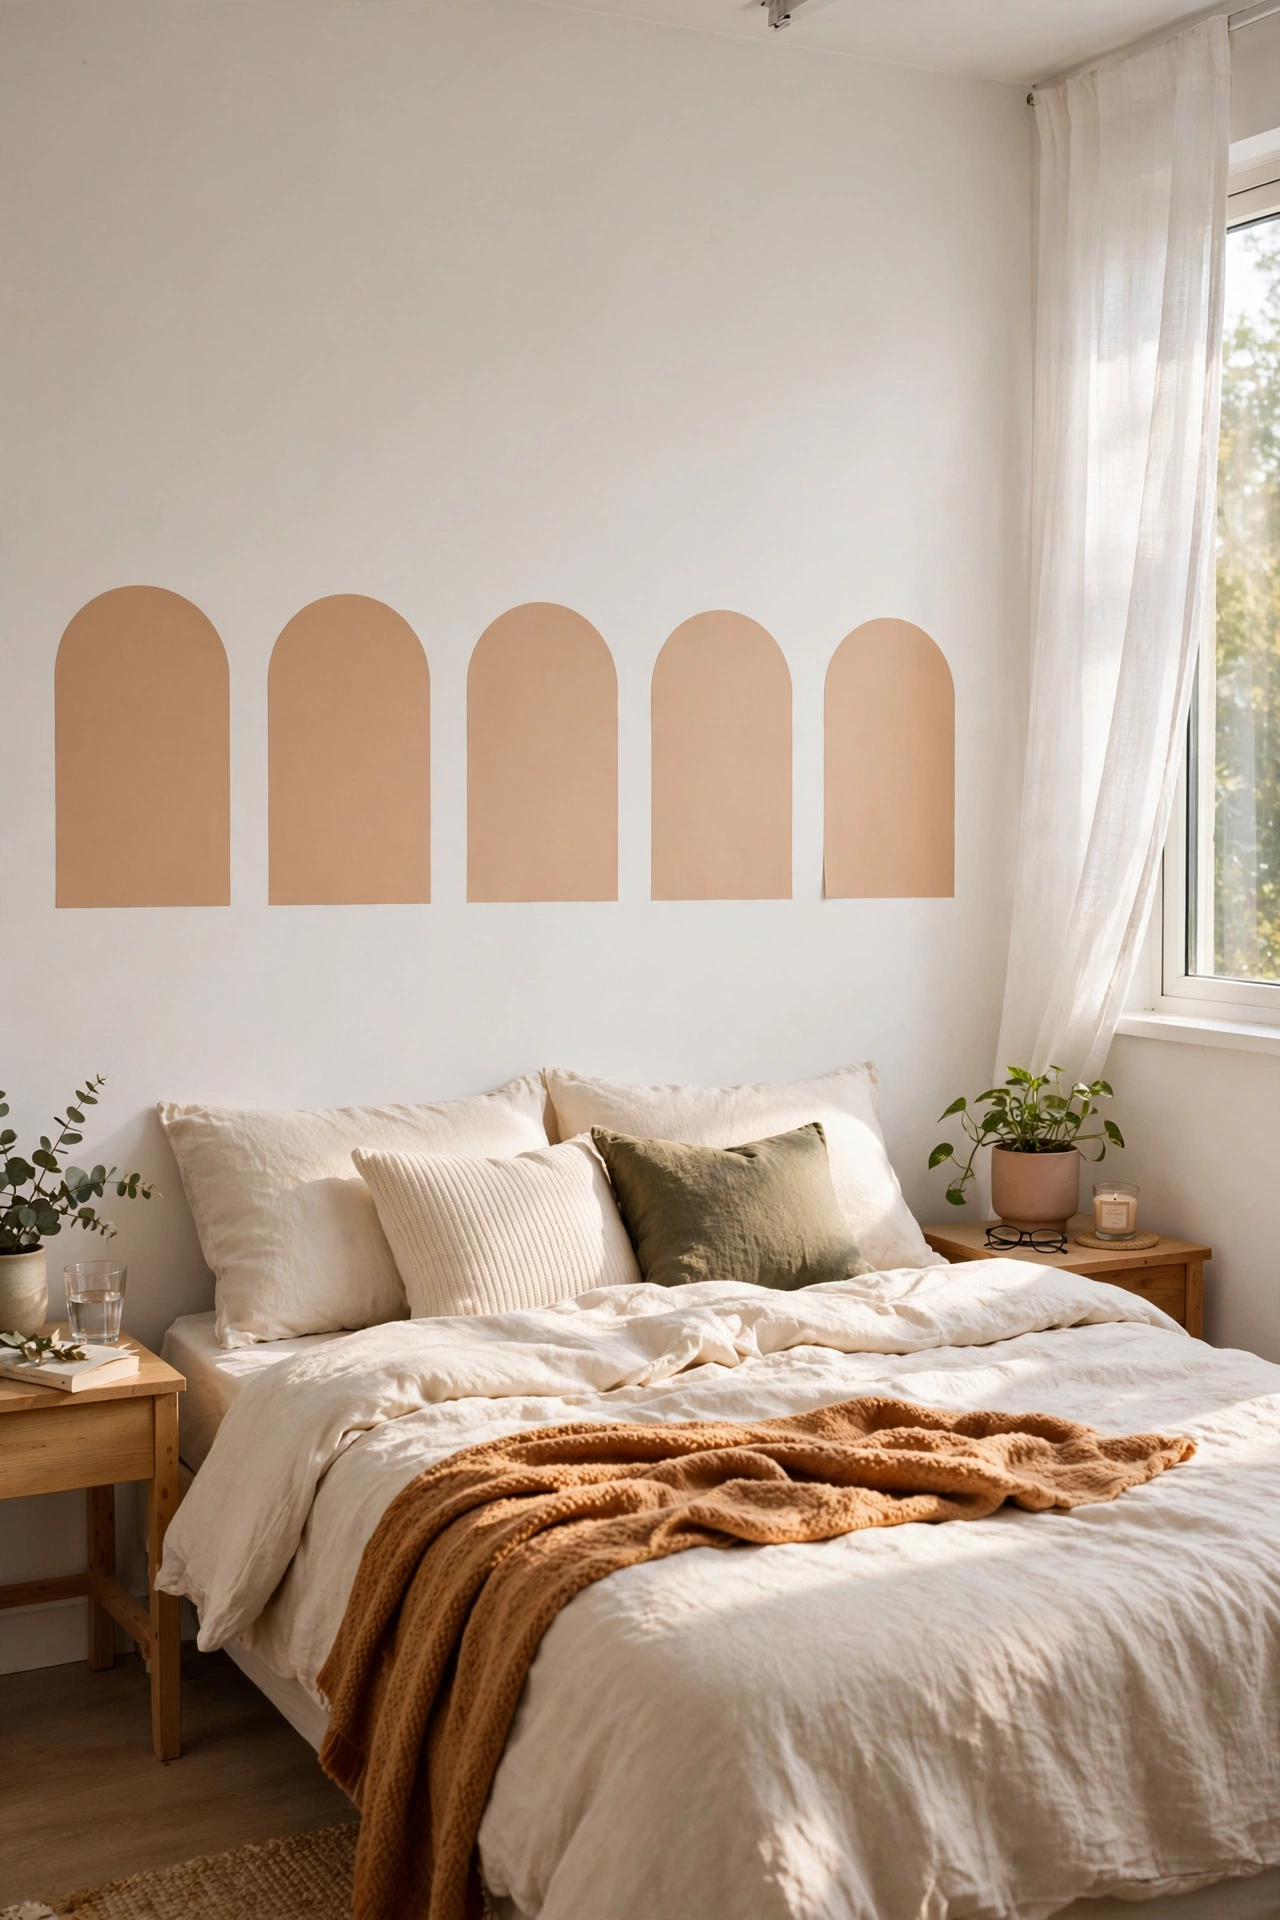
Removable wall decals give you a headboard-height feature with nothing to hang. I placed a set of $16 arch decals in a row above my bed, spacing them evenly with a tape measure and stepping back after every third one to check the line. The trick is buying quality decals with proper adhesive, because cheap ones curl at the edges within weeks. My first set was bargain-bin and half of them peeled by month two. The better set has been crisp for over a year. They peel off cleanly with no residue. If you can place a sticker straight, you can do this project in under an hour.
Cost: ~$14-22 | Time: 45 minutes
12. Bedside Caddy That Hangs on the Mattress
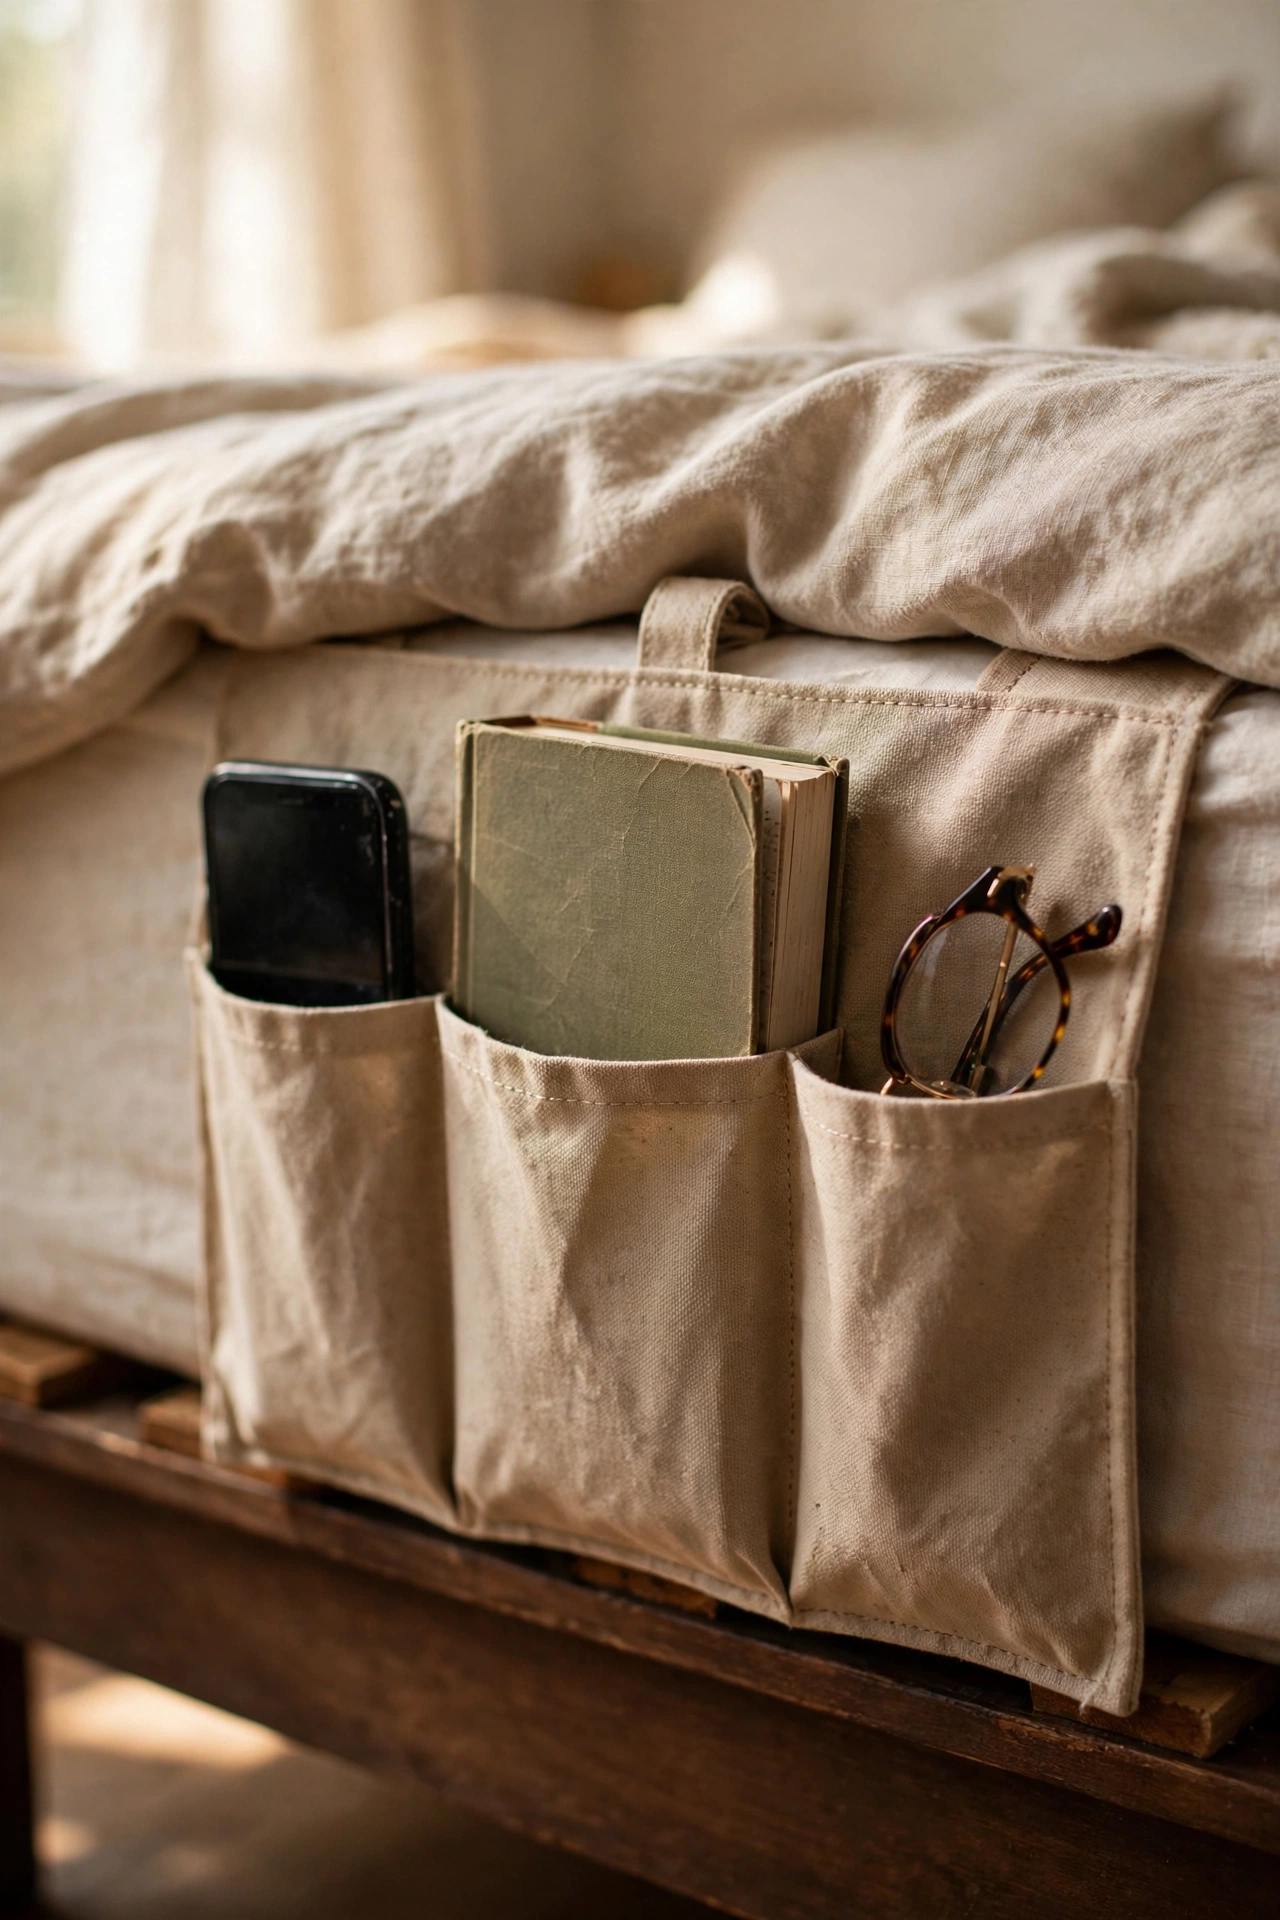
A bedside caddy slides between the mattress and base, giving you nightstand storage with no furniture at all. I bought a $12 canvas caddy with three pockets and tucked its flap under my mattress. It holds my phone, book, glasses, and water bottle within arm’s reach. This is ideal for tiny rentals where a nightstand will not fit beside the bed. My caddy has survived two years of nightly use without slipping, because the mattress weight locks the flap in place. Choose canvas over thin fabric, since the cheap ones tear at the seam within months. It lifts out in one pull on moving day.
Cost: ~$10-15 | Time: 5 minutes
13. Clamp Lamp on the Headboard
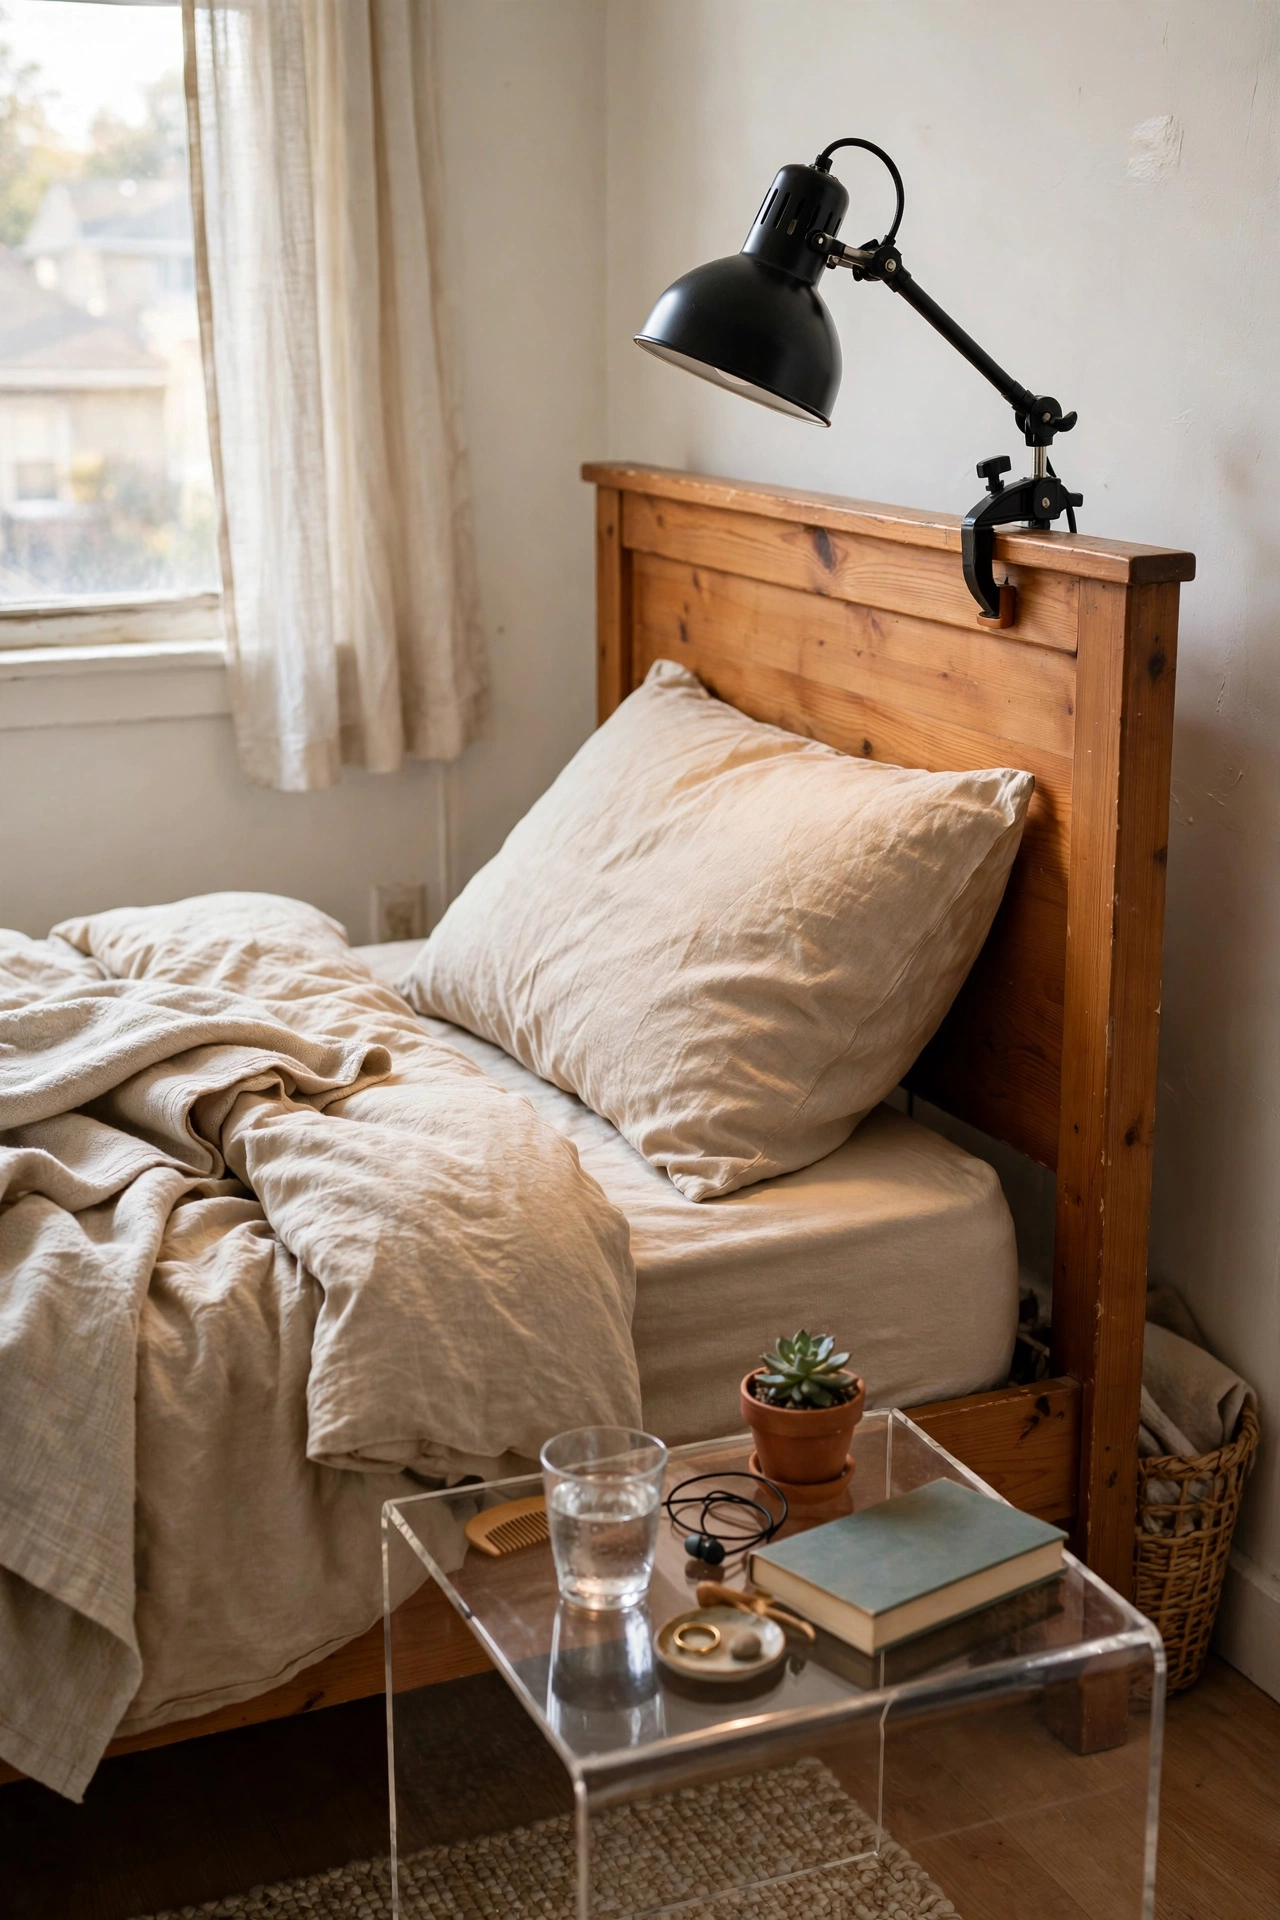
A clamp lamp grips the headboard and gives you a reading light with no drilling and no table needed. I clamped a $16 adjustable lamp to the top rail of my headboard, angled over my pillow, and fitted a warm bulb. Tighten the clamp firmly and check it weekly for the first month, because vibration can loosen it. Mine has never slipped once properly tightened. This frees up the entire nightstand surface, which matters in a small rental bedroom. The adjustable arm means both sides of the bed can share one lamp. It unclamps in seconds and leaves no mark on the wood.
Cost: ~$14-20 | Time: 10 minutes
14. Freestanding Garment Rack as Decor

A freestanding garment rack turns your prettiest clothes into bedroom decor while adding hanging space. I bought a $30 sturdy metal rack and hung my five favourite outfits on matching wooden hangers, keeping everything else in the wardrobe. The matching hangers are what make it look styled instead of desperate. My first attempt used a mix of plastic hangers and it looked like a jumble sale. Uniform hangers transformed it into a boutique display. Keep it to your best pieces and rotate them seasonally. It stands on its own feet, needs no wall fixing, and disassembles flat for moving day.
Cost: ~$25-35 | Time: 30 minutes
15. Over-the-Door Full-Length Mirror with Hooks
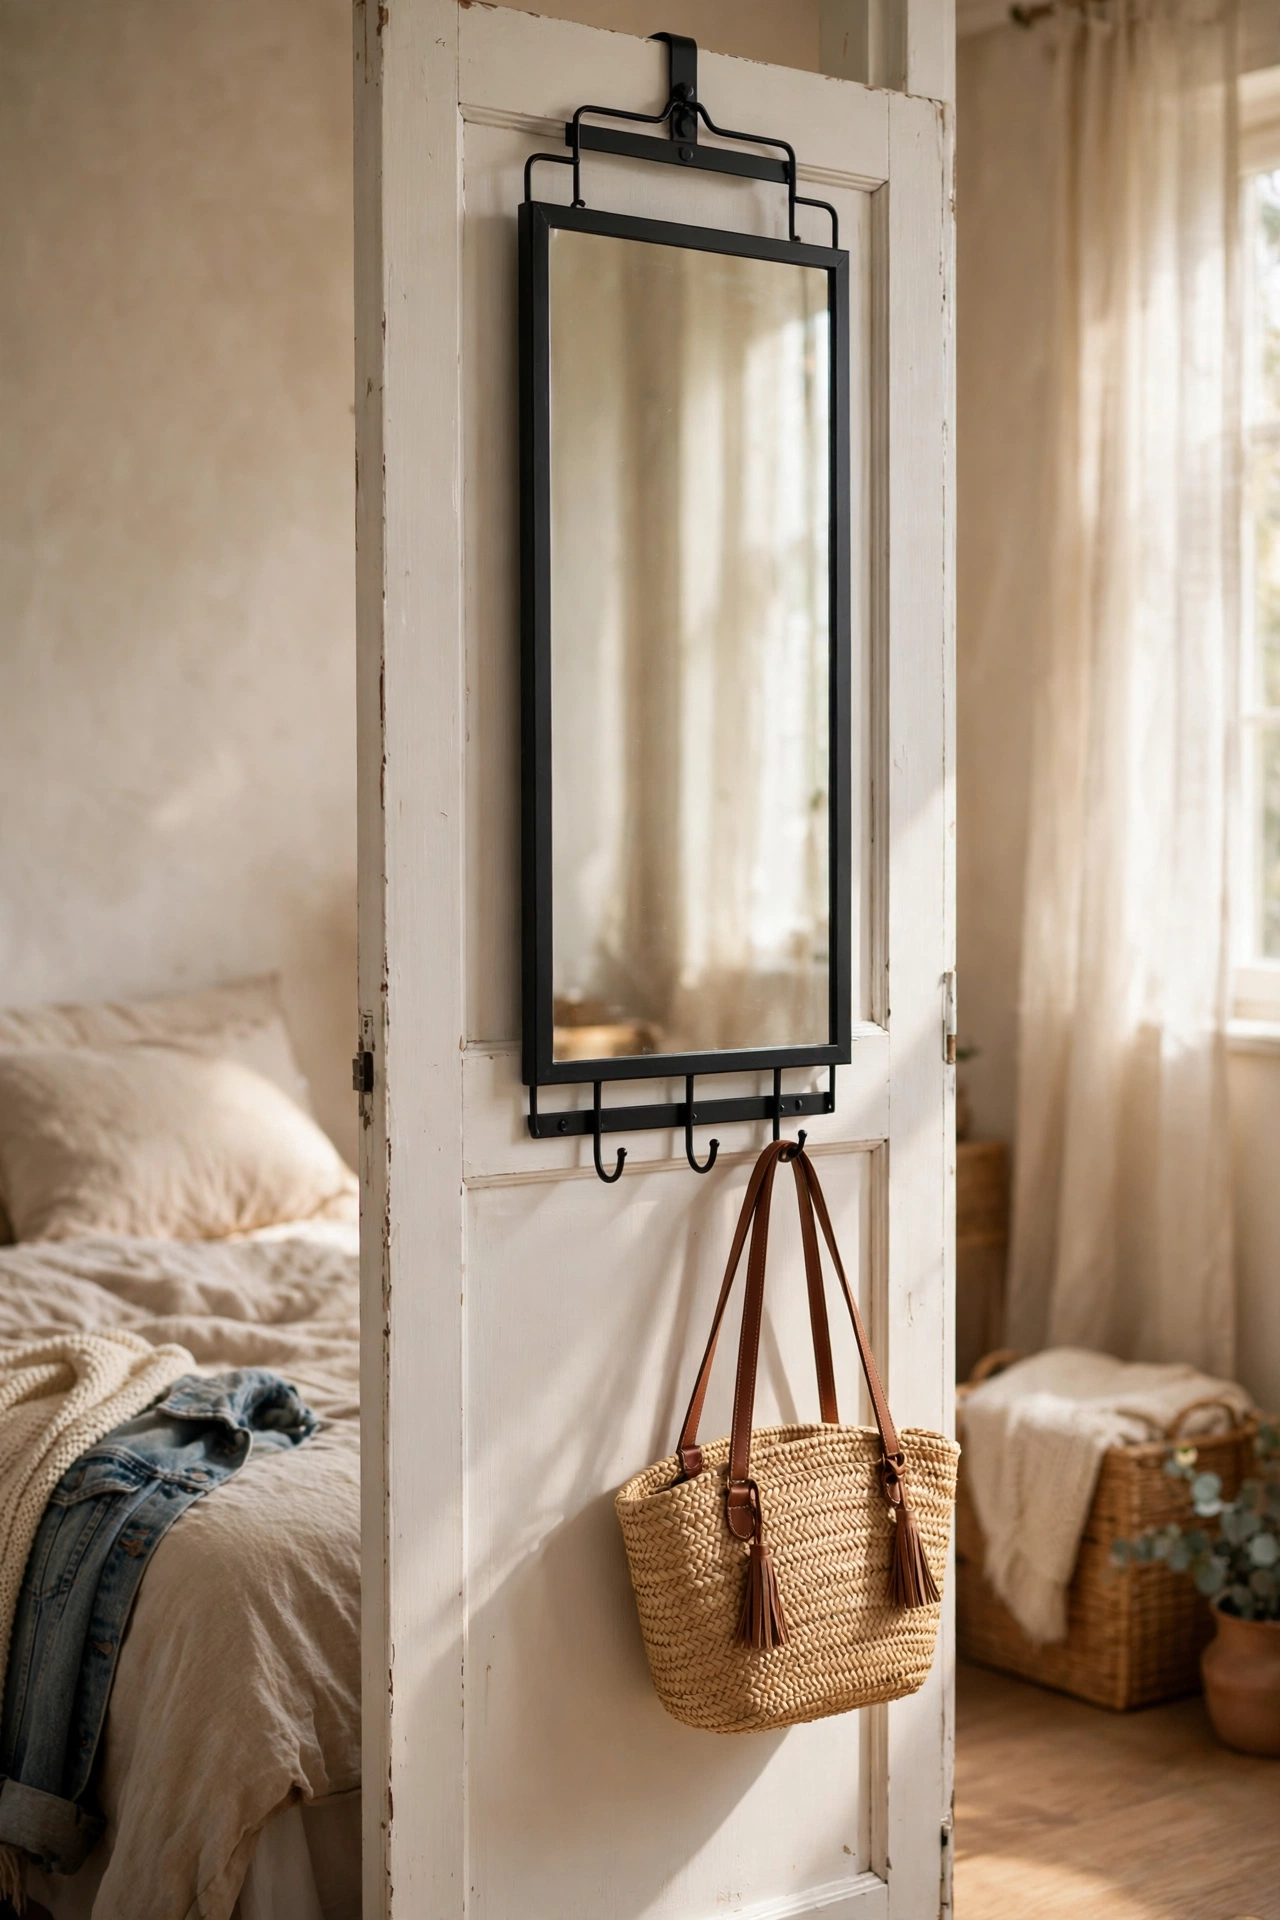
An over-the-door mirror with hooks on the back gives you two functions from one door. I hung a $24 mirror panel over my wardrobe door; the back has four hooks that hold my handbag and scarves. Check your door’s thickness before buying, because the brackets fit standard doors and slip on thick fire doors. Mine fit perfectly on the bedroom door and has never rattled. The padded brackets protect the paint, and the mirror makes my narrow room feel twice as wide. It lifts off in seconds when you leave. In a rental where wall space is precious, the back of a door is free real estate.
Cost: ~$20-28 | Time: 5 minutes
16. Washi Tape Frame Gallery
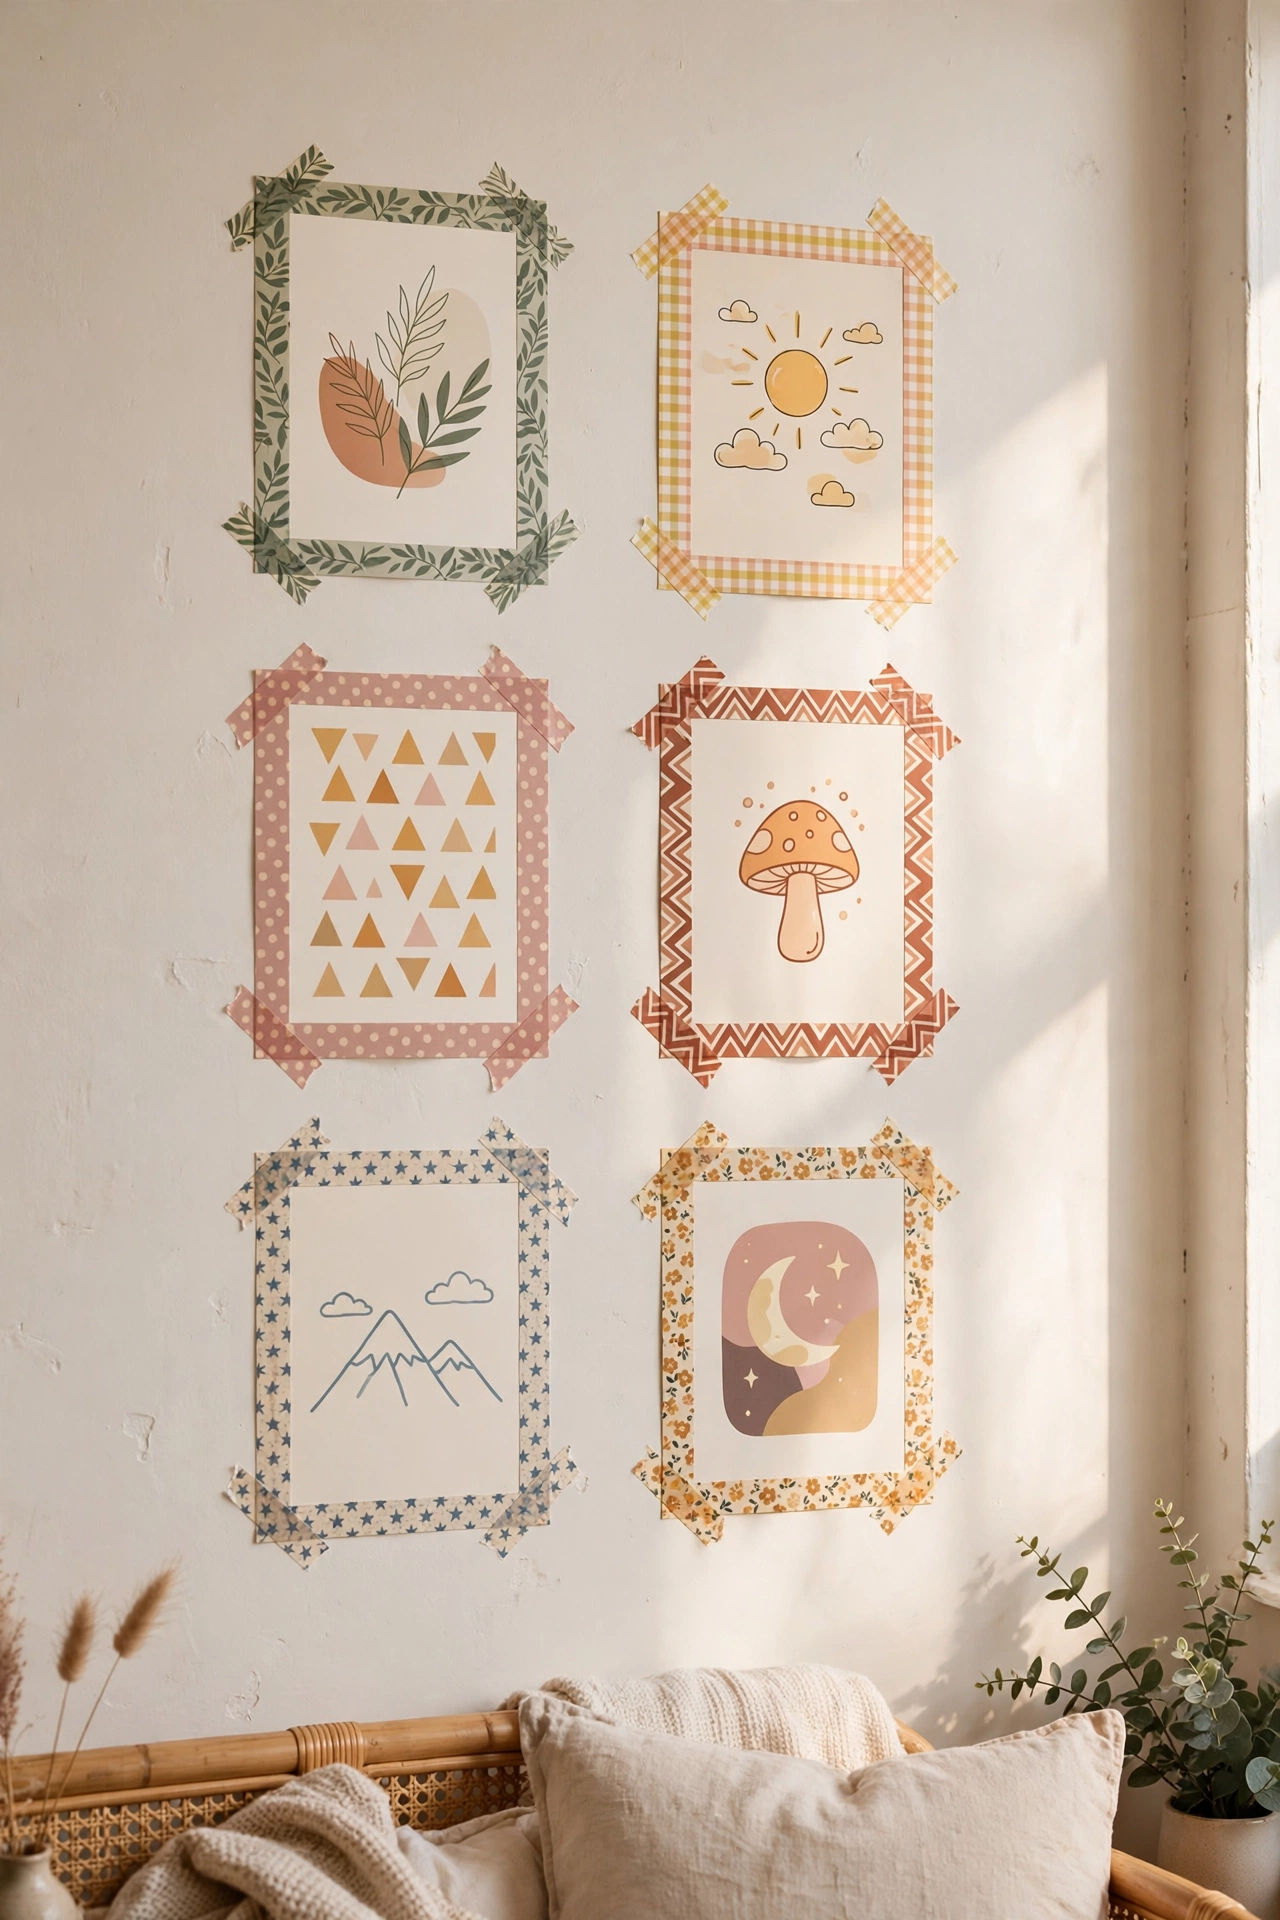
Washi tape frames let you display prints with literally zero wall contact damage. I arranged six art prints on my wall and framed each one with strips of patterned washi tape, mitring the corners neatly with a craft knife. The tape peels off paint cleanly even after a year, which is the whole point. Press the tape firmly and smooth out bubbles as you go. My first frames had wavy edges because I rushed; redoing them slowly took ten extra minutes and looked professional. Change the tape colour seasonally for a fresh look at almost no cost. This is the gentlest wall art method that exists.
Cost: ~$8-14 | Time: 45 minutes
17. Rolling Cart as a Nightstand
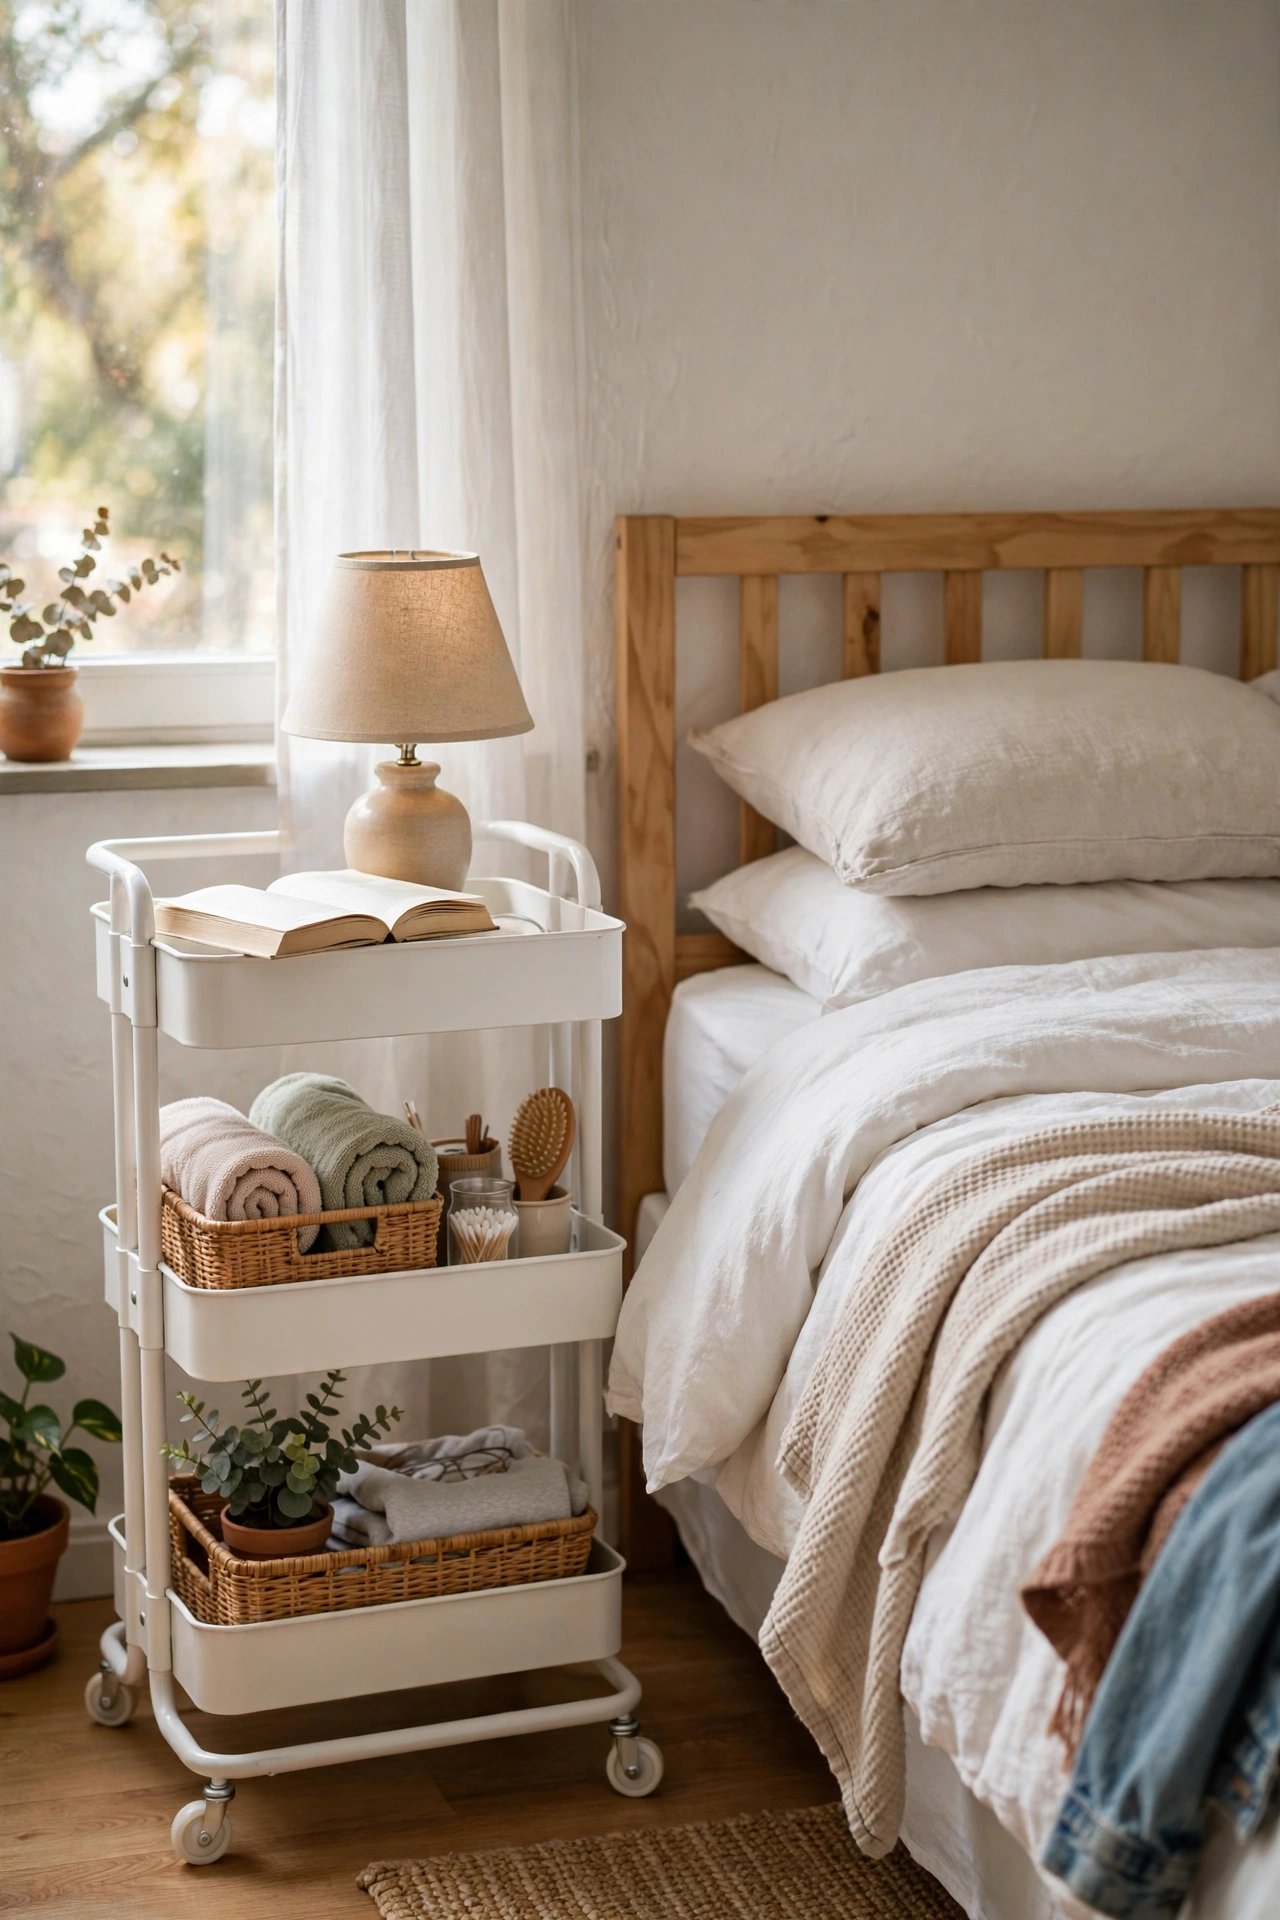
A three-tier rolling cart makes a nightstand that moves wherever you need it. I bought a $25 metal cart in white, topped it with my lamp and book, and filled the lower tiers with chargers, journals, and hand cream. Lock two of the wheels so it stays put beside the bed but still rolls out for cleaning. Mine drifted across the room twice before I learned this. The tiers hold three times what a normal nightstand does, which matters in a small rental. It assembles with an Allen key in twenty minutes and flat-packs for moving day. No fixings, no marks, maximum storage.
Cost: ~$22-30 | Time: 30 minutes
18. Tension-Rod Bed Canopy
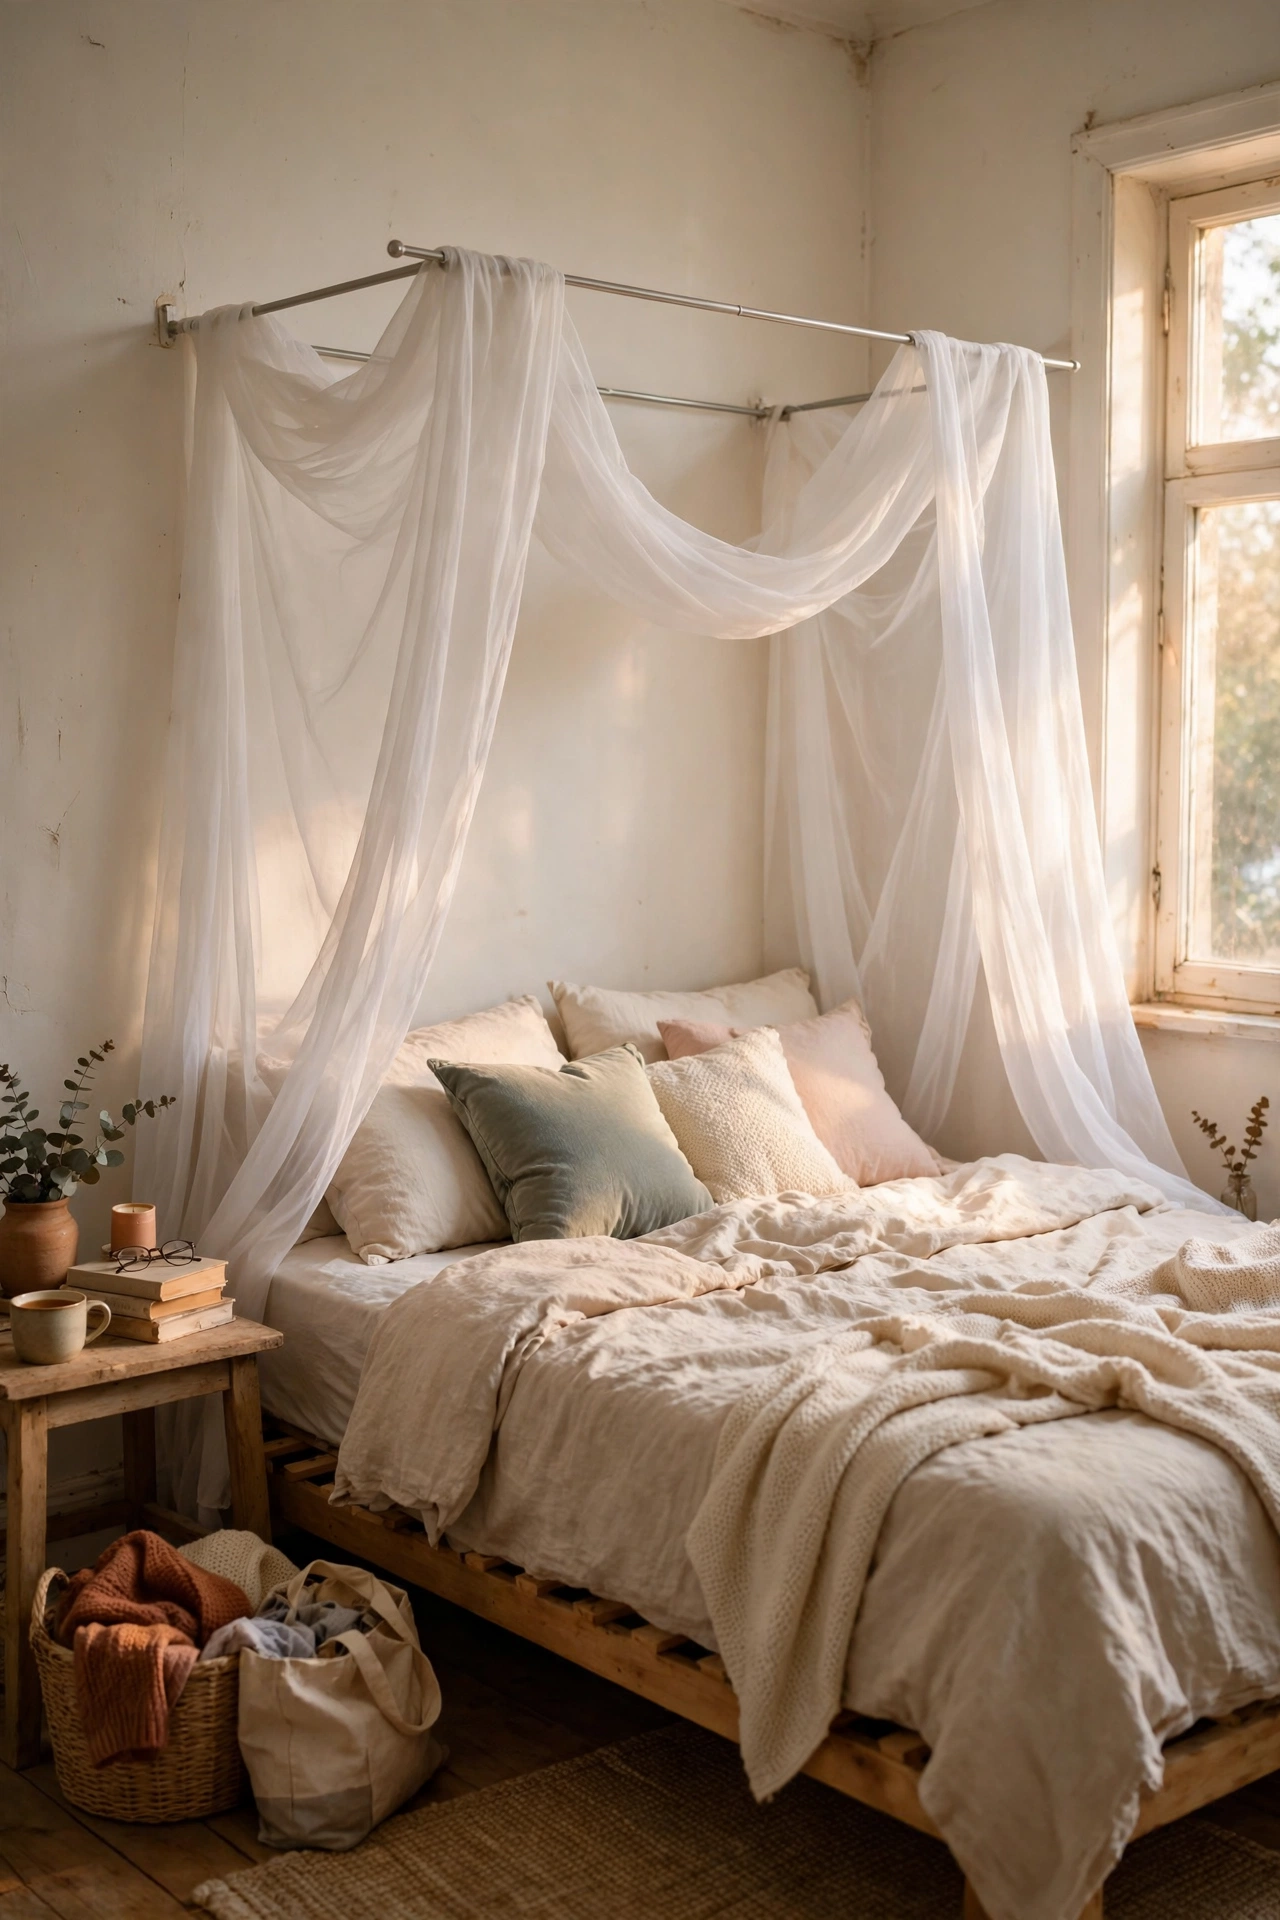
Two tension rods and sheer panels create a canopy bed with nothing attached to the ceiling. I mounted one rod across the head of the bed and one at the foot, both wedged between the walls, and draped sheer white panels over them. The rods must be truly snug, so twist until they resist firmly. My foot-end rod slipped the first night because I had been gentle with it. A firm twist solved it permanently. The sheers soften the whole bed and make a plain rental bed feel romantic. Everything comes down in minutes and the ceiling never knew it was there. Measure your wall span before buying the rods.
Cost: ~$25-35 | Time: 40 minutes
19. Command Hook Hanging Plants
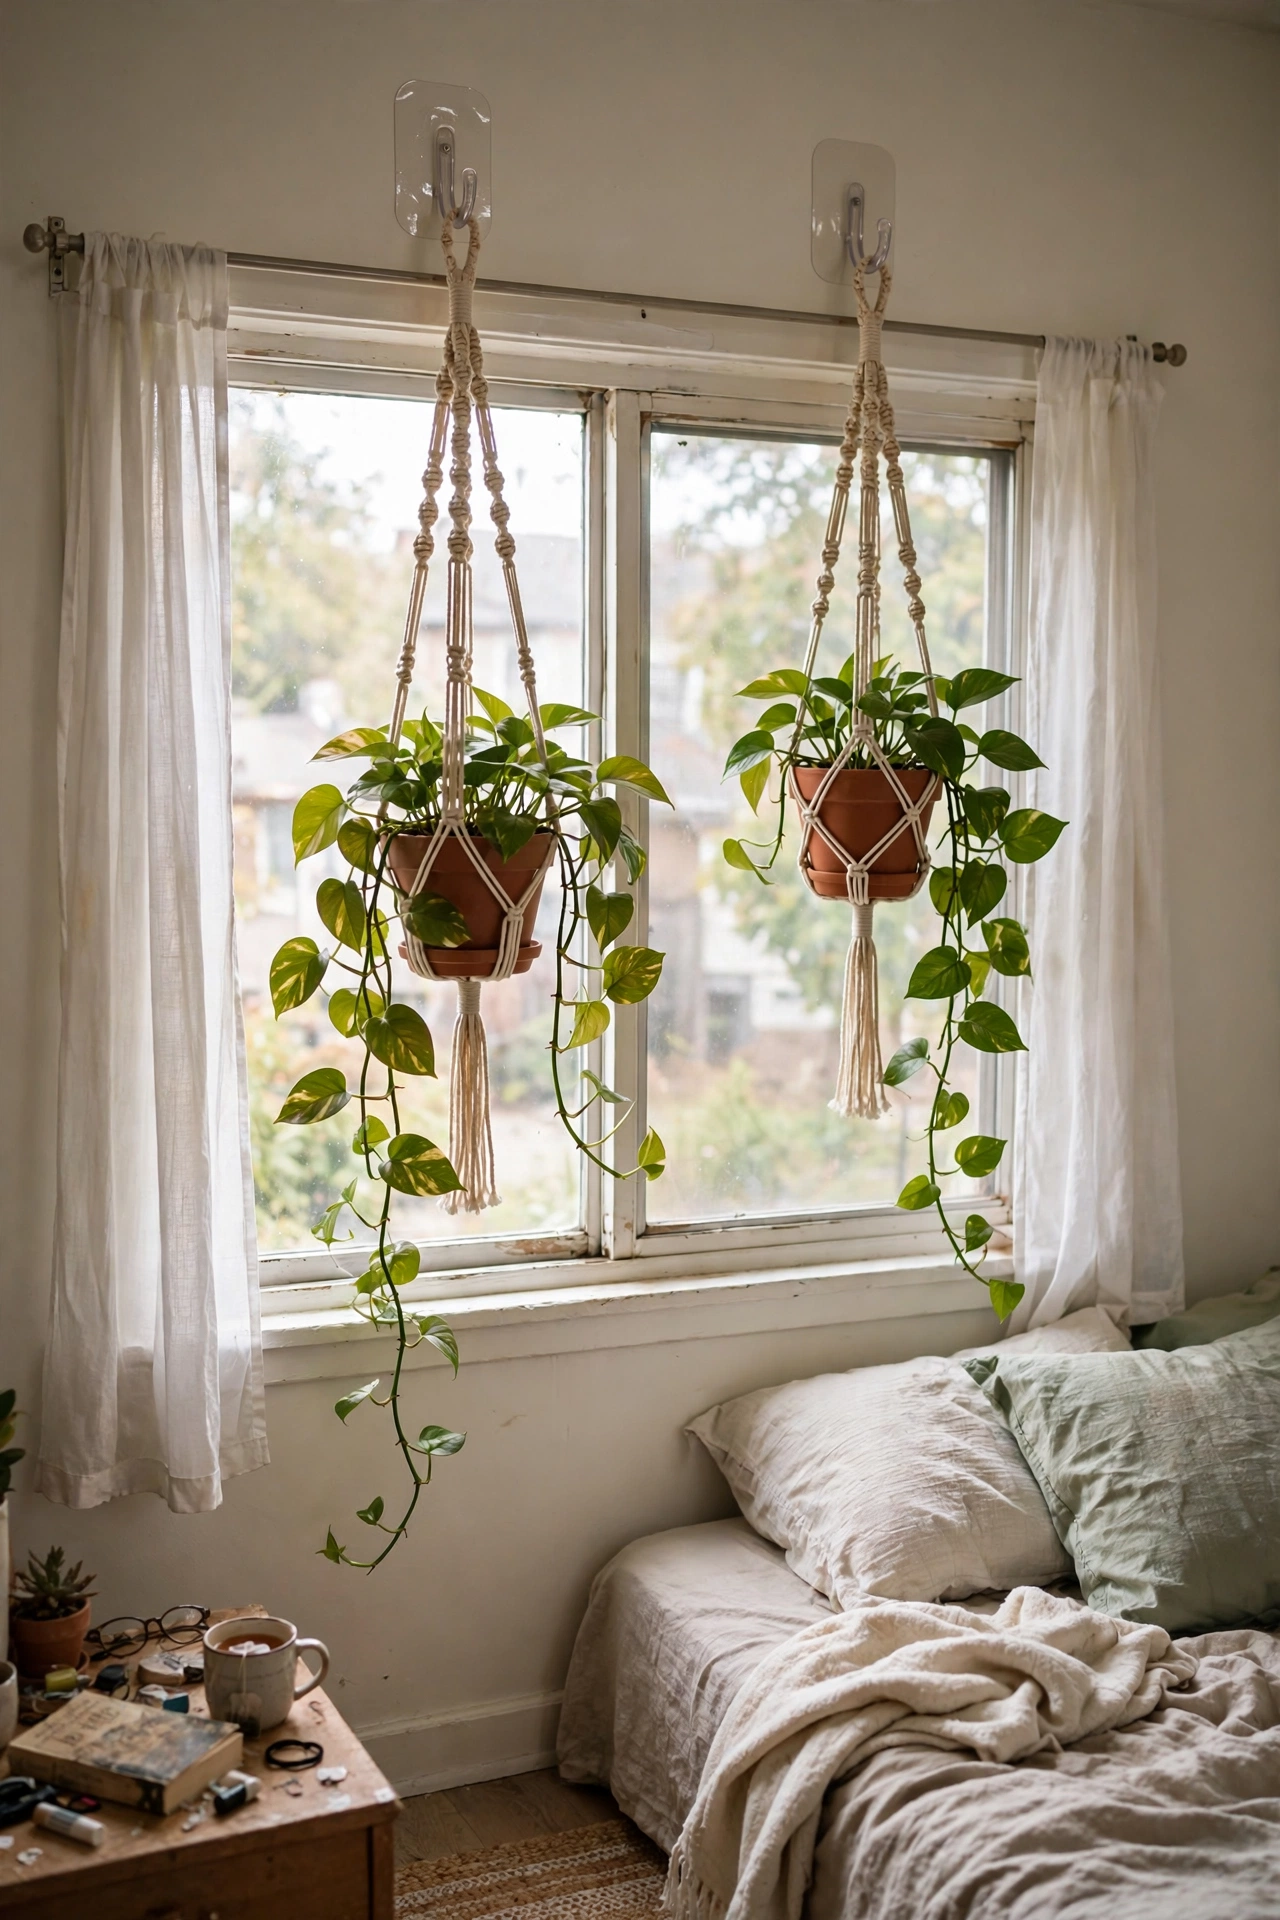
Command hooks let you hang trailing plants with no ceiling anchors. I hung two pothos in lightweight macrame hangers from large adhesive hooks beside my window, keeping each plant under the hook’s weight limit with room to spare. Use the hook size rated well above your plant’s weight, because a watered plant is heavier than it looks. My first hook was borderline and I spent a week nervous. Upsizing one hook size ended the worry. The trailing leaves soften the rental’s hard corners beautifully. Twist the hanger monthly so the plant grows evenly. The hooks pull off cleanly when you move the jungle along.
Cost: ~$18-28 | Time: 20 minutes
20. Freestanding Bookshelf Styled as Decor
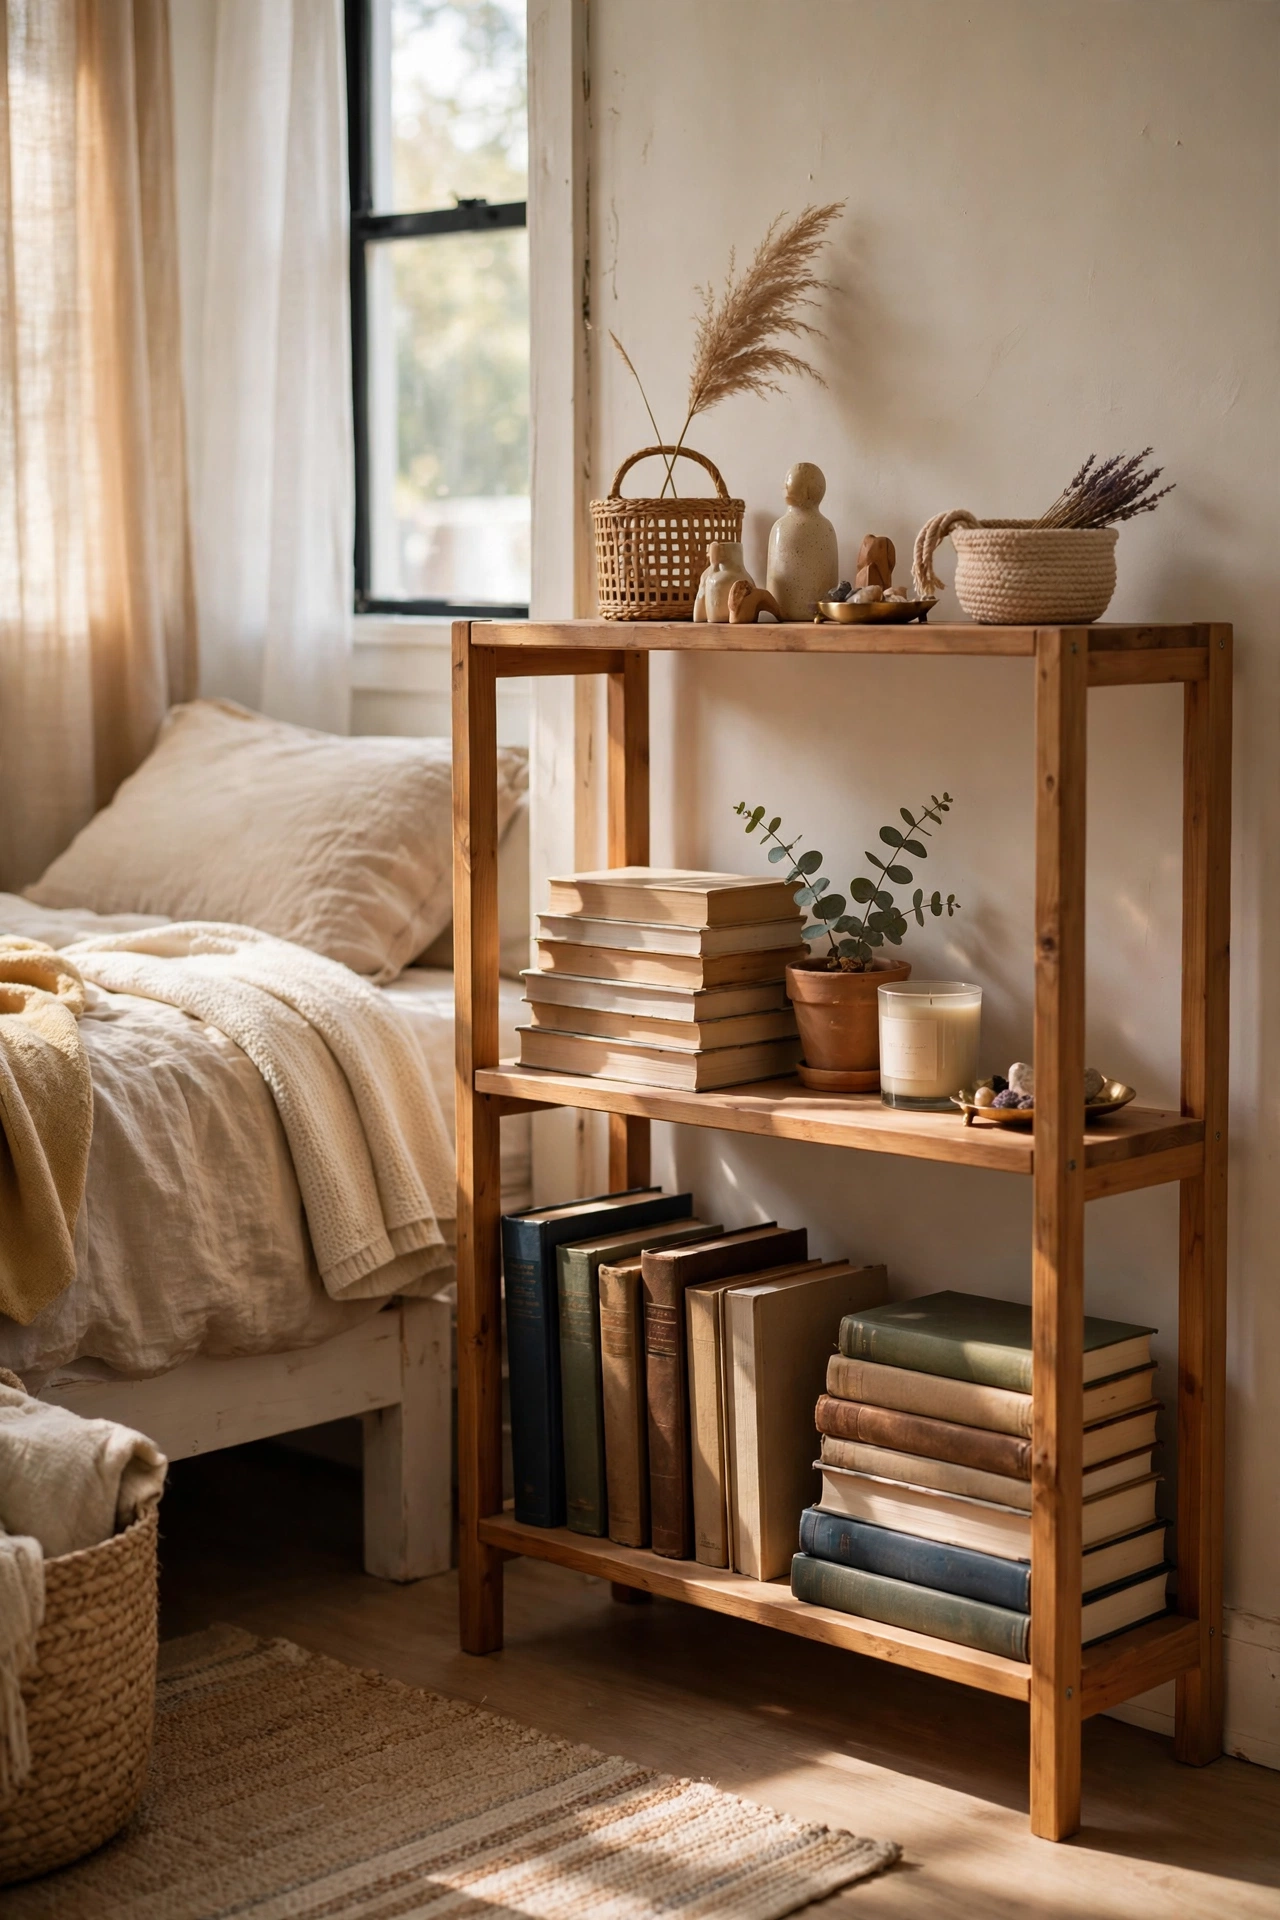
A small freestanding bookshelf needs no wall fixing if you keep it low and style it well. I bought a $30 three-shelf unit and anchored it with weight, not screws: heavy books on the bottom shelf and lighter decor above. The bottom-heavy rule is what keeps it stable without a wall strap. My first arrangement put the plant on top and books in the middle, and it felt tippy. Swapping the weight downward fixed it completely. Style the shelves with books, one plant, and breathing room between groups. It holds my whole library and moves out as one solid piece with nothing to patch behind it.
Cost: ~$28-38 | Time: 40 minutes
21. Photo Clip String on Command Hooks
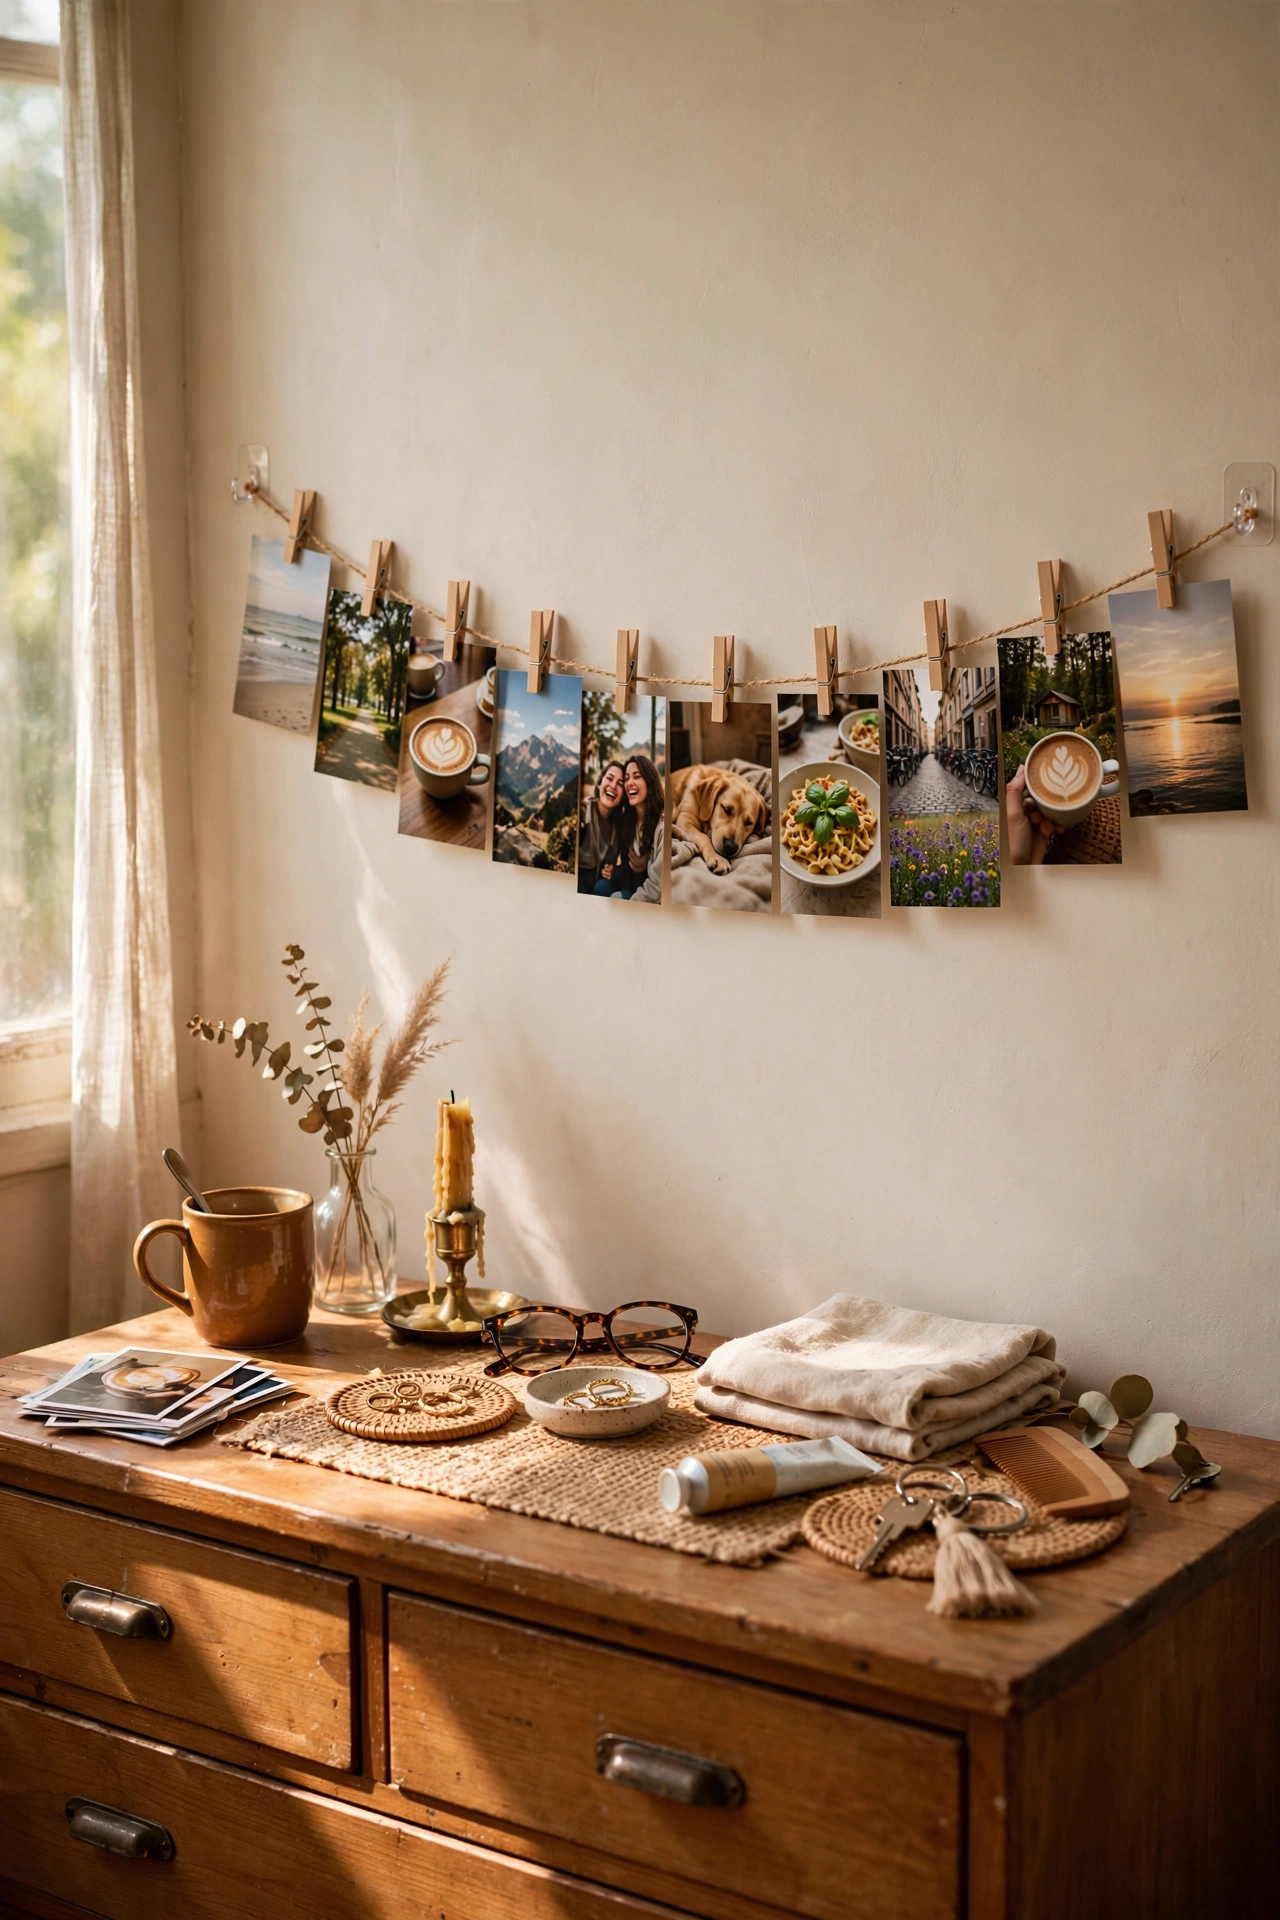
A string of photos clipped along twine gives you a personal gallery with two tiny hooks. I ran jute twine between two small command hooks above my dresser and clipped twelve favourite photos along it with mini wooden pegs. Space the photos evenly and mix orientations so it looks collected, not lined up. My first string had all the photos facing the same way and it looked like a police lineup. Alternating portrait and landscape made it feel like a real display. Swap the photos seasonally in minutes. The whole thing weighs almost nothing, so the hooks hold easily, and it all peels away cleanly on moving day.
Cost: ~$8-12 | Time: 30 minutes
22. Peel-and-Stick Tile Nightstand Makeover
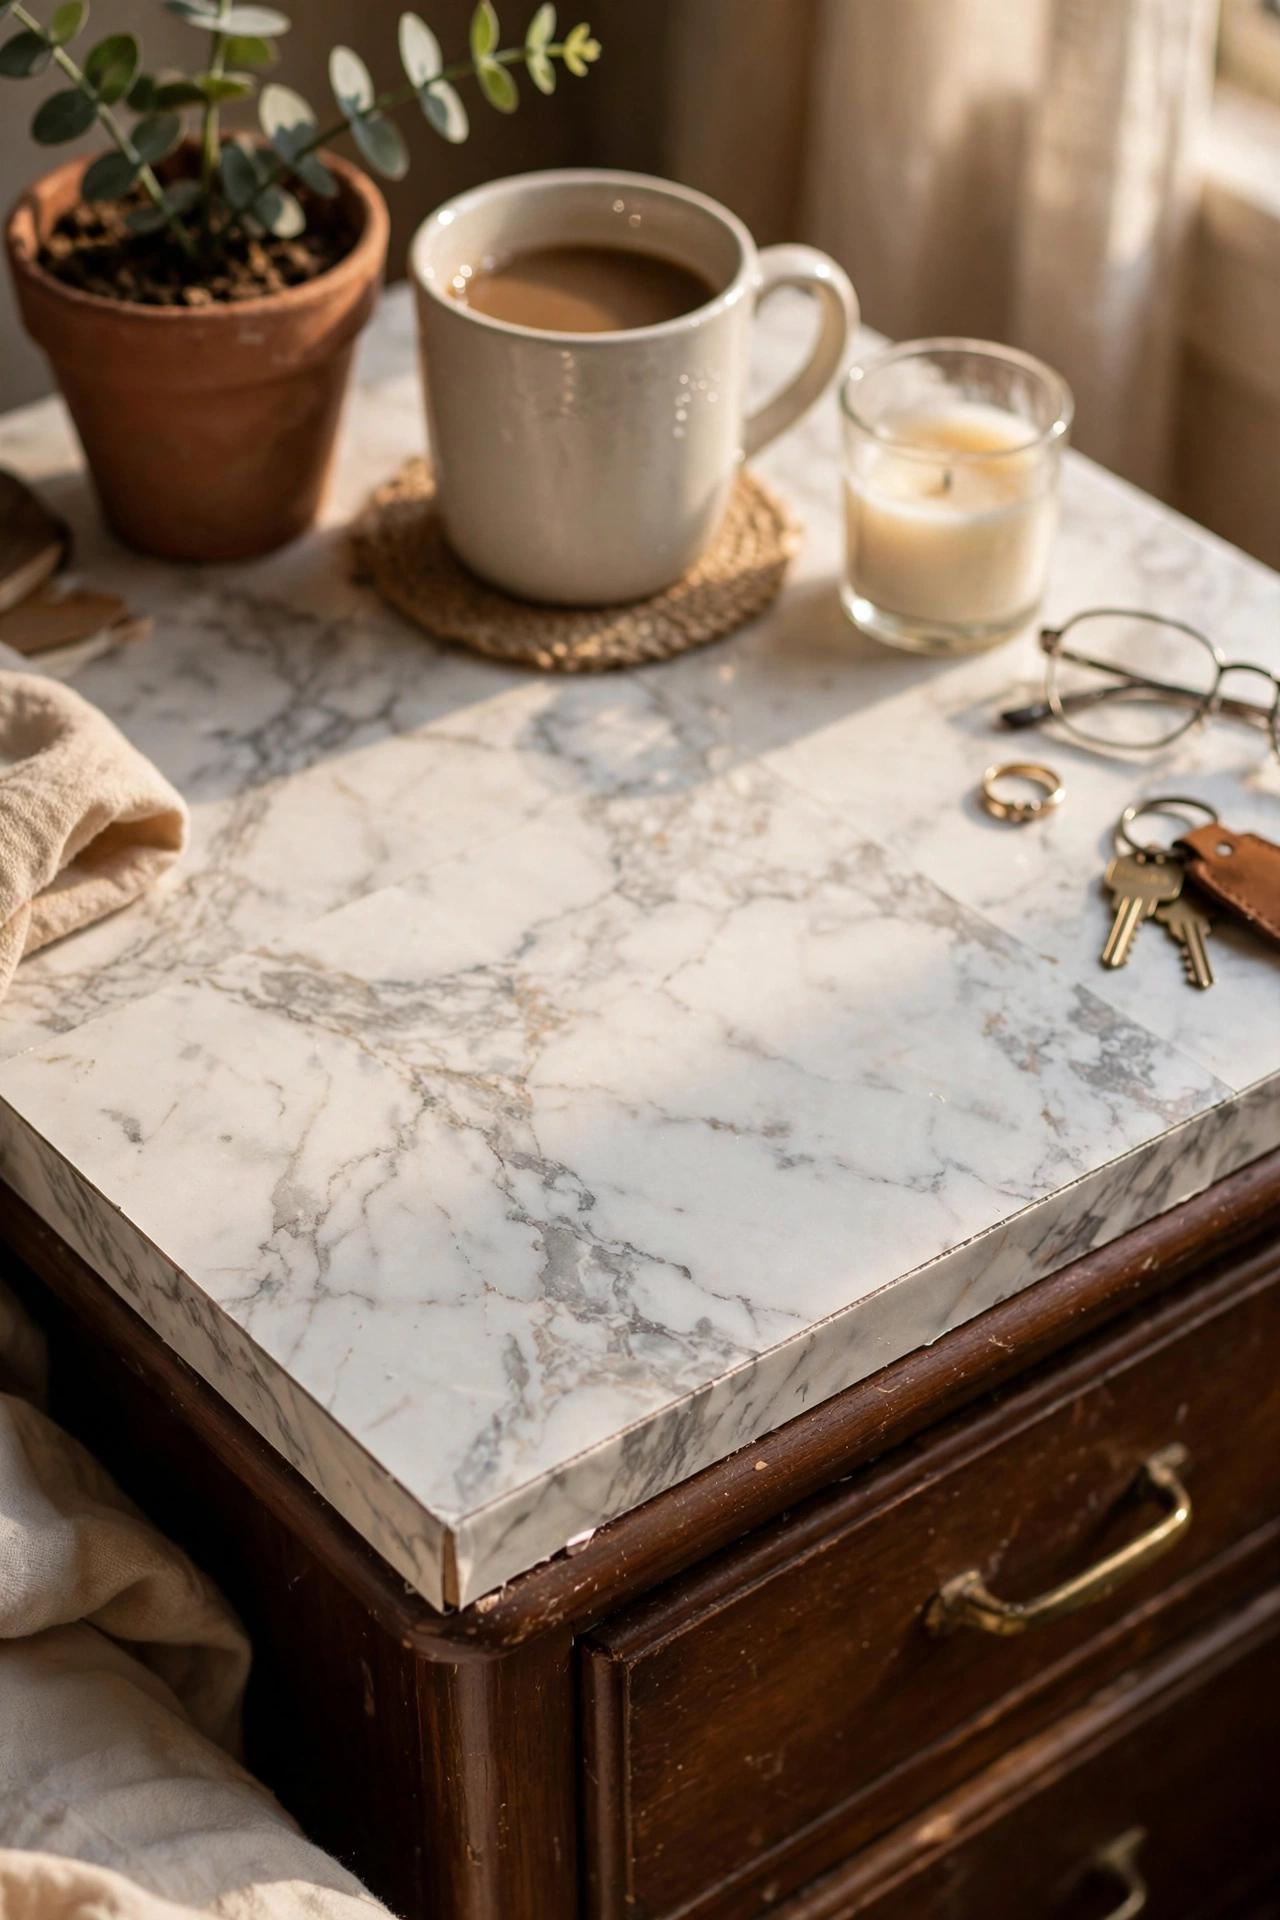
Peel-and-stick tiles transform a tired landlord nightstand without paint. I covered the top of my scratched rental nightstand with marble-look adhesive tiles, trimming the edges with a craft knife and smoothing out every bubble. Clean the surface with rubbing alcohol first so the adhesive grips properly. My first tile lifted at the corner because I skipped the cleaning step. Redoing it on a clean surface has held for a year. The marble top makes a $10 secondhand nightstand look expensive. When you leave, warm the tiles with a hairdryer and peel them off; the original surface stays exactly as you found it.
Cost: ~$10-16 | Time: 30 minutes
23. Contact Paper Drawer Refresh
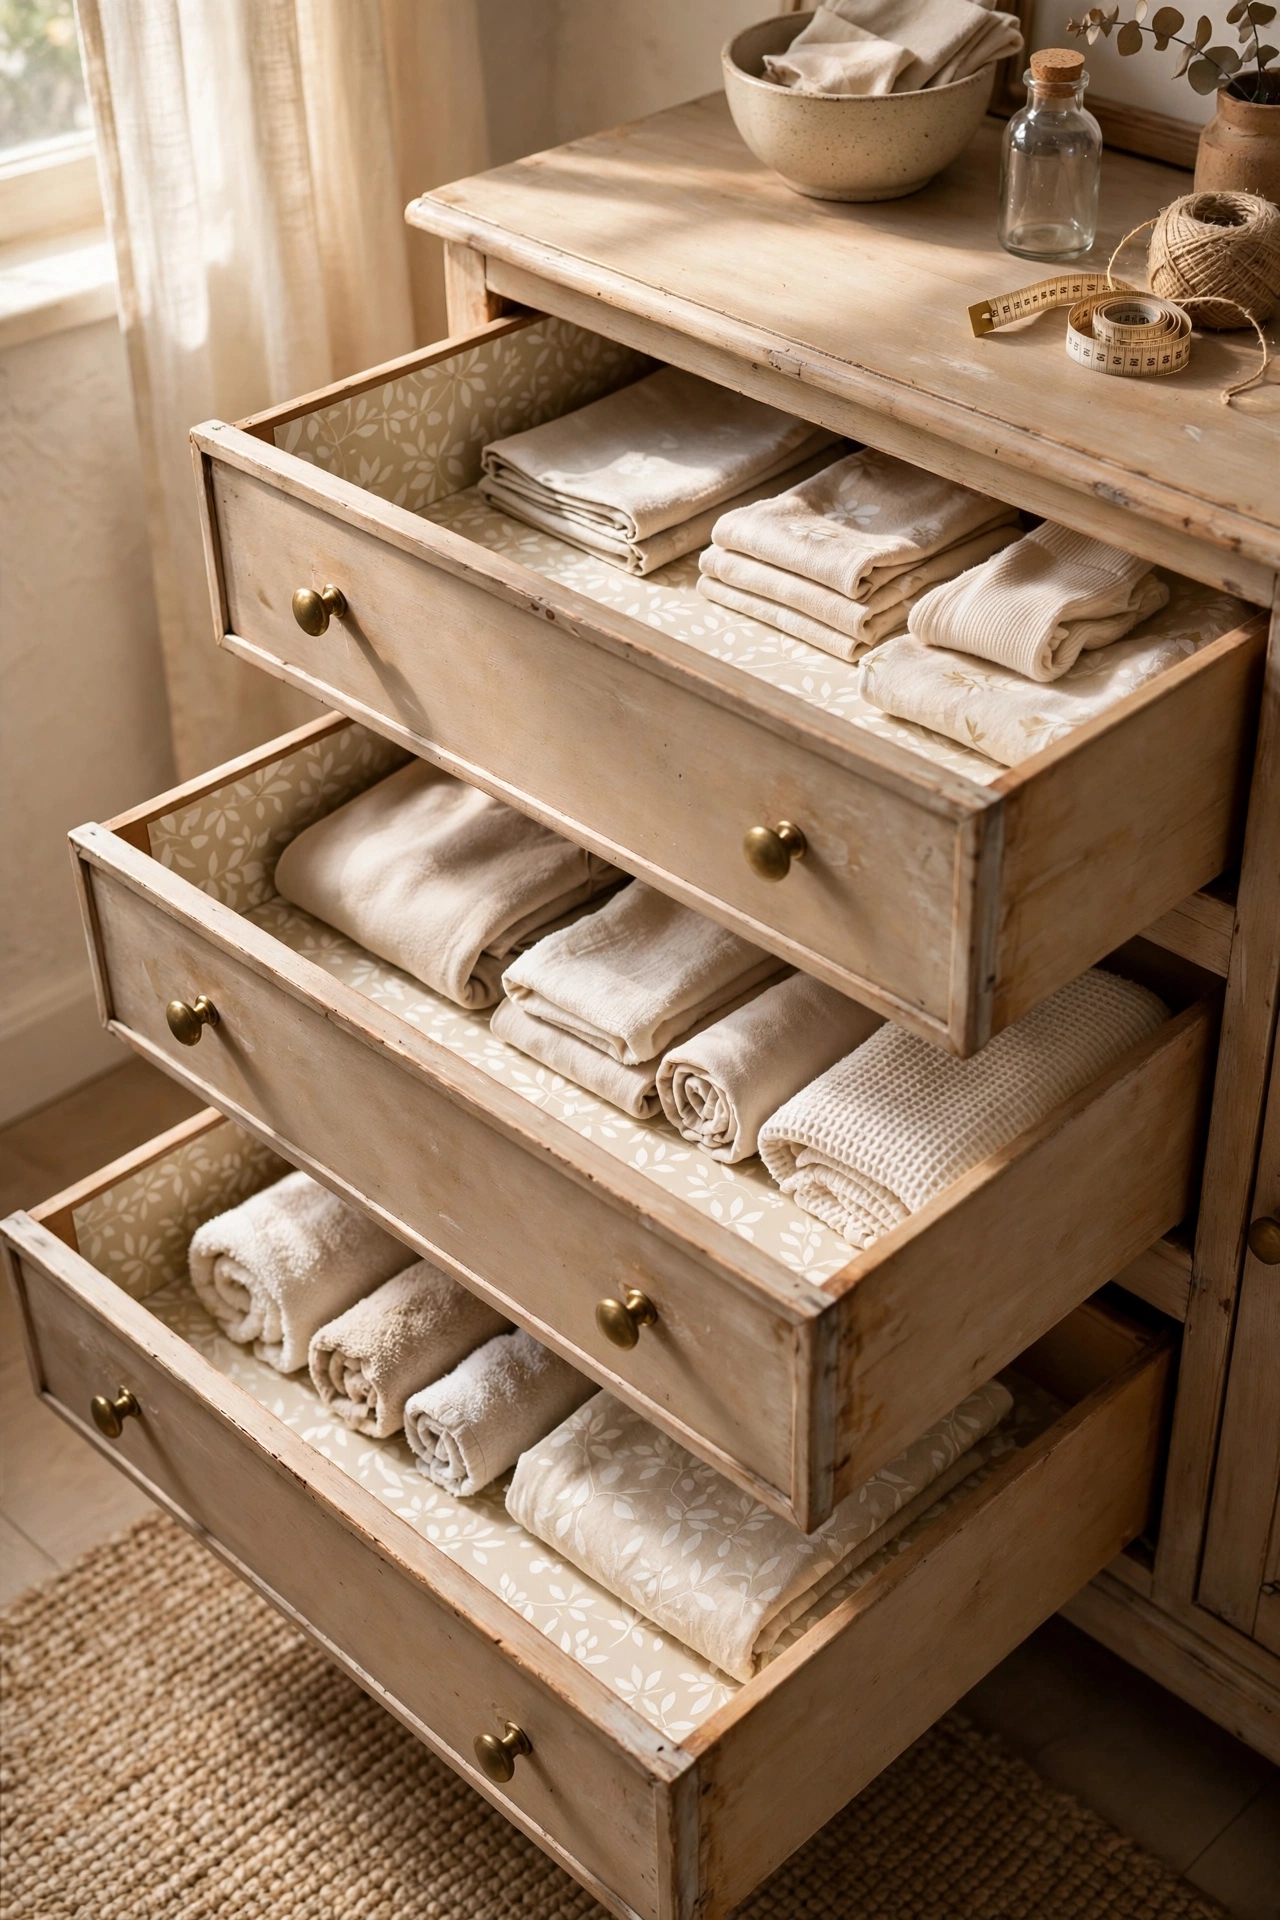
Contact paper inside drawers and on shelf liners freshens rental furniture invisibly. I lined my dresser drawers and wardrobe shelves with a $9 roll of cream patterned contact paper, cutting each piece a quarter inch short so the edges never peel. The paper hides stained drawer bottoms and makes opening them feel clean. Smooth each sheet from the centre outward to push out air bubbles. My first drawer had a wrinkle right in the middle because I laid the whole sheet down at once. Peeling it back halfway and re-smoothing fixed it. It lifts out without residue when you go, and the landlord sees the same drawers they left.
Cost: ~$8-12 | Time: 45 minutes
Quick questions, answered
Will command strips really hold picture frames?
Yes, if you follow the weight rating and the wait time. Use the size rated above your frame’s weight, press firmly for thirty seconds, and wait a full hour before hanging. Most failures come from hanging immediately. Pull the tab straight down on moving day and the paint stays intact.
What is the safest way to hang curtains in a rental?
Tension rods inside the window recess are the safest option, since they touch only the frame sides. For wider windows, use adhesive curtain rod brackets rated for the weight. Both come off cleanly, and neither needs a drill.
How do I get my full deposit back after decorating?
Photograph every wall and surface on move-in day, use only removable products, and remove everything two weeks before checkout so you can touch up any marks. My last two rentals returned the full deposit because every change was designed to be reversible from the start.
📌 Renting? Pin this post now so you can save this idea for your next weekend refresh.
More rental-safe ideas here: (see also: 21-renter-friendly-living-room-ideas/) (see also: 19-navy-blue-bedroom-decor-ideas-on-a-budget/) (see also: 17-bedroom-decor-ideas-under-100-for-a-cosy-retreat/)
