21 Renter-Friendly Living Room Ideas That Need No Drilling
Some landlords treat a drill like a declaration of war, and honestly, I have learned to love the constraint. Working out renter friendly living room ideas that need no drilling has made me a more creative decorator, not a more limited one. Adhesive strips, tension rods, leaning frames, and clever furniture placement can do almost everything a drill can do, with the bonus that it all comes down cleanly. My deposit has survived four flats intact, and every one of them looked like mine.
Below, each idea is split into two parts: first exactly how to do it, then the honest story of how it went in my own rentals, mistakes included. No holes, no filling, no awkward checkout conversations. Just a living room that feels like home from week one.
Adhesive-Strip Gallery Wall, Floor to Ceiling
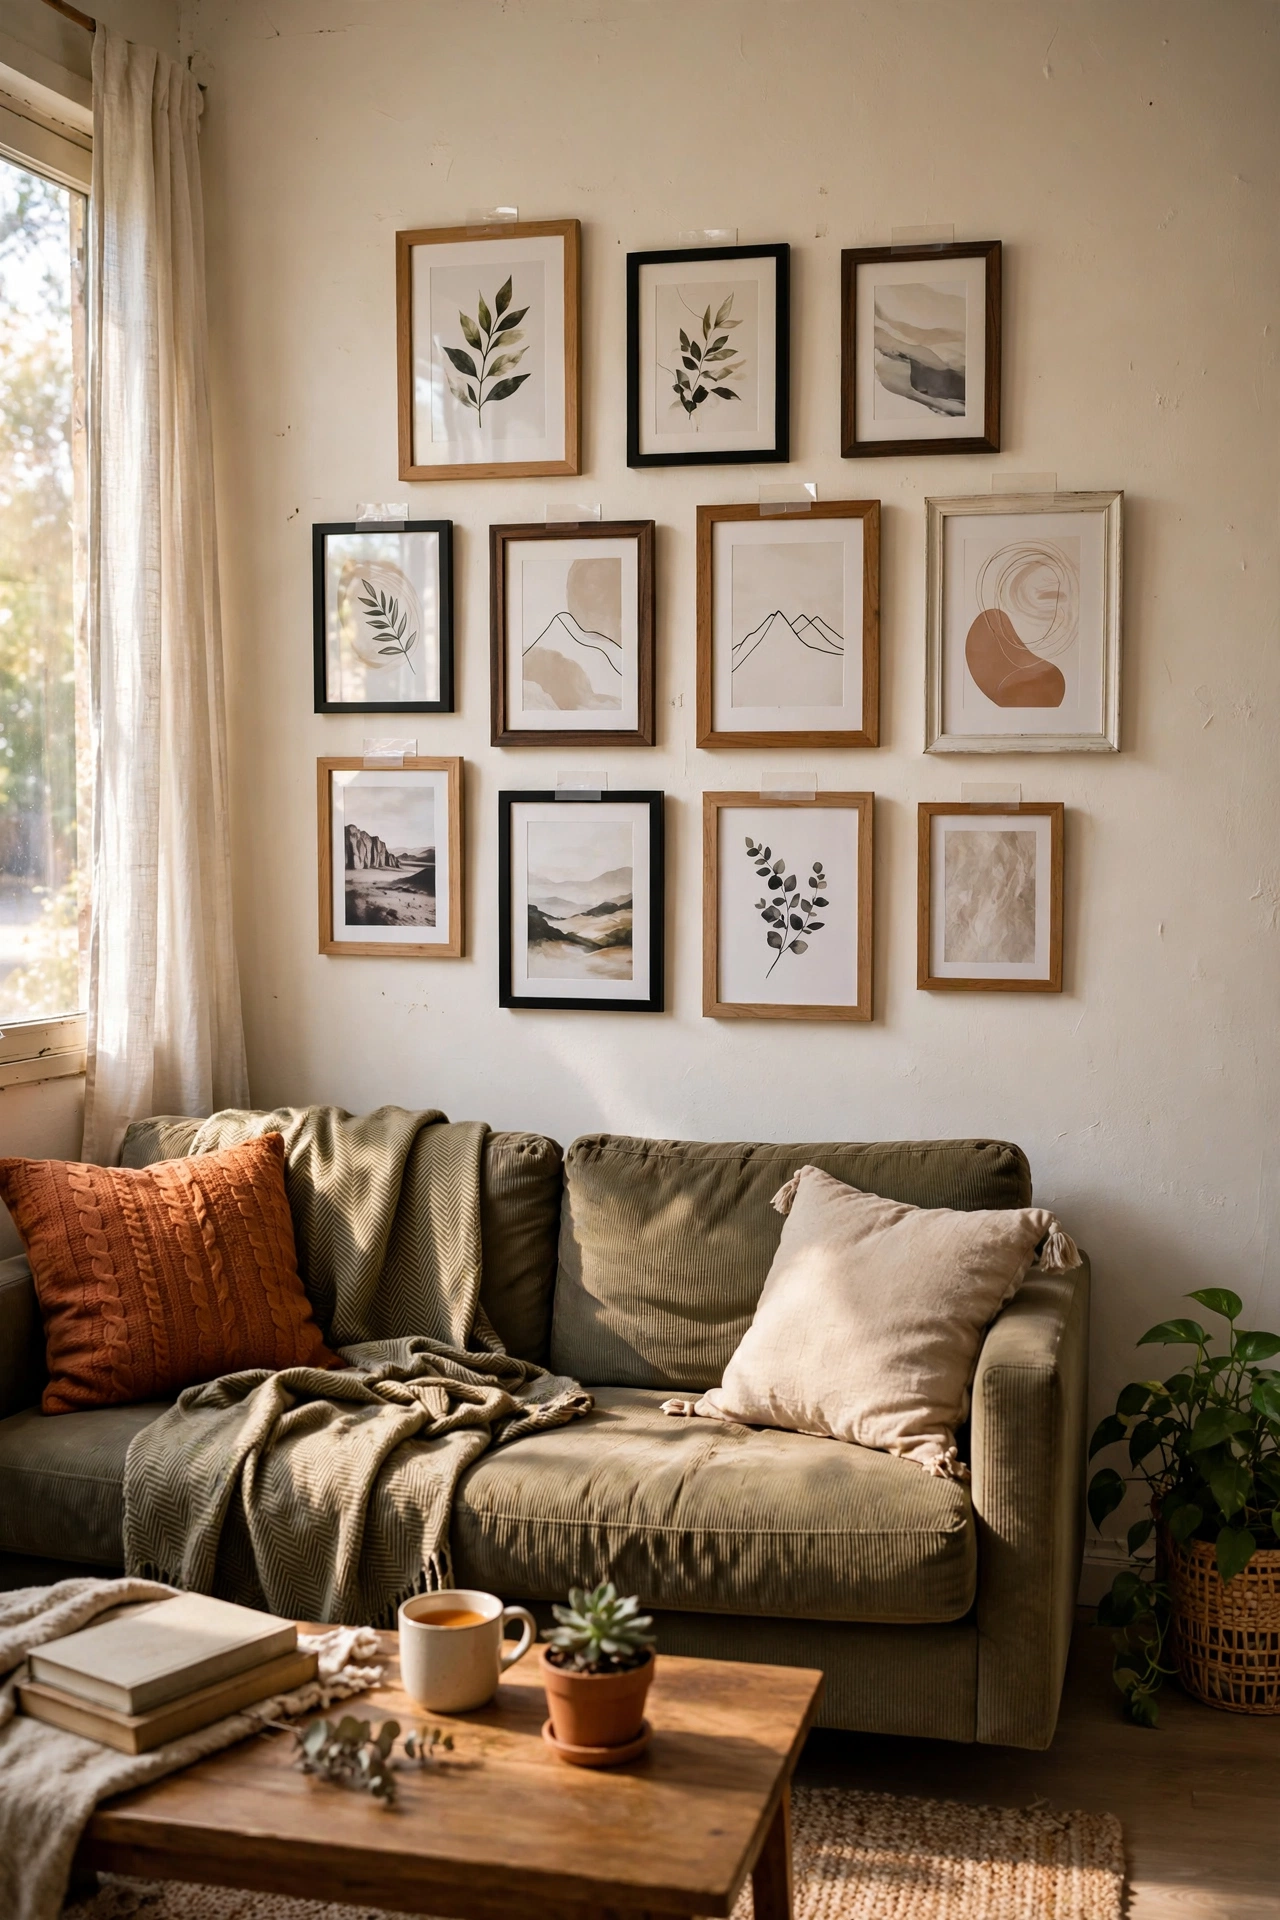
Plan your gallery on the floor first, then hang every frame with adhesive picture strips rated for its weight. Clean the wall with rubbing alcohol, press each strip firmly for a full thirty seconds, and wait an hour before hanging the frame. Use two strips per frame minimum, and check the weight rating on the packet. Work from the centre outward so the arrangement stays balanced.
I tried this in a flat with a plaster wall the landlord was precious about, and eleven frames went up in one rainy Sunday. My mistake was hanging the biggest frame with a single strip to save money, and it slid down the wall at 3am, scaring me half to death. Two strips, proper brand, weight rating respected. Two years later they all came down without a single mark, and I got my full deposit back.
Cost: ~$22 | Time: 1.5 hours
Tension Rod Inside the Window Recess
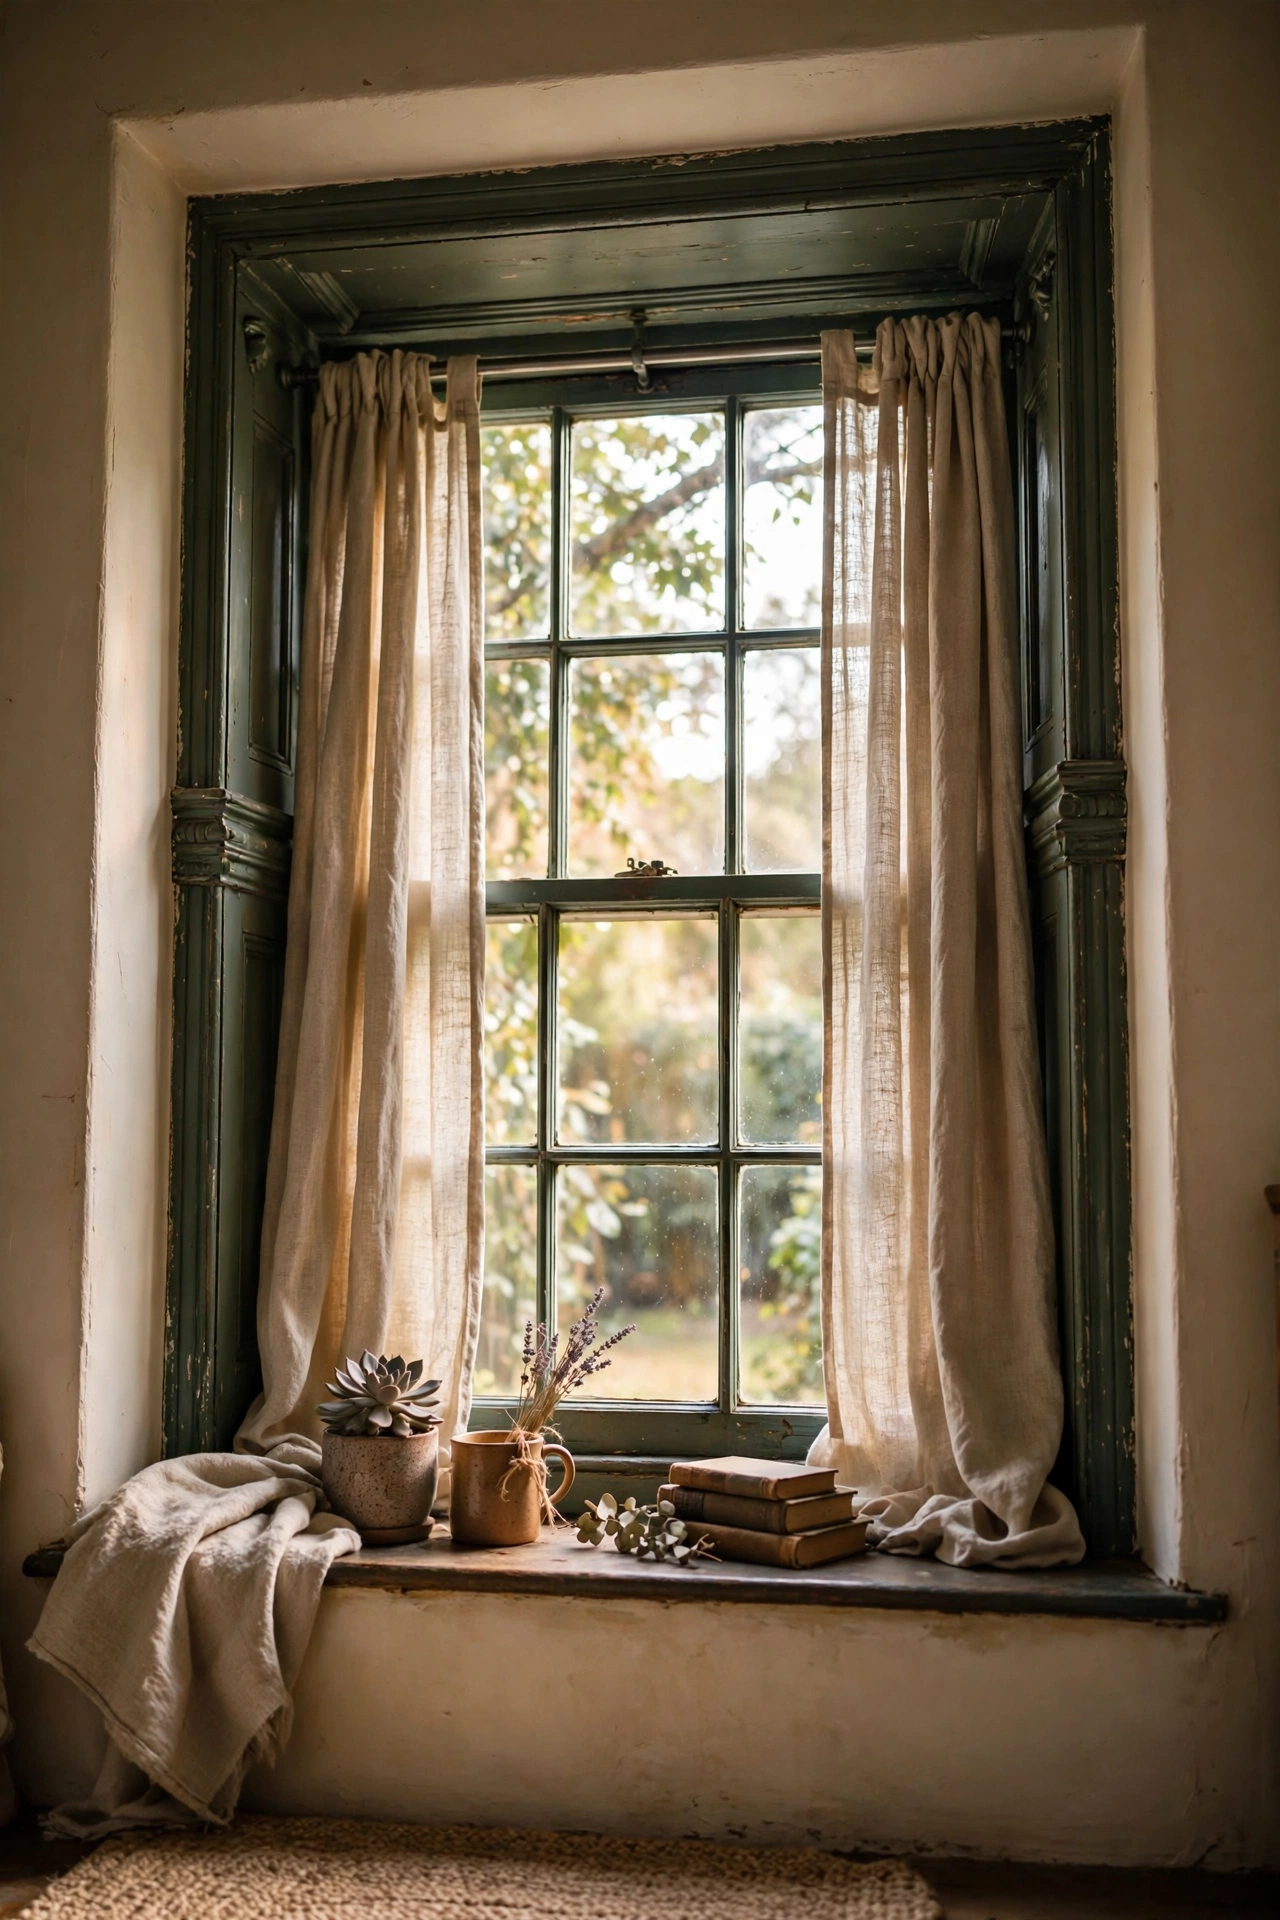
Measure the inside of your window recess and buy a tension rod that extends slightly beyond that width. Twist it to length, wedge it firmly into the recess, and hang light to medium curtains from it. For wide windows, add a centre support or use two rods meeting in the middle. Test the grip by tugging firmly before trusting it with your curtains.
I tried this in a Victorian conversion where drilling near the sash windows was forbidden, and honestly the curtains looked identical to drilled ones. My mistake was buying the cheapest rod for heavy velvet curtains, and it bowed so badly the curtains pooled in the middle. Match the rod to the curtain weight, and when in doubt go one strength up. It twisted out in seconds when I moved, no trace left behind.
Cost: ~$16 | Time: 15 minutes
Leaning Floor Mirror Against the Wall
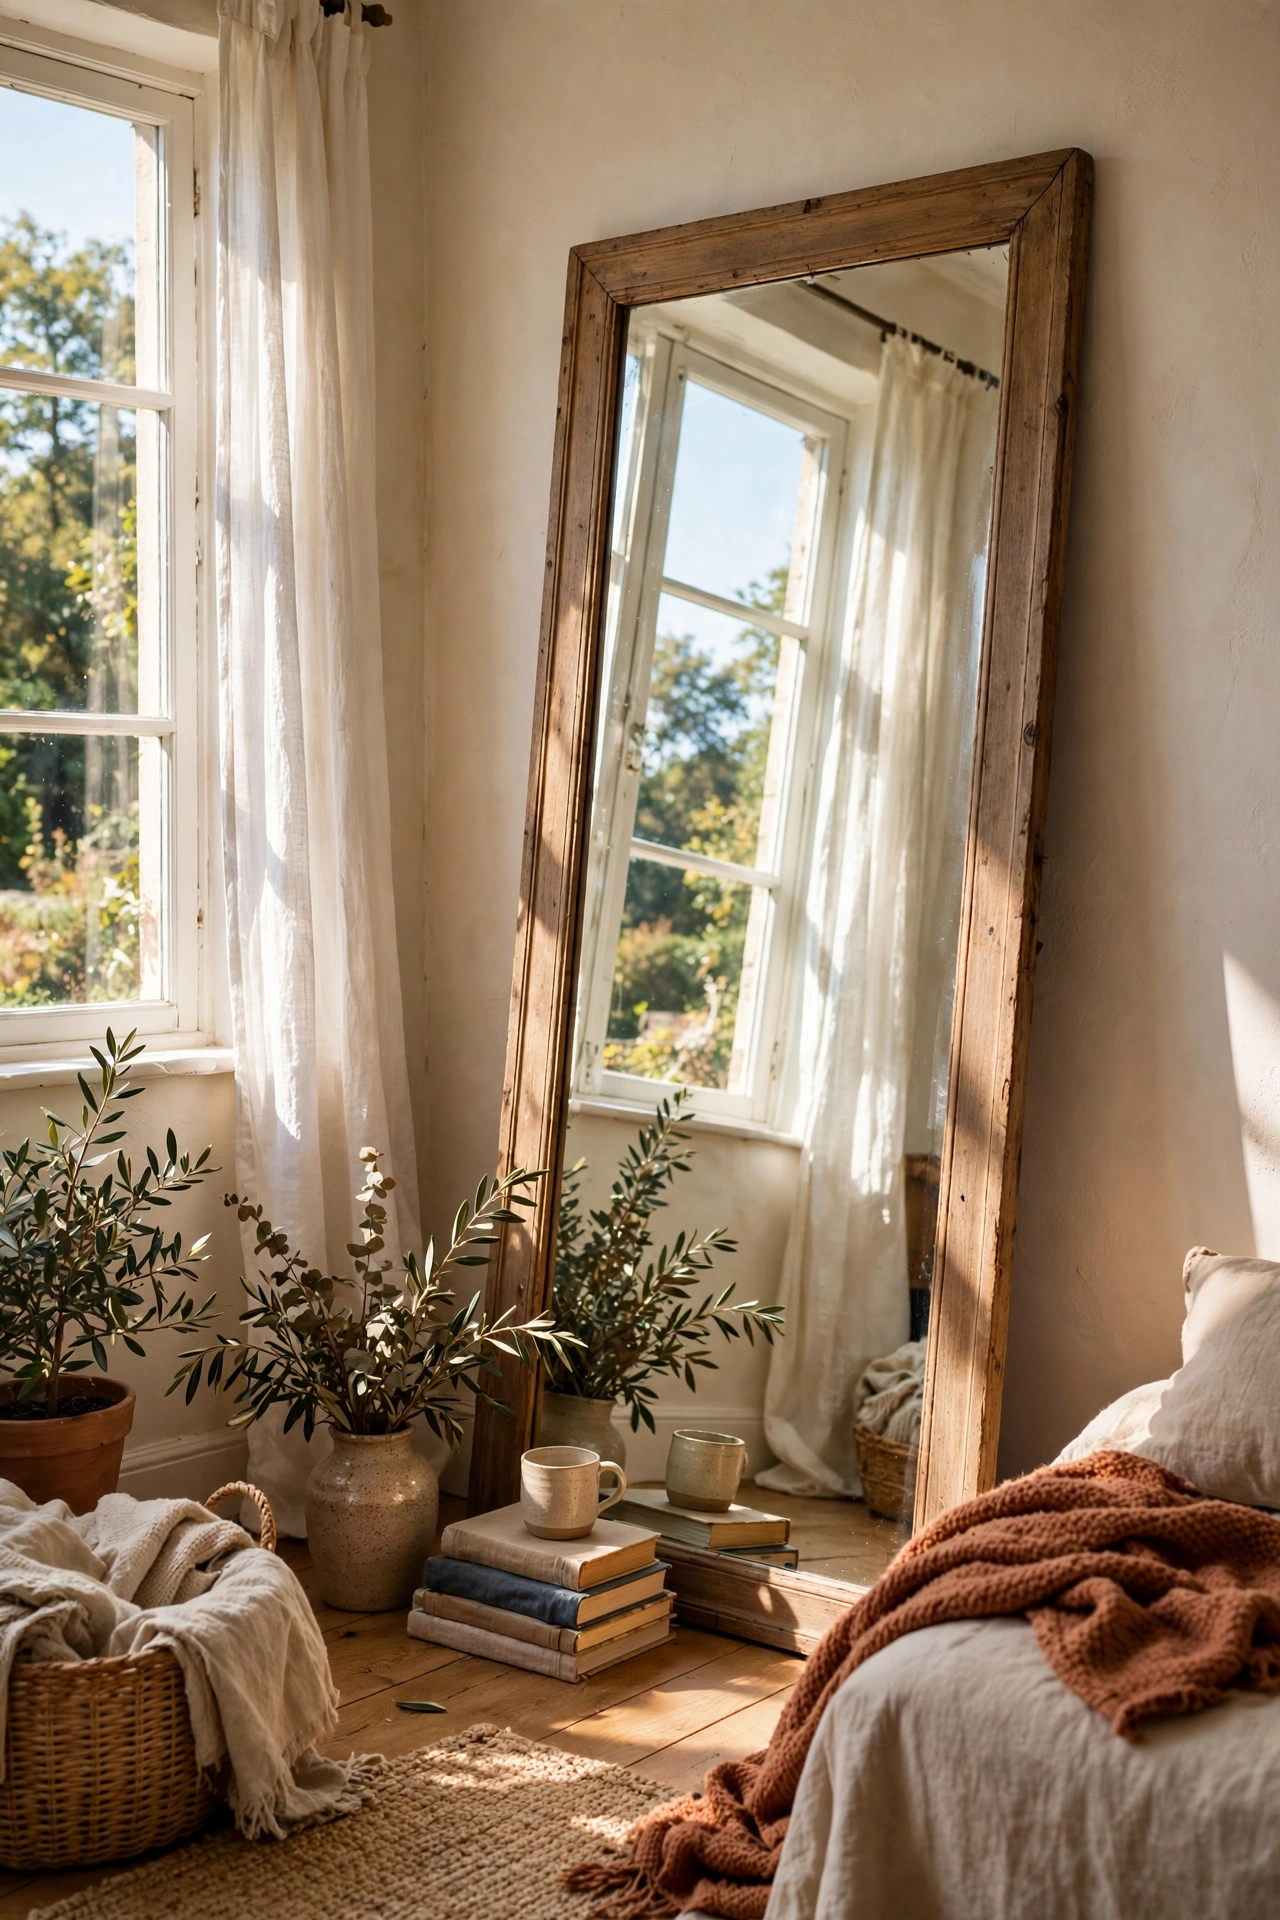
Choose a tall mirror with a sturdy frame, lean it against the wall at a slight angle, and secure the top edge with a small adhesive bumper so it cannot slip forward. Place it where it reflects a window or something beautiful, never a blank wall. On hard floors, add non-slip pads under the base; on carpet, check its position weekly as it can drift.
I tried this opposite my living room window in a basement flat, and the doubled light genuinely changed how the room felt. My mistake was positioning it where it reflected the television, so every film night had a ghostly double image glaring back at me. Angle matters as much as position. It is still the single most impactful thing I have ever done to a rental, and it took ten minutes.
Cost: ~$45 | Time: 10 minutes
Freestanding Garment Rack as Display
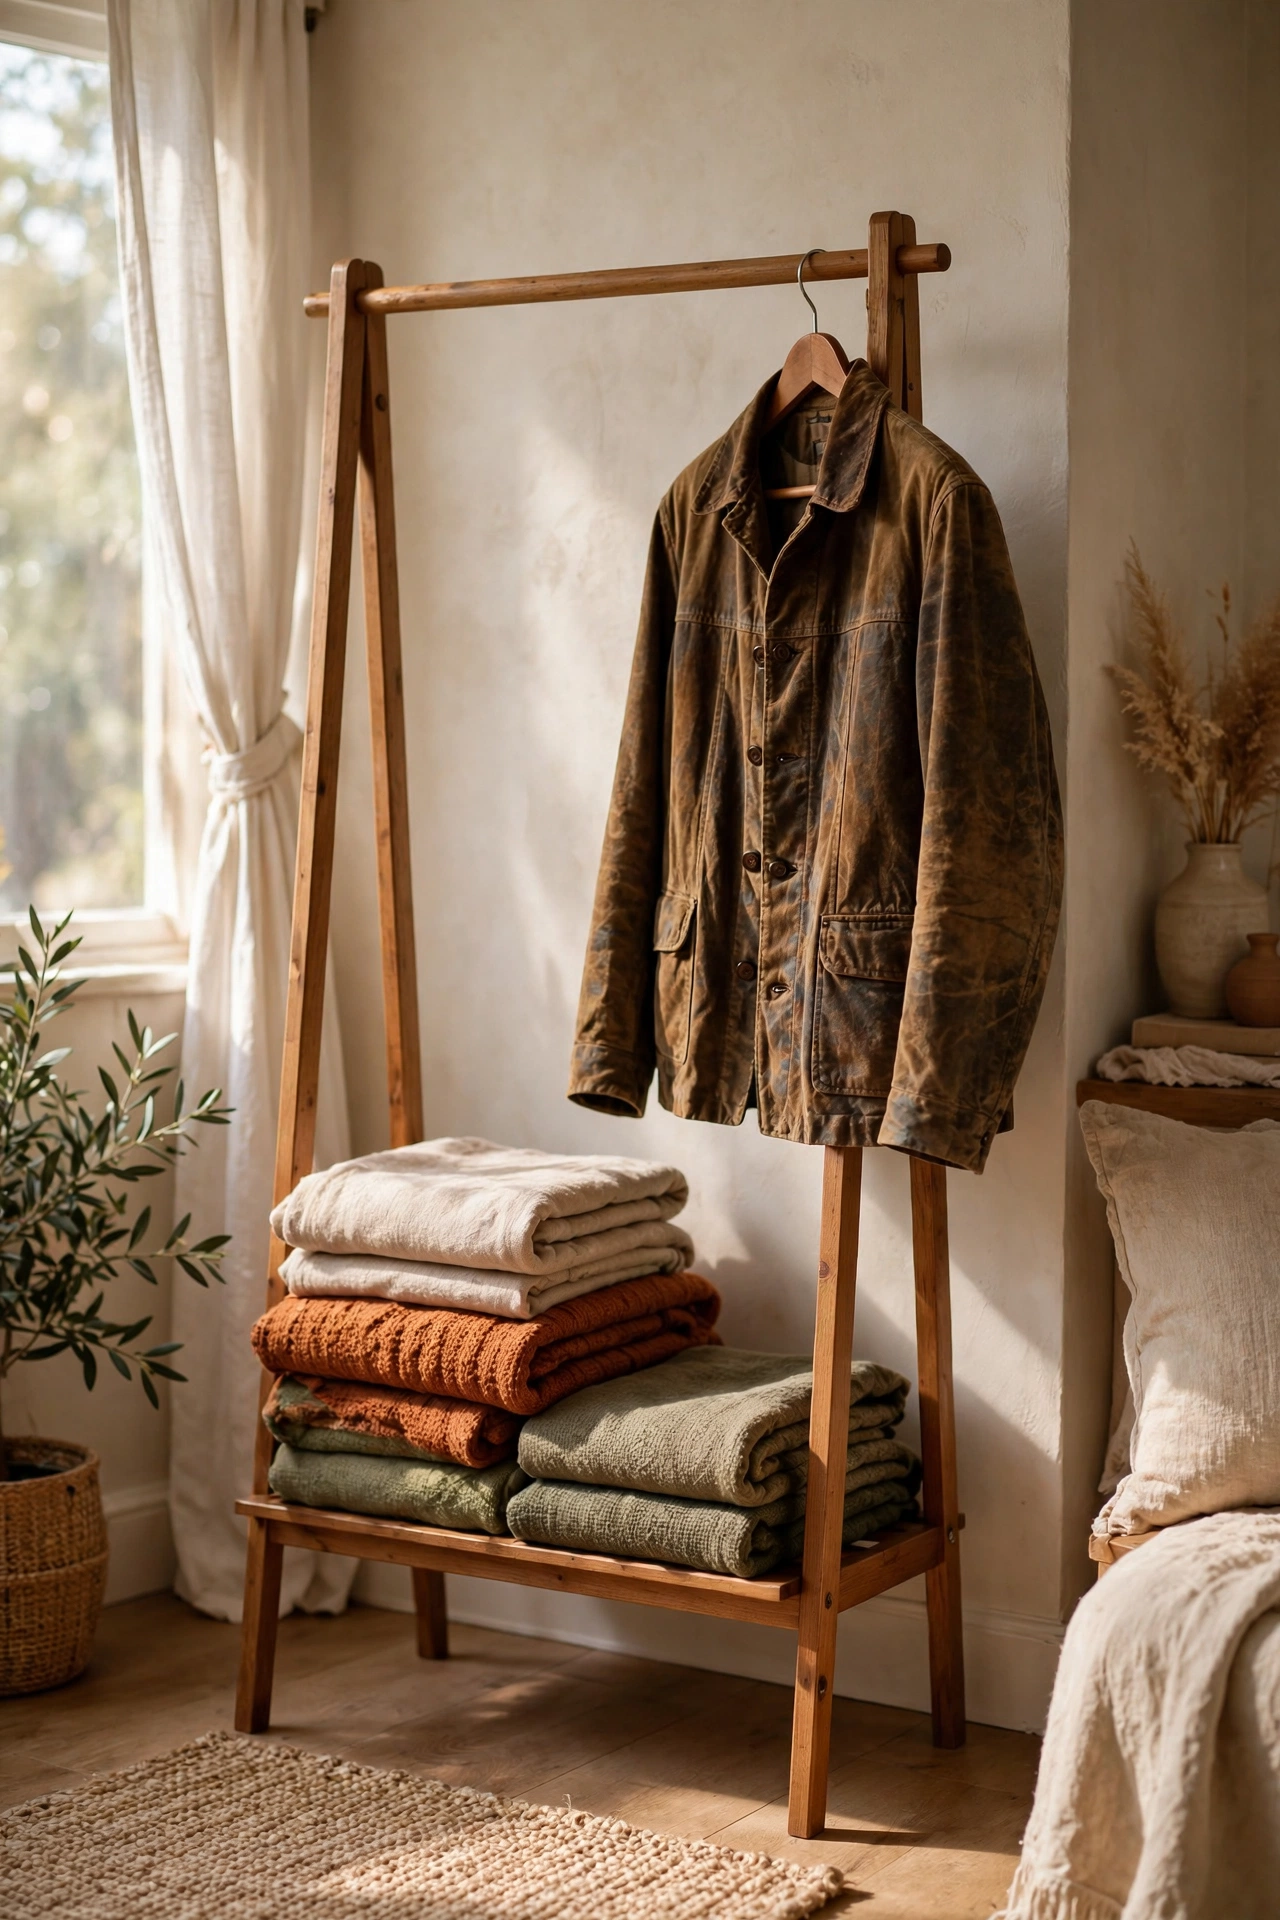
Assemble a sturdy freestanding garment rack and use it as a display rail for throws, quilts, or a curated rail of beautiful clothes. Position it against an empty wall where art would normally go. Choose a wooden or brass-finish rack rather than flimsy chrome, and keep the hanging items colour-coordinated so it reads as styling, not storage overflow.
I tried this with three beautiful throws and a vintage kimono-style jacket, and visitors assumed it was an intentional art installation. My mistake was letting it slowly become the floordrobe, covered in yesterday’s jeans. The rule that saved it: nothing on the rail that you would not photograph. It holds a surprising amount while looking deliberate, and it flat-packs for moving day.
Cost: ~$30 | Time: 20 minutes
Peel-and-Stick Backsplash-Style Wall Panels
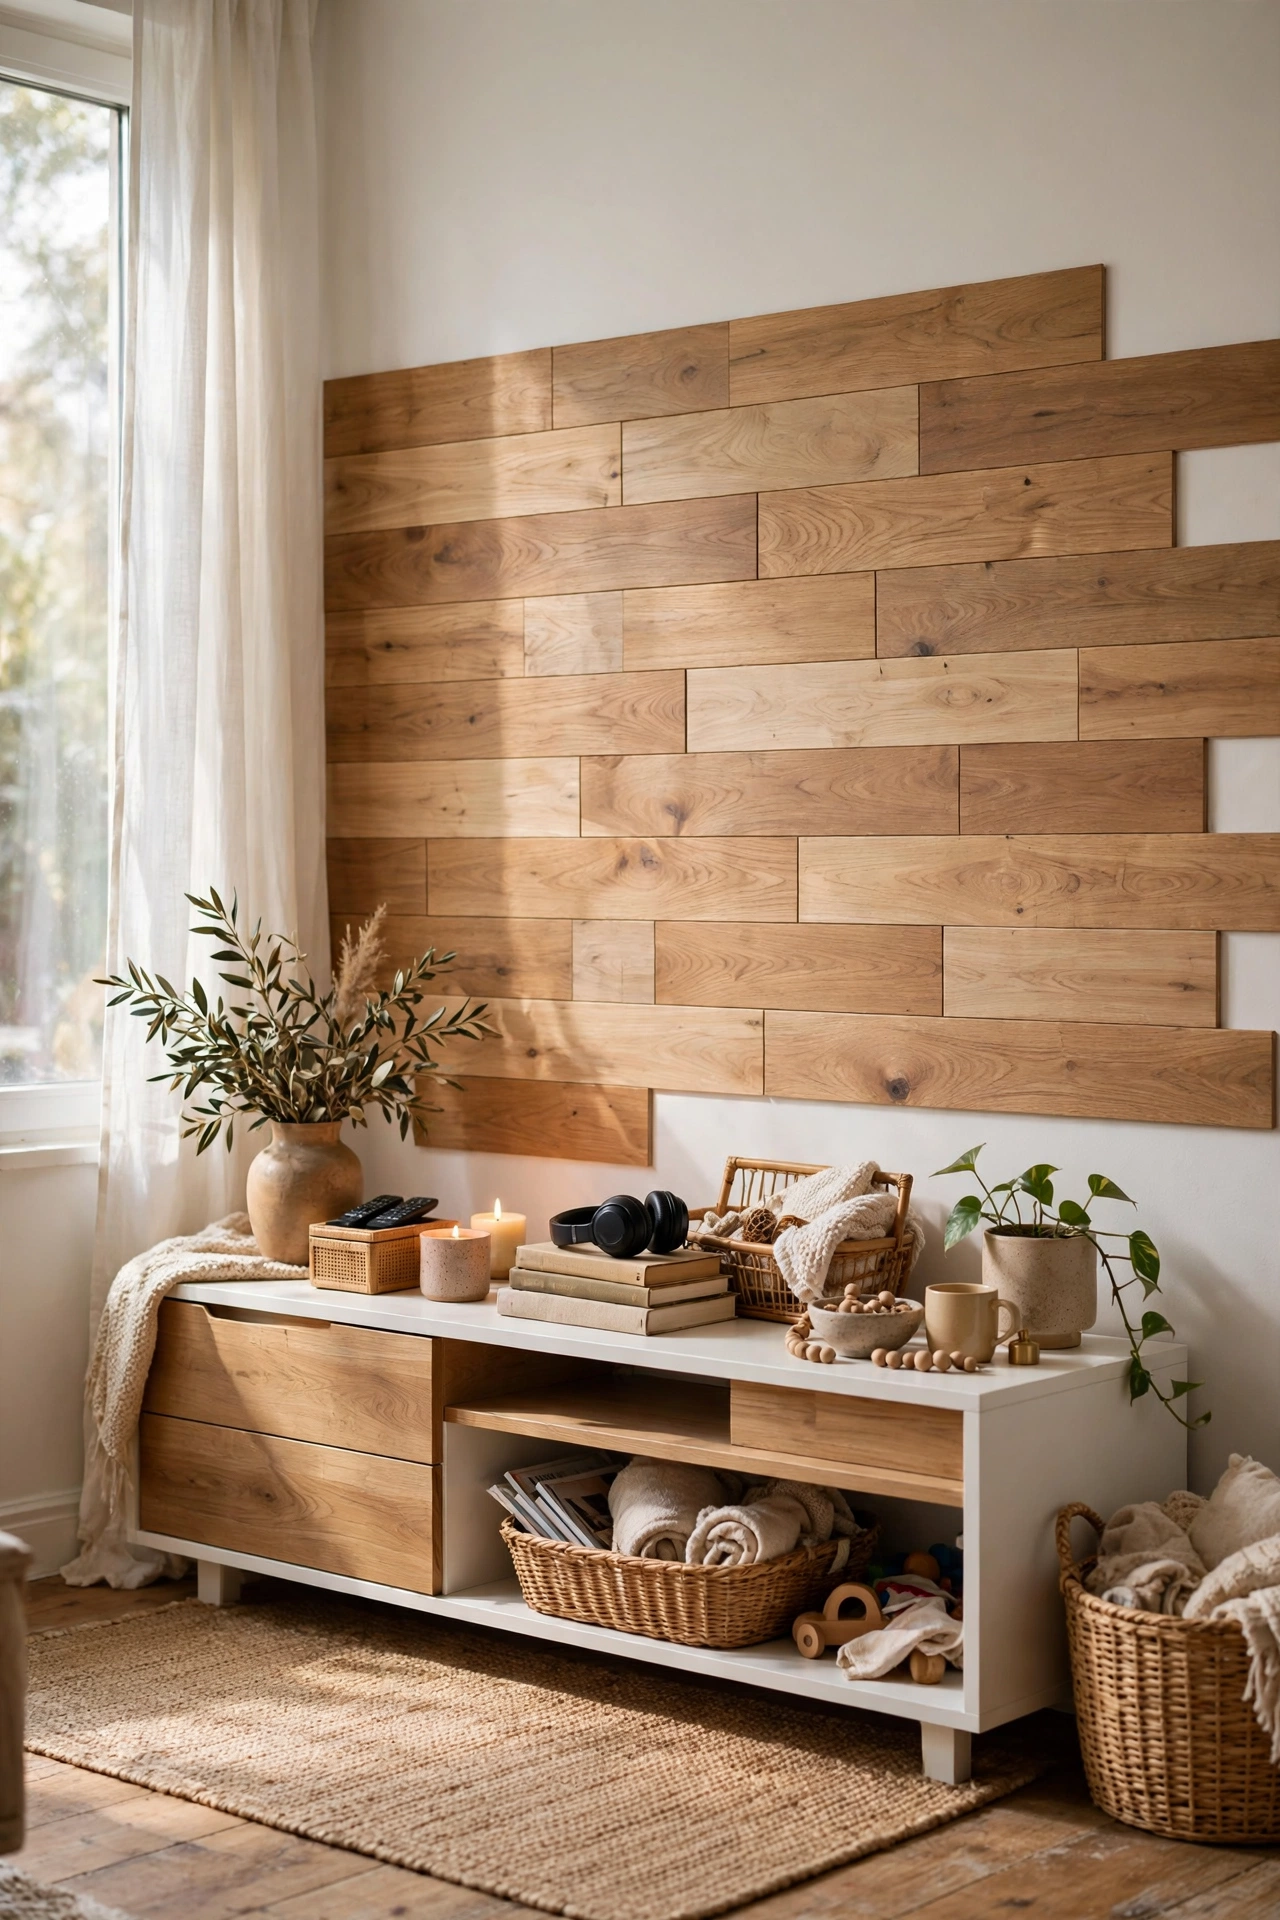
Apply peel-and-stick decorative panels to one wall section, smoothing from the centre outward to push out air bubbles. Start at the top and work down, aligning each panel carefully with the last. These come in tile, wood, and botanical designs, and most peel off cleanly. Test a hidden corner first, especially over old paint.
I tried wood-look panels behind my media unit to warm up a cold white wall, and the texture made the corner feel built-in rather than rented. My mistake was applying them on a humid day when the adhesive was sluggish, and two panels slid overnight. Dry day, firm pressure, and they have stayed put for eighteen months. When I move, they peel off and the wall underneath is untouched.
Cost: ~$28 | Time: 1 hour
Stacked Books as a Side Table

Stack your largest, sturdiest hardbacks into a stable column beside the sofa, largest at the bottom, and top with a small tray for your drink. Use books you actually own and love, alternating the direction slightly for stability. Keep the stack to a safe height, about knee level, and place a non-slip mat under the base.
I tried this when I could not afford a side table and had too many books, and it solved both problems at once. My mistake was building it too tall and too narrow, and the whole thing toppled when the cat launched off it. Wide base, modest height, and it has survived two years and one house move intact. It is the most complimented ten-pounds-worth of furniture I own.
Cost: ~$0 | Time: 10 minutes
Plug-In Pendant Light Hung From a Hook
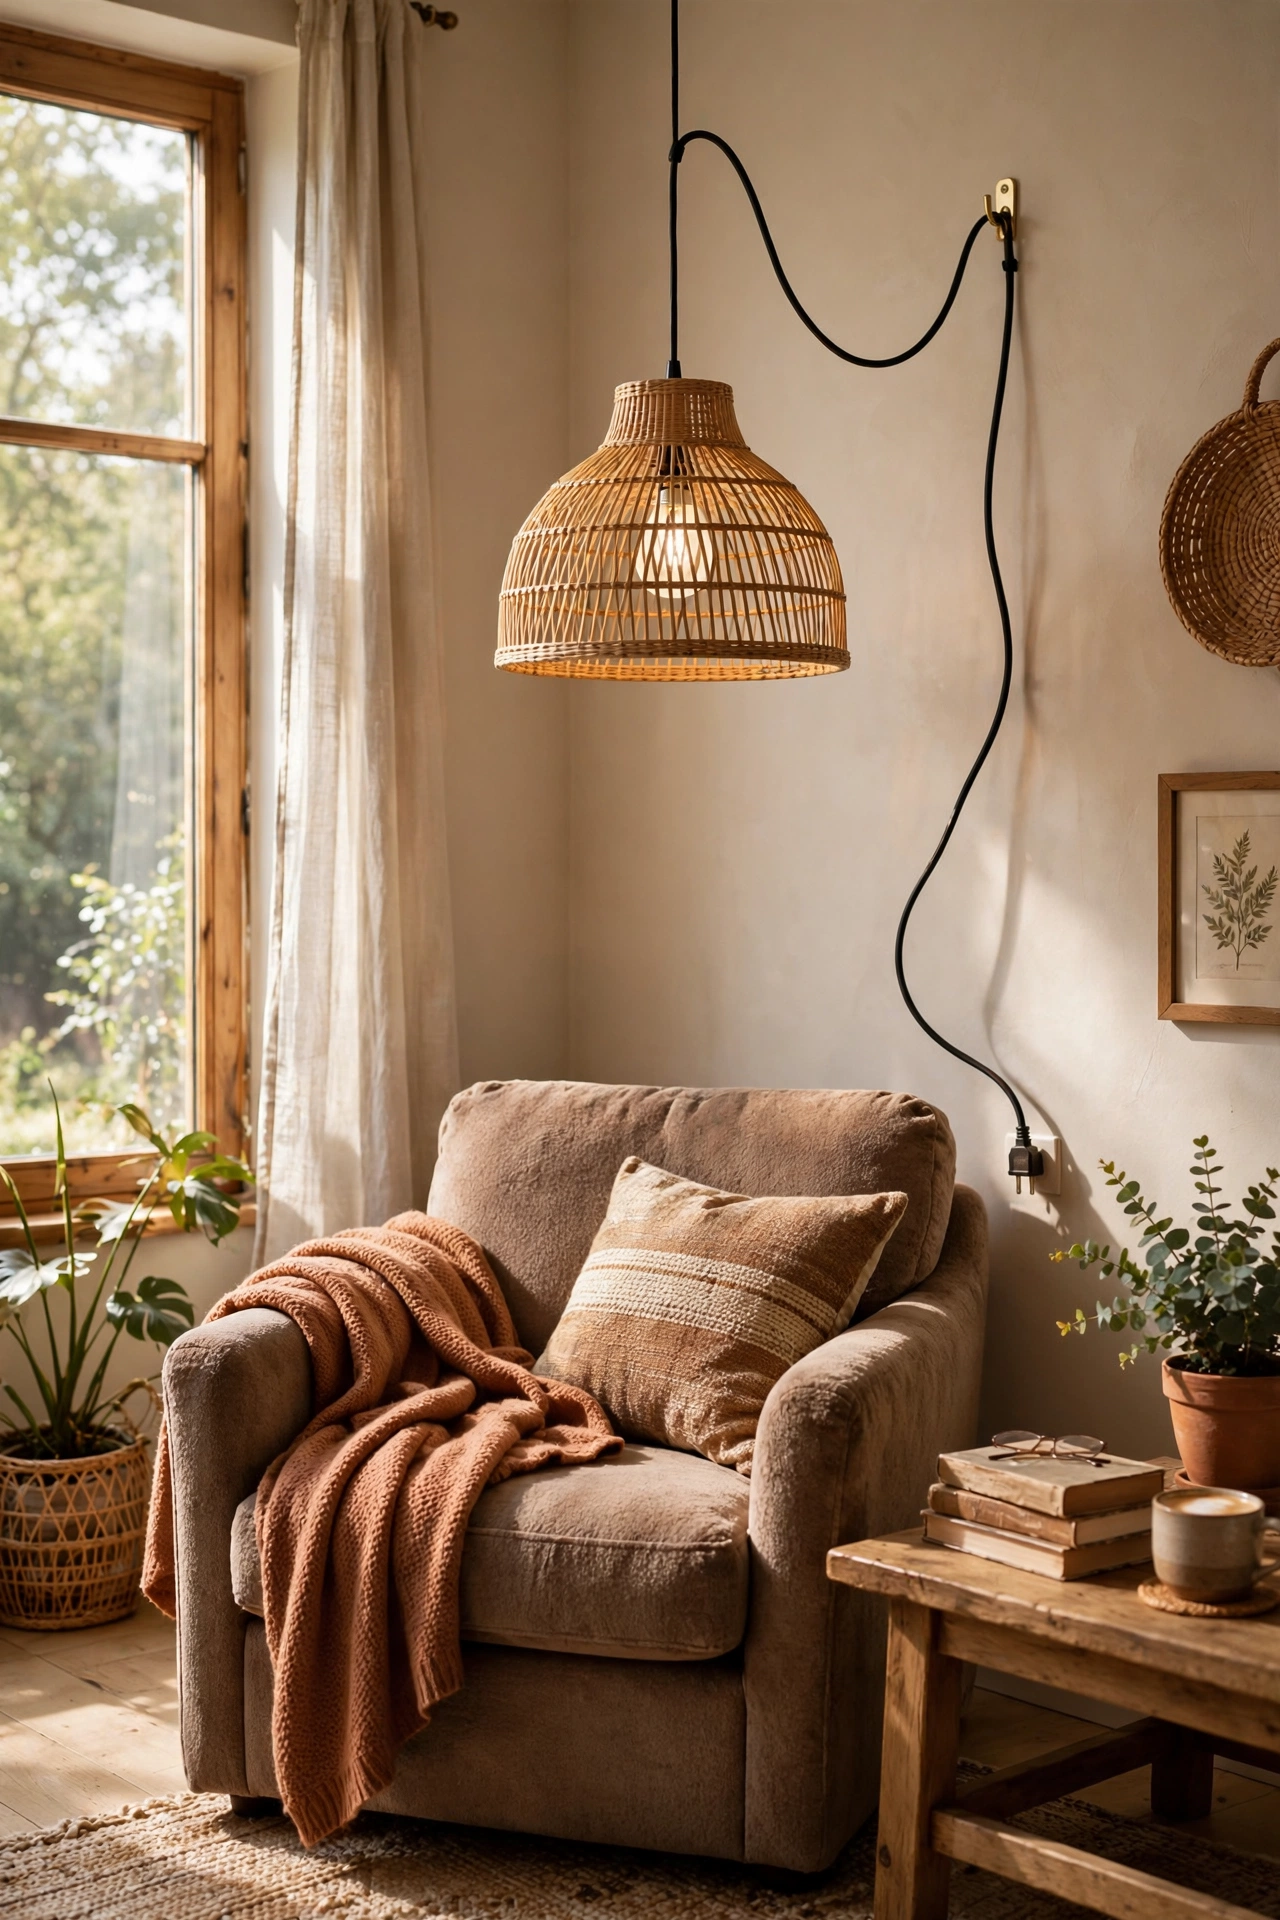
Hang a plug-in pendant light from a removable adhesive ceiling hook, and swag the cord to the wall with small adhesive cord clips, running it down to the nearest socket. Choose a beautiful shade, rattan or fabric, and the light looks hardwired. Use an adhesive hook rated for the weight, and keep the cord neat with the clips.
I tried this over my reading chair to replace a depressing ceiling rose situation, and the pool of warm light made the corner the best seat in the house. My mistake was using a hook rated for half the shade’s weight, and I woke to the pendant on the floor. Check the rating, then double it for peace of mind. It unplugs and unhooks in minutes when the tenancy ends.
Cost: ~$32 | Time: 25 minutes
Removable Wallpaper on the Alcoves Only
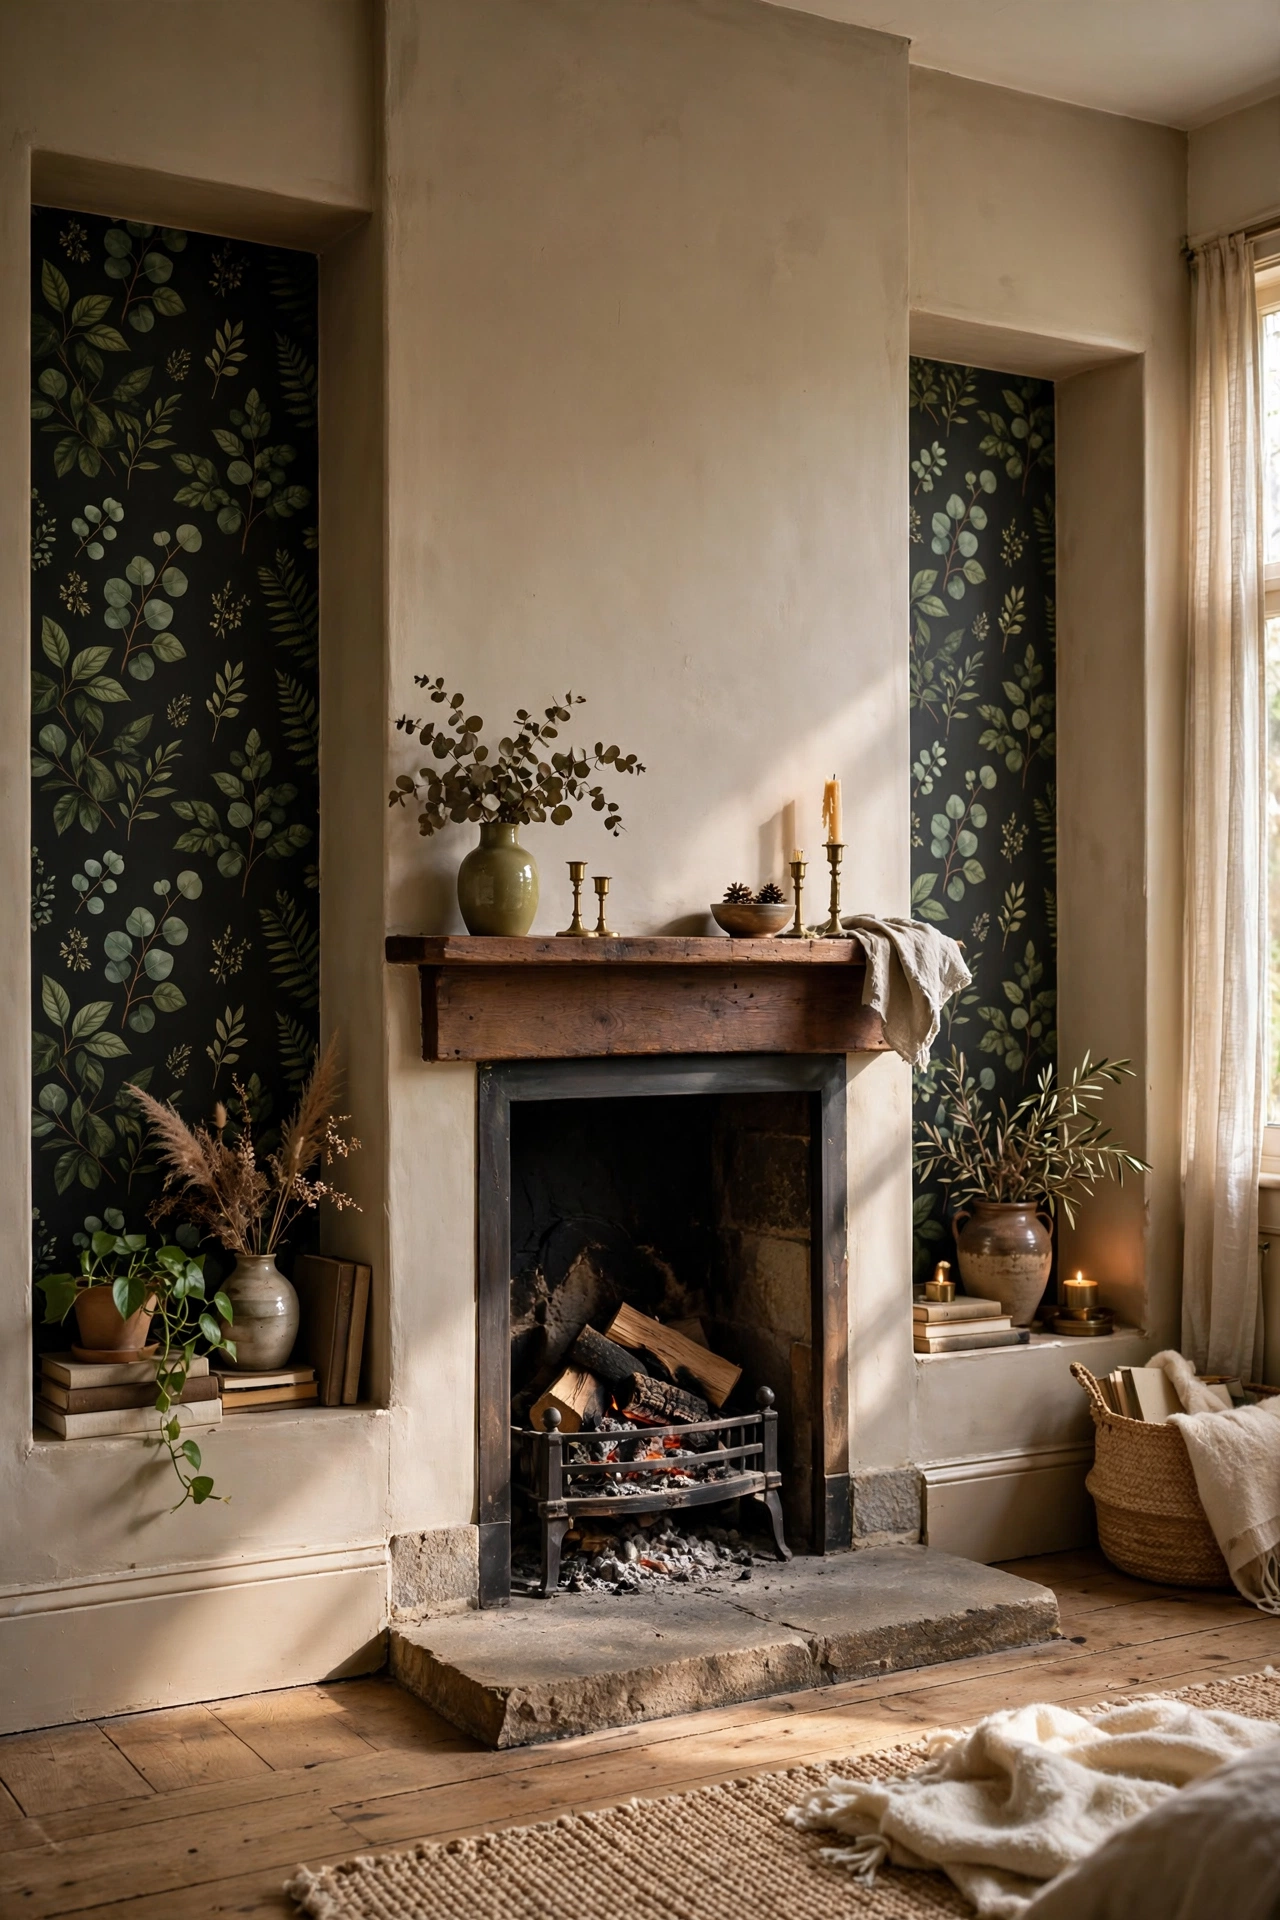
Instead of papering a whole wall, apply peel-and-stick wallpaper just inside the alcoves or recesses. The smaller area is easier to apply perfectly, uses less paper, and creates jewel-box moments of pattern. Measure carefully, cut panels slightly oversized, and trim in place with a craft knife for crisp edges.
I tried this in the two alcoves either side of my chimney breast with a dark botanical print, and the contrast with the plain walls looked incredibly high-end. My mistake was trying to pattern-match across the alcove edge, which wasted half a roll. Inside the alcove, nobody sees the seams if you butt them tightly. It took one roll, one afternoon, and the landlord never even noticed it was not paint.
Cost: ~$18 | Time: 1 hour
Ladder Shelf Leaned in the Corner
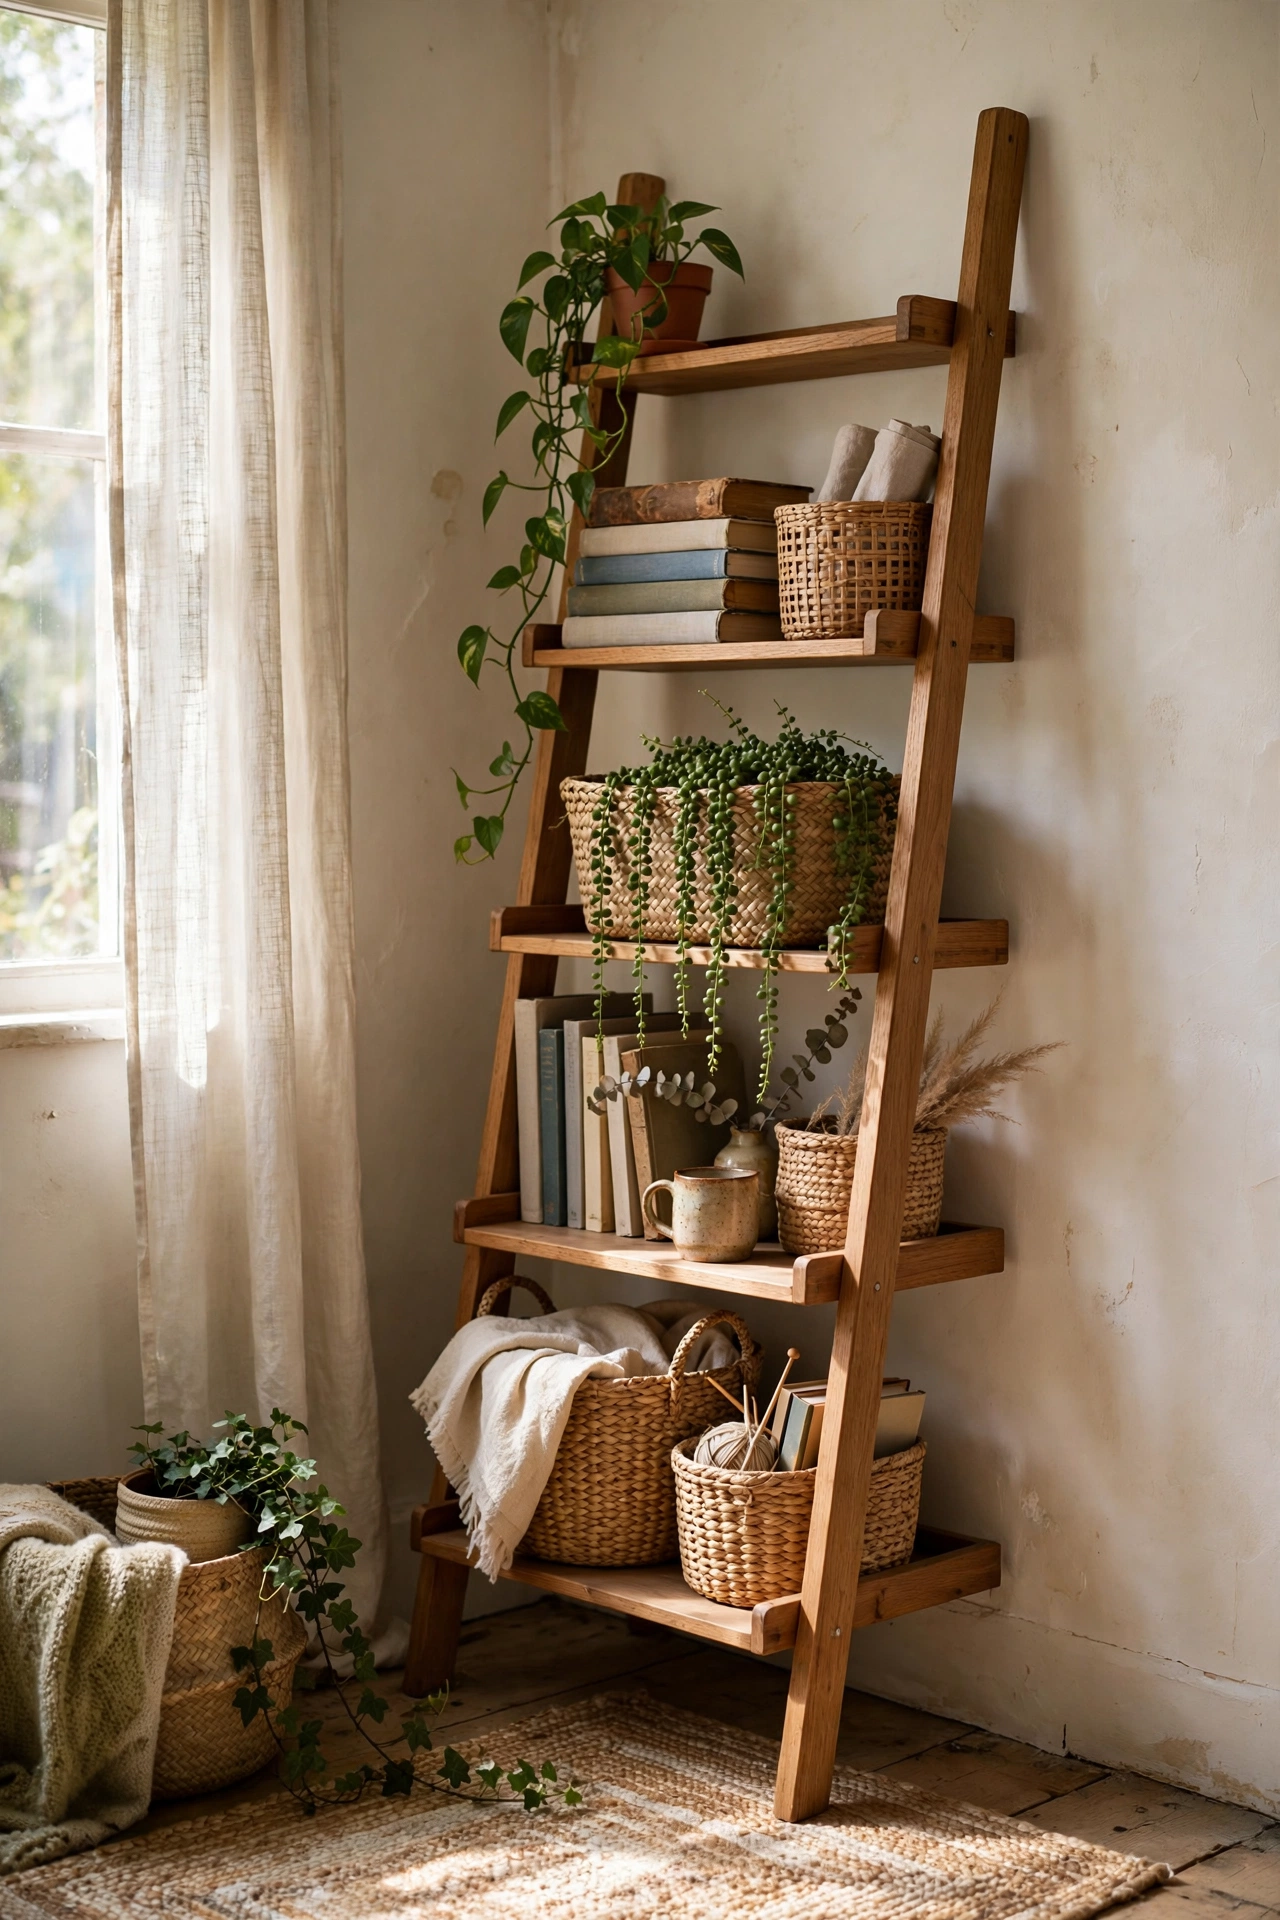
Lean a ladder shelf against the wall in an empty corner, secure the top with a small adhesive pad, and style the rungs with plants, books, and baskets. The A-frame shape is inherently stable, and the graduated shelves are perfect for display. Keep heavier items low and the top shelf light for safety.
I tried this in the dead corner by my front door, and it became the drop zone, the plant hospital, and the book display all at once. My mistake was buying a narrow one that wobbled every time I brushed past it. A wide-based ladder shelf with deep rungs is rock solid. It leans, it lifts, it moves to the next flat without a single hole in any wall.
Cost: ~$38 | Time: 15 minutes
Shower-Curtain-Rod Room Divider Curtain
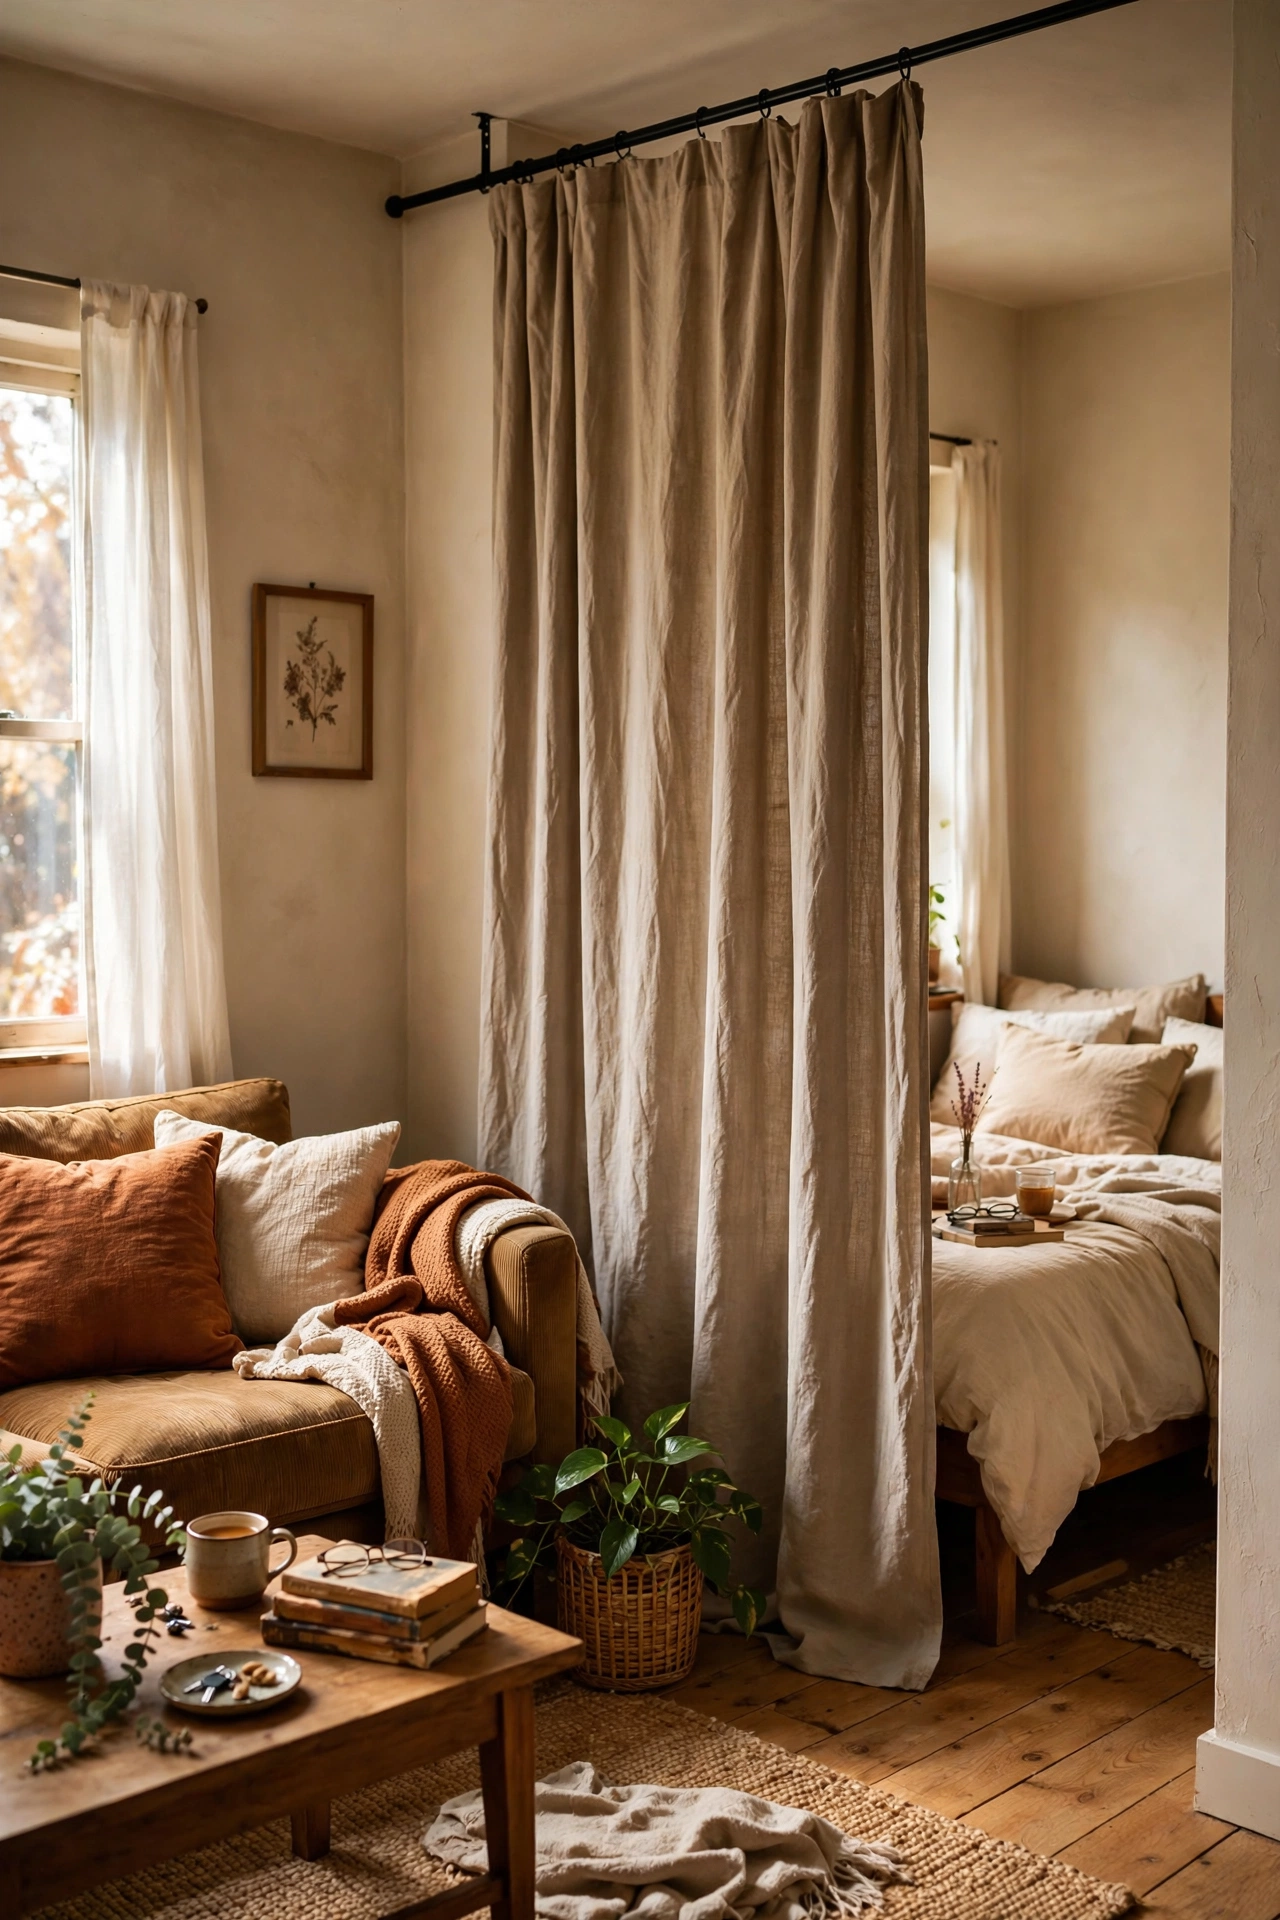
Wedge a tension shower rod between two walls or inside a wide doorway, and hang a curtain panel to divide or soften a space. In an open-plan rental, this creates a visual boundary between living and sleeping areas. Choose a curtain in a colour that complements the room, and hang it high for maximum effect.
I tried this in a studio flat to separate the bed area from the living space, and the curtain made the whole place feel twice as intentional. My mistake was using a sheer curtain that did nothing visually. A medium-weight fabric with some presence actually defines the zones. It drew back in seconds when I wanted open plan, and came down without a trace on moving day.
Cost: ~$24 | Time: 20 minutes
Adhesive LED Strip Behind the Media Unit
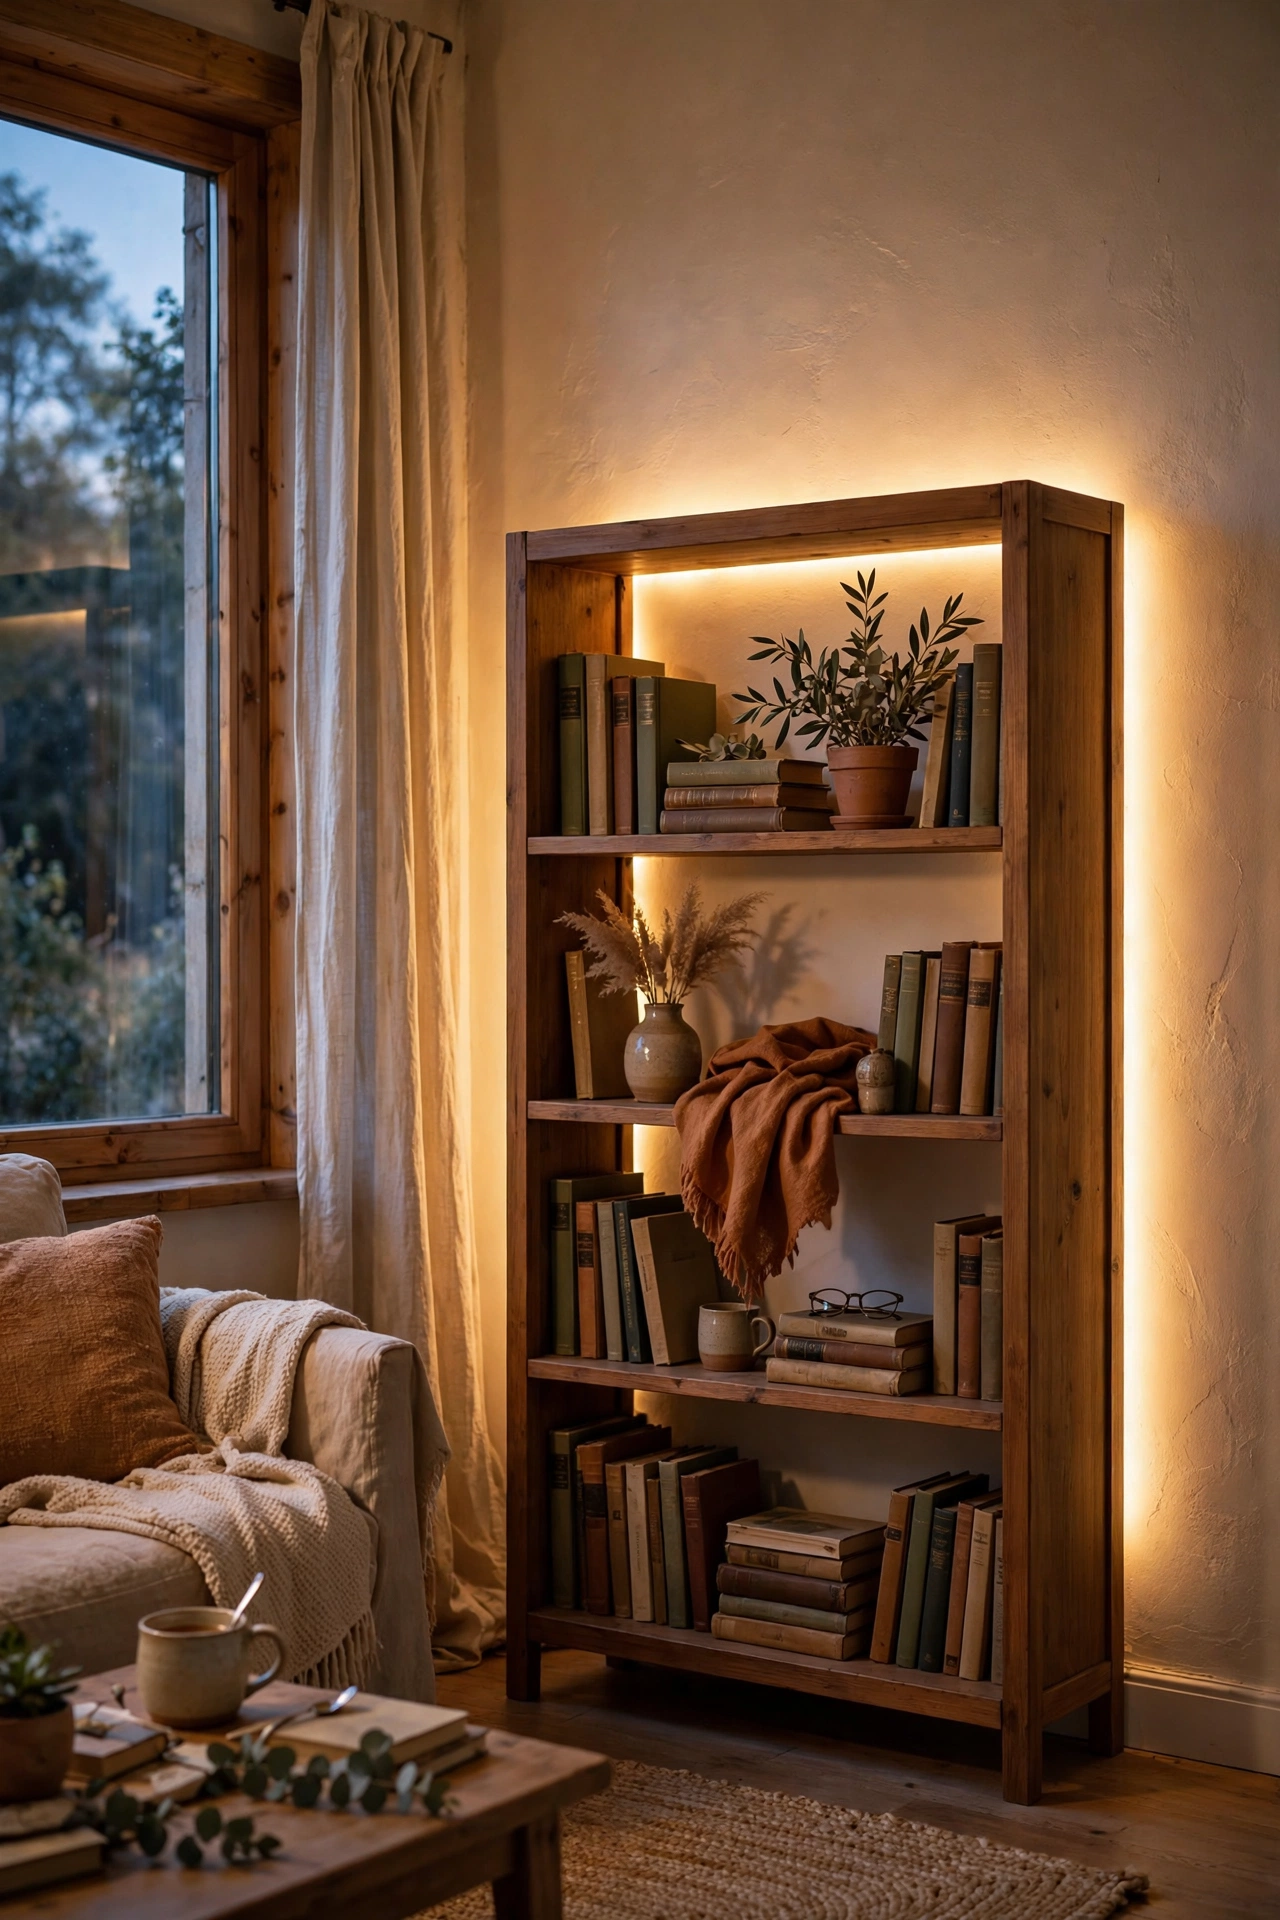
Stick an adhesive LED strip to the back edge of your media unit or shelving, plug it into a USB socket or timer plug, and enjoy the warm backlight glow. The light washes the wall behind the furniture and makes the whole setup look expensive. Choose warm white, and hide the strip itself so only the glow is visible.
I tried this behind my bookcase after seeing the effect in a hotel, and the evening ambience was transformative for about fifteen pounds. My mistake was buying a colour-changing strip and leaving it on blue for a week, which made the living room feel like a nightclub. Warm white, dimmed low, is the setting you will actually live with. It peels off when you move, no damage done.
Cost: ~$15 | Time: 20 minutes
Washi Tape Faux Picture Frames
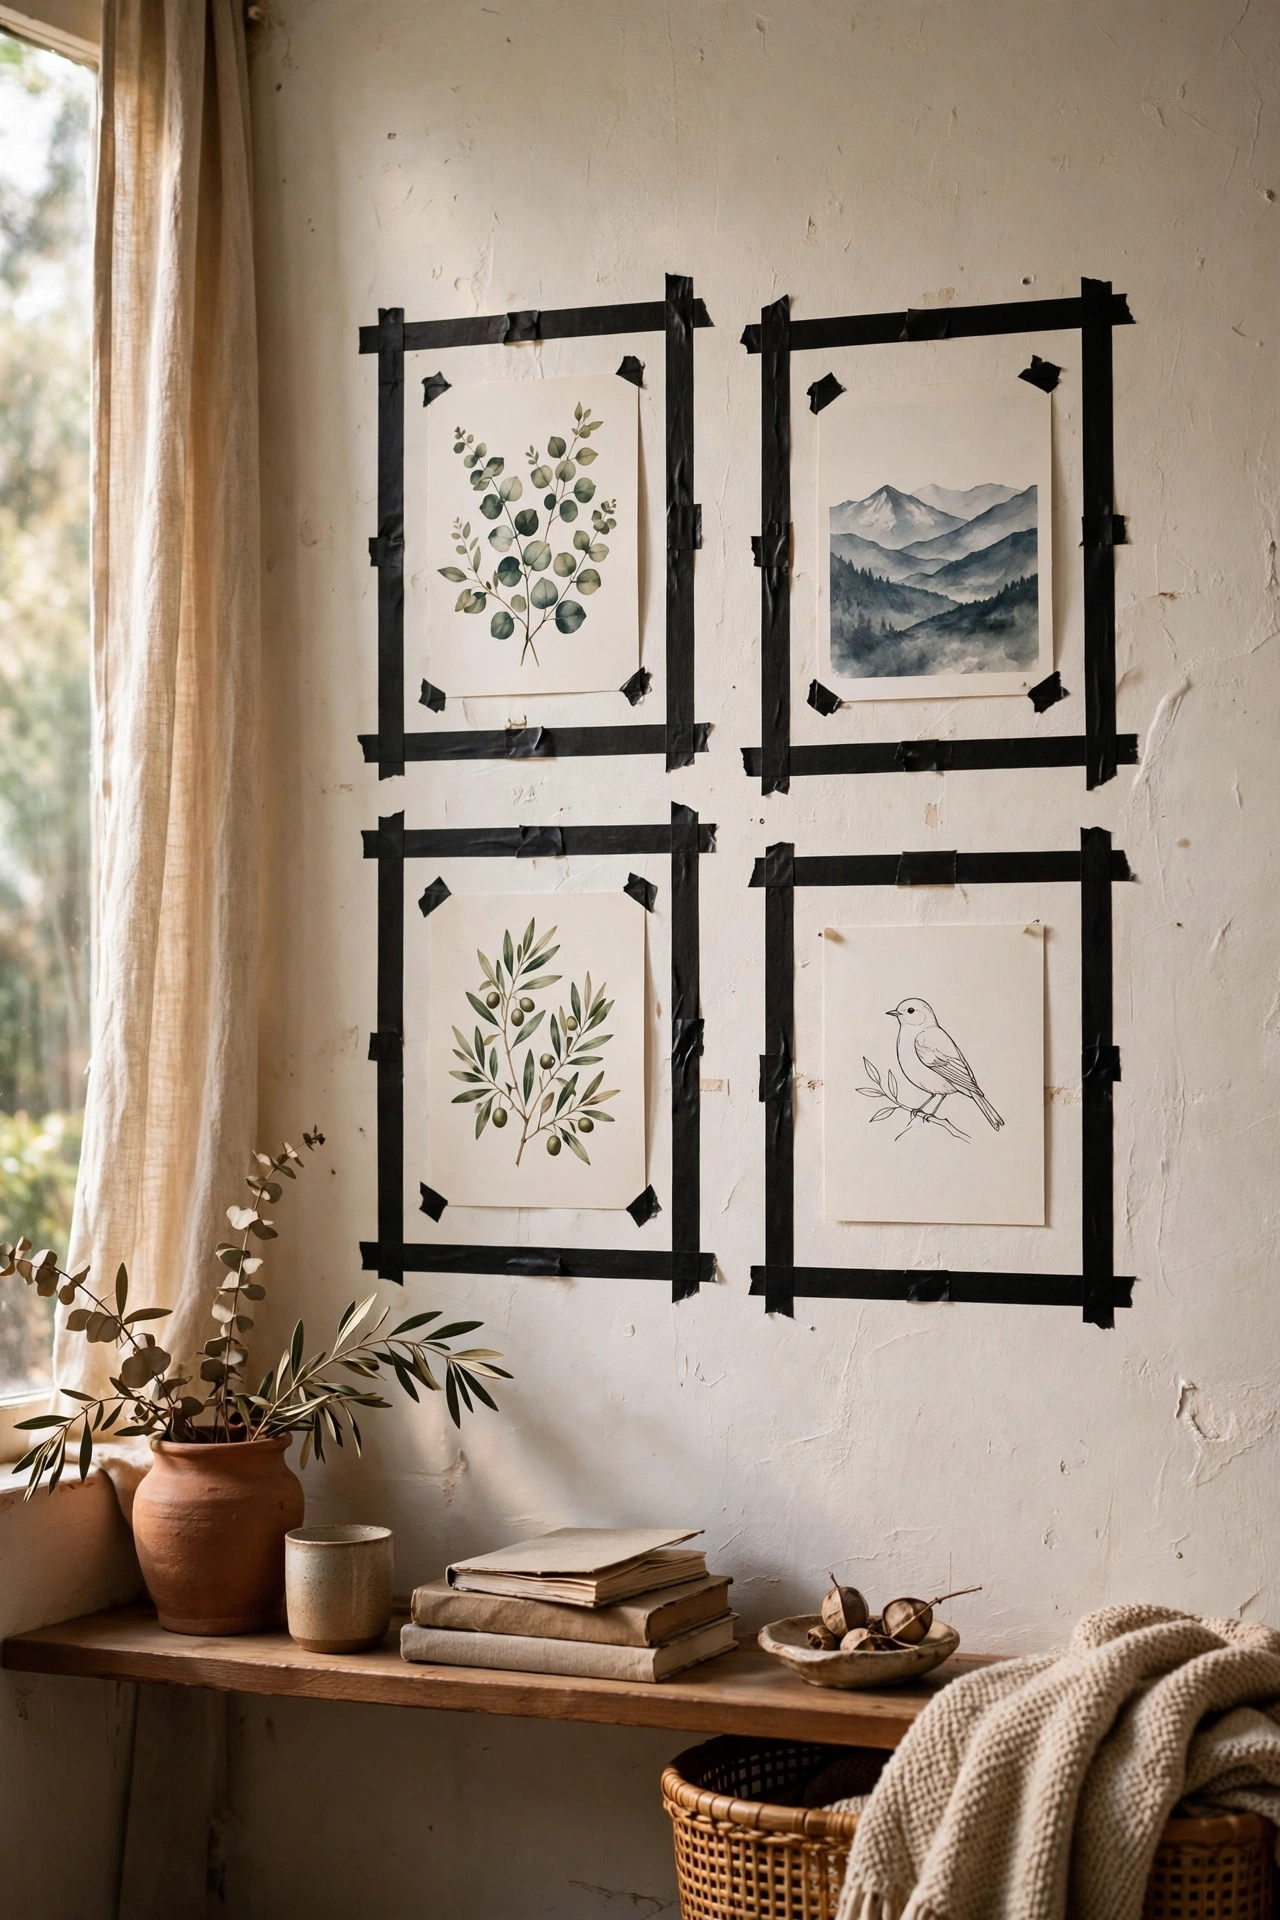
Create the outline of picture frames directly on the wall with washi tape, and stick prints or photos inside each taped frame. Use a level or a phone app to keep lines straight, and choose tape in a colour that pops against your wall. The effect reads as a gallery wall from across the room.
I tried this above my desk with six taped frames in black washi tape, and guests kept trying to touch the frames that were not there. My mistake was making the frames all different sizes with no rhythm, which looked chaotic. A simple grid of equal frames looks far more intentional. When I got bored, I peeled them off in five minutes and started again somewhere else.
Cost: ~$7 | Time: 40 minutes
Over-Sofa Console Table, Freestanding
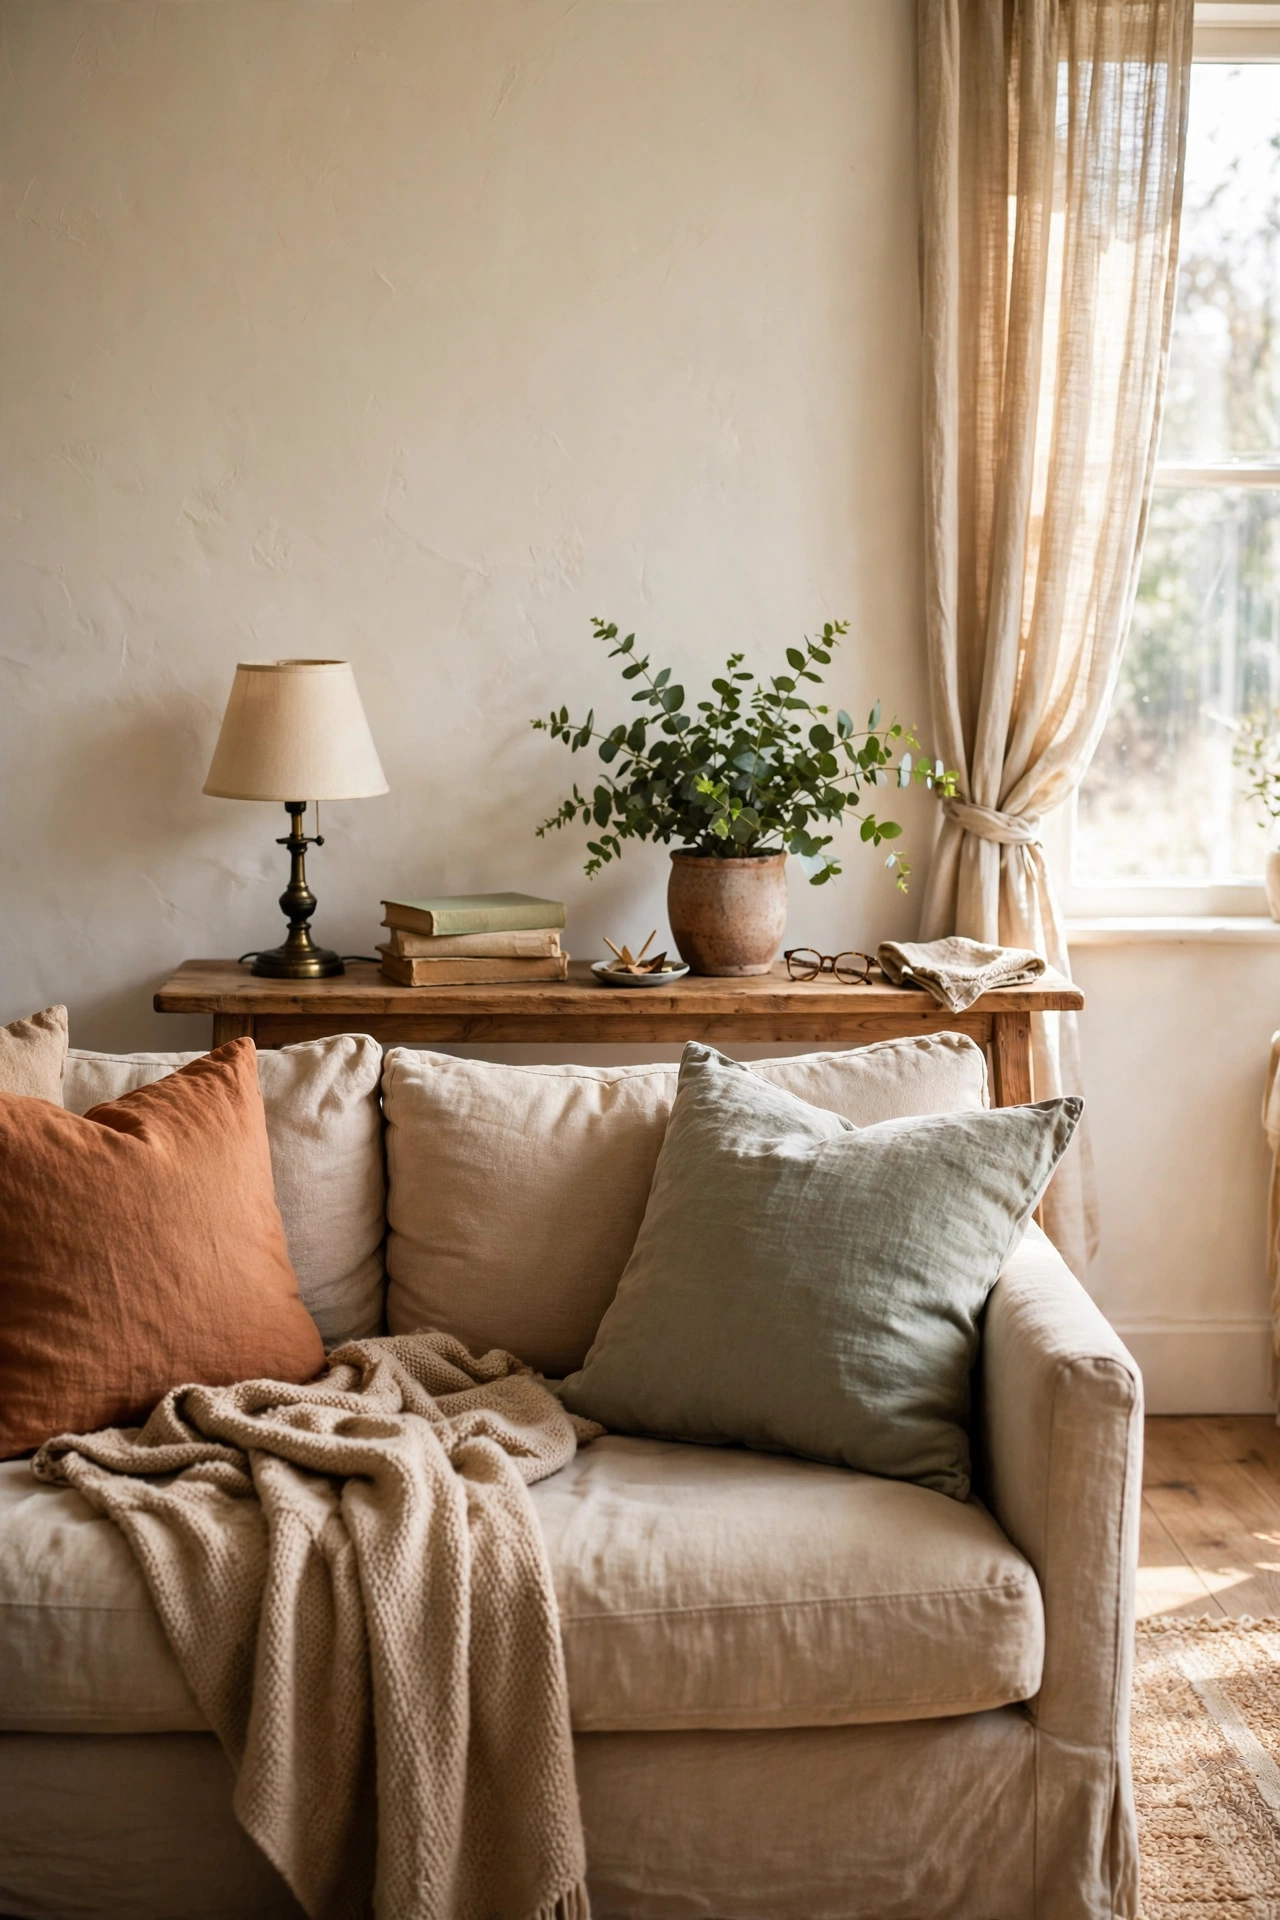
Place a narrow console table behind the sofa, style it with a lamp, a stack of books, and a small plant, and the sofa area instantly looks layered and intentional. No fixing needed, the sofa holds it in place. Choose a table slightly lower than the sofa back so it does not dominate.
I tried this when the back of my sofa faced the front door and looked bleak from the entrance. The console gave the entrance view something to land on, and the lamp added evening warmth. My mistake was buying one too deep, which pushed the sofa too far into the room. Narrow is the key word, 25cm deep is plenty. It is also the perfect spot for keys and the post.
Cost: ~$42 | Time: 15 minutes
Floor Cushions Stacked as Sculpture
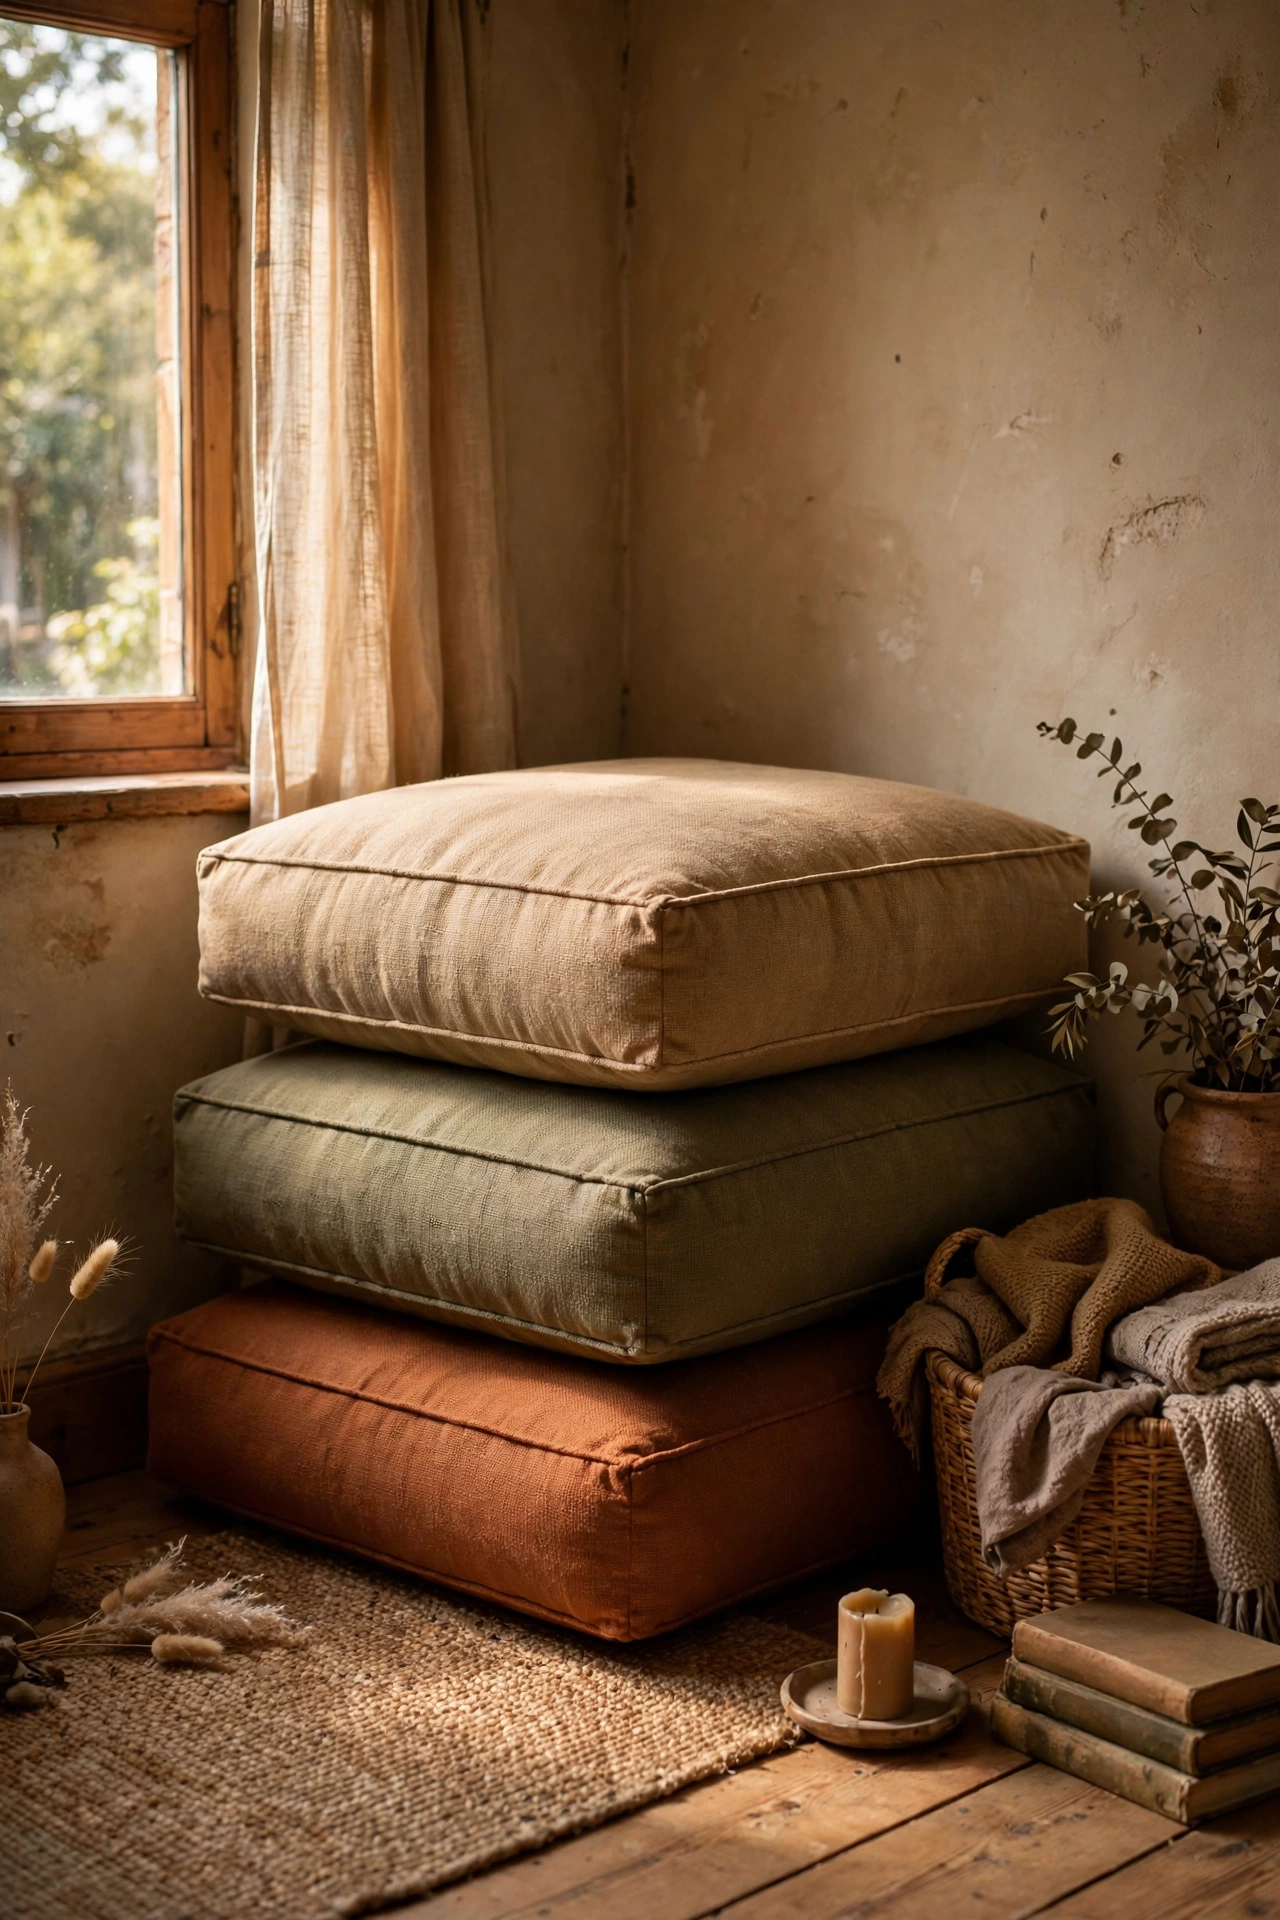
Stack two or three beautiful floor cushions in a corner when not in use, and they read as a sculptural pile rather than clutter. Choose covers in colours that work with the room, and stuff them firmly so they hold their shape. They deploy as extra seating in seconds when friends come over.
I tried this in a small living room where proper extra seating would never fit, and the cushion stack became part of the decor. My mistake was buying slippery polyester covers that slid off the stack constantly. Cotton or canvas covers grip each other and stay put. They have hosted more film nights than I can count, and they stack back up afterwards like nothing happened.
Cost: ~$36 for three | Time: 10 minutes
Magnetic Knife-Strip Style Display Rail
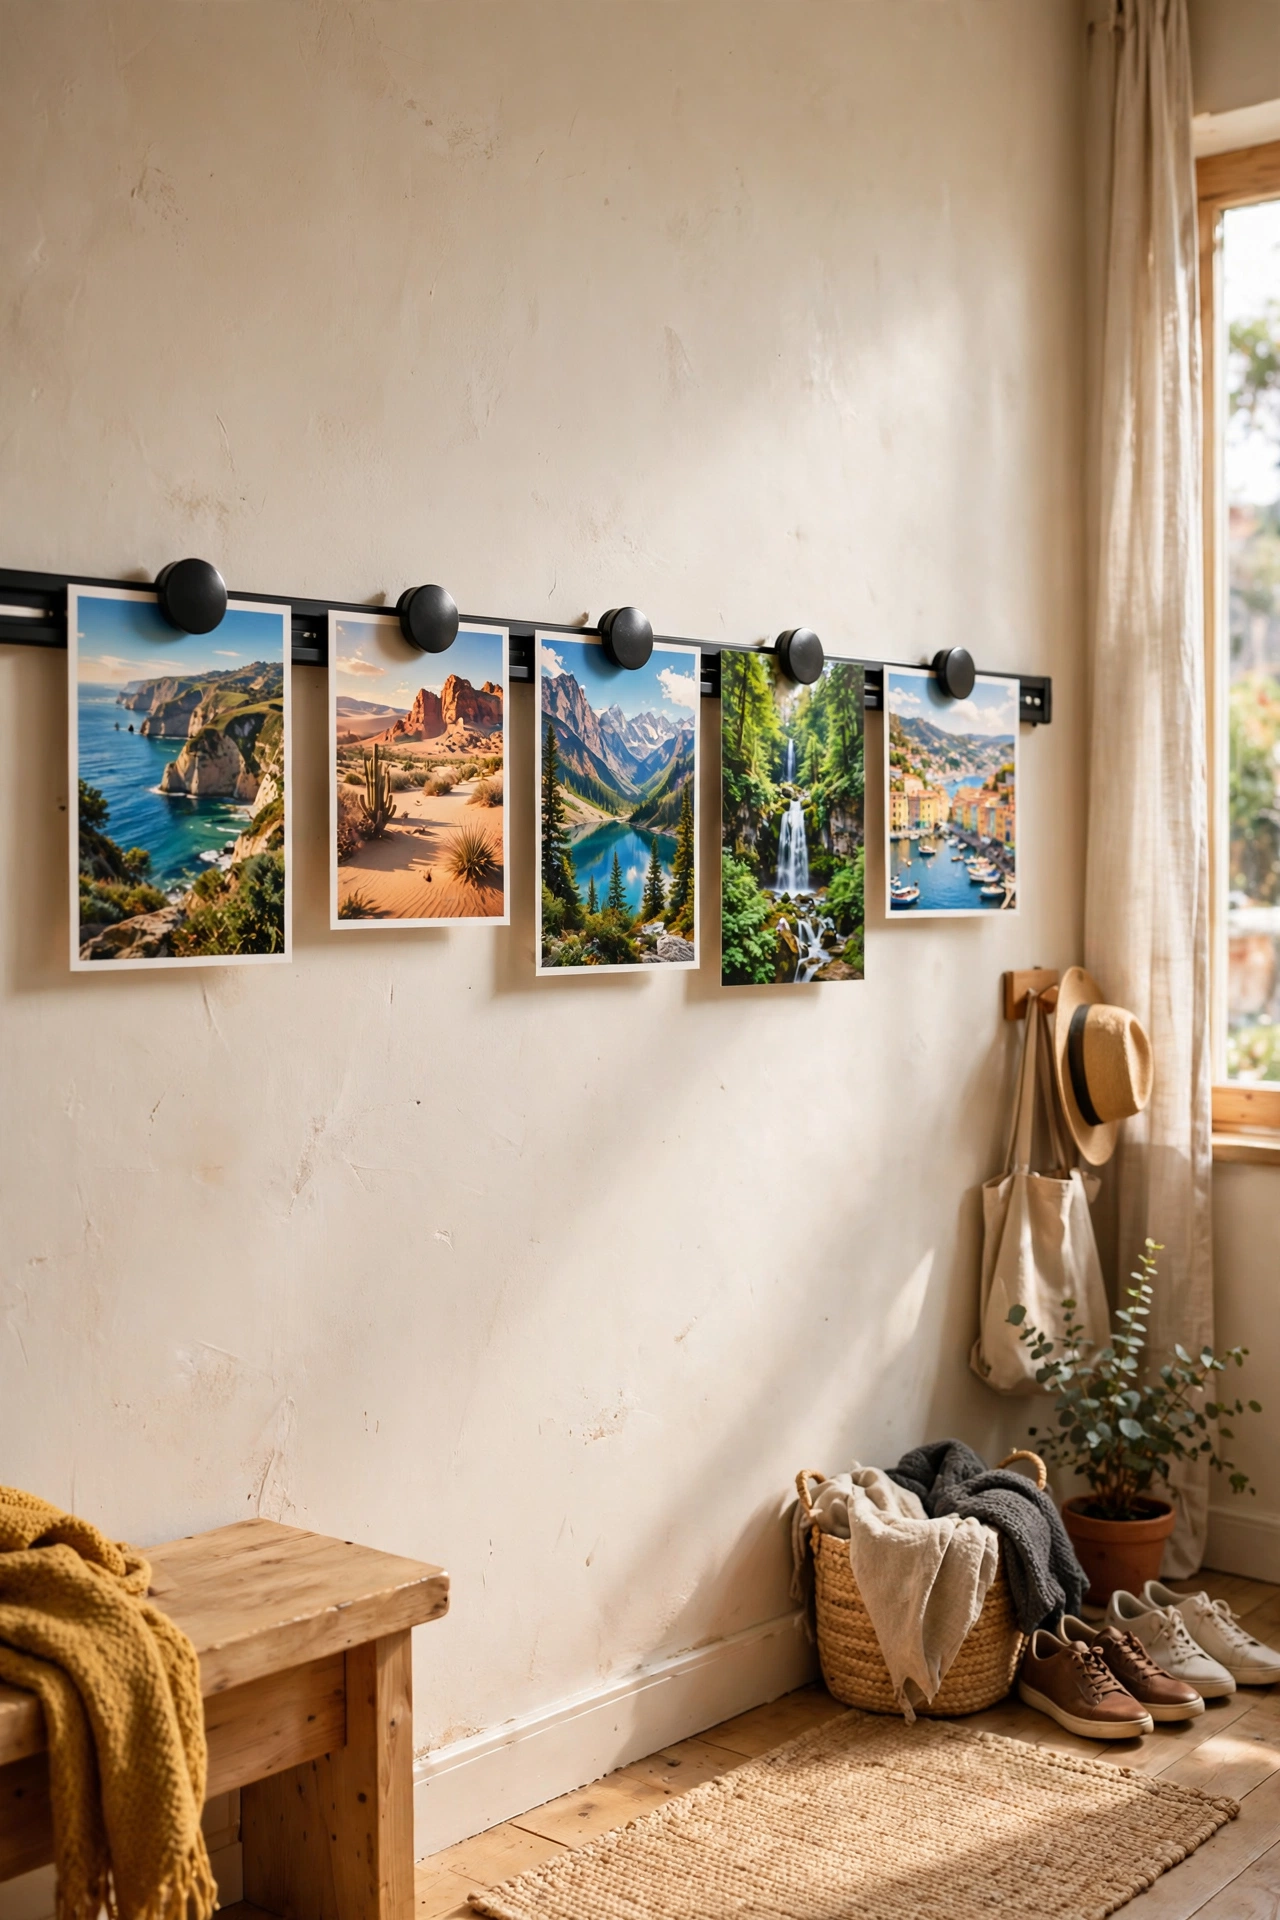
Mount a magnetic strip with strong adhesive backing on the wall, and use it to display small metal-framed photos, postcards in magnetic frames, or tiny art prints. It is a rotating display you can rearrange daily. Keep the items light and the magnets strong, and the rail becomes an ever-changing gallery.
I tried this in my hallway with a collection of travel postcards, and rearranging it became a weirdly satisfying Sunday ritual. My mistake was using weak craft magnets that dropped postcards behind the radiator. Proper neodymium magnets hold firmly and the display survives door slams. It is the lowest-commitment gallery wall imaginable, and it moves with a single peel.
Cost: ~$14 | Time: 20 minutes
Room Divider Curtain on a Freestanding Frame
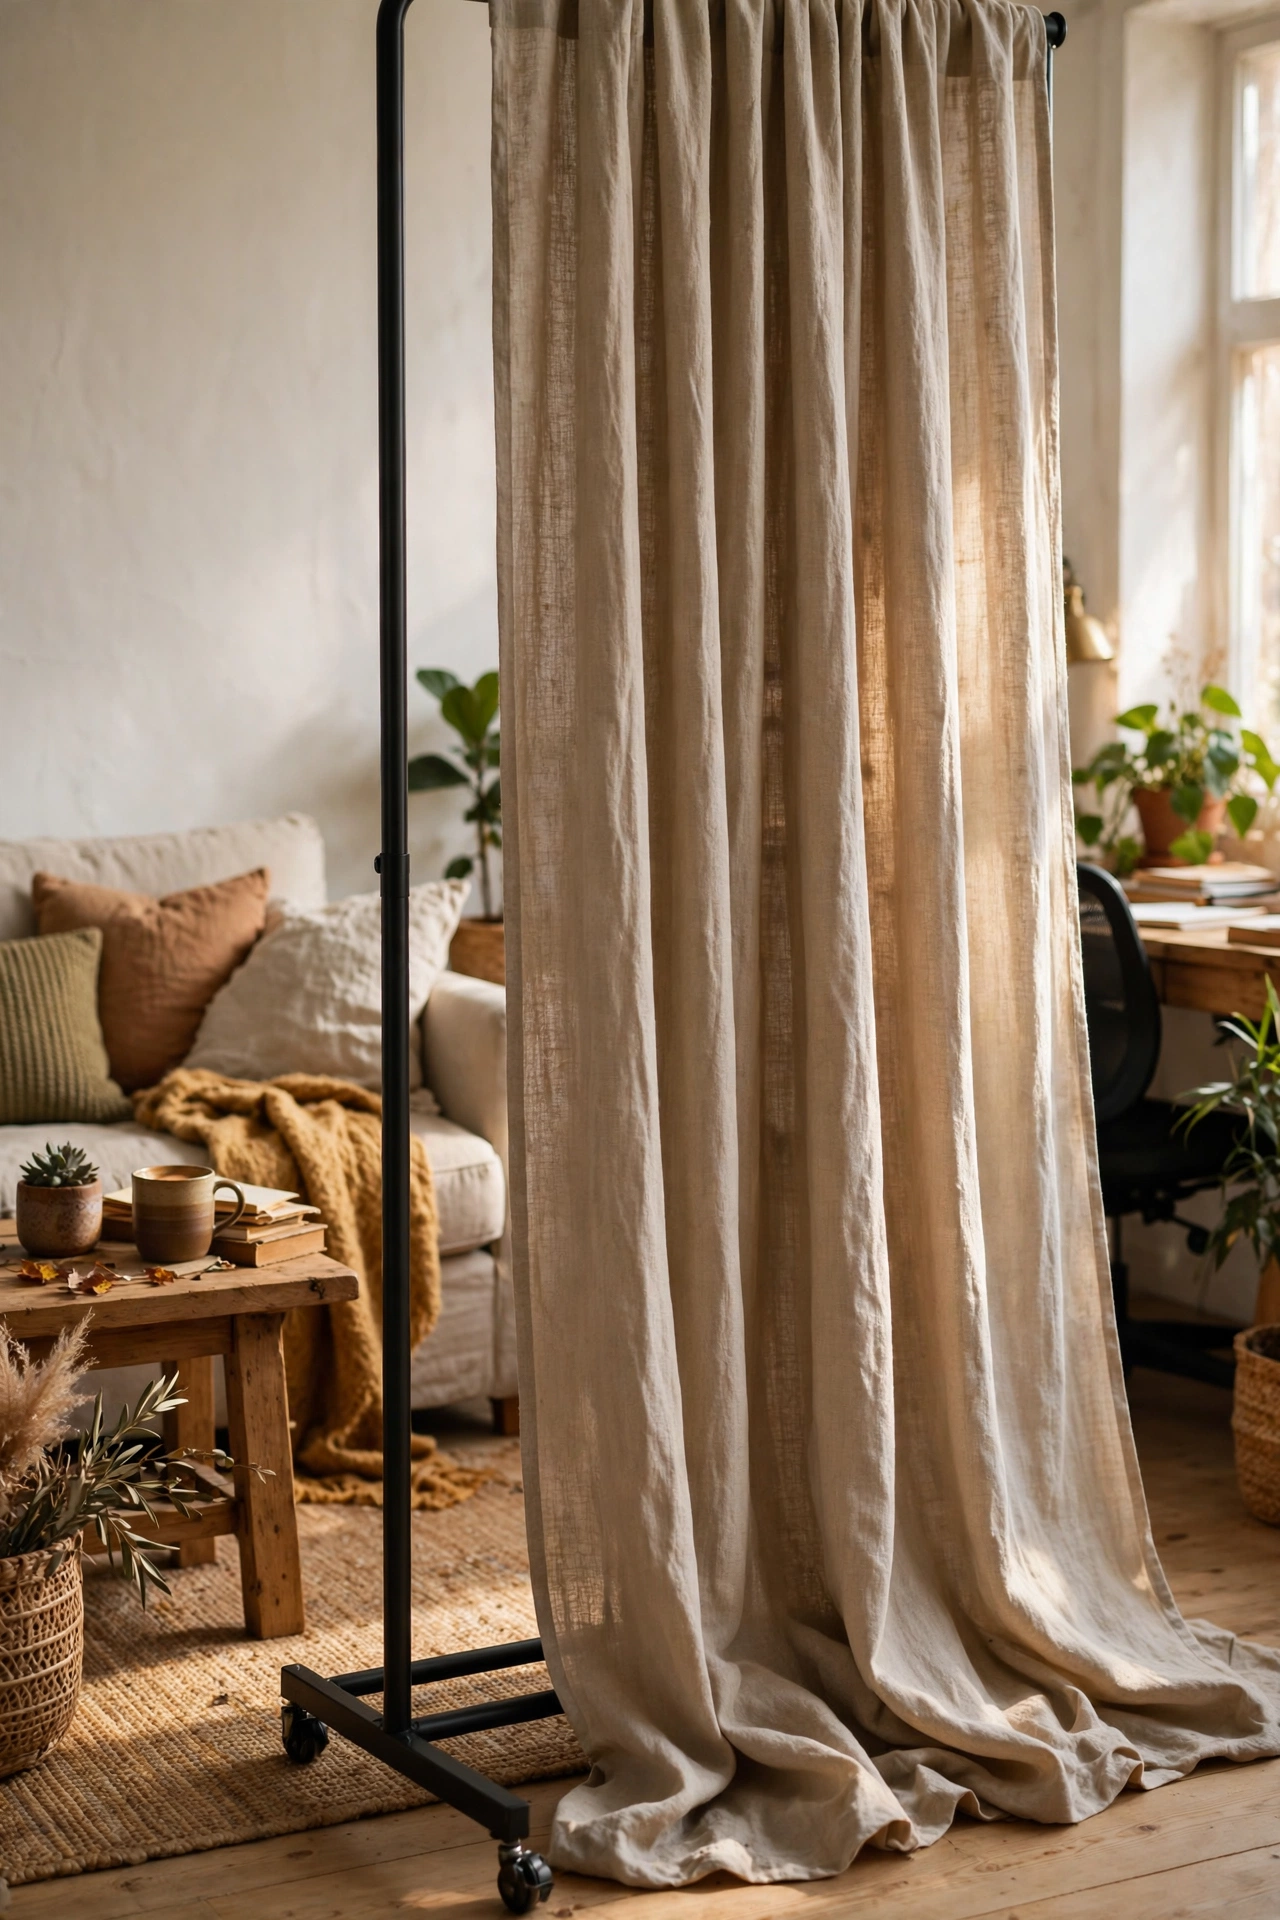
Hang a curtain from a freestanding garment rail to create a soft divider that needs no wall contact at all. Position it to hide a workspace, a laundry airer, or just to add textile softness to a hard corner. The rail stands on its own feet, so there is genuinely nothing to fix to anything.
I tried this to hide my desk during weekends, and drawing the curtain on Friday evening became a little ritual that switched my brain out of work mode. My mistake was using a curtain too short, which looked like a cafe apron. Floor-length fabric pooling slightly is what makes it look luxurious rather than improvised. The rail dismantles into a bag for moving day.
Cost: ~$34 | Time: 20 minutes
Adhesive Hooks for Hanging Planters
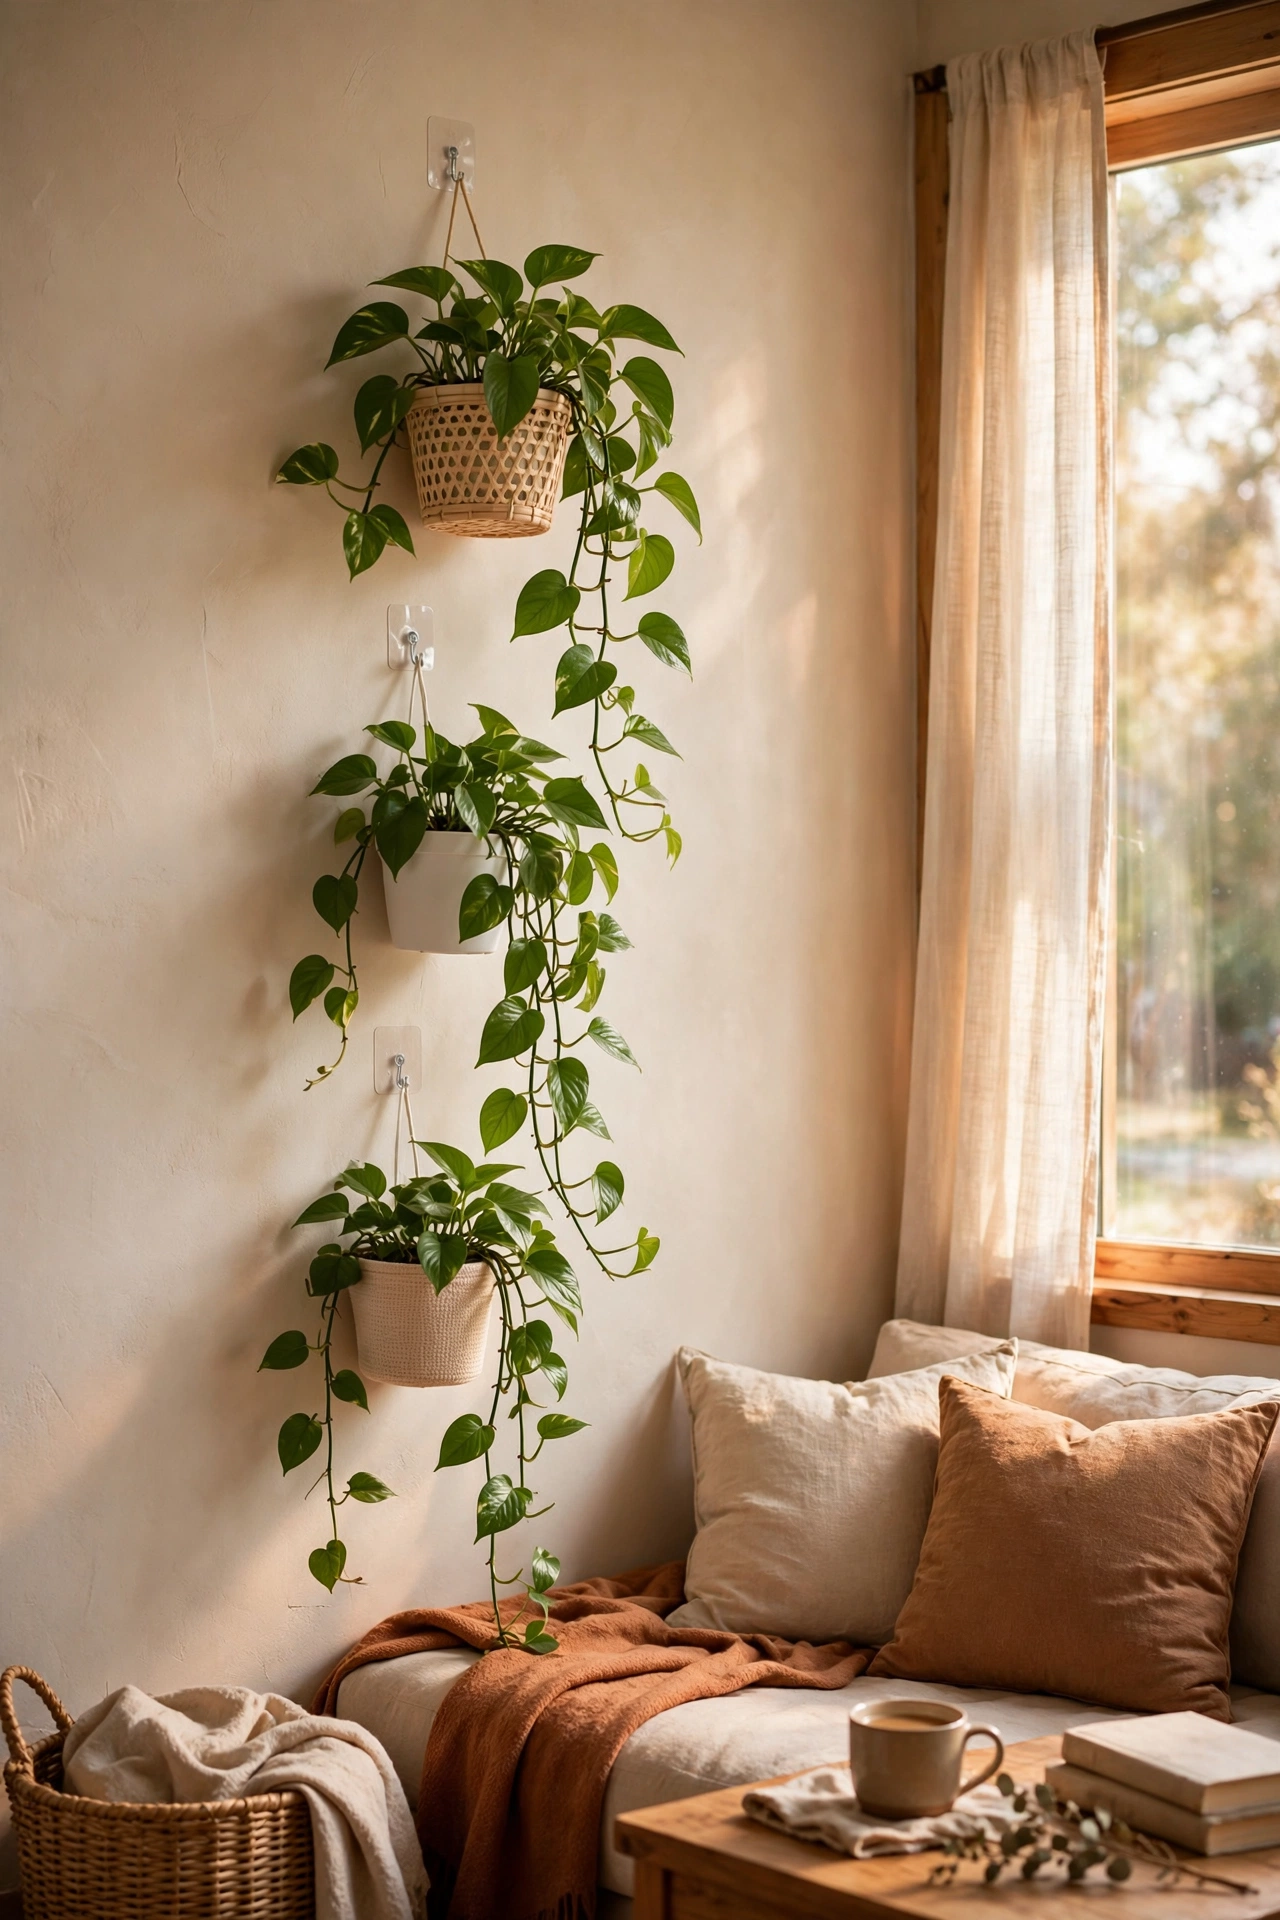
Stick heavy-duty adhesive hooks to the wall or window frame and hang lightweight planters from them. Trailing pothos and spider plants look wonderful at height, and the hooks hold surprising weight when properly applied. Clean the surface first, press firmly, and wait the full curing time before hanging.
I tried this with three trailing plants along my living room wall, and the greenery at eye level changed the whole feel of the room. My mistake was hanging a heavy ceramic pot on a hook rated for half its weight, and I found it on the floor one morning. Lightweight pots only, or upgrade to the heavy-duty outdoor-rated hooks. The plants have now trailed two feet and the wall looks like a living thing.
Cost: ~$16 | Time: 25 minutes
Peel-and-Stick Floor Tiles in the Entryway
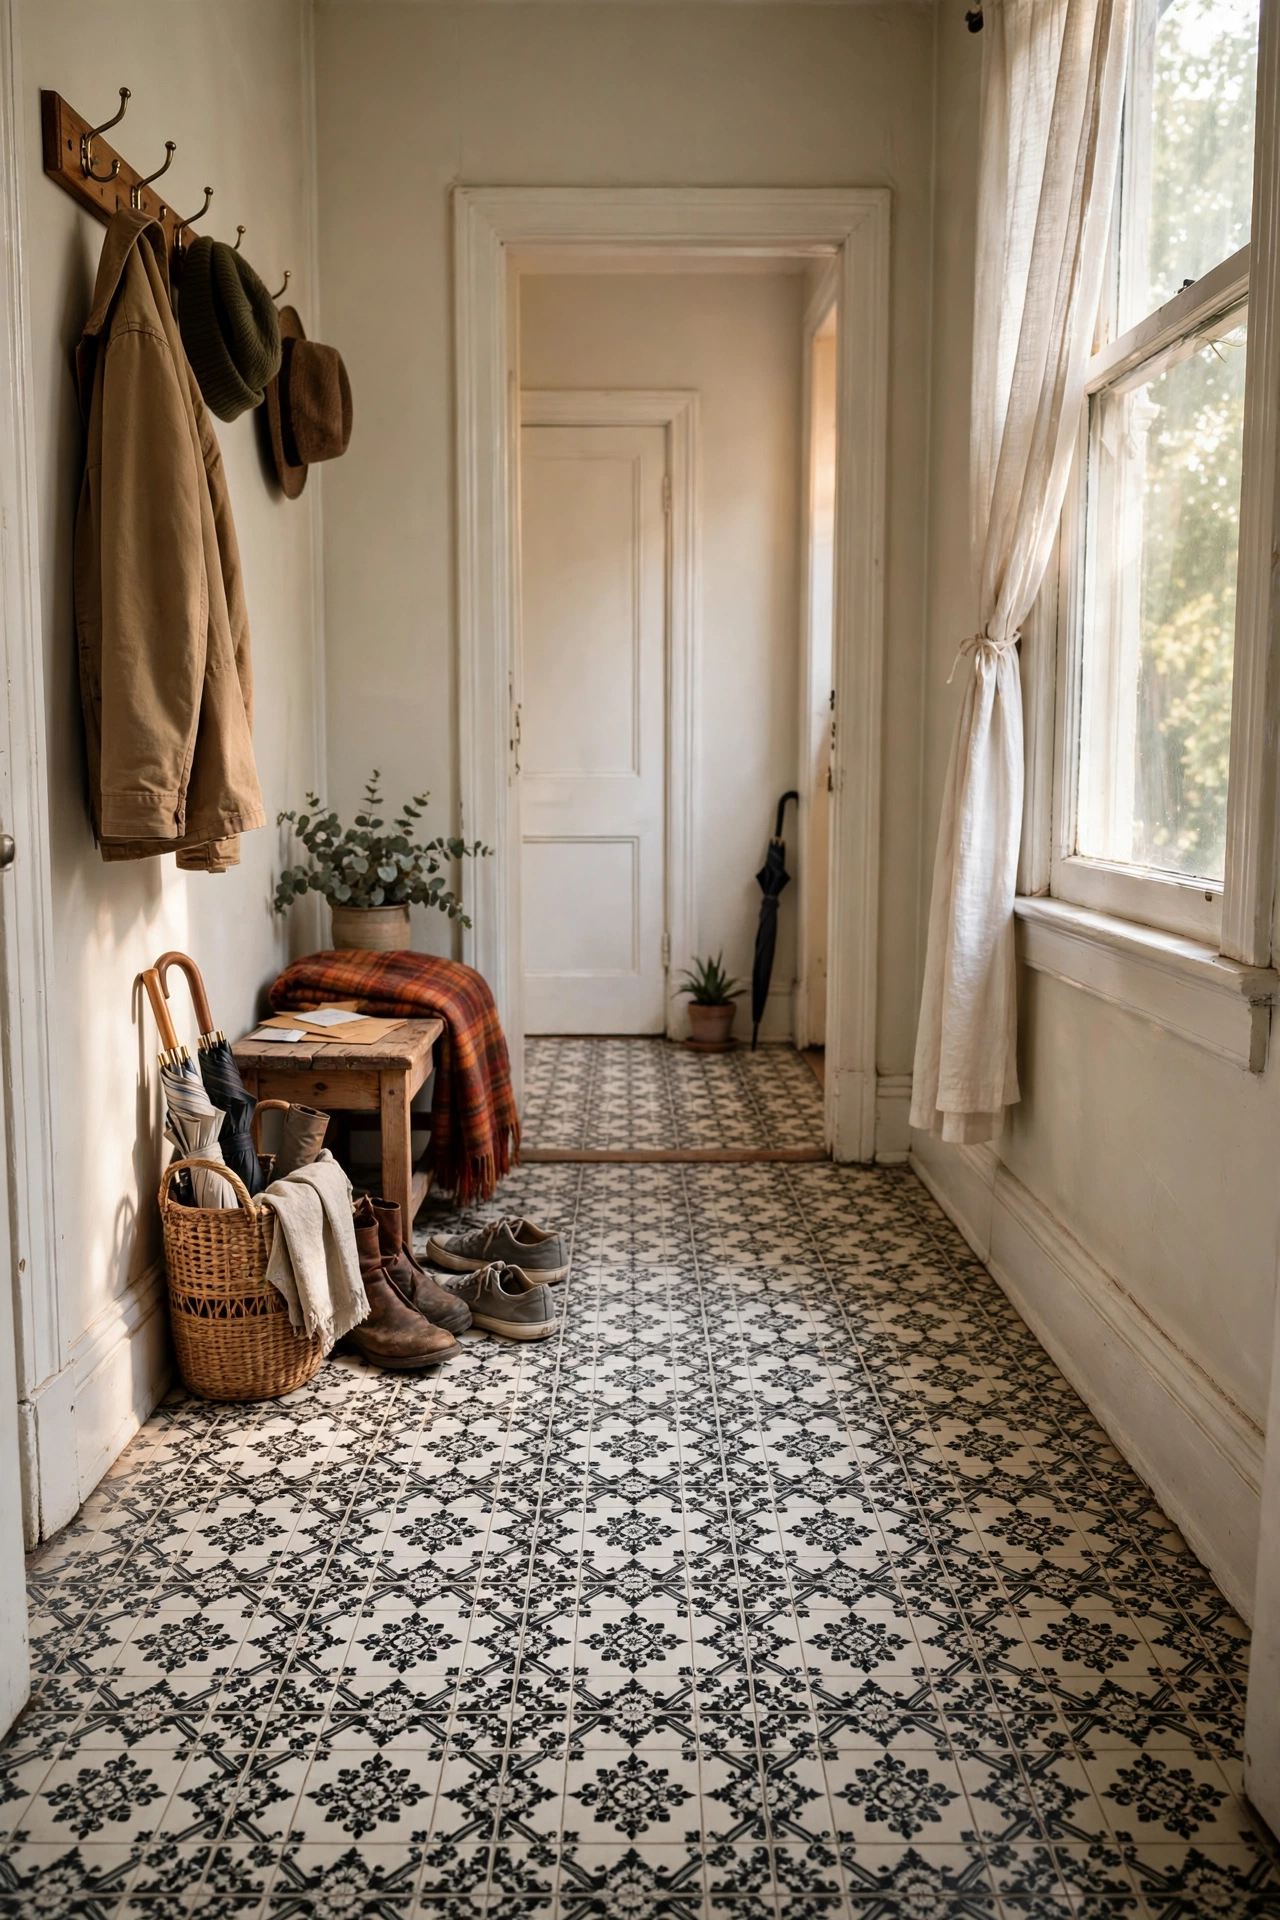
Lay peel-and-stick vinyl tiles over ugly rental flooring in the entryway zone to define the entrance beautifully. Clean the floor thoroughly, lay from the centre outward, and roll firmly for good adhesion. They handle foot traffic well and peel up when you leave, though they grip best on smooth hard floors.
I tried a black-and-white Victorian pattern in my hallway over depressing grey lino, and the transformation was so dramatic the letting agent photographed it. My mistake was laying them on a dusty floor, and the edges lifted within weeks. Scrub the floor first, really scrub it, and they bond properly. They defined my entrance as its own space, which made the living room beyond feel bigger.
Cost: ~$30 | Time: 1.5 hours
Freestanding Full-Length Cheval Mirror
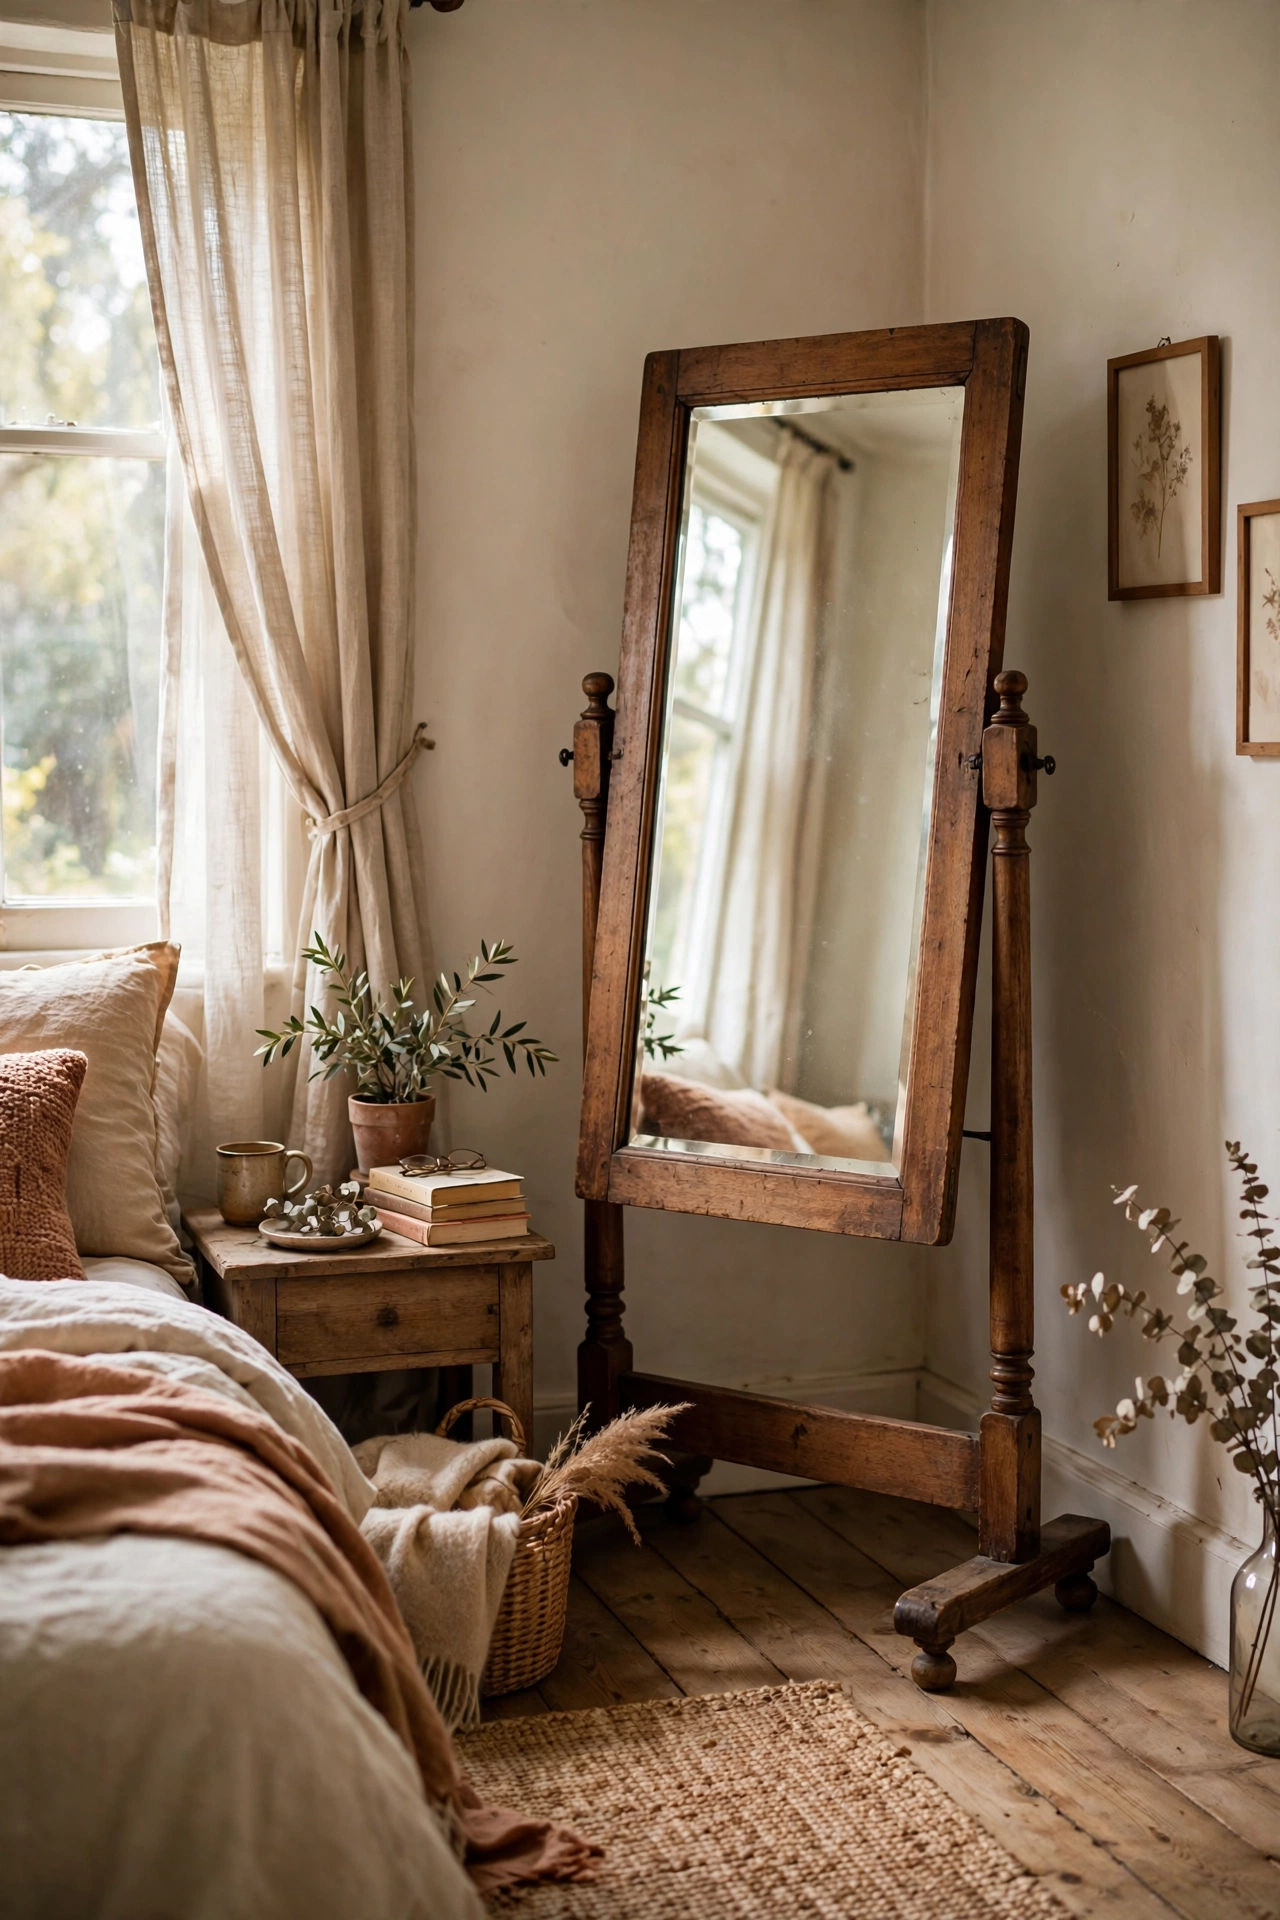
A cheval mirror on its own stand needs no wall at all and brings old-school glamour to a rental corner. The tilting frame lets you angle it perfectly, and the stand makes it completely freestanding. Look for secondhand ones, they are always on resale sites because people underestimate their size.
I tried this in my bedroom corner, visible from the living room through the open door, and the glimpse of it made both rooms feel grander. My mistake was placing it where the afternoon sun hit it directly, creating a blinding laser beam across the sofa every day at four. Position with the sun in mind. It is furniture, art, and light-bouncer in one, and it walks out with you.
Cost: ~$50 secondhand | Time: 15 minutes
Command-Hook Fairy Light Canopy
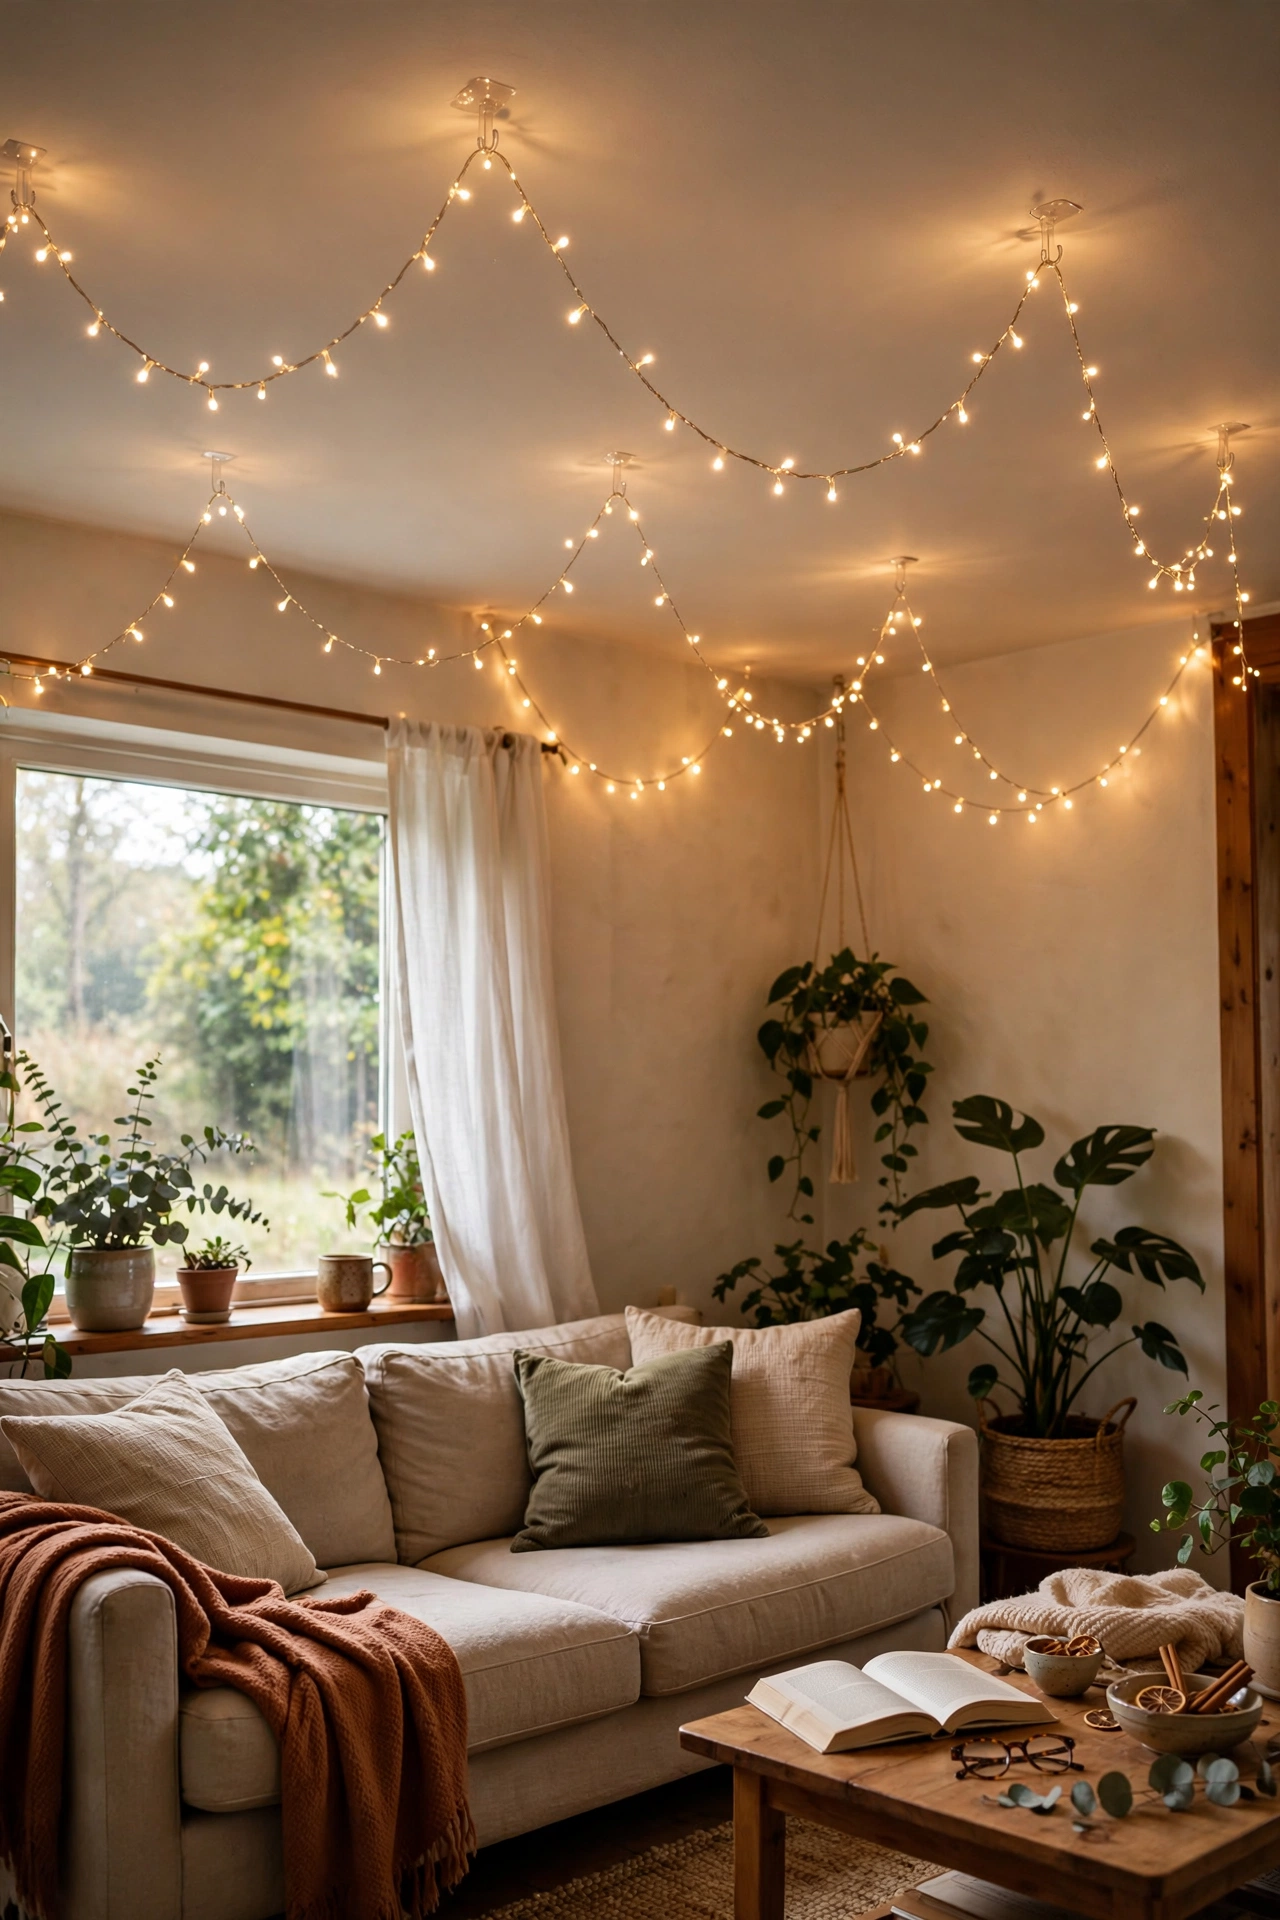
Drape fairy lights across the ceiling from a series of adhesive hooks to create a starry canopy effect with zero drilling. Plan a gentle swag pattern, stick the hooks up, and drape the light strings loosely between them. Use warm white lights on a timer plug so they glow every evening automatically.
I tried this in a flat with the world’s most depressing ceiling, and the canopy of lights made the ceiling disappear entirely. My mistake was pulling the lights taut between hooks, which looked severe and put strain on the adhesive. Loose swags are prettier and kinder to the hooks. It turned every evening into an occasion, and the hooks peeled off cleanly two years later.
Cost: ~$18 | Time: 45 minutes
Roll-Up Bamboo Blind as Wall Texture
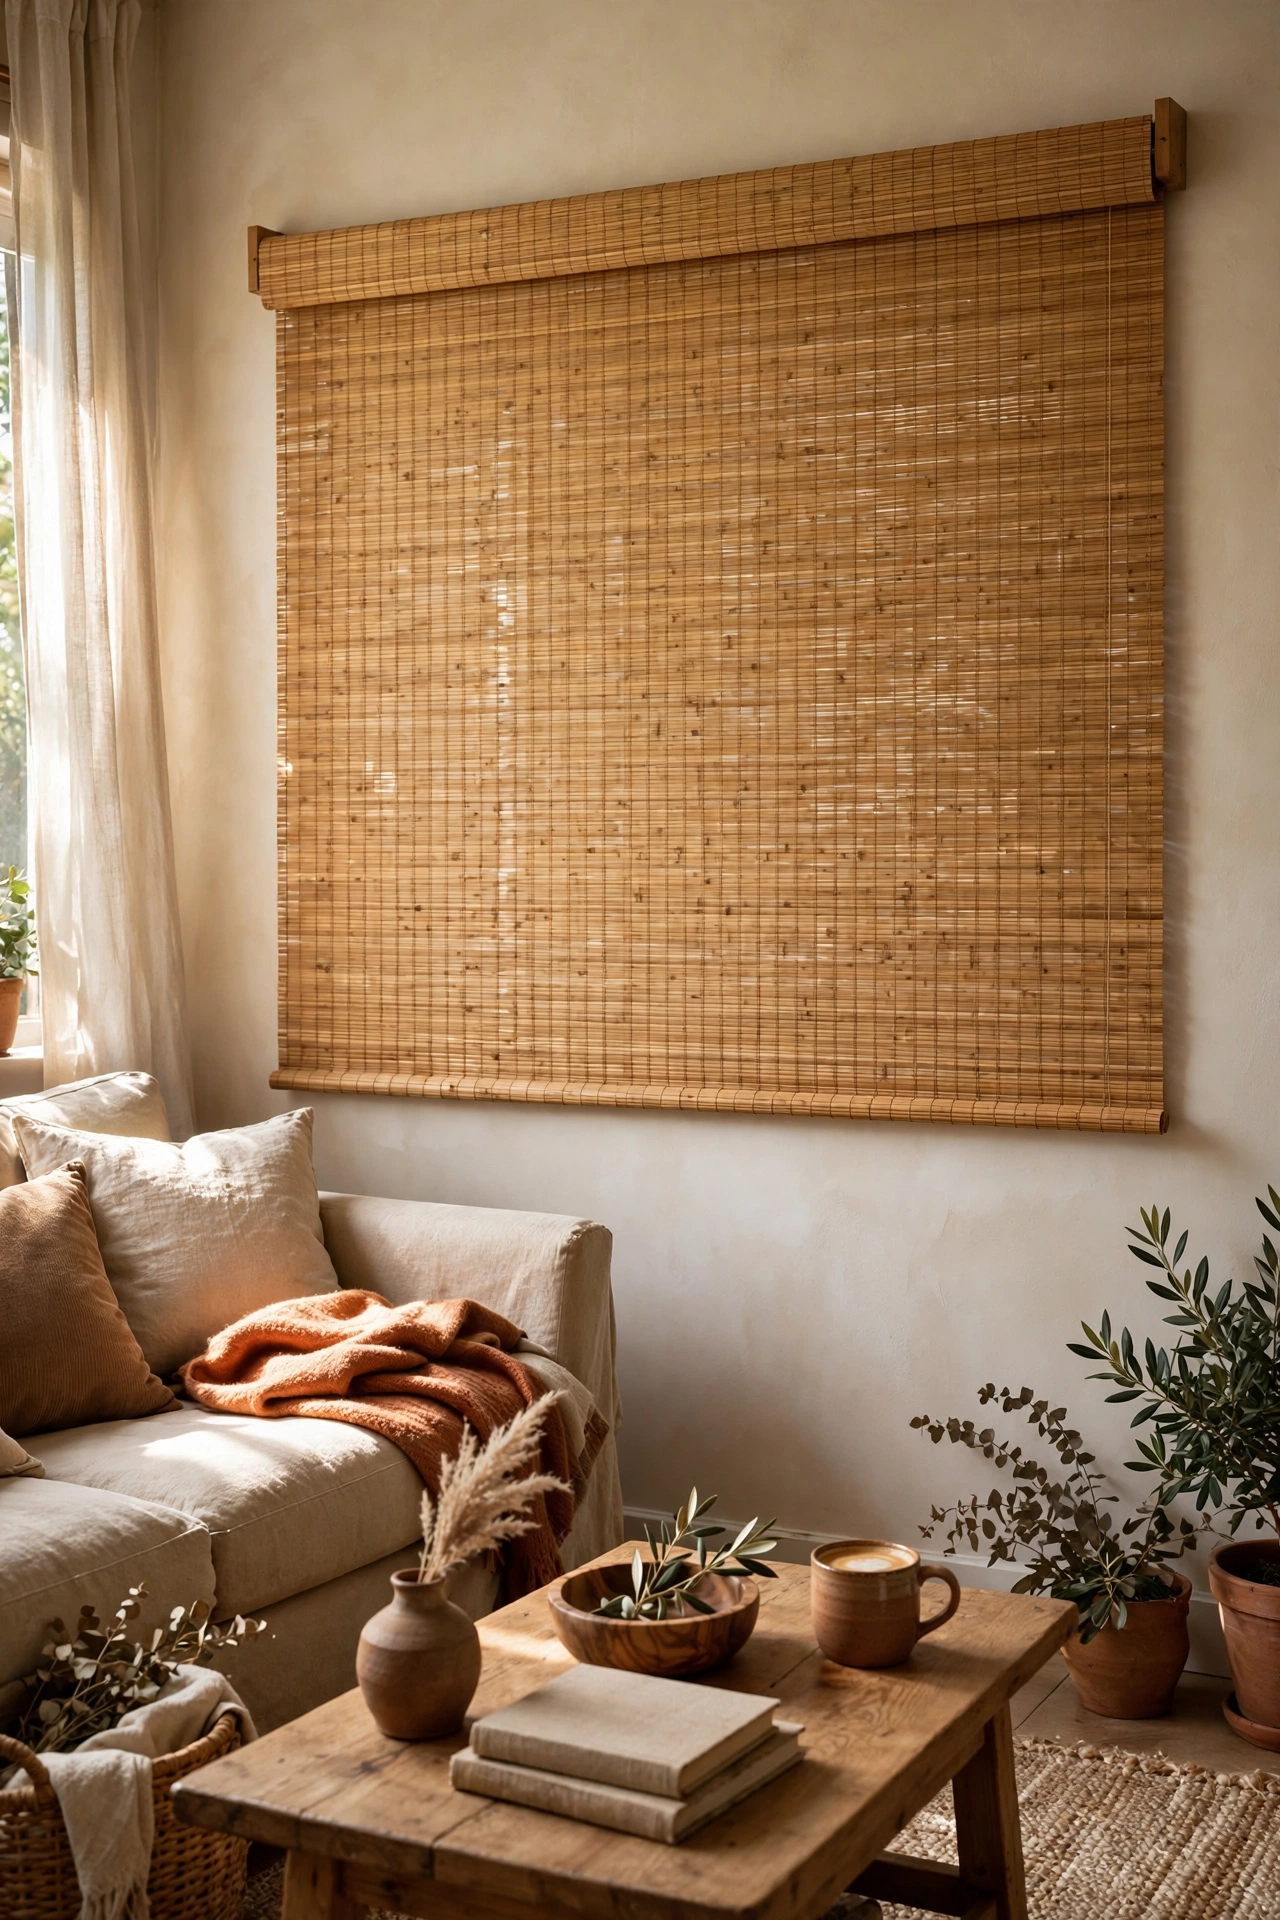
Hang a roll-up bamboo blind flat against the wall with adhesive hooks, and it becomes a panel of natural texture. Choose a wide blind, hang it fully extended, and let the woven bamboo add warmth to a plain wall. It reads as intentional wall decor, not a misplaced window treatment.
I tried this on the big blank wall in my dining-living space, and the natural texture broke up the plasterboard monotony beautifully. My mistake was hanging it with the roll mechanism at the top visible, which gave the game away. Mount it upside down or hide the roll behind a slim pelmet of fabric. It adds the organic texture that rented rooms so often lack, and it rolls up for the move.
Cost: ~$22 | Time: 20 minutes
Keep going with rental ideas: 23 Renter-Friendly Living Room Ideas You Can Take With You and 21 Living Room Wall Decor Ideas That Cost Almost Nothing.
Pin this for your next move, because the week before a move is exactly when you will wish you had saved every no-drill trick in one place.
