17 Thrifted Dresser Makeover Ideas
17 Thrifted Dresser Makeover Ideas
A thrifted dresser makeover is how I learned that the best furniture in my home was never going to come from a flat-pack box. I dragged home a scarred six-drawer dresser for $30, spent a weekend with sandpaper and a $16 tin of paint, and ended up with a piece guests ask about constantly. That dresser taught me that thrifted wood is usually better quality than anything new at the same price, and paint hides a multitude of sins.
This list is everything I have learned across a dozen dresser flips since: what paint actually sticks, which shortcuts backfire, and how to make a thrift store find look like it came from a boutique. Every idea below is a full makeover approach with real costs and honest timings, and I have flagged the mistakes I made so you can skip them.
1. Fresh Paint and New Knobs, Done Right
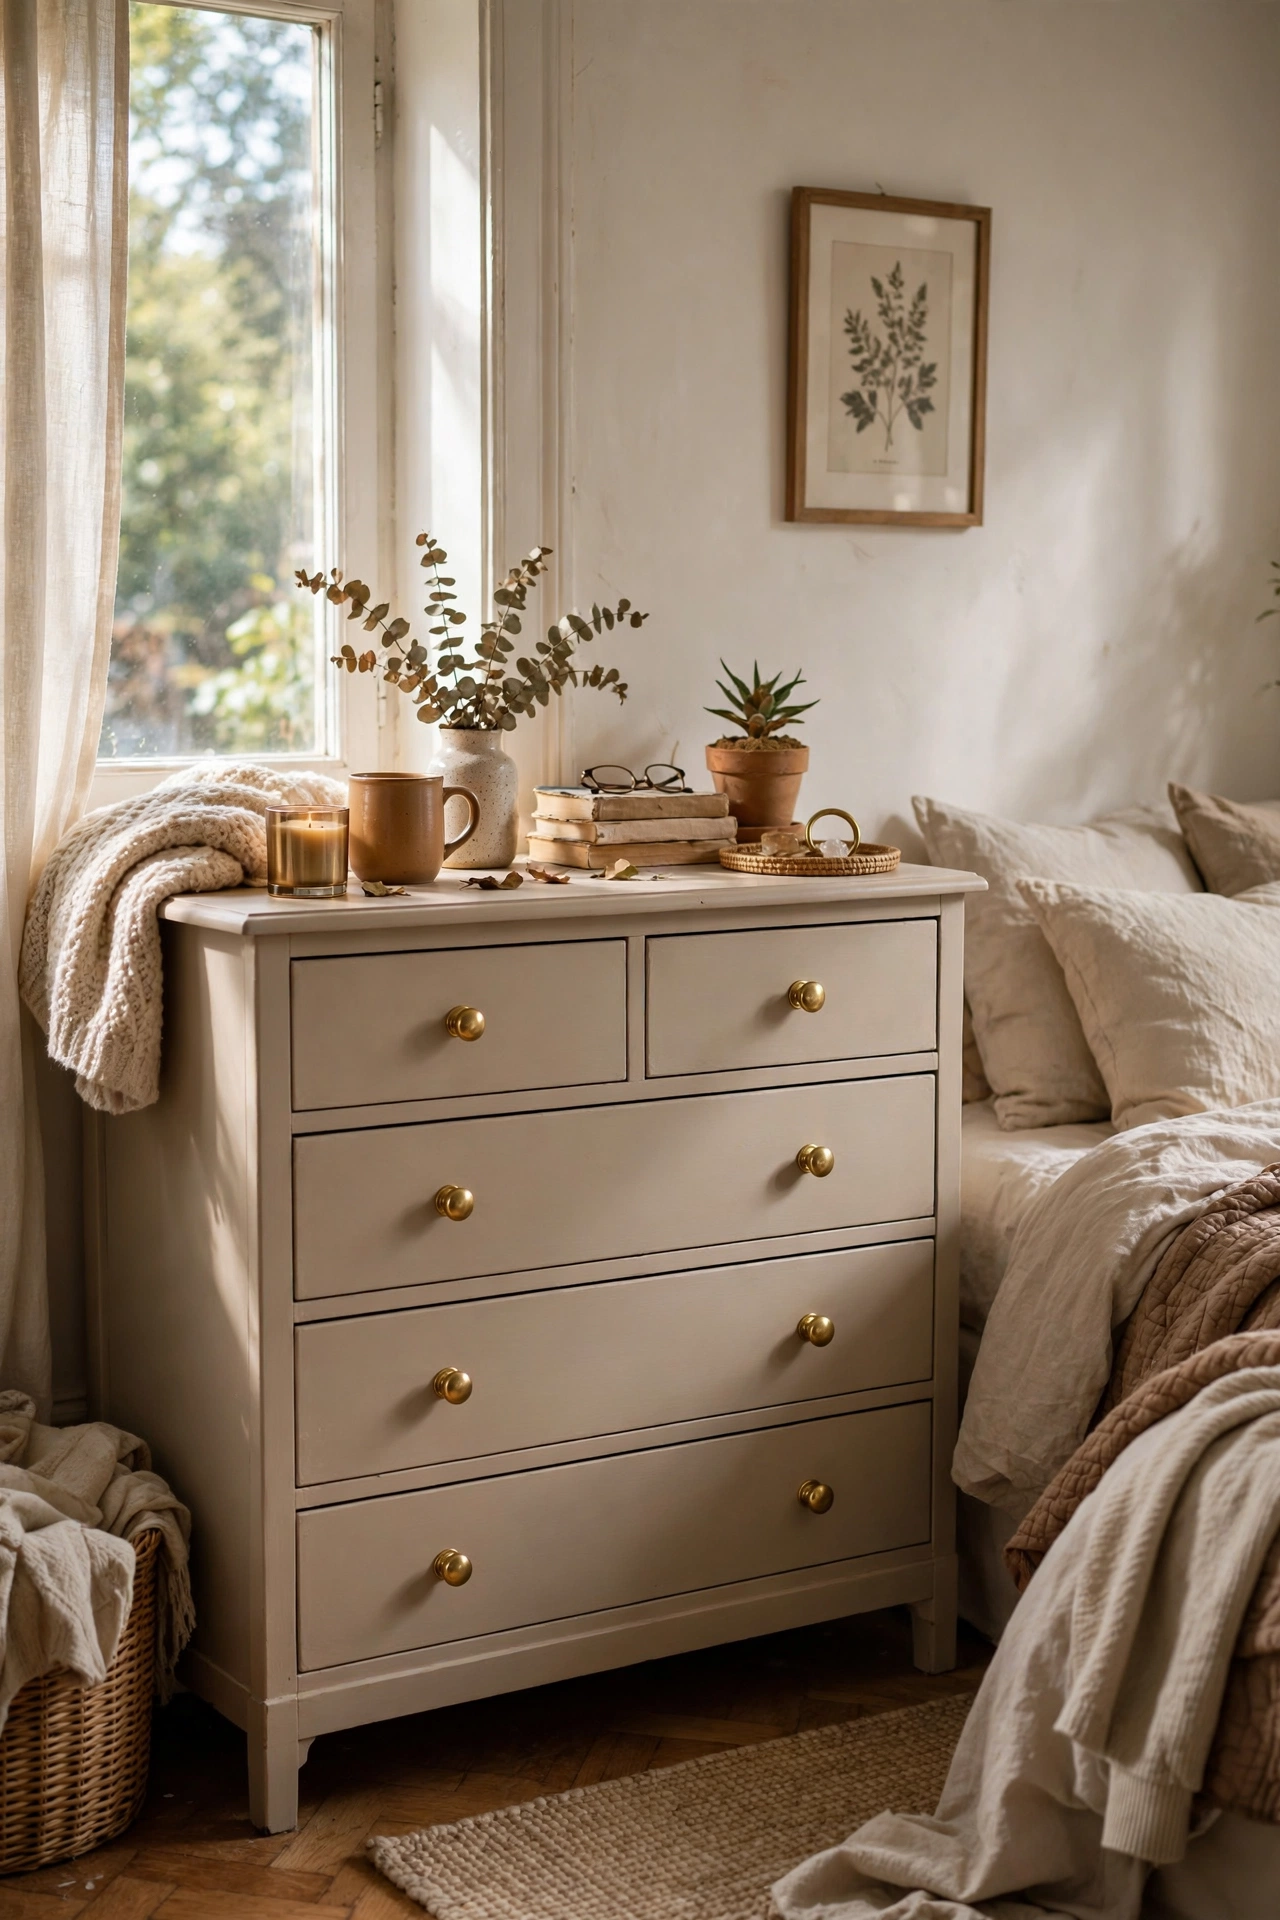
Fresh paint and new knobs is the classic thrifted dresser makeover, and it works because the transformation is total. I clean mine with a degreaser first, then brush on two coats of satin furniture paint at about $16 a tin, letting each coat dry a full day. Knobs are the jewellery: I swapped wood knobs for $2 brass cup pulls and the dresser looked twice the price. My early mistake was skipping the cleaning step, and the paint peeled within a month. Clean, paint, wait, knobs. Follow that order and the finish lasts years.
Cost: ~$28-40 | Time: 2 days with drying
2. Two-Tone Paint: Body One Colour, Drawers Another
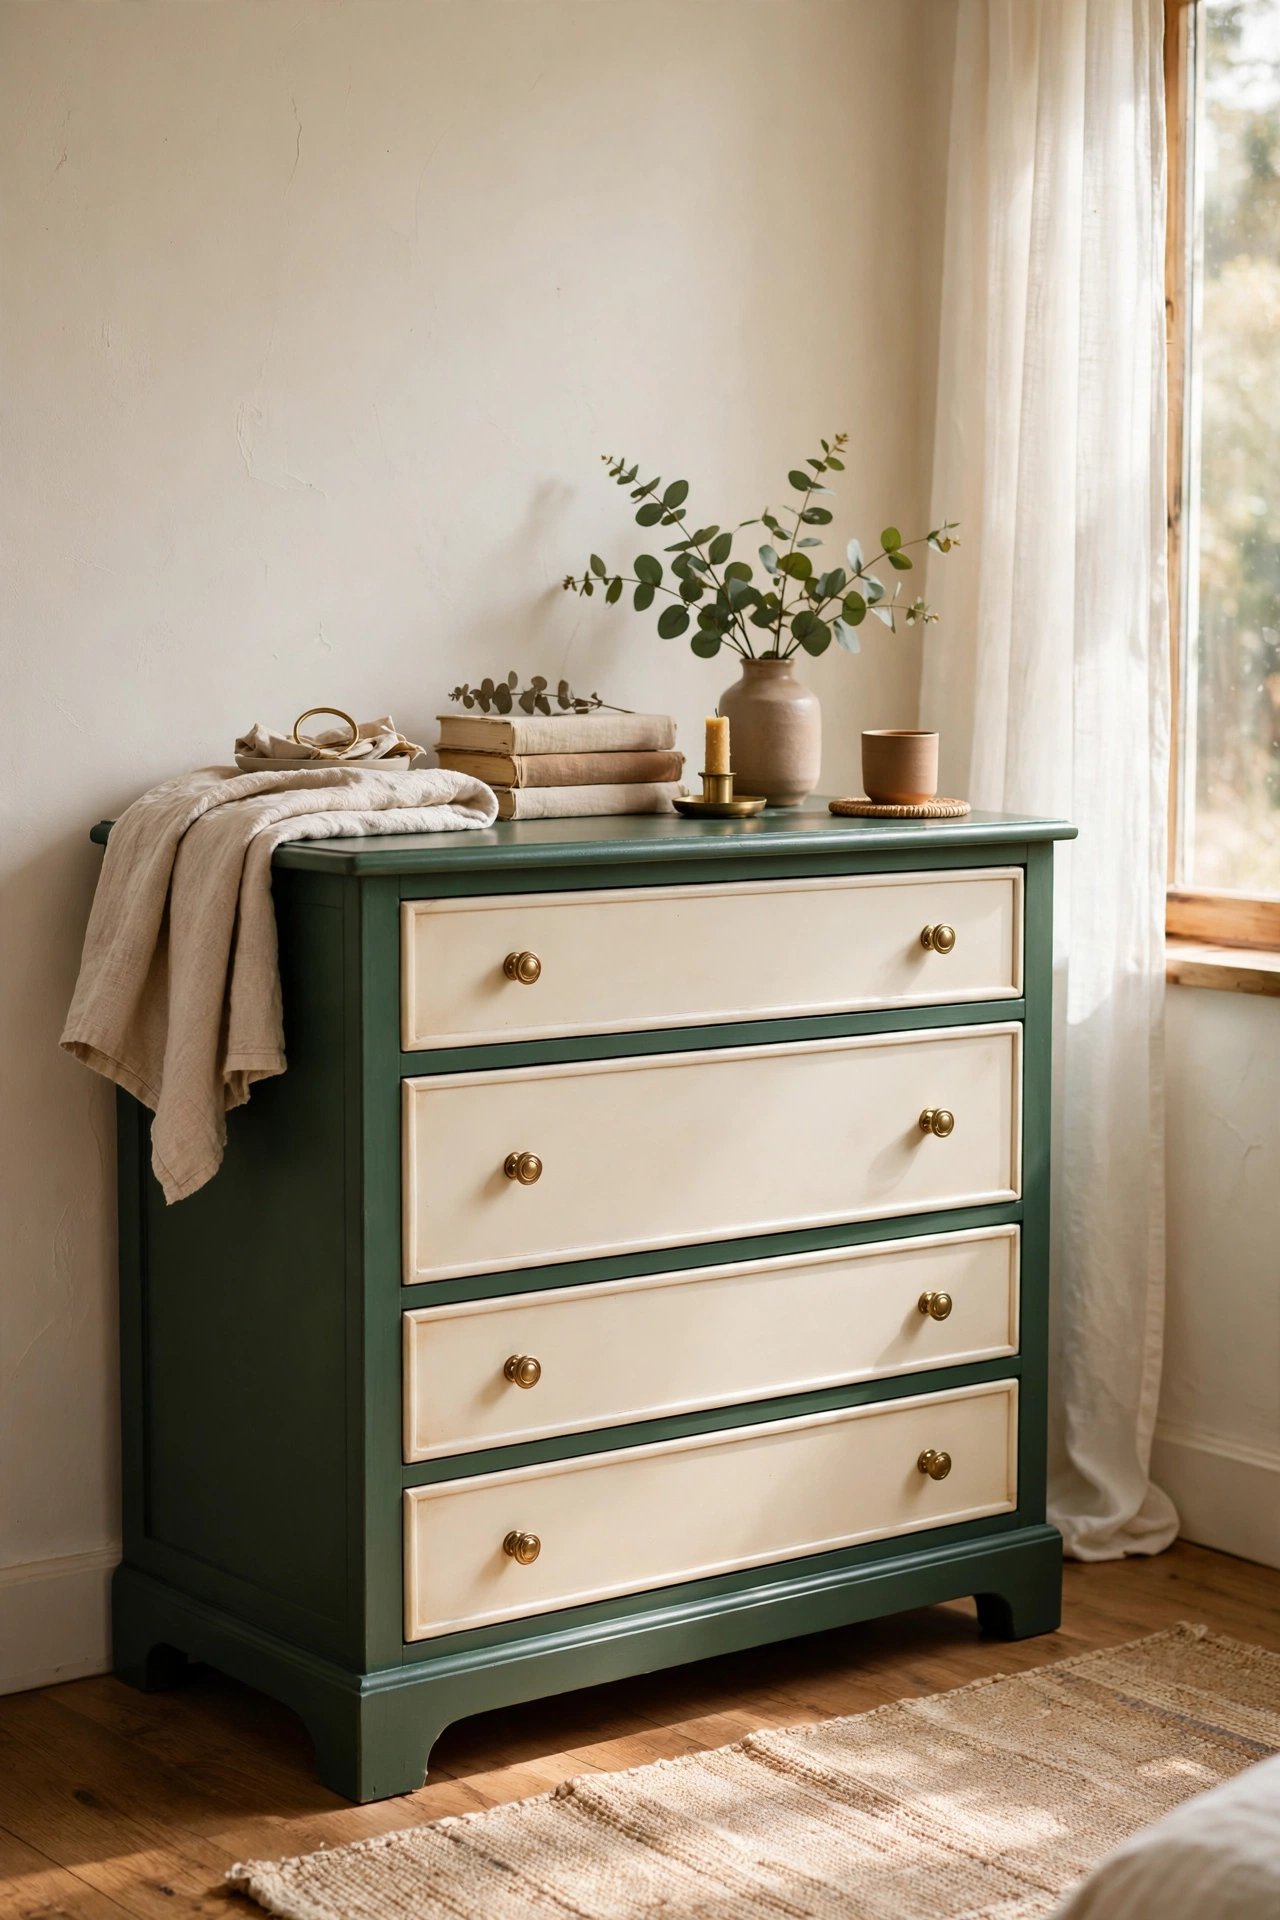
Two-tone paint, body one colour and drawers another, makes a plain dresser look designed. I painted a body deep forest green and the drawer fronts warm cream, taping the edges with painter’s tape for crisp lines. The trick is choosing colours that share a temperature, both warm or both cool, so the pairing reads intentional. My first attempt paired a cool grey with a warm mustard and it clashed badly. Repainted in two warm tones and it sold at a flea market within the hour. Two tins of paint, one afternoon of taping, striking result.
Cost: ~$30-42 | Time: 2 days with drying
3. Decoupage Drawer Fronts With Wrapping Paper
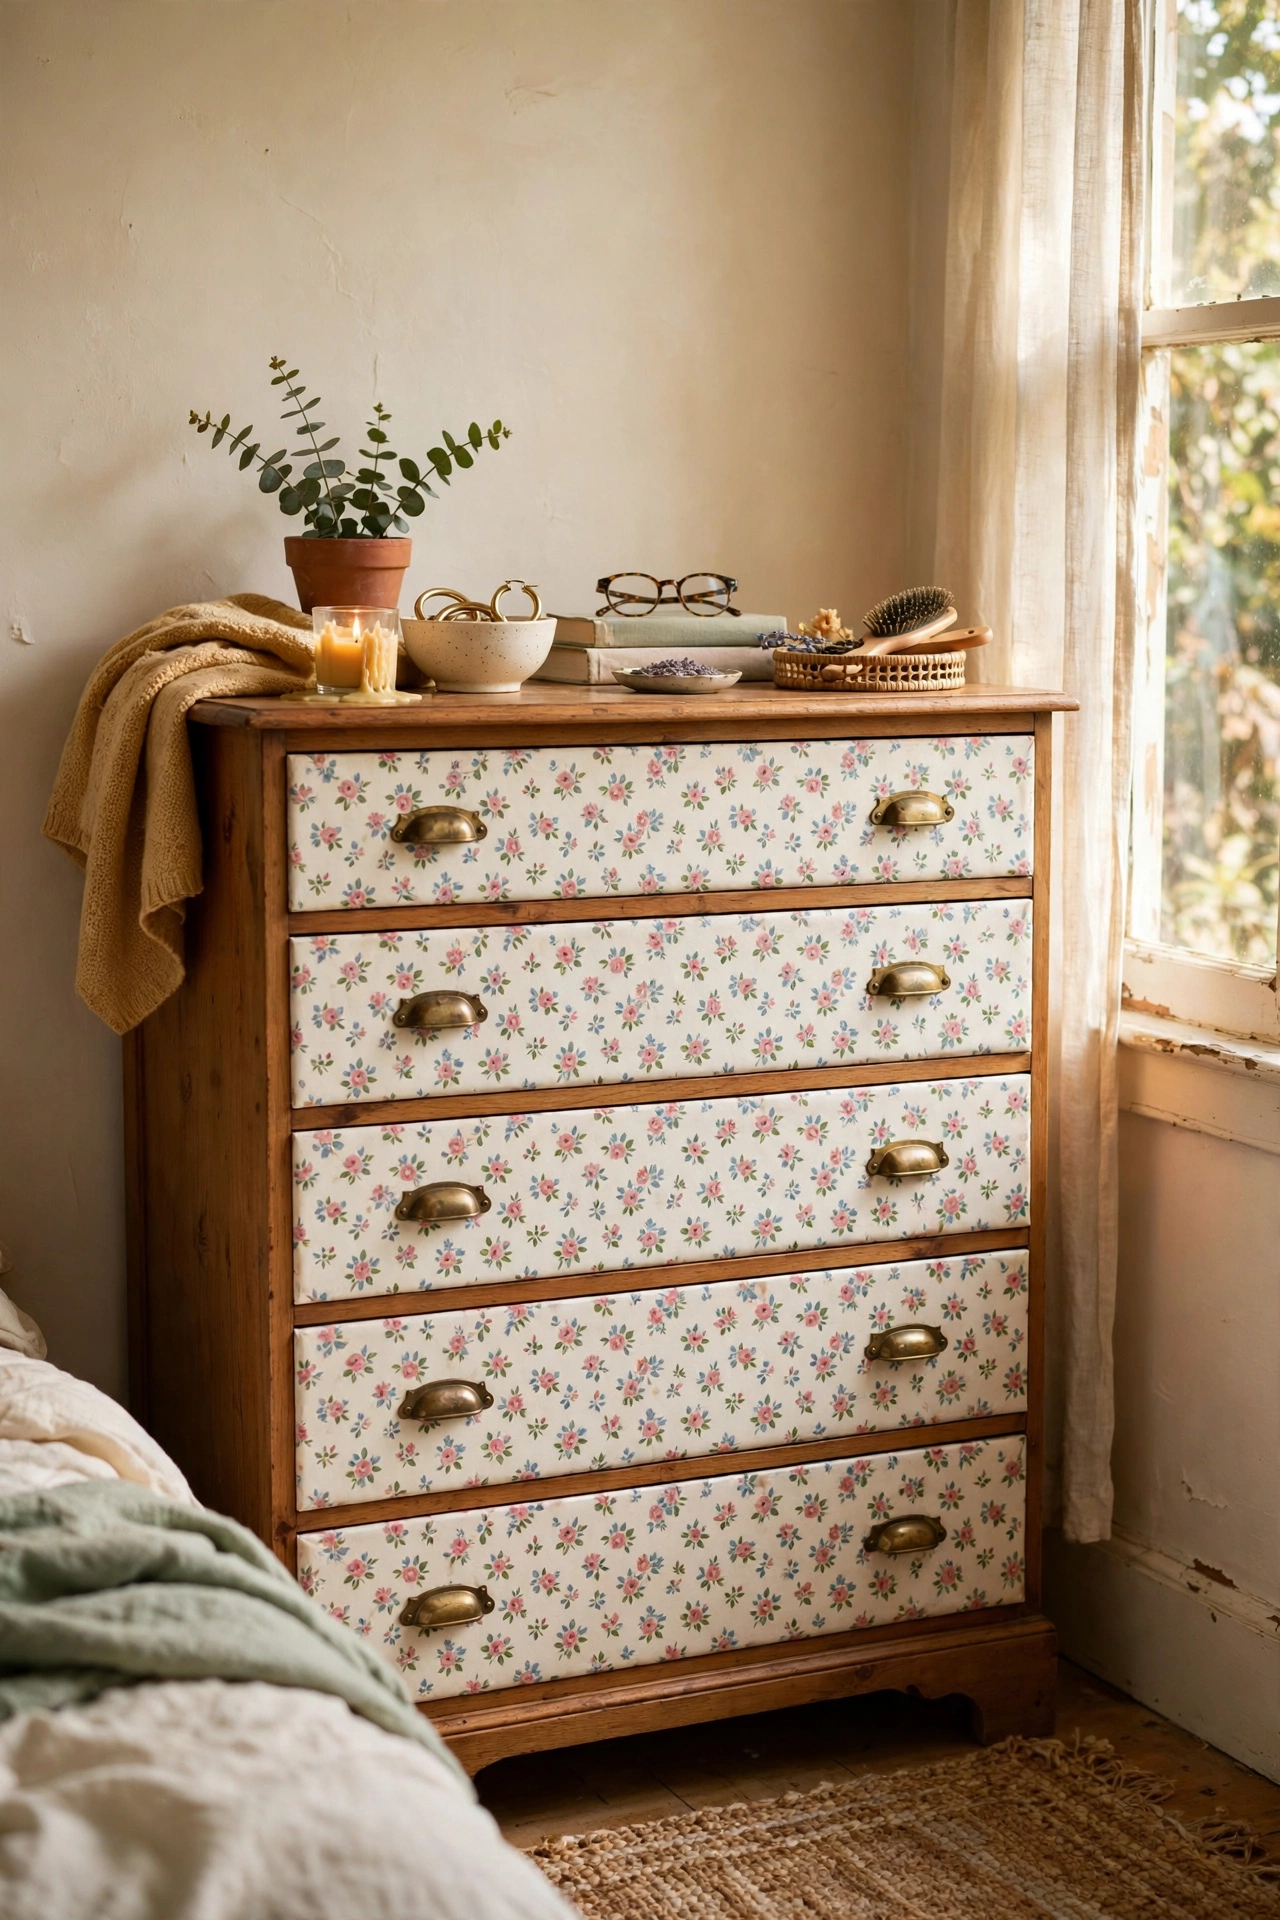
Decoupage drawer fronts with pretty wrapping paper is the cheapest custom look there is. I cut $3 gift wrap panels to fit each drawer front, sealed them on with Mod Podge, and top-coated twice for durability. Choose a paper with a small repeat pattern so the seams between drawers stay hidden. My first paper had a huge floral motif that broke awkwardly across drawers. The smaller pattern reads seamless. Total cost was under ten dollars and the dresser looks like hand-painted wallpaper. Seal the edges well, because lifting corners are the giveaway.
Cost: ~$8-14 | Time: 3 hours
4. Peel-and-Stick Wallpaper Drawer Liners That Show
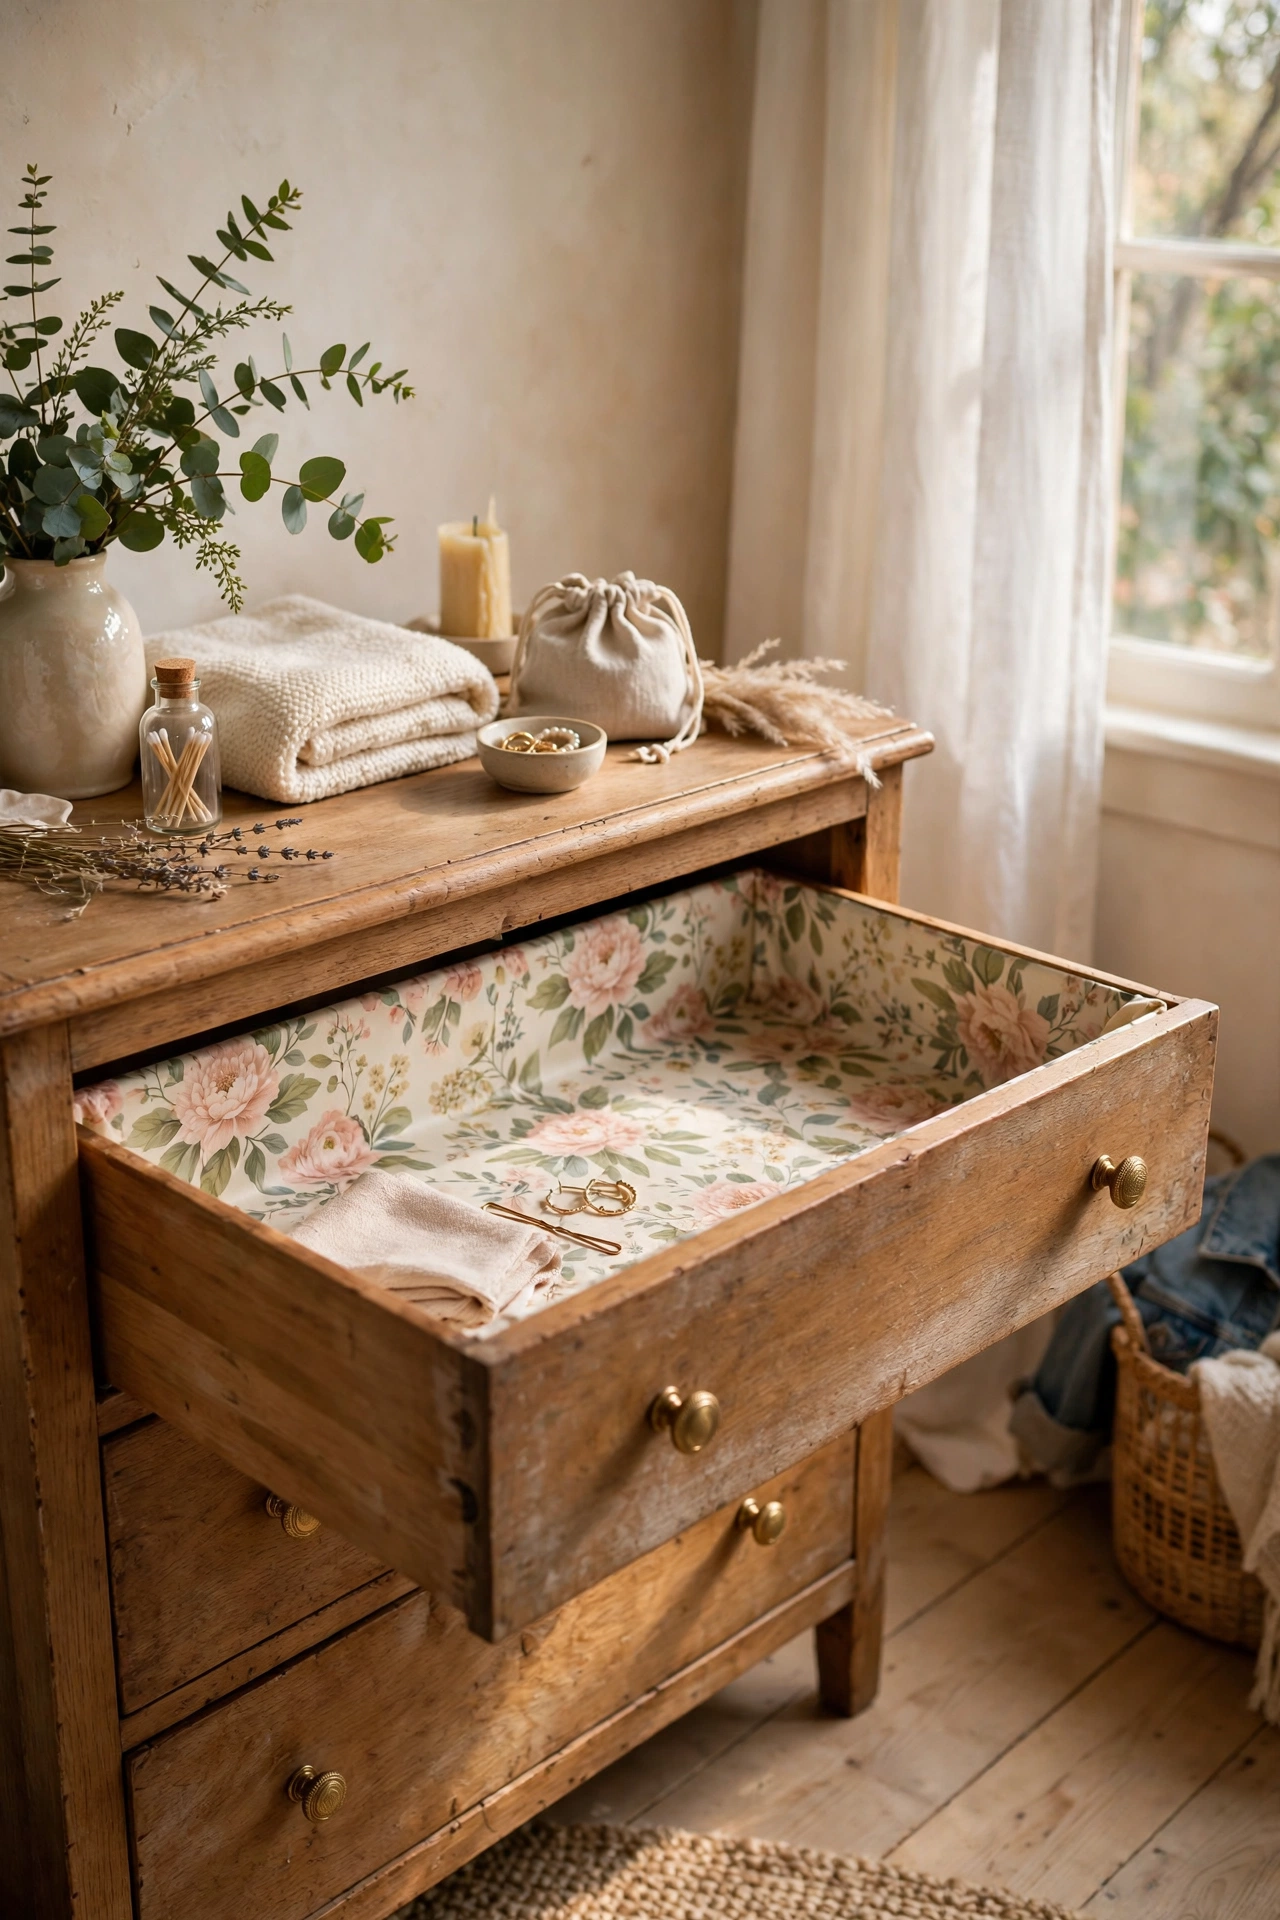
Peel-and-stick wallpaper as drawer liners that peek out when drawers open is a lovely surprise detail. I lined my drawers with a $9 roll of floral peel-and-stick, cutting each piece a quarter inch smaller than the drawer base so the edges tuck cleanly. Smooth from the centre outward to avoid bubbles. The liners protect the drawers too, which matters for thrifted pieces with worn interiors. I used to think liners were invisible effort. Then a guest opened a drawer and gasped. Now I line every makeover. Five minutes per drawer.
Cost: ~$9-15 | Time: 45 minutes
5. A Stencilled Pattern on the Drawer Fronts
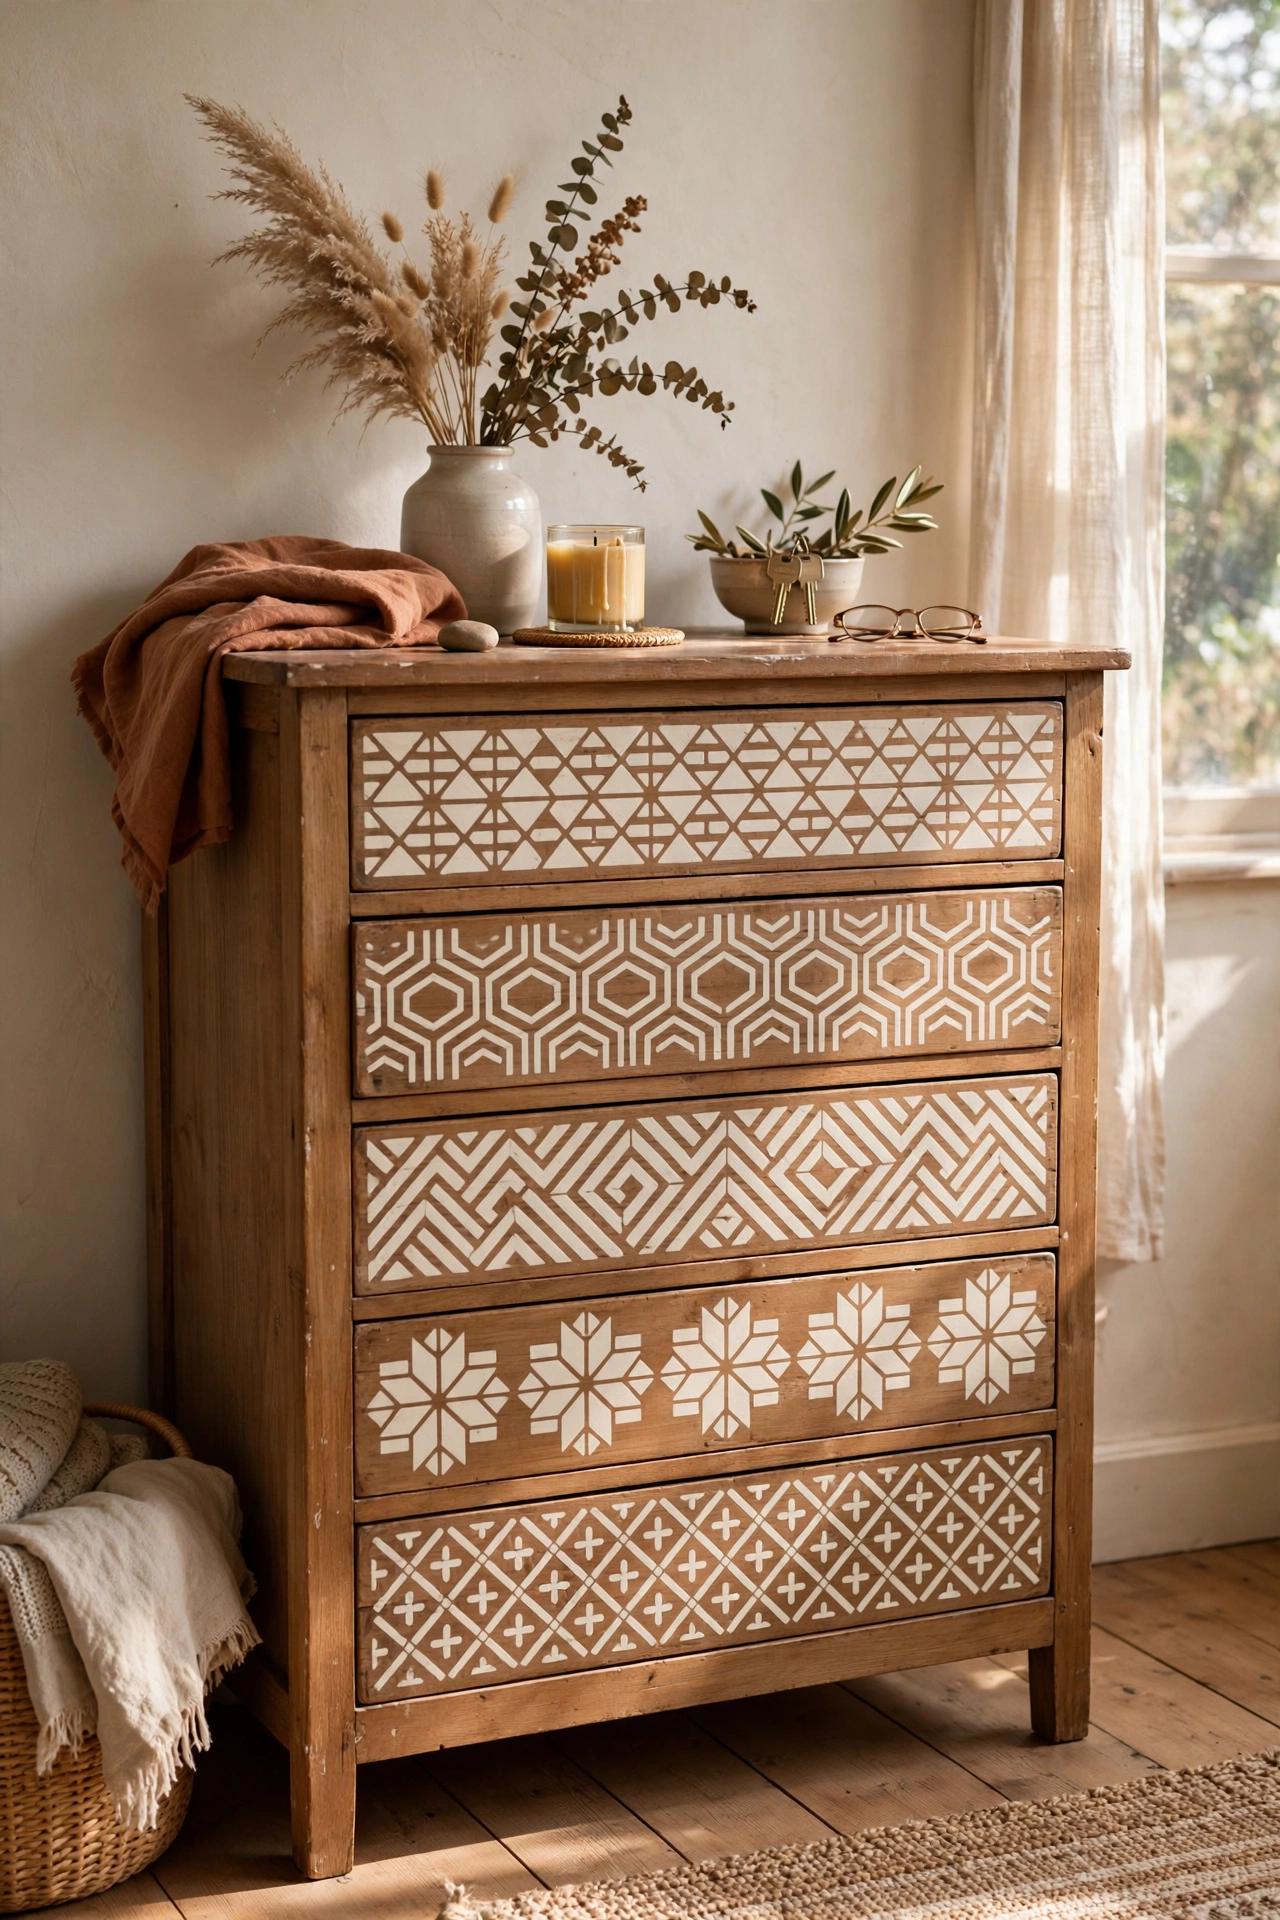
A stencilled pattern on drawer fronts gives a hand-painted look without freehand skill. I used a $7 geometric stencil and dabbed paint with a nearly dry foam roller, working in thin layers so nothing bled under the edges. Less paint is always more with stencils. My first attempt was so heavy the pattern looked stamped on, and I had to sand it off and start over. Two whisper-light coats gave crisp edges. Tape the stencil flat, step back often, and keep the pattern centred on each drawer for the boutique look.
Cost: ~$14-20 | Time: 2 hours
6. Chalk Paint With a Light Distress
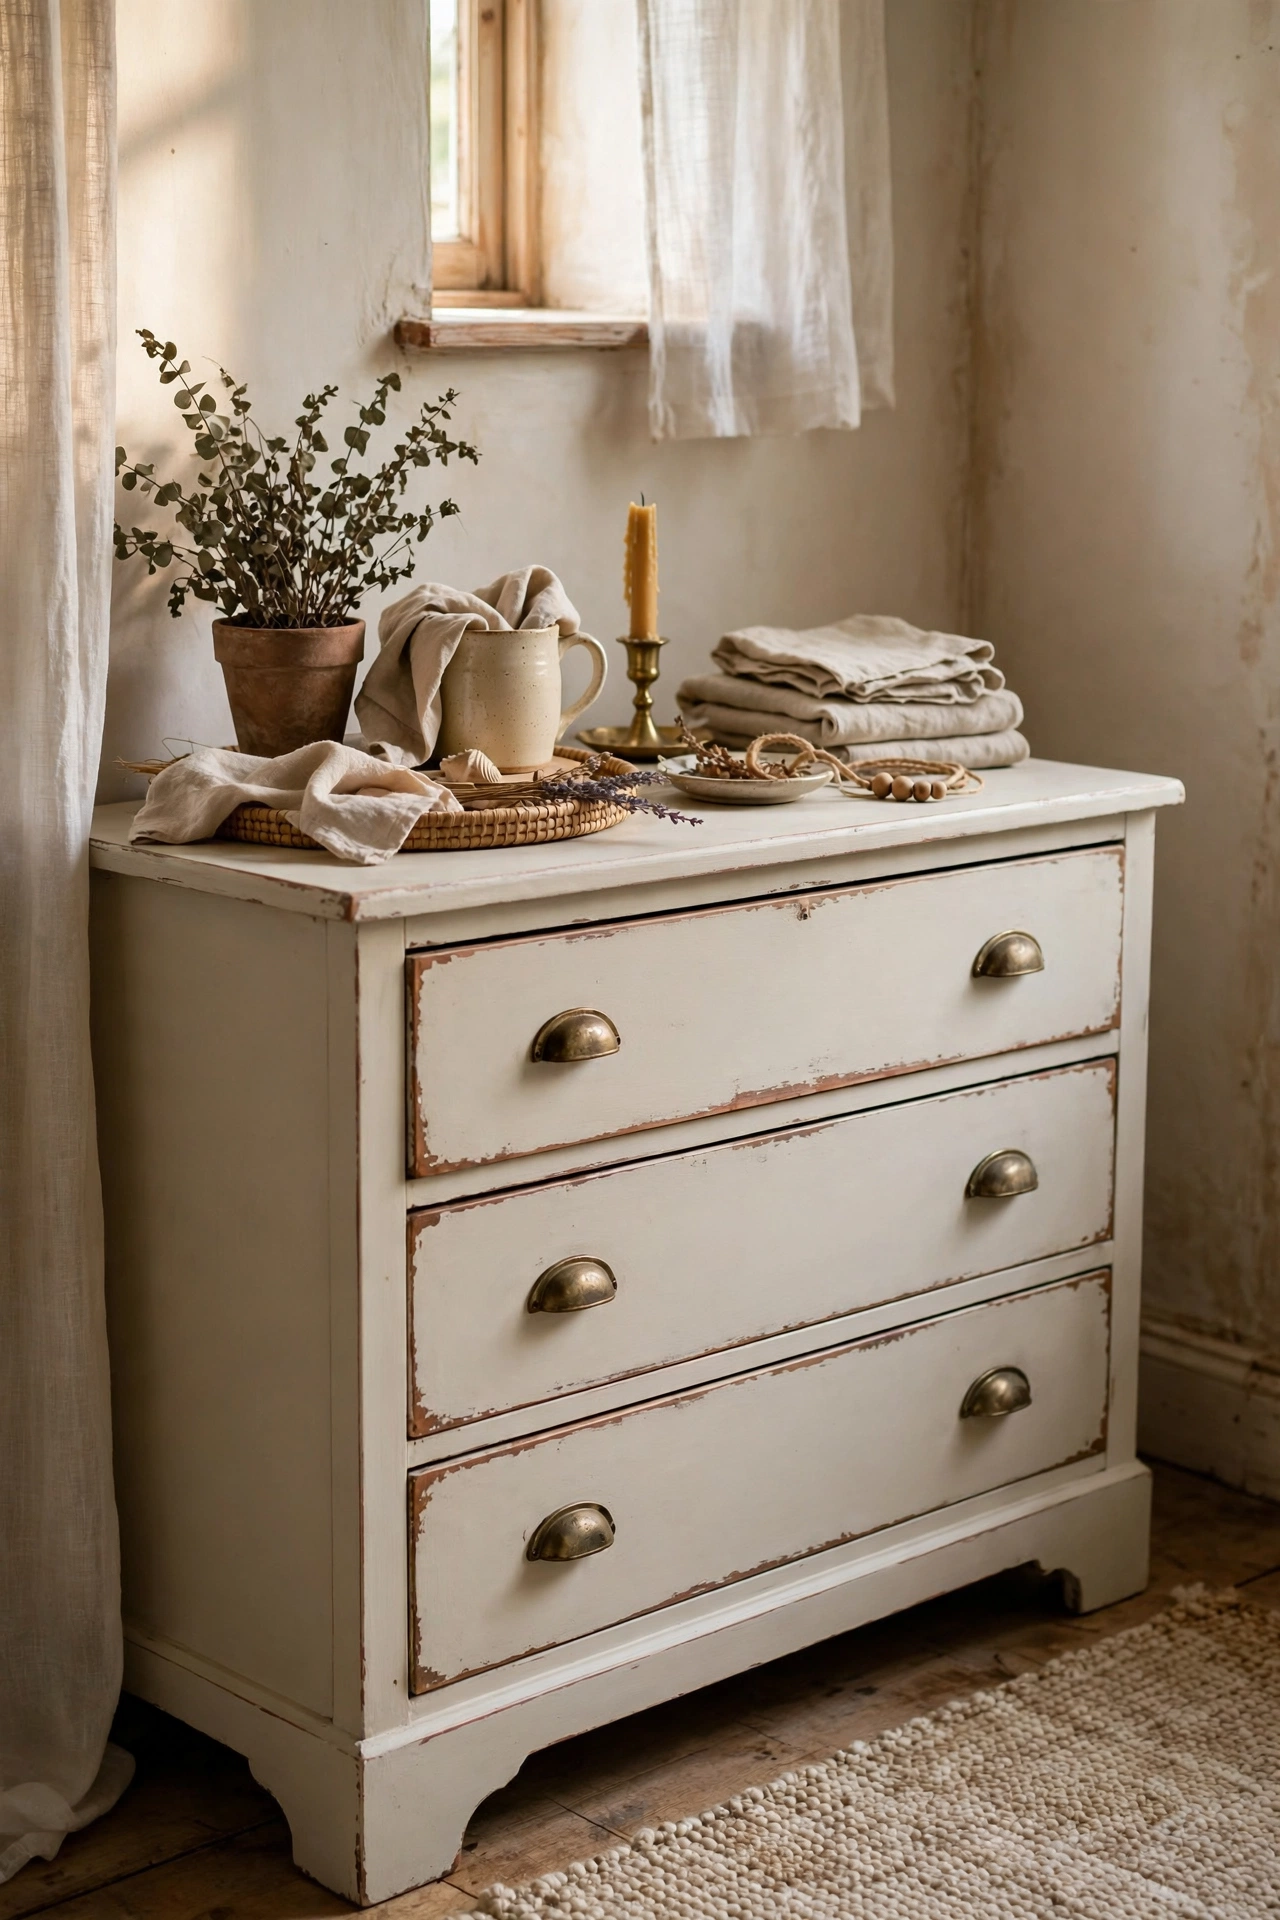
Chalk paint with a light distress is forgiving for beginners because it sticks to almost anything. I brushed two coats of $18 chalk paint on a scuffed dresser with barely any prep, then rubbed the edges lightly with 220-grit paper to reveal hints of wood underneath. Distress sparingly, because heavy distress reads theme-park. My first one looked like it had survived a flood. Light touches on corners and edges only, then a coat of clear wax to seal. The matte finish hides every sin of the thrift store years.
Cost: ~$24-34 | Time: 2 days with drying
7. Matte Black for a Modern Reset
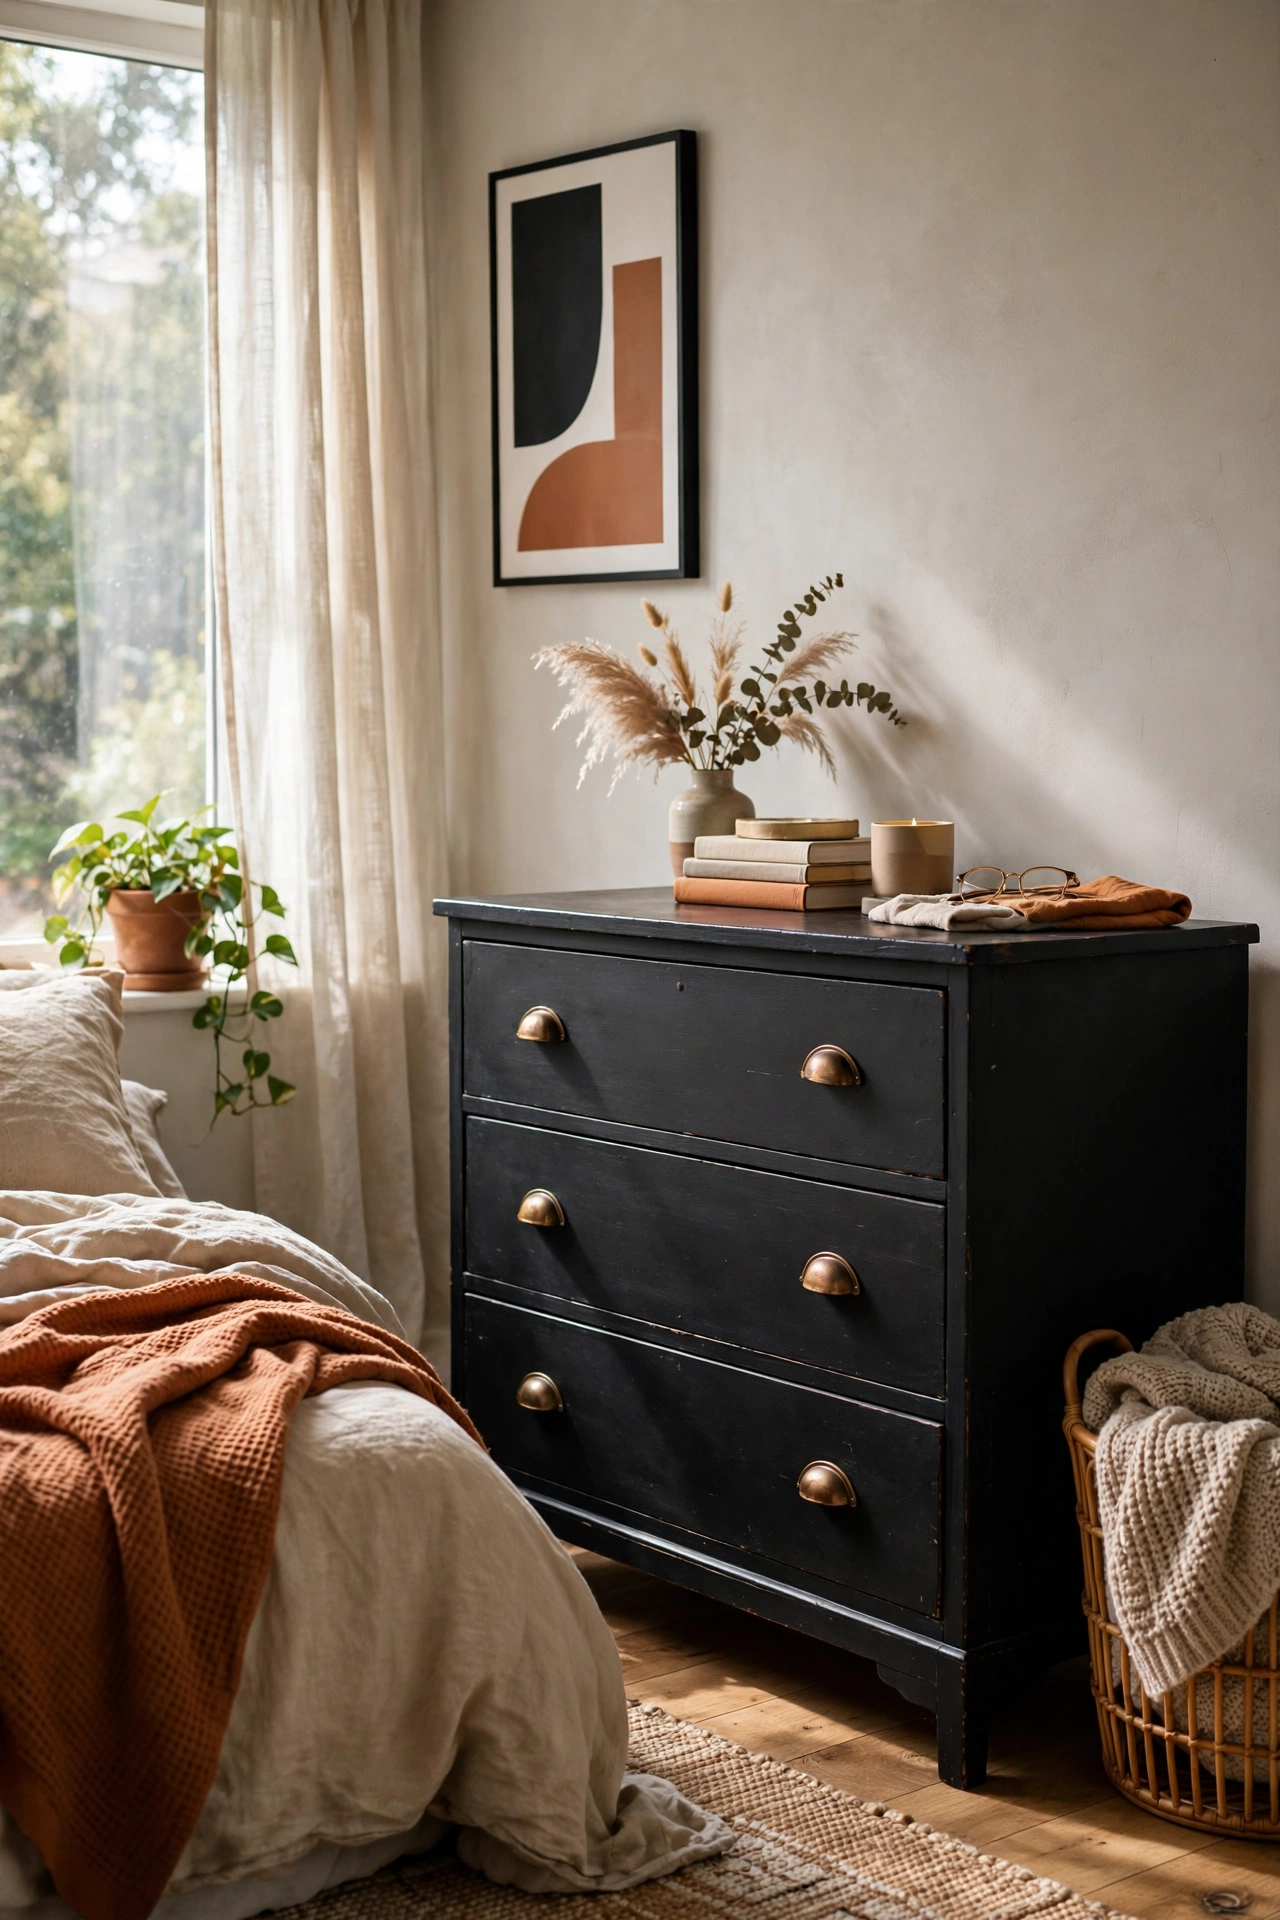
Matte black paint is the fastest modern reset for a dated dresser. I brushed two coats of matte black furniture paint on a honey-oak relic for $17, and it went from 1994 to boutique in a weekend. Black shows every brush mark, so use a foam roller on the flat fronts and brush only the edges. My first coat streaked badly until I switched tools. Pair it with warm wood or brass knobs so it does not read harsh. This makeover gets the most compliments of any piece I own, and it cost less than dinner out.
Cost: ~$20-30 | Time: 2 days with drying
8. Cane Webbing Inserts on Flat Drawer Fronts
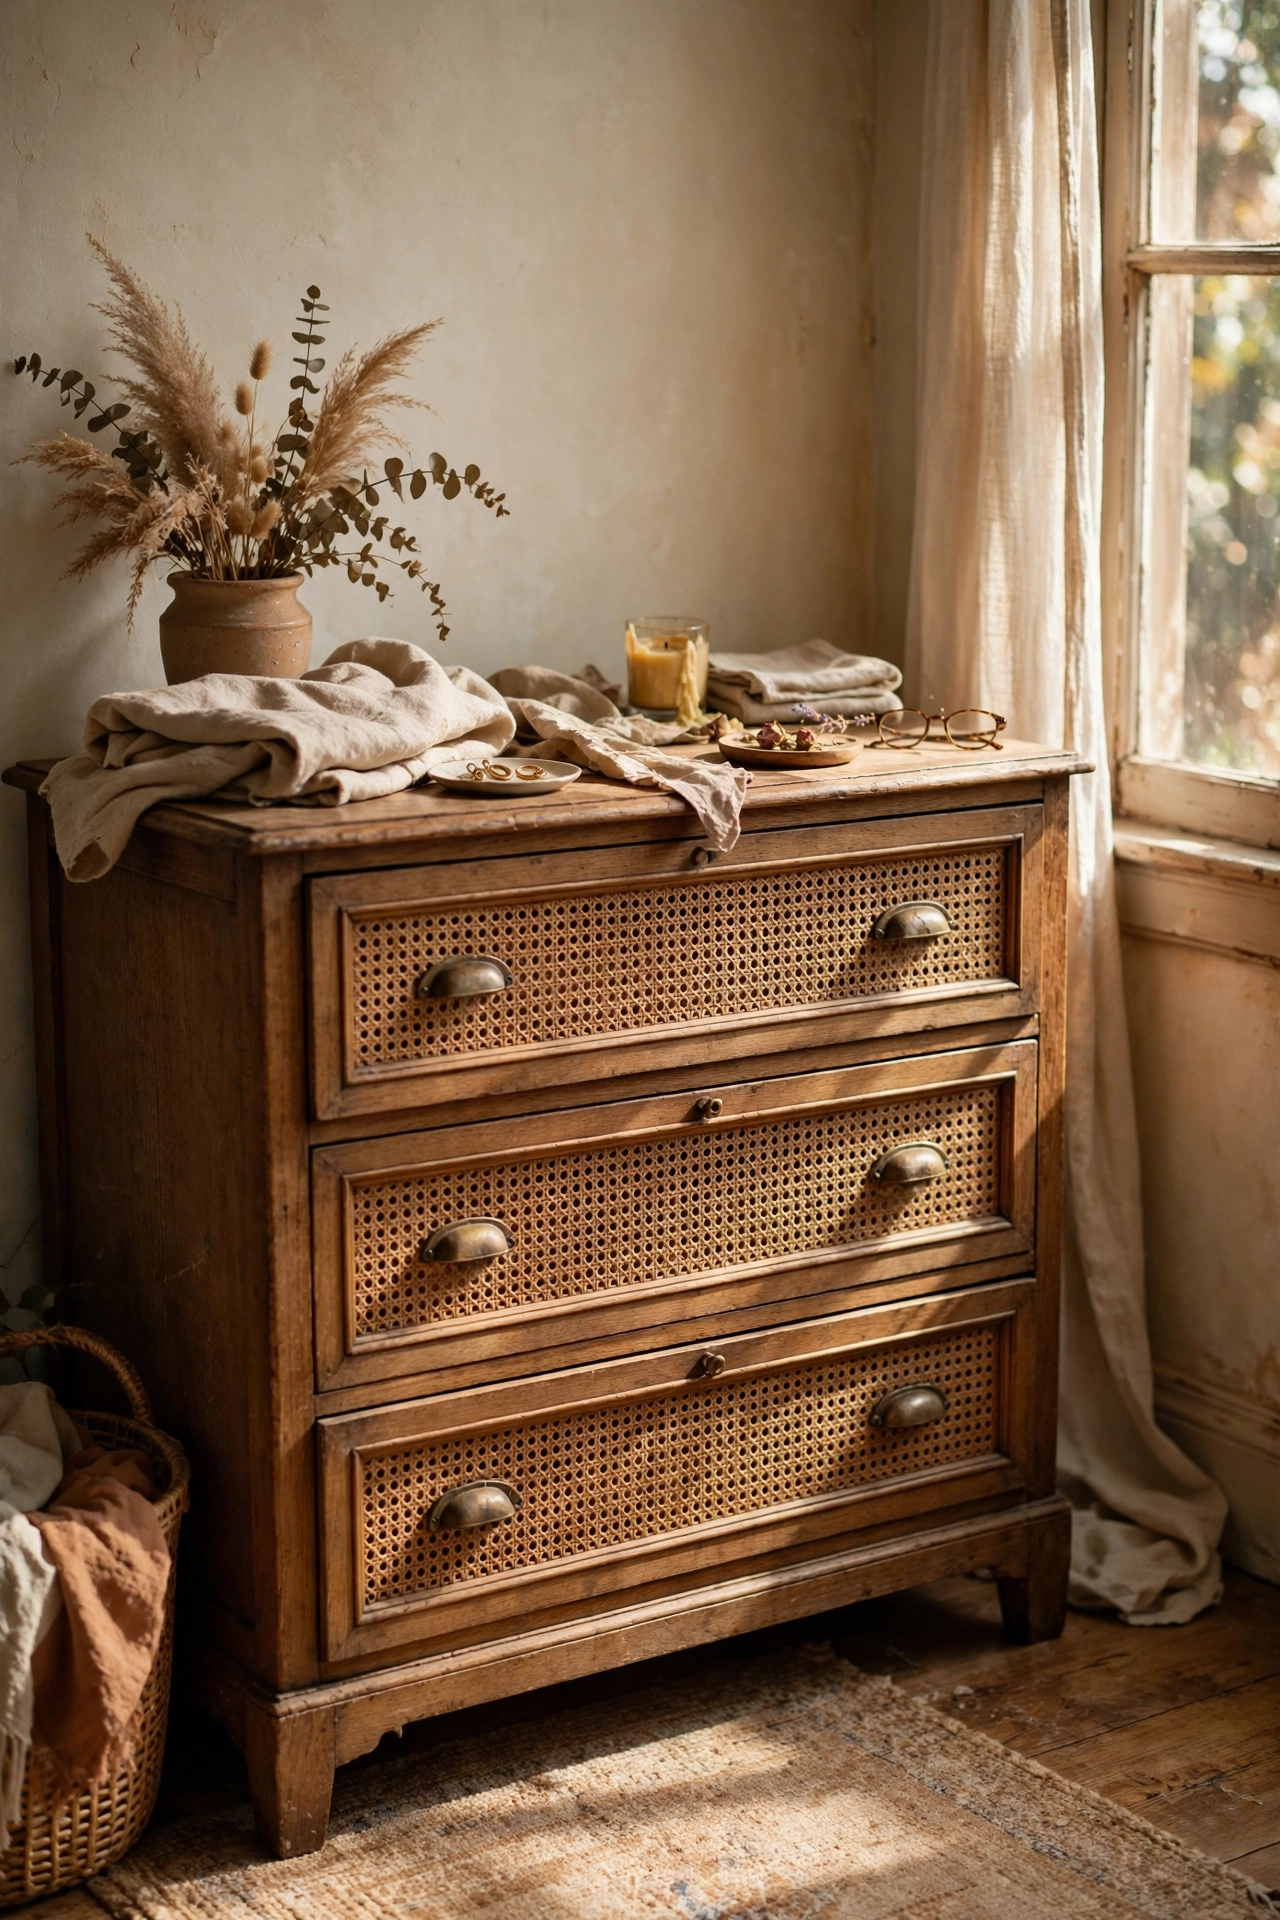
Cane webbing inserts on flat drawer fronts add texture and a vintage rattan feel. I cut panels from a $14 roll of cane webbing, glued them into simple wooden frames I screwed onto each drawer front, and the plain dresser gained serious character. Soak the webbing in warm water for twenty minutes first so it lays flat and tightens as it dries. My dry first panel buckled and I had to redo it. Trim the edges carefully, since frayed cane looks scruffy. The result reads like a much more expensive rattan piece.
Cost: ~$22-32 | Time: 3 hours
Pro tip: Always check the drawer slides and joints before you buy. Wobbly drawers are usually just loose screws, but a split side panel or warped frame is a walk-away. I pass on anything with water damage on the back panel.
9. Leather Pulls Instead of Knobs
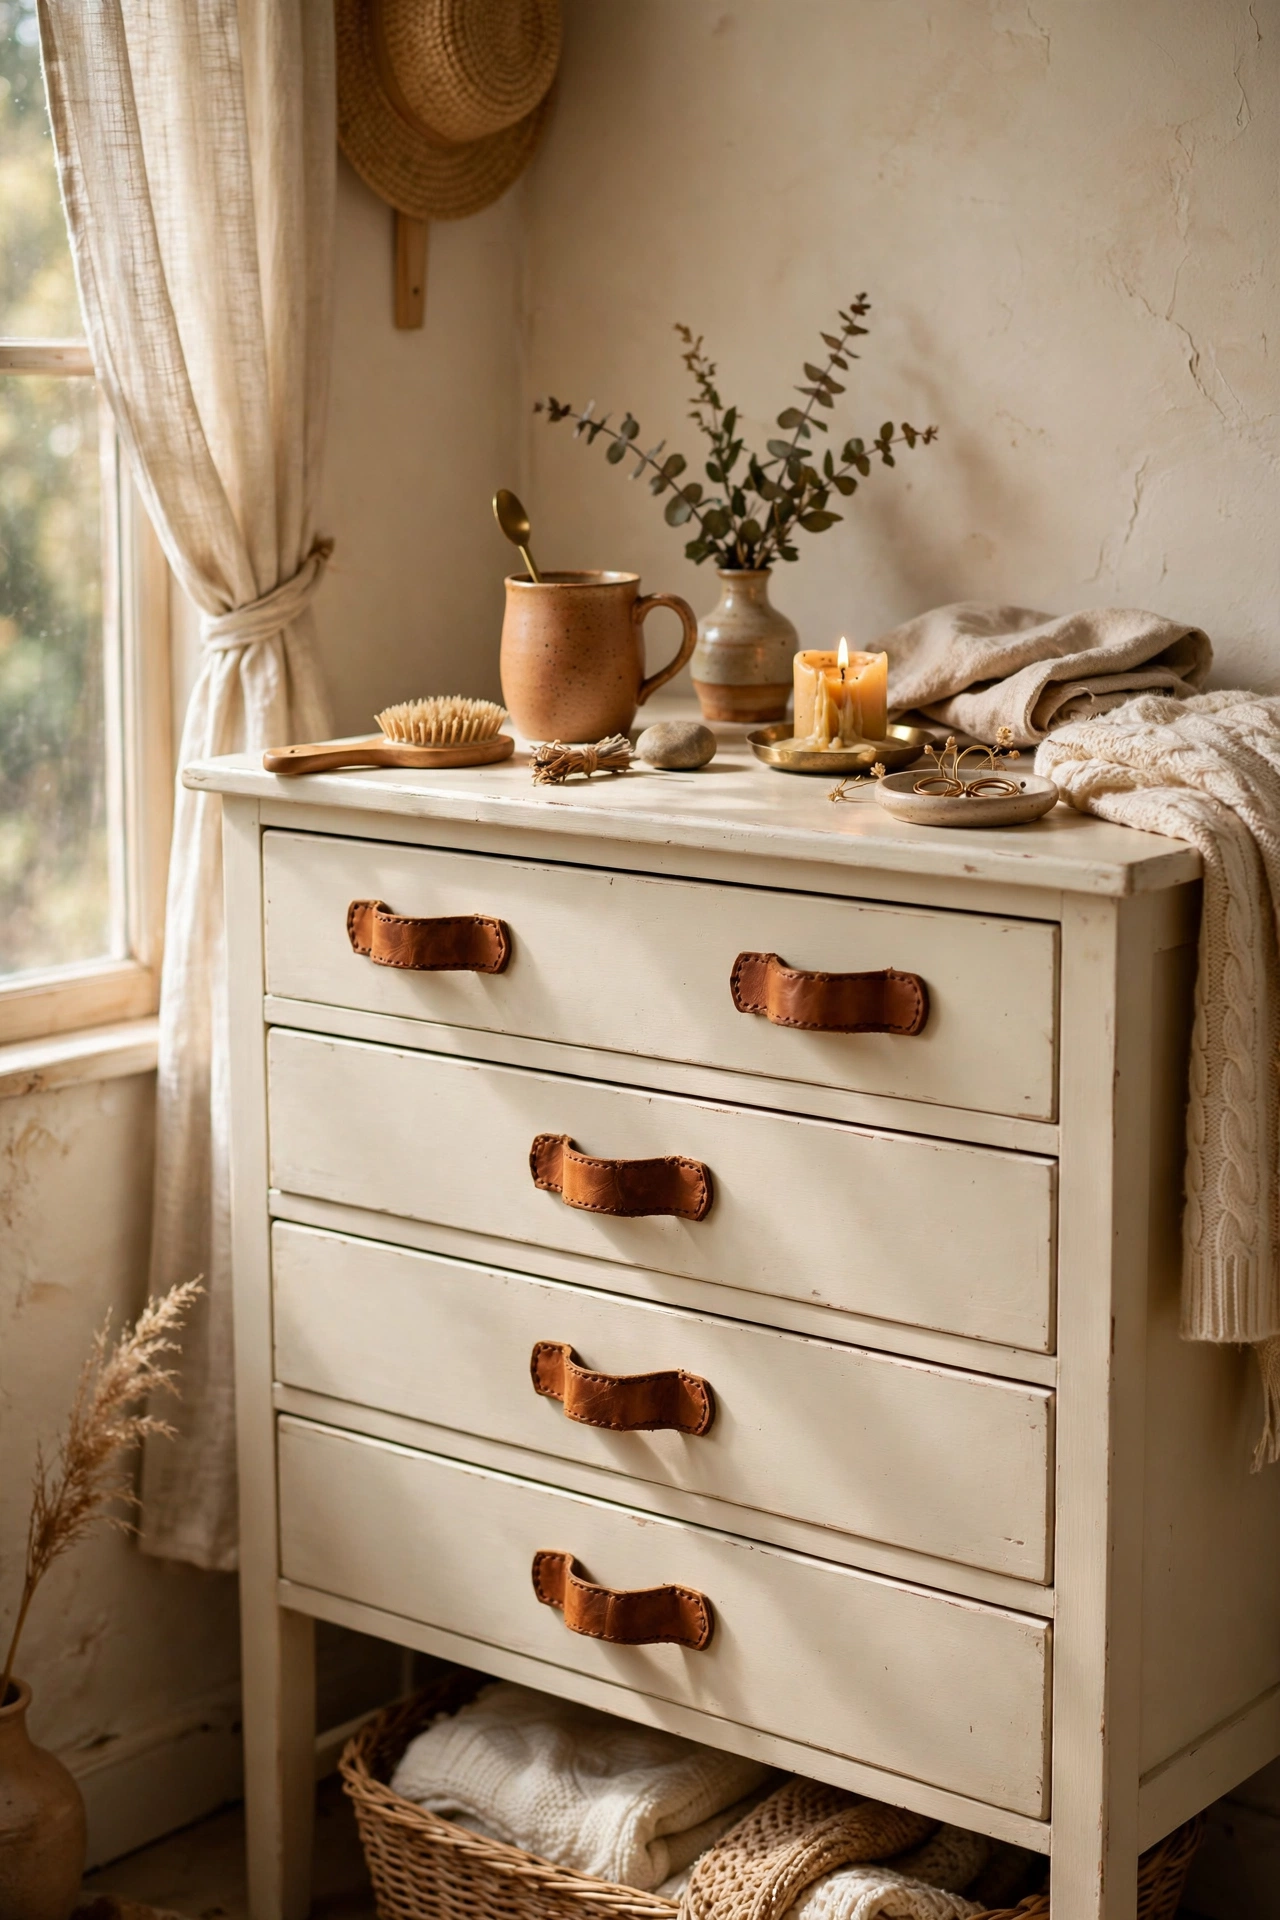
Leather pulls instead of knobs give a dresser a warm, crafted feel for very little money. I cut a $10 leather strip into eight pulls, punched holes in each end, and screwed them on with small bolts. The leather softens and darkens with handling, which only improves the look. Measure the hole spacing twice before cutting, because leather does not forgive mistakes. I rushed one and the pulls sat crooked. A cardboard template fixed the rest in minutes. On a cream or navy body, leather pulls look properly expensive.
Cost: ~$14-22 | Time: 1 hour
10. Stencilled Numbers on Each Drawer
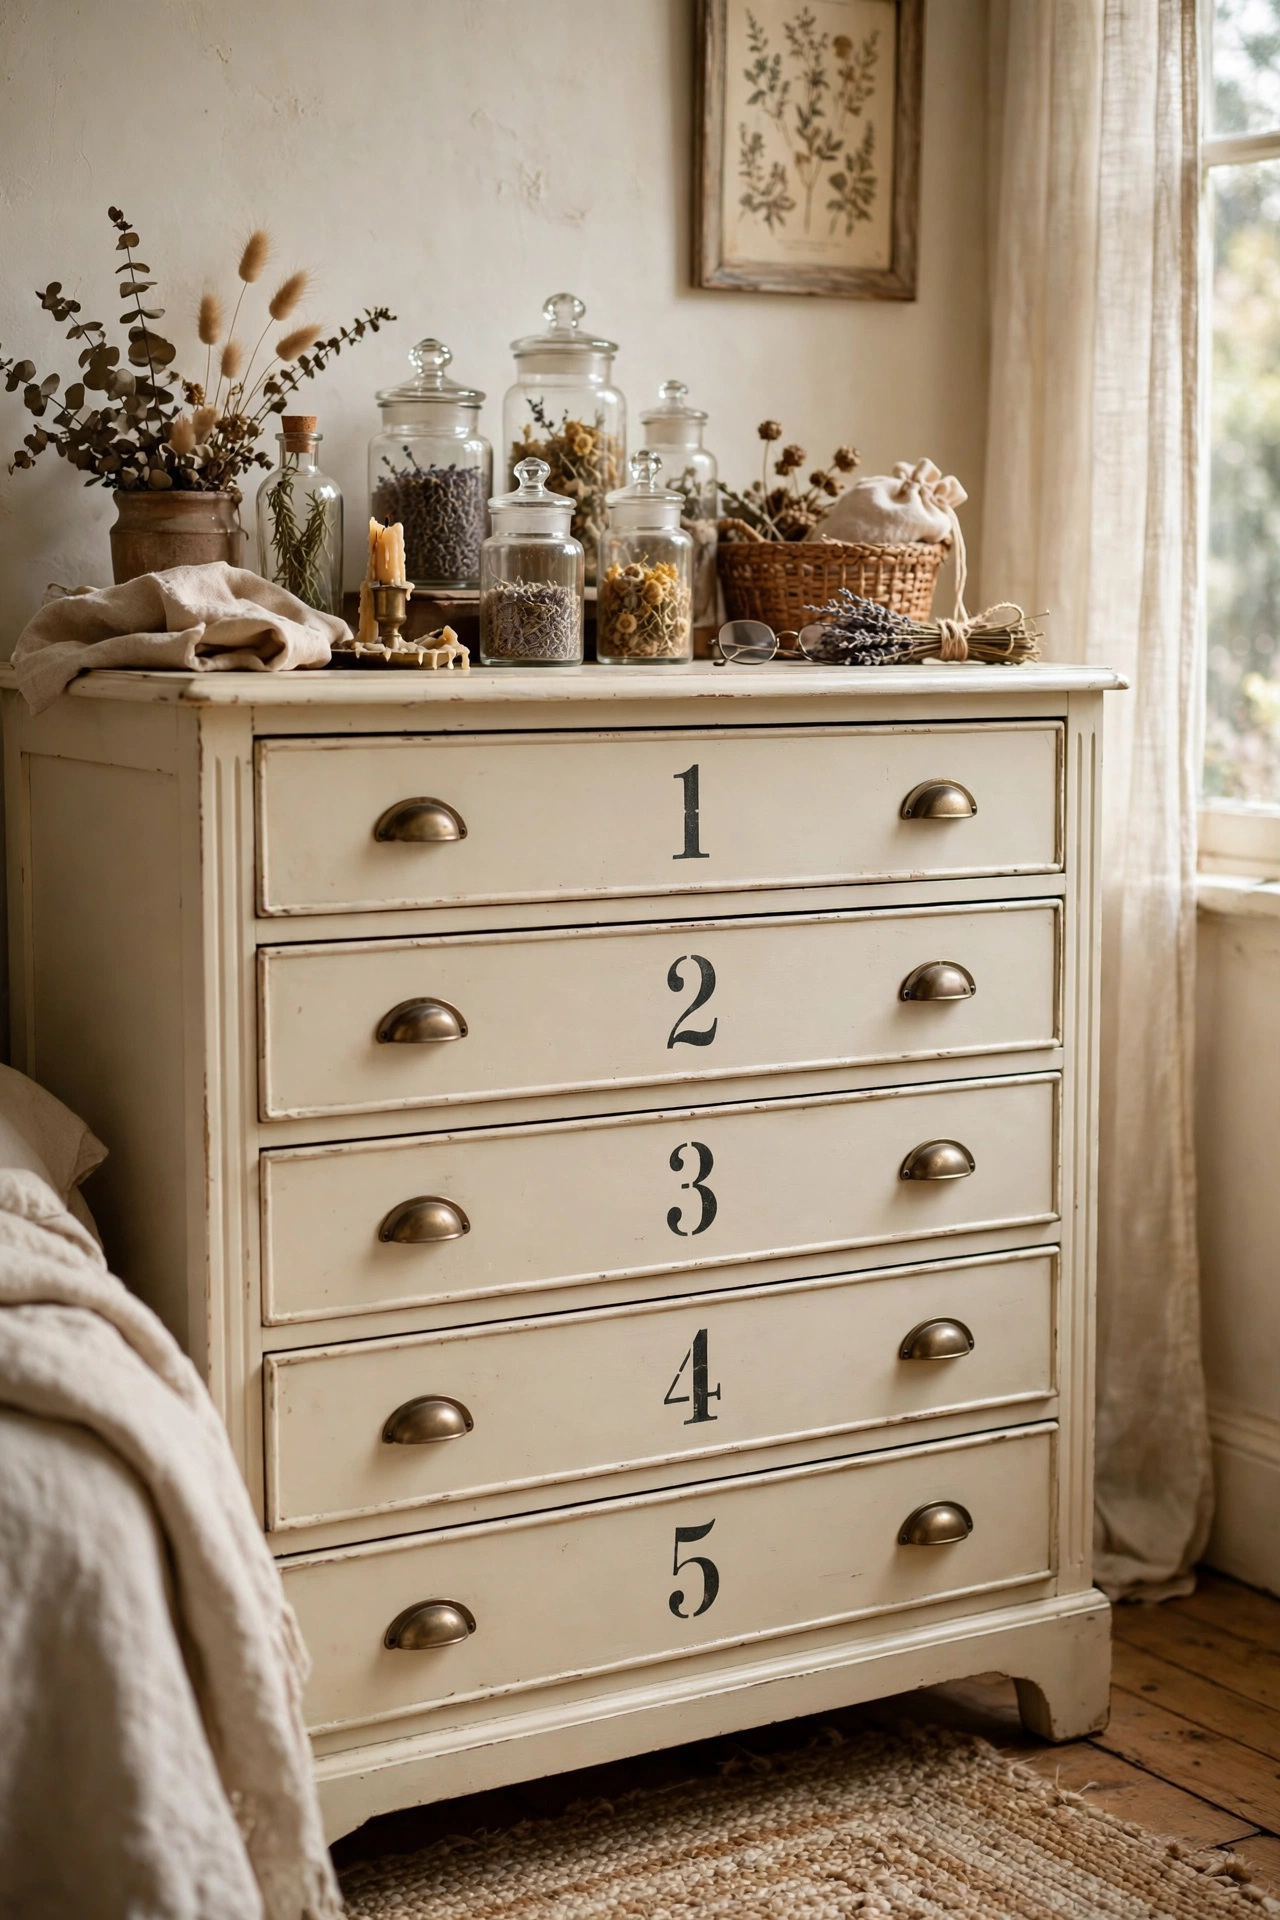
Stencilled numbers on each drawer give a dresser an apothecary, collected-over-time feel. I used small number stencils and matte black craft paint on cream drawer fronts, centring each number carefully. The font matters more than you think, so pick a classic serif style. My first try used a bubbly font and looked like a classroom. Serif numbers look like an antique shop find. Seal with a clear topcoat so the numbers survive daily tugs. Guests always ask where I bought it, which is the best review a makeover can get.
Cost: ~$12-18 | Time: 2 hours
11. Ombré Paint From Dark to Light
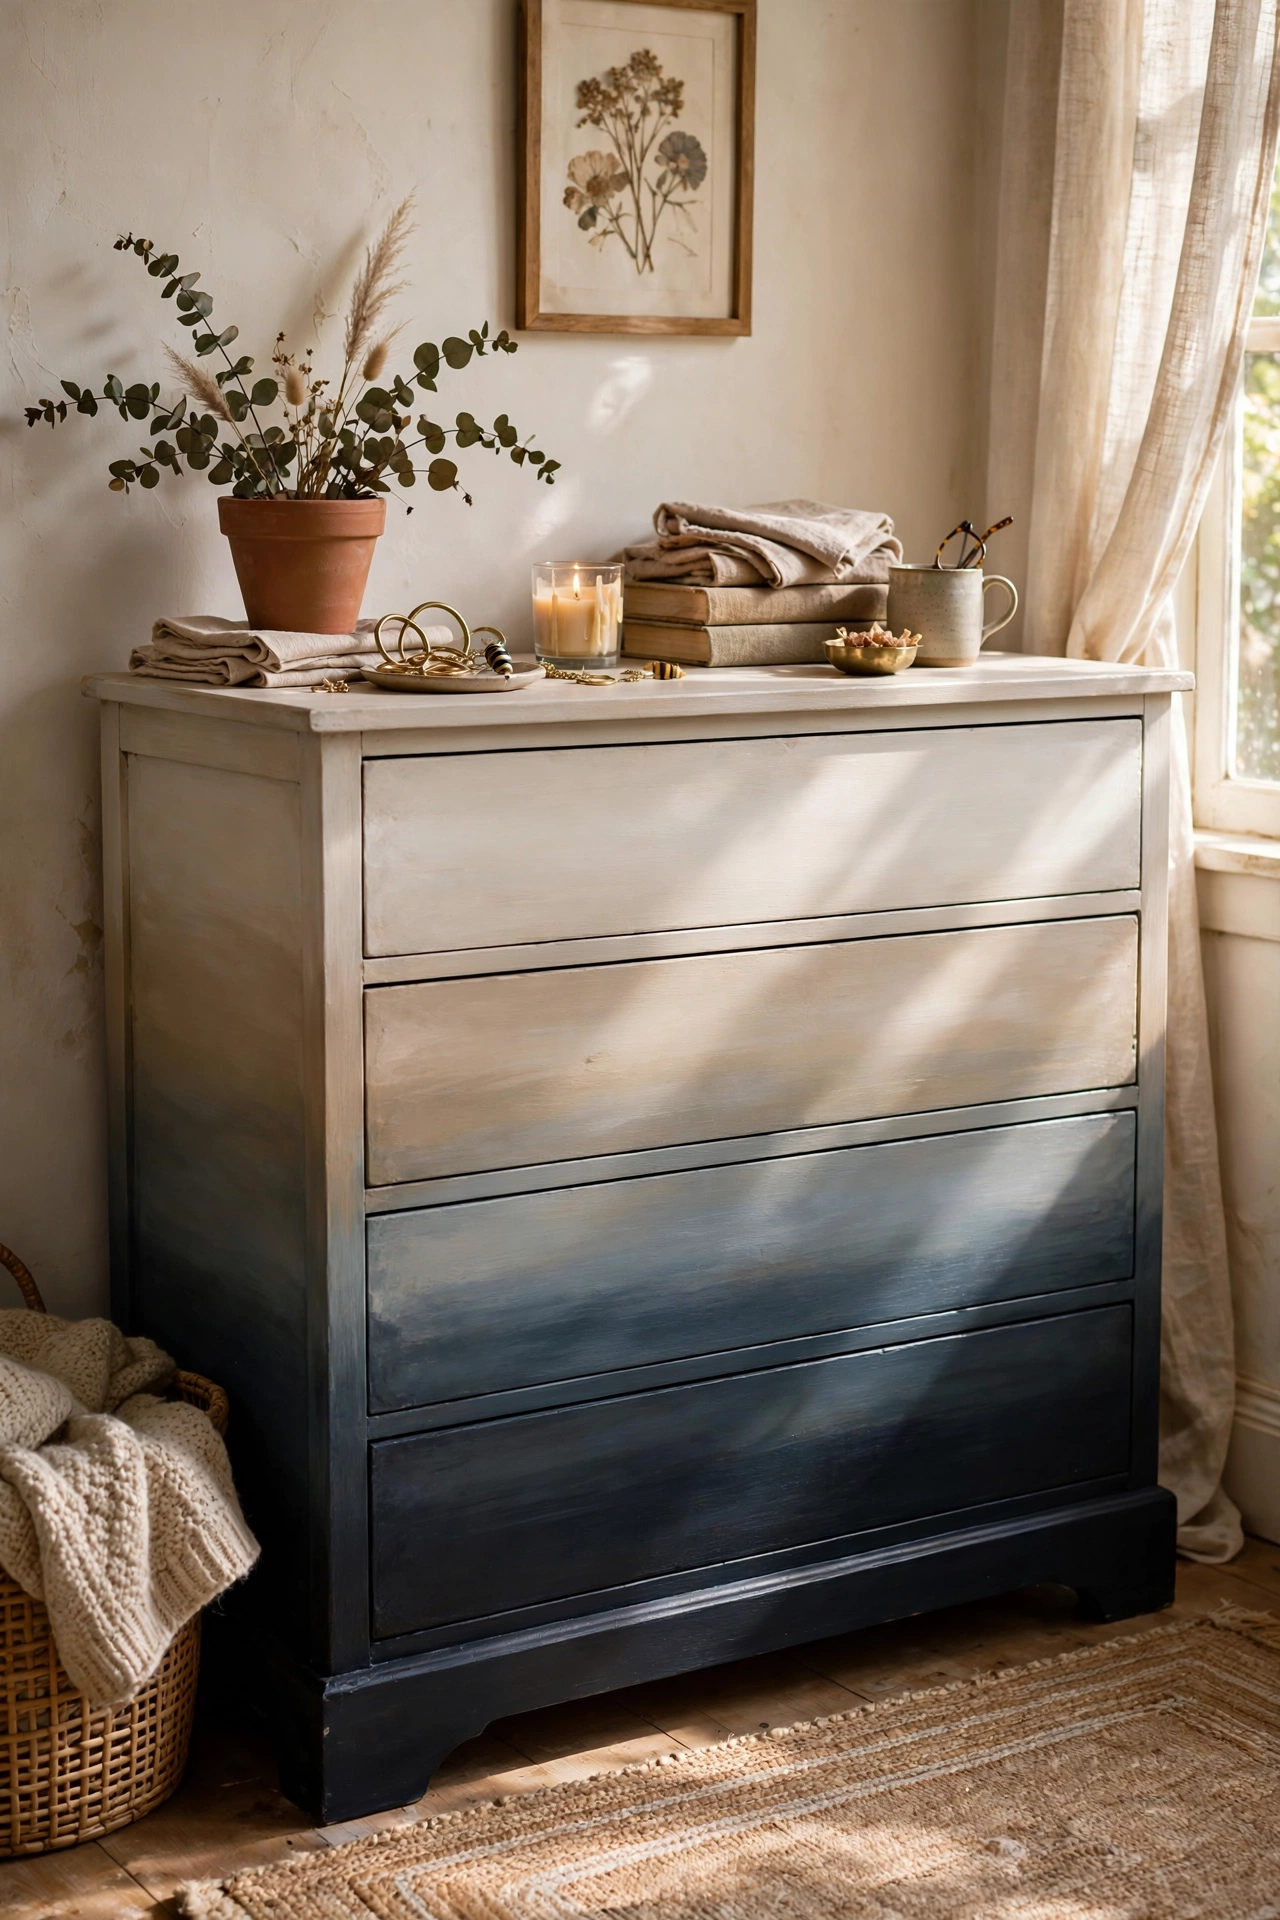
Ombré paint from dark to light across the drawers turns a plain dresser into art. I mixed one base colour with increasing amounts of white, painting the bottom drawer darkest and each one above a shade lighter. Blend where drawers meet by dry-brushing the transition colour along the edges. My first ombré jumped too sharply between drawers, so now I mix one extra mid-tone for every step. Four or five shades across the drawers reads smooth. It takes patience but zero extra skill, and the gradient always photographs beautifully.
Cost: ~$24-34 | Time: 3 hours plus drying
12. A Restored Wood Top With a Painted Body
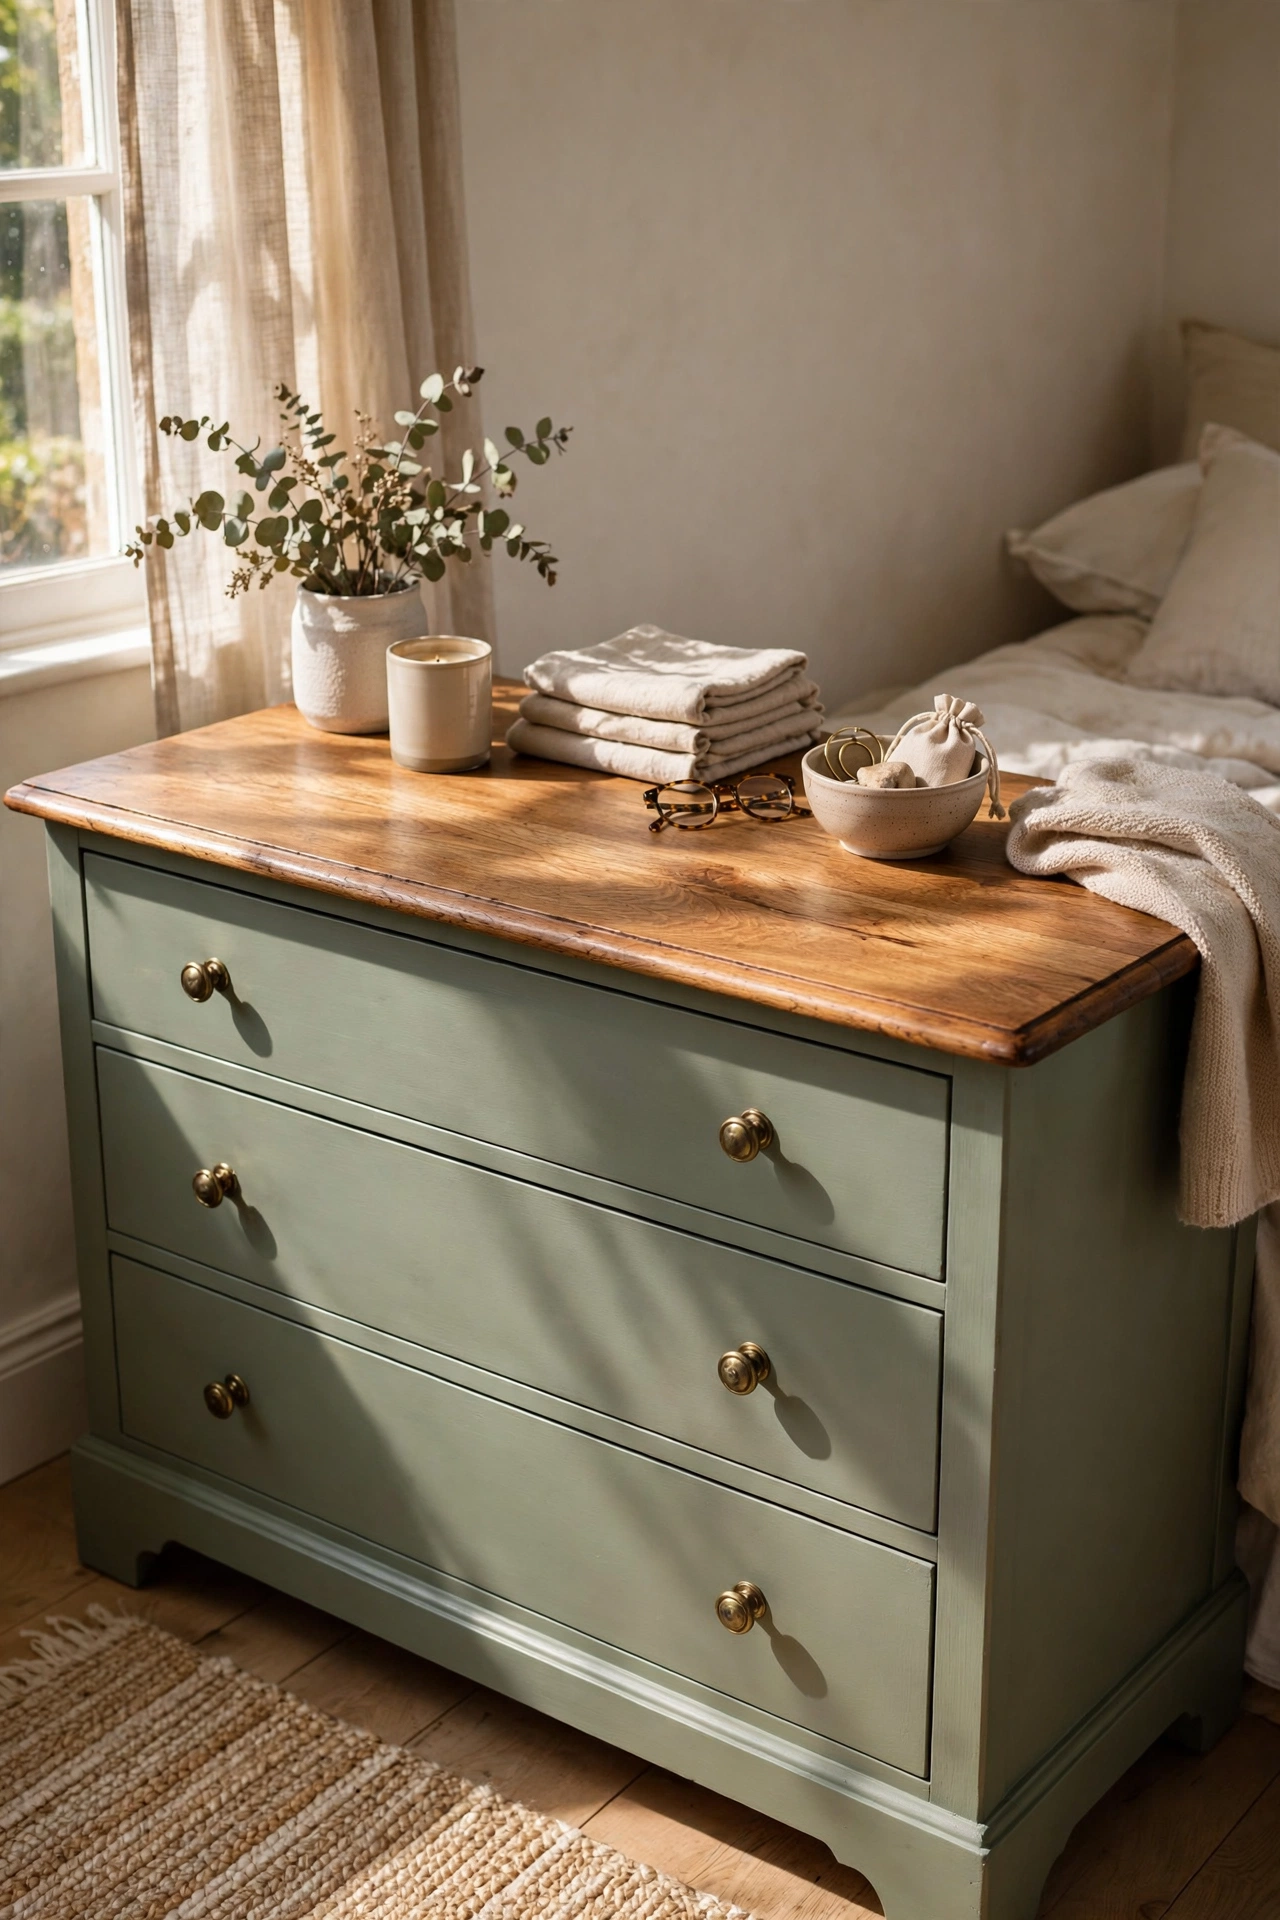
A restored wood top with a painted body gives you the best of both worlds. I sanded a battered dresser top down to bare wood with 80 then 150-grit paper, sealed it with three thin coats of polyurethane, and painted the body sage green. The natural top warms the whole piece. Mask the top carefully before painting the body, because green flecks on wood are a pain to remove. I learned that the hard way. The contrast of wood and paint reads far more expensive than paint alone, and the sealed top survives daily use beautifully.
Cost: ~$28-40 | Time: 2 days with drying
13. Faux Marble Contact Paper on the Top
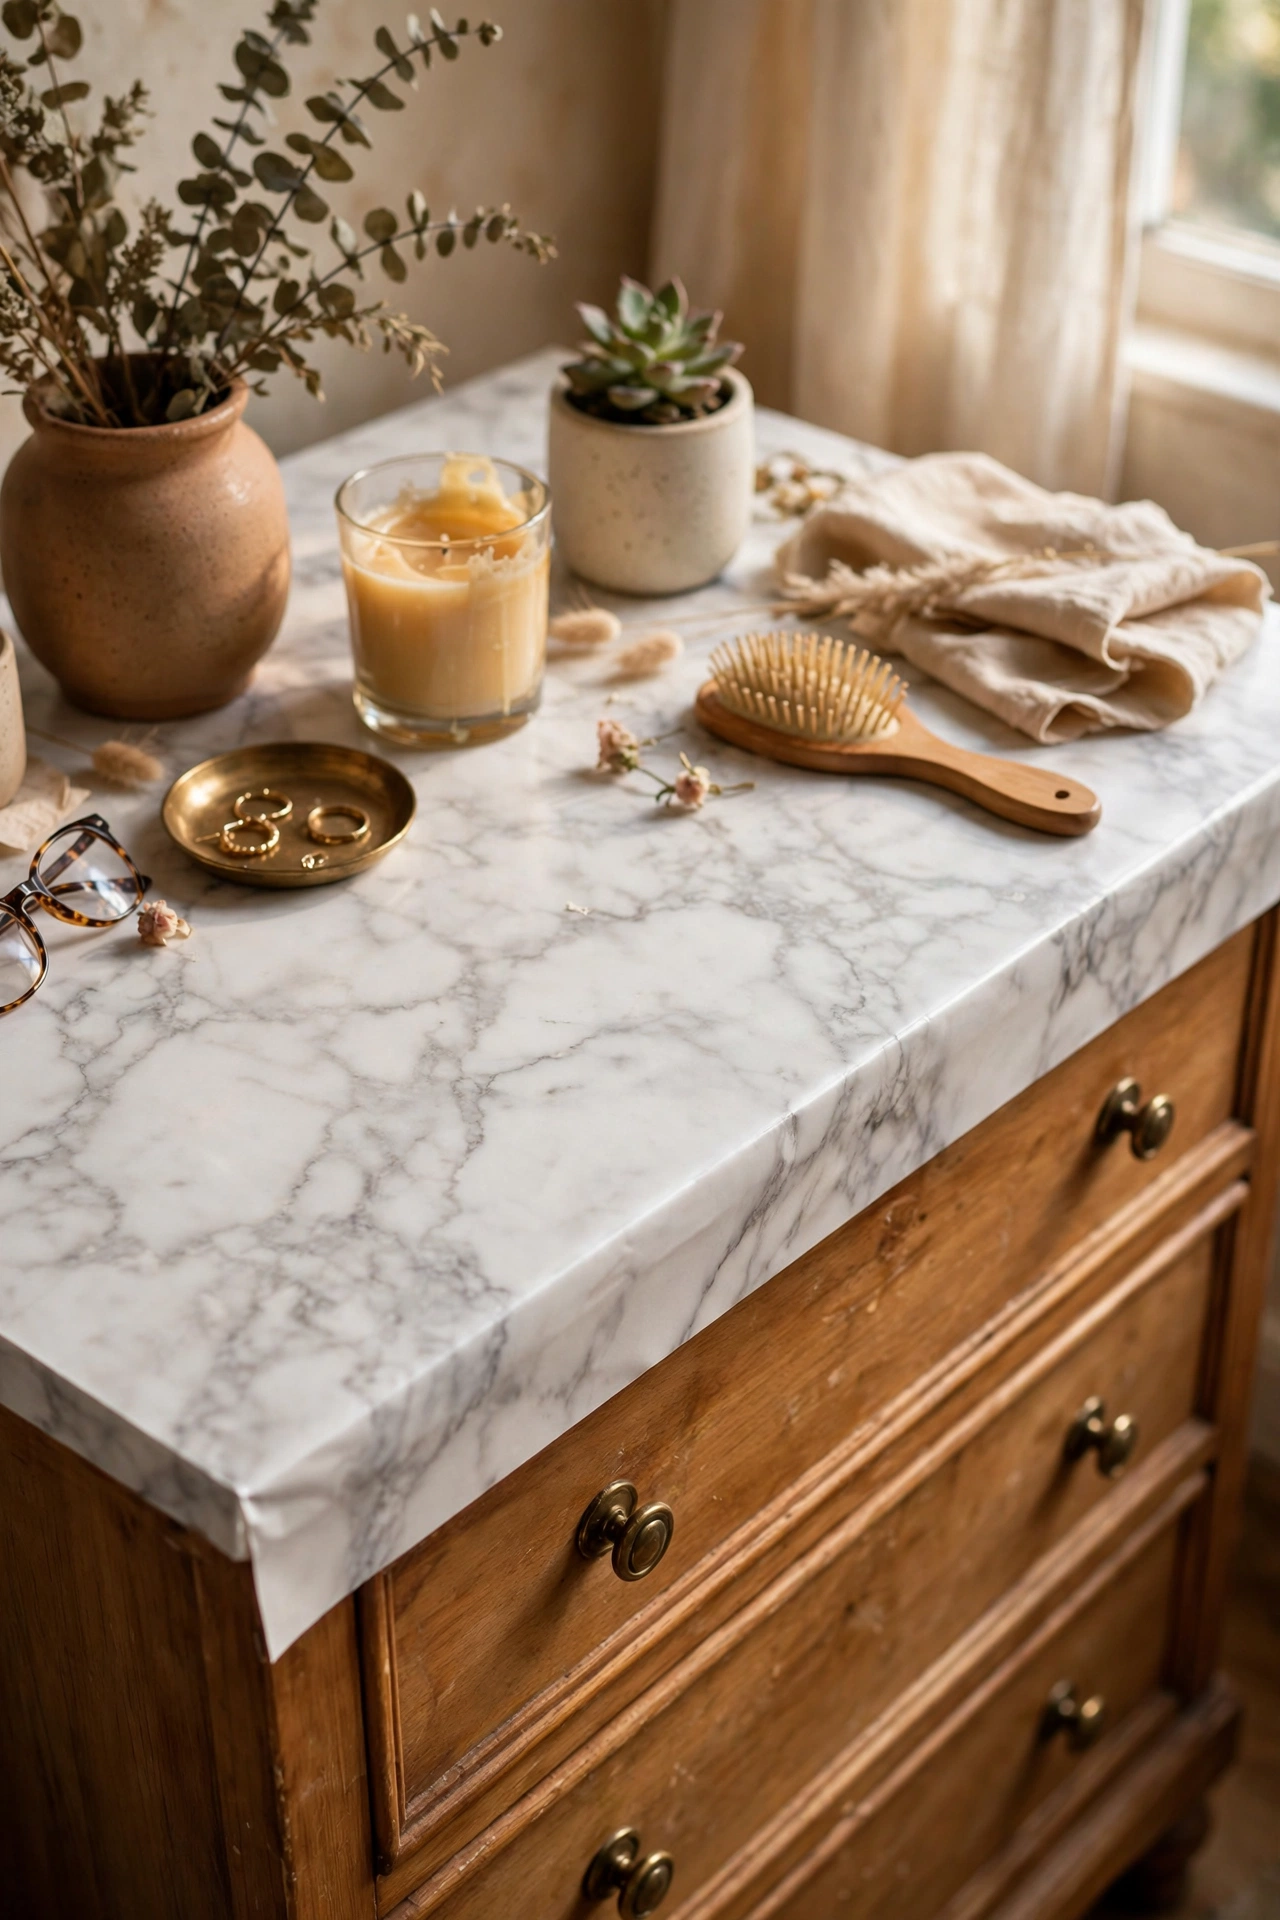
Faux marble contact paper on the top fakes a stone surface for under ten dollars. I laid a $7 marble contact paper sheet over the dresser top, smoothing with a credit card from the centre out to push bubbles to the edges. Work slowly and peel as you go, because repositioning stretches the paper. My first sheet wrinkled at the corner and I had to start over with a fresh piece. Trim the overhang with a sharp craft knife for a clean edge. It fools everyone until they touch it, and it wipes clean.
Cost: ~$7-12 | Time: 45 minutes
Pro tip: Paint cures for weeks, not hours. A finish that feels dry can still dent under a book or a lamp. I give every painted dresser a full week before styling the top, and I have never had a dent since starting that rule.
14. New Tapered Legs for a Mid-Century Feel
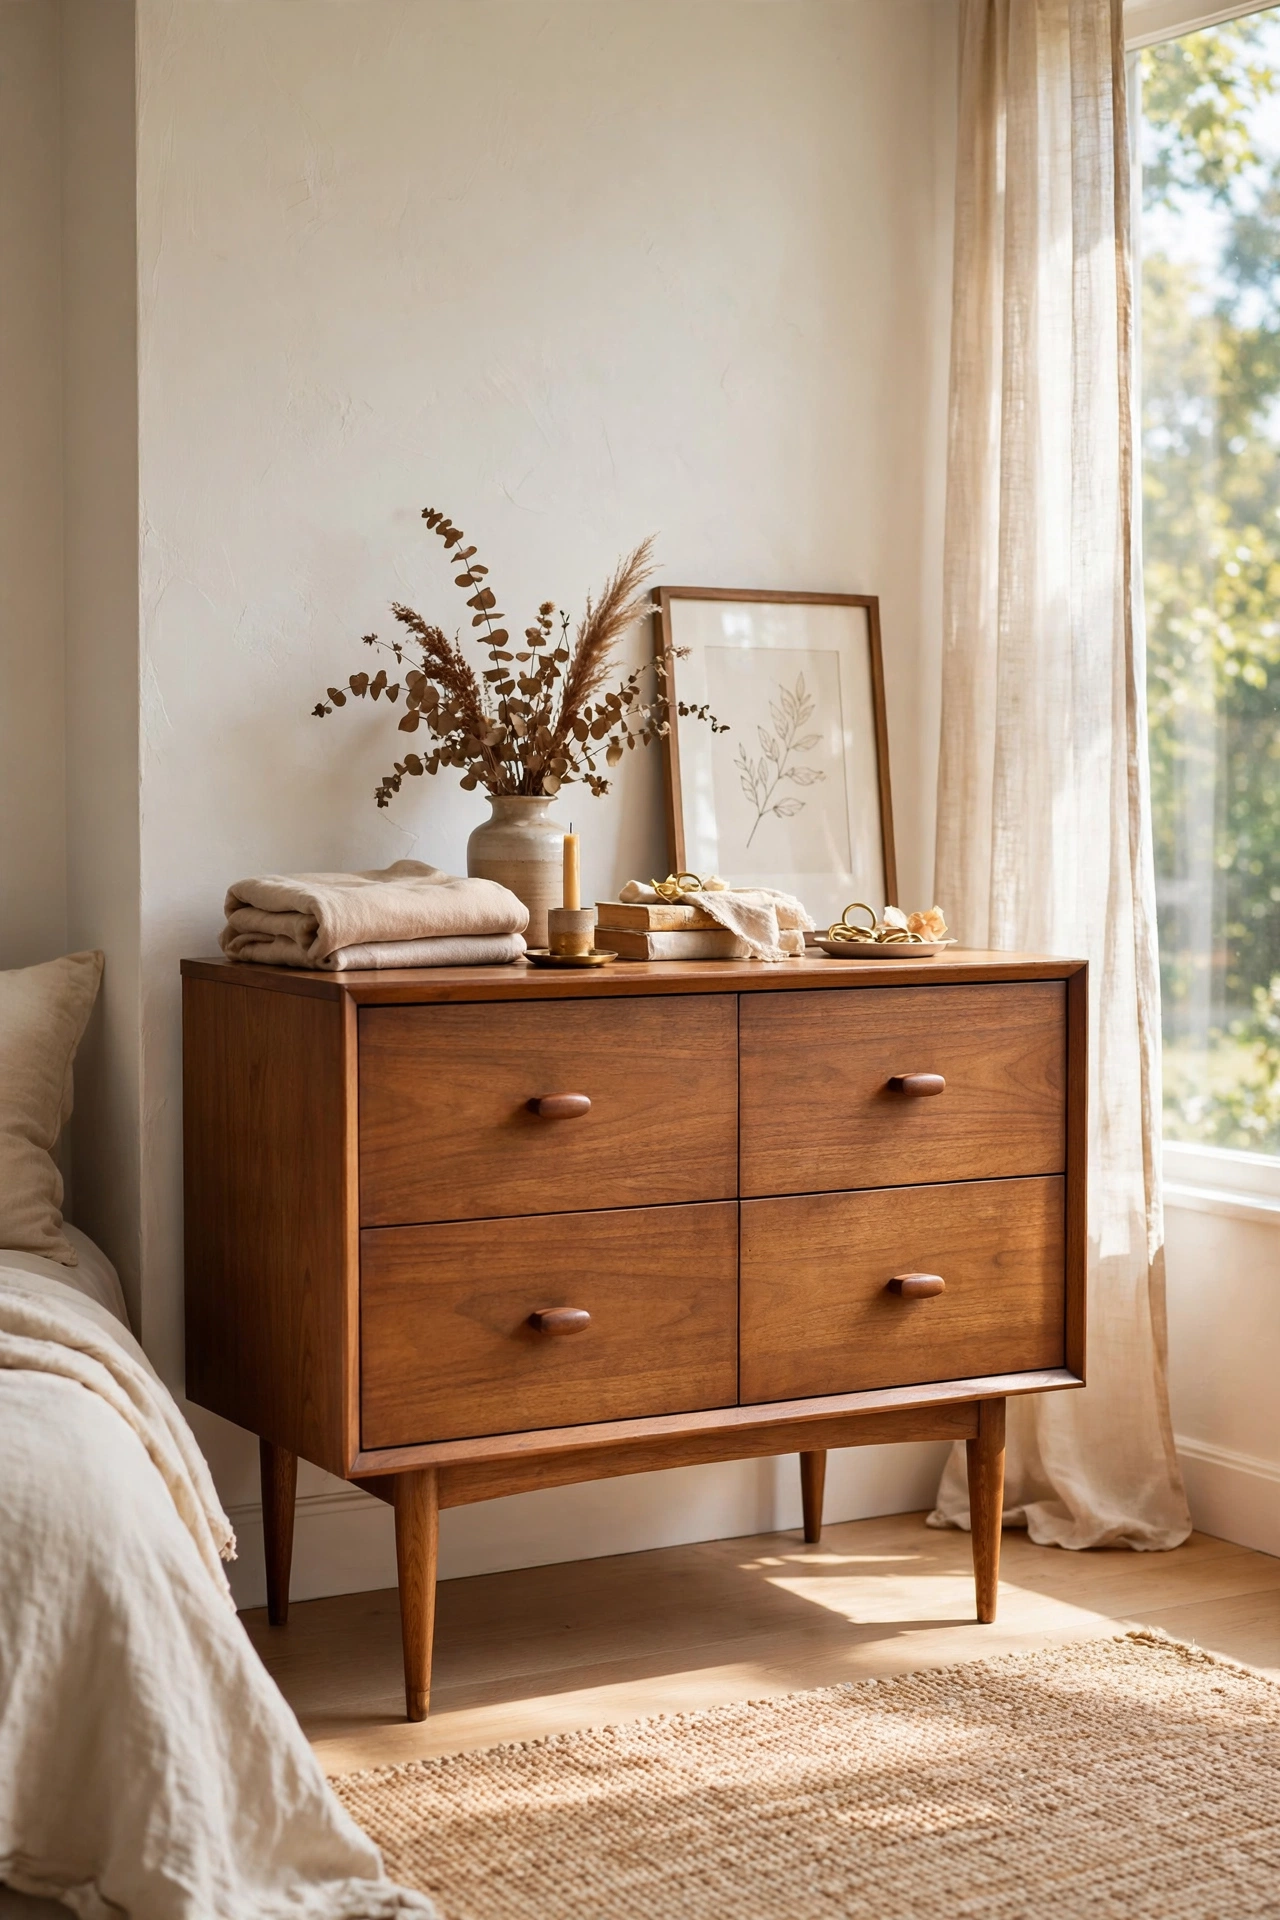
New tapered legs for a mid-century feel lift a dresser from frumpy to fabulous. I unscrewed the squat old feet and bolted on four $6 tapered wooden legs with angled mounting plates, raising the dresser about six inches. Angled plates matter, because straight plates make the legs look bolted on. My first set splayed oddly until I repositioned the plates. The added height makes small bedrooms feel larger and vacuuming easier. Six dollars a leg transformed a $25 thrift find into the piece every guest photographs.
Cost: ~$28-38 | Time: 1 hour
15. A Soft Whitewash for a Farmhouse Look
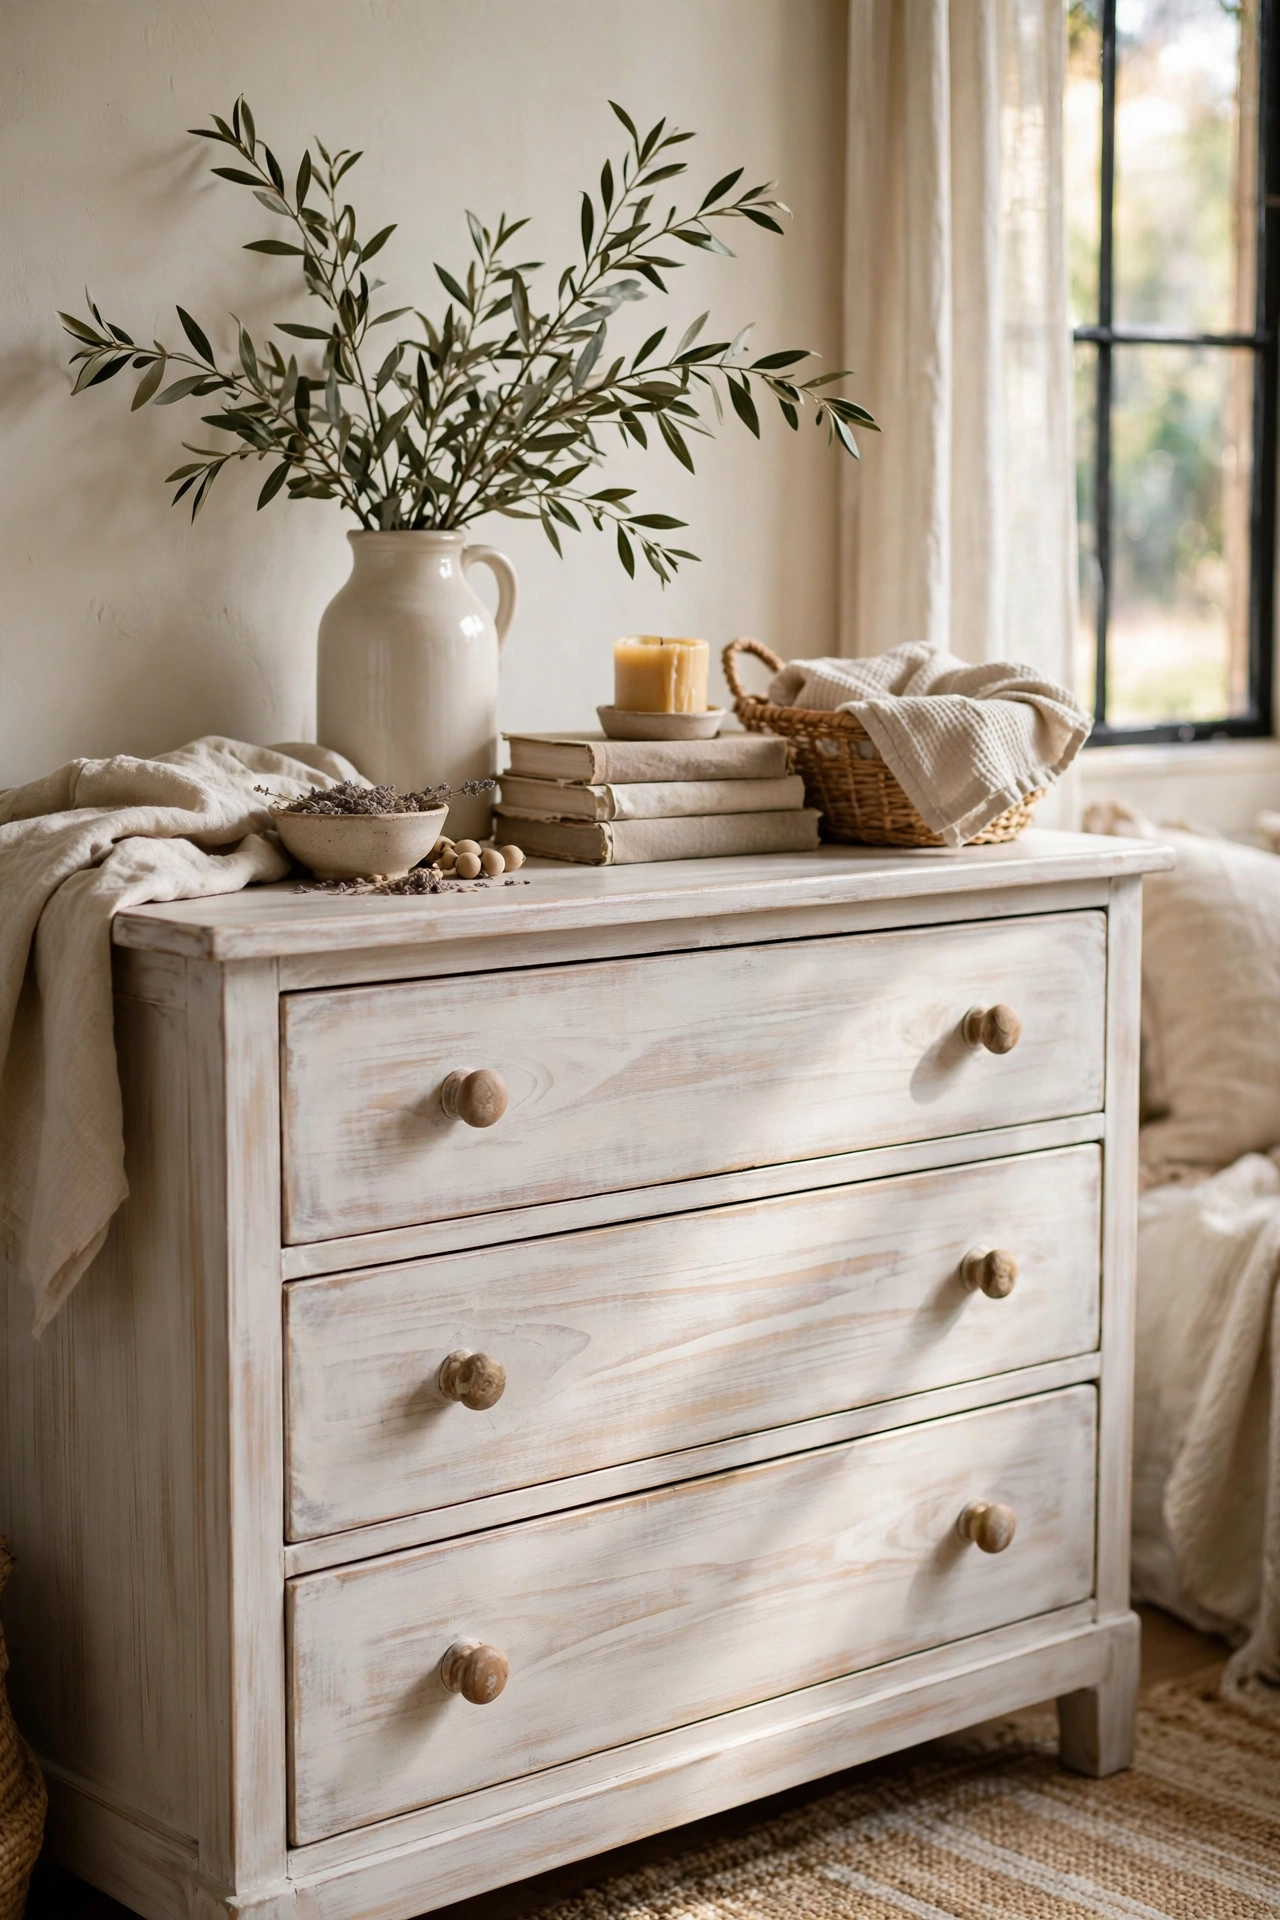
A soft whitewash for a farmhouse look lets wood grain show through milky colour. I mixed white paint half-and-half with water, brushed it on in the direction of the grain, and wiped back with a rag after thirty seconds. Work one drawer front at a time so the wash does not dry before you wipe. My first whole-dresser attempt dried patchy and I had to sand it back. Section by section gives an even, soft finish. Two light passes beat one heavy one. Seal with clear wax for a soft sheen.
Cost: ~$14-22 | Time: 2 days with drying
16. Committing to a Bold Teal Statement Dresser
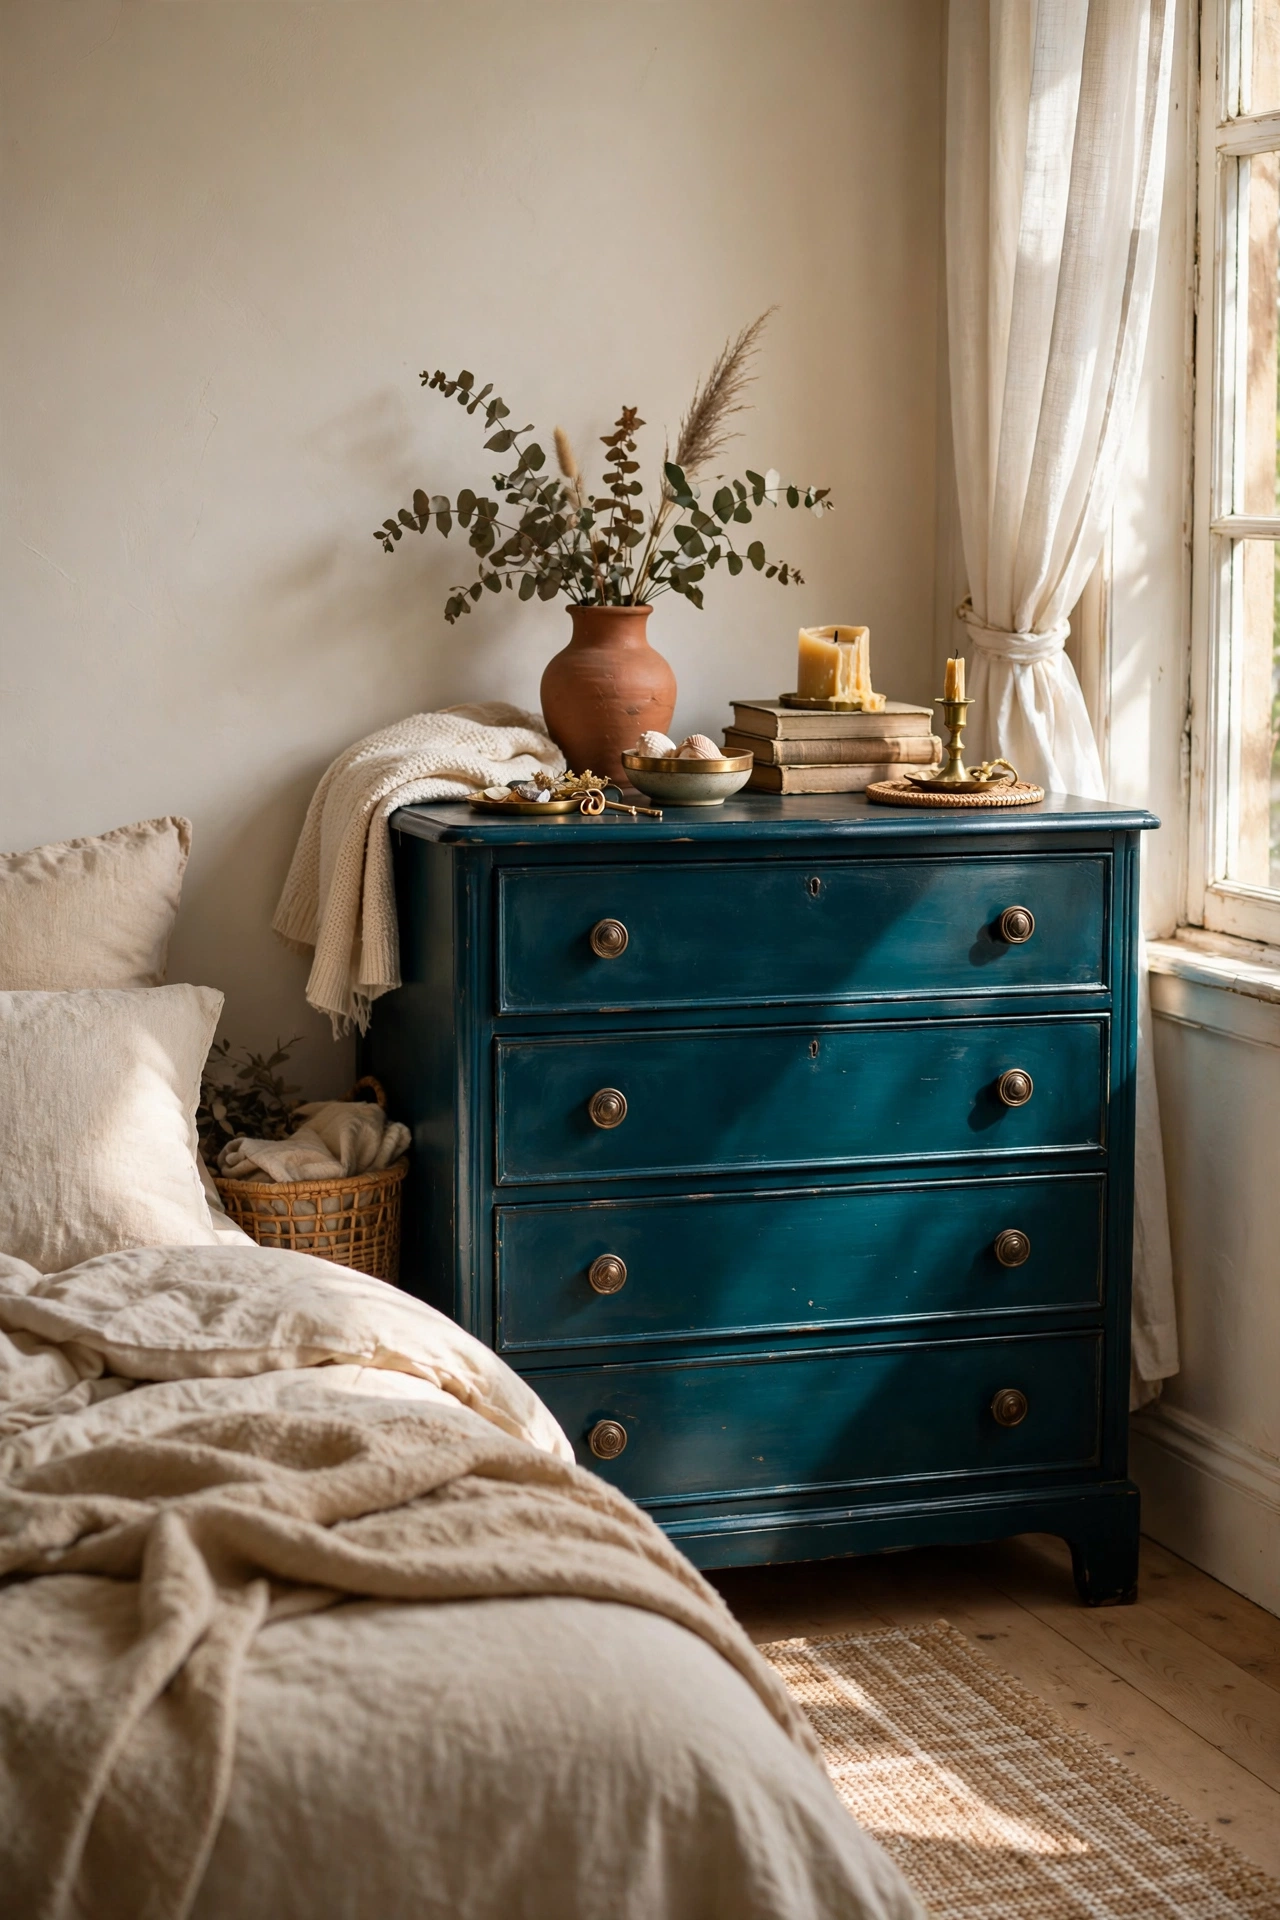
Committing to a bold teal statement dresser sounds scary and looks incredible. I painted a boring oak dresser deep teal satin for $17, and it became the star of the bedroom. Bold colours demand good prep, so clean, sand lightly, and prime, because teal over grime peels fast. My test swatch on the back panel convinced me after a day of living with it. Style around it with neutrals so the dresser stays the hero. Beige bedding, wood tones, done. It is the loudest piece I own and I would not change a thing.
Cost: ~$22-32 | Time: 2 days with drying
17. The Inside-Drawer Refresh: Paint, Line, Done
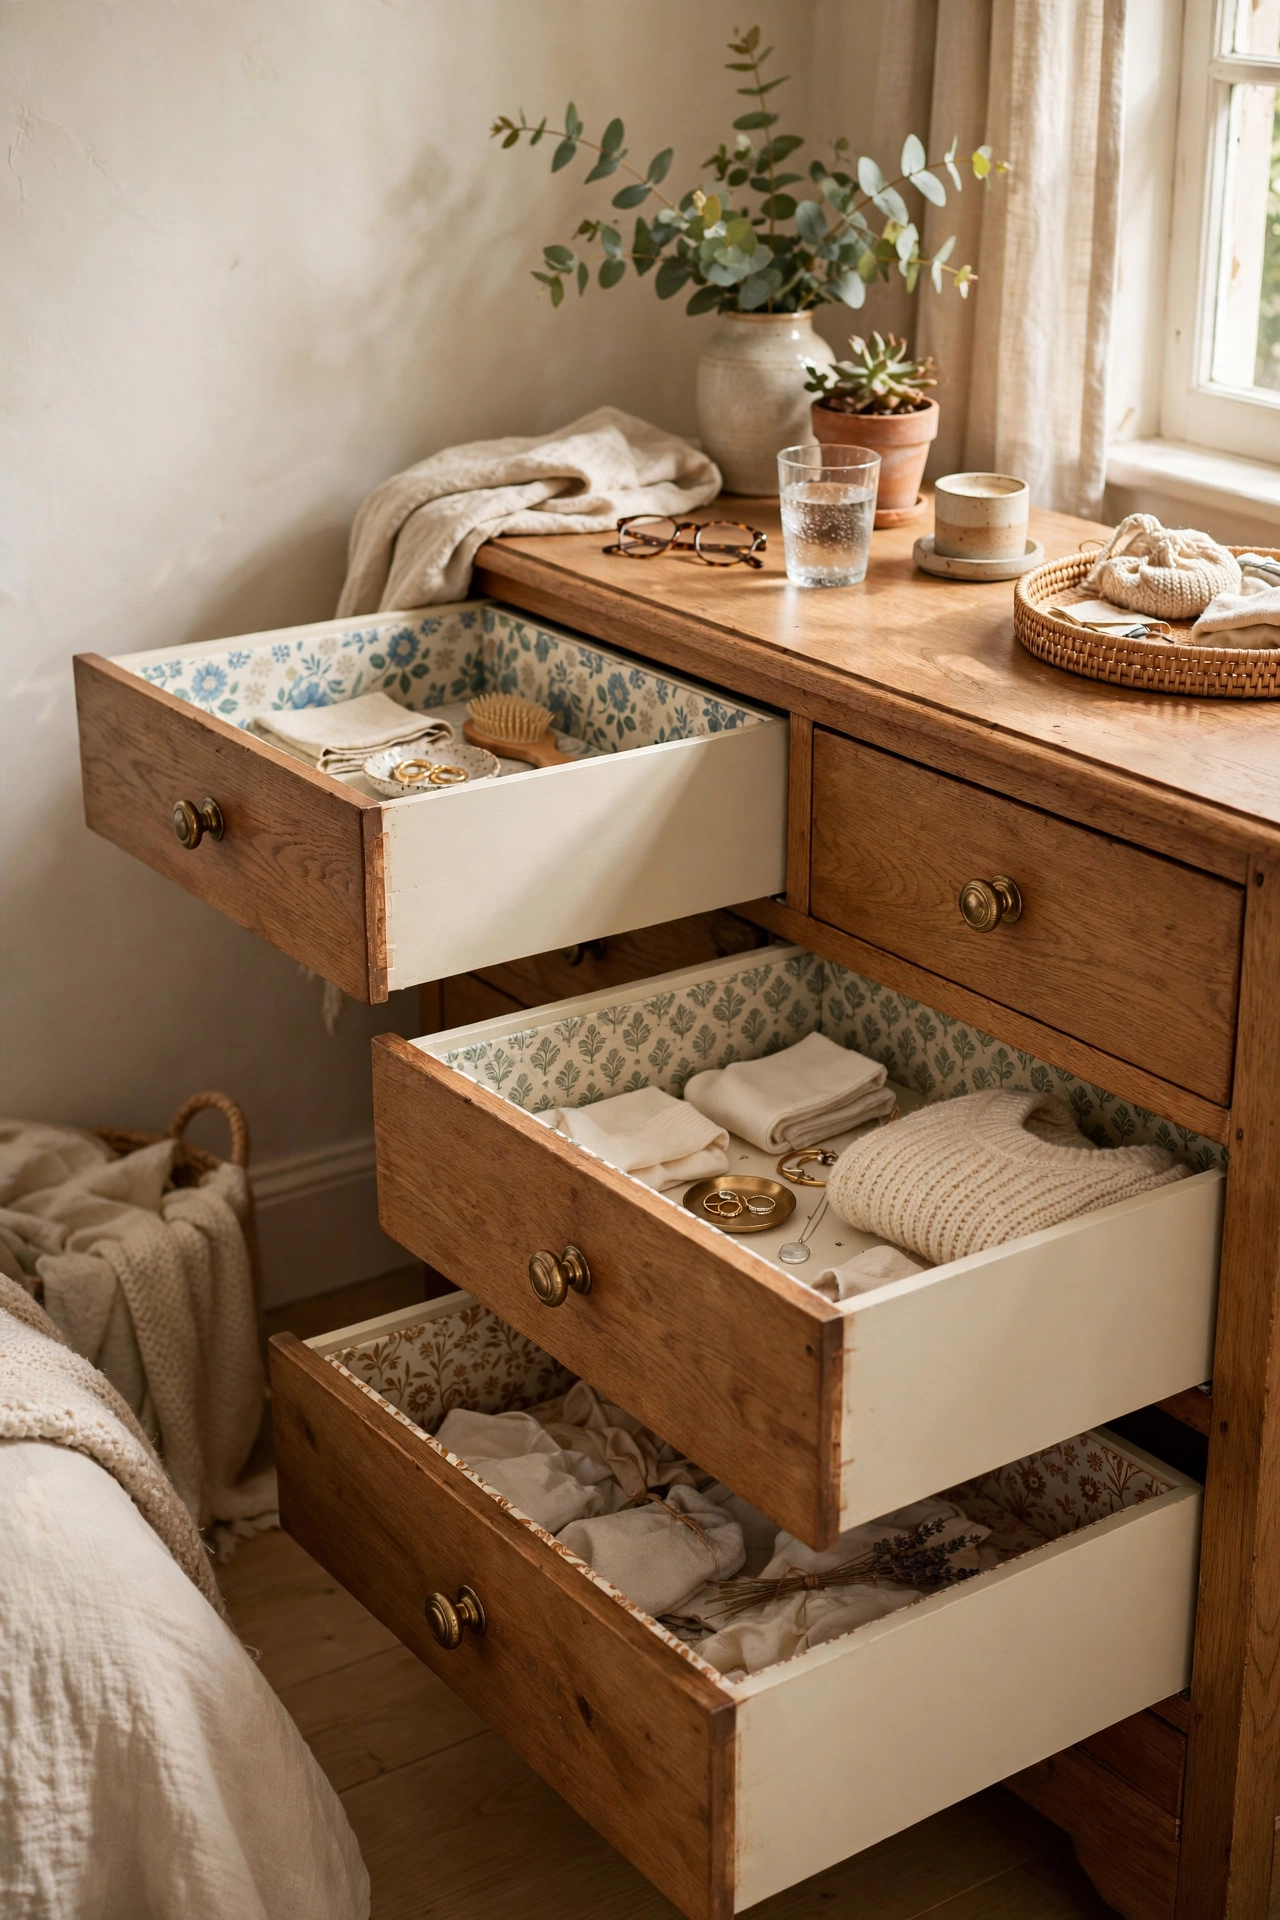
The inside-drawer refresh, paint, line, done, is the finishing touch most flippers skip. I painted the interior of my drawers a soft cream for $6, lined the bases with patterned paper, and the dresser felt brand new. Sand the insides lightly first, because rough thrifted interiors grab paint unevenly. My first liner wrinkled because I skipped the sanding and smoothing step. This takes an hour and costs almost nothing, yet opening a drawer now feels like a little gift. Nobody sees it but you, which makes it the best kind of upgrade.
Cost: ~$8-14 | Time: 1 hour plus drying
Quick questions, answered
What paint works best on old thrifted dressers?
A good furniture or cabinet paint in satin finish is the safest bet. Chalk paint is the most forgiving if you hate prep work, but always seal it with wax or a topcoat, because unsealed chalk paint marks easily.
Do I really need to sand before painting?
Usually a light scuff-sand is enough. Clean first, then a quick pass with 120-grit paper so the paint grips. Skip sanding entirely only with chalk paint on matte wood, and even then a light scuff helps.
How do I fix drawers that stick?
Rub a white candle or bar soap along the runners and the drawer sides. If that fails, check for a loose screw or a warped runner, which are the usual culprits. Most sticking drawers are fixed in five minutes.
How do I stop paint chipping on high-use drawers?
Prep properly, use a bonding primer on glossy surfaces, and let the paint cure for at least a week before heavy use. A clear topcoat on drawer edges adds real protection where fingers grab daily.
📌 If you’ve thrifted a dresser, save this idea for your next weekend makeover!
Thrifted furniture fan? These are right up your street: (see also: 17-thrifted-living-room-decor-that-dont-look-cheap) (see also: 21-thrifted-bedroom-decor-that-look-designer) (see also: 25-thrifted-living-room-decor-worth-every-penny)
