19 Christmas Living Room Decor Ideas on a Budget
The first Christmas I spent in my own flat, I had exactly forty pounds left after rent and bills, and a living room that looked like a waiting room. I wanted proper Christmas living room decor, the kind that makes the whole room glow when the lights go down, but every shop window seemed priced for someone else. So I made a deal with myself: no single decoration could cost more than a takeaway coffee, and I had to use what I already owned first. That was five years ago, and honestly, that December taught me more about decorating than any magazine ever has.
Here is what I learned. Christmas decorating is not about buying a whole new room. It is about three things: warm light, natural texture, and one colour repeated with confidence. Pinecones you pick up on a walk beat plastic baubles from a bargain bin every time. A string of fairy lights in a jar you already own beats a forty-pound ornament. Every idea below follows that rule, and every one of them costs less than a decent pizza.
And if you take one lesson from my forty-pound Christmas, make it this: start with the tree and the mantel, because that is where your eyes go, then let the rest of the room catch up. By the second week of December my little flat smelled of cinnamon and looked like a Christmas card. Yours can too, without touching your savings.
Paper Star Lanterns Glowing in the Front Window
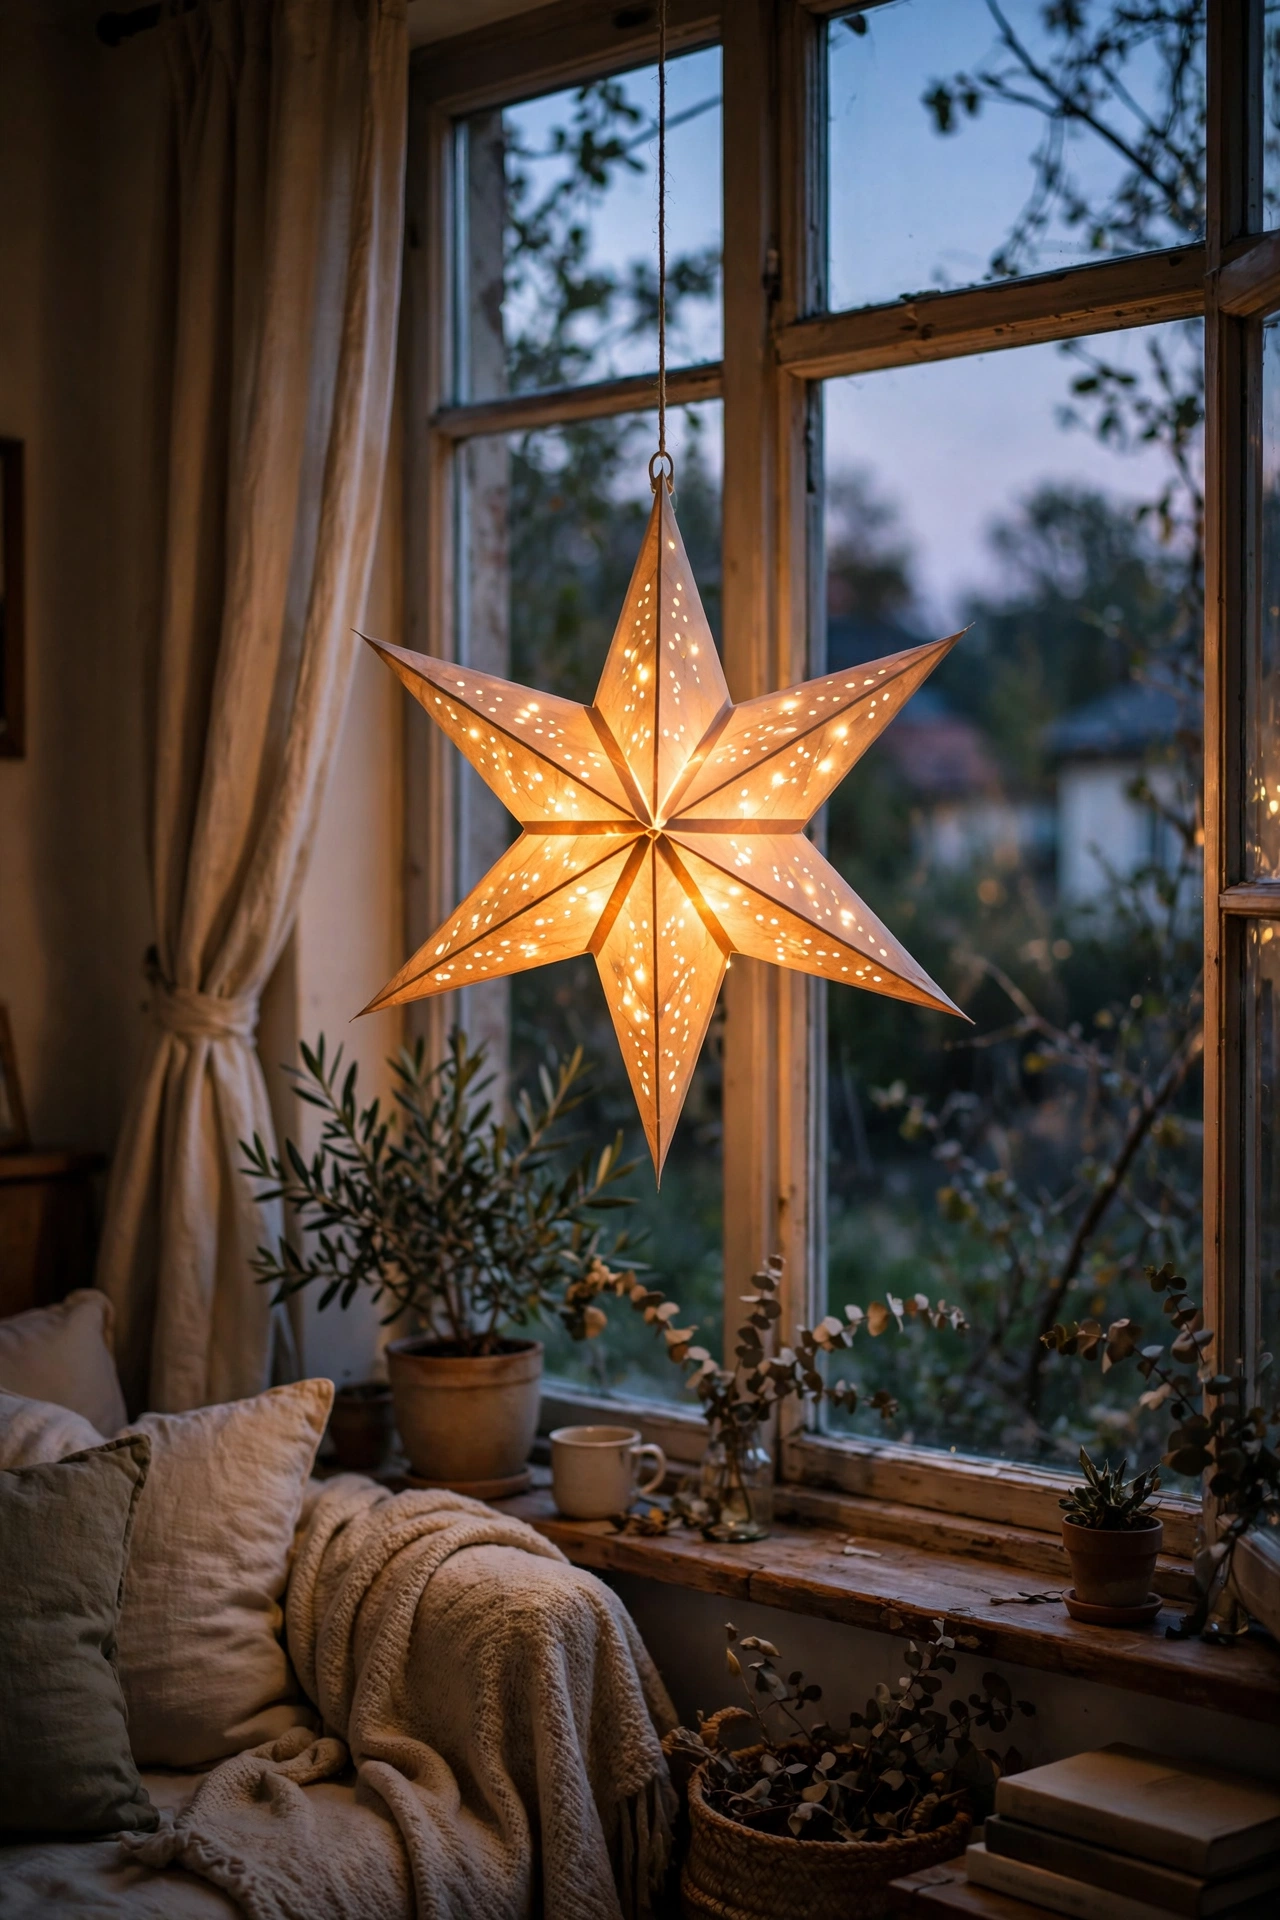
A big paper star lantern in the window is the oldest trick in the book, and it works because it is visible from the street and costs almost nothing. Buy a flat-pack paper star from a craft shop or online, open it up, and pop a battery fairy light inside. Hang it with a bit of fishing line so it floats in the middle of the window. I tried this the year my tree was a sad little thing, and neighbours actually knocked to ask where I had bought it. My mistake was using a real candle the first time, which scorched the paper within an hour. Battery lights only, always. It gives the whole living room a warm amber wash in the evenings.
Cost: ~$6 | Time: 15 minutes
Foraged Pinecone Garland Across the Mantel
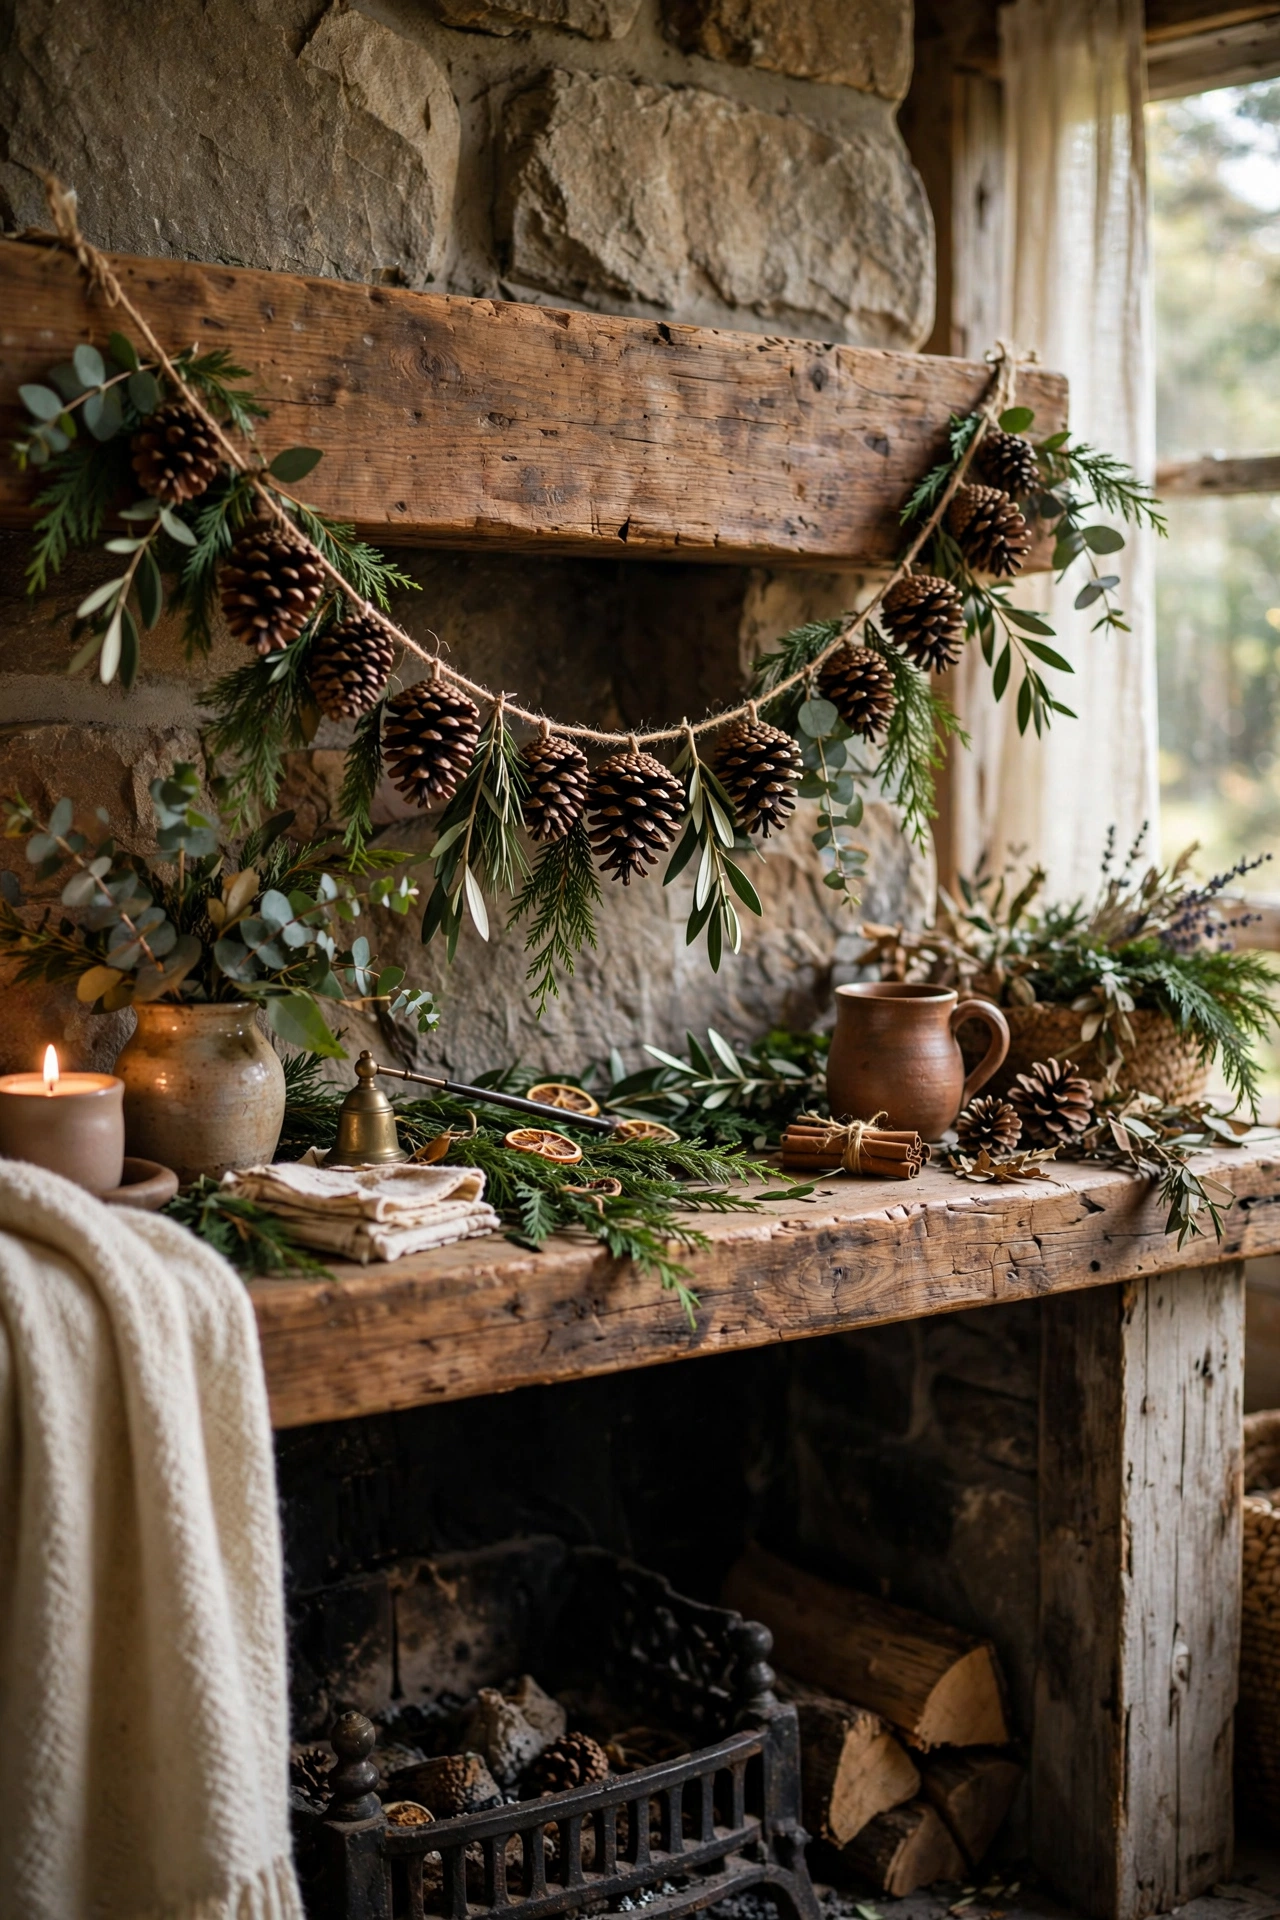
Pinecones are free, and a garland of them looks like something from a countryside cottage. Collect a carrier bag of pinecones on a walk, shake off the dirt, and bake them at a low heat for an hour to kill any bugs and open them up. Then tie them along a length of twine with short bits of wire or more twine, spacing them about a hand’s width apart. Drape it across the mantel and tuck in a few sprigs of whatever greenery you can find. I tried this with cones straight off the ground one year and spent a week finding tiny spiders in the living room, so do not skip the baking step. It smells faintly of forest and costs nothing.
Cost: ~$3 for twine | Time: 1 hour plus baking
Brown Kraft Paper Bunting Strung Over the Sofa

A roll of brown kraft paper, the kind used for wrapping parcels, becomes the prettiest bunting when you cut it into triangles and string it up. Cut a long strip, fold it, and snip triangles in one go so they are all the same size. Thread them onto string with a dab of glue or a stapler. I strung mine across the wall above the sofa and wrote a word on each triangle with a white paint pen: peace, joy, cocoa, naps. My mistake was hanging it too high the first time, where nobody could read it. Keep it at eye level when you are sitting down. It looks handmade in the best way, not the sad way.
Cost: ~$5 | Time: 45 minutes
Thrifted Brass Candlesticks Clustered on the Coffee Table
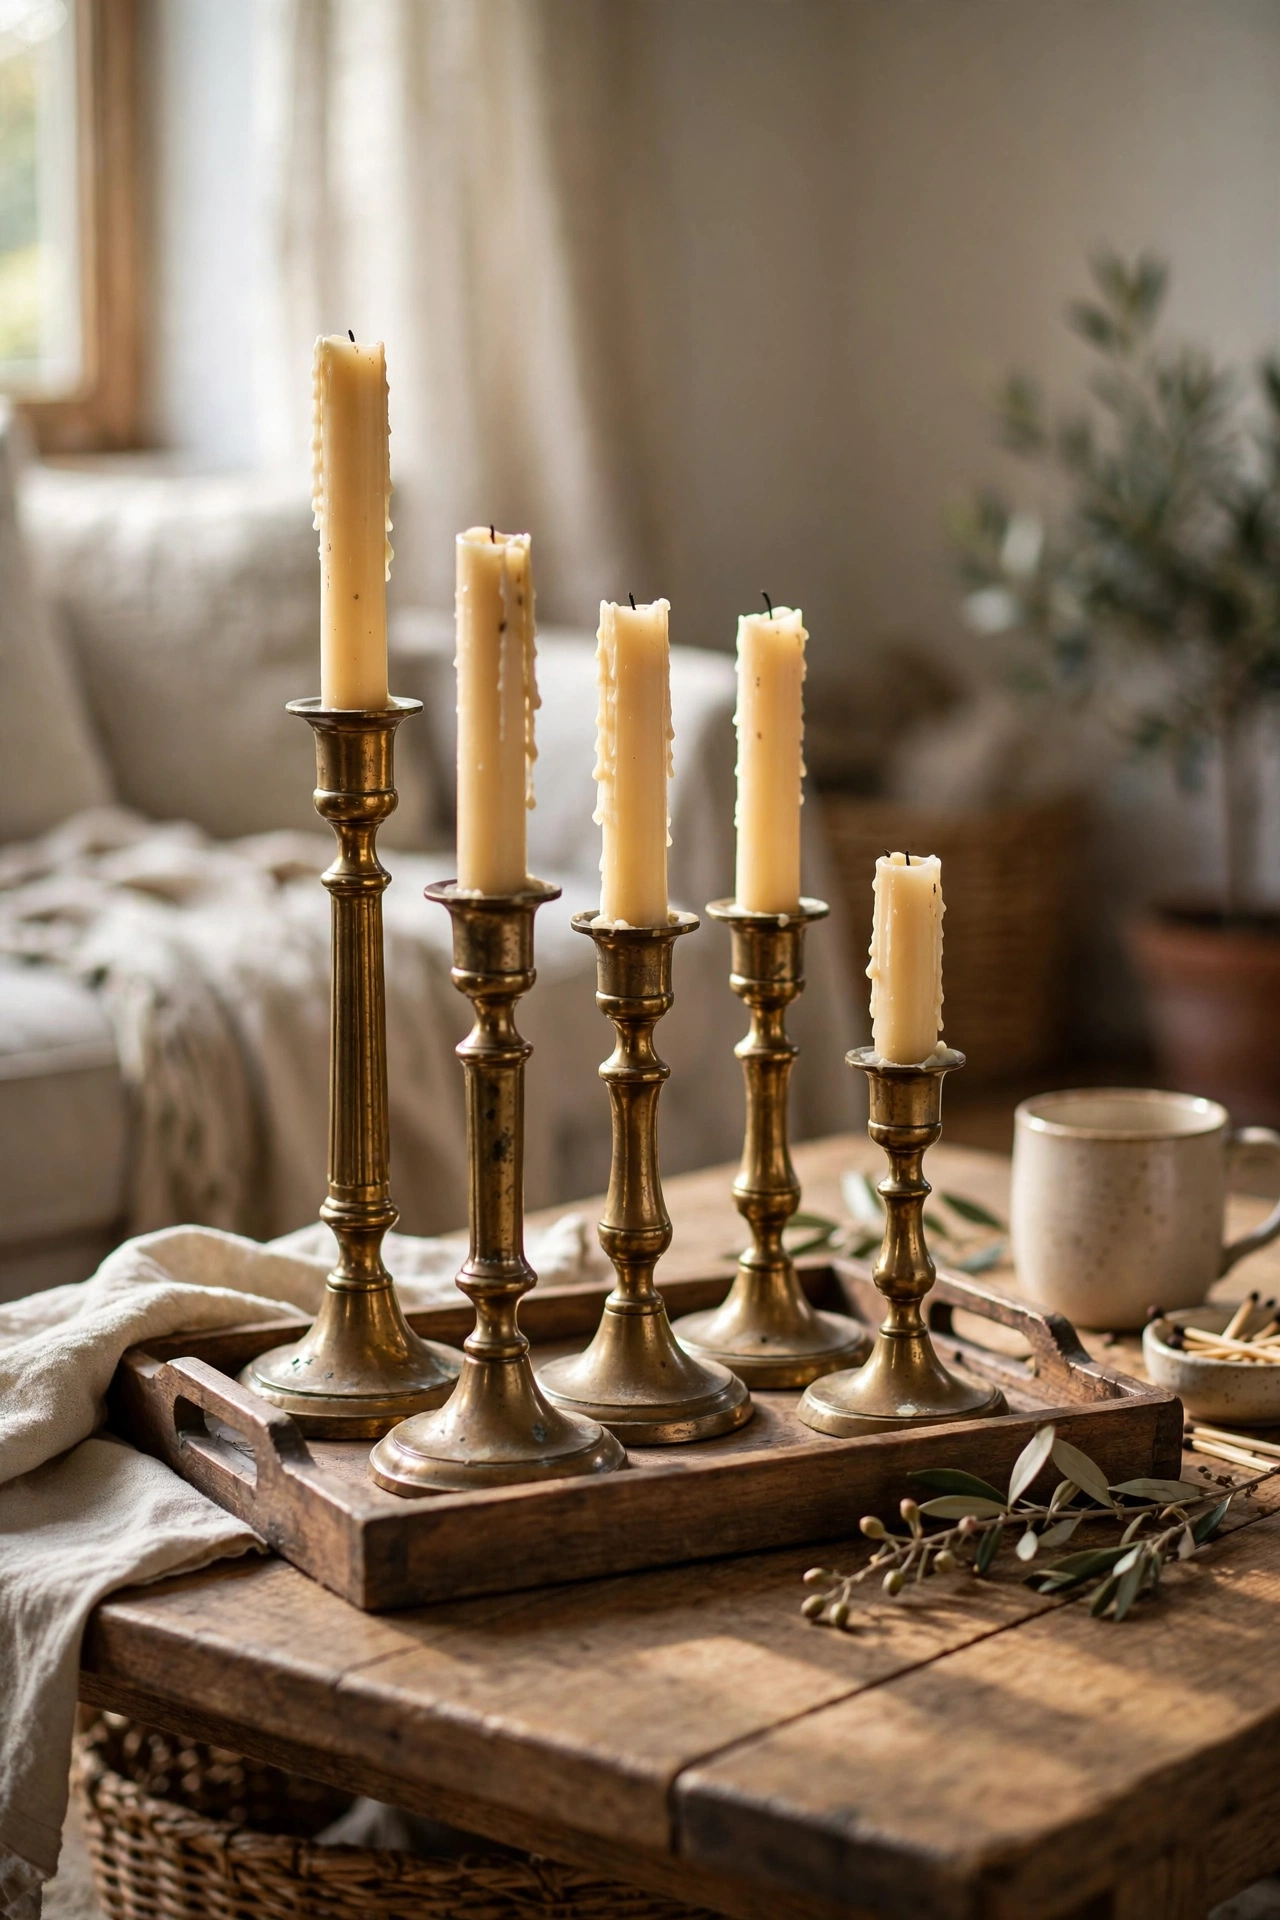
Brass candlesticks turn up in charity shops constantly, usually for a pound or two each, and a cluster of them at different heights looks genuinely expensive. Buy three to five in mixed heights, polish them with a bit of vinegar and salt if they are tarnished, and put simple white or cream candles in them. Group them on a tray on the coffee table so the wax has somewhere to land. I tried this after spotting the same look in a hotel lobby, and the glow they throw across the room in the evening is unreal. My mistake was buying all the same height once, which looked like a school dinner table. Vary the heights and it instantly looks styled.
Cost: ~$10 for the set | Time: 20 minutes
Dried Orange Slice Garland on the Tree
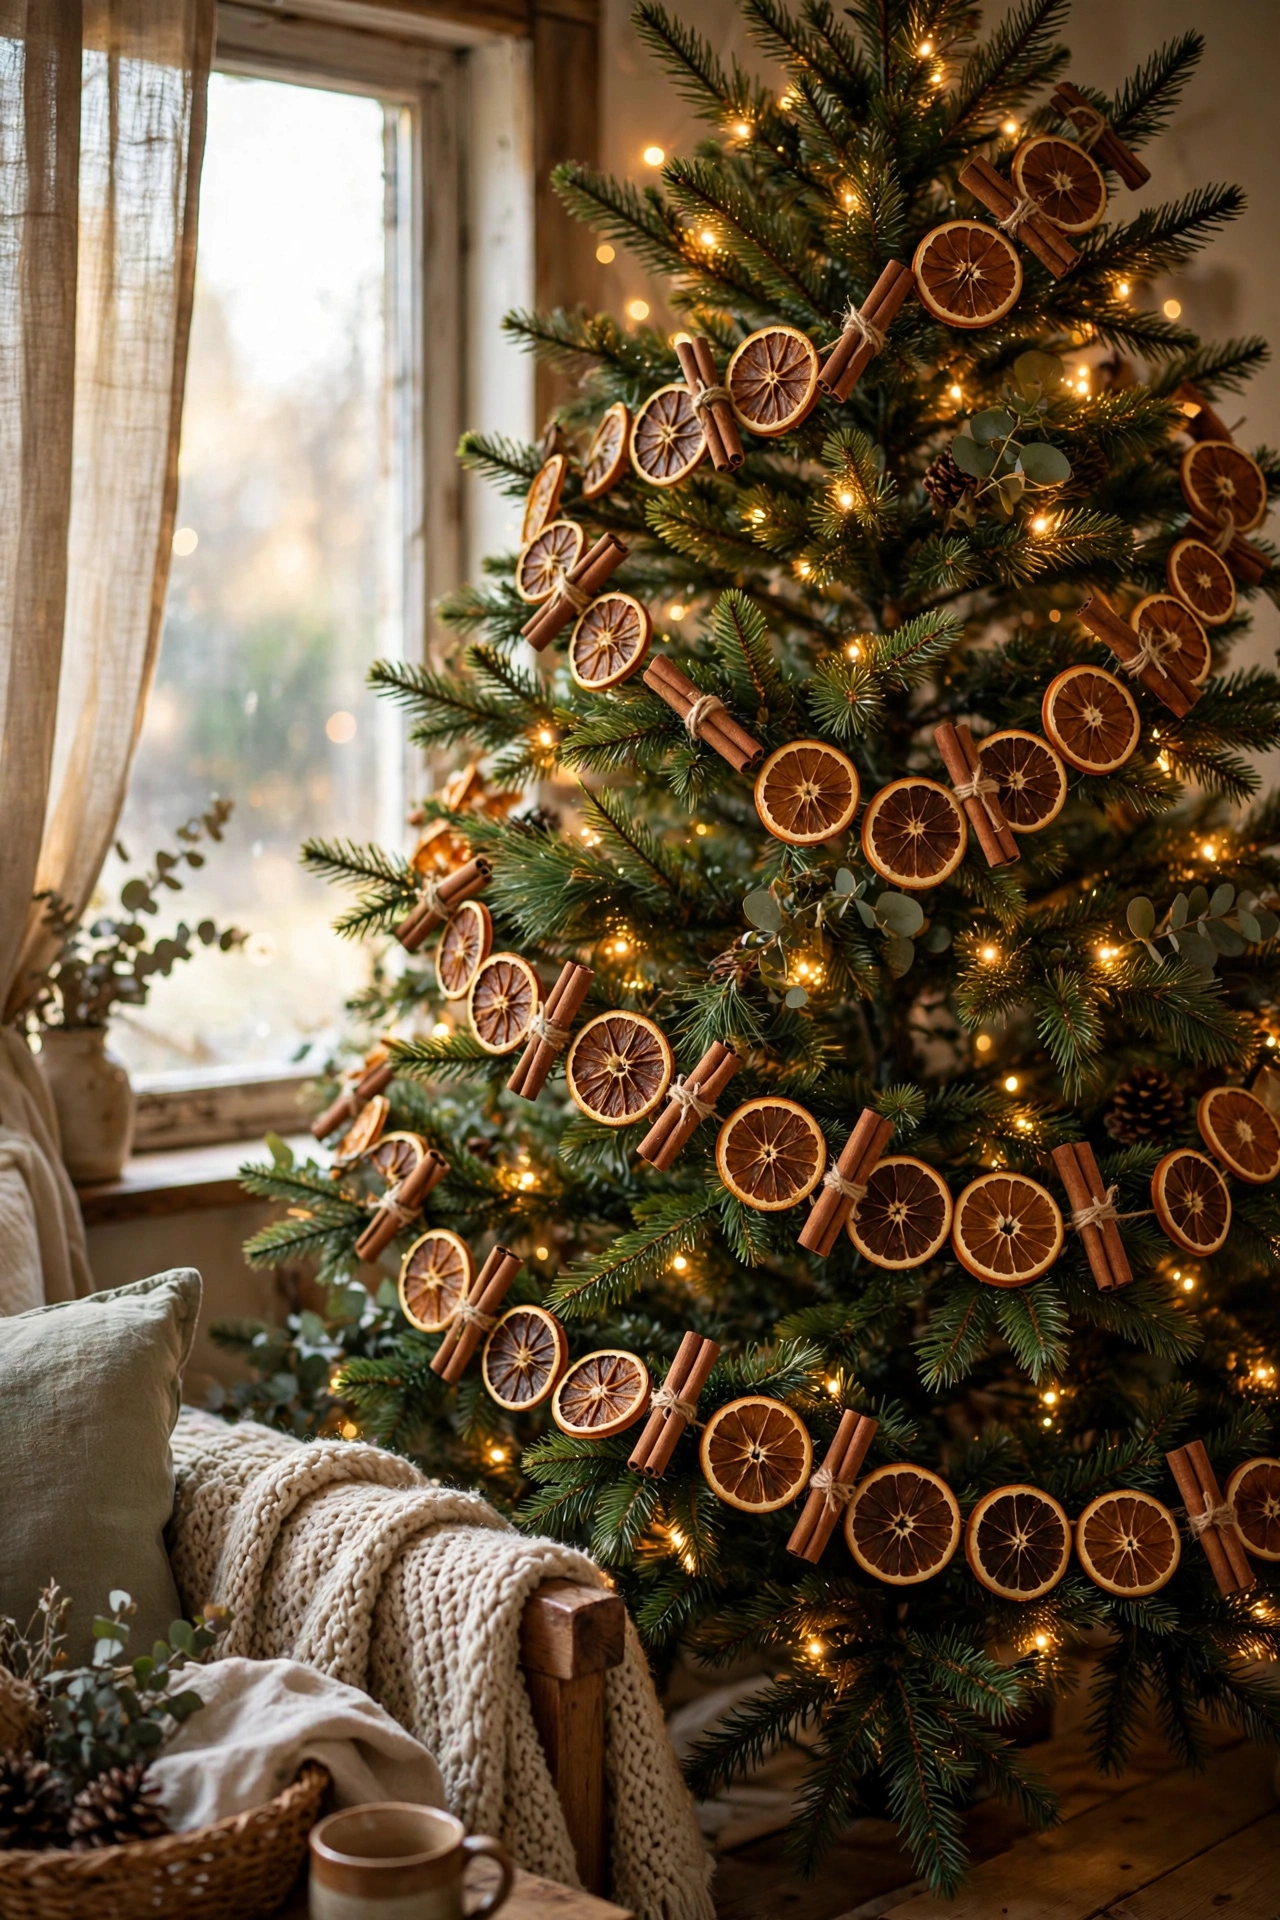
Dried orange slices are the decoration that makes people ask where you bought them, and the answer is your own oven. Slice oranges about half a centimetre thick, lay them on a baking tray, and dry them on the lowest oven setting for three to four hours, flipping once. Thread them onto twine with a needle, alternating with cinnamon sticks if you like. I tried this the year I could not afford new baubles, and the garland is still going strong three Christmases later because I store it in a dry box. My mistake was slicing them too thin the first time, and they curled into sad little crisps. Half a centimetre is the magic thickness.
Cost: ~$4 for oranges | Time: 4 hours, mostly hands-off
Cinnamon Stick Bundles Tied With Twine

A bundle of cinnamon sticks tied with twine and tucked into the tree or laid on the mantel gives you scent and decoration in one move. Buy a bag of cinnamon sticks from a world food shop, where they are half the price of the supermarket spice aisle. Tie five or six together with twine, add a sprig of dried rosemary if you have it, and nestle them into the branches of the tree or along the mantel garland. I tried scattering them loose the first year and they slid down behind the sofa and vanished until spring. Tied bundles stay put and look intentional. When the scent fades, dab on a drop of cinnamon oil and they are back.
Cost: ~$5 | Time: 10 minutes
Fairy Lights Curled Inside a Big Glass Vase
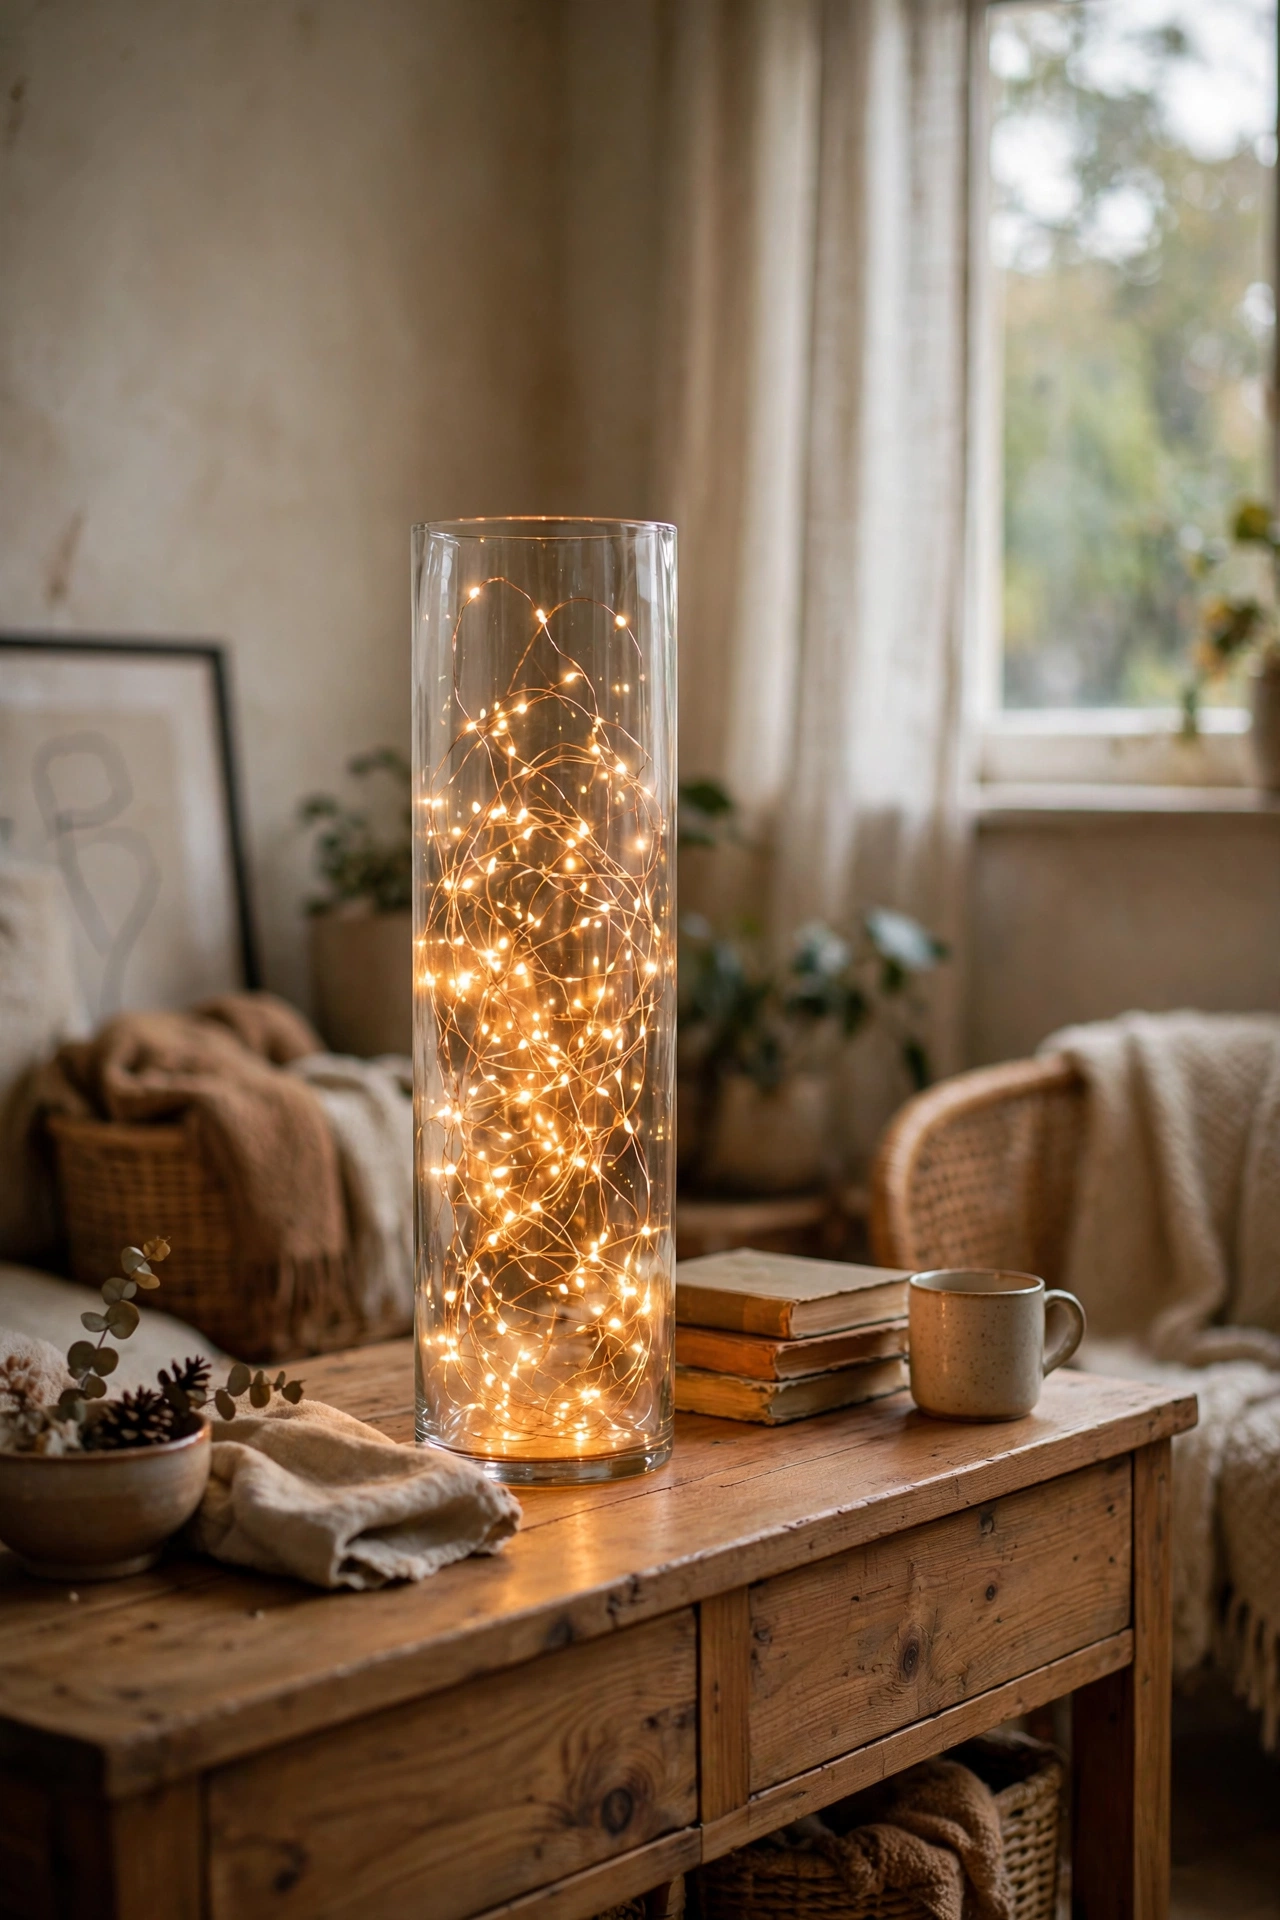
A tall glass vase you already own, filled with a string of warm fairy lights, becomes a glowing centrepiece that needs nothing else. Coil the battery pack at the bottom, stuff the lights in loosely, and set it on the sideboard or the hearth. The glass multiplies the light and throws little sparkles on the walls. I tried this with cool white lights first and it looked like a laboratory, so warm white only. My mistake was using a vase with a narrow neck, which made the battery pack impossible to reach when the timer needed resetting. Wide mouth, easy access, and it will glow every evening from December to January.
Cost: ~$7 for lights | Time: 5 minutes
A Red Throw Blanket Draped Over the Sofa Arm

One deep red or cranberry throw blanket changes the whole colour story of a living room in about ten seconds. Fold it in thirds lengthways and drape it over one arm of the sofa, letting it hang evenly on both sides. That is it. That is the whole project. I tried this on a whim with a blanket I had owned for years, and suddenly the grey sofa looked festive and the cushions looked deliberate. My mistake was buying a cheap thin one first that slid off every time someone sat down. A slightly heavier knit stays put. Pair it with one green cushion and you have a Christmas palette without buying a single ornament.
Cost: ~$12 | Time: 2 minutes
Pine Branch Clippings in a Tall Floor Vase
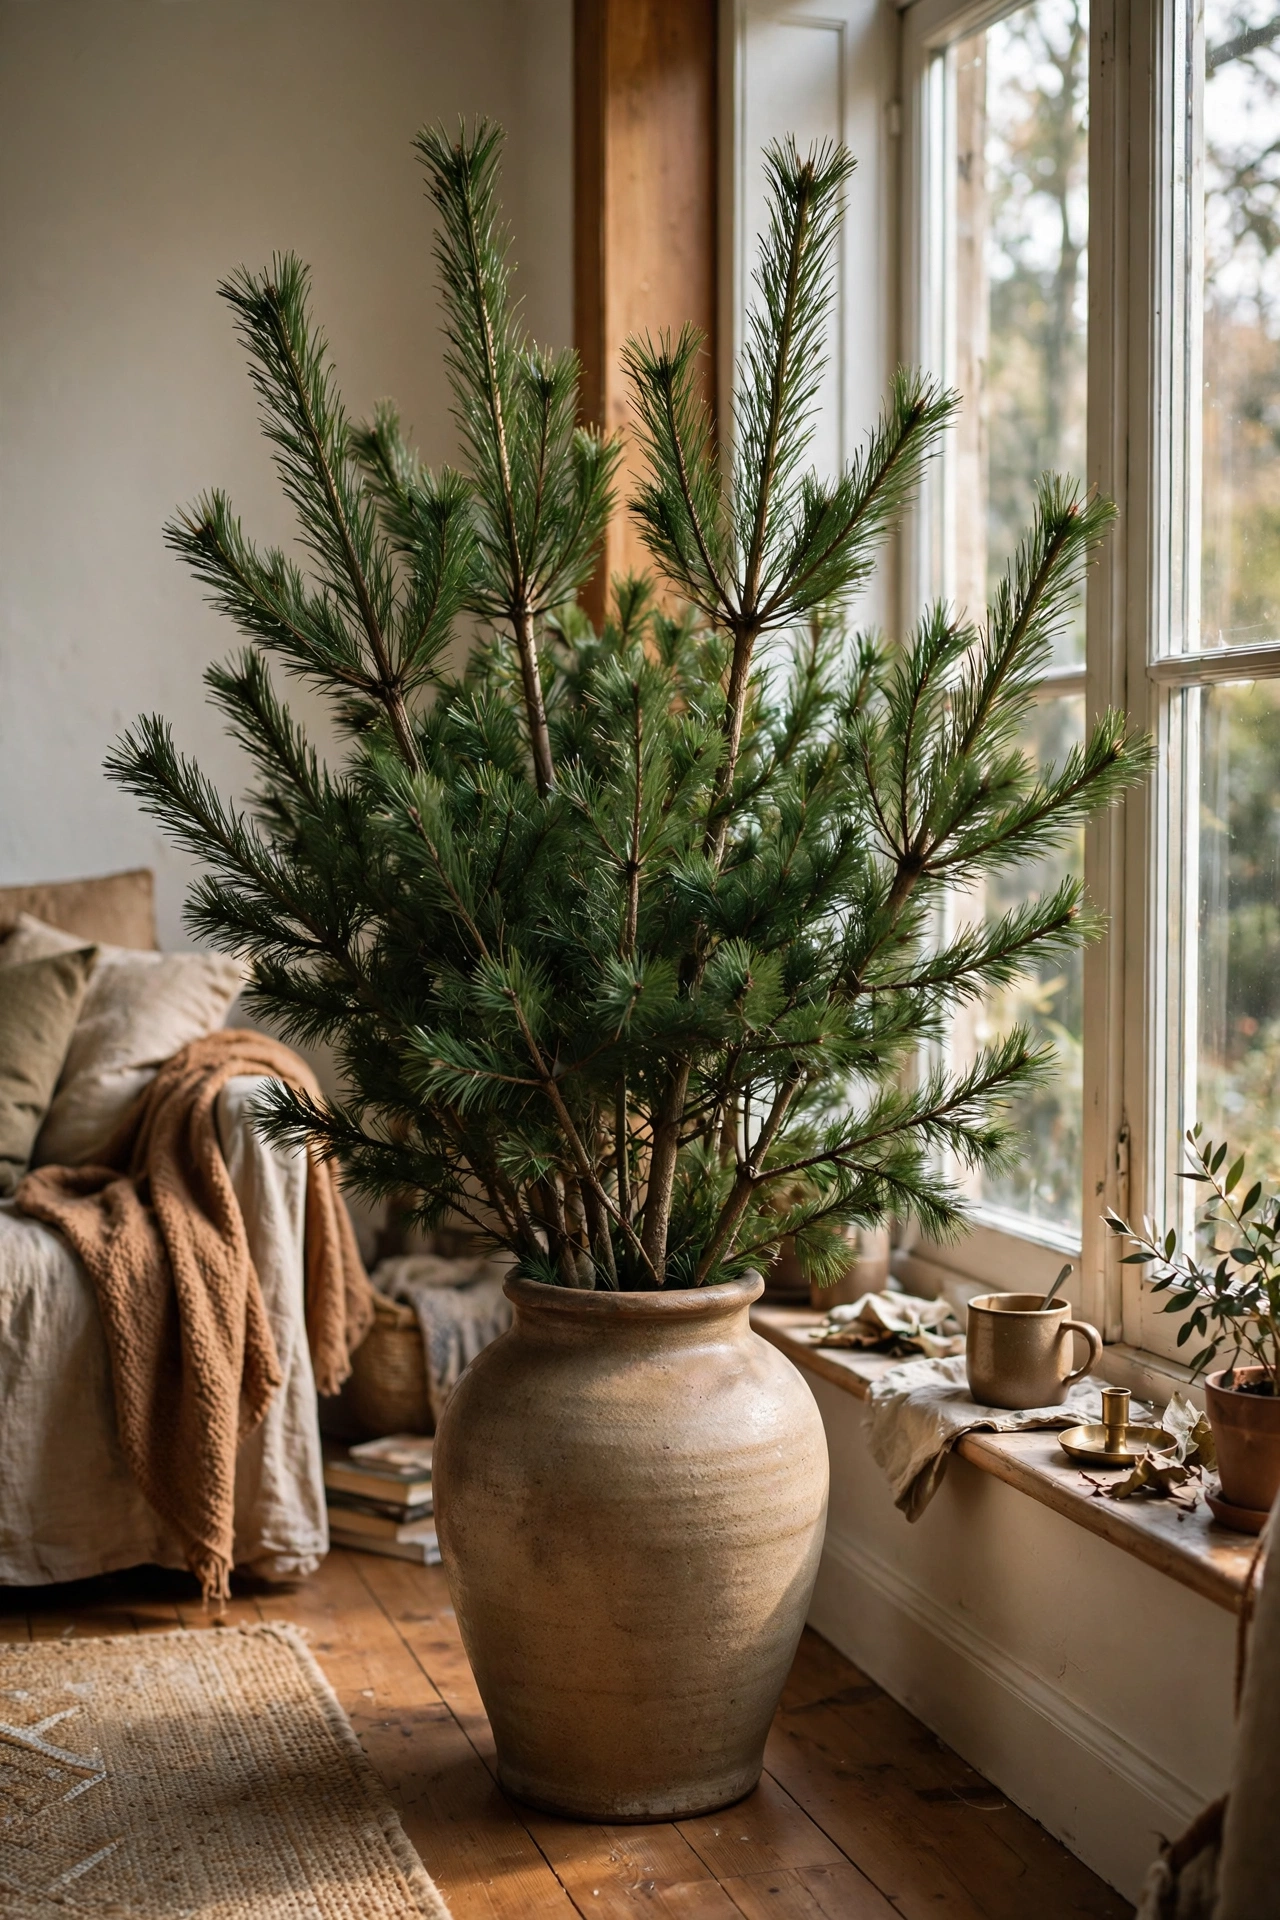
If you have a real tree, the branches you trim off the bottom are free decorations. If you do not, ask at a tree lot in December, they sweep up armfuls of trimmings and will usually give you some. Stand five or six long branches in a tall vase or an old milk churn, fan them out, and hang two or three light ornaments on them. I tried this in the corner by the window and guests assumed it was some designer Scandi thing. My mistake was putting them in water in a vase with a narrow base, and the whole thing toppled in the night. Heavy vase, no water needed, they will stay green for weeks in a cool room.
Cost: ~$0 | Time: 10 minutes
Cookie Cutter Ornaments Hung With Ribbon

Metal cookie cutters in Christmas shapes make the sweetest tree ornaments when you tie ribbon through them. Star, tree, angel, gingerbread man, whatever you have in the baking drawer. Thread a loop of narrow ribbon or twine through each one and hang them straight on the branches. I tried this when my ornament box was looking tired, and the cutters catch the fairy lights beautifully because of the metal edges. My mistake was using wide ribbon that overwhelmed the small cutters. Thin ribbon, simple knot, and they look like something from a country kitchen. Afterwards, wash them and they go straight back to baking duty.
Cost: ~$0 if you own them | Time: 15 minutes
Tartan Ribbon Bows on the Curtain Tiebacks
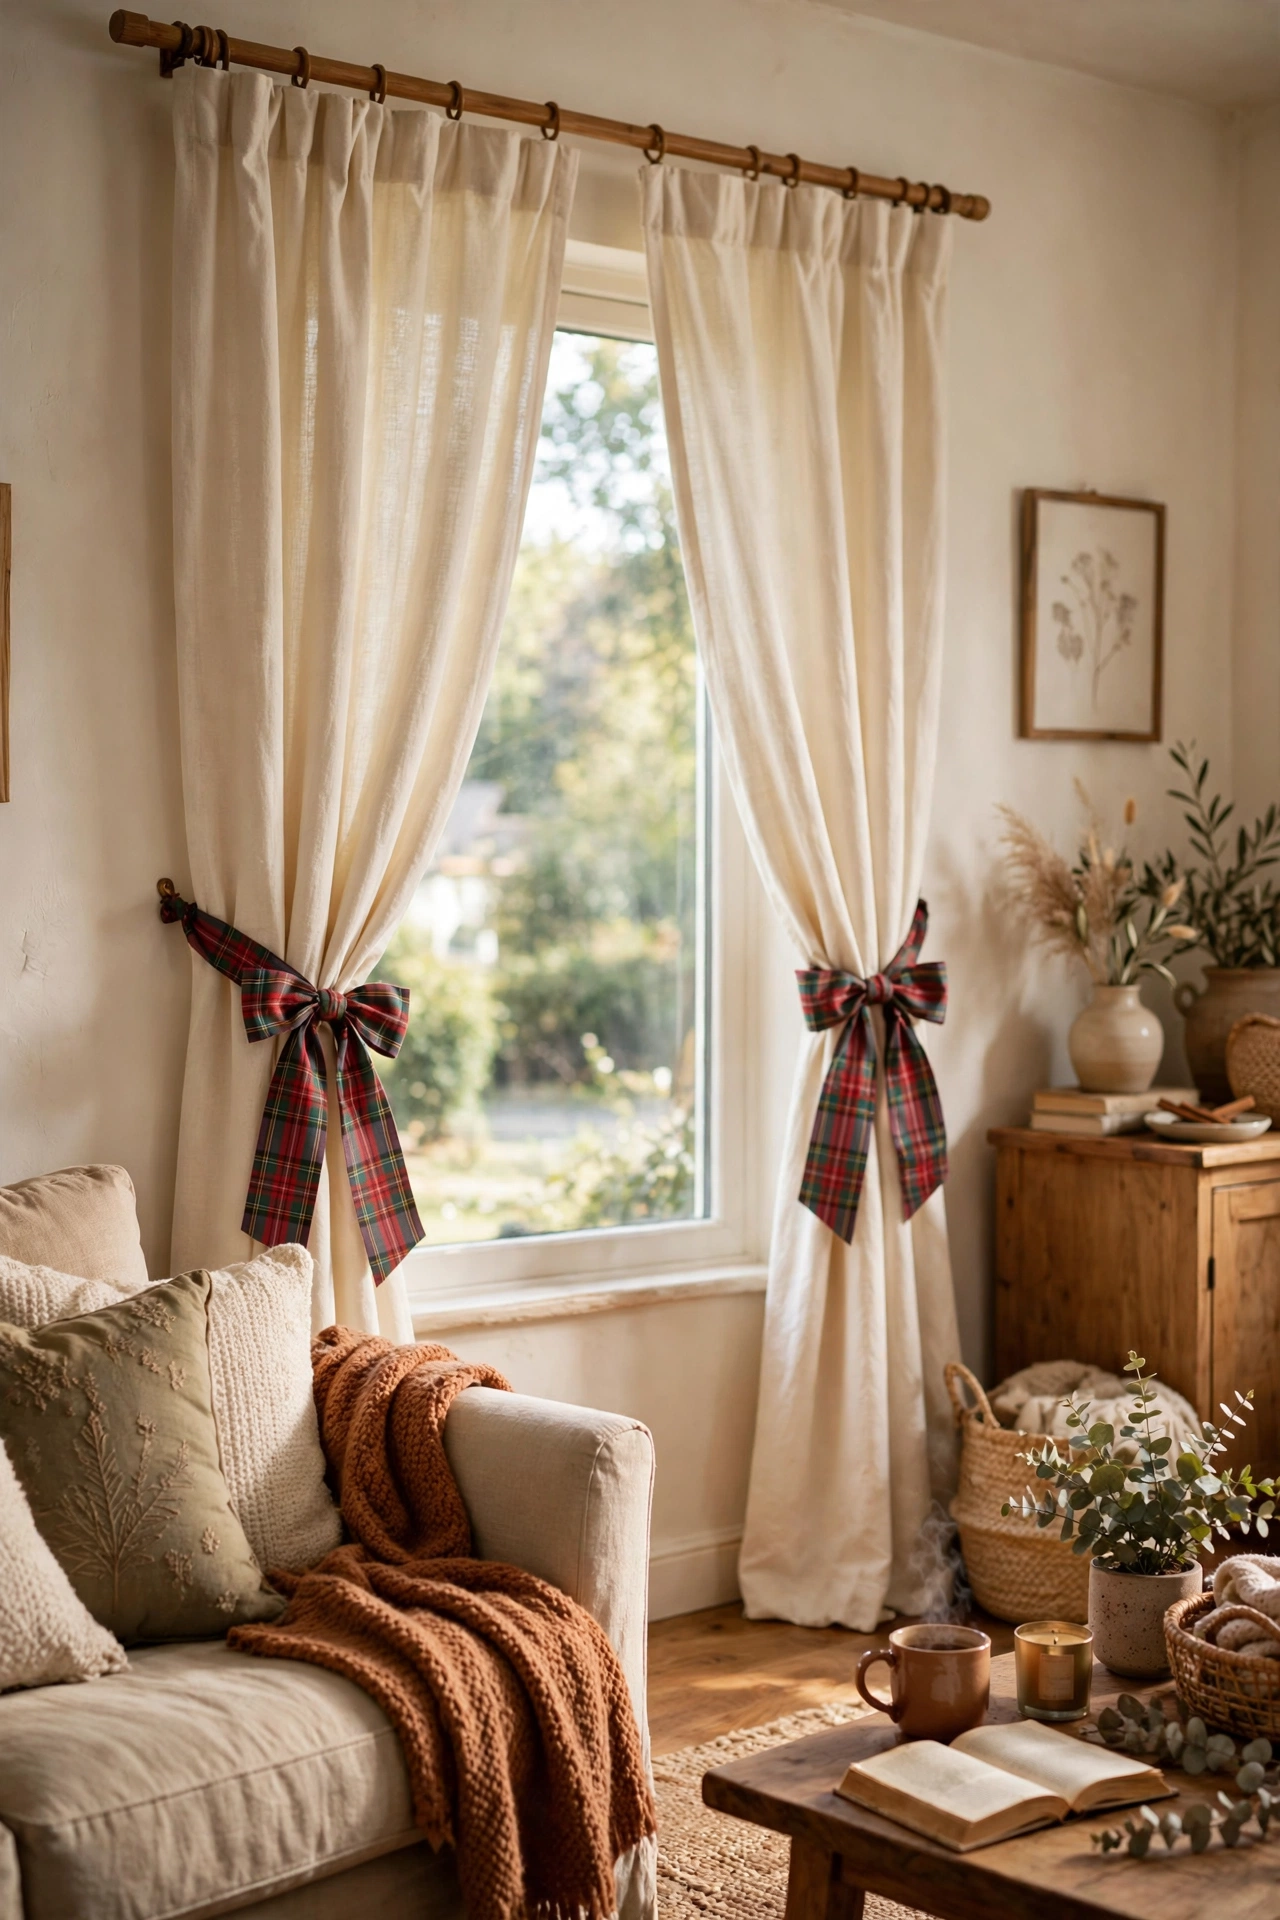
A length of tartan ribbon tied into a bow around each curtain tieback is a tiny change with an outsized effect. Buy a few metres of wired tartan ribbon from a craft shop, cut two generous lengths, and tie a full bow where the tieback gathers the curtain. The wired edge lets you shape the loops so they hold. I tried this the year I wanted the room to feel festive without touching the tree, and it worked on plain curtains I had owned for years. My mistake was cutting the ribbon too short the first time, which gave me sad little knots instead of bows. Be generous with the length, you can always trim.
Cost: ~$8 | Time: 10 minutes
Chalkboard Sign With Handwritten Carol Lyrics
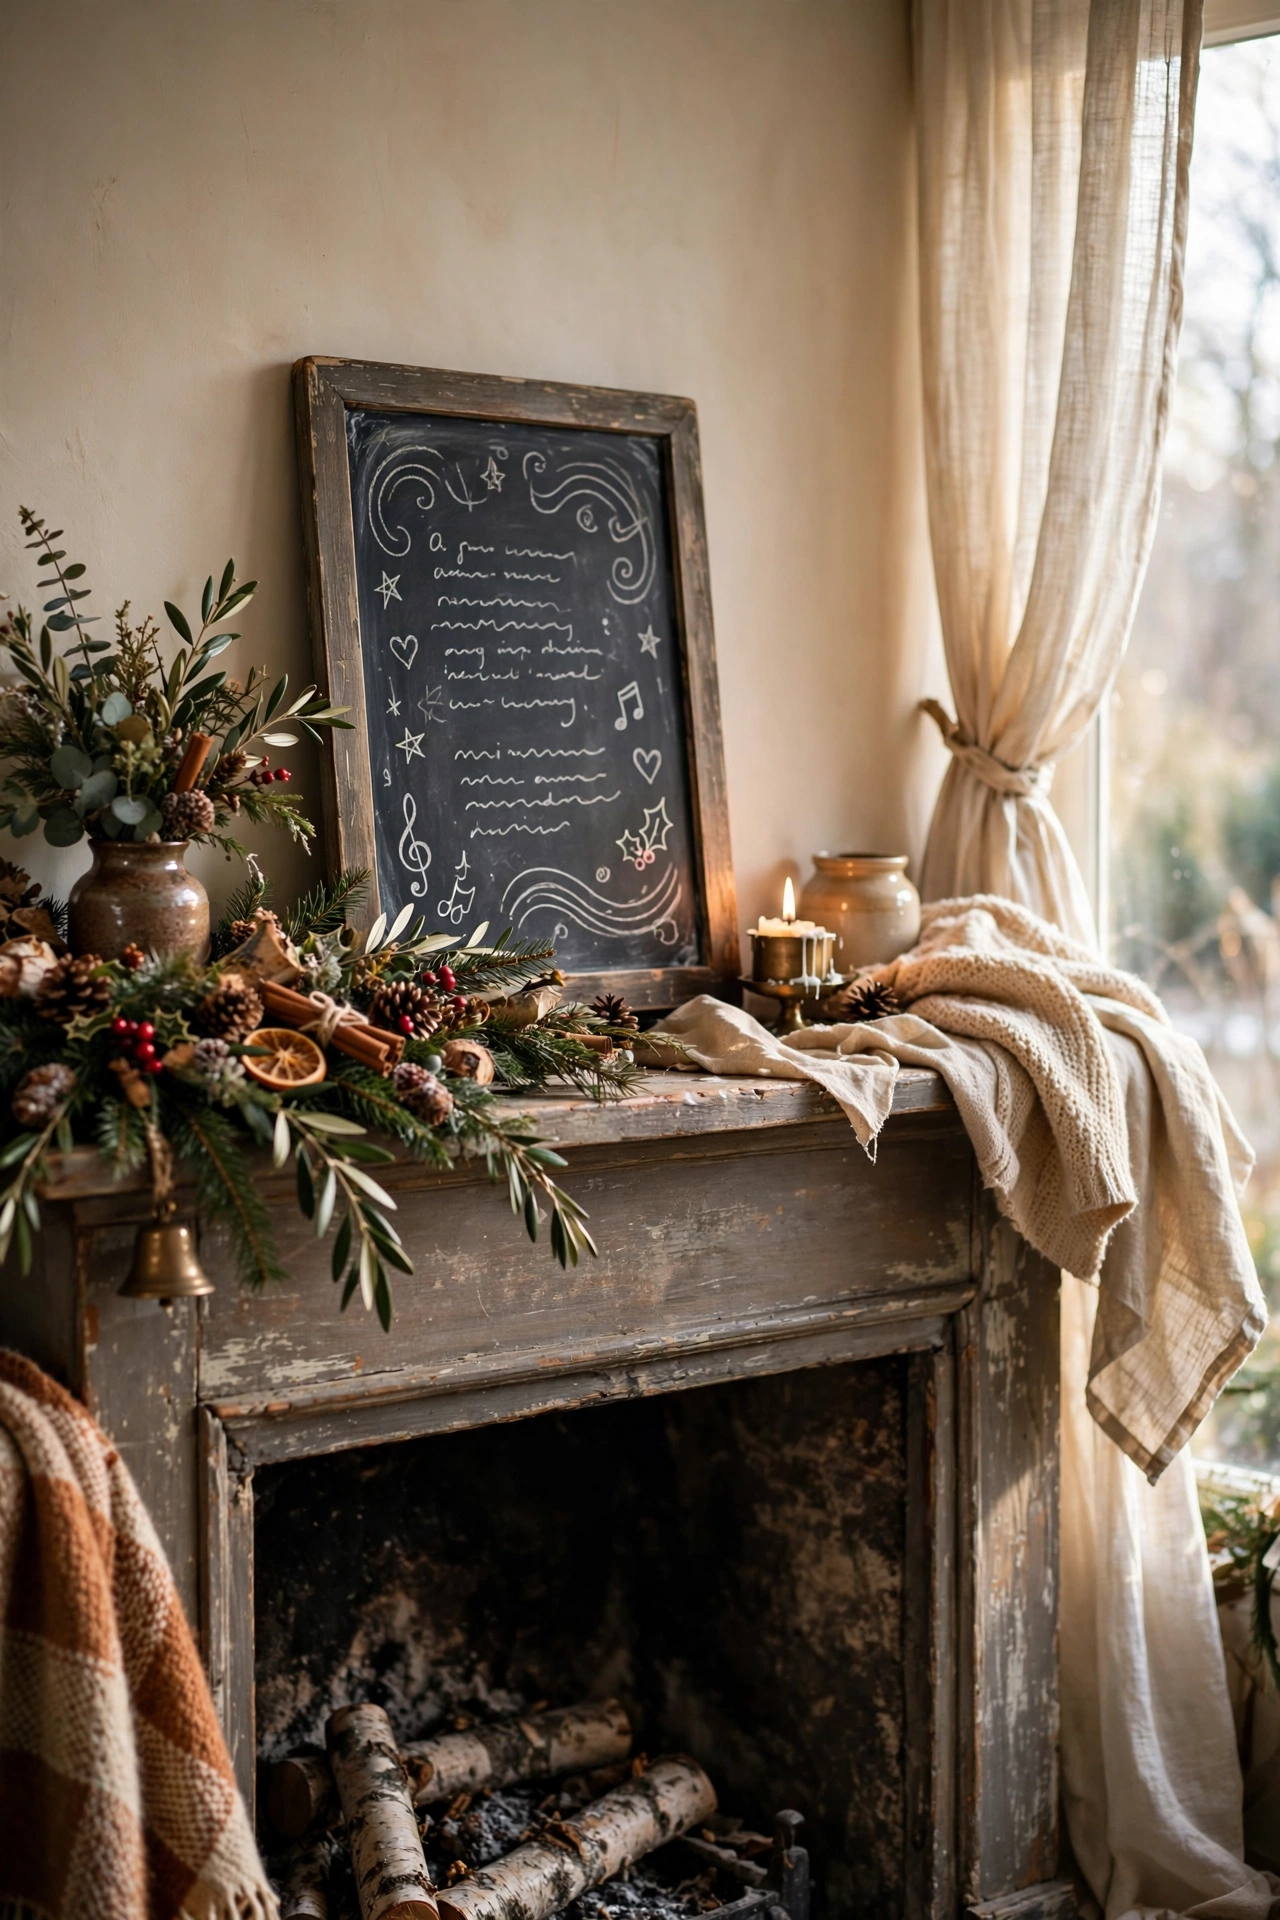
A small chalkboard propped on the mantel with a line from your favourite carol written on it feels personal in a way shop-bought signs never do. Pick up a cheap framed chalkboard, or paint a bit of board with chalkboard paint, and write one line in your best handwriting. Ours says “and heaven and nature sing” every year. I tried lettering the whole verse once and it looked crowded and stressed. One line, big and confident, is all you need. My mistake was using a dry-erase marker instead of chalk the first time, and it never fully came off. Real chalk, damp cloth, done.
Cost: ~$6 | Time: 10 minutes
Mason Jar Snow Globes on the Windowsill

Mason jars, a little fake snow, and a bottle brush tree become snow globes that children will shake a hundred times. Glue a small tree or a tiny house to the inside of the lid, fill the jar three quarters with water, add a teaspoon of glycerine and a spoonful of fake snow or glitter, screw the lid on tight, and flip it. I tried this with the kids one rainy afternoon and it kept them busy for two hours, which is worth more than the cost. My mistake was not sealing the lid with glue, and one enthusiastic shake soaked the windowsill. A ring of waterproof glue around the rim keeps everything inside where it belongs.
Cost: ~$9 for a set of three | Time: 30 minutes
Evergreen Sprigs Tucked Into the Bookshelves

You do not need a garland to make shelves feel festive. Tuck small sprigs of evergreen, eucalyptus, or even rosemary between the books on your shelves, one sprig every few books. It takes five minutes and the whole bookcase looks dressed for the season. I tried this after seeing it in a friend’s house, and the trick is to use sprigs with a bit of stiffness so they stand up rather than flop. My mistake was using long floppy branches that slid down behind the books. Short, stiff sprigs, pushed in at an angle, and they stay put for weeks. Mist them with water every few days to keep them fresh.
Cost: ~$0 | Time: 10 minutes
Dollar Store Bottle Brush Trees in a Cluster
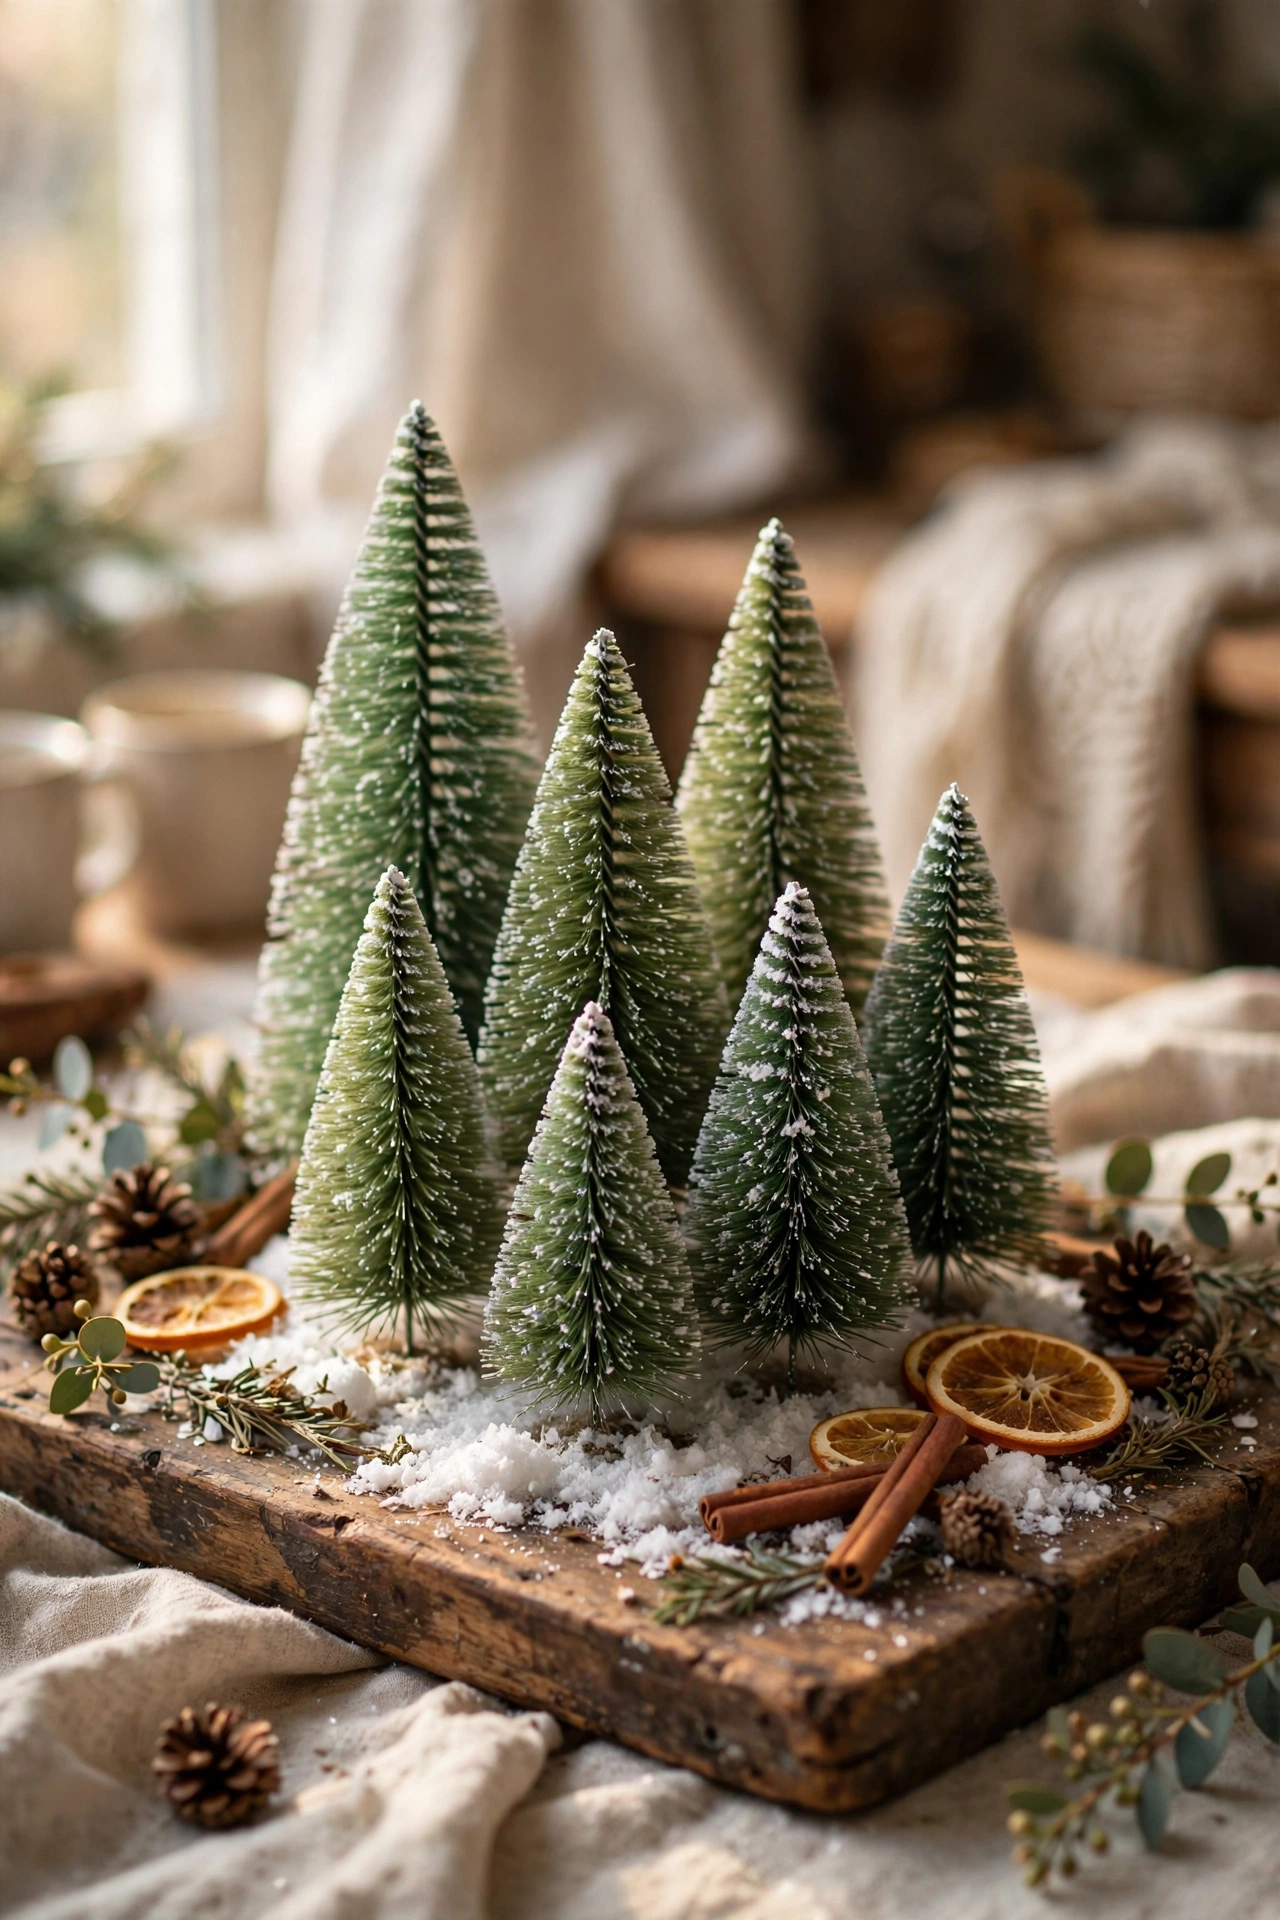
Those little bottle brush trees from the pound shop look cheap on their own and charming in a crowd. Buy five to seven in mixed sizes, ideally all one colour, and cluster them on a tray, a stack of books, or the windowsill. The trick is grouping: one looks sad, seven look curated. I tried scattering them around the room individually and they disappeared into the background. Clustered tight on a wooden tray with a bit of fake snow sprinkled around, they became the thing everyone commented on. My mistake was mixing green, white, and pink ones, which looked like a sweet shop. One colour, mixed heights, done.
Cost: ~$7 for the cluster | Time: 10 minutes
Popcorn and Cranberry Garland You Make Together

Stringing popcorn and cranberries is the oldest Christmas craft there is, and it still works because it looks beautiful and costs the price of a bag of popcorn. Pop a big bowl, let it cool completely, and thread it onto strong thread with a needle, alternating with fresh cranberries. Drape it on the tree or across the mantel. I tried this with the radio on one Sunday afternoon and it was genuinely the calmest hour of my December. My mistake was using stale popcorn that crumbled on the needle. Freshly popped, fully cooled, and thread a cranberry every six or seven pieces to keep it from looking sparse.
Cost: ~$5 | Time: 1 hour
Wrapped Empty Boxes Stacked Under the Tree

A tree with nothing under it looks unfinished, and wrapped empty boxes fix that for the price of some paper. Save cereal boxes and delivery boxes, wrap them in kraft paper or newspaper, and tie with string or ribbon. Stack them under the tree in the first week of December, long before the real presents appear. I tried this the year money was tightest, and honestly nobody could tell which boxes were real. My mistake was wrapping them all in the same paper, which looked like a display in a shop window. Mix two or three papers and vary the sizes, and the tree looks abundant from day one.
Cost: ~$4 for paper and ribbon | Time: 30 minutes
Pine-Scented Simmer Pot on the Stove

A simmer pot makes the whole living room smell like Christmas for pennies, and scent is half of decorating. Fill a small pan with water, add orange slices, a handful of cranberries, two cinnamon sticks, a few cloves, and a sprig of pine or rosemary. Simmer on the lowest heat, topping up the water through the evening. I tried this before a Christmas party instead of buying an expensive candle, and three separate guests asked what the gorgeous smell was. My mistake was letting it boil dry once, which filled the house with the smell of burnt citrus instead. Low heat, check the water every hour, and the room smells like a forest had a baby with a bakery.
Cost: ~$3 | Time: 5 minutes to assemble
Gold Spray-Painted Thrift Frames as Tree Ornaments

Tiny thrifted frames, sprayed gold and hung on the tree with ribbon, look like heirlooms. Buy the smallest frames you can find in charity shops, the 3×4 inch ones nobody wants. Remove the glass, give them two light coats of gold spray paint, and tie ribbon through the top to hang. I tried this with silver paint first and they disappeared against the fairy lights. Gold catches the light and glows. My mistake was spraying too thick in one coat, which dripped and looked lumpy. Two thin coats, drying in between, and they look like something passed down through generations rather than rescued from a bargain bin.
Cost: ~$10 including spray paint | Time: 40 minutes plus drying
Looking for more seasonal ideas? See 23 Fall Living Room Decor Ideas on a Budget for the autumn lead-up, 25 Fireplace Mantel Ideas for the Living Room on a Dime for mantel styling, and 17 Cozy Living Room Ideas You Can Do This Weekend for quick winter warmth.
Save this post to your Christmas board now, because December-you will thank November-you when the decorating weekend arrives.
