21 Peel and Stick Bathroom Floor Ideas Renters Swear By
Every renter knows that bathroom floor: yellowed linoleum, chipped tiles, or a pattern nobody would choose on purpose. You cannot rip it out, your landlord will not replace it, and a rug only hides so much. That is exactly why a peel and stick bathroom floor has become such a renter favourite — it covers the ugly stuff in an afternoon, peels off when you move, and costs far less than real tile. Below are 21 looks that actually hold up in a steamy bathroom, from marble and wood planks to bold checkerboard. Measure once, clean well, and you can walk on a brand-new floor by dinner.
1. Classic White Marble Peel and Stick Tiles
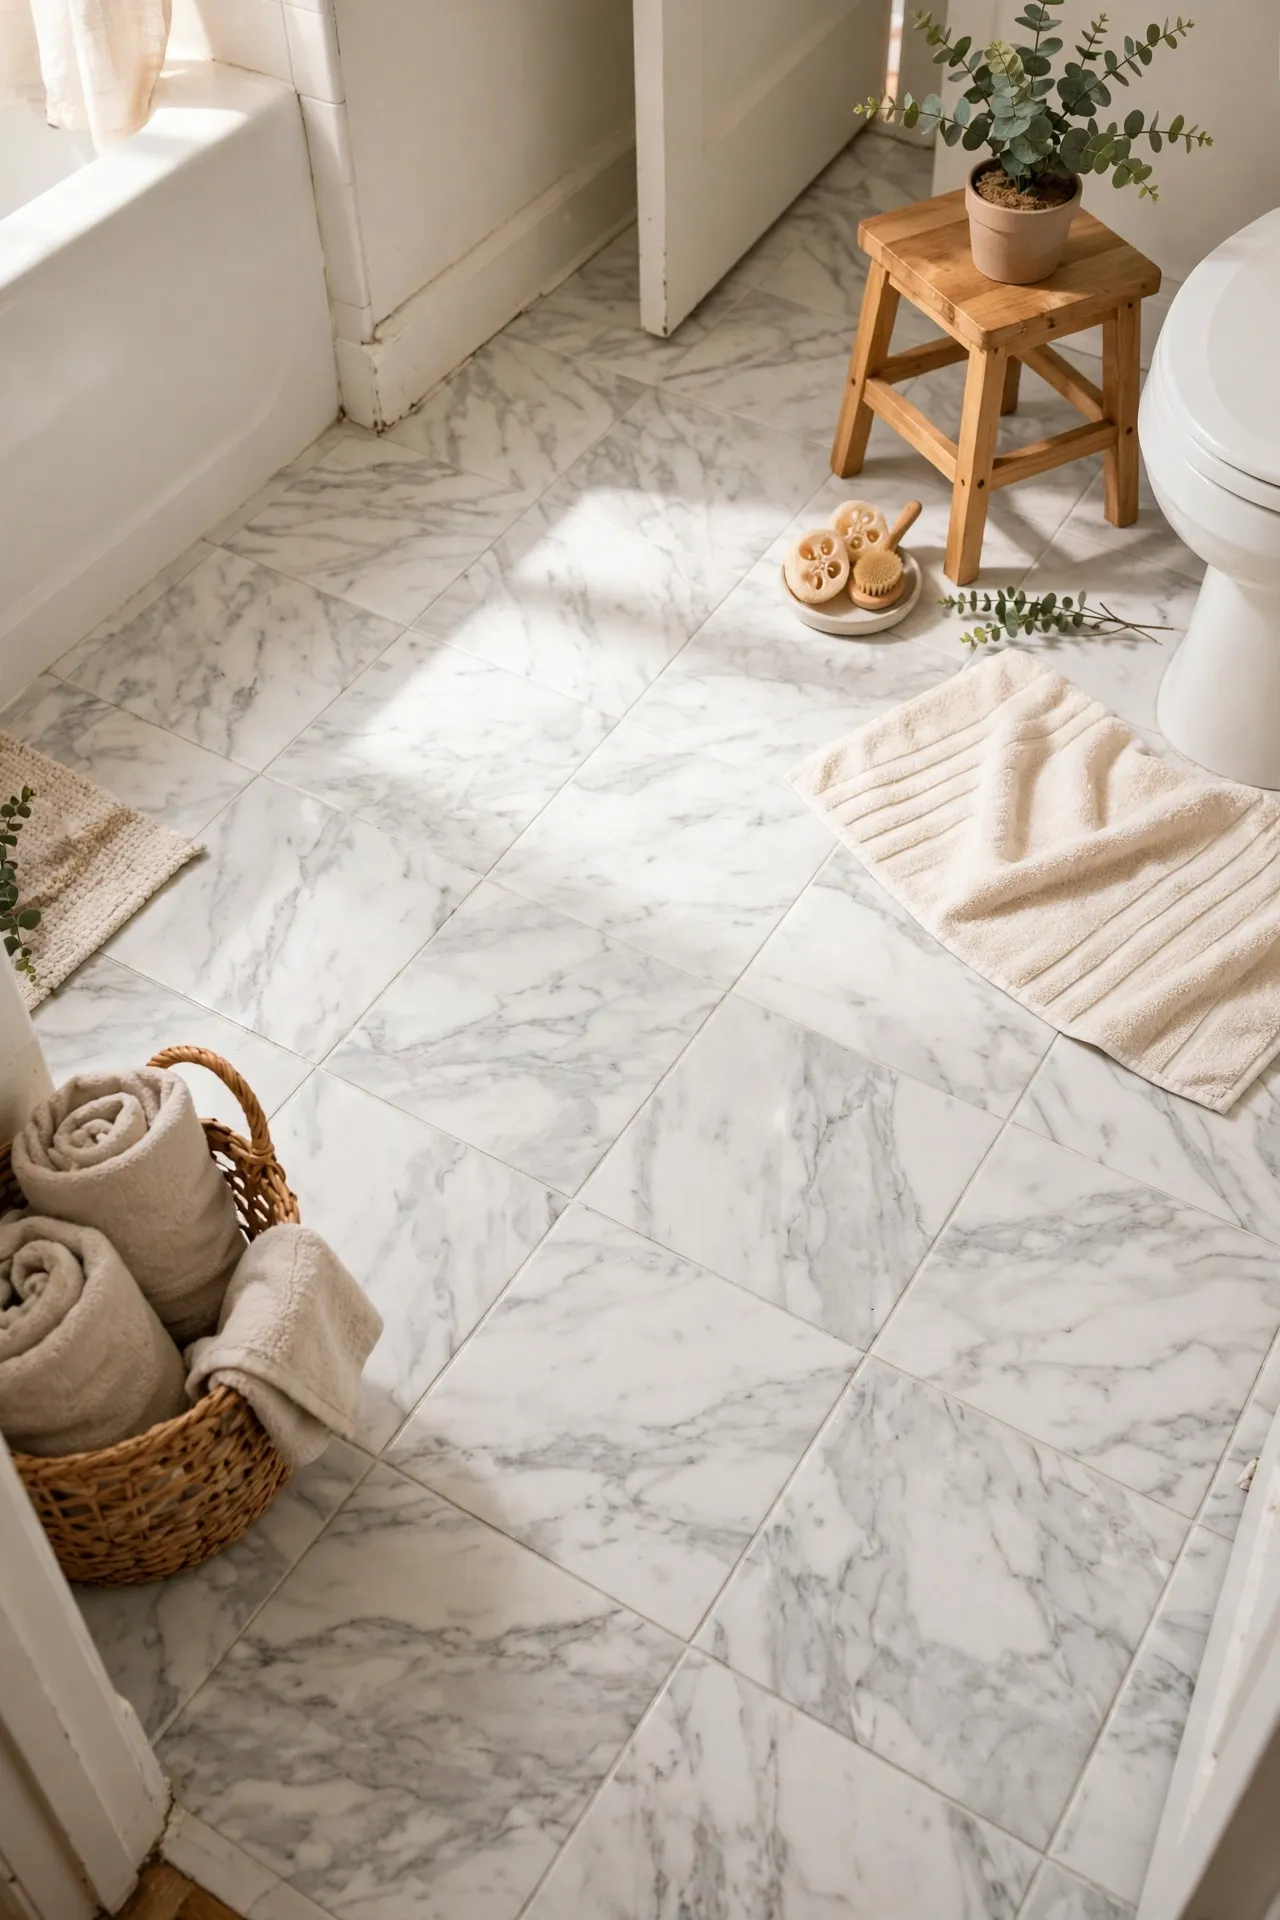
White marble-look peel and stick tiles give a tired bathroom floor an instant clean, bright lift without any grout or mess. Start by cleaning the old floor thoroughly and letting it dry completely, then lay the tiles from the centre of the room outward so the edges look balanced. Press each tile firmly, especially at the corners, and use a utility knife for neat cuts around the toilet base. I tried this in my first rental and the mistake to avoid is laying tiles over a dusty floor — they will lift within weeks. A good clean and a dry surface make all the difference.
Cost: ~$45 | Time: 120 minutes
💰 Budget win: Cover only the visible floor area and leave the space under the vanity untouched to use fewer tiles.
2. Warm Wood-Look Planks That Fool the Eye
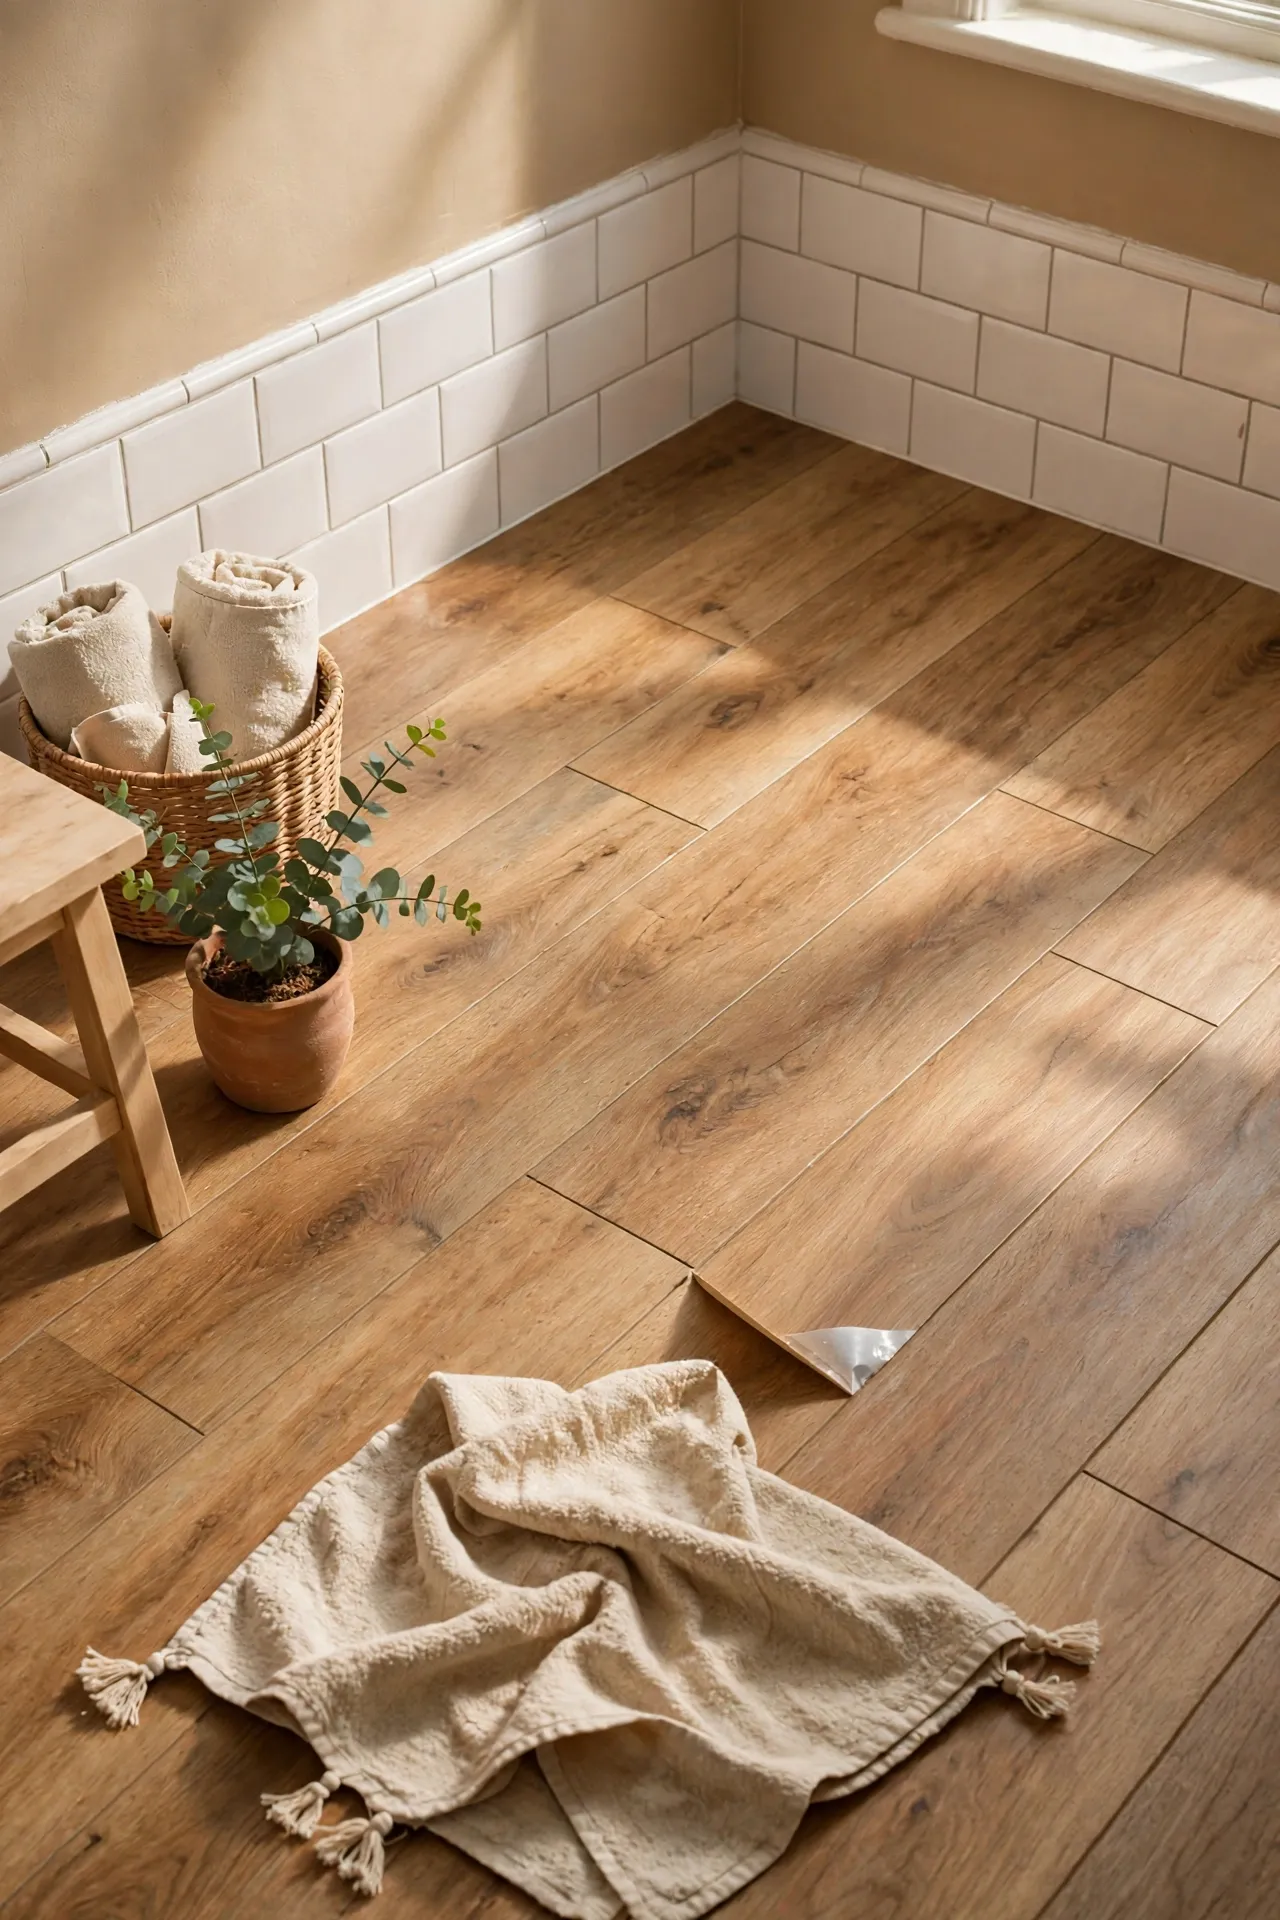
Wood-look peel and stick planks warm up a cold bathroom and fool most visitors into thinking you have real hardwood. Choose a warm oak tone that matches your towels or vanity, then stagger the joints like real floorboards for a natural look. Clean and dry the subfloor first, peel the backing slowly, and press each plank down with a roller or heavy book. I tried this in a small bath and the mistake to avoid is lining up all the seams in a row — it looks fake right away. Staggering the joints is the one detail that sells the illusion.
Cost: ~$55 | Time: 150 minutes
💰 Budget win: Buy planks in a bulk pack rather than single boxes to bring the per-plank price down.
3. Black and White Checkerboard for Vintage Charm
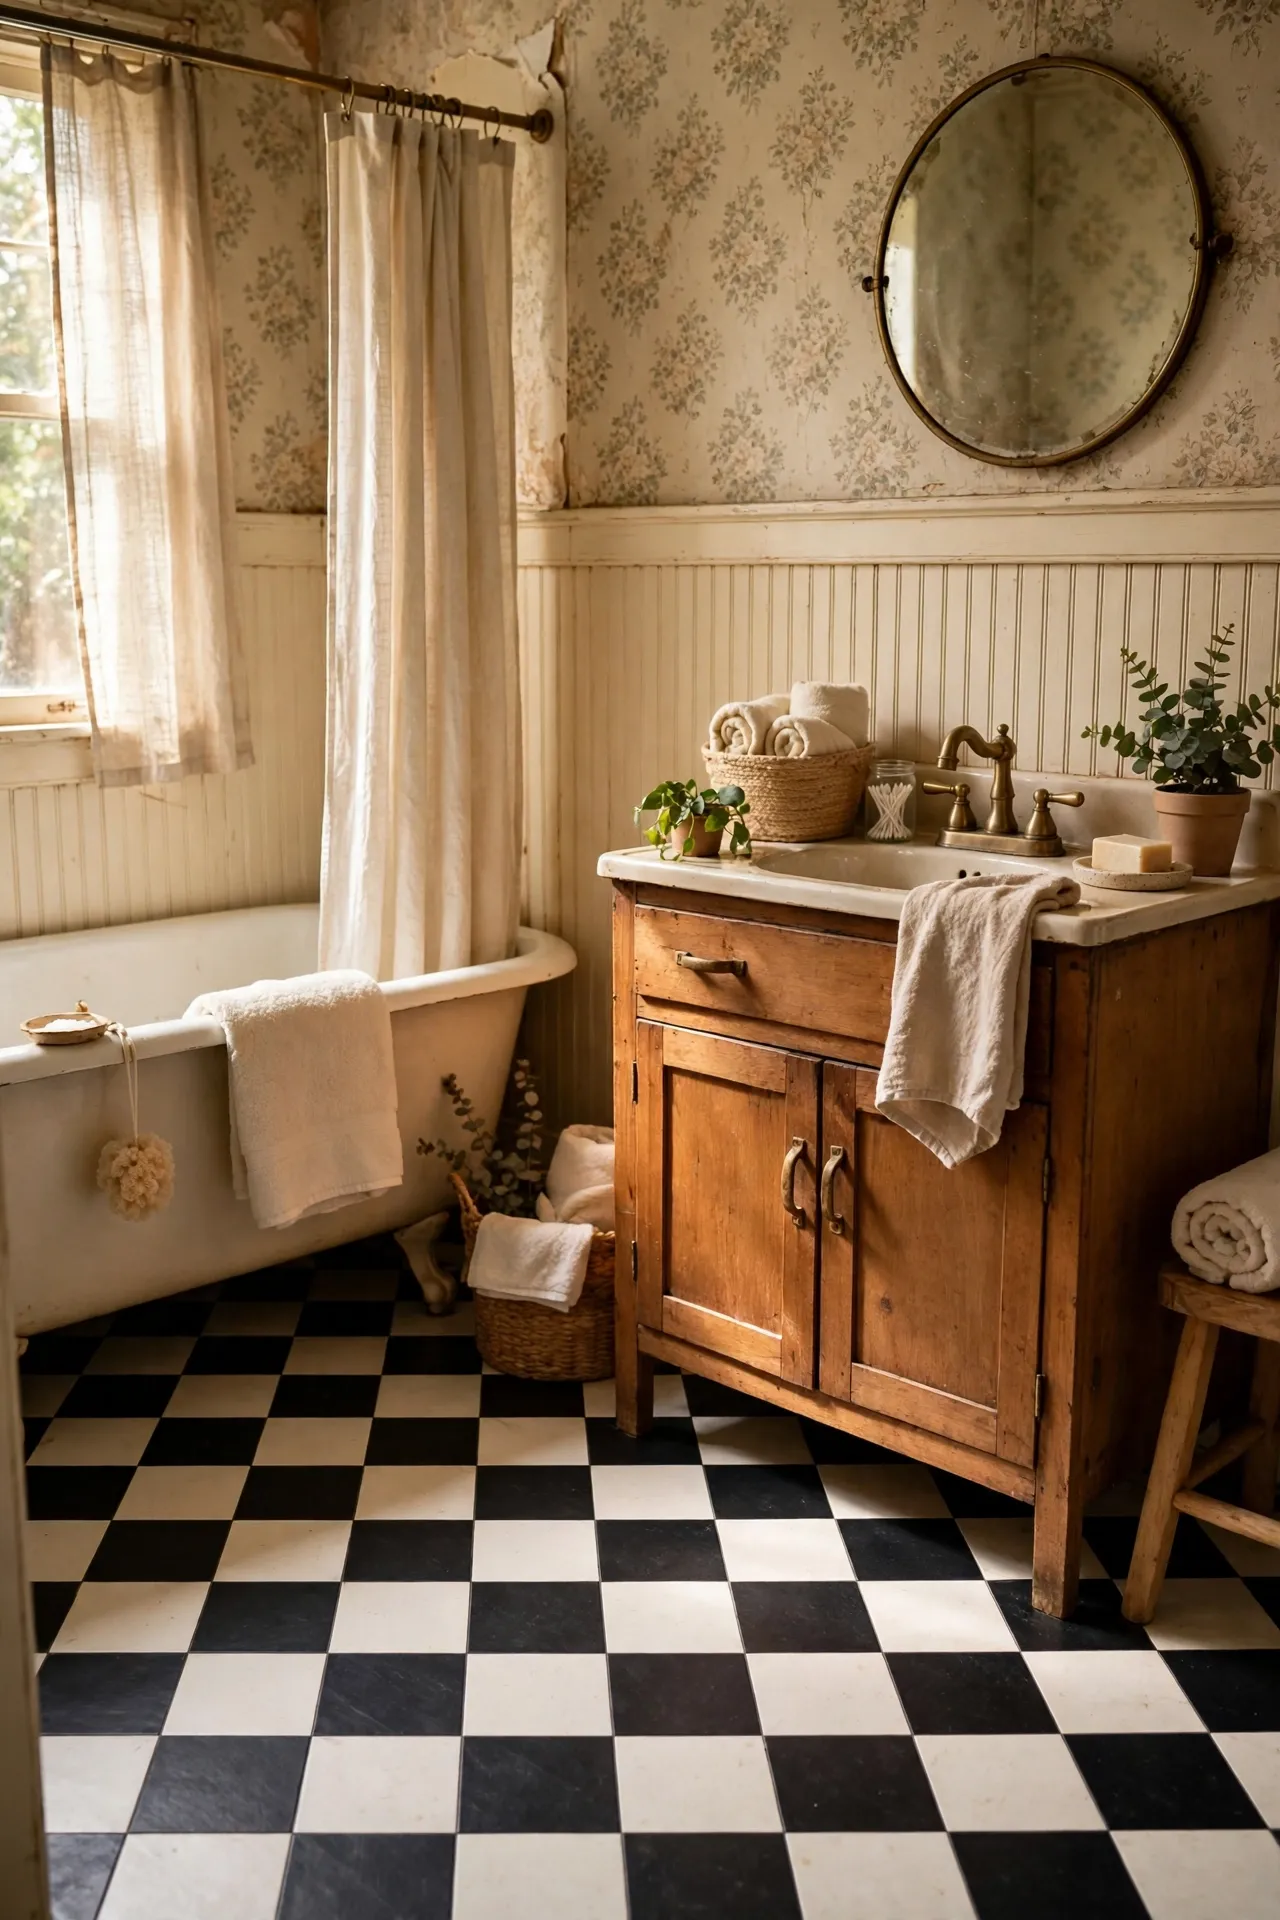
A black and white checkerboard floor brings vintage charm to even the plainest rental bathroom, and it pairs with almost any wall colour. Plan the layout on paper first so the pattern centres on the doorway, then lay alternating tiles in straight rows. Keep a damp cloth handy to wipe the surface as you go. I tried this pattern and the mistake to avoid is starting in a corner — you will end up with a skinny sliver of tile at the door. Centring the pattern first keeps the edges looking intentional on both sides.
Cost: ~$50 | Time: 150 minutes
💰 Budget win: Use plain black and white tiles instead of patterned checkerboard sheets for a cheaper, classic result.
4. Soft Grey Stone Tiles With a Matte Finish
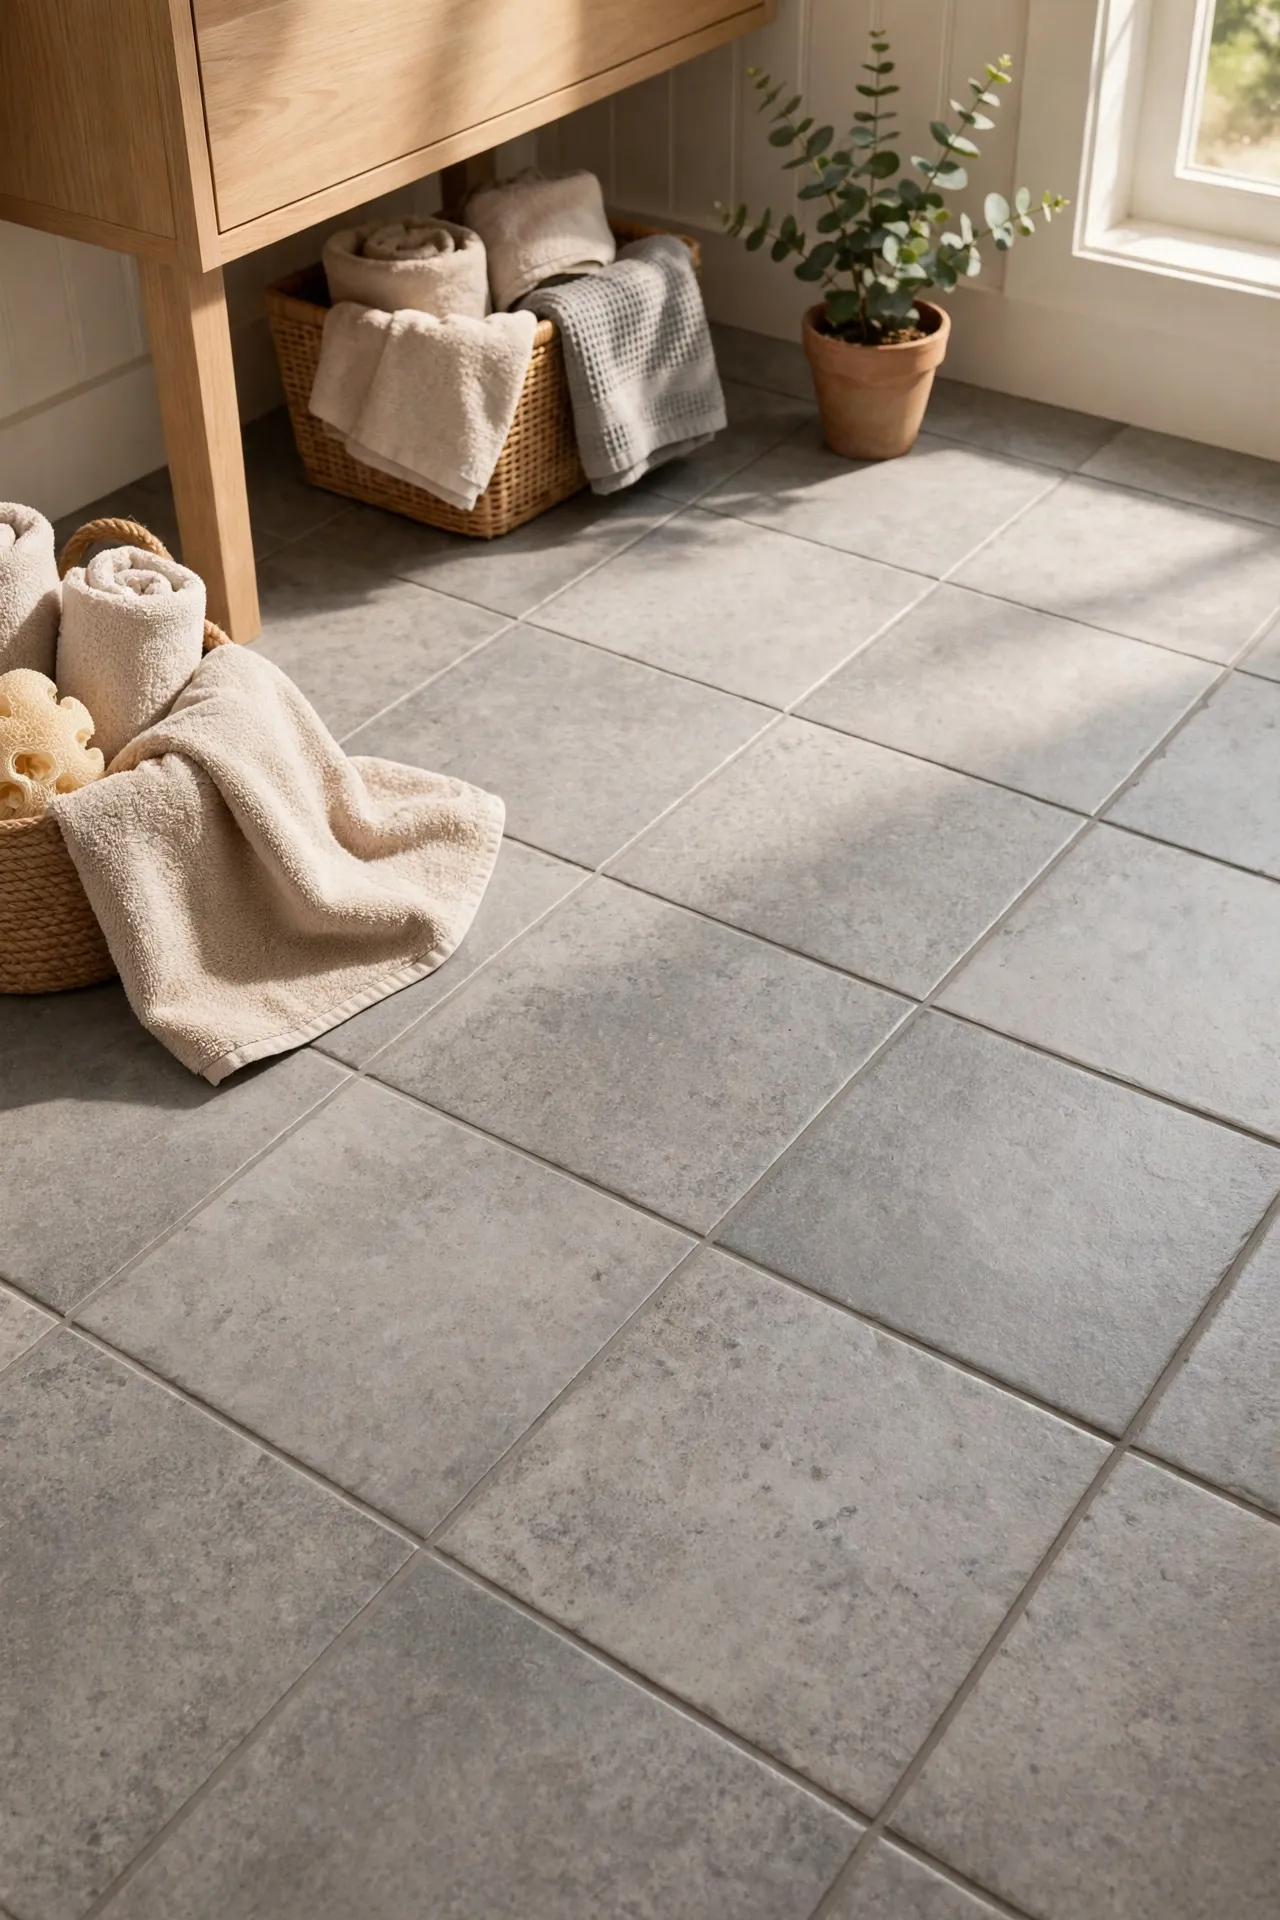
Soft grey stone-look tiles with a matte finish hide water spots and everyday wear far better than shiny tiles. Lay them in a simple grid, pressing out air bubbles as you go, and seal the edges near the tub with a thin line of waterproof caulk. Choose a mid-grey tone so the floor does not look too dark in a small room. I tried matte grey tiles and the mistake to avoid is skipping the caulk by the tub — splashes will creep under the edges. That one extra step keeps the floor stuck down for months longer.
Cost: ~$48 | Time: 120 minutes
💰 Budget win: Pick a matte stone tile that already looks sealed instead of buying a separate sealant product.
5. Herringbone Wood Planks in a Small Bathroom
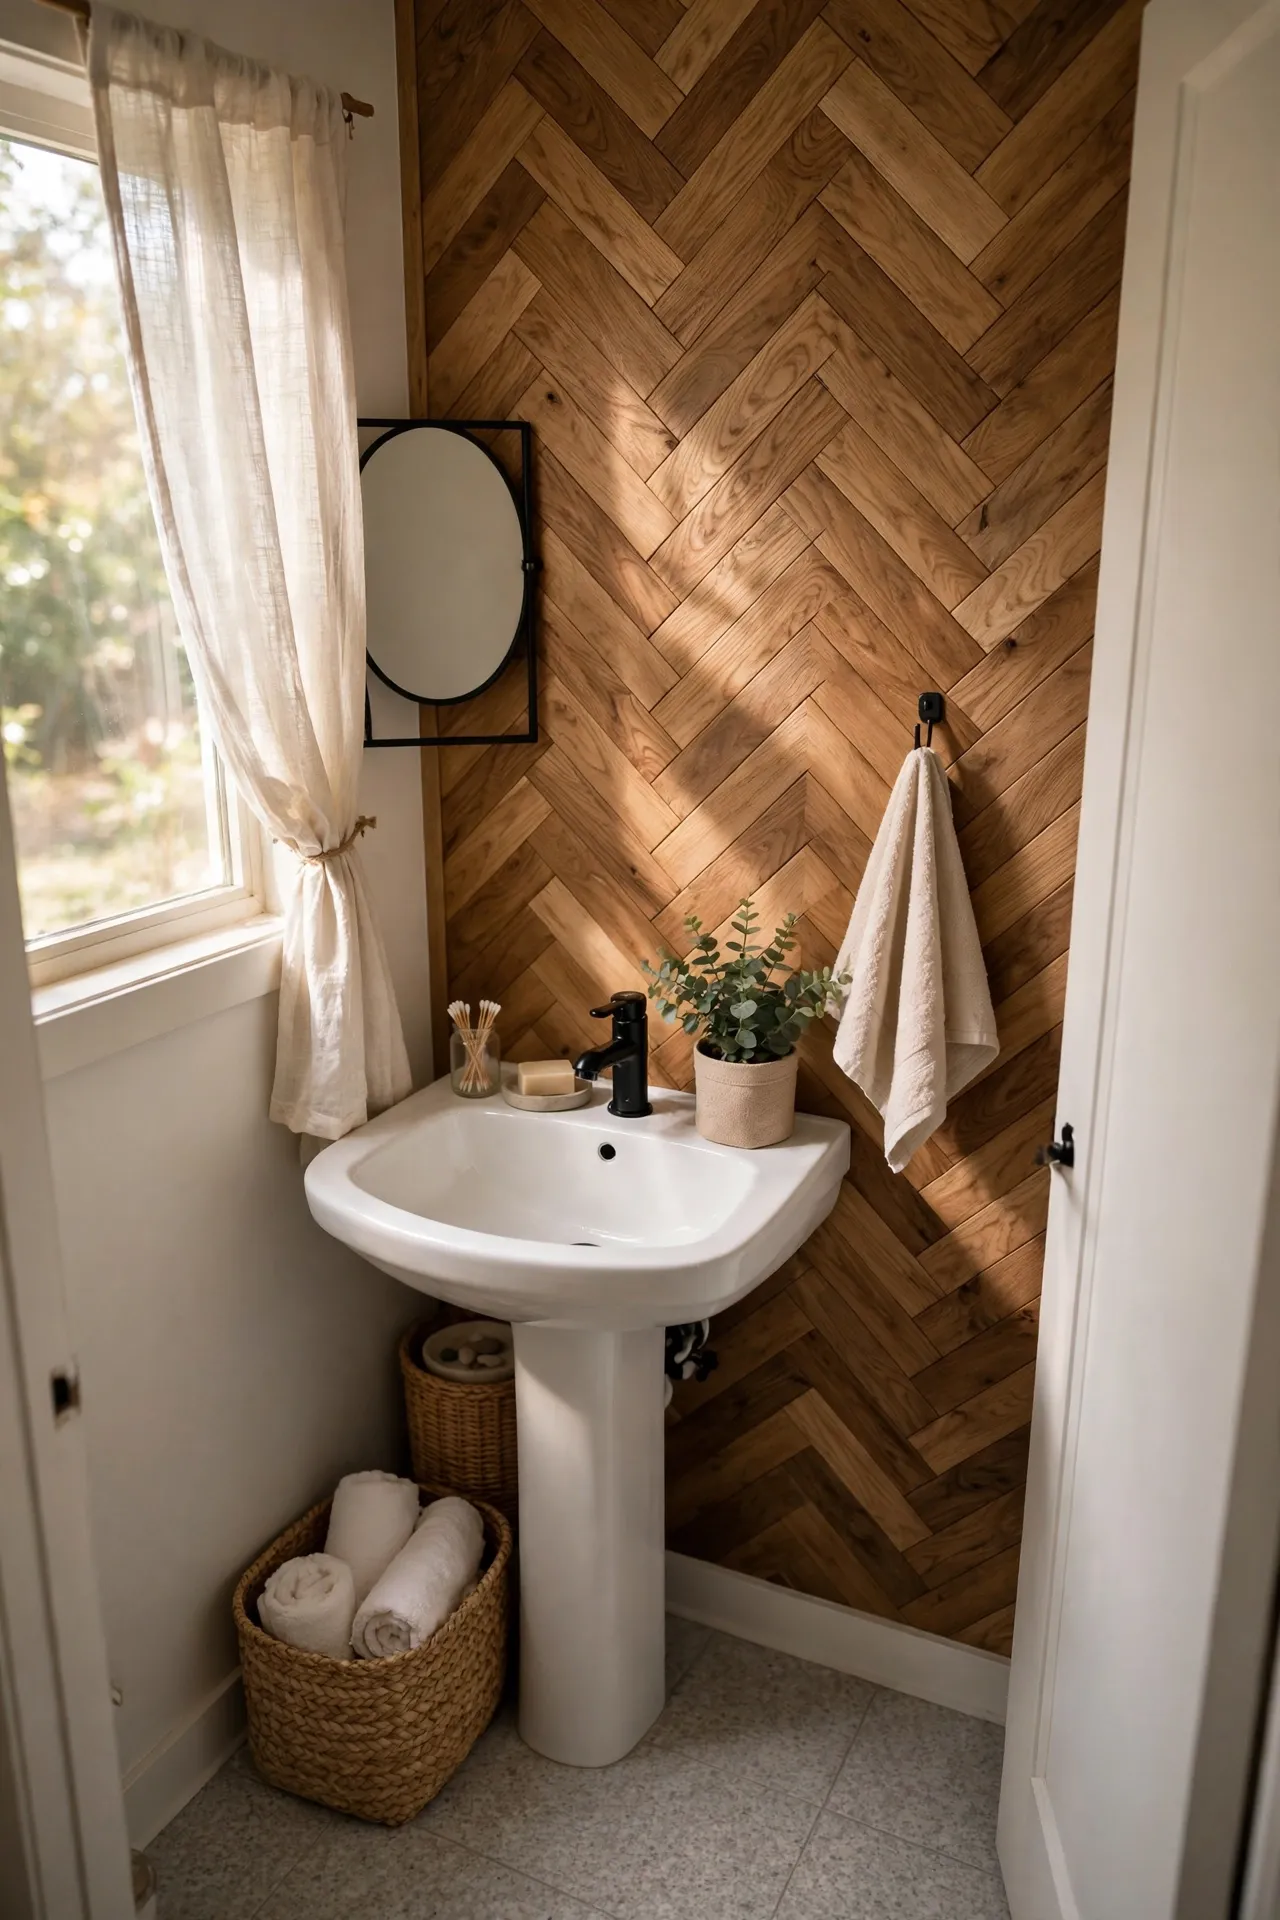
Herringbone wood planks make a small bathroom floor look custom and expensive, even though the planks just peel and stick. Dry-lay a few rows first to get the zigzag angle right, then work outward from the centre of the room. Cut the edge pieces carefully with a sharp knife and a straight edge. I tried this layout and the mistake to avoid is rushing the first two rows — herringbone only looks good when those rows are straight. Take your time at the start, and the rest of the floor will fall into place much faster.
Cost: ~$65 | Time: 210 minutes
💰 Budget win: Buy one extra box for herringbone cuts instead of reordering later at a higher shipping cost.
6. Terrazzo Speckle Tiles for a Playful Floor
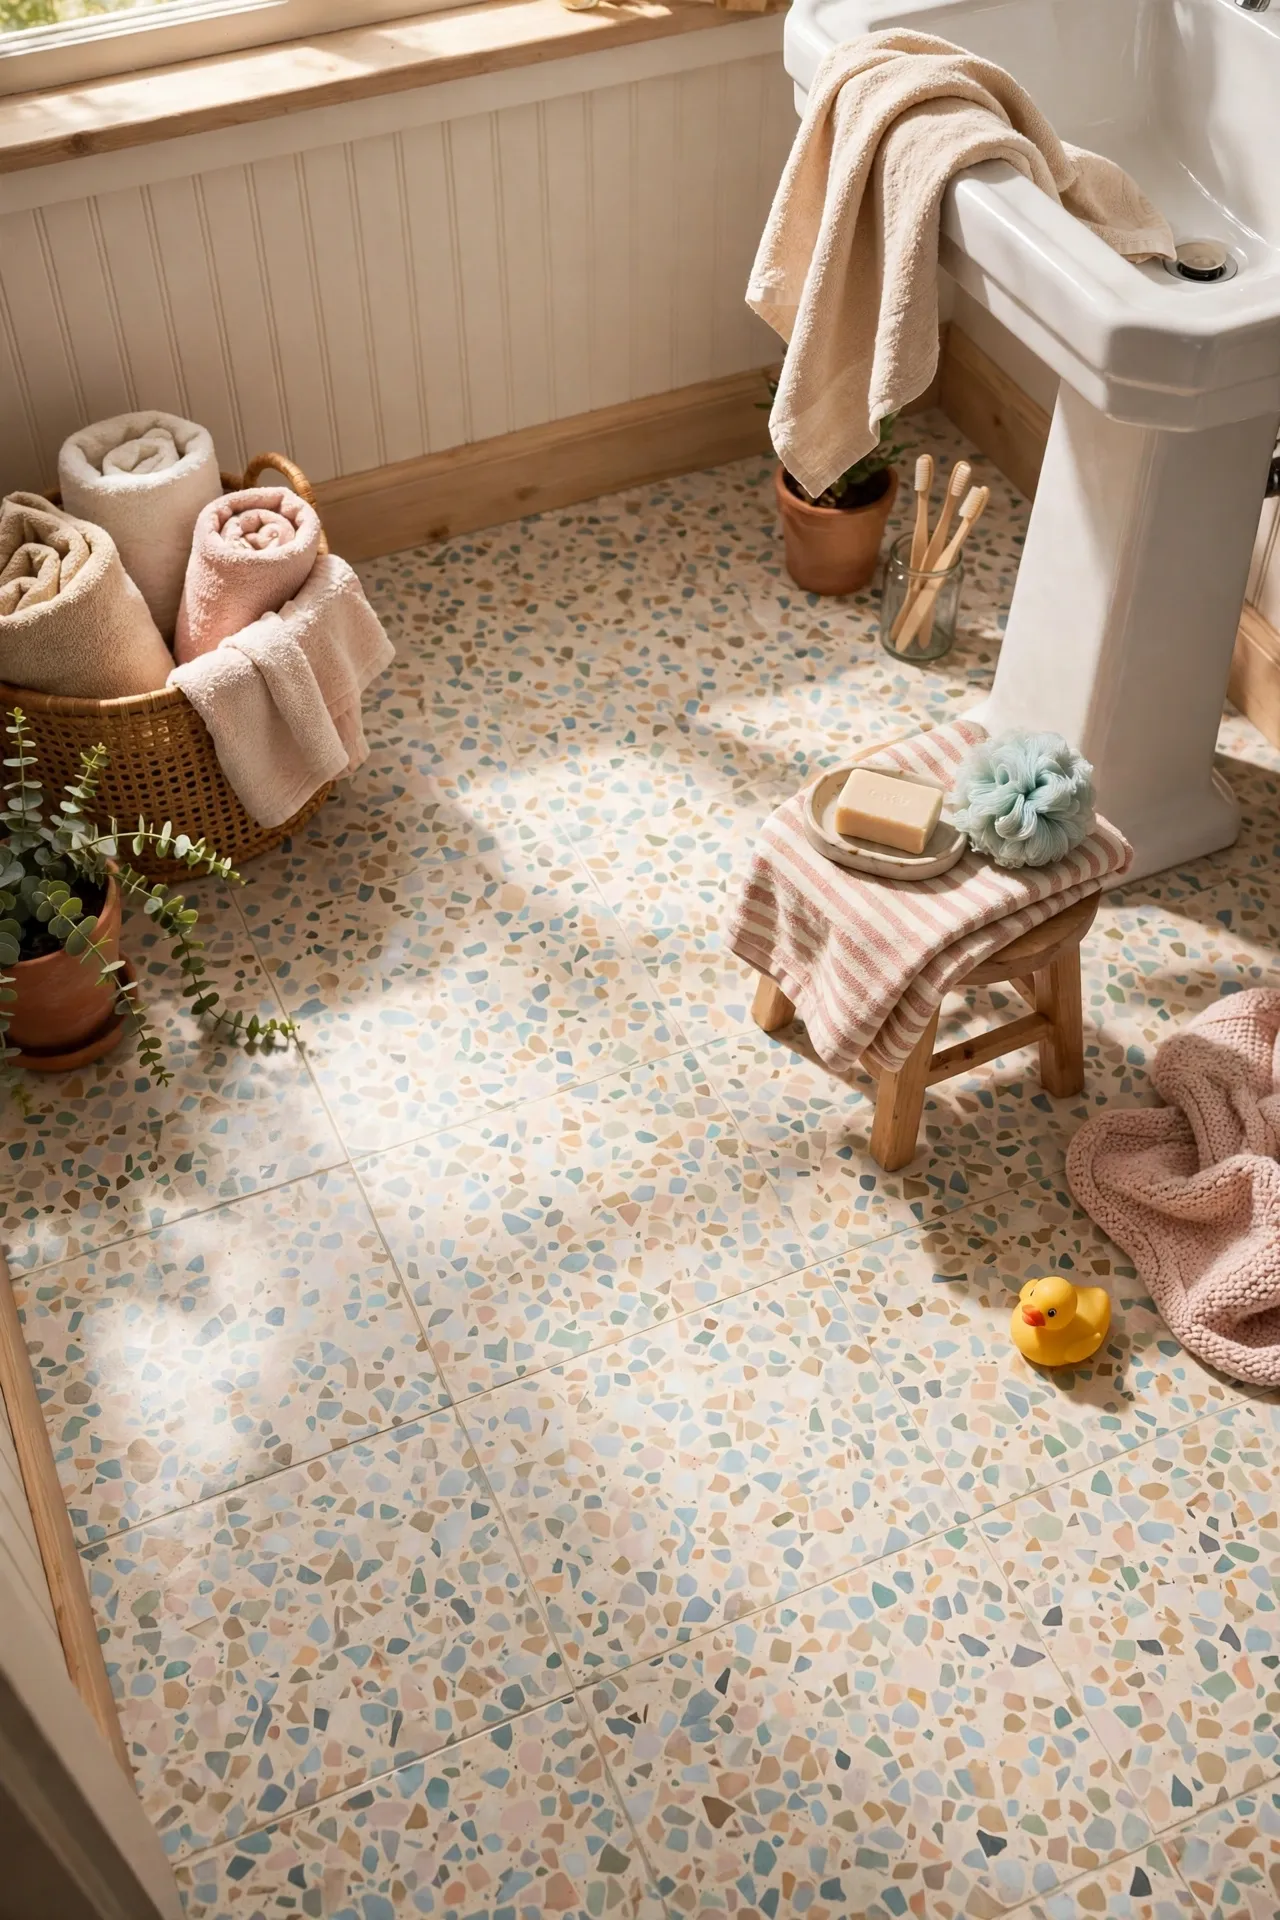
Terrazzo speckle tiles add playful flecks of colour to a plain bathroom without committing to a bold wall colour. Choose a base of white or cream with small speckles, then lay the tiles in a straight grid so the pattern stays calm. Press firmly and roll over each tile to remove air pockets. I tried terrazzo in a guest bath and the mistake to avoid is pairing it with a busy shower curtain — too many patterns fight each other. Keep towels and curtains plain, and let the speckled floor be the fun part of the room.
Cost: ~$52 | Time: 130 minutes
💰 Budget win: Use terrazzo tiles only in the main walkway and plain tiles under fixtures to stretch the pack further.
7. Deep Green Tiles for a Moody Renter Refresh
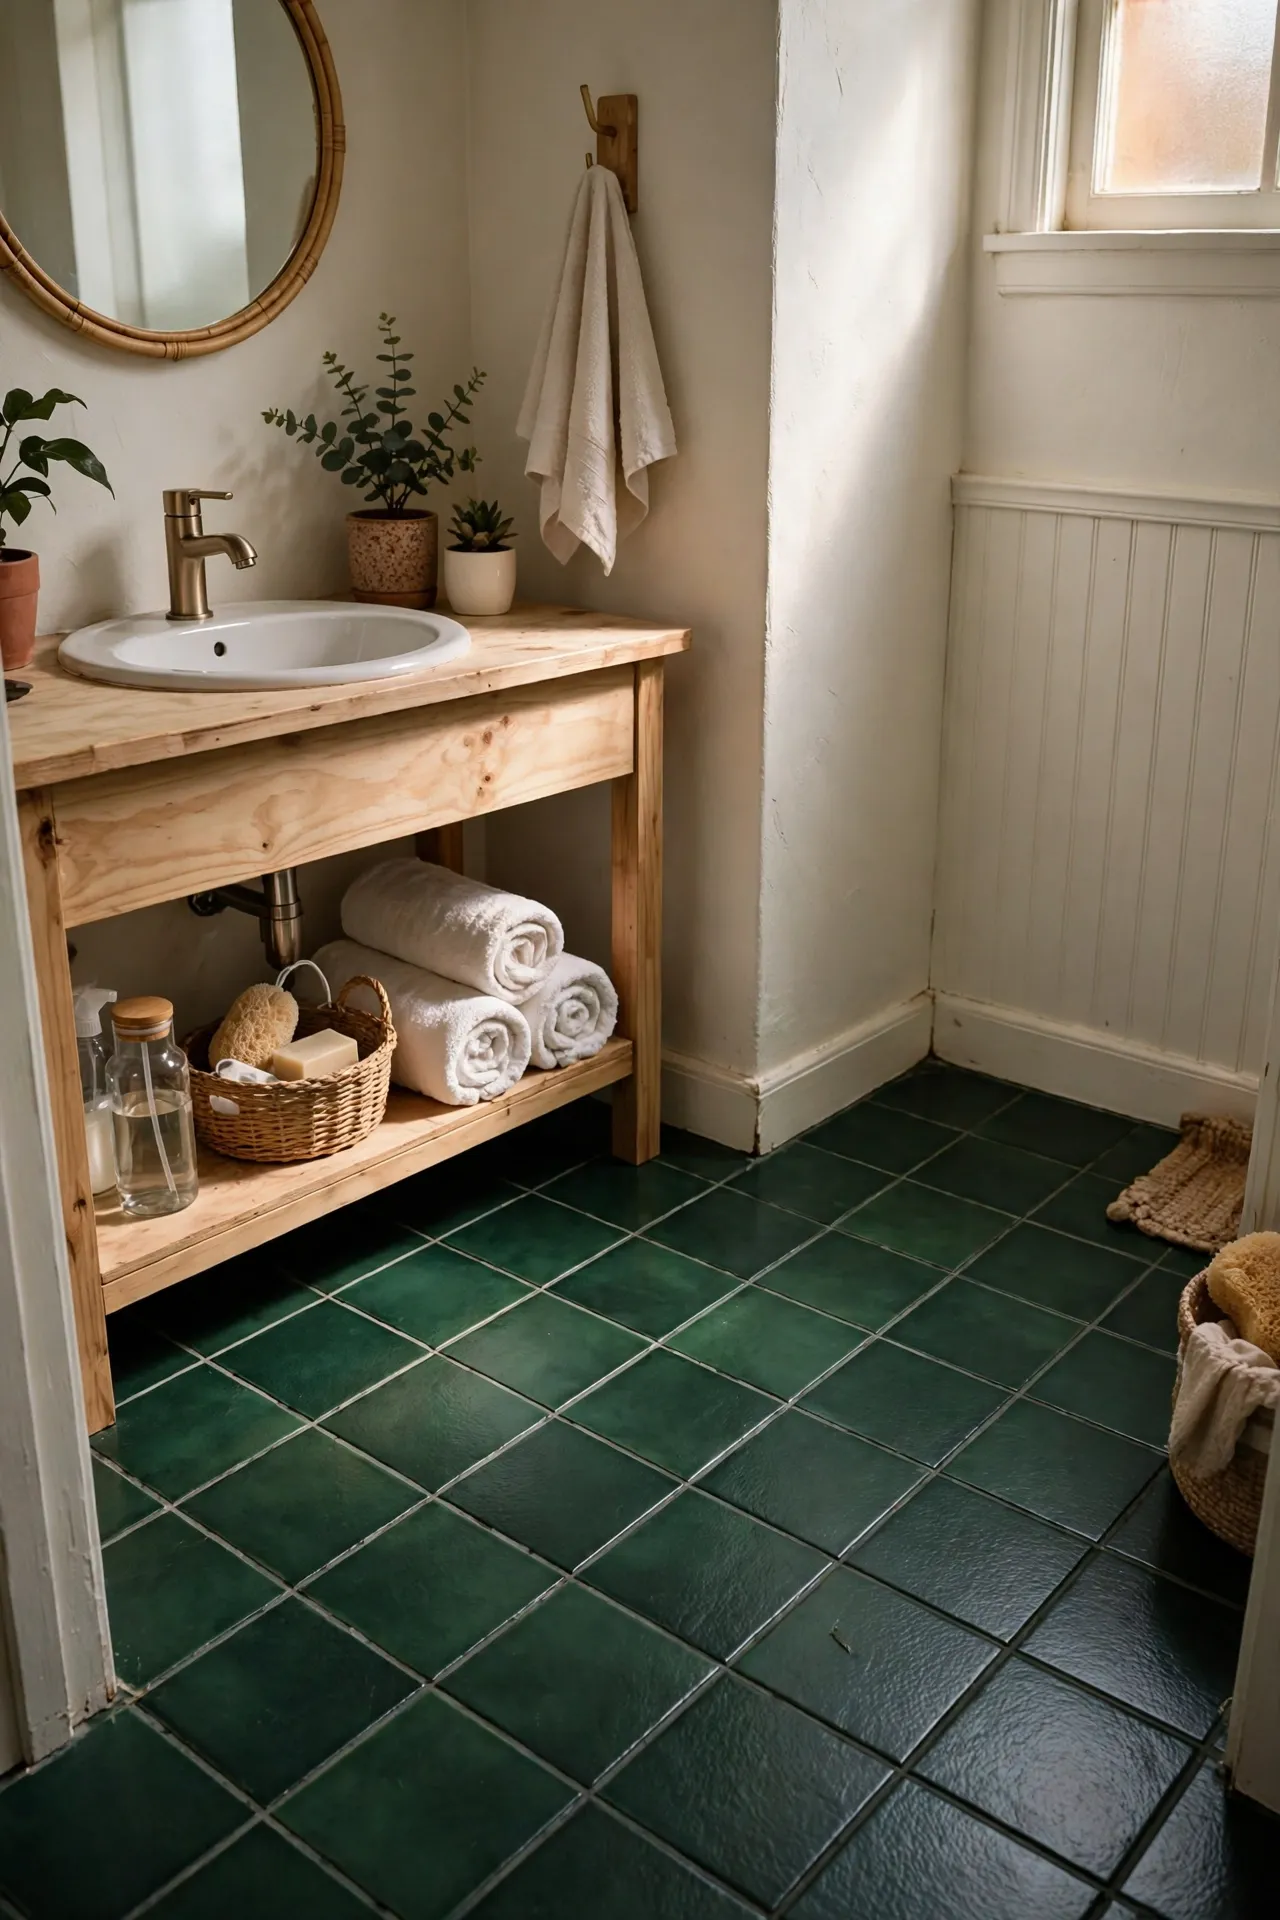
Deep green peel and stick tiles turn a bland bathroom into a moody, grown-up space that still feels renter-safe. Pair the green floor with white walls, brass fixtures, and cream towels so the room stays bright enough. Lay the tiles in a grid, checking the colour in daylight as you go, since green can shift under warm bulbs. I tried a deep green floor and the mistake to avoid is adding more dark colours on top — green walls plus a green floor feels heavy fast. Let the floor carry the colour alone.
Cost: ~$54 | Time: 130 minutes
💰 Budget win: Test one tile under your bathroom lighting before buying the full pack to avoid a costly colour mismatch.
8. Light Oak Planks Over Old Linoleum
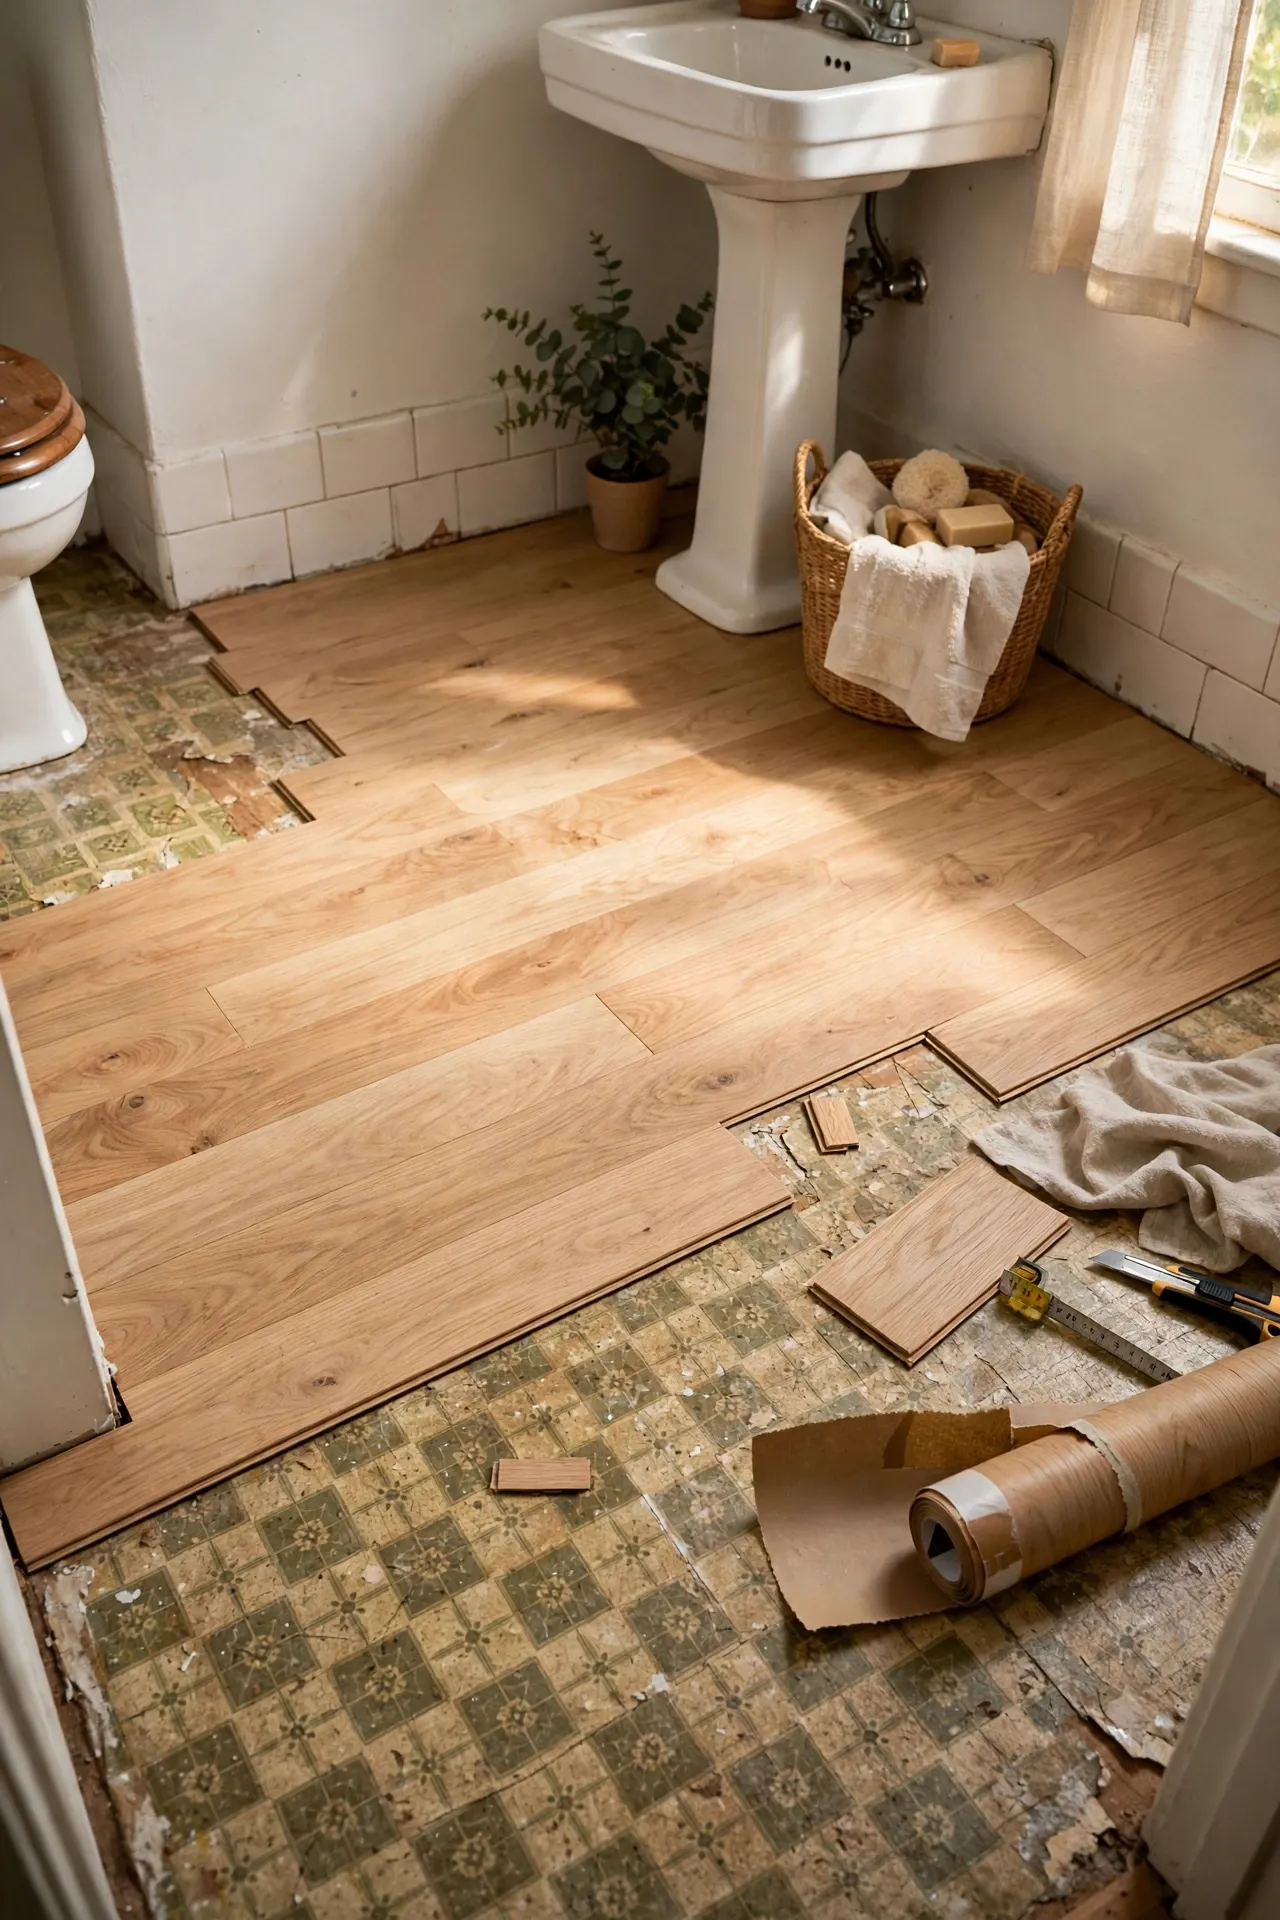
Light oak planks laid over old linoleum are the easiest cover-up for a floor you hate but cannot remove. Wash the linoleum, dry it fully, and check for loose edges that need sticking down first. Then lay the planks lengthwise toward the door so the room feels longer. I tried this over 1980s linoleum and the mistake to avoid is laying planks over a bubbled or peeling section — the bump will show through and the plank will lift. Fix loose spots first with a little adhesive, then lay your new floor on top.
Cost: ~$58 | Time: 160 minutes
💰 Budget win: Lay planks directly over sound linoleum instead of paying for removal or a new underlayment.
9. Hexagon Tiles in Soft Sage and Cream
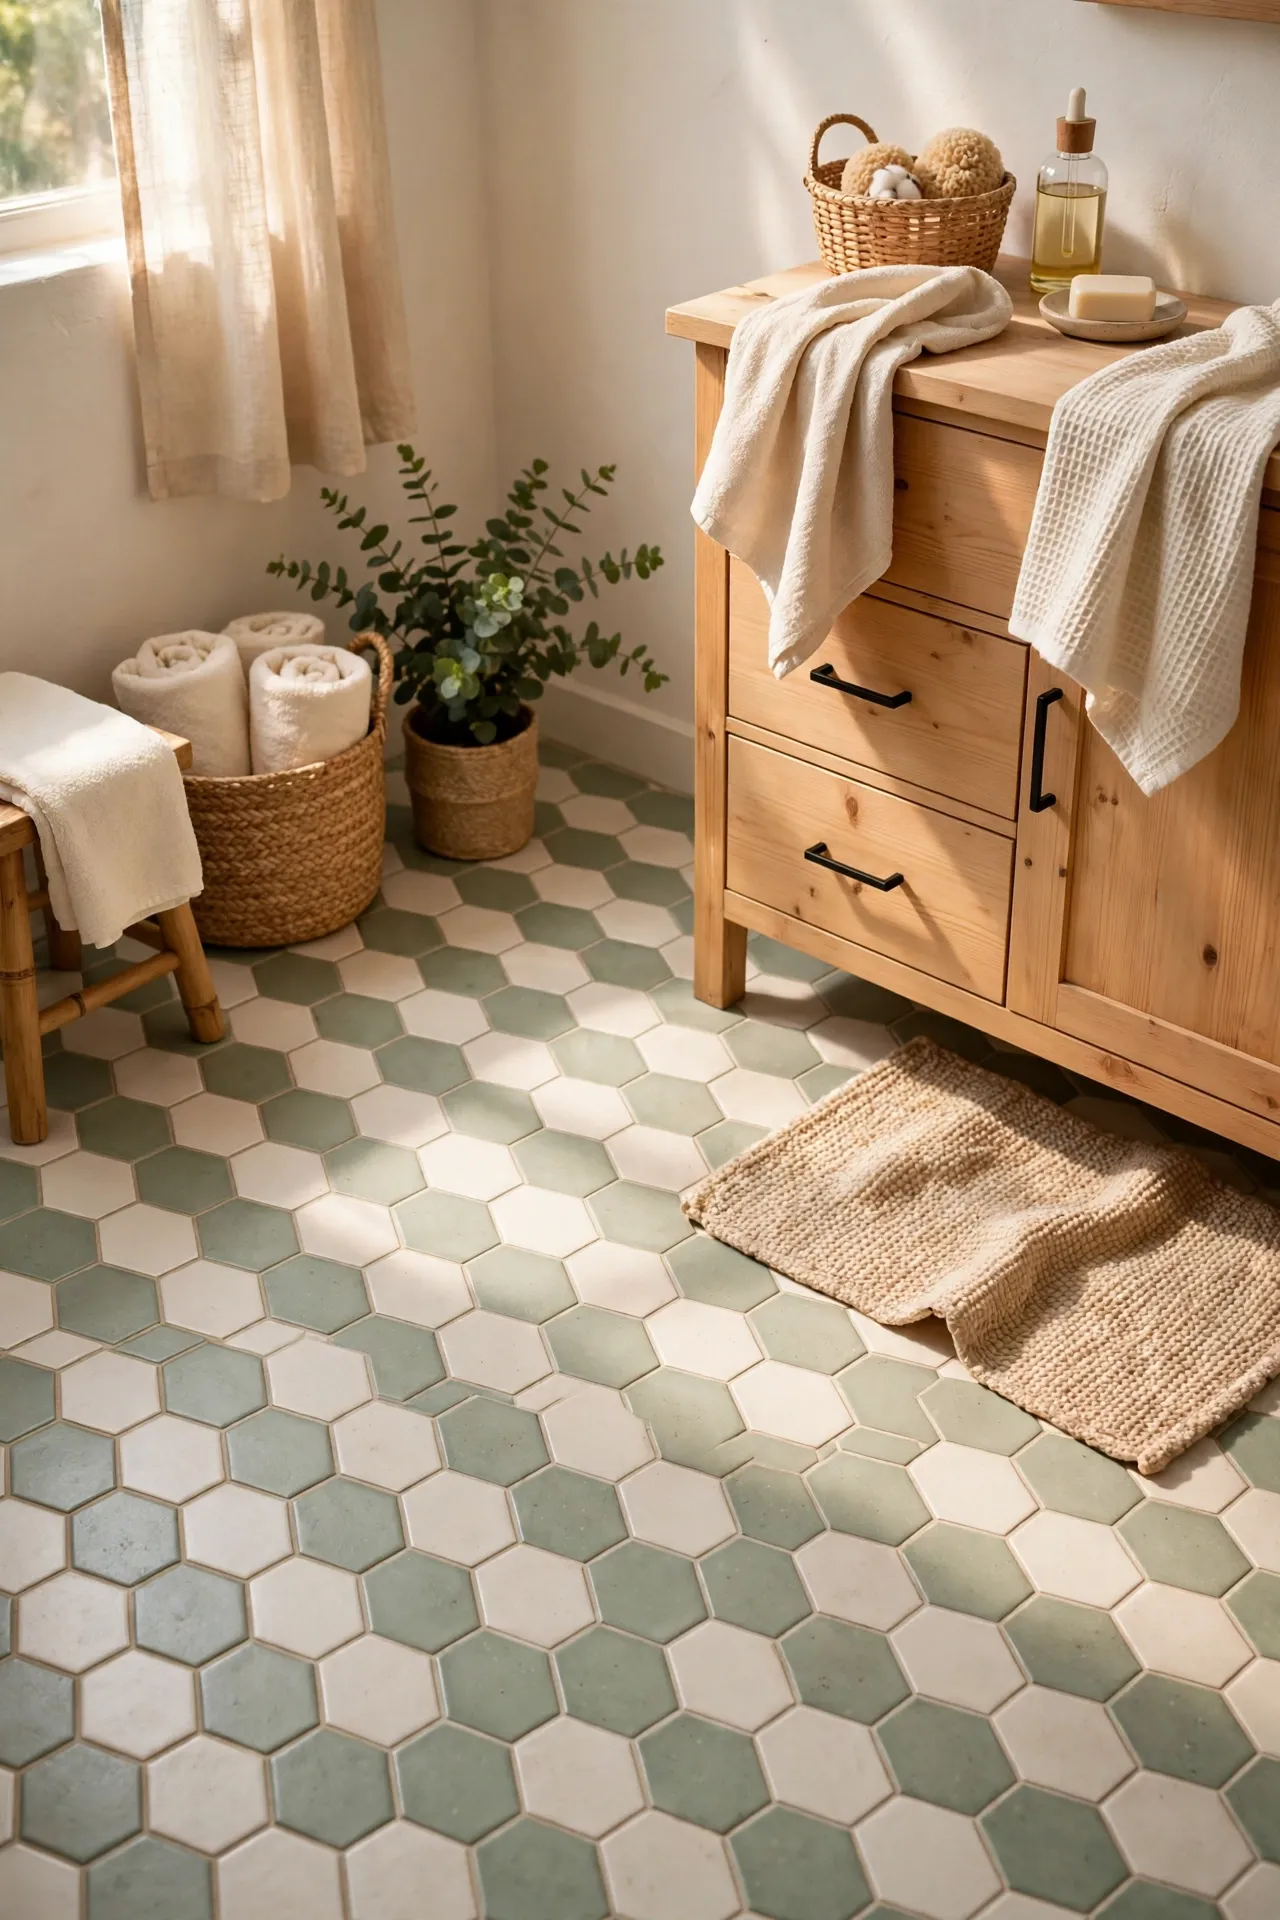
Hexagon tiles in soft sage and cream give a bathroom a gentle, honeycomb look that feels both fresh and timeless. Lay them in rows, matching the hex points carefully, and trim the edges with a sharp knife for a tidy border. Keep the grout lines in the printed pattern aligned as you place each sheet or tile. I tried hex tiles and the mistake to avoid is stretching or forcing a sheet to fit — the pattern will warp and look crooked. Cut the sheet cleanly instead, and the honeycomb shape will stay crisp.
Cost: ~$60 | Time: 170 minutes
💰 Budget win: Use hexagon sheets for the centre of the room and plain tiles at the edges where cuts would waste pattern.
10. Bold Geometric Tiles Behind the Vanity Area
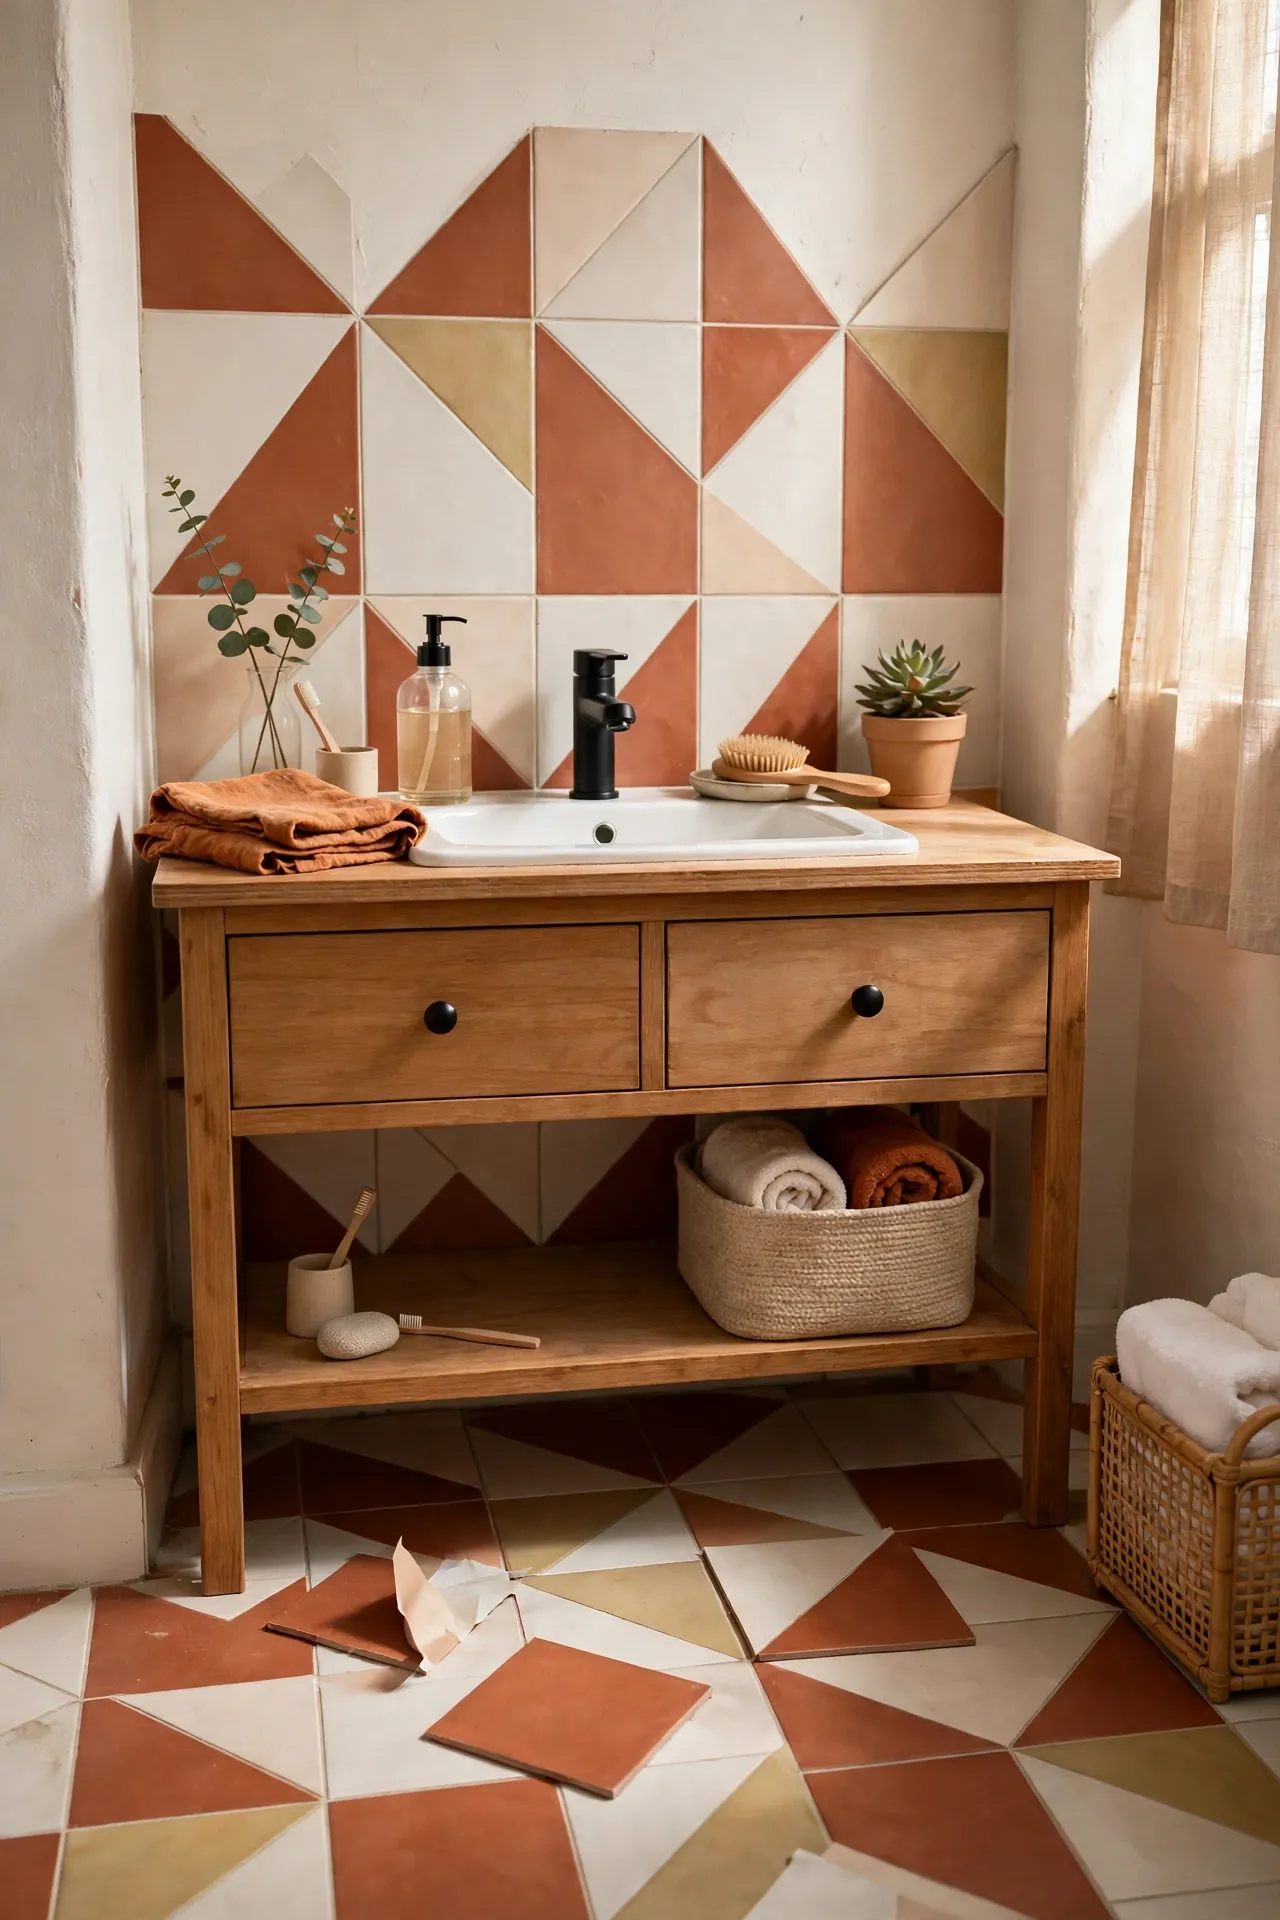
Bold geometric tiles work best as a defined zone, like the area in front of the vanity, rather than across the whole floor. Mark the zone with painter’s tape first, lay the geometric tiles inside it, and surround them with plain tiles for a rug-like effect. This trick makes the vanity area feel styled without overwhelming a small room. I tried this zone idea and the mistake to avoid is letting the pattern drift off-centre — measure from the vanity, not from the wall. Centring on the vanity keeps the whole design looking deliberate.
Cost: ~$56 | Time: 150 minutes
💰 Budget win: Buy just enough geometric tiles for the vanity zone and use cheaper plain tiles for the rest of the floor.
11. Sandstone-Look Tiles That Warm Cold Floors
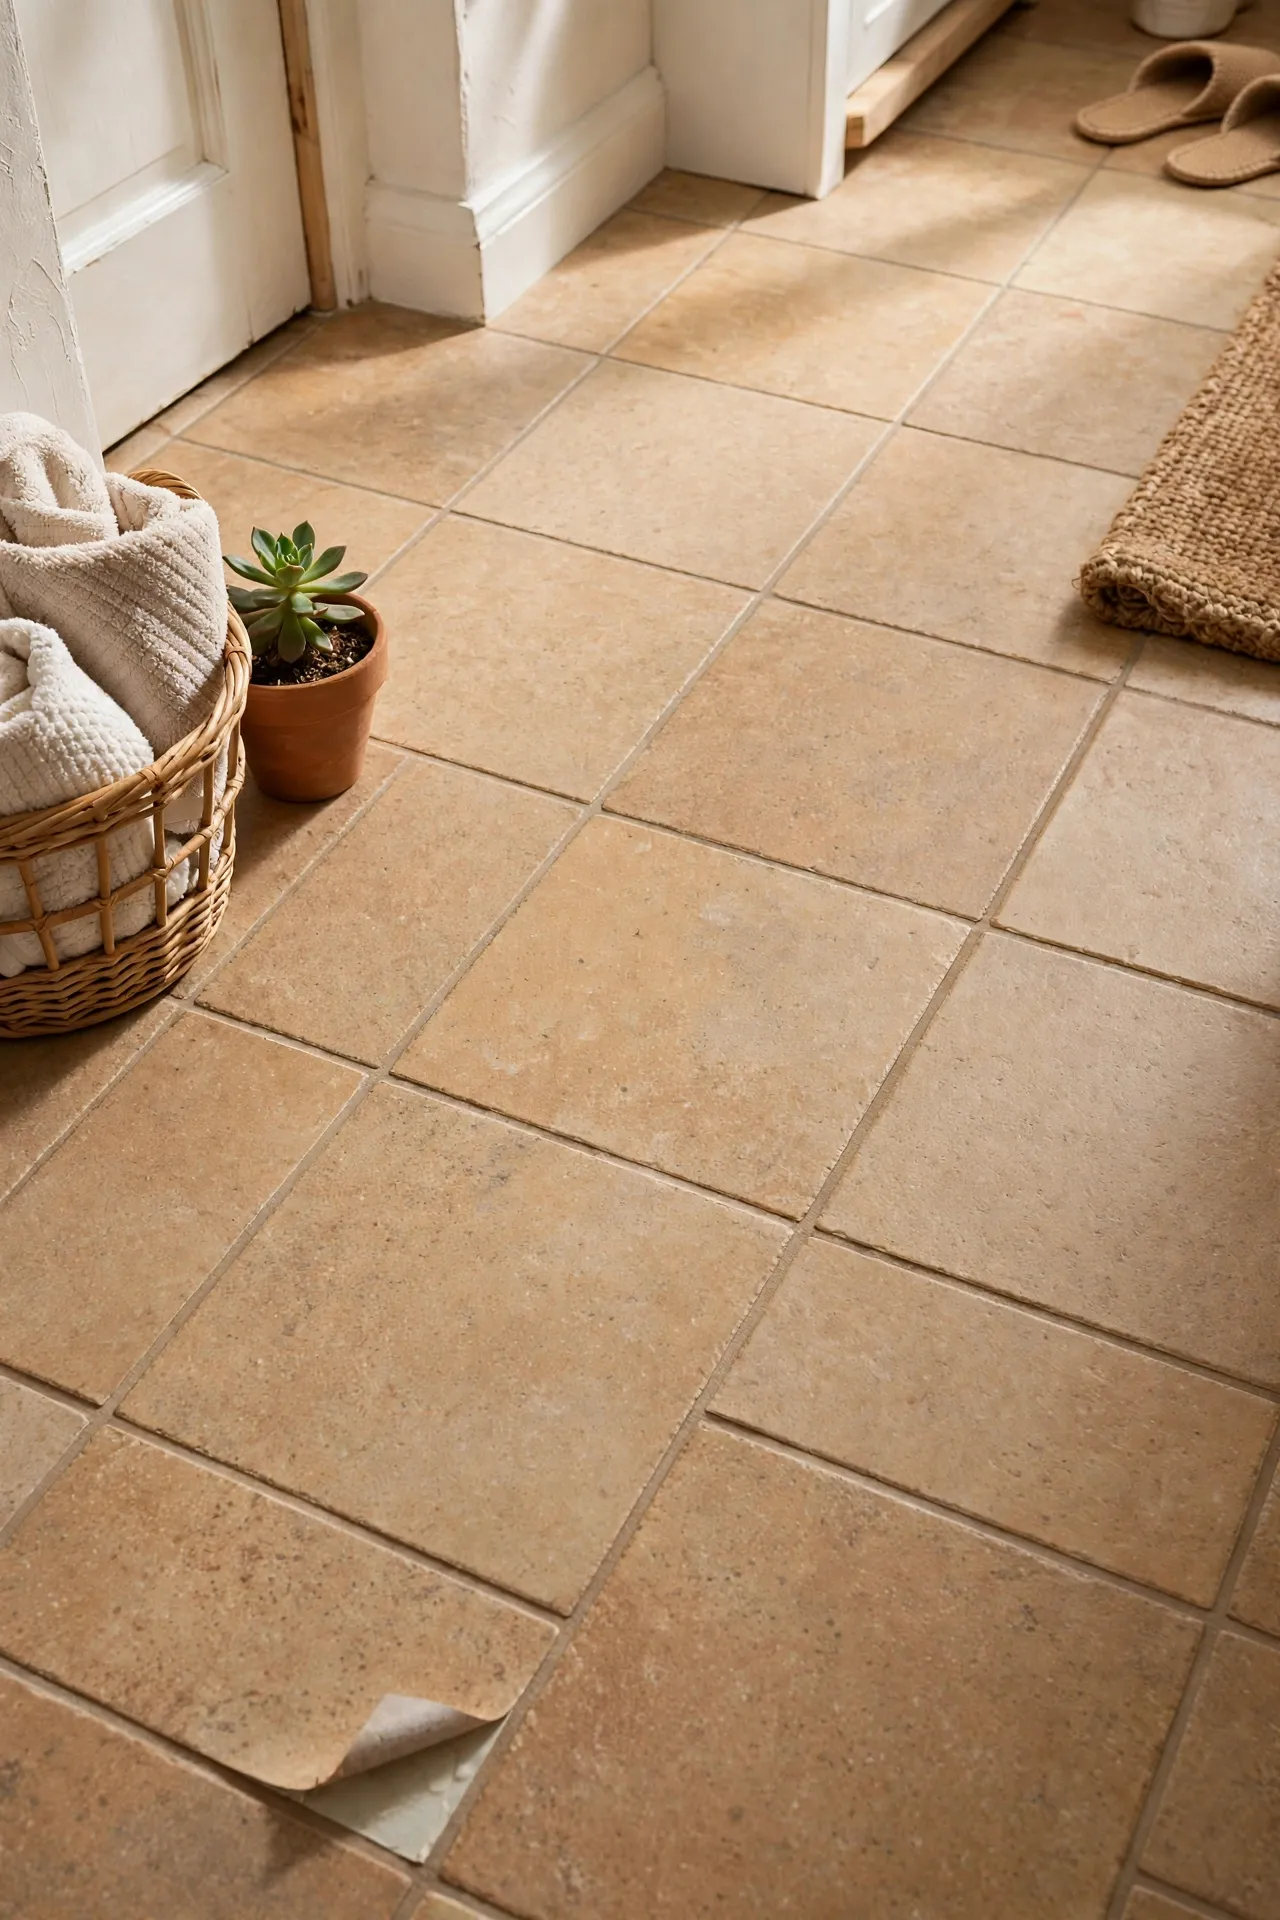
Sandstone-look tiles in warm tan tones make a cold bathroom floor feel warmer, even before you add a rug. Choose a tile with soft variation rather than a flat colour, so it reads like natural stone. Lay the tiles in a brick pattern, pressing each one down fully, and add a bath mat in a matching tone. I tried sandstone tiles in a basement bathroom and the mistake to avoid is pairing them with cold grey walls — the mix feels confused. Warm walls, warm towels, and warm stone together make the room feel cosy.
Cost: ~$50 | Time: 130 minutes
💰 Budget win: Choose sandstone-look vinyl tiles over real sandstone for warmth without the sealing and weight.
12. Charcoal Slate Tiles With Subtle Texture
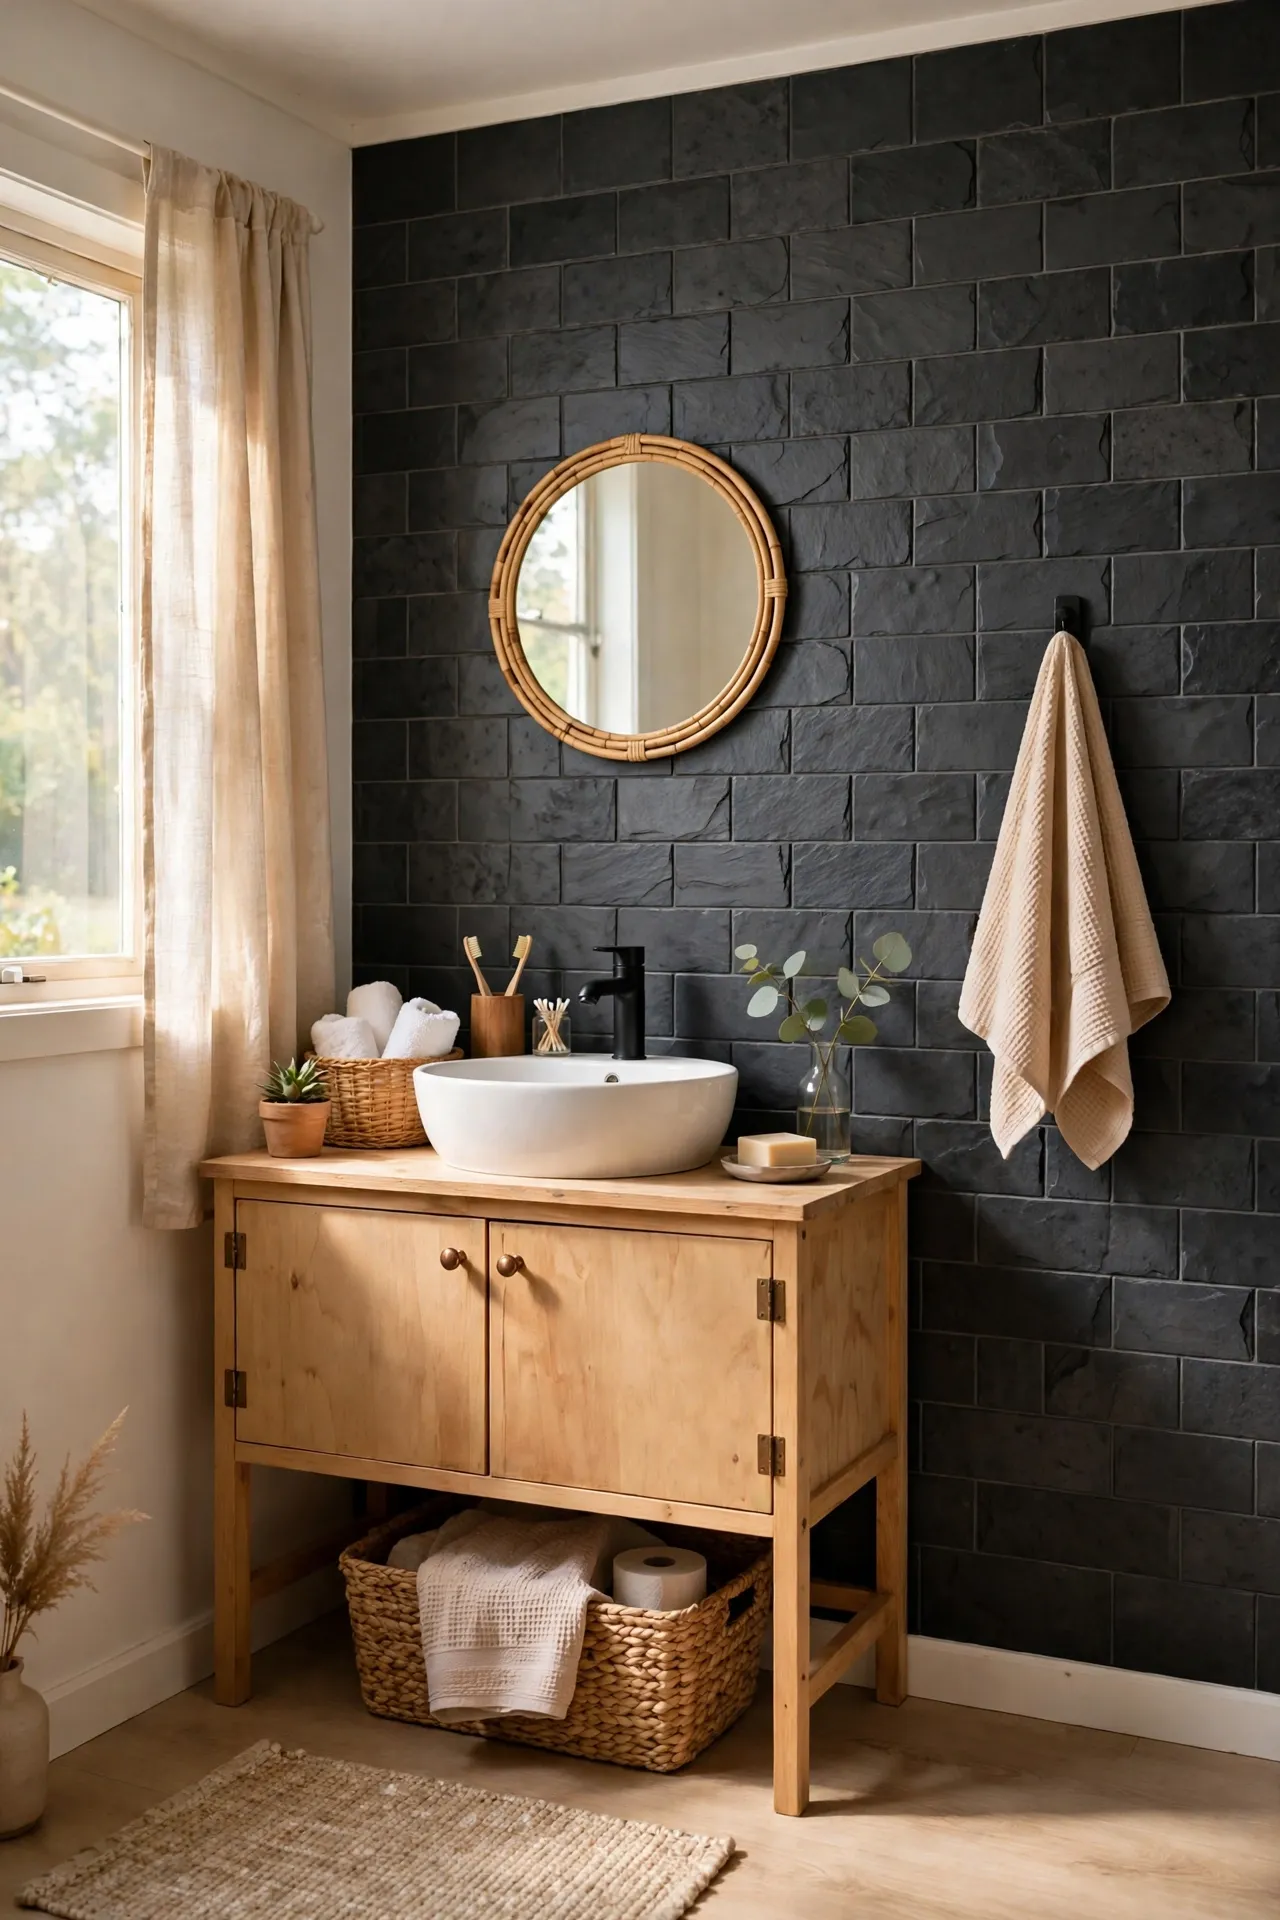
Charcoal slate-look tiles with a subtle texture give a rental bathroom a sleek, modern base that hides dirt well. Pair them with white walls and light towels so the dark floor does not close the room in. Lay the tiles in a straight grid and wipe them as you go to keep dust off the adhesive edges. I tried charcoal tiles and the mistake to avoid is using them in a windowless bathroom with no light — the room can feel like a cave. Add a bright mirror and warm bulbs, and the dark floor will look intentional instead.
Cost: ~$52 | Time: 130 minutes
💰 Budget win: Keep your existing light fixtures and just add warmer bulbs to balance a dark floor for a few dollars.
13. Whitewashed Planks for a Coastal Bathroom
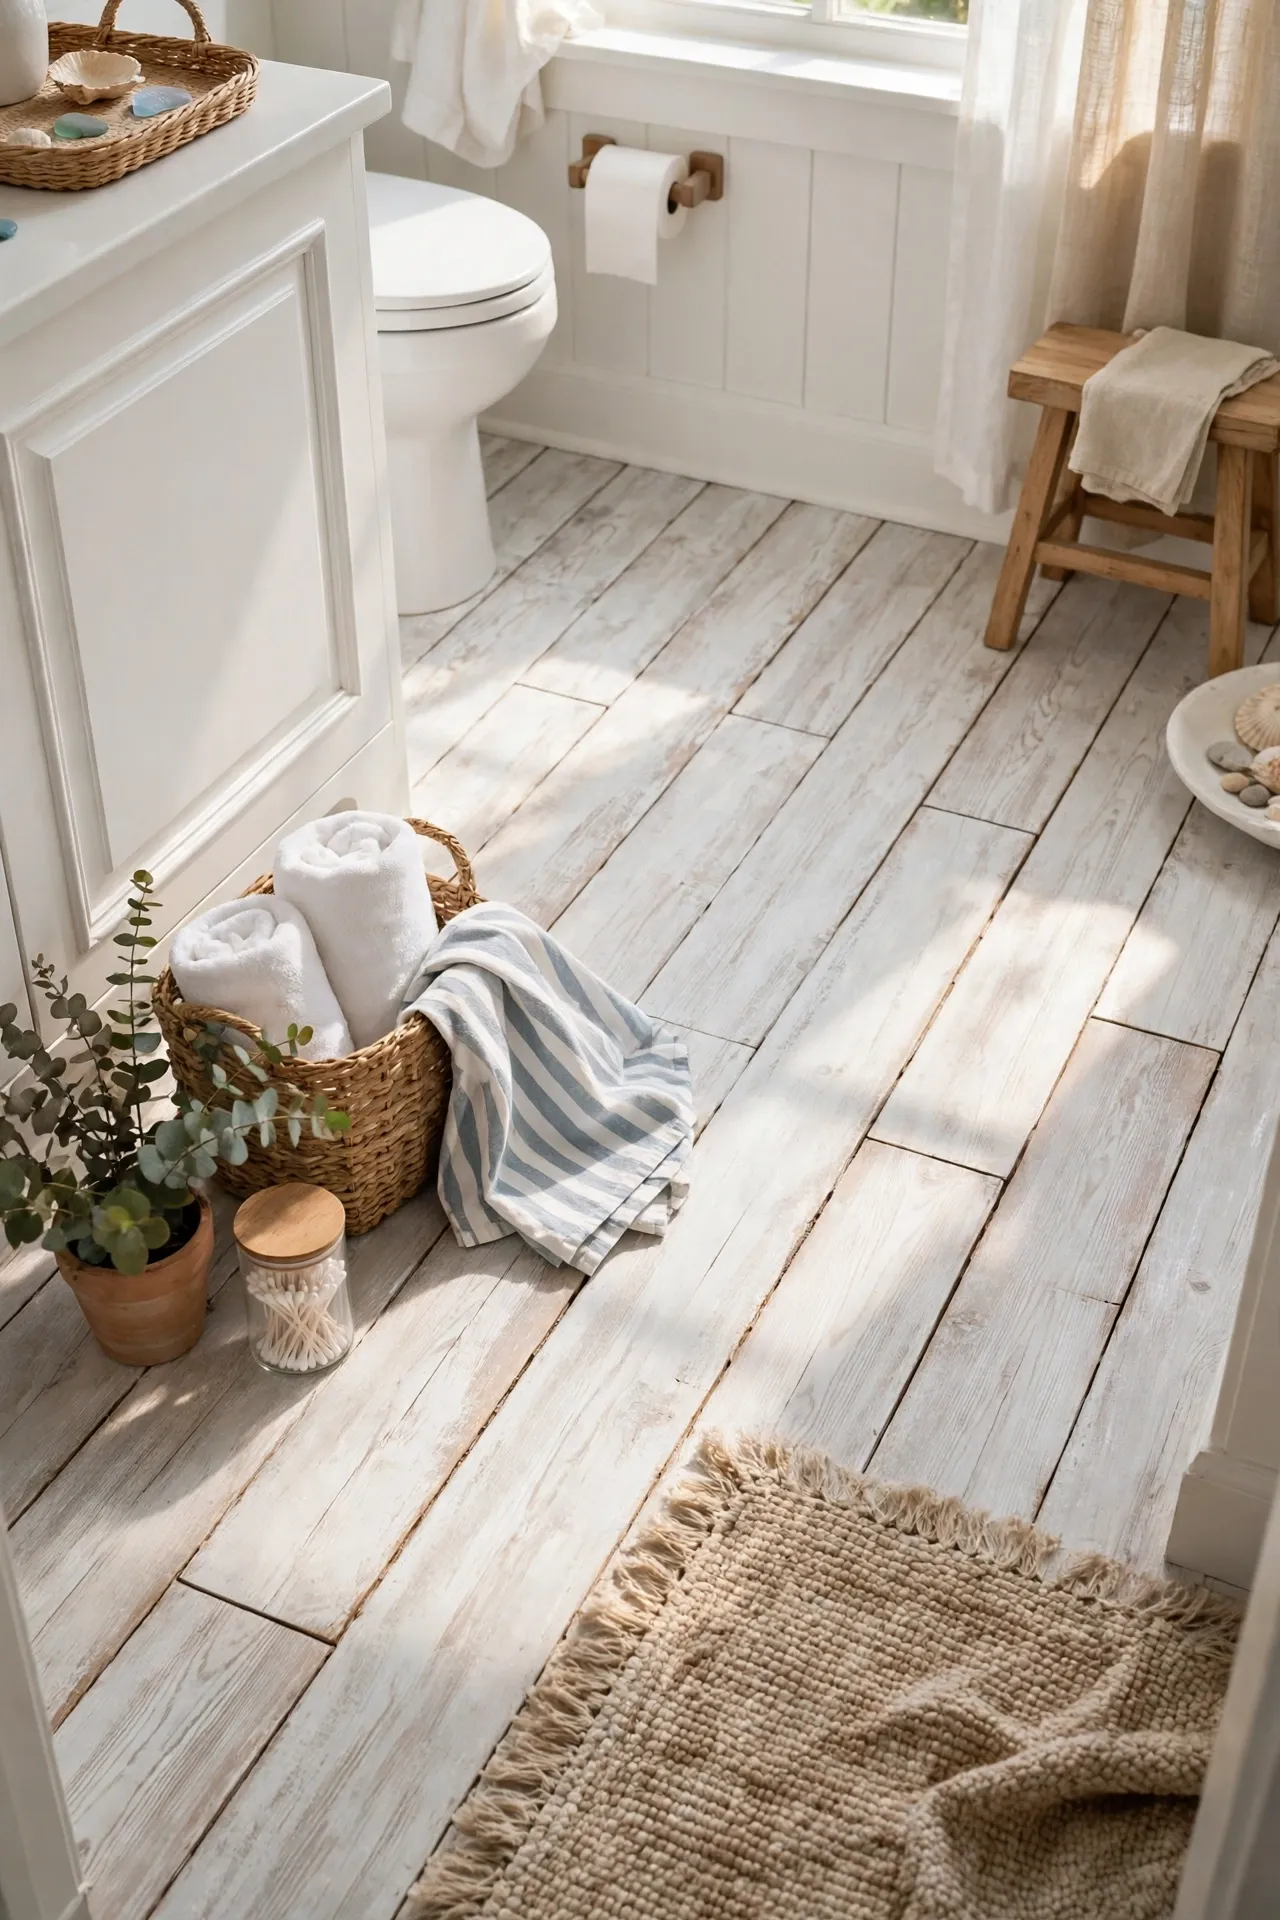
Whitewashed planks bring a breezy coastal feel to a bathroom, even if you live far from the sea. Lay the planks lengthwise, stagger the seams, and pair them with white towels and a woven basket for a relaxed look. The pale wood brightens a dark floor and makes small rooms feel airy. I tried whitewashed planks and the mistake to avoid is choosing a plank that is too white — it can look washed out under harsh lighting. A plank with faint wood grain showing through looks far more natural and forgiving.
Cost: ~$56 | Time: 150 minutes
💰 Budget win: Pair whitewashed planks with accessories you already own in white and natural wood instead of buying coastal decor.
14. Blush Pink Tiles for a Soft Statement Floor
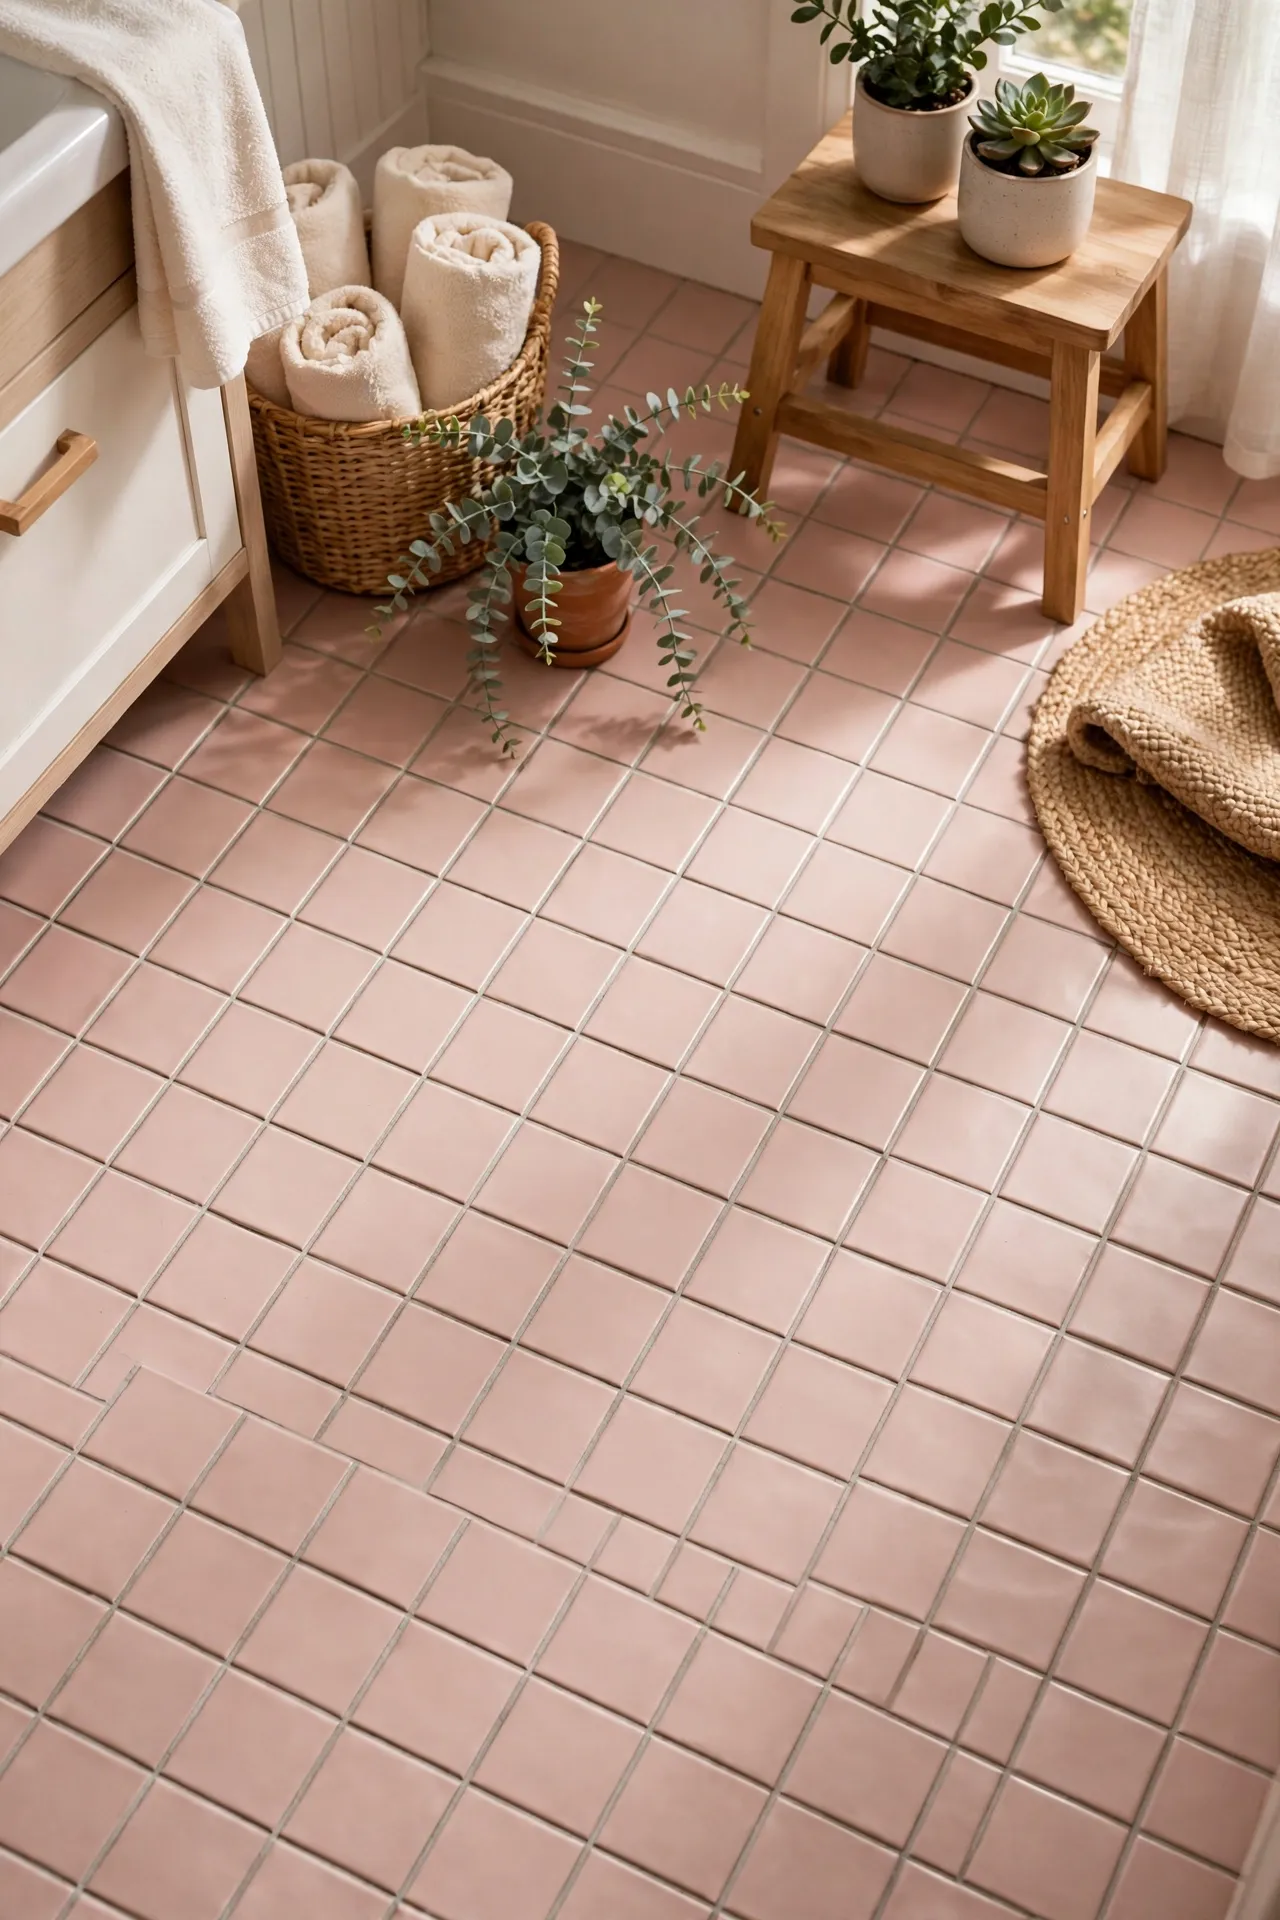
Blush pink tiles make a soft statement that feels pretty without turning the bathroom into a theme room. Choose a muted blush, not bubblegum pink, and pair it with cream walls and brushed gold fixtures. Lay the tiles in a grid and step back often to check the colour in natural light. I tried blush tiles in a small powder room and the mistake to avoid is adding pink towels and pink walls too — one pink element is charming, three is too much. Keep everything else neutral and let the floor blush quietly.
Cost: ~$54 | Time: 130 minutes
💰 Budget win: Use blush tiles on the floor only and keep walls and towels neutral to avoid buying a whole pink set.
15. Brick-Look Tiles for an Industrial Edge
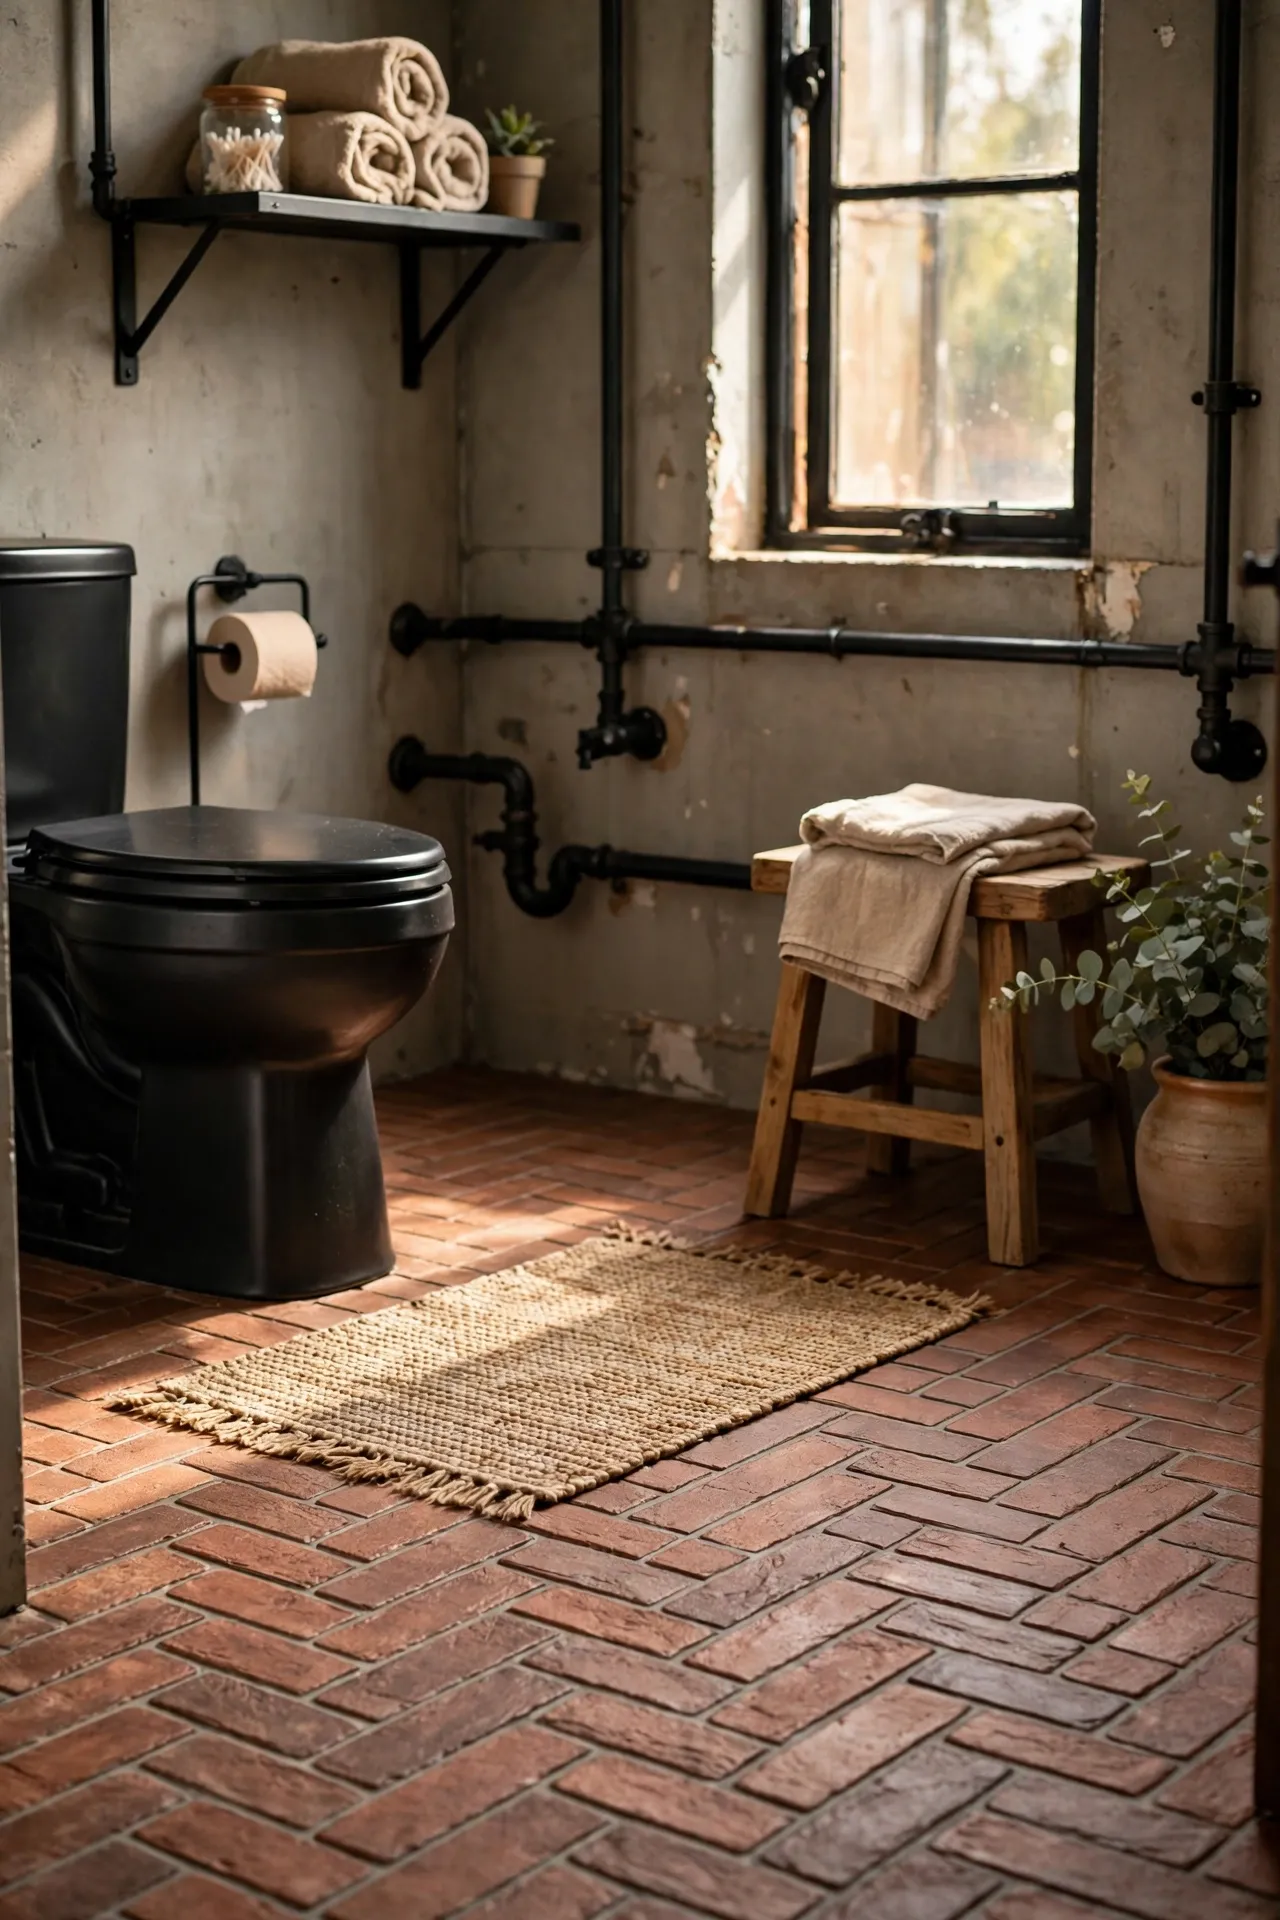
Brick-look peel and stick tiles give a bathroom an industrial edge that works surprisingly well with black fixtures. Lay them in a running bond pattern, like a real brick wall laid flat, and keep the lines straight with a level. Pair the floor with simple white walls so the brick pattern stands out. I tried brick tiles and the mistake to avoid is mixing them with another strong pattern — brick plus checkerboard curtains is visual noise. One strong pattern per room is plenty, and brick is a strong one.
Cost: ~$58 | Time: 160 minutes
💰 Budget win: Use brick-look tiles on the floor only, not the walls, to get the industrial look for half the material cost. Pin this one — you’ll want it when you’re standing in the home aisle.
16. Cream Basketweave Tiles for Classic Appeal
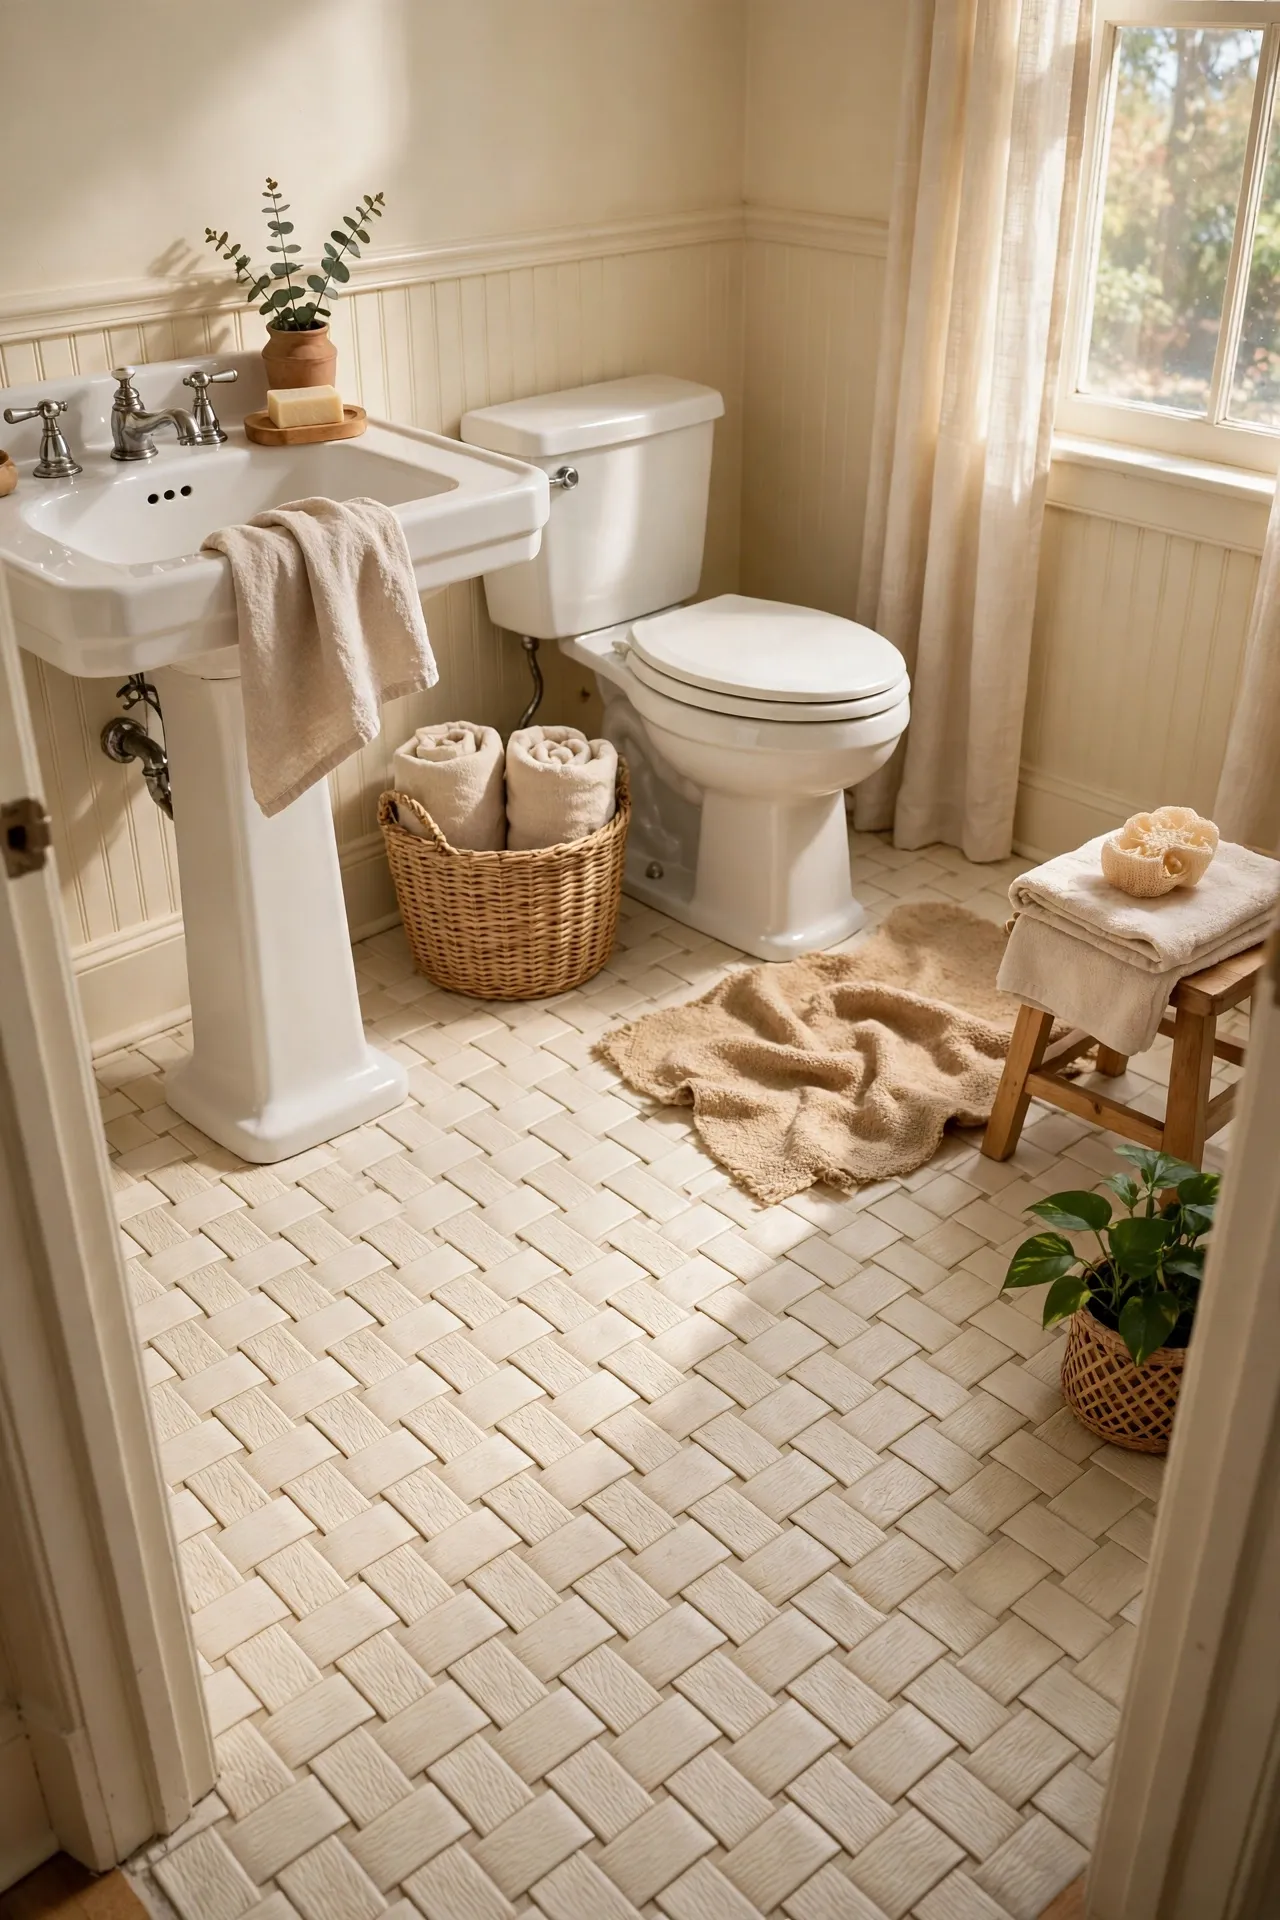
Cream basketweave tiles look classic and calm, like the floors in older homes that never go out of style. Lay the woven-pattern tiles in a straight grid, aligning the basket pattern carefully so it does not look twisted. Pair them with white subway walls and chrome fixtures for a timeless bathroom. I tried basketweave tiles and the mistake to avoid is rushing the alignment — a twisted basket pattern is obvious from the doorway. Lay a few tiles, step back, check the weave, then continue across the room.
Cost: ~$57 | Time: 150 minutes
💰 Budget win: Choose a printed basketweave tile instead of real woven mosaic for the classic look at vinyl prices.
17. Dark Walnut Planks for a Rich Contrast
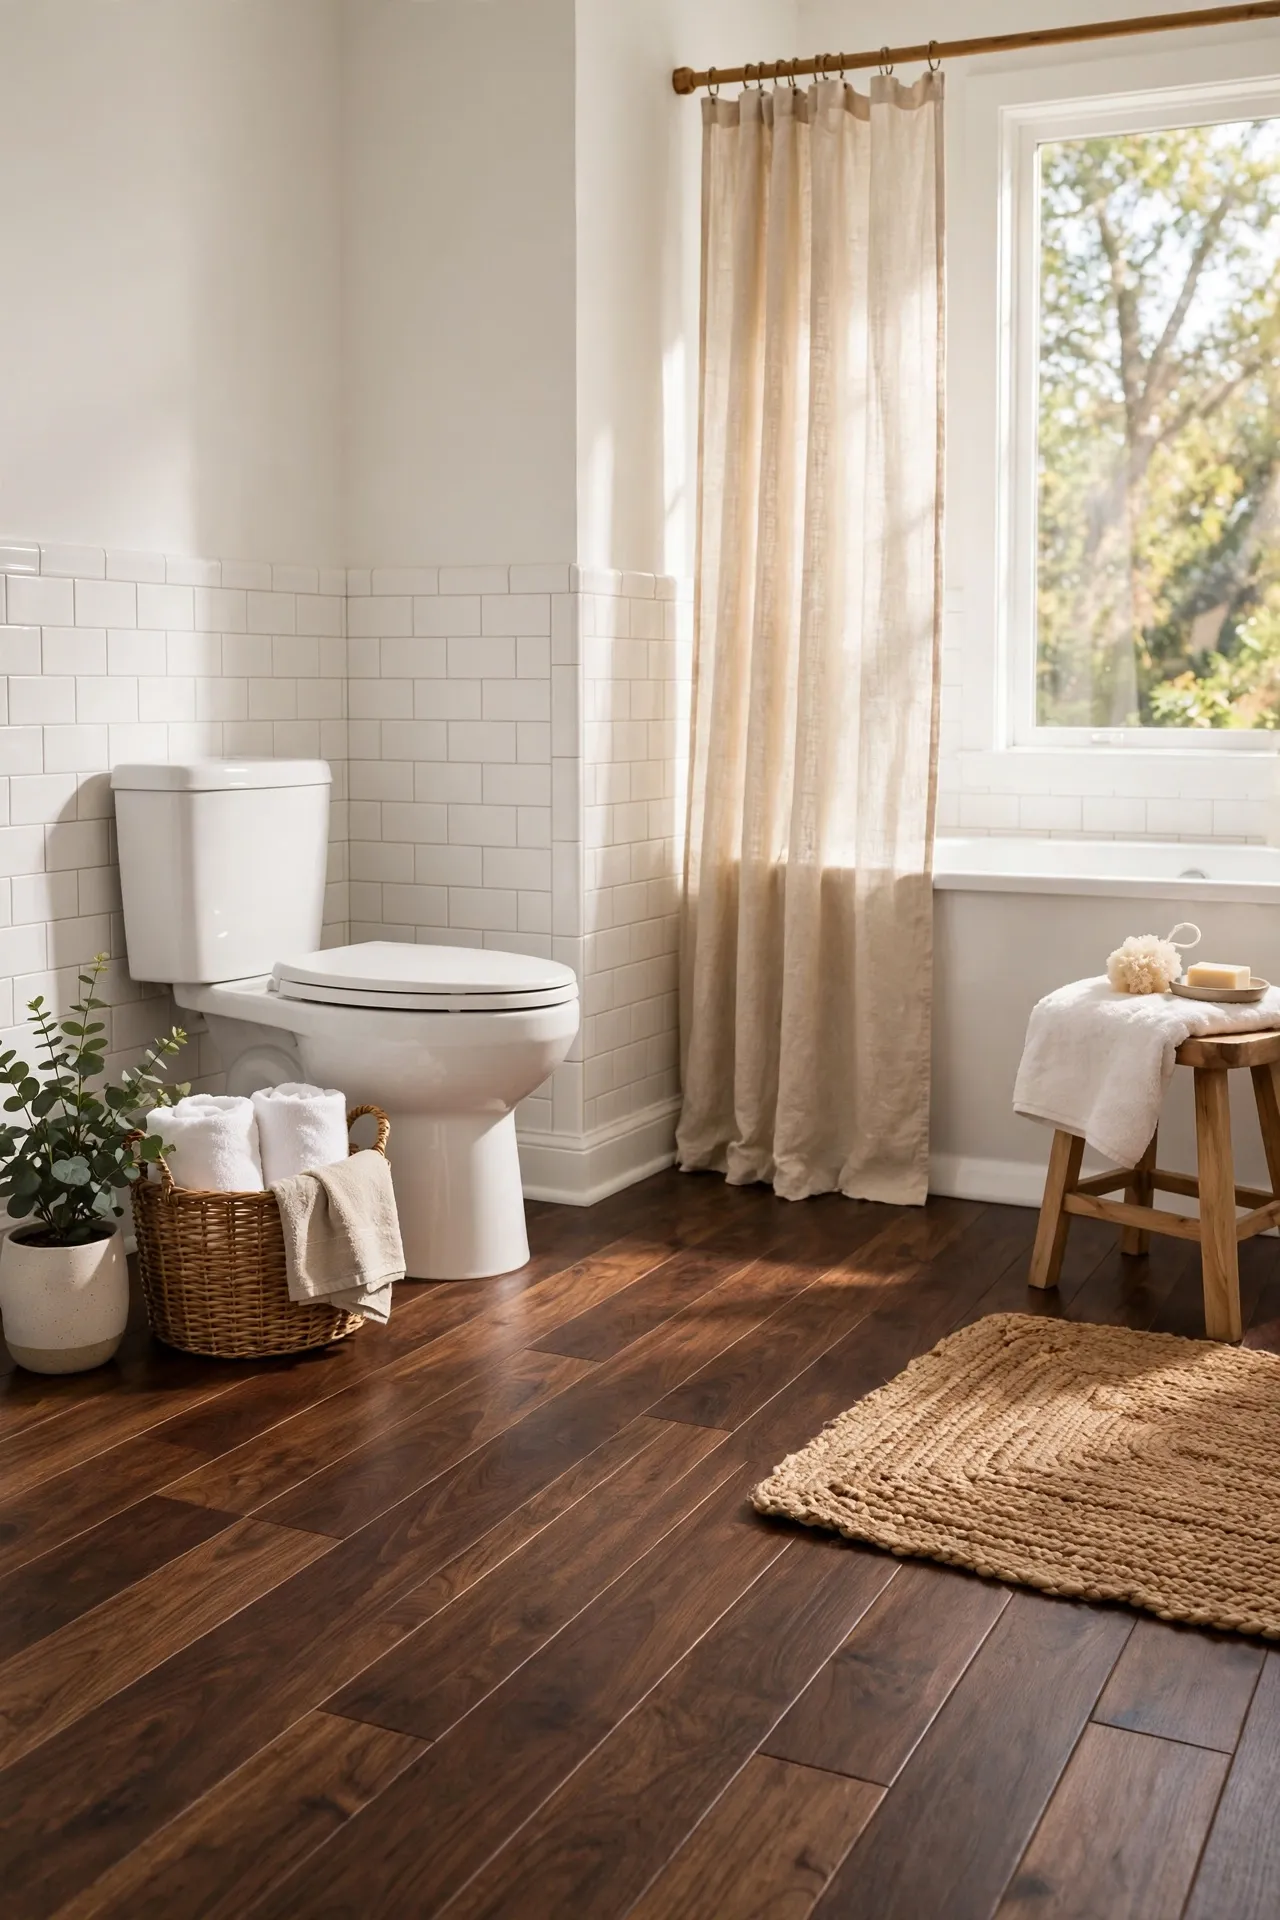
Dark walnut planks give a white bathroom a rich contrast that feels warm and a little luxurious. Lay the planks with staggered joints, and keep walls and towels light so the dark floor does not dominate. Add a wooden bath mat or stool in a lighter wood to bridge the tones. I tried dark walnut in a white bathroom and the mistake to avoid is using dark towels as well — too much dark makes the room feel smaller. Light towels, a bright mirror, and dark floors together strike the right balance.
Cost: ~$60 | Time: 160 minutes
💰 Budget win: Use dark walnut planks only on the floor and keep existing light walls to avoid repainting the whole room.
18. Mosaic Tiles in Blue and White
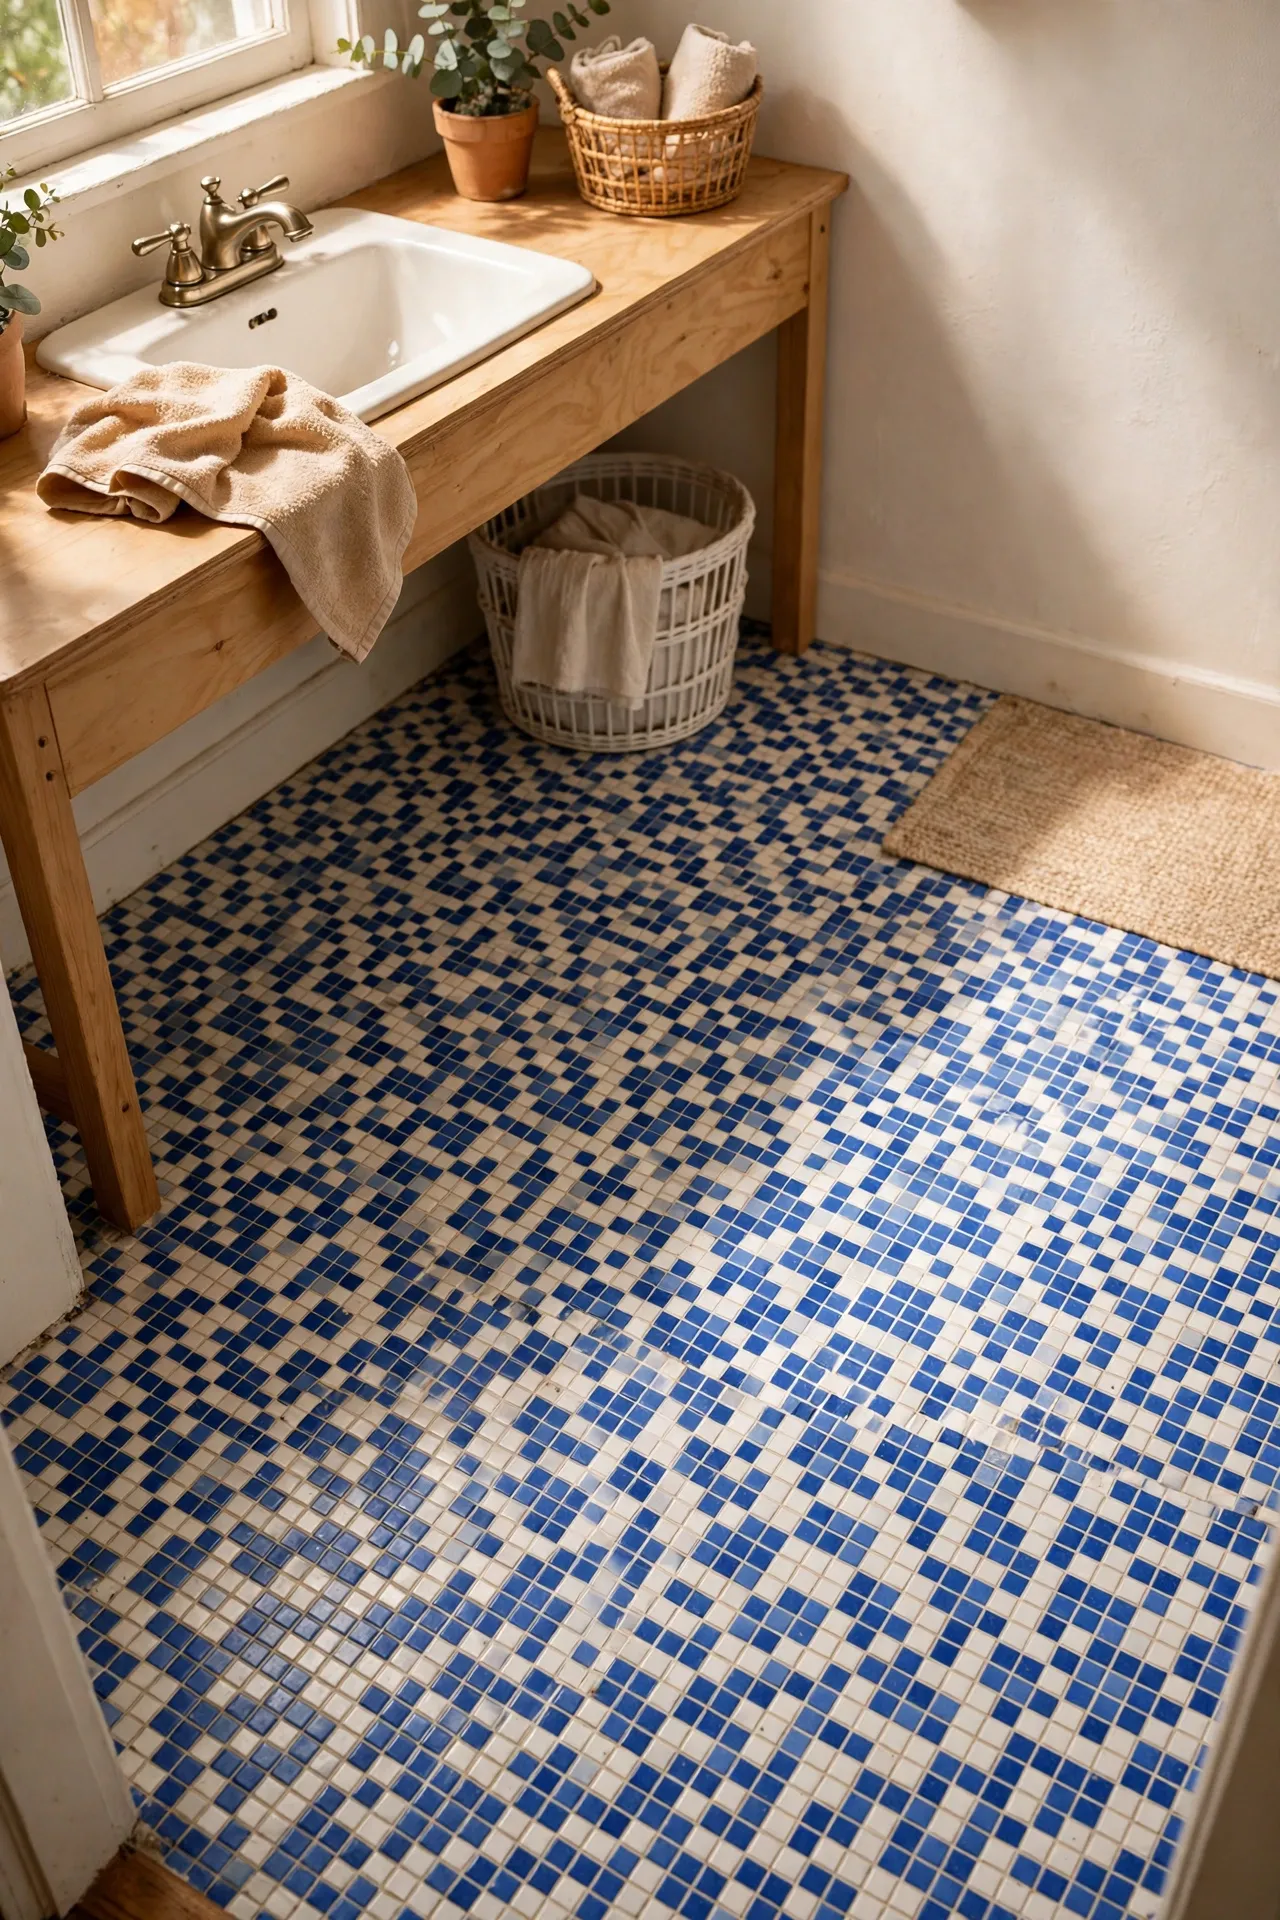
Blue and white mosaic tiles bring a fresh, almost seaside energy to a rental bathroom floor. Choose a small mosaic pattern so the floor reads as texture rather than a big graphic, and pair it with plain white walls. Lay the sheets carefully, pressing out bubbles, and trim around fixtures with a sharp knife. I tried blue mosaic tiles and the mistake to avoid is pairing them with a patterned shower curtain — blue mosaic plus bold curtain is too busy. Plain white curtains let the mosaic shine without competing for attention.
Cost: ~$59 | Time: 160 minutes
💰 Budget win: Use mosaic sheets for the main floor and plain white tiles under the tub to save on the pricier pattern.
19. Speckled Concrete Tiles for a Modern Look
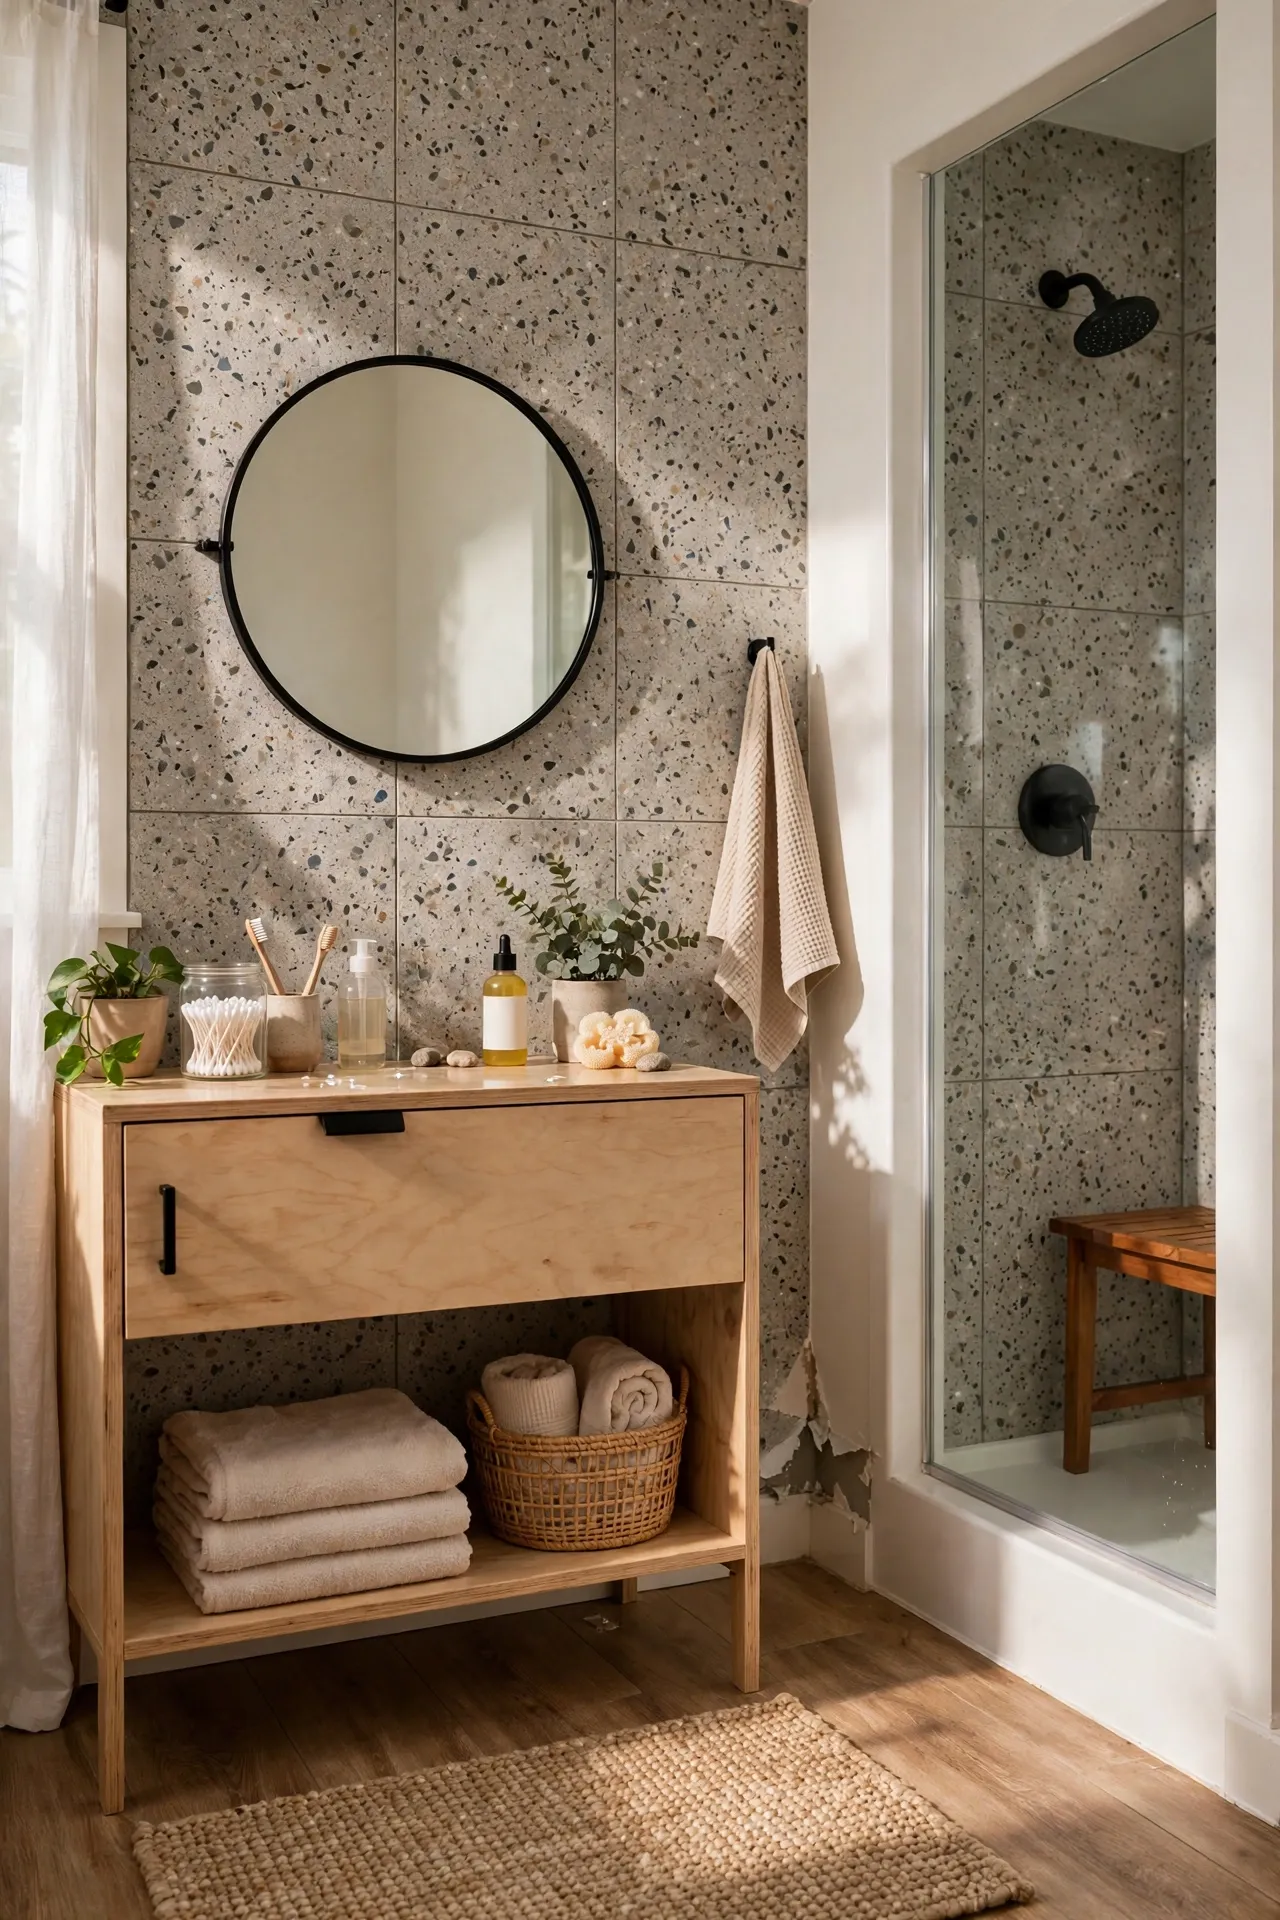
Speckled concrete-look tiles give a bathroom a modern, urban feel without the cold hardness of real concrete. Choose a light grey concrete tile with fine speckles, lay it in a grid, and pair it with black or wood accents. The speckle hides dust and water marks between cleans. I tried concrete tiles and the mistake to avoid is choosing a very dark concrete in a small room — it can feel heavy fast. A light concrete tone keeps the modern look while keeping the room bright and open.
Cost: ~$53 | Time: 130 minutes
💰 Budget win: Pick concrete-look vinyl over real concrete tiles to skip sealing, weight, and professional installation costs.
20. Warm Terracotta Tiles Without the Commitment
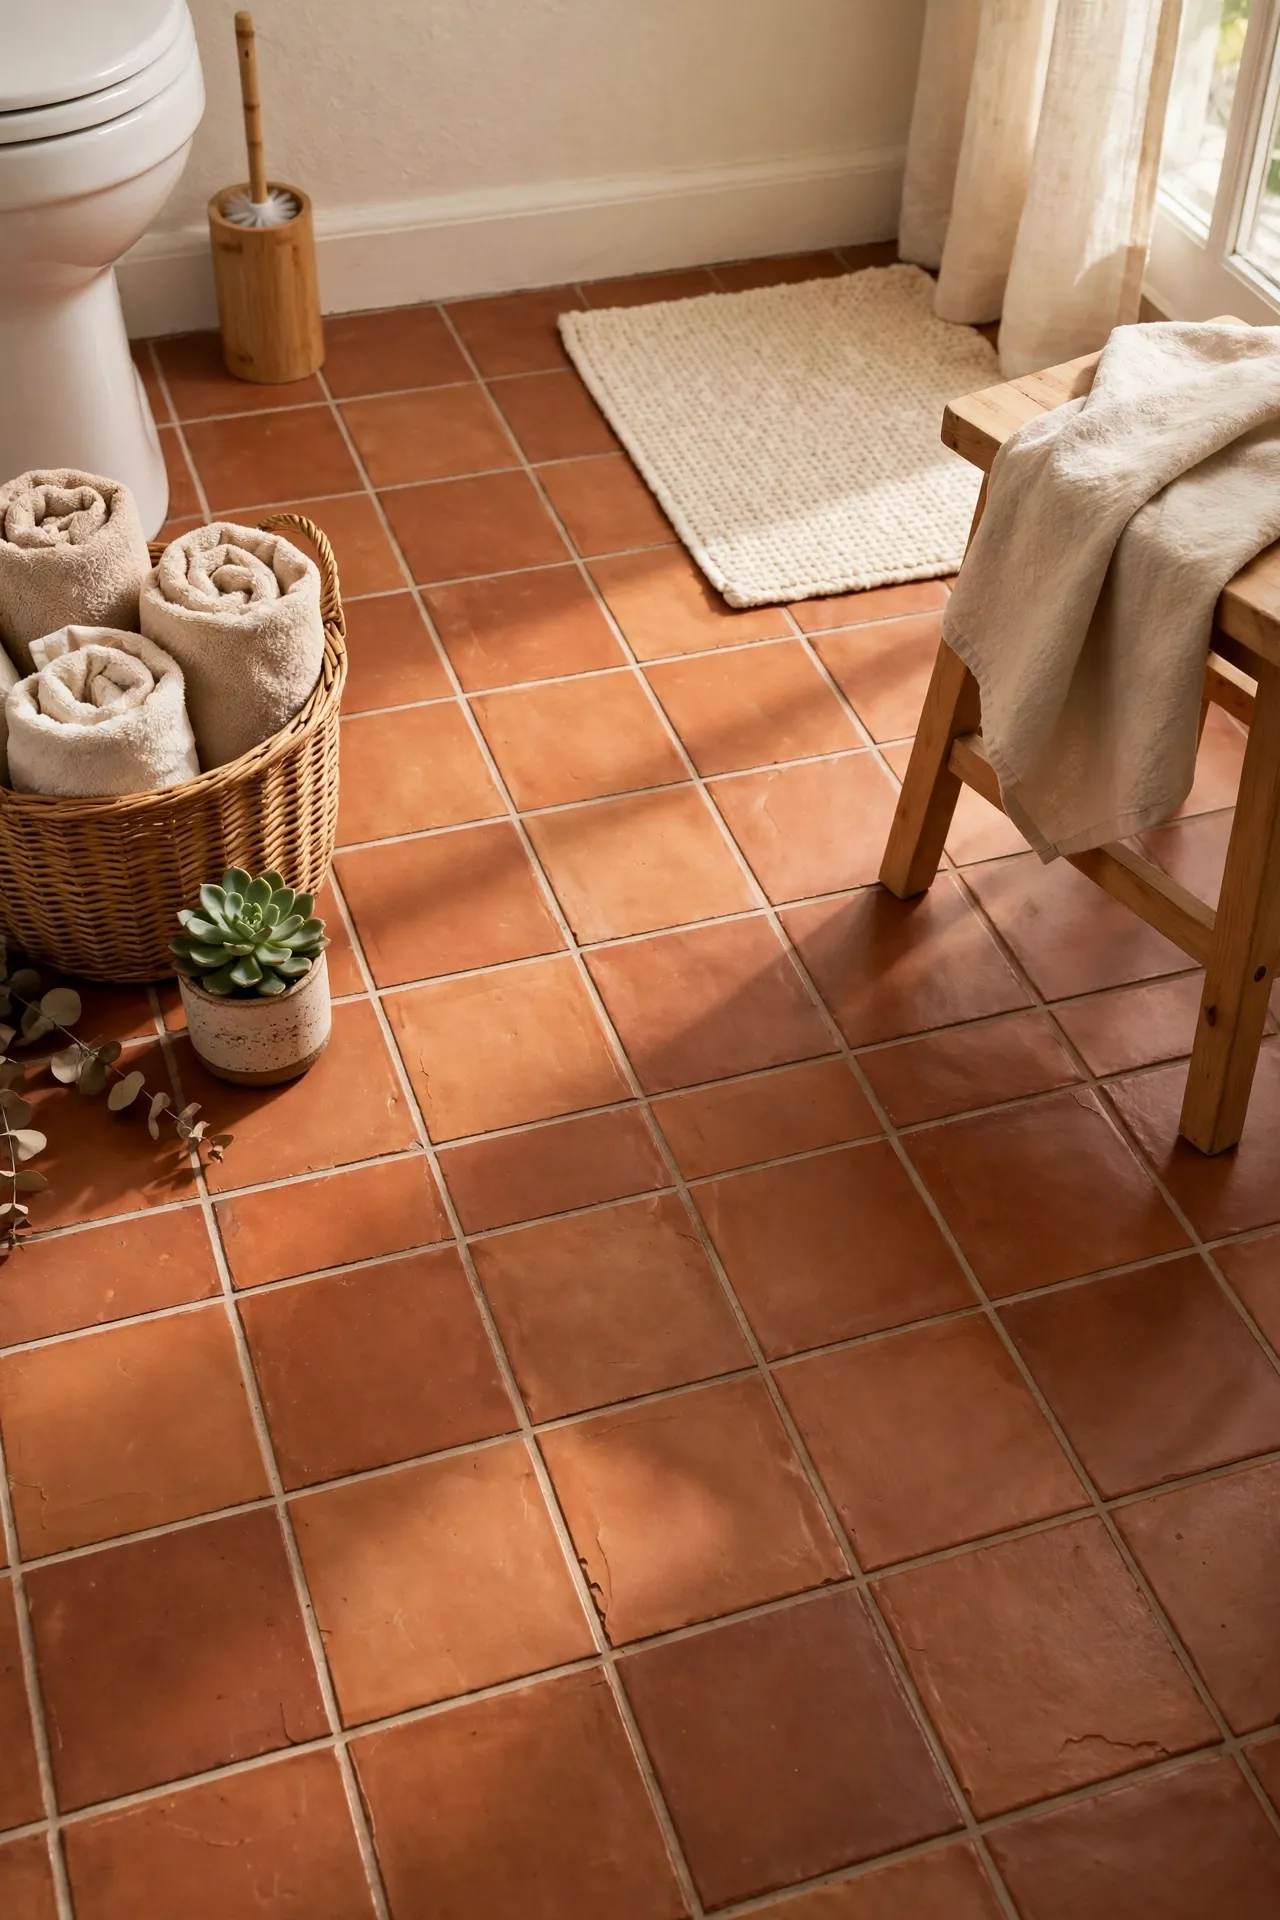
Warm terracotta tiles bring Mediterranean warmth to a bathroom, and peel and stick versions let you try the colour without any commitment. Lay them in a straight grid, pair them with cream walls and woven baskets, and enjoy the sunny tone. Terracotta works well with plants too, so add a small pot by the window. I tried terracotta tiles and the mistake to avoid is pairing them with orange towels — the room turns orange all over. Cream, white, and natural wood keep terracotta warm without tipping into overload.
Cost: ~$55 | Time: 140 minutes
💰 Budget win: Try terracotta in peel and stick form first before committing to real terracotta tile in a home you own. For more renter ideas, see (see also: renter-friendly-bathroom-upgrades-youll-love) and (see also: small-bathroom-ideas-under-100).
21. Checkerboard in Beige and Cream for Renters
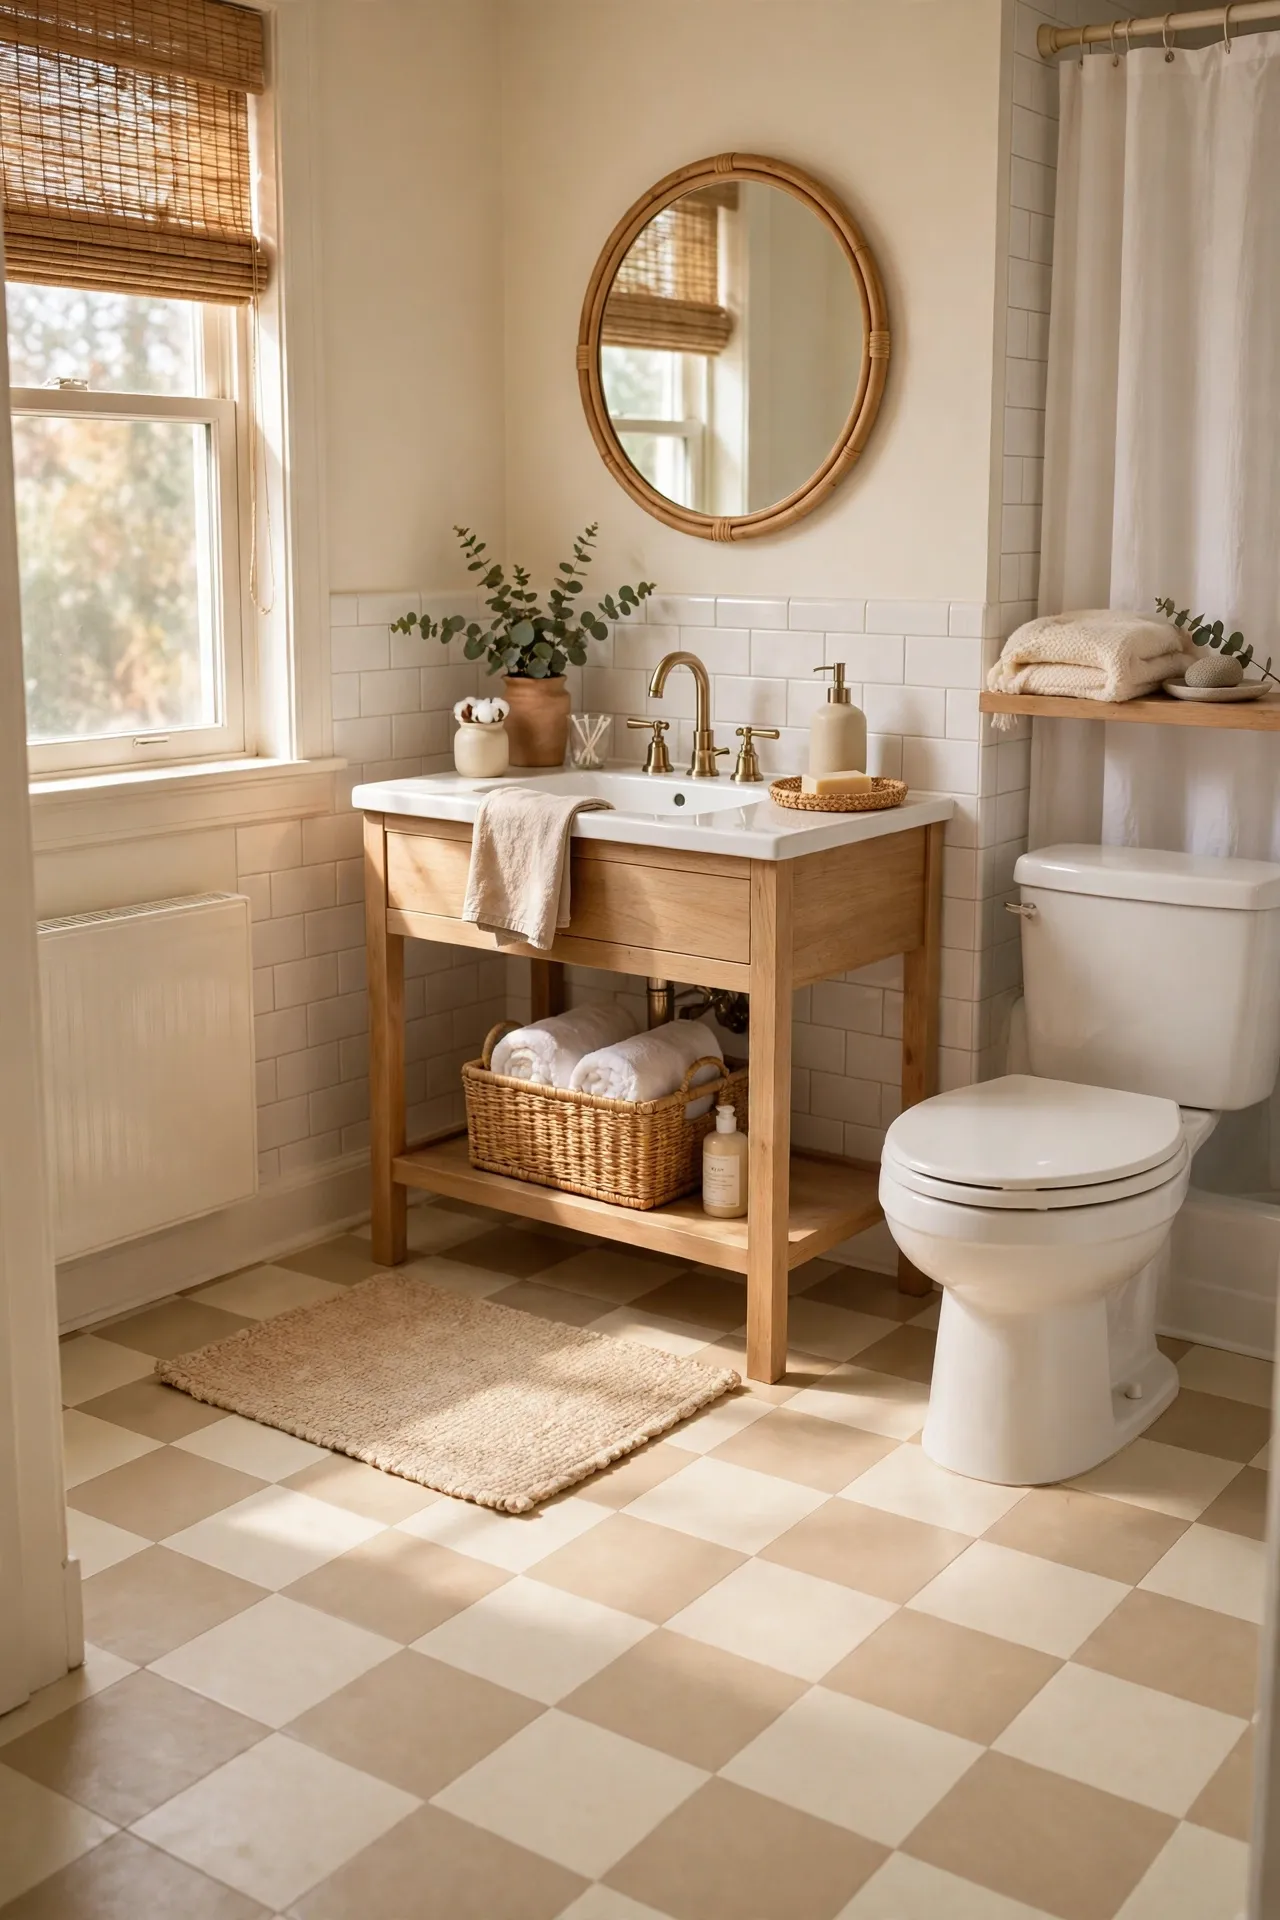
A beige and cream checkerboard is the softer cousin of black and white — it adds pattern without shouting. Lay alternating beige and cream tiles in a grid, centred on the doorway, and pair the floor with warm wood and brass. The soft contrast suits almost any wall colour a landlord might have chosen. I tried this softer checkerboard and the mistake to avoid is using two tones that are too close together — the pattern disappears. Hold the two tiles side by side in daylight first, and make sure you can clearly see the checkerboard from the door.
Cost: ~$51 | Time: 140 minutes
💰 Budget win: Use beige and cream tiles you can reuse in another pattern later, since both tones pair with many styles. Also see (see also: beige-bathroom-decor-on-a-budget) for matching wall ideas.
Quick Questions, Answered
Will peel and stick tiles damage my rental floor when I remove them? On smooth, sound floors like vinyl or tile, they usually peel off cleanly with gentle heat from a hair dryer. Test one tile in a hidden corner first, lift it slowly, and clean any residue with warm soapy water before move-out.
Do peel and stick floors hold up in a steamy bathroom? Yes, if the floor is clean and dry before laying and the edges near the tub are sealed. Avoid laying them over peeling paint or rough concrete, and wipe up standing water promptly so moisture does not creep underneath.
How long does a peel and stick bathroom floor last? In a typical rental bathroom, a well-laid floor lasts one to three years, often for the whole tenancy. High-traffic spots by the sink may lift first, so keep a few spare tiles to replace a single worn tile instead of redoing the room.
Start with a clean floor, a pattern you actually like, and one free afternoon. By tonight you could be standing on a floor that finally feels like yours — and when moving day comes, it peels up and leaves the old floor just as you found it.
