21 Dollar Store Picture Frame Ideas That Look Custom
My grandmother’s hallway was lined with portraits in heavy gilt frames, and I always assumed that look was out of reach on my budget. Then I discovered that dollar store picture frame ideas that look custom are mostly about finishing techniques, not the frame itself — a two-dollar frame with the right treatment fools everyone. I reframed my entire hallway for under thirty dollars, and my mother asked if I had finally hired a framer. These 21 ideas are the techniques that make cheap frames look bespoke.
Work on a covered table with good light — most of these involve paint, glue, or cutting, and you will do neater work when you are not balancing things on your lap.
1. Gold-Leafed Ornate Frames
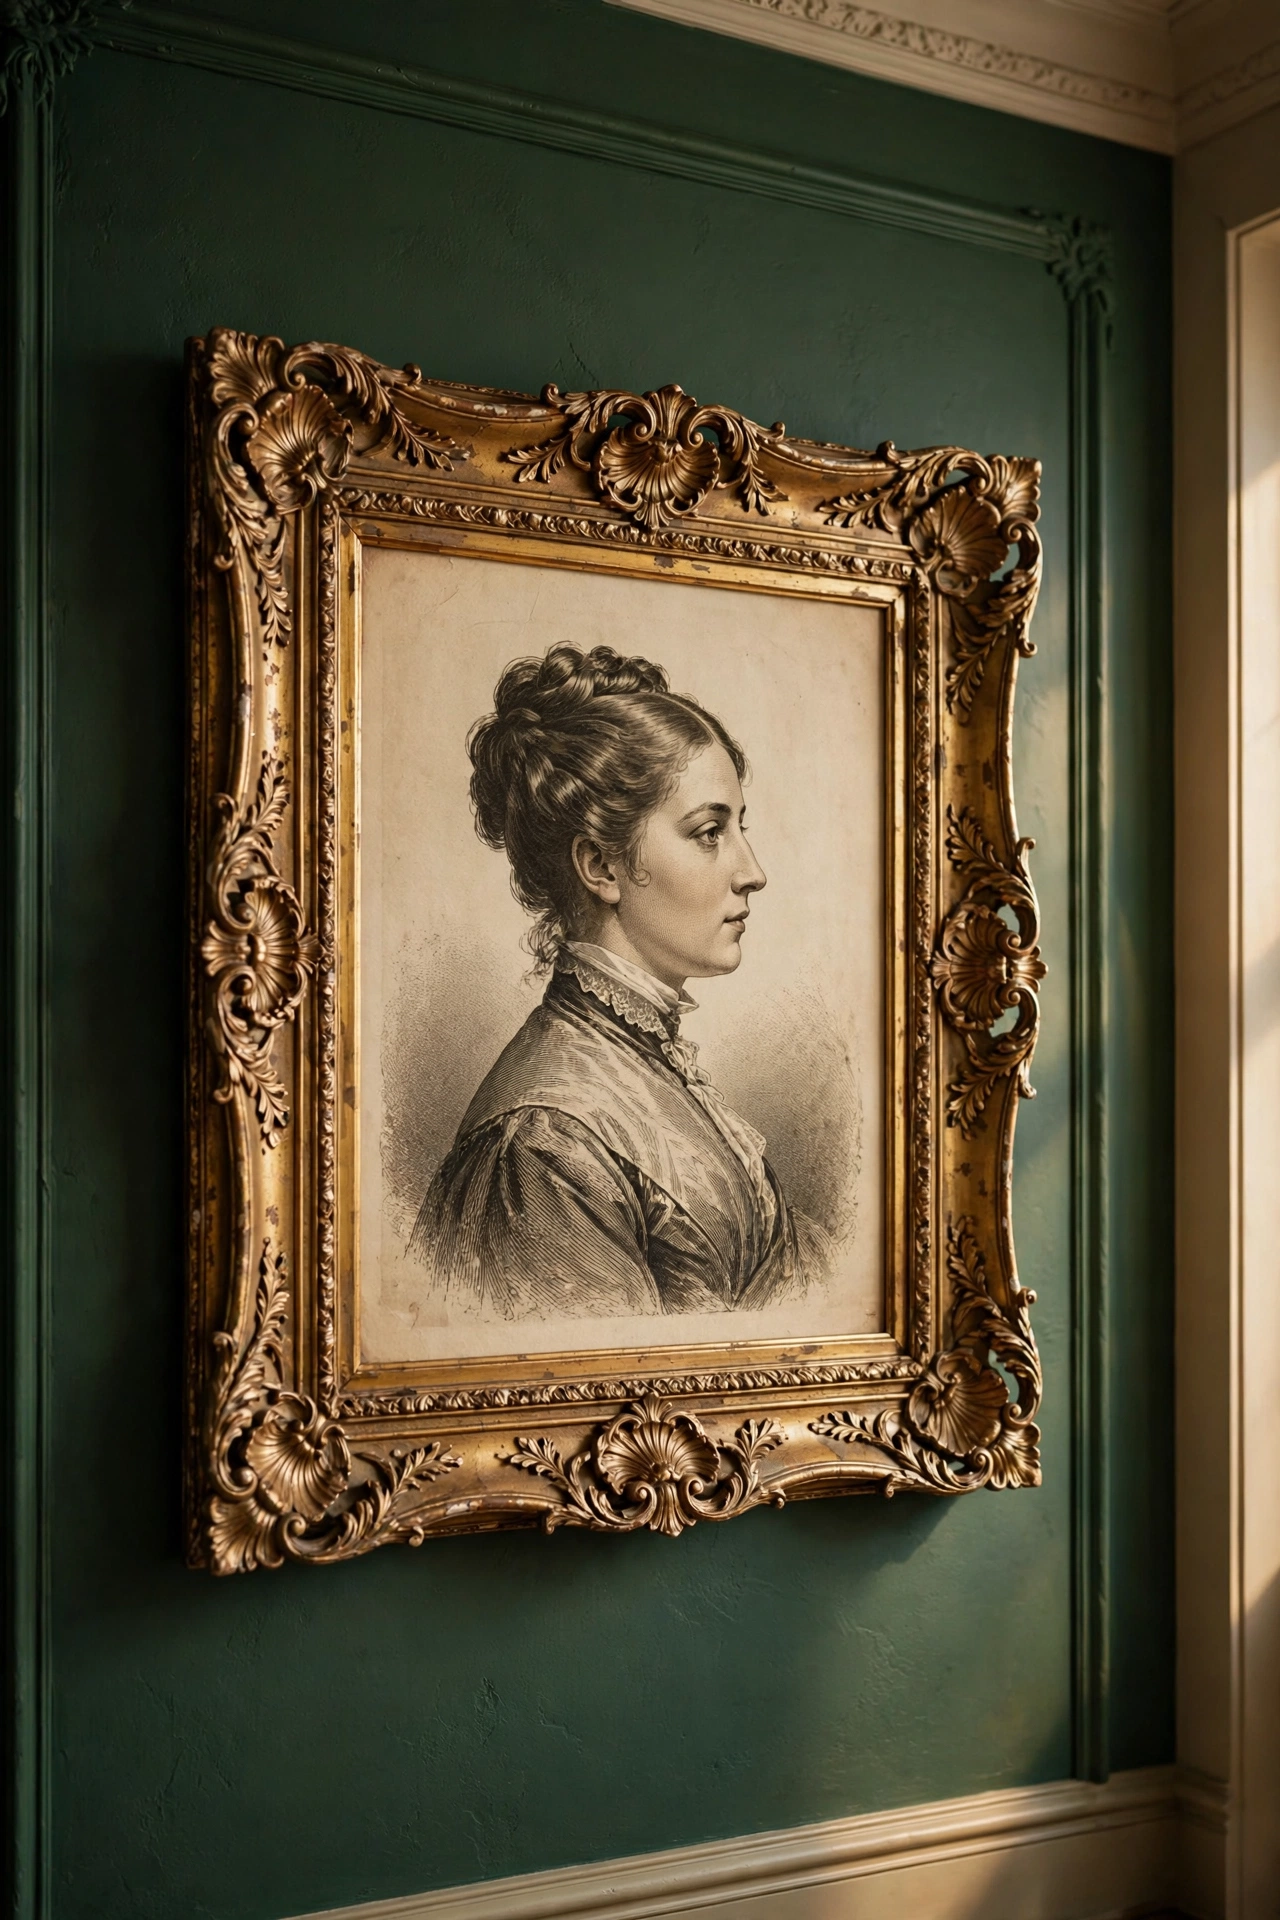
Imitation gold leaf sheets turn a plain ornate frame into something that looks genuinely gilded. Brush on the adhesive size, wait until it goes tacky, then press the leaf sheets on and brush away the excess with a soft brush. The slightly imperfect coverage is actually the charm — real antique gilt is never perfect either. Seal it with a clear topcoat so the leaf does not flake. Use it on one statement frame rather than every frame in the room; gilding is a spice, not a main course.
Cost: ~$8 · Time: 1 hour plus drying
2. Oversized Mat Custom Look
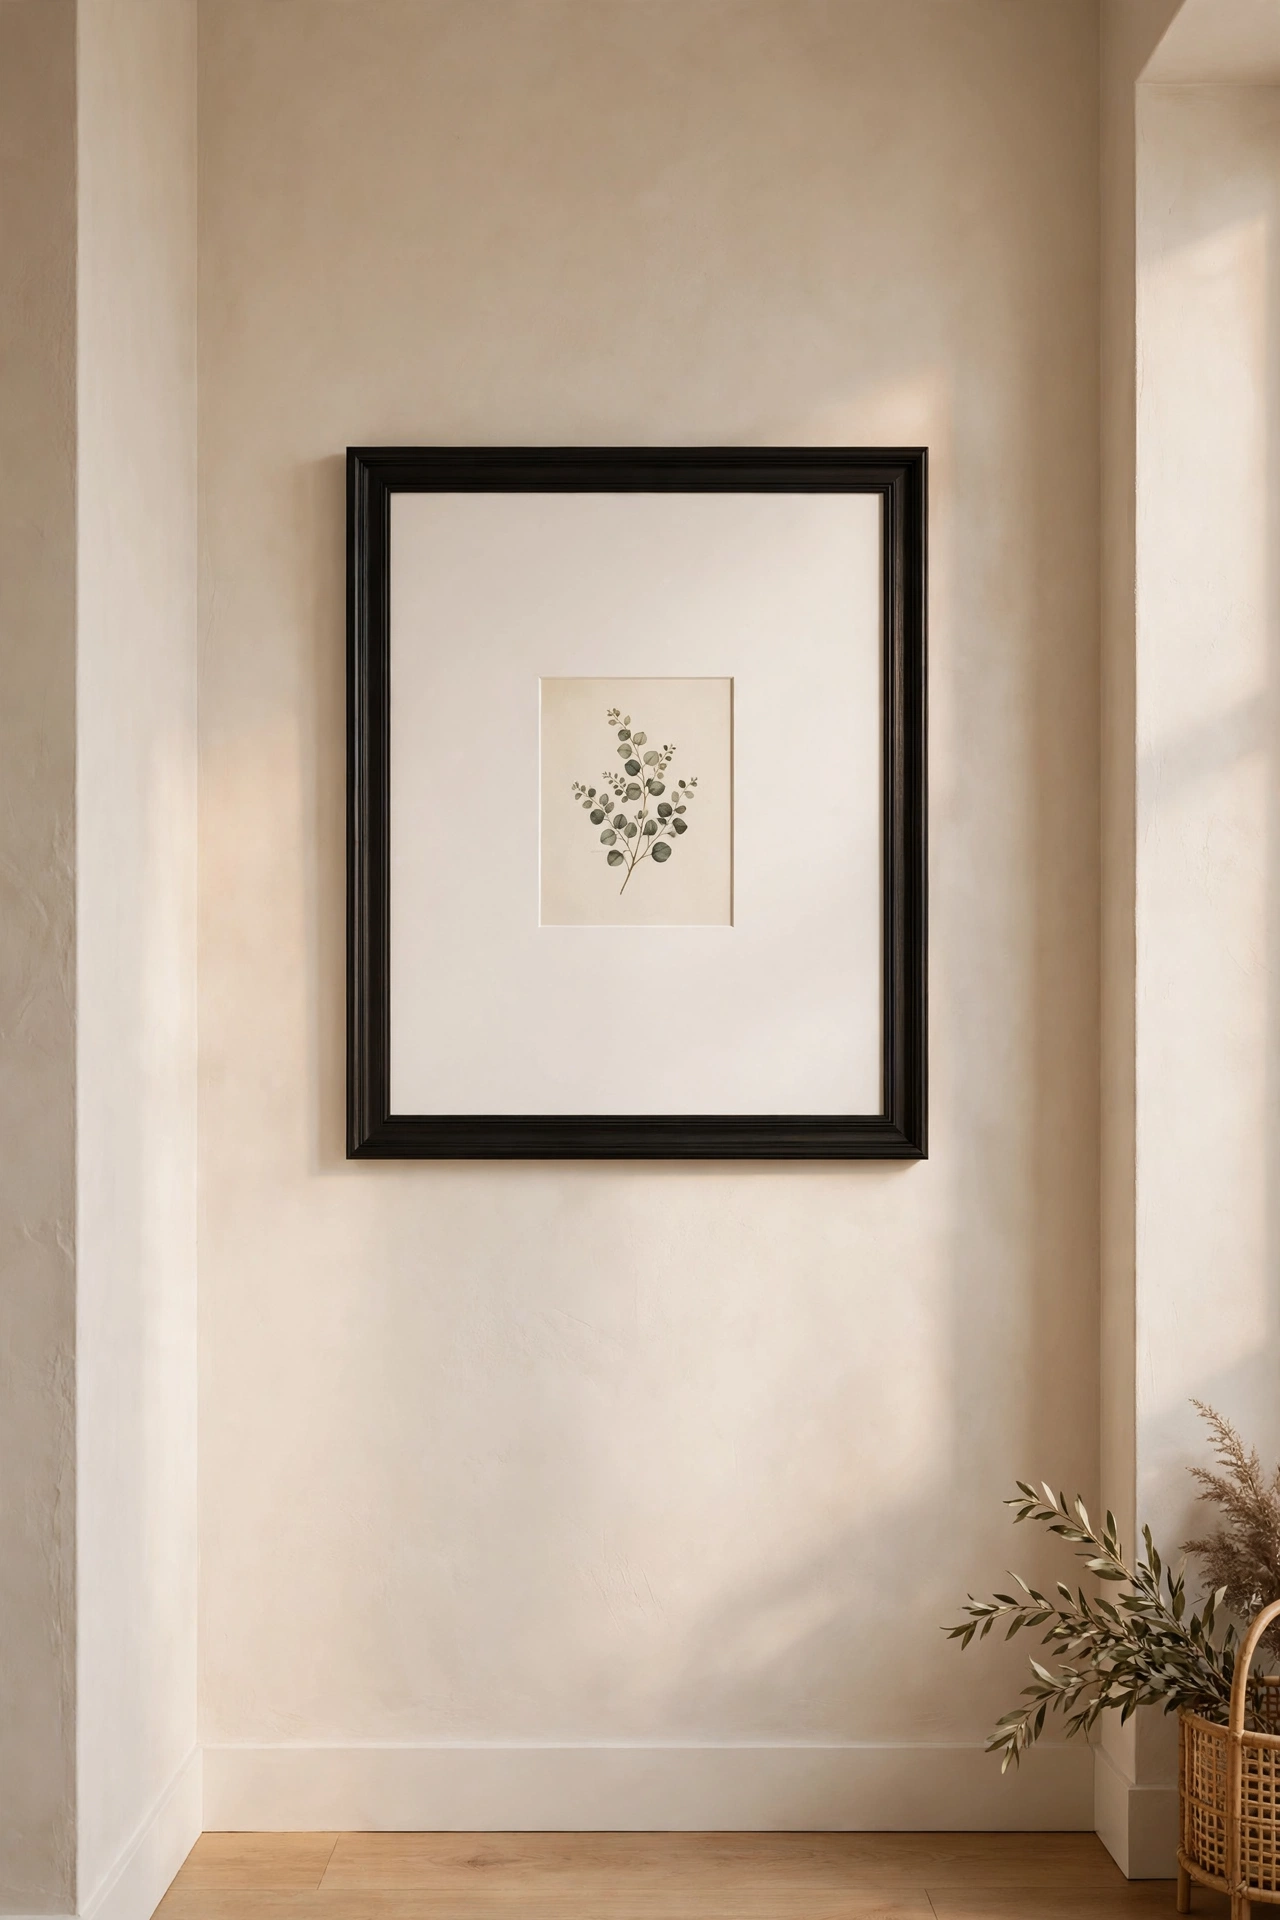
Custom framers use wide mats to make small art look important, and you can steal the trick with a large frame and a small print. Buy a frame two sizes bigger than your art, cut a mat from mount board with a centred opening, and the small print suddenly has gallery presence. The generous white space is what reads as expensive — it is the visual equivalent of speaking slowly and confidently. I tried this in my own hallway with postcard-sized prints, and one mistake to avoid is cutting the mat opening by eye; measure twice, because a crooked window ruins the effect.
Cost: ~$6 · Time: 30 minutes
3. Floating Frame Effect With Spacers
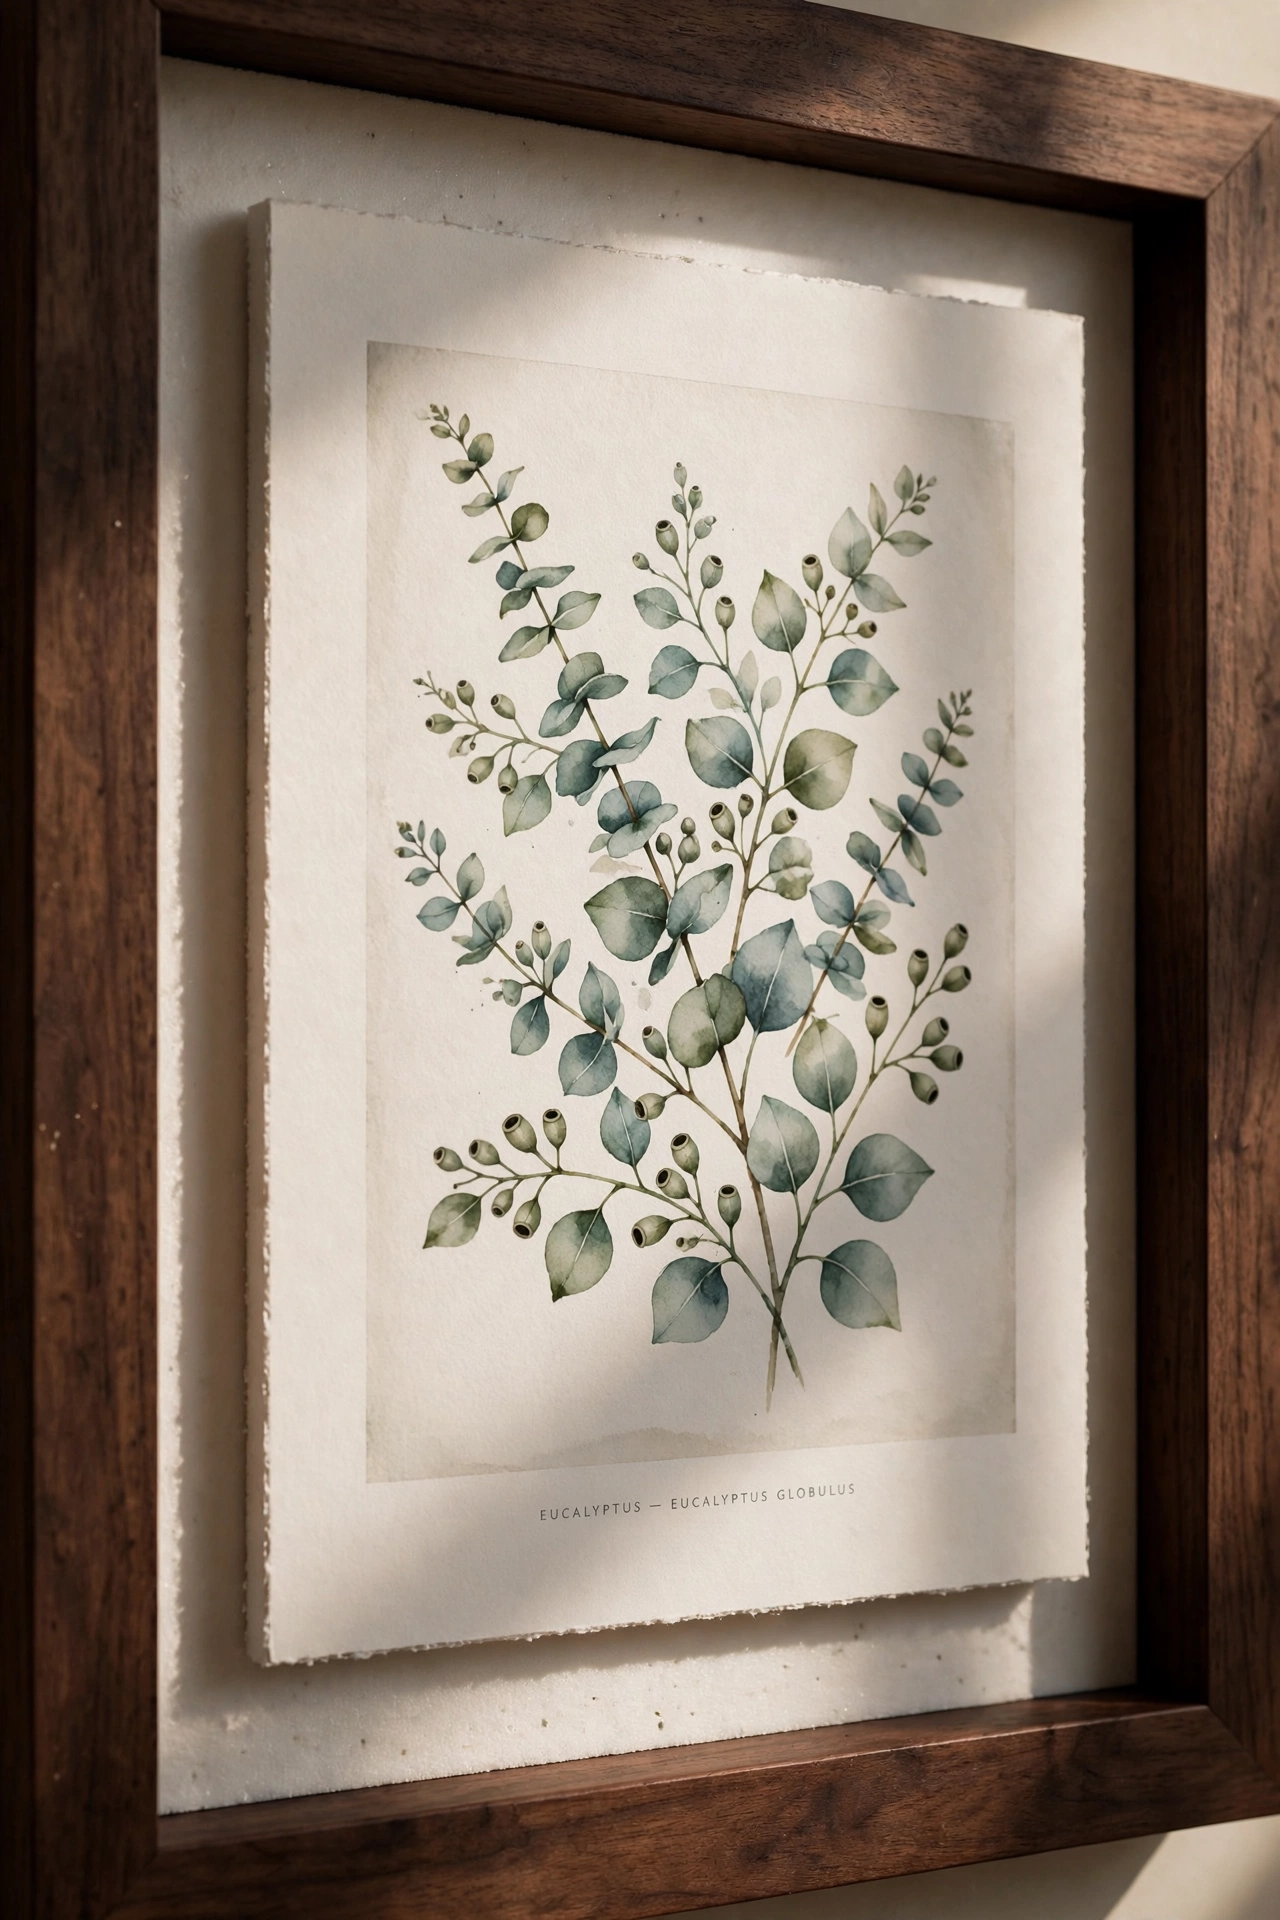
Gallery float frames — where the canvas appears to hover inside the frame — cost a fortune, but foam spacers fake it convincingly. Stick small foam blocks to the inside edges of a deep frame, mount your print on foam board, and set it on the spacers so a shadow gap runs all the way round. That thin line of shadow is the entire trick; it creates depth that flat framing cannot. It works best with art on rigid board rather than floppy paper, which can bow in the middle.
Cost: ~$7 · Time: 30 minutes
4. Clipboards as Rustic Frames
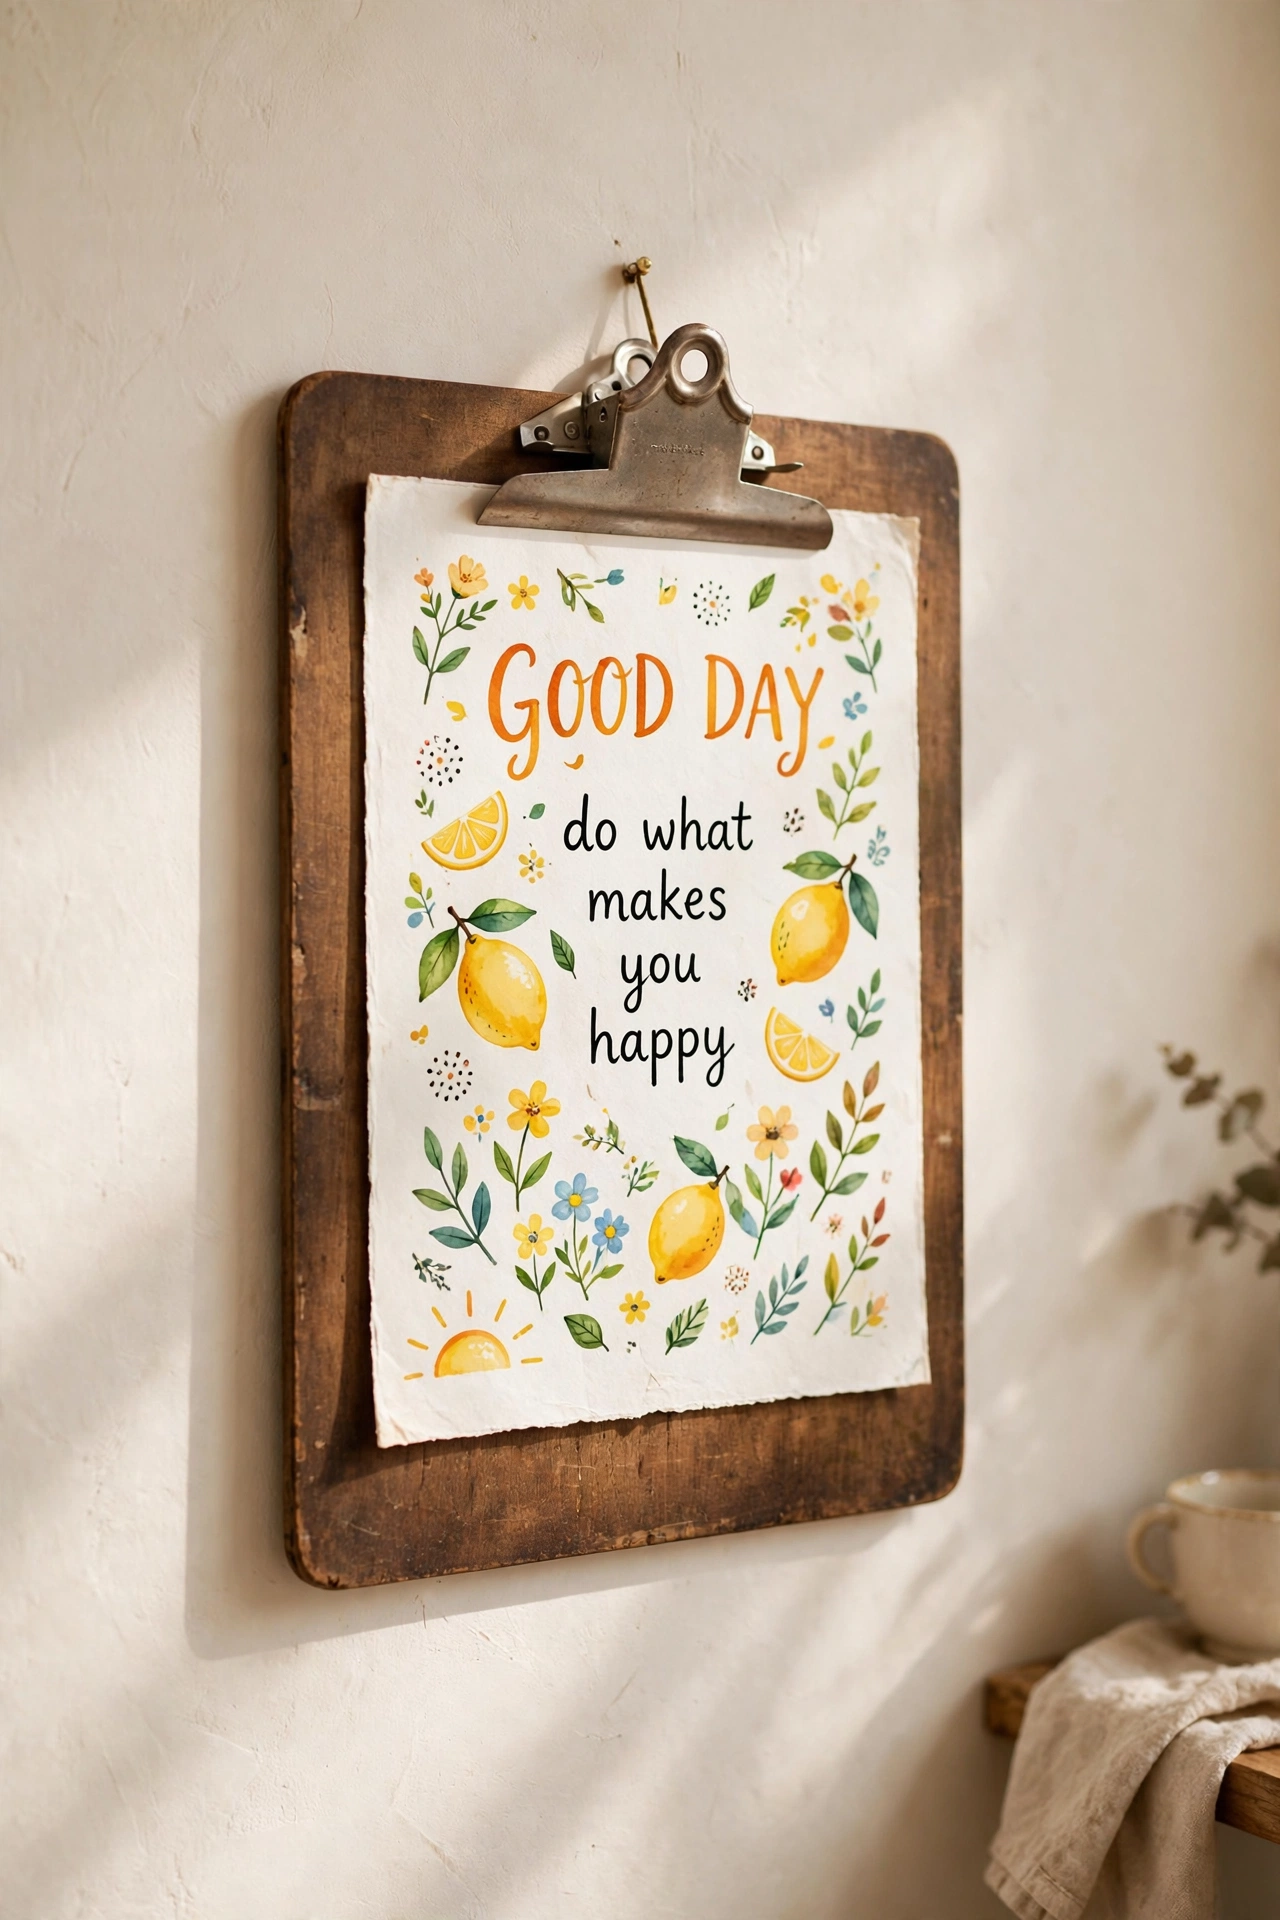
A wooden clipboard holding an art print is the most relaxed framing there is — clip the print under the clip, hang the clipboard by its hole, done. It suits kitchens, kids’ rooms, and anywhere that should feel unfussy rather than formal. Swap the art in seconds when the mood changes, which makes clipboards perfect for children’s artwork rotations. Choose clipboards with a decent wood finish; the very pale cheap ones benefit from a quick rub of wood stain or even strong tea.
Cost: ~$4 · Time: 10 minutes
5. Chalk-Painted Distressed Frames
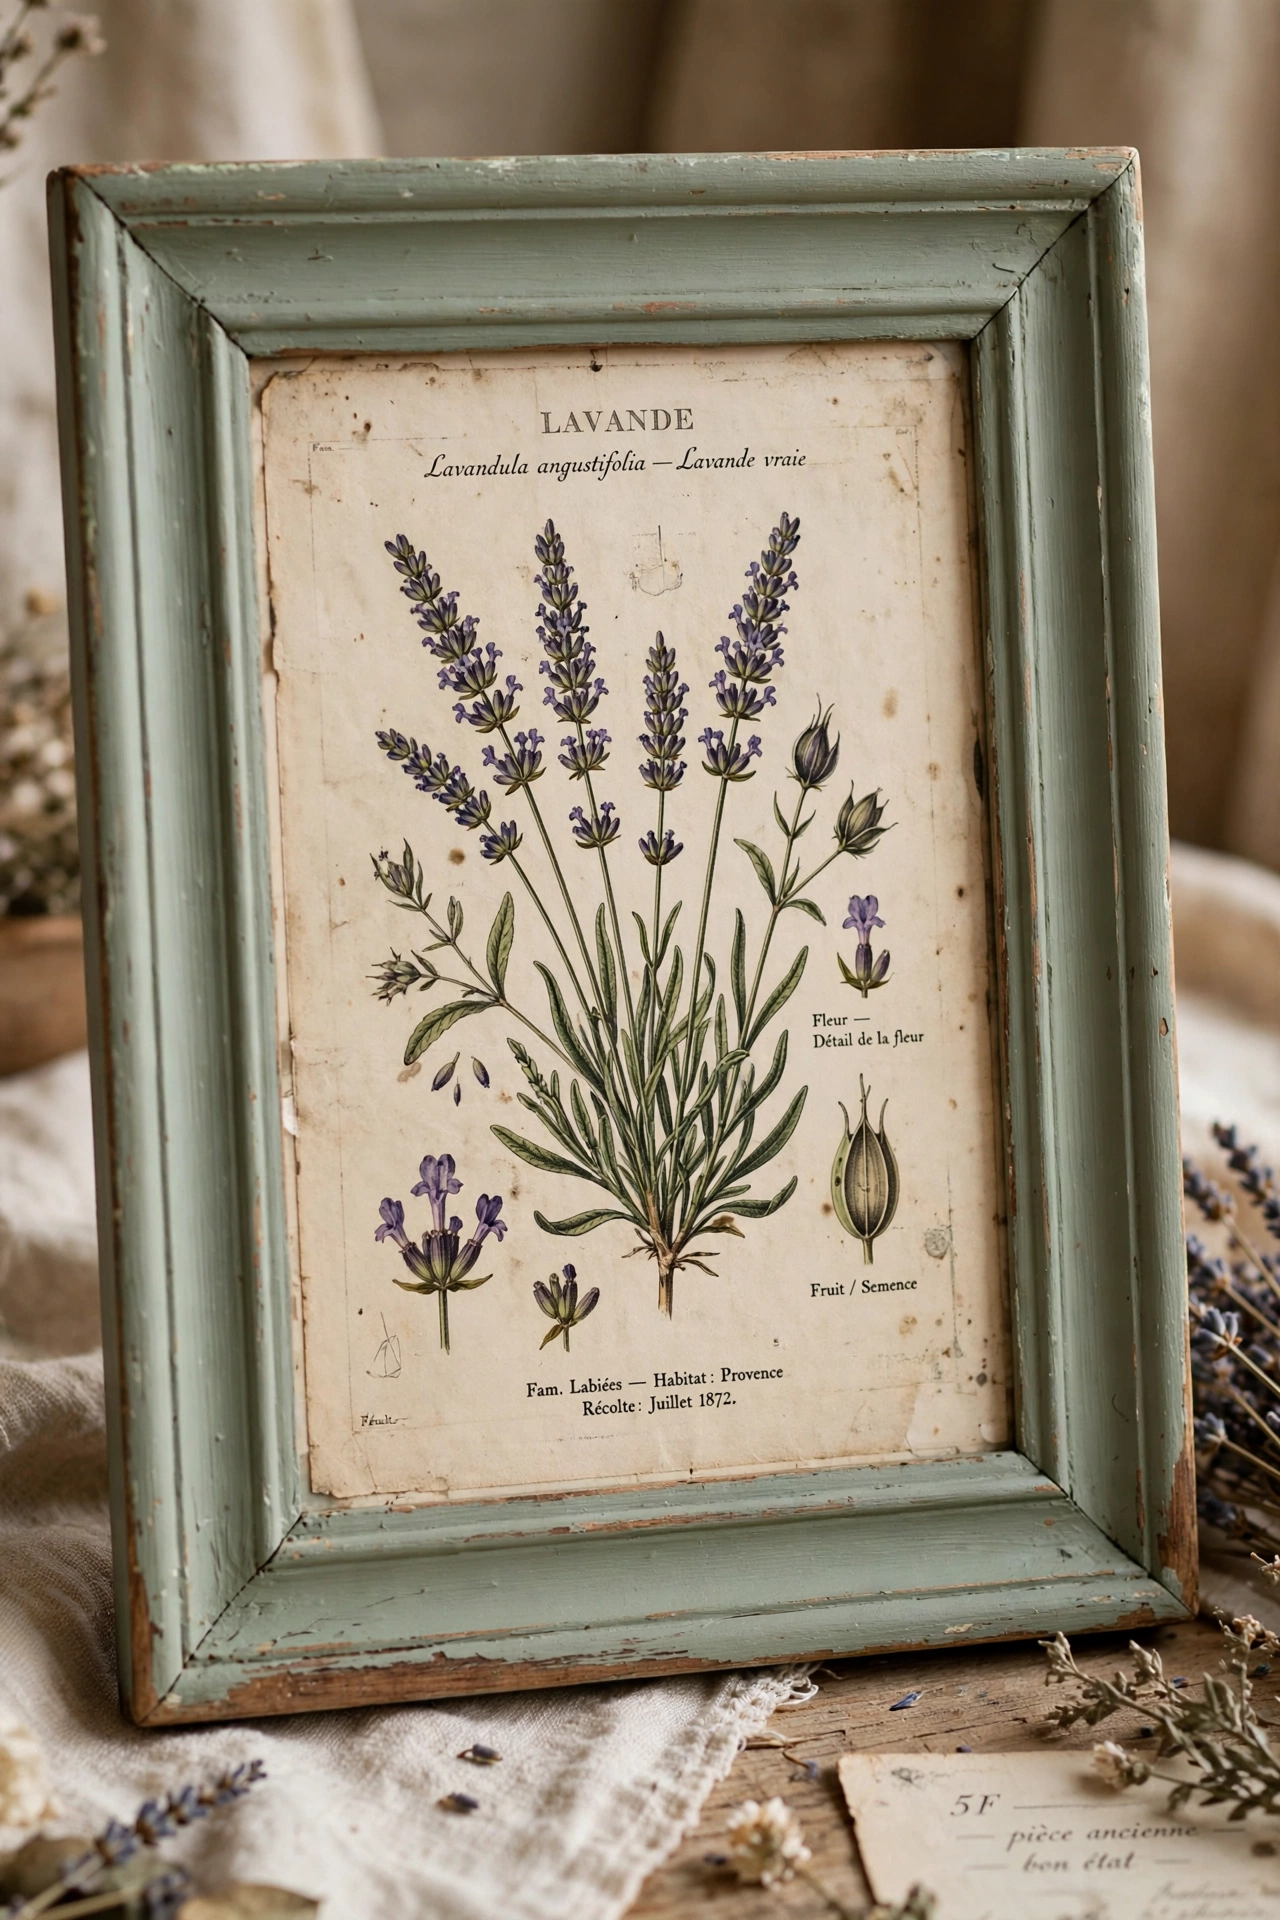
Chalk paint plus a bit of sandpaper gives any frame a timeworn, French-flea-market finish. Paint the frame in a soft colour — sage, duck-egg, or warm white — let it dry, then sand the edges and raised details lightly to reveal hints of the wood beneath. The distressing should concentrate where hands would naturally wear it: corners and raised moulding. Seal with clear wax for durability. It is a forgiving technique; uneven distressing just looks more authentic.
Cost: ~$7 · Time: 1 hour plus drying
6. Fabric-Wrapped Mats
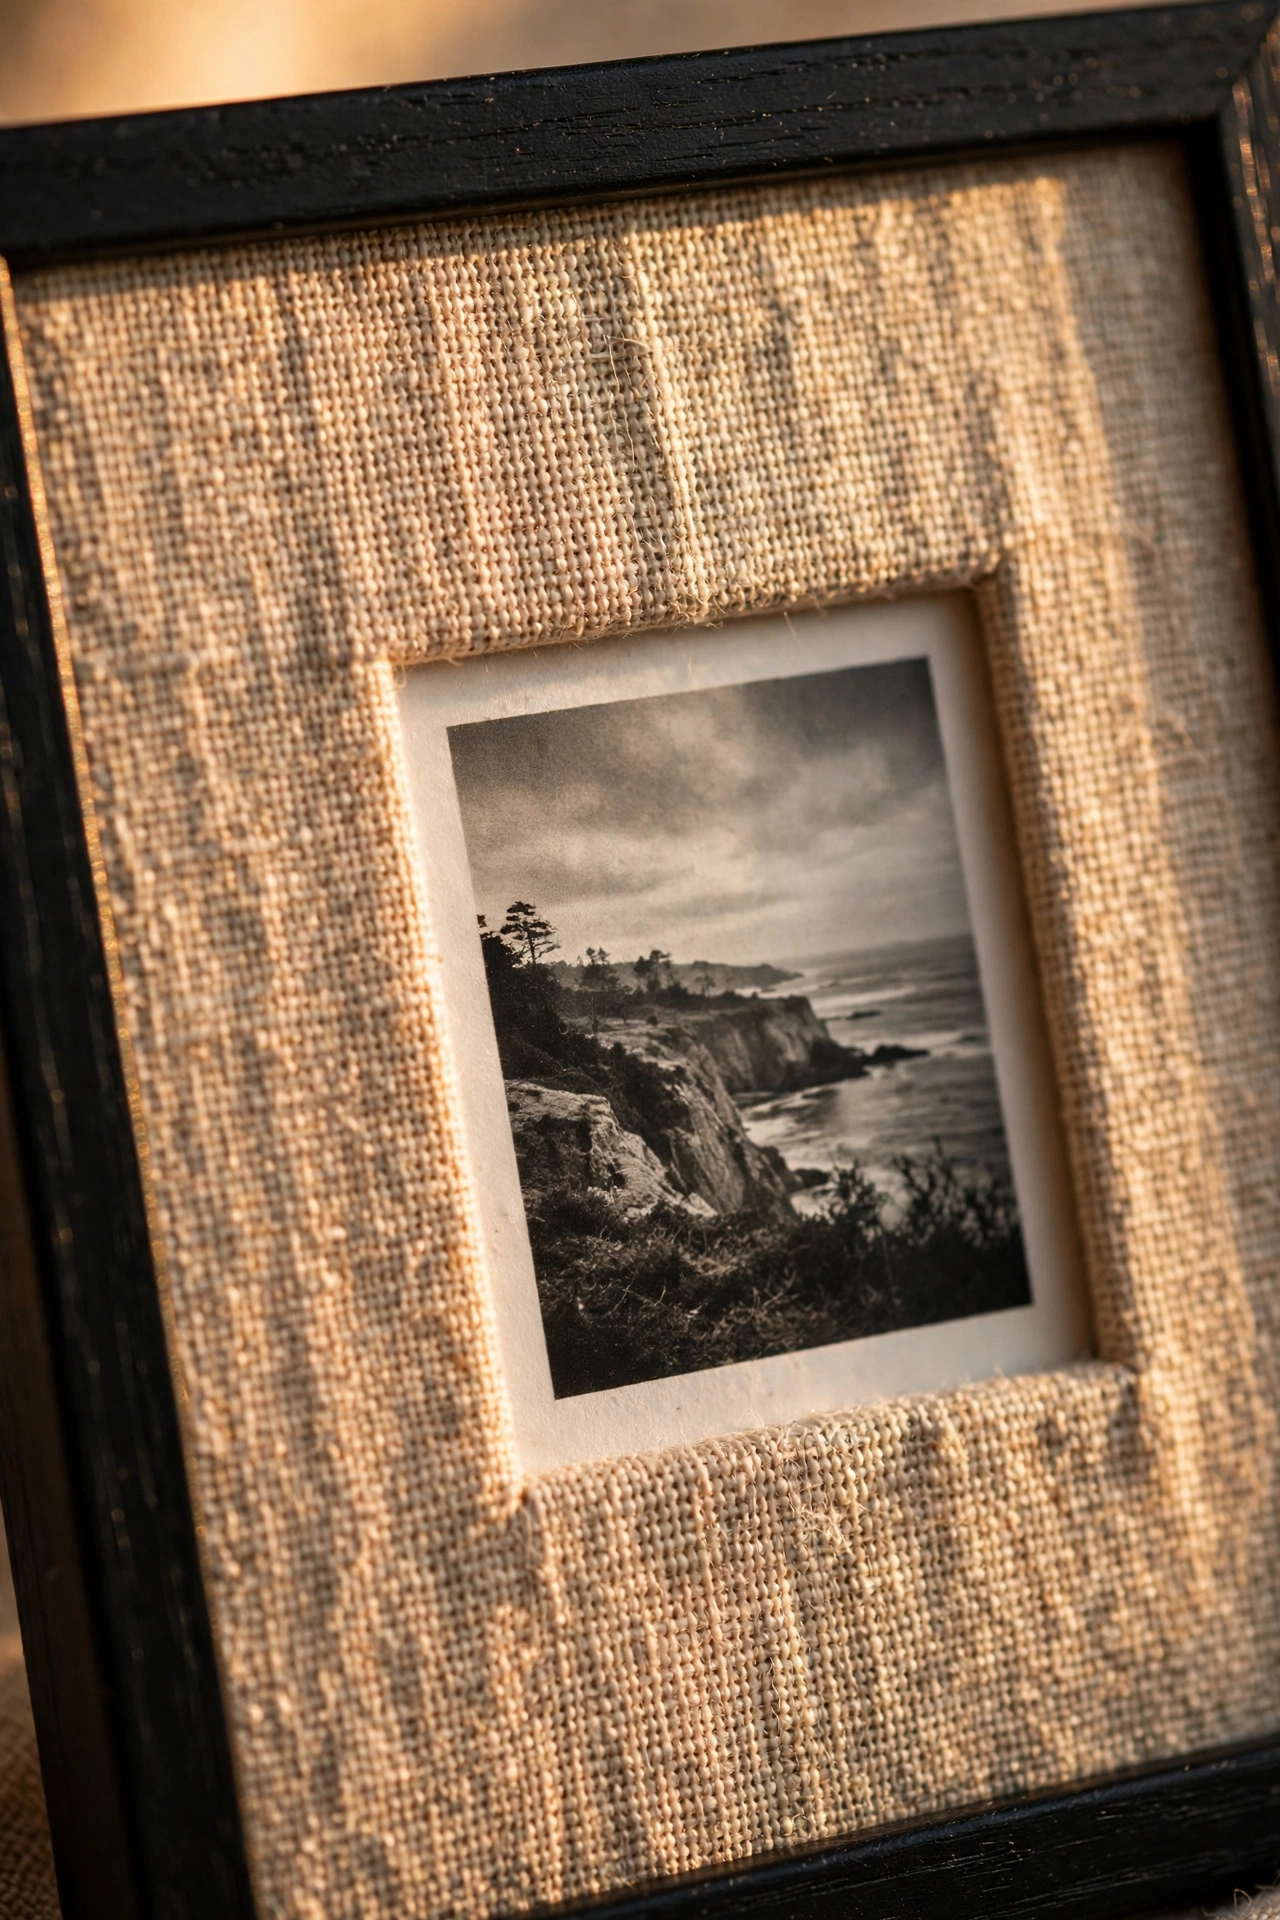
Wrap a plain mat in linen or burlap and the frame gains a textile richness that paper mats cannot match. Cut the fabric generously, wrap it around the mat board like a present, and glue it neatly at the back. The weave adds texture that catches light beautifully, especially in natural linens. It suits botanical prints and black-and-white photography particularly well. Keep the fabric pattern-free or very subtle — the texture is the star, and pattern would fight the art.
Cost: ~$6 · Time: 30 minutes
7. Shadow Box Frames for Keepsakes
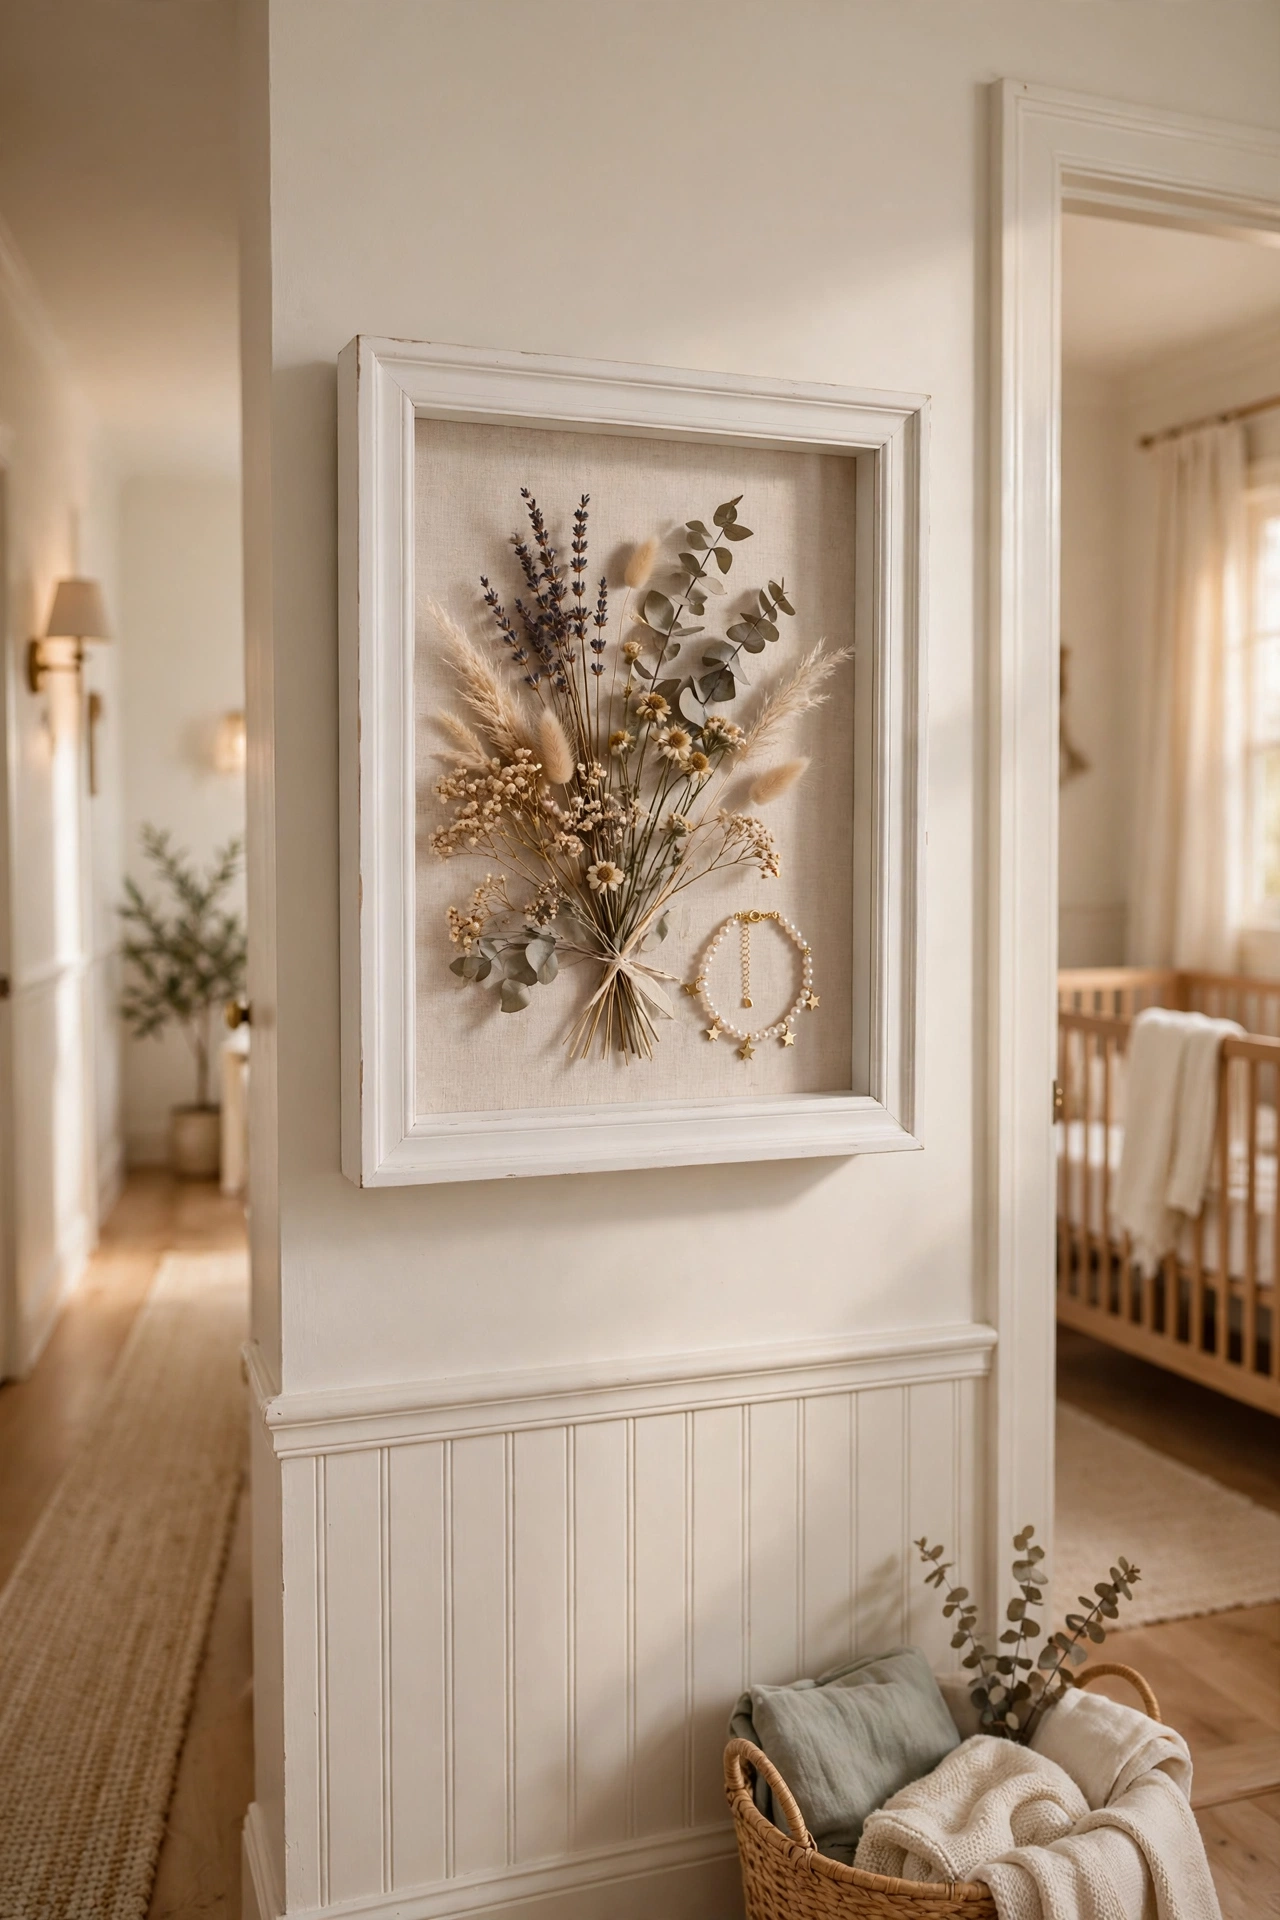
Deep shadow box frames turn small keepsakes — a christening bracelet, dried wedding flowers, a child’s first shoes — into museum-style displays. Arrange the items on the backing with pins or discreet glue dots, keeping the composition simple with plenty of space around each piece. The depth creates little stages that elevate ordinary objects into exhibits. Label nothing; the mystery of unexplained objects is part of the charm. For wall display ideas, see (see also: 23-dollar-store-wall-decor-ideas-worth-every-penny).
Cost: ~$8 · Time: 40 minutes
8. Black Lacquer-Look Frames
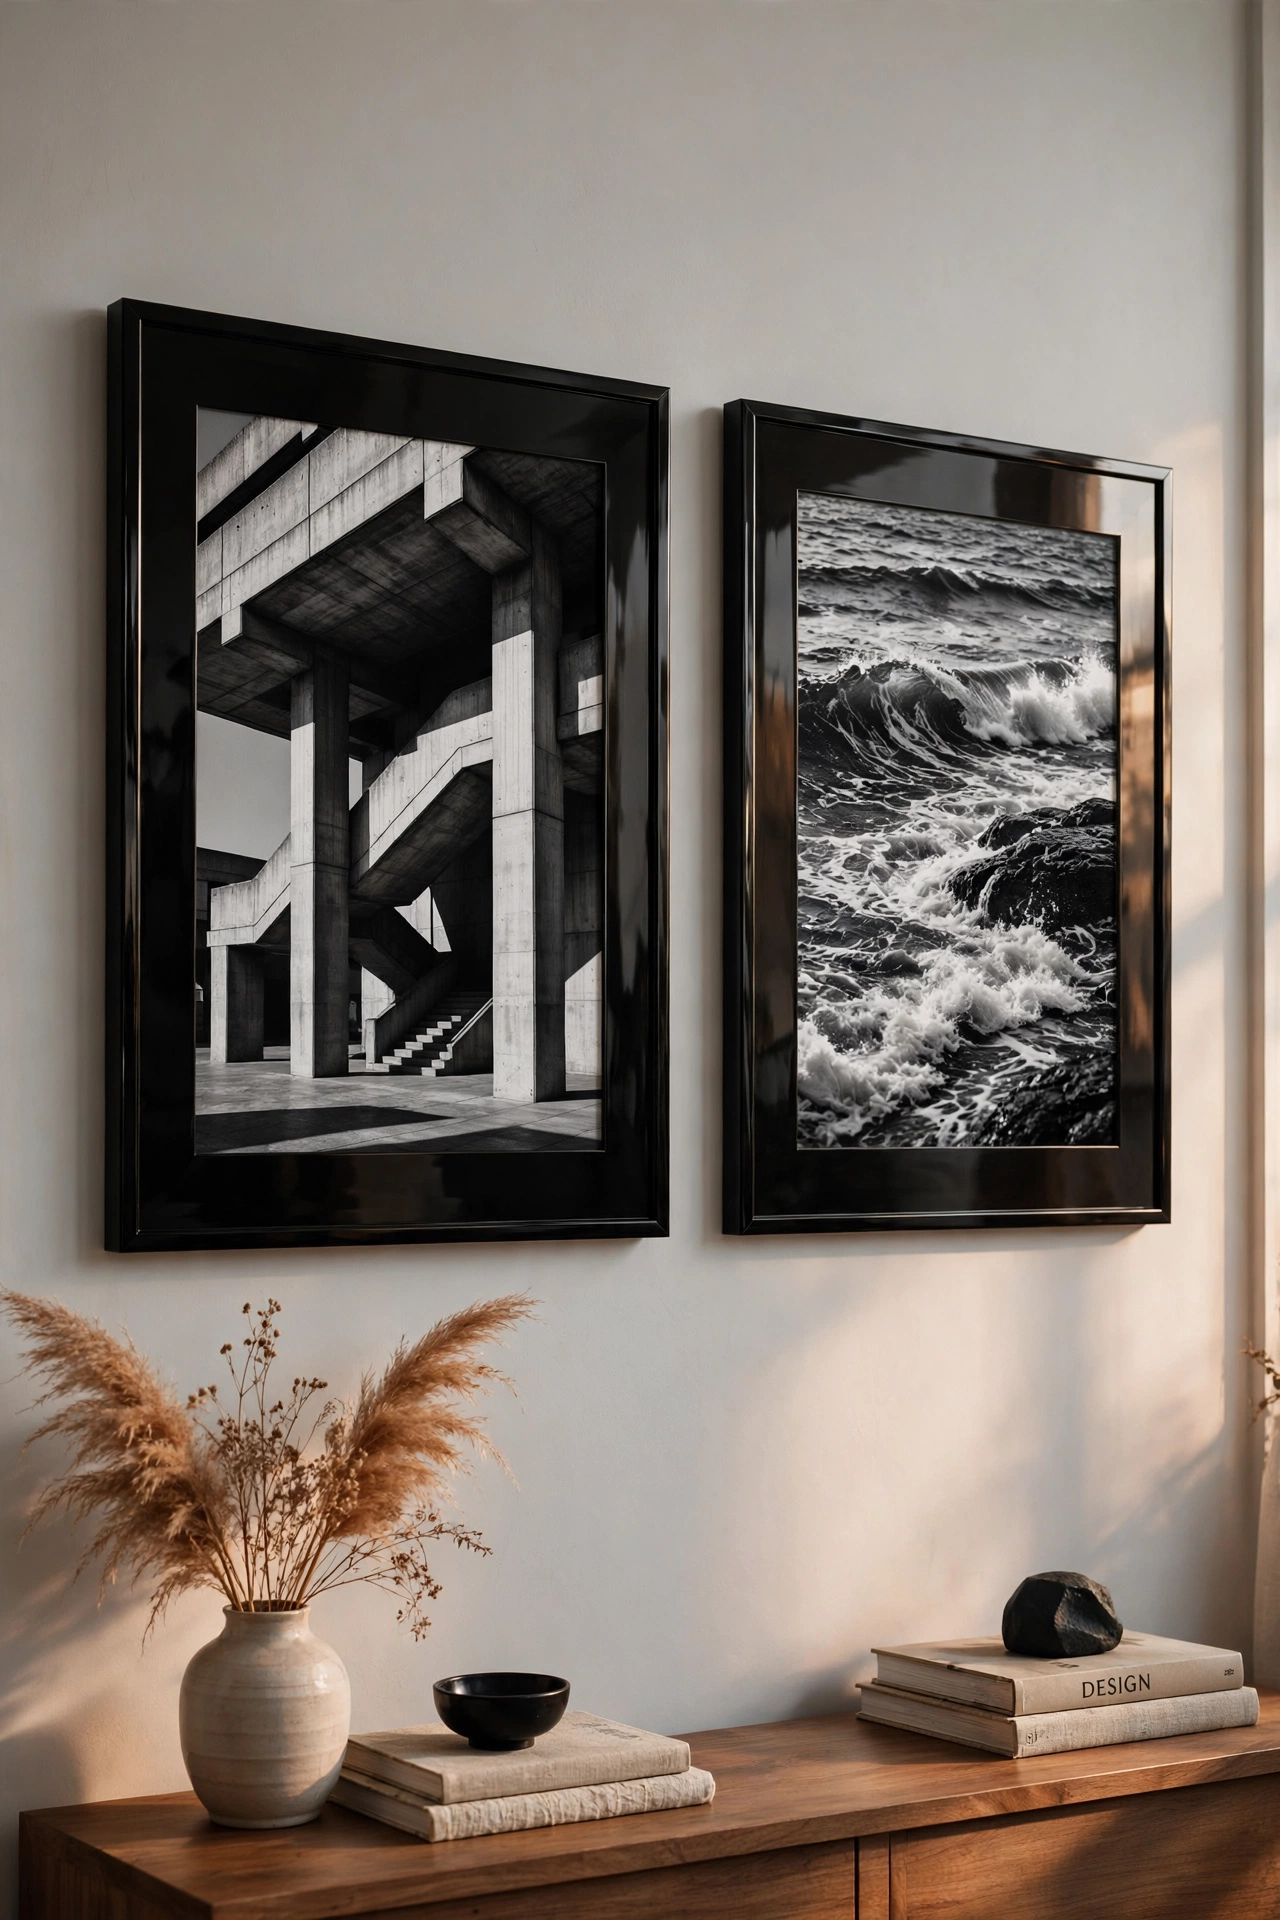
Gloss black frames look like lacquered designer pieces when the finish is smooth — and the trick is all in the preparation. Lightly sand the frame, apply a spray primer, then two thin coats of gloss black spray, letting each cure fully. The mirror-like finish is what sells it; rushed, drippy paint is the giveaway. Use them for black-and-white photography or bold graphic art, where the high-contrast frame becomes part of the composition.
Cost: ~$8 · Time: 1 hour plus curing
9. Arch-Shaped Mat Cut-Outs
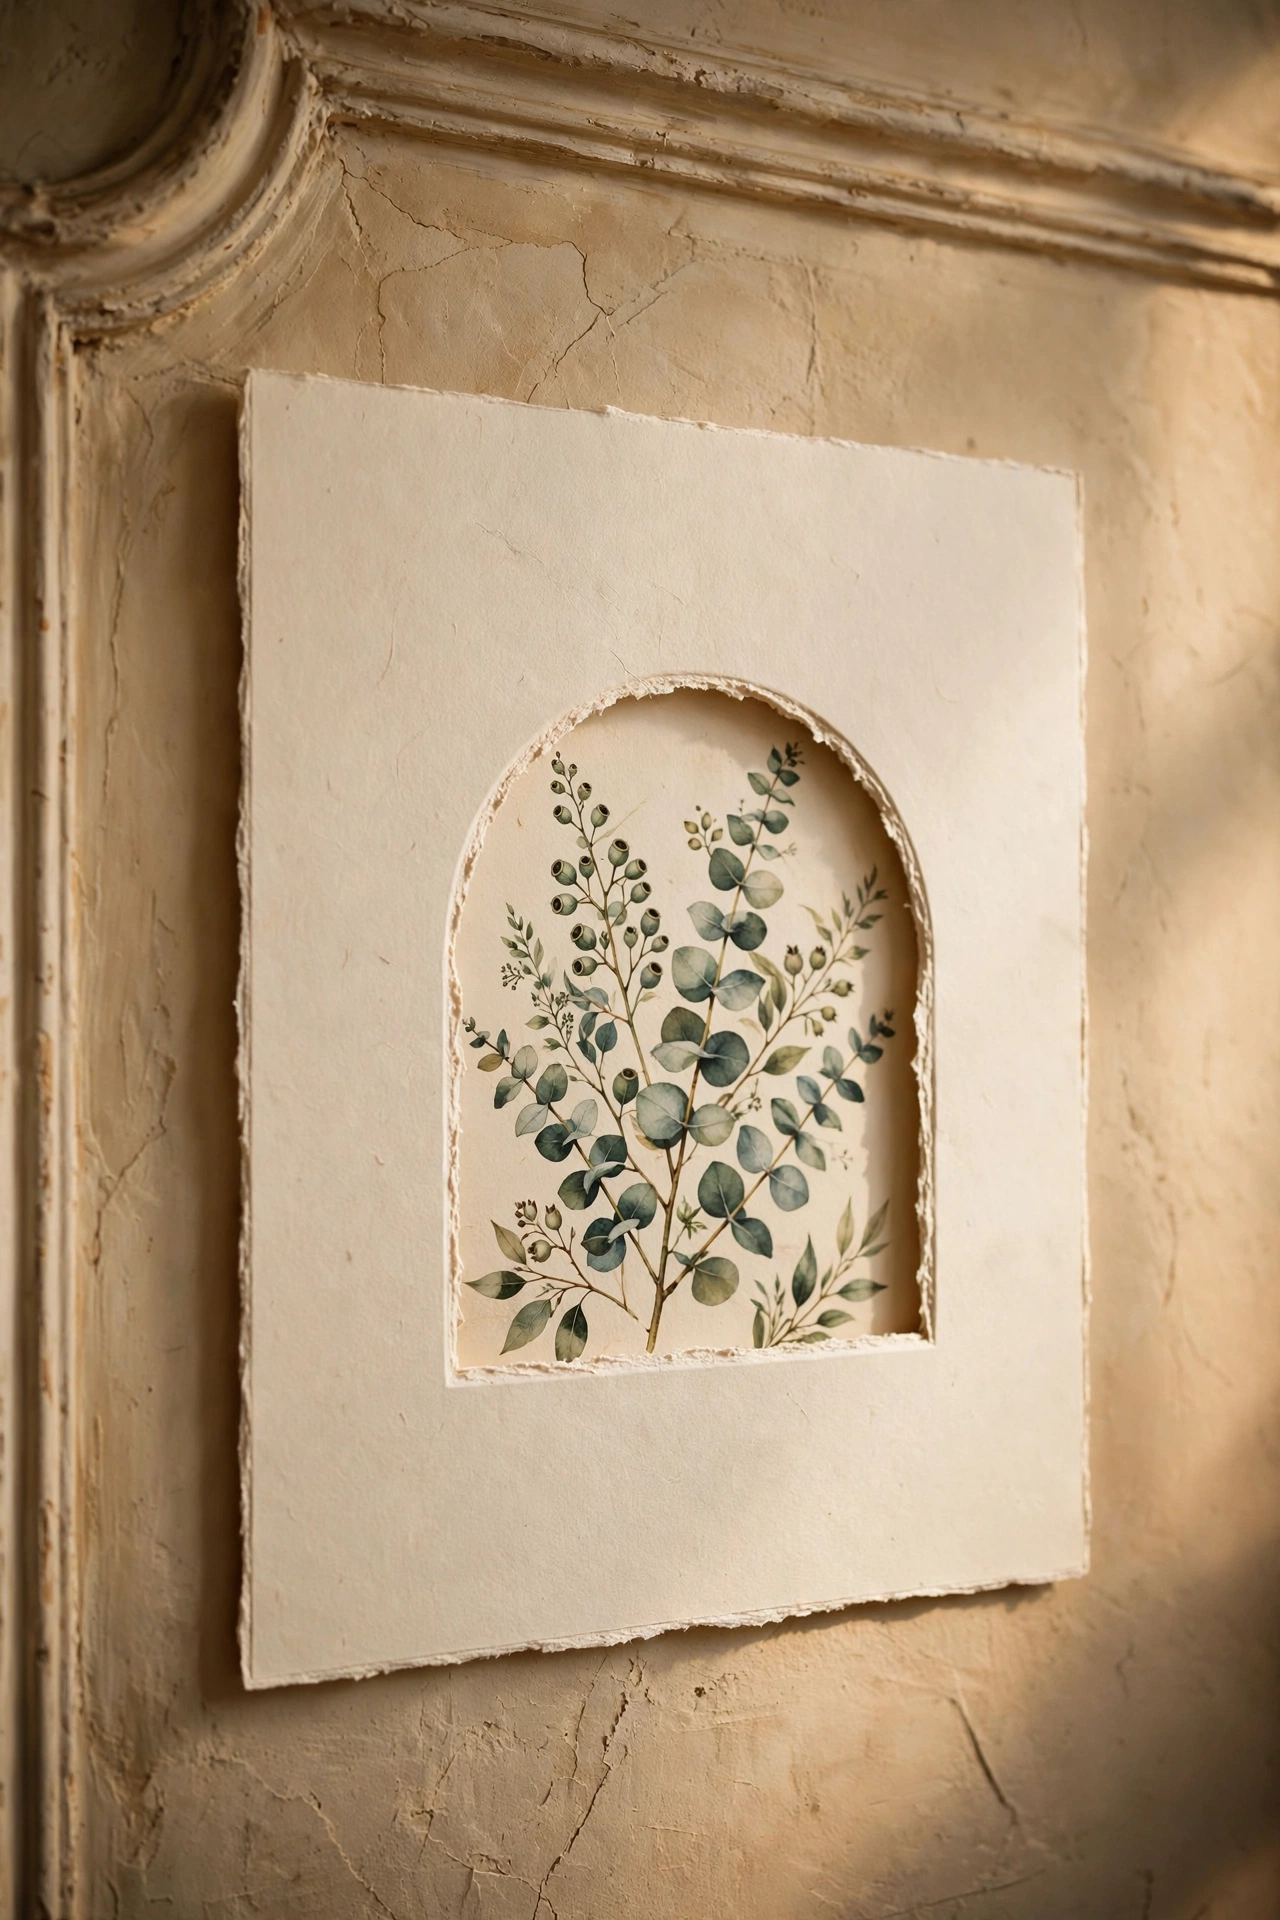
Cut the mat opening as an arch instead of a rectangle and an ordinary print becomes a design moment. The arched window echoes the architectural trend in high-end interiors, and it flatters portraits and botanical prints especially. Draw the arch with a compass or a bowl as a guide, cut carefully with a craft knife, and keep the reveal — the visible mat border — even all round. It is a small geometric twist with a disproportionate style payoff.
Cost: ~$5 · Time: 30 minutes
10. Layered Frame Collage
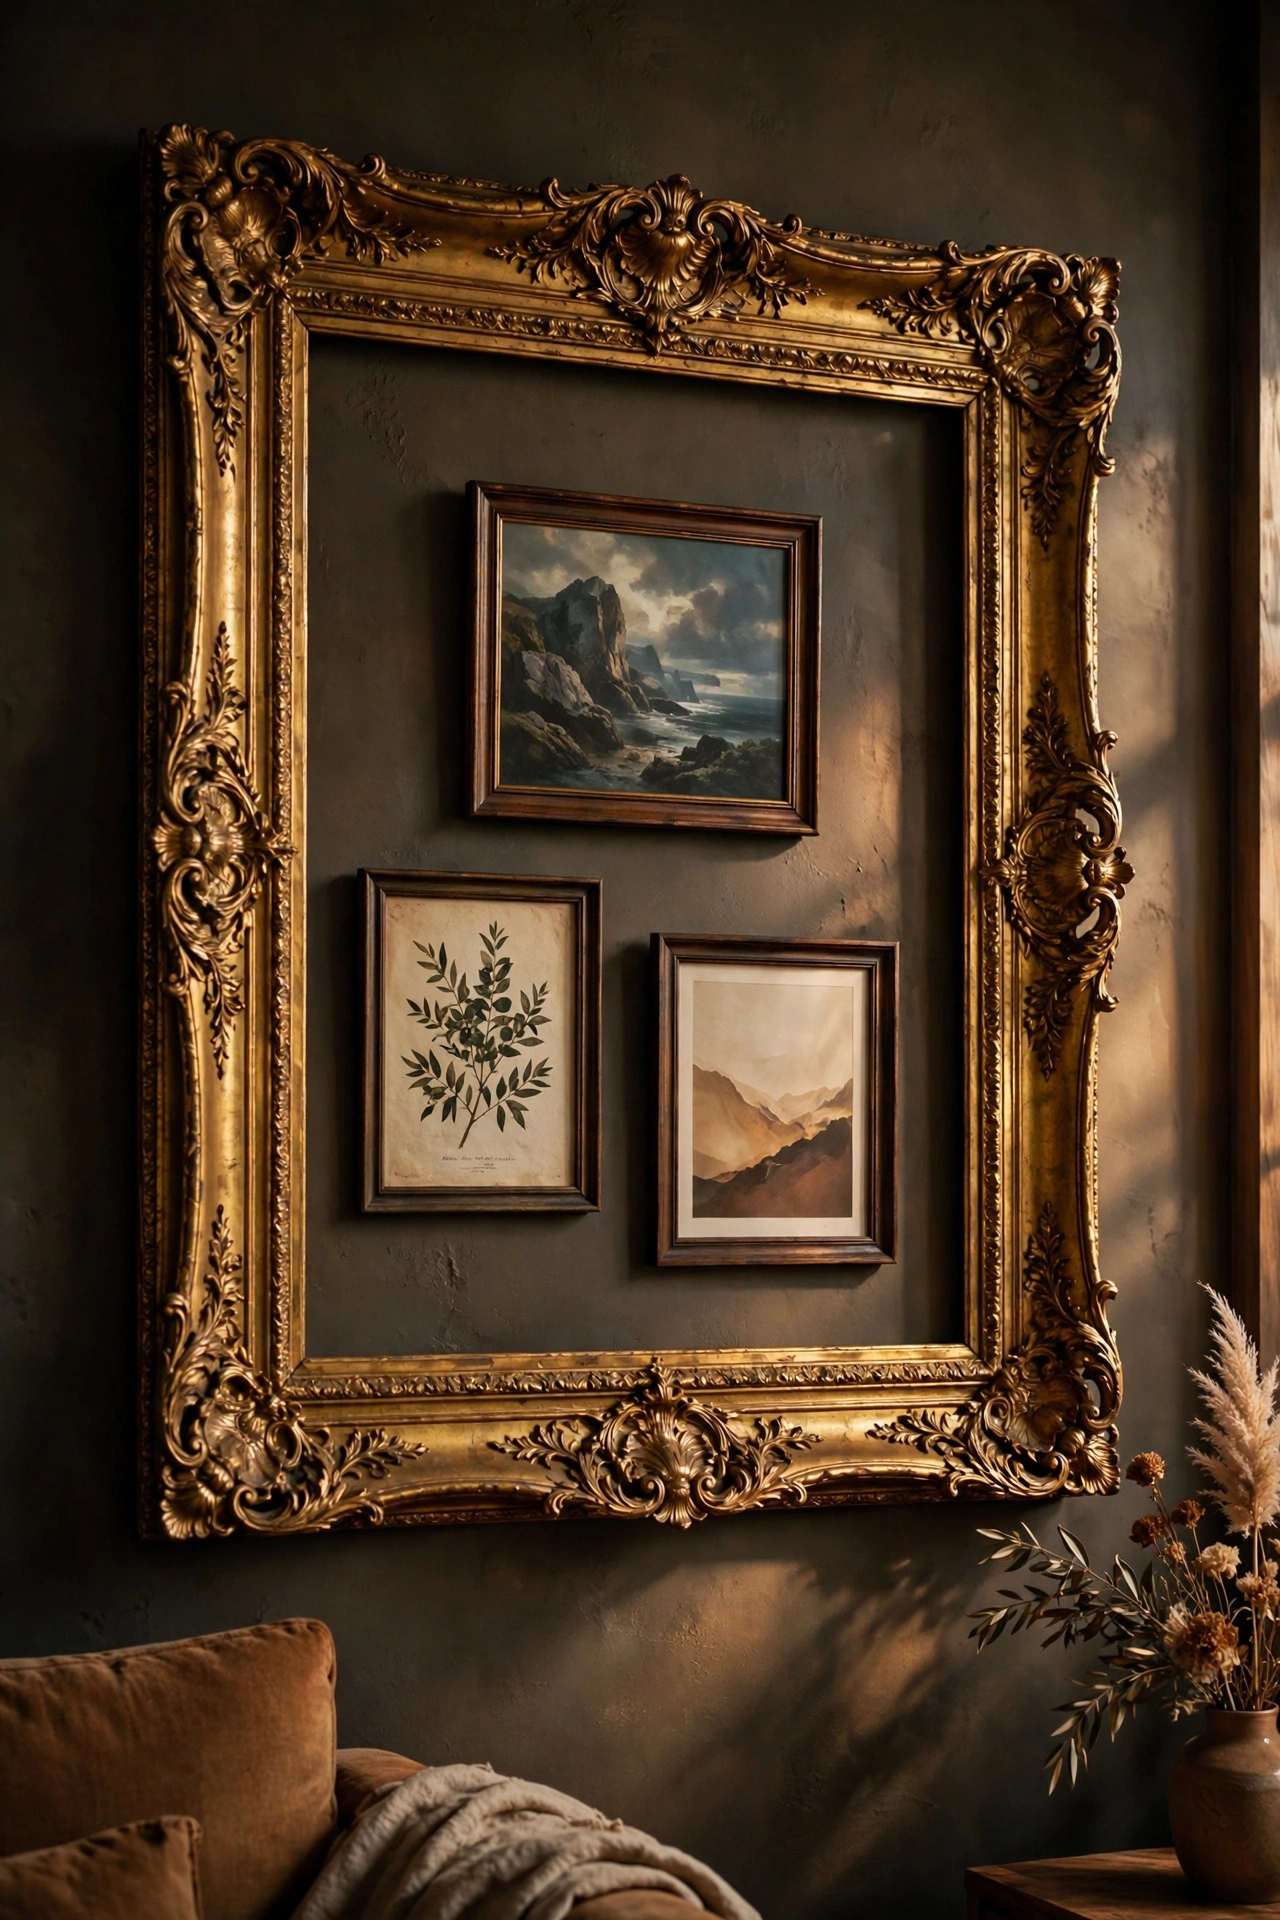
Hang a large empty ornate frame on the wall, then hang smaller framed prints inside its borders — frames within a frame. The outer frame becomes architecture, and the inner pieces read as a curated collection. It works brilliantly over a mantel or console where one big statement beats a scattered gallery. Keep all the inner frames in one finish so the composition holds together; the layering provides the interest, not colour chaos.
Cost: ~$10 · Time: 45 minutes
11. Mirrored Backing Behind Prints
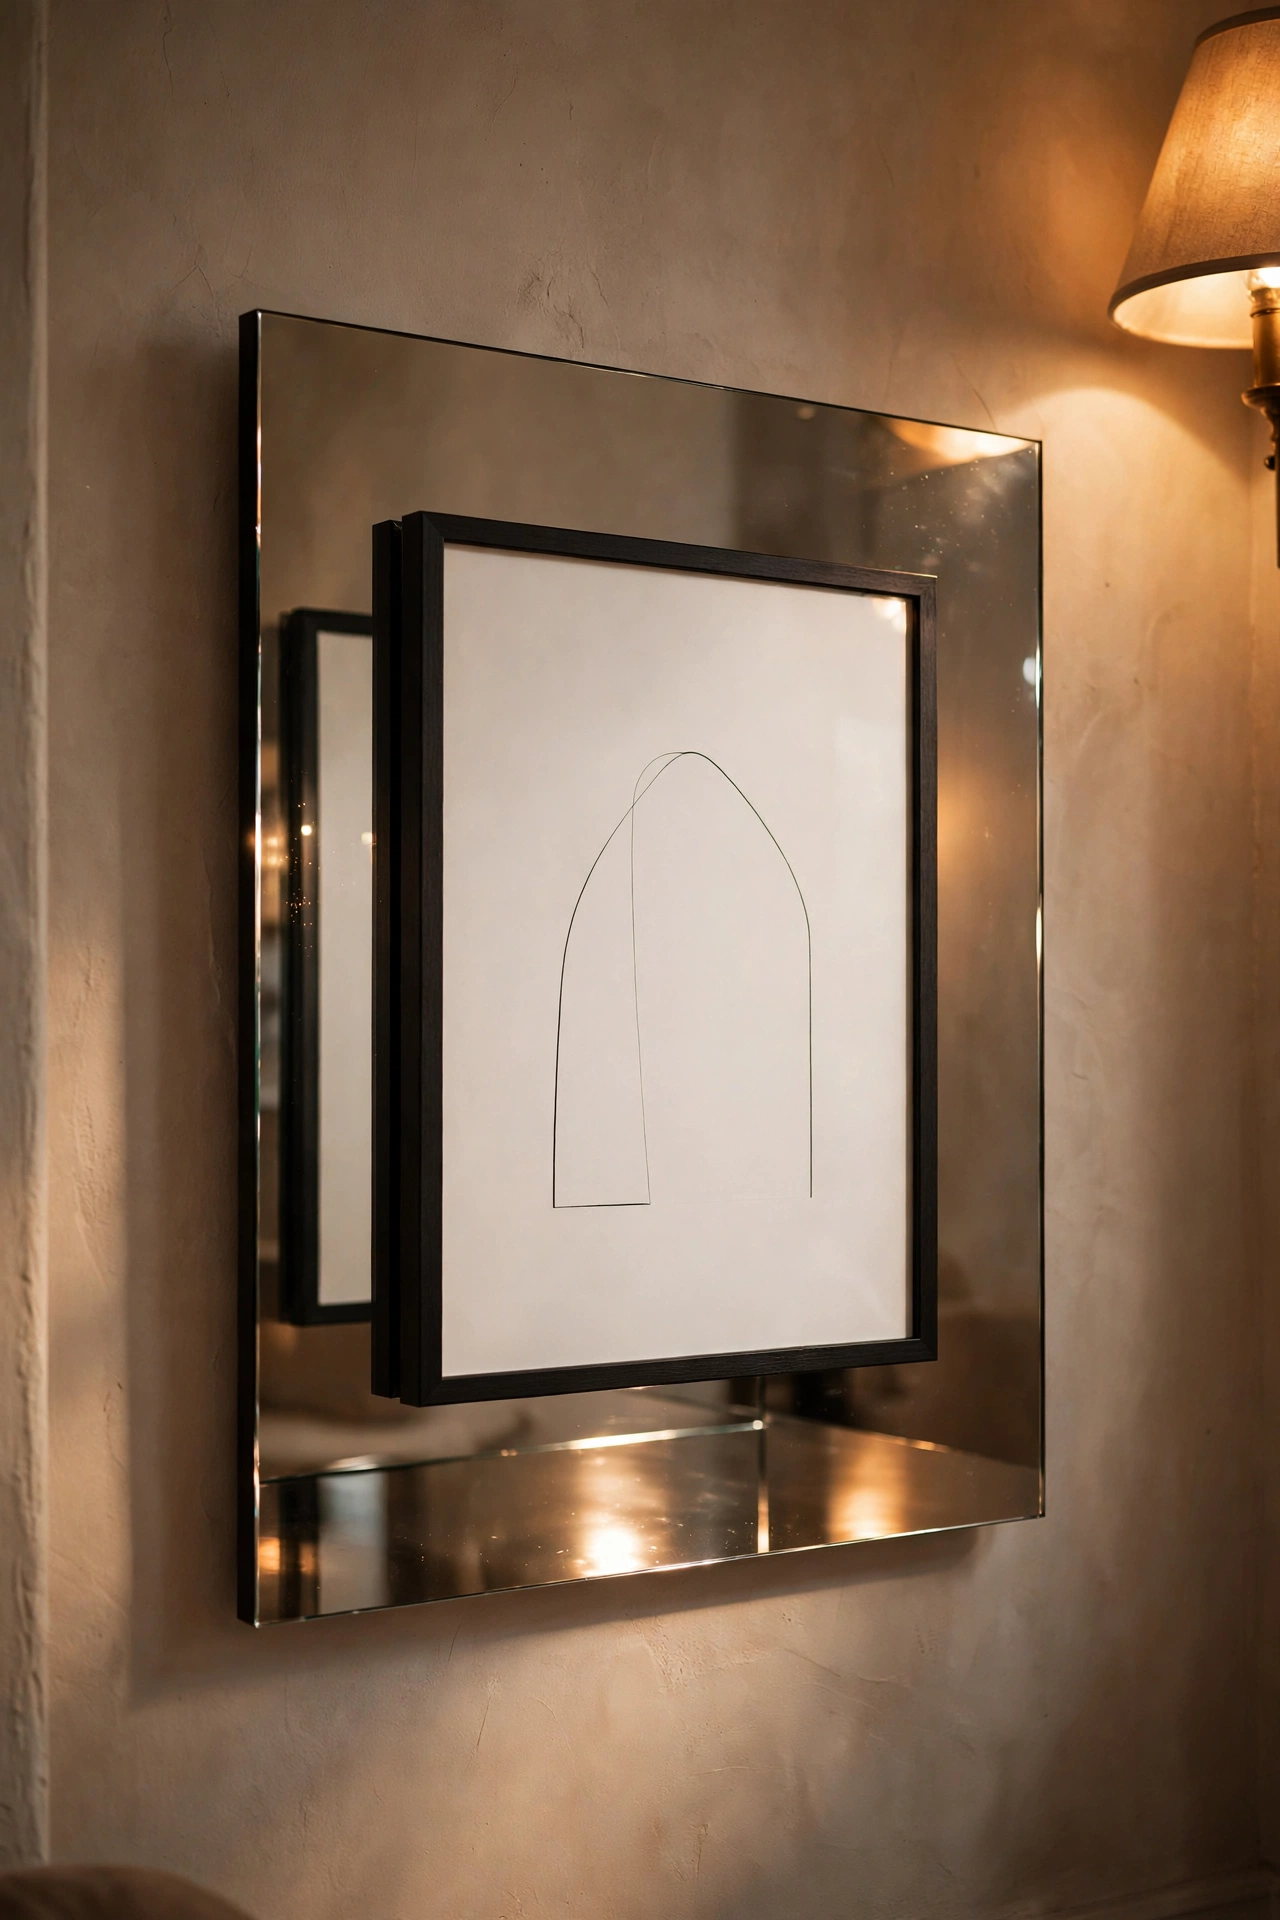
Replace a frame’s backing board with a piece of mirror and the art appears to float over a reflective surface — light bounces around the image in a way that looks genuinely custom. It works best with prints that have plenty of white space, so the mirror shows through around the art. Cut the mirror to size at a glass shop if you are unsure about cutting it yourself; most will do it for a few dollars. The effect is subtle in daylight and magical by lamplight.
Cost: ~$9 · Time: 30 minutes
12. Decoupage Napkin Frame Borders
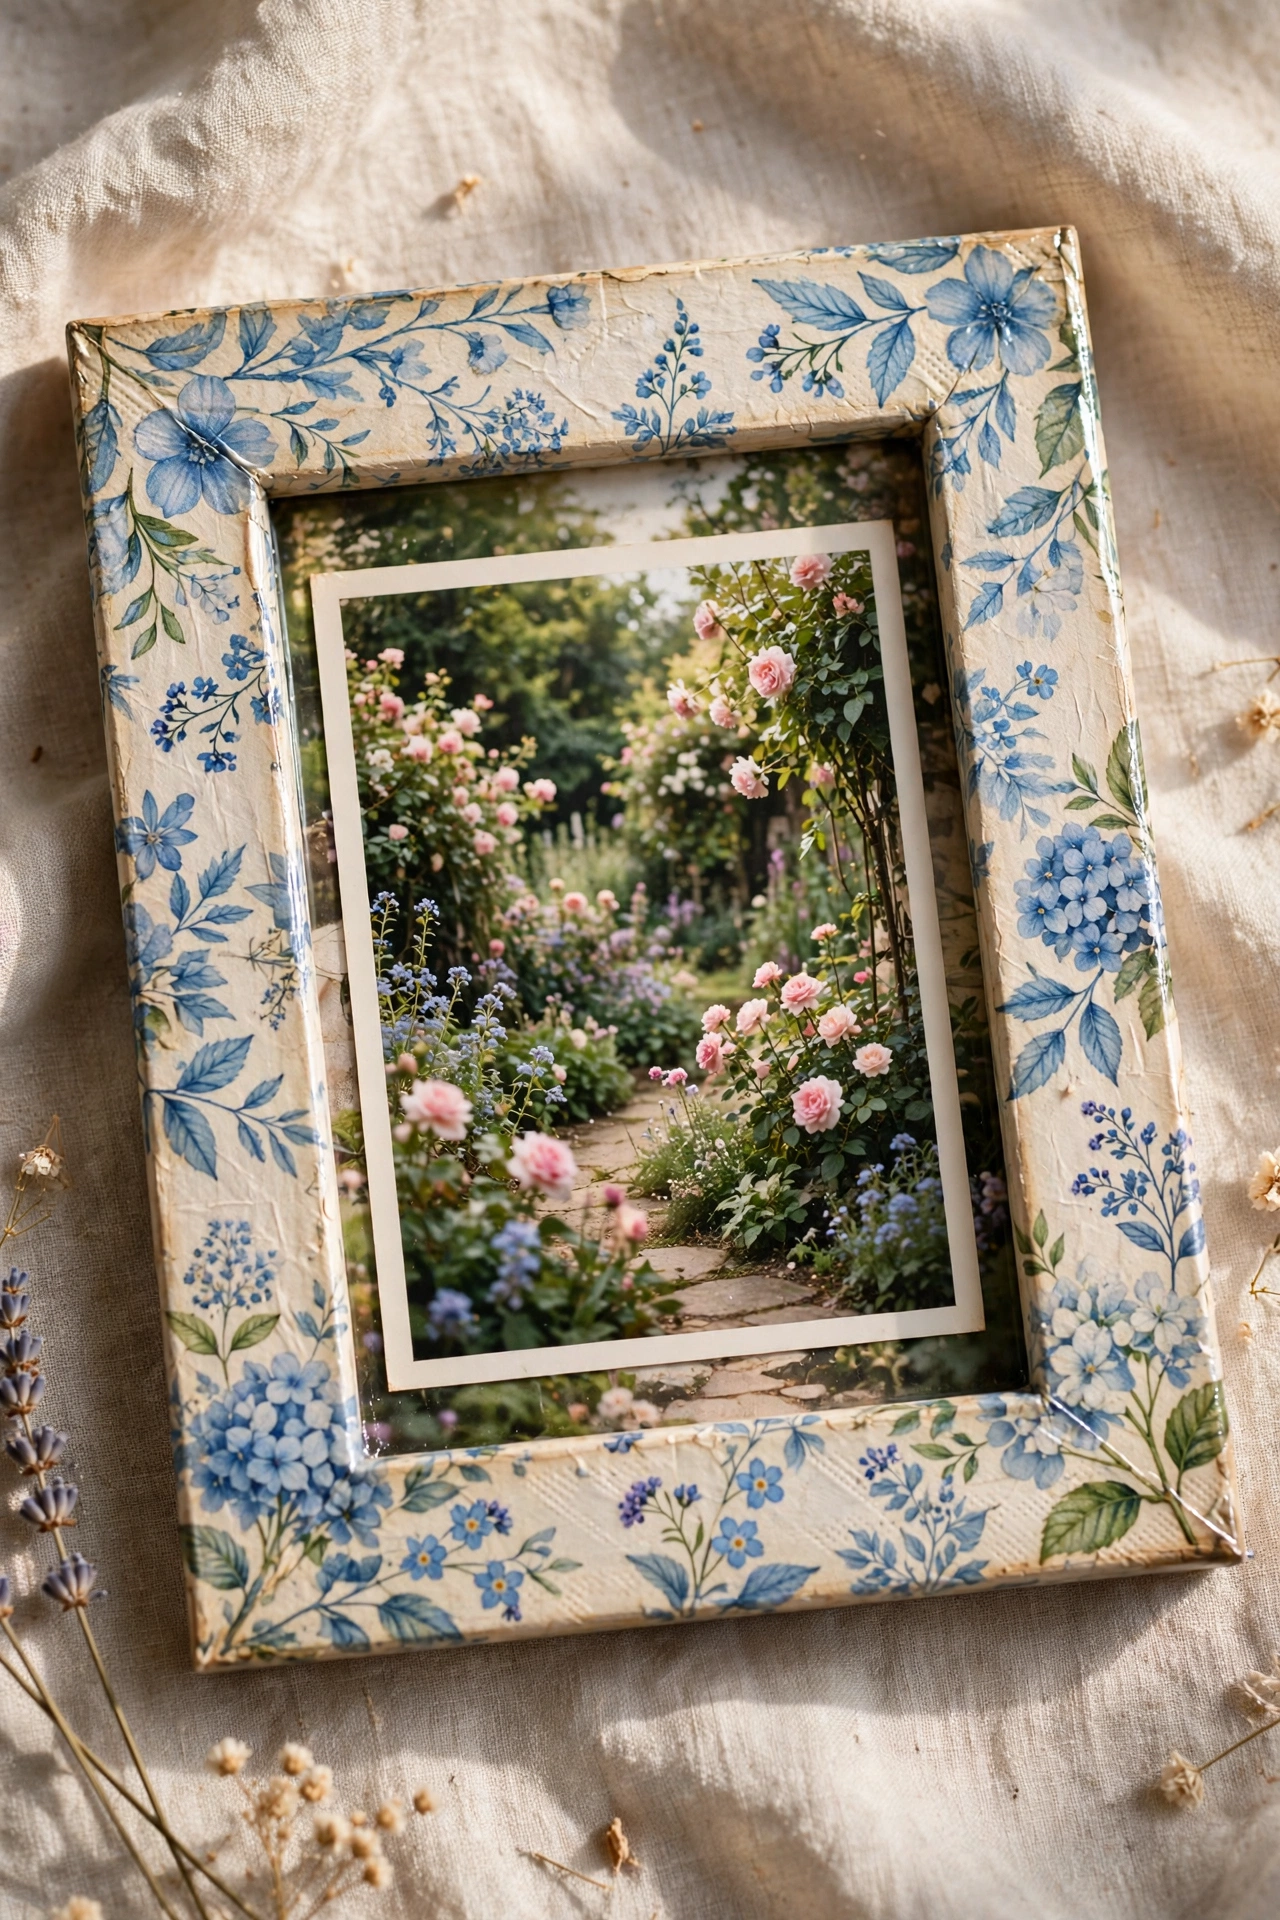
Pretty paper napkins, decoupaged onto plain wooden frames, give you patterned frames that look hand-painted. Separate the napkin layers, brush decoupage medium onto the frame, lay the patterned layer down smoothly, and seal with two topcoats. Floral and chinoiserie patterns work beautifully; avoid anything too novelty. The sealed finish is wipeable and durable, so these survive kitchens and bathrooms. Tear the napkin edges rather than cutting for an invisible blend into the frame.
Cost: ~$6 · Time: 1 hour plus drying
13. Rubbed Bronze Wax Finish Frames
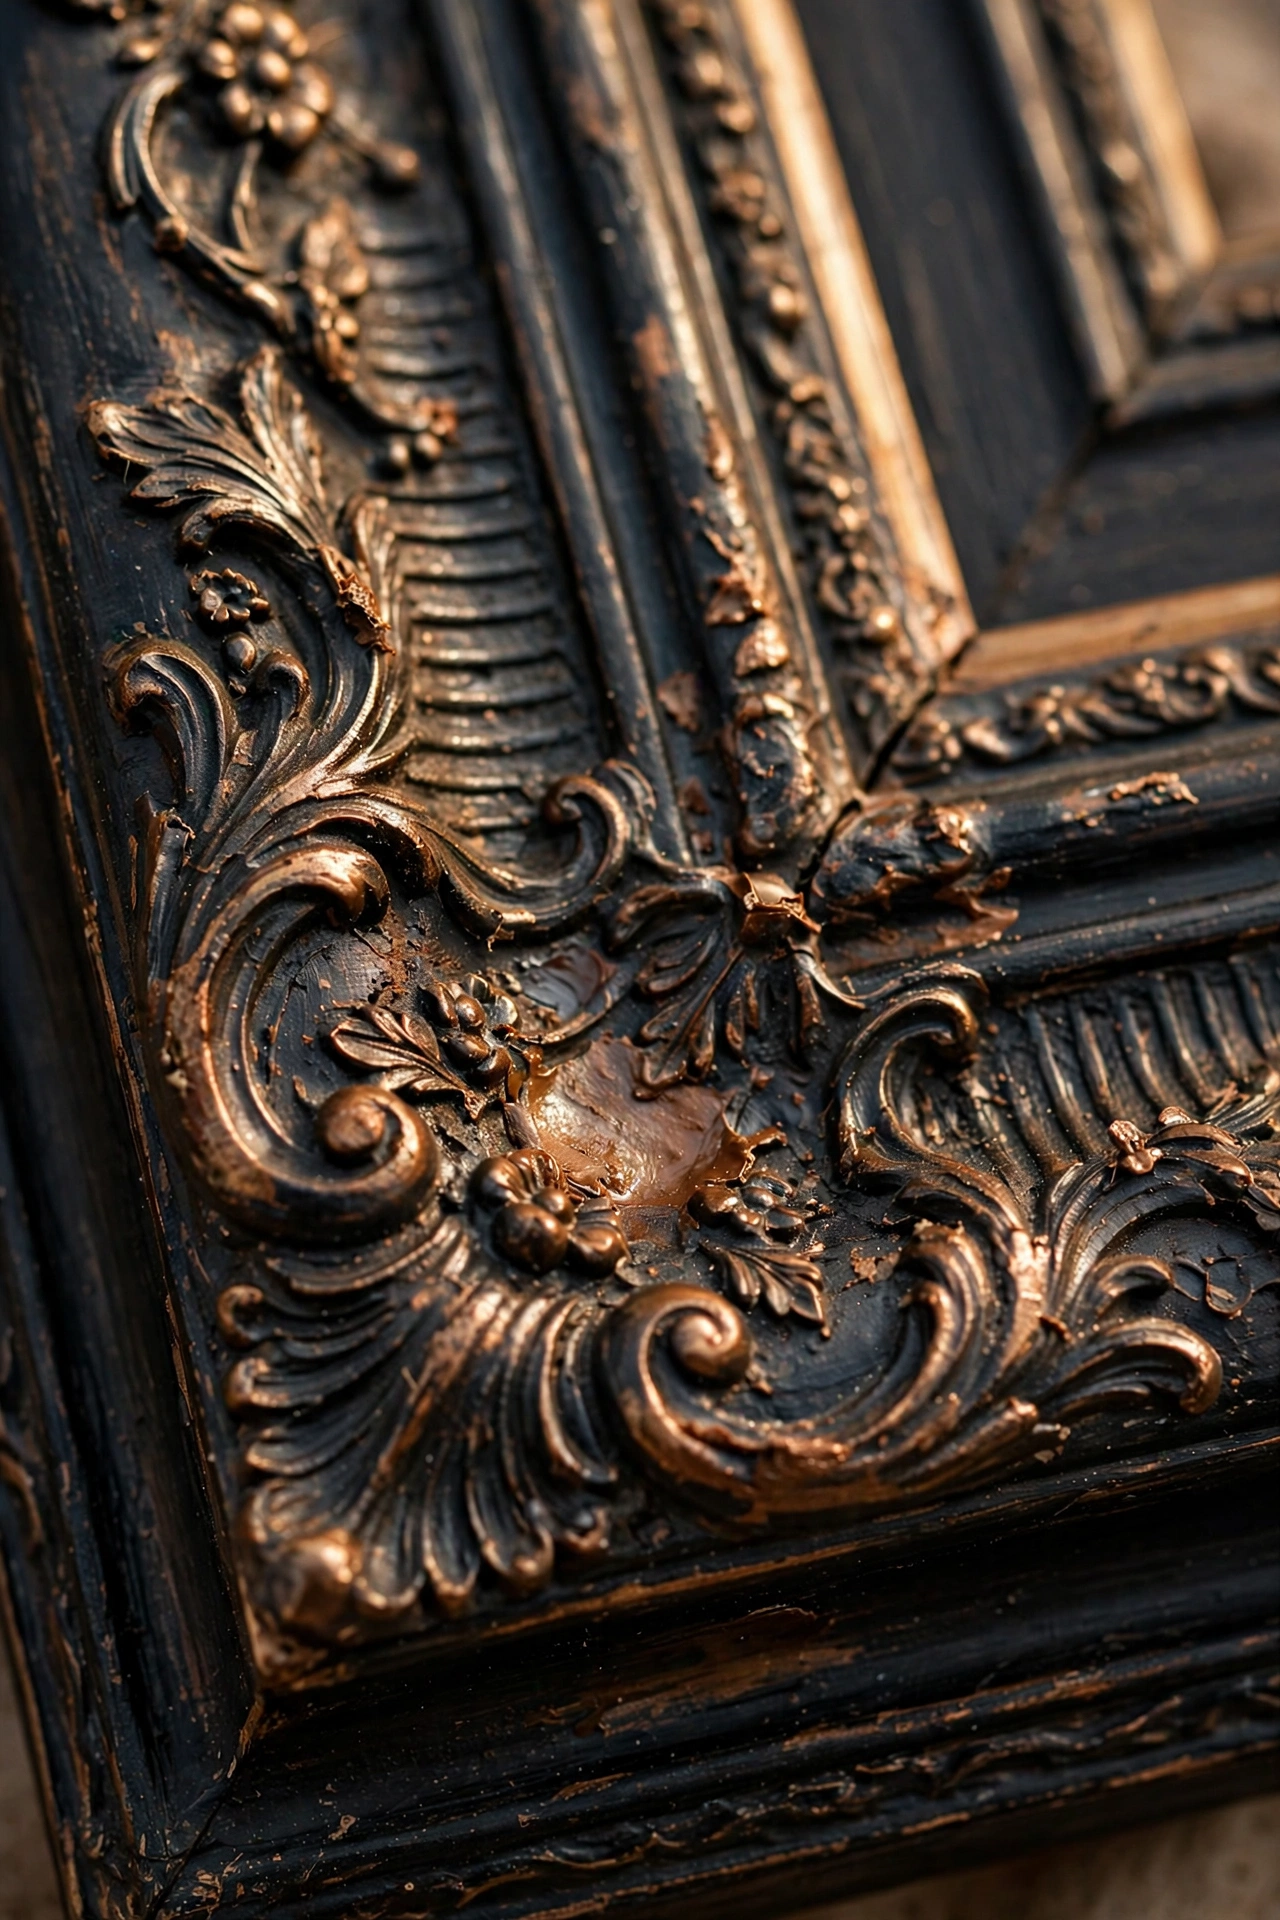
Rub bronze wax paste over a dark-painted frame and you get an aged metallic finish that looks like antique bronze. Paint the frame matte black first, then buff the wax onto raised areas with a cloth, leaving recesses dark. The contrast between the metallic high points and dark shadows mimics centuries of handling. It is the most convincing faux-metal finish I have found — far better than metallic spray paint, which tends to look flat. A little wax goes a long way; build it up gradually.
Cost: ~$9 · Time: 45 minutes
14. Multi-Opening Collage Frames
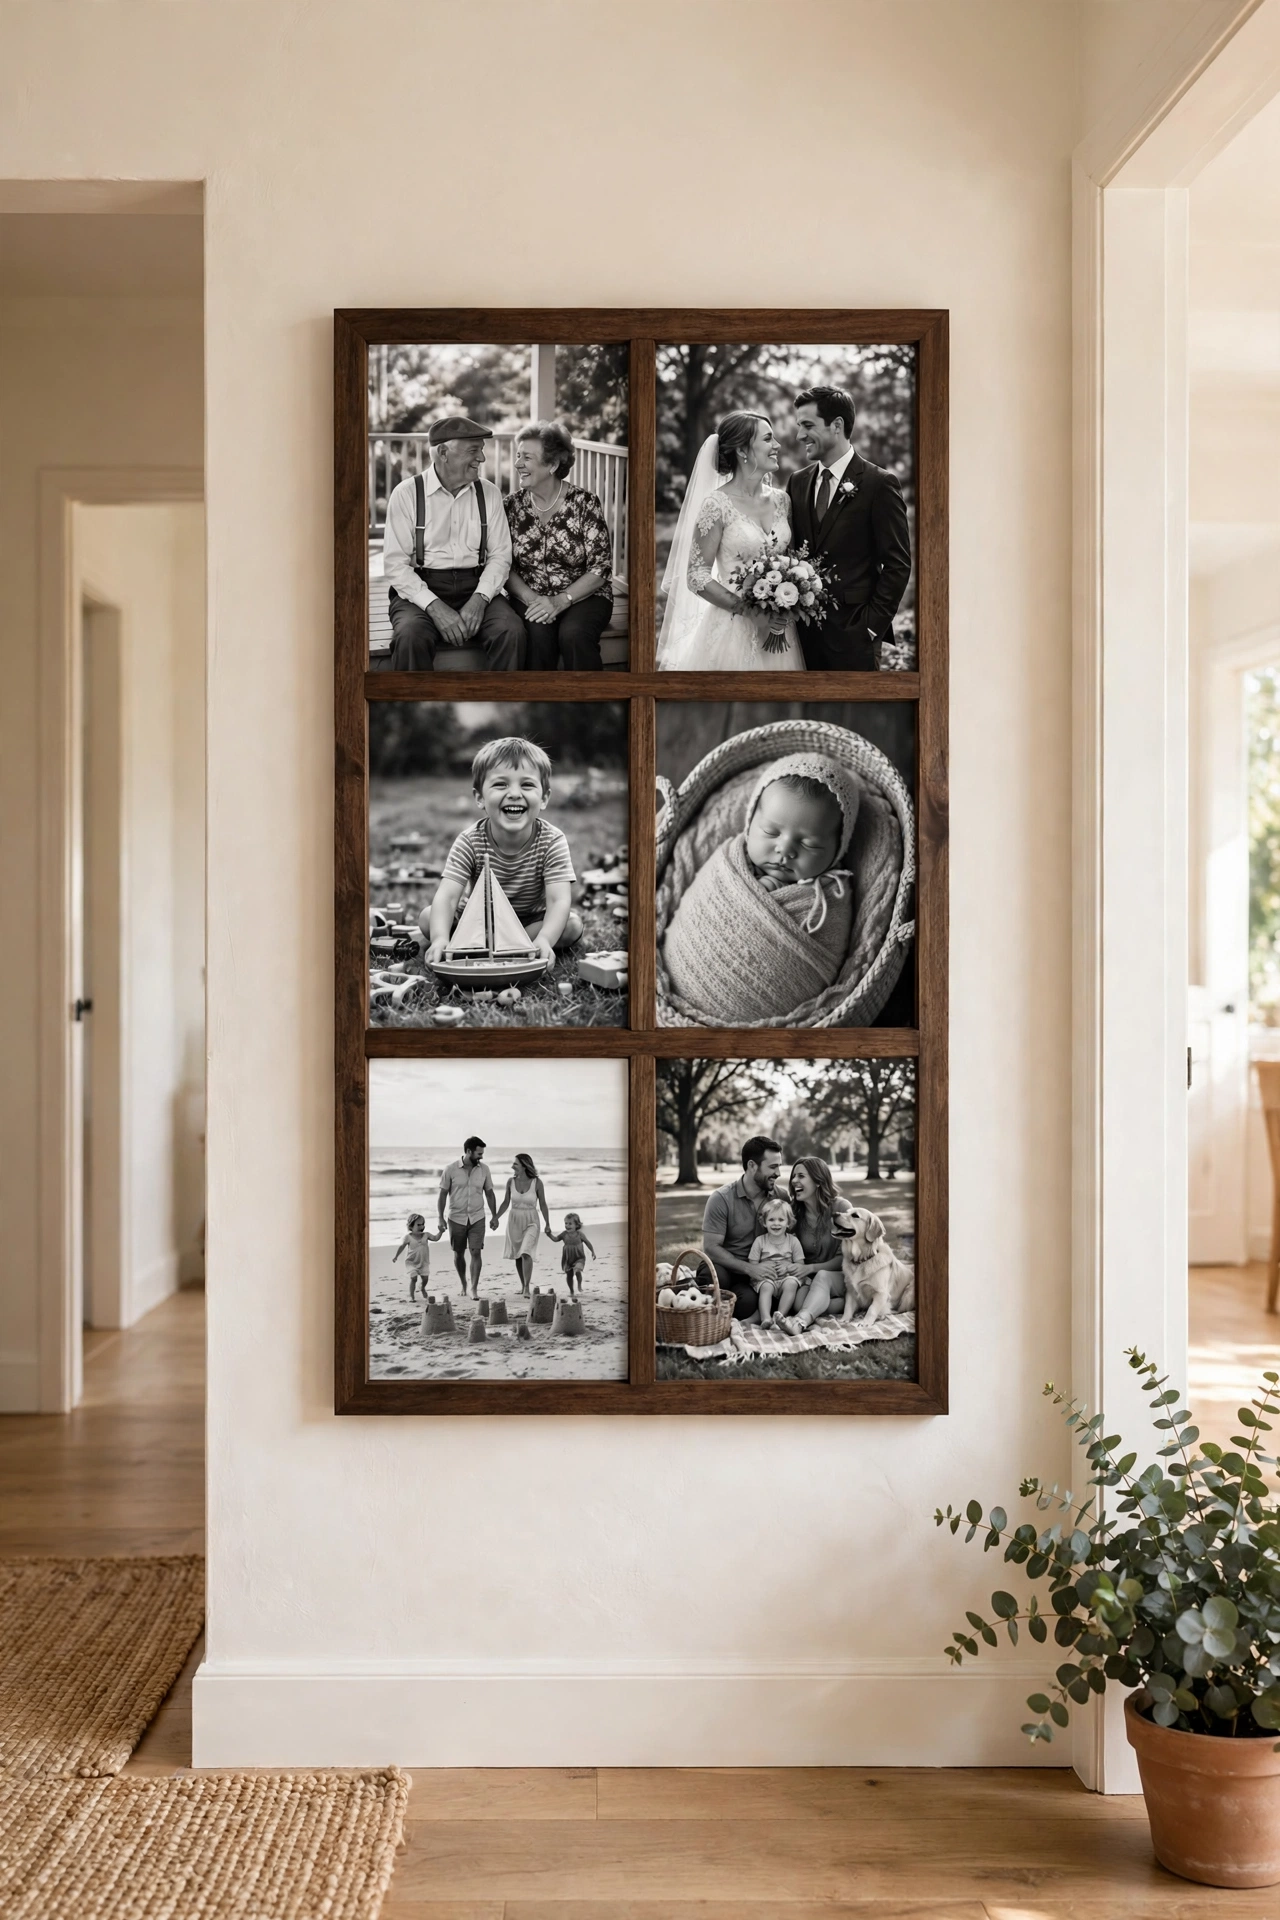
A single frame with multiple openings displays a photo series as one designed piece — holidays, a child’s year, a home’s rooms. The unified frame makes random phone photos look like a deliberate collection, which is exactly what custom framing does. Print all the photos in the same tone — all colour or all black-and-white — because mixed tones fight each other in close quarters. Hang it where the story can be read: hallways are perfect for these narrative pieces.
Cost: ~$8 · Time: 30 minutes
15. Magnetic Poster Frames
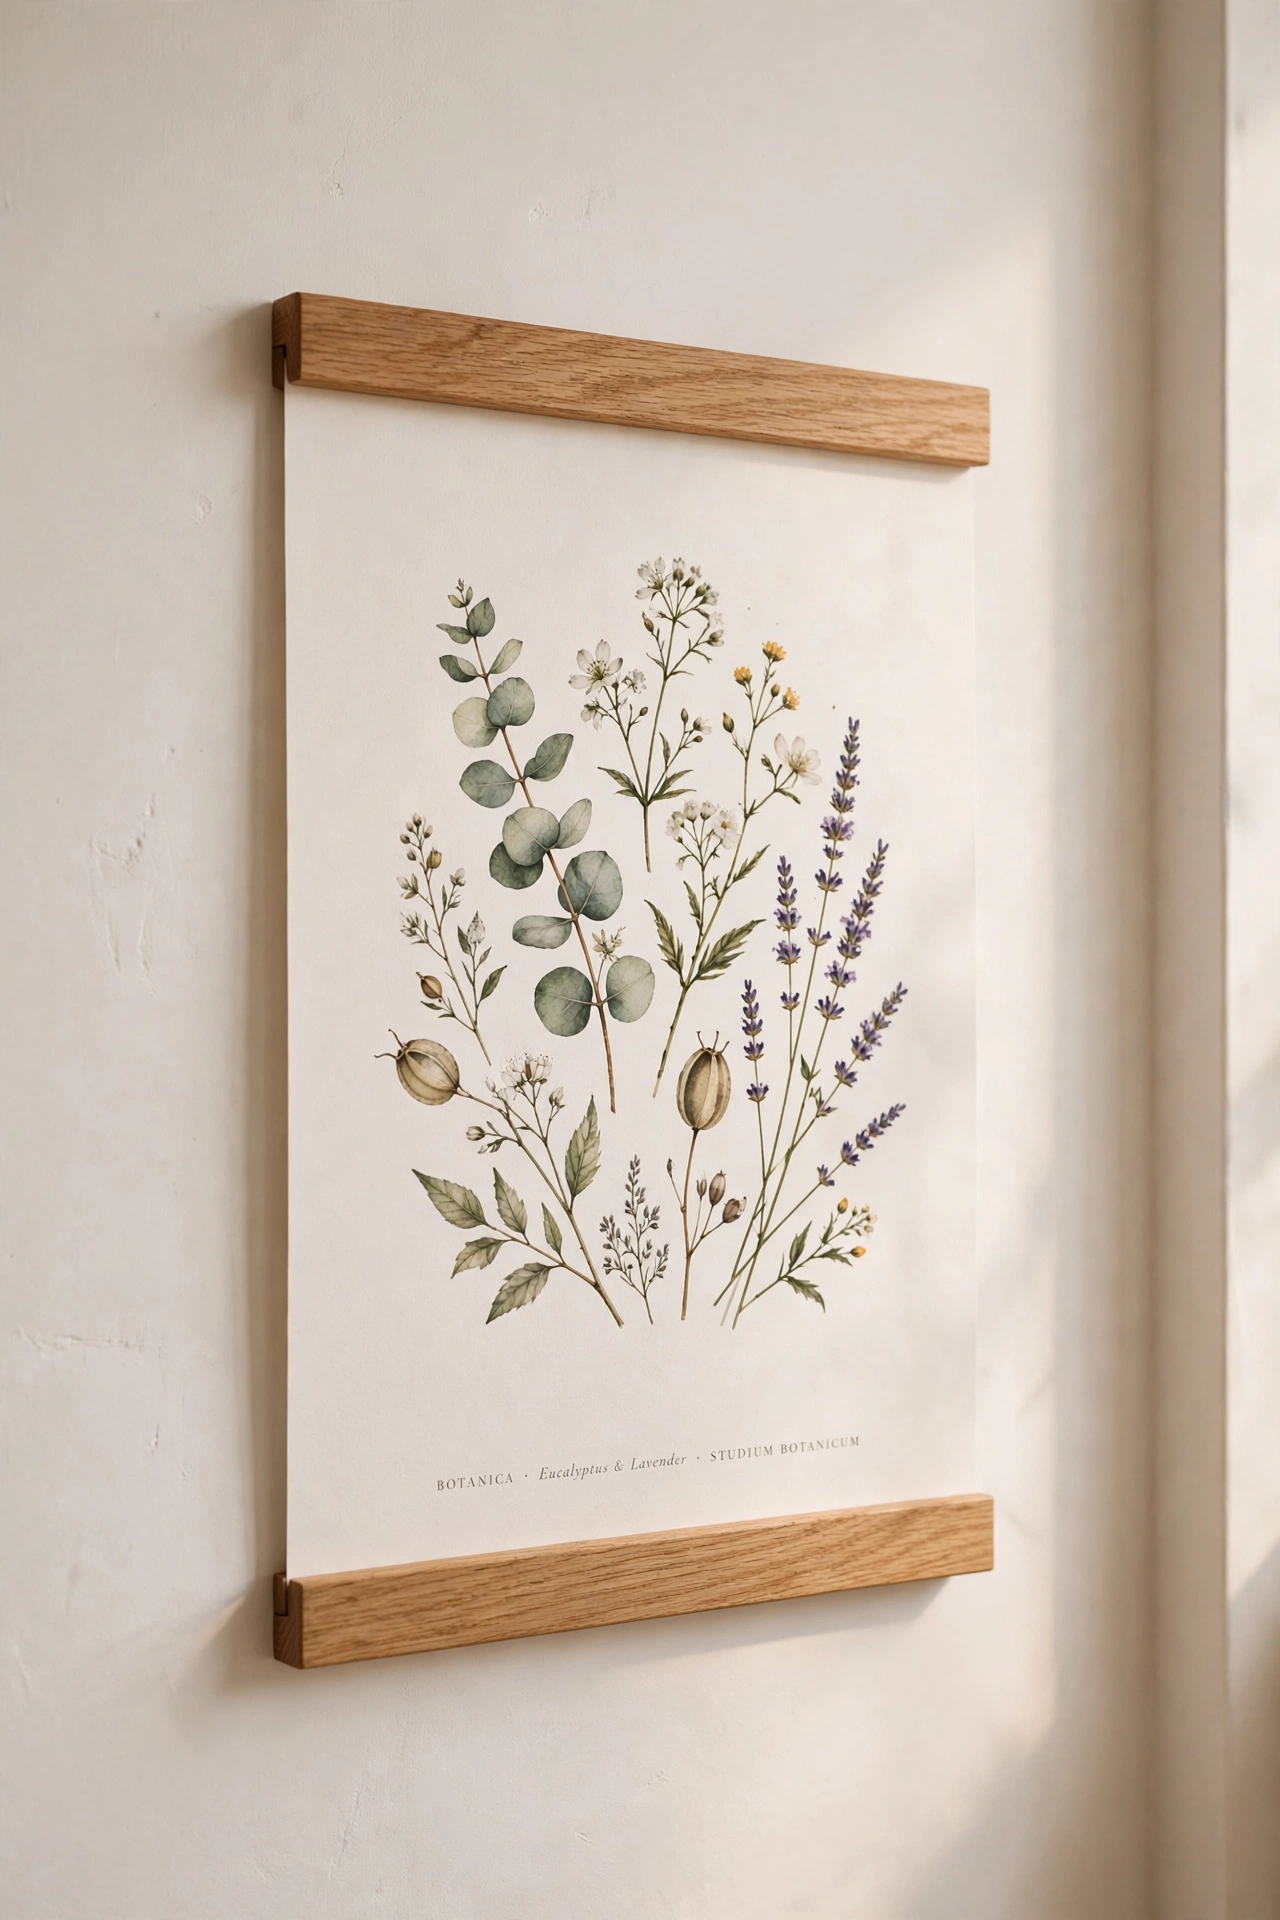
Two wooden bars with magnets that sandwich a poster’s top and bottom are the minimalist’s frame — no glass, no fuss, endlessly swappable. Hang the top bar from a nail or hook and the poster hangs perfectly flat, weighted by the bottom bar. It suits art prints and textile pieces beautifully, and swapping art takes ten seconds. The oak-look bars suit Scandinavian and modern rooms; the whole thing costs less than a takeaway and looks like a design-store find.
Cost: ~$6 · Time: 10 minutes
16. Monogrammed Frame Corners
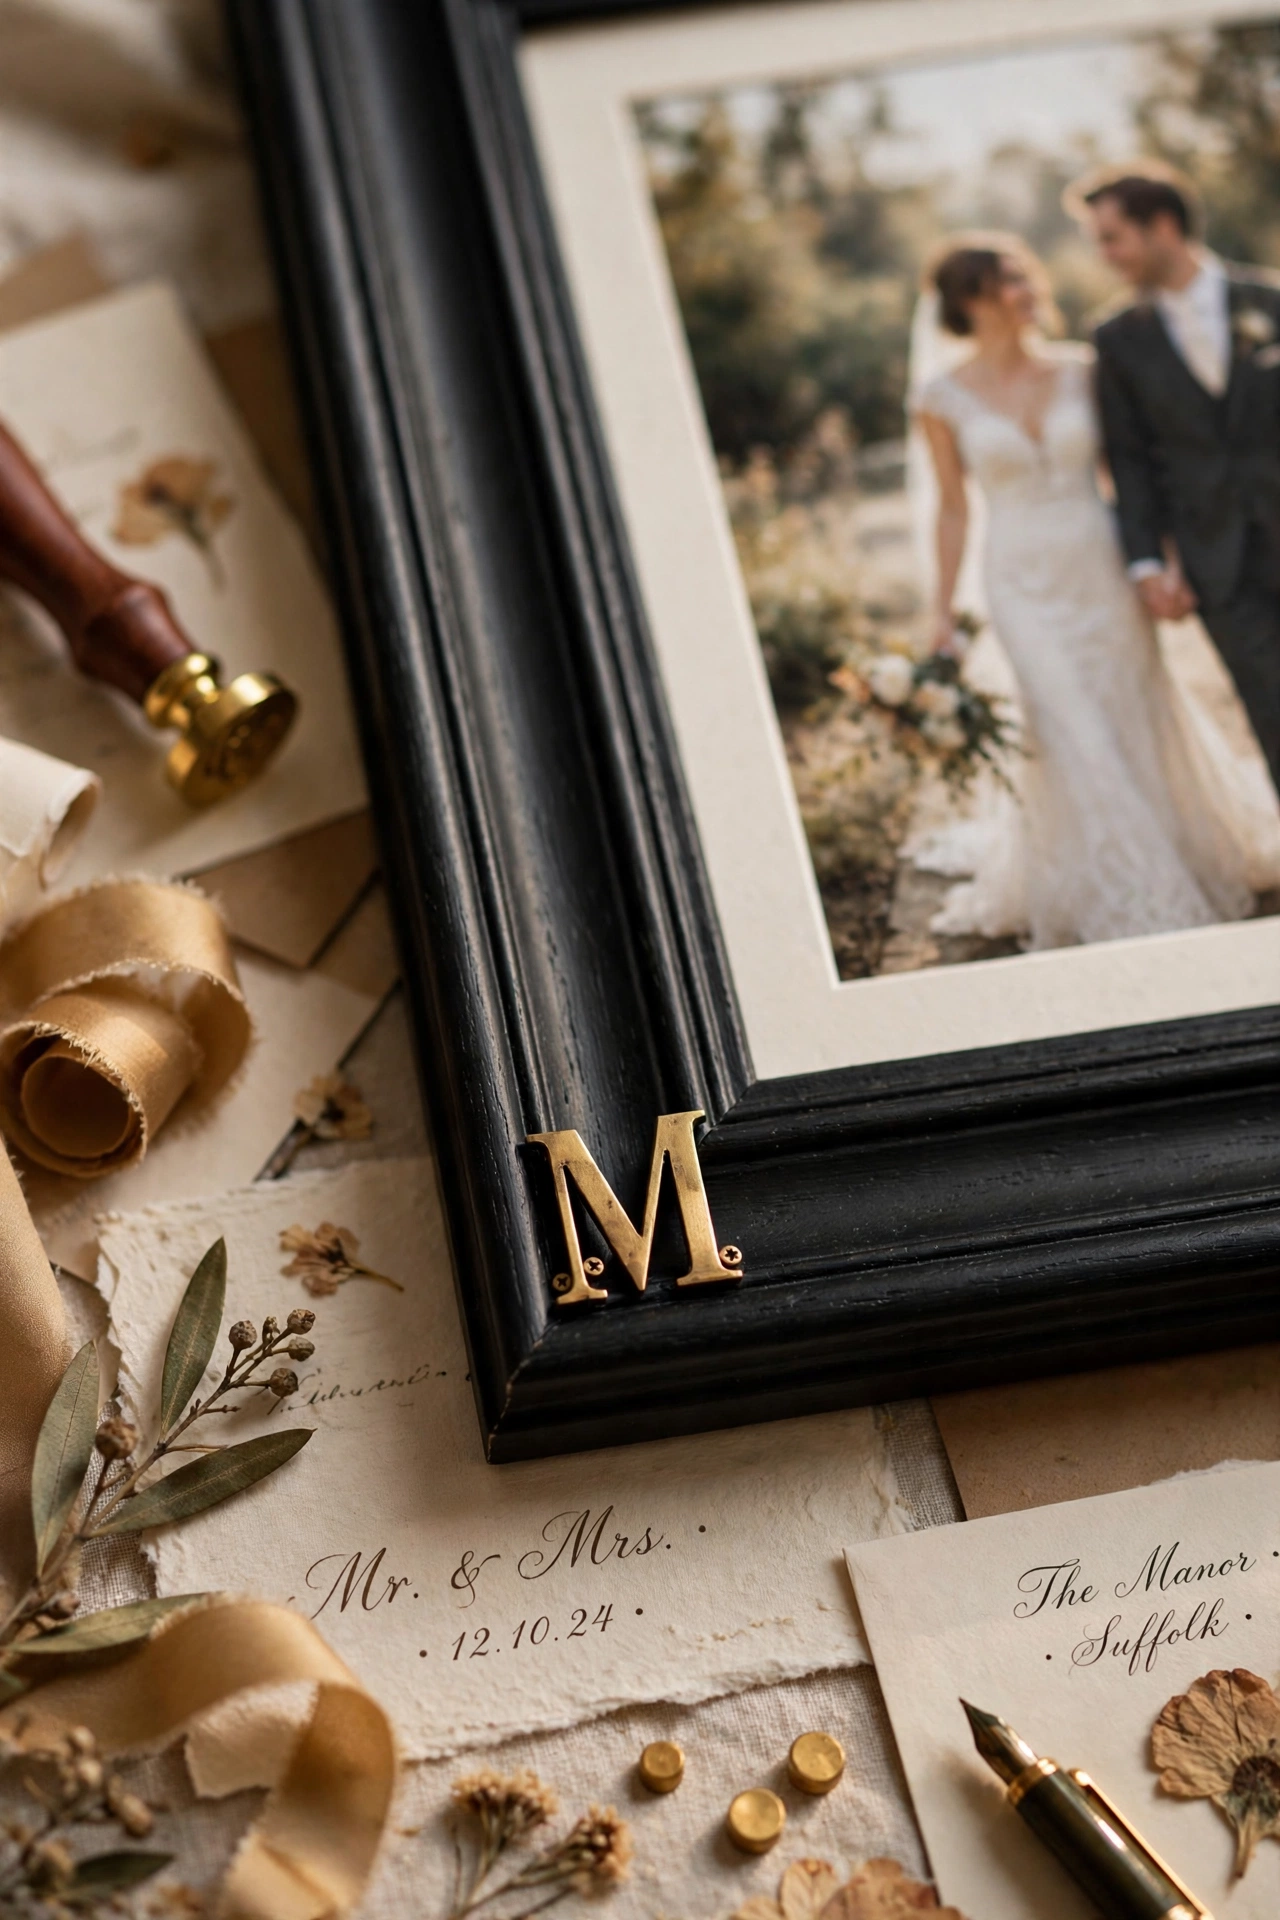
Add a small brass monogram or initial to the bottom corner of a frame and it instantly looks bespoke — like something from a stationery atelier. Self-adhesive metal letters, the kind sold for scrapbooking, press on cleanly and stay put. Keep it to one initial per frame and one monogrammed frame per grouping; restraint is what makes it look expensive rather than crafty. It is a lovely touch for wedding photos and christening portraits, where the personal detail feels appropriate.
Cost: ~$5 · Time: 15 minutes
17. Oversized Frame Leaned on the Mantel
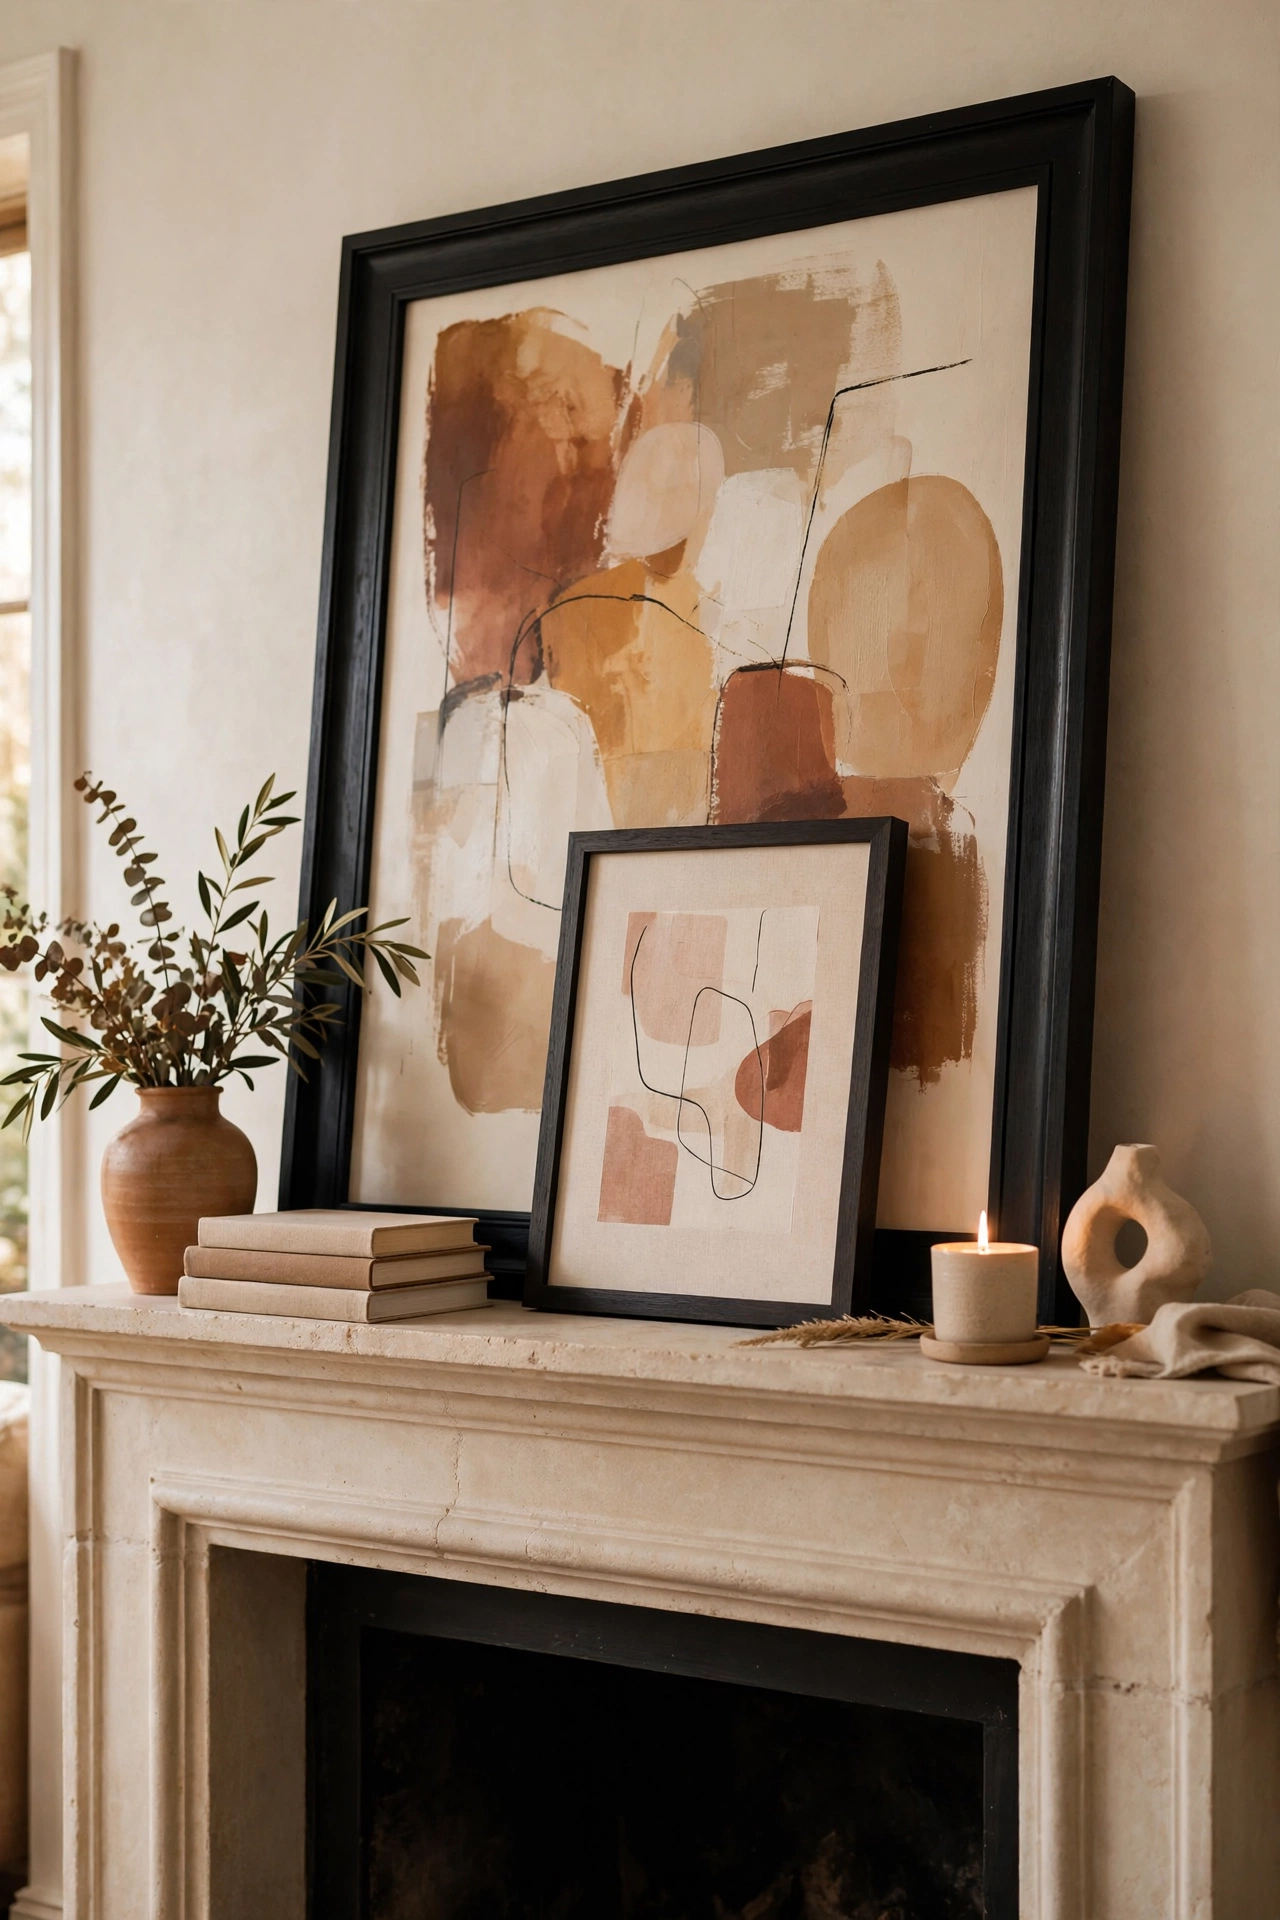
Sometimes the custom look is about placement, not alteration: lean an oversized frame against the wall on the mantel instead of hanging it. The casual lean reads as confident styling — galleries do it, designers do it — and it lets you use a frame far larger than you would dare hang. Layer a smaller frame in front for depth. Make sure the mantel is deep enough that the frame cannot topple forward, and keep the art inside simple; the scale is the statement here.
Cost: ~$9 · Time: 10 minutes
18. Acrylic Block Photo Frames
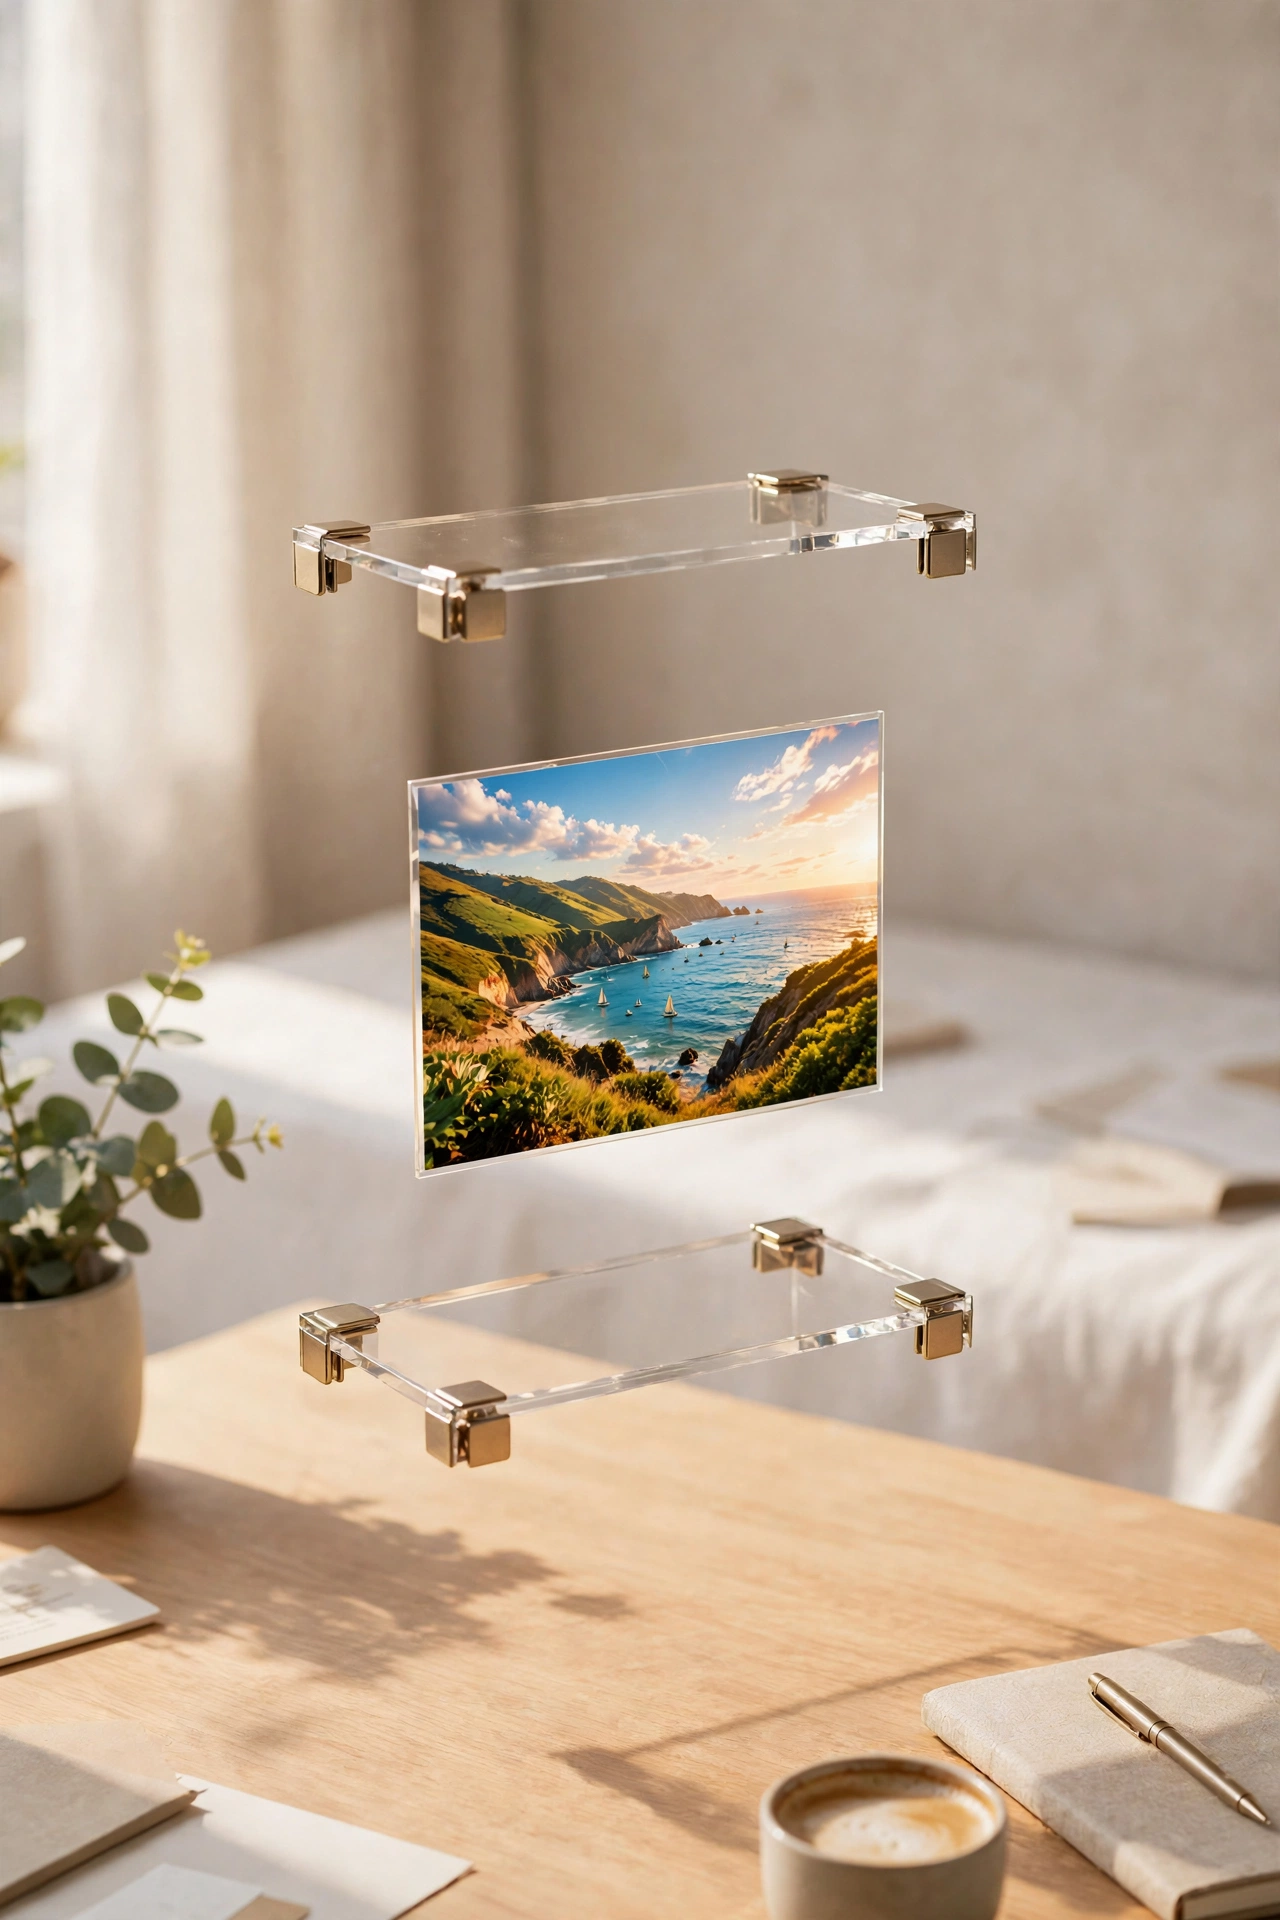
Two pieces of acrylic held by magnetic corners sandwich a photo into a floating glass-block effect — modern, minimal, and genuinely striking. The photo appears suspended with no visible frame, which makes colours pop. They suit desks and shelves where a chunky little object holds its own. Keep the acrylic clean with a microfibre cloth; fingerprints are the enemy of the floating illusion. Use high-contrast photos for maximum impact through the clear layers.
Cost: ~$7 · Time: 10 minutes
19. Dried Fern Silhouettes on Dark Backing
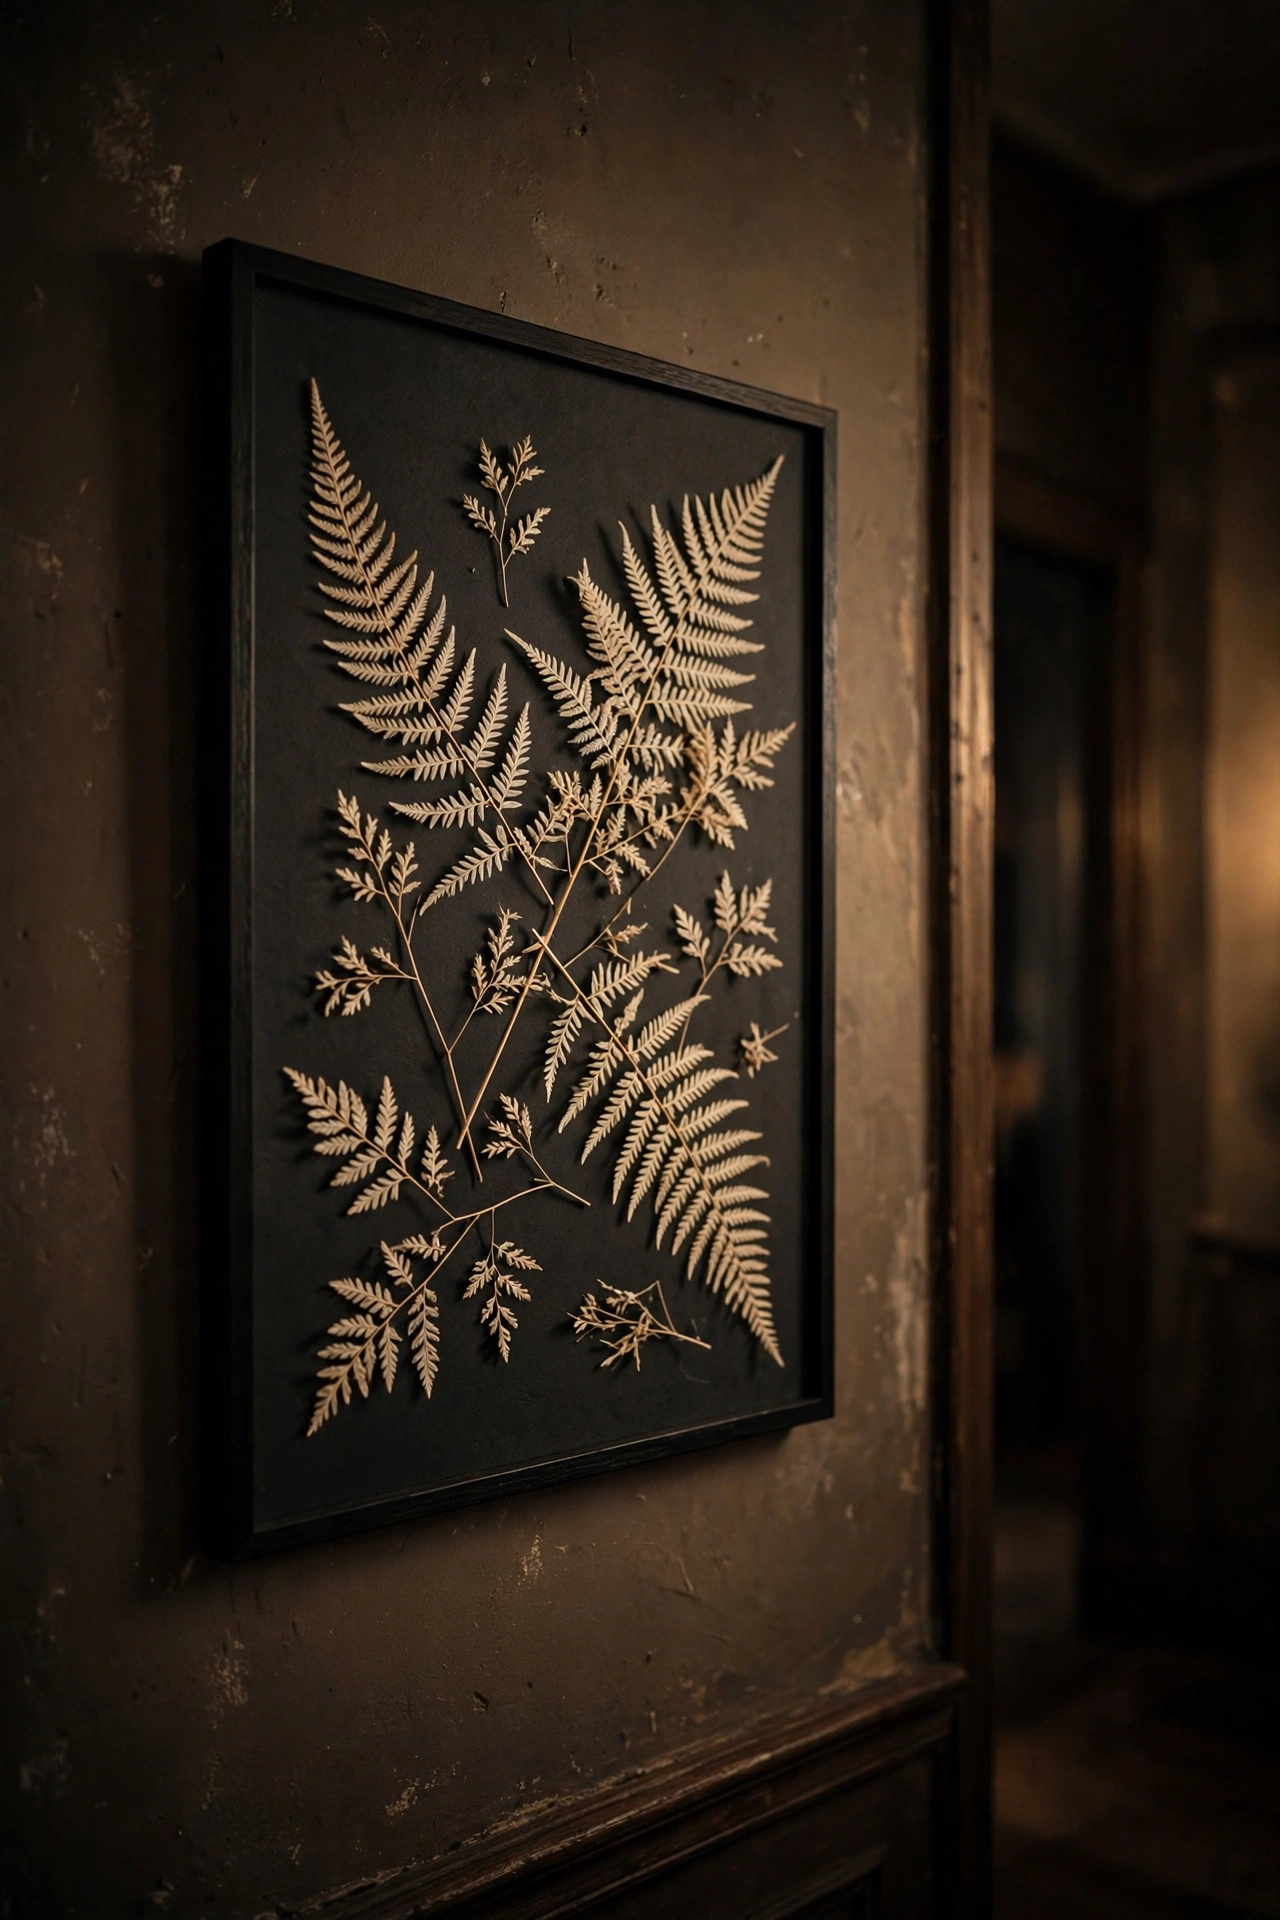
Press dried ferns onto a dark charcoal or navy backing inside a simple frame and you get botanical art with real drama — the pale fronds glow against the dark ground like specimens in a natural history museum. Arrange three fronds of different sizes asymmetrically and fix with tiny glue dots. The contrast is what makes it look designed rather than crafty. It suits hallways and studies beautifully, anywhere that can take a bit of moodiness.
Cost: ~$6 · Time: 30 minutes plus pressing
20. Brass Clip Frames for Art Swaps
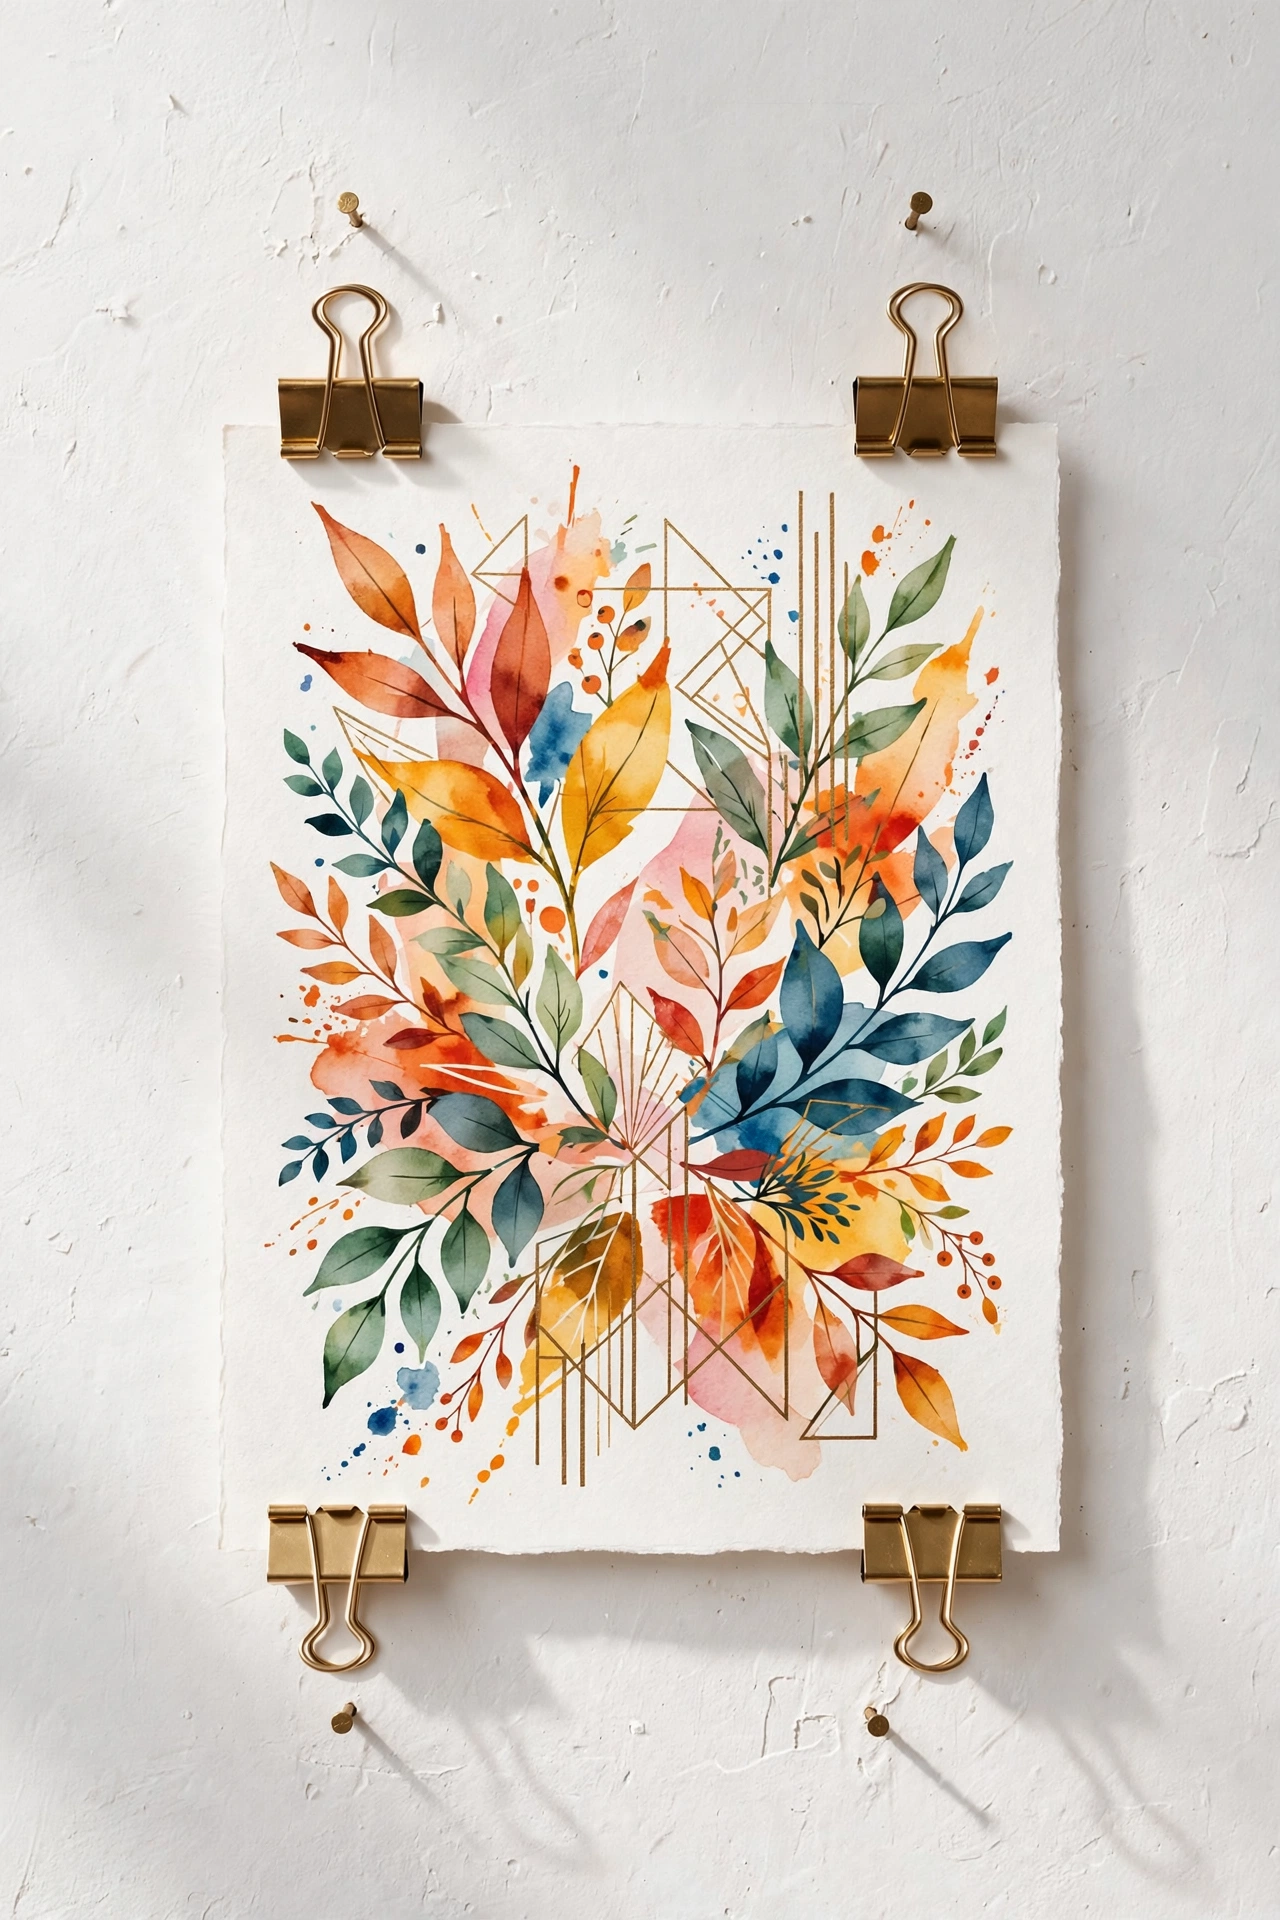
Brass binder clips holding art prints directly on the wall are industrial-chic framing with zero commitment. Clip the print top and bottom, hang from small nails, and the brass hardware becomes the frame. It is perfect for rotating kids’ art or seasonal prints — swapping takes seconds. Use two clips per print minimum so nothing curls or twists. The raw brass against white walls is a combination that always looks intentional. For living-room gallery ideas, see (see also: 23-dollar-tree-living-room-decor-hacks-that-look-high-end).
Cost: ~$4 · Time: 15 minutes
21. Frame Moulding as a Mirror Border
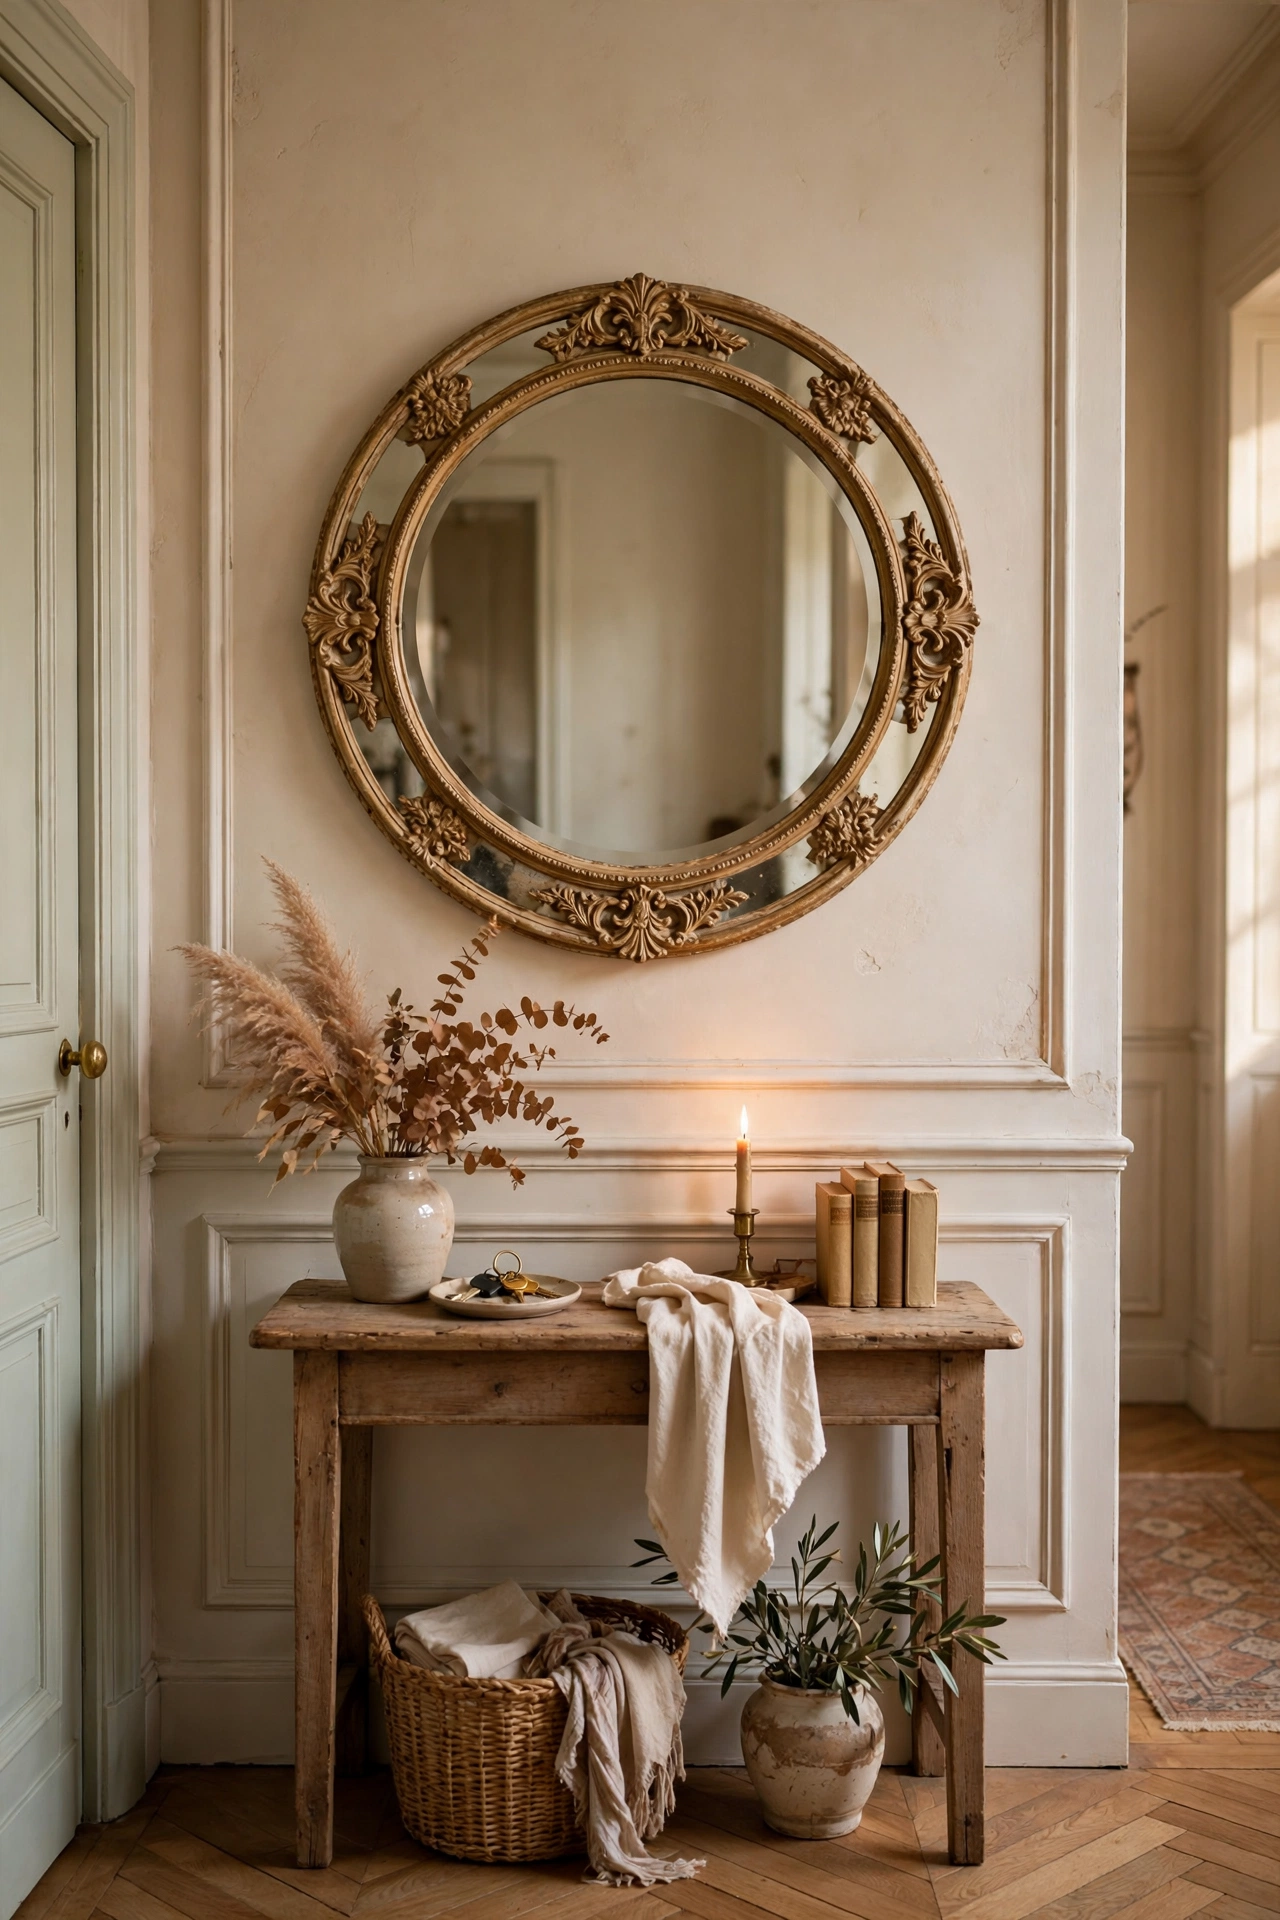
Glue decorative frame moulding strips around a plain wall mirror and it becomes a custom statement piece. Mitre or butt-join the corners neatly, paint the whole thing — mirror frame and moulding — one colour, and the join disappears. Antique gold over the lot gives you the vintage French look; matte black gives you modern graphic punch. Measure the mirror first and buy moulding to fit; the frame should sit proud of the mirror edge by a couple of centimetres all round.
Cost: ~$10 · Time: 1 hour
Spotted your favourite? Save this idea for later — pin it to your DIY board so the technique is waiting when your next framing project calls.
Custom framing is a craft, but the custom look is mostly confidence and a few good techniques. Pick the finish that suits your home, practice on one frame first, and enjoy art that looks like it cost a fortune to frame.
